Monthly Archives: August 2017

I Bought a Collection of Estate Pipes


Blog by Steve Laug

One of the benefits of the blog is that I meet a lot of really nice people around the world – some of them pipe men and some of them family members. Not long ago I received an email from a fellow on the blog about some pipes that he had. His father had died in June and he was cleaning up the estate and found a box of pipes and accessories. He contacted me to see if I was interested in the lot. He did not want to piece them out; he wanted to sell them all. He sent me a small spread sheet of his Dad’s pipe collection so I could see what was included. He had a column with the stamping information on the pipes and noted any issues that he saw. We talked a few times on the phone about the condition of each pipe and I really enjoyed meeting and talking with him.We emailed back and forth and I called him several times. We chatted a bit about what he wanted to get for the collection in terms of a price and after discussing it with his wife and family we arrived at a fair price for the collection. He surprised me by adding all of the accessories along with the pipes as well as two pipe racks. I transferred the payment to him and the package was sent to my brother Jeff. It is simpler than sending it to Canada so it worked well for the seller to send it there.

When the package arrived in Idaho Jeff messaged me and said it was there. He took photos for me of the unpacking process so I could see what was there. This is the one thing I miss being far away – I don’t get the sense of surprise that comes as each pipe is unwrapped. No matter how well they have been described or how many photos have been included there is nothing quite the same as going over each piece in person.

Even though the U-Haul box says it is small it was a large box and well packed. The racks and surprises were packed in paper and protected by the crumpled packing materials. The pipes were individually wrapped in bubble wrap. 
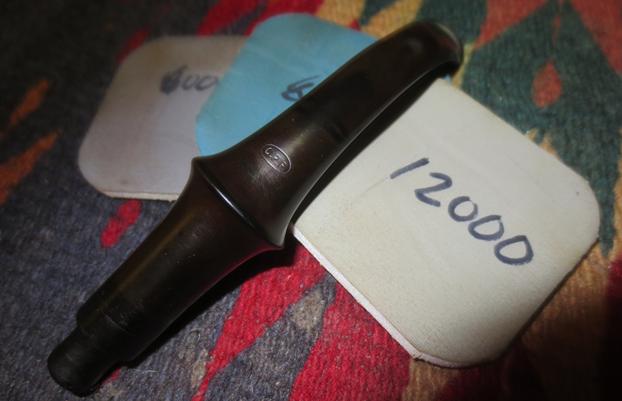
Jeff unwrapped the two pipe racks and took photos of them for me (Understand – the photos were coming on messenger as soon as he unwrapped them so I was virtually experiencing the thrill of each piece he took out of the box). The first rack was a 9 pipe circular rack with room in the middle for a humidor (which was missing). It appeared to be made of walnut and was in good condition. The second rack was a 12 pipe rack and was more worn. It too was probably walnut but had a dark opaque stain on it.
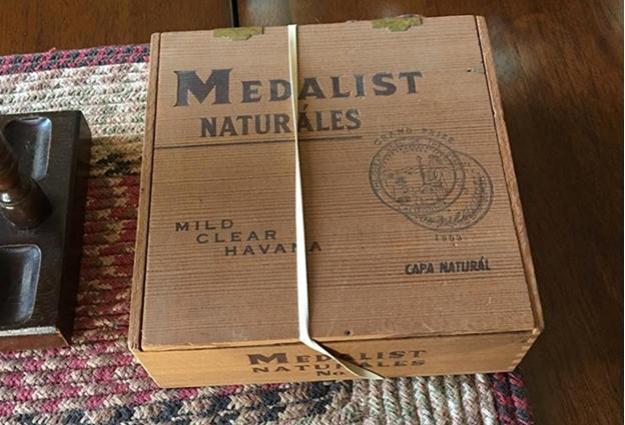
The next item out of the box was a mysterious cedar cigar box held closed by a rubber band. This was the surprise I had not expected in the lot. I could not wait to see the next photo and know what was in the box. I don’t know about you but when I find this kind of closed box I have all kinds of notions as to what may be inside and over the years most of those notions have been realized.
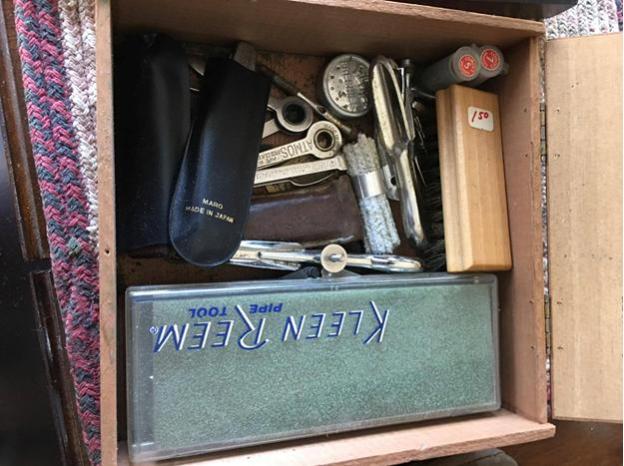
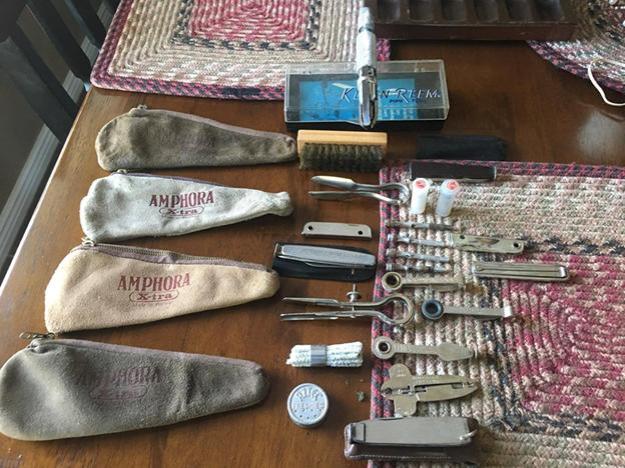
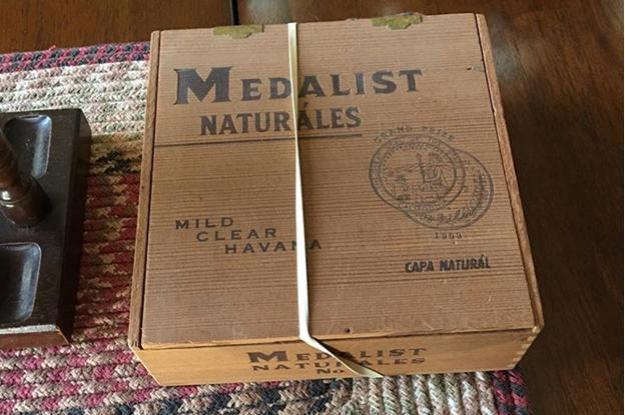
Jeff removed the rubber band and opened the lid. He took a photo of the contents inside without going through them so I could see what he saw. I could see a lot of different items from pipe knives to reamers to brushes to mysterious little tubes in the top right corner. Inside the box, before he could see the contents, he had to remove some leather pipe bags. These were stamped Amphora Xtra Holland.
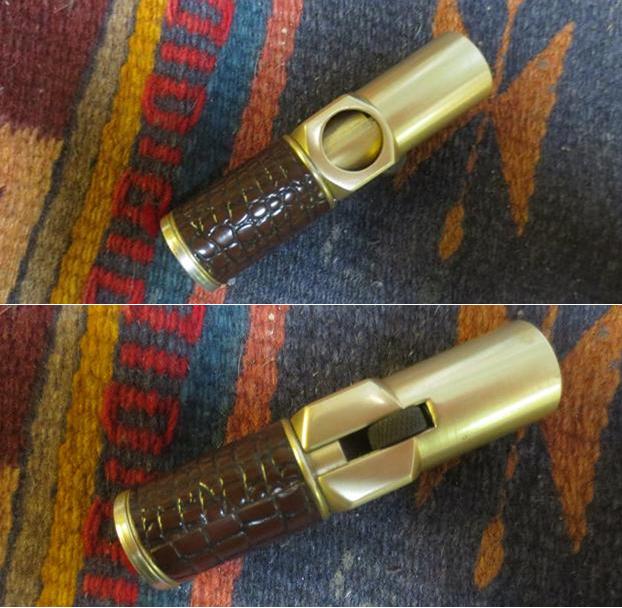
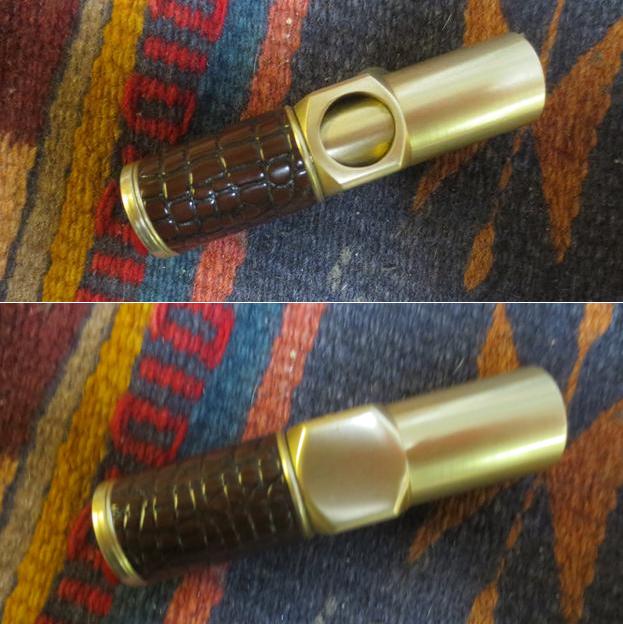
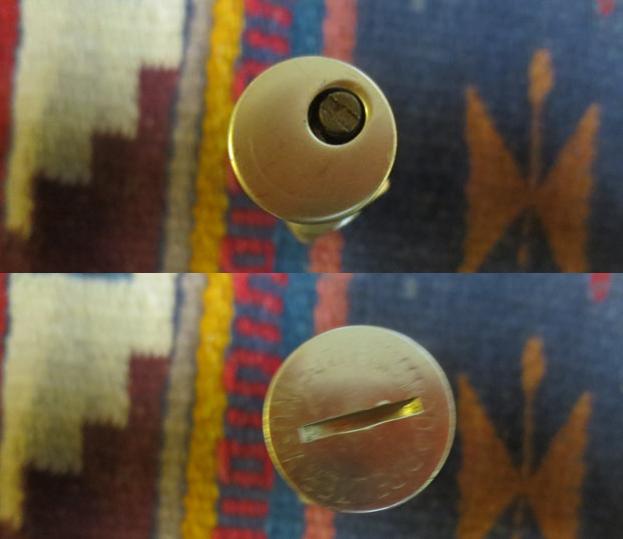
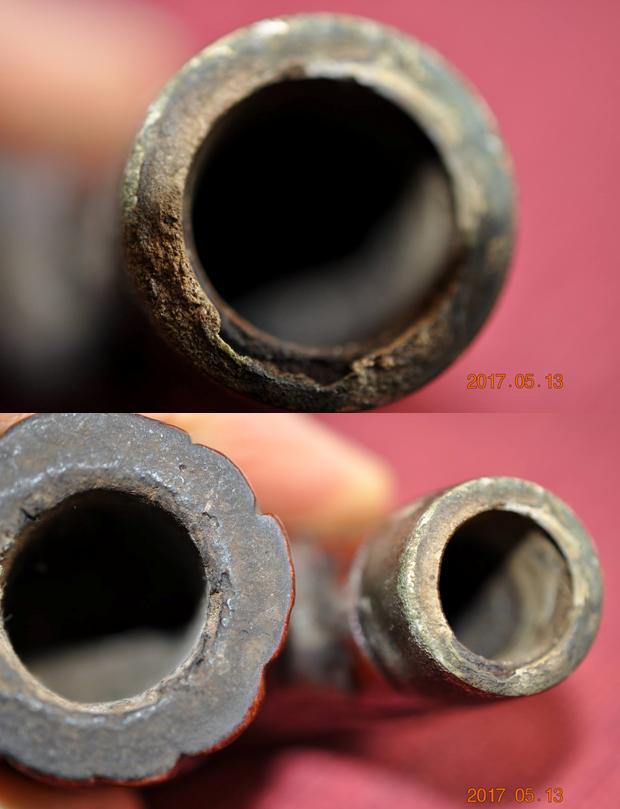
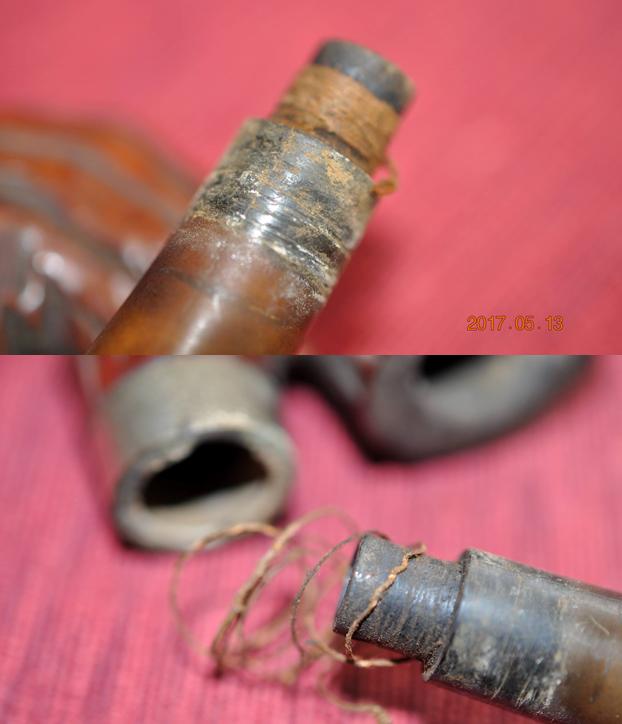
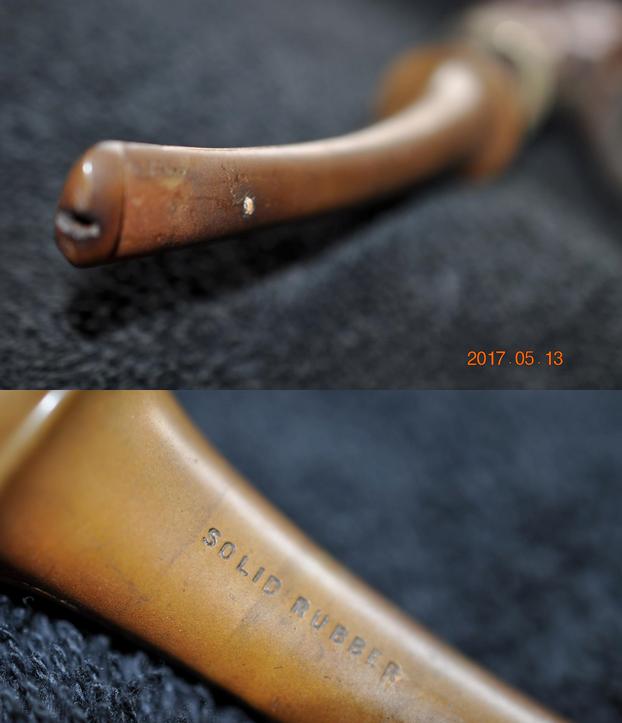
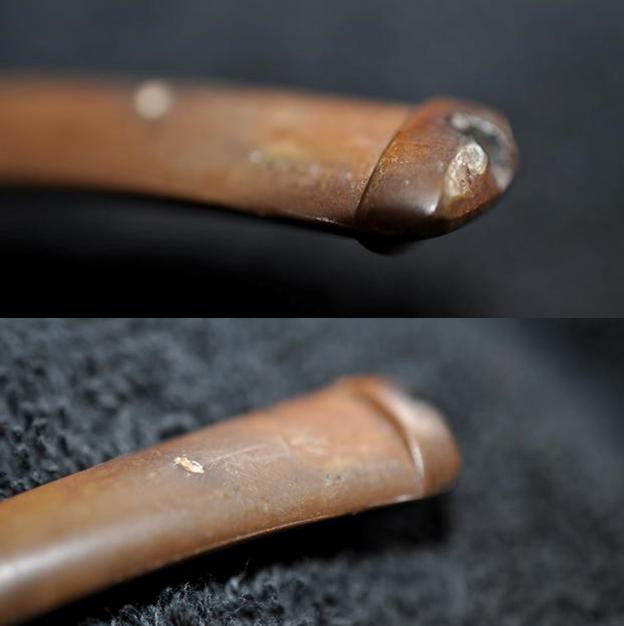
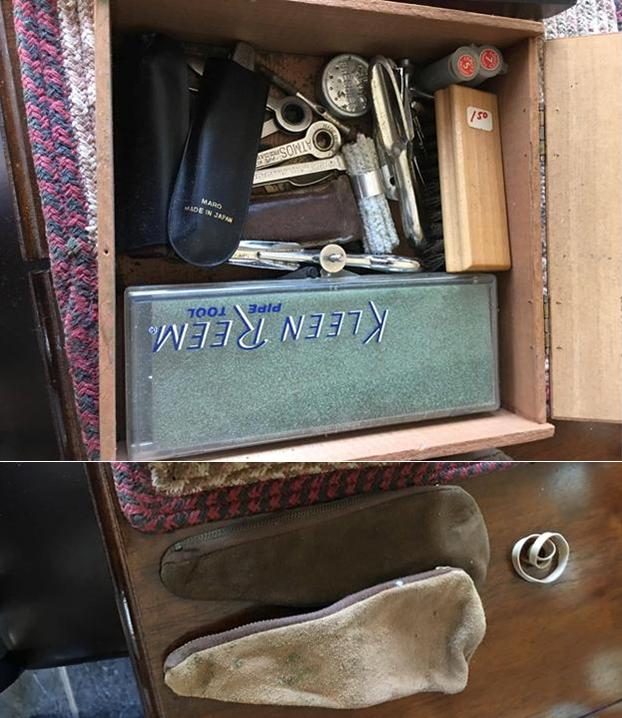
Jeff unpacked the surprise box slowly and photographed each step of his discovery. I have already written a blog on what the box contained so I won’t repeat it here. Suffice, to say that there were some reamers and pipe parts that I have been looking for and not found for quite a few years. Here is the link to the blog. https://rebornpipes.com/2017/08/22/sometimes-when-you-buy-an-estate-there-are-unexpected-additions/ The photos that follow tell the story better that words. With the mystery box unpacked and inventoried Jeff went on to unpack the carefully wrapped pipes. He took photos of the lot once he had removed them from the box and before he unwrapped them. The suspense was building for me. I wondered how each pipe looked. Descriptions and spread sheets can only tell so much but when you have the pipe in hand you know far more.
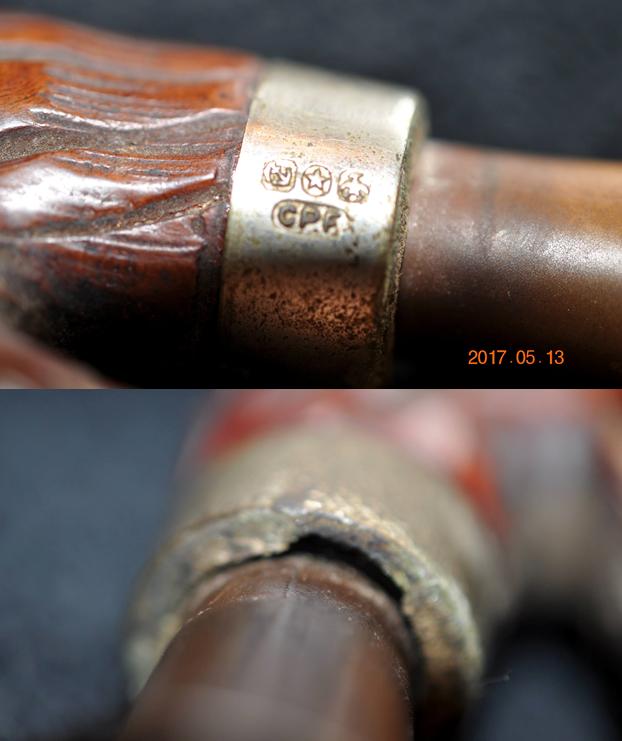
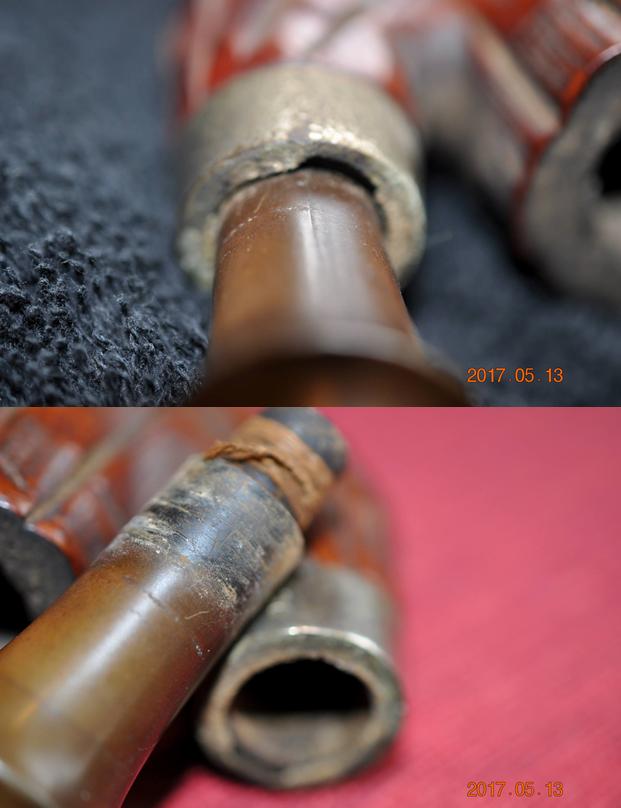
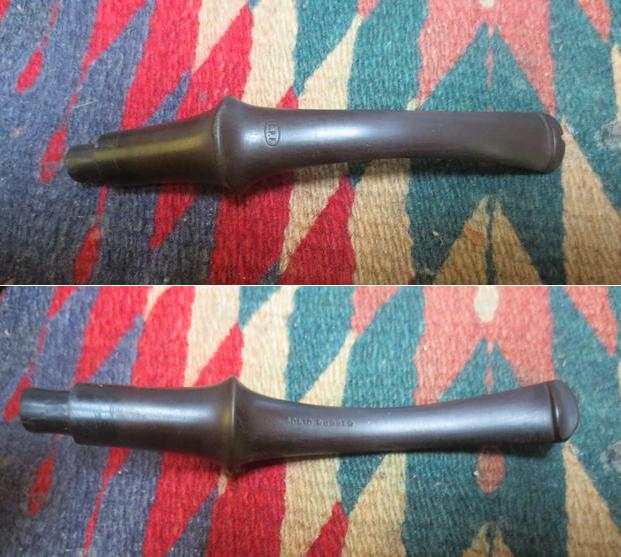
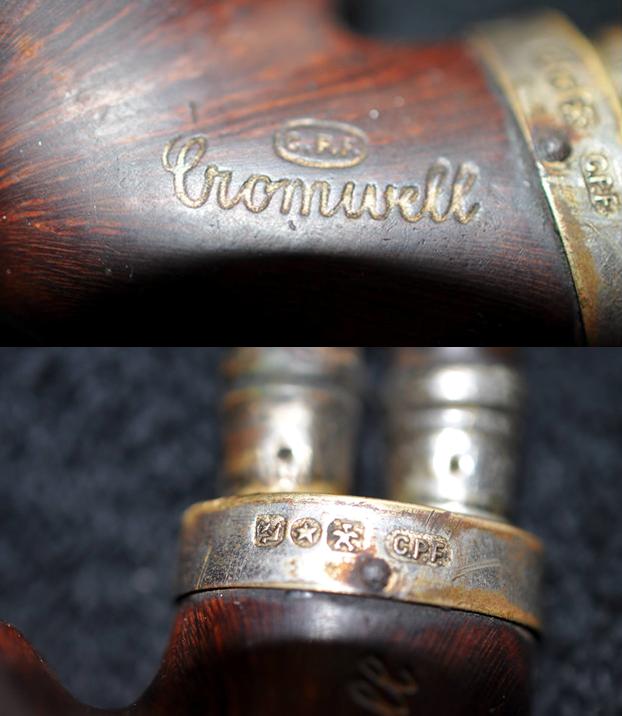
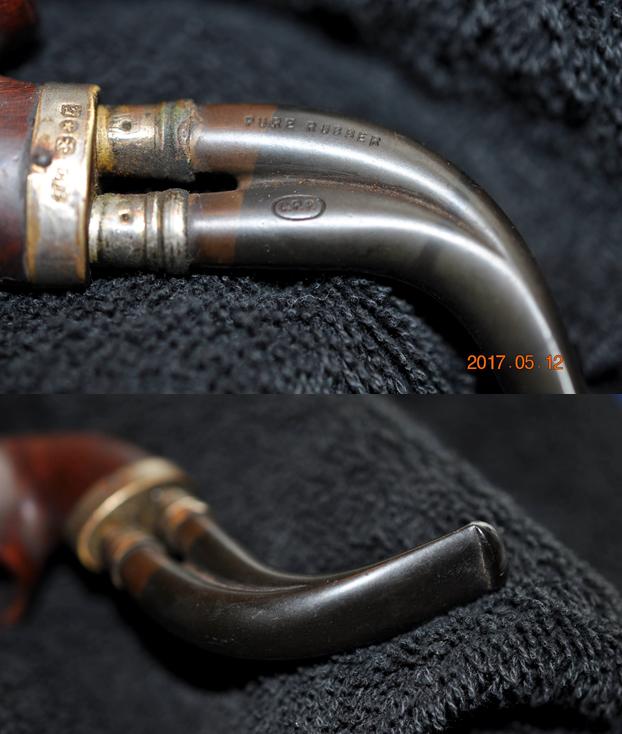
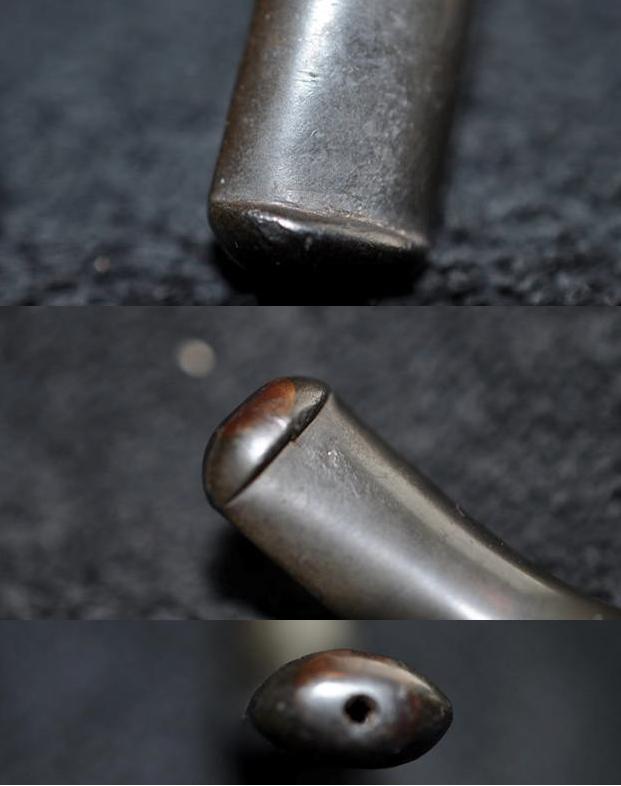
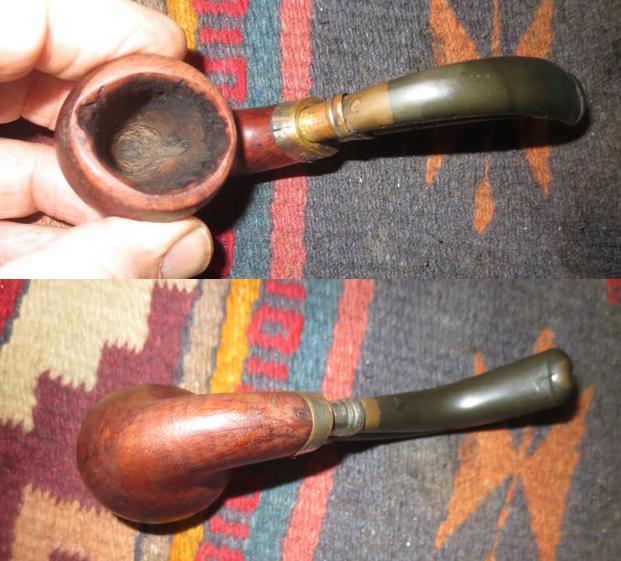
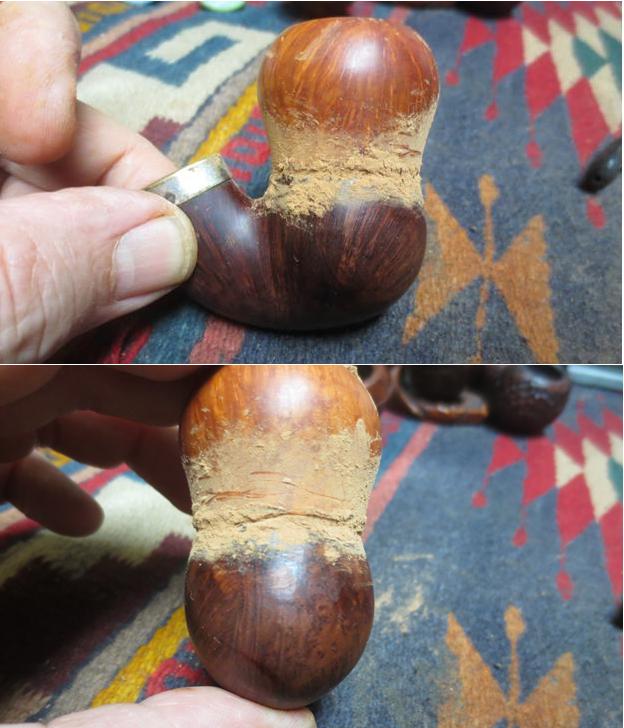
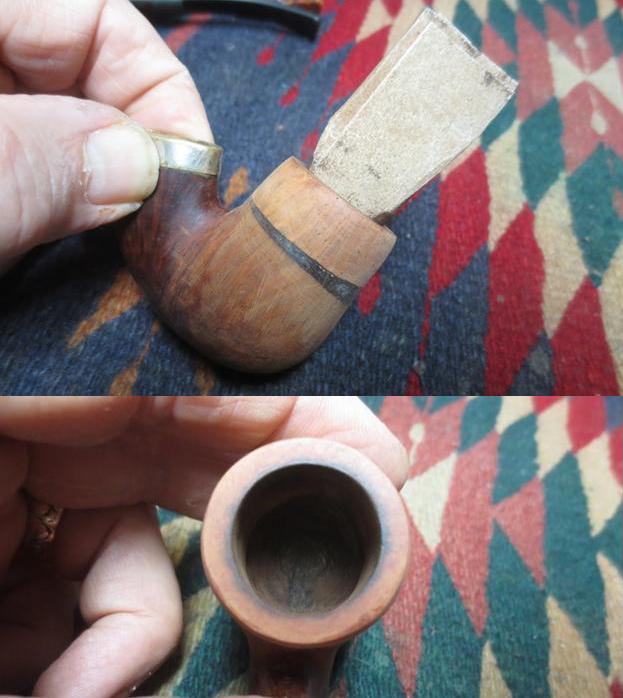
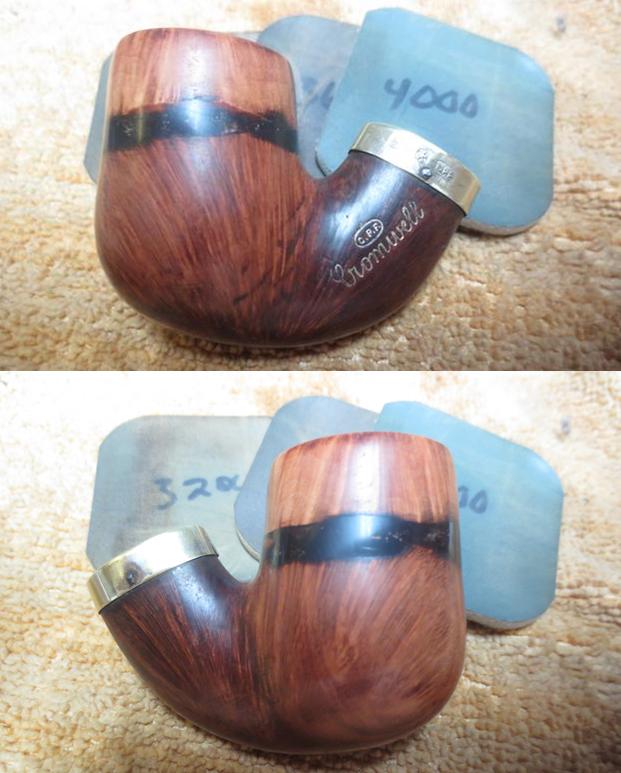
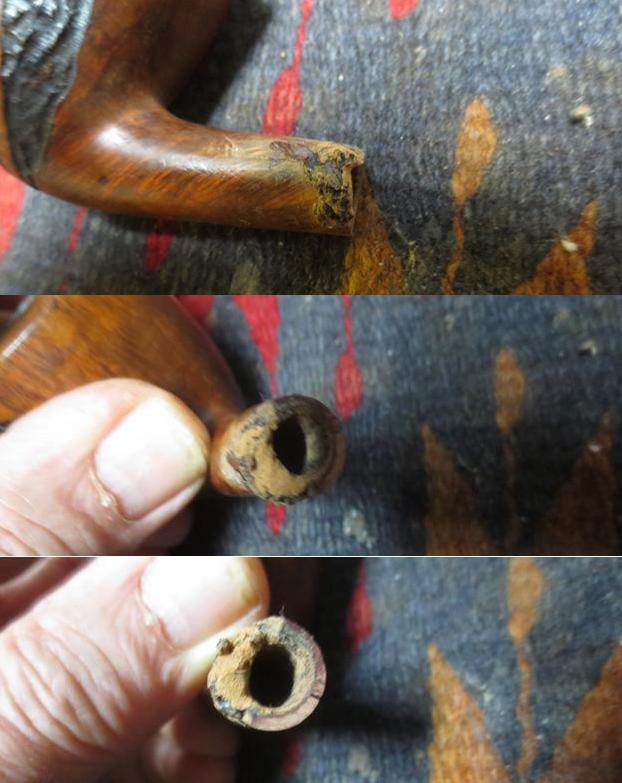
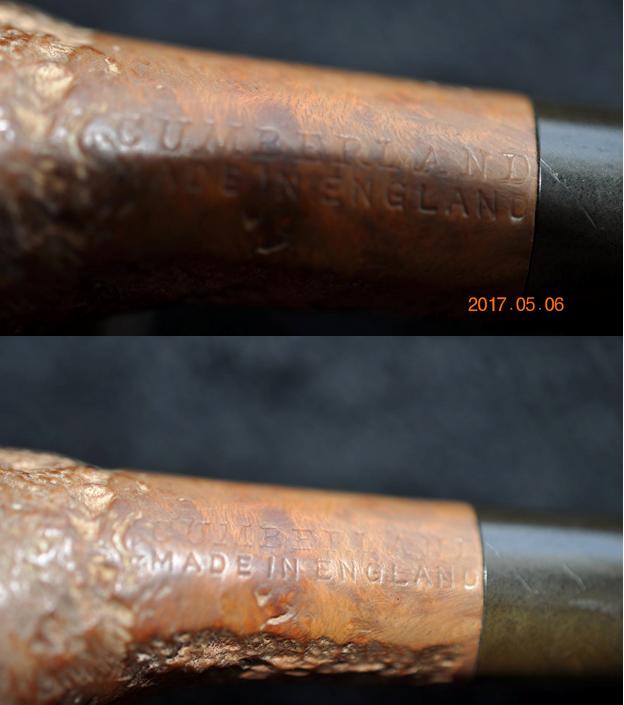
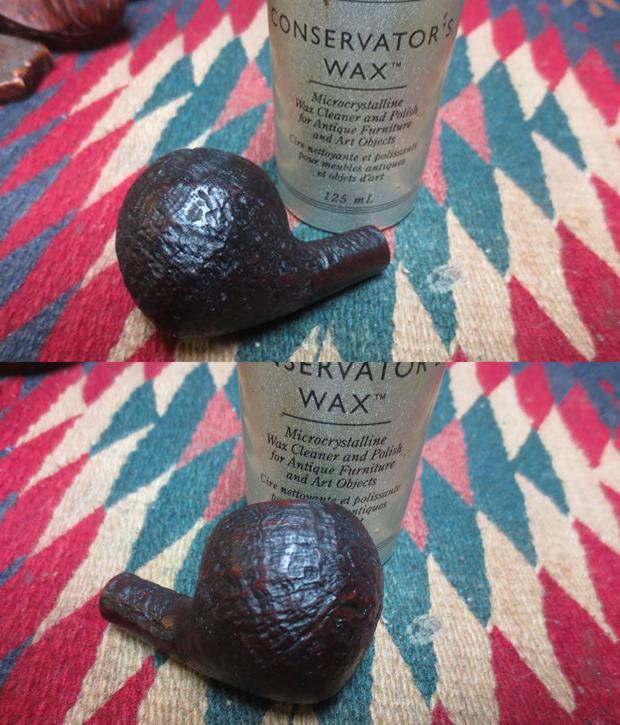
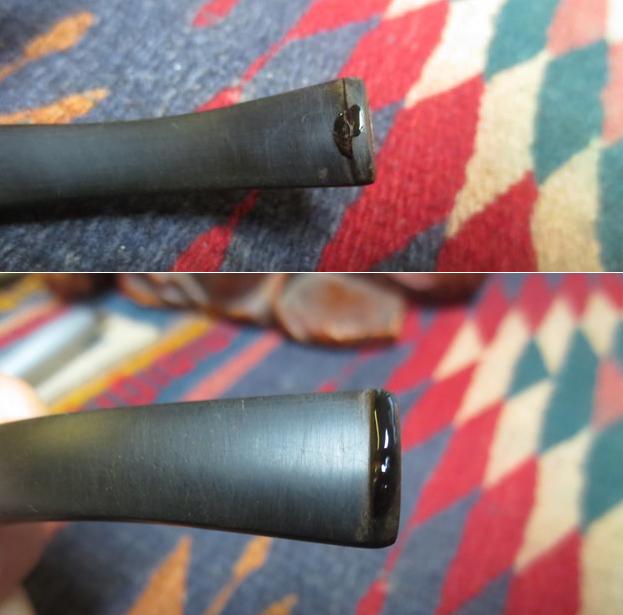
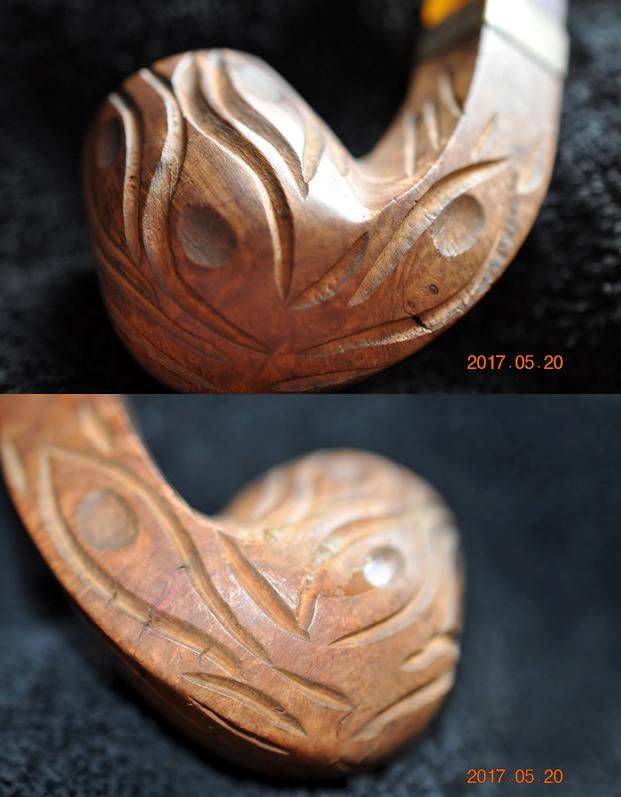
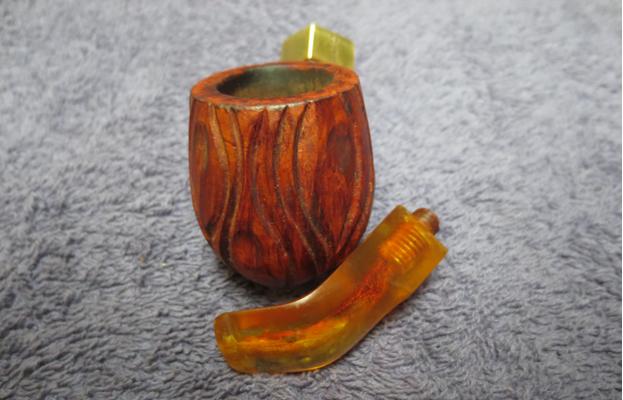
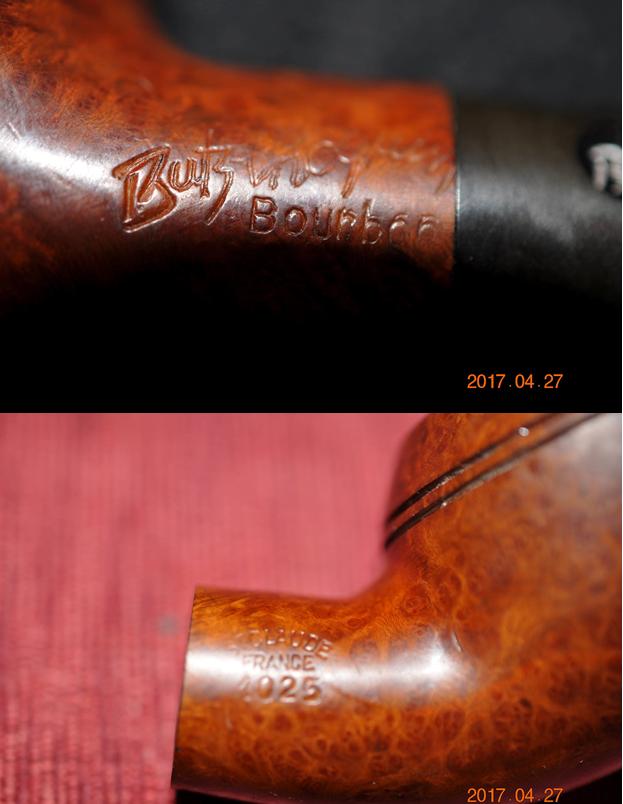
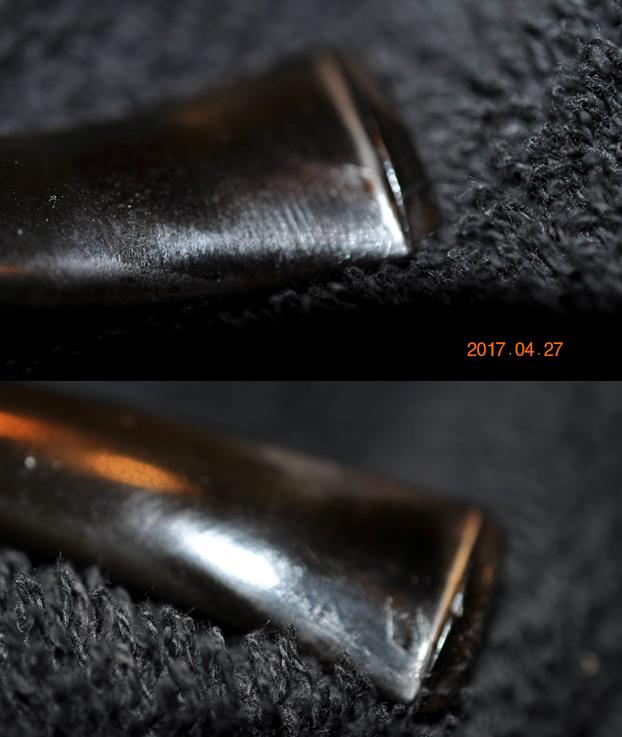
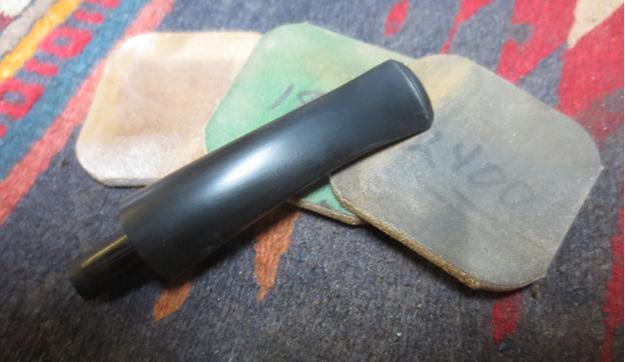
The seller had put a small paper label on each pipe describing what he found as he went over them for me. The descriptions matched the spread sheet that he had emailed. Some of the pipes had pipe cleaners in the stem and shank. The photos show each set of pipes as he unwrapped them. As I saw them I was getting more excited about them. They were dirty and had cake in the bowls and wear on the stem but I was happy to see that the work needed was less than expected. 
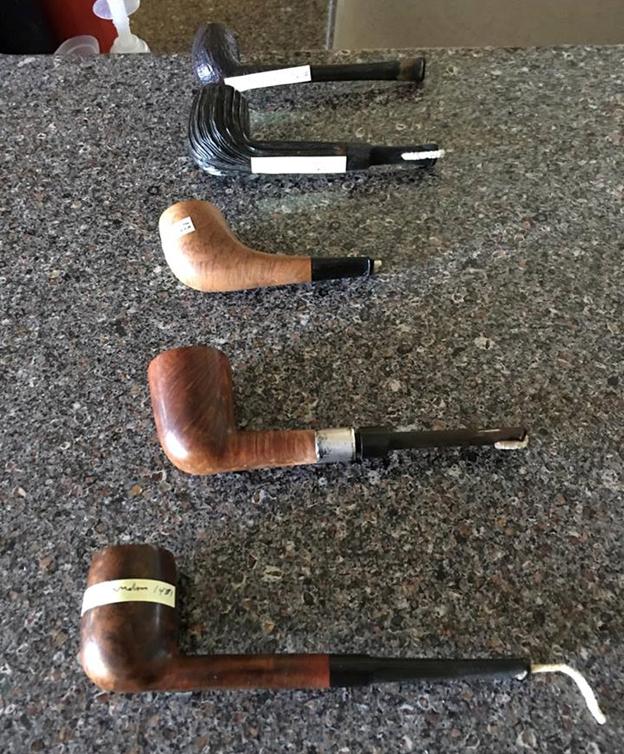
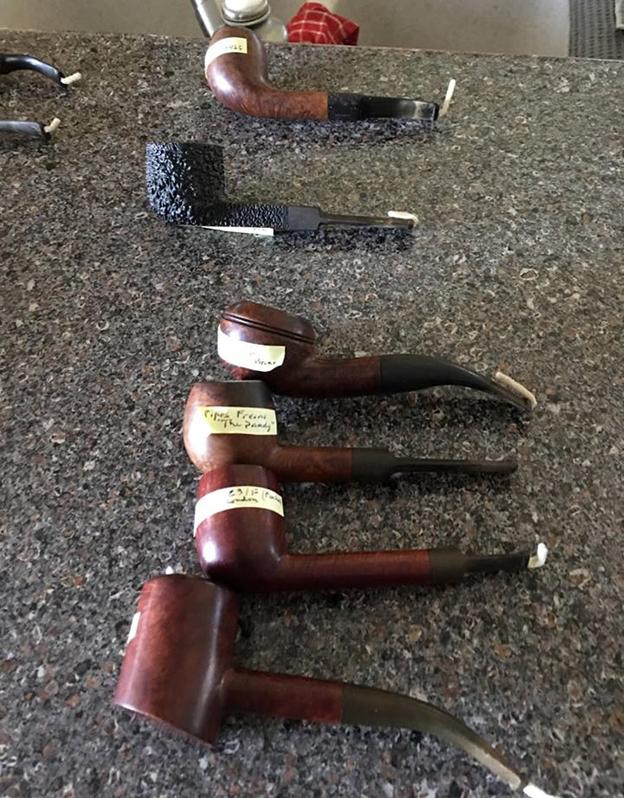
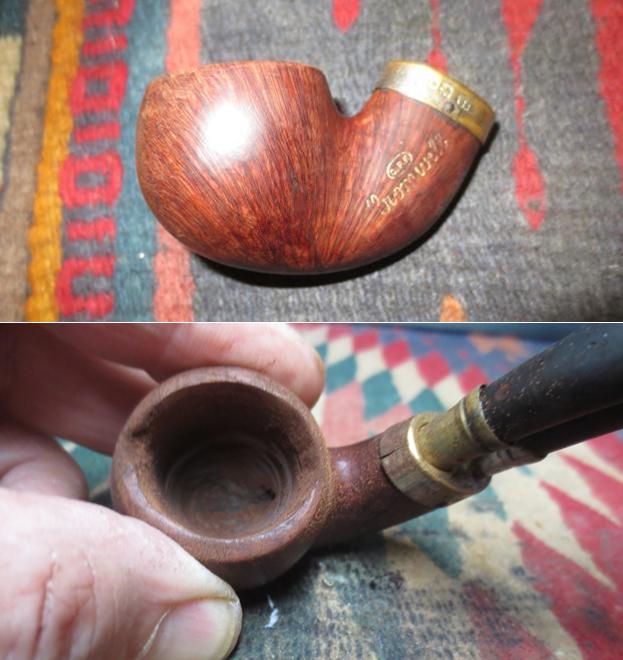
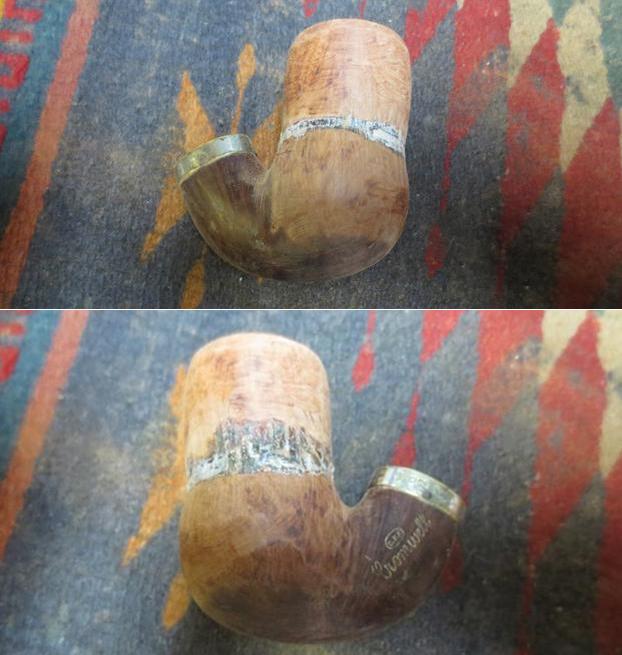
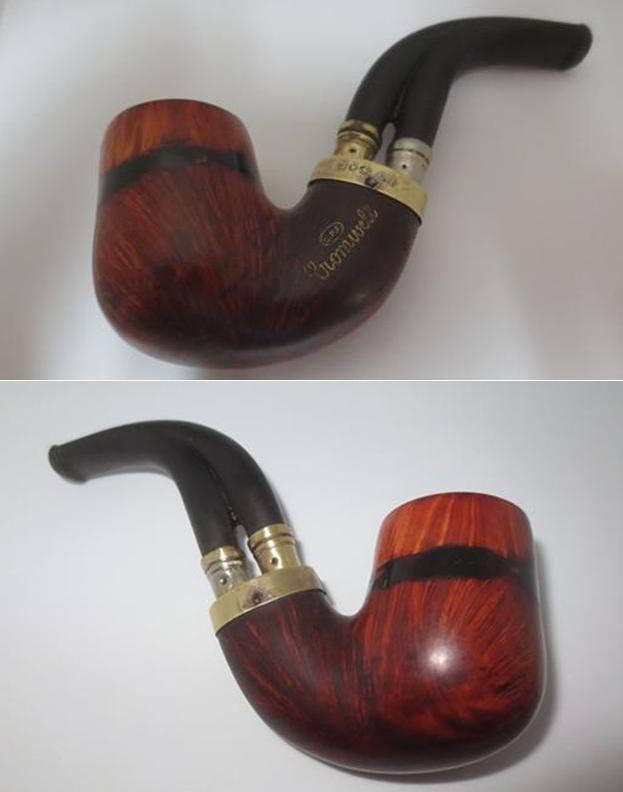
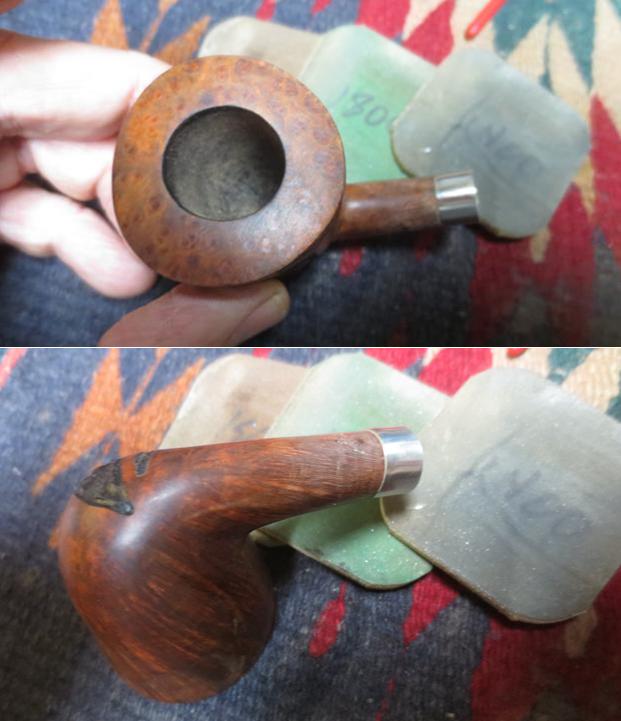
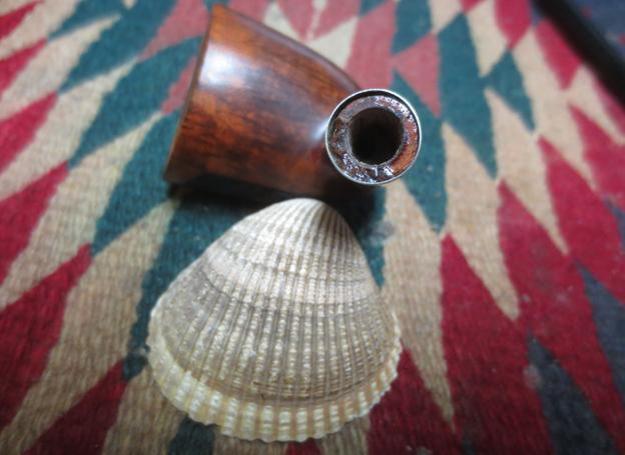
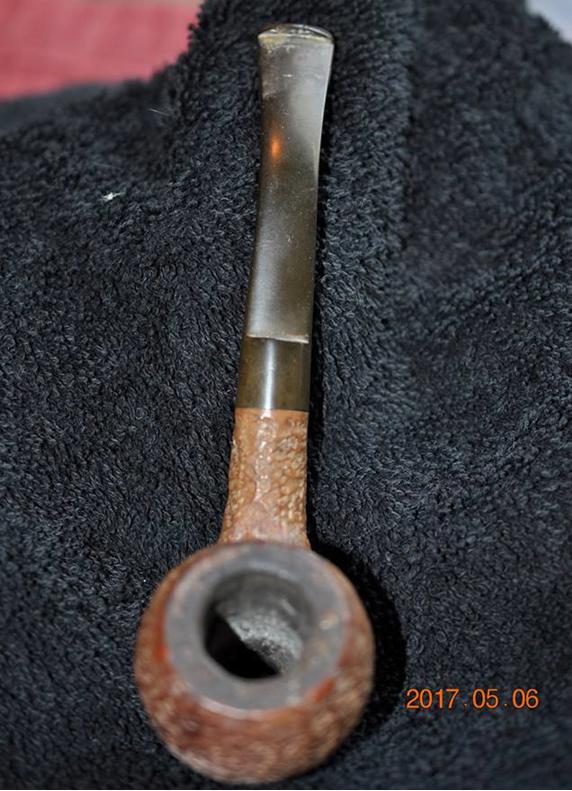
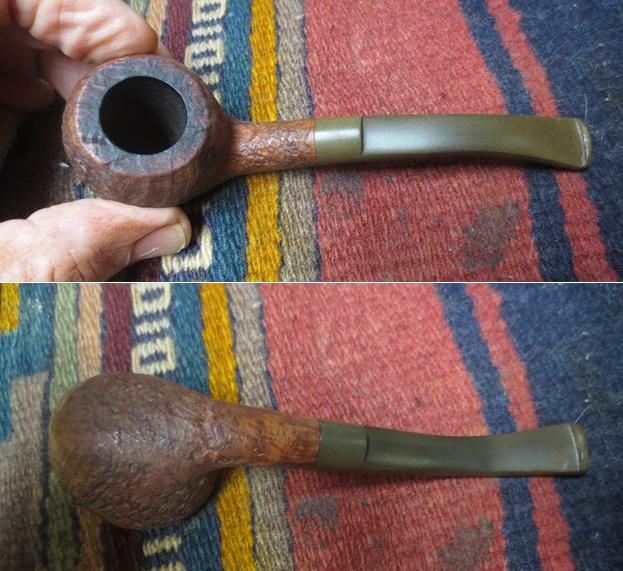
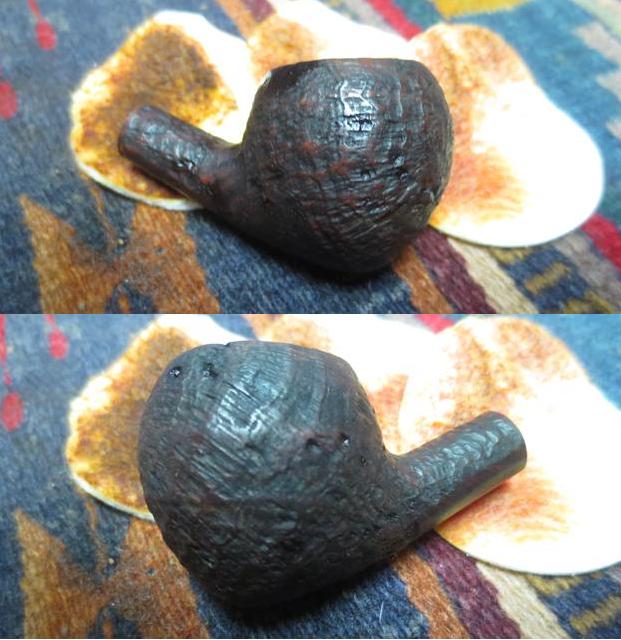
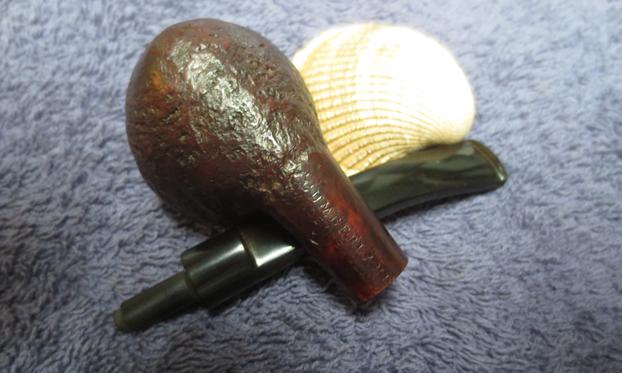
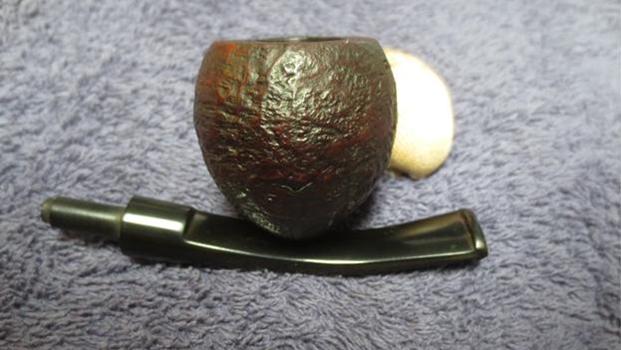
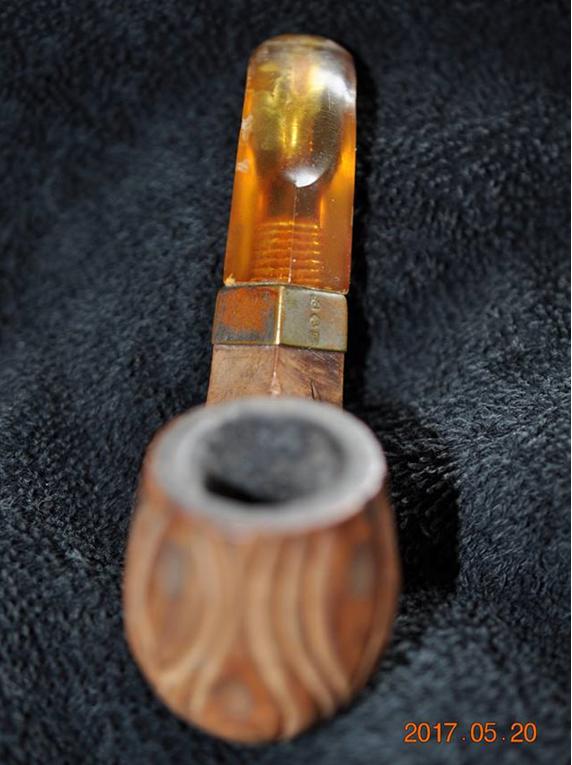
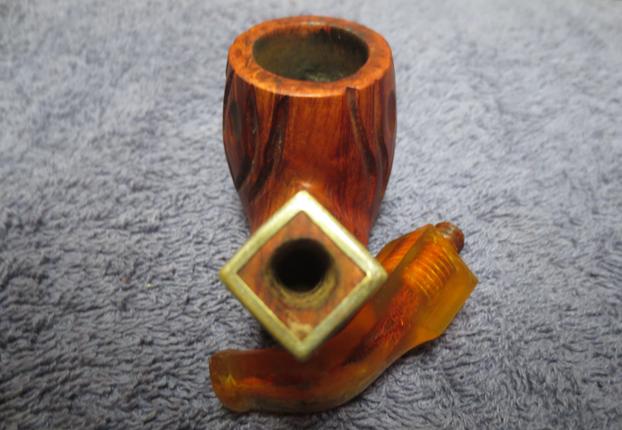
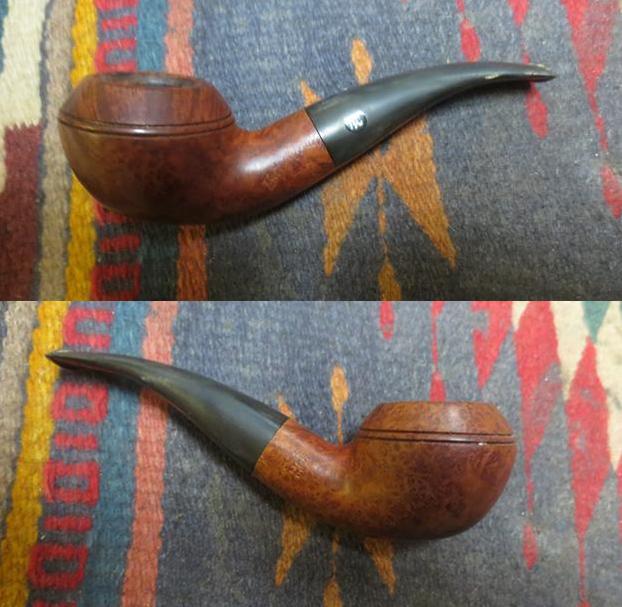
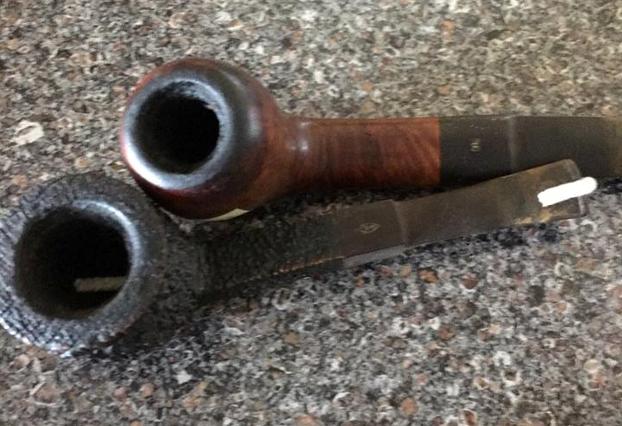
The next photo is a little blurry but I have included it because I think it adequately captures the excitement of unwrapping each successive package. There were some very nice old pipes in this lot. Some were average and some were above average. It was going to be a fun lot to work on.
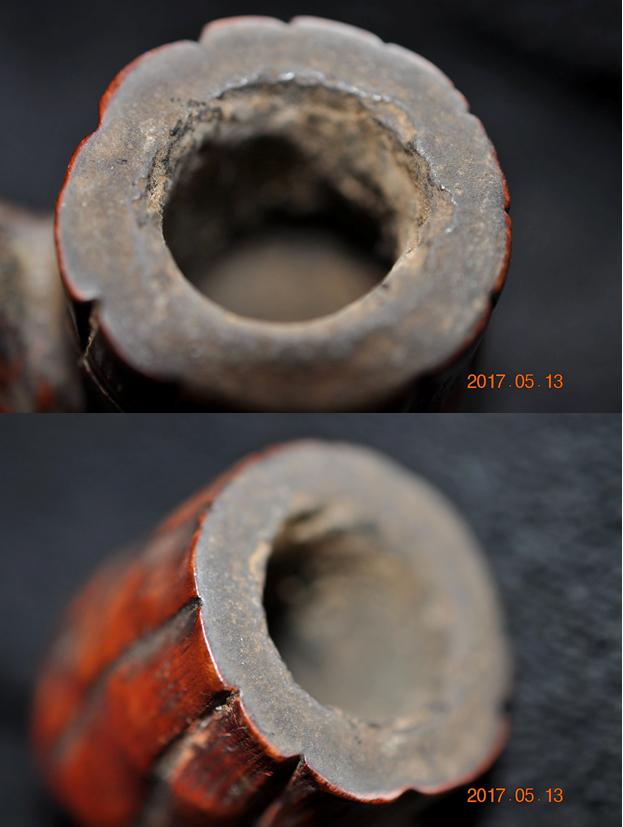
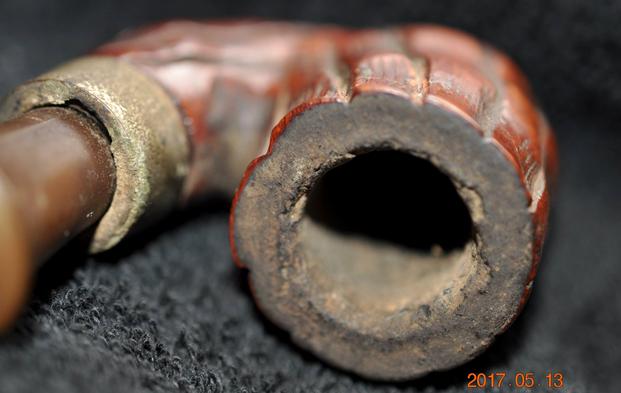
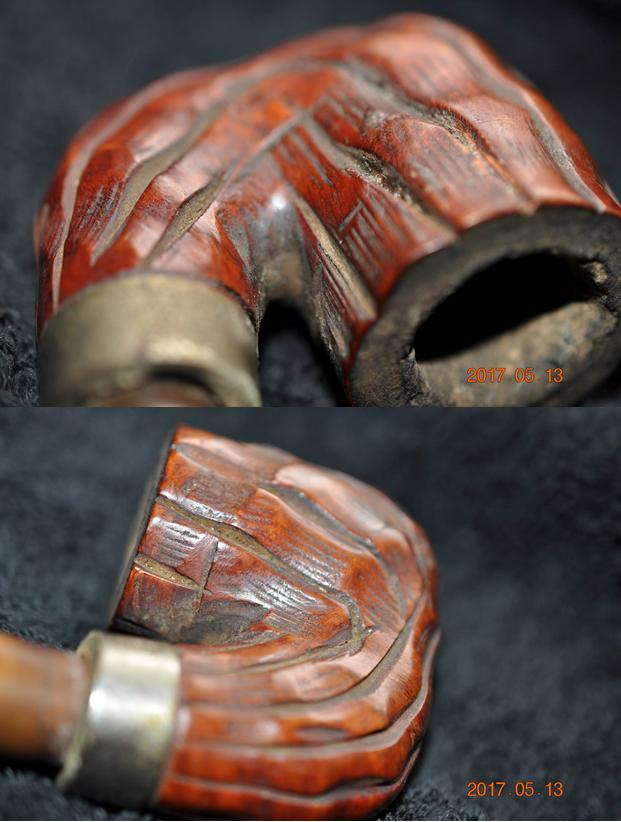
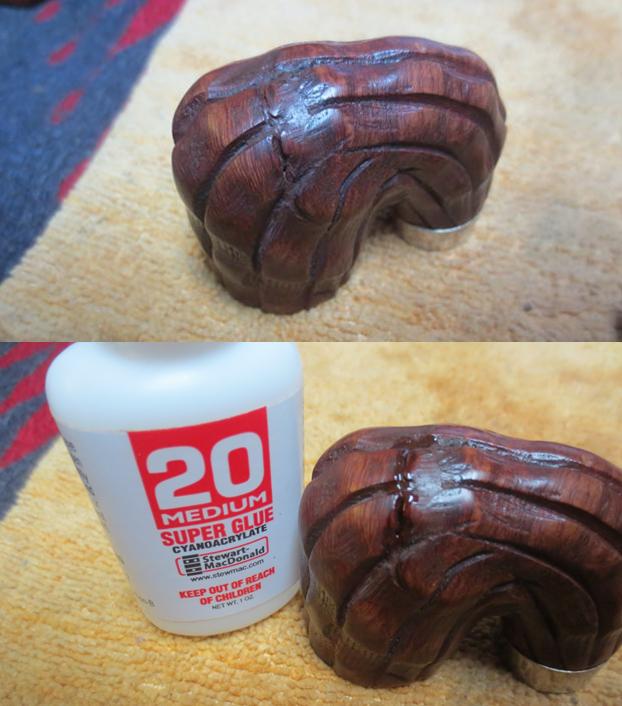
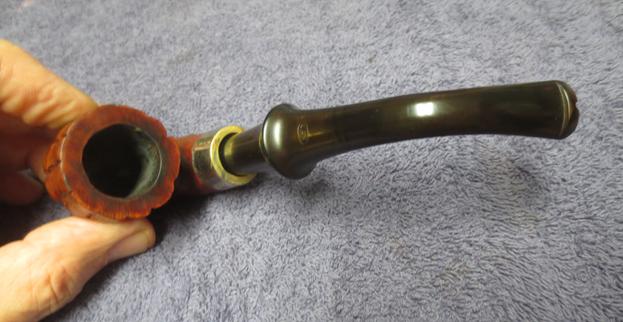
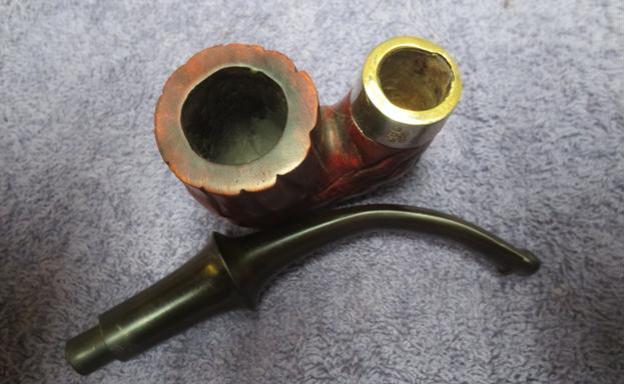
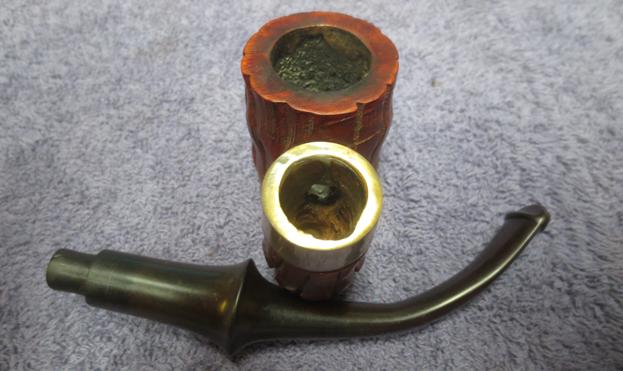
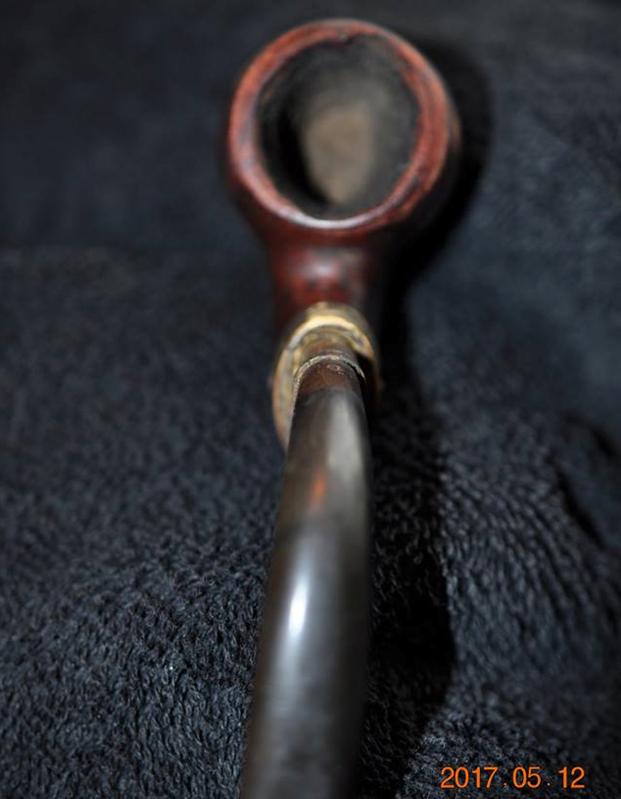
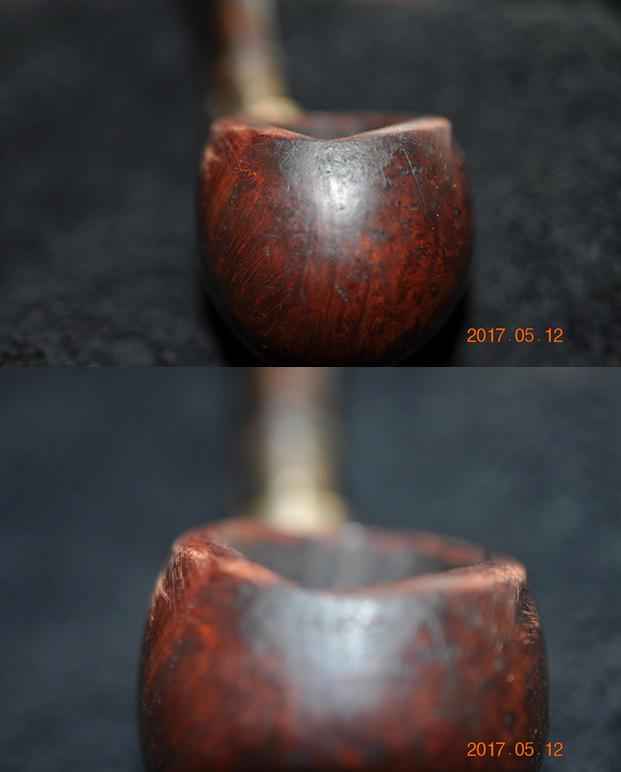
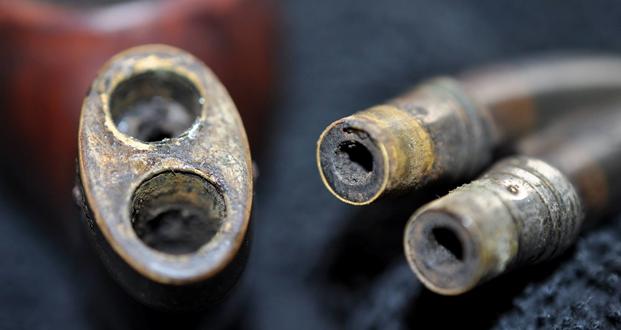
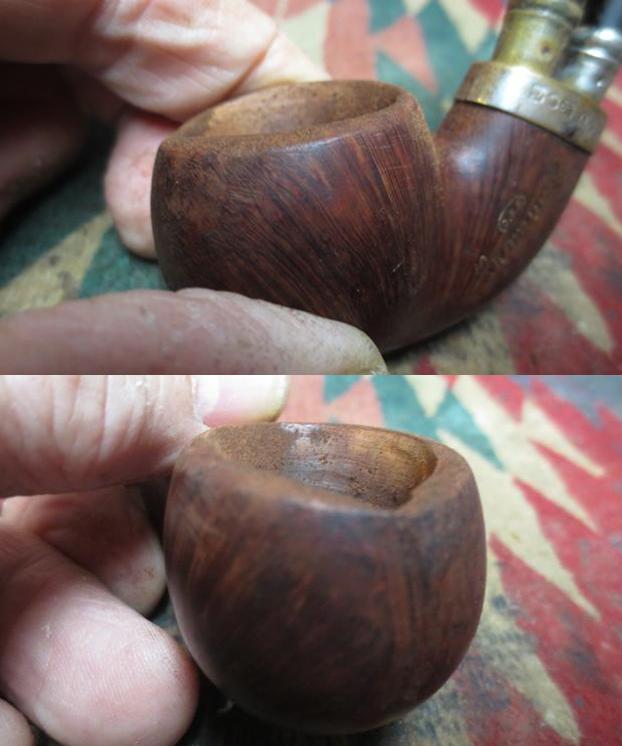
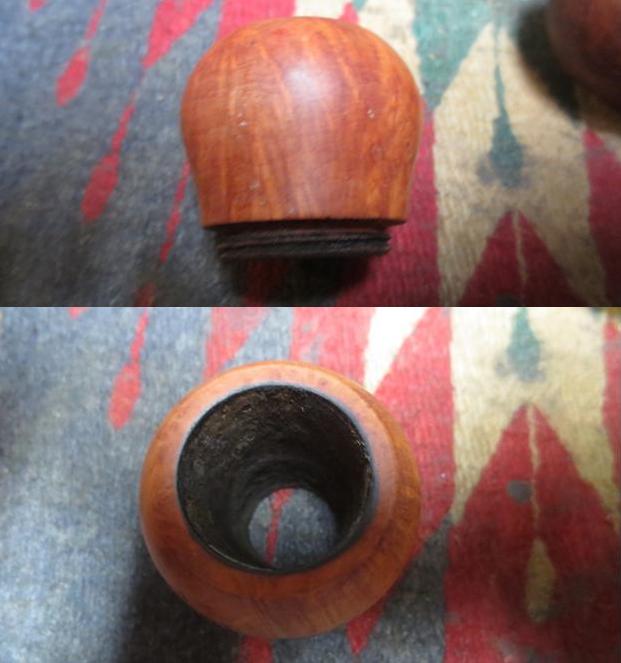
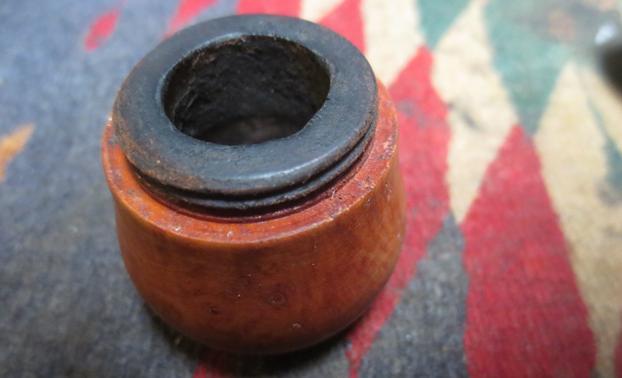
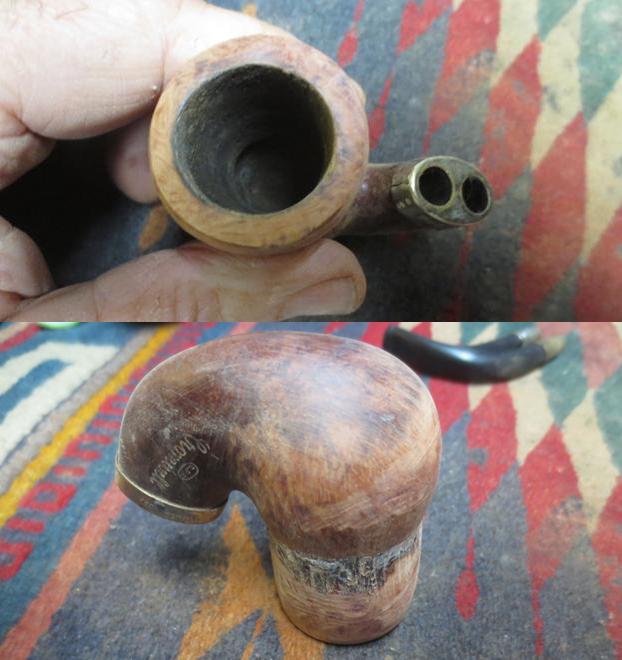
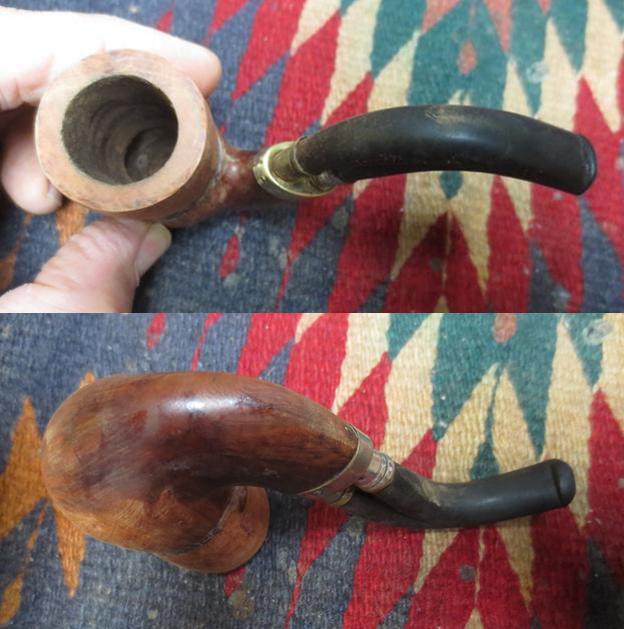
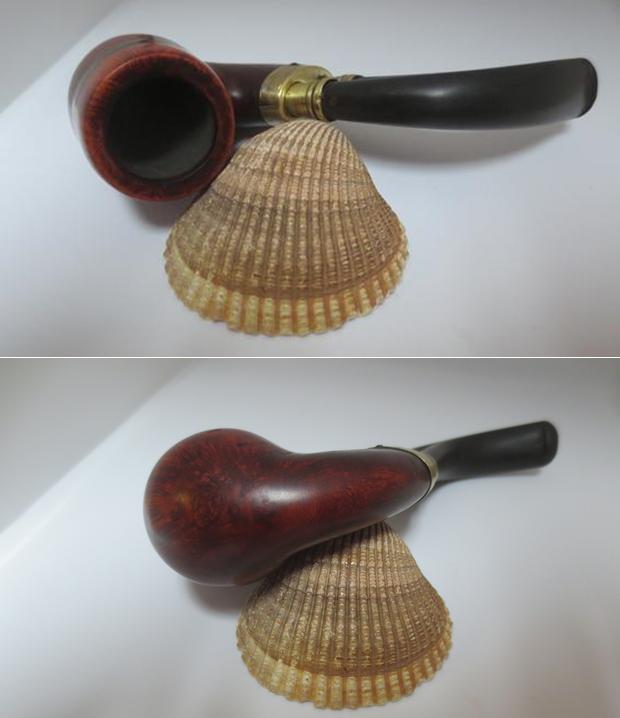
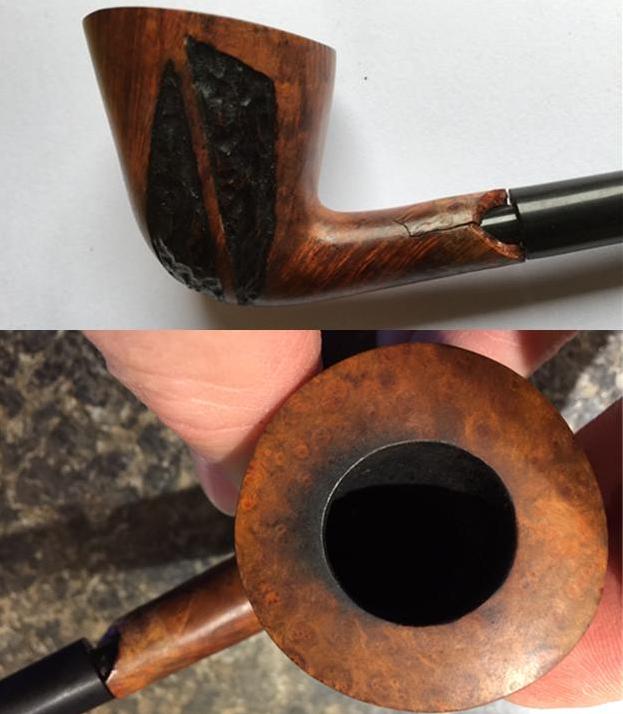
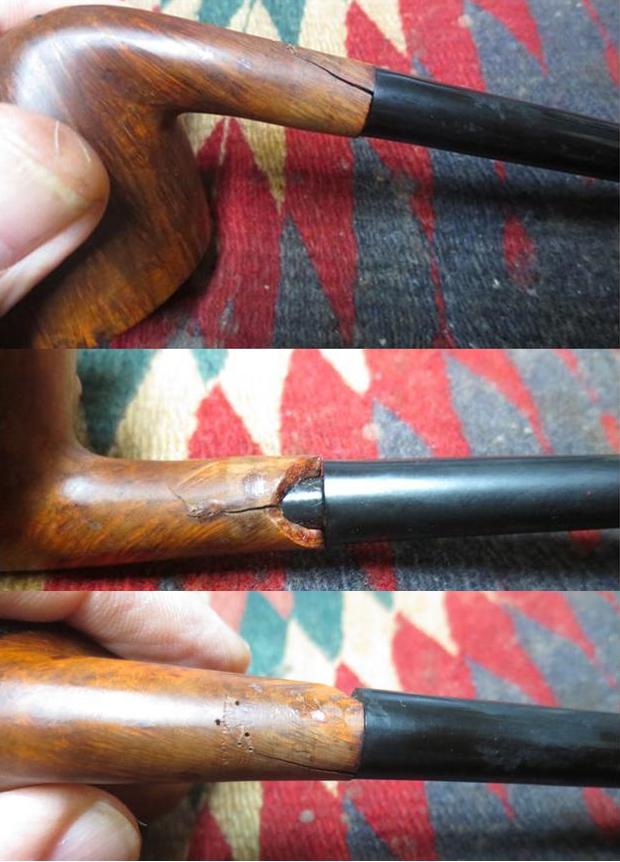
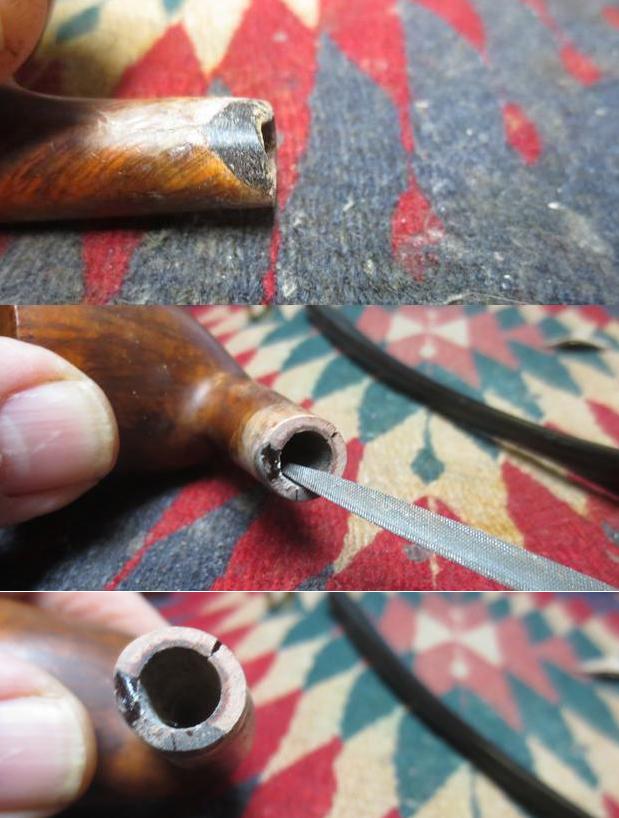
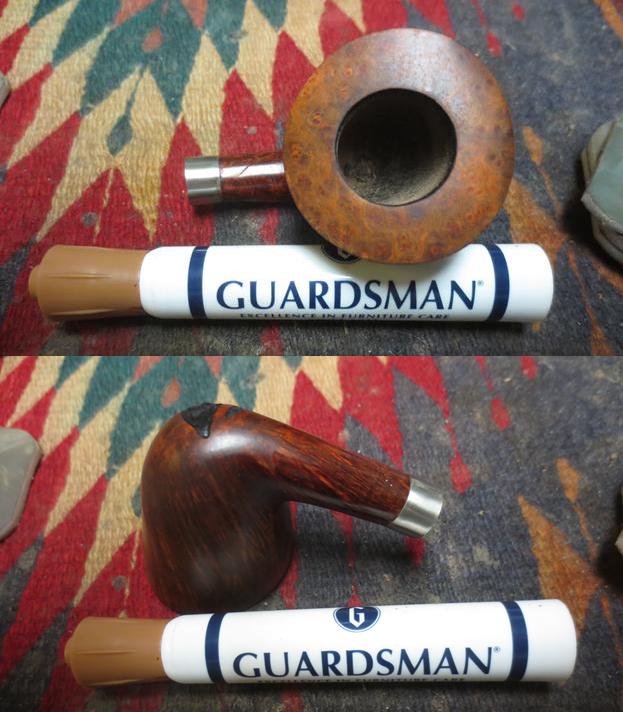
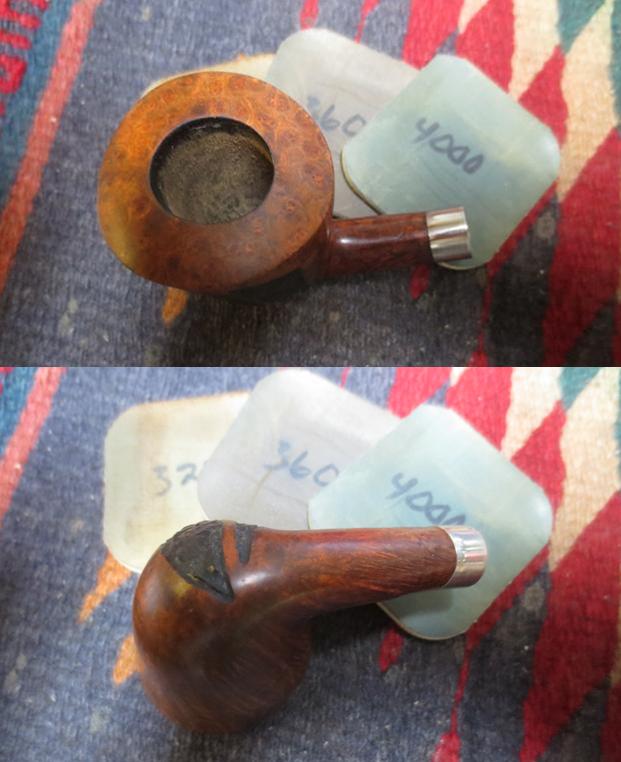
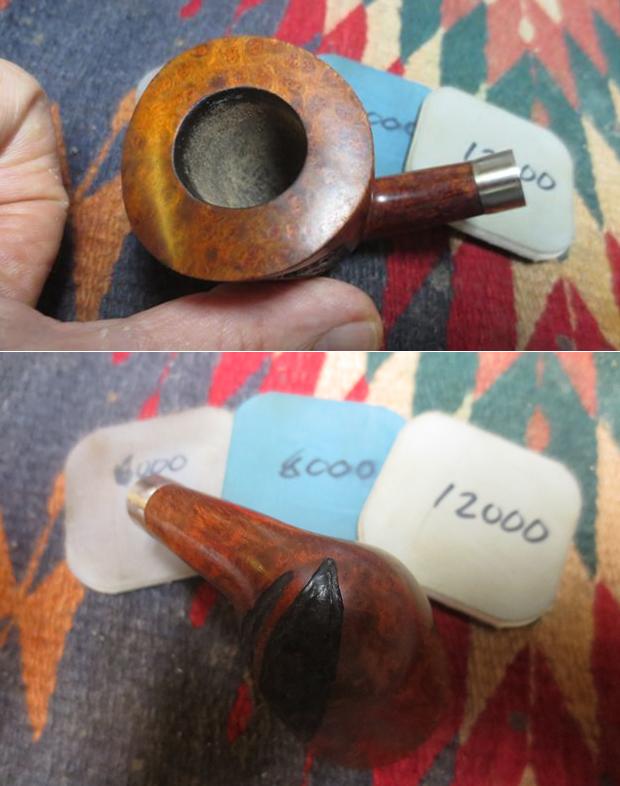
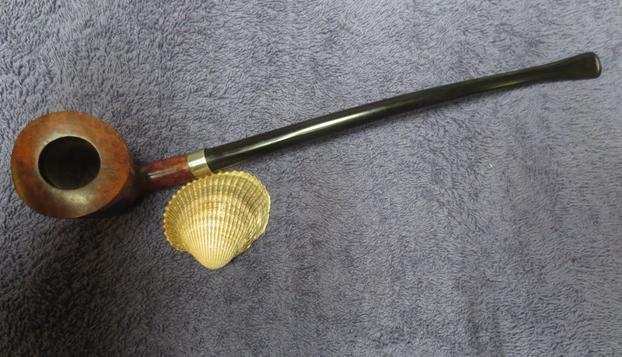
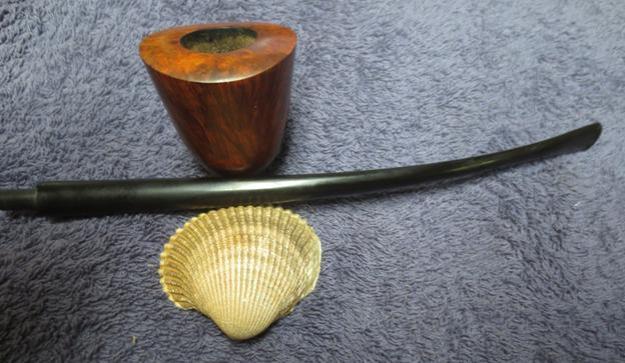
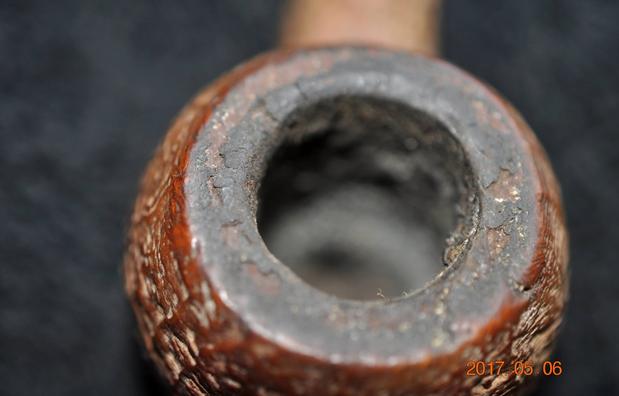
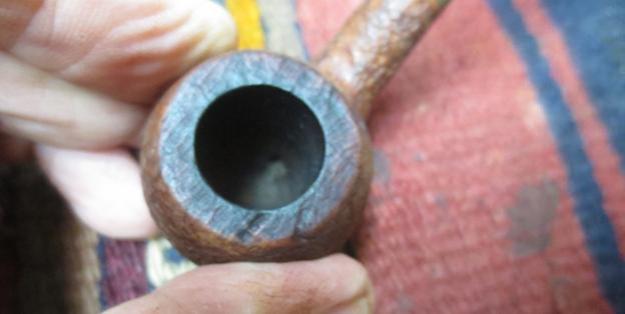
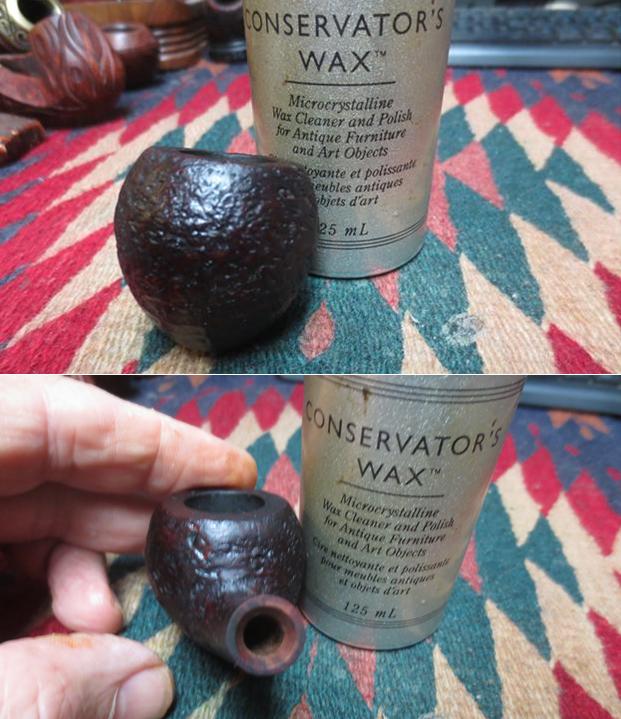
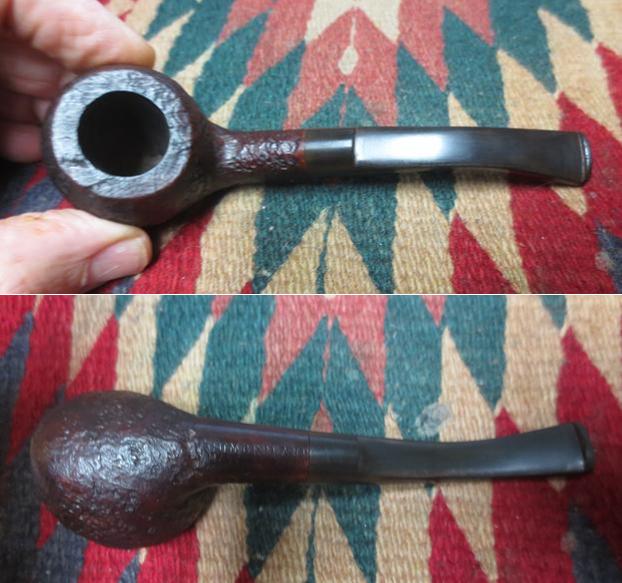
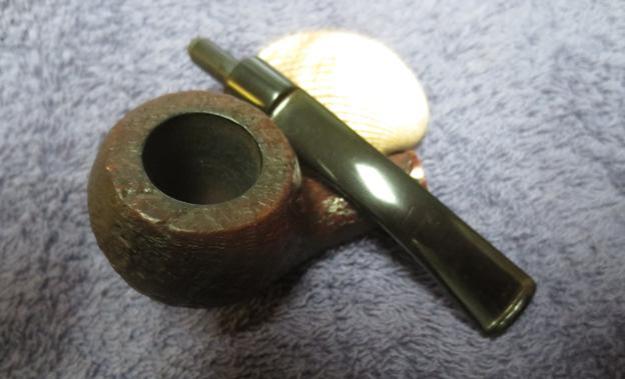
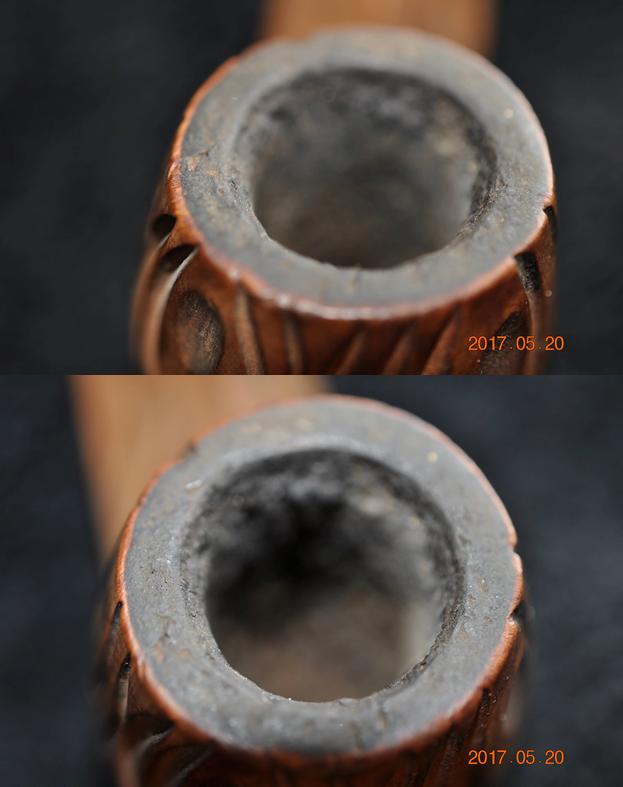
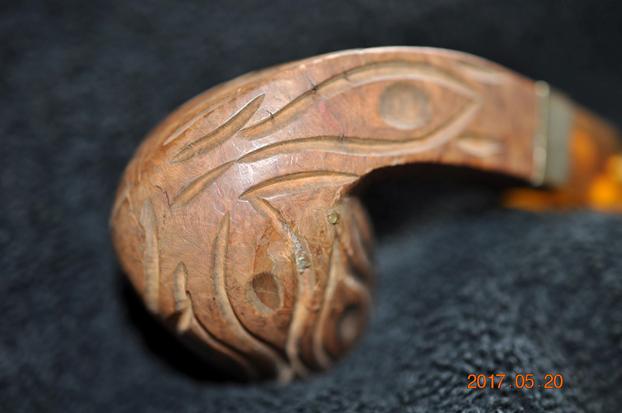
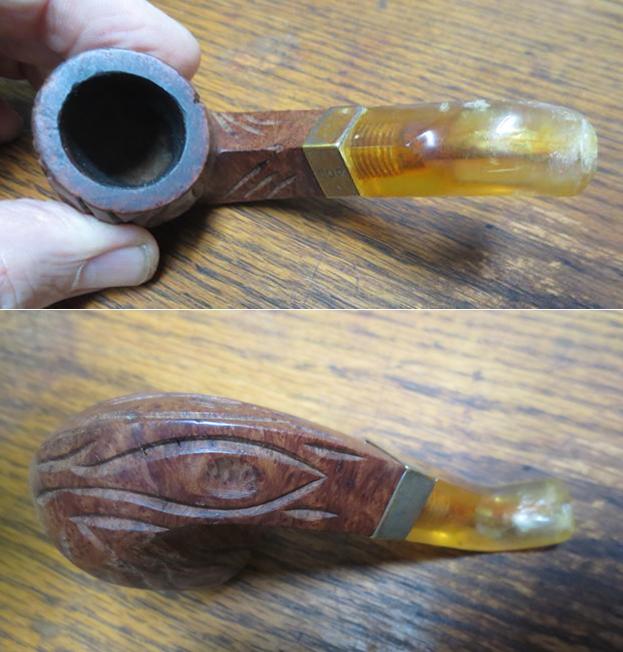
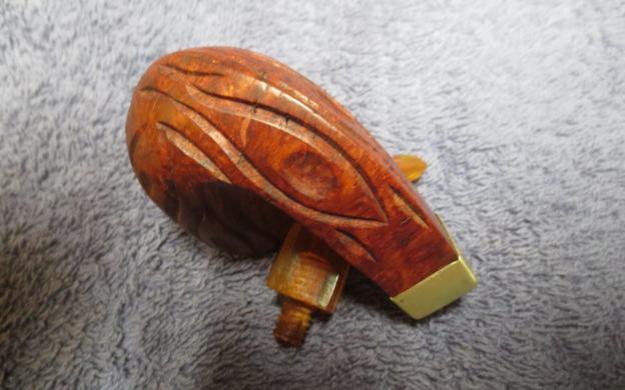
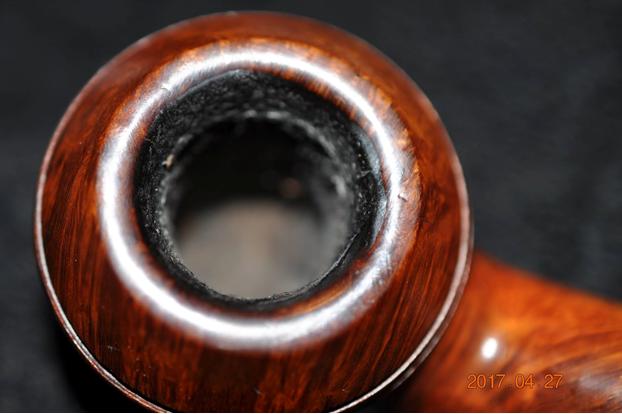
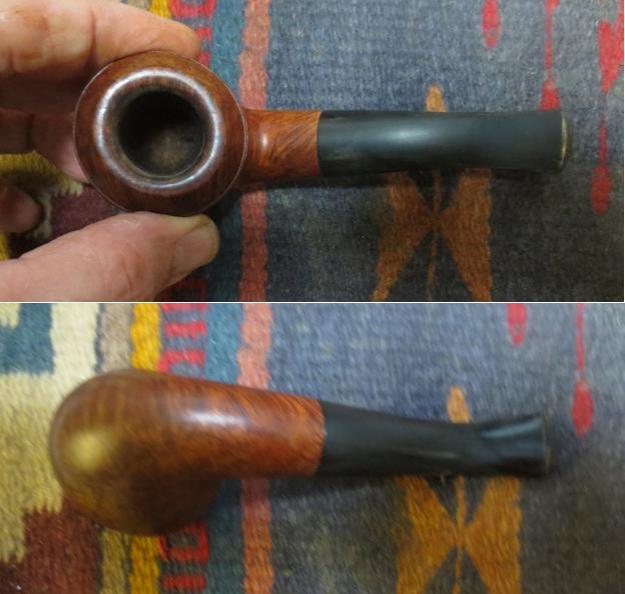
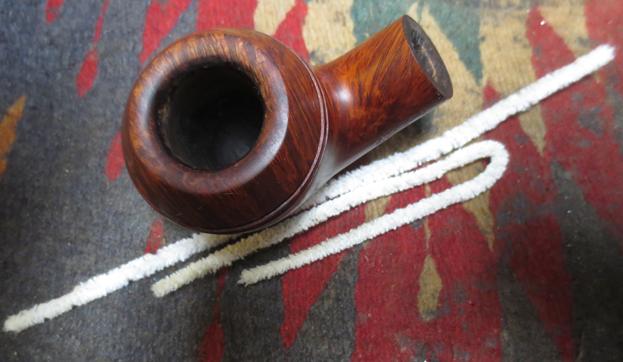
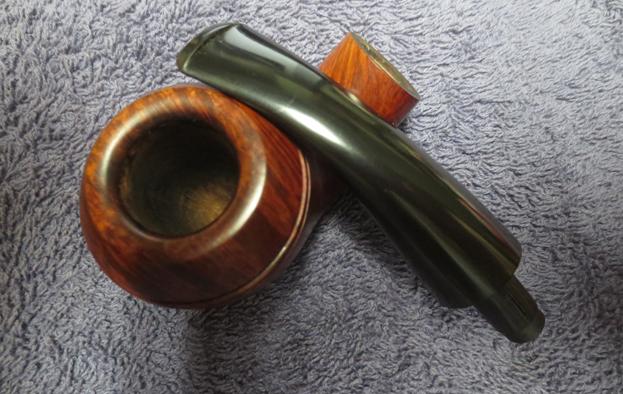
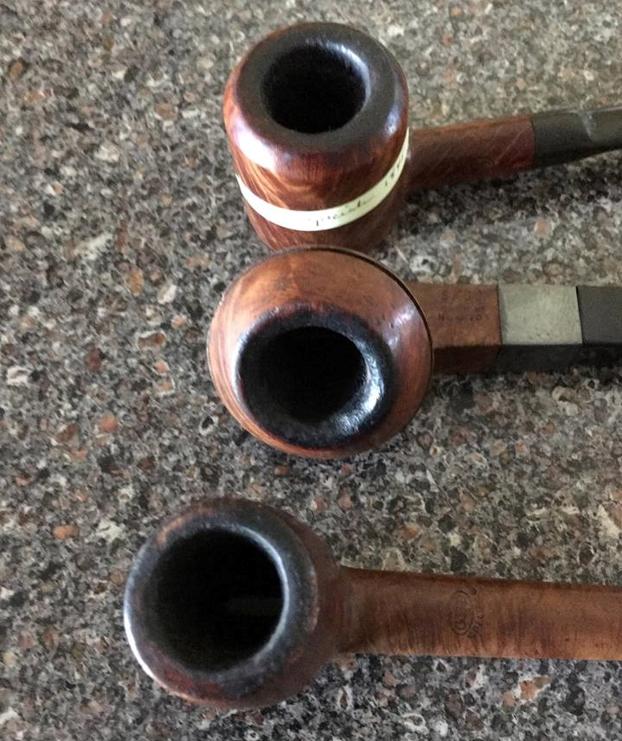
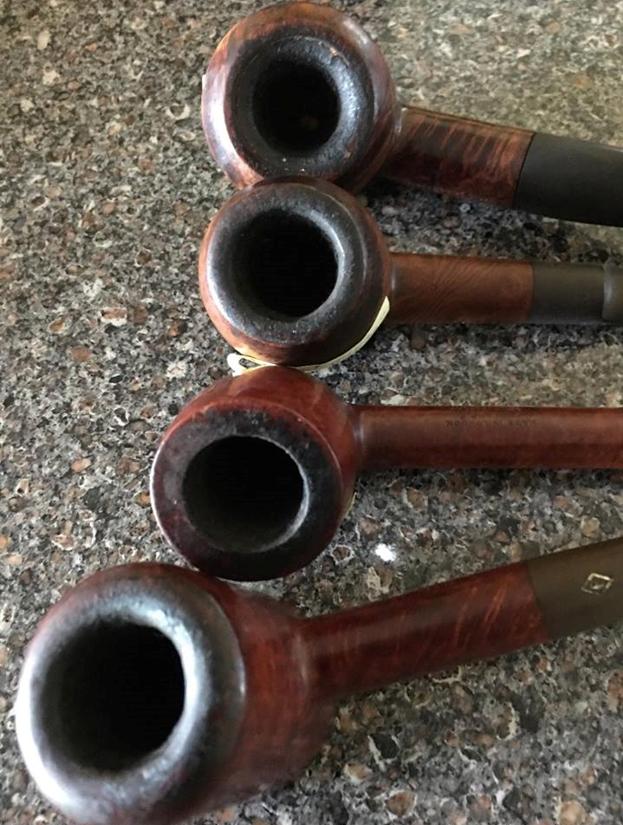
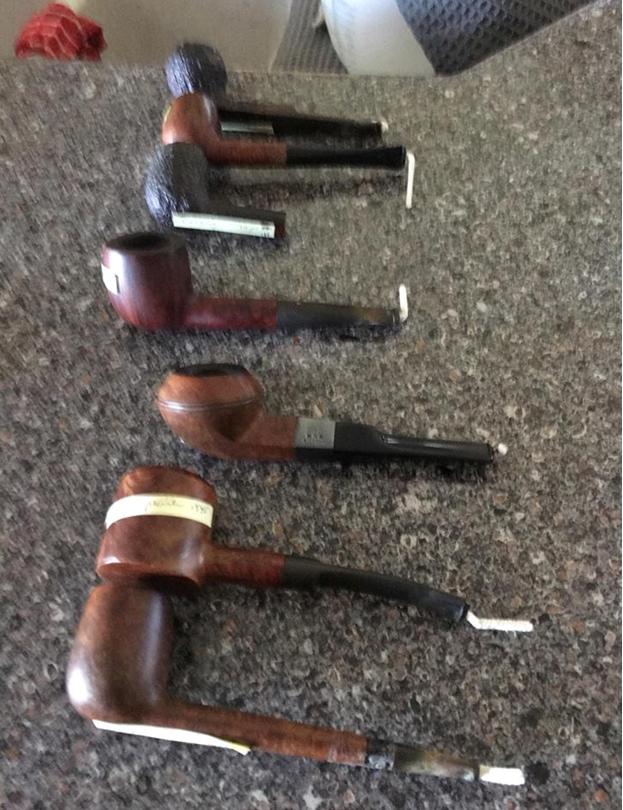
Jeff took a photo of the rim top and bowl to give me a better idea of the condition of the pipes. There were no surprises here – mostly what I expected tired and dirty pipes that needed TLC. 
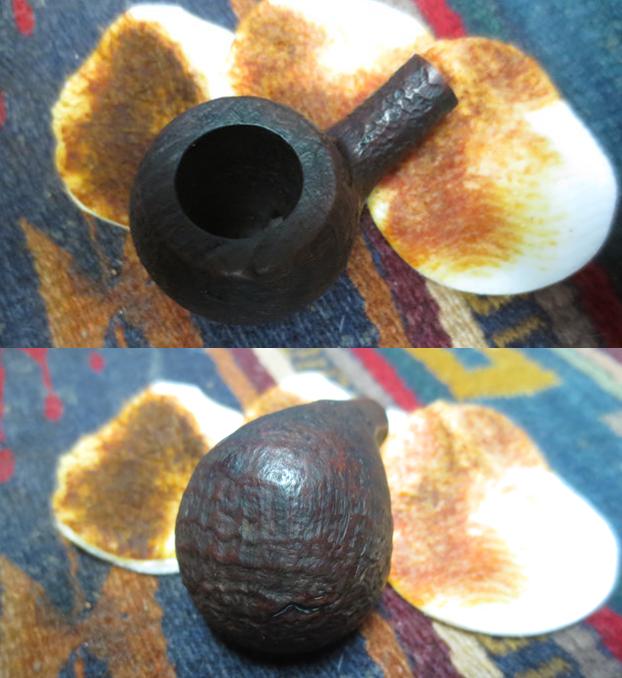
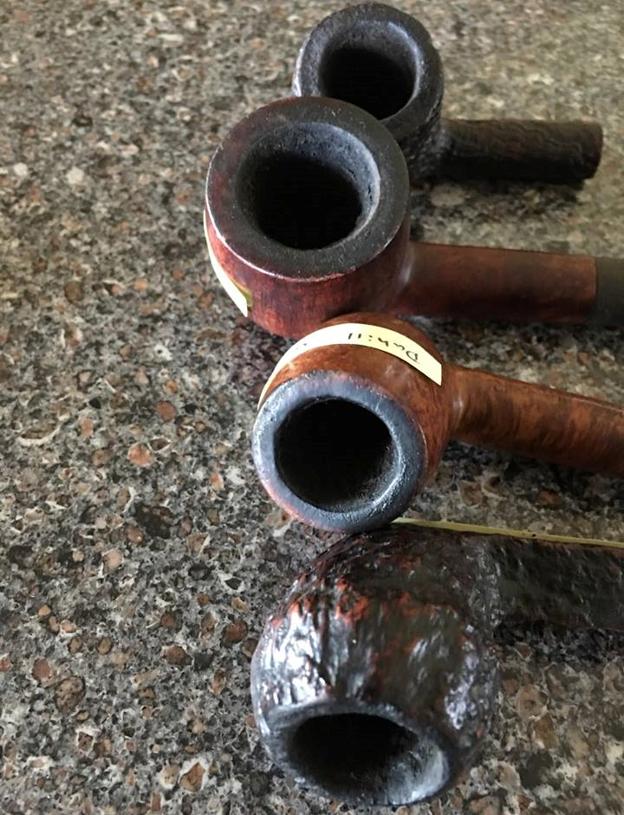
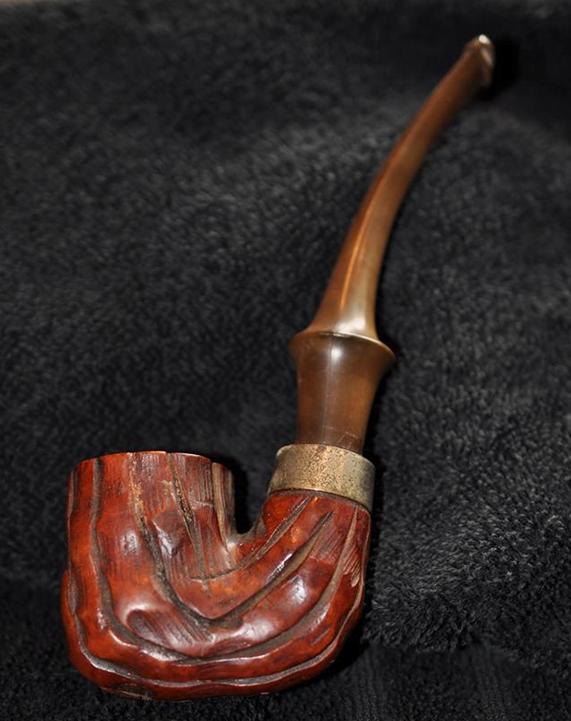
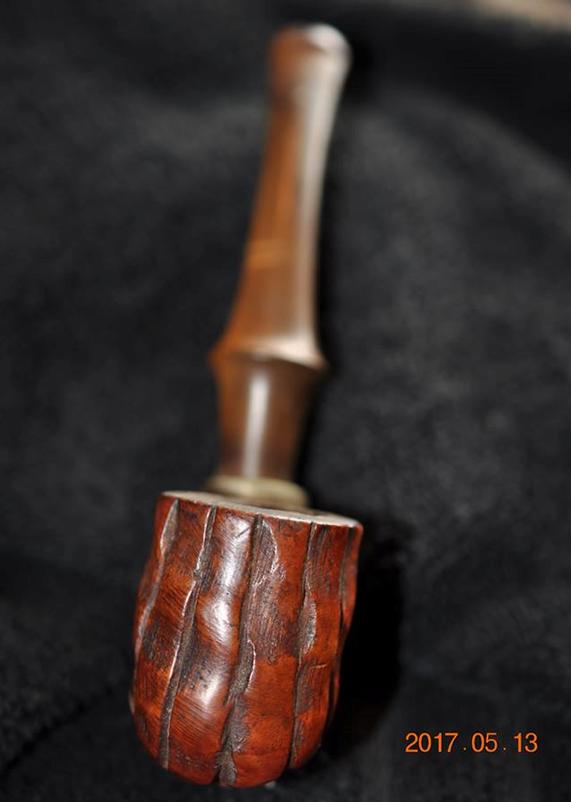
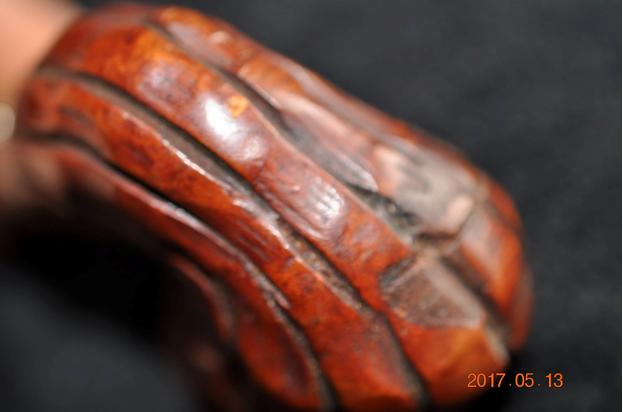
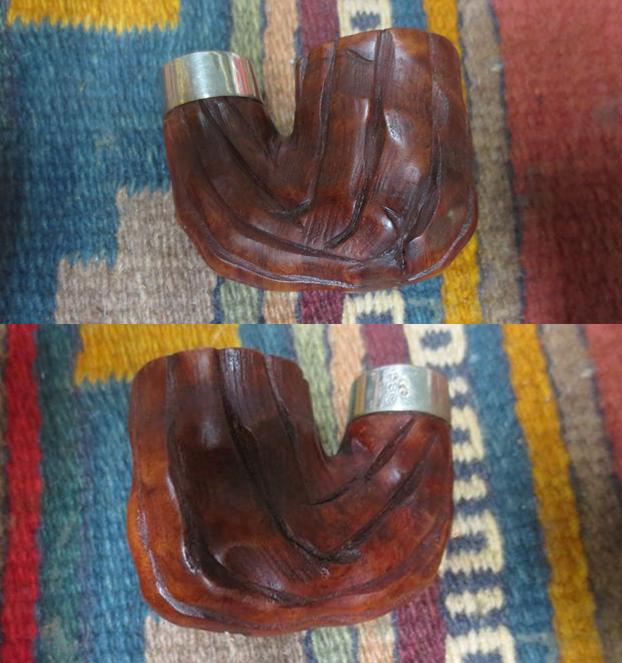
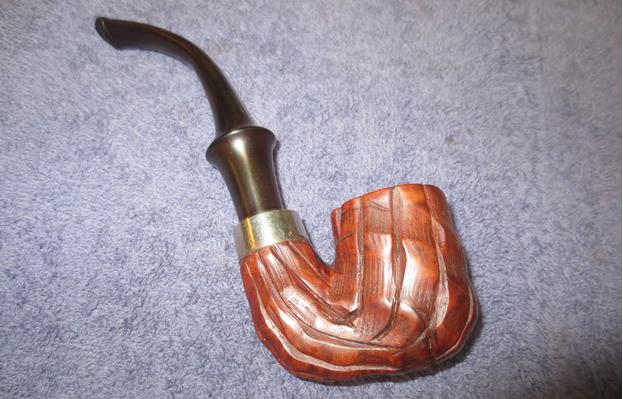
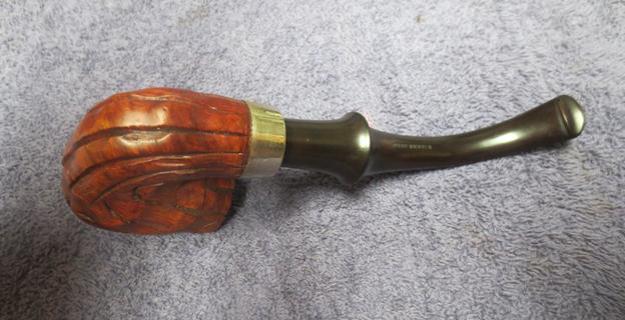
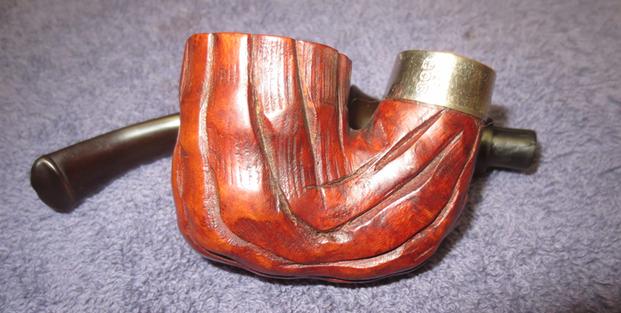
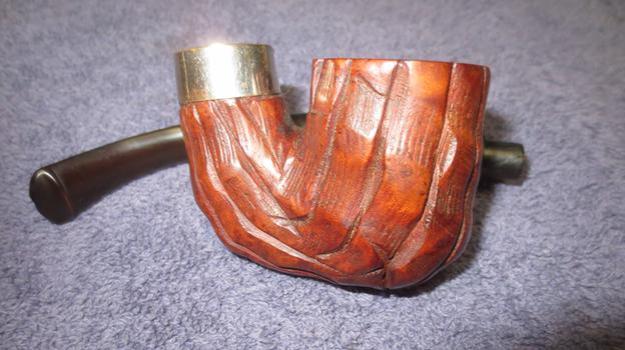
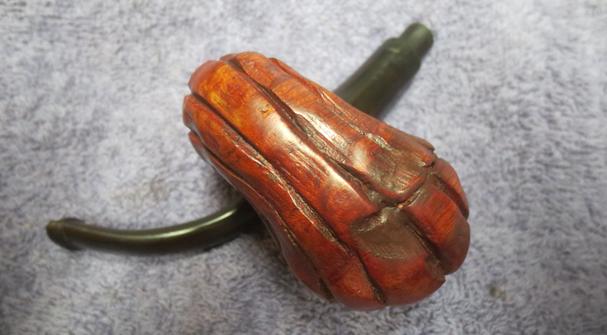
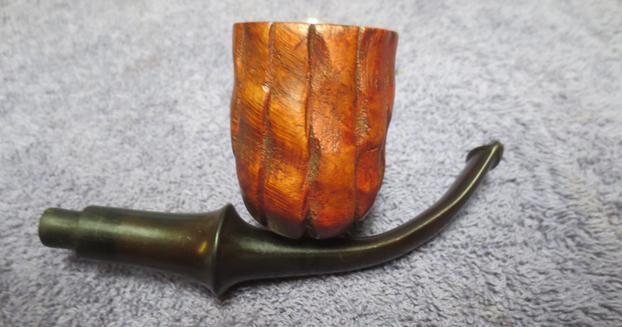
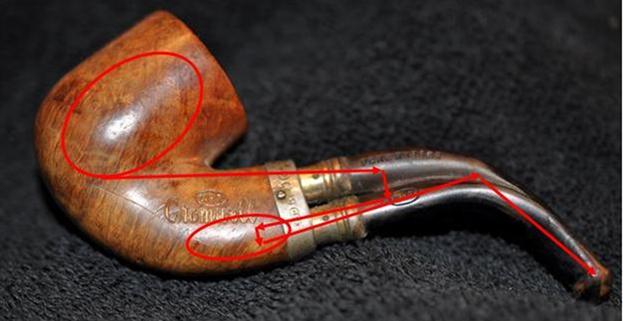
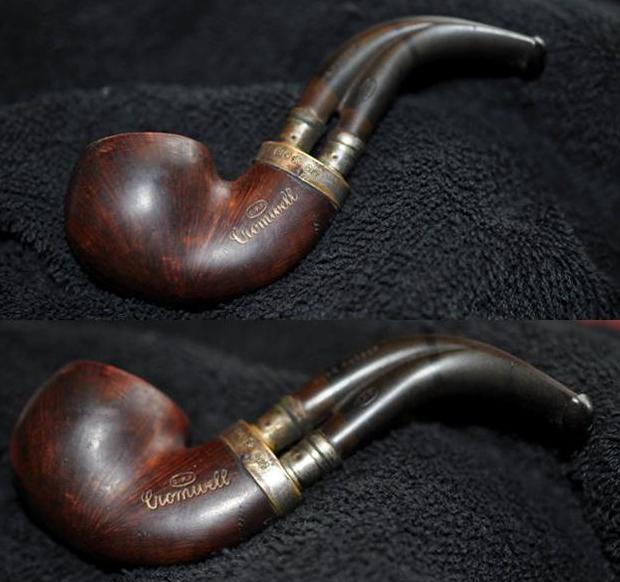
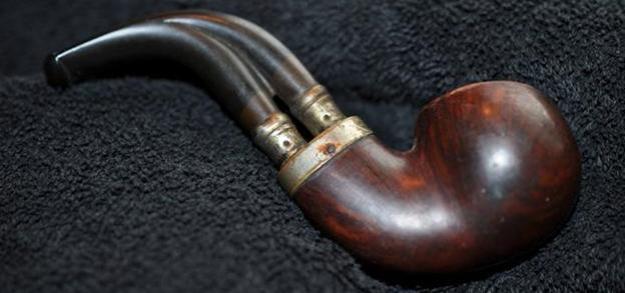
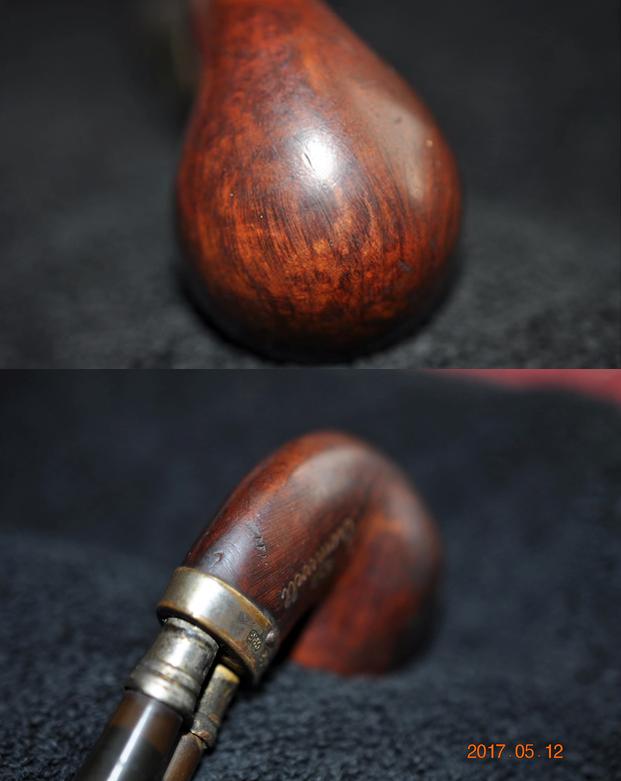
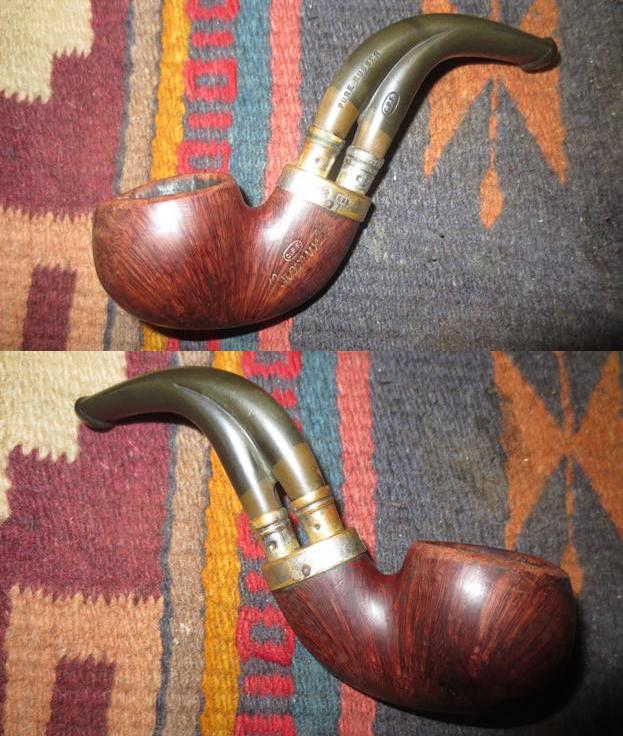
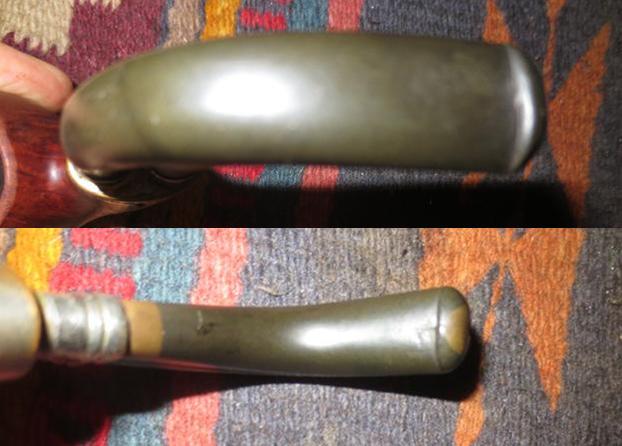
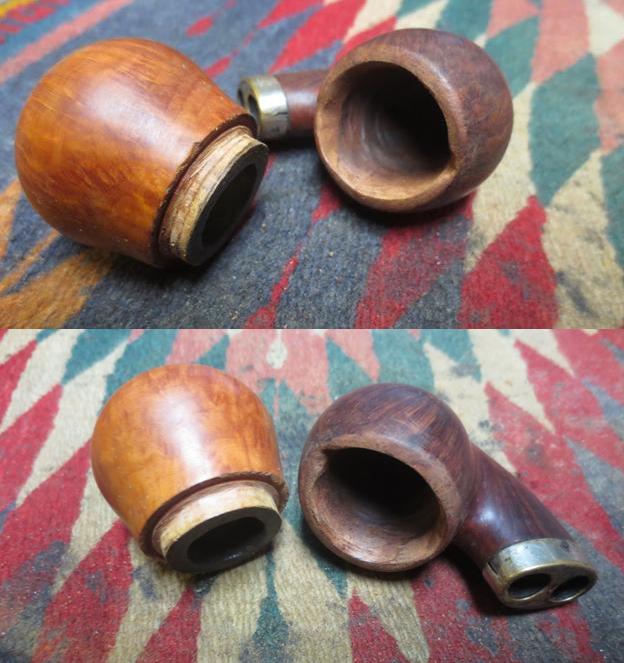
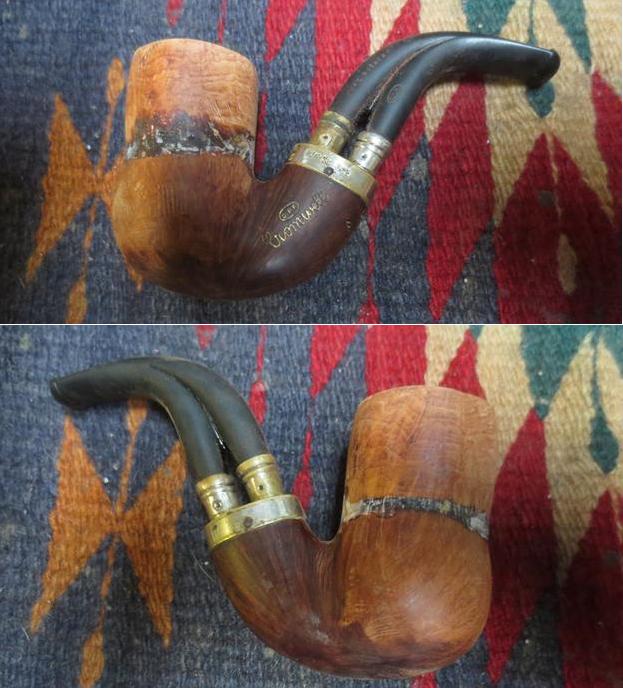
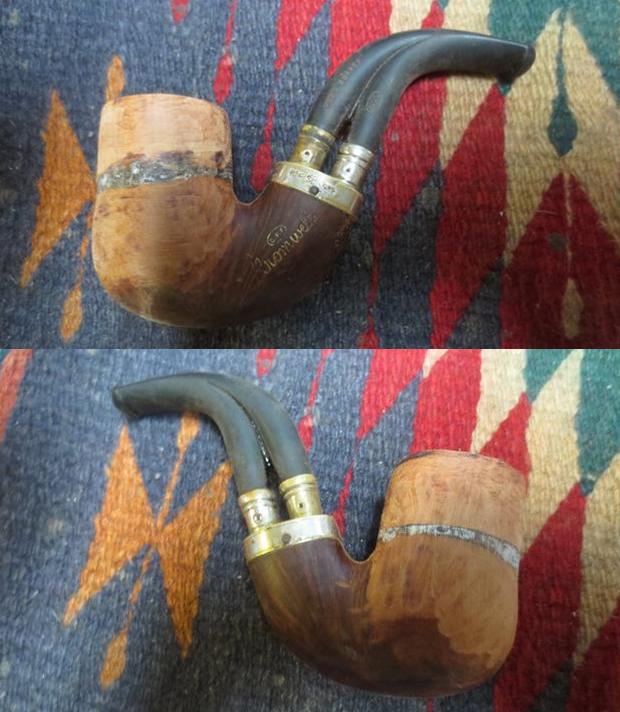
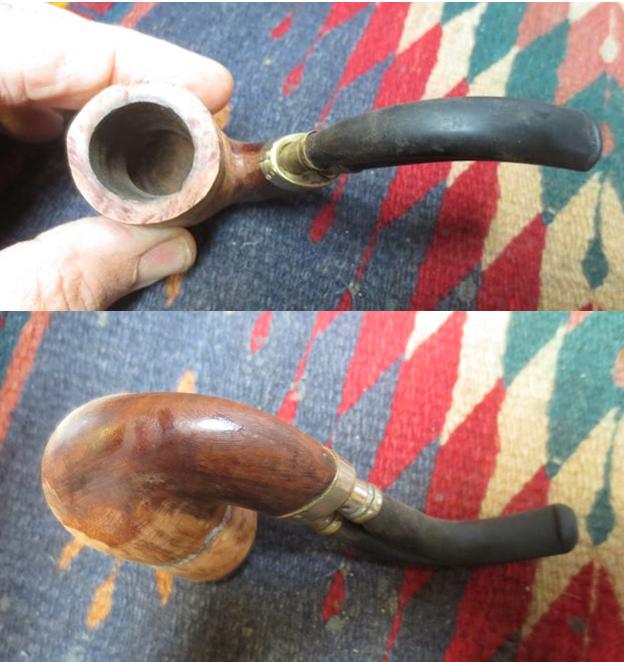
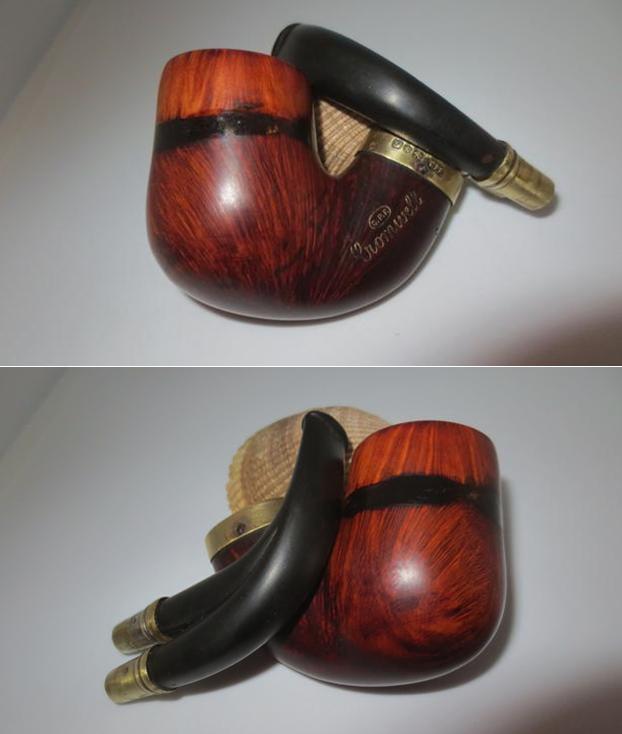
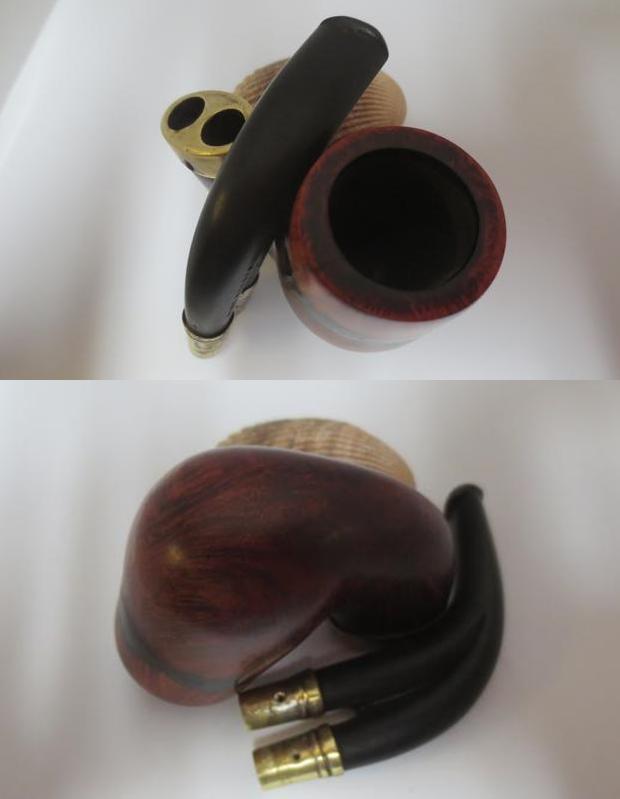
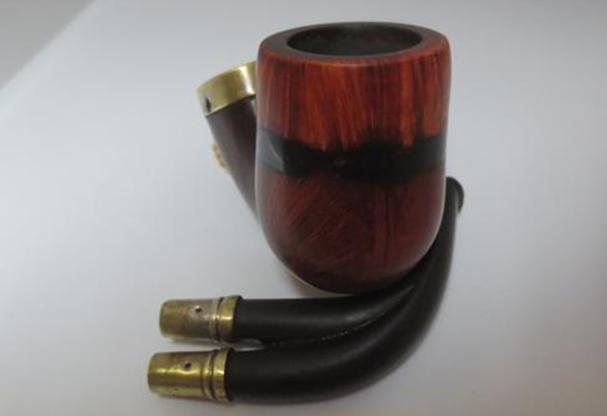
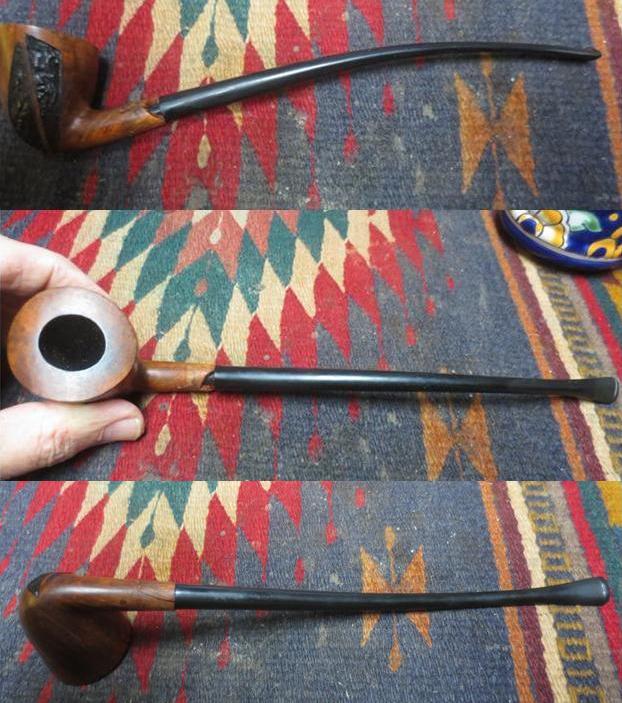
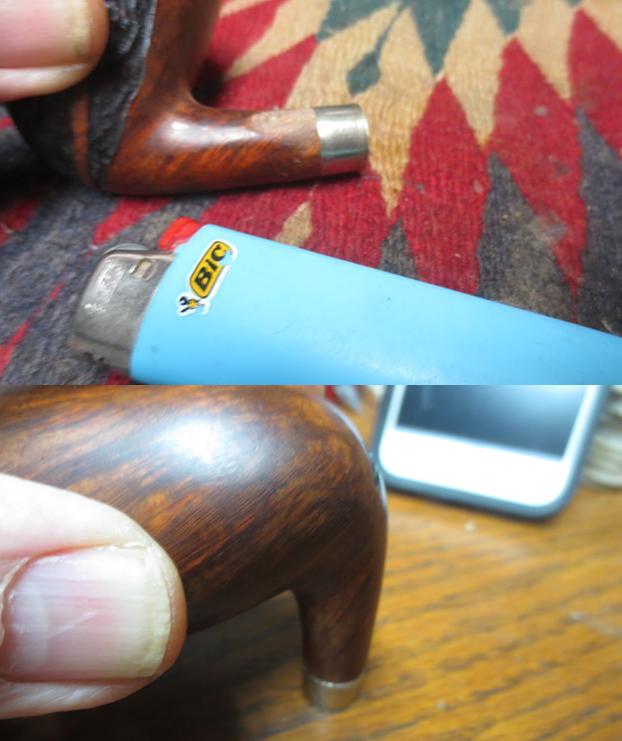
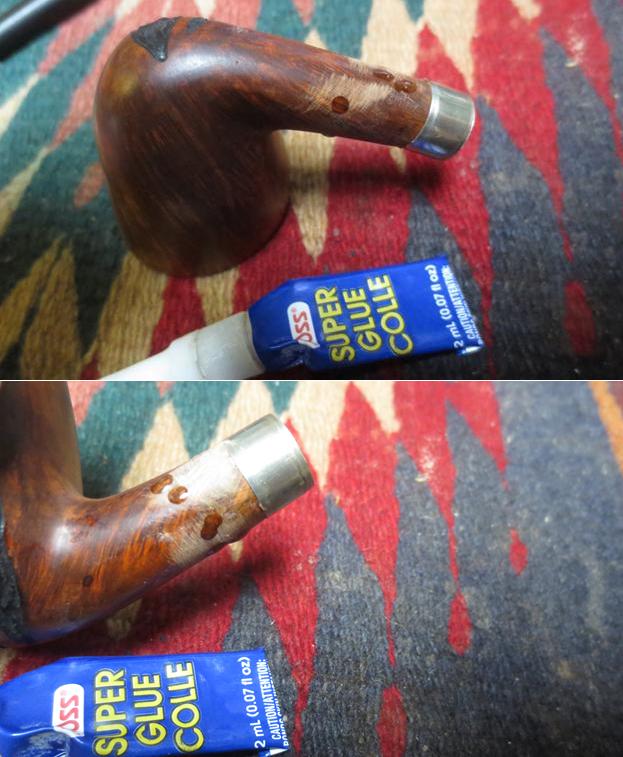
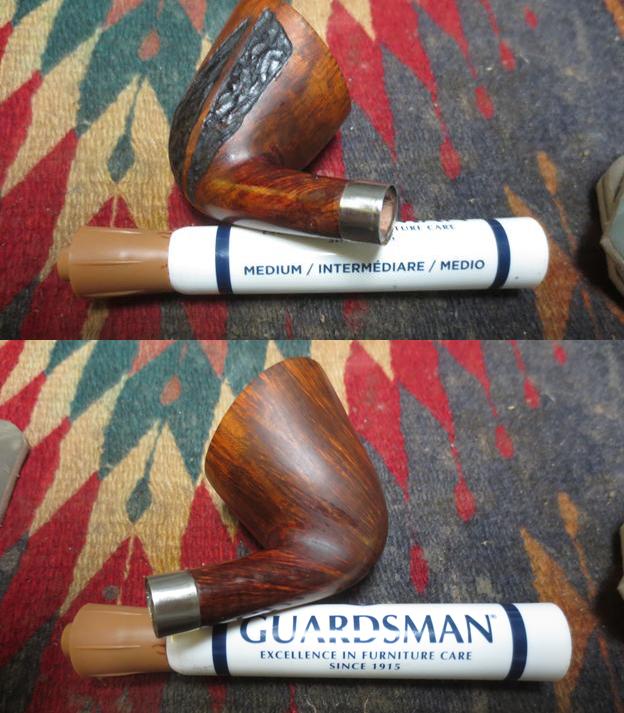
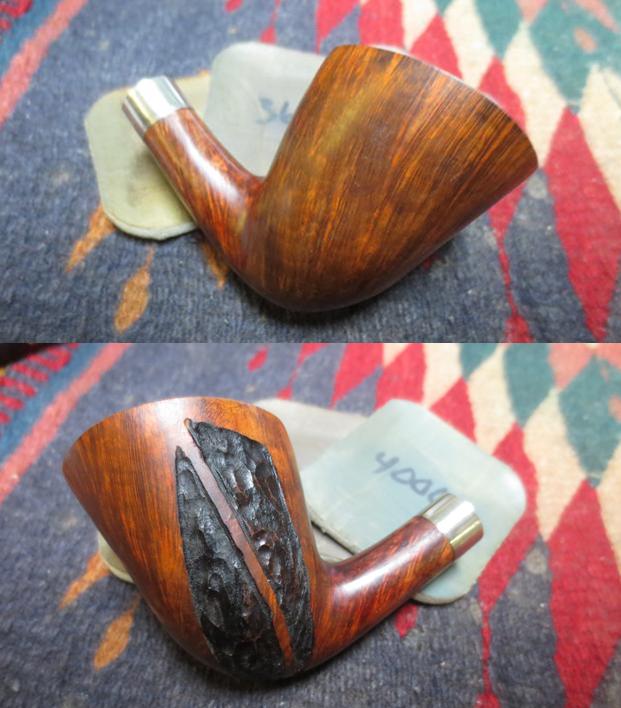
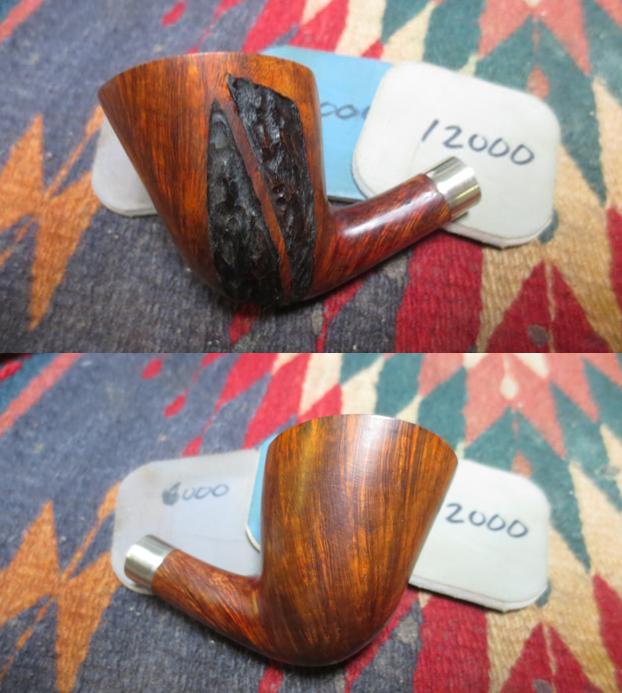
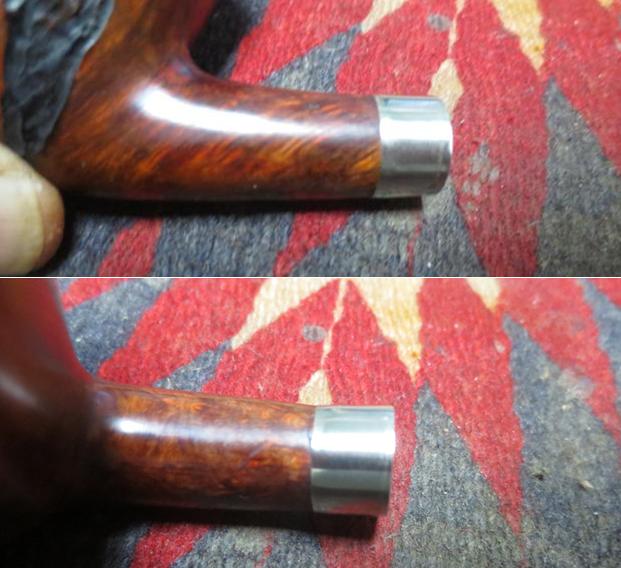
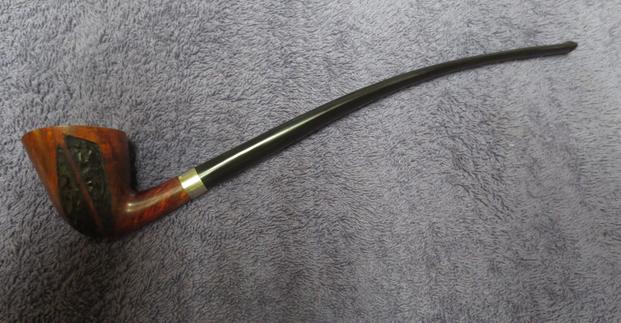
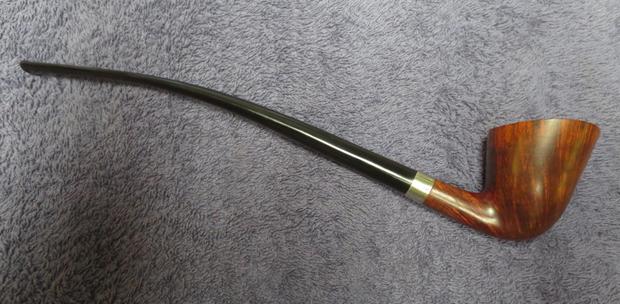
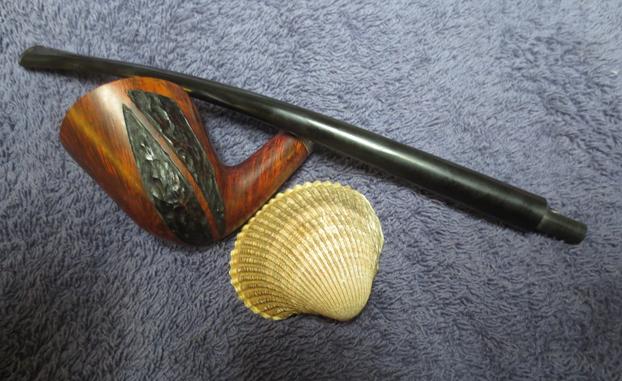
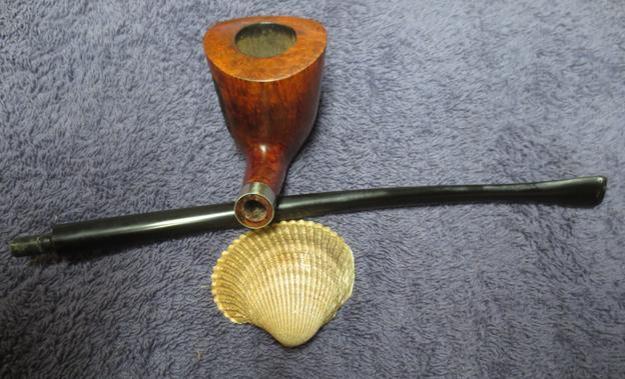
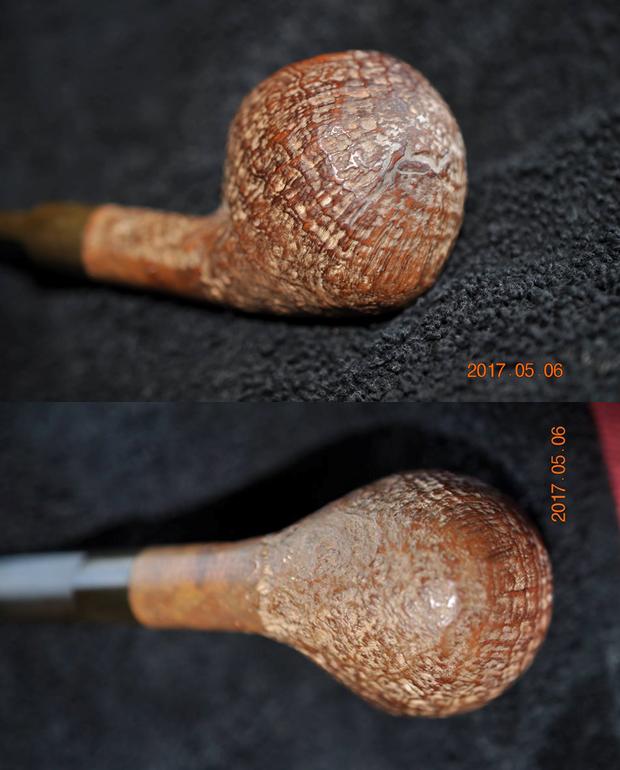
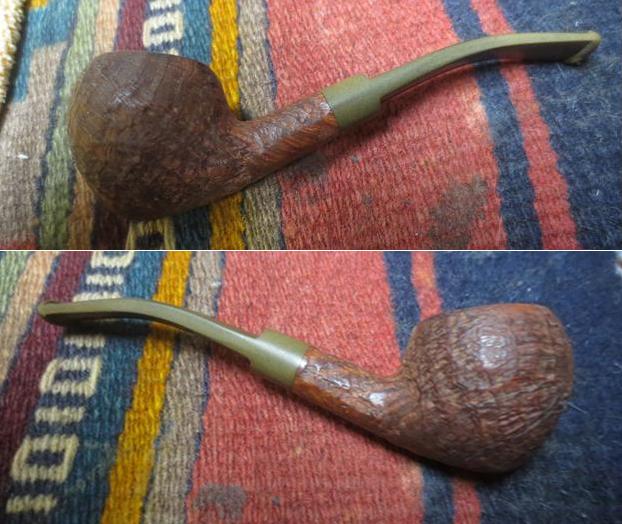
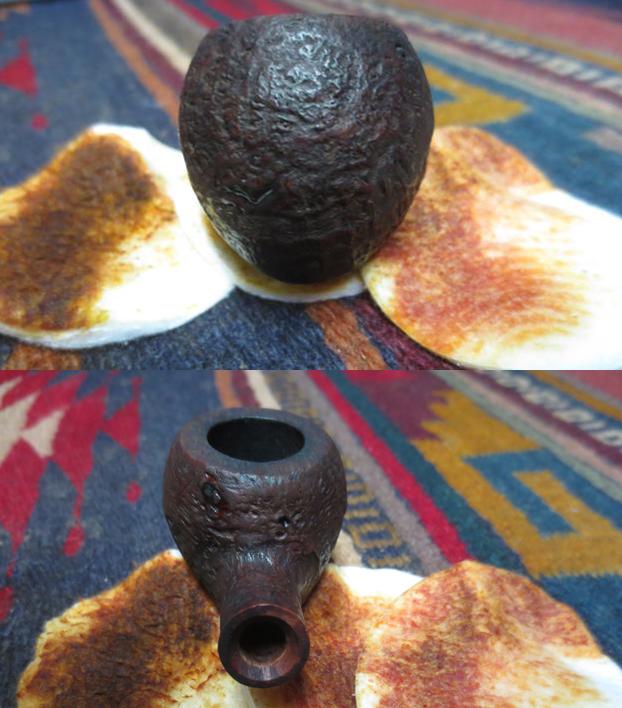
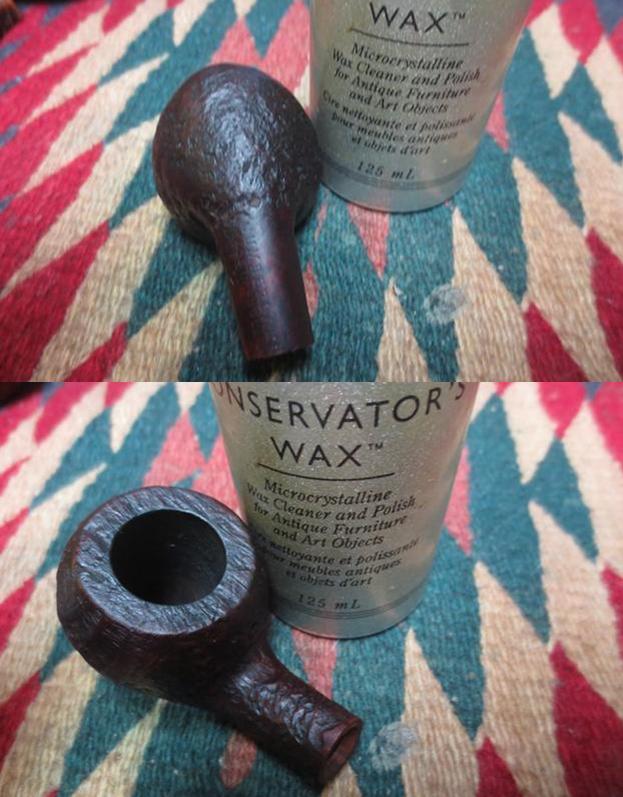
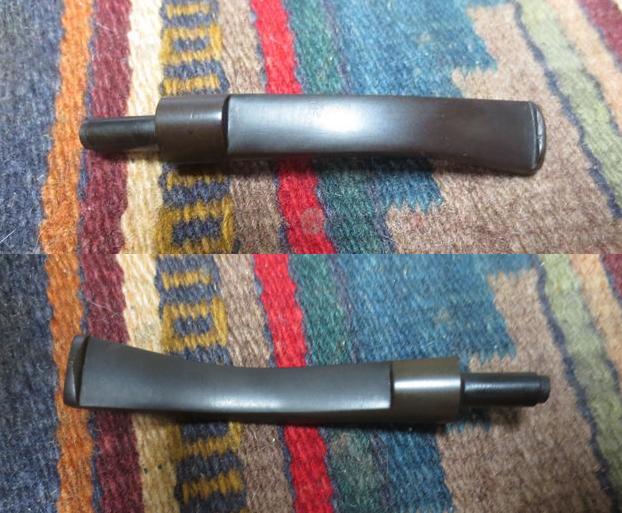
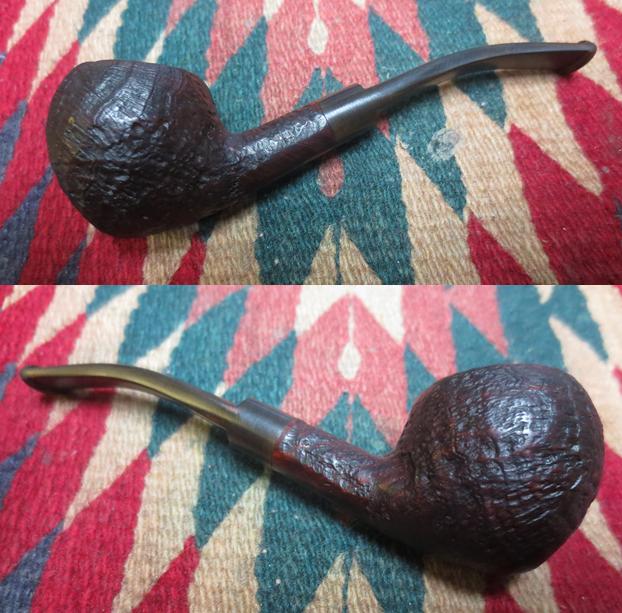
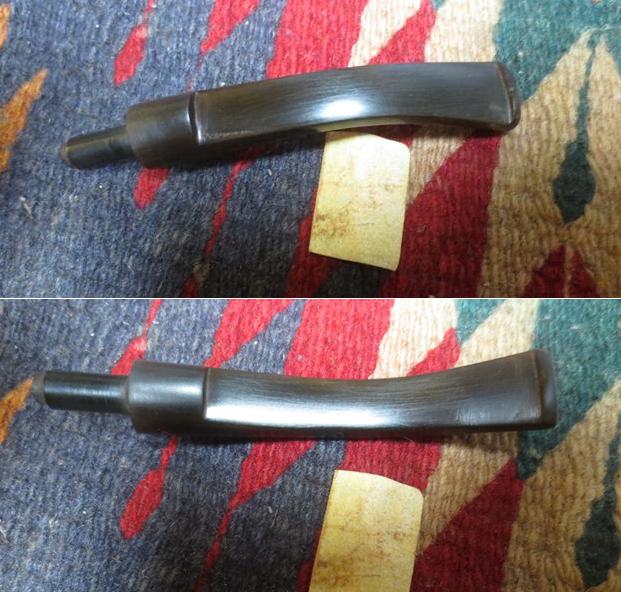
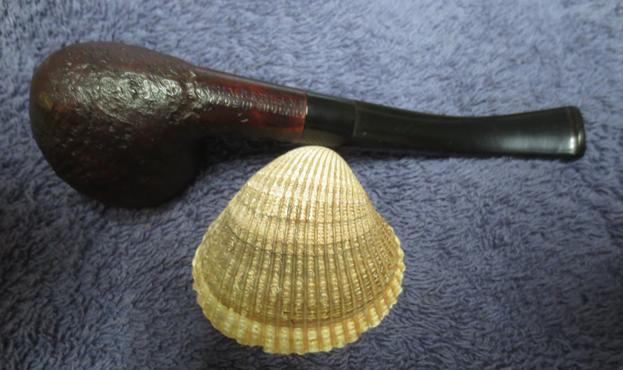
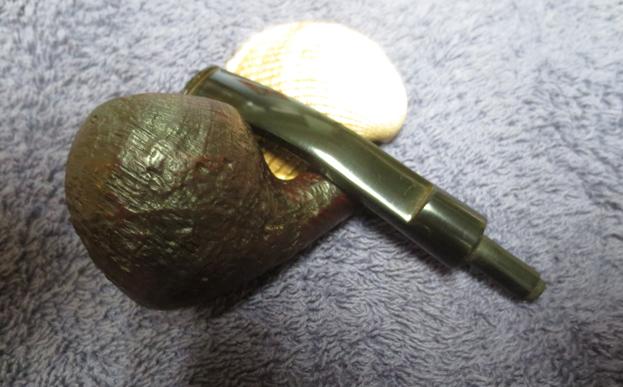
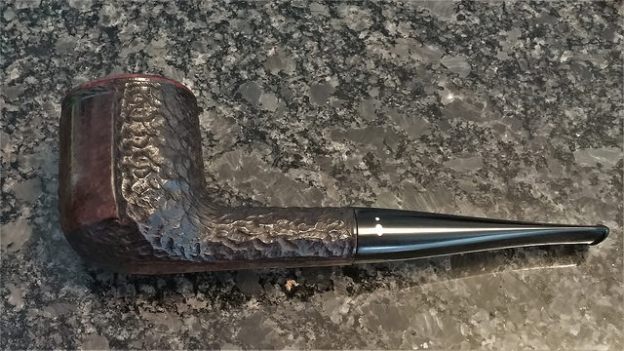
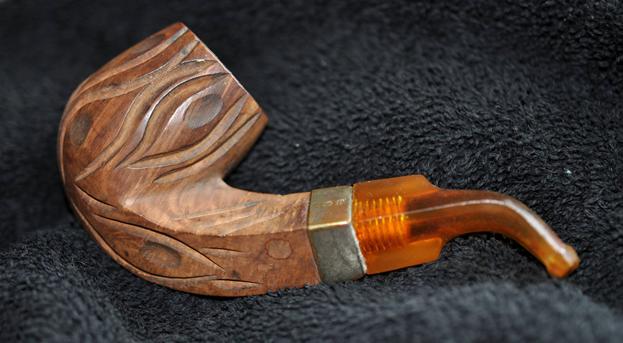
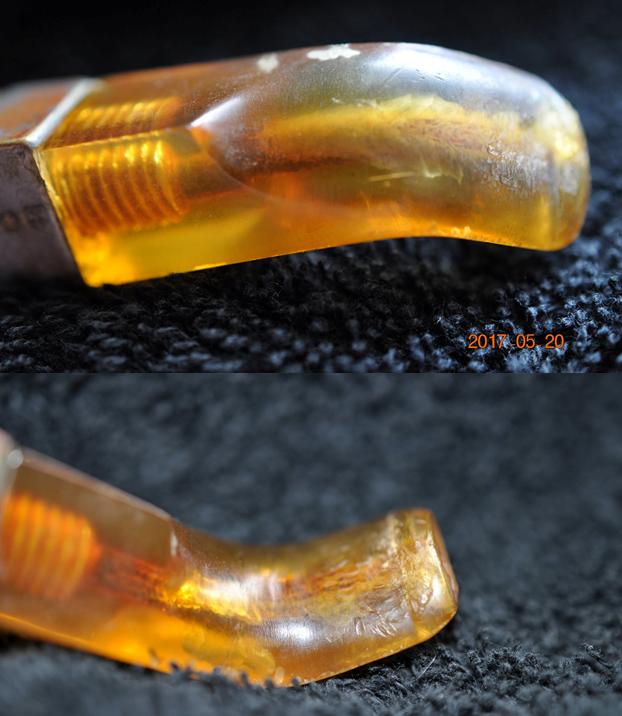
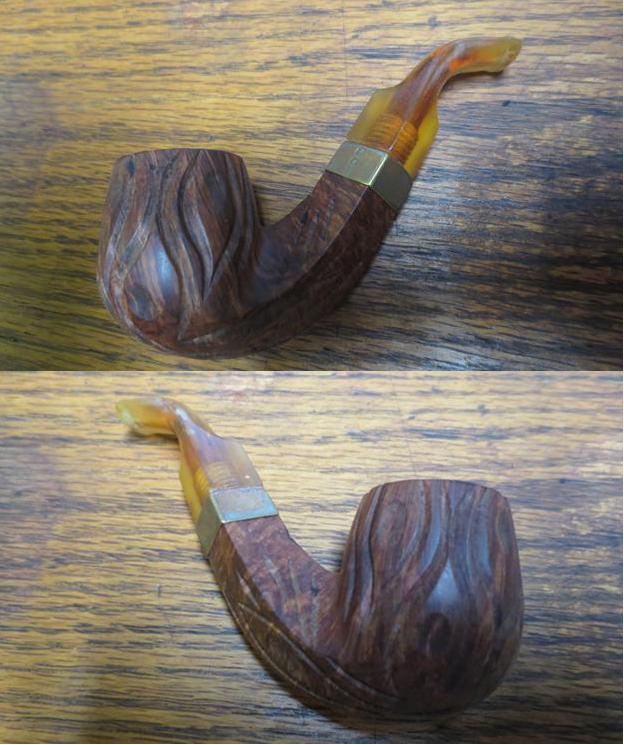
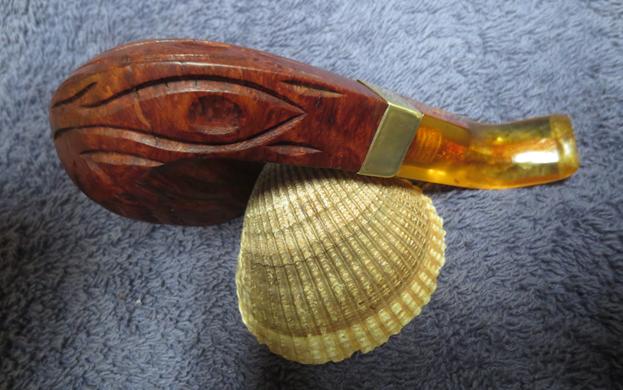
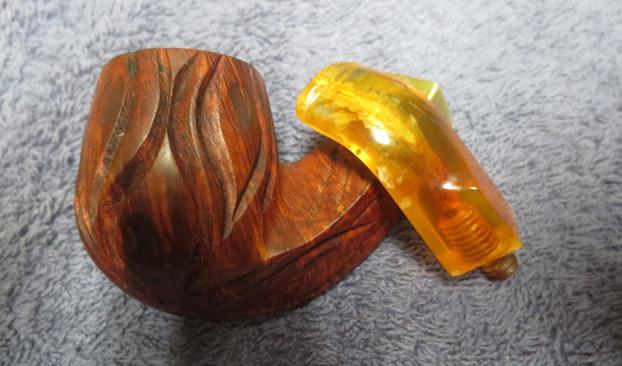
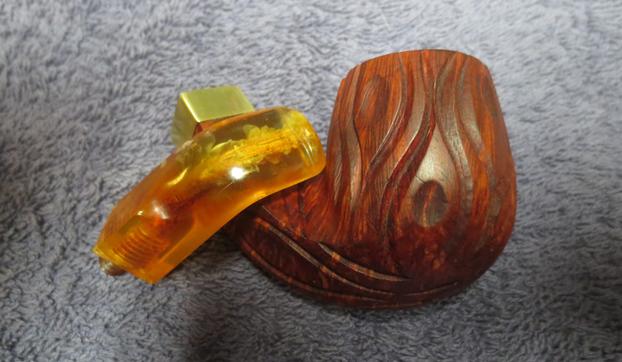
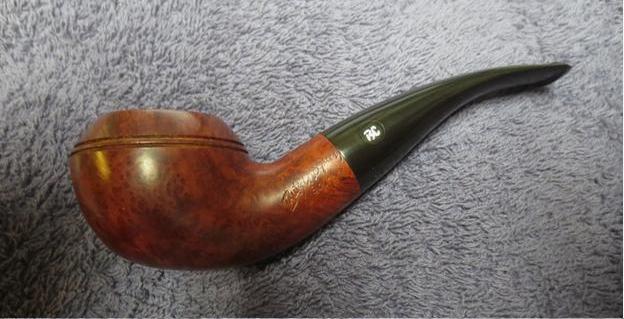
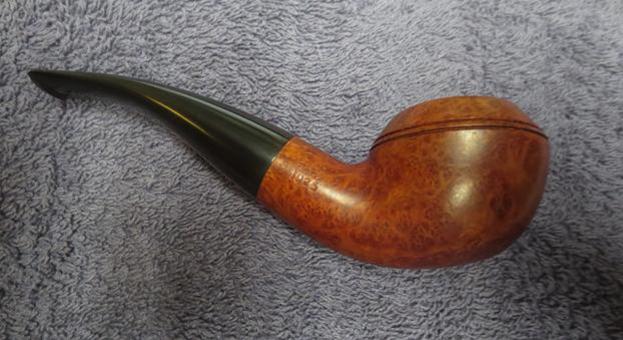
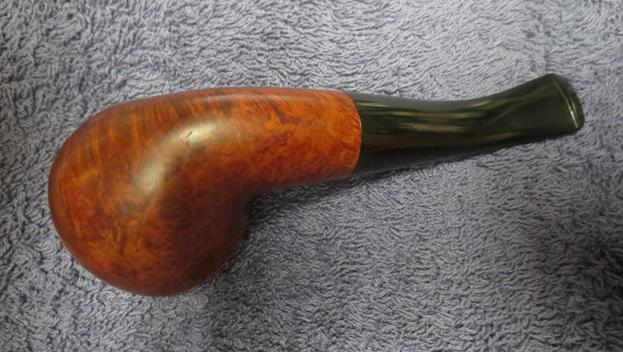
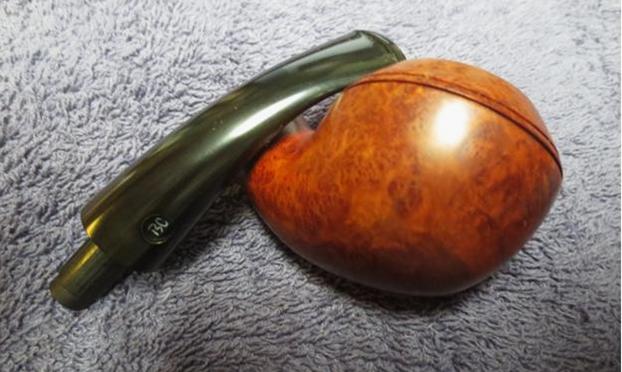
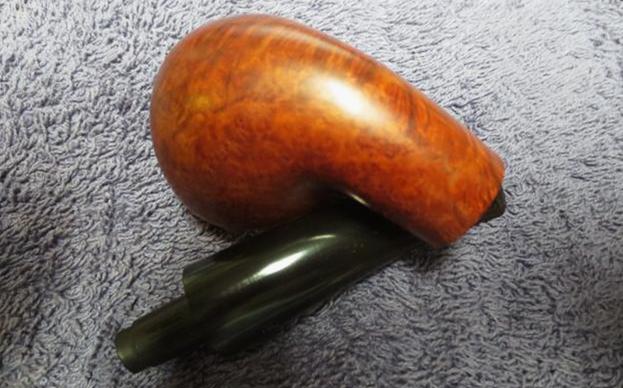
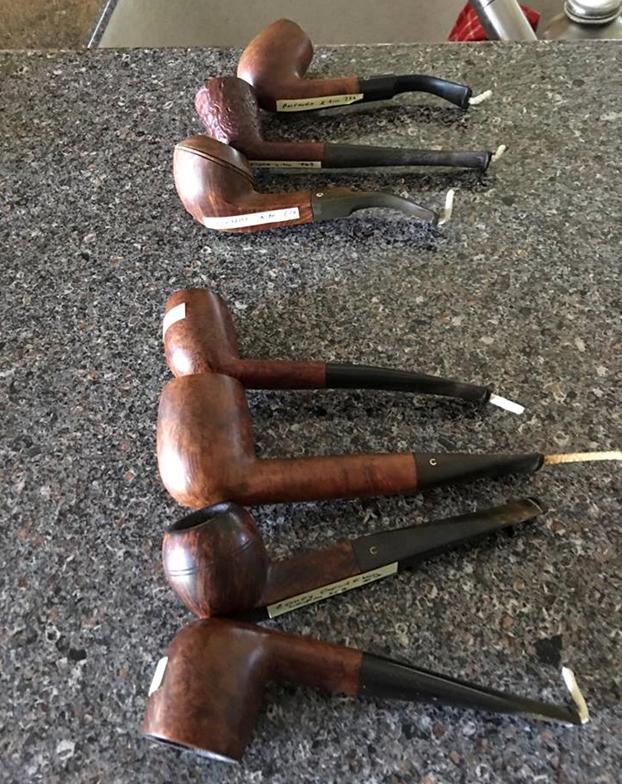
Jeff took a series of photos of side view of the pipes as a group. The pipes looked like they were in good shape. 
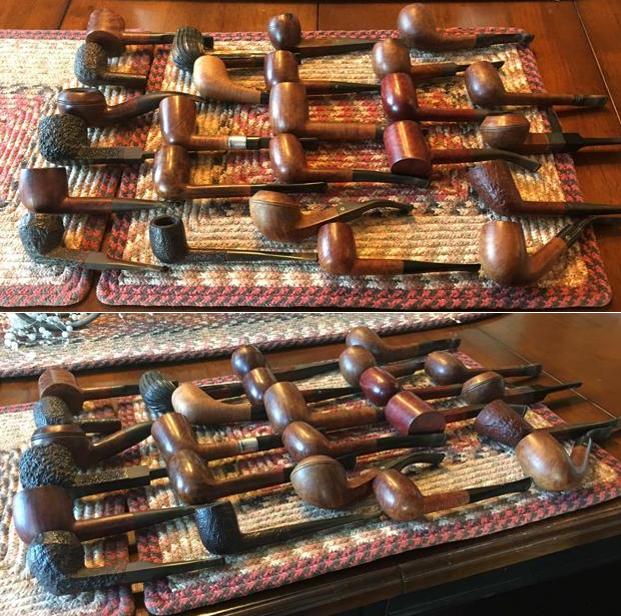
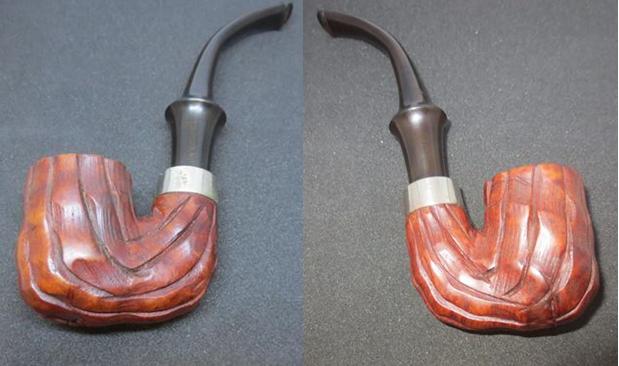
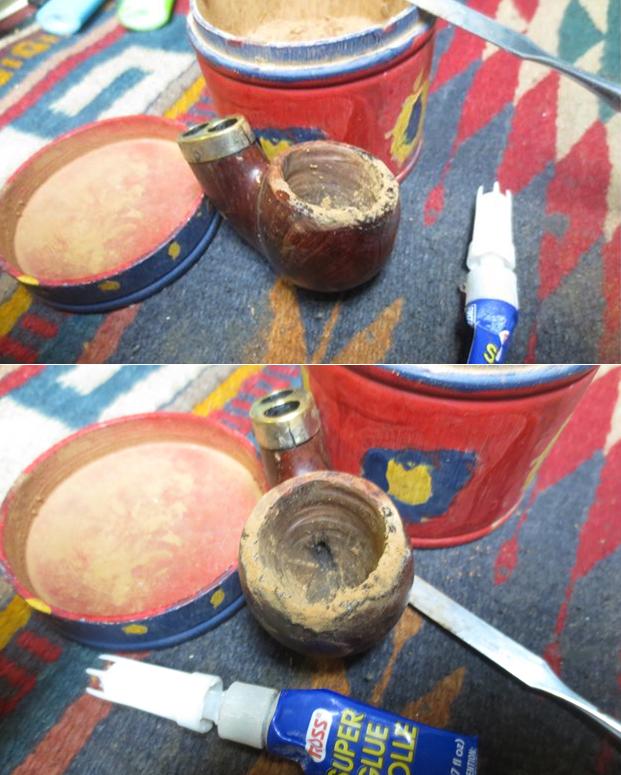
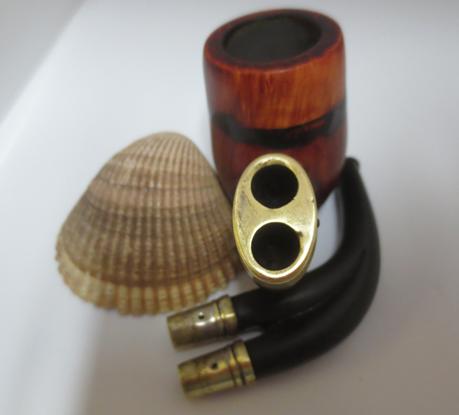
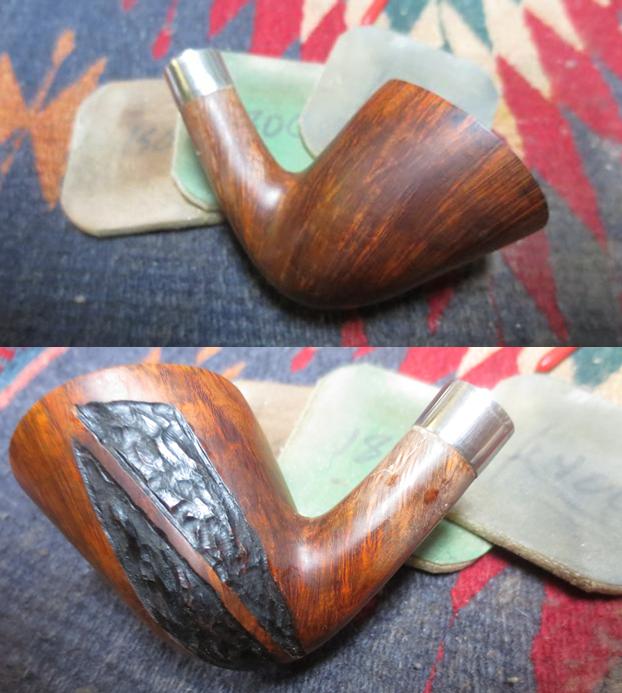
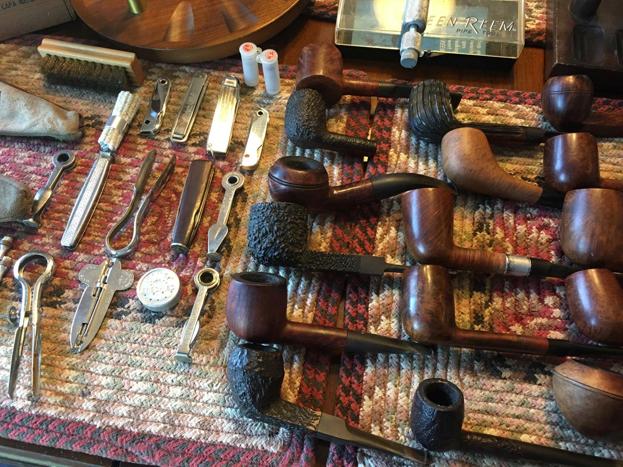
He set up all of the pieces of this purchase on his table and took a series of photos of the whole together – pipes, accessories, reamers and racks. It looks very good. I am looking forward to working on this batch of pipes and restoring them to their former glory. 
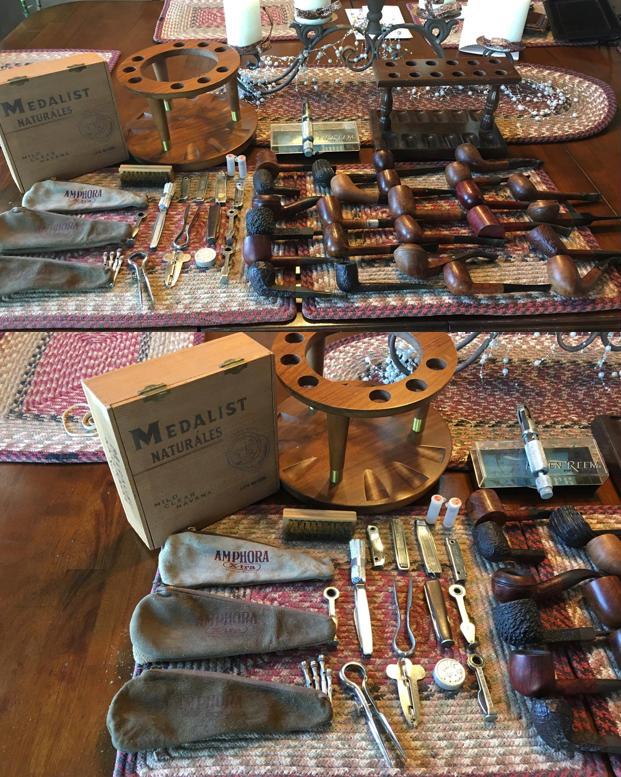
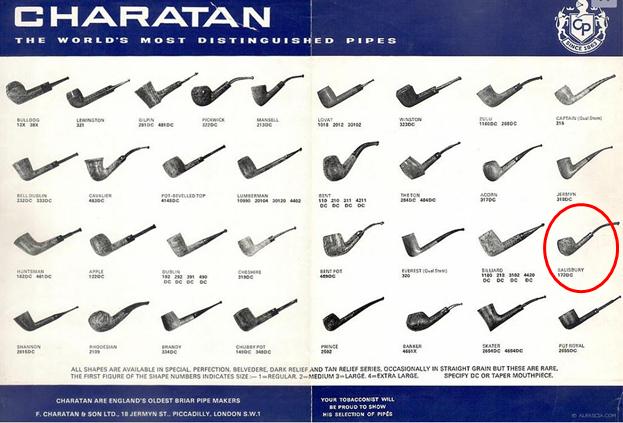
It is a nice batch of pipes and I am excited to work on them. The mix of brands is interesting and will make it fun as well. The additional surprise of the reamers, pipe knives and parts is a great bonus. I could not be happier with this estate purchase. I send my thanks to the seller and posthumously to his father the pipe man. I will think of you both as I work on each one.

Rediscovering my old Nimrod Lighter


Blog by Steve Laug

Not too long ago I was scrolling through the Gentlemen’s Pipe Smoking Society on Facebook on a lunch break and came across a post on Nimrod Pipe Lighters. The poster included a lot of sales brochures and booklets that showed how to use and care for the lighter. The first poster caught my eye because the gold coloured Nimrod in the ad was identical to the one that I have in my pipe cabinet. The post made me want to read further and copy the link and the pictures and leaflets that were posted. Here is the ad that caught my eye.When I got home from work I took my lighter out of the pipe cabinet and took a good long look at it. It is a lighter that I had not used for a long time. It is one I have not even spent time with for quite a while. It really is a nice accessory and one that is pleasing to the eye. While I looked at it I tried to remember how it ended up in my hands. I think it may have been a gift to me from a pipe man name Daryl in Washington. Over the years we sent each other tobacco and pipes. I did a few repairs for him and visited him in his home. We shared some bowls and stories together. The more I think about it the more am certain that it came from him. One day out of the blue he sent the lighter. He said that he had several and thought of me and sent it my way. It is a nice pipe accessory and make a great addition to my pipe lighters. It is gold/polished brass in colour with a brown vinyl lizard skin covering on the bottom half of the lighter. I took some photos of the lighter from various angles and sides to capture the uniqueness of the Nimrod.  The top of the lighter has a slotted screw that when unscrewed hold the flint. On the right or left side there is a striker wheel that when spun with the thumb against the flint produced a spark that ignited the wick in the other end of the barrel. The wick sat in a reservoir of lighter fluid so it ignited when the flame caught it. On the underside of the lighter the stamping is faint but in a bright light it reads NIMROD ® PIPELITER Made in the USA.There was great photo of the lighter with the flame captured. It is the same lighter I have and the look is the same.Going through the various sales brochures and inserts I could see that the one I had was labeled as a Nimrod Executive NO. 900E. It was described as having a gold anodized finish and vinyl lizard grip. I have circled it in red below.Mine is a top of the line lighter. There was also another model that I have had and passed on to others called a Sportsman. The person who posted on Facebook also included a display of this line of Nimrod lighter. I love the advertising on the card – America’s Favorite Pipeliter. At $4.95 and an unconditional guarantee with never a charge for repairs it was a great deal.The patent on the pipe was filed on May 17, 1946 by A.F. Ward Jr. and the patent was granted on December 9, 1947. The patent number is 2,432,265.Included in the post were two instructional brochures on the Use, Care and Feeding of Your Nimrod. I expect that these were in the boxes the lighters came in originally. When I received my lighter it did not include the instructions. However, the lighter was pretty self-explanatory. Now that I have read over these pamphlets and instructions I am even more interested than ever to refill the lighter fluid and start to use the lighter again. I love reading these old pieces of tobacciana that take me back to an earlier simpler time. Enjoy reading these documents.

New Life for a C.P.F. Wellington Style Pipe


Blog by Steve Laug

The next pipe on my work table is another C.P.F. from the virtual pipe hunt Jeff and I did in Montana. It is an interesting piece in that it has some age on it but to my thinking it is “newer” than the other C.P.F. pipes I have been working on from that hunt. This one has no stamping on the bowl but has the C.P.F. in an oval logo stamped on the ferrule underneath a set of the expected faux hallmarks.

To me it is very much like later C.P.F./KB&B post-merger Chesterfield pipes. KB&B acquired or started the C.P.F. line sometime between 1884 and 1898” (http://kaywoodie.myfreeforum.org/archive/cpf__o_t__t_161.html). They operated the factory at 129 Grand Street, in New York City, New York. The ferrule and stem are not stamped with the dual stamp that later pipes had, so I think it is safe to assume that it is from pre-1900. I went back and read my blog post on the background of the brand and I think I was able to date this one a bit.

The C.P.F. brand was discontinued sometime between 1910-1920. I turned to a quote I found from Bill Feuerbach where he notes the following, which pins down the time frame of the discontinuation of the brand more specifically, “I have a C.P.F. Chesterfield in our office display that has a nametag from way before my time that says 1900 C.P.F. Chesterfield. It looks like most other Chesterfields you’ve seen, including the military type push stem, except this stem is horn and not vulcanite. As far as I have gathered the C.P.F. brand was phased out sometime around 1915” (http://kaywoodie.myfreeforum.org/archive/cpf__o_t__t_161.html). Interestingly, he noted that the Chesterfield name and style was later introduced in the KB&B, Kaywoodie and Yello-Bole lines. He says that the 1924 KB&B catalog shows KB&B Chesterfields. (Here is a link to the full blog on the brand: https://rebornpipes.com/2013/04/14/some-reflection-on-the-historical-background-on-cpf-pipes/).

My brother Jeff took the previous and the following photos of the pipe before he cleaned it and sent it to me. It was extremely dirty with grime settled deep in all of the grooves of the rustication on the bowl. The nickel ferrule was oxidized and had turned and the stamping in the metal was not visible on the left side. The stem was oxidized and spotty looking and to my eye it had appeared to have straightened over time and lost some of the natural curve it originally had. This old pipe was in really rough shape. The rim was heavily covered in a thick lava coat and the bowl was caked with a hard carbon. It was thick against the walls with the cake thicker on the back side of the bowl. The way the cake was it was hard to tell what kind of condition the inner and outer edge of the bowl would be in until it was all removed.The next photo not only shows more of the rim and bowl but also the damage and heavy oxidation of the ferrule. It was rough to touch and there was a large piece missing on the end.The next photos show the dirt that was caked in the grooves and carvings of the bowl and shank sides. The curved area between the bowl and the shank was really dirty. The third photo below shows the heel of the bowl and the small crack that went across the width. It was hard to tell if it was just a flaw in the briar or a true crack. Once it was cleaned up I would be better able to tell. The one thing going for it was that there was no darkening to the exterior of the heel. The ferrule had come loose at some point in its life and had been reglued upside down. The C.P.F. in an oval logo and the faux hallmarks were on the bottom of the shank. The damaged spot on the ferrule had turned to the top of the shank. I wondered if the damage had been engineered when the shank had been drilled. Once again, I would know once we had cleaned it up and looked at it up close. When the stem was removed the end was wrapped up the stem about an inch with cord. This was often done to tighten the fit in the shank. I have found that on pipes this dirty that the sump below the airway in the mortise is generally filled and the sides of the mortise are so dirty that the stem no longer fits correctly in the shank. Jeff took a photo of the shank end to show the damage to the ferrule close up. It almost looks like it is notched. I am wondering if the turned ferrule (the notch) on the top of the shank rather than the bottom was not one reason for the misfit of the stem.The next two photos show the wrap as he began to unwind it from the end of the stem.The stem was badly oxidized and it was going to be hard to get all of the oxidation off the old vulcanite. The button end had a slight notch that opened up the orific airway. I was not sure if this was original or if it was damage. The stem was stamped on the underside with the words SOLID RUBBER and on the topside near the saddle with C.P.F. in an oval. There was some definite wear and tear on the stem but surprisingly no tooth marks. Once again, Jeff did his usual thorough cleanup of the pipe. He reamed the bowl with a PipNet reamer, scraped the rim top with a Savinelli Fitsall Pipe Knife to clear off the lava build up. He cleaned out the internals – mortise, airway in the shank and stem with alcohol, cotton swabs and pipe cleaners. He scrubbed the exterior of the briar with Murphy’s Oil Soap to remove all of the grime and grit in the finish and clean out the areas around the issue I had noted on the heel of the bowl. He rinsed the briar under running water and dried it with a soft cloth. He soaked the stem in OxyClean to bring the oxidation to the surface and remove the grime. When the pipe arrived in Vancouver it certainly looked different than it did when we picked it up out of the sale display in Montana. I did not take photos of the pipe before I started working on it but instead got sucked into the restoration process.

I heated the ferrule with a Bic lighter to soften the glue that held the metal to the shank end. It took a bit of heating a cooling before I was able to pry the ferrule off the shank end. In the photo below you can see the glue on the shank end and the notch in the face of the ferrule. I wiped down the finish with acetone on a cotton pad paying special attention to the glue on the shank end. I wanted the shank end clean before I reglued the ferrule on it. I painted all-purpose glue around the shank, aligned the ferrule so that the notch was at the bottom of the shank and the C.P.F. logo and faux hallmarks were on the left side of the shank as they had originally been when the pipe left the factory. I pressed the ferrule in place. Once it set on the shank I tried the stem and it fit better than previously. I put the stem in a bath of Before & After Pipe Stem Deoxidizer for 24 hours to let the mixture do its magic on the badly oxidized stem.Once the bowl had been reamed clean it was clear that the cake had been reamed out before with a knife and the airway entered the bowl high. The bottom of the bowl was below the airway and because of that it made the bottom quite thin. While the bowl was not burned or damaged it was a candidate for that to happen. I mixed a batch of JB Weld and applied it to the bottom of the bowl and up the sides part way to raise the bottom of the bowl and protect it. The airway entrance was also to open so I built up the edges around it with some of the mix. I set the bowl aside to let the repair cure overnight, turned off the lights and called it a day. Work was so busy last week that I did not get to work on the pipe again until the weekend. The stem had soaked in the bath for 48 hours and I was hoping that the mixture had done its magic and remove the oxidation. I took it out of the bath and dried it off and ran pipe cleaners and alcohol through the airway in the stem.I put a pipe cleaners in the airway and heated the solid rubber stem with a candle to soften the stem enough to be able to bend it. I kept it high enough above the flame so that the rubber would not burn. Once it was soft and flexible I bent it to the point that when in the shank it sat properly in the mouth of the pipe man.I sanded the stem with 220 grit sandpaper to remove the tooth chatter on both sides of the stem in front of the button. I reshaped the end of the button to make it more round and remove some of the damage on the edges.I buffed the stem with red Tripoli to remove some of the deep remnants of oxidation. I polished it with micromesh sanding pads – wet sanding it with 1500-2400 grit pads and rubbing it down after each pad with Obsidian Oil. I dry sanded it with 3200-12000 grit pads and once again rubbed it down after each pad. I gave it a last coat of oil after the 12000 grit pad and set it aside to dry. I examined the area on the heel of the bowl with a lens and could see that the bowl was not cracked but rather I was dealing with a flaw in the briar. I picked it clean and wiped it down with alcohol on a cotton swab to make sure that there was no debris in the crack. I pressed some briar dust into the flaw with a dental pick and spatula. I put clear super glue on top of the briar dust and let it seep into the flaw.I carefully sanded the repaired area with a folded piece of 220 grit sandpaper to smooth out the repair. Once it was smooth I touched up the stain with a medium grit stain pen and buffed the bowl with Blue Diamond on the buffing wheel. I rubbed the briar down with Conservator’s Wax and when it dried, I buffed it with a clean buffing pad to raise the shine. The next photos show the bowl at this point in the process.(An interesting note at this point. Looking down the bowl from the top you can see the JB Weld repair on the bowl bottom. Once this cures for about a week I will give the pipe a bowl coating of sour cream and charcoal powder.)I buffed the stem with Blue Diamond and gave it several coats of carnauba wax. I gave the bowl several more coats of Conservator’s Wax and buffed the pipe with a clean buffing pad to raise a shine on the pipe. The finished pipe is shown below. The dimensions of the pipe are Length: 6 ½ inches, Height: 1 ¾ inches, Bowl diameter: 1 3/8 inches, Chamber diameter: ¾ inches. Though the pipe is far from perfect, I think this old-timer has been given a new lease on life and should last the next pipe man for many years to come. The damages are repaired but in many ways still speak of the story of the old pipe. Hopefully the next pipe will keep the trust for this old pipe and pass it on to the next generation. Thanks for looking.

“Frankensteining” a Badly Damaged C.P.F. Cromwell Double stem pipe


Blog by Steve Laug

This is the second C.P.F. Cromwell Double stem system pipe that I have worked on (https://rebornpipes.com/2017/07/01/out-damn-spots-a-c-p-f-cromwell-double-vertical-stem-bent-billiard/). This one was in very rough shape but the stem was in much better condition. Like other older C.P.F. pipes this one has some real charm that deserved to be repaired and brought back to life. Like the other Cromwell it is on the petite side of things – 4 ½ inches long and 1 ½ inches tall. It was a nice piece of briar, a mix of grains. The silver collar on the shank is stamped with the same faux hallmarks and the C.P.F. in an oval logo as the previous one. It is probably silver or at least plated but I am not sure. The stem is the unusual part of the mix. It has two silver plated spigot tenons that fit into openings in the silver collar. The twin stems merge into one single airway. In the previous blog I posted a line drawing on the pipe showing the flow of air through the bowl to the button. I include that below as it is quite unique to this particular pipe.He took photos of the pipe from a variety of angles to show the uniqueness and the condition. The finish was worn and the top of the bowl had been burned and sanded down by about half of the briar. It was uneven and broken looking. But I think that the pipe still had some life in it. I was toying with the idea of “Frankensteining” the pipe. I was thinking about bonding the upper portion of another pipe bowl to the damaged portion of this bowl. The left side of the shank is stamped in worn gold leaf C.P.F. in an oval over Cromwell in script. There is no other stamping on the bowl. The stem is also stamped on the left side and reads PURE RUBBER on the top stem and C.P.F. in an oval on the lower stem. This pipe is also from the virtual pipe hunt my brother and I did in Montana. The photos he took are shown below. The next two photos show that the pipe continued to be smoked even after all of the damage. It must have been someone’s favourite pipe as you can see the cake that is formed around the inside walls of the bowl. The rim top and edges are absolutely savaged and it looks like someone took a rasp or file to the top to try to smooth out the damage. A view from the front of the bowl shows the damage to the top of the bowl and how it dips dramatically at the front. The bowl sides are scratched and damaged as well.The next two photos show some of the nice grain that remains on the bottom and sides of the bowl.The stamping on the left side of the shank is very readable – C.P.F. in an oval logo over Cromwell in script format. The metal ferrule bears the C.P.F. in an oval logo flanked on the left by the same three faux hallmarks that were on all of the other C.P.F. pipes.The double stem inserted in the ferrule has end caps that are also metal and pressed onto the vulcanite. The stem is stamped Pure Rubber on the top stem and the C.P.F. in an oval logo on the lower stem. The stem is oxidized but it is in good condition.The stem surface at the top and underside near the button is worn and has tooth chatter and wear on the sharp edge of the button.When the stem was removed from the shank the inside of the mortise was dirty and had a lot of oxidation and buildup on the inside and on the stem caps. The airways were also dirty and almost clogged.Once again Jeff did his usual thorough cleanup of the pipe. He reamed the bowl and cleaned out the internals – both sides of the twin mortise, and the convoluted airways in the shank and stem with alcohol, cotton swabs and pipe cleaners. He scrubbed the exterior of the briar with Murphy’s Oil Soap to remove all of the grim and grit in the finish and clean out the areas around the sandpits. He rinsed the briar under running water and dried it with a soft cloth. He soaked the stem in OxyClean to bring the oxidation to the surface and remove the grime. When the pipe arrived in Vancouver it certainly looked different than it did when we picked it up. I took the photos below to show the condition of the pipe when I brought it to the work table.

The briar was really a nice piece with flowing straight and flame grain running up the sides of the bowl and shank and birds eye on the bottom of both. The rim top was basically gone and what remained was very damaged with missing chunks of briar on the inner edge. The angle of the remaining rim was lower in the front than it was in the back. The bottom of the bowl was over reamed. I took a close up photo of the rim top and bowl. It was really damaged but it was clean. You can see the chips and missing chunks of briar in the rim top. The bowl is totally out of round and is rough with file marks on the top surface.The OxyClean soak had brought the oxidation to the surface of the vulcanite. It was evenly distributed over the entire stem surface. There was some tooth chatter and marks on the stem that showed up with the soak. They are not deep so they will easily cleanup.I topped the bowl with 220 grit sandpaper on a topping board. I wiped the bowl down with alcohol on a cotton pad to clean up the dust from the topping process. I put the stem in the Before & After Pipe Stem Deoxidizer to soak and turned my attention to working on my idea for the bowl repair. I went through a box of bowls and stuff I have here for repairing pipes and I found a bowl that originally came from a metal pipe that had an open bottom. It was solid with no fills and it was one I had around that did not fit any of the metal bases in my drawer. I decided it would work really well as the replacement for the top half of the bowl. It was time to begin “Frankensteining” the two parts so that they would fit together. I used the sanding drum on the Dremel to sand off the threads on the bowl base and also sand out the inside of the Cromwell base.I built up the top edge and rim top of the bowl with a combination of briar dust and clear super glue. I wanted to build an even surface for the base of the bowl to rest on. I wanted the bowl to anchor firmly in the base using the smoothed out threaded portion of the bowl.I took photos of the bowl top after I had topped it on the topping board. You can also see the sanding marks of the sanding drum on the inside of the bowl.I applied super glue to the edges of the top bowl and on the inside of the base and glued the bowl to the base. I held it in place until the glue set. When it had dried I filled in the gaps between the bowl top and base with super glue and briar dust as shown in the photos below. This is where I begin to shape the “Frankenpipe” and bring the two parts together. I used a Dremel and sanding drum to begin to blend the two parts together. I need to reduce the diameter and flow of the top of the bowl so that it would blend in with the sides of the base portion of the bowl. It was going to take a lot of sanding but I think it actually would work. At this point the bowl is quite tall and that would need to be shortened. I took the stem out of the Before & After bath and dried it off with a rough cloth to remove the oxidation and sludge that clung to the surface of the vulcanite. I cleaned out the airways in the stem with pipe cleaners and alcohol. I sanded out the tooth marks at the button on both sides and wiped the surface with Obsidian Oil. I was so intent on cleaning it up that I forgot to take photos of the stem work.I still needed to polish the stem with micromesh sanding pads but I would do that later in the process.

I turned back to the bowl and continued to sand with the Dremel and sanding drum shaping the bowl top to match the flow of the base. I shortened it each time I sanded the sides but it was going to take some time. I put the stem back in the shank and took photos to see where I stood with the reshaping work. You can begin to see the shape of the new pipe emerging as I sand it. I removed more of the height off the top of the bowl and continued to sand and remove excess briar around the base and sides to blend the two parts together. The photos tell the story. I continued to shape and shorten the new bowl with 220 grit sandpaper. I worked on the inside of the bowl using the Dremel with a sanding drum to smooth out the joint of the two parts. I followed up by using 180 grit sandpaper. In the photos below the pipe is beginning to take shape.To protect the joint on the inside of the bowl from potential burn out or damage I mixed a batch of JB Weld and used a spatula to apply it to the inside of the bowl. I decided to stain the briar with a dark brown aniline stain to make the grain stand out on the briar. I would sand it all off but the dark brown would highlight things well. I would not be able to hide the connection between the two parts of the bowl so I was thinking that I could leave the shank darker, the bottom a shade lighter, the junction between the two black and the top portion lighter. It would have a contrast like a meerschaum. I stained it and flamed it to set the grain in the briar. I repeated the process multiple times. While the stain cured on the bowl I worked on the stem with micromesh sanding pads. I wet sanded it with 1500-2400 grit pads and wiped it down with Obsidian Oil. I dry sanded it with 3200-12000 grit pads and wiped it down with the oil after each pad. Once again I was so absorbed in working on the bowl that I forgot to take photos of the stem work. I set the stem aside to dry and went back to the bowl. I sanded the bowl with 180 and then 220 grit sandpaper to remove the stain coat on the bowl. The dark band is not even but it looks really good to me. I touched up the stamping on the left side of the shank with Rub’n Buff European Gold. I applied it with a cotton swab and buffed it off with soft pad. It is very readable and clear.With all of the touch ups finished and sanding finished on the bowl it was time to polish the briar. I really like to polish it with micromesh sanding pads as it brings the grain to the surface and gives the briar a deep shine. I work the same each time – wet sanding with 1500-2400 grit pads and dry sanding with 3200-120000 grit pads. I wiped the bowl down with a damp cloth after each pad. I polished the ferrule and the stem ends with the micromesh pads at the same time. I wiped them down with a jeweler’s cloth to protect and give them a shine. I buffed the bowl and stem separately with Blue Diamond on the buffing wheel being careful around the joint of the two parts of the bowl and the metal end caps on the double stem. I gave the bowl and stem multiple coats of carnauba wax and buffed it with a clean buffing pad. I rubbed the bowl down with a light coat of olive oil and buffed it with a soft microfiber cloth to deepen the shine on the bowl. The repaired pipe is shown in the photos below. I am pretty happy with how it turned out. In a few days I after the JB Weld has cured in the bowl I will give the bowl a coat of sour cream and charcoal powder to further protect it. What do you think of this Frankenstein pipe? Thanks for looking.

Repairing a broken shank and crooked alignment on a Joh’s Churchwarden


Blog by Steve Laug

I received an email a few weeks ago from a fellow in Vancouver named Chris, asking if I would have a look at a cracked shank on his Joh’s churchwarden. He figured that it was not repairable but wanted to know if I would cut back the broken shank and refit the stem. I asked him to send me some photos of the damaged shank so I could see it myself. He sent me two photos of the pipe – one from the left side and the other from the top. The photos showed some extensive damage to the shank. There were cracks on the top, the bottom, the right and the left side of the shank. There was a large chunk of briar missing on the left side of the shank. It also appeared to me that the diameter of the stem was smaller than the diameter of the shank and that the stem sat toward the left side of the shank.Chris brought the pipe by my office for me to have a look at. We sat in my office and he went over the pipe with me. It was a nice looking pipe with two rusticated panels on the left side of the bowl and the rest of the bowl and rim were smooth. The pipe was in good shape other than the broken shank. The rim had some darkening and oils on the back side. The stem was in excellent condition with no tooth marks at all on either side. We made the decision to work on it and see what I could do repairing the damage. I took photos of the pipe when I brought it home from work and put it on the work table.I took close up photos of the cracked and broken shank. You can see the extensive damage and the difference in the diameter of the shank and the stem. I used a microdrill bit on the Dremel and drilled pin holes at the end of each crack to stop the cracks from spreading further.I used a combination of super glue and briar dust applied in layers to build up area where there was a missing chunk of briar in the left side of the shank. I built it up until the missing chunk was replaced with the mixture. It was not pretty but it was better than it was when I started the process.I sanded the repair with a sanding drum on my Dremel. The sanding drum smoothed out the repair on the exterior of the shank. The next series of three photos show the repaired area of the shank. I used a needle file to smooth out the inside of the mortise and to begin to return it to round. I would do more work on that once I had pressure fit a nickel band on the shank. I heated the nickel band with a Bic lighter to expand it and pressed it onto the shank of the pipe until the edge of the band and the edge of the shank end were even.I remembered that I had not filled in the pinholes that I had drilled. I used clear super glue and a tooth pick to put a bead of glue on top of each pin hole. When the glue had dried I sanded the shank repairs smooth with 220 grit sandpaper until they were blended into the surface of the briar.I polished the sanded areas of the briar and the dirty top of the bowl with 1500-2400 grit micromesh sanding pads. I wiped the shank down with a damp cotton pad to remove the dust. I used a medium brown stain pen to touch up the sanded areas around the shank. The medium brown blended perfectly with the existing stain. I polished the bowl and shank with 3200-12000 grit micromesh sanding pads and wiped it down with a damp cotton pad to remove the sanding dust on the surface after each pad. Before I took photos of the polished stummel after using the 12000 grit pad, I gave the bowl multiple coats of Conservator’s Wax and buffed the pipe on the buffer with a clean buffing pad to give it a shine. The polished pipe is shown in the photos below. I took close up photos of the shank repair and band to show the look of the repaired shank. If you look closely you can see the repaired cracks and the tiny pinholes but the pipe looks very good with the new nickel band and blended stain. I reshaped the mortise with needle files and built up the left side of the tenon with clear super glue to move the stem toward the centre of the shank. Once I had finished the alignment was far better than when I started and the stem looks more centred in the shank. I used a tooth pick and super glue to fill in the gap between the band and the right side of the shank. You can see from the photo that the shank was not round but more oval and slanted to the left. With the band and the repair the shank is round and the mortise end looks far better.I buffed the bowl and stem with Blue Diamond on the buffing wheel and gave the bowl and stem multiple coats of carnauba wax to protect it. I used a very light touch on the rusticated portions of the left side of the bowl. I buffed the pipe with a clean buffing pad to raise a shine and hand buffed it with a microfiber cloth to deepen the shine. The pipe is well proportioned with the following dimensions Length: 10 inches, Height: 2 inches, Bowl diameter: 1 ¾ inches, Chamber diameter: ¾ inches. The finished pipe is shown in the photos that follow. I think Chris will be happy to see one of his favourite pipes returned to his rotation looking better than when he left it with. Chris if you read this – tell us what you think. Enjoy. Thanks for looking.

Restoring a Made in England Cumberland Acorn


Blog by Steve Laug

The stamping on the next pipe that crossed my work table was faint but it read Cumberland over Made in England. There is no shape number and no other name on the pipe. There is nothing Cumberland about the pipe as far as I can tell – the stem is black vulcanite and appears to be original. The finish is sand blast and quite nice though there are some sand pits in the bowl that are quite large and have been filled in. The rim and bowl are in good condition. The stem was badly oxidized and had a few tooth marks but otherwise clean. Like I said nothing Cumberland about it. I looked on Pipephil’s site and as expected nothing with this name other than Dunhill. I looked at Who Made That Pipe and they list it as UNKNOWN. So the mystery remains. I have no idea who made this nicely shaped acorn but I know that it was made in England. Anyone have any ideas?

I received a comment on the blog and on my Facebook page both confirming what I asked regarding the maker of this pipe. Al Jones (upshallfan) and Dan Chlebove both figured it was made by Charatan. I did some searching online and found a Charatan Shape Chart on Al Pascia’s website. Sure enough, the shape was on the chart. It is the Salisbury Shape 173. Dan noted that it was an older one because it did not have the Double Comfort style bit on it. I think that the scar on the front of the bowl and the sandpit on the back make it a Charatan Reject. Thanks for the information gentlemen.My brother took the photo above and the ones that follow to show the condition of the pipe when it arrived in Idaho. The finish was very dirty and there was a lot of grime and dirt in the grooves of the sandblast. There was significant tar and darkening on the rim top and edges. The bowl had a thick cake and it had overflowed onto the rim top. The stem was lightly oxidized and very dirty with the slot almost closed off with tars. There were tooth marks and chatter on both the top and underside of the stem near the button and tooth damage to the sharp edge of the button on both sides.The next photo shows the cake and the overflow on to the bowl top. I have found that generally this kind of buildup protects the rim top as well as the inner and outer edges from damage.The next photos show the interesting sandblast finish on the bowl from various angles. Looking past the dirty finish it is an interesting blast. The first photo below shows the sandpit on the front of the bowl but future photos will give a better view of that spot.I have included both of the next photos because together they give a clear view of the stamping on the underside of the shank. The first one show the CUMBERLAND stamping though the Made in England stamp is blurry. The second is the reverse. The shank is stamped on the curve of the shank so it is hard to get a clear photo of both at the same time.The close up photos of the stem surfaces show the tooth marks, chatter and damage to the edge of the button on both sides.Jeff did his usual thorough cleanup of the pipe. He reamed the bowl and cleaned out the internals – mortise, airway in the shank and stem with alcohol, cotton swabs and pipe cleaners. He scrubbed the exterior of the briar with Murphy’s Oil Soap to remove all of the grim and grit in the finish and clean out the areas around the sandpits. He rinsed the briar under running water and dried it with a soft cloth. He soaked the stem in OxyClean to bring the oxidation to the surface and remove the grime. When the pipe arrived in Vancouver it certainly looked different than it did when we picked it up. I took the photos below to show the condition of the pipe when I brought it to the work table. The finish looked amazingly clean. The rim top looked better without the tars and buildup. There was some darkening on the rim top but the edges of the rim looked very good.The OxiClean had done the job and the oxidation was on the surface of the vulcanite stem. It was pretty green. I dropped it in the Before & After Pipe Stem Deoxidizer to soak for 24 hours while I turned my attention to the stummel. The “Harry Potterish” scar (flaw/sandpit) on the front of the bowl was quite deep but it was not cracked. To me it took away from the overall look of a nice sandblast. There was also a round sandpit on the back side of the bowl on the left toward the top edge that also needed attention. I used a brass bristle brush to scrub out the remaining debris in those areas. I filled them in with clear super glue to blend them into the surface of the briar better. When the repairs had cured I carefully wiped around the edges with acetone on a cotton swab to remove the excess glue. I have found that the super glue repairs leave a shiny spot on the finish if you don’t remove the overage. To blend the repairs into the briar even more I topped up the repaired areas with black super glue. It would blend in better with the final stain that I was planning on using on the briar. I cleaned up the areas with a cotton swab and acetone to remove any excess glue in the surrounding sandblast. I warmed the briar and stained it with a dark brown aniline stain. I applied the stain and flamed it several time until I had an even coverage on the stummel. I set the pipe aside for about an hour and worked on another pipe I have on the work table. When the stain had dried I wiped it off with alcohol on a cotton pad to make it more transparent and show some of the underlying grain. I like the contrast that happens in the finish when I wiped off some of the stain. Notice the repaired areas on the front and back side of the bowl. They blend in quite well with the darker finish. I gave the sandblast several coats of Conservator’s Wax and buffed it with a shoe brush to raise the shine. I really like the new colour on the bowl and find that the repaired areas really do blend in quiet well with the rest of the finish. It also blends in the darkening on the rim top and gives the pipe a richer new look. I took the stem out of the Before & After soak and dried off the stem with a rough cloth to remove the remnants of the soak and the oxidation that it had lifted. The next two photos show the stem after the soak. There is still some deep oxidation that will need to be addressed but it looks far better than it did when I started.I put the stem on the stummel and took some photos to get an idea of where I was at with the restoration. The pipe is going to look good once I am finished. I used some black super glue to repair the edge of the button on both sides of the stem. Once the repair dried I sanded the repairs and the rest of the stem with 220 grit sandpaper to shape the button and to remove the remaining oxidation. I worked on the saddle portion of the stem carefully so as not to round the edges where it met the shank of the pipe. It was looking better but more work was necessary to bring it to a full shine. I polished the stem with micromesh sanding pads – wet sanding with 1500-2400 grit pads and wiping the stem down after each pad with Obsidian Oil. I polished the stem with Before & After Pipe Polish to further remove the scratches left behind by the sandpaper. I dry sanded the stem with 3200-12000 grit micromesh pads to deepen the polish. I wiped the stem down after each pad and set it aside to dry after sanding with the 12000 grit pad. I put the pipe back together and polished it with Blue Diamond on the buffing wheel. I find that Blue Diamond Plastic polish really takes out the scratches in the vulcanite stems. I gave the stem multiple coats of carnauba wax and polished it with a clean buffing pad. I hand waxed the sandblast bowl with a final coat of Conservator’s Wax and buffed it with a clean buffing pad. I hand buffed the bowl and stem with a microfiber cloth. The darker stain blended the repaired sandpits and the darkening on the rim top into the rest of the finish. It turned out to be a nice looking pipe – its dimensions are Length: 5 ½ inches, Height: 1 1/2 inches, Bowl diameter: 1 3/8 inches, Chamber diameter: ¾ inches. The finished pipe is shown in the photos below. I will be putting it on the rebornpipes store soon. If it interests you, send me an email to slaug@uniserve.com or a message on Facebook. Thanks for looking.

Rehabilitating a Brigham Executive 604 Large Billiard with a Seized Stem


A nice combination of a pipe restorers skills made this pipe a success. Well done Charles.

I’ve mentioned in an earlier post that Brigham offered the ever-popular Straight Billiard shape in several sizes and considered them from the start as separate product offerings rather than variations on a theme. Thus there are three shape numbers for a Brigham Billiard – 02 for a small pipe , 03 for a medium pipe, and 04 for a large pipe.

The pipe on the table today is the largest of the shapes listed above, the 04 Large Straight Billiard, and it certainly lives up to the designation. As a rough size reference, Brigham’s 02 Billiard shares the same stummel dimensions as my Dunhill Group 3 Shell Briar; Shape 03 approximates a Dunhill Group 4, and the 04 Large Billard is a big one, at a Group 6.

This old billiard is an impressive handful of briar, even in the rather rough state in which it arrived for refurbishment. As…

View original post 1,716 more words

Sometimes when you buy an estate there are bonuses


Blog by Steve Laug

I negotiated the purchase of a lot of pipes from a fellow who contacted me about his father’s estate pipes. His dad had left behind 25 pipes, two pipe racks and some pipe paraphernalia that he would send along as well. I had no idea what to expect in terms of the paraphernalia but I looked forward to seeing what he packed. I had the package shipped to Jeff in Idaho. When the box arrived my brother took pictures of the box as he opened it. It was well packed with lots of padding to keep things from being damaged in shipping. He removed the paper packing material and inside everything was individually wrapped in bubble wrap. After he removed the packed pipes and the racks there was a small cigar box that was held closed with an elastic band. It was a hinged cedar box that was stamped Medalist Naturales Mild Clear Havana. I could not wait until he opened the box.He removed the elastic band and inside an interesting assortment of pipe parts and tools. There were quite a few reamers of different brands and some other assorted items. I could see a humidifier tab that you could put in a pouch or jar, a small brush with a wooden handle and what appeared to be two small plastic containers – one with a label that looked like it had a number 5 on the top and the other a number 7. There were also some Comoy’s Stingers in the box and a boxed KleenReem Pipe Reamer. Jeff included a few photos of the opened box from different angles before he unpacked to give me a feel for what might be in store.Jeff removed the lid off the plastic box that held the KleenReem Pipe Tool. The pipe reamer rested in a formed sponge that was originally form fitted to the reamer. The sponge had disintegrated into pieces and was the tool itself was formed into the hatching on the tool.Jeff wiped off the debris from the items in the box and laid them out on the table. There were four zipper pouches for Amphora X-tra Holland pipes. There was the Kleen Reem box that had the instructions on the inside. He removed the various pipe knives from their cases and added them to the collection.I wrote him and asked him to identify the various reamers and items on the table. He sent me a list of the items with their names. I have inserted numbers in the photo below to match the list below. (The KleenReem Pipe Tool is not shown in the photo below.)

    1. The Aonian
    2. Barker Mfg. Co. Portland, OR.
    3. Richards Shefield England
    4. Cook’s Pipe Reamer Ansonia, Conn. Made in U.S.A.
    5. Pipe Cleaners that come with the KleenReem pipe reamer kit,
    6. Aztec Freshies Clay Moistener Co. NYC.
    7. Maro Stainless Steel Japan (Brown handle)
    8. Four Comoy’s stingers
    9. Made in Czechoslovakia scoop and tamper
    10. Imco’s Pipe Companion Made in U.S.A.
    11. Atmos Pipe Kit Prod. Co. N.Y.11 N.Y.
    12. Atmos Folding Pipe Reamer Made in U.S.A.
    13. Masteromet Stainless Japan
    14. No Name Made in USA file, bottle opener, and knife
    15. Dunhill Stainless Steel Made in England knife and poker.
    16. -17. Comoy’s #7 washers (8), and Comoy’s #5 washers made for Comoy’s Grand Slam pipes.

Looking at all the assorted pipe reamers and knives in the collection I was excited to see what was there. I have a quite a few reamers in my collection but none of these. I did not have many pipe knives at all so I was looking forward to adding them to the collection.

An Old Bakelite Stemmed Diamond Shank Bent Billiard


Blog by Steve Laug

This old-timer came from the lot we purchased on our virtual pipe hunt in Montana. It has no stamping anywhere on the sides of the shank. There are faux hallmark on the oxidized brass band that don’t really help in identifying the pipe. The bowl and the shank have an interesting rustication pattern of swirls and divots. The finish was long gone from the bowl and the briar was worn and dirty. Some of the grooves were stained from oils and tars. There was a bone tenon in the stem that screwed into the shank of the pipe. The stem was worn and chipped with deep tooth marks on the top and underside near the button and on the button edges itself. My first impressions of it make me think it is Bakelite not amber. It is not heavy and it is warm to touch. The chips along the edges look like chips in Bakelite not amber and the tooth dents also go along with the theory of it being Bakelite.There was something about the rustication pattern that reminded me of some of the rustication patterns that I have seen on older Wellington style C.P.F. pipes. The next two photos show one with a similar style of rustication and it was in the same lot of pipe from the virtual pipe hunt.The C.P.F. pipe above has a nickel band that had similar faux hallmarks as the one I am working on but it also has the C.P.F. oval stamped in the metal. The hallmarks are an anchor, a star and a bird of some sort. The first photo below is from the pipe I am working on and the second one is the C.P.F. Wellington.It also has the same kind of work on the edges of the ferrule that are folded over the end of the shank. All of these parallels make me wonder if the pipe I am working on was also made by C.P.F. I may never know but I think that it is a pretty good guess.

Jeff took the first photo above and the others that follow before he cleaned up the pipe to give me some idea of what we were dealing with. It is an interesting old pipe and the mystery of the trying to figure out who carved it may never fully be answered. The next photos show the pipe from various angles – looking at it from the left side, the front of the bowl and the underside of the bowl and the shank. You can see from the photos that the finish is almost nonexistent. There are spots on the briar that look like water stains but we won’t know until Jeff does his cleanup work on it. Looking at the pipe from the top down you can see the thick overflow of lava on the top of the rim and the thick cake in the bowl. Remarkably the inner and outer edge of the bowl appear to be in good condition with no damage but I would know for sure once it had been cleaned and reamed.The next close up photos show the swirling carving and divots on the sides and bottom of the bowl. There is some sticky substance like that found on sales labels on several spots on the briar. It is interesting to me that you can see the grain in the wood and some fills peeking through the remnants of the finish. It appears to have some beautiful grain. There were some chips and nicks along the sharp edges of the diamond shaped stem. There was tooth chatter and tooth marks on the top and underside near the button. The surface of the button itself had tooth marks on the left side. All were repairable but all were quite deep.Jeff reamed the bowl with a PipNet reamer and a Savinelli Fitsall Pipe Knife to finish the cleanup of the bowl. He scrubbed the exterior of the pipe using Murphy’s Oil Soap and a tooth brush. He worked the crevices and carvings over carefully to remove the sticky substance and the dirt and grime that were ground in there. When he finished scrubbing the briar he rinsed it off under running water. He dried it off with a soft cloth and the soap had removed the deeply ground in grime on the finish and the lava on the rim edges. He ran pipe cleaners and alcohol through the mortise and the airway in the shank and stem to remove dust and debris that had collected there. He carefully scrubbed out the nicks and tooth marks on the saddle stem using a tooth brush and rinsed it with water. Once the pipe was clean, he packed it up and sent it my way for the repair and restoration work. I took photos of the pipe when I brought it to my worktable. It is another intriguing little pipe from the collection of older C.P.F. and WDC pipes from our Montana pipe hunt. Once the rim top was cleaned I found that there was damage to the inner edge. There was also some darkening and surface damage on the flat of the rim as well that would need work.Jeff had been able to remove the debris from the chips and tooth marks on the stem surface. It was rough to touch but should clean up well. He had also removed all the tars and oils in the airway of the stem.I filled in the tooth marks and chips in the stem with amber super glue and set the stem aside in my drilled block to dry. This block allows me to work on both sides at the same time thus cutting my drying/curing time.While the repair on the stem cured I turned my attention to the inner edge of the bowl. I used a folded piece of 220 grit sandpaper to smooth out the damaged edge and bring the bowl back to round.To smooth out the surface of the rim I used a coarse, medium and a fine grit sanding sponge like a topping board. This method removes the grime and build up without removing briar from the rim surface.The band was loose on the shank so I removed it and polished it with micromesh sanding pads and a jeweler’s cloth to remove the tarnish. I used a pick to put some all-purpose glue on the surface of each side of the diamond shank and pressed the band in place. I set the bowl aside to let the glue dry.I polished the stem with micromesh sanding pads. I could not do anything about the spidering around the internal airway but the stem was very clean. The repairs polished up nicely. I wet sanded the stem with 1500-2400 grit pads and dry sanded with 3200-12000 grit pads. I wiped it down with Obsidian Oil after each pad and set it aside to dry after the final coat of oil. I polished the pipe with Blue Diamond on the buffing wheel. You have to have a light touch on the old Bakelite as it will melt and become deformed if you have too heavy a touch. At this point in the process I did not want to make more work for myself. I gave the stem multiple coats of carnauba wax and polished it with a clean buffing pad. I hand waxed the rusticated bowl with Conservator’s Wax and buffed it with a clean buffing pad. I hand buffed the bowl and stem with a microfiber cloth. This turned out to be a pretty little pipe – its dimensions are Length: 4 ½ inches, Height: 1 ¾ inches, Bowl diameter: 1 ¼ inches, Chamber diameter: ¾ inches. The finished pipe is shown in the photos below. If it interests you send me an email to slaug@uniserve.com or a message on Facebook. Thanks for looking.

One of my favourite shapes – a Butz-Choquin Bourbon Rhodesian 1025


Blog by Steve Laug

The next pipe I brought to the work table was a Butz-Choquin (BC) Rhodesian. The Rhodesian shape is one of my favourites and one that continually look for in my pipe hunting. My brother, Jeff found this one either on his eBay hunts or his antique mall hunting trips. The pipe is similar in shape to the GBD 9438 and also the Peterson 999 but there is a slight difference. The BC is squatter to my eye – less height from the bottom of the stummel to the top of the cap and a bit wider at the same time. It is still one of those shapes that sits well in the hand and just feels like it was made to clutch as you smoke it. This one is stamped Butz-Choquin in script over the word Bourbon on the left side of the shank. On the right side it is stamped St. Claude over France over the shape number 1025.

The origin of the Butz-Choquin brand reaches back to 1858 when Jean-Baptiste Choquin in collaboration with his son-in-law Gustave Butz created their first pipe in Metz (France). Since 1951 Butz-Choquin is a brand of the Berrod-Regad group (Saint-Claude, France). Jean Paul Berrod managed the company from 1969 to 2002 when he retired and sold the corporation to Mr. Fabien Gichon. Denis Blanc, already owner of EWA, took over the Berrod-Regad group in 2006.

The finish on the bowl was in great condition, just dirty. There was some great grain on the bowl sides, top and bottom. The twin grooves around the rim were dirty and filled in with debris. The rim top had some dents and dings in the surface of the rim. The fit of the stem against the shank was excellent with no gaps or separation. The stem was lightly oxidized and dull but should clean up very well. The next photo is a close up of the bowl and rim. You can the thick cake in the bowl but it had not overflowed on to the rim top. You can also see the small nicks and dents in the surface of the curved rim top. The mortise and the airway in the shank and the stem were dirty and black with grime.The stamping on the left side of the shank appeared to be double stamped. The Butz-Choquin part of the stamp was clear. The Bourbon stamping was double and the letters appeared to be blurry when looked at without a light. The next photos show the stamping on both sides of the shank.The grain on the bottom of the bowl was quite beautiful cross grain that ran from the bottom of the bowl the length of the shank.The surfaces of both the top and bottom sides of the stem near the button had a lot of tooth chatter and a few tooth marks. None of them were too deep so they should clean up easily.Jeff did his usual thorough cleanup of the pipe. He reamed the bowl with the PipNet reamer and tidied it up with a Savinelli Fitsall Pipe Knife. He took the cake back to bare briar. He scrubbed the mortise and the airway in the shank and the stem with alcohol, pipe cleaners and cotton swabs. He scrubbed the externals with Murphy’s Oil Soap and a tooth brush to remove the grime. He scrubbed the stem in the same way. He rinsed the pipe off with running water to rinse off the soap. When I received the pipe in the mail it looked really good. It did not appear to need too much work. I took photos of the pipe before I started working on it. I took a close up photo of the rim top and bowl. I apologize that it is out of focus but you can see that the bowl and rim are clean. As the work progresses I will take further photos of the rim and bowl to show its condition.The stem looked really good – Jeff was able to remove the grime and clean up the oxidation on the surface. The tooth chatter really was quite light. There was one small tooth mark on the left side of the top near the button that would need some work. I sanded the tooth chatter with 220 grit sandpaper to remove it and the tooth mark to reduce it. I polished the stem with micromesh sanding pads – wet sanding it with 1500-2400 grit pads and dry sanding it with 3200-12000 grit pads. I rubbed the stem down with Obsidian Oil after each of the pads. After the 12000 grit pad I gave it a final coat of oil and set it aside to dry. The pipe had a heavy cased tobacco smell that lingered in the shank and bowl even after cleaning it with alcohol. I decided to give it a cotton ball and alcohol soak. I stuffed the bowl with cotton balls until it was full. I used an ear syringe to fill the bowl with alcohol. I stuck a cottons swab and then a thick pipe cleaner in the shank to absorb the tars and oils that were in the shank and it would also wick the alcohol up the shank to help clean it. I set the bowl aside to let the alcohol and cotton do their work over night. In the morning when I checked the pipe the cotton pad was brown with the oils it had drawn out of the bowl. I removed the cotton pads and ran pipe cleaners through the shank to pick up any leftover oils. The pipe cleaners were surprisingly clean. I polished the briar and the stem with Blue Diamond on the buffing wheel and gave the bowl and stem multiple coats of carnauba wax. I buffed the pipe with a clean buffing pad to raise the shine and hand buffed it with a microfiber cloth to deepen it. It is a beautiful pipe whose dimensions are Length: 5 ¼ inches, Height: 1 3/8 inches, Bowl diameter: 1 ¾ inches, Chamber diameter: ¾ inches. I am going to put this one on the rebornpipes store soon, even though everything in me wants to hang on to it. If you are interested email me at slaug@uniserve.com or send me a message on Facebook. Thanks for looking.