Blog by Steve Laug
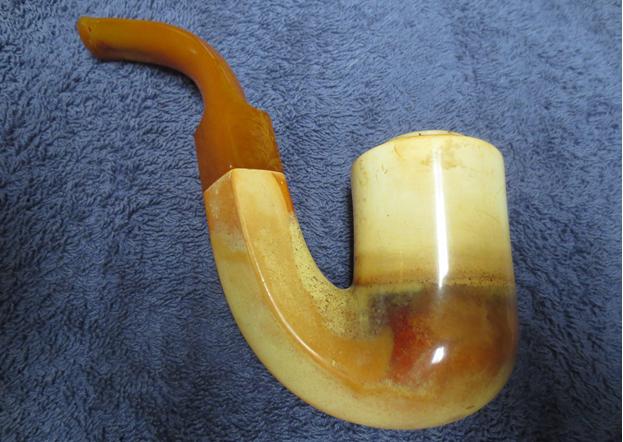
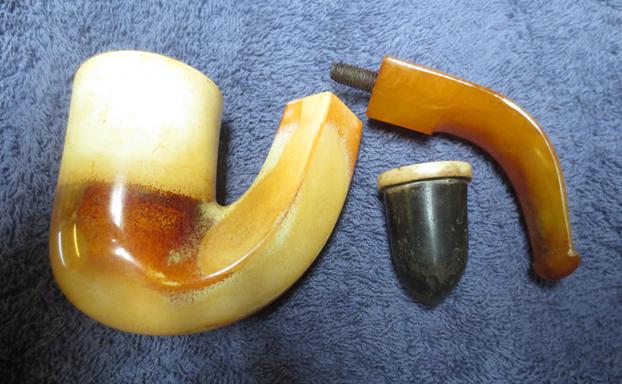
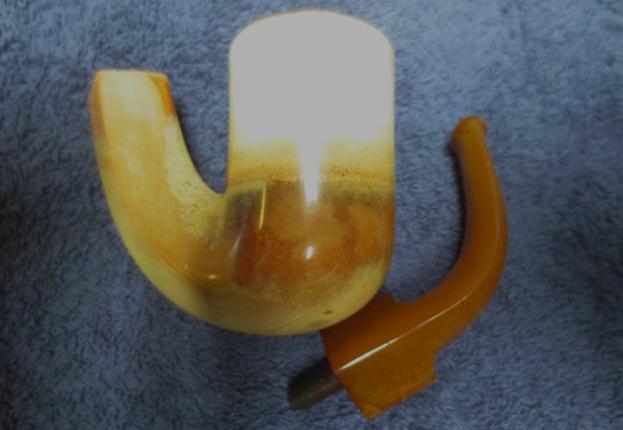
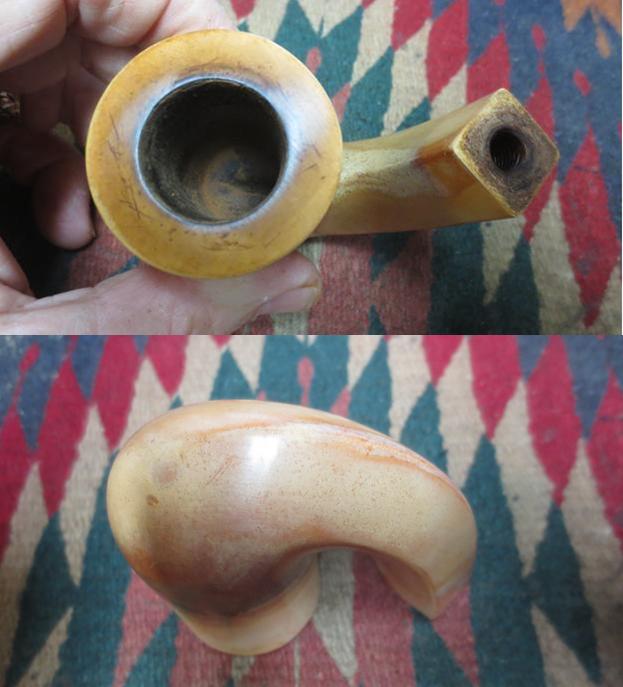
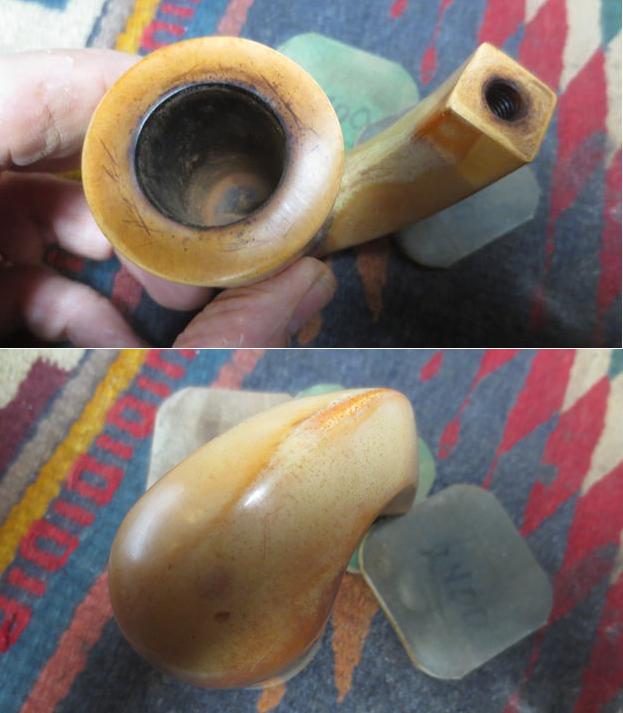
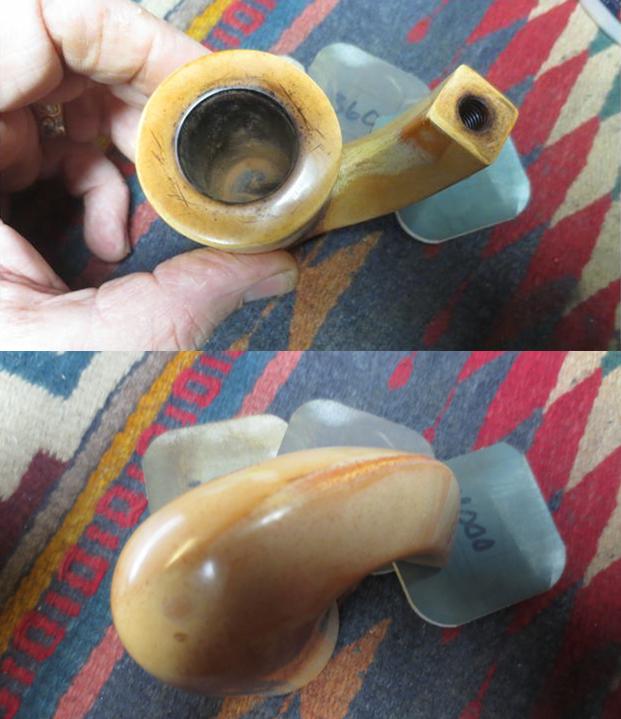
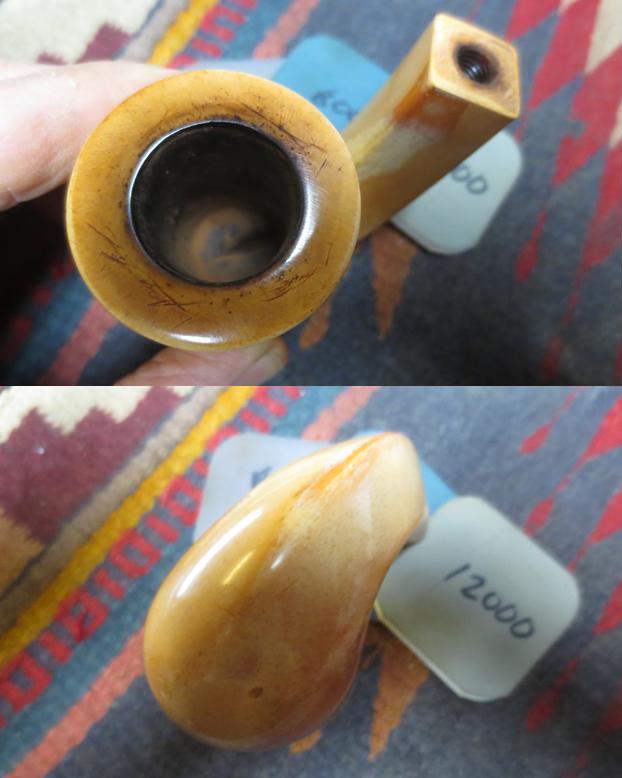
I was visiting my family in Idaho and staying with Jeff and his wife when this pipe arrived. We opened the box and took it out and I think both of us were surprised at how big it was. We took it out and turned it over in our hands to examine it. It was a huge meerschaum Oom Paul. The meer seemed to have an interesting colouring pattern coming up from the bottom of the bowl. The surface of the meerschaum was dirty and scratched. The rim top had a strange stepped up section that rose above the top of the rim. It was chipped and no longer round. The bowl had a cake in it and it did not seem to be as deep as the bowl exterior would have led us to believe. It was odd. The area around the raised section of the rim top was dirty and had a thick build up of tars and oils flowing out from the raised portion toward the outer edge of the rim. The stem was in rough condition at the button end but it aligned perfectly with the diamond shank. It was amber coloured Bakelite stem and I believe it was original. There were deep tooth marks and chatter on the stem at the button on both sides. The button itself was misshapen from tooth marks. I took photos of the pipe before I started the cleanup.
 The out of round portion that extends above the rim surface and the colouration pattern on the sides of the bowl made me wonder what I was dealing with in terms of the mechanics of this pipe. When I inserted my finger in the bowl, it is not as deep as the depth of the outer portion of the pipe. That too made me wonder.
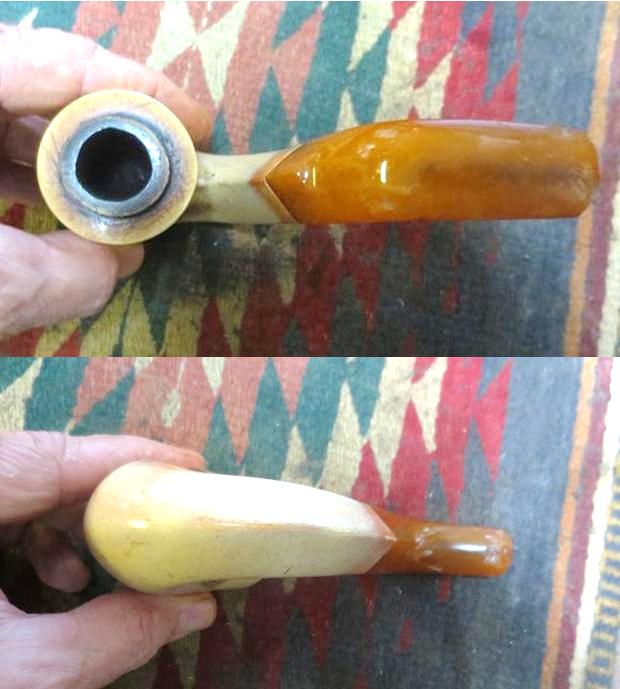 I took a close up photo of the rim top to show the condition of the bowl and rim at this point. You can see the rough inner and outer edges of the raised portion of the pipe. There was also scratching in the surface of the lower potion and a ring of darkening around the edge where the raised portion met the lower portion. This made me wonder if I was not dealing with some kind of bowl insert.
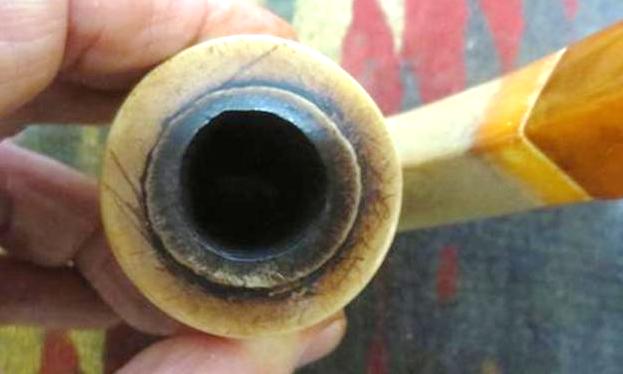 I took photos of the stem damage on both sides of the stem. The button and the flat portion had a lot of tooth marks and chatter that left a very rough and uneven surface on both sides.
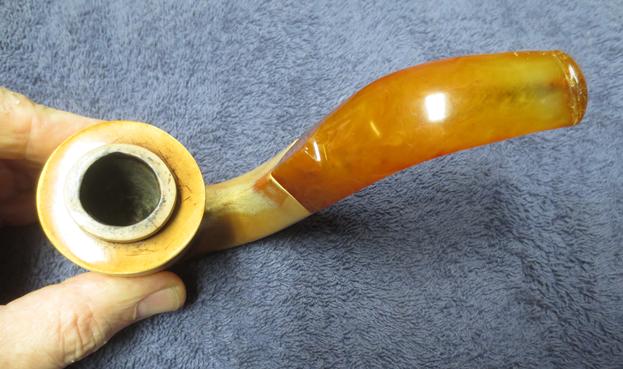
 I unscrewed the stem from the shank and found that the pipe had a metal tenon in the stem itself. That was a good sign in that it was not stuck in the shank.
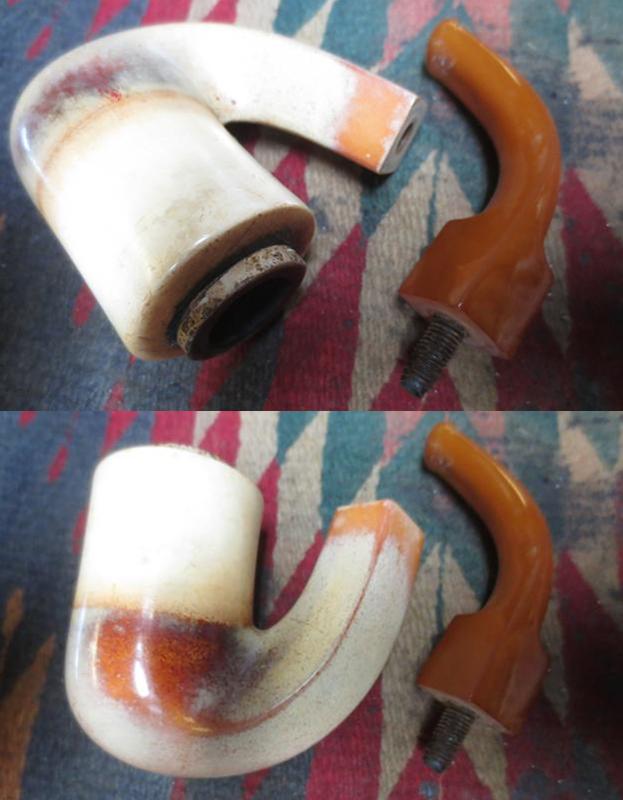 The next two photos show the cake in the bowl and how I used a Savinelli Fitsall Pipe knife to trim back the cake to bare meerschaum.
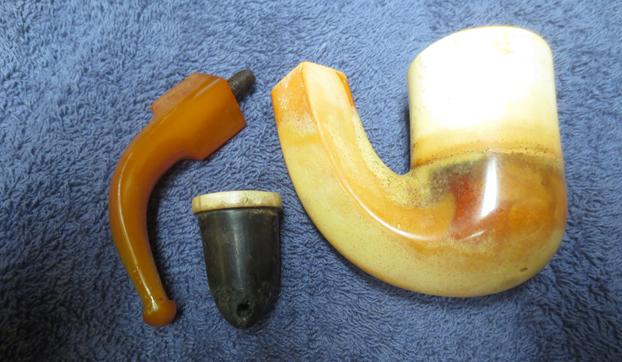
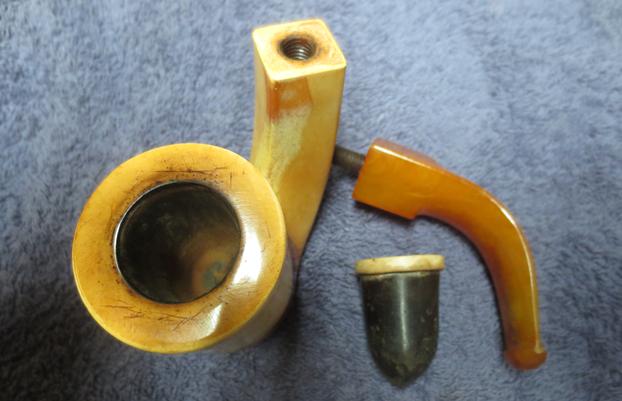
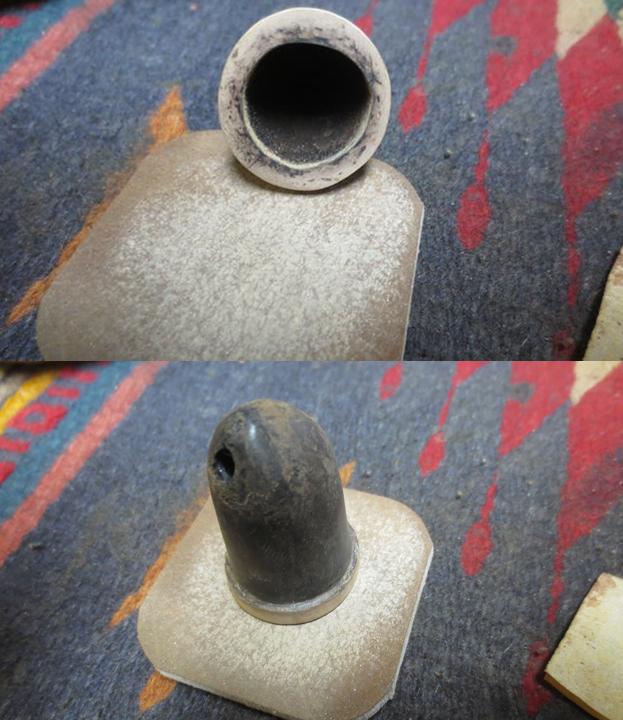
 I used a cotton swab to run a bead of alcohol around the raised portion of the bowl to begin to loosen it. I ran alcohol, pipe cleaners and cotton swabs through the mortise and shank of the pipe to clean out the tars. I ran a pipe cleaner into the airway in the bowl and as I pulled it back and forth the raised portion came loose on the pipe cleaner. I removed the inner bowl from the outer and was surprised by how deep the outer bowl was. The inner bowl was quite shallow and had the airway on the back side. In the bottom of the outer bowl there was a ball of cotton or wool that was used as a trap for moisture and a filter. It was brittle and crusty with old tars. It is visible in the third and fourth photo below. I used the Savinelli Fitsall Reaming Knife to ream the outer bowl.
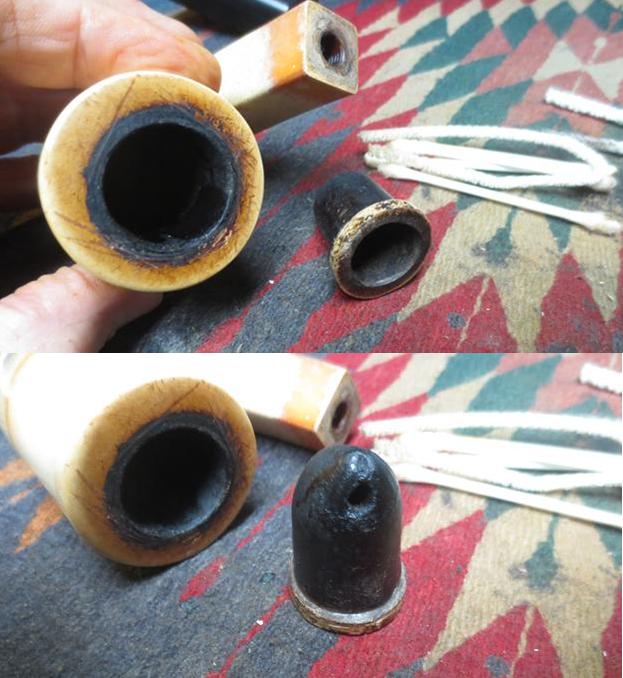
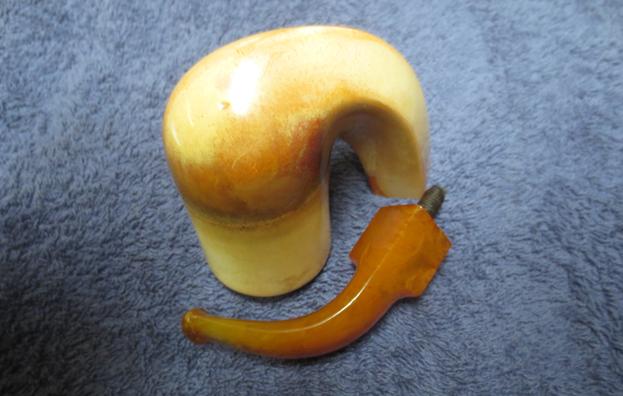
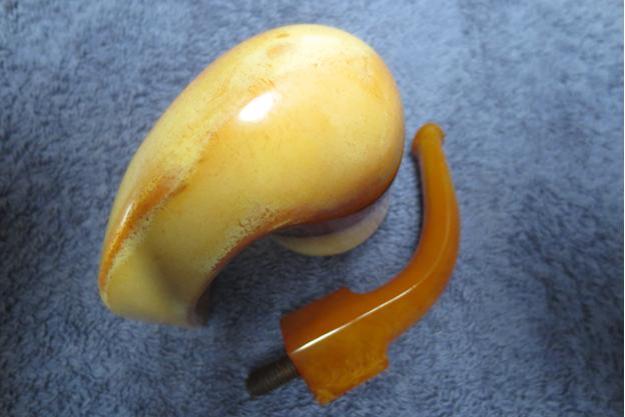
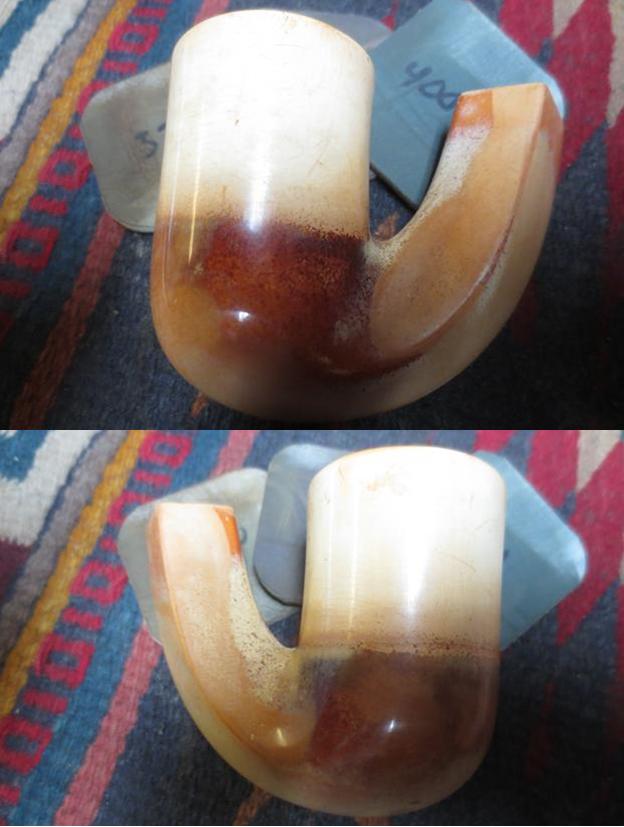
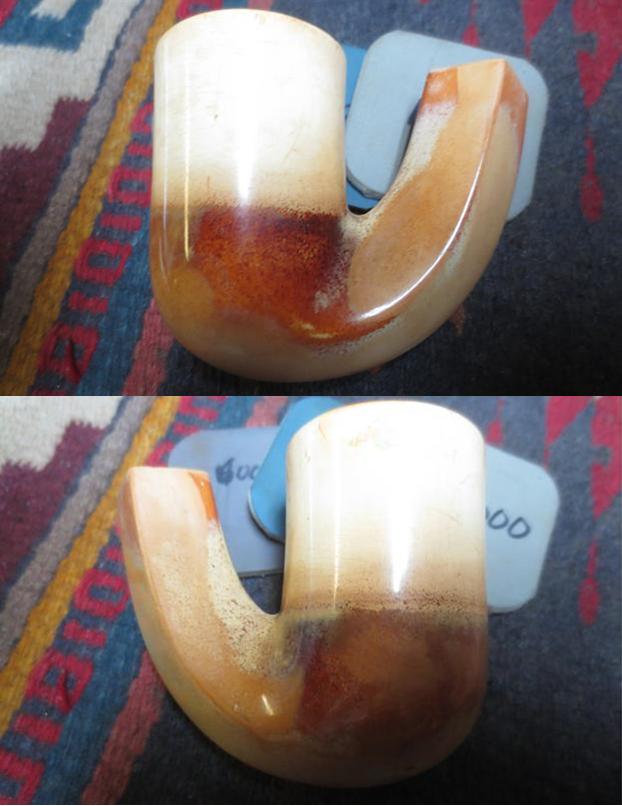
 I scrubbed the inside and outside of the two bowls with SoftScrub cleanser and a tooth brush. I worked on the rim top with the scrub and tooth brush and was able to remove the tars and oils that were on that surface. Once it was clean I rinsed the pipe under running water. I dried it off with a soft cloth. The photos below show the bowl after the scrubbing and rinsing. The line on the bottom half of the bowl makes sense now. The colouration is all below the bottom of the insert bowl. Everything above the insert shows no colour at this point.
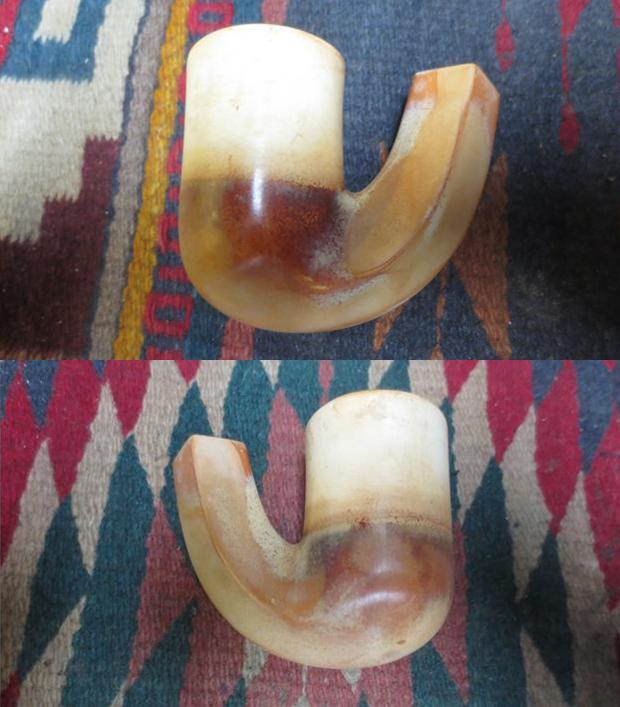
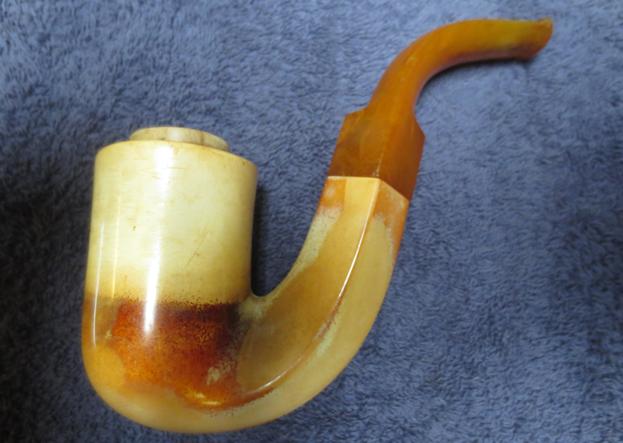
 The outer edge of the inner bowl was damaged. It almost looked as if someone had tried to remove it with a pair of pliers. The edge was very rough and no longer round. The inside edge and the outside edge was damaged. I used a Dremel and sanding drum to clean up the outer edge of the bowl. I sanded the bowl surface, the edges and the bottom portion of the bowl with 220 grit sandpaper and with 1500-2400 grit sandpaper. The next four photos show the bowl after my cleanup work. There was some darkening on the rim top that I was not able to remove without removing significant amounts of the meerschaum.
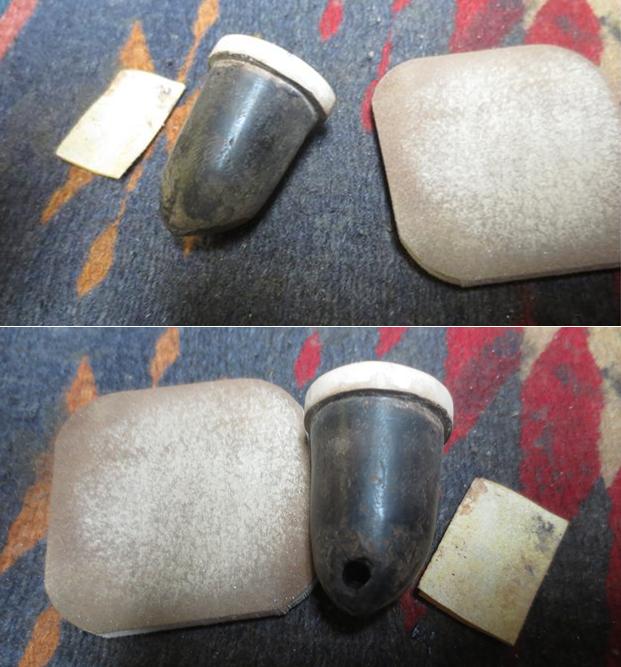
 I worked over the inner edge of the bowl with a folded piece of 220 grit sandpaper. I wanted to clean it up and make it more round again.
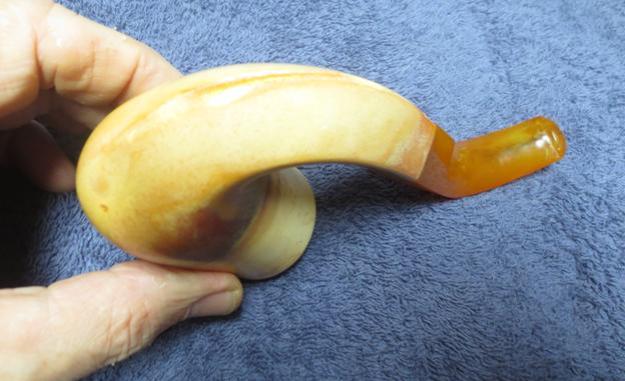
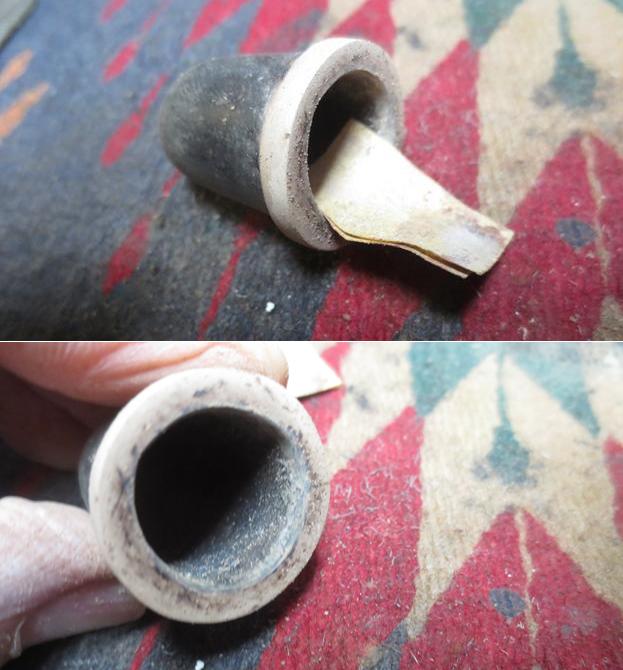 One the bowl was cleaned up I put it back in the outer bowl and took a picture of how it looked in place in the meerschaum. I could easily put it in place and remove it with the tip of my index finger. The second photo below gives some idea of the size of the inner bowl.
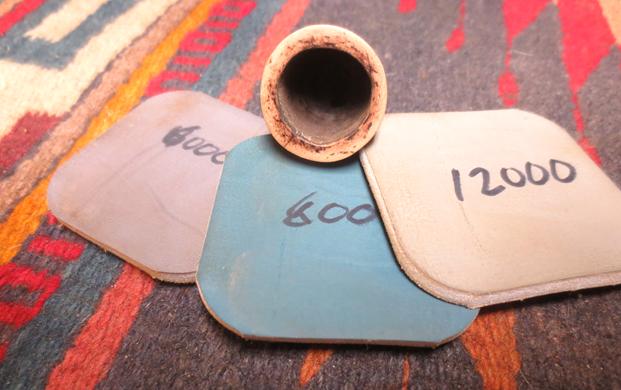
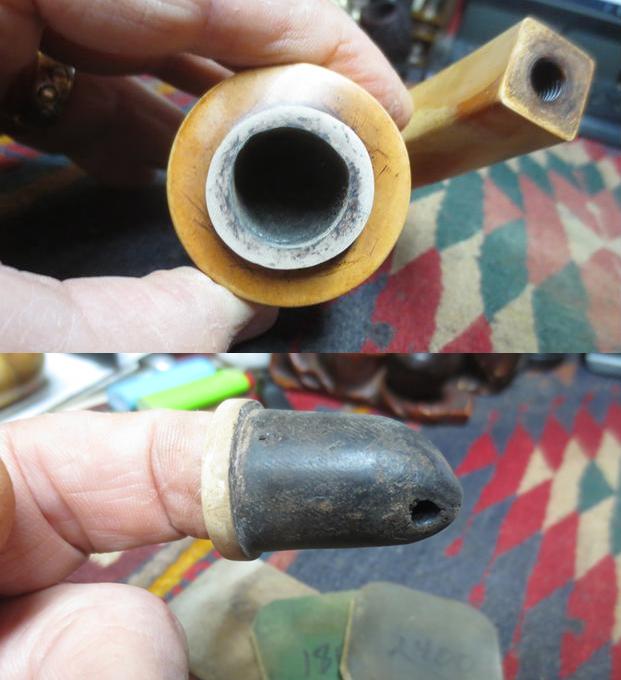 I polished the inner bowl with micromesh sanding pads – wet sanding with 1500-2400 grit pads and dry sanding with 3200-12000 grit pads. Each successive pad brought more of the shine to the surface of the inner bowl. I waxed the bowl edge and rim top with Clapham’s Beeswax and hand buffed it to raise a shine.
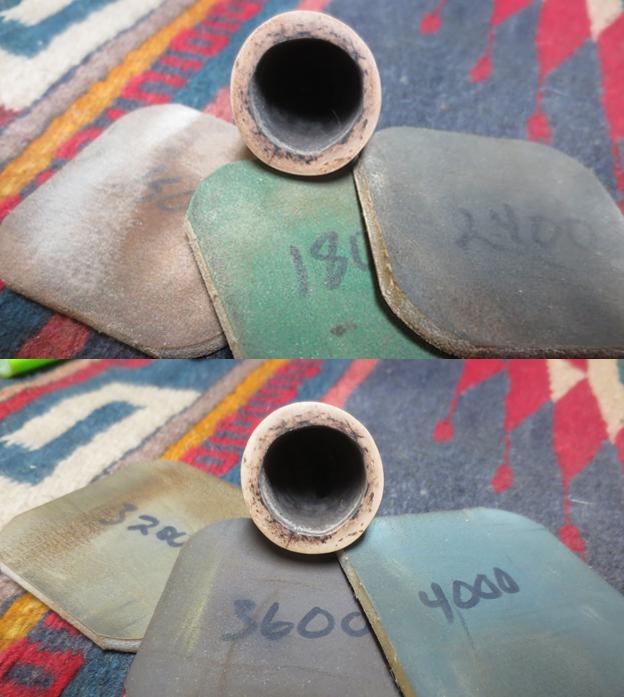
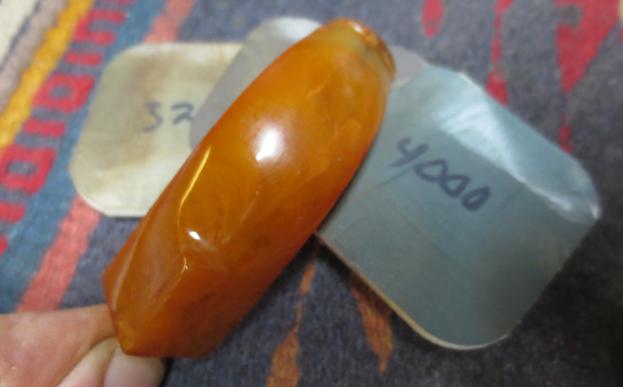
 I cleaned up the damaged portions of the stem with a cotton swab and alcohol to remove any debris in the deep tooth marks. I filled in the tooth marks and rebuilt the button surfaces to make the orific button round like it was originally. I layered on the amber super glue in the marks and on the button until the surfaces were slightly over filled.
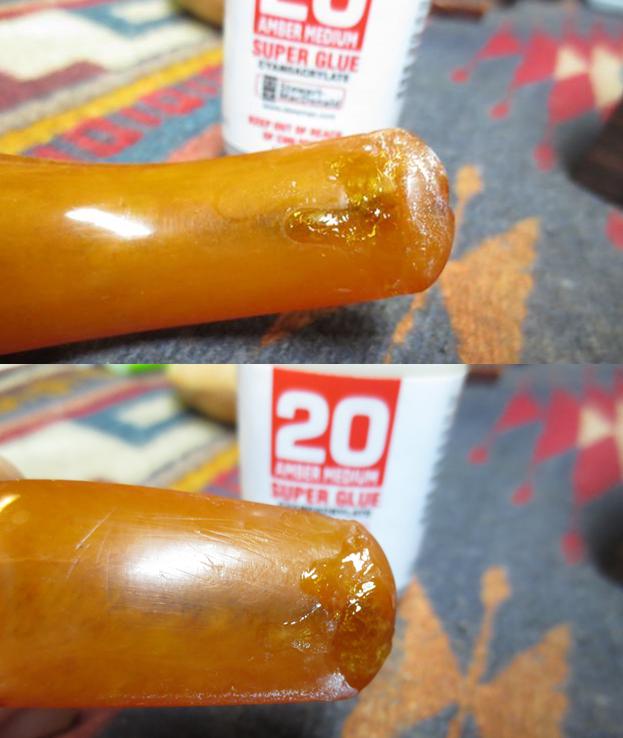 I put the stem in my ebony drilled block to allow the repair to dry on both sides.
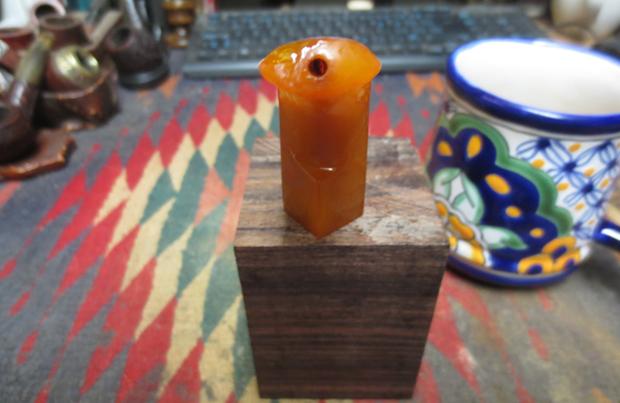 When the repair dried I recut the edges of the button on the top and underside of the stem with a needle file. I also smoothed out the surface of the repairs with the file to match the surface of the rest of the stem. I sanded the repaired areas on the stem surface and the button with 180 and 220 grit sandpaper to blend them into the surface of the stem and the button. I wanted the repairs to be as invisible as possible when the stem was examined.
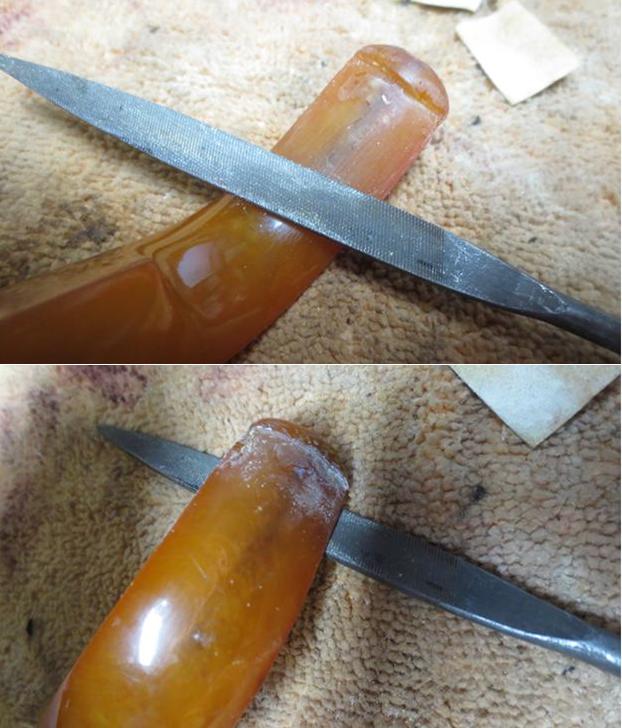
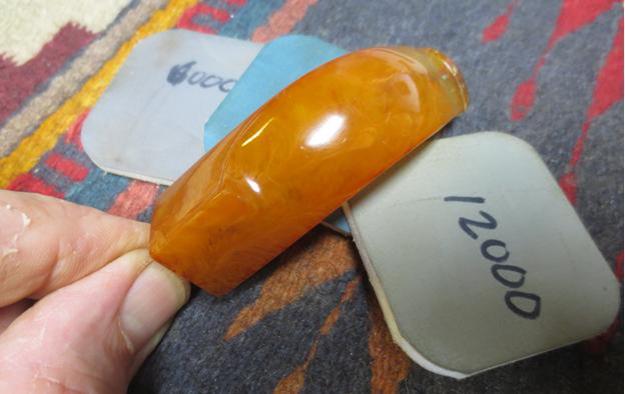
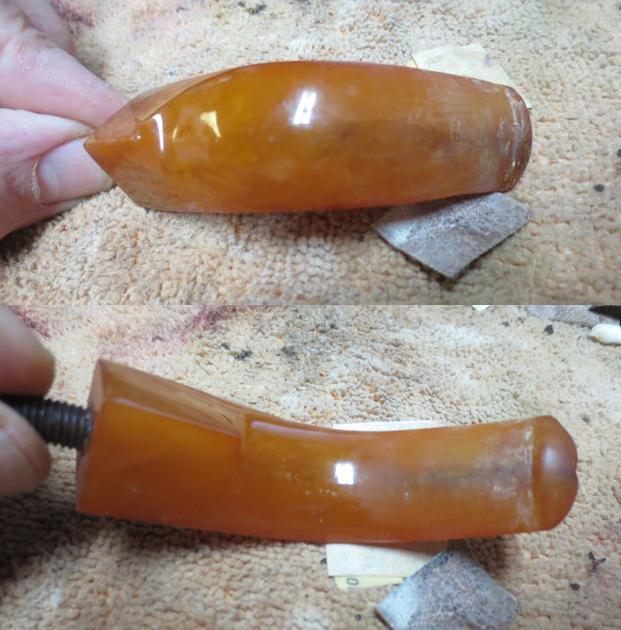 I polished the stem with micromesh sanding pads – wet sanding with 1500-2400 grit sanding pads and dry sanding with 3200-12000 grit pads. I rubbed the stem down after each sanding pad with Obsidian Oil. After the final sanding pad I gave it a final rubdown with the oil and set it aside to dry.
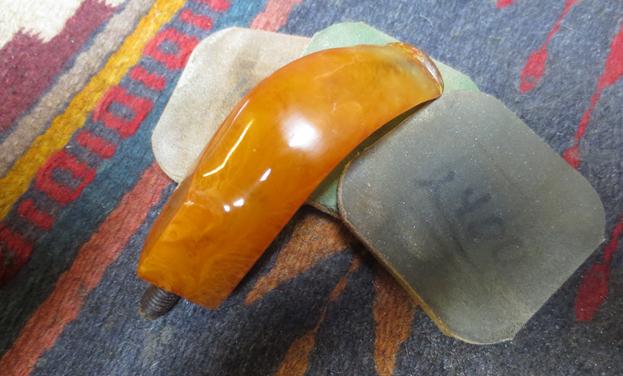
 I cleaned the end of the shank with alcohol and cotton swabs to remove the tars and build up on the shank end.
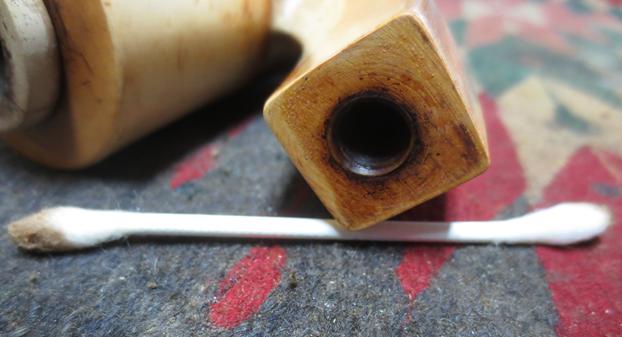 I polished the meerschaum bowl with micromesh sanding pads – wet sanding with 1500-2400 grit pads and dry sanding with 3200-12000 grit pads. I wiped the bowl down after each pad with a dry felt cloth to polish it further. I have found that the micromesh pads do not remove the patina in the colouring meerschaum.
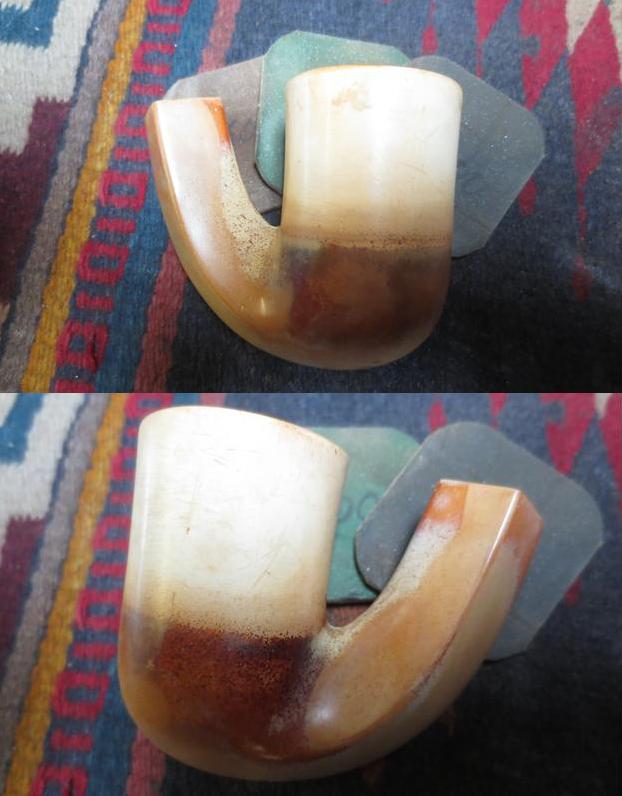
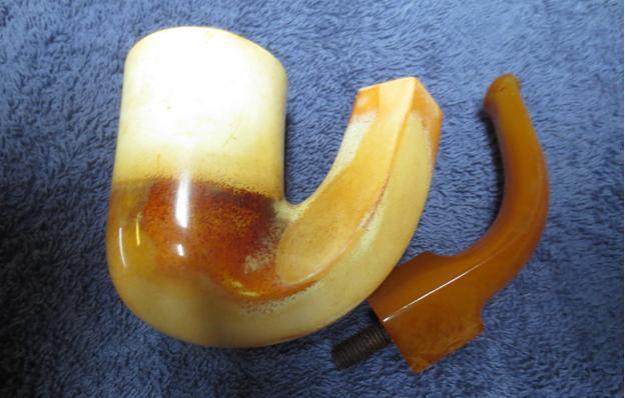
 I put the stem back on the bowl and buffed it with Blue Diamond on the buffing wheel to raise a shine. I put the inner bowl on the end of my finger and buffed it with Blue Diamond. I buffed the stem, the inner and outer bowl with a clean buffing pad to raise a shine. I hand buffed the pipe with a microfibre cloth to deep the shine. I inserted the inner bowl in the outer bowl and hand buffed it all one final time with the microfibre cloth. It is a big pipe and fills the hand. It is definitely one that should be smoked sitting beside the fire, sipping your favourite beverage and reading a good book. The dimensions of the pipe are Length: 6 inches, Height: 3 inches (with the inner bowl inserted), Outer diameter of the bowl: 1 ¾ inches, Chamber diameter: ¾ inches. The finished pipe is shown in the photos below. Thanks for joining me in the process.