Monthly Archives: December 2016

Cleaned an 80+year old KBB Yello-Bole Churchwarden 2095


Blog by Steve Laug

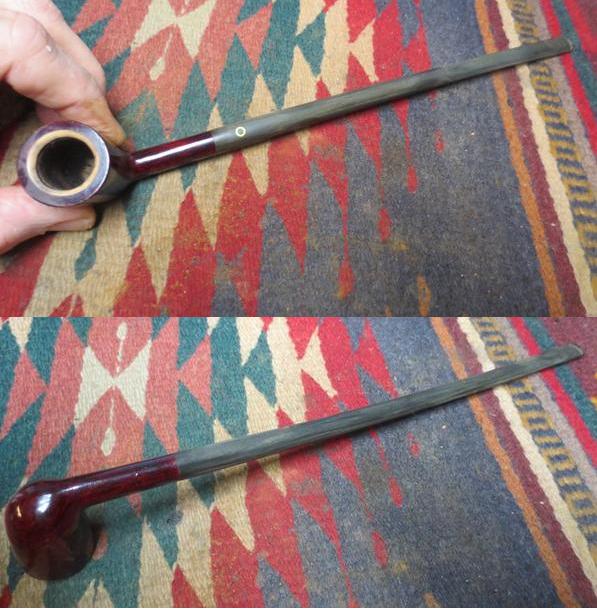
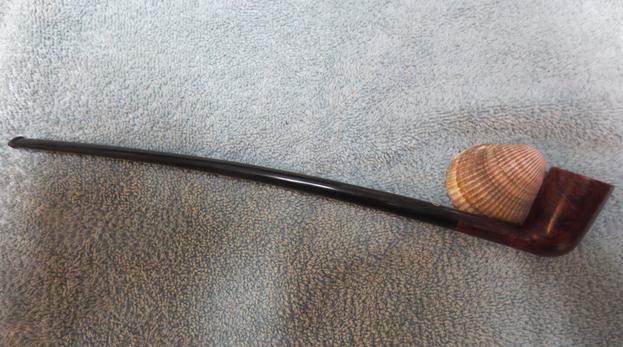
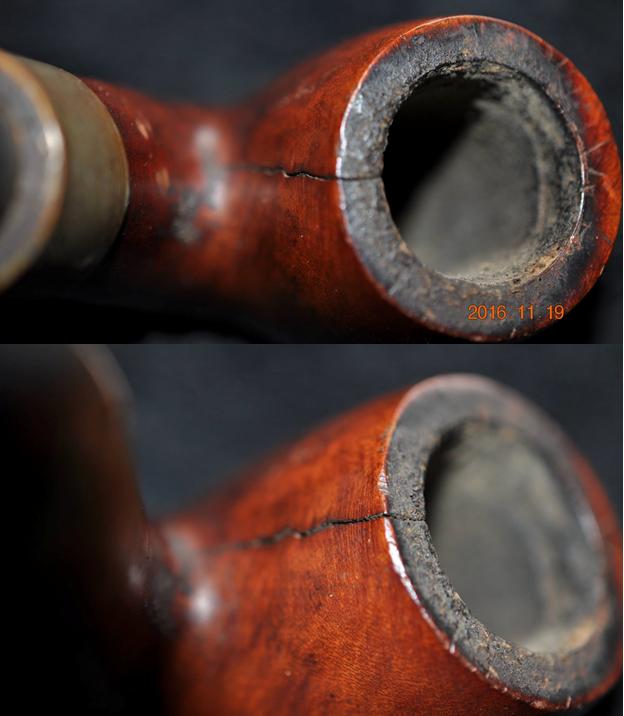
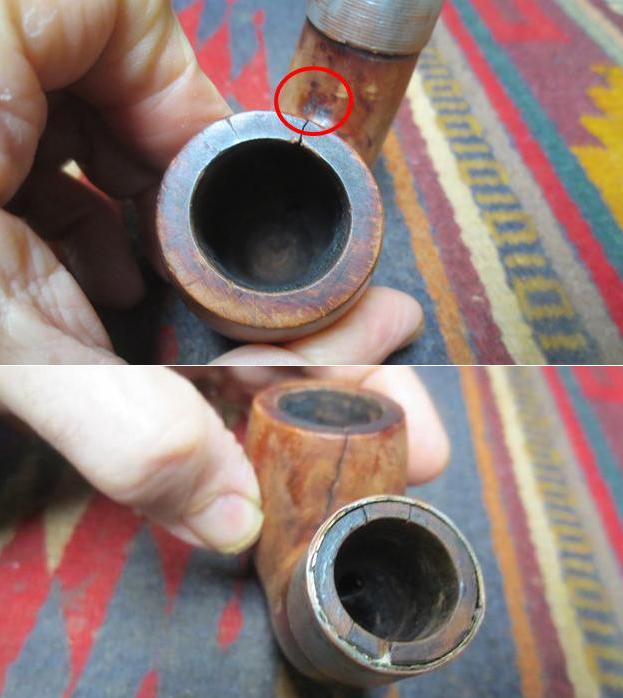
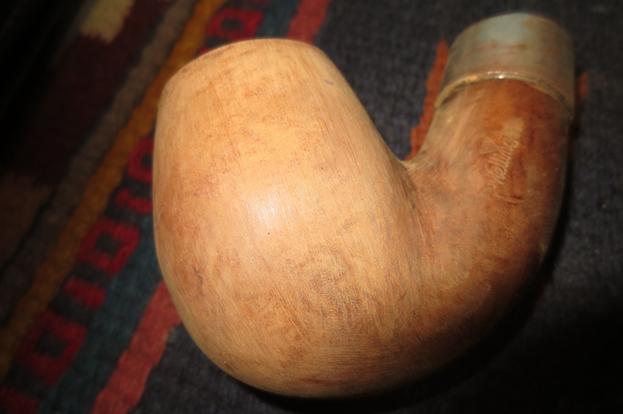
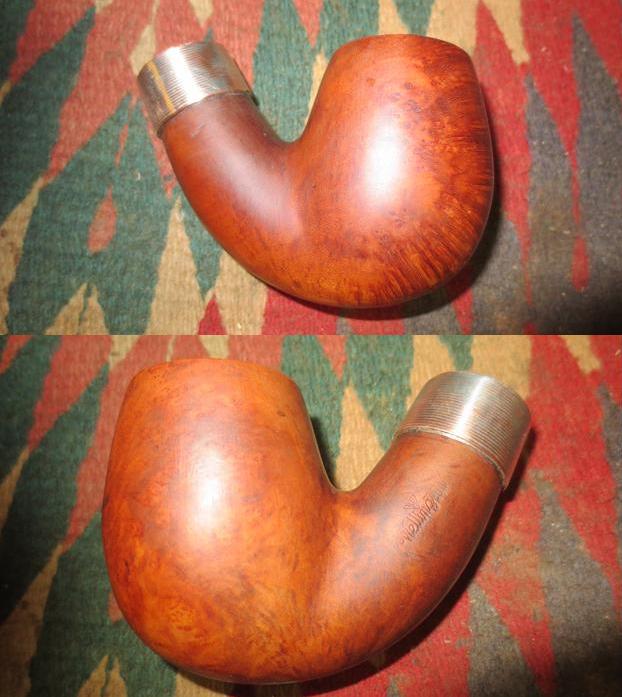
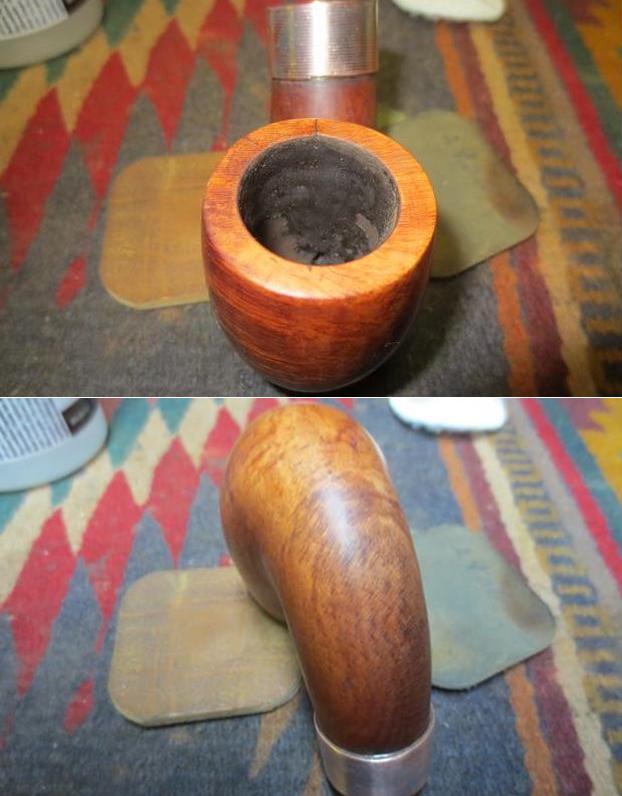
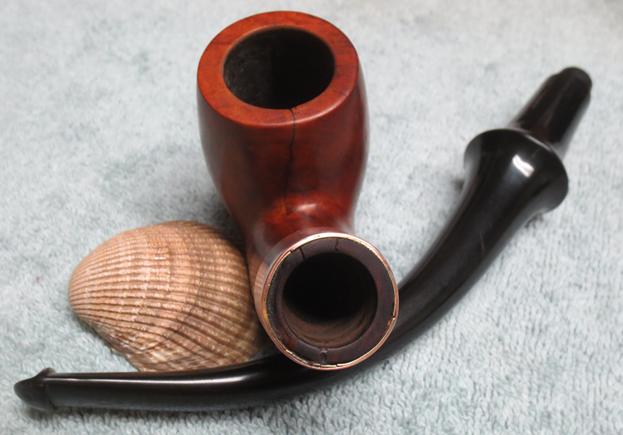
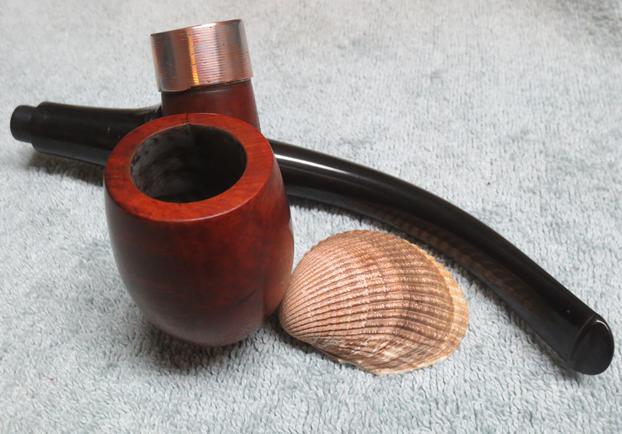
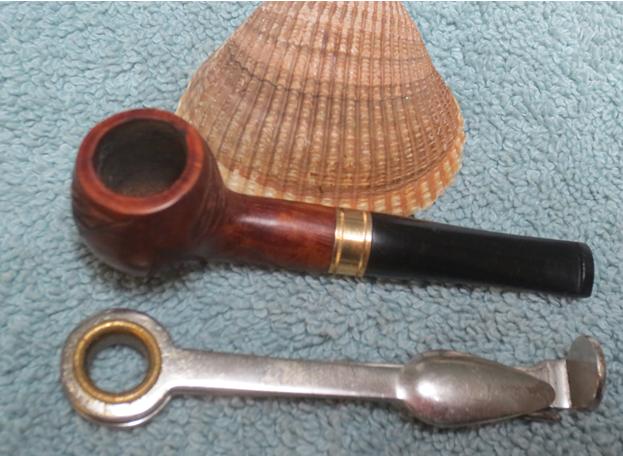
After the last challenge of the cracked bowl on the WDC Wellington House Pipe it was time to take on something that would go quickly and have some real beauty as well when finished. My brother had included just the pipe in the latest shipment that came to Vancouver from Idaho. It is a twelve inch long churchwarden. The bowl had the typical varnish coat over a oxblood stain that was peeling. There was a light cake in the bowl and the rim was dirty but the Yello-Bole Honey Cured Coating was very visible on the inner bevel of the rim top. The stamping on this one is the classic older Yello-Bole. It had the KBB cloverleaf on the left side of the shank and next to that it read YELLO-BOLE over Honey Cured Briar. ON the right side of the shank it has the shape number 2095. The stamping is in excellent shape. The stem was lightly oxidized and had the yellow circle on the top side near the shank/stem junction. There were single cut marks on both the top and underside of the stem about three inches forward from the button. There was also minimal tooth chatter and tooth marks on the stem on either side. The stem did not fit all the way into the shank when the pipe arrived in Idaho. (I have included the photos of the pipe that my brother took before he started to clean up the pipe.)cw1 cw2From a comment on a blog I wrote on the various Yello-Bole logos in my collection of these pipes I was able to narrow down a date for the pipe. Here is the link to the post and the comments on the blog: https://rebornpipes.com/2013/01/25/yello-bole-logos-from-my-collection-of-old-yello-bole-pipes/. The comment came from Troy who I consider my go to guy for Yello-Bole informantion (who has written on rebornpipes and also has a blog of his own). Troy wrote as follows on dating Yello-Bole pipes by the stamping and logos.

“I have a large KBB Yello-Bole collection, They are some of my most favorite pipes and the best smokers for the money (briar wise) you can find in my opinion. I have restored and researched them quite a bit. I have several listed on my blog that I have cleaned or restored. I own about 30-40 KBB Yello-Boles now.”

“Here is a little guide to dating KBB Yello-Boles. If it has the KBB stamped in the clover leaf it was made 1955 or earlier as they stopped the stamping after being acquired by S.M. Frank. From 1933-1936 they were stamped Honey Cured Briar. Pipes stems stamped with the propeller logo they were made in the 30s or 40s no propellers were used after the 40s. Yello-Bole also used a 4 digit code stamped on the pipe in the 30s. If the pipe had the Yello-Bole circle stamped on the shank it was made in the 30s this stopped after 1939. If the pipe was stamped BRUYERE rather than briar it was made in the 30s.”

From that information I ascertained the following. The churchwarden I had was stamped with KBB in the cloverleaf on the shank side which told me that the pipe was made before 1955. It is also stamped under the YELLO-BOLE name stamp with the words Honey Cured Briar which put its manufacture between 1933 and 1936. Further the four digit shape code 2095 also put the date in the 1930s. With all of that collected I knew the pipe was made between 1933 and 1936 which means that this old Churchwarden has seen a lot of life. I wish it could tell its story.

My brother included some close up photos of the rim top and the peeling varnish on the bowl sides and bottom for information. You can also see some peeling of the varnish on the rim top along with the darkening and overflow of cake.cw3 cw4 cw5The next photo shows the stamping on the left side of the shank. The stamping is clear and readable.cw6The next two photos show the condition of the stem. You can see the tooth chatter and marks on the stem surface on both sides. None of them are deep and all should be able to be polished out.cw7The next photo shows the cut mark on the top side of the stem. There is a matching mark on the underside.cw8My brother cleaned up the pipe – reaming the bowl, cleaning out the shank, airway in the shank and stem with alcohol, cotton swabs and pipe cleaners. The inside was clean. He scrubbed the briar and stem with Murphy’s Oil Soap and cleaned out the buildup on the rim and the grime on the sides of the bowl. The next four photos show what the pipe looked like when it arrived in Vancouver. It was ready to clean up and bring back to life.cw9 cw10I took a close up photo of the bowl and rim. The beveled inner edge shows the Yello-Bole coating. It is also visible on the inside of the bowl.cw11I sanded the stem with 220 grit sandpaper and worked on the tooth chatter on each end with the same sandpaper.cw12 cw13I took closeup photos of the Yello-Bole stinger apparatus. The first shows the topside of the stinger and the second the underside.cw14I took closeup photos of the existing finish on the bowl to show the peeling varnish and the speckled finish.cw15I wiped down the bowl with acetone on a cotton pad to remove the varnish coat and I was surprised by the grain that came through once the varnish was gone.cw16 cw17I waxed the bowl with Conservator’s Wax so that I could see the scratching and spots that needed more attention on the briar. A bit of a shine makes issues in the briar stand out.cw18 cw19I polished the briar with micromesh sanding pads – dry sanding it with 3200-12000 grit pads. I wiped the bowl down with a damp cotton pad to remove any polishing dust left behind.cw20 cw21I polished the stem with micromesh sanding pads – wet sanding it with 1500-2400 grit pads and dry sanding with 3200-12000 grit pads. I rubbed it down with Obsidian Oil after each set of three pads. After the last set of pads I rubbed it down with a final coat of oil and set the stem aside to dry.cw22 cw23 cw24I buffed the bowl with Blue Diamond on the buffing wheel to polish out the last of the scratches in the briar. I gave the bowl multiple coats of carnauba wax and buffed the bowl with a clean buffing pad. The next photos show the finished bowl.cw25 cw26 cw27 cw28I put the stem on the bowl and buffed the entirety again with Blue Diamond and gave the stem multiple coats of carnauba wax. I buffed it with a clean buffing pad and hand buffed the pipe with a microfibre cloth to deepen the polish. The finished pipe is shown in the photos below. It is cleaned, all varnish has been removed from the bowl and shank and it has been waxed and buffed. The finished pipe has a rich shine and all of the grain is visible through the finish. Thanks for walking through the restoration with me.cw29 cw30 cw31 cw32 cw33 cw34 cw35 cw36
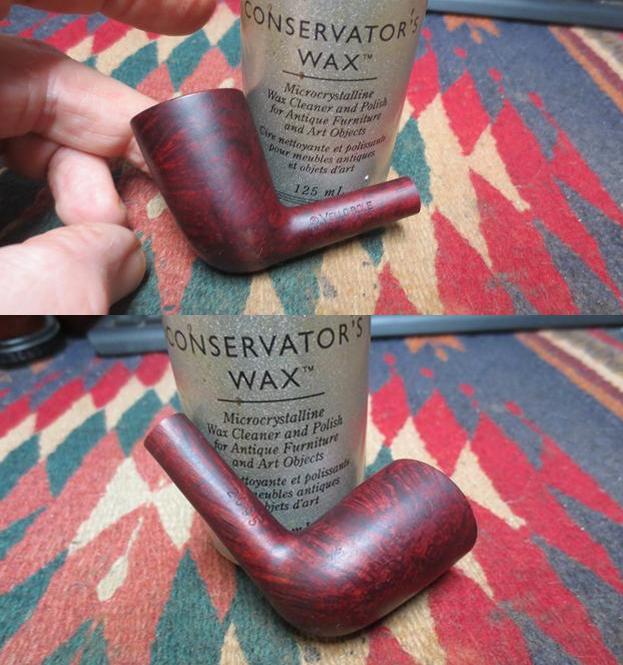
An Addendum – a Bowl Coating for the Cracked Bowl of the WDC Wellington House pipe


Blog by Steve Laug

In a recent blog I wrote about repairing a WDC Wellington House pipe with a cracked bowl that had been half way repaired by someone else. I wrote about using JB Weld on the inside of the bowl (https://rebornpipes.com/2016/12/30/sprucing-up-a-home-doctored-wdc-wellington-house-pipe/).  Some folks have been concerned about toxicity of this product in the bowl of a pipe. Even though the studies on the material have shown that once it is cured and dried the substance is neutral and there is no toxicity issues I still take several precautionary measures to minimize the possibility. First, I sand the repaired area smooth leaving JB Weld in only the repaired areas while leaving the briar bare around the repairs. Second, I mix and apply a bowl coating to the entire bowl to protect the bowl and provide an extra layer between the JB Weld and the tobacco. The coating when dry encourages a new cake to develop as the carbon/charcoal in the mixture provides a rough surface for the cake to adhere to more quickly.

In that particular blog I commented that I was out of charcoal capsules so the bowl coat would have to wait. Yesterday while I was out and about I was able to find some of the capsules that I needed for the mixture. This morning I mixed up a batch of bowl coating for the pipe. I decided to document it as I put it together and write a short tutorial on how I mix the bowl coating and apply it. The photos below show the internal and the external repair to the bowl and where it stood when I posted the blog.bowl1Here are the steps in the process I use along with explanatory photos.

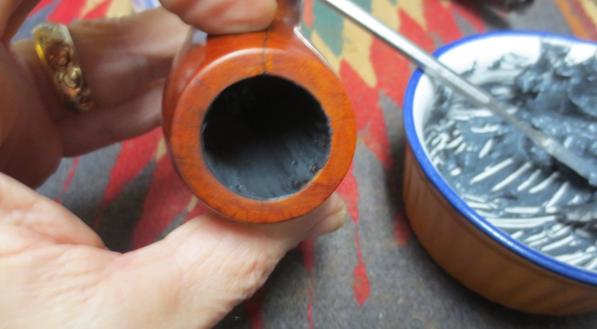
Step 1 Assemble all the ingredients – not too many in this case. I use five Activated Charcoal capsules (food grade) and a tablespoon of sour cream. This amount of sour cream and charcoal is more than enough to coat one bowl but I find it is easier to mix this size batch with what I have. I will often do a second bowl to use up the mixture. I use a small glass bowl to mix the concoction in as I find that is easy to use and clean up afterward.bowl2Step 2 Twist the capsules apart and dump the charcoal powder out of each half onto the sour cream in the mixing bowl. I generally break open two at a time, stirring them into the sour cream with a dental spatula. You can use anything you want to stir the mixture together.bowl3Step 3 When the ingredients are well mixed you should have a dark grey paste in your bowl. It will still smell like sour cream at this point but do not worry when it dries the smell dissipates and all that is left is a dark coating that protects the wall of the bowl. The sour cream acts as the medium for applying the charcoal powder (carbon) to the bowl walls.bowl4Step 4 When the bowl coating is well mixed fold a pipe cleaner in half and use it to apply the coating to the walls of the pipe. I have tried different tools to apply the mixture to the bowl walls and always come back to the folded pipe cleaner.bowl5Step 5 Using the pipe cleaner put a dollop of the mixture on the bottom of the bowl and smooth it upward around the bowl sides. The first dollop will give you enough to paint half way up the bowl walls. You can put a pipe cleaner in the airway into the bowl so as not to clog it or you can be careful as you paint the mixture around that area.bowl6Step 6 Continue painting the mixture up the sides of the bowl to the rim. Do not worry about getting the coating on the rim as it can easily be wiped off when you have finished.bowl7Step 7 When the entire bowl is covered I carefully run the folded pipe cleaner over the surface to smooth out any lumps or thick spots and even out the painting on the walls and bowl bottom. I add more coating as necessary for an even coverage around the bowl.bowl8Step 8 Wipe down the mixture from the edge and surface of the rim with either your finger or a cotton pad to leave the rim top clean. Set the bowl aside in an upright position until the bowl coating has dried. I generally find that the mixture takes a good 24 hours to cure and another half day for the smell to dissipate. Once it is dry the entire bowl is a dark black colour and is dry to touch.bowl9Step 9 I let the bowl sit for four or five days until it is cured and dry. Once the coating has cured the pipe is ready to load with your favourite tobacco and fire up a smoke.

That is it – not a complicated mixture or formula and not a complicated application process. It certainly may seem strange to you to make up the concoction and put it in a pipe but it is a mixture that I have used for quite a few years now and it provides that needed insulation on the walls of the bowl until a new cake has time to form. Honestly there is no residual taste of sour cream that is transferred to your first smoke. Just smoke and know that the repair on the walls of the pipe is safely covered by this added layer of insulation.

Christmas Addendum – Short Snorter Burn Through Repair


Blog by Dal Stanton

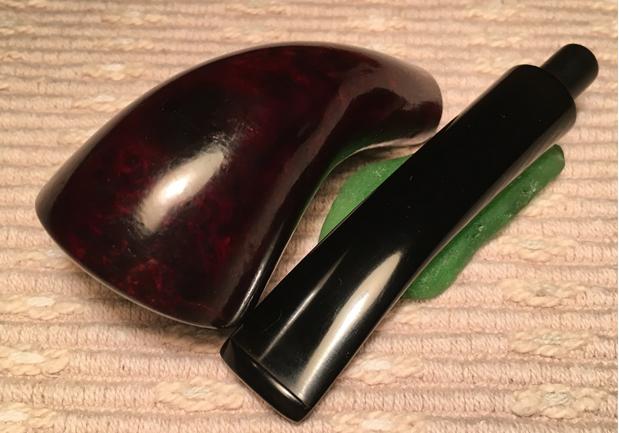
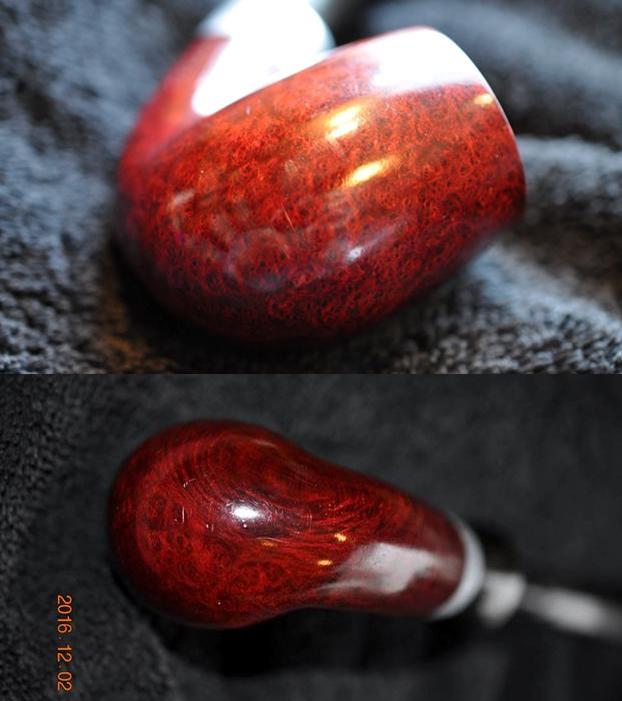
Having semi-completed the restoration of the unmarked Weber Short Snorter previously (see Link), since my wife and I were heading to Denver for Christmas, I ran out of time to complete the needed repair of this Short Snorter’s burn through problems.  The slender horn shape had contributed to a thinning front firewall which in turn had created a darkened burnt area on the front of the bowl, which in turn had produced a burn fissure crack in the impacted briar.  My subsequent attempt to repair the crack by drilling holes (not going through to the fire chamber!) on either side of the crack to halt any crack creep, resulted in one of the drilled holes punching through the thinner-than-expected wall…. Things went from bad to worse in a blink!  A briar dust mixed with superglue patch soon followed.  I completed the full restoration of stummel and stem except for rebuilding the fire chamber.  A few pictures serve as a reminder of the restoration dealing with the burn area bringing us up to date.chris1 chris2 chris3 chris4With this Short Snorter destined to be under the tree in Denver as a gift for my daughter, Santa’s sleigh took the shape of Lufthansa Airlines from Sofia via Munich to Denver to deliver the gift in time.  Now that Christmas Day is finished, the Short Snorter unwrapped and introduced to a new steward, I need to complete the repair to the internal burn area.  Using Charles Lemon’s technique, author of Dad’s Pipes, of applying JB Weld to rebuild the internal firewall, I had ordered JB Kwik from Amazon and it arrived in the mail in Denver for my use with the Short Snorter.  To make sure the internal bowl was clean; I wiped it down with alcohol.  The trick will be to do the work and not disturb the externals which are already completed!chris5Since this is my first time using a JB Weld product I read the directions – a novel idea!  I discover that the mixture between the two tubes that make up the ‘weld’ is straight forward.  The JB Kwik ‘hardener’ and ‘steel’ are mixed at a 1 to 1 ratio.  The directions also describe a window of 4 minutes until the mixture sets and then 4 hours until fully cured.  The JB Weld website gives JB Kwik a tensile strength rating at 2424 PSI and withstanding temperatures up to 300ºF (See Link).  Since I want to build-up the thinned fire chamber wall with a thick layer of JB Weld, I insert a folded pipe cleaner into the mortise and slightly out the draft hole as it enters the internal bowl.  When I put the JB Weld mixture in the bowl, I don’t want the airway plugged!chris6 chris7Since this is my first go at using JB Weld, I did not know how much to use.  I squirt out probably more than needed, but I would rather err on that side than not enough.  I first put some hardener on the cardboard mix area.  Then, taking more effort to squeeze out of the tube, I put an almost equal amount of ‘steel’ next to it and then mix.  When it appeared mixed, using the end of a plastic spoon as a spatula (left over from our Christmas feast!) I try to apply the mixture carefully – wanting to avoid the finished rim!  With a gloved hand, I use my pinky finger to contour the weld mixture over the forward burned area making sure the thin chamber wall is reinforced well with added thickness and I also shape the round curvature of the forward chamber patched area. As careful as I try to be, I dribble a bit of weld mixture over the rim.  With a wetted paper towel, I easily can wipe the rim dribble off while the weld mixture is in the setting state.  I also wipe the inner rim with my gloved thumbnail to clean away the weld mixture leaving a briar strip above the patched area.  Pictures show the progress.chris8 chris9 chris10After about 5 minutes, I take the following picture.  The JB Kwik is setting and I put it aside for its 4-hour rest to cure.chris11Hindsight is 20/20 they say.  In hindsight, I should have removed the pipe cleaner while the JB Weld was still pliable and shaped the draft hole.  After the JB Kwik Weld cured, I yank a bit on the pipe cleaner and the pipe cleaner is not budging!  After unsuccessfully pulling on the welded pipe cleaner a few times, I take needle-nose plyers and extract the pipe cleaner leaving behind pipe cleaner fibers.  To remove the left-over pipe cleaner fiber and to contour the draft hole I sand with a round needle file.  I follow this with 220 grit sanding paper and smooth the internal surface between the native briar and the cured JB Weld patch and finish by wiping the bowl with 95% isopropyl to remove left over dust and debris.  The last picture in the set below clearly shows the reinforced area of the fire chamber.  It looks good and feels smooth. The pictures show the progress.chris12 chris13To complete the bowl repair, I mix sour cream and charcoal to form a paste that I use to create a protective insulation around the bowl.  This insulation provides the foundation for a new cake to form to protect the briar long-term.  After cured, it is hard and leaves no taste or smell.  When Steve first told me about this mixture, I was a bit doubtful!  Yet, after using this mixture several times, his assurances have been verified.  After applying the paste to the internal wall with a folded pipe cleaner, I set the bowl aside to cure well overnight.chris14The next morning I record the following pictures completing this Christmas Addendum of the Short Snorter from Denver.  I trust you all have had a wonderful Christmas and you will enjoy a blessed New Year!  Thanks for joining me!chris15

Sprucing up a Home Doctored WDC Wellington House Pipe


Blog by Steve Laug

Have you ever been pipe hunting in an antique shop and in your conversation with the clerk at the checkout have them tell you that they have a pipe at home that they would love to have you see? If not I assure you that you will. It seems to happen to me and certainly to my brother. Sometimes going back to see the pipe is a good thing and sometimes it is not worth the trip. My brother recently went through this very thing in a shop on the Oregon Coast. The clerk said that he had an old pipe – thought it was a churchwarden – at home and he would love to see it go to someone who would restore it. He said it was interesting but it was in rough shape. He told my brother that he would bring it to the shop the next day. He lived a fair ways away from the shop so he could not go and get it at the moment. My brother left the shop knowing that he would need to go back and have a look at the pipe. Two days later he made the drive back to the shop. The seller had left it behind the counter for him. The person at the counter took the pipe out and handed it to him. The clerk had been right – it was in rough shape but it was not a churchwarden but old WDC Wellington House Pipe. (I have included the photos that my brother took of the pipe before he cleaned it and sent it to me in Vancouver.)mess1Even at first glance it was rough but he did not expect what he found as he went over it. As he turned it in his hands he saw that the bowl had a large crack on the back side of the bowl that went from the rim to the shank bowl junction. It went all the way through and ran down the inside back of the bowl to a spot just above the airway. This was not good.mess2The bowl was caked and dirty and the cake had flowed over the top of the rim leaving a hard rough surface. Even through the grit he could see that there were a lot of nicks, scratches and dents in the rim top. On top of that the left side of the bowl was rough and seemed like it had road rash. It appeared that someone had tried to smooth it over but it was till rough to touch.mess3 mess4The Wellington ferrule was gone and had been replaced with a piece of what appeared to be a cut off piece of pipe glued and pressed onto the shank end. Looking at the pipe from the shank end you could see why the band had been as a lot of small cracks could be seen that extended down into the mortise. The cut off piece of pipe literally bound the shank together tightly with no give. The stem was the only part of the pipe that was in excellent condition. It bore the Solid Rubber stamp on the underside but the topside was missing the WDC Wellington stamp. It was obvious to me that someone had loved this old pipe and that they had done whatever was necessary to keep it functioning. The repair work was solid but it really was a mess. After the fellow had gone to the effort to bring the pipe to the shop my brother felt obligated to buy it. The deal was struck and the pipe came home with him.mess5The next two photos show the stamping on the shank. It reads Wellington under the WDC triangle on the left side of the shank. There are a lot of nicks and scratches around the shank that look like damage done when the band was glued in place. The Solid Rubber stamping on the can be seen in the second photo below.mess6The stem was actually in the best condition of the entire pipe. There was very little tooth chatter and marks near the button. There were some marks on the ridge on the underside and there was a spot of metal shining through the rubber there as well. The entire stem was lightly oxidized and pitted.mess7My brother did his usual thorough clean before sending it to Vancouver. He reamed the bowl and removed the cake that was built up on the walls and had overflowed onto the rim of the bowl. He cleaned out the mortise, the airway in the shank and the stem with alcohol, pipe cleaners and cotton swabs. He scrubbed the exterior of the bowl with Murphy’s Oil Soap and was able to remove the grime and dirt and the chipped and damaged finish. The next four photos show what the pipe looked like when it arrived.mess8 mess9I took some close up photos of the shank band. It is obvious to me that the repair on the shank was home done and involved cutting a piece of pipe and gluing and pressing it onto the shank. The third photo shows the shank end and there are at least 4-6 cracks showing that previous owner had glued and repaired with the cut off piece of pipe as a band. The band repair had been finished off with a bevel of glue banked against the band and shank. The piece of pipe that functioned as the band was striated and copper colour peeked out from under the surface oxidation. The crack on the back of the bowl is visible in the second photo below.mess10 mess11I took a close up photo of the left side of the bowl to show the rash on the side of the bowl. It was very rough and scored. It would need to be sanded smooth to repair the amount of damage.mess12I took photos of the crack in the bowl. It is on the back side as noted above. It extends down the back of the bowl to the shank/bowl junction (photo 2). What was interesting to me was that there were two small holes drilled at the twin ends of the crack in the bend of the junction. They had been filled in with glue and sanded smooth. I have circled them in red in the photo below (photo 1). I don’t why the previous repair had not continued with filling in the crack on at least the outside of the bowl but it did not. Possibly it was because the crack went through the bowl and extended down to a spot just above the entrance of the airway in the bowl (photos 3-4). There appeared to be burn damage on the back wall of the bowl on both sides of the crack. The rest of the interior walls of the pipe were solid with no damage.mess13 mess14As I mentioned before the best part of this pipe was the stem. In fact at one point I considered throwing the bowl away and saving the stem for a future repair.mess16With so much work to do on the bowl it was hard to decide where to begin. I turned it over in my hands for a few moments and decided to start by sanding out the rough side of the bowl. I would try to remove all of the damage that had been done in that area. The next two photos show the damaged area after the first sanding with 180 grit sandpaper. You can see how extensive this rash was on the bowl side.mess17I decided to top the bowl to deal with the damaged portion of the rim. I used the topping board and 220 grit sandpaper to remove the damaged rim surface and clean it in preparation for the crack repair. You can see that I needed to do some more reaming in the bowl to clean it up.mess18With the rim finished I went back to sanding the bowl side with 220 grit sandpaper. I worked to remove the damage on the side and worked over the curve of the bowl shank junction. When I finished with the 220 grit sandpaper the bowl side was smooth. The roughness and damage had been removed. The briar needed to be sanded with higher grit sandpapers and sanding sponges to remove the scratches.mess19I topped the shank end with 220 grit sandpaper on the topping board to smooth out the sharp edge of the metal band and prepare the shank end for some repairs.mess20I filled in the chipped areas on the shank end with briar dust and super glue. When the glue dried I topped it further and added a little glue on the long chipped area on the left of the second photo below.mess21I scraped away the excess glue along the edge of the band on the shank with a sharp knife. Once I finished the transition was smoother. I would sand the area along the band to clean up the scratches but the thick glue was removed.mess22There were some deep nicks on the lower front side of the bowl that needed to be filled. I filled them with super glue and briar dust and sanded them smooth to match the surface of the surrounding briar. I sanded around the shank band at the same time to smooth out the scratches and nicks.mess23I moved to the back of the bowl and filled in the exterior part of the crack with super glue and briar dust. The twin drilling at the bottom of the crack by the previous owner had done a good job stopping the crack from going further so I did not need to deal with that issue. There was no movement in the crack when I squeezed it together. It was stable so I moved on to do the surface repair. I put super glue in the crack and then pressed briar dust into the glue to seal the surface of the crack. mess24It was time to address the internal crack at this point. I needed to join the two sides of the crack together inside and also address the burned areas around both sides of the crack. I scraped out the inside of the bowl with a Savinelli Fitsall Pipe Knife to remove the remaining excess cake. I made sure to remove all of the cake. I worked on the area around the crack to remove all of the carbon and picked the area with a dental pick to see how badly the area was burned. I sanded the inside of the bowl with a rolled piece of 220 grit sandpaper to smooth out the walls.mess25I sanded the repair on the exterior of the bowl with 220 grit sandpaper to remove the excess patch material on the exterior of the crack. I smoothed it out to match the surrounding briar. The repair is looking really good on the exterior and the sanded interior of the bowl (also visible in the photo) was in better shape than I expected.mess26I wiped down the inside of the bowl with damp cotton swabs to remove the dust and debris from the bowl sides. With all of the preparations finished the inside crack was ready for repair using JB Weld. I have used it before following the directions from Charles Lemon on Dadspipes blog and had good results. I mixed the two parts of the “goop” together and applied the mixture to the inside of the bowl with a dental spatula. I pressed the mix into the crack and then spread it over the surface of the back wall on both sides of the crack. Once I had good coverage on the wall and in the crack I set the bowl aside to let the glue set.mess27 mess28While the repair in the bowl interior cured I turned to deal with the minimal damage to the stem. I sanded the light tooth chatter and small bite marks on the top and underside of the stem near the button using 220 grit sandpaper. I reshaped the button edge and the straight edge on the underside of the stem at the same time.mess29When the internal repair had dried to touch I could turn my attentions to the sanded exterior once again. I wiped the bowl down with a light coat of olive oil to make the scratched areas stand out and show me where I needed to do more sanding.mess30 mess31I polished the briar and the metal band with micromesh sanding pads – wet sanding it with 1500-2400 grit pads to smooth out all of the scratches and areas that showed up with the olive oil rubdown. The more I sanded it the more the grain began to stand out. There was some great birds-eye and cross grain in the briar. The third photo shows the JB Weld repair on the inside of the bowl very clearly. Once it turns black it will have cured enough to sand.mess32 mess33I continued to polish the briar and band with micromesh sanding pads – dry sanding it with 3200-12000 grit pads until the bowl shone.mess34I stained the pipe with a dark brown aniline stain thinned 50/50 with isopropyl alcohol. I applied the stain, flamed the stain to set it and repeated the process until the coverage was even around the bowl and rim.mess35I gave the bowl several coats of carnauba wax and buffed it with a clean buffing pad. I took the following photos to show what the bowl looked like now that it was stained and waxed. It is a pretty piece of briar and a far cry from the mess I started with.mess36 mess37I set the bowl aside and polished the stem. I buffed it with red Tripoli to remove as much of the light oxidation as possible. I wet sanded the stem with 1500-2400 grit micromesh sanding pads and dry sanded it with 3200-12000 grit pads. (For some reason the last photo of the stem has a yellow tint and makes it look oxidized. It actually shone at this point in the process with no oxidation left. I rubbed it down with Obsidian Oil after each set of three pads. After the final rubdown I set the stem aside to dry.mess38 mess39 mess40By this point in the process the JB Weld had hardened. It had been about 4-5 hours. It was time to smooth out the inside of the bowl and remove the excess JB Weld. I used the Dremel with a sanding drum to smooth out the back side of the bowl. You can see the spots on the bowl wall where I left the material to fill in the damaged areas on the wall. I went on to sand the interior wall with 180 and 220 grit sandpaper to further smooth out the repair and minimize the JB Weld. The repairs had stabilized the cracked bowl and it was usable once again.mess41I have one final step to take to before I can close the book on this repair. I need to mix a bowl coating to paint the inside of the bowl with. It is a mixture of sour cream and activated charcoal powder. I had to order some more as I ran out of the charcoal capsules and my local pharmacy was also out of stock. It may take a while to get some so for now the bowl is finished. Once the bowl coating is applied and has cured the pipe will be ready to smoke and carry on a long life.

At this point in the process when all is basically finished I can honestly say that I am glad I did not scrap bowl to the junk box. It has some beautiful grain and I think it looks good with the scar on the back side of the bowl where the crack used to be. The metal pipe band polished up nicely with hints of copper and silver mingled together giving it a bit of a sparkle. The finished pipe is shown in the photos below. It has been buffed with Blue Diamond a final time and given multiple coats of carnauba wax. I buffed it with a clean buffing pad and then by hand with a microfibre cloth to deepen the shine. The write up is longer and the photos are many this time around. It was a lot of work to give this old timer another chance but I think it was worth the effort. Thanks for bearing with me. mess42 mess43 mess44 mess45 mess46 mess47 mess48 mess49 mess50 mess51

Restoring Another Unique Windy Perpetual Drysmoker


Blog by Steve Laug

Today I have been working on the second Windy Perpetual Dry Smoker that has come across my work table. The first was a gift from Troy who writes here on rebornpipes. I have written the description of the restoration on a previous blog. You can read about the cleanup and restoration on that blog: https://rebornpipes.com/tag/windy-perpetual-drysmoker-pipe/ . In that blog I did some research on the brand, as prior to the first pipe I was gifted I had never heard of or seen one of these pipes. I decided to repeat a portion of that first blog here to give some background on the brand.

Here is the link to one of my favourite informational sites on metal and unique system style wooden pipes. The link will take you to the article as a whole and some photos that show the pipe quite well: http://www.smokingmetal.co.uk/pipe.php?page=508

“WINDY PERPETUAL DRYSMOKER by Stan Wolcott”

“In my travels I recently came across this intriguing pipe on which very little information appears online by Google search. The left side (?) is stamped “Windy Perpetual Drysmoker” and on the right side (?) “Imported Briar/Italy”. The stem has a small round gold medallion on the left side bearing an “R”. Although several similar pipes are pictured online here in the USA and UK, no explanatory information is included with those images. Floyd Norwood of Tennessee, who restored the pipe for me, also had no idea how the pipe was to be smoked. Tony Pringle of the UK, who has one pictured on his website, believes there may be other pieces which are missing from the four present in the images—flat cap, rounded cap with five vent holes (presumably the wind cap) and the pipe bowl and stem. As can be seen from the images, the flat cap has female threads and screws into the bottom (?) onto male threads on the bowl. The wind cap has male threads and screws into the top (?) of the bowl. I have placed the question marks in parentheses following the terms top, bottom, right and left, since I’m not even sure whether the flat cap is intended to be the bottom. Can someone out there enlighten me and the NASPC readership about this “mystery pipe”, its manufacturer and the proper way of smoking it?”

“The “Perpetual” part of the name seems to come from the ability to actually load more tobacco from the bottom of the pipe whilst still alight and of course the dottle etc. gets burnt as the smoking progresses. Rather ingenious. There are at least two possible for makers from the logo, REGIS and EMPIRE STATE and nothing seems to be known of these either.

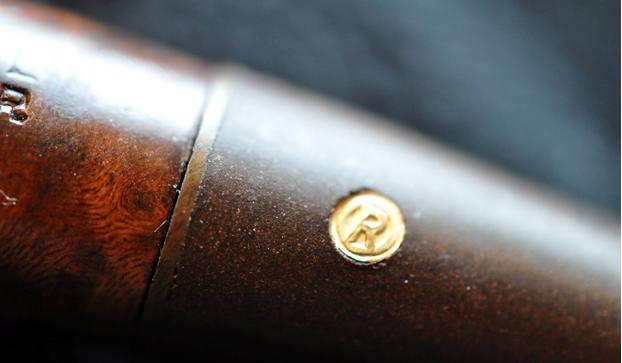
Tony Pringle of smokingmetal then includes the following photos of the pipe. There is no doubt that it is the same pipe that I have. There are a few variations between the two but the overall design is the same. He shows photos of the pipe as a whole, taken apart and of the stamping.dry1I have only included the first photos as the pipe I have is virtually identical to this one. Mine also has the gold circle R on the logo on the side of the stem. The only difference is that mine is has a brass spacer on the stem that forms a thin band between the shank and stem. Mine is also in better condition than the one in the photos with no cracks or breaks in the bowl, caps or threads. I believe along with Tony from smokingmetal that the pipe was crafted in the late 1940s. Many things about the briar quality, the rubber that is used in the stem etc. point to manufacture of the pipe occurring during or after the conclusion of World War II.

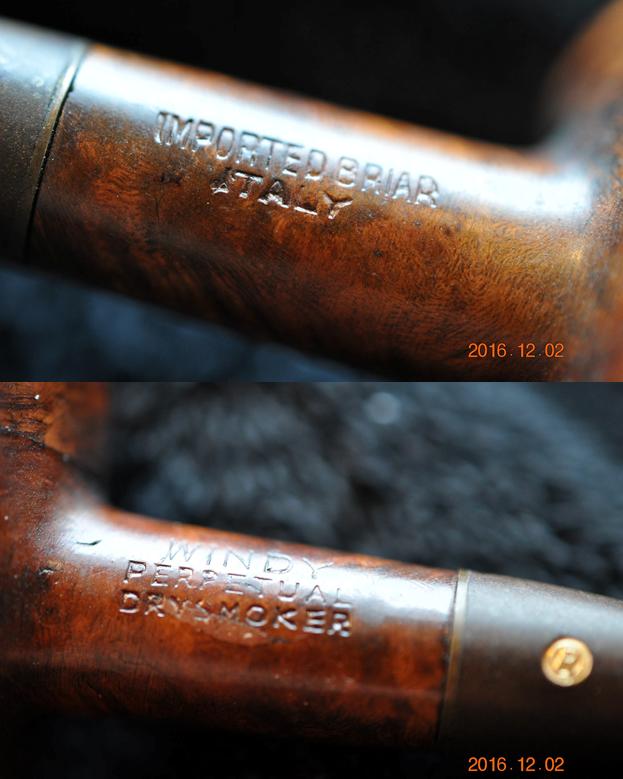
The stamping on the one above and the one I have is simply WINDY over PERPETUAL over DRYSMOKER in caps on what is the left side of the shank. On the right side of shank it is stamped Imported Briar over Italy. The pipe is meant to be smoked with the perforated, rounded cape pointing downward. That is why the stamping is the way it is. If the pipe is held otherwise the stamping is upside down. If the pipe is inverted it can be set upright on a desk or table on the flat top cap and act as a sitter pipe. The pipe is 5 ¼ inches from the front of the bowl to end of bit. The diameter of the outer bowl is 1 3/8 inches. The chamber diameter is just over 5/8 inch and depth is over 1 ¼ inches with both the top and bottom cap removed. The pipe is lit from the bottom and the wind cap cover is screwed in place. I think that more tobacco can be fed in from the top of the bowl with the flat cap removed thus making the pipe a PERPETUAL DRYSMOKER.

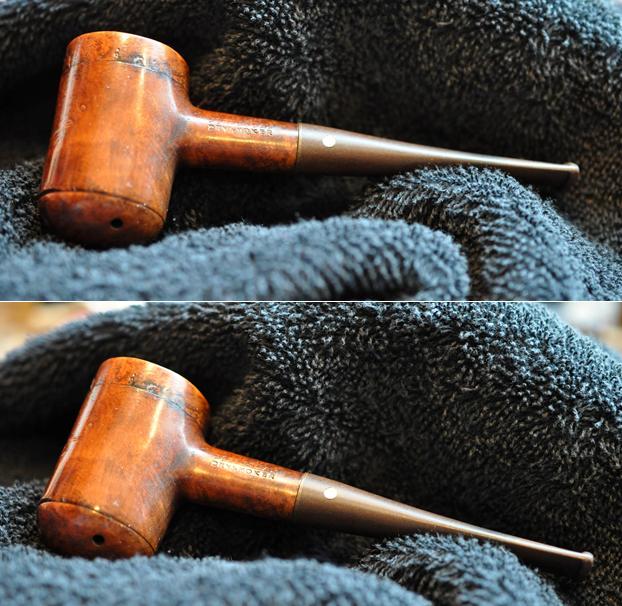
The pipe my brother Jeff picked up is shown in the next photos that he took of it before cleaning it and sending it to me in Vancouver. You can see some darkening in the finish around the flat cap on the bowl and some general wear and tear to the finish as a whole. The bowl has quite a few fills in the shank, the left and right front sides and the crowned perforated bottom cap. The stem was oxidized quite heavily and the diameter of the shank and the diameter of the stem did not match.dry2Jeff took some great photos of the bowl taken apart. Contrary to what Tony and Stan mention in the quote article from the website all the parts are present with the pipe. There are no additional pieces needed to make the pipe functional. The first two photos show the rounded bottom cap and the flat top cap removed from the bowl. You can see the wooden threads on the inside of the bowl in the first photo where the bottom cap screwed into it. The second photo shows the threads on the outside of the bowl where the flat top cap screwed onto it. The completed pipe resembled a salt or pepper shaker to my mind – a unique and interesting smoking device. Both caps were darkened by smoking but appeared to be clean. There was a small crack in the rounded bottom cap but it did no effect the fit in the bowl.dry3He also took some photos with the parts laid out together to give an overall idea of what the pipe looked like.dry4My brother also included some close up photos of the sides of the bowl to show the condition of the finish and what would need to be done to clean it up. He included a photo of the flat top cap to show the remarkable grain underneath the staining and grime.dry5 dry6The next two photos show the stamping on both sides of the shank. The third photo shows the brass circle R logo on the stem and also the brass spacer in between the stem and the shank.dry7 dry8The final two photos Jeff included showed me the condition of the stem. It looked really good other than the oxidation. There was no tooth chatter or tooth marks in the surface. The only issue I would need to address was the mismatched diameter of the shank and the stem.dry9My brother did a really thorough job cleaning up this old pipe. When it arrived in Canada the inside of the bowl and both caps was really clean. He had scraped out the light cake in the bowl and cleaned out the mortise and airway in the stem and shank with alcohol, cotton swabs and pipe cleaners. He cleaned off the exterior of the bowl and was able to remove much of the grime on the surface. The brass space was oxidized but would clean up easily when I worked on the diameter of the stem. I took the next four photos to show the condition I found the pipe in when I unpacked it here in Vancouver.dry10 dry11I took the pipe apart and took photos of the parts of the bowl – the centre core, the rounded bottom cap and the flat top cap. In the photos the core is flat side up in the first one and rounded side up in the second one. The bowl and caps were very clean and you could see raw briar inside all of the parts which led me to think that the pipe had not been smoked often.dry12I took some close up photos of the stem to record its condition as well.dry13The fit of the crowned bottom cap to the edge of the core part of the pipe had some damage to it that did not allow the cap to seat tightly against the edge of the core. I topped it with 220 grit sandpaper on the topping board until the cap fit snugly.dry14I put the cap back in place and wiped the bowl down with acetone on cotton pads to remove the finish. The fills on the bowl were dimpled so they would need to be repaired with briar dust and super glue.dry15 dry16With the finish removed I could better assess the darkened areas around the sides and bottom of the flat cap. I could also see areas that needed to be sanded around the edges of the rounded bottom cap also. I sanded the entire pipe with 220 grit sandpaper to remove the damaged areas and smooth out the transitions between the core and the caps. I also smoothed out the edges of the fills to prepare them for repair later in the process.dry17 dry18With that part finished I needed to rework the shank/stem diameter. The right side of the shank was narrower than the right side of the stem. With the stem removed it was easy to see why. That side of the briar shank was thinner in terms of the thickness of the walls of the shank than the left side. The red circle shows the side that needed to be taken down.dry19I used the Dremel with a sanding drum to take down the excess vulcanite and brass of the spacer.dry20I cleaned out the areas around the fills and removed any of the loose debris around them. I rebuilt the areas around the fills with a mixture of clear super glue and briar dust. I overfilled the repairs to allow for shrinkage. I sanded the repairs smooth to match the surface of the bowl.dry21I sanded the repairs smooth and then polished the areas with micromesh sanding pads. I wet sanded the repaired areas with 1500-2400 grit sanding pads and dry sanded them with 3200-12000 grit pads. I wiped the bowl down with a damp cloth. I stained the bowl and the caps with dark brown aniline stain and flamed it to set it. I repeated the process until the coverage was even.dry22 dry23I buffed the bowl with Blue Diamond polish on the buffing pen. I gave it several coats of carnauba wax and buffed it to a shine.dry24 dry25I sanded the stem with 220 grit sandpaper to smooth out the scratch marks on the vulcanite. I polished it with micromesh sanding pads – wet sanding with 1500-2400 grit pads and dry sanding with 3200-12000 grit pads. I rubbed the stem down with Obsidian Oil after each set of three pads. After the final coat of oil I set it aside to dry.dry26 dry27 dry28I buffed the pipe with Blue Diamond once more and then gave the bowl and stem multiple coats of carnauba wax. I buffed it with a clean buffing pad to polish it and then by hand with a microfibre cloth to deepen the shine. The finished pipe is shown in the photos below. Some of the character marks of the pipe that came to me still show and I am sure could tell a story if they were able to speak. I like the finished look – the marks and all give the pipe a sense of history and time. It is not a bad looking old pipe considering that it has traveled from the 1940s into 2016 and who knows how much longer. Thanks for looking.dry29 dry30 dry31 dry32 dry33 dry34 dry35 dry36

One of my favourite GBD Shapes and Finishes – a Prehistoric 269 Bulldog


Blog by Steve Laug

After refurbishing a lot of pipes over the years I have come to opinions about pipe brands and shaped. To my eye certain brands really get a certain shape and really nail it perfectly. To me the GBD Bulldog, shape 269 is one of those shapes. To me it is the quintessential straight shank bulldog. Others do it well but GBD absolutely gets the shape. Add to that fact that certain finishes have also grown on me over the years and one of those is the GBD Prehistoric sandblast. You combine the finish and the shape components on this pipe and I have a real beauty on the restoration table today. My brother is also becoming a die-hard GBD fan so when he saw this one he decided it was one to go after. Needless to say he got it. He took some photos of the pipe before he cleaned it up to send up to me in Vancouver. I have included those below.gbd1The finish on the pipe looks to be in excellent condition. Later close-up photos will show the grime and dust in the grooves and crevices of the sandblast but there are no chips or nicks in the briar. The bowl had remnants of tobacco in the bottom and the cake had overflowed on to the rim top. The curved bevel of the Prehistoric smooth rim was thickly tarred and caked. It was hard to tell from the photos if there were any nicks or deep scratches in the rim. I have found that the thicker the cake and tars on the rim the more likely it is that I will find the rim to be pretty pristine underneath. The stem was deeply oxidized and the GBD logo insert on the stem had been buffed to death but the fit of the stem to the shank was perfect. There was only light tooth chatter and a few scratches on the top and underside of the flat portion of the stem. The photo below gives a clear picture of the condition of the rim and the cake in the bowl.gbd2The sand blast on the heel of the bowl was deep and craggy and the contrast of browns in the stain really highlighted the layered look of the blast.gbd3The stamping on the left underside of the shank in a smooth panel is very readable and sharp. It reads GBD in the oval over Prehistoric in Germanic script. Next to that it reads London England over the shape number 269. The second photo below shows the over buffed roundel in the stem. It is still readable but is quite flattened and broadened. I will have to see if I can clean that up a bit in the process of the restoration – or at least not damage it any further.gbd4The next two photos show the top and underside of the stem. The oxidation is quite heavy and deep in the vulcanite. There is some light tooth chatter and scratches on the stem near the button and on top of the button on both sides but no deep tooth marks.gbd5My brother is getting really good at cleaning up these old timers and I have to say I am getting spoiled at getting pipes that I don’t have to ream and scrape to clean before I can start the restoration process. In this case he scrubbed the briar with Murphy’s Oil Soap and got rid of the grime and dust in the crevices and removed most of the buildup on the rim top. He reamed the bowl and scrubbed out the mortise and the airway in the shank and stem with alcohol, cotton swabs and pipe cleaners. When I received it the pipe was clean and ready to restore. The briar was dry from the scrubbing and the removal of all of the oils. It appears to have lost some of the rich colour but I have learned that once I begin to work on it the life begins to come back to the briar so I was not too concerned. The oxidation had also really risen to the surface of the stem and looked ugly. I took the next four photos to show what the pipe looked like when it arrived.gbd6 gbd7I took a closeup photo of the rim top to show what it looked like when I received it. He had been able to remove the buildup and caking on the rim but there was still some darkening that needed to be dealt with. I also took closeup photos of the stem to show how the pitted and oxidized surface looked before I started. This was going to be a tough stem to clean up.gbd8 gbd9I decided to start with the rim top. I started polishing it by wet sanding with 1500-2400 grit micromesh sanding pads. I wiped it off with a damp cotton pad and dry sanded it with 3200-12000 grit pads. The rim began to take on its original sheen and the darkening and rim damage was removed.gbd10I gave the bowl a light rub down with olive oil and it absorbed it quickly into the dry and lifeless feeling briar. I buffed it by hand with a soft microfiber cloth and took the next set of photos to show what a little oil will do to a dry and thirsty finish.gbd11 gbd12I sanded the stem with 220 grit sandpaper being very careful around the GBD roundel on the stem. I was able to remove much of the surface oxidation on the stem and I started to see the black stem peeking through.gbd13I decided to try several of the stem polishes I have around here to try to break through the oxidation. I started with Denicare Mouthpiece Polish which is a very gritty and cuts through the oxidation and helps polish the stem. I followed that with the Before & After Polishes which are also gritty but each of them the Fine and the Extra Fine are less so than the Denicare polish. While they worked well overall and cut through a lot of oxidation it took much scrubbing with cotton pads to polish it to the place the stem is in the photo below.gbd14I still needed to polish the stem further with micromesh sanding pads – wet sanding with 1500-2400 grit pads and dry sanding it with 3200-12000 grit pads. I rubbed it down after each set of three pads with Obsidian Oil. After the last set of pads I gave it a final coat of oil and set it aside to dry. gbd15 gbd16 gbd17I buffed the bowl rim and the stem with Blue Diamond on the buffing wheel to shine it further. I gave the stem and the bowl rim multiple coats of carnauba wax on the wheel and hand applied Conservator’s Wax to the sandblast bowl sides and shank. I buffed the entire pipe with a clean buffing pad, carefully buffing around the stamping and the brass roundel on the stem. The finished pipe is shown in the photos that follow. The overall appearance of the pipe is very good. In some of the close up photos the light shows me some spots along the crease of the button where the stubborn oxidation did not all come clean. Ah well. It is one of those that I think I will revisit repeatedly over the course of its life with me. Thanks for journeying with me on this troublesome oxidation removal process. Thanks for reading. gbd18 gbd19 gbd20 gbd21 gbd22 gbd23 gbd24 gbd25

A Tiny Salesman Pipe – What a Contrast to those Giant House Pipes


Blog by Steve Laug

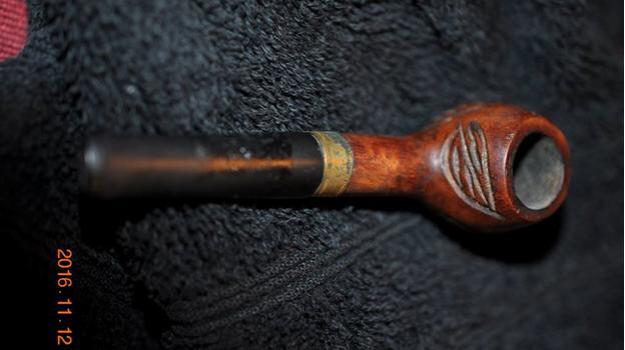
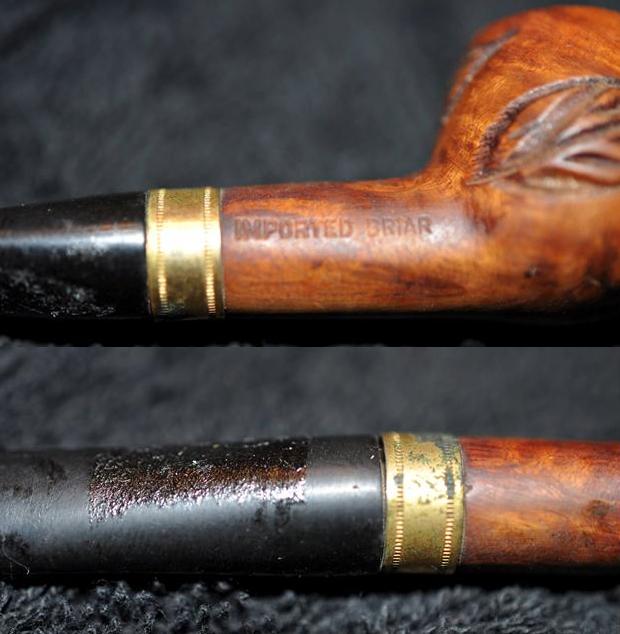
Yesterday and today I have been working on two giant pipes – two House Pipes. The first was a CPF French Briar Giant and the second was a KBB Yello-Bole 3068C Giant. Both were over 10 inches long with at least a 2 inch bowl. I have written about both of them on the blog. You can read them by clicking on the name of the pipe above as they have been linked to the appropriate blog. This afternoon I decided to do something a little different. In the latest box my brother sent he included a tiny little pipe. It is 3 ¼ inches long, 1 inch tall, outside bowl diameter 7/8 inches, inside bowl diameter 7/16 inches. In the photo below you can see it in comparison to the big Yello-Bole 3068C. It is minuscule.tiny1I took a photo of the pipe between my thumb and forefinger to give an idea of the size in hand. What do you think? Would you ever smoke a pipe this tiny? It is fully functional.tiny2My brother took some photos of it to show the condition when he got it. You can see that it was in rough shape and had been smoked quite a bit. Pretty amazing in my opinion as the bowl is the size of a small thimble. The bowl is carved with tobacco leaves around all sides – front, back, right and left. The bottom of the bowl is smooth as is the rim. The finish is in rough shape with grit and grime in all of the grooves, a dark spot on the underside of the bowl and darkening at the rim with the inner edge slightly out of round. There is a small brass band around the shank of the pipe that has a set of rings around it on the inside and outside edges. In the first photos that my brother took before cleaning it you can see the oxidation and what looks like damage to the band. The stem also appeared to be in rough shape.tiny3 tiny4My brother took a few close-up photos that show the condition of the pipe and categorically show that it had been smoked quite a bit for the doubters among us. The first photo shows the only stamping on the pipe – Imported Briar on the right side of the shank. It also shows some of the oxidation on the band and intricate rings around its edges. The second photo shows how the stem is not aligned in the shank due to the dirtiness of the shank and also the condition of the stem. It appears that there some glue on the stem from a label that was on the pipe at the antique shop where he purchased it.tiny5The next photo shows the rim with a cake in the bowl and the damaged inner edge the rim on the lower left side of the photo. The second photo gives a good picture of the carved leaves on the bowl sides and back. They had a similar etching pattern around the edges of the leaves as those on the twin rings on the shank band.tiny6At this point you might well be wondering what the point is in investing time and effort into the restoration of this small bit. It takes as much work to clean and restore a tiny pipe as it does a big one and the steps and process is the same regardless of size. Though it is a good question there is something singularly interesting in these small pipes that were used by salesmen in their sales routes through city tobacco shops. This one is particularly unique in that I have never seen one with this attention to detail. Soooo… the short of it is that between my brother and I we decided to clean it up and restore this bit of tobacciana.

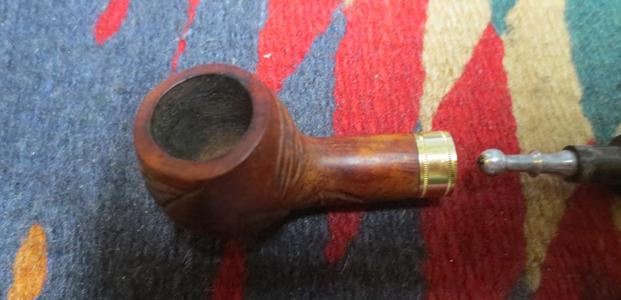
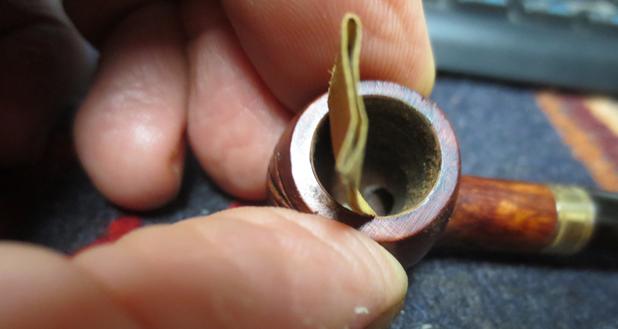
Jeff did his usual thorough job in cleaning if this tiny little apple. He reamed it with a Savinelli Fitsall Pipe Knife (and by the way it truly does fit all) to remove the cake. He scrubbed the surface of the bowl and rim with Murphy’s Oil Soap and a tooth brush to remove all of the grime. He used the soap on the exterior of the stem and the band with the tooth brush and was able to remove all of the grime and glue that remained on the stem and the oxidized portion of the band. He cleaned out the mortise and the airway in the stem and the shank with alcohol, cotton swabs and thin pipe cleaners. When the pipe arrived in Vancouver it looked like a different pipe.tiny7 tiny8When I took the pipe apart you can imagine my surprise when I found tiny stinger in the end of the tenon. It was a typical ball and slot style stinger with an open slot on the top side of the stinger allowing airflow into the stem. Jeff had cleaned up the stinger so that was polished and none of the typical tars and oils that collect on these contraptions was present.tiny9He had been able to clean up the band so that it shone and the rim top was actually quite clean. The damaged area on the back right side of the inner edge was not too bad and would be able to be cleaned up easily.tiny10The stem was actually in very good condition. The glue on the underside from the label had come off nicely. There were no tooth marks or chatter on the stem at all. A light polishing would make it like new.tiny11I used a folded piece of 220 sandpaper to clean up the damage on the inner edge of the rim. It did not take too much and the nicked area was removed and smoothed out.tiny12I polished the briar with micromesh sanding pads – dry sanding with 1500-12000 grit pads. I wiped the briar down with a damp cloth after the polishing and then buffed it lightly with a soft cloth.tiny13I polished the stem with micromesh sanding pads – wet sanding with 1500-2400 grit pads and dry sanding with 3200-12000 grit pads. I rubbed the stem down after each set of three pads with Obsidian Oil and after the last coat of oil I set the stem aside to dry.tiny14 tiny15 tiny16I lightly sanded the burn spot on the bottom of the bowl with 220 grit sandpaper and buffed it with red Tripoli to minimize the spot. I buffed the bowl and stem with Blue Diamond on the buffing wheel and then gave the pipe multiple coats of carnauba wax. I used a light touch on all buffing of the bowl so as not to get build up in the grooves of the carved leaves. I buffed the pipe with a clean buffing pad and by hand with a microfibre cloth to deepen the shine. The finished pipe is shown in the photos that follow. It took as much work as a full-sized pipe to bring it back to life – though in proportion. Personally I think it was worth the effort. It is a fine piece of tobacciana history and I sure wish it could talk and tell its story. I wondered how it ended up in Boise, Idaho and where it was before then. At least the part of the story from Boise to Idaho Falls and then to Vancouver in Canada has now been recorded. Thanks for looking.tiny17 tiny18 tiny19 tiny20 tiny21

Refreshing Another Giant – a KBB Yello-Bole Imperial 3068C Bent Billiard


Blog by Steve Laug

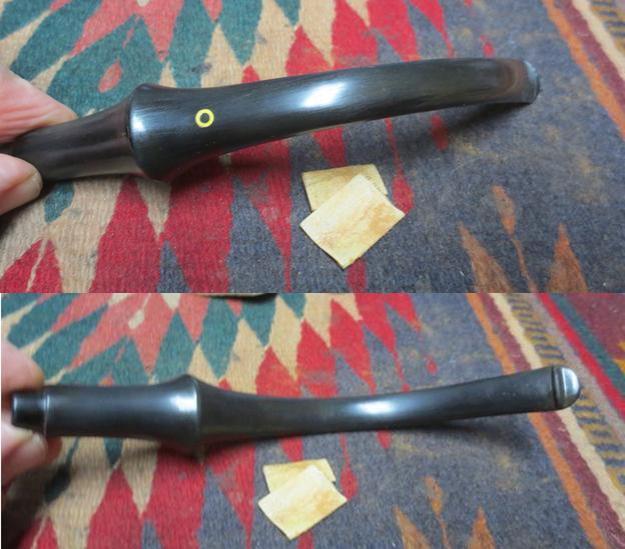
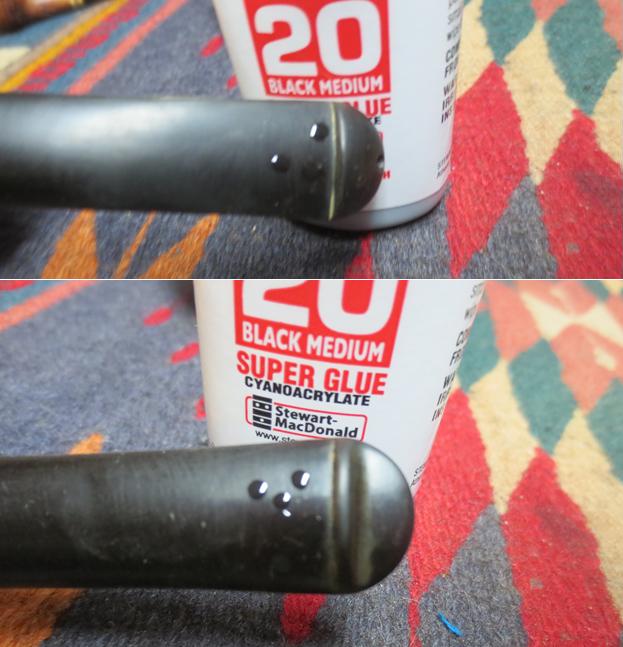
When I cleaned up a previous KBB Yello-Bole Imperial 3068C for a reader of the blog my brother immediately was struck by the beauty of the old pipe. He decided he would find one for me that matched the one I cleaned up for the reader. If you want to read about the cleanup of that one here is the link: https://rebornpipes.com/2016/11/10/breathing-life-into-a-huge-kbb-yello-bole-3068c-bent-billiard/. The 3068C is a large pipe. It is reminiscent of the WDC Wellington in many ways but to me there is a simple elegance to the lines of the 3068C that are more smooth and beautiful. This is another giant pipe. The dimensions are: length 10 inches, height 2 ¼ inches, outer diameter of the bowl 1 ½ inches, inner bowl diameter 7/8 inches. I took a photo of the pipe in hand to give an idea of the size of this old giant.imp1As opposed to the other 3068C I cleaned up this one was in remarkably good shape. The shiny varnish coat actually was perfect with no peeling or nicks in it. The grain shone through and was a great mixture of birds-eye and cross grain. The Yello-Bole Honey Cured coating still showed on the bevel of the inner rim and in parts of the bowl. The rim surface had some very small dents or scratches in it but they did not seem to break the finish on the bowl. There was a light cake in the bowl. The nickel ferrule was oxidized and lightly scratches but otherwise undamaged. The stem had the classic older Yello-Bole circle on the top of the stem just behind the saddle and was lightly oxidized with minimal tooth chatter on the top and underside of the stem at the button.imp2 imp3My brother took the above photos and the ones that follow to show the overall condition of the pipe. The next two close up photos show the rim top and inner rim bevel. The Yello-Bole Honey Cured coating can be seen on the edge of the bowl and going down into the bowl. You can also see the small dents in the rim and the light grime that had built up on the surface of the rim.imp4The next two photos give a good idea of the grain that shone through on this old pipe. The front and back of the bowl has some amazing birds-eye grain and the sides, rim and bottom show some really nice cross grain.imp5The stamping on the shank was sharp and readable. The left side bore the KBB cloverleaf logo with Yello-Bole over stamping that read Reg.U.S.Pat.Off. Beneath that was the line stamping in script Imperial. Finally underneath all of that was stamped Cured with Real Honey. On the aluminum ferrule cap there was a remnant of the KB&B cloverleaf. It is interesting to me that while all Yello-Bole pipes are stamped with KBB (minus the ampersand &) in a cloverleaf on the shank both this pipe and the previous one had the KB&B cloverleaf on the ferrule. I wonder if the company made one size fits all with the ferrules and used them on both Yello-Boles and KB&B pipes. The right side of the shank is stamped Real Bruyere over the shape number 3068C.imp6The final two photos that my brother included show the tooth marks and chatter on the top and underside of the vulcanite stem at the button. The mild oxidation is also visible in the photos.imp7My brother did the necessary cleaning on the pipe – reaming and cleaning out the mortise and the airway in the stem and shank. I cleaned off the grime on the finish and wiped down the stem. When I received the pipe it looked be in excellent condition and would not take a lot of work to refresh it. I took the next four photos to show what it looked like when it arrived in Vancouver.imp8 imp9I took some close up photos of the rim and the stem to show the condition. The rim was in excellent shape and Jeff was able to clean up the inner bevel on the rim to reveal the Yello-Bole Honey Coating. The stem photos show the oxidation and the small tooth marks and chatter on both sides of the stem near the button.imp10 imp11I sanded the oxidation on the stem with 220 grit sandpaper to remove the brown topcoat that it had and also worked over the tooth chatter and tooth marks on both sides.imp12I used drops of medium viscosity black super glue to fill in the small tooth marks on both sides of the stem. They are shown in the photos below. The small black spots are the super glue repairs to the stem surface. You will note that there were more issues on the underside of the stem than the top side.imp13Once the repairs were dry I sanded them back to the surface of the stem with 220 grit sandpaper.imp14I polished the sanded spots by wet sanding with 1500-2400 grit micromesh sanding pads.imp15I wet sanded the entire stem and continued to sand the repaired areas with 1500-2400 grit micromesh sanding pads. I rubbed the stem down with Obsidian Oil and then dry sanded it with 3200-12000 grit pads. I rubbed it down with oil after each set of three pads and after the final set I gave it a last coat of Obsidian Oil and set it aside to dry.imp16 imp17 imp18The nickel ferrule had a lot of tiny scratches in the surface of the metal. I sanded it with micromesh sanding pads to polish out the scratches and raise a shine in the nickel.imp19I polished the briar with 3200-12000 grit micromesh sanding pads to raise the shine and smooth out the small scratches on the sides and bottom of the bowl as well as the rim.imp20 imp21 imp22I buffed the bowl and stem with Blue Diamond on the buffing wheel to further polish the briar and vulcanite. I gave the stem multiple coats of carnauba wax and buffed the bowl and stem with a clean buffing pad to polish and raise the shine. I hand buffed it with a microfibre cloth to deepen the shine. The finished pipe is shown in the photos below. It turned out to be a very beautiful pipe that needed just a few touches of TLC to bring it to its fullest. It is another large pipe that would make a great reading or house pipe. It is comfortable in hand and the grain is interesting enough to give hours of observation pleasure. Thanks for looking.imp23 imp24 imp25 imp26 imp27 imp28 imp29 imp30

Refreshing an old giant – CPF French Briar Bent Billiard


Blog by Steve Laug

I have always heard and read that during WWII years it was virtually impossible to get briar in the US and rubber for stems was at a premium. During those years, Mountain Laurel and Manzanita – close kin to Mediterranean Briar – were used. The bowls have a different appearance than briar – the grain on the bowl sides and rim are very different. The stems were often made of repurposed rubber and I have seen bits of metal in the cast rubber of the stems. While that is interesting information the next pipe on the table is far older than WWII. But it could be made of Laurel and it certainly had bits of metal in the solid rubber stem. It came from my brother as well. It is a CPF French Briar bent billiard. It is a large pipe – the length is 11 inches, the height is 2 ¼ inches, the outside diameter of the bowl is 1 ½ inches and the inner diameter is 7/8 inches and the depth of the bowl is 1 9/16 inches. I took the next photo to give an idea of the size of the pipe when I received it.cpf1Don’t you ever wish these old pipes could talk? They could certainly tell some amazing stories of their journeys. My brother wrote to tell me that this old CPF Giant was found in an antique store in Idaho Falls, Idaho. The owner had told him that the pipe was owned by an artist who strictly used it as a art prop… never smoked it. That’s why it was in great shape for the age. My brother took some photos of the pipe before he did his clean up and sent it to me. The finish was in decent shape. There was some spottiness to the finish but no deep nicks of scratches. The rim had overflow from the cake in the bowl that was thick on the entire surface. The metal band had some scratches and appeared to have rotated on the shank in the photos showing that it was probably loose. The stem was clean with minimal tooth chatter near the button with a little wear on the top and underside of the orifice button. There was some oxidation on the rubber.cpf2I have restored quite a few CPF pipes in the past and did a blog on the historical background of the brand. You can read the entirety at this link: https://rebornpipes.com/2013/04/14/some-reflection-on-the-historical-background-on-cpf-pipes/. I have summarized part of it in what follows to connect this pipe to the history of the brand.
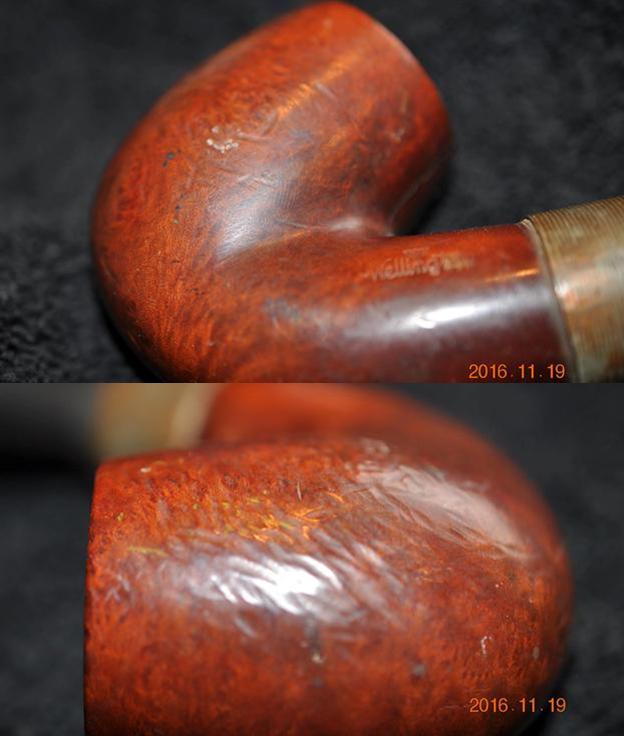
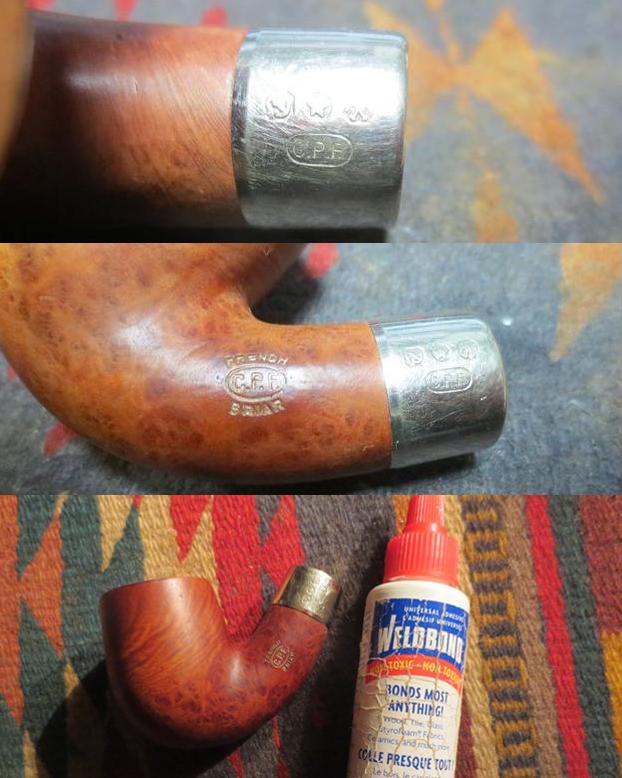
One of the secondary hobbies to pipe refurbishing that I enjoy doing is to research the history of a particular brand or make. In a recent EBay lot I bought there were 3 pipes that were stamped with the CPF logo – CPF in an oval with the word FRENCH stamped in an arch above the oval and the word BRIAR stamped in an arch below the oval. I had heard that the CPF stood for a variety of names from Consolidated Pipe Factory to Colossus Pipe Factory and even Chesterfield Pipe Company. There was a wide range of conflicting information available on the websites and forums that I read while looking into the brand…”

“…CPF in the logo stands for Colossus Pipe Factory. The brand was purchased by KB&B sometime between 1884 and 1898 and it continued until 1915. That time frame gives help in dating some of the older CPF pipes you or I might find. It can be said that prior to the dual stamping it is fairly certain that the pipe is pre-1884 to 1898. After the dual stamping it can be placed post 1898 until the closure of the brand line in 1915. CPF made beautiful pipes. I believe Sam Goldberger was correct in his assertion that the carvers who made the pipes were of European training and used the classic shapes and well-aged briar.”

Armed with that information I should be able to narrow down the period in which the pipe was made. Since the pipe and the ferrule both bear only the CPF logo I can safely say the pipe was made before the time period mentioned above as sometime between 1884 and 1898 when the CPF company was sold. I also know that from 1898-1915 all of the pipes that came out of the factory bore a dual CPF/KB&B stamp. The fact that this one does not puts the date of manufacture before or around the early 1880s. It is an old pipe.

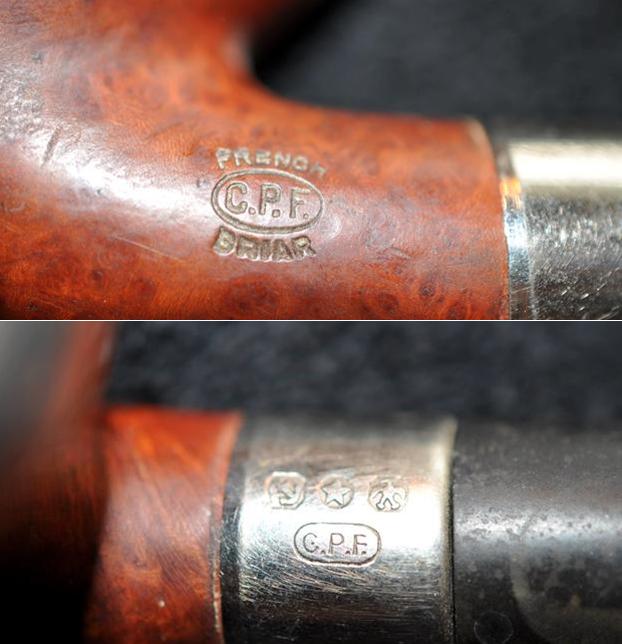
My brother took some close up photos of the pipe. The first two show the grain on the bottom of the bowl. It is a mixture of birds-eye and cross grain that is really scrambled up. I have not seen the kind of grain patterns that show up on just one side of this old timer. It is the graining pattern that makes me wonder if I am really dealing with briar here. The third photo shows the bowl and the rim. You can see the thin even cake and the buildup of tars and oils on the top of the rim. The internal and external edges of the rim appeared to be in excellent condition.cpf5cpf6The next two photos show the stamping on the left side of the shank and on the ferrule. The shank reads C.P.F. in an oval with French above the oval and Briar below the oval. The stamping is filled with gold gilding. The stamping on the ferrule has three hallmarks – an anchor, a star and an eagle which from previous research on this brand are determined to be faux hallmarks and are there for looks rather than giving pertinent information on the band. Beneath the hallmarks is the C.P.F. oval.cpf7The stem was lightly oxidized and the orific button on the end had some chips missing on the top and bottom sides. The underside of the stem was stamped Solid Rubber. From what I could find online the Solid Rubber stamp was originally used when rubber or vulcanite started becoming popular for pipe stems in the mid to late 1800s. I have found from working on them that solid rubber stems are different from vulcanized rubber stems. They seem to have less oxidation and seem denser in composition. They are heavier that vulcanite stems that are the same size as well. I have also found that they need to be cleaned differently. Solvents that are fine for vulcanite can cause hard rubber to “ripple”. They require a little extra care when performing maintenance.cpf8My brother did a great job cleaning the pipe up. He reamed the bowl and cleaned off the buildup on the rim. All that was left was some darkening. He cleaned out the internals so that when I got it the mortise, airway in the bowl and the stem were spotless. The bowl interestingly enough was not smoked all the way to the bottom. The last half of the bowl was still raw briar undarkened by smoke and heat. I took the next four photos to show what the pipe looked like.cpf9 cpf10I took a closeup photo of the rim top to show what I needed to deal with on that front. The surface was clean but there were some scratches and there were some nicks in the edges of the bowl. There was also some darkening around the inner edge of the bowl.cpf11I also took some close up photos of the identifying marks that I noted above in my description of the pipe. The CPF stamping on the shank was clear but the ferrule had rolled to one side and would need to be glued. The Solid Rubber stamping is also clear on the underside of the stem.cpf12I scrubbed the surface of the briar with acetone and cotton pads to clean off the remaining finish on the bowl and shank. I was careful to avoid the gold stamping on the left shank side.cpf13 cpf14The ferrule had rolled over to the top of the shank. The stamping was on top and should have been aligned with the stamping on the left side of the shank. I removed the ferrule and cleaned up the briar. I reapplied some all purpose glue to the briar and pressed the ferrule back on the shank. I aligned the stamping on the ferrule with that on the shank.cpf15The fit of the stem in the shank was very tight. I used alcohol and cotton swabs to clean out the stain spots on the inside of the mortise. It did not take too much to remove the shiny spots and once they were gone the stem fit better.cpf16I sanded the bowl and shank with a medium and fine grit sanding sponge to remove the scratches and clean up the rim top. I was able to remove all of the nicks and spots on the rim. The scratching on the bowl sides was minimized.cpf17 cpf18I used black super glue to rebuild the damaged portions of the top and underside of the button edge. It took multiple coats rebuild it back to the size I needed so that I could reshape it with sandpaper and files.cpf19When the glue had dried I sanded it with 220 grit sandpaper to reshape it. I wanted it rounded like the undamageed portions of the button. It did not take too much work to reshape it. I polished the stem and button with micromesh sanding pads – wet sanding with 1500-2400 grit sandpaper and dry sanding with 3200-12000 grit pads. I rubbed the stem down with Obsidian Oil after each set of three pads. After the final rub down with oil I set the stem aside to dry.cpf20 cpf21 cpf22I polished the bowl with micromesh sanding pads as well. I wet sanded it with 1500-2400 grit pads and dry sanded it with 3200-12000 grit pads. I wiped the bowl down with a small bit of olive oil on a paper towel and hand buffed it with a soft cloth.cpf23 cpf24I buffed the bowl and stem with Blue Diamond on the buffing wheel. I gave it multiple coats of carnauba wax and buffed it with a clean buffing wheel to raise the shine on the pipe. I hand buffed it with a microfibre cloth to deepen the shine. It is shown in the photos below. It is cleaned and ready to fire up with a fresh bowl of tobacco. It is a beautiful pipe for being over 130 years old. It will be a great pipe for sitting and reading as the large bowl will last a long time. It is also surprisingly light weight for a pipe of its size. Thanks for walking with me through the restoration.cpf25 cpf26 cpf27 cpf28 cpf29 cpf30 cpf31 cpf32 cpf33

Redemption of a Mayfair 1005 Bent Tree Stump Pipe


Blog by Steve Laug

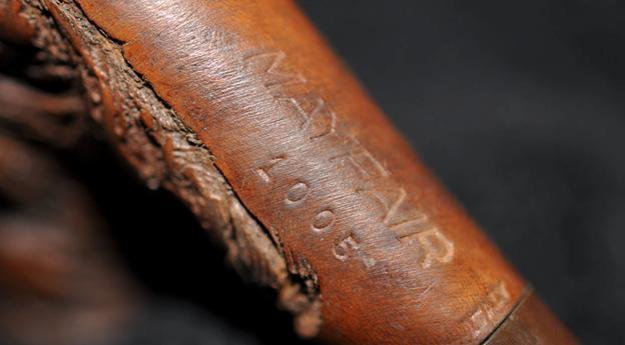
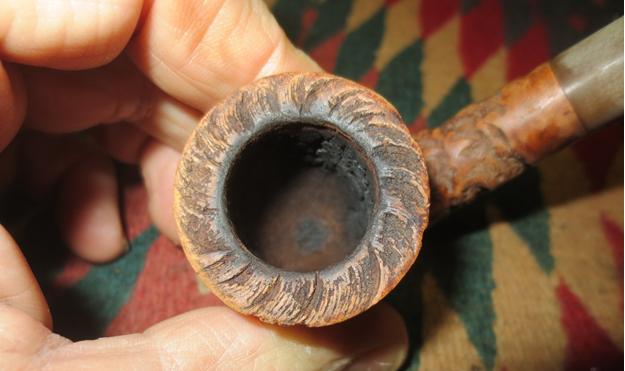
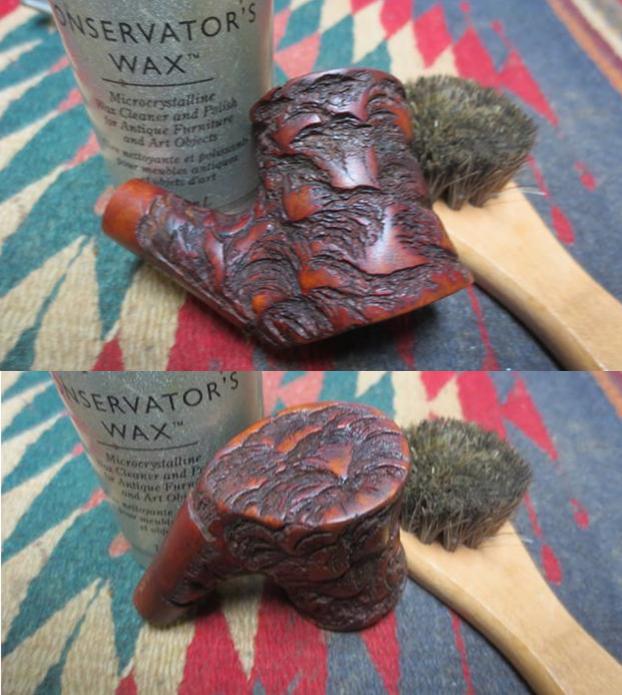
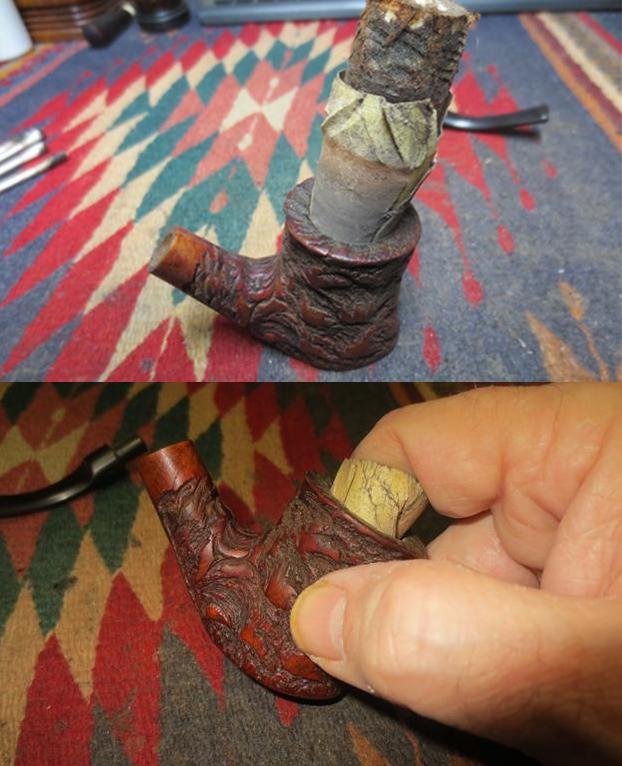
I can see what attracted Jeff to this pipe right away because it also grabs my attention. It has a rugged looking rustication that is somewhere between an aged piece of leather and a gnarled tree stump. There is something very charming about the appearance of the pipe that is for certain. The briar by and large appears to be in decent shape. The stamping on the shank reads MAYFAIR over 1005 with Italy stamped next to the stem shank junction. First thought was it may be a Sasieni or Charatan but I do not think it is. There is something almost Lorenzo like in terms of the look of the carving and the shape. The way the stamping is done and the Italy stamp makes me think that it is a basket pipe made for a pipe shop called the Mayfair Shop. In my I found that there is a shop in Edmonton, Alberta Canada called Mayfair Smoke & Gift Shop. There is also an area on London called Mayfair that at one time housed many pipe and tobacco shops. My own feeling is that the pipe probably came from the shop in Edmonton – the Italy stamp on the shank makes me think that rather than and English shop.may1 may2The next close up photos show more of the carving on the bowl close up and the condition of the rim and cake in the bowl. In the first photo below there is a small chip out of the rim edge that shows up but should be easy to hide in the rustication. The rim top is quite dirty with the overflow of cake from the bowl. It is hard to see under the thick cake on it but there are curved strokes around the rim top that go clockwise. They include larger deeper strokes and fine hairlike strokes that are also in the grooves of the rustication on the bowl sides.may3The next photo shows the stamping on a smooth portion on the bottom of the shank. Does anyone know who made the Mayfair brand of pipe that was stamped like this?may4Other than being deeply oxidized the stem was in decent shape. There were not any tooth marks or deep tooth chatter on the stem surfaces. There was a cursive stylized T on the left side of the saddle portion of the stem.may5My brother cleaned up the pipe and sent it my way in Vancouver. As usual he did a thorough job of reaming and cleaning the inside of the shank, mortise and airway in the stem. They were spotless. I took the next four photos to show what the pipe looked like when it arrived.may6His cleanup of the rim revealed the curved clockwise strokes around the top surface.may7I took a close up picture of the rim top and if you look into the bowl a serious issue that would need further exploring.may8Even after the cleanup the stem looked in decent shape.may9I used a dental pick to probe the serious spidering cracks and crevices on the inside of the bowl. These were far worse than the recent ones that I addressed in the bowl of The Tobacconist Inc. Rhodesian recently using pipe mud (https://rebornpipes.com/2016/12/22/a-reclamation-project-the-tobacconist-inc-made-in-england-rhodesian/). These were deep and intricately burned gouges in the surface of the bowl. I used the Savinelli Fitsall Knife to scrape out as much damage on the walls as possible and without gouging out more and further damaging the surface. The next series of photos show the bowl as I turned it around examining the damage.  may10 may11I have to tell you at this point I was seriously considering throwing the pipe into the discard box and not bothering working any further on it. The stem could be salvaged and parts of the briar may be salvageable for repairs. It really was a desperate looking situation. It appeared to be a bowl on the very edge of being burned out all around – one of the worst messes on the inside of a bowl I had seen. But… and this is where I took a chance. I really like the rustication pattern on the briar and the shape also grabbed me so I decided to try a remedy that Charles Lemon of Dadspipes has used far more than me. I thought it might just work on this old bowl and provide a possible redemption to ongoing service.

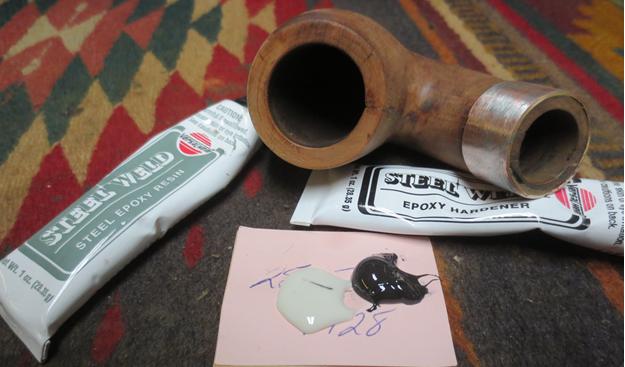
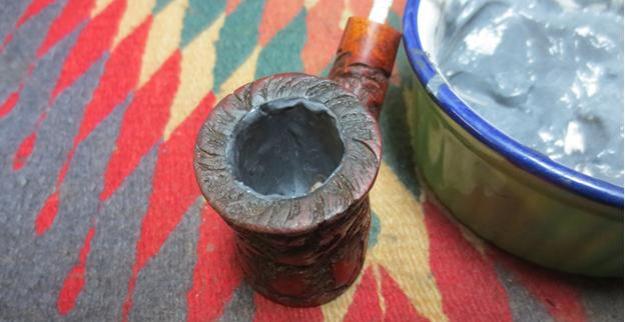
I picked at the wood with a dental pick to remove any loose chips or chunks of briar to get the wood back to as solid a base as possible. I cleaned out the interior of the bowl with a cotton swab and alcohol until I removed all of the dust and debris from the cracks.I wanted a clean surface to work with. I set the bowl aside to dry and went to the hardware liquidation store down the street. I picked up some JB Weld (or rather a brand called Steel Weld which was made by JB Weld). I mixed the base and the hardener on a patch of paper with a wire until I had it well blended. Using a dental spatula I pressed the mixture into all of the cracks on the inside of the bowl. I slathered on (technical term) the coat of the mixture until all the inside walls of the bowl were smoothly covered.may12 may13I dampened a cotton pad with alcohol and wiped off the JB Weld that had gotten on the rim top and inner edge of the bowl. I did not want it to harden as then it would be impossible to remove from the strokes on the surface. I set the bowl aside to let the bowl repair harden. Once it was cured overnight I would sand the surface clean leaving the repair only in the cracks themselves.

Being impatient by nature and by choice, I wanted to keep working on the pipe. I know that I have many more to work on but I wanted to see what the exterior of this old timer looked like once it was restained. So when the internal repair had hardened to touch (about an hour later) I decided to stain the briar. I used a Dark Brown aniline stain and applied it to the briar with a folded pipe cleaner. I flamed the stain to set it in the grooves and grain. I repeated the process until the coverage was what I wanted.may14 may15With the stain coat done I took two photos to show the rim and interior of the bowl to show how the repairs looked before I sanded them down. The JB Weld still needed to cure but you can see how the walls looked at this point.may16I wanted to protect the bowl from the dust and the debris that would fly when I sanded out the bowl so I gave it a first coat of Conservator’s Wax. I buffed it with a shoe brush.may17 may18I set the bowl aside until the afternoon to let the repair cure and turned my attention to the stem. I sanded it with 220 grit sandpaper to remove the oxidation on the surface and smooth out the pitting.may19I polished the stem with micromesh sanding pads – wet sanding the stem with 1500-2400 grit pads and dry sanding with 3200-12000 grit pads. After each set of three pads I gave the stem a rub down with Obsidian Oil. After the final rub down I set the stem aside to dry until I had finished the bowl.may19a may19b may19cWhen I came back to the bowl in the afternoon I took some photos of the interior before I sanded it to show what the dried JB Weld looked like. The surface is rough to the touch and hard. The cracks however are completely filled in.may20I used the Dremel and sanding drum to remove much of the excess fill/repair material. I set the Dremel at the lowest speed and slowly worked it over the inside of the bowl walls. I was able to remove much of the overage that way but I could not get all of the material off. My goal was to leave the JB Weld only in the crevices and cracks in the walls and not on the walls themselves. I wrapped a piece of 220 grit sandpaper around a wine cork, roughened the end to give some leverage on it and sanded the inside of the bowl. This further took back the JB Weld. I finished sanding the inside with a piece of 220 grit sandpaper wrapped around my index finger. When I was finished the cracks were filled and the bowl was smooth to touch.may21 may22I wiped down the inside walls of the bowl  with cotton swabs and clean water and the shank with pipe cleaners and clean water to remove all of the sanding dust and debris left behind by my work in the  bowl. The next photos show the repairs on the walls of the bowl. The bowl is solid and feels undamaged. My next step in the repair is to coat the walls with a mixture of sour cream and charcoal powder – a bowl coating. This will further protect the walls and provide insulation until a cake can be formed.may23I walked down to the local supermarket and purchase a small package of sour cream. I put a spoonful of sour cream into a small bowl and broke open the last of my activated charcoal capsules into it. I mixed it with a spoon until the mixture was a dark grey colour and well blended.may24I know at this point many of you are thinking “sour cream in a pipe”. But that is exactly what  I used. I mixed it well and put it on the walls of the pipe with a dental spatula and spread it evenly across the walls with a folded pipe cleaner. I had inserted a pipe cleaner in the shank to keep the airway clear of the bowl coating. I can assure you after many years of using this mixture – one by the way that is used by many pipe makers – that the mixture dries and has no residual smell or tasted. It is absolutely neutral. It provides a good insulator for the bowl while cake is formed. In this case it also covers the lines of JB Weld in the cracks of the bowl interior so it serves a dual purpose.may25 may26I put the bowl aside to let the bowl coating cure and harden. I let it sit overnight to cure. I knew that once it had hardened it would be completely neutral in smell and taste. This morning the bowl coating had dried to a solid black colour with a little grit from the charcoal. The sour cream smell was gone and the bowl was smooth and black to the bottom.may26a may26bThis morning I gave the bowl several more coats of Conservator’s Wax, buffed it with a shoe brush and finished by buffing it with a clean buffing pad to bring a shine to the smooth and rusticated portions of the bowl. I buffed the stem with Blue Diamond Polish on the buffing wheel and gave it several coats of carnauba wax. I buffed it with a clean buffing pad to raise the shine. I hand buffed the whole pipe with a microfibre cloth to deepen the shine and give the pipe a sense of warmth that this last step gives it. The finished pipe is shown in the photos below. It may seem like a lot of work to redeem this old pipe but the look of the finished pipe says it all to me. This one will be a pleasure to fire up and hold. The tactile nature of the rustication is complex and interesting to hold and study. Would you have done this work on one you have on the table? The only way that you will be able to answer that question is when you lay eyes on one that grabs a hold of your attention. Until then you may wonder at my madness. Thanks for walking with me through this exercise. may27 may28 may29 may30 may31 may32 may33 may34