Monthly Archives: March 2015

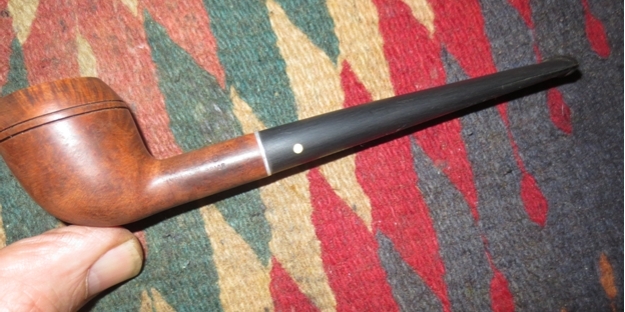
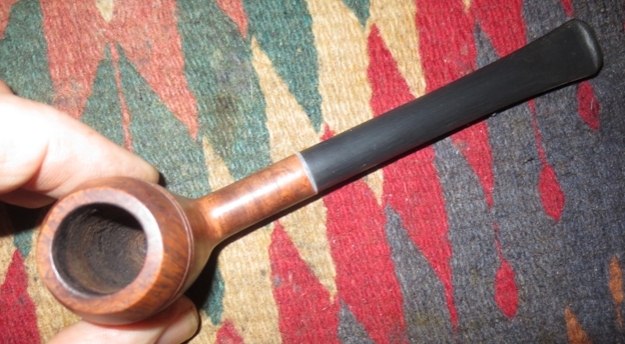
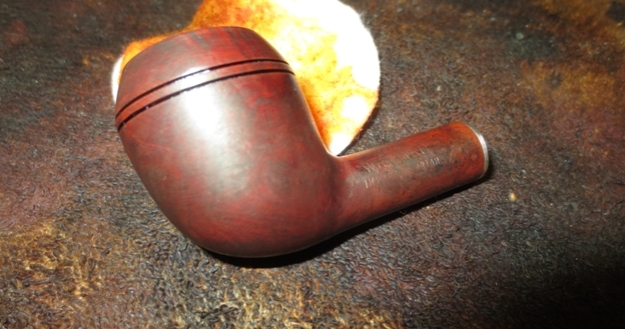
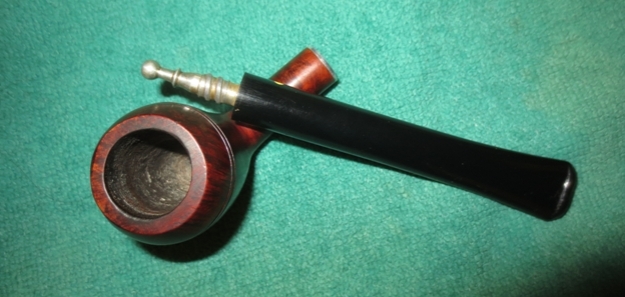
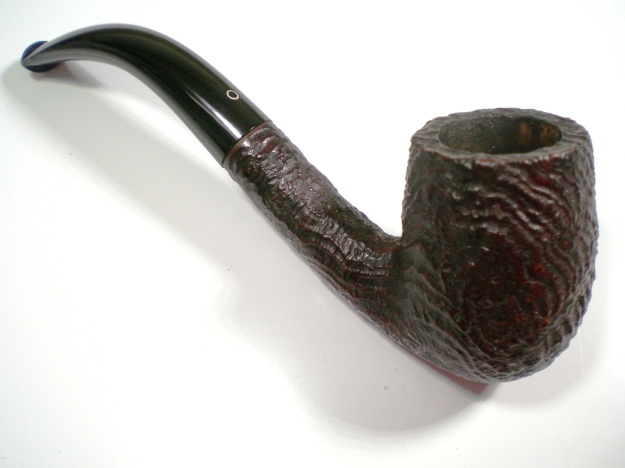
A New Lesson Graces an Albertson Sandblasted Bent Bulldog Restore


Guest Blog by Robert M. Boughton
Member, North American Society of Pipe Collectors
http://www.naspc.org
http://www.roadrunnerpipes.com
http://about.me/boughtonrobert
Photos © the Author

“Every failure is a lesson well learned, every success is a battle well fought, and every friend is a jewel well-kept in one’s heart.”
― Unknown

INTRODUCTION
As a valued friend and mentor, Chuck Richards can be counted on to tell me the truth, always. No matter how special are the occasions when his comments are clear thumbs-up, being thick-skinned, I can say with all honesty that I value more the constructive tips, outright lessons and even contributions (whether requested or not) that this gem of a friend has shared with me during the fleeting past three years since I made my first pipe restoration of a Czech-made La Grande Bruyère mini bent billiard. This openness in my character is fortunate, considering the greater incidence of the latter compared to the former.

Chuck with Victor Rimkus in a rare peaceful moment.

Chuck with Victor Rimkus in a rare peaceful moment.

The only aspect of Chuck’s always invaluable input that sometimes frustrates me, as can happen in particular when two people are friends and see each other often, is his erratic timing. While for the most part Chuck speaks his mind with blunt promptness, he has far more projects in his own shop, not counting the free work he performs for customers at the tobacconist where he works, than I can even imagine. Therefore, he has the odd habit of briefing me on certain pipe restoration intelligence data, pertinent to my Need to Know clearance, crucial to my reputation and consequent success in the business.

By way of example, there was the time early last December when Chuck, after being approached by an unspecified number of my local customers with reports of un-thorough cleaning of the inner stems and shanks of some pipes I had sold to that date, at last brought up the subject. I was not only unhappy to learn that any of my friends and associates who paid money for my pipes were too worried they might “hurt my feelings” by giving me the chance to correct the problem myself; I was still more irked that Chuck failed to warn me after the first instance. [See https://rebornpipes.com/2014/12/10/in-retort-to-claims-of-unclean-restored-pipes-robert-m-boughton/ for the full story.] Of course Chuck then emphasized the importance of retorting, and in one mad 18-hour marathon when my retort kit arrived in the mail soon after, I corrected the problem with every remaining pipe on my sales list, as I have done with each pipe I’ve restored since.

And so, last Friday night at our weekly pipe club get-together I showed Chuck my latest finished projects. He examined them before leaning toward me to tell me discretely of another fellow club member who saw my array of pipes for sale next to his at the monthly Moose Club meeting, where we are free to sell. It seems the gentleman in question, who is getting into the restoration practice, wondered why my pipes (and his own, it turned out) looked “so dull” compared to Chuck’s. I am pleased that I was apprised of the comment soon afterward, but had to wonder why Chuck – who no doubt noticed the same effect long ago – didn’t tell me of the importance of using an un-waxed buffer wheel after each application of the various waxes that can be used to finish pipes.

I had more than usual difficulty grasping the process as Chuck explained it to me, until his third description, when some light in my head snapped on. I understood he was not talking about removing the nice shiny layer of wax applied with such care; he was describing a way to take off the excess wax and firm up the rest so that it would shine even more, not smudge and last longer.

“You won’t believe the difference in the look of the pipe when you use a clean buffer after each wax you put on it,” Chuck told me, smiling in relief and the genuine pleasure he derives from explaining anything pipe-related, when he saw that my head had wrapped around the whole idea.

Again, of course, I remembered Chuck’s work-load and other difficulties, not to mention the bombardment of questions he receives every day from friends and customers. I identified with the high probability that every time he planned to say something it simply slipped his mind.

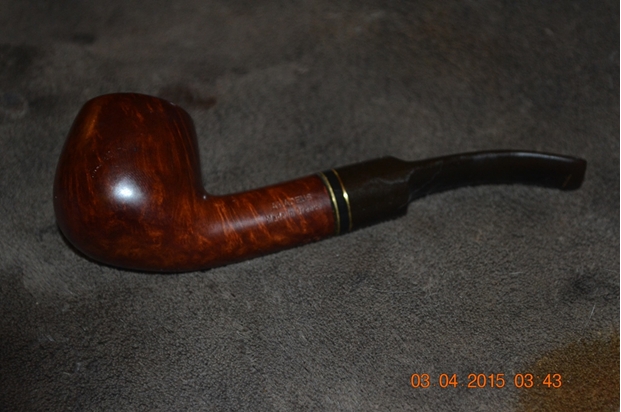
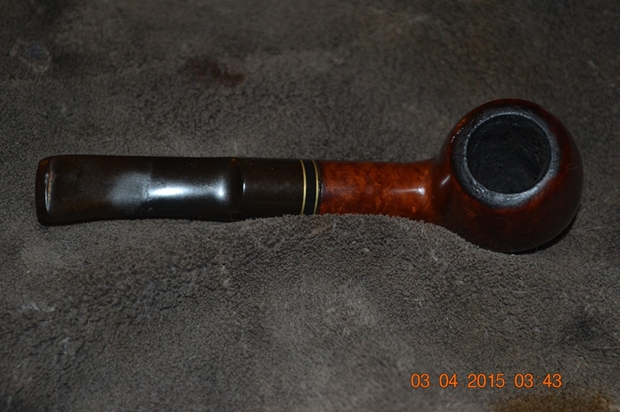
At any rate, this blog concerns a lovely rusticated bent bulldog made by the Belgian company known as Albertson, which, after World War II, was taken over by the Hilson factory. Since that crafter went bankrupt in 1980, the Albertson brand has been continued by the Royal Dutch Pipe Factory.

Considerable work went into this particular restoration, the first opportunity to use my new knowledge of proper pipe waxing. Thank you, Chuck, for being a real friend again. I officially challenge anyone to inspect this bulldog and find anything whatsoever lacking in its inner and outer shimmer.

THE RESTORATION Robert2

Robert3

Robert4

Robert5

Robert6

Robert7

Robert8 When my now customary first step of OxiCleaning the stem was complete, the well-shaped and gently curved stem was clean but covered with green, white and brownish spots. I solemnly affirm that I documented the result with a photo, but it seems to have been lost due to a malfunction of my camera. Likewise, the effects of 220-grit sandpaper on removing the serious tooth chatter that marred both sides of the top of the stem, almost an inch below the lip, are gone. Even the lip had been gnawed and required intense sanding, but at least I avoided Black Super Glue.

I stripped the rusticated briar in Everclear.Robert9 Again, the photos of the bare briar after this process are not to be found, although rubbing with super fine steel wool, then sanding the top of the bowl above the traditional line to make it lighter in color, followed by a thorough micro-meshing of the whole with five grades from 1500-4000 made the wood ready for buffing. The only way I can even begin to explain the absence of these particular photos is to note that all of them were taken in order during a short period of peculiar behavior by the DSLR.

After sanding the chamber with 320-grit paper followed by 200, I retorted the pipe. For the first time, that step required only one test tube of boiled alcohol, thanks to the excellent care by the previous owner and the Everclear soak. I had stained all of it but the top and rim with burgundy boot dye, which I flamed and hand-buffed with 4000 micromesh before resorting to 3600 to heighten the new red tone. Here is the briar when I was almost done prepping it for the final buffs.Robert10 At the last moment, I decided to give the upper part of the bowl and the rim a final sanding with 320-grit paper and re-using the same micromesh progression as before to take it all the way down to its natural light brown color. All was in order to try out my newly-learned wheel buffing technique.

The stem took a little extra work with its extra lines, using the regular red Tripoli followed by White Diamond. I happened to have an extra, new buffer which I then attached to the electric wheel that had held the red Tripoli cloth. Beginning on the briar with a regular white Tripoli buff, I held it up in the light for a better look before I moved to the clean buffer and turned the wood with extra care. Again I held it up to see the change, which, as Chuck had promised, was prominent. Repeating these steps with White Diamond and at last carnauba (since I still need to replace my spent supply of Halcyon II), when the work was done I was truly impressed with the far finer and more solid shine.Robert11

Robert12

Robert13

Robert14

Robert15

Robert16 CONCLUSION
I was fortunate to start with an estate pipe that was well-tended by it prior owner, and I like to think that he would be pleased with its new, sharper two-tone look. My only regret is that now I have to re-polish my entire growing collection of pipes for sale. But I am looking forward to the next monthly Moose Lodge meeting of the pipe club on the third Thursday of April. You can bet I’ll be there, with all of my pipes arranged proudly beside Chuck’s.

Still I wonder…what future comments might make their way to me via my good friend and mentor? Perhaps now my potential local customers might find the good grace and trust to approach me instead.

Restoring a Willard Imported Briar Rhodesian


Blog by Steve Laug

I am finally finishing up the final pipes in the box of gift pipes. This one is a little long stemmed Willard Rhodesian. It is stamped Willard over Imported Briar. It was in pretty good nick. The finish was worn and peeling in some places. There were scratches in the surface of the briar on the sides of the bowl. The bowl was lightly caked with remnants of tobacco clinging to the walls of the bowl. The stem was chewed but no deep marks were in the surface. The stem is that odd nylon like material that was on pipes of this era. It had a threaded tenon and a short stinger that was pretty clean as well. The stem was clean on the inside as was the shank of the pipe. The stem was slightly over turned and had some damage to the nylon of the upper portion of the stem.Willard1

Willard2

Willard3

Willard4 The next two photos show the tooth damage to the top and underside of the stem near the button.Willard5

Willard6 I decided to remove the spotty and peeling finish first. I wiped it down with acetone on cotton pads until the varnish coat was removed. To my surprise there were no visible fills in this piece of briar. The wood actually had some nice grain under the varnish coat.Willard7

Willard8

Willard9

Willard10 I sanded the stem with 220 grit sandpaper to remove the damage on the surface and the tooth marks on the top and underside near the button. I heated the stinger with a lighter to soften the glue so that I could correct the over turned stem. Once it was softened I put it in the mortise and turned it clockwise until it lined up with the bowl properly. I let it cool and harden once again before removing it from the shank.Willard11 I scraped out the slight cake and remnants of tobacco with a pen knife taking it back to bare wood so that a new cake could be built up by the next pipe man.Willard12 I sanded the bowl and the stem with a medium and fine grit sanding sponge to remove the scratches left behind by the sandpaper and then put it back on the pipe and took the next set of photos.Willard13

Willard14

Willard15

Willard16 I stained the bowl with a dark brown aniline stain mixed with two parts alcohol to thin it down and lighten it. I applied it and then flamed it with a lighter to set the stain. I reapplied the stain and flamed it again.Willard17

Willard18 Once the stain dried I wiped the bowl down with alcohol on a cotton pad to even out the stain coat and to make it more transparent.Willard19

Willard20

Willard21

Willard22 I put the stem back on the shank and sanded it with micromesh sanding pads to polish it. I wet sanded with 1500-2400 grit pads and dry sanded with 3200-12,000 grit pads. I rubbed it down with Obsidian Oil between each set of three pads and then again the final time. I did not buff the stem with the buffer as I find that the nylon stems do not do well with the heat of the buffer. I applied some Paragon Wax to the stem and hand buffed it with a shoe brush.Willard23

Willard24

Willard25 I buffed the bowl with White Diamond and Blue Diamond on the buffing wheel and then gave it multiple coats of carnauba wax. The finished pipe is shown in the photos below. It is ready for a long life of delivering a decent smoke to whomever’s rack it ends up gracing. It is a pretty little Rhodesian that looks great.Willard26

Willard27

Willard28

Willard29

Willard30

Sometimes I can’t help myself and have to refinish a new pipe – a Butz Choquin Belami Pocket Canadian


Blog by Steve Laug

When I was in Stuttgart, Germany recently I purchased a petite pocket Canadian made by Butz Choquin. The cost was relatively cheap at 43€. It was stamped Butz Choquin Belami on the top of the shank and St. Claude in an arch over France. I like the contrast stain on the pipe and the fact that it would fit nicely in my coat pocket while traveling in Germany. When I returned to my hotel room I looked it up on the web. I found that it was listed as a Junior Pipe on the Butz Choquin Website and in fact there was a picture of a pipe that looked very much like the one I picked up. (http://www.butzchoquin.com/detail.php?id=BCBELUN5PF4)BC1 I liked the look, the shape and the size of the pipe as soon as I saw it and decided it was a pipe that would commemorate my trip to Stuttgart. There was a sandblast version of the pipe available as well and I looked them both over carefully before choosing the smooth one. I purchased the pipe and a pouch of one of the shop blends called Cigarren-Mezger Vaihinger Mischung Nr. 15 – an English mixture to christen the pipe. It was one of the only shop blends that did not have some kind of fruit topping. I took my newly purchased pipe and tobacco to a coffee shop across the street from the shop and loaded a bowl of the Vaihinger Mischung Nr. 15. I bought a cup of dark hot chocolate and fired up the bowl and sipped the hot chocolate. I was impressed by how well the pipe smoked. It delivered a flavourful and cool smoke from start to finish. Early in the bowl there was a slight charcoal taste from the bowl coating but it soon disappeared into the well rounded English smoke. While I smoked it I looked it over more carefully. Though it was smoking well the finish left much to be desired. It was rough to say the least. After smoking it a few moments I noticed that the stem had oxidized. I would need to think about what to do with the finish when I returned to Canada.BC2

BC3 I smoked the pipe for the remaining week of my German trip and continually looked it over. As I had decided when I bought it the shape was perfect and the taper on the short stem fit well with the overall look of the pipe. It felt good in the hand and was a pleasure to smoke. But the rough finish became increasingly problematic to me. There were a lot of scratches in the briar on the surface of the rim and the rest of the bowl and shank. The contrast stain was nice with the dark black under coat that highlighted the grain and the lighter yellow brown top coat to add depth to the finish. But the pre-staining finish work was severely lacking as the scratches from the initial sanding were tactile and visible. A coat of varnish had been applied to the pipe that not only covered the bowl but also flowed over part of the stem. The varnish on the stem showed up when the pipe was smoked. The stem oxidized in weird patterns around the flow of the varnish. It gave the stem almost a flame pattern with the oxidation appearing from the button forward about a ½ inch along the jagged edges of the varnish coat. I would need to address the finish of the pipe when I returned to Canada.BC4

BC5 I took it to the worktable and took the above photos before beginning to work on the pipe. Though it is hard to really see the roughness of the finish some of the scratches are visible in the photos. The oxidation of the stem is also less visible in the photos than it was in person. I stripped off the varnish using acetone on a cotton pad. I used it sparingly as I wanted to remove the varnish but not the stain. I sanded the pipe with a medium and a fine grit sanding sponge to remove the remaining varnish and also remove the scratches in the briar. I then sanded it with micromesh sanding pads – wet sanding with 1500-2400 grit pads and dry sanding with 3200-12,000 grit pads. I sanded the stem as well with a fine grit sanding sponge and the micromesh sanding pads being careful to avoid the BC logo that was painted on the stem. Once the bowl was smooth I buffed it with White Diamond and then rubbed it down with a light coat of olive oil to enliven the finish and then gave the bowl and stem multiple coats of carnauba wax to protect the finish and vulcanite. I finished by buffing it with a soft flannel buff to raise the shine. I am happy with the finished pipe. Now not only does it smoke well but it feels better in the hand looks more finished to the eye. Sometimes I just can’t help myself and have to refinish a pipe that simply irritates my sensibilities.BC6

BC7

BC8

BC9

BC10 (The apparent scratch on the pipe shown at the top of the photo that runs from the shank across the stem is merely a hair on the lens of the camera.)BC11

Great afternoon in Stuttgart, Germany with Pipemaker James Gilliam


Blog by Steve Laug

For most of the month of March I have been in Europe doing some work for the Foundation I am with. I spent some time earlier in the month in Athens, Greece before coming to Stuttgart, Germany last week. Previous to the trip I had written James Gilliam about the possibility of getting together while I was in Stuttgart. I had some free time on Thursday afternoon so we met up for a bowl or two and a coffee at a local coffee shop. We met and visited for a few hours and talked pipes and pipe making. I learned quite a bit about some of the polishes, stains and tools that James uses and will be hunting them down with the links he sent me later that evening.Sttugart visit I appreciated James making time to get together and enjoyed our visit. We had chatted over the internet on forums and via email previously but this was the first face to face meeting. I have one of James’ pipes – a nice bamboo billiard that I thoroughly enjoy. It is a great smoking pipe. I also have one of James’ restorations – a restemmed Yello-Bole that is also a favourite. I traded him for that a while back and originally was going to sell it. The stem was so nicely made that once I had it in hand I kept it. James makes one of the best stems from button to tenon that I have found. The shaping and button/slot work is excellent and make a very comfortable smoking pipe. His drilling is open and the draw is effortless.
When I contacted James and arranged to meet him in Stuttgart before my trip I went through some of my pipes and chose one that I would give him. The gift pipe, a horn-shaped pipe stamped Little Champion seemed to be the one that stood out. It had a nice blast and a unique shape. It was a little one but it is about the size James makes his pipes. The write up on the refurb on this one can be found here: https://rebornpipes.com/2014/12/24/the-little-champion-057-horn-reborn/ Champ1

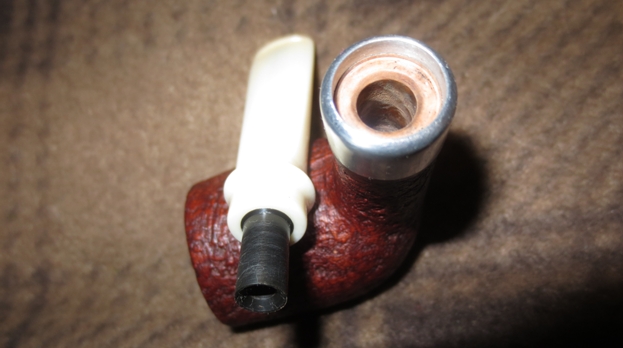
Champ2 We enjoyed some coffee and conversation and James laughingly said that he was smoking his pipes instead of selling them. He had been smoking one of his speckled egg pipes while we visited and a small little billiard lay on the table. It had a lovely shallow blast and an aluminum end cap. The stem was a faux military mount that sat nicely inside the end cap. James had turned the aluminum end cap and polished it until it shone. The ivory coloured polyester stem looked like ivory. The soft colour and the smoothness of the polyester gave the pipe stem a warmth and depth that was beautiful. Then to my surprise at one point in the afternoon James gifted me the little billiard. I could not believe that James gave me this pipe. It is an amazing gift and a great smoking pipe. I have been smoking some aged Louisiana Red in it since I returned from Germany and the size, shape and weight and the craftsmanship have made it an instant favourite. Thanks so much James for the unexpected gift. I look forward to other JSEC pipes joining this one and the bamboo shank pipe in my rack in the days to come.JSEC4
JSEC5

jsec6

jsec7

jsec8

JSEC9

A Restored Orlik Dugout Billiard


Blog by Steve Laug

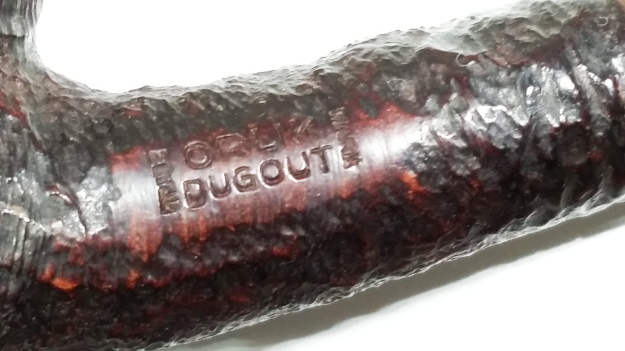
Al Jones’ recent posts on his restorations of two Orlik pipes – one a Sterling and one a Dugout – for John Guss prompted me to take this old Orlik Dugout out of my pipe cabinet and take a few photos. I restored it many years ago now and have smoked it many times since that restoration. The pipe originally came to me via an eBay auction. When it arrived I cleaned up the bowl and the stem. I remember that the bowl was caked and in need of a reaming and cleaning. The shank was dirty and the stem was oxidized. I cleaned both up and waxed and polished the pipe. It came in a worn black leather covered case with a red velvet lining. The pipe fit the case perfectly. There was an indentation for a second stem or a cigarette holder that no longer was present. Some of these older cased pipes came with a vulcanite and an amber stem – this may have been the case here. The blast was originally deep but had been worn over the years.Orlik1 The stamping on the pipe is very clear. It reads ORLIK over DUGOUT with TRADE to the left of the stamping and MARK to the right. The finish appears to almost be a rustication with a sandblast afterwards. It has both a black understain and a brown overstain. The combination of the rustication and blast is what I think gives it the name dugout.Orlik2 The stem is similar to the one that Al cleaned up for John on his Dugout. It has the same shape and look to the button. It has an orific airway in the end of the rounded button on the stem.Orlik3

Orlik4

Orlik5 While the walls are thin on the bowl the pipe smokes cool nonetheless. It is one of my favourite old collectible pipes.

Repaired a couple of Brighams for a friend


Blog by Steve Laug

The pipe at the top of the photo is a Brigham Algonquin shape 265. It is a newer Brigham and has the nylon tenon and system. The second pipe is a Brigham 384 volcano. The stem of that one is shown in the photo below. A friend and reader of the blog, Joe Iacobellis sent me a note to see if I could help him out on these two. He had restored the bowls on both pipes but the stems were giving him fits. The Algonquin was completely restored and he put the stem on the finished pipe to have a look. When he took the stem off the tenon and system apparatus remained in the bowl. It was stuck and would not come out. The two brass dots or pins had come loose from the tenon and though the stem fit well the tenon would not come out of the shank or stay in the stem. The stem on the Volcano was a mess. There seemed to have been a coating of varnish or something on the stem and when he worked on it the surface came off pitted and scarred. He wanted me to help on these two issues so I had him send them to me.Brig1 When I came home from a recent trip for work the pipes were waiting for me. The issues that Joe had mentioned in his email were right on. The tenon on the Algonquin was torn where the pins had come free from the nylon. The tenon was stuck in the shank and would not move. I put the bowl in the freezer over night and let it sit. When I took it out in the morning I used a pair of needle nose pliers to carefully twist the tenon out of the shank. I cleaned out the shank with pipe cleaners and cotton swabs and isopropyl alcohol to make sure that shank was not the issue. I put the tenon back in place on the stem and it was fairly tight. I twisted it back into the shank and it fit well. When I removed the stem the tenon was once again stuck in the shank. I used the needle nose to twist it out again. I used an ice pick to push the pins further out of the inside of the stem so that the surface was smooth. I used some clear super glue and coated the end of the tenon and pressed it into place in the stem.

After the glue set I used the ice pick and a small furniture hammer to tap the pins back into the tenon. I tapped lightly so as not to damage the tenon or the stem. I pushed the stem into the shank and twisted it out several times to make sure that the fit was good and the tenon would remain in the stem instead of the shank. It worked! I then cleaned up the tenon and the stem with micromesh sanding pads to polish it. I buffed it on the buffer with Blue Diamond and then carnauba wax. I gave the rim of the bowl a light coat of cherry stain to bring it closer to a match on the bowl. I buffed the rim and gave it a coat of carnauba. The finished pipe is shown below.Brig2

Brig3

Brig4

Brig5

Brig6

Brig7

Brig8 The stem on the volcano took some work. The surface of the vulcanite was rough and somewhat ridged from the varnish or clear coat on it. I used some 220 grit sandpaper to clean up the surface of the stem and remove the oxidation around the shank/stem junction. I sanded it with a medium and a fine grit sanding sponges. I then wet sanded it with 1500-2400 grit micromesh sanding pads. I buffed it with Tripoli before dry sanding it with 3200-12,000 grit sanding pads to finish polishing the stem. Once completed I gave it a light buff with Blue Diamond and then gave it several coats of carnauba wax.Brig9

Brig10

Brig11

Brig12 Joe, the pipes are finished. I will get them wrapped up and in the mail as soon as possible. I think they came out great and hope you will get a lot of use out of them. Enjoy! Thanks for sending them to me to work on, I enjoyed it.

For the Love of an Amadeus Half-Bent Brandy


Guest Blog by Robert M. Boughton
Member, North American Society of Pipe Collectors
http://www.naspc.org
http://www.roadrunnerpipes.com
http://about.me/boughtonrobert
Photos © the Author

“According to Diotima, Love is not a god at all, but is rather a spirit that mediates between people and the objects of their desire. Love is neither wise nor beautiful, but is rather the desire for wisdom and beauty.”
― Plato (429?–347 BCE), Athenian philosopher, in “Symposium,” 360 BCE

INTRODUCTION
Amadeus may be known best as the 1984 feature film that won eight Academy Awards and was titled after the fourth given (or in this case, chosen) name of the latter 18th century Austrian composer, more often shortened to Mozart. Christened Johannes Chrystosomus Wolfgangus Theophilis Mozart, the often inebriated genius preferred the Latin translation of Theophilis – Greek for “lover of God” – which is Amadeus, derived from amare, to love, and Deus, God. The name also happens to be a Greek pipe brand founded in 1975 by eight artisans.

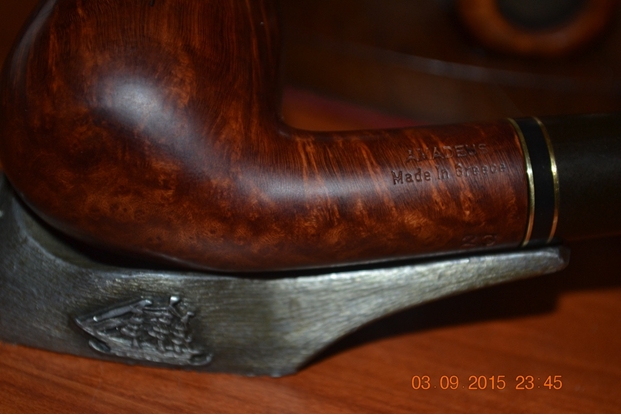
The half-bent brandy I obtained as part of a multi-pipe estate lot last year is a mid-level example of an Achaki-Amadeus S.A. briar. The company’s products range in price new from $50 on sale to $320 at the regular rate. They are all made of high quality Mediterranean briar, and the Greek company is among the primary suppliers of that variety of wood to other makers including Stanwell, Vauen, Tsuge and the late Bjarne Nielsen of Denmark.

This Amadeus arrived in much better than usual shape except for the chamber and rim and some minor wear of the stem.AM1

Am2

AM3

Am4

Am5

Am6

AM7 THE RESTORATION
I was eager to start a OxiClean bath on the stem. Knowing the stem hole as well as the outer area would benefit from a good soak for about a half-hour, I suspected that some of the chatter I could see in line with the lower lip would require more than that and even some sanding before micro-meshing.Am8

Am9 In the meantime, I had no trouble removing the little bit of blackening of the rim with easy rubbing using super fine steel wool, and the mild buildup of carbon in the chamber with a 19mm reamer followed by 150-grit paper and finished to silky smoothness with 320-grit.

Although the top of the stem was good after the soak, rinse and a wet micromesh work-over – building a grade at a time from 1500-4000 – the bottom, after the same treatment, indeed needed more work.AM10

Am11 And so I removed a little more of the chatter with 200-grit paper and applied some Black Super Glue.Am12

Am13 My work so far was easy, but being the glass-half-empty sort I was prepared to discover serious accreted grime when I commended the stage of clearing the mortise and shank with a wire-handled cleaner dipped in Everclear. But my luck continued. After a few passes that met no resistance and resulted in minor darkness of the cleaner, I decided with a rare sense of admiration that the previous owner had enjoyed the Amadeus brandy for some time and taken appropriate care of it. Reattaching the stem, I retorted the pipe with a mere two Pyrex test tubes of boiled alcohol.

As has been the case in many of my restorations so far, I was curious with the shade of the stain that I considered to be over-dark. To my way of thinking, as long as a careful visual analysis reveals no hidden reason for the extra obscuring, the clearer the grain, the better. And so, again with the utmost gentleness, I used a small piece of steel wool to lighten the briar and worked my way up the micromesh scale.Am14

Am15

Am16

Am17

Am18

AM19 For those of you with more discerning eyes, the pieces of crud visible with enlargement of the last photo, showing the shank opening, resulted from a final impulsive sanding of the chamber. Rest assured none of it remained after I noticed and gave it a good blow.

The two pieces of the pipe were ready for buffing. I used red and white Tripoli and White Diamond on the stem (big surprise) and white Tripoli, White Diamond and three coats of carnauba on the wood.Am20

Am21

Am22

Am23

Am24

Am25

Am26 CONCLUSION
There were no big problems with this restoration; no special problems to report or whine about; no particular distinction of the Amadeus itself, except for its very fine craftsmanship and, to me, less common country of manufacture. Still, it is a real beauty, an opinion I expressed in an email to Achaki-Amadeus to date the crafting of the pipe. Excepting the general pleasure of the simple but effective restoration, in fact, the most exciting aspect of the process came after the fact, when I received a response from one of the brand’s owners:

This is a line we used to make some good ten years ago. If you are in the USA it was imported in the country four years ago.

I hope I helped.

Thank you for your kind words.

Best regards

Makis Minetos

Please visit my blog:

http://www.acutabovebriar4.blogspot.com

Orlik “Dugout” Restoration


Blog entry by Al Jones

This beautiful Orlik “Dugout” belongs to Jon Guss.   I didn’t find a lot of information online about Orlik pipes.  I did find a trade magazine ad using the name “Dugout”, dated to 1922.  The blast on this pipe is outstanding.  The pipe was in very good condition, particularly the stem.   A beautiful fitted case holds the pipe, which usually indicated a premium pipe grade.

Jon sent me this about the Orlik Dugout line:

Dugout: Introduced about 1921 (see attached trademark registration for U.S. market); their earliest known sandblast, presumably a response to Dunhill; advertised to be “light as a feather”; priced at the top of Orlik’s line, along with the Bruyere Antique; in production through about 1941 (although it was briefly revived much later)

We can’t be certain this is Jon’s pipe, as his has no shape number (not uncommon in early Orliks).  As you can see from his early catalog page, there is a very strong resemblance.  Additionally, the Orlik script on the case is identical to what is shown in this catalog.  This pipe would have also has the metal “Scraper” apparatus (as shown on the previous Sterling pipe).

Catalog_Ad Orlik_5026_Dugout_Catalog

Below is the unrestored pipe, which was in really excellent condition.

Orlik_Dugout_Before (1) Orlik_Dugout_Before (3) Orlik_Dugout_Before Orlik_Dugout_Before (2) Orlik_Dugout_Before (4)

I reamed the slight cake from the bowl, then soaked it with alcohol and sea salt.  The shank was cleaned with a soft bristle brush and alcohol.  I used a cloth and a mild Oxy-clean solution to remove the build-up on the bowl top.

The stem was in such good shape, I started with 1500 grade paper to bring up the shine, followed by 2000 grade and then 8000 and 1200 grade Micromesh sheets.  The stem was then buffed lightly with White Diamond rouge and Meguiars Plastic Polish.

I polished the briar by hand with a cloth and some Halycon wax.

Despite the deep bend, the pipe easily passes a cleaner.

Below is the finished pipe.

Orlik_Dugout_Finished Orlik_Dugout_Finished (6) Orlik_Dugout_Finished (4) Orlik_Dugout_Finished (7) Orlik_Dugout_Finished (5) Orlik_Dugout_Finished (8) Orlik_Dugout_Finished (9) Orlik_Dugout_Finished (3) Orlik_Dugout_Nomenclature (1) Orlik_Dugout_Nomenclature


Orlik “Sterling” Restoration


Blog entry by Al Jones

This is the last pipe in the group sent to me by Jon Guss.  This Orlik is stamped “Sterling”, which is known to be a high grade Orlik.  Jon supplied this information and catalog picture.

Sterling: Introduced about 1933; second highest in price after the Bruyere Antique and Dugout; in production through about 1941

Sterling_Catalog

This pipe also came with a beautiful fitted case.  The pipe was in very good condition, particularly the stem, which only had some minor teeth marks.  The briar had a very heavy cake and significant build-up on the bowl top.   The pipe is blasted with polished panel inserts.

Orlik_Sterling_Before (1) Orlik_Sterling_Before (4) Orlik_Sterling_Before Orlik_Sterling_Before (2) Orlik_Sterling_Before (3)

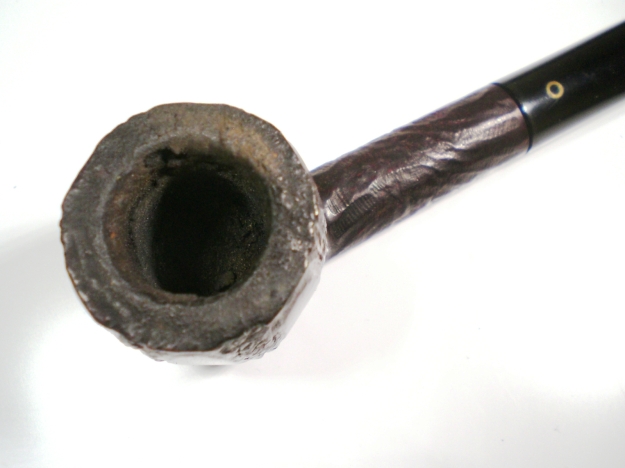
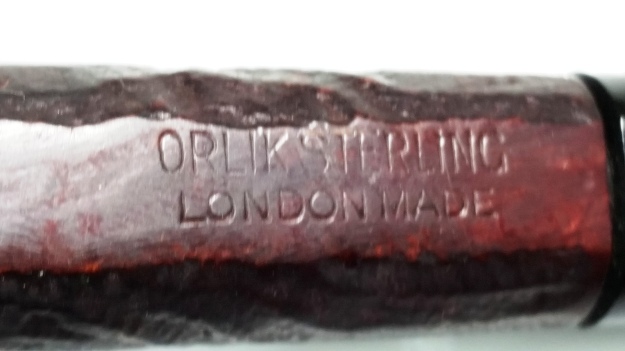
The stem fitment was not flush and I wasn’t certain if that was due to build-up of tars in the shank or the metal stinger apparatus.  Jon send me the patent information on the metal apparatus, which was patented by Orlik.  In the Patent document, it is referred to as a “scraper”.  Jon  told me that Orlik collectors also refer to the piece as a “scoop”.  The insert is engraved “Orlik London”.  From the Patent information:

195,291. Orlik, L. May 4, 1922. Tobacco pipes. – In tobacco pipes of the kind having a scraper connected to the mouthpiece, the scraper 7 is of part-circular section and has a tubular end slipjointed into a flanged metal spigot 3 screwed into the mouthpiece. The metal spigot is prevented from rotating by a pin 10 driven into the mouthpiece and engaging a recess in the flange 8. The Provisional Specification states that a tube receiving an absorbent cartridge may be provided instead of the scraper.

Orlik_Scoop_Patent Info Orlik_Sterling_Finished (7)

I heated the scraper and it was easily removed from the stem.  I reamed the bowl and soaked it with alcohol and sea salt.  The shank was cleaned with a soft bristle brush and alcohol.  After this step, and the scraper removed, the stem fit properly into the shank.

The stem was in such good shape I started with 1500 grade wet sandpaper, then moved to 2000.  This was followed with 8000 and 12000 grade Micromesh paper.  The stem was lightly buffed with White Diamond and Meguiars Plastic polish.

The bowl top was cleaned with a soft cloth and a mild Oxy-clean and water solution.  I polished the briar by hand using Halycon wax.

Below is the finished pipe.

Orlik_Sterling_Finished Orlik_Sterling_Finished (4) Orlik_Sterling_Finished (6) Orlik_Sterling_Finished (3) Orlik_Sterling_Finished (2) Orlik_Sterling_Finished (1) Orlik_Sterling_Finished (5) Orlik_Sterling_Nomenclature

Hardcastle “Straight Grain” Restoration


Blog entry by Al Jones

This is the second of four pipes belonging to Jon Guss.  This one is a Hardcastle marked “Straight Grain”.  The pipe was in overall excellent condition with just some slight scorching of the rim and some light oxidation and teeth marks on the stem.

This is the first Hardcastle that I’ve had on my workbench and I found little online about this maker.  According to John Loring, Hardcastle was an independent brand begun in 1908, and was bought by Dunhill’s in 1946. In 1967, Hardcastle was merged with Parker, to become Parker-Hardcastle, Ltd.  Loring suspects that after 1967, Dunhill and Parker “seconds” were marketed with the Hardcastle brand.  Loring states that, in the absence of sales receipts, or other items of provenance, Hardcastles cannot be accurately dated.  From the Pipepedia page, the “Straight Grain” model is listed being from the Family Era.

Jon was able to supply me with this additional information about his Hardcastle Straight Grain pipe:

I believe it was produced by the company starting about 1935 (when the business was still called “Lewis & Hardcastle”; that stopped the next year), and continued to appear in price lists through 1950. Based on the details of the listings, however, I suspect it was actually only produced until early in WWII. For the first two years of production (1935-1936) the Straight Grain, along with the Leward model, were Hardcastle’s top of the line; after that they both were superseded by the Supergrain.

Below are pictures of the unrestored pipe.

Hardcastle_Straight_Grain_Before Hardcastle_Straight_Grain_Before (2) Hardcastle_Straight_Grain_Before (1)

I reamed the pipe and soaked the bowl with alcohol and sea salt.   I used a worn piece of 8000 grit Micromesh paper to remove the scorch marks on the bowl top, without lifting the stain.  The bowl was then buffed lightly with White Diamond and several coats of carnuba wax

I used 800 grit wet sandpaper on the stem to remove the oxidation and teeth marks.  I worked around the “H” stem logo.   That was followed with 1500 and 2000 grit wet paper, then the 8000 and 12000 grade Micromesh sheets.  The stem was then buffed lightly with White Diamond and Meguiars plastic polish.

Below is the finished pipe.

Hardcastle_Straightgrain_Finished Hardcastle_Straightgrain_Finished (4) Hardcastle_Straightgrain_Finished (2) Hardcastle_Straightgrain_Finished (6) Hardcastle_Straightgrain_Finished (3) Hardcastle_Straightgrain_Finished (5) Hardcastle_Straightgrain_Nomenclature Hardcastle_Straightgrain_Nomenclature (1)