Monthly Archives: June 2012

GBD Prehistoric Prince 357 Refurb


Blog by Al Jones

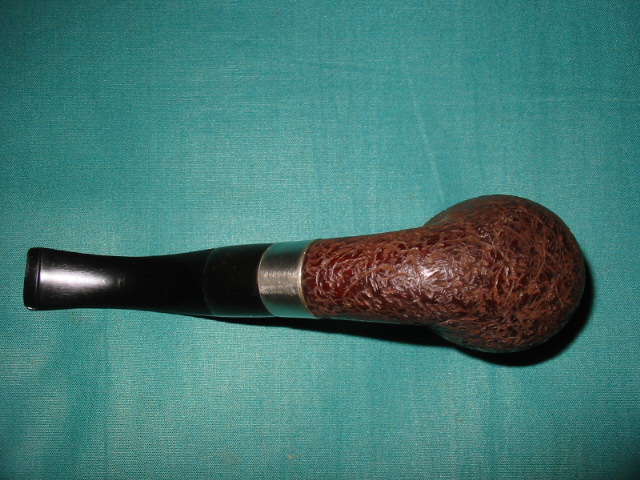
These old GBD’s just seem to follow me home. This one, a Model 357 in Prehistoric finish, wasn’t getting much action on Ebay and I bit. The Ebay pictures showed the briar was in pretty good shape and Perspex stems are generally pretty easy to restore. I didn’t have a Prince style pipe in my collection and this one looked like a suitable candidate. I weighed the pipe at 35 grams. That was also appealing and it should be comfortable in the mouth.

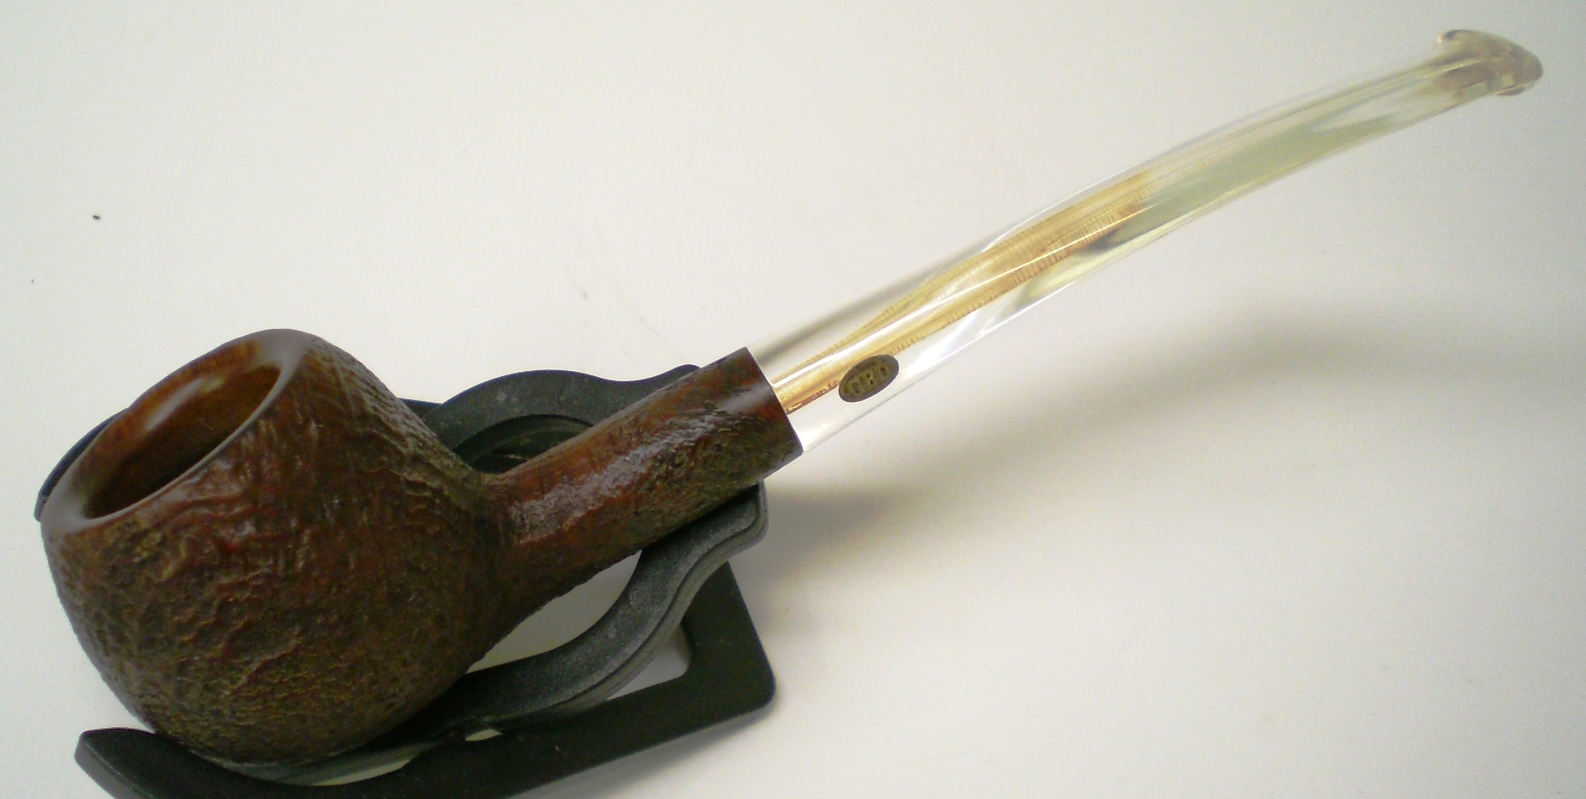
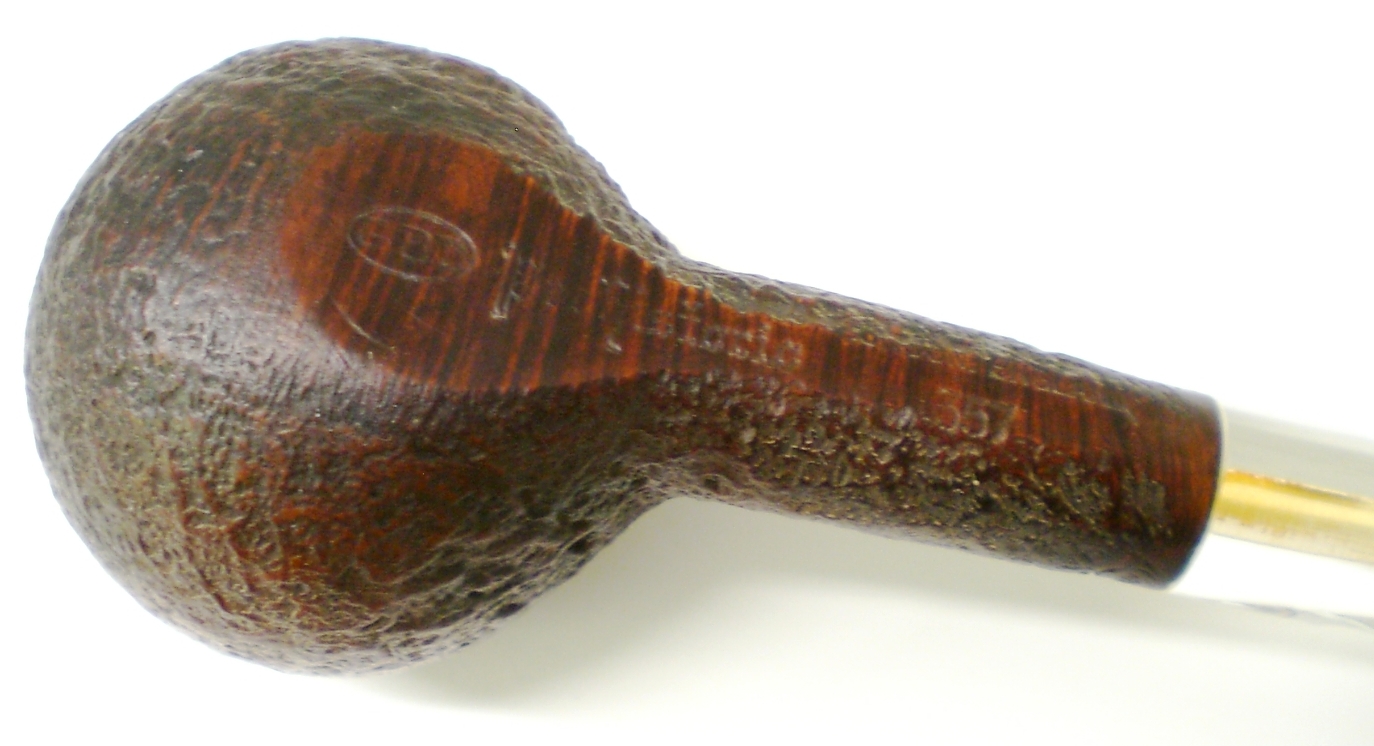
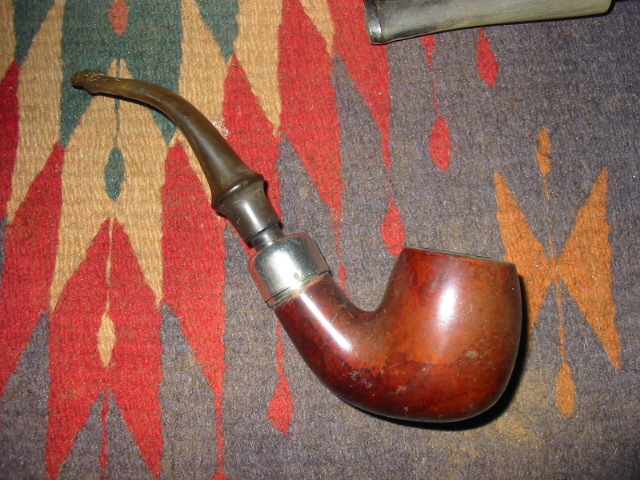
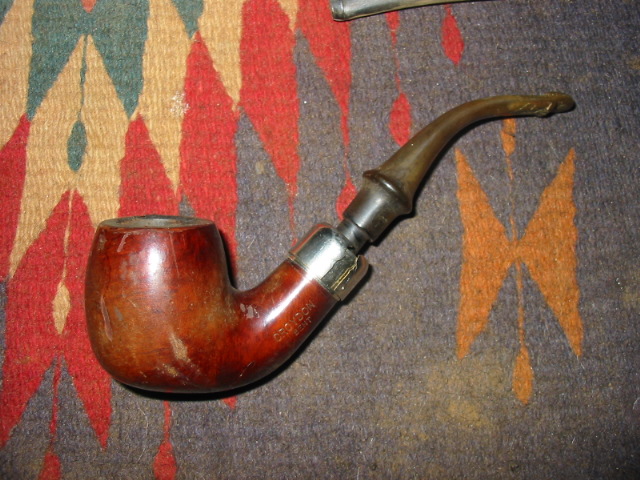
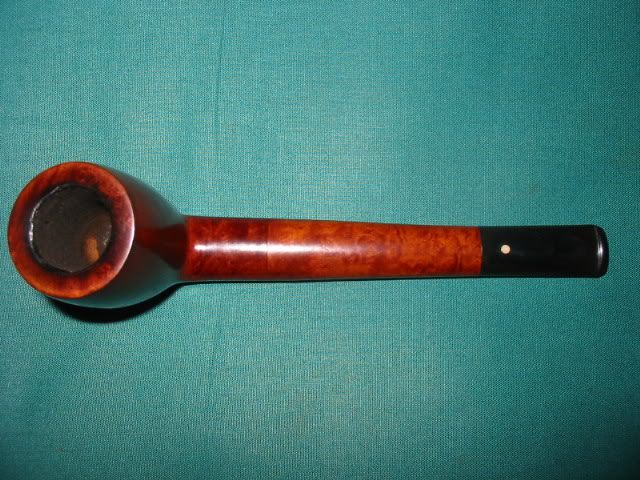
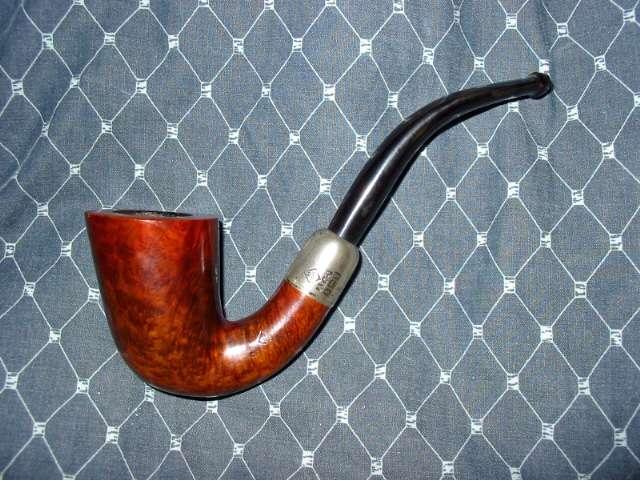
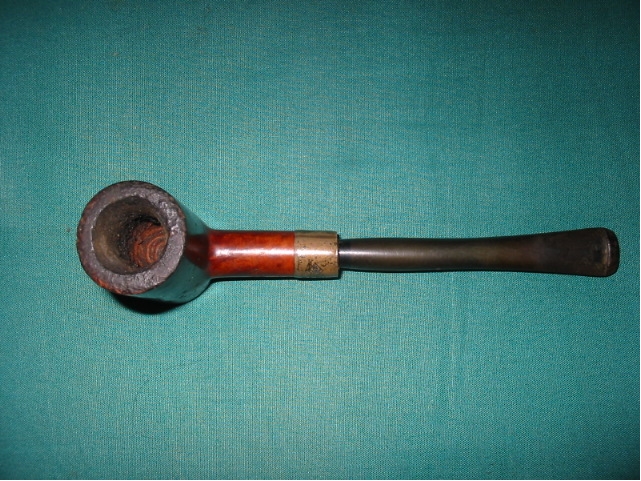
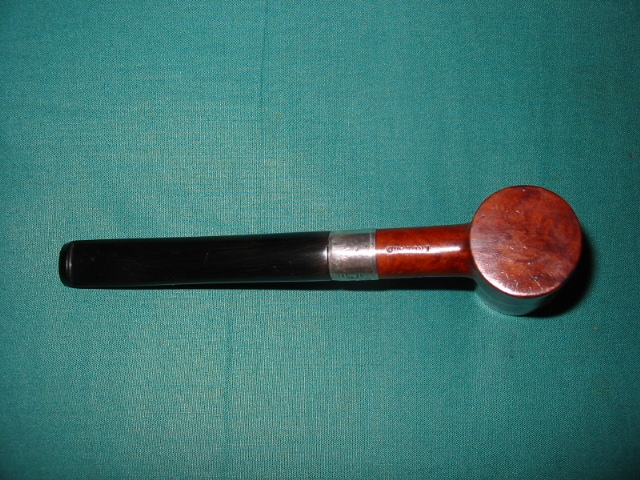
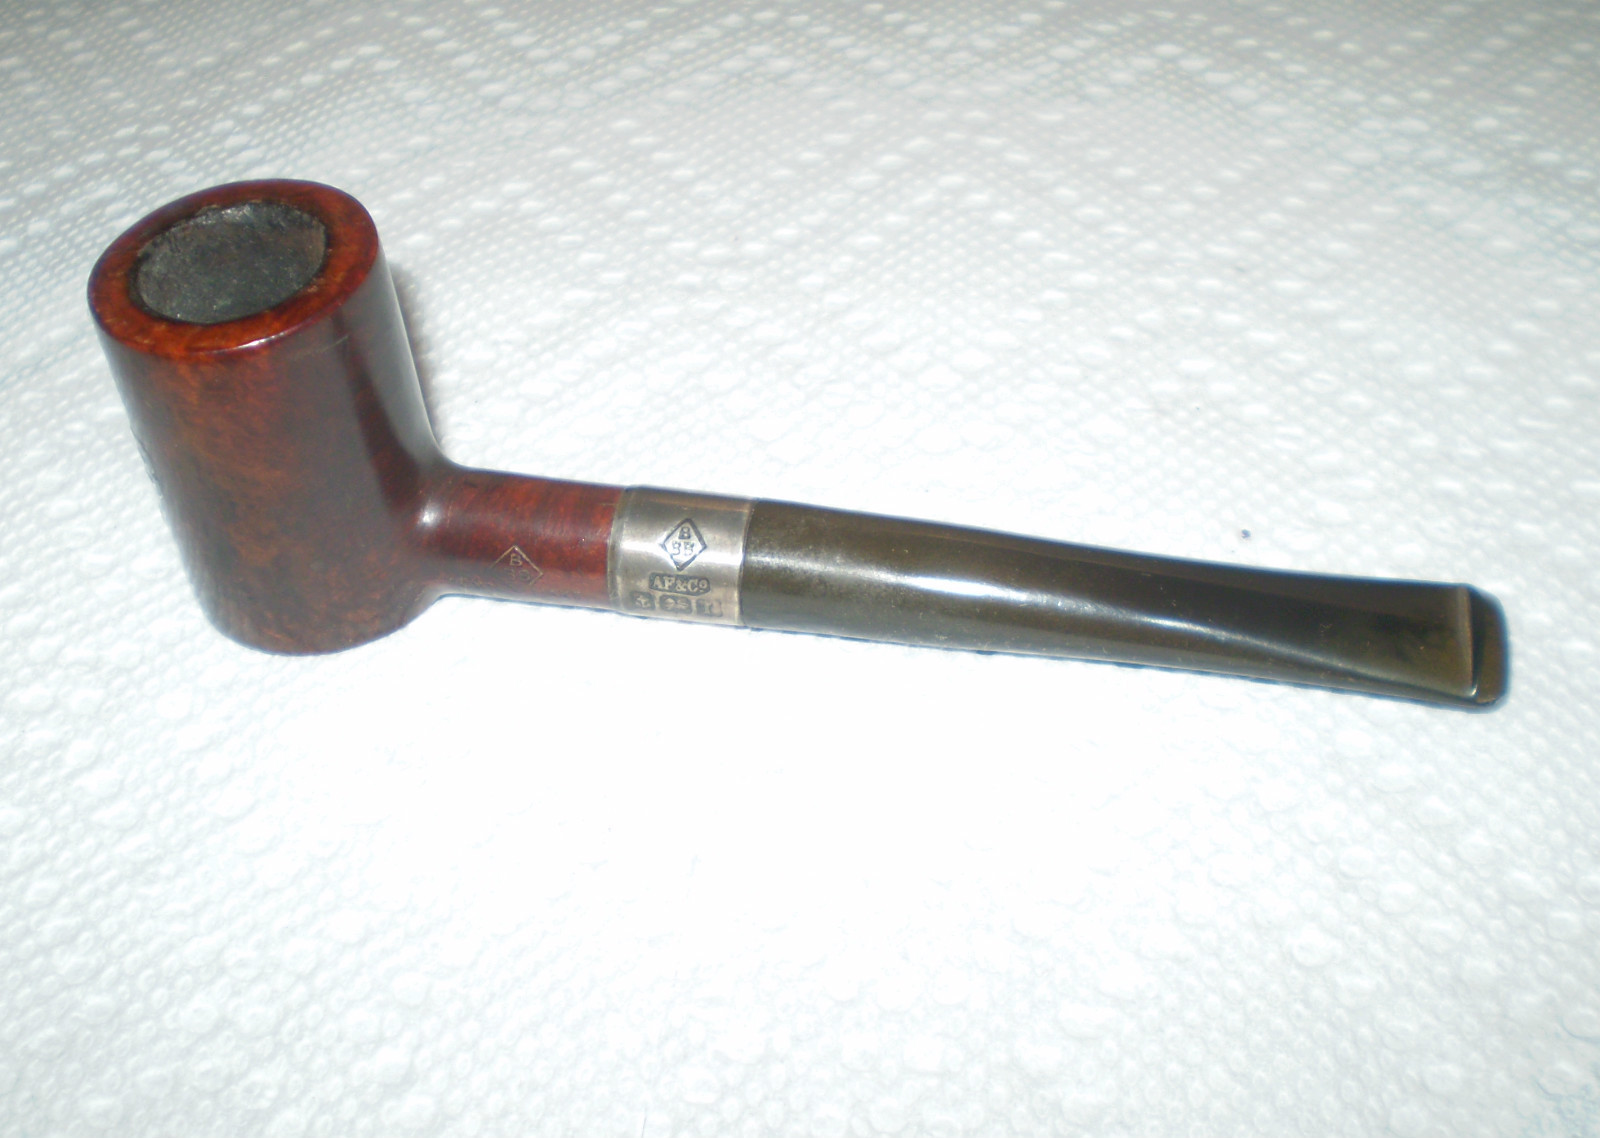
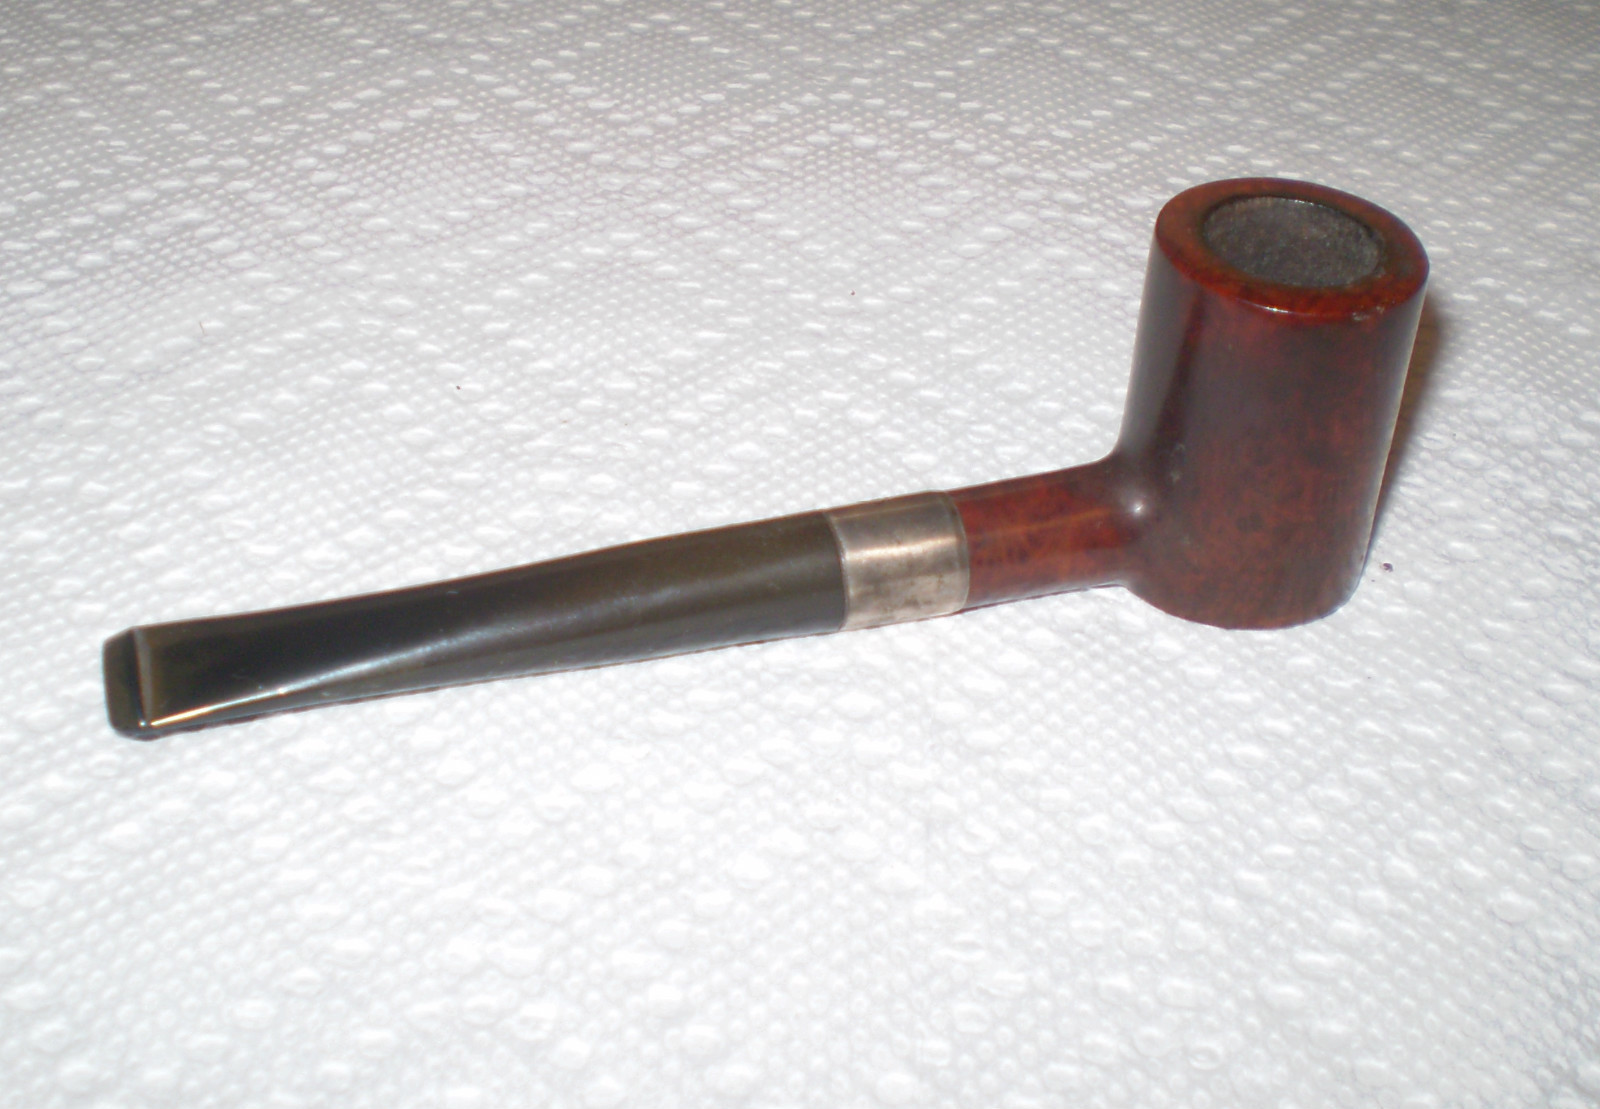
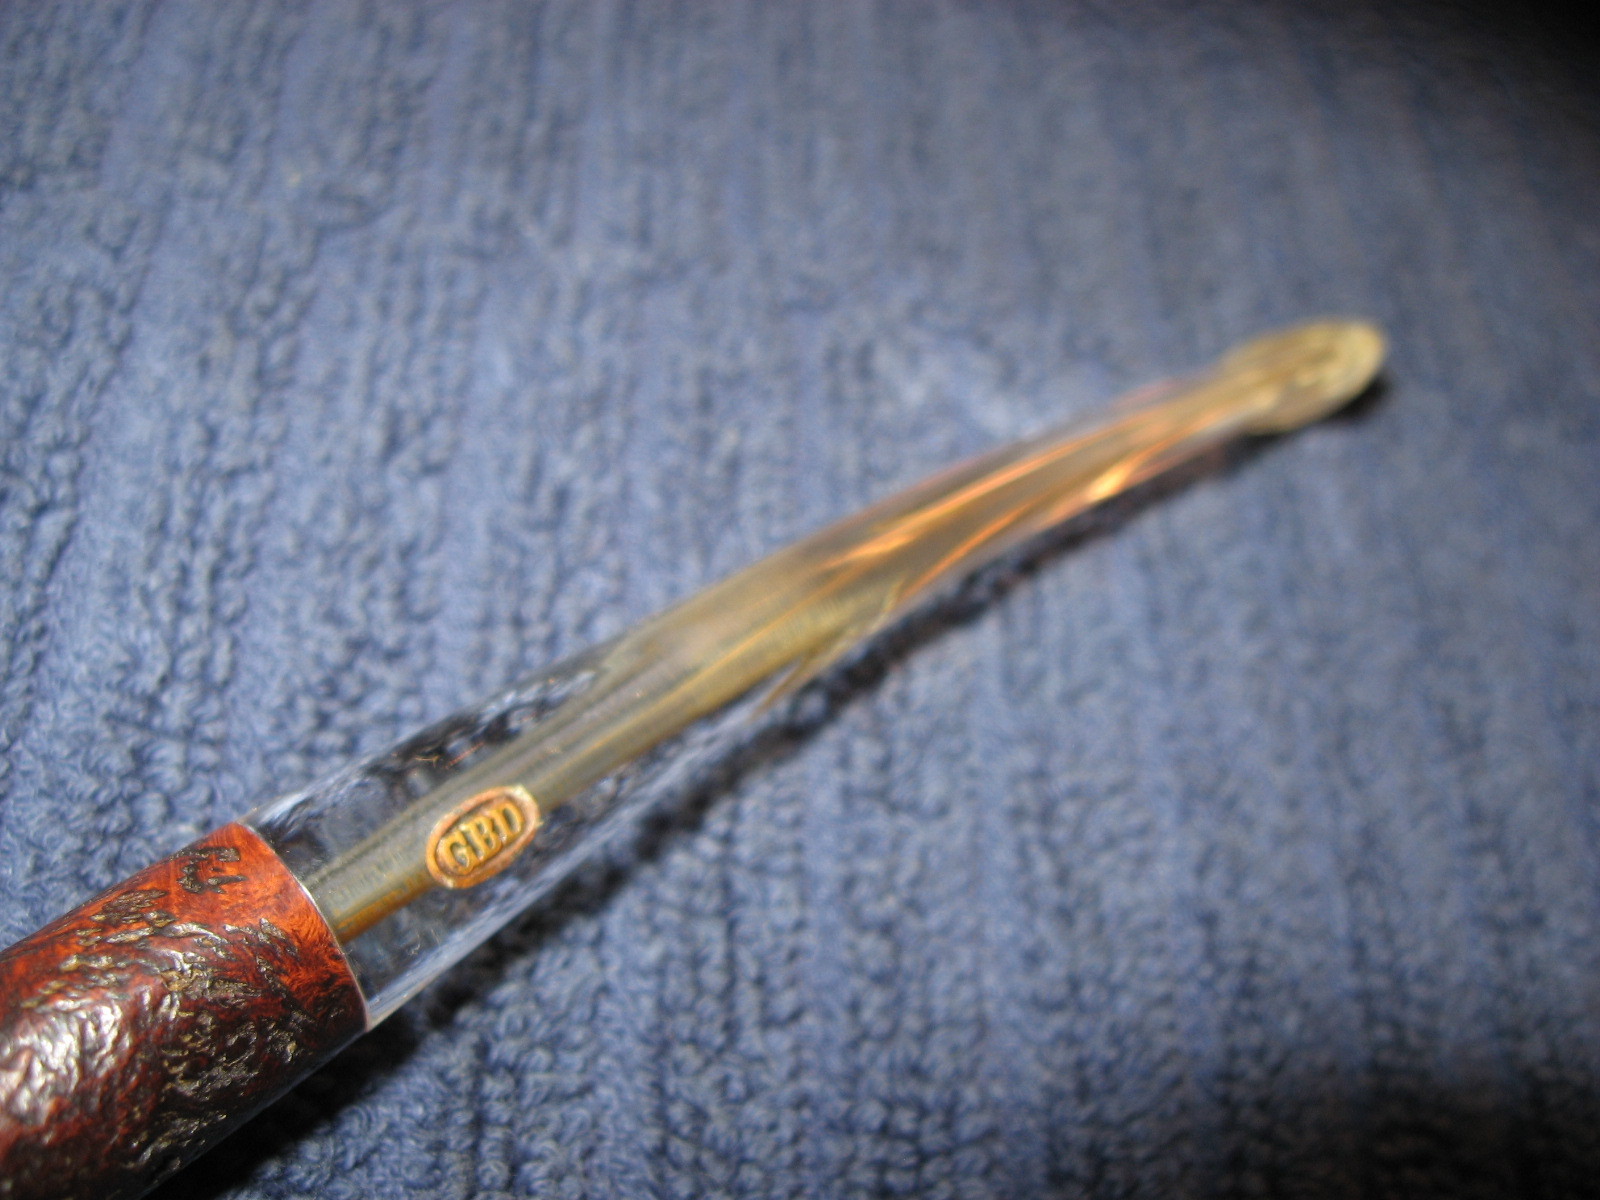
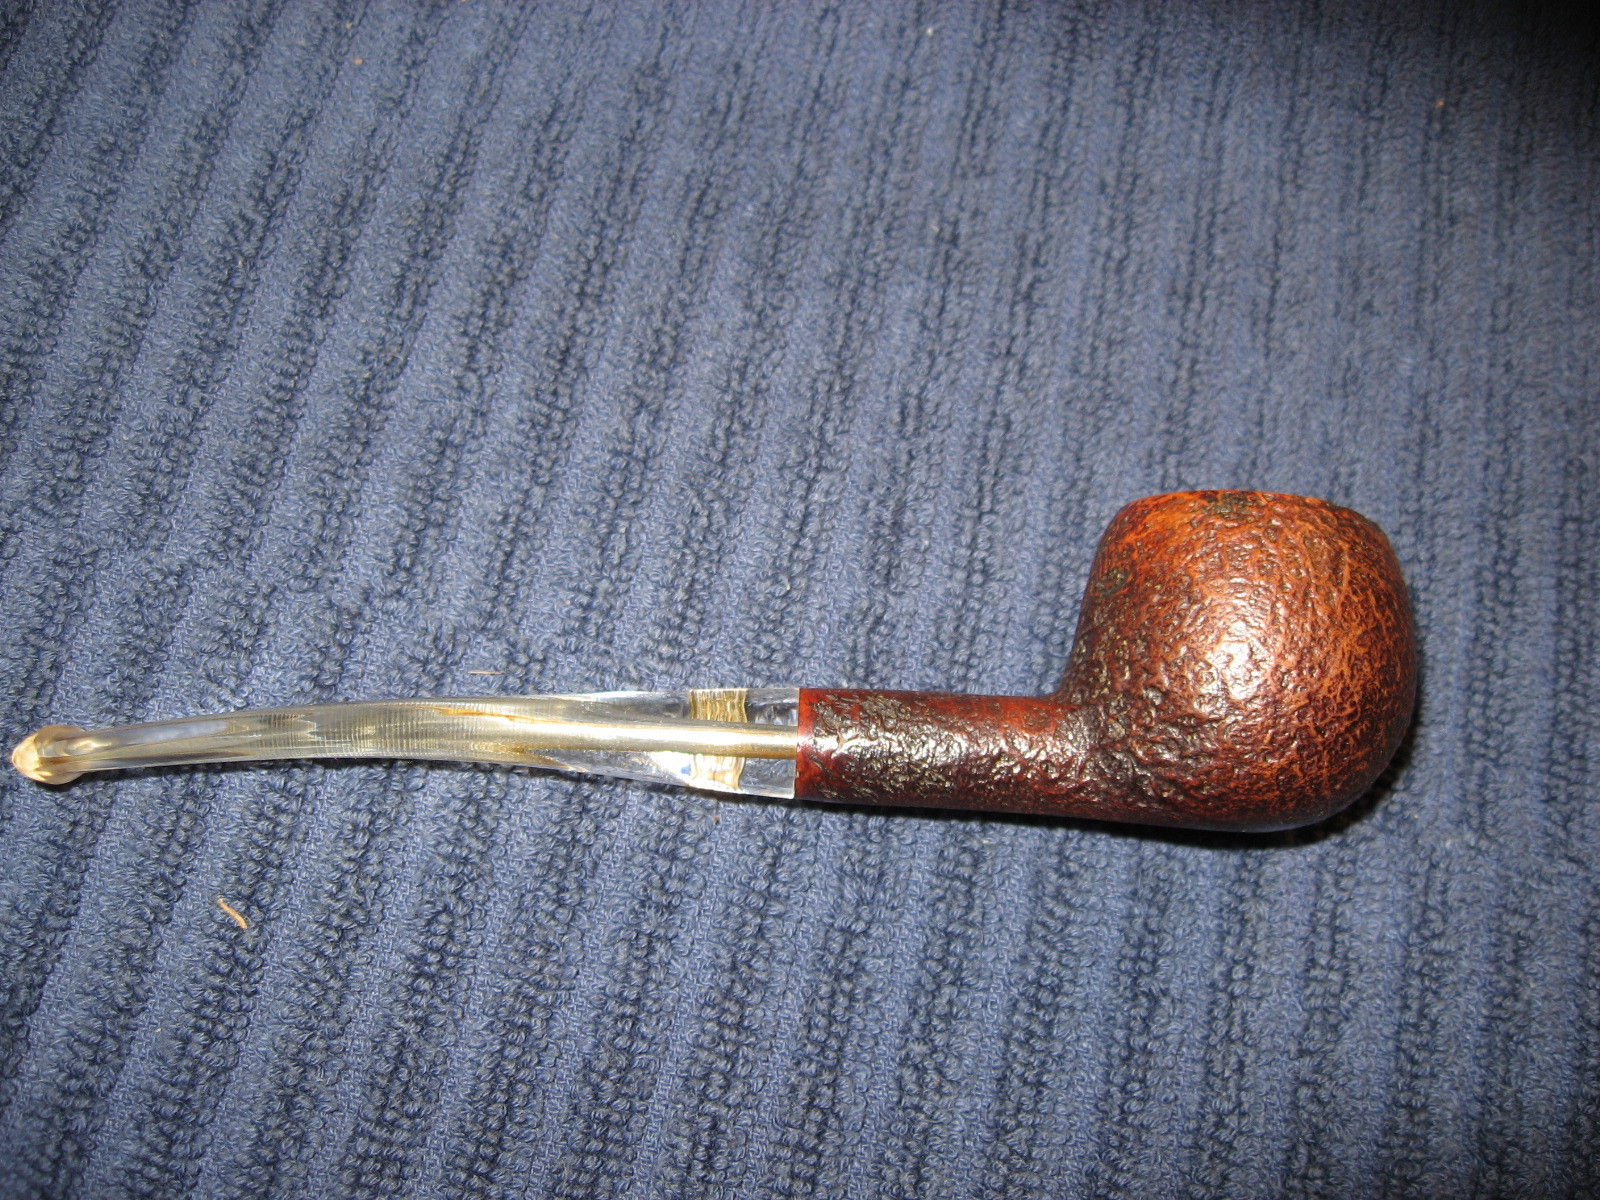
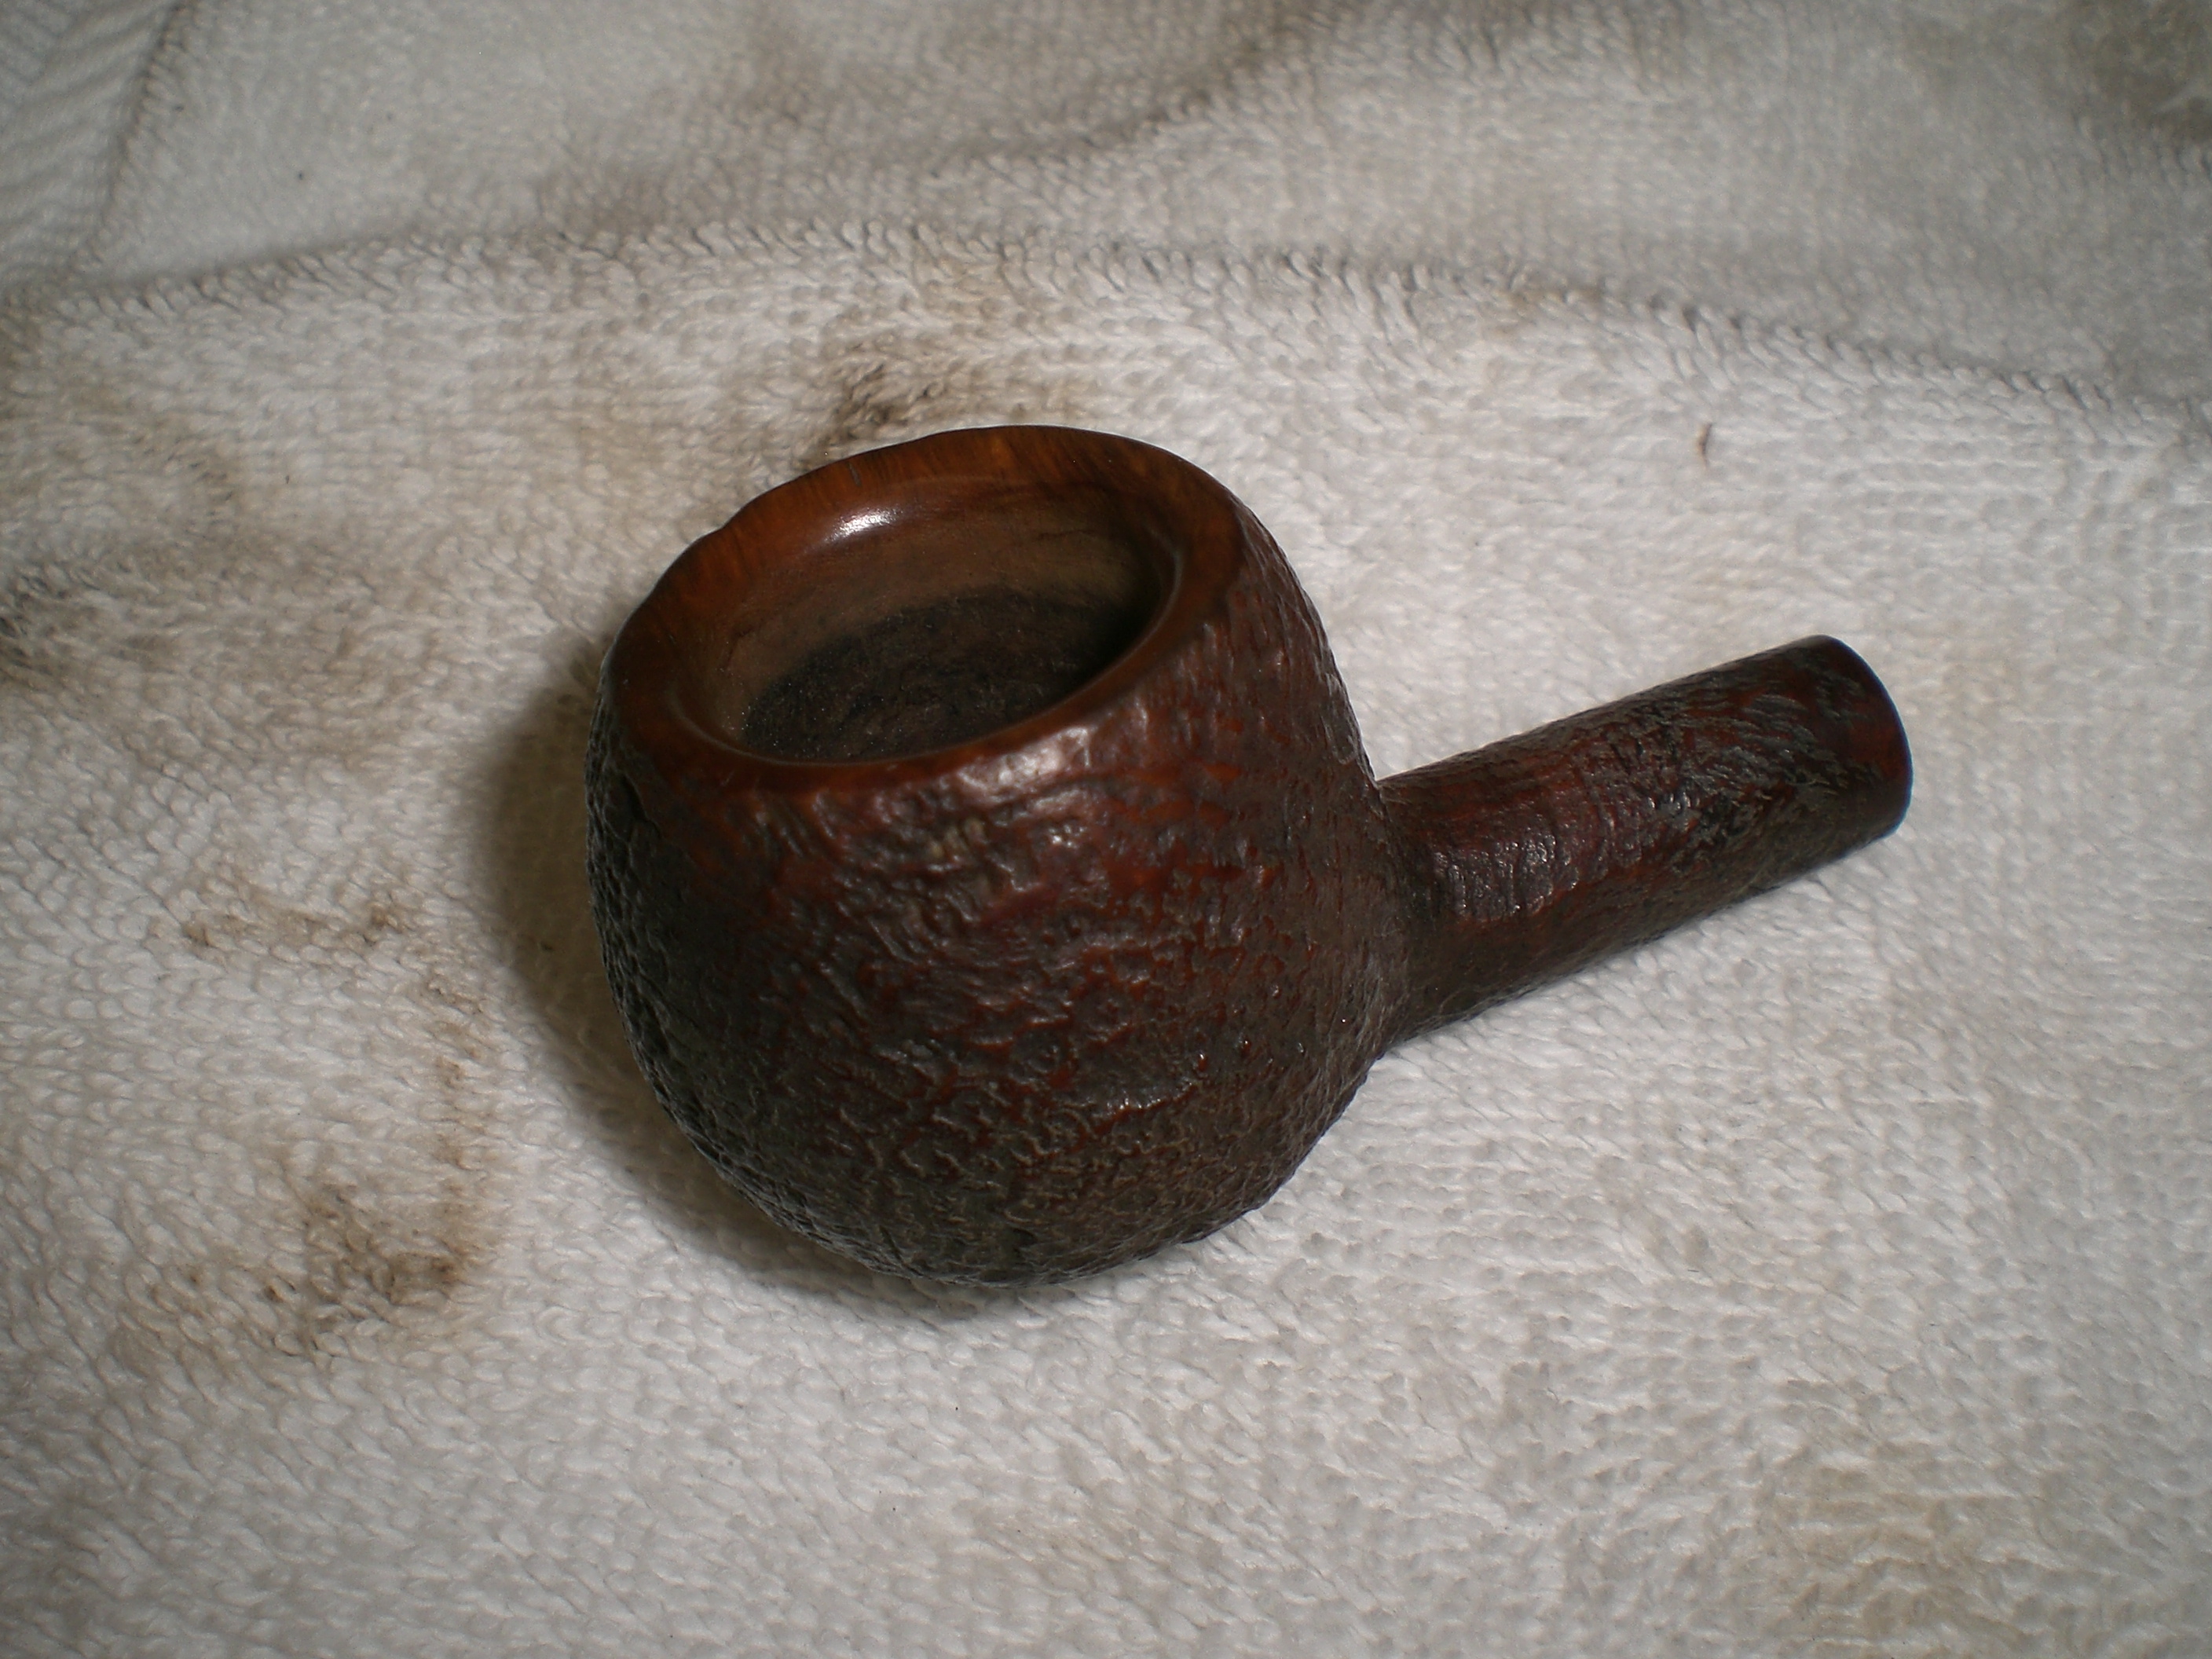
The pipe as I received it from the seller:

GBD_357_Prehistoric_Prince_Ebay ad (2)

GBD_357_Prehistoric_Prince_Ebay ad

GBD_357_Prehistoric_Prince_Ebay ad (3)

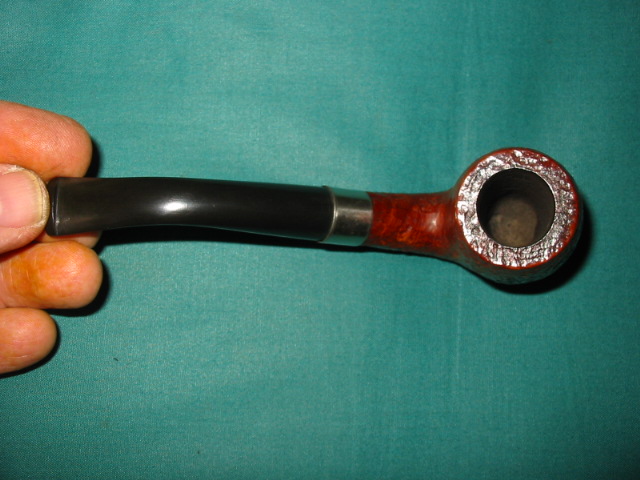
Using my Castleford tool, I reamed the light cake in the bowl and let it soak with some Sea Salt and Everclear. The Everclear took some of the finish off the bowl top and revealed some scrapes as well. I decided the blast was too nice to leave it in that condition and I knew the nicks on the bowl top would polish smooth. A smooth, beveled GBD bowl top looks great in my opinion and that feature is an attractive aspect of these pipes.

While the bowl was soaking, I worked on the Perspex stem. It had a few tooth marks that I was able to sand out starting with some 1500 than 2000 grit wet paper. I than buffed it with the 8,000 and 12,000 grade micromesh pads. I ran some bristle pipe cleaners with Everclear thru the stem. I’d been advised previously to run a dry cleaner thru following the Everclear as to not cloud the stem draft hold of Perspex material.

Then, as with the stem, I used some 1500 than 2000 grit wet paper on the polished bowl top, than the last two grades of micromesh. Next up, re-staining, which is still a little nerve-wracking to me.

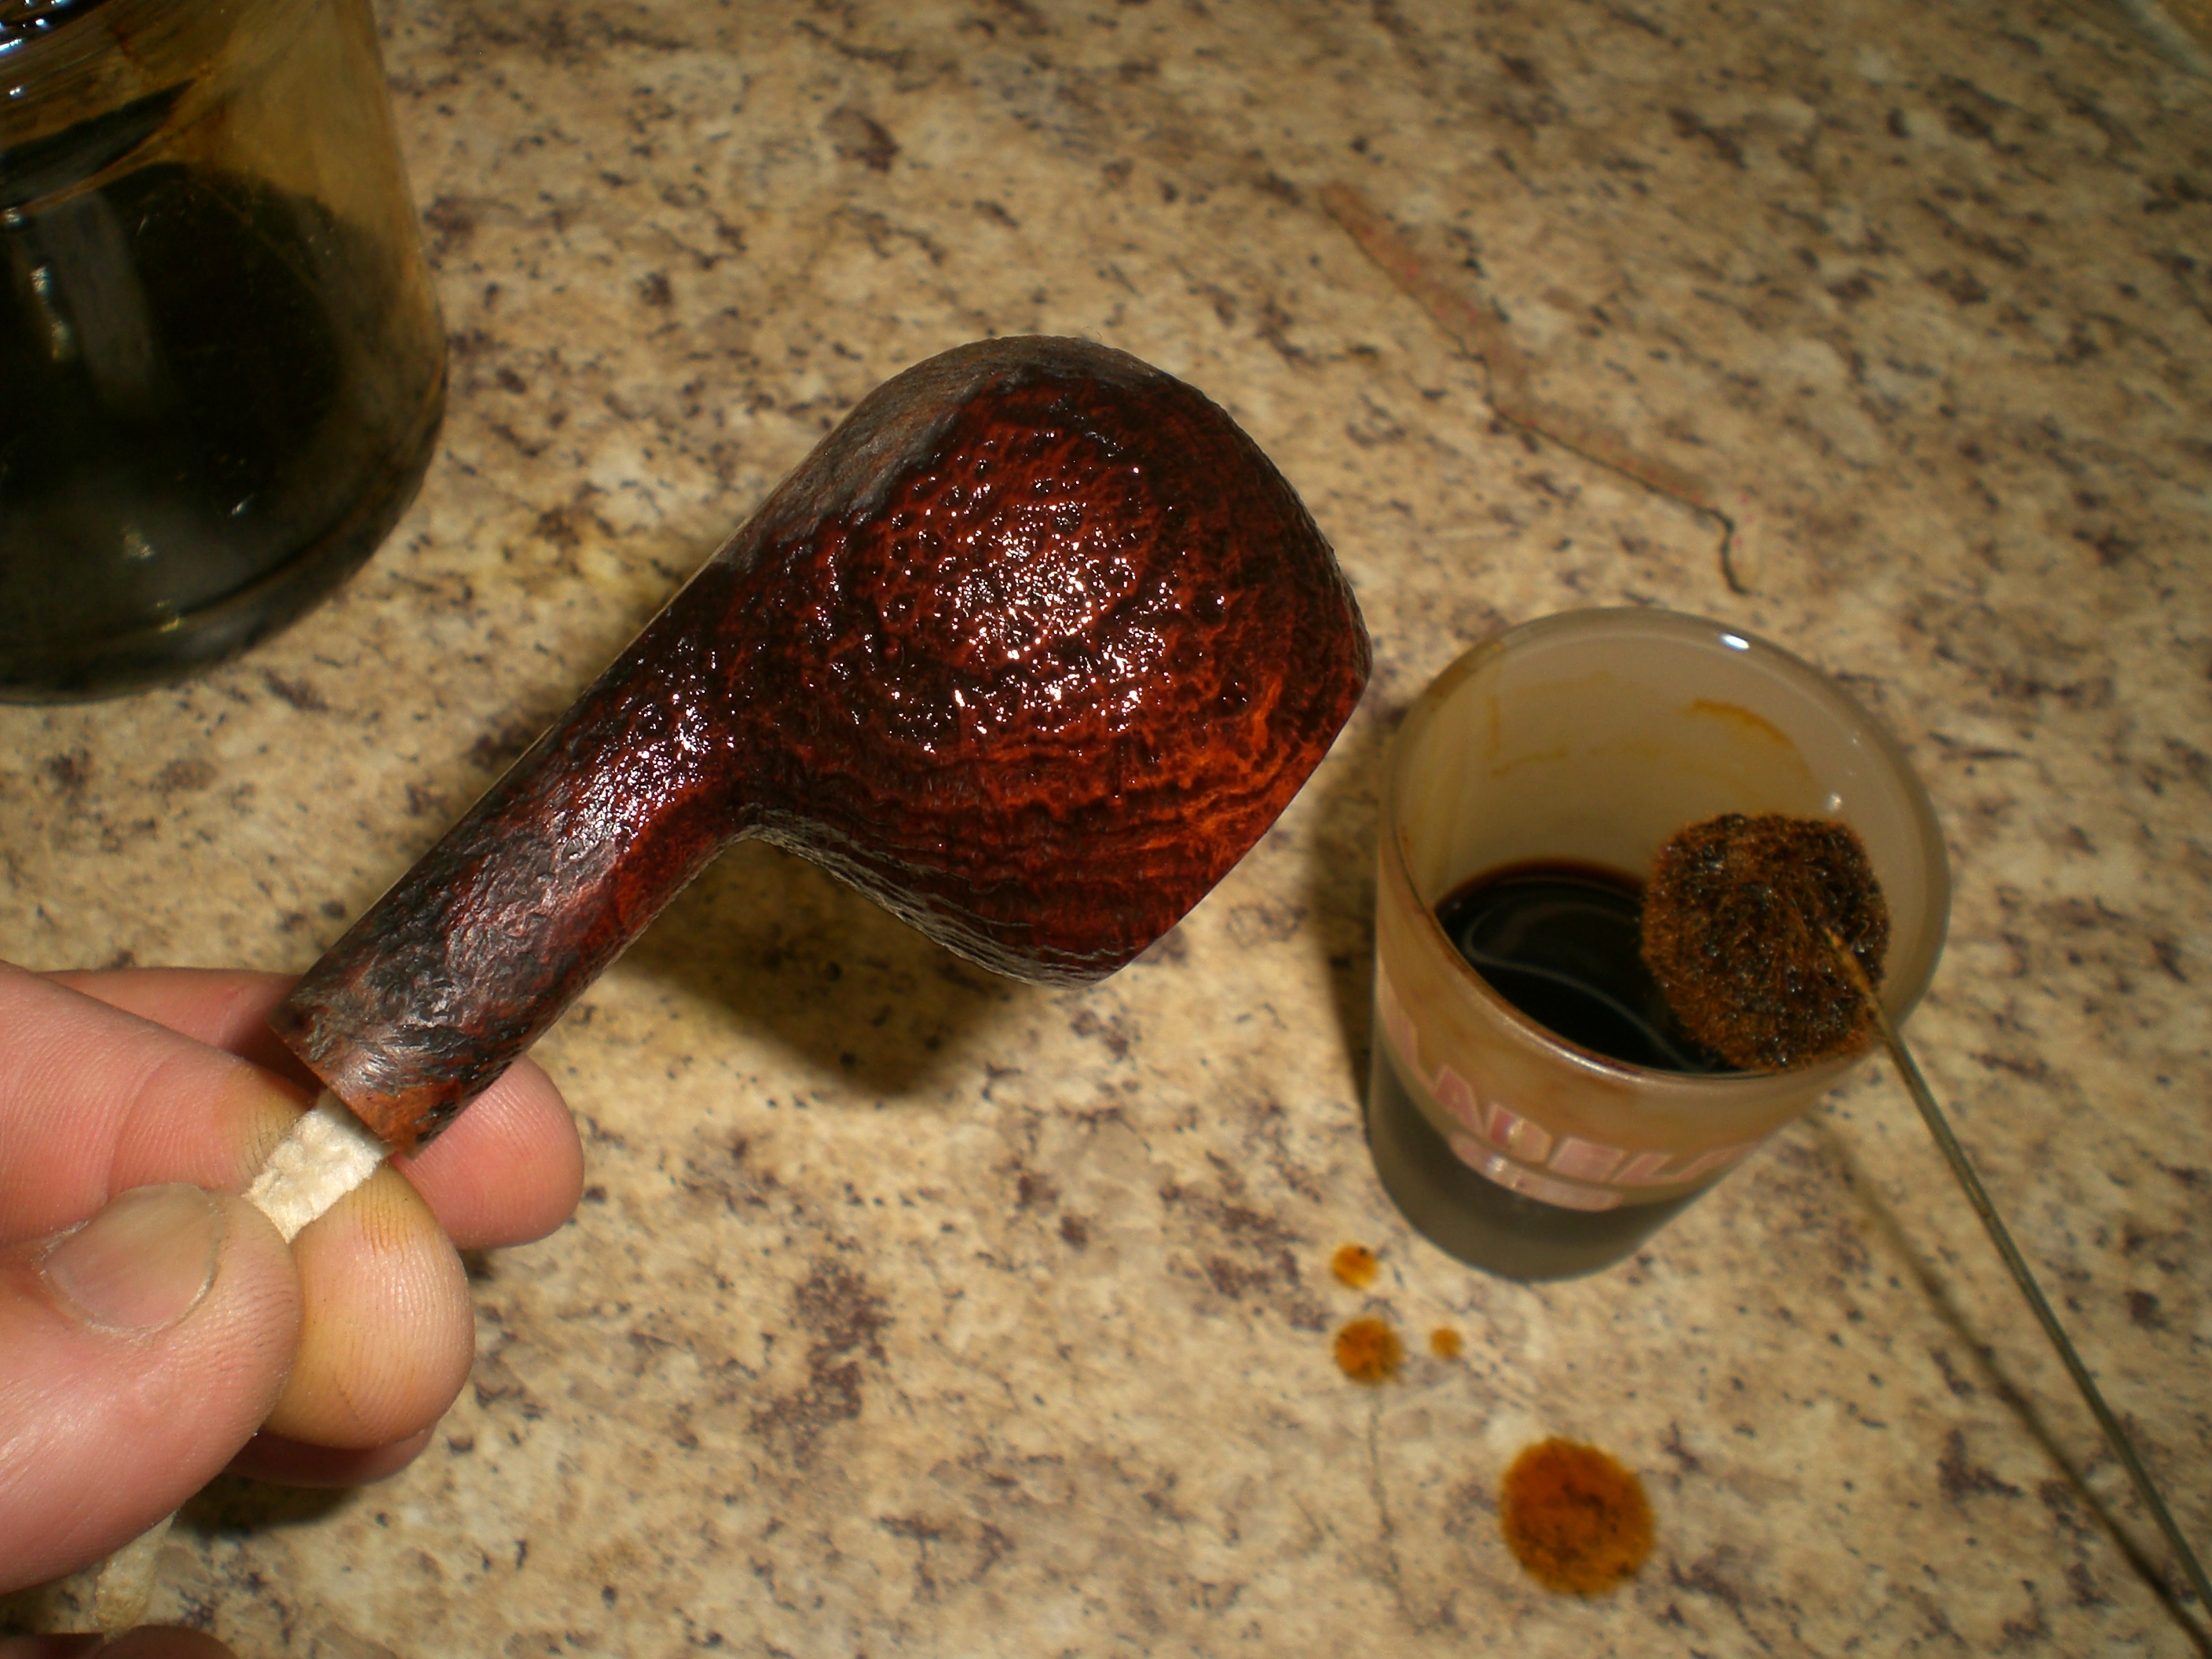
I reviewed Steve’s past blog entries on re-staining a bowl. I had previously completed that step only two other times. I soaked the bowl in a small container of isopropyl alcohol for several hours. I used an old brass bristle brush to help remove the stain and any wax. Than, I let it soak for another few hours. Once the finish was removed, I prepared to re-stain it. I really liked the light brown factory finish and used some Fieberlings Medium Brown stain, but thinned it considerably. On my first two re-stain jobs, my finish came out too dark. This time, I nailed it and the color is just what I desired. I used the dauber supplied by Fieberlings to apply the stain, held by a bent pipe cleaner. After the first coat dried, I applied a second coat. This time I set the stain with a flamer from a lighter. Be sure to not have the pipe sopping with stain, as that burns too long and could leave a burn mark on the briar.
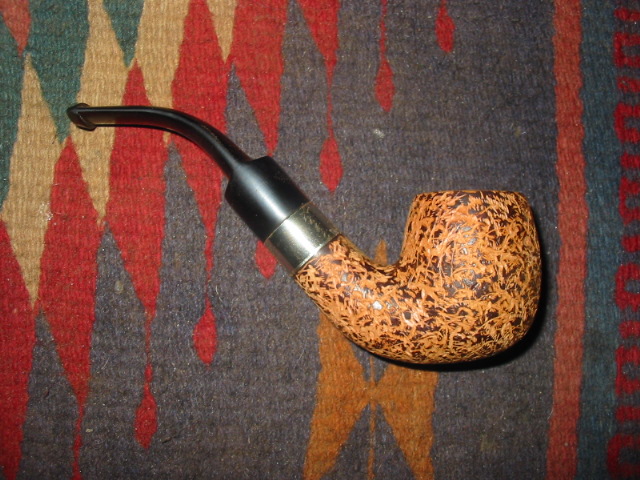
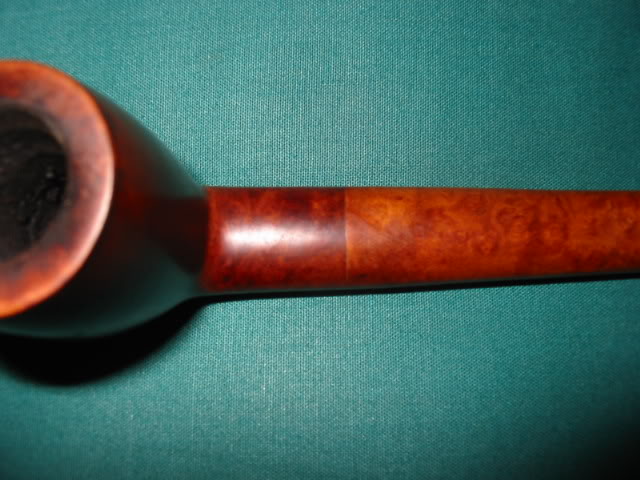
Applying the stain:

GBD_357_Prehistoric_Prince_Restain (1)

GBD_357_Prehistoric_Prince_Restain (2)

GBD_357_Prehistoric_Prince_Restain

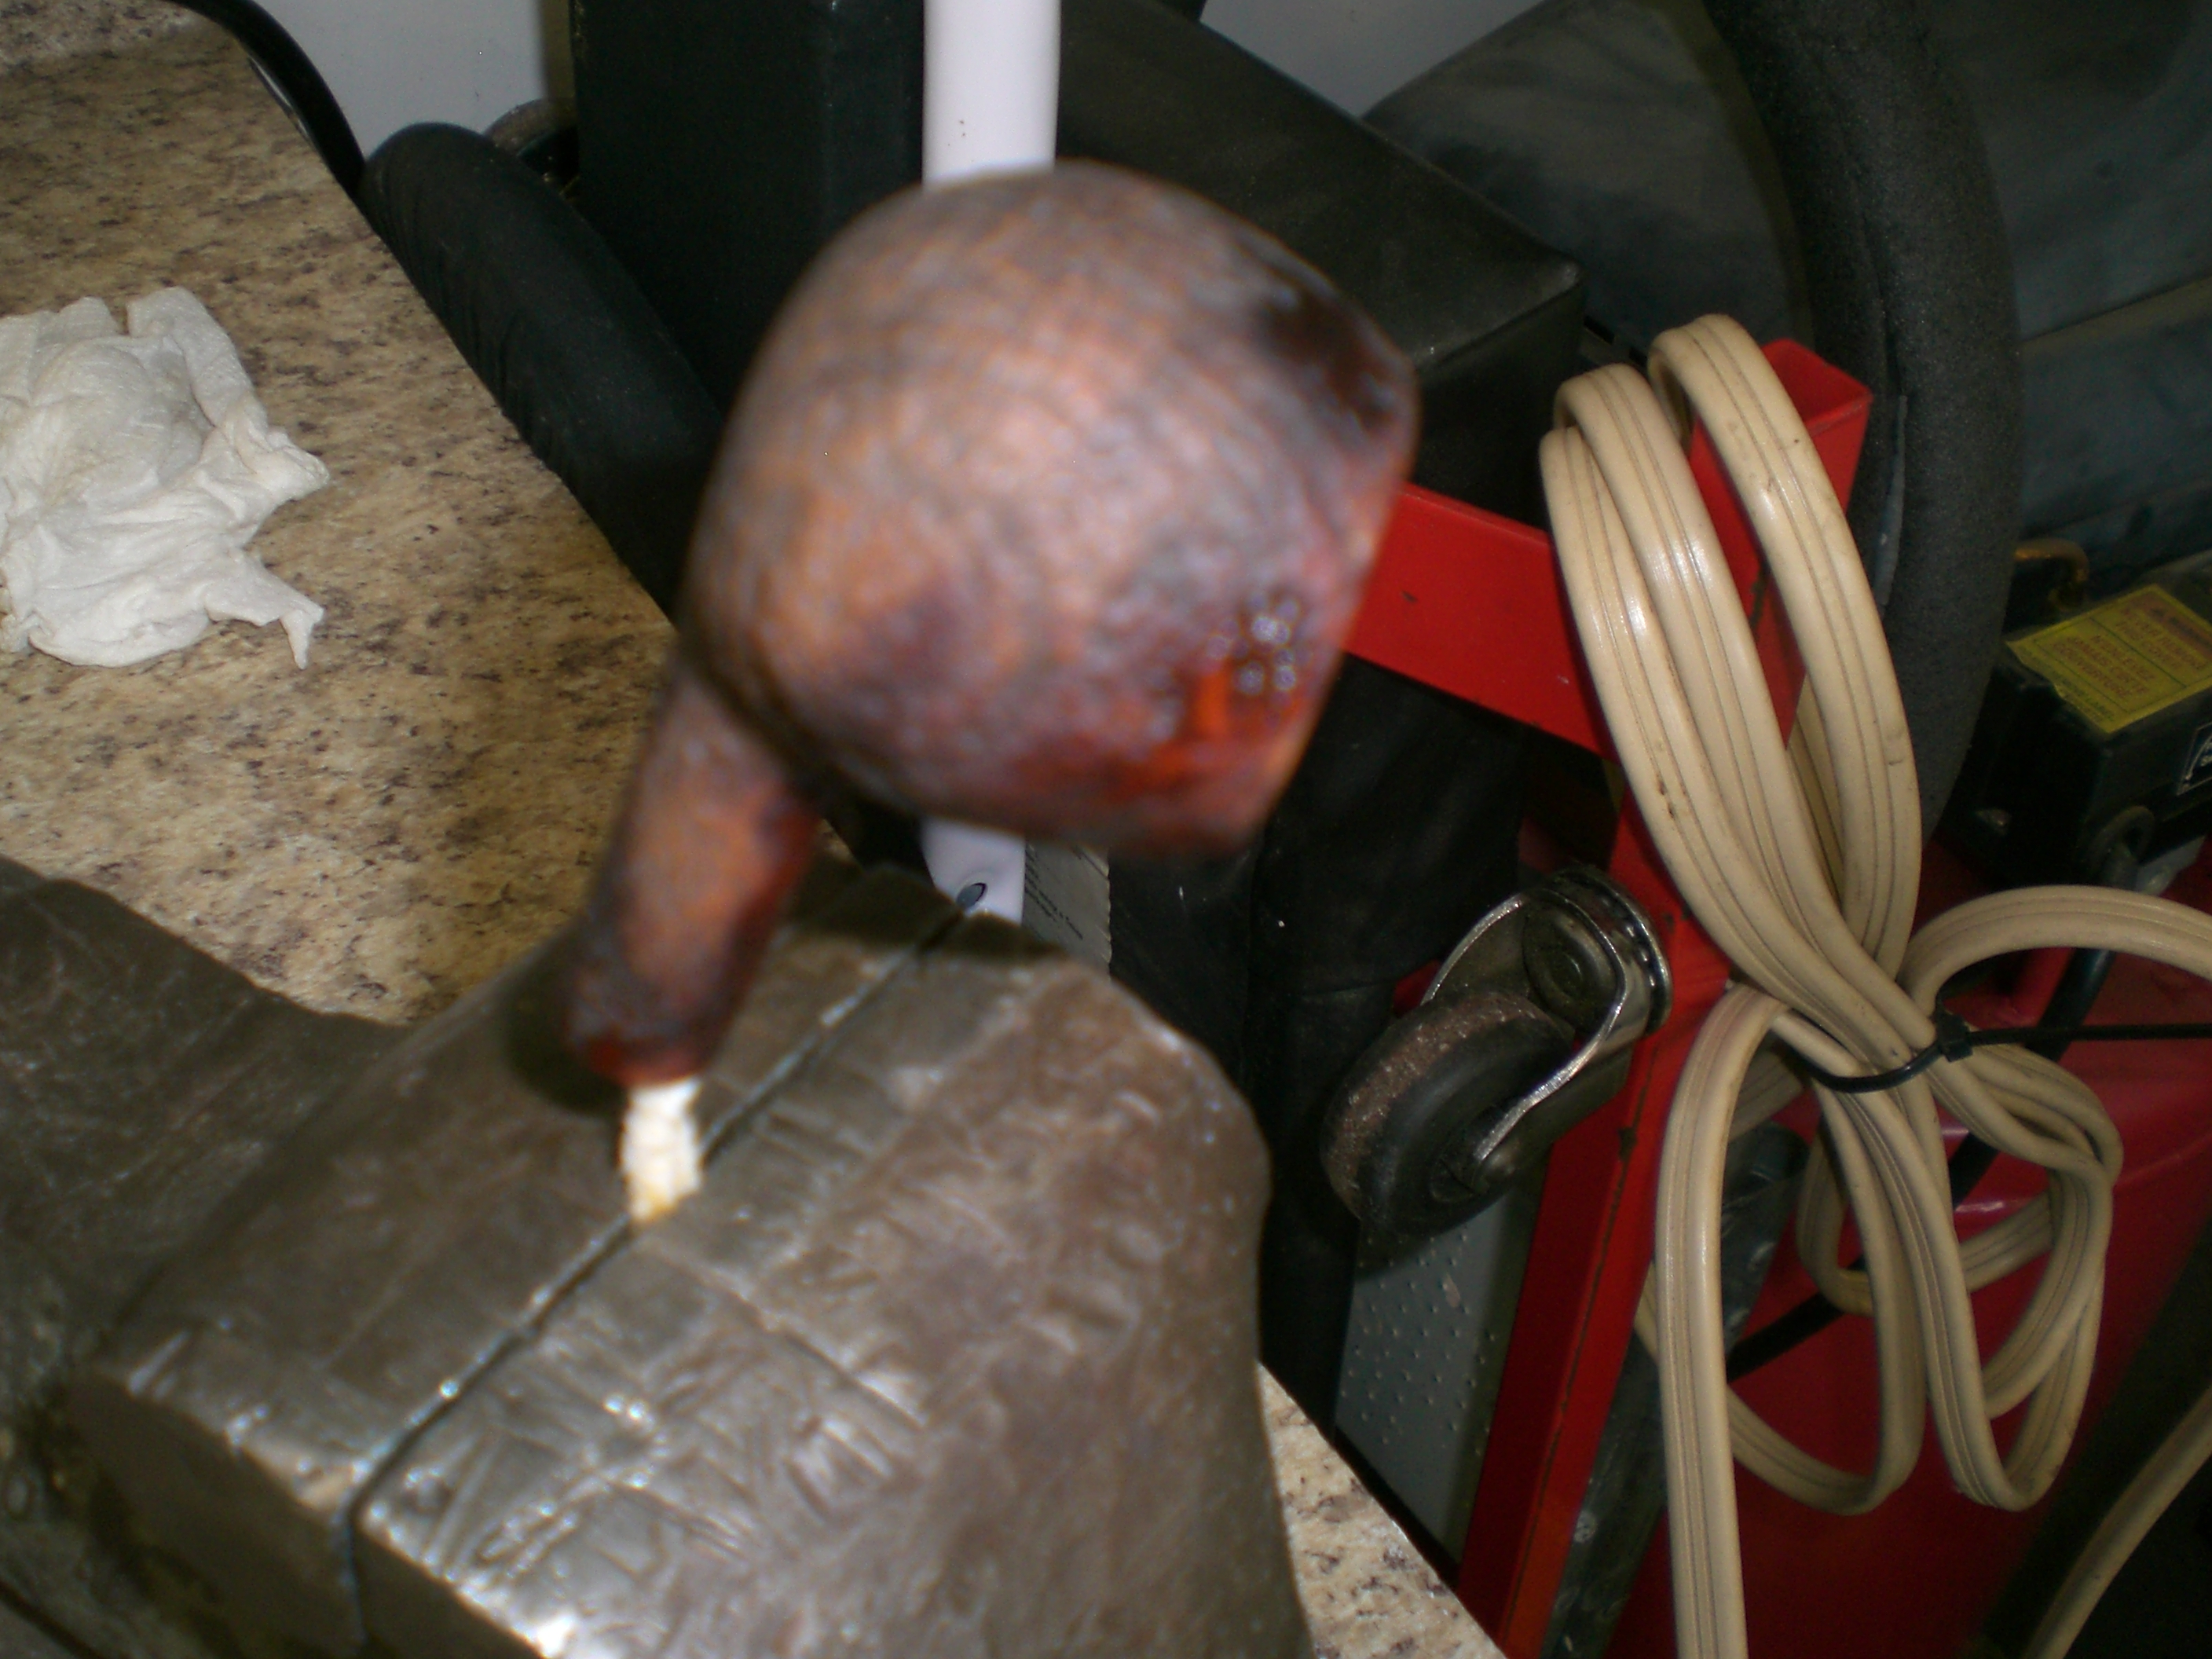
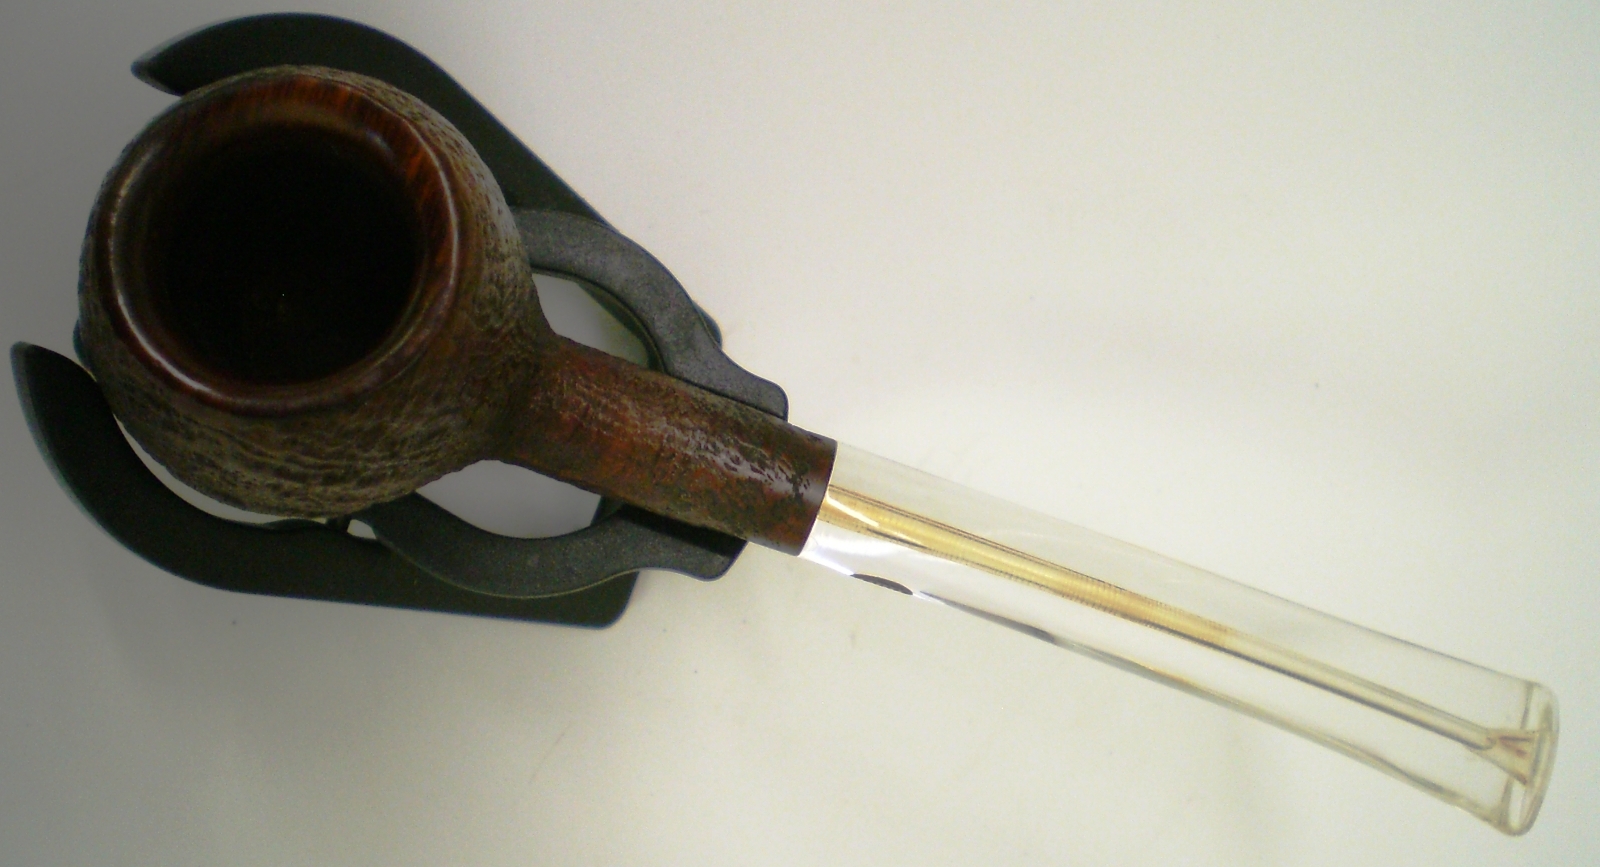
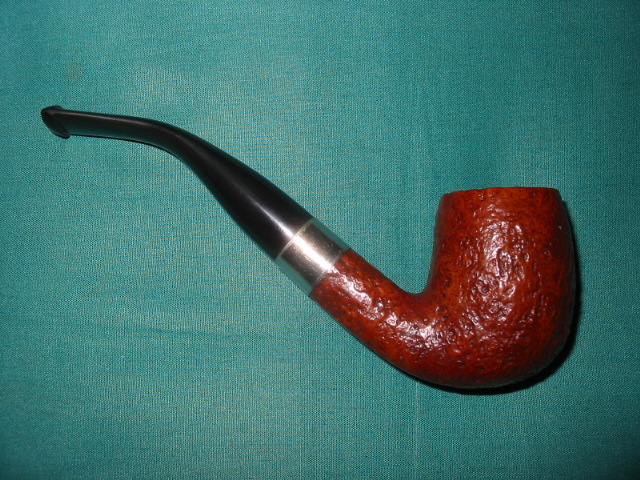
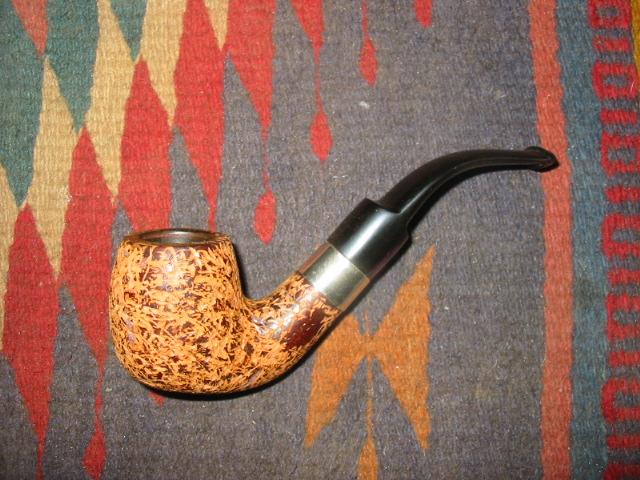
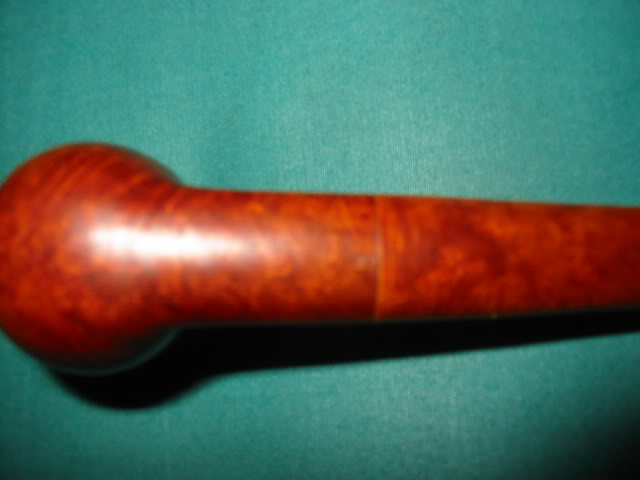
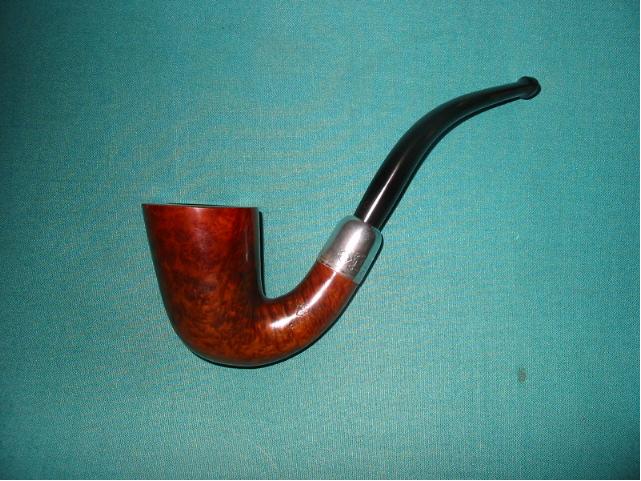
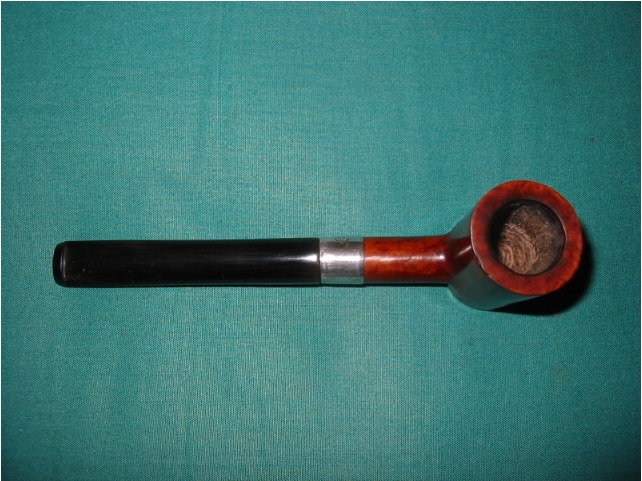
The next step was on the buffing wheel with some White Diamond rouge. A light touch is used as to not damage the bowl or add any unnecessary wear. Carnuba wax was then applied using a dedicated loose cotton buff. The bowl following the White Diamond and Carnuba wax applications:

GBD_357_Prehistoric_Prince_Finished (8)

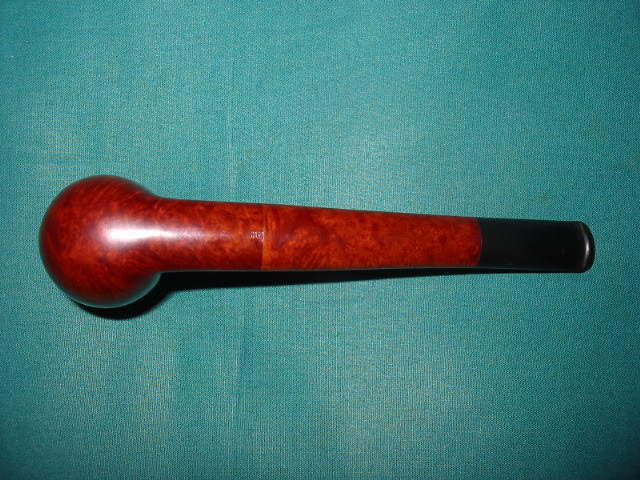
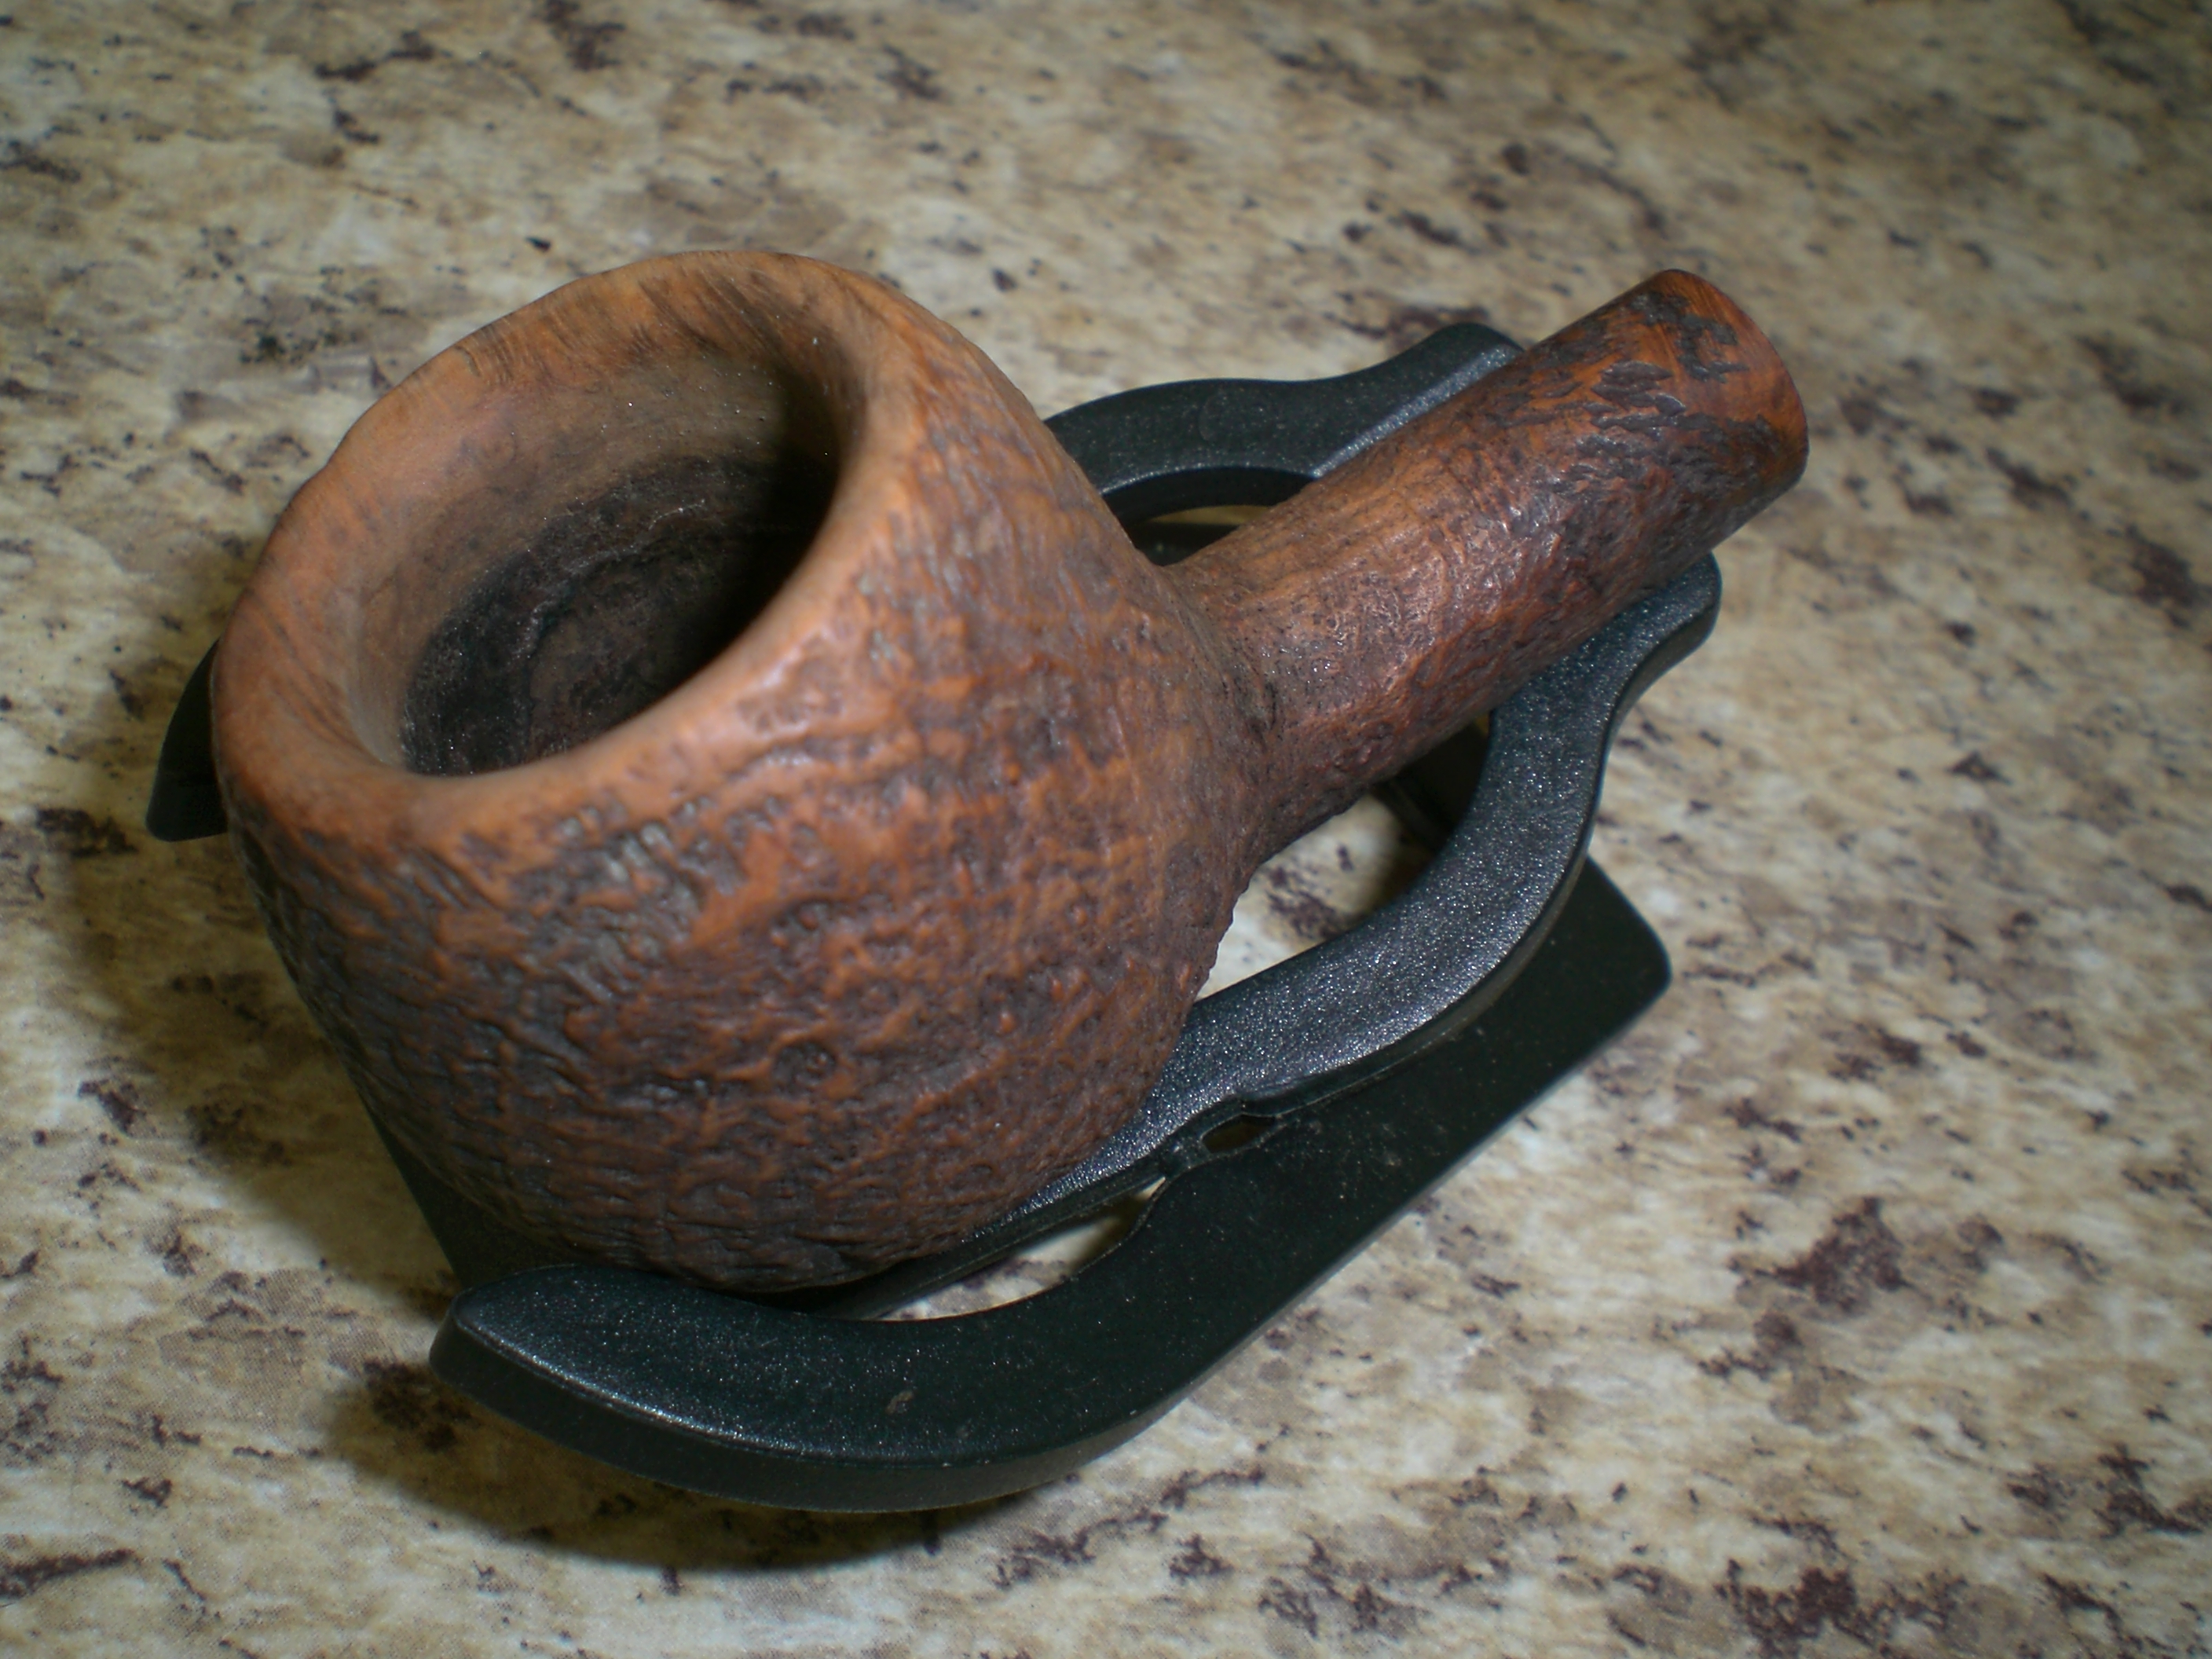
The final step was a hand polish with Halycon wax and she was ready to smoke. I’m dedicating this one to Orlik’s “Golden Sliced” blend, which is a good smoke in the hot summer months of Maryland.
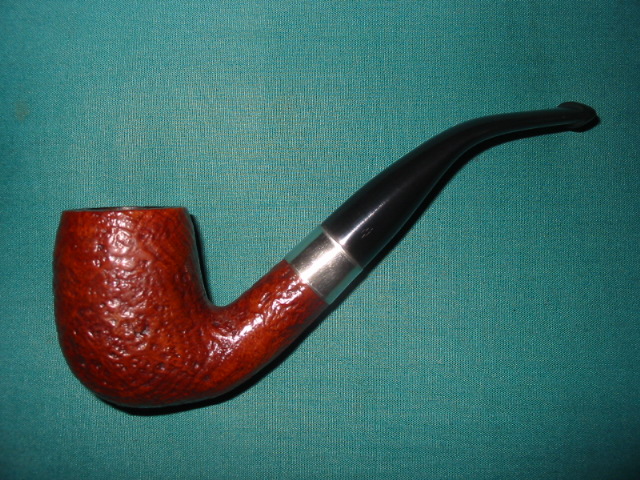
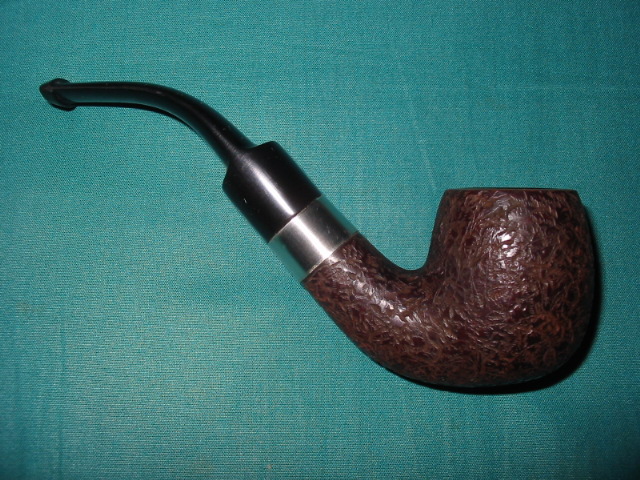
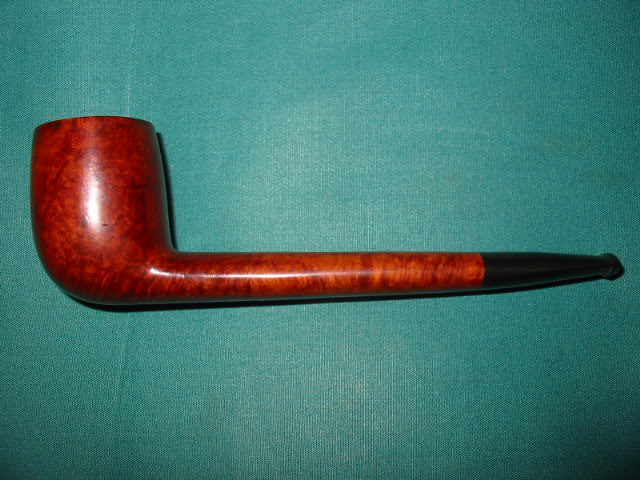
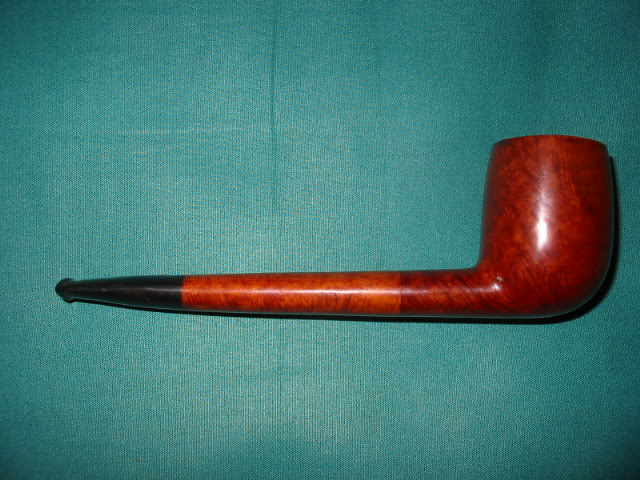
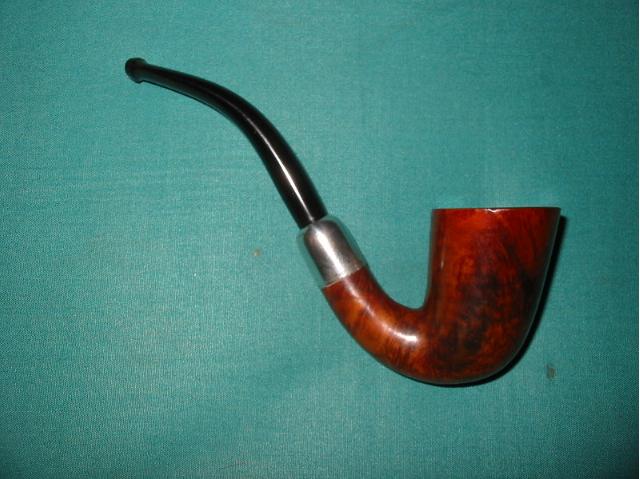
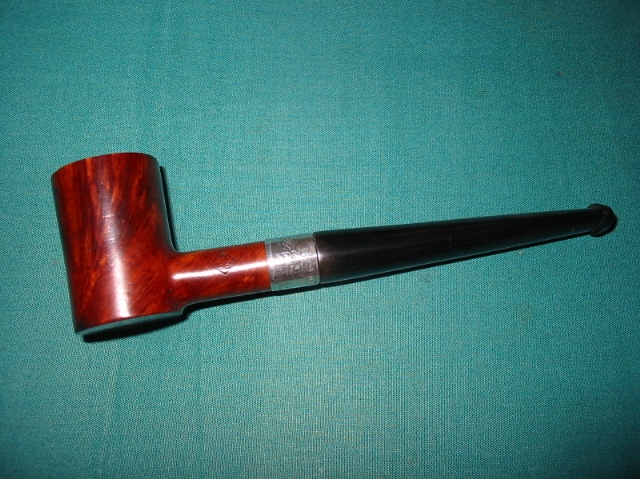
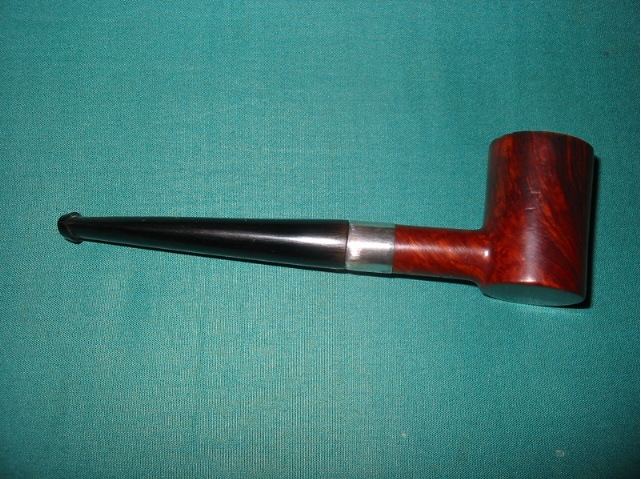
The finished pipe:

GBD_357_Prehistoric_Prince_Gallery

GBD_357_Prehistoric_Prince_Finished (3) Cropped

GBD_357_Prehistoric_Prince_Finished (1) Cropped

A Barling’s Frustration


I had this old bowl in my box that just looked like a Barlings. I took it out and studied under bright light and a loop. It had the arched Barlings over Make. The other side was stamped EL and Made in England (I believe). It had a serious crack in the shank so I superglued it and banded it. This little pipe became the definition of frustration for me. It was a beautiful and I was incredibly hopeful when I cleaned it up and prepared it for the new stem I had cut for it. The grain was very nice and to find that it was an older Pre-transition Barling’s pipe was exciting. The bowl cleaned up very well. The shank and new band looked great. All that remained was to finish working over the stem for it.

About that time my wife came down to the basement where I was working on it and we decided to go for our Saturday morning walk about. We had planned to take the bus down to an area we like to visit and check out the antique shops. This is something that we both enjoy so I put the little Barling’s my pocket and brought along some sand paper to work on it while sitting and waiting for the bus. We had a good morning, went to the Vancouver Flea Market and even found a couple of older Peterson pipes that I picked up. We decided to have some lunch before going home so we walked over to a nearby Korean BBQ and ordered a nice lunch.

While we were waiting for our lunch I guess the pipe fell out of my pocket. I did not notice until the waiter stepped on something and I heard a crack. Well the long and short of it is when we sat down to lunch it had fallen out of my pocket and when the waiter stepped on it the shank cracked off just ahead of the band. I had a sick feeling as I picked up the pieces of the broken old timer. My visions of a nice older Barling’s Pot shape were pretty much crunched. I put the pieces on the table and looked them over as we continue to wait for the meal and I grumbled about my stupidity in not zipping the coat pocket and also about bringing it with me in the first place.

Once we had finished eating and headed home I had calmed down enough to think about what I would do with the pipe. I took the pieces to the basement work table and turned on a bright overhead light so that I could examine the damages. As I looked at the broken shank I could see that the wood was darkened, almost burned around the crack. It was almost as if the heat in the shank had found a flaw in the briar and followed it outward to the surface. It had not gotten all the way to the surface but was just under the outer layer of the finish. So it appeared that the crack was worse than I had imagined.

That helped me to get over being incredibly frustrated and disappointed in the broken shank. So I spent some time looking it over and decided I could work with it. I decided to turn it into a nose warmer. The saddle stem I had made was too small in diameter to fit so I had to cut another stem. I cut off the ragged edges of the break and used a piece of sandpaper on a solid board to face the shank again. I also drilled out the shank and opened it up enough to accept the new tenon. The tenon is a bit shorter than normal 5/8″ to allow a little difference between the opening in the bowl wall and the mortise. I re-banded the shank for a second time to strengthen the shank after the previous break. I fit the stem to the pipe and sanded and polished it to a shine. Then I buffed and waxed the “new” little pipe. I made it such that I can one day put a church warden stem on the bowl should I desire to do so. For now though it is a nose warmer with a short taper stem. Total length is 4 3/4 inches.

Here are some pictures of the finished pipe. I had pictures of the pipe before and after the break but somehow they were erased so this is all I have left to show. I hope you can imagine what it looked like with the new saddle stem before it broke. But if not, you can see the new version. I am also ordering a churchwarden stem for it so I can fit one of those to it as well. Should look great that way as well.

ImageImageImage

BBB Diamond shank billiard


Blog by Steve Laug

This older BBB Diamond Shank billiard was a pleasure to bring back to life. I love the older BBBs and this one has a place in my collection. It is only stamped BBB in the diamond on both the shank and the stem. There are no shape numbers of other features. I have no idea on what its age is but love the shape. The diamond shank and the way it flows into the bowl make it a unique among my BBB billiards. It is stained in a rich oxblood colour and it is a clean little pipe. When I picked it up off EBay it appeared to be pretty clean other than a bit of oxidation on the stem. Sure enough, when it arrived it was very clean. The bowl only needed a slight ream to be ready to smoke. I wiped down the outside of the bowl with a damp soft cloth dipped in Murphy’s Oil soap lightly so as not to disturb the finish but remove the grime. The top had some darkening and tar that came off easily with the Murphy’s Soap. I coated the bowl with several coats of carnauba wax and set it aside.

To deal with the oxidation on the stem I sanded it with 400 and 600 grit wet dry sandpaper dipped in water to give it a bite. I finished that with micromesh pads – 1500, 1800, 2400, 4000 and then I took it to the buffer for Tripoli and a bit of White Diamond before giving it several coats of carnauba wax. It has a wide open bowl and draw.

ImageImageImage

Replacing a screw mount stem


I have always wondered how to replace screw mount tenons without drilling out the mortise. I have done that before and it works well but I wanted to try to create a new screw mount stem using the existing tenon. I have learned from repairing overturned stems that you can heat the tenon and adjust its fit so I figured heating it and removing it would work much the same. So for the subject of the experiment I decided to tackle refurbishing an old Whitehall pipe I had here.

The Whitehall had a screw mount stem with a stinger attachment. The stinger was removable leaving about a half inch of tenon that I could work with. The stem had a huge hole on the underside of the stem near the button and was not a candidate for a stem patch. It would work perfect for the plan.

I heated the metal tenon with my heat gun until I could loosen it from the stem. I used a pair of needle nose pliers after wrapping the tenon with a cotton cloth to protect the threads. With a minimal effort of wiggling the tenon it came out very easily. Once it was removed I cleaned it thoroughly with pipe cleaners, alcohol and steel wool.

I then matched the length of the existing tenonless stem with my stem blanks until I had one that was roughly the same length and thickness. I used my Dremel to cut off the precast tenon until it was close to the flat surface of the stem. I then used the flat board with sandpaper attached (like I do when topping a bowl) to sand the surface flush. Care must be exercised to keep the stem vertical or the surface will quickly get an angle. I smooth that surface with wet dry sandpaper 40 and 600 grit and finished it with the micromesh pads.

Once completed smoothing the end of the stem I used a series of drill bits to work my way up to 1/4 inch diameter hole that the tenon insert required. I have learned the hard way that to start with the size I want can often cause the stem to break in my hands. So because of that I progress through the series of bits until it is the correct size. Before gluing the insert in place I screwed it into the shank and put the stem on so that it was correctly aligned. I did not want to have an overturned or under-turned stem when I was finished. I marked the insert with a black marker so that I would know which side was the top and then unscrewed it from the shank. I coated the insert end with some epoxy (like I do when inserting Delrin tenons in to the stem) and pressure fit it into the stem with the mark on the top side of the fitting. It was a perfect fit. The superglue dries quickly so I checked the fit on the stem again to make sure it still aligned. It did!!

I used my Dremel to shape the diameter of the stem until it was a close fit and then finished the fit with sand papers and micromesh. When I had it smooth and shiny I buffed it with Tripoli, White Diamond and finally several coats of carnauba wax. I then used my heat gun to bend the stem to the right angle for this bent pipe. I cooled it under cold water and then polished and buffed it again.

The bowl had been cleaned and scrubbed to remove the grime and build-up of the years with Murphy’s Oil Soap and a soft bristle tooth brush. Once it was clean I gave a light coat of medium brown stain and then waxed it with Halcyon II wax.

Here is the finished pipe:

ImageImageImage

Old Croydon-Reborn


I have spent a bit of time on this old Croydon Bent (Peterson Line of seconds I believe). In fact I probably spent more time than I should have done, judging by other refurbishers throw away buckets. Sometimes I just have to see what I can make of an old tired ugly looking pipe. It is a challenge more than it is a labour of restoration. In fact it could probably be argued that when I am done with this one it really no longer should be considered a Croydon at all. I suppose it is a matter of how far one goes in the process of restoration before it becomes a totally new work of briar. In my mind this one would probably qualify for the removal of the name – or at least a hyphenated name CROYDON-REBORN.

When I received this one it was in pretty rough shape. In the pictures below you can see the state of the finish on the bowl. There were places where pieces of the lacquer finish were peeling away and falling off. The stain on the bowl was spotted and variegated. Even the many fills all over the bowl had shrunken significantly and what remained were dips and divots in the surface. The rim was one part of the pipe that was in pretty good shape. It had some tar build up and a bit of blackening but no nicks and dents. That is actually remarkable given the condition of the rest of the pipe. The silver shank cap was split in half and torn from the stem being jammed in and out of the bowl. The P-lip stem was also marked with tooth chatter, was oxidized and dented.

ImageImageImage

I did not have any end caps in my collection of pipe odds and ends so I decided to put a regular nickel band on the shank as it was thin and weakened from the broken shank cap. I cleaned the shank end with alcohol and dried it out. I heated a band and pressure fit it on the shank. There was a small gap at the edge that I filled with wood glue to give stability to the shank. I probably should have waited to apply the band but the shank seemed fragile and I wanted to stabilize it before further work on the bowl.

I have never liked the thin Peterson type stems so I decided to restem it with a saddle fish tail stem. I used my PIMO tenon turner and turned the tenon close and sanded it to a good tight fit. I used my Dremel to take down the excess diameter of the stem and worked on the ridges and seams with the Dremel. I sanded the roughness of the new stem until it was smooth with 240 grit sandpaper followed by 400 and 600 grit wet dry sandpaper and a bit of water. It was finished with the regular regimen of micromesh pads – 1500, 1800, 2400, 3200, 4000 and 6000 grit. The final polish was done on the buffer with White Diamond and carnauba wax.

The bowl was a major problem. I tried to strip the bowl using acetone and 99% Isopropyl alcohol and could not break through the finish – don’t what they coated it with but it would not let go. I resorted to sanding the bowl to try and remove the finish and sanded, sanded and re-treated it with acetone and alcohol. The finish was finally gone and I had a raw briar bowl with so many fills in it that it looked like it had freckles. I decided to try staining it with a dark brown stain to hide the fills and give it a good deep colour that was a bit opaque. Once it was dry I buffed it and polished it with wax. It looked really awful and I hated it!!! Soooo… I decided to rusticate it. I used my fist full of nails (pipe with nails inserted in it) to do the rustication that appears in the photos below. The previous coat of stain that I had applied helped with the process of rustication and I could clearly see where I needed to do a bit more work. This is when I wished that the band was not present as it would have been a bit easier to avoid contact with the band and the rusticator.

Image

ImageImage

Once the rustication was acceptable to me, and the pipe felt good in the hand I prepared it for staining. On this one that involved using the floral frog to knock off any loose chips of briar and to smooth out the surface before I wiped it down with a damp alcohol cloth. I also sanded the rim smooth and used the micromesh to get rid of any scratches. A smooth rim and a smooth spot around the Croydon stamping would look good on the finished pipe. I decided to go for an aged leather like finish on this pipe as it seemed to fit the shape and the look. I gave the pipe a coat of black stain as an undercoat and then buffed it off the high spots. I gave the entirety a coating of Fiebing’s Medium Brown for the top coat. I flamed it and after drying took it to the buffer for a light buff. I waxed it with Halcyon II and buffed it with a soft cloth to give it the final look. Below are pictures of the finished pipe. In my book it is a significant improvement over the original!

ImageImageImage

This One is a Mystery Pipe – Is it a ?Dunhill?


You will notice from the title of this blog piece that the Dunhill title is framed with question marks. The pipe is a mystery to me all the way around. There is nothing straightforward with it in terms of stamping or composition. It is composed of three distinct pieces (stem, shank and shank/bowl) that have been joined together at some point in the pipe’s history. From the pictures below you can see the junction of the bowl and the shank. The stem on the shank is a white dotted Dunhill stem. How did this pipe come to be and how did it incorporate at least two different pipes? It would be great if this old timer could tell its story because I am sure that it would be an interesting tale. Did the original owner break the shank on his pipe and then have a repair man do the fix? If so, did the repairman use a second pipe shank to add to the bowl for the repair or did the original owner take two of his pipes (both broken) and have them put together in this creative fashion? Did he take the bowl from one and the longer shank and stem from another and join them to form a new third pipe? Was the original of both pipes a Canadian or was the one that the bowl came from a billiard? I don’t think I will ever know the answer to those questions and even others if I took the time to think it out. But I do know that this is part of the pleasure I derive from working on estate pipes. I enjoy trying to put together the story of an old pipe.

I picked this one up from EBay. I was the only one bidding on it. I think the seller had marked it a Dunhill Canadian for sale so it had many viewers but no other bidders. I knew from a quick look at the pictures the seller provided that it was probably not a Dunhill. I could not be certain but the shape of the bowl did not quite measure up to other Dunhill Canadians that I have and the flow of the stem and bowl was different to my eye. Others may be able to point out other inconsistencies that they see but that is what I felt as I looked at the pipe. What caught my eye though and caused me to put in a minimal bid were the shank construction (reconstruction) and the flow of the pipe. I liked the looks of it. I was also curious to see how it was done. It looked like a well done repair, if indeed it was one. I wanted to see it close up and study it. The white spot on the stem was a bonus though I could see from the photos that it was not likely a Dunhill.

When it arrived I took it from the box and did a quick field dress cleaning of the pipe. Reamed the bowl, wiped down the outside with an alcohol damp cloth so that I could see the stamping or remnants of stamping that remained. The bowl portion (the section from the front to the union on the shank) has stamping on the bottom of the shank that looks to be what remains of a Sasieni stamp or at least the last few letters “ieni”. That is a bit mysterious to me in that the other Sasieni Canadian I have has the stamping running in the opposite direction. So my guess is that this one is upside down – not unheard of but interesting nonetheless. The shank and stem portion (from the junction backward to the stem) are definitely from the same pipe. The fit of the stem to the shank is absolutely perfect with no sanding or shaping marks, no gap and no change of profile to the stem. Under a bright light is possible to make out faint stampings on the shank remnant – and I do mean faint. They appear to be the last four letters of Dunhill – “hill” and under that there are the four letters “land” which could be then end of the word England. From that I would conjecture that what I have is a combination of a Sasieni and a Dunhill pipe. The Sasieni contributed the bowl and part of the shank and the Dunhill the rest of the shank and the stem. Whoever did the union of the two old pipes did a superb job as the joint is very well done. The grains of the two parts of the shank are very different and the staining does not match. But other than that it is a flawless union.

ImageImageImage

With the mystery still unsolved I went to work on the ?Dunhill?/Sasieni. I gave it a better reaming and also cleaned it. The bowl had been very caked when I initially cleaned it so I did a deeper reaming taking it back to the wood. It had a very heady smell of Lakeland style tobaccos so I wanted to remove the remnant of that in the cake and prepare it for the tobacco that I would smoke in it. The shank and stem were tarry and restricted by the gunk inside them. I used a shank brush and many pipe cleaners to clear out the airway. I also tried to shine a light down the bowl to see if there was any evidence of how the repairman had done the union of the shank pieces. But the light would not shine that far down the shank. From the ease with which the pipe cleaners slid down the shank and the smoothness of the airway it was clear that the job was very well done. I also used a drill bit on my KleenReem reamer and ran it through the shank with no catches.

Obviously this was a favourite pipe for the previous owner. It was well cared for, repaired and put together and well smoked. I cleaned it with Isopropyl 99% and then sanded out the tooth chatter on the mouth piece. I wiped down the bowl and shank with undiluted Murphy’s Oil Soap and scrubbed it with a tooth brush. It removed the grime from the bowl and the rim. Once dry I cleaned off the remaining lava on the rim with 400 and 600 grit wet dry sandpaper. Once the bowl and shank were clean I wiped the entirety down with acetone. I wanted to get as much of the stain out so that I could try to get a bit better match on the two parts. I re-stained it with a cherry stain I have in the shop as it seemed likely that it was that colour from what was under the grime. The union of the two is still very visible even with a re-stain. The two parts took the stain very differently. I finished by buffing it with Tripoli and White Diamond before giving it multiple coats of Carnuba wax. I am happy with the results. I have smoked it quite often since the refurbishing and find that it is a great smoker. It is lightweight and comfortable in the mouth and the hand. The only thing that would make it even better in my opinion is to have the whole story behind this pipe. Ah well… I am going to go and fire up a bowl of good Virginia and enjoy adding my story to this pipe.

ImageImageImageImage

One of my favourite refurbs – 1919 BBB Bent Calabash


I was going through some old pictures on my hard drive the other day and found this one that I bought on EBay for a very reasonable price early in 2008. I finished refurbishing it in March of 2008. It was and is one of my favourites. You can see from the picture below what kind of shape it was in when I got it. In the pictures on EBay it looked worse than it does in the picture below. I opened the box when it arrive expecting far worse. I bid on it because I liked the shape of the pipe and I figured it would be a challenge.

The stem was oxidized to the brown white coloration that appears below. It almost appeared to be a horn stem – but it was not. When I removed it from the shank – which took a bit as it was stuck by the goop in the shank and the oxidation that portion was black. I put it in the freezer for a short period of time to cause some expansion and contraction in the stem that would loosen it from the shank. When I took it out of the freezer it was easily removed. I went to work on the inside of the stem with shank brushes and pipe cleaners, both bristle and fluffy dipped in alcohol. I worked on the stem until the cleaners came out white and clean.

I then mixed a batch Oxyclean and soaked it in the solution overnight to soften the oxidation. I find that the Oxyclean solution (warm water and a half scoop of Oxy in a pint jar) works wonders in softening the oxidation. It does not remove it but it made it easier to remove. Once I took it out of the solution the next morning to work on it I used 240 grit sandpaper to remove the oxidation. It worked well to take off the brownish white coating on the stem. Once that was finished it was a dull brown and I continued to work on it with the 400 grit wet dry sandpaper until it was a dull black. I then progressed to 600 grit wet dry sandpaper to further remove the grime. I used both of these sandpapers with water as I find it gives the grit more bite on the stem. I had not discovered micromesh at this time so I used 800 and 1000 grit sand paper and continued to sand the stem clean. By the time I used the 1200 grit wet dry sandpaper the stem was looking like new. I took it to my buffer and used the Tripoli and White Diamond to finish the job.

While the stem was soaking in the oxy I reamed and cleaned the pipe bowl and shank. I worked on it until the pipe cleaners came out clean. It took many bristle cleaners and many fluffy one to get it clean. I also used cotton swabs in the shank to remove the tars and build up there. I scrubbed the outside of the bowl and rim with Murphy’s Oil Soap to remove the grime and deep seated dirt on the bowl. After I finished the scrub and clean I put the bowl in a bath of Isopropyl alcohol to remove any remaining dirt and grime and the badly damaged finish on the bowl. That was the first night of my working on the pipe. I went to bed that evening with both the bowl and the stem soaking in their separate baths.

Image

The next morning I finished up the stem and set it aside as I described above. I turned my attention to the pipe bowl. I removed it from the alcohol bath and dried it off. I used a wet cloth and a butter knife heated over a flame to raise the dents in the outer rim of the pipe and the sides of the bowl. The process is quite simple. You wet a cloth, wring it out so it is not dripping wet yet still wet. Then fold it and put it over a dent. Heat the knife (I use our gas stove to do it but have also used an alcohol lamp). I then lay the flat blade of the knife on the dent. You will hear a hiss as the heat causes steam to rise from around the blade. The steam causes the dent to rise. I applied the blade repeatedly until the dents were minimized. Then I took it to my work table and used a flat board and a piece of sandpaper to top the pipe just enough to remove the remaining dents and damage. I do that on a flat surface to maintain the flatness of the rim without changing the angle. When that was finished I wiped down both the bowl and rim with an alcohol damp cloth to remove any residual sanding dust.

I then used an aniline stain, in this case medium brown as I had researched and found that the colour matched the colour of the pipe when it was new. I used the dauber that came with the stain and applied it to the rim and the body of the pipe. I started at the bottom of the bowl and worked my way up to the rim. The rim always the last part I do. Once it was completely covered with stain I ignited it with my lighter to set the stain. The process is called flaming the stain (at least that is what I call it.) I let it dry while I put a coat of wax on the stem.

When the stain was dry I took the bowl to my buffer and gave it a buff with Tripoli and White Diamond to remove the top coat of the stain and the opacity of the stain. The result can be seen in the picture below. I also used some silver polishing compound applied with a soft cloth to remove the tarnish on the end cap. I finished that process with a silver polishing cloth to give it a good shine. When that was completed I gave the bowl and cap a good buff with carnauba wax then reinserted the stem and gave the entire pipe an extra coat of wax for a finish.

Image

I still smoke it today and it delivers proudly! The last two pictures below show what the pipe looks like today after 4 years of use. It has developed a deep patina to the bowl and the warmth of the medium brown stain has mellowed into a richness that is really nice. Repeated waxings over the years have helped mellow the finish and also deepen the black of the vulcanite stem. This is one of my favourite old pipes. It truly is a reborn pipe. In 7 years it will be 100 years old. Some days I wish it could talk because I can’t even begin to imagine the stories it could tell.

ImageImage

A BIC lighter and Oxidation


Blog by Rob Hardy and Steve Laug

Thanks to a serendipitous discovery by a friend of mine, Rob Hardy (incoinnu on Smokers Forums), who also does refurbishing as a hobby we have worked out a very different method of dealing with oxidation on vulcanite stems. The long term effects of the procedure are still in the process of being worked out though it is hard to imagine any long term effects as the heat is not left on the surface of the stem for a significant amount of time at all. The short term benefit is pretty astounding.
BIC
This is what he wrote regarding his new process with my additions and after thoughts. “Those of us who love refurbishing have spent too many hours trying to remove oxidation from vulcanite stems. We all longed for some magic solution that would reverse the process of oxidation. We have tried one or all of these products in our efforts to fight back the dreaded green brown, noxious discolouration of the stem – Oxyclean, sodium hypochlorite solution from 1-12%, Armorall, Armorall Tire Foam, olive oil, stem oil, automotive lens cleaner, eye of newt, toe of frog, etc. These liquids served to either soften the oxidation or disguise it. None of them remove the problem and under a strong light or magnification it was still there. Many of us have sanded using a variety of sandpaper grits both dry and wet, micromesh sanding pads or paper, and toothpaste with micro abrasives until our fingers were sore and raw. The overall effect of this process served merely to level the surface of the stem until the oxidation would be sanded away. It is very effective but also very time consuming. Over time the shape and sharp angles of the stem are changed. There had to be a better way of dealing with this that was still effective and less labour intensive. I was fortunate to be able to purchase a lot of 17 estate pipes from my local B&M, over half of them had heavily oxidized stems. After refurbishing the Savinelli Punto de Oro that was in the lot I was considering taking up refurbishing as a new hobby. I then started on the Dunhill and K&P Peterson. The Peterson was cleaned and reamed and was ready for the stem work. There was a minute tooth mark near the button that I wanted to remove so I was using Steve Laug’s technique of applying heat to the indentation to raise the dents. Usually I do this after I have removed the oxidation and work on a clean stem. This time however, for who knows what reason the stem had not been clean at all and was an oxidized mess. To raise the tooth dent I applied the heat from a BIC lighter with the flame 1/2″ from the stem. The indentation lifted…AND THE OXIDATION DISAPPEARED! Wow! I could not believe my eyes so I continued for the length of the stem and it worked – the oxidation was gone. I used short strokes with the flame of the lighter and wipes with a wet paper towel. After each wipe the paper towel came out with yellow stains. This seemed too good to be true. Out came my jewellers’ loupe for closer examination. I had to see this close up and personal. Under the magnification I could see that the heat had evened out the surface of the vulcanite and pitting and oxidation were gone. There was only BLACK vulcanite. I stayed up until one o’clock in the morning sanding the stem up through 8000 grit micromesh. I left the waxing until this morning. This stem now looks like it did when it left the factory over 60 years ago. I was and still am amazed at the results. I had to try it again this morning on a Stanwell stem. I used the same technique with the lighter and the wet paper towel. I used a lot of caution around the logo, covering it with a wet paper towel to protect it while heating with the lighter). It took only ten minutes to clean the stem of the oxidation! What a difference in the amount of time it took to clean this stem. It is cleaned and now ready for sanding and buffing. I tried it on a third stem. I moved over the stem with the lighter, six seconds per inch of stem, before wiping with a wet paper towel. Again the towel came out with the yellow colouring of the oxidation and all that remained behind was the black vulcanite. Each of the three stems took little time to clean and all that remained to finish them was to sand and smooth and then buff and polish.” Here are just a few important pointers that Rob and I have learned in the process:

  1. Do not leave the flame in one spot, keep it moving – burning vulcanite stinks and you will ruin the stem.
  2. Use a slow 1″ side to side sweep with the flame half an inch below the stem. Repeat until the stem is completely black and then sand.
  3. As the flame moves across the surface there is a light sulfur smell that is given off as the oxidation burns.
  4. In sanding the stem use a variety of grits of sandpaper (400 and 600 grit wet dry and higher grits if you choose) then micromesh pads or paper (1500, 1800, 2400, 3200, 4000, 6000) before buffing with Tripoli and White Diamond. I have also used 0000 steel wool and found that it is a good first step before the wet dry sandpaper is used.

A New Polishing Tool (at least to me)


I received an email advertisement from Stewart-Macdonald the same company that sells black super glue. In it they were talking about a new product that is used in the guitar making industry. I have found that several of the tools and sanding blocks etc. work very well in refurbishing pipes. These particular tools are called Fret Erasers. They are flexible self-padded rubber blocks embedded with abrasive grits. They were being billed as “incredibly handy, to erase fine file marks and scratches”. The grits are color-coded for convenience. The ad went on to say that they polish the frets to a high gloss shine.

Image

They come in coarse, medium, medium fine, fine and extra fine. I ordered a pair of the two finest grits to try out in my work on stems. My expectations were that they would exceptionally well up against the angles of the button at the end of the pipe stem and also very well around inset logos and medallions. The edges are square and the block fits well in the hand and can be held against the angle of the button easily. I have sanding wedges and small sanding blocks that I used to work with around the button and always fought them a bit to keep the sand paper from slipping or getting worn thin at the crease. This product does not have that problem and they leave behind no sandy grit or particles of steel wool (as the advert promised).

I put them through their paces on the last batch of stems that I cleaned up and they worked nicely and left a smooth shiny surface. In my experimenting with them I used them between the wet dry sandpaper and the micromesh pads. I left the final polishing to the higher grits of micromesh pads. I also used them around the BBB Diamond and the GBD rondelles and they were easily maneuvered around those without compromising the relief of the stamping. I also want to try them around stamped logos and see how well they work. In the future I plan on using these two blocks in place of the 4000 and 6000 grit micromesh pads for the final polishing before I buff them on the wheel.

Here is the link to the Stewart-Macdonald website and the Fret erasers.
http://www.stewmac.com/npa/0472?utm_…_0472_20120423

Image

Anybody else ever used these?


The 1912 BBB Poker


Blog by Steve Laug

I picked up this old 1912 BBB Poker on EBay not long ago. It is stamped BBB in a diamond on the shank and on the underside England. The silver is hallmarked Birmingham 1912. It is a smaller group 1 or 2 sized pipe. In the pictures the military stick bit looked like it belonged. It looked like it was shipped that way from the factory. The grime on the silver and on the shank as well as the oxidation on the stem made it appear to be that style of pipe. When it arrived with the other 5 pipes that I bought with it I examined it a bit more closely. In the picture below you can see the roughness of the stem. It is definitely poorly cut. The closer I looked the more I realized that it was a poor replication of an older stem. A BBB pipe of this age came with a different style of military stem and it had an orifice button rather than a slot like this one. The stick bit was not original as it was a slotted bit and was not finished smoothly. There were lots of file marks on both sides of the stem. When I removed the stem I was even more certain that it was a poor copy. The one thing I was still thinking was that it was definitely spigot or military bit pipe.

ImageImage

Then I began to work on the shank and the band. Someone had darkened the end of the shank to make it look almost black like the tarnished silver band. Once I cleaned the silver and cleaned the shank I could see that it was not a silver end cap at all but a very typical BBB silver band. In the picture below you can clearly see the end of the shank showing as it sits inside the silver band. I used a 1500 micromesh pad to clean off the end of the shank and return it to wood. When I re-stained the pipe I would also re-stain the shank end to match. It was clear that I would need to do a bit of research on what kind of stem was originally on this poker style pipe if I was to restore it to its original glory.

Image

I have a copy of the BBB Catalogue reprint from Gary Shrier so I got it out and went to work researching the look of the missing original stem. It became clear rather quickly that the pipe shape I had originally came with a taper stem with an orific button. In the catalogue is the exact shape in the exact size. I could not believe it. I laid the bowl on the page and then traced out the shape and size of the stem. A part of my hobby refurbishing is collecting old stems. I buy them wherever and whenever I find them and stockpile them in an old coffee can in my office. I went and got the can and emptied it on my desk to sort through what I had. I have yet to organize them by size so it is a matter of dumping the can out and digging through them. Well, I found one in my can of stems that had the right orifice button and the correct taper so I turned the tenon and fit the stem to the pipe. I used my Dremel to remove excess diameter from the stem so that it was the same diameter as the shank and band.

I also had to clean up the bowl of the pipe as the top was pretty beat up and the inside rim had been chipped and cut as if it had been carelessly reamed with a knife. I steamed the dents from the rim and carefully did a minor topping on the bowl to bring the top back to smooth and the inner and outer rim to smooth. I also chamfered or beveled the inner rim to bring it back into round. There were also dents on both sides of the bowl so I steamed those out as well. I use a wet cloth and a hot butter knife (heated over a flame) to raise the dents. I finished the work on the pipe by re-staining the top to match the bowl then buffed it and gave it a final polishing with White Diamond and then several coats of carnauba wax.

Here are pictures of the finished pipe. Other than being in colour it is a perfect match to the one in the catalogue.

ImageImageImageImage

Edit – 24 Feb. 2013 – I just came across an old BBB poker on eBay that is similar to the one above. I did some research on the stem on the one above and restemmed it. The one in the eBay photos is a newer version of the same pipe number. I have attached two photos below for sake of comparison.

BBB Poker BBB Poker 2