I have always wondered how to replace screw mount tenons without drilling out the mortise. I have done that before and it works well but I wanted to try to create a new screw mount stem using the existing tenon. I have learned from repairing overturned stems that you can heat the tenon and adjust its fit so I figured heating it and removing it would work much the same. So for the subject of the experiment I decided to tackle refurbishing an old Whitehall pipe I had here.
The Whitehall had a screw mount stem with a stinger attachment. The stinger was removable leaving about a half inch of tenon that I could work with. The stem had a huge hole on the underside of the stem near the button and was not a candidate for a stem patch. It would work perfect for the plan.
I heated the metal tenon with my heat gun until I could loosen it from the stem. I used a pair of needle nose pliers after wrapping the tenon with a cotton cloth to protect the threads. With a minimal effort of wiggling the tenon it came out very easily. Once it was removed I cleaned it thoroughly with pipe cleaners, alcohol and steel wool.
I then matched the length of the existing tenonless stem with my stem blanks until I had one that was roughly the same length and thickness. I used my Dremel to cut off the precast tenon until it was close to the flat surface of the stem. I then used the flat board with sandpaper attached (like I do when topping a bowl) to sand the surface flush. Care must be exercised to keep the stem vertical or the surface will quickly get an angle. I smooth that surface with wet dry sandpaper 40 and 600 grit and finished it with the micromesh pads.
Once completed smoothing the end of the stem I used a series of drill bits to work my way up to 1/4 inch diameter hole that the tenon insert required. I have learned the hard way that to start with the size I want can often cause the stem to break in my hands. So because of that I progress through the series of bits until it is the correct size. Before gluing the insert in place I screwed it into the shank and put the stem on so that it was correctly aligned. I did not want to have an overturned or under-turned stem when I was finished. I marked the insert with a black marker so that I would know which side was the top and then unscrewed it from the shank. I coated the insert end with some epoxy (like I do when inserting Delrin tenons in to the stem) and pressure fit it into the stem with the mark on the top side of the fitting. It was a perfect fit. The superglue dries quickly so I checked the fit on the stem again to make sure it still aligned. It did!!
I used my Dremel to shape the diameter of the stem until it was a close fit and then finished the fit with sand papers and micromesh. When I had it smooth and shiny I buffed it with Tripoli, White Diamond and finally several coats of carnauba wax. I then used my heat gun to bend the stem to the right angle for this bent pipe. I cooled it under cold water and then polished and buffed it again.
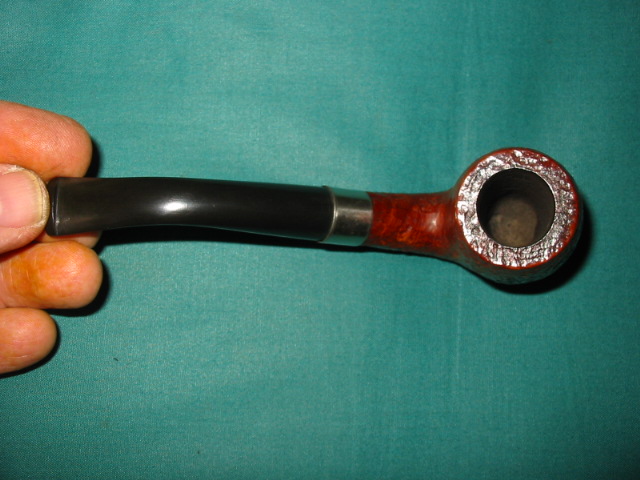
The bowl had been cleaned and scrubbed to remove the grime and build-up of the years with Murphy’s Oil Soap and a soft bristle tooth brush. Once it was clean I gave a light coat of medium brown stain and then waxed it with Halcyon II wax.
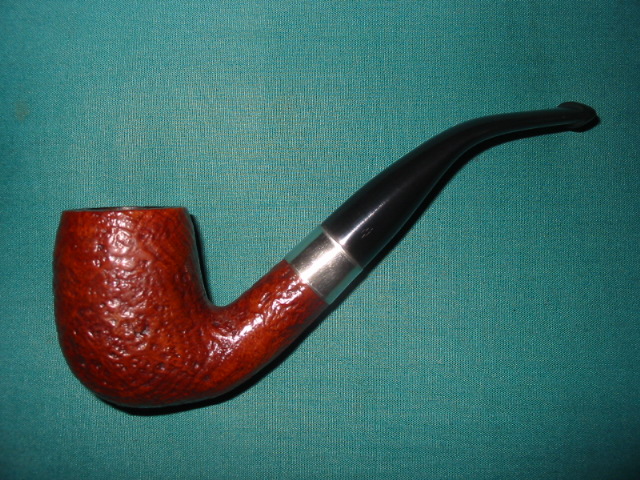
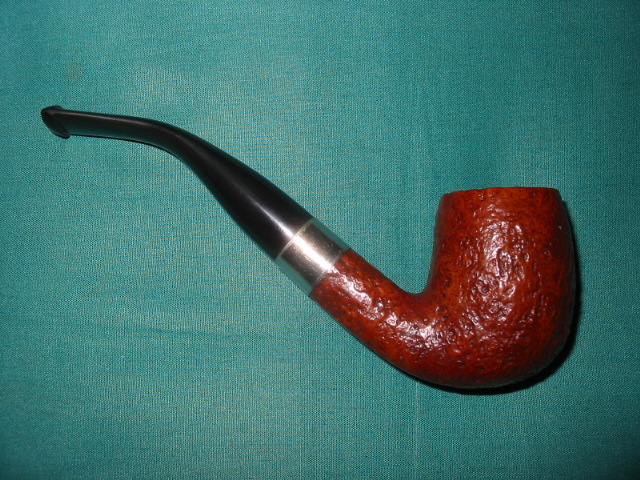
Here is the finished pipe: