Monthly Archives: January 2022

Breathing New Life into the SECOND of a Cased Set of  Two English Made Peterson’s Bulldogs – 493 Straight Bulldog London Made


Blog by Steve Laug

The next pipe I am working on is the fourth Peterson’s and the second pipe in the cased set of Bulldogs that came to me from a friend of mine for me to work on. The pair (pipes 3 and 4) came in a nice leather cast that was travel/time worn on the top and underside and damaged on the edges. I have not finished the 80S Bent Bulldog yet as the stem is taking considerably more time than I expected. I set it aside for a bit take a break from the intensive rebuild work and give the straight Bulldog some attention.

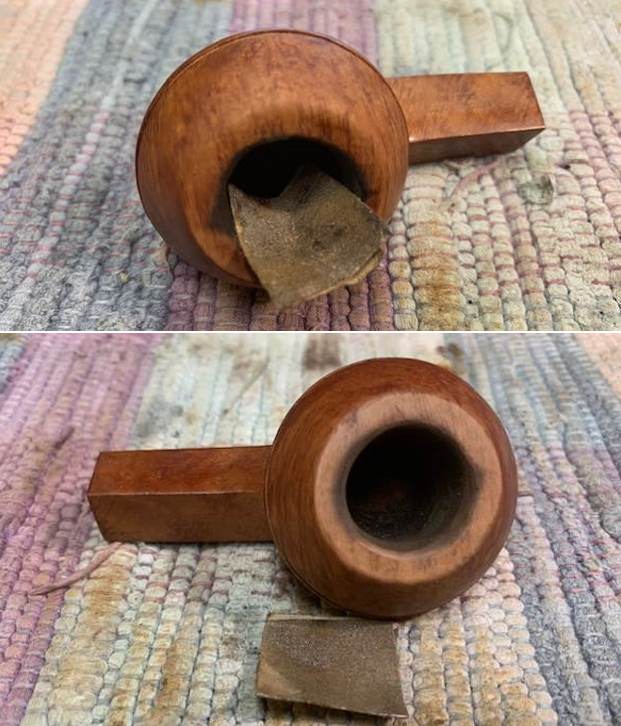
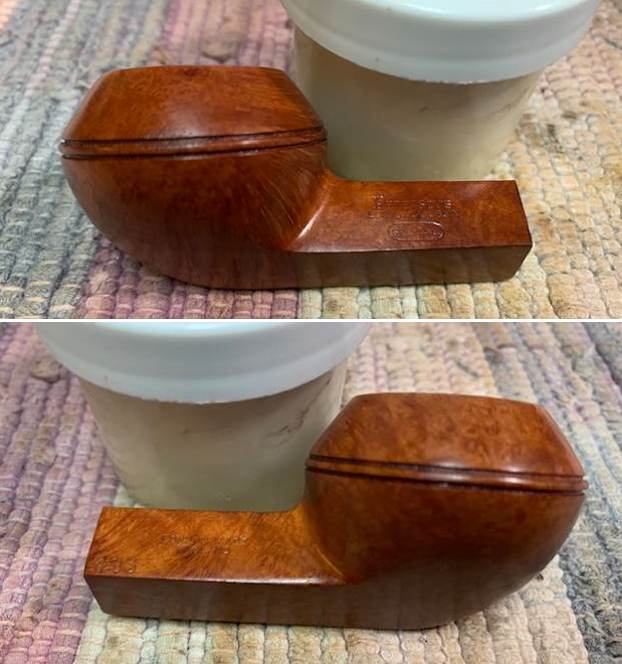
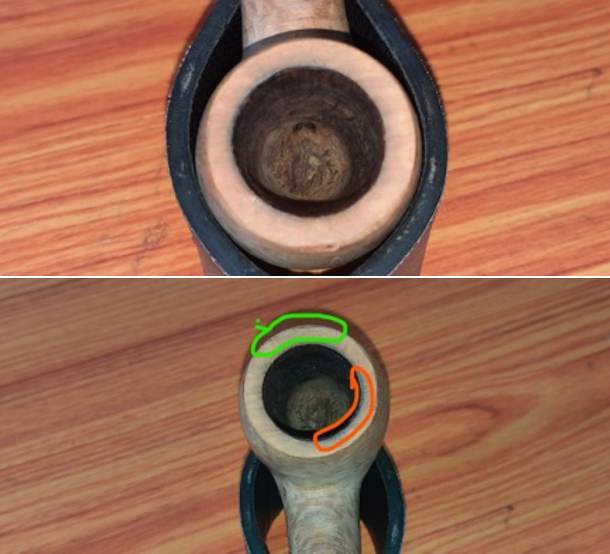
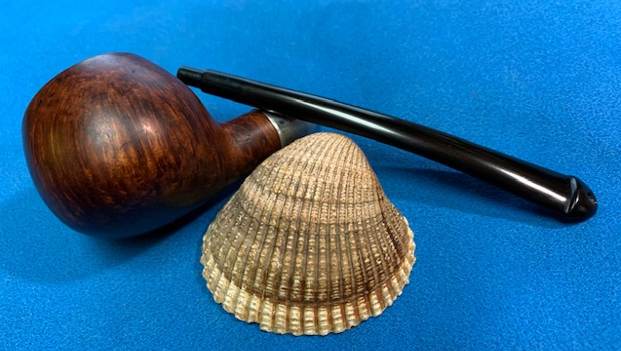
Here are some of the photos of the case and the pipes that I am working on. It was not a large case but a common style carrying case for pipes of this era. I am hoping to do some work and narrow down the dates on the pair of pipes.The inside of the case was lined with soft golden suede. The case was fitted for the pipes that it contained – a straight and a bent bulldog with similar finishes. The lid of the case had a logo on it that was a gold and burgundy oval that read PETERSON’S over Dublin & London. It was dirty but not in bad condition. The finish on both pipes was dirty and tired looking but the grain peeked through the grime and oils on the finish. I decided to work on the bottom pipe next – the Straight Bulldog 493. The rim top had a thick lava build up and some light scratching peeking out from the lava. The inner edges of the rim looked like there was both burn damage and reaming damage but I would not know for sure until it was clean. The outer edge looked good. The stamping on the shank sides was clear and readable. It is stamped on the left side and reads Peterson’s [over] London & Dublin [over] an oval with the word SPECIAL stamped inside. On the right side of the shank it is stamped London Made [over] England. Next to that at the shank/stem joint was the shape number 493. There is no “P” logo on the stem. The stem was oxidized but it was otherwise in good condition. There were tooth marks and chatter on both sides ahead of the button. I have included the pictures that my friend sent me before I took on the pipes. The first shows the rim top with the issues described above. The second and third photos show the stamping as noted above.It took nearly a month for the pipes to arrive in Canada for me to work on. I took photos of the straight Bulldog to have an idea of what I was dealing with. You can see from the photos what I saw. The finish is was dirty but the pipe had some amazing grain on the shank and bowl sides. Rim top had a thick lava build up and it was hard to know what was under that. The inner edge of the bowl had some lava as well but there was some potential damage to the edge. The outer edge of the bowl was in surprisingly good shape. There was tobacco debris in the bowl and a thick cake. The original style stem is present and has a thick coat of oxidation. There were tooth marks and chatter on both sides ahead of the button. I took some photos of the rim top, bowl and stem to capture the condition of the pipe. You can see the cake in the bowl. There is a lava coat and some darkening. There was damage all around the inner edge of the bowl. The P-lip stem appears to be in good condition with oxidation at different levels on each side of the diamond stem. You can see the tooth marks on both sides ahead of the button.I took photos of the stamping on the shank sides. They were clear and readable as noted above.I removed the stem from the bowl and took a photo of it to show its appearance. Before I started the restoration process on the pipe I wanted to see if I could pin down a time period for the London Made England Special.

I turned to the section on that stamping in the book, The Peterson Pipe by Mark Irwin & Gary Malmberg. I quote from the section on the COM stamp on page 296-297 below:

Peterson maintained a factory in England for about a quarter of a century, from the late 1930s to ’62. Corporate transcripts and London business periodicals suggest that the London operation on White Lion Street was about to get underway in ’37. Only a handful of London hallmarked Petersons are documented, stamped with the date marks 1936 and 1939, and these have no COM stamp. Their output would be limited by the onset of the Battle of Britain in July 1940, but it seems reasonable to suppose pipes were made at the London factory during WWII, inasmuch as the K&P Staff Register lists twelve employees earning wages there in January ’44. London hallmarked Petersons have been identified with dates of 1949-54. Most London-made Petersons in a collector’s inventory were made in these postwar years, from 1949 until the closing of the factory in ’62… the presence of one variation of another on a pipe is not by itself a reliable indicator of its age.

That information narrowed the date of manufacture to the time period between 1949-1962. That is not a long period of time to be sure but now it was time to account for the stamping SPECIAL in an oval. What did that mean? Is there more specifics that can be learned with that stamp?

I turned to page 313 of the above Peterson Pipe book and read the following on the SPECIAL Stamp.

SPECIAL Stamp – used on special order or small batch custom pipes, it will often appear under other stamps, such as PETERSON’S SYSTEM, DE LUXE or DUBLIN & LONDON. Used frequently on pipes cut by master carver Paddy Larrigan.

So it appears that this set of Bulldogs were made in London in a limited time period and perhaps were made by Paddy Larrigan himself. Was he perhaps visiting the London factory in those post war years? I guess we will never know for sure but it kind of a nice thought regarding the pipes.

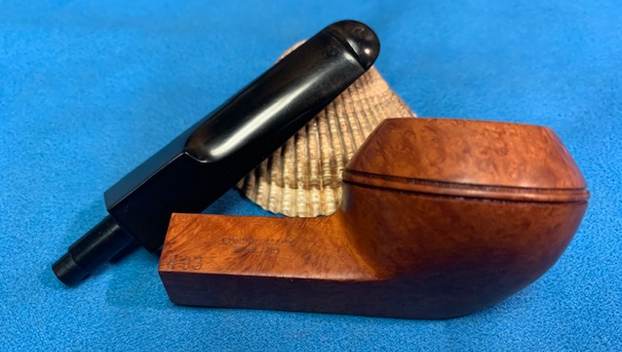
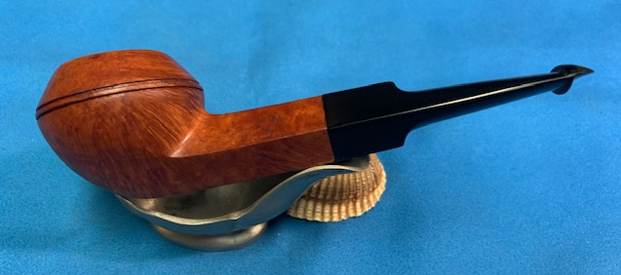
Armed with this information I started working on the pipe. I reamed the bowl with a PipNet pipe reamer to remove the cake from the bowl. I cleaned up the remaining cake with a Savinelli Fistall Pipe Knife. I sanded the bowl with 220 grit sandpaper wrapped around a piece of dowel to smooth out the inside of the bowl. The walls looked very good with no checking or heat damage. I cleaned out the shank with pipe cleaners, cotton swabs and 99% alcohol to remove the oils from the walls. It was filthy and when I was finished it smelled clean and fresh. I cleaned out the inside of the stem with alcohol and pipe cleaners.I scrubbed the bowl with undiluted Murphy’s Oil Soap to clean off the thick oils and grime ground into the surface of the briar. I scrubbed the lava on the rim top with a Scotch Brite pad to remove the build up there. I used a shank brush to clean out the mortise The bowl looked and smelled much better and the grain really began to stand out clearly. I worked over the top and the inner edge of the bowl with 220 grit sandpaper to smooth out the burned edge and the damaged rim top. It definitely came out looking much better. I try to steam out the dents a bit more to reduce them more. The trick on these old pipes is not to go overboard on the repairs but to leave a bit of the story behind as it changes the shape and feel of the pipe. I steamed out the dents/hatch marks on the top of the bowl using a hot butter knife and a wet cloth. I heated the knife on my gas stove and then pressed it against the wet cloth. The steam generated caused the dents to lift. I repeated the process until I was unable to lift them any more. While it is not perfect it is certainly better.I polished the briar (carefully avoiding the areas where the pipe is stamped on the shank sides) with micromesh sanding pads. I dry sanded it with 1500-12000 grit sanding pads. I wiped it down after each pad with a damp cloth to remove the sanding debris. I worked some Before & After Restoration Balm into the surface of the smooth briar with my finger tips. The product is amazing and works to clean, enliven and protect the briar. I let it sit on the briar for 10 or more minutes and then buff it off with a soft cloth. It really makes the grain sing. I set the bowl aside and turned my attention to the stem. I sanded the stem surface with 220 grit sandpaper to break up the oxidation and remove the tooth chatter on marks on both sides. I started the polishing of the stem with 400 grit wet dry sandpaper.I polished the vulcanite with micromesh sanding pads. I used 1500-12000 grit pads to polish the vulcanite. I wiped down the stem with Obsidian Oil after each sanding pad. I have an oil impregnated piece of cloth that I use after each pad. I polished it further with Before & After Stem Polish both Fine and Extra Fine polishes. I gave it a further coat of Obsidian Oil and set it aside to dry. I put the pipe back together – the bowl with its new stem. This smooth finished Peterson’s London & Dublin SPECIAL 493 Straight Bulldog is a real beauty with great grain around the bowl. The thin P-lip style vulcanite stem works very well with the medium brown briar. This English Made Special pipe is a very collectible part of Peterson’s history. The grain on the bowl is quite beautiful and came alive with the buffing. I used Blue Diamond on the buffing wheel on both the bowl and stem. I gave both multiple coats of carnauba wax on the wheel then buffed it with a clean buffing pad to raise the shine. I hand buffed it with a microfibre cloth to deepen the shine. The Peterson’s SPECIAL 493 Straight Bulldog feels great in the hand. It is lightweight and the contrast in the browns of the briar and the polished vulcanite stem is quite amazing. The dimensions of the pipe are Length: 5 ¾ inches, Height: 1 ½ inches, Outer diameter of the bowl: 1 ¼ inches, Chamber diameter: ¾ of an inch. The weight of the pipe is 1.34 ounces/38 grams. It really is a beauty. I have one more pipe to work on from my friends collection and then I will send them all back to him. Thanks for walking through the restemming and the restoration with me. Cheers.

Cleaning up a GBD Prehistoric 133 Medium Billiard


Blog by Mike Belarde

Hello, I hope everyone is doing well.  I finally had a nice low-key weekend and was able to work on another pipe. I have had this GBD Prehistoric Billiard for a while and have been looking for a chance to work on it.  The pipe itself is a nice jaunty saddle stemmed Billiard with GBDs Prehistoric sandblast finish.

When I received the pipe, it was in a very dirty condition.  The surface of the stummel was caked with grime. The rim of the bowl had a good amount of carbon overflow, and the chamber was heavily caked.   The stem was in pretty fair condition.  It had light oxidation and took chatter, but the button was buffed down from years of use. The stamping was still legible on this pipe, and read GBD in an oval with the Prehistoric stamp and a 133-shape number. Below is an advertisement found on Pipedia describing the Prehistoric line. Even in its grimy condition, the pipe had an attractive rugged look, and I hoped that it turned out to be a fun workhorse pipe that I could take with me on a fishing trip or some other outdoor adventure. A link to the Pipedia web page has been provided below. Now to work on the pipe.  https://pipedia.org/wiki/GBD_Model_InformationThe first step in the process is to address the internals of both the briar and stem, and then clean up the grime on the stummel, and the carbon build up on the rim.   I started by reaming the chamber and then lightly sanding it with a piece of 220 grit sandpaper.  I took bristled pipe cleaners dipped in alcohol to clean the shank.  As you can see from the pictures this pipe was loved and used often.  Cleaning the internals of this pipe took a long time. Once I had that completed, I moved on to addressing the dirt and grime on the exterior of the stummel. I scrubbed the stummel with Murphy’s Oil Soap and an old toothbrush, rinsed it under warm water. I then scrubbed the rim with an old green scouring pad and some more Murphy’s Oil Soap. During this process a large amount of dirt lifted from the surface of the pipe and exposed some really great surface texture. The rim and the chamber cleaned up well and appeared to be in good condition.  I took the rest of the charring or darkening on the rim and inner rim with a folded piece of 320 grit sandpaper. The stummel seemed to be fairly clean but I decided to de-ghost the piped further.  I inserted two folded fluffy pipe cleaners through the shank and down into the chamber to act as a wick.  I have found that using fluffy pipe cleaners is easier for me than trying to fish an elongated cotton ball down the shank.  I then placed a cotton ball in the chamber and saturated it with isopropyl alcohol.While the stummel was de-ghosting. I placed the stem in a small Tupperware container to soak in Briarville’s Oxidation Remover solution.  I left both the stummel and stem to soak overnight.

Both the alcohol and the Briarville solution further cleaned the pipe.  I took the stem out of the solution and rinsed it and then ran some alcohol dipped pipe cleaners through it.  I then scrubbed the stem with Soft Scrub and the scouring pad to clean it up further.

After this was done I filled the tooth chatter in with super glue. Once the clue was dry I sanded down the patch with a piece of folded 220 grit sandpaper.Once I had the patch sanded down flush to the surface of the stem, I turned to the micromesh pads. I took the stem through the progression of micromesh pads (1500-12000). I polished the stem with each pad and wiped the stem down with a cotton pad soaked in Obsidian Oil in between the use of each pad. In the last step, I polished the stem with Before and After’s Extra Fine Polish. Satisfied with the progress on the stem, I turned my attention to the stummel. I polished the briar with the progression of micromesh pads (1500-12000) wiping it i with a damp paper towel.   Once this step was done, I mixed some dye up to touch up the stain. I’m not sure if the cleaning process removed some of the old stain, but I liked the highlights that had been exposed on the ridges of the sandblast.  I decided to heighten this effect.

I mixed a one-to-3 ratio of Light Brown and Russet leather dye with alcohol to thin the dye down.  I like to apply the stain with a small hobby brush. I find that the brush helps me to coat the stummel evenly. Once the stain was applied, I used a small tea candle to fire the briar and set the dye.  I let the stummel sit for a couple of hours and then removed some of the excess stain with a cotton pad soaked in acetone. After removing some of the excess stain with acetone I began to polish the stummel with the micromesh pad series (1500-12000). I wiped the briar down with a damp paper towel between each pad. Once I was finished with the micro pads, I worked some Before and After Restoration Balm into the stummel. The pipe was really looking nice at this point!  I let the balm sit for about 10 minutes and then buffed the stummel with a cotton cloth. In the last step of the process, I buffed both the stummel and stem with Red Tripoli and Blue Diamond.  I then gave both several coats of Carnauba wax and buffed them with a cotton cloth.

I’m really happy how this pipe turned out, and am looking forward to loading it up and relaxing with it in the backyard. Thanks for taking the time to read this post!

Just A Little TLC And This Amazing Harcourt ‘S’ Came Back Alive Again


Blog by Paresh Deshpande

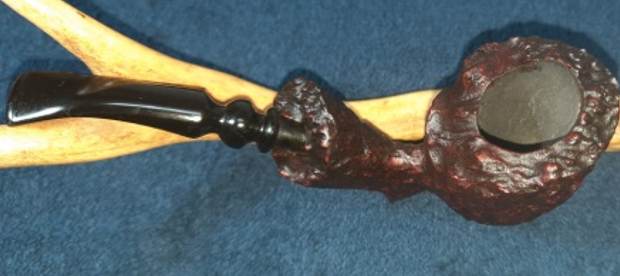
I was and still am a big fan of Preben Holm and never miss an opportunity to own one of his creations, specially the older ones. His early pipes were graded from 1 to 8 in ascending order and I have grades 1, 3, 4, 6, 7 and 8 in my collection. These are all stunning pipes without doubts. Thus when this pipe came up for auction on eBay in 2018, I had to bid on it. Waiting for the last opportune moment to place my bid is always the longest wait and the timing has to be just right, too late and your bid may not be accepted and too early gives reaction time to other buyers. In this case, everything went just right and I landed being the highest bidder. A month and a half later, the pipe was received by Abha in Pune.

This ruggedly beautiful free hand pipe is unsmoked with pristine bowl coating, save for the dust that has accumulated on the coat. The aggressively rusticated stummel is large and fits snugly in the palm with a tactile hand feel. It is stamped on the lower smooth surface at the shank end as “S” over “HARCOURT” over “HAND CARVED” over “MADE IN DENMARK”. The vulcanite fancy stem is devoid of any stem logo. All the stampings are crisp and easily readable.Dimensions Of The Pipe
(a) Overall length of the pipe:          5.2 inches.

(b) Bowl height:                                  2 inches.

(c) Inner diameter of chamber:       0.8 inches.

(d) Outer diameter of chamber:      1.7 inches.

While researching Dunhill pipes that I have restored, I remembered that to cater to the Danish Free Hand pipe craze in the 1960s Dunhill had engaged Preben Holm to carve pipes for them and this line was named as HARCOURT. However, this being the first Harcourt pipe that I would be working on, I searched my first ‘go to’ site, rebornpipes and the very first search result was this pipe that has identical stamping including the grade stamp ‘S’. For interested readers, here is the link to the write up which provides all the information on these pipes.

https://rebornpipes.com/2019/09/07/replacing-a-broken-tenon-and-restoring-a-harcourt-hand-carved-s-freehand/

The only additional piece of information that I would like to add here is the grading system adopted by Preben Holm for Harcourt line of pipes. This information is reproduced from pipedia.org (https://pipedia.org/wiki/Harcourt)

And I quote:-

The stamping includes a letter, and seems to adhere to the Preben Holm grading scale with grades of A, B, C and D in ascending order.

The grade lettering on the pipe that I am working on is “S” and finds no mention in the above grading scale by Preben Holm. Since the grading system is in ascending order starting with A, I safely assume that the letter S denotes the highest grade or even Special grade. Any informed input on this issue is most welcome, in fact, solicited.

Initial Inspection
This pipe has one of the most aggressive rustication that I have seen on pipes and it looks and feels fantastic. The reddish brown hues, the Acorn shaped bowl and the talon shaped shank adds to the visual appeal of the pipe. The pipe is unsmoked and thus the chamber, the platueau rim top and the rim edges are all pristine. The stummel surface has accumulated dust in the crevices of the rustication, giving it a dull and tired appearance. The vulcanite fancy stem is undamaged but oxidized. Given below are a few pictures of the pipe before I started working on it. Detailed Inspection
As mentioned above, this is seems to be an unsmoked pipe. The plateau rim top is as good as new with no lava overflow or charring or chipped surfaces. The bowl coating is still intact with no signs of being smoked. The only cleaning that is required is for removing the dust that has lodged itself in to the nooks and crannies of the plateau surface. There are no odors of old tobacco and oils and gunk and that is a refreshing change from the last project. The large rusticated stummel with thick walls are in excellent condition with no damage. The gnarly high points in the rustication are a pleasure to hold in the hand. The Acorn shaped bowl nicely fills up the hand making for a very comfortable grip. Dust has covered the crevices in the rustication giving a lifeless and dull look to the pipe and would need to be cleaned. The plateau shank end is also dusty and would benefit for a nice scrub. The mortise is clean. The fancy vulcanite stem is sans any logo or tooth chatter, bite marks. The only issue that requires to be dealt with is the minor oxidation over the surface. Running a couple of pipe cleaners dipped in alcohol will be sufficient to clean the air way of all the dust that may have been lodged inside.The Process…
I started the restoration of this pipe by first cleaning the internals of the stem with bristled pipe cleaners and 99.9% pure isopropyl alcohol. I followed it up by sanding the entire stem with a folded piece of 220 grit sand paper to remove the surface oxidation and cleaned the surface with a cotton swab and Murphy’s Oil Soap.
I dropped the stem in to “Before and After Deoxidizer” solution developed by my friend Mark Hoover. The solution helps to draw out heavy oxidation to the surface, making its further removal a breeze, while the minor oxidation is eliminated to a very great extent. The initial sanding also helps to draw out the complete oxidation as the sanding opens up the stem surface that has been initially covered with oxidation. I usually dunk stems of 4-5 pipes that are in-line for restoration and this pipe is marked with blue arrow. I generally allow the stems to soak in this solution overnight to do its work.The next morning, Abha removed the stem that had been soaking in the deoxidizer solution overnight. She cleaned the stem under warm running water and scrubbed the raised oxidation from the stem surface using a Scotch Brite pad and cleaned the airway with a thin shank brush. She further removed the oxidation by scrubbing the stem with 0000 grade steel wool and applied a little EVO to rehydrate the stem.Abha, thereafter, continued the sanding cycle by dry sanding the stem using 320, 400, 600 and 800 grit sand papers followed by wet sanding the entire stem with 1000, 1500 and 2000 grit sand papers. This not only ensured a nice even and smooth stem surface, but also removed the oxidation from the surface. I rubbed the stem surface with some EVO and set it aside to be absorbed in to stem surface. Thereafter, she launched a second determined assault on the stem, subjecting it to the complete cycle of micromesh polish. The end result is a gorgeous, smooth and shiny looking black of the vulcanite stem. The time that Abha was working on the stem, I ran a pipe cleaner dipped in alcohol through the mortise and airway to clean out the dust that had gathered over time. The shank internals were all clean save for a little stain that had made its way into the shank while staining.Once the internals of the shank were cleaned, I cleaned the external surface of the stummel with Murphy’s Oil soap and cotton swabs followed by scrubbing the rusticated surface with a toothbrush and dish washing soap. This rid the nooks and crevices of all the accumulated dust, dirt and grime from the rusticated stummel. I also cleaned the shank internals with dish washing soap and shank brush. To enliven the briar wood and further enhance the contrast of the dark reddish browns of the high points of the rustication with the black of the rest of the stummel surface, I rubbed a little quantity of “Before and After” balm in to surface and set it aside for 20 minutes for the balm to be absorbed in to the briar. Thereafter I hand buffed it with a microfiber to deepen the shine. The stummel looks nice and vibrant. This was followed by the routine regime of polish with carnauba wax using my hand held rotary tool. This Preben Holm carved Harcourt looks unique and oozes quality. To deepen the shine, I gave a vigorous rub to the entire pipe with a microfiber cloth. This is truly a beautiful pipe and will be joining my now increasing personal collection. Here are a few pictures that should give you a fair idea about the end results… Thank you all for being a part of this journey and support extended.

Peterson Pre-Republic 999 Sterling Restored


By Al Jones

This tired Peterson 999 Sterling showed up on eBay, with four very poor, dark photos, sold by a non-pipe vendor who didn’t take returns. These auctions always carry a bit of risk with them. However, the pipe appeared solid enough that I took the risk.

I was quite pleased opening the well-packaged pipe. The stem was solid, and the bowl showed no structural issues. Sterling grade Petersons often come with faux hallmarks, and sure enough, that was the case. I was quite pleased to see the round “Made In Ireland” country of manufacture stamp that was used for a short period of time from approximately 1945 to 1947. The rest of the nomenclature was solid.

Below is the pipe as it was received.

The pipe had heavy oxidation, two teeth indention’s and some chatter underneath the P-lip button. The silver band was heavily oxidized and the bowl top had some mild build-up.

I used my reamer set to remove the mild cake, and found the bowl interior to be in excellent condition. The bowl was then soaked with sea salt and alcohol. I used a micromesh sheet to remove the build-up on the bowl top.

Following the soak, I mounted the stem to restore it. I used a lighter to lift out the two teeth indention’s. The oxidation and chatter was removed with 600, 800, 1500 and 2000 grade wet sandpaper, followed by 8000 and 12000 grade micromesh sheets. The oxidation around the P-lip button was particularly stubborn, and I wrapped paper around a small needle file to completely remove it from the profile. The stem was then buffed with White Diamond and Meguiars Plastic Polish.

I used some Stainless polishing creme to remove the tarnish on the band. The band sits a millimeter below the end of the shank. It has picked up a few handling marks over 70 plus years, but I think they add to the character of the pipe and no doubt they were well earned.

I’m very pleased to add this one to my Peterson collection. Below is the finished pipe.

Weight: 63 grams

New Life to a Mysterious French Made C.A.V of St. Claude Canadian


Thanks Dal.. i know Kenneth could not find any information on it either in his searching… nice looking Canadian.

The Pipe Steward

I’m finally able to do something productive after having a bout with the COVID virus.  Nasty stuff. The next pipe on the worktable is the second pipe that pipe man Mike commissioned from the ‘For “Pipe Dreamers” ONLY!’ online collection benefitting the Daughters of Bulgaria.  Mike fares from the great state of Tennessee and is the founder and administrators of the FB group, Brothers by Briar. Here are pictures of the French made C.A.V of St. Claude – a handsome Canadian now on the worktable.The nomenclature is stamped on the upper side of the oval Canadian shank: BRUYERE [over] ST. CLAUDE.With the COM of St. Claude, France, the only identifier is the stem logo which is stamped with C.A.V inside an oval.  At first, I thought there were periods after each letter, but 2 periods are used as dividers between the letters.  At this point, I…

View original post 1,989 more words

A Beautiful Petite “FCC” Double Footed Cutty Restored To Its Former Glory


Blog by Paresh Deshpande

The next pipe that I chose to work on was a petite slender two legged classic Cutty shaped pipe that is stamped as “FCC”, each letter in a square and all the squares are co-joined to form a rectangle. Apart from the FCC stamp, there is no other stamp on the briar. The shank end has a nickel ferrule (most probably) with a squat diamond bearing letters “A–B” over three cartouches with its engravings completely worn out. Now the reasoning for assuming the ferrule to be nickel plated is firstly that I could not find any silversmith with letter “A B” in a diamond on my usual go to sites as well as searching the net. Secondly, during the course of restoring the pipe, the ferrule came loose revealing a prominent crack to the shank end and this ferrule was a repair band that was put by the previous repairman. Here are the pictures of the stampings. It would be interesting to know the views and opinions on my musings. There was no information about this pipe that was available on the internet. The lack of COM stamp also contributed to the mystery of this pipe. Even “Who Made That Pipe” by Herb Wilczak and Tom Colwell finds no mention of this brand and as stated above the ferrule has faux stampings. The only pointer that this is an old timer comes from the oval stem slot which was seen on early pipes.

In the interest of pipe collector community, I request the readers to share any information that they may have about this brand.

Initial Visual Inspection
The double legged Cutty shaped pipe has beautiful mixed grains around the stummel which is covered in dust. The stummel has a couple of deep scratches and one fill towards the foot. The rim top is covered in lava overflow with some serious damage to the inner rim edge and as a result appears out of round. There is a thick layer of cake in the chamber. The slender vulcanite stem is heavily oxidized with a chunk of vulcanite missing from end of the step tenon. There are issues that need to be addressed, but it still is a beautiful pipe and once it is restored, the elegance and beauty of this pipe shall be worth appreciating. Here are a few pictures of the pipe before I begin working on it. Dimensions Of The Pipe
(a) Overall length of the pipe:          6 inches.

(b) Bowl height:                                  1.4 inches.

(c) Inner diameter of chamber:       0.6 inches.

(d) Outer diameter of chamber:        1.1 inches.

Detailed Inspection…
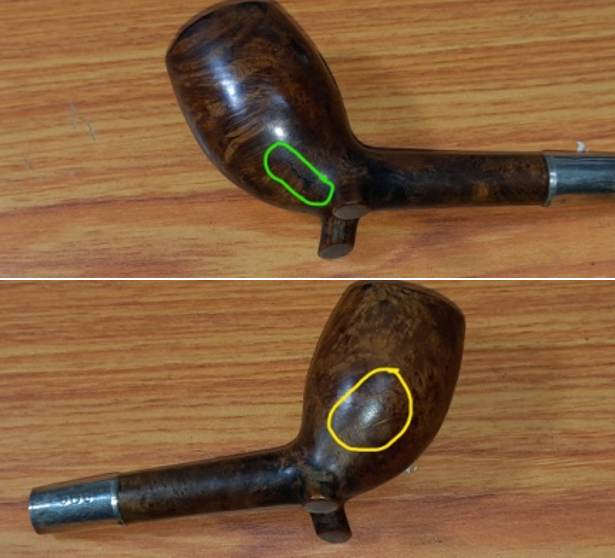
The chamber has a thick layer of even cake and has a strong sweet smell to it. The rim top surface has darkened due to lava overflow which is not very thick. The inner edge is uneven, but closer inspection makes me believe it to be more so because of uneven cake at the rim edge. The inner edge appears to be charred in 11 o’clock and 6 o’clock direction (encircled in pastel blue). The outer edge has a very shallow ding which is encircled in yellow. The stummel has some interesting grain patterns hidden under the dust that has accumulated over the surface. There is a fill towards the foot of the stummel on the left side and is encircled in green. This fill seems like a crack but it is not. The stummel surface has a few scratches but the two on the right side of the stummel are prominently visible (encircled in yellow). The two legs of the bowl are perfectly flat and angled making the pipe a sitter. The long slender shank has a dark patch (encircled in red) at the bowl shank junction and is likely another fill or a crack. I shall be sure about this only once the surface is thoroughly cleaned. The shank has heavy accumulation of oils, tars and gunk. The sweet smell is pretty strong here too. The long and slender vulcanite stem slightly tapers towards the tenon end giving a very classy look to the pipe. The step tenon has a chunk of vulcanite missing from the end and would need to be rebuilt. The stem has deep seated oxidation that imparts to it a greenish brown hue. The bite zone has minor tooth chatter and the buttons are sans any damage. The oval shape of the slot end and the slot itself is old fashioned and is a pointer to this being an older pipe from the 20s- 30s. Both the tenon end and slot end shows heavy accumulation of gunk and has an awful stink to it. This stem is going to be a bear to clean.The Process…
Since there were other stems that were ready to be put into the stem deoxidizer solution, I decided to clean the internals of this stem first so that it could be put in the solution with other stems. I cleaned the stem airway with a thin shank brush and anti oil soap. The amount of gunk that was cleaned can be judged from the pictures below. It took considerable time and elbow grease to get the stem airway clean. I further cleaned the internals with regular and bristled pipe cleaners dipped in alcohol. Once I was done with the internal cleaning of the stem airway, I sanded the stem surface with a folded piece of 220 grit sandpaper to loosen and remove superficial oxidation from the stem surface. I wiped the stem clean with Murphy’s Oil Soap on a cotton swab. It has been our experience that such sanding yields the best end results after the deoxidizer solution has completed its assigned task.The stem was immersed in the Before and After Deoxidizer solution, a product that has been developed by Mark Hoover. This solution raises the oxidation to the stem surface and helps in easy removal and imparting a nice shine to the stem after polishing. The pipe is indicated with a yellow arrow indicator. The stem was allowed to soak into this solution overnight.The next morning, Abha took the stem out from the solution. She cleaned the stem under running warm water and scrubbed the raised oxidation from the stem surface using a Scotch Brite pad and cleaned the airway with a thin shank brush. She further removed the oxidation by scrubbing the stem with 0000 grade steel wool and applied a little EVO to rehydrate the stem. She ran a couple of pipe cleaners through the stem airway to clean the airway of the deoxidizer solution and water.Staying with stem repairs, I warmed up the bite zone with the flame of a lighter to raise the minor tooth indentations to the surface. The heat helps the vulcanite to expand and regain its original shape. This method may not always completely raise the depressions to the surface, but most of the times, to a great extent. In this case the tooth indentations were raised completely to the surface. I followed up the heating of the stem surface with sanding the bite zone with a piece of 220 grit sandpaper to even out the surface.Next, I decided to address the broken end of the step tenon. I first inserted a pipe cleaner that had been smeared with petroleum jelly (Vaseline) through the tenon end into the stem air way. This helps prevent the CA superglue and charcoal mix from sticking to the pipe cleaner and prevents the mix from running down into the air way and clogging it. I generously applied a mix of CA superglue and activated charcoal over the tenon end to be rebuilt. I applied a thick layer of the mix as this provides sufficient patch material to work with during subsequent filing and shaping to match the repairs with the stem surface. Once I had applied the mix, I set it aside to cure overnight.By next afternoon, the tenon rebuild had cured perfectly and was fit to work on. I used a folded piece of 220 grit sand paper to sand the patch and achieve an even match with the rest of the tenon surface. I shaped the opening of the rebuilt tenon for smooth and even airway surface using a round needle file and topped the tenon face on a piece of 220 girt sand paper to achieve a perfect seating of the step tenon into the mortise.I further sanded the entire stem with 320 followed by 400, 600, 800 and 1000 grit sand paper. This helps to reduce the scratch marks left behind by the more abrasive 220 grit paper and also to remove complete oxidation from the stem surface. I rubbed a small quantity of EVO to rehydrate the stem and set it aside.With the stem set aside, I had a second look at the stummel and decided to start with reaming the chamber. Using size 1 head of the PipNet reamer, I took the cake down to the bare briar. I used my fabricated knife to remove the carbon layer from areas which could not be accessed by the reamer head. Next, with a folded piece of 220 grit sandpaper pinched between fingers, I sanded the wall surface to a smooth finish and ensured there are no traces of residual carbon anywhere in the chamber. I cleaned the chamber with a cotton swab wetted with alcohol. There are a couple of heat fissures that can be seen over the surface of the wall but they seem to be superficial. It could be just a thin layer of residual cake that has hardened rock solid or could be a heat fissure proper and in that case, I would need to fix it. But first, I would need to soften the cake. I cleaned the mortise using q-tips, pipe cleaners and alcohol. I scrubbed out the dried oils and tars from the walls of the shank using a bent dental tool. It was only once the shank internals were cleaned that I could see the thin crack to the shank. However, the repair band was firmly glued to over the shank end. I shall continue further cleaning of the shank internals when I clean the external surface of the stummel.I decided to give the stummel a salt and alcohol treatment. This would address three issues, firstly the strong sweet ghosting smell secondly, loosen the rock hard carbon layer from the chamber wall and lastly the alcohol may loosen the glue that kept the repair band firmly attached to the shank. I wrapped a little cotton around a pipe cleaner and inserted it through the mortise into the chamber. I packed the space around this pipe cleaner in the shank with cotton balls. Next, I firmly packed the cotton balls in to the chamber about half an inch below the rim and soaked the cotton balls with isopropyl alcohol up to the brim. About half an hour later, the level of alcohol had gone down, having being absorbed by the cotton. I topped it up once again and set it aside overnight. By next morning, the cotton and alcohol had drawn out all the remaining oils and tars from the chamber and mortise, fulfilling its intended task. I removed the cotton balls and ran pipe cleaners through the mortise to clean out all the loosened tars and gunk and further cleaned it with alcohol and q-tips. The chamber now smells clean and fresh. I set the stummel aside to dry out naturally. All the three issues that I wanted to address with this process have been achieved as will be brought out subsequently.With the bowl internals clean, I moved to clean the exterior of the stummel. I used a hard bristled tooth brush and Murphy’s Oil soap to scrub the stummel and rim top. For this stummel cleaning, l used Murphy’s Oil soap as I wanted to preserve the old patina that had developed on the stummel and was not sure how the Briar cleaner product would affect it. After the scrub with oil soap, I washed the stummel under running warm water with anti oil dish washing detergent till the stummel surface was clean and dried it using paper towels and a soft cotton cloth. I simultaneously cleaned the shank internals with the detergent and hard bristled shank brush and set the stummel aside to dry out naturally. This cleaning had now exposed all the fills (encircled in pastel blue), charred rim surface at 11 and 3 o’clock directions (encircled in yellow) and scratches over the stummel surface. As spelled out earlier, during the alcohol bath, alcohol had seeped through the crack in the shank and loosened the glue that held the band over the shank and during the external cleaning the band came out easily revealing the crack that it had covered. It’s a large crack that would need to be addressed.I cleaned the mortise and shank internals with anti oil soap and shank brushes. I also removed all the debris and old glue from within the crack using a thin sharp fabricated tool. I further cleaned the crack using cotton swab and alcohol.With the prep for the crack repair completed, it was time to move on with the task. Under a magnifying glass, I marked the end point of the crack with a marker pen. This is the guide point where I shall drill a counter hole to prevent further spread of the crack in any direction. Using a 1mm drill bit mounted on my hand held rotary tool, I drilled a counter hole at the end of the crack. I also inspected the fills that I had observed after external cleaning of the stummel. The only fill that would need to be refreshed was the one on the left side of the stummel near the foot. With my fabricated sharp knife, I removed the old putty fill and cleaned the pit with alcohol.I filled the pit and the shank crack, counter hole included, with a mix of briar dust and superglue. I sprayed an Accelerator over the fills to hasten the process of curing.Remember the issue of heat fissures I had brought out earlier? Well, after the alcohol bath, I checked the chamber again and it was confirmed that these are not just a result of hardened carbon cake but indeed the briar had charred along these heat lines. Using a sharp and thin knife, I checked all the heat lines and removed the charred briar from the two of these heat fissures (indicated with green line). I needed to address this as it could lead to a burnout at a later date when it is smoked.Once the shank crack and the refreshed fill had completely cured, using a flat head needle file, I sanded the repaired areas to achieve a rough match of the fills with the surrounding surface. I used a round needle file to even out the fill which had seeped inside the shank. I further evened out the fills with a folded piece of 320 grit sand paper. I checked the seating of the repair band over the shank and fine tuned the adjustment and glued it in place once it was perfect. Next I addressed the charring to the rim surface that I had ascertained after the cleaning of the stummel. I topped the rim surface over a piece of 220 grit sandpaper, frequently checking for the progress being made. It was peculiar to note that the charring at 11 and 3 o’clock directions was over both the inner and outer rim edges. I masked these charred marks by creating a bevel over both the edges with a piece of 220 grit sandpaper pinched between fingers. The results were definitely satisfactory. I sanded the entire stummel with a folded piece of 220 grit sandpaper. This addressed many of the scratches and dings from the surface. Those that remained are being accepted as part of the pipe’s journey thus far. I have addressed all the repair issues of the pipe and now handed it over to Abha, my wife, to work her magic in polishing the stummel and stem. To bring a deep shine to the vulcanite stem, Abha went through the complete set of micromesh pads, wet sanding with 1500 to 12000 grit pads. She wiped the stem with moist cloth after each pad and rubbed it down with Extra Virgin Olive oil to rejuvenate the vulcanite. The finished stem is shown below.She wet sanded the entire stummel with 1500 to 12000 grit micromesh pads, wiping frequently with a moist cloth to check the progress. Next, she rubbed a small quantity of “Before and After Restoration Balm” deep in to the briar with her finger tips and let it rest for a few minutes. The briar now has a nice vibrant appearance with the beautiful grain patterns displayed in their complete splendor. She further buffed it with a horse hair brush. After Abha handed over the shining stummel, I ran my fingers along the chamber walls and realized with a cringe that I had not addressed the issue of heat fissures. I decided to fill only the heat fissures from where I had removed the charred briar with layer of J B Weld. J B Weld is a two-part epoxy Cold Weld in two tubes; hardener and steel which are mixed in two equal parts (ratio of 1:1) with hardening time of 5-6 minutes and complete curing time of 6-8 hours. I poured the contents of the two tubes and mixed it well. I applied this mix, as evenly as possible, over the heat lines in the chamber wall surface. I worked fast to ensure an even coat before the weld could harden. I set the stummel aside for the application to harden and cure overnight. By the next afternoon, the J B Weld had cured and hardened considerably. With a folded piece of 150 grit sandpaper, I sanded the filled JB Weld from the heat lines till all that remained was a smooth surface with the weld deeply embedded into the heat lines and protecting the briar from further damage. There was only one more issue that needed to be addressed and one that could not be ignored, being a functional issue. After I had lined the walls of the chamber with a thin coat of J. B. Weld, it was necessary to prevent the walls from coming in to direct contact with the burning tobacco. I addressed this issue by mixing activated charcoal and plain yogurt to a thicker consistency, just enough that it would spread easily and thereafter applied it evenly all along the chamber walls after inserting a folded pipe cleaner through the draught hole to keep it open. Once dry and set, this will not only protect the walls but also aid in faster build up of cake.Now onto the home stretch… To complete the restoration, I re-attached the stem with the stummel. I mounted a cotton cloth buffing wheel to my hand held rotary tool, set the speed at about half of the full power and applied Blue Diamond compound to the entire pipe to remove all the minor scratches that remained. I wiped/ buffed the pipe with a soft cotton cloth to clear it of any leftover compound dust. With a cotton buffing wheel earmarked for carnauba wax, I applied several coats of carnauba wax. I worked the complete pipe till the time all the wax was absorbed by the briar. The pipe now boasted of a beautiful and lustrous shine. I vigorously rubbed the pipe with a microfiber cloth to deepen the shine and also clean away any residual wax that had been left behind. I vigorously buffed the nickel ferrule with a jeweler’s cloth and brought it to a nice shine. I was very happy with the way this beauty had turned out. The following pictures speak of the transformation that the pipe has undergone.

Breathing New Life into a 1906 Peterson’s Patent System Shape 14


Blog by Steve Laug

The next pipe is the second of four Peterson’s that came to me for work from a friend of mine. It is another older, nice looking Peterson’s System Pipe that was quite a mess. The finish was worn and dirty. The rim top was lightly damaged, darkened and had a lava build up. The inner edges of the rim were worn but looked okay. The silver ferrule was tarnished but the stamping was readable. The stamping on the shank sides was readable with a lens. It is stamped across the shank horizontally on the left side and reads Peterson’s [over] Patent [over] Dublin. There is no stamping on the right side of the shank. The silver ferrule is stamped K&P [over] three hallmarks -1. Hibernia seated on a throne (represents Ireland) 2. Crowned harp (signifying the quality of the silver) 3. The letter “L” (giving the year of manufacture). All are in square shaped cartouches. Under these it is stamped Peterson’s [arched over] Dublin. I will need to confirm the date stamps and the stamping to confirm the dating of the pipe. There appears to be a split in the silver ferrule under the tarnish on the right top side. The stem is also stamped and reads Peterson’s arched over Patent. I have included the pictures of the pipe that my friend sent to me early on in our conversation. My friend also sent along a page out of the 1906 Peterson catalog that one of his friends has a copy of. I have included the photo below. His pipe is the second one down in the photo below. It is a shape 14. He also included a  photo of the stamping on the shank and the silver ferrule. It reads as noted above. The ferrule has turned downward over time. It took nearly a month for the pipes to arrive in Canada for me to work on. I took photos of them to have an idea of what I was dealing with. You can see from the photos what I saw. The finish is really worn and dirty almost obscuring the amazing grain that is on the bowl sides. Rim top showed darkening as noted above and there were cuts or marks on the top of the rim. The inner edge and outer edge of the bowl was in surprising good shape. There was a build up of lava on the rim top and a thick cake in the bowl. The airway in mortise is very constricted and clogged and will need to be opened once again. The silver ferrule had a split on the top right side but it did not go from top to bottom It was very tarnished but readable. The original style patent stem is present and in remarkable good condition. There were light tooth marks and a lite calcification at ahead of the button on both sides. I took some photos of the rim top and bowl to capture the condition of the pipe. You can see the cake in the bowl. There is a light lava coat and some darkening. There was damage all around the outer edge of the bowl that was heavy on the right front edge. You can see the marks of a crack in the ferrule on the right side in the first photo. The older style P-lip system stem is in good condition with some calcification on the top and underside of the stem near the button. There were light tooth marks and chatter on both sides.I took photos of the stamping on the shank sides and the silver ferrule to try and capture them as best as I could. They were weak but they are readable with a lens. They read as noted above.I removed the stem from the bowl and took a photo of it to show its appearance. The tenon end of the stem has some calcification (or possibly some dried silver polish) where it sat against the silver.Before I started the restoration process on the pipe I wanted to confirm the date that my friend had sent to me for this pipe. I turned to Peterson’s Hallmark Chart that I have on rebornpipes to pin down the date (https://rebornpipes.com/tag/peterson-hallmark-chart/). I have include a copy of that chart below. I drew a red box around the date stamp that matches the one on the pipe. It is a 1906 Peterson Patent System Pipe Shape 14.I expanded the chart above and captured the section that included the section from 1906-1933 below. It confirms that the date is indeed 1906.Now I knew that I was working on a Peterson’s Patent System pipe made in 1906 and the Dublin stamp tells me it was made in Dublin.

I turned to Peterson’s Dublin in the book, The Peterson Pipe by Mark Irwin & Gary Malmberg. I quote from that section below:

 Dublin (1906-2003) Although DUBLIN appears under PETERSON’S on many pipes over the decades, it has served mostly as part of the brand name. The word first appeared on pipes hallmarked 1906-11, stamped PETERSON’S over PATENT OVER DUBLIN. The simpler PETERSON’S over DUBLIN first appeared on pipes hallmarked 1912 after the expiration of the patent. Illustrations of pipes in the ’37 catalogue show a random dispersion of the stamp PETERSON’S over OF DUBLIN together with the ordinary PETERSON’S over DUBLIN on every model offered. Specimen of the former will bear either an Irish COM or LONDON MADE over ENGLAND COM and almost certainly date from 1945-62. It was first mentioned in print as part of a model name in the ’68 price list, as K&P DUBLIN, in ’92 for a Danish market line…

Armed with this information I started working on the pipe. I reamed the bowl with a PipNet pipe reamer to remove the cake from the bowl. I cleaned up the remaining cake with a Savinelli Fistall Pipe Knife. I sanded the bowl with 220 grit sandpaper wrapped around a piece of dowel to smooth out the inside of the bowl. The walls looked very good with no checking or heat damage. I cleaned out the shank with pipe cleaners, cotton swabs and 99% alcohol to remove the oils from the walls. It was filthy and when I was finished it smelled clean and fresh. I cleaned out the inside of the stem with alcohol and pipe cleaners.I scrubbed the bowl with Murphy’s Oil Soap to clean off the thick oils and grime ground into the surface of the briar. When the warm water hit the ferrule it slipped off into my hands. (Great news as it had turned and needed to be reset correctly). I scrubbed it on undiluted and rinsed it off with warm water to remove the soap and the grime. The bowl looked much better and the grain really began to stand out clearly. I also used some small shank brushes to try to open the airway into the bowl. With a little bit of work the draught is perfect. I ran some more pipe cleaners and cotton swabs through the shank and airway to remove the tars that had loosened by scrubbing. Once finished I aligned the stamping on the ferrule and carefully slid it in place on the shank. I also ran a light bead of CA glue along the split in the ferrule to stop it from going further. My friend would need to take it to a jeweler to have it soldered with silver for a proper restore.I worked over the top and the inner edge of the bowl with 220 grit sandpaper to smooth out the burned edge and the rim top. I also worked a bit on the outer edge damage on the front o the bowl at the same time. It definitely came out looking much better. The trick on these old pipes is not to go overboard on the repairs but to leave a bit of the story behind as it changes the shape and feel of the pipe. I polished the briar (carefully avoiding the areas where the pipe is stamped on the shank sides) with micromesh sanding pads. I dry sanded it with 1500-12000 grit sanding pads. I wiped it down after each pad with a damp cloth to remove the sanding debris. I worked some Before & After Restoration Balm into the surface of the smooth briar with my finger tips. The product is amazing and works to clean, enliven and protect the briar. I let it sit on the briar for 10 or more minutes and then buff it off with a soft cloth. It really makes the grain sing. I polished the silver ferrule with a jewelers cloth to remove the remaining tarnish/oxidation and protect it against further tarnishing. There are a few dings in the silver but I chose to leave them as part of the story of the pipe. I carefully buffed the briar and avoided the silver. I did not want to further damage it or cause it to loosen so I chose to wax it by hand with Conservator’s Wax and buffed it with a soft cloth. I set the bowl aside and turned my attention to the stem. I examined it closely and saw the Peterson’s Patent stamp on the stem. The frustrating thing is that it was intermixed with the deep scratches on the shank end of the stem. I carefully sanded the scratched areas, avoiding the stamping on the stem. I used a small piece of 220 grit sandpaper and polished it with 400 grit wet dry sandpaper.I polished the vulcanite with micromesh sanding pads – dry sanding with 1500-12000 grit pads. I wiped down the stem with Obsidian Oil after each sanding pad. I have an oil impregnated piece of cloth that I use after each pad. I polished it further with Before & After Stem Polish both Fine and Extra Fine polishes. I gave it a further coat of Obsidian Oil and set it aside to dry. I put the pipe back together – the bowl with its new stem. This smooth finished 1906 Peterson’s Patent  System Pipe Shape 14 is a real beauty with great grain around the bowl. The thin P-lip style vulcanite stem works very well with silver ferrule and the medium brown briar. This Irish made System pipe is a very collectible part of Peterson’s history. The grain on the bowl is quite beautiful and came alive with the buffing. I used Blue Diamond on the buffing wheel on both the bowl and stem. I gave both multiple coats of carnauba wax on the wheel then buffed it with a clean buffing pad to raise the shine. I hand buffed it with a microfibre cloth to deepen the shine. The Peterson’s Patent System feels great in the hand. It is lightweight and the contrast in the browns of the briar, the sterling silver ferrule and the polished vulcanite stem is quite amazing. The dimensions of the pipe are Length: 6 inches, Height: 2 inches, Outer diameter of the bowl: 1 1/8 inches, Chamber diameter: ¾ of an inch. The weight of the pipe is 2.19 ounces/62 grams. It really is a beauty. I have two more  pipes left to work on from my friends collection and then I will send them all back to him. Thanks for walking through the restemming and the restoration with me. Cheers.

From The Brink Of No Return… A c1916 BBB Own Make Bulldog


Blog by Paresh Deshpande

The journey of this pipe began way back in the year 1916 when it came out of the workshop as a brand new Blumfeld’s Best Briar pipe in the classical Bulldog shape. Thereafter this pipe traveled with a British piper across the seven seas aboard a steamer from England and reached the shores of India. And during its stay here in India, it served its Steward well and when the British left India for good, it was gifted to my grandfather and thence continued to serve him till he quit enjoying his pipe in 1970s. Whether this pipe was gifted or it was purchased as a brand new by my grandfather cannot be ascertained, but given the economics of that era, the former appears to be most likely.

Well, now a 105 years later, this pipe is on my work table, nicely cleaned by Abha way back in 2018. It was in that huge lot of around 50 plus pipes that she had cleaned up and sent me for further restoration when I was away from my family for work. As the pipe sits on my table, I very well know the reason for the delay in working on this pipe.

This classic shaped square shank Bulldog has some beautiful mixed grains that can be made out from under the dull and lackluster stummel surface. It is stamped on the left side of the stummel as “BBB” in a rhombus with “OWN” and “MAKE” on either side of the rhombus. The Sterling silver ferrule at the square shank end is stamped as “BBB” in a rhombus over “AF & Co.” in a rectangle over the three cartouche bearing hallmarks. Starting from the left, the first cartouche bears the stamp of an “Anchor” for  the Birmingham Assay Office followed by the “Lion Passant” certifying the silver quality and the last cartouche bears the Date letter “r”. The vulcanite saddle stem is devoid of any stem logo. The stampings are clear and easily discernible. BBB – Pipedia has detailed information on the origins of the brand and transition to the Cadogan group and would be a good read for those interested. I would like to highlight that, quote “At the beginning, BBB produces two qualities. One, BBB Own Make, became finally BBB Best Make, other pipes being simply estampillées BBB. There are reasons to believe that Own Make in fact were produced in London (Reject pipes cuts year R stamped one them.), whereas the simple BBB were imported, and this, to the paddle of the 20th century. However, if all that is not very clear, it is probable that the lines low-of-range were an import of Saint-Claude un-quote.

Now coming on to the most interesting and satisfying part of the research on this piece of briar and that is establishing the probable date of manufacture of this pipe. I prefer to follow English silver marks: the guide to hallmarks of London sterling silver (silvercollection.it)  while establishing the dates on the basis of the date letter in the hallmarks. The Anchor points to the Birmingham Assaying Office. Thereafter, I followed the link to the dating guide of the Birmingham Assay Office to date this pipe. I have included a hallmark chart for dating the pipe. I have put a red mark around the letter for 1916. It is the same style of “r” and the cartouche that holds the letter stamp, matches the photo as well.

To summarize, this BBB was made in 1916, give or take a year as the ferrules were assayed in bulk and used as required. The stamp of Own Make designates this as the finest quality pipe that was made in London for the local market in a Bulldog shape which was made in limited quantities.

Initial Visual Inspection
As stated at the beginning of the write up, Abha, my wife who helps with the initial cleaning, had worked on this pipe in 2018 and sent it out to me for further restoration along with 50 odd pipes. She had reamed the chamber down to bare briar, cleaned the internal of the shank and stem followed by external cleaning of the stummel using Murphy’s Oil soap. Unfortunately there are no ‘before’ and ‘during the process’ pictures. The initial condition of the pipe can be gauged from the pictures of the pipe as it sits on my work table. Dimensions Of The Pipe
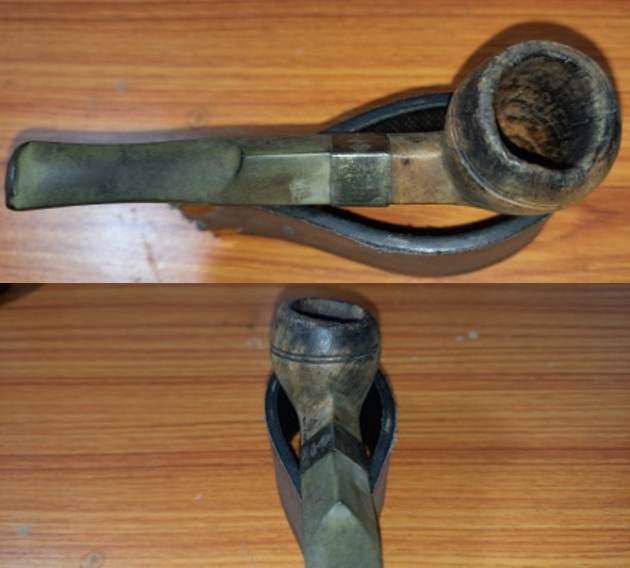
(a) Overall length of the pipe: –          4.5 inches.

(b) Bowl height: –                               1.2 inches.

(c) Inner diameter of chamber: –         0.8 inches

(d) Outer diameter of chamber: –        1.2 inches

Detailed Inspection
The rim top surface is where the maximum damage is on this pipe. The rim edges have been subjected to a heavy knocking all around but moreover in the 6 and 7 o’clock direction (encircled in green). A small crack is seen extending over the rim surface down towards the twin rings in 12 o’clock direction and is indicated with red arrows. This crack extends inside the chamber and the same is encircled in red. The rim has thinned out considerably towards the front between 12 and 1 o’clock direction (encircled in yellow). There is a chunk of briar that is missing from 3 o’clock direction either due to knocking against a hard edge or could be due to charring or combination of both. This damaged portion of the rim is encircled in pastel blue. The chamber walls show webbing of heat lines/ fissures. These repairs to the rim surface damage will be the most challenging part of the resurrection of this pipe.  The stummel surface is dull and lackluster with dirty brownish yellow hues to the briar surface. A few very minor scratches and dings can be seen over the stummel surface. The front and aft of the stummel surface in the crown is darkened. I would need to check if the charring is deep grained or just superficial. The gap between the twin rings separating the crown from the rest of the stummel is uneven, but thankfully, it is unbroken. The beauty and quality of this old pipe lies in the perfectly proportioned shape and the fact that there is not a single fill over the entire briar surface of the stummel. The shank and mortise are nicely cleaned up by Abha. The diamond shaped vulcanite saddle stem is deeply oxidized. The tenon is missing a portion of the surface and would need to be rebuilt. The bite zone has tooth indentations on either surface. The buttons on either surface is worn down and has deep bite marks at the corner. Abha had already cleaned the stem internals and thus, I can proceed with stem repairs and restoration.The Process…
I started the restoration of this old timer by immersing the stem in to the deoxidizer solution from Mark Hoover. Before dunking the stem in to the solution, I ran a couple of pipe cleaners dipped in alcohol through the previously cleaned airway to remove the dust that may have accumulated over the last three years. I scrubbed the stem surface with a piece of 220 grit sandpaper to loosen up the oxidation from the surface and further cleaned it with Murphy’s Oil soap on a cotton swab. Once the surface was cleaned, I dunked the stem in to the deoxidizer solution along with the other pipe stems that are in queue for restoration and indicated with a green arrow. The stem is allowed to soak in the solution overnight giving ample time for the solution to pull much of the oxidation to the surface.The next morning, Abha removed the stems (stem indicated with pastel green arrow is the one being worked on) that had been soaking in the deoxidizer solution overnight. She cleaned the stem and the stem airway under running warm water and scrubbed the raised oxidation from the stem surface using a Scotch Brite pad and the airway with a thin shank brush. She further removed the oxidation by scrubbing the stem with 0000 grade steel wool and applied a little EVO to rehydrate the stem. This now gives a clearer picture of the extent of damage as can be seen in the pictures below. The lower bite zone including the button edges on either surface have deep tooth indentations and will need to be reconstructed. The tenon end would also need to be rebuilt. Fortunately, there are no traces of deep seated residual oxidation visible over the surface. I heated the bite zone of the stem with the flame of a lighter to raise the tooth indentations to the surface by causing the vulcanite to expand. This did raise the bite marks to an extent; however, I would still need to rebuild the buttons and fill the bite marks in the bite zone.To begin repairs to the stem, I first inserted a pipe cleaner that had been smeared with petroleum jelly (Vaseline) through the tenon end in to the stem air way. This helps prevent the CA superglue and charcoal mix from sticking to the pipe cleaner and prevents the mix from running down in to the air way and clogging it. I generously applied a mix of CA superglue and activated charcoal over the stem areas to be rebuilt. I apply a thick layer of the mix as this provides sufficient patch material to work with during subsequent filing and shaping to match the repairs with the stem surface. Once I had applied the mix, I set it aside to cure overnight.With the stem repairs set aside to cure, I turned my attention to the stummel repairs. The summary of major issues identified during the detailed inspection is given below:-
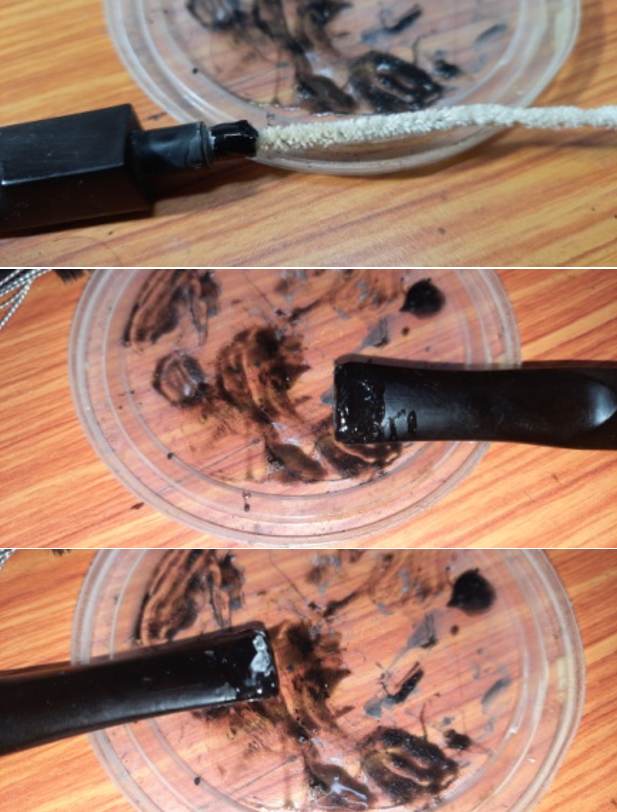
(a) Crack to the front of stummel that extends to the inside of the chamber.

(b) The large trough to the rim surface and thinning of the rim on the right side of the stummel.

(c) Heat lines/ fissures over the walls of the chamber.

With a flat head needle file, I removed the charred briar from the rim surface till I reached solid briar wood. This now gives a clearer idea as to the exact extent of damage and the repairs required.  I decided to address the crack to the stummel surface first. I marked the end point of the crack with a sharpie pen under magnification. This helps to identify the end point later with naked eye and also provides start point for the drill bit to bite in. With a 1 mm drill bit mounted on to my hand held rotary machine, I drilled a counter hole at the end of the crack, taking care not to go too deep and end up drilling a through-hole. I had to mark and drill a second counter hole as I later realized that the crack extended slightly below the first one that I had drilled. I ran the sharp dental tool along the crack to remove the dirt and debris that may have been lodged in the crack. This crack and counter holes would get filled with briar dust and CA superglue when I would reconstruct the trough in the rim surface and so I did not proceed to fill the same at this stage. Next, I got around to addressing the rim top damage. The extent of the dip or trough caused due to banging against a hard surface and or charring of the rim edge was deep and would necessitate heavy topping off of the rim surface, and I for one, absolutely wish to avoid any loss of briar. Also topping to the extent that was required to eliminate the deep trough would completely alter the original shape and symmetry of this pipe.  So, I planned on first filling up the deep trough on the rim edge using briar dust and superglue to roughly match the surrounding intact rim surface and some more and then topping it to achieve a smooth even surface. Theoretically, this sounds logical.
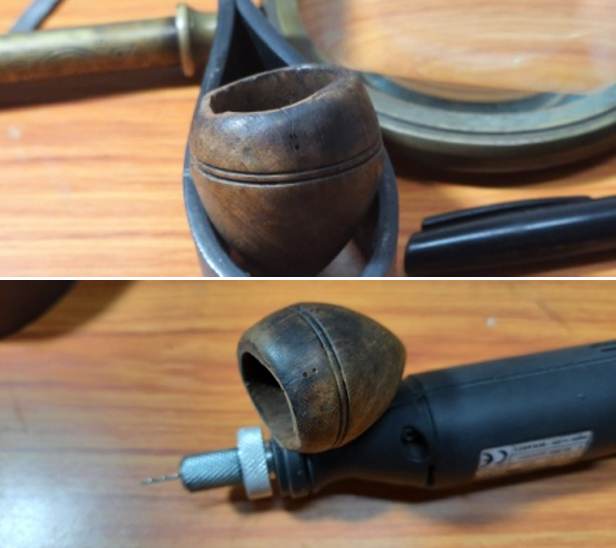
I resorted to the layering method again; first I layered superglue along the damaged surfaces of the rim followed by sprinkling of briar dust, another layer of superglue followed by a final layer of briar dust. This final layer of briar dust reduces the probability of air pockets (or so I thought). In the second picture, you can see that the layering has not been done to the level of the rim surface but above the surrounding intact rim surface as I would be sanding the rim subsequently. Using the same technique, I rebuilt the inner surface to increase the thickness of the rim that was thinned out. I set the stummel aside to cure.  The stem repairs had hardened considerably over the past 18 odd hours. I used a flat head needle file to sand the patch and achieve a rough match with the rest of the stem surface. I further evened out the patch with a folded piece of 220 grit sand paper. Similarly, I shaped the rebuilt tenon for perfect seating into the mortise. For a better blending, I further sanded the entire stem with 320 followed by 400, 600, 800 and 1000 grit sand paper. This helps to reduce the scratch marks left behind by the more abrasive 220 grit paper. I rubbed a small quantity of EVO to rehydrate the stem and set it aside. With the stem set aside, I turned my attention back to the stummel and rim repairs where the fills/ repairs had hardened completely. To speed up the removal of excess mix of briar dust and superglue from the repaired areas, I mounted a sanding drum over my hand held rotary tool and carefully sanded down the excess patch material. I further shaped and matched the repaired area with the rest of the stummel by sanding with a 180 grit sand paper. At this point, I noticed a large number of air pockets in the repaired areas and can be identified in the form of light colored pockets in the surface.And so here I was, filling the air pockets with a mix of briar dust and superglue and praying that these pockets are completely filled. Once I was done, I set the stummel aside for the mix to harden.While I was working on the stummel repairs, Abha, my wife was quietly giving finishing touches to the stem. She went through the entire set of micromesh pads, wet sanding with 1500 through to 12000 grit pads. She applied a little quantity of EVO and set the stem aside for final polish with polishing compounds.By next afternoon, the repairs to the rim had completely hardened. I set about sanding the repaired surface with a sanding drum mounted on to my rotary tool to match the rest of the surface. With a folded piece of 180 grit sand paper, I fine tuned the match further. At this stage, even though the air pockets have reduced to an extent, but not eliminated. I further realized that the rim top is still thin on the right side and needs to be built up further. To get the rim thickness to match the rest of the rim surface, I coated that portion of the inner wall that needed to be built up with a mix of briar dust and superglue. One has to be careful to coat only the required areas as it would mean extra effort and time wasted to remove the unwanted coat at a later stage. I set the stummel aside for the mix to cure.As I was busy with the rim repairs, Abha had polished the stem and had placed it on my work table. She polished the stem with micromesh pads, wet sanding with 1500 to 12000 grit pads. When she was through with the micromesh cycle, she deeply rubbed a small quantity of EVO in to the stem surface to rehydrate it and set it aside for me to give a final polish with blue diamond and carnauba wax. The finished stem looks a nice shining black. It was after I clicked pictures that I noticed that air pockets can be seen in the repairs to the bite zone. Is it the superglue that is at fault or is it me doing something wrong? Well, I shall live with it for now as these air pockets are not easy to discern with naked eye and maybe later someday I shall redo the stem repairs.Once the repairs to the rim had cured, I used a sanding drum mounted on to my rotary tool to smooth and even out the fills. I fine tuned the matching of the repairs with the surrounding surface by sanding with a piece of 180 grit sand paper. Now to even out the rim top surface…To even out the rim top surface, I topped the rim surface on a piece of 220 grit sandpaper till I had achieved an even a rim surface as was achievable while maintaining the shape and proportions of the stummel. A few light spots are seen where the glue did not mix with the briar dust forming an air pocket which got exposed during the sanding process.I addressed the issue of these air pockets by spot filling them with superglue using a toothpick. To speed things up, I used an accelerator to hasten the curing of the superglue. Once the glue had hardened, I evened out the fills by sanding with a 220 grit sand paper to a smooth finish. Unfortunately, I lost the pictures of this stage somewhere during transferring of data from mobile phone to my laptop.
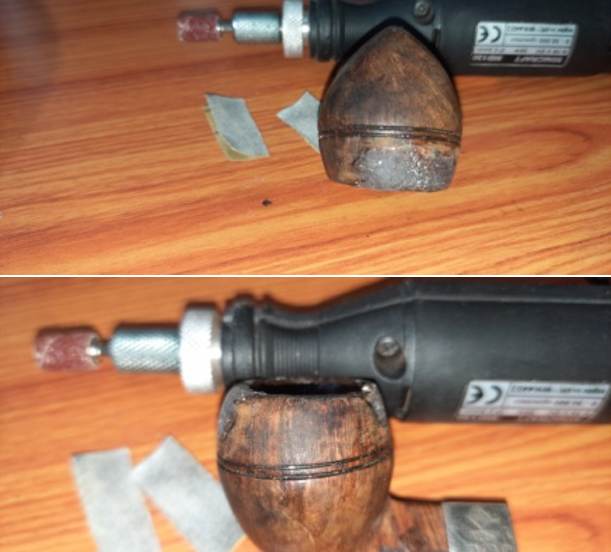
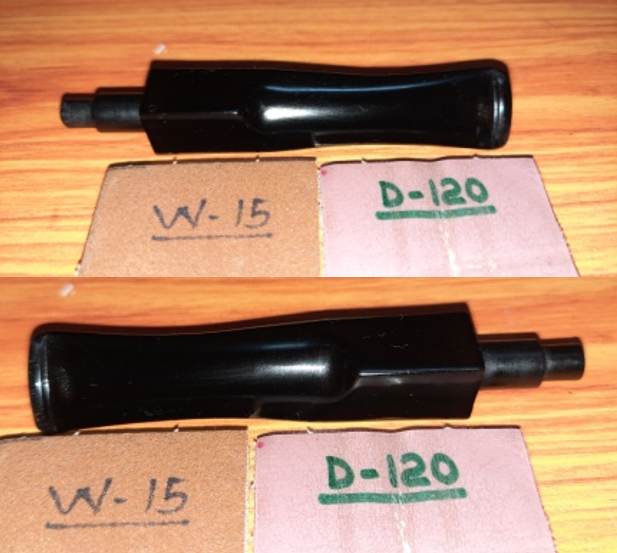
With the rim repairs completed, I sanded the entire stummel progressively using 320, 600 and 800 grit sand papers. This not only addressed the minor scratches and dings over the surface, but also evened out any high spots left behind during the rim repairs. Satisfied with the progress made, I handed over the stummel to Abha for her to weave her magic with the micromesh pads. She polished the stummel, going through the entire set of 9 micromesh pads. To further blend the repairs with the surrounding surface, I stained the repaired area with a dark brown stain pen and set the stummel aside overnight for the stain to set. Once the stain was set, I rubbed a small quantity of “Before and After Restoration Balm”, a product developed by Mark Hoover that helps to rejuvenate and protect the briar. The transformation is almost immediate and the results are outstanding. The repairs, though visible on closer inspection, have blended in beautifully. Save for the final wax polish, the cosmetic aspect of this pipe has been taken care of and with great results! Now to address the functional aspects…

While carrying out the detailed inspection, I had observed and noted heat lines along the inner walls of the chamber. These heat lines are places from where burnouts usually happen if not addressed. Added to this was the rebuilt rim surface using briar dust and superglue. To isolate the heat lines and the rebuilt rim top surface from coming in direct contact with smoldering tobaccos, I decided to give a thin coat of JB Weld to the inner chamber walls and once the weld had hardened, a coat of activated charcoal and yogurt which is organic, neutral tasting and completely safe for humans would be applied over the JB Weld layer. This coat also aids in a faster build up of the cake.

With the PoA ready, I mixed the two part epoxy. J B Weld is a two-part epoxy Cold Weld in two tubes; hardener and steel which are mixed in two equal parts (ratio of 1:1) with hardening time of 5-6 minutes and complete curing time of 6-8 hours. I poured the contents of the two tubes and mixed it well. I inserted a petroleum jelly coated regular pipe cleaner through the draught hole to prevent it from getting blocked due to the J B Weld mix. I applied this mix, as evenly as possible, over the entire chamber wall surface and worked fast to ensure an even coat over the chamber walls before the weld could harden. I set the stummel aside for the application to harden and cure overnight. The J B Weld coat had hardened considerably by next day evening when I got around to working on the pipe. I mounted a sanding drum on to my hand held rotary tool and after setting the speed to half of the full RPM, I sanded the excess coat from the chamber walls. To further fine tune and keep the coat to a minimum thickness, I further sanded with a 150 grit sand paper till I had a coat thickness that was just sufficient to protect the briar underneath. Here is how the chamber appeared at this stage. After I had protected the repaired portion of the rim and the walls of the chamber with a coat of J B Weld, it was necessary to prevent this coat from coming into contact with the burning tobacco. I addressed this by mixing activated charcoal and plain yogurt to a thicker consistency, just enough that it would spread easily and applied it evenly all along the chamber walls after inserting a folded pipe cleaner through the draught hole to keep it open. Once dry and set, this will not only protect the walls but also aid in faster build up of cake.To complete the restoration, I mounted a cotton cloth buffing wheel onto my hand held rotary tool and polished the stummel and stem with Blue Diamond compound. This compound helps to remove the minor scratch marks that remain from the sanding. I mounted another cotton buffing wheel that I have earmarked for carnauba wax and applied several coats of the wax. I finished the restoration by giving the entire pipe a rigorous hand buffing using a microfiber cloth to raise the shine further. The finished pipe looks amazingly beautiful and is ready to join my collection of other BBB pipes that I have inherited. I only wish it could share with me its story of the past years while I enjoy smoking my favorite Virginia blend in it or maybe an English blend or maybe just keep admiring it.

Another Of My Inherited BBB Restored…And What A Mess It Was


Blog by Paresh Deshpande

The next pipe that had moved up the queue of pipes for restoration is also a BBB, but from a newer era as compared to the c.1916 pipe that I had just restored. The aim of selecting this pipe was to show the general condition of the pipes that I had inherited. All or most of them were very well loved and thus extensively smoked without any signs of ever having being cleaned and maintained. The philosophy was simple, select one favorite pipe, smoke the pipe till it fouls up then chuck it, buy a new pipe and repeat the process… It was an era when Barling family still owned the brand and Loewe pipes were still made in the Haymarket area! Ah….. That bygone era of beautiful and superb quality English pipes.

This is a beautiful well grained bent billiards with a nice hand feel, is perfectly proportioned and the quality just oozes out of every inch of the pipe. The sterling silver ferrule at the shank end bears the stamp of “BBB” enclosed in trademark rhombus over “STERLING” over “SILVER”. The stamping on the right side is greatly faded and only “MAKE” is visible under magnification and bright lights. The left side of the shank bears the slightly worn out shape code “304”. The high quality vulcanite stem has the trademark metal rhombus stamped “BBB”. I have worked on quite a few BBB pipes in the past and read a ton of material from various sources on BBB and to save time of our esteemed readers, I shall not reproduce the article but have provided a link for the most reliable and concise information on pipedia.org, https://pipedia.org/wiki/BBB

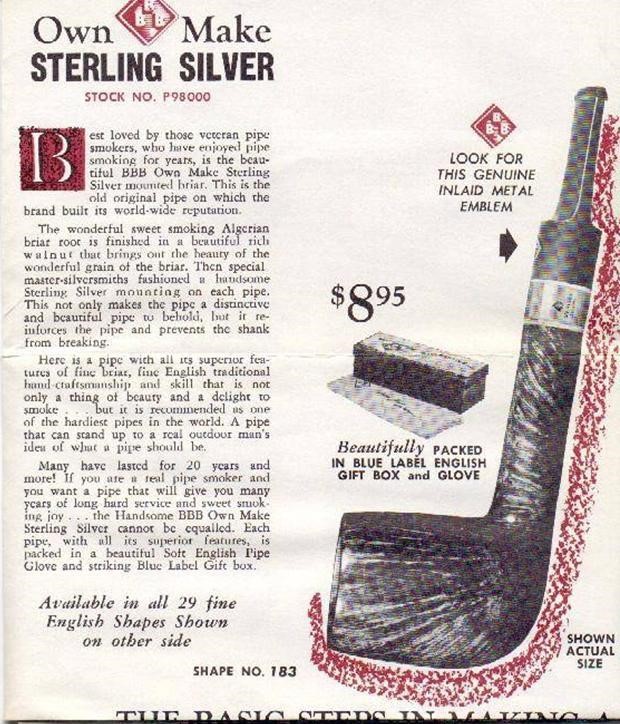
What were of interest to me, however, were the BBB catalogs that Doug Valitchka has contributed on pipedia.org. I reproduce a picture of the Sterling Silver line of pipes from BBB that gives out a brief introduction to the line and also the cost of the Sterling Silver line of pipes prevalent at that time. This and the subsequent link that I shall be providing, is a strongly recommended read for all those interested in old flyers and promotional endeavors from BBB.Pipedia.org also has a link to a PDF copy of 1960 brochure which is a very strong recommendation either for referencing or as a general read (https://pipedia.org/images/e/e8/BBB_1960.pdf). The pipe currently on my table has a shape number 304 which has been described in the brochure as a Bent Billiard.

Thus from the above, this pipe must have been with my grandfather from somewhere since late 1950s or very early 1960s making it 60 year old, give or take a few.

Initial Visual Inspection
The chamber has a thick layer of cake, so thick that I am unable to see the heel of the chamber. There is a heavy overflow of lava over the rim surface. The stummel appears dull and lackluster from all the heavy use and overflowing oils and tars which has attracted a ton of dust and grime from years of storage. However beneath all the dirt and grime some beautiful bird’s eye and cross grain over the stummel awaits revelation. There are a few dents, dings and chipped surface in the stummel. The sterling Silver band has turned black due to oxidation. The vulcanite stem is heavily oxidized with deep tooth chatter/ bite marks and calcification in the bite zone. The airway is clogged with dried oils and crud. Shown below is the pipe as it presents itself on my worktable. Dimensions Of The Pipe
(a) Overall length of the pipe:          5.2 inches.

(b) Bowl height:                                  1.7 inches.

(c) Inner diameter of chamber:        0.8 inches.

(d) Outer diameter of chamber:      1.2 inches.

Detailed Inspection
Apparently this chamber has never ever seen a pipe reamer nor has ever experienced the luxury of having a cake of the thickness of a dime. There is a thick layer of cake in the chamber which restricts reaching to the bottom of the chamber. The cake is very hard and dry and it was with some difficulty that I could pry out a couple of chips of cake from the rim surface with my knife. This is going to be one bugger to clean, I say. The thick lava overflow over the rim top surface obscures the condition of the rim surface and will be ascertained only after the crud is removed. Ditto as regards the condition of the chamber wall. I shall deliberate in detail on these issues once the cake has been rid of. The ghost smells are very strong, in fact so strong that the entire room reeked of the smell of rancid tobacco. The stummel is covered in overflowing carbon, oils and ash. Add to this grime, the many years of dust and dirt due to uncared for storage ground into the surface and you have a filthy, dull and dirty looking briar. There are some tightly packed Bird’s eye grains peeking from either sides of the stummel while beautiful cross grains adorn the fore and aft of the bowl. There are a few scratches, dents and dings over the stummel surface (enclosed in pastel blue), nothing severe that would need to be filled. However, to the front of the bowl just below and along the outer edge of the rim, there are a couple of spots that are missing briar (green circle). I may have to rebuild it using briar dust and superglue. The mortise is chock-a-block with old oils, tars and gunk to the extent that I couldn’t see the light in the chamber. The Sterling Silver ferrule is deeply oxidized but without any damage. Cleaning this pipe will be a long haul. The vulcanite stem is deeply oxidized but thankfully without any major damage. There are few tooth indentations and tooth chatter on either surfaces of the stem along with calcification in the bite zone. The button edges on either side have been chewed and would benefit from a rebuild/ reshaping. The step tenon opening is completely clogged and remnants of oils and tars and gunk can be easily observed on the sides and on the inside of the opening. The horizontal slot face is brutally oxidized and filled with gunk. The smells emanating from the stem are quite strong and repulsive. The brass logo is crisp and intact and would benefit from a nice polish.The Process…
Since there were other stems that were ready to be put into the stem deoxidizer solution, I decided to clean the internals of this stem first so that it could be put in the solution with other stems. I cleaned the stem airway with a thin shank brush and anti oil soap. The amount of gunk that was cleaned can be judged from the pictures below. It took considerable time and elbow grease to get the stem airway clean. In spite of my best efforts, I could not get the brush to completely pass through the stem. Closer inspection of the slot end confirmed my worst fears and I could see that the slot was blocked with the crud from the stem airway. I used a sharp dental tool to pry out the block and further cleaned the internals with regular and bristled pipe cleaners dipped in alcohol.This internal cleaning was followed by sanding the stem external surface with a folded piece of 220 grit sandpaper to loosen up and remove superficial oxidation. It has been our experience that such sanding yields the best end results after the deoxidizer solution has completed its assigned task. Before dunking the stem in the deoxidizer solution, it was cleaned up with Murphy’s Oil Soap and a cotton swab.The stem was immersed in the Before and After Deoxidizer solution, a product that has been developed by Mark Hoover. This solution raises the oxidation to the stem surface and helps in easy removal and imparting a nice shine to the stem after polishing. The pipe is indicated with an orange arrow indicator. The stem is allowed to soak into this solution overnight.The next morning, Abha took the stem out from the solution. She cleaned the stem under running warm water and scrubbed the raised oxidation from the stem surface using a Scotch Brite pad and cleaned the airway with a thin shank brush. She further removed the oxidation by scrubbing the stem with 0000 grade steel wool and applied a little EVO to rehydrate the stem. She ran a couple of pipe cleaners through the stem airway to clean the airway of the deoxidizer solution and water. There is a need to further sand the stem to completely remove the oxidation.Continuing with the stem repairs, to address the deeper tooth indentations/ bite marks, I warmed up the bite zone with the flame of a lighter. The heat helps to expand the vulcanite and retain its original shape. This method may not always completely raise the depressions to the surface, but most of the times, to a great extent. In this case the tooth indentations were raised to a great extent, but the damage to the button edge would require a rebuild. I followed up the heating of the stem surface with sanding the bite zone with a worn out piece of 180 grit sandpaper to even out the surface. Next I rebuilt the button edge with a mix of activated charcoal and superglue. I applied it over the buttons on either sides of the stem and set it aside for the mix to cure.Now it was time for me to work on the stummel. I did this by first reaming the chamber with size 1 followed by size 2 PipNet reamer head. I further scraped the chamber walls with my fabricated knife to remove the remaining carbon deposits where the reamer head could not reach. I scraped out the lava overflow from the rim top surface. Once the cake was reamed back to the bare briar, I used a 150 grit sand paper followed by 220 grit sand paper to remove all the traces of remaining cake and also to smooth out the inner walls of the chamber surface. Finally, to remove the residual carbon dust, I wiped the chamber with a cotton pad wetted with 99.9% pure isopropyl alcohol. The huge pile of carbon dust that was reamed out is an indication enough to the amount of carbon that had accumulated in the chamber.With the chamber and rim top surface free of all the cake and overflowing oils and tars, I took a closer look at the chamber and rim top surface. The rim top has a number of dents and is undulated, probably a result of striking against a hard surface to remove dottle. Also a result of these strikes is that the outer rim edge is chipped and damaged on the left side between 9 and 12 o’clock direction (encircled in pastel blue). The inner rim appears to have had a bevel and there seem to be signs of charring on the right side (encircled in yellow). There are webbings of thin superficial heat lines along the wall of the chamber (indicated by green arrows); however these are to be expected in a pipe that has been so heavily smoked. These heat lines are very minor and superficial and do not detract from the smoke worthiness of this pipe for the next 60 years.During the handling of the stummel, the Sterling silver band came off allowing me to check for damage underneath the band. Thankfully other than being filthy, there was none. I cleaned the mortise with hard bristled pipe cleaners and alcohol. Using a fabricated tool, I scraped the dried accumulated gunk from the mortise to the extent possible. The mortise would be further cleaned during the stummel cleaning. With the internal cleaning done, it was time for the external cleaning of the stummel surface. I used a hard bristled tooth brush and Murphy’s Oil Soap, to scrub the stummel and rim top. The hardened and stubborn cake was dislodged from the rim surface and shank end using Scotch Brite pad and with a brass wired brush. I washed the stummel under running warm water with anti oil dish washing detergent till the stummel surface was clean and dried it using paper towels and soft cotton cloth. I simultaneously cleaned the shank internals with the detergent and hard bristled shank brush and set the stummel aside to dry out naturally. It is pertinent to mention here that even after all this cleaning of the chamber and shank internals, the ghost smells are still very invasive. This would require adoption of more invasive methods to get rid of these old smells.Since the stummel and stem were drying and curing respectively, I completed one of the mundane but equally important tasks of polishing the Sterling silver band. I used a local product that is available in India only to polish the band. The liquid polish was applied to the band and wiped it out after a few seconds. The polish completely removed the oxidation and gave a nice shine to the band.To address the rim top damage, I topped the rim top on 220 grit sandpaper till the surface was nice and even. I hate losing any briar and restrict it to the barest minimum that is required. The damage to the outer rim edge, though greatly eliminated, can still be seen to the front side (encircled in green). This would need to be reconstructed subsequently. The charring to the inner rim edge is still visible (encircled in orange). These issues could be completely addressed by the process of topping but the extent of topping that would be required to do so would alter the bowl height and also the entire pipe profile. I decided subject the stummel to an alcohol bath to address the strong smells from the stummel before moving ahead with repairs to the inner and outer rim edges. I used cotton balls which is an at par substitute to Kosher salt as I have realized over the years. I drew out a wick from the cotton and along with a folded regular pipe cleaner; inserted it into the mortise and through the draught hole into the chamber. Thereafter, I packed the chamber with cotton balls to about quarter of an inch below the inner rim edge and soaked the cotton balls with isopropyl alcohol up to the brim. About half an hour later, the level of alcohol had gone down, having being absorbed by the cotton. I topped it up once again and set it aside overnight. By next morning, the cotton and alcohol had drawn out all the remaining oils and tars from the chamber and mortise, fulfilling its intended task. I removed the cotton balls and ran pipe cleaners through the mortise to clean out all the loosened tars and gunk and further cleaned it with alcohol and q-tips. The chamber now smells clean and fresh. I set the stummel aside to dry out naturally. While the stummel was soaking in the alcohol bath, I had a look at the stem repairs and found the repairs completely cured. With a flat head needle file, I sanded these fills to achieve a rough match with the stem surface. I further fine tuned the match by sanding the repairs with a folded piece of 220 grit sand paper pinched between my thumb and forefinger. I followed it up by sanding the entire stem surface using 320, 400, 600, 800, 1000, 1500 and finally with a piece of 2000 grit sand paper. This serves to reduce the sanding marks of the more abrasive sand papers. I also sharpened the button edges while sanding. I wiped the stem with a cotton swab and alcohol to remove all the oxidation and sanding dust from the surface. I applied a little Extra Virgin Olive oil over the stem and set it aside to be absorbed by the vulcanite. Returning back to the stummel repairs, with a folded piece of worn out 180 grit sand paper pinched between my thumb and forefinger, I carefully gave a rough bevel to the inner rim edge and addressed the issue of charred inner rim edge. I filled up the chipped areas on the outer rim edge with a mix of superglue and briar dust and set the stummel aside for the fills to cure and harden.Once the mix had hardened, with a flat head needle file I sanded the fills to achieve a rough match with the rest of the rim edge. I further blended in the fills with a folded piece of 180 grit sand paper. I also sharpened the rough bevel to the inner edge that I had cut earlier. The rim top surface and the edges look much better at this stage of restoration. I further sanded the entire stummel with a piece of 220 grit sand paper to address the minor scratches and dings that would otherwise show after micromesh polishing cycle. I followed it by wet sanding the stummel with 1500 to 12000 grit micromesh pads, wiping frequently with a moist cloth to check the progress. I rubbed a small quantity of “Before and After Restoration Balm” deep into the briar with my finger tips and let it rest for a few minutes. The balm almost immediately works its magic and the briar now has a nice vibrant appearance with the beautiful grain patterns displayed in their complete splendor. I further buffed it with a horse hair brush and gave a vigorous buff with a microfiber cloth to deepen the shine. The beauty of this piece of briar is marred ever so slightly by a small pit on the left side of the bowl at the shank and bowl junction. Other than this, the briar only has only bird’s eyes and cross grains to boast. No wonder then that it was sold as a mid level line, below VIRGIN and above THORNEYCROFT.

To put the finishing touches, I mounted a cotton cloth buffing wheel onto my hand held rotary tool and polished the stummel and stem with Blue Diamond compound. This compound helps to remove the minor scratch marks that remain from the sanding. Next, I mounted another cotton buffing wheel that I have earmarked for carnauba wax and applied several coats of the wax. I mounted a clean cotton cloth buffing wheel and gave the entire pipe a once over buff. I finished the restoration by giving the entire pipe a rigorous hand buffing using a microfiber cloth to raise the shine further. The finished pipe with the aged patina to the briar looks amazingly beautiful and is now ready for its long second innings with me.

Breathing Life into a 1921 Peterson’s Dublin Prince


Blog by Steve Laug

The next pipe came to me for work from a friend of mine. It is a nice looking Peterson’s Prince that was quite a mess. The finish was worn and tired with fading on the left side of the bowl and shank. The rim top was damaged and darkened with a lava build up. The inner edges of the rim were damaged and worn. The silver ferrule was tarnished but the stamping was readable. The stamping on the shank sides was readable with a lens. It is stamped diagonally on the left side and reads Peterson’s [over] Dublin. On the right side it is also stamped diagonally and reads Made In [over] Ireland. The silver ferrule is stamped K&P [over] three hallmarks -1. Hibernia seated on a throne (represents Ireland) 2. Crowned harp (signifying the quality of the silver) 3. The letter “f” (giving the year of manufacture). All are in scalloped square shaped cartouches. Under these it is stamped Peterson [over] Dublin. I will need to confirm the date stamps and the stamping to confirm the dating of the pipe. I have included the pictures of the pipe that my friend sent to me early on in our conversation.It took nearly a month for the pipes to arrive in Canada for me to work on. I took photos of them to have an idea of what I was dealing with. You can see from the photos what I saw. The finish is really worn and faded on the left side mid bowl back to the ferrule on the shank. The older finish was dark on the rest of the bowl. Rim top showed darkening as noted above and there were cuts or marks on the top of the rim. The inner edge had some damage and nicks at the front side of the bowl. There was a build up of lava on the rim top and a light build up of cake in the bowl. The silver ferrule was tarnished but readable. I took some photos of the rim top and bowl to capture the condition of the pipe. You can see the cake in the bowl. There is heavier lava on the top left and back of the rim than on the rest. There was damage all around the inner edge of the bowl that included reaming and burn damage. The military stick bit style stem was heavily oxidized and there was some calcification on the top and underside of the stem near the button. There were tooth marks and chatter on both sides.I took photos of the stamping on the shank sides and the silver ferrule to try and capture them as best as I could. They were weak but they are readable with a lens. They read as noted above.I removed the stem from the bowl and took a photo of it to show its appearance. The tenon end of the stem has some calcification (or possibly some dried silver polish) where it sat against the silver.Before I started the restoration process on the pipe I wanted to confirm the date that my friend had sent to me for this pipe. I turned to Peterson’s Hallmark Chart that I have on rebornpipes to pin down the date (https://rebornpipes.com/tag/peterson-hallmark-chart/). I have include a copy of that chart below. I drew a red box around the date stamp that matches the one on the pipe. It is indeed a 1921 Peterson. I expanded the chart above and captured the section that included the section from 1907-1961 below. It confirms that the date is indeed 1921.Now I knew that I was working on a Peterson Prince made in 1921 and the Dublin stamp tells me it was made in Dublin.

I turned to Peterson’s Dublin in the book, The Peterson Pipe by Mark Irwin & Gary Malmberg. I quote from that section below:

 Dublin (1906-2003) Although DUBLIN appears under PETERSON’S on many pipes over the decades, it has served mostly as part of the brand name. The word first appeared on pipes hallmarked 1906-11, stamped PETERSON’S over PATENT OVER DUBLIN. The simpler PETERSON’S over DUBLIN first appeared on pipes hallmarked 1912 after the expiration of the patent. Illustrations of pipes in the ’37 catalogue show a random dispersion of the stamp PETERSON’S over OF DUBLIN together with the ordinary PETERSON’S over DUBLIN on every model offered. Specimen of the former will bear either an Irish COM or LONDON MADE over ENGLAND COM and almost certainly date from 1945-62. It was first mentioned in print as part of a model name in the ’68 price list, as K&P DUBLIN, in ’92 for a Danish market line…

Armed with this information I started working on the pipe. I put the stem in a bath of Briarville’s Pipe Stem Deoxidizer to deal with the thick oxidation on the surface. I would let it sit for about 6 hours and then remove it and work on it in the mean time I decided to work on the bowl. I lightly topped it with  220 grit sandpaper on a topping board to remove the damage on the rim top and the thick lava coat.I reamed the bowl with a PipNet pipe reamer to remove the cake from the bowl. I cleaned up the remaining cake with a Savinelli Fistall Pipe Knife. I sanded the bowl with 220 grit sandpaper wrapped around a piece of dowel to smooth out the inside of the bowl. The walls looked very good with no checking or heat damage. After reaming the bowl I turned my attention back to the rim edge and top of the bowl. I worked over the edge of the bowl with 220 grit sandpaper to smooth out the burned edge and the rim top. I wrapped a small wood ball in sandpaper and used it to sand the top and inner edge and give it a light bevel to minimize the inner edge. I scrubbed the bowl with Murphy’s Oil Soap to clean off the thick oils and grime ground into the surface of the briar. I scrubbed it on undiluted and rinsed it off with warm water to remove the soap and the grime. The bowl looked much better and the grain really began to stand out clearly. I cleaned out the shank with pipe cleaners, cotton swabs and 99% alcohol to remove the oils from the walls. It was filthy and when I was finished it smelled clean and fresh.I polished the briar (carefully avoiding the areas where the pipe is stamped on the shank sides) with micromesh sanding pads. I dry sanded it with 1500-12000 grit sanding pads. I wiped it down after each pad with a damp cloth to remove the sanding debris. I worked some Before & After Restoration Balm into the surface of the smooth briar with my finger tips. The product is amazing and works to clean, enliven and protect the briar. I let it sit on the briar for 10 or more minutes and then buff it off with a soft cloth. It really makes the grain sing. I polished the silver ferrule with a jewelers cloth to remove the remaining tarnish/oxidation and protect it against further tarnishing. There are a few dings in the silver but I chose to leave them as part of the story of the pipe. I set the bowl aside and turned my attention to the stem. I took it out of the Briarville Pipe Stem Deoxidizer and cleaned off the outside and the inside of the stem. I rubbed the stem down with a paper towel to clean off the remaining oxidation. I cleaned out the inside of the stem with alcohol and pipe cleaners.I “painted” the tooth marks in the vulcanite with the flame of a Bic lighter and was able to life the tooth marks to the surface. The surface looked really good.I polished the vulcanite with micromesh sanding pads. I used 1500-12000 grit pads to polish the vulcanite. I wiped down the stem with Obsidian Oil after each sanding pad. I have an oil impregnated piece of cloth that I use after each pad. I polished it further with Before & After Stem Polish both Fine and Extra Fine polishes. I gave it a further coat of Obsidian Oil and set it aside to dry.I put the pipe back together – the bowl with its new stem. This smooth finished 1921 Peterson’s Dublin Prince is a real beauty with great grain around the bowl. The thin P-lip style vulcanite stem works very well with silver ferrule and the medium brown briar. This Irish made Prince is a very collectible part of Peterson’s history. The grain on the bowl is quite beautiful and came alive with the buffing. I used Blue Diamond on the buffing wheel on both the bowl and stem. I gave both multiple coats of carnauba wax on the wheel then buffed it with a clean buffing pad to raise the shine. I hand buffed it with a microfibre cloth to deepen the shine. The Peterson’s Prince feels great in the hand. It is lightweight and the contrast in the browns of the briar, the sterling silver ferrule and the polished vulcanite stem is quite amazing. The dimensions of the pipe are Length: 6 inches, Height: 1 ½ inches, Outer diameter of the bowl: 1 ¼ inches, Chamber diameter: 7/8 of an inch. The weight of the pipe is 1.20 ounces/34 grams. It really is a beauty. I have three other pipes to work on from my friends collection and then I will send them all back to him. Thanks for walking through the restemming and the restoration with me. Cheers.