Blog by Paresh Deshpande
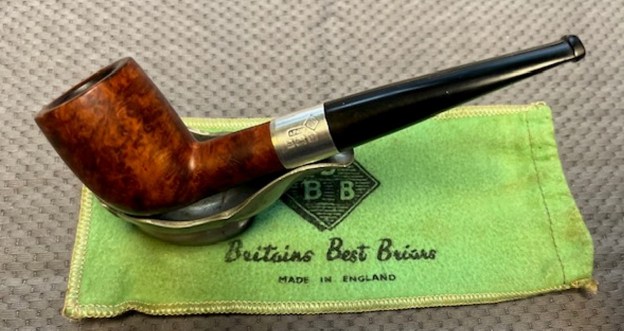
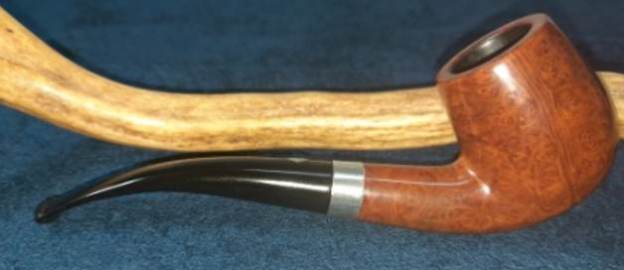
The next pipe that had moved up the queue of pipes for restoration is also a BBB, but from a newer era as compared to the c.1916 pipe that I had just restored. The aim of selecting this pipe was to show the general condition of the pipes that I had inherited. All or most of them were very well loved and thus extensively smoked without any signs of ever having being cleaned and maintained. The philosophy was simple, select one favorite pipe, smoke the pipe till it fouls up then chuck it, buy a new pipe and repeat the process… It was an era when Barling family still owned the brand and Loewe pipes were still made in the Haymarket area! Ah….. That bygone era of beautiful and superb quality English pipes.
This is a beautiful well grained bent billiards with a nice hand feel, is perfectly proportioned and the quality just oozes out of every inch of the pipe. The sterling silver ferrule at the shank end bears the stamp of “BBB” enclosed in trademark rhombus over “STERLING” over “SILVER”. The stamping on the right side is greatly faded and only “MAKE” is visible under magnification and bright lights. The left side of the shank bears the slightly worn out shape code “304”. The high quality vulcanite stem has the trademark metal rhombus stamped “BBB”.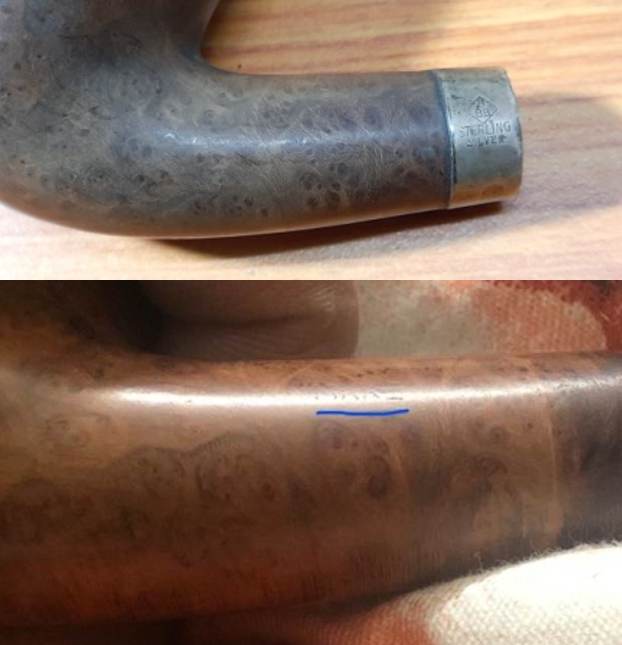
 I have worked on quite a few BBB pipes in the past and read a ton of material from various sources on BBB and to save time of our esteemed readers, I shall not reproduce the article but have provided a link for the most reliable and concise information on pipedia.org, https://pipedia.org/wiki/BBB
What were of interest to me, however, were the BBB catalogs that Doug Valitchka has contributed on pipedia.org. I reproduce a picture of the Sterling Silver line of pipes from BBB that gives out a brief introduction to the line and also the cost of the Sterling Silver line of pipes prevalent at that time. This and the subsequent link that I shall be providing, is a strongly recommended read for all those interested in old flyers and promotional endeavors from BBB.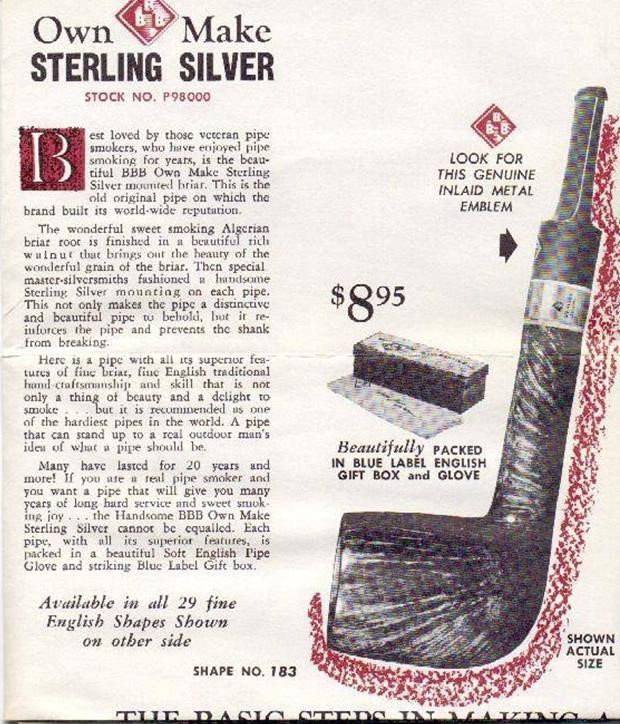 Pipedia.org also has a link to a PDF copy of 1960 brochure which is a very strong recommendation either for referencing or as a general read (https://pipedia.org/images/e/e8/BBB_1960.pdf). The pipe currently on my table has a shape number 304 which has been described in the brochure as a Bent Billiard.
Thus from the above, this pipe must have been with my grandfather from somewhere since late 1950s or very early 1960s making it 60 year old, give or take a few.
Initial Visual Inspection
The chamber has a thick layer of cake, so thick that I am unable to see the heel of the chamber. There is a heavy overflow of lava over the rim surface. The stummel appears dull and lackluster from all the heavy use and overflowing oils and tars which has attracted a ton of dust and grime from years of storage. However beneath all the dirt and grime some beautiful bird’s eye and cross grain over the stummel awaits revelation. There are a few dents, dings and chipped surface in the stummel. The sterling Silver band has turned black due to oxidation. The vulcanite stem is heavily oxidized with deep tooth chatter/ bite marks and calcification in the bite zone. The airway is clogged with dried oils and crud. Shown below is the pipe as it presents itself on my worktable.
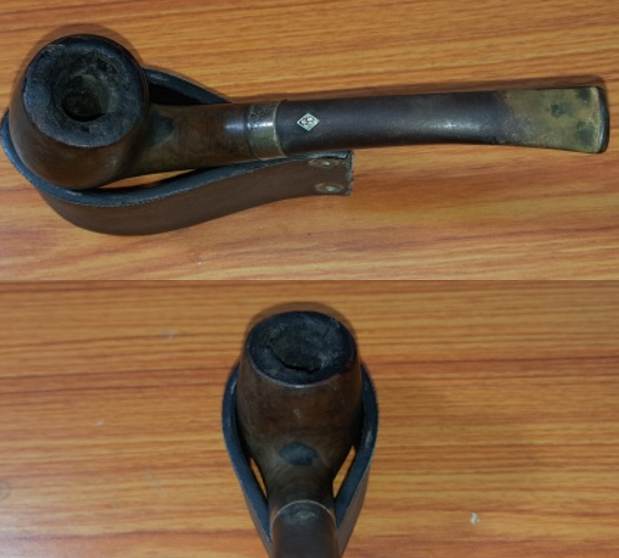
 Dimensions Of The Pipe
(a) Overall length of the pipe: 5.2 inches.
(b) Bowl height: 1.7 inches.
(c) Inner diameter of chamber: 0.8 inches.
(d) Outer diameter of chamber: 1.2 inches.
Detailed Inspection
Apparently this chamber has never ever seen a pipe reamer nor has ever experienced the luxury of having a cake of the thickness of a dime. There is a thick layer of cake in the chamber which restricts reaching to the bottom of the chamber. The cake is very hard and dry and it was with some difficulty that I could pry out a couple of chips of cake from the rim surface with my knife. This is going to be one bugger to clean, I say. The thick lava overflow over the rim top surface obscures the condition of the rim surface and will be ascertained only after the crud is removed. Ditto as regards the condition of the chamber wall. I shall deliberate in detail on these issues once the cake has been rid of. The ghost smells are very strong, in fact so strong that the entire room reeked of the smell of rancid tobacco.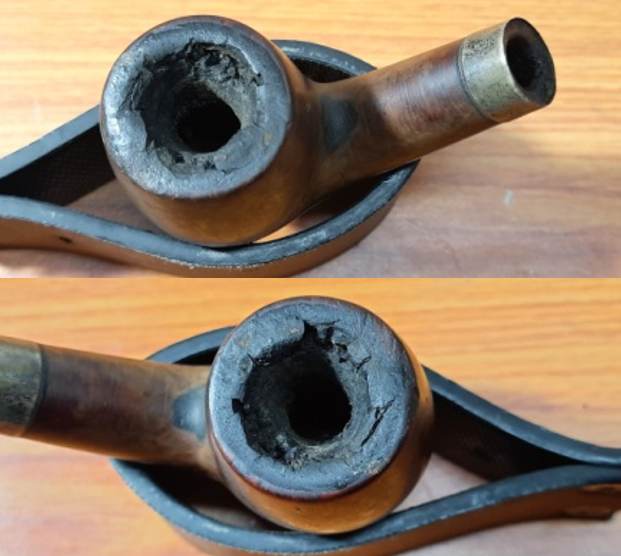
 The stummel is covered in overflowing carbon, oils and ash. Add to this grime, the many years of dust and dirt due to uncared for storage ground into the surface and you have a filthy, dull and dirty looking briar. There are some tightly packed Bird’s eye grains peeking from either sides of the stummel while beautiful cross grains adorn the fore and aft of the bowl. There are a few scratches, dents and dings over the stummel surface (enclosed in pastel blue), nothing severe that would need to be filled. However, to the front of the bowl just below and along the outer edge of the rim, there are a couple of spots that are missing briar (green circle). I may have to rebuild it using briar dust and superglue. The mortise is chock-a-block with old oils, tars and gunk to the extent that I couldn’t see the light in the chamber. The Sterling Silver ferrule is deeply oxidized but without any damage. Cleaning this pipe will be a long haul.
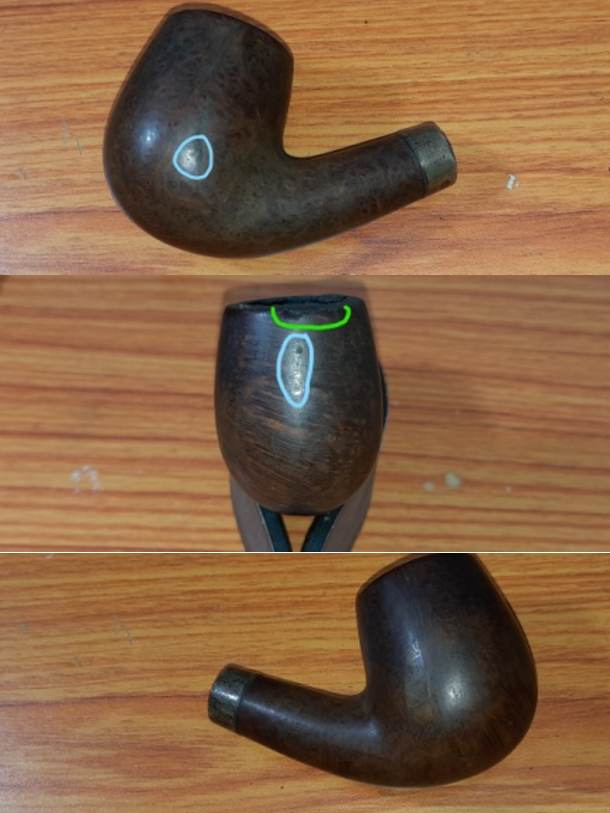
 The vulcanite stem is deeply oxidized but thankfully without any major damage. There are few tooth indentations and tooth chatter on either surfaces of the stem along with calcification in the bite zone. The button edges on either side have been chewed and would benefit from a rebuild/ reshaping. The step tenon opening is completely clogged and remnants of oils and tars and gunk can be easily observed on the sides and on the inside of the opening. The horizontal slot face is brutally oxidized and filled with gunk. The smells emanating from the stem are quite strong and repulsive. The brass logo is crisp and intact and would benefit from a nice polish.
 The Process…
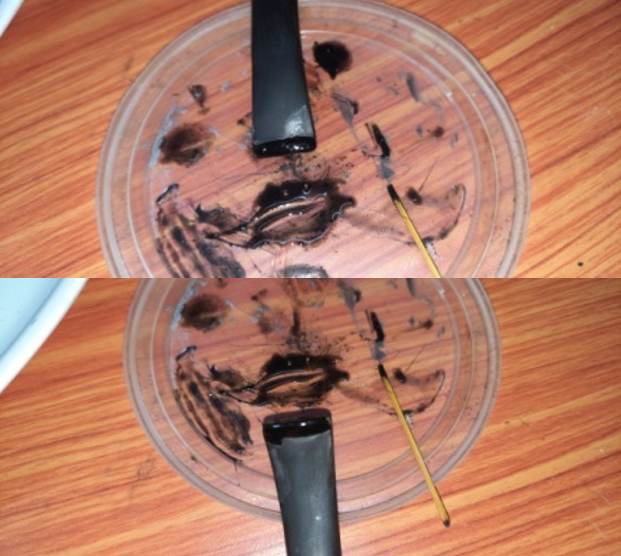
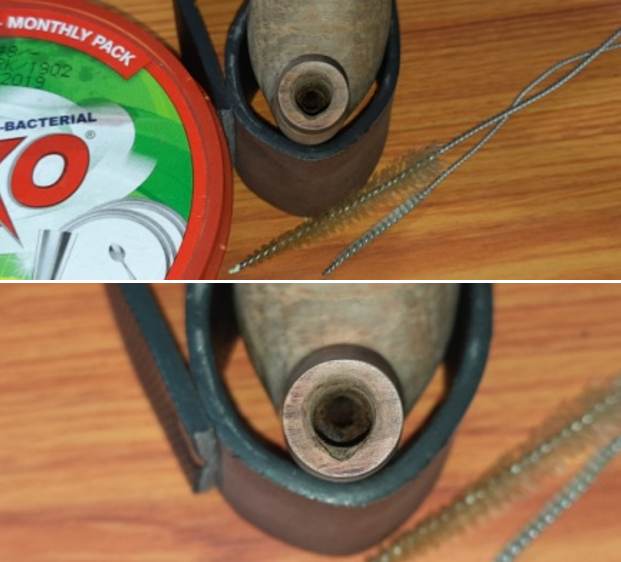
Since there were other stems that were ready to be put into the stem deoxidizer solution, I decided to clean the internals of this stem first so that it could be put in the solution with other stems. I cleaned the stem airway with a thin shank brush and anti oil soap. The amount of gunk that was cleaned can be judged from the pictures below. It took considerable time and elbow grease to get the stem airway clean. In spite of my best efforts, I could not get the brush to completely pass through the stem. Closer inspection of the slot end confirmed my worst fears and I could see that the slot was blocked with the crud from the stem airway. I used a sharp dental tool to pry out the block and further cleaned the internals with regular and bristled pipe cleaners dipped in alcohol. This internal cleaning was followed by sanding the stem external surface with a folded piece of 220 grit sandpaper to loosen up and remove superficial oxidation. It has been our experience that such sanding yields the best end results after the deoxidizer solution has completed its assigned task. Before dunking the stem in the deoxidizer solution, it was cleaned up with Murphy’s Oil Soap and a cotton swab.
 The stem was immersed in the Before and After Deoxidizer solution, a product that has been developed by Mark Hoover. This solution raises the oxidation to the stem surface and helps in easy removal and imparting a nice shine to the stem after polishing. The pipe is indicated with an orange arrow indicator. The stem is allowed to soak into this solution overnight.
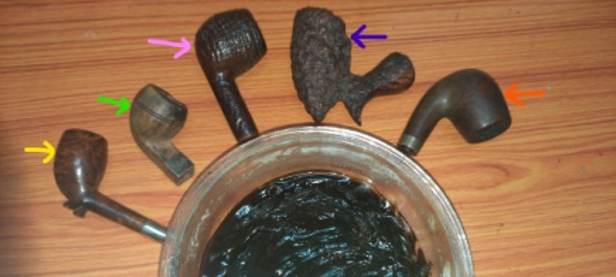 The next morning, Abha took the stem out from the solution. She cleaned the stem under running warm water and scrubbed the raised oxidation from the stem surface using a Scotch Brite pad and cleaned the airway with a thin shank brush. She further removed the oxidation by scrubbing the stem with 0000 grade steel wool and applied a little EVO to rehydrate the stem. She ran a couple of pipe cleaners through the stem airway to clean the airway of the deoxidizer solution and water. There is a need to further sand the stem to completely remove the oxidation.
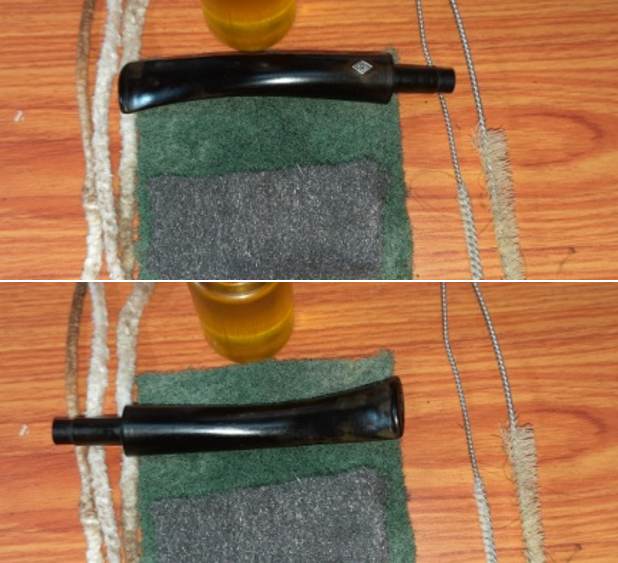 Continuing with the stem repairs, to address the deeper tooth indentations/ bite marks, I warmed up the bite zone with the flame of a lighter. The heat helps to expand the vulcanite and retain its original shape. This method may not always completely raise the depressions to the surface, but most of the times, to a great extent. In this case the tooth indentations were raised to a great extent, but the damage to the button edge would require a rebuild. I followed up the heating of the stem surface with sanding the bite zone with a worn out piece of 180 grit sandpaper to even out the surface.
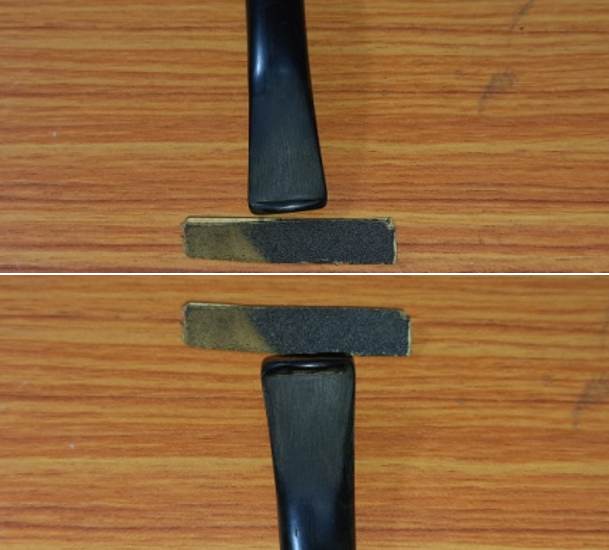 Next I rebuilt the button edge with a mix of activated charcoal and superglue. I applied it over the buttons on either sides of the stem and set it aside for the mix to cure.
 Now it was time for me to work on the stummel. I did this by first reaming the chamber with size 1 followed by size 2 PipNet reamer head. I further scraped the chamber walls with my fabricated knife to remove the remaining carbon deposits where the reamer head could not reach. I scraped out the lava overflow from the rim top surface. Once the cake was reamed back to the bare briar, I used a 150 grit sand paper followed by 220 grit sand paper to remove all the traces of remaining cake and also to smooth out the inner walls of the chamber surface. Finally, to remove the residual carbon dust, I wiped the chamber with a cotton pad wetted with 99.9% pure isopropyl alcohol. The huge pile of carbon dust that was reamed out is an indication enough to the amount of carbon that had accumulated in the chamber.
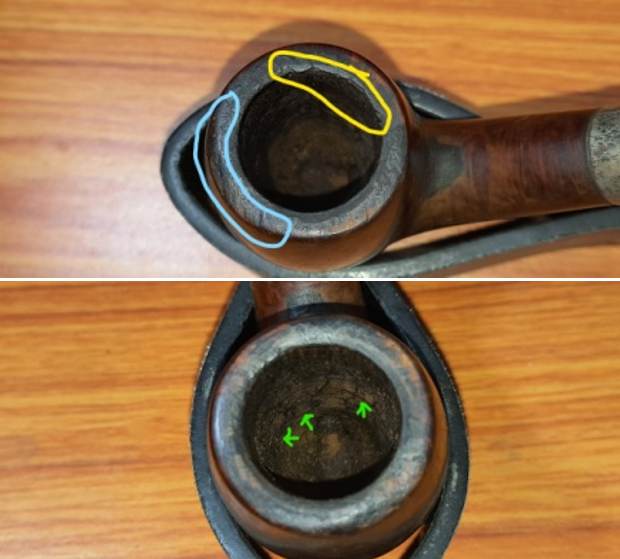
 With the chamber and rim top surface free of all the cake and overflowing oils and tars, I took a closer look at the chamber and rim top surface. The rim top has a number of dents and is undulated, probably a result of striking against a hard surface to remove dottle. Also a result of these strikes is that the outer rim edge is chipped and damaged on the left side between 9 and 12 o’clock direction (encircled in pastel blue). The inner rim appears to have had a bevel and there seem to be signs of charring on the right side (encircled in yellow). There are webbings of thin superficial heat lines along the wall of the chamber (indicated by green arrows); however these are to be expected in a pipe that has been so heavily smoked. These heat lines are very minor and superficial and do not detract from the smoke worthiness of this pipe for the next 60 years.
 During the handling of the stummel, the Sterling silver band came off allowing me to check for damage underneath the band. Thankfully other than being filthy, there was none. I cleaned the mortise with hard bristled pipe cleaners and alcohol. Using a fabricated tool, I scraped the dried accumulated gunk from the mortise to the extent possible. The mortise would be further cleaned during the stummel cleaning.
 With the internal cleaning done, it was time for the external cleaning of the stummel surface. I used a hard bristled tooth brush and Murphy’s Oil Soap, to scrub the stummel and rim top. The hardened and stubborn cake was dislodged from the rim surface and shank end using Scotch Brite pad and with a brass wired brush. I washed the stummel under running warm water with anti oil dish washing detergent till the stummel surface was clean and dried it using paper towels and soft cotton cloth.

 I simultaneously cleaned the shank internals with the detergent and hard bristled shank brush and set the stummel aside to dry out naturally. It is pertinent to mention here that even after all this cleaning of the chamber and shank internals, the ghost smells are still very invasive. This would require adoption of more invasive methods to get rid of these old smells.
 Since the stummel and stem were drying and curing respectively, I completed one of the mundane but equally important tasks of polishing the Sterling silver band. I used a local product that is available in India only to polish the band. The liquid polish was applied to the band and wiped it out after a few seconds. The polish completely removed the oxidation and gave a nice shine to the band.
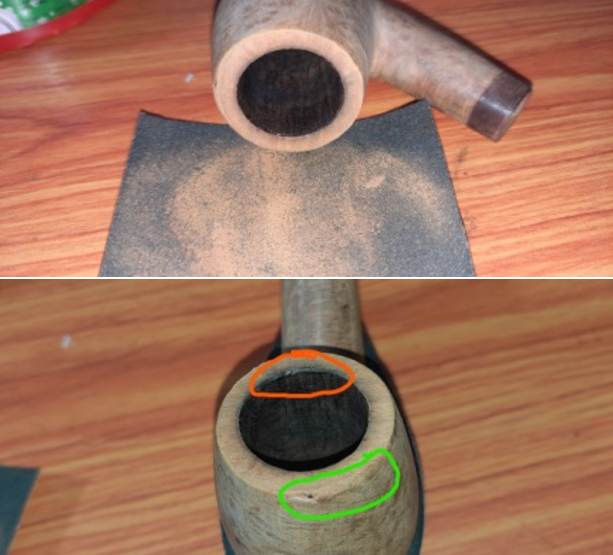
 To address the rim top damage, I topped the rim top on 220 grit sandpaper till the surface was nice and even. I hate losing any briar and restrict it to the barest minimum that is required. The damage to the outer rim edge, though greatly eliminated, can still be seen to the front side (encircled in green). This would need to be reconstructed subsequently. The charring to the inner rim edge is still visible (encircled in orange). These issues could be completely addressed by the process of topping but the extent of topping that would be required to do so would alter the bowl height and also the entire pipe profile.
 I decided subject the stummel to an alcohol bath to address the strong smells from the stummel before moving ahead with repairs to the inner and outer rim edges. I used cotton balls which is an at par substitute to Kosher salt as I have realized over the years. I drew out a wick from the cotton and along with a folded regular pipe cleaner; inserted it into the mortise and through the draught hole into the chamber. Thereafter, I packed the chamber with cotton balls to about quarter of an inch below the inner rim edge and soaked the cotton balls with isopropyl alcohol up to the brim. About half an hour later, the level of alcohol had gone down, having being absorbed by the cotton. I topped it up once again and set it aside overnight. By next morning, the cotton and alcohol had drawn out all the remaining oils and tars from the chamber and mortise, fulfilling its intended task. I removed the cotton balls and ran pipe cleaners through the mortise to clean out all the loosened tars and gunk and further cleaned it with alcohol and q-tips. The chamber now smells clean and fresh. I set the stummel aside to dry out naturally.
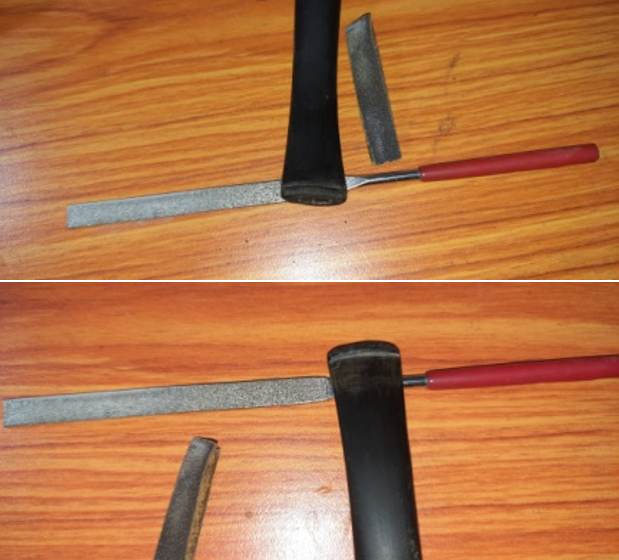
 While the stummel was soaking in the alcohol bath, I had a look at the stem repairs and found the repairs completely cured. With a flat head needle file, I sanded these fills to achieve a rough match with the stem surface. I further fine tuned the match by sanding the repairs with a folded piece of 220 grit sand paper pinched between my thumb and forefinger. I followed it up by sanding the entire stem surface using 320, 400, 600, 800, 1000, 1500 and finally with a piece of 2000 grit sand paper. This serves to reduce the sanding marks of the more abrasive sand papers. I also sharpened the button edges while sanding. I wiped the stem with a cotton swab and alcohol to remove all the oxidation and sanding dust from the surface. I applied a little Extra Virgin Olive oil over the stem and set it aside to be absorbed by the vulcanite.
 Returning back to the stummel repairs, with a folded piece of worn out 180 grit sand paper pinched between my thumb and forefinger, I carefully gave a rough bevel to the inner rim edge and addressed the issue of charred inner rim edge. I filled up the chipped areas on the outer rim edge with a mix of superglue and briar dust and set the stummel aside for the fills to cure and harden.
 Once the mix had hardened, with a flat head needle file I sanded the fills to achieve a rough match with the rest of the rim edge. I further blended in the fills with a folded piece of 180 grit sand paper. I also sharpened the rough bevel to the inner edge that I had cut earlier. The rim top surface and the edges look much better at this stage of restoration. I further sanded the entire stummel with a piece of 220 grit sand paper to address the minor scratches and dings that would otherwise show after micromesh polishing cycle.
  I followed it by wet sanding the stummel with 1500 to 12000 grit micromesh pads, wiping frequently with a moist cloth to check the progress. I rubbed a small quantity of “Before and After Restoration Balm” deep into the briar with my finger tips and let it rest for a few minutes. The balm almost immediately works its magic and the briar now has a nice vibrant appearance with the beautiful grain patterns displayed in their complete splendor. I further buffed it with a horse hair brush and gave a vigorous buff with a microfiber cloth to deepen the shine.
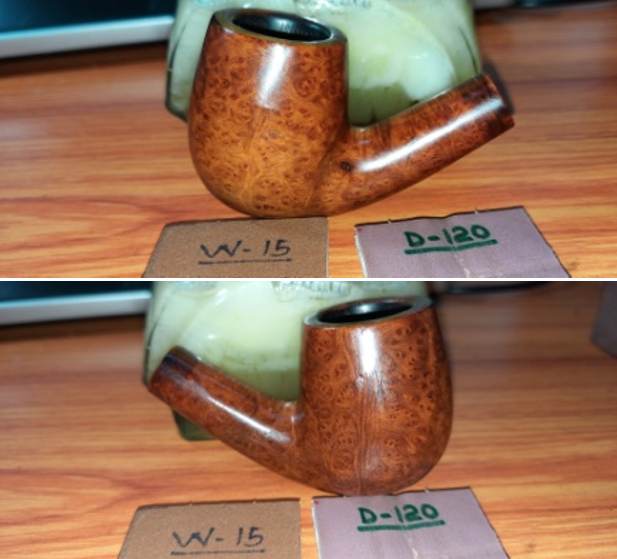

 The beauty of this piece of briar is marred ever so slightly by a small pit on the left side of the bowl at the shank and bowl junction. Other than this, the briar only has only bird’s eyes and cross grains to boast. No wonder then that it was sold as a mid level line, below VIRGIN and above THORNEYCROFT.
To put the finishing touches, I mounted a cotton cloth buffing wheel onto my hand held rotary tool and polished the stummel and stem with Blue Diamond compound. This compound helps to remove the minor scratch marks that remain from the sanding. Next, I mounted another cotton buffing wheel that I have earmarked for carnauba wax and applied several coats of the wax. I mounted a clean cotton cloth buffing wheel and gave the entire pipe a once over buff. I finished the restoration by giving the entire pipe a rigorous hand buffing using a microfiber cloth to raise the shine further. The finished pipe with the aged patina to the briar looks amazingly beautiful and is now ready for its long second innings with me.


 Jeff took photos of the bowl and rim top to show the condition of the bowl. The rim top is dirty with lava and deep nicks in the surface of the rim. There is a thick cake in the bowl. The silver band on the shank is oxidized and stamped as noted above. The stem is oxidized and is very dirty from the shank to the button. There are light tooth marks and chatter on the stem on both sides ahead of the button.

 He took photos of the sides and the heel of the bowl to show the condition of the finish and the grain around the pipe. It has some great grain showing through the grime.
 He took photos of the stamping on the sides of the shank and on the silver band on the shank. It reads as noted above. It is faint in spots but is still very readable.
 The Sterling Silver band on the shank was oxidized but was also stamped as noted above. The BBB in a diamond logo identifies the pipe brand of this pipe. The AF&Co in a rectangular stamp to the left of the BBB logo identifies the silversmith as Adolf Frankau and Company who was the owner of the BBB brand. Underneath that stamp there were three hallmarks – an Anchor, a Rampant Lion and the letter “n”. All were in shield style cartouches. The Anchor is the mark for the city of Birmingham where the silver was assayed. The Lion is the mark for the quality of silver used – in this case .925 Silver. The letter “n” is the date stamp. I turned to a link on a British Hallmark site to look for the date code. I found a listing for Birmingham silver dates (https://www.925-1000.com/dlc_birmingham.html). I did a screen capture of the chart and have included it below. The letter “n” is in the same shape cartouche as the section I have marked in the picture below. That identifies the pipe as having been made in 1912.
 Now it was my turn to work on the pipe. Jeff had done an amazing cleanup of the pipe. He reamed the cake with a PipNet reamer and cleaned up that with a Savinelli Fitsall Pipe Knife. He scrubbed the internals of the bowl and stem with alcohol, cotton swabs and pipe cleaners. He scrubbed the externals with undiluted Murphy’s Oil Soap and rinsed the bowl off with running water. He soaked the stem in Briarville’s Pipe stem Deoxidizer and once it had soaked, rinsed it off with warm water to remove the residual solution. He dried it off and rubbed it down to remove any oxidation that was still on the stem. The pipe looked very good when I received it.
 I took a photo of the rim top to show the condition. You can see the clean bowl. The bowl is in excellent condition and is clean. The rim top and the inner edge showed damage with nicks and scratches on the top and roughness to both the inner and outer edges. The stem came out looking clean. There were some light tooth marks and chatter on both sides ahead of the button.
  I took photos of the stamping on the shank. It is faint but still very readable. There was also a very faint stamp on the stem but I am still not certain it is the correct stem because of the fit and shape of the stem. I removed the stem from the shank and took a photo of the pipe parts to show what I was working with.
  I began my work on the pipe by addressing the issues with the rim top and the rim edges both inner and outer. I used a folded piece of 220 grit sandpaper to smooth out the inner edge and work to bring it back to round.
 The rim looked much better at this point thought there was still damage at the front of the inner edge of the bowl. I used a piece of 220 grit sandpaper and a wooden ball to give the inner edge and rim top a slight bevel. It looked much better.
 I built up the large chip in the outer edge of the bowl at the front with clear CA glue and briar dust. I put a spot of glue on the area and dipped the bowl into the briar dust. It stuck to the glue and came of the rest of the bowl. Once it dried I sanded it smooth with a 320 grit sanding pad to smooth out the repair on the top and the front of the bowl. It looked very good.
 I used a Cherry stain pen to touch up the repaired areas of the bowl. I stained the rim top with the same pen at the same time. It looked much better.
 I sanded the briar with 320-3500 grit sanding pads to smooth out the nicks and scratches in the bowl sides, rim and heel of the bowl. I wiped it down after each sanding pad with a damp cloth to remove the sanding dust and debris.
 The pipe had cleaned up so well that I turned to polish the briar with micromesh sanding pads. I dry sanded it with 1500-12000 grit sanding pads and wiped the bowl down after each pad with a damp cloth. By the final pads the briar really had a shine.


 I rubbed the briar down with Before & After Restoration Balm. I worked it into the briar with my fingertips. The product works to clean, enliven and preserve the briar. I let it sit for 10 minutes then I buffed it with a cotton cloth to deepen the shine. The briar really comes alive with the balm.

 Next, I moved on to further smooth out the surface of the vulcanite. I sanded it with 320-3500 grit sanding pads to further clean up the scratches and file marks on the surface of the stem.
 I polished the vulcanite with micromesh sanding pads – 1500-12000 grit pads. I wiped it down with Obsidian Oil after each sanding pad. I used Before & After Pipe Polish – both Fine and Extra Fine to further polish the stem. It really took on a shine and I knew that once it was buffed it would look amazing.
 I put the stem back on the 1912 BBB Own Make Billiard with a Vulcanite Stem and took it to the buffer. I worked it over with Blue Diamond to polish out the remaining small scratches. I gave the bowl and the stem several coats of carnauba wax and buffed the pipe with a clean buffing pad to raise the shine. I hand buffed it with a microfiber cloth to deepen the shine. The pipe polished up really well and the rim top looked good. I was happy with the look of the finished pipe. The photos below show what the pipe looks like after the restoration. The 1912 BBB Own Make Billiard is a beautiful and unique take on a classic shape. The polished, hard rubber taper stem looks really good with the browns of the briar. The dimensions of the pipe are Length: 5 ½ inches, Height: 1 ¾ inches, Outside diameter of the bowl: 1 ¼ inches, Chamber diameter: ¾ of an inch. The weight of the pipe is 1.45 ounces/41 grams. This is another old time BBB pipe that I will be adding to my BBB Collection. I love these old time English Pipes by BBB as they are a real pleasure to smoke. Thanks for walking through the restoration with me.


