Monthly Archives: April 2024

Restoring 1957 Dunhill 252 Dunhill Shell Briar Billiard


Blog by Steve Laug

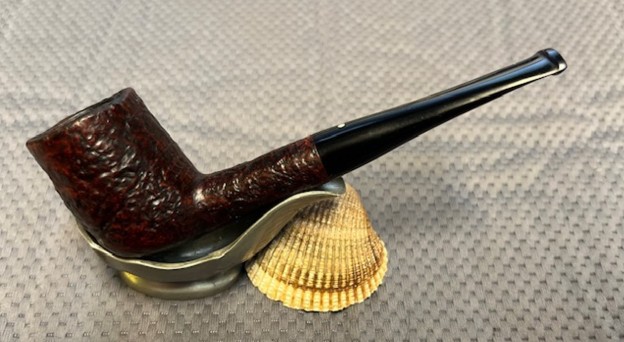
The next pipe on the table is a sandblast Dunhill Billiard. It had a taper, vulcanite stem with a white spot. We purchased it from a seller in Copenhagen, Denmark 01/22/2024. The pipe is stamped on the heel of the bowl and on the underside of the shank. On the heel of the bowl it is stamped with the shape number 252. That is followed with stamping on the shank Dunhill [over] Shell Briar. That is followed by Made in [over] England7. There is a 4 in a circle and an S which speak of the size of the pipe being a Group 4 and the finish S a Shell Briar. The rim has lava filling in the sandblast but the rim edges look very good. There is a moderate cake in the bowl. There were oils and grime ground into the bowl sides gives the finish a flat look. There was a sticky substance on the underside of the shank covering the Circle 4S stamp. There is a great sandblast showing through the grime. The vulcanite stem is quite clean with grime and grit on the surface. There were light tooth marks on both the top and underside of the stem just ahead of the button. The button edge had lost definition. Jeff took photos of the pipe before he started his clean up work. I have included them below. He took photos of the pipe’s bowl and rim top to show the cake in the bowl and the lava coat overflowing onto the top. It is another dirty pipe. He also took photos to capture the tooth marks on the top and underside of the stem near the button. He took photos of the sides and heel of the bowl to show the rugged sandblast around the bowl and the amount of grime ground into the surface of the briar. He took photos of the stamping on the underside of the shank. It is faint in spots but still readable as noted above. I wanted to unpack the Dunhill stamping on the shank and work to understand each element of the stamp. I generally use the Pipephil site to gather as much initial information as possible (http://pipephil.eu/logos/en/dunhill/shell-briar1.html). The stamping is interpreted as follows: The number 252 is the shape number for a taper stem Billiard. The Shell Briar stamp refers to the finish. The superscript 7 following the D of England would give the date the pipe. The 4S is the size of the pipe and the finish. The photo below shows some similar stamping.Pipephil also has some helpful dating keys on the site that are basically flow charts that you can walk through to date your pipe (http://pipephil.eu/logos/en/dunhill/cledat-en1.html). I turned to Part 1 of the Dating Key and followed the chart. This pipe has a superscript 7 following the D in England. There was no patent number so that took me to the section on the chart below (column one) which instructed me that the pipe could be dated as being made “posterior to 1954”. I followed the link under “Your pipe is posterior to 1954. Narrow down your dating”. That took me to Page 2 of the dating key (http://pipephil.eu/logos/en/dunhill/cledat-en1a.html). The third column (suffix 5…9) led me to the section with a 7 after the D in England. There was a directive for dating the pipe spelled out as follows: 1950 + suffix 7 which gives the pipe a date of 1957. I then turned to Pipedia’s section on Dunhill Shell Briar to get a bit of background on the Dunhill finishes (https://pipedia.org/wiki/Dunhill#Root_Briar). I quote:

Shell

A deep craggy sandblast with a black stain finish (usually made using Algerian briar) – the color of the stain used has varied over the years. Although there is some doubt as to them being the first to sandblast pipes, Dunhill’s Shell pipes, and the sandblasting techniques developed to create them are considered one of Dunhill’s greatest and most lasting contributions to the art of pipe making.

The documented history of Dunhill’s inception of the Shell is largely limited to patent applications — there are no catalog pages or advertisements promoting blasted pipes at the time. The preliminary work on the English patent (No. 1484/17) was submitted on October 13, 1917. The patent submission was completed half a year later, on April 12, 1918, followed by the granting of the English patent on October 14, 1918. This was less than a month before the end of The Great War on November 11th.

In 1986 Dunhill released a line of premium Shell finish pipes – “RING GRAIN”. These are high-quality straight grain pipes which are sandblasted. Initially only Ring Grain, but now in two different finishes. In 1995 the “Shilling” was introduced with Cumberland finish – it is an extremely rare series. These pipes exhibit a deeper blast characteristic of that of the 1930’s – mid-1960’s (and the limited ‘deep blast’ pipes of the early 1980s) and show a fine graining pattern. These are considered the best new Dunhills by many enthusiasts today and are very rare. The finish is sometimes described as tasting like vanilla at first, with the taste becoming more normal or good as the pipe breaks in.

I turned to work on the pipe itself. Jeff had done an amazing cleanup of the pipe. He reamed the light cake with a PipNet reamer and cleaned up that with a Savinelli Fitsall Pipe Knife. He scrubbed the internals of the bowl and stem with alcohol, cotton swabs,pipe cleaners and shank brushes. He scrubbed the externals with undiluted Murphy’s Oil Soap and rinsed the bowl off with running water. He soaked the stem in Briarville’s Pipe stem Deoxidizer and once it had soaked rinsed it off with warm water to remove the residual solution. He dried it off and rubbed it down to remove any oxidation that was still on the stem. The pipe looked very good when I received it. I took a photo of the rim top to show the condition. It looks pretty good with the tars and oils removed from the rim top. The inner edge of the bowl looked to be in good condition. The bowl itself was very clean. The stem came out looking quite good with some chatter and some wear on the sharp edge of the button.I took a photo of the underside of the shank to show the stamping. The photo shows the stamping and is actually more readable in person. I removed the stem from the shank and took a photo of the pipe parts to show what I was working with. It is a nice looking pipe.

I rubbed the briar down with Before & After Restoration Balm. I worked it into the briar with my fingertips and a horsehair shoe brush to work it into the nooks and crannies of the sandblast finish. The product works to clean, enliven and preserve the briar. I let it sit for 10 minutes then I buffed it with a cotton cloth to deepen the shine. The briar really comes alive with the balm. I set the bowl aside and turned to address the stem issues. I recut the edge of the button with a small file. It took a bit of work to sharpen the edge and give it a better transition. I sanded it smooth with 220 grit sandpaper to smooth out the surface. I sanded it with 320-3500 grit sanding pads. I wiped it down after each sanding pad with a damp cloth. By the final 3500 grit sanding pad the rim top had a shine.I polished the vulcanite with micromesh sanding pads – 1500-12000 grit pads. I wiped it down with Obsidian Oil after each sanding pad. I used Before & After Pipe Polish – both Fine and Extra Fine to further polish the stem. This 1957 Dunhill Shell Briar 252 Billiard with a Vulcanite taper stem has a beautiful, unique Dunhill Sandblast finish that is very deep and craggy. The Shell Briar mixed brown finish highlights some great grain around the bowl and shank. It has a unique sandblast that Dunhill specialized in making. The polished vulcanite taper stem adds to the mix. I put the stem back on the bowl and buffed the pipe with Blue Diamond on the buffing wheel being careful to not buff the stamping. I gave the bowl multiple coats of Conservator’s Wax and the stem multiple coats of carnauba wax on the buffing wheel and followed that by buffing it with a clean buffing pad. I hand buffed the pipe with a microfiber cloth to deepen the shine. The finished Dunhill Shell Briar 252 Billiard is quite nice and feels great in the hand. Give the finished pipe a look in the photos below. The dimensions of the pipe are Length: 5 ½ inches, Height: 1 ¾ inches, Outside diameter of the bowl: 1 ¼ inches, Chamber diameter: ¾ of an inch. The weight of the pipe is 1.34 ounces/38 grams. Thanks for walking through the restoration with me as I worked over another beautiful pipe. This one will be going on the rebornpipes store in the English Pipe Makers Section. Thanks for your time.

Restoring a Dunhill Shell 21051 Zulu


Blog by Steve Laug

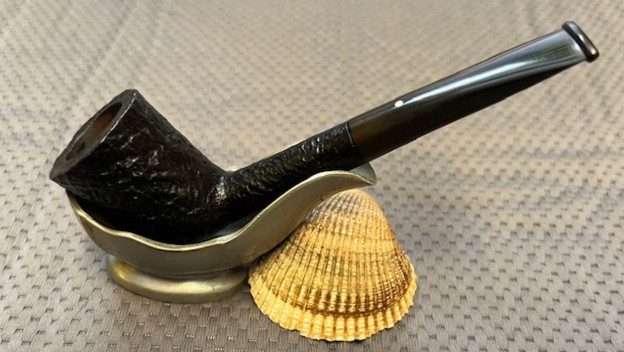
The next pipe on the table is a sandblast Dunhill Zulu. It had a taper, vulcanite stem with a white spot. We purchased it from an estate in Oregon City, Oregon, USA 03/21/2024. The pipe is stamped on the heel of the bowl and on the underside of the shank. On the heel of the bowl it is stamped with the shape number 21051. That is followed with stamping on the shank Dunhill Shell [over] Made in England11. The rim has a thick lava coat filling in the sandblast. The cake in the bowl has been trimmed recently but there is still a moderate coating. The inner edge of the rim actually looks quite good with little or no damage or burn marks. There were oils and grime ground into the bowl sides gives the finish a dullness. There is a deep sandblast showing through the grime. The vulcanite stem is oxidized and dirty with grime and grit on the surface. There are some light tooth marks on both the top and underside of the stem just ahead of the button. Jeff took photos of the pipe before he started his clean up work. I have included them below. He took photos of the pipe’s bowl and rim top to show the cake in the bowl and the lava coat overflowing onto the top. It is another dirty pipe. He also took photos to capture the tooth marks on the top and underside of the stem near the button. He took photos of the sides and heel of the bowl to show the rugged sandblast around the bowl and the amount of grime ground into the surface of the briar. He took photos of the stamping on the underside of the shank. It is faint in spots but still readable as noted above.I wanted to unpack the Dunhill stamping on the shank and work to understand each element of the stamp. I generally use the Pipephil site to gather as much initial information as possible (http://pipephil.eu/logos/en/dunhill/shell-briar1.html). The stamping is interpreted as follows: The number 21051 is the shape number for a taper stem Zulu. The Shell stamp refers to the finish. The number 11 following the D of England would give the date the pipe.

Pipephil also has some helpful dating keys on the site that are basically flow charts that you can walk through to date your pipe (http://pipephil.eu/logos/en/dunhill/cledat-en1.html). I turned to Part 1 of the Dating Key and followed the chart. This pipe has the number 11 following the D in England. There was no patent number so that took me to the section on the chart below (column one) which instructed me that the pipe could be dated as being made “posterior to 1954”. I followed the link under “Your pipe is posterior to 1954. Narrow down your dating”. That took me to Page 2 of the dating key (http://pipephil.eu/logos/en/dunhill/cledat-en1a.html). The second column (suffix 1…4) or (11…39) led me to the section with an 11 after the D in England. There was a directive for dating the pipe spelled out as follows: 1960 + suffix 11 which gives the pipe a date of 1971.I then turned to Pipedia’s section on Dunhill Shell Briar to get a bit of background on the Dunhill finishes (https://pipedia.org/wiki/Dunhill#Root_Briar). I quote:

Shell

A deep craggy sandblast with a black stain finish (usually made using Algerian briar) – the color of the stain used has varied over the years. Although there is some doubt as to them being the first to sandblast pipes, Dunhill’s Shell pipes, and the sandblasting techniques developed to create them are considered one of Dunhill’s greatest and most lasting contributions to the art of pipe making.

The documented history of Dunhill’s inception of the Shell is largely limited to patent applications — there are no catalog pages or advertisements promoting blasted pipes at the time. The preliminary work on the English patent (No. 1484/17) was submitted on October 13, 1917. The patent submission was completed half a year later, on April 12, 1918, followed by the granting of the English patent on October 14, 1918. This was less than a month before the end of The Great War on November 11th.

In 1986 Dunhill released a line of premium Shell finish pipes – “RING GRAIN”. These are high-quality straight grain pipes which are sandblasted. Initially only Ring Grain, but now in two different finishes. In 1995 the “Shilling” was introduced with Cumberland finish – it is an extremely rare series. These pipes exhibit a deeper blast characteristic of that of the 1930’s – mid-1960’s (and the limited ‘deep blast’ pipes of the early 1980s) and show a fine graining pattern. These are considered the best new Dunhills by many enthusiasts today and are very rare. The finish is sometimes described as tasting like vanilla at first, with the taste becoming more normal or good as the pipe breaks in.

I turned to work on the pipe itself. Jeff had done an amazing cleanup of the pipe. He reamed the light cake with a PipNet reamer and cleaned up that with a Savinelli Fitsall Pipe Knife. He scrubbed the internals of the bowl and stem with alcohol, cotton swabs, pipe cleaners and shank brushes. He scrubbed the externals with undiluted Murphy’s Oil Soap and rinsed the bowl off with running water. He soaked the stem in Briarville’s Pipe stem Deoxidizer and once it had soaked rinsed it off with warm water to remove the residual solution. He dried it off and rubbed it down to remove any oxidation that was still on the stem. The pipe looked very good when I received it. I took a photo of the rim top to show the condition. It looks pretty good with the tars and oils removed from the rim top. The inner edge of the bowl looked very good and the bowl itself was very clean. The stem came out looking quite good with light tooth marks and chatter on both sides ahead of the button. I took a photo of the underside of the shank to show the stamping. The photo shows the stamping and is actually more readable in person. I removed the stem from the shank and took a photo of the pipe parts to show what I was working with. The stem had an aluminum inner tube in the tenon. It is a nice looking pipe.I cleaned up the rim top with a brass bristle wire brush to remove the dust that remained into the sandblast finish. It looked much better.I rubbed the briar down with Before & After Restoration Balm. I worked it into the briar with my fingertips and a horsehair shoe brush to work it into the nooks and crannies of the sandblast finish. The product works to clean, enliven and preserve the briar. I let it sit for 10 minutes then I buffed it with a cotton cloth to deepen the shine. The briar really comes alive with the balm. I set the bowl aside and turned my attention to the stem. I sanded it with 320-3500 grit sanding pads. I wiped it down after each sanding pad with a damp cloth. By the final 3500 grit sanding pad the rim top had a shine.I polished the vulcanite with micromesh sanding pads – 1500-12000 grit pads. I wiped it down with Obsidian Oil after each sanding pad. I used Before & After Pipe Polish – both Fine and Extra Fine to further polish the stem. This 1971 Dunhill Shell 21051 Zulu with a Vulcanite taper stem has a beautiful, unique Dunhill Sandblast finish that is very deep and craggy. The Shell pipe’s mixed brown finish highlights some great grain around the bowl and shank. It has a unique sandblast that Dunhill specialized in making. The polished vulcanite taper stem adds to the mix. I put the stem back on the bowl and buffed the pipe with Blue Diamond on the buffing wheel being careful to not buff the stamping. I gave the bowl multiple coats of Conservator’s Wax and the stem multiple coats of carnauba wax on the buffing wheel and followed that by buffing it with a clean buffing pad. I hand buffed the pipe with a microfiber cloth to deepen the shine. The finished Dunhill Shell 21051 Zulu is quite nice and feels great in the hand. Give the finished pipe a look in the photos below. The dimensions of the pipe are Length: 5 inches, Height: 1 ½ inches, Outside diameter of the bowl: 1 ¼ inches, Chamber diameter: ¾ of an inch. The weight of the pipe is .74 ounces /21 grams. Thanks for walking through the restoration with me as I worked over another beautiful pipe. This one will be going on the rebornpipes store in the English Pipe Makers Section. Thanks for your time.

Restoring a Lovely 1965 Dunhill Root Briar PO F/T ¼ Bent Bulldog


Blog by Steve Laug

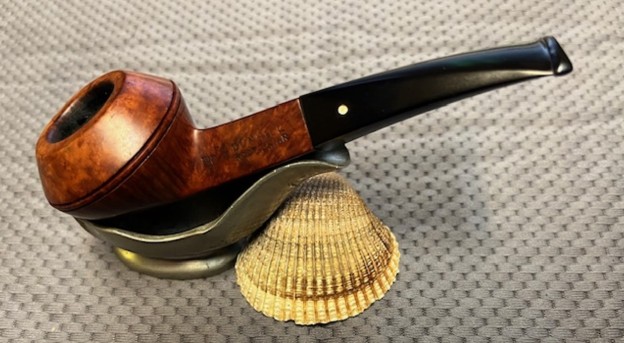
The next pipe on the table is a sandblast Dunhill Squat ¼ Bent Bulldog. It had a taper, vulcanite diamond stem with a white spot. We purchased it off eBay from a seller in Jordan, Minnesota, USA on 03/21/2024. The pipe is stamped on the left side of the shank and reads PO F/T followed by Dunhill [over] Root Briar. On the right side of the shank it reads Made in [over] England5. The is followed by 4 in circle followed by an R. The rim top has some lava on the top and thickly caked on the inner edge of the bowl. It is hard to assess the condition of the inner edge of the rim due to the cake and lava overflow. There were oils and grime ground into the smooth finish on the bowl sides gives the finish a flat look. There is some great grain showing through the grime. There is some damage to the twin rings around the bowl cap on the right side. The vulcanite stem is oxidized, calcified, and dirty with grime and grit on the surface. There were light tooth marks on both the top and underside of the stem just ahead of the button. The white spot on the on the left side of the stem was odd – it looked sunken and there was some glue over the top of it. Jeff took photos of the pipe before he started his clean up work. I have included them below. He took photos of the pipe’s bowl and rim top to show the cake in the bowl and the spotty lava coat on the rim top. It is another dirty pipe. He also took photos to capture the condition of the stem and the light tooth marks on the top and underside of the stem near the button. He took photos of the sides and heel of the bowl to show the beautiful grain around the bowl and the amount of grime ground into the surface of the briar. Jeff also took a photo of the damage on the two rings and center ring around the cap on the bowl. It is heavy damage but I will see what I can do with it.He took photos of the stamping on the underside of the shank. It is faint in spots but still readable as noted above. He took a photo of the strange, almost soft white spot on the side of the stem. I wanted to unpack the Dunhill stamping on the shank and work to understand each element of the stamp. I generally use the Pipephil site to gather as much initial information as possible (http://pipephil.eu/logos/en/dunhill/root-briar1.html). The stamping is interpreted as follows: The number PO the shape number for a ¼ Bent Bulldog. The F/T stamp is used to designate Fish Tail stem. The Root Briar stamp refers to the smooth finish. The number 5 following the D of England would give the date the pipe. The Circle 4R shows it is a Group 4 sized pipe and the R is the designation for a Root Briar. The photo below shows a pipe that is stamped similarly to the one that I am working on. Pipephil also has some helpful dating keys on the site that are basically flow charts that you can walk through to date your pipe (http://pipephil.eu/logos/en/dunhill/cledat-en1.html). I turned to Part 1 of the Dating Key and followed the chart. This pipe has a 5 following the D in England. There was no patent number so that took me to the section on the chart below (column one) which instructed me that the pipe could be dated as being made “posterior to 1954”.I followed the link under “Your pipe is posterior to 1954. Narrow down your dating”. That took me to Page 2 of the dating key (http://pipephil.eu/logos/en/dunhill/cledat-en1a.html). The third column (suffix 5…9) led me to the section with a 5 after the D in England. There was a directive for dating the pipe spelled out as follows: 1960 + suffix 5 which gives the pipe a date of 1965.I then turned to Pipedia’s section on Dunhill Root Briar to get a bit of background on the Dunhill finishes (https://pipedia.org/wiki/Dunhill#Root_Briar). I quote:

Root Briar

Introduced in 1931 and highly prized because the grain is more pronounced in this finish (usually made using Corsican briar – was made exclusively from that briar into the 60s). The Root Briar finish requires a perfectly clean bowl with excellent graining. Therefore, it is the most expensive of the Dunhill pipes. Corsican briar was most often used for the Root finish since it was generally more finely grained. This is a rare finish, due to the scarcity of briar suitable to achieve it. These pipes are normally only available at Company stores, or at Principle Pipe Dealers. Straight grained pipes were formerly graded A through H, but are now only “Dr’s” and graded with one to six stars, with the letters G and H still used for the very finest pieces.

Dunhill introduced its third major finish, the Root finish, in 1931. Corsican mountain briar is characteristically beautifully grained and the Root was made exclusively from that briar into the 1960s. The pipe was finished with a light natural stain to allow the beauty of the graining to show through. Although always available with a traditional black vulcanite bit, the Root was introduced in either 1930 or more likely 1931 and fitted with a marble brown dark and light grained vulcanite bit that has since become known as the ‘bowling ball’ bit because of the similarity in appearance between the bit’s finish and that of some bowling balls of the time. With the war, however, the bowling ball bit was dropped from production. Through 1954 (and after) the Root pipe nomenclature (including shape numbers) was identical to that of the Bruyere except that instead of the “A” of the Bruyere, the Root was stamped with an “R”. In 1952 when the finish rather then LONDON was placed under DUNHILL, ROOT BRIAR rather then BRUYERE was used for the Root. Loring, J. C., The Dunhill Briar Pipe, The Patent Years and After (self-published, Chicago, 1998).

I turned to work on the pipe itself. Jeff had done an amazing cleanup of the pipe. He reamed the cake with a PipNet reamer and cleaned up that with a Savinelli Fitsall Pipe Knife. He scrubbed the internals of the bowl and stem with alcohol, cotton swabs,pipe cleaners and shank brushes. He scrubbed the externals with undiluted Murphy’s Oil Soap and rinsed the bowl off with running water. He soaked the stem in Briarville’s Pipe stem Deoxidizer and once it had soaked rinsed it off with warm water to remove the residual solution. He dried it off and rubbed it down to remove any oxidation that was still on the stem. Whoever had repaired the stem had used a soft substance and wood glue to fill in the white spot. With the cleaning it fell out and when it arrived here was missing. I was in a hurry to get started with that so I filled in the spot with white acrylic and used some clear CA glue to seal it. I forgot to take photos of the stem without the white spot so use your imagination. Other than that the pipe looked very good when I received it. I took a photo of the rim top to show the condition. It looks pretty good with the tars and oils removed from the rim top. The inner edge of the bowl was slightly damaged and there was some darkening on the top. The bowl itself was very clean. The stem came out looking quite good with light tooth marks and chatter on both sides ahead of the button. I would need to fix the white spot on the stem.I took a photo of the sides of the shank to show the stamping. The photo shows the stamping and it is clear and readable as noted above. I removed the stem from the shank and took a photo of the pipe parts to show what I was working with. It is a nice looking pipe. I decided to start my restoration work on the pipe by addressing the missing white spot on the stem side. I filled in the hole with some white acrylic nail polish. It dries hard and cures. I filled it in and worked it into the hole. Once it had hardened I scraped off the excess and sanded it with a worn 320 grit sanding pad to remove the excess.Once I smoothed it out I put a drop of clear CA glue on the dot to seal it. When the glue hardened I flattened it out with the 320 sanding pad. It was smooth and hard and looked perfect. I still needed to polish the stem but the base was good.I set the stem aside to cure. I turned my attention to the bowl. I addressed the darkening on the inner edge of the rim and the damaged spots on the rim top by lightly topping the bowl on a topping board with 220 grit sandpaper. I used an oak stain pen to stain the newly sanded top to match the rest of the bowl. I sanded the bowl and rim top with 3203500 grit sanding pads. I wiped the bowl down after each pad with a damp cloth. The briar really took on a shine. The rim top matched the rest of the bowl very well. I polished the briar with micromesh sanding pads – dry sanding with 1500-12000 grit pads. I wiped it down after each sanding pad with a damp cloth to remove the sanding debris on the surface. I rubbed the bowl down with Before & After Restoration Balm. I worked it into the surface of the briar with my fingertips to clean, enliven and protect it. I let the balm sit for a little while and then buffed with a cotton cloth and shoe brush to raise the shine. I turned back to the stem and I polished the vulcanite with micromesh sanding pads – 1500-12000 grit pads. I wiped it down with Obsidian Oil after each sanding pad. I used Before & After Pipe Polish – both Fine and Extra Fine to further polish the stem. I gave it a final coat of Obsidian Oil and set it aside to dry. This 1965 Dunhill Root Briar PO F/T ¼ Bent Bulldog with Vulcanite taper stem has a beautifully grained Dunhill Root Briar. It has a classic Dunhill Bulldog Shape that is perfect in the hand. The nicks in the twin rings around the bowl cap on the right side are present but not to obvious. The Root Briar mixed brown finish highlights some great grain around the bowl and shank. The polished vulcanite diamond taper stem adds to the mix. I put the stem back on the bowl and buffed the pipe with Blue Diamond on the buffing wheel being careful to not buff the stamping. I gave the bowl and the stem multiple coats of carnauba wax on the buffing wheel and followed that by buffing it with a clean buffing pad. I hand buffed the pipe with a microfiber cloth to deepen the shine. The finished Dunhill Root Briar PO F/T ¼ Bent Bulldog is quite nice and feels great in the hand. Give the finished pipe a look in the photos below. The dimensions of the pipe are Length: 5 inches, Height: 1 ½ inches, Outside diameter of the bowl: 1 ¾ inches, Chamber diameter: ¾ of an inch. The weight of the pipe is 1.27 ounces/3.6 grams. Thanks for walking through the restoration with me as I worked over another beautiful pipe. This one will be going on the rebornpipes store in the English Pipe Makers Section. Thanks for your time.

Refurbishing An Early Butz Choquin “A Metz” Bent Billiard


Blog by Paresh Deshpande

This pipe too came to me in that lot of 40 pipes purchased from Etsy.fr of which I have restored a few, the ROPP PNEUMATIC being the latest project. This pipe is a large billiard with a swan neck like graceful bend to the shank that extends over to the horn stem. The stummel appears dull and lifeless and yet through this, beautiful cross grains can be faintly made out over the sides of the stummel with bird’s eye grain at the foot. A copper band adorn the shank end with it’s crimped shank end edges covering the shank face. It is stamped over the left shank surface as “BUTZ-CHOQUIN” over “A” over “METZ”. The copper band has minuscule cartouche with some mysterious stampings that are neither visible under bright light nor under magnification.A couple of years ago, I had worked on an early Butz Choquin pipe that was very similarly stamped. I had studied the brand then and also before that when I had refurbished my inherited CHOQUIN PIPE from first era 1858. Given below is the link to the write up on the similarly stamped pipe. For the sake of brevity, I have avoided reproducing the information and implore readers to follow the link for better understanding the brand and establishing the provenance of the pipe (https://rebornpipes.com/2022/04/17/restoring-a-beautiful-older-butz-choquin-a-metz-pipe/).

After reading through the material and correlating the dates, I can, with certainty, claim that this pipe (broadly) is from pre 1951 when Berrod- Regad took over Butz Choquin and moved production from Metz to St. Claude as evidenced from the A METZ stamping.

Further narrowing down the period, I strongly feel that this pipe dates to pre 1920. This conclusion is based on the fact that; firstly, the stem and tenon material used is horn and bone respectively which were the preferred material after Amber during this period for making stems as hard rubber/ vulcanite gained prominence during 1920s. Secondly, the round orifice at the stem end was commonly used until 1920s when vulcanite/ hard rubber with elliptical slot end gained prominence subsequently. Thirdly, use of cork lining inside the mortise to firmly seat the bone tenon in to the mortise.

Any inputs and corrections to my above understanding are solicited and encouraged. Such healthy discussions not only promote interaction between us but also enhance knowledge about pipes and establishing its provenance by sharing information.

Initial Visual Inspection
The elegant swan neck shape of the shank that extends into the stem is the USP of this pipe. The chamber appears to have an even thin layer of cake that appears to have been meticulously maintained by the previous owner. There are a few minor dings to both the inner and outer rim edges. The stummel boasts of beautiful cross grains over the surface with bird’s eye grains at the foot of the stummel. The briar looks dull and lifeless. The mortise has residual old oils and gunk making the draw hard. The horn stem with bone tenon is dull, dry and shows signs of beginnings of cracks over the surface. Both the tenon and orifice slot are clogged with old tars and grime. This one will require a ton of work to spruce it up to its former glory. Following pictures should provide a better understanding of the condition of the pipe before I begin my work. Detailed Visual Inspection
The first impression that I got at a glance of the chamber was an even well maintained layer of cake with practically no darkening of the rim surface or accumulation of carbon overflow. This definitely was either a well cared for pipe or the seller had done so for bargaining a better price. There a few dings on the right and left side of the outer rim edge (encircled in blue). The inner rim edge is intact save for some very minor divots that should be easily addressed with a couple of passes of a piece of 180 grit sandpaper along the edge. The rim top is nicely even and clean, requiring no topping, which I tend to avoid as much as possible. The stummel is dull, lifeless and lacklustre. Under all the dullness and poor appearance, lurks some beautiful cross grains and bird’s eye over the feet of the stummel awaiting exposure. The stummel has developed a deep dark patina from all the years of smoking and handling. There is one fill (encircled in yellow) that would need to be refreshed. Also a couple of minor divots (encircled in red) mark the stummel surface. The mortise is chock-a-block with old oils, tars and gunk and this leads me to the conclusion that it was the seller who had reamed the cake and cleaned the rim surface to ask for a better price. The copper band at the shank end is dull and covered in dust, grime and oxidation. The first issue that I noticed on close examination of the stem surface were a number of cracks all over the upper and lower surfaces. I drew out my magnifying glass and had a hard look at the cracks under bright light. Thankfully, almost all of these cracks were minor and very superficial, save for a few (encircled in red) over the upper surface and would need to be addressed. These cracks are caused because of drying of the horn material due to lack of usage and hot weather conditions. These cracks would need to be stabilized, repaired and hydrated. There are deep tooth indentations in the bite zone, very close to the button edges on either surface of the stem. The long bone tenon has darkened considerably and is covered in grime with the opening showing accumulation of oils, tars and gunk. This condition is similar at the orifice slot. The seating of the stem in to the mortise is very loose. The Restoration Process
The process of this restoration started with stem repairs. I first cleaned the stem airway by running a few hard bristled and regular pipe cleaners dipped in isopropyl alcohol followed by further cleaning with anti oil dish washing soap and thin shank brushes. The pipe cleaners pictured below and the gunk that was removed while cleaning with the shank brushes of which pictures were not clicked, tell a story of how dirty the stem internals were. I continued cleaning of the stem air way till white foam was seen coming out from the air way. I also scrubbed the stem surface with a Scotch Brite pad and soap. The next step was to stabilize the cracks on the top surface of the stem. Using a 1 mm drill bit mounted on a hand held rotary tool, I drilled counter holes at the start and end points of these cracks. These counter holes prevent the further expansion of the cracks in either directions. I filled these holes, cracks and the tooth indentations in the bite zone with CA superglue and set it aside for the glue to harden. I was still sometime away from hitting the sack and with the stem set aside for the repairs to cure; I decided to work the stummel. I began with reaming the chamber with size 1 head followed by size 2 head of the PipNet reamer. The heap of dislodged carbon did surprise me as I had anticipated a far less cake formation along the walls. I further scraped the chamber walls with my fabricated knife to remove the remaining carbon deposits where the reamer head could not reach. Once the cake was reamed back to the bare briar, I used a 220 grit sand paper to remove all the traces of remaining cake and also to smooth out the inner walls of the chamber surface. Finally, to remove the residual carbon dust, I wiped the chamber with a cotton pad wetted with 99.9% pure isopropyl alcohol. The chamber walls are solid without any heat lines or fissures.While I was handling the bowl, the copper band at the shank end came loose and it was then that I saw the cork lining along the walls of the mortise that was in place to ensure a snug fit of the long bone tenon in to the mortise. This cork lining has dried and needs to be revitalized. This lining also means that I would have to be careful while I clean the mortise so as not to erode and break the cork thus disturbing the seating of the stem.As observed above, the mortise is completely clogged with old oils, tars and ash resulting in a very hard and laborious draw. This was the issue that I addressed next. Using dental tools and fabricated poker, I scraped out the entire gunk from the walls of the mortise taking care that the cork lining is not damaged in the process. I used the drill bit from the Kleen Reem to remove and open up the shank airway. It was a tedious and time consuming work, but well worth the caution and efforts. The heap of crud extracted from the shank confirms the reason for the hard and laborious draw. I ran a few hard and regular pipe cleaners dipped in alcohol through the mortise and airway to remove residual gunk. The mortise is now clean with a much better open and easy draw. I shall continue with the cleaning process when I clean the stummel surface.The last agenda for the night was the external cleaning of the bowl and further internal cleaning of the mortise. I cleaned the external surface with a hard-bristled toothbrush and concentrated Murphy’s oil soap. I scrubbed the rim top and stummel surface with the soap and Scotch Brit pad. I rinsed the stummel under warm running water and dried it with paper towels and soft cotton cloth. The grains are now clearly visible and awaiting a nice polish to pop out. This cleaning also brought a few dents and scratches over the stummel surface and outer rim edge to the fore that would need to be addressed and the fill observed near the foot has loosened that would need to be refreshed. I extended my work time for a while and cleaned out the shank internals. I cleaned the shank walls by scrubbing it with shank brushes and anti-oil dish washing soap while being careful around the cork! The bowl is now clean and fresh. I set the bowl aside to dry under a heat lamp.The next evening with the stummel now dry and the stem repairs completely cured, I had the option of either working on the stummel or the stem. There was this small step that was needed to address the fill that required to be refreshed and that is where I began. With sharp dental tool, I removed the old fill and cleaned the area with alcohol. Next, I mixed briar dust with CA superglue to form putty and applied this mix over the area to be filled. I set the stummel aside for an hour or so for the mix to harden, which is almost instantaneous over the surface.I set the stummel aside and worked on the stem repairs next. The repairs had completely hardened and all that needed to be done was to blend in these repairs with the rest of the stem surface. I began by sanding the fills with a flat needle file to achieve a rough match followed by sanding the entire stem with a worn folded piece of 180 grit sandpaper. The button edges were also evened out and sharpened during the process. The fills will be further blended during the polishing cycle using various grit sandpapers and micromesh pads. I applied a generous layer of EVO and massaged it in to the horn stem to hydrate it and set it aside for the oil to be absorbed into the horn.Using the same tools and sandpaper, I blend in the stummel fill with the rest of the briar surface. This blending of the fill will be further fine-tuned when I sand the stummel surface with 220 grit sandpaper to address the issue of dings and scratches over the surface.I addressed the dents and dings to the outer rim edge by creating a bevel with a folded piece of 180 grit sandpaper pinched between fingers and running them evenly over the outer edge surface. I am quite happy with the appearance of the bowl with the bevelled outer rim. Next, I cleaned the copper ferrule at the shank end with “Pitambari”, a powder that is available all across India that is used to clean and shine brass, copper and silver ware. This compound is a very fine powder and is least abrasive with fantastic results. The band is now a nice shining piece and will provide a nice contrast between the shining horn stem and the dark brown stummel. I attached the band at the shank end with all-purpose glue.The next step was to sand the entire stummel surface with sandpaper to remove the scratches and dings that are visible. I used a well worn piece of 180 grit sandpaper to sand the surface. The sanding marks that are now visible will not be so once the bowl is subjected to polishing regime with micromesh pads and compounds. There are a couple of dings and scratches that are still visible, but I shall let them be as part of the pipe’s century old existence! I followed it by wet sanding the entire stummel with 1500 to 12000 grit micromesh pads, wiping frequently with a moist cloth to check the progress. I rubbed a small quantity of “Before and After Restoration Balm” deep in to the briar with my finger tips and let it rest for a few minutes. The balm almost immediately works its magic and the briar now has a nice vibrant appearance with the beautiful grain patterns displayed in their complete splendor. The contrast of the dark browns of the Bird’s eye and cross grains with the natural patina of the rest of the stummel adds an interesting dimension to the appearance of the stummel which cannot be sufficiently described in words and be rather seen in person. I really like the looks of the stummel at this point in restoration. The grains and the clean lines of this piece of briar is really appreciable. With the stummel set aside, I polished the stem by wet sanding, starting with 400 and progressing through 600, 800, 1000, 1500 and 2000 grit sandpapers. I rubbed a good amount of EVO in to the stem surface and set it aside to be absorbed.A few hours later, I wiped the stem surface with paper towels and began the polishing cycle using micromesh pads. I wet sanded the stem surface going through 1500 to 12000 grit pads. I set the stem aside after rubbing it down with EVO again.To complete the restoration, I mount a cotton cloth buffing wheel on to my hand held rotary tool and polished the stummel and stem with Blue Diamond compound. This compound helps to remove the minor scratch marks that remain from the sanding. With another cotton buffing wheel that I have earmarked for carnauba wax, I applied several coats of the wax. I finished the restoration by giving the entire pipe a rigorous hand buffing using a microfiber cloth to raise the shine further. The finished pipe looks amazingly beautiful and is ready to join my collection. I only wish it could share with me its life story of the past years while I enjoy smoking my favorite Virginia blend in it or maybe an English blend or maybe just keep admiring it! Big thank you to all the readers who have joined me on this path by reading this write up as I restored and completed this project.

More from the Great Morning Pipe Hunt


Blog by Kenneth Lieblich

Having read Steve’s run-through of our treasure hunt, I figured I may as well add my finds, for the record. Steve has obviously infected me with the ‘bug’ of hunting down pipes. As he related, we had a great time and here are the six pipes I grabbed:First is a gorgeous black meerschaum billiard with an amber stem (not snapped – Deo gratias) and sterling silver bands around the shank and bowl. And it came with its proper case! I checked the hallmarks and they date this pipe to 1919 – a real old timer. Markings indicate that this is an Adolph Frankau. More on this pipe will come when I do some research.Second is a pipe that we thought was from Preben Holm – but isn’t. Doesn’t matter, it’s still a beauty. It’s made in Denmark by Granhill, which was a brand used by an American, Michael Kabik. This is a really well-made freehand pipe with a fine stem and stunning grain all over the bowl.Third is a really handsome rusticated pipe from Edward’s – a storied company from Florida that secretly stashed a bunch of Algerian briar during a time when it was hard to come by. I really like this shape and looking forward to cleaning it up.Fourth is a fascinating Peterson meerschaum Rhodesian. It has really neat colouring on the bowl and looks like it was greatly enjoyed by its previous owner. I assume that this pipe was made in the Isle of Man, as I believe all (or most) of Peterson’s meers were made there.Fifth is a cutty that’s a bit of a gamble. It isn’t fancy in any way, but it is well-drilled and well-fitted. It says KOOTENAY on the shank, which is a word I know from geography, but not from the world of pipes. Why did I buy it? Because the other side of the shank reads “Made in Canada” in a style that strongly resembles the pipes of the great Canadian artisan, Leonard Payne. More research will definitely be needed here.Sixth and last is a handsome French Lovat with no name of note, but a lot of character. It’s a real looker and I think it’s going to clean up really well.

Steve gave you a good overview of the antique fair, so I won’t reinvent the wheel. I had a great time with Steve and I am always indebted to his knowledge and insight. Hopefully, as time passes, some of that will leech its way into me!

Please follow me here on Steve’s website or email me directly at kenneth@knightsofthepipe.com. Thank you very much for reading and, as always, I welcome and encourage your comments.

Pipe Gods Smiled and I Got Not One But Three Les Wood Pipes…Restoring the Last of the Three Les Wood Pipes; a Smooth Bent Bulldog “Reo”


Blog by Paresh Deshpande

With this write up, I have reached a personal statistical milestone of 200th contribution on rebornpipes.com, a journey that I was encouraged to embark upon, helped and supported at each hurdle by my Guru, mentor and now a dear friend, Steve and without whom I would have remained alienated from this fantastic world of pipe repairs, restorations and pipe collection.

So, thank you Steve for making this platform available to me for learning and enjoying myself! And now, back to the pipe on my work table!

I had purchased three Les Wood pipes from a gentleman and had restored two of the three pipes and have added it to my personal collection. Given below is the link to the first write up posted on Reborn pipes and is a recommended read to know how I came to be in possession of this lot and brief research on husband wife duo of Leslie Wood and Dolly and the pipes they make.

https://rebornpipes.com/2022/08/05/pipe-gods-smiled-and-i-got-not-one-but-three-les-wood-pipes-restoring-a-les-wood-poker/

Below is the link to the second Les Wood pipe that I have refurbished and added to my personal collection. I would request you to read through the write up as the stampings are totally at a variance from those seen on the Les Wood Poker pipe.

https://rebornpipes.com/2023/07/15/pipe-gods-smiled-and-i-got-not-one-but-three-les-wood-pipes-restoring-second-of-the-three-les-wood-pipes-a-bark-silver-spigot/

The third pipe from this lot of Les Wood pipe is a large smooth bent pipe in classic English bulldog shape in dark brown and red color. The pipe oozes very high quality briar and a well cut handmade vulcanite stem, all in the hallmark of a Les Wood pipe! The pipe is stamped on the lower panel of the square shank with three stars one below the other on the far left side. It is followed by “FERNDOWN” in an arch over “REO”, all in block capital letters. These stampings are followed by “HAND MADE IN” over “ENGLAND” over “LES WOOD” towards the sterling silver shank end band. The Sterling silver band bears the stamp “L & JS” in a rectangular cartouche over “.925”. The vulcanite saddle stem is stamped on the left side of the saddle as “LJS”. In addition to the information that I have assimilated while working on the two Les Wood pipes above, I would like to reproduce the following snippet of information from pipedia.org

To many pipe smokers, Les Wood’s pipes embody the revival of great English pipe making initiated by Ashton in the early 1980s. The high-grade Italian and Spanish plateau he prefers is oil-cured in the tradition of both Dunhill and Ashton. The pipes are renowned for their pleasant, slightly nutty flavor and remarkable smoking characteristics. They feature impeccable craftsmanship extending to very good stem/bit work, though many pipes are often a bit heavier. The hallmark of his work, of course, is the excellent silver work. Almost all of his pipes feature rings or ferules for spigot stems. Grading is by finish: “Bark” (ca. 90%, rusticated, dark brown and black), “Antique Bark” (tan rusticated), “Reo” (brown and red, smooth), “Root” (orange, smooth), and “Tudor Root” (orange and brown smooth) and by size (one to four stars). He also designates straight grains with SG.

Due to the vagaries of international trademark law, he sold his earlier pipes as ” L.&J.S Briars”, “Ellwood”, “Les Wood” or “L. Wood”. Until recently, an average of 1500 – 2000 pipes a year were sold as “Ferndown” — named for the mansion he lives in — in the UK and US, but as “L. Wood” pipes in Germany.

Thus, from the above, the pipe currently on my work table is an early Les Wood pipe made in US/ UK and is one of 10% smooth pipe made in that year.

Initial Visual Inspection
The pipe is heavy! That’s the first thing that I noticed, heavier than even the Poker that I had restored earlier. The finish is dark and dull with dust and grime ground in to the surface. There is some darkening of the rim top surface, more noticeably towards the back of the rim in 6 ‘O’ clock direction. The rim edges are sans any damage. There is a thick layer of cake inside the chamber with a wad of unburnt tobacco at the heel of the chamber. The hand cut, high quality vulcanite stem is deeply oxidized with some very light bite marks in the bite zone. The mortise has some serious accumulation of old oils and tars that needs to be cleaned. There are serious ghost smells emanating from the chamber and the mortise. Overall, with some TLC, this pipe should regain its former glory when it first left Ferndown Mansion. Detailed Visual Inspection
The chamber has a thin layer of cake with some unburnt residual tobacco at the heel of the bowl. However, if my experiences of working on two previous Ferndown from this same estate are anything to go by, then I think the cake layer is thick, but evenly maintained. The chamber smells a rather strong fragrant hinting at being used to smoke English blend or an aromatic. The rim top surface is clean, smooth and even and so are the rim edges. I do not envisage any issues related to heat lines/ fissures along the chamber walls. The stummel surface is covered in a layer of dust and grime giving the surface a dull and lackluster appearance. From underneath this grime, a mix of bird’s eye swirls and cross grains can be seen that waits to be brought to the fore. The twin rings separating the cap of the stummel from rest of the bowl is without any nicks/ chips/ dents or dings. The mortise shows presence of some oils and tars, but should be easily cleaned. The Sterling Silver band is deeply oxidized and tarnished at places. Once cleaned and polished, this band will add a nice classy bling to the appearance of the pipe. The beautiful vulcanite stem is hand cut and oozes very high quality of material use and also craftsmanship of highest quality. The stem is oxidized with very minor tooth chatter and bite marks seen in the bite zone on both the upper and lower surfaces of the stem. These tooth chatter and tooth indentation should be easily addressed by heating the affected areas to raise the vulcanite and thereafter sanding it down to match the rest of the stem surface. The tenon end and the horizontal slot end show very minor traces of accumulation of dried gunk and grime.The Restoration Process
I started the refurbishing of this Les Wood by working the stem first. Since there were other stems that were ready to be put into the stem deoxidizer solution, I decided to clean the internals of this stem first so that it could be put in the solution with other stems. I cleaned the stem airway with a thin shank brush and anti-oil soap. I used a sharp dental tool to clean the horizontal slot and further cleaned the internals with regular and bristled pipe cleaners dipped in alcohol.The stem was immersed in the Deoxidizer solution, a product that has been developed by Mark Hoover. This solution helps raise the stem oxidation to the surface thus helping in easy removal and subsequently imparting a nice shine to the stem after polishing cycle. The pipe is indicated with a red arrow. The stem is allowed to soak into this solution overnight.The pipe next to the one indicated in the picture above, is also a Ferndown which is the next pipe in line. This one is a NOS un-smoked pipe that too came from the same gentleman’s collection as these three Les Wood pipes and was the last one that he intended to pass on to his family members. However, for reasons best known to the gent, he voluntarily offered the pipe to me at the price which I had first quoted for the very first Les Wood from his collection. I could sense a feeling of sadness in his communication and I made him a payment without further queries. The pipe made its way to me as I worked on the REO.

Now it was time for me to work on the stummel. I did this by first reaming the chamber with size 3 and 4 PipNet reamer heads. I further scraped the chamber walls with my fabricated knife to remove the remaining carbon deposits where the reamer head could not reach. Once the cake was reamed back to the bare briar, I used a piece of 220 grit sand paper to remove all the traces of remaining cake and also to smoothen out the inner walls of the chamber surface. Finally, to remove the residual carbon dust, I wiped the chamber with a cotton pad wetted with 99.9% pure isopropyl alcohol. The huge pile of carbon dust that was reamed out is an indication enough to the amount of carbon that had accumulated in the chamber while the smaller heap is that of the un-burnt tobacco from the chamber. The chamber walls are solid without any heat lines or fissures. I further cleaned the mortise by scrapping out the dried gunk with a dental tool. I ran a few pipe cleaners dipped in alcohol to moisten the dried gunk and assist in its removal. I shall further continue the internal cleaning of the chamber and mortise with cotton and alcohol soak.I continued the cleaning of the chamber and shank internals with a salt and alcohol bath. I use cotton balls which is an at par substitute to Kosher salt as I have realized over the years. I draw out a wick from the cotton and along with a folded regular pipe cleaner; insert it in to the mortise and through the draught hole in to the chamber. Thereafter, I packed the chamber with cotton balls to about quarter of an inch below the inner rim edge and soaked the cotton balls with isopropyl alcohol up to the brim. About half an hour later, the level of alcohol had gone down, having being absorbed by the cotton. I topped it up once again and set it aside overnight. By next morning, the cotton and alcohol had drawn out all the remaining oils and tars from the chamber and mortise, fulfilling its intended task. I removed the cotton balls and ran pipe cleaners through the mortise to clean out all the loosened tars and gunk and further cleaned it with alcohol and q-tips. With the internal cleaning now completed, I undertook the cleaning of the external surface. I wiped the surface with Murphy’s oil soap on a cotton pad and further cleaned it with a wet cotton swab to remove all the soap from the surface and wiped it dry with paper towels and cotton cloth. The usual process that I follow while cleaning the external surface is to scrub the stummel with oil soap and rinse under running warm water. However, in this case, I was keen to preserve the stain and finish to max extent possible and hence the slight modification to the process. I further dried the surface with a heat gun to ensure that there is no moisture in the surface. My exuberance to see the shine and gloss that this pipe is capable of, thanks to the processes employed by Les Wood’s wife; I decided to continue with the stummel refurbishment. I dry sand the surface with 1500 to 12000 grit micromesh pads, wiping frequently with a dry soft cotton cloth to check the progress made. Once the micromesh polish cycle was completed, I massaged a small quantity of ‘Before and After Restoration Balm’ in to briar surface and set it aside for few minutes. Once the briar was rejuvenated, I hand buffed the stummel with a microfiber cloth to a deep and luxurious shine. It was here that I noticed that all the cleaning of the stummel had left the finish over the rim surface a bit splotchy and light. Using a dark brown wood stain pen, I stained the rim top surface and set it aside for the stain to set.Now that the internal and external cleaning of the stummel was nearly done and also the stem had now been soaking for more than 24 hours, I removed the stem from the solution. I first scrubbed the stem surface with a Scotch Brite pad, always being mindful of the stem logo on the left side. I followed this scrubbing with a nice cleaning of the surface using a 0000 grade steel wool. I rinsed the stem under running water to rid the stem of the thick deoxidizer solution. I ran a couple of pipe cleaners to remove any residual deoxidizer solution from the airway.To address the minor tooth chatter on either surface, I heated the bite zone with the flame of a soft flame lighter. The heat from the lighter expands the vulcanite and fills up the tooth chatter. The results are not always perfect, but in this instance, the results are very satisfactory.I followed it up by wet sanding the entire stem surface using320, 400, 600, 800, 1000, 1500 and finally with a piece of 2000 grit sand paper. This progressive sanding with higher grit sandpapers serves to reduce the sanding marks of the more abrasive sand papers. I also sharpened the button edges while sanding. I wiped the stem with a moist cotton swab to remove all the oxidation and sanding dust from the surface. I applied a little Extra Virgin Olive oil over the stem and set it aside to be absorbed by the vulcanite.With a jeweller’s cloth, I polished the sterling silver band at the shank end to a nice shine.On the way to complete the project, I polished the stem and stummel surface with White Diamond. Next, I replaced the buffing wheel on the rotary tool with the one that has been earmarked for Blue diamond compound and polished the entire pipe. I like the way the pipe is polishing up at this stage. With a cotton buffing wheel that I use for carnauba wax, I applied a coat of carnauba wax and continued to work on it till the complete coat of wax had been polished out. I mounted a clean cotton cloth buffing wheel and gave the entire pipe a once over buff. I finished the restoration by giving the entire pipe a rigorous hand buffing using a microfiber cloth to raise the shine further. The finished pipe looks beautiful and is ready to be added to my personal collection of pipes. P.S.: The finished pipe has a fantastic glass like shine which has been a hallmark finish from Dolly and the pipe looks very beautiful. This entire project has been very close to my heart for a reason and shall find a place of pride in my Les Wood collection.

I wish to thank readers of rebornpipes.com who have spared their valuable time in reading through this work. I look forward to your comments and suggestions for improvements. I wish to make a mention of one follower of Reborn Pipes who had been regularly in touch. However, since last month there has been no communication. If you are reading this blog my friend, a simple message of your well-being will be highly appreciated. Cheers…

You Have to Join Kenneth and Me on a Great Morning Pipe Hunt


Blog by Steve Laug

I can’t speak for you, I know that but for me there is nothing more exciting and enjoyable than wandering through an antique mall, shop, thrift shop or show with singular purpose and laser focus on finding whatever pipes lurk in the nooks and crannies of the shelves, displays and tables. Everywhere I travel I make time to do this. I have hunted pipes in London, Paris, Budapest, Sofia and Athens. In each of those cities and a plethora of North American cities I have found some incredibly interesting pipes. Because of that the rush of a pipe hunt, the expected finds and joys always are just below the surface when I get ready to hunt. Do you have the same experience in your pipe hunting?  Do you have the same adrenaline rush as you prowl through a site like a carnivore hunting his prey? Does even the glint of a pipe give you a rush of excitement as you make your way to it? Does a great find make your heart beat faster? If you don’t, then what is wrong with you?

Once I see a pipe hidden in the detritus on a seller’s table every sense comes alive. There is a buzz that goes on in my head as I pick up a potential piece and examine it. I do all of this without expression or any external signals to the seller. I turn it over in my hands with bated breath hoping that it is a keeper. I check the stamping, the condition of the bowl, the stem condition, note issues that will need to be addressed. There are many other items that I go over as I turn it in my hands that are more a habit or feeling that I have more than a tangible thing I can define. After that I have to decide if I want to work on it. Notice I say want not if I can. I have learned that with a little ingenuity most things are fixable if I want to. But if I don’t want to it will sit here unfinished for a long time. If the pipe passes my assessment I remain quiet as I don’t want to give the seller any sense that the pipe is special and worth more than he is thinking. It really is a game for a good poker face. Then I ask the price and make my offer, always willing to walk away. If you experience this you will know that the brand is irrelevant in many ways as each of us has our own “holy grail” pipe that we dream of.

Some background for you on yesterday’s pipe hunt. Last year Kenneth Lieblich and I visited the Fraser Valley Antique and Collectible Club show in New Westminster. I brought along two of my daughters and we had a great time walking through all of the items that sellers had displayed. They found some things that interested them and we found a few pipes. We had a good laugh at the huge variation of prices that sellers were charging. They ranged from $8 to over $195 with no obvious rationale for the difference. It truly seemed to be a shot in the dark for them to arrive at a price. Some sellers were flexible and some were adamant that their old Dr. Grabow was worth hundreds. There were always those who loved to haggle and that for me was actually a part of the joy of the hunt. There will always be dreamers who think they hold a “special” pipe that everyone should be fighting over to own. More power to them. We would thank them, shake our heads and move on to another table. We had a great time together looking and then afterwards having coffee and visiting.

So, when Kenneth wrote about a month ago and sent me a link to the sale I did not need a lot of convincing. I wrote back that I was excited to go and if all humanly possible I would come. The organizers describe the event as a two day show of over 200+ tables, tons of various endless vintage antiques & collectibles: vintage advertising tins and signs, oil & gas, toys, radios, fishing tackle, hunting & sports memorabilia, post cards, old photos, LP records, medalta, orange crush, Coca-Cola, Pepsi, moorcroft, movie posters, brewerania, fruit jars, soda pop / ginger beer bottles, drug stores, ephemera, old tools, books, Fire King Jadeite, Chinese Asian artifacts, tobacco, dolls, jewelry, stoneware pottery, comics, coins, stamps, Hudson Bay, Chinaware – hotel ware & restaurant ware, steamship, general store items, small vintage furniture – home decor, etc. – you name it; it’s here & you do not want to miss out! I did not want to miss out so it went on the calendar.

So yesterday, April 27, 2024 we met at the arena at 8:45am and joined the queue of folks who were waiting to get inside. Kenneth brought his eldest daughter and I brought the same two with me as last year. There is always a lot of energy in the queue as folks discuss their hopes and expectations and catch up with each other. It is really a grand time. We chatted and introductions were made between the daughters. Kenneth and I enjoy these kinds of hunts. We wander down each aisle and carefully examine each sellers table for a potential pipe treasure that fits our demands! I say demands because over the years I have become ever more selective and sadly I seem to have passed that on to Kenneth.

Just before 9:00 am the doors opened and along with the waiting crowd we made our way into the arena. Like last year you paid at the door and immediately were in the midst of tables and sellers in the lobby area. We made our way through the tables and in the first few minutes came upon a seller with the typical overprice carved meerschaum figural and some Grabows and other drugstore pipes. However, in the midst of the pipe pile there was a Peterson’s System Standard Bowl sans stem. It was a 307 shape but was stamped 1307 which is something I will tell you about when I restem and restore it. We dickered and bartered and I added the first pipe to my pocket. We made our way to the arena and though it looks small it was crowded. I have included some photos from the advertising down by the Club for the event to give a sense of what we saw. It took us over an hour and a half to work our way through the tables two times to make sure we did not miss anything. We went down each row examining the offerings on the tables. We each found several pipes as we walked our way through. Kenneth and I would spot a few pipes and come together to go through them. It was great fun to discover a rack or a pile of old pipes to work through. The majority of the pipes were not for us. There were many Grabows, Medicos, other drug store pipes and even a few Figural Meerschaums. We would love them over and walk away. I must remember to bring a pocket lens with me next time. My eyesight combined with the lighting in the arena made it hard to clearly see the stamping on some of them. Each table provided the chance to look at things that the seller described as antiques or collectibles and to me some were neither. I felt my age as looked at toys I had played with, games I had enjoyed and household items that mom used to prepare and serve our meals. It was really a walk through my past.

Once we had finished going through the tables twice we went to the lobby and enjoyed a coffee and some hot chocolate. Kenneth and I went through our purchases. We both had some nice additions to our collections to work on. When I got home I took some photos of the finds of the hunt. As a group they look quite nice. I am sure Kenneth can add his finds if he chooses to do so. I took photos of each of pipes and have included how each one was stamped on the shank sides. I have also given a brief overview of the condition of the pipe.

1. The first pipe shown below is stamped Jeantet [over] Fait Main on the left underside of the shank. On the right underside of the shank it is stamped with the number 4 (shape number?) and with Made in France along the shank/stem junction. There is a Jeantet logo J in a silver oval on the left topside of the diamond stem. It is kind of a Freehand Bent Dublin with a Diamond shank.

The pipe has some great grain around the bowl sides and shank. The rimtop is flat and slightly oval. The bowl had a moderate cake on the walls and thankfully no lava on the rim top or edges of the bowl. The stem was oxidized and had light toothmarks on the top and underside ahead of the button.2. The second pipe shown below is stamped Jeantet [over] Fait Main on the top of left side of the shank. On the right side it is stamped with the shape number 9 [over] Made in France. There is a Jeantet logo J in a silver oval on the left topside of the stem. It is a bit of a Freehand Bent Apple with a unique stem shape.

The pipe has some great grain around the bowl sides and shank. The rim top is slightly oval and bevelled inward toward the bowl. The bowl had a moderate cake on the walls and some lava on the rim top rear inner edge of the bowl. The stem was oxidized and had light toothmarks on the top and underside ahead of the button.3. The third pipe shown below is stamped Peterson’s [over] System [over] Standard on the left side of the shank just below the nickel ferrule. On the right side it is stamped Made in the Republic of Ireland (in three lines) with the shape number 1307 below that. The nickel ferrule was stamped on the left side and read K&P Peterson’s [over] three classic Makers marks. These included a Shamrock, a Wolfhound and a Tower without a door. There was no stem with the pipe.

The pipe has some great grain around the bowl sides and shank. It is a large System Standard 307 shape with an extra number “1” included ahead of the 307. The bowl had a moderate cake on the walls and a thick lava coat on the rim top and inner edge of the bowl. 4. The fourth pipe shown below was stamped on a smooth panel on the underside of the shank with a shape number 625 followed by Brigham [over] Made in Canada Squat Straight Bulldog. The pipe has a typical rusticated finish on the bowl and a smooth rim cap.

The pipe has some great grain around the bowl cap with an interesting rustication on the sides and shank. The bowl had a moderate cake on the walls and a thick lava coat on the rim top and the inner edge of the bowl. The stem was oxidized and slightly dirty with a single brass dot on the top of the saddle stem. There were light tooth marks on the top and underside ahead of the button. The metal tenon tube was seized in the shank making the stem unremovable.Looking at the pipes I brought home I was happy with what I had found. A usual I thoroughly enjoyed the hunt. It was truly a pleasure and the thrill of searching and finding can’t be matched. I only wish that I could do more of the hunting and finding. As I think about the trip I realize that one thing that would have added to the pleasure is if you could have been with us. If you have not gone on a pipe hunt you really should go. But until the at least we can tell you thanks for going with us on paper. Hope you had a good time.

Restoring a Dunhill 156F/T Shell Briar Made in England 7 Bent Billiard and a Fishtail Stem


Steve Laug

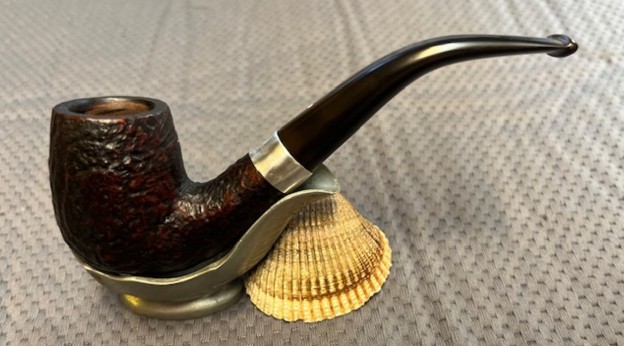
The next pipe on the table is a sandblast Dunhill Bent Billiard. It had a taper, vulcanite fishtail stem with a white spot. We purchased it from an estate sale in Oregon City, Oregon, USA on 03/21/2024. The pipe is stamped on the heel of the bowl and on the underside of the shank. On the heel of the bowl it is stamped with the shape number 156 F/T. That is followed with stamping on the shank Dunhill [over] Shell Briar. Next to that is stamped by Made in [over] England7. The pipe has a Sterling Silver repair band on the shank with a crack visible on the underside of the shank. The rim has a thick lava coat filling in the sandblast. It is from the overflowing cake in the bowl. It is hard to assess the condition of the inner edge of the rim due to the cake and lava overflow. There were oils and grime ground into the bowl sides gives the finish a flat look. There is a deep sandblast showing through the grime. The vulcanite stem is oxidized, calcified, and dirty with grime and grit on the surface. There were light tooth marks on both the top and underside of the stem just ahead of the button. Jeff took photos of the pipe before he started his clean up work. I have included them below. He took photos of the pipe’s bowl and rim top to show the cake in the bowl, the ream marks on the top portion of the bowl and the lava coat filling in the sandblast on the rim top. It is another dirty pipe. He also took photos to capture the tooth marks on the top and underside of the stem near the button. He took photos of the sides and heel of the bowl to show the rugged sandblast around the bowl and the amount of grime ground into the surface of the briar. He took photos of the stamping on the underside of the shank. It is faint in spots but still readable as noted above.I wanted to unpack the Dunhill stamping on the shank and work to understand each element of the stamp. I generally use the Pipephil site to gather as much initial information as possible (http://pipephil.eu/logos/en/dunhill/shell-briar1.html). The stamping is interpreted as follows: The number 156 the shape number for a taper stem Bent Billiard. The F/T stamp is used to designate Fish Tail stem. The Shell Briar stamp refers to the finish. The number 7 following the D of England would give the date the pipe. The Sterling Silver band is stamped Sterling Silver. The photo shows a pipe that is stamped similarly to the one that I am working on.Pipephil also has some helpful dating keys on the site that are basically flow charts that you can walk through to date your pipe (http://pipephil.eu/logos/en/dunhill/cledat-en1.html). I turned to Part 1 of the Dating Key and followed the chart. This pipe has a 7 following the D in England. There was no patent number so that took me to the section on the chart below (column one) which instructed me that the pipe could be dated as being made “posterior to 1954”. I followed the link under “Your pipe is posterior to 1954. Narrow down your dating”. That took me to Page 2 of the dating key (http://pipephil.eu/logos/en/dunhill/cledat-en1a.html). The third column (suffix 5…9) led me to the section with a 7 after the D in England. There was a directive for dating the pipe spelled out as follows: 1960 + suffix 7 which gives the pipe a date of 1967.I then turned to Pipedia’s section on Dunhill Shell Briar to get a bit of background on the Dunhill finishes (https://pipedia.org/wiki/Dunhill#Root_Briar). I quote:

Shell

A deep craggy sandblast with a black stain finish (usually made using Algerian briar) – the color of the stain used has varied over the years. Although there is some doubt as to them being the first to sandblast pipes, Dunhill’s Shell pipes, and the sandblasting techniques developed to create them are considered one of Dunhill’s greatest and most lasting contributions to the art of pipe making.

The documented history of Dunhill’s inception of the Shell is largely limited to patent applications — there are no catalog pages or advertisements promoting blasted pipes at the time. The preliminary work on the English patent (No. 1484/17) was submitted on October 13, 1917. The patent submission was completed half a year later, on April 12, 1918, followed by the granting of the English patent on October 14, 1918. This was less than a month before the end of The Great War on November 11th.

In 1986 Dunhill released a line of premium Shell finish pipes – “RING GRAIN”. These are high-quality straight grain pipes which are sandblasted. Initially only Ring Grain, but now in two different finishes. In 1995 the “Shilling” was introduced with Cumberland finish – it is an extremely rare series. These pipes exhibit a deeper blast characteristic of that of the 1930’s – mid-1960’s (and the limited ‘deep blast’ pipes of the early 1980s) and show a fine graining pattern. These are considered the best new Dunhills by many enthusiasts today and are very rare. The finish is sometimes described as tasting like vanilla at first, with the taste becoming more normal or good as the pipe breaks in.

I turned to work on the pipe itself. Jeff had done an amazing cleanup of the pipe. He reamed the light cake with a PipNet reamer and cleaned up that with a Savinelli Fitsall Pipe Knife. He scrubbed the internals of the bowl and stem with alcohol, cotton swabs,pipe cleaners and shank brushes. He scrubbed the externals with undiluted Murphy’s Oil Soap and rinsed the bowl off with running water. He soaked the stem in Briarville’s Pipe stem Deoxidizer and once it had soaked rinsed it off with warm water to remove the residual solution. He dried it off and rubbed it down to remove any oxidation that was still on the stem. The pipe looked very good when I received it. I took a photo of the rim top to show the condition. It looks pretty good with the tars and oils removed from the rim top. The inner edge of the bowl was slightly damaged and out of round. The bowl itself was very clean. The stem came out looking quite good with light tooth marks and chatter on both sides ahead of the button. I took a photo of the underside of the shank to show the stamping. The photo shows the stamping and is actually more readable in person. I removed the stem from the shank and took a photo of the pipe parts to show what I was working with. It is a nice looking pipe. I sanded the inside of the rim top with a folded piece of 220 grit sandpaper to smooth out the damage to the edge. I stained the sanded edge with a Mahogany stain pen to blend it into the surrounding briar surface. It looked much better.I rubbed the briar down with Before & After Restoration Balm. I worked it into the briar with my fingertips and a horsehair shoe brush to work it into the nooks and crannies of the sandblast finish. The product works to clean, enliven and preserve the briar. I let it sit for 10 minutes then I buffed it with a cotton cloth to deepen the shine. The briar really comes alive with the balm. I set the bowl aside and turned to address the stem issues. I scrubbed the surface of the stem with Soft Scrub Cleanser and cotton pads to remove the remaining oxidation. It looked better once I finished.I sanded it with 320-3500 grit sanding pads to further remove the oxidation remaining and tooth chatter on the surface. I wiped it down after each sanding pad with Obsidian Oil on a cloth. By the final 3500 grit sanding pad the rim top had a shine.I polished the vulcanite with micromesh sanding pads – 1500-12000 grit pads. I wiped it down with Obsidian Oil after each sanding pad. I used Before & After Pipe Polish – both Fine and Extra Fine to further polish the stem. This 1967 Dunhill Shell Briar 156 F/T Bent Billiard Vulcanite taper stem has a beautiful, unique Dunhill Sandblast finish that is very deep and craggy. The Shell Briar mixed brown finish highlights some great grain around the bowl and shank. It has a unique sandblast that Dunhill specialized in making. The polished vulcanite taper stem adds to the mix. I put the stem back on the bowl and buffed the pipe with Blue Diamond on the buffing wheel being careful to not buff the stamping. I gave the bowl multiple coats of Conservator’s Wax and the stem multiple coats of carnauba wax on the buffing wheel and followed that by buffing it with a clean buffing pad. I hand buffed the pipe with a microfiber cloth to deepen the shine. The finished Dunhill Shell Briar 156 F/T Bent Billiard is quite nice and feels great in the hand. Give the finished pipe a look in the photos below. The dimensions of the pipe are Length: 5 ½ inches, Height: 1 ¾ inches, Outside diameter of the bowl: 1 ¼ inches, Chamber diameter: ¾ of an inch. The weight of the pipe is 1.38 ounces/40 grams. Thanks for walking through the restoration with me as I worked over another beautiful pipe. This one will be going on the rebornpipes store in the English Pipe Makers Section. Thanks for your time.

Reviving a Hard Ridden Savinelli Freehand Bent Dublin


I love these internal repairs Charles. You have certainly mastered this. Thanks for the clear step by step procedure.

There is an old adage that tiny problems become large problems if left unattended, and the pipe on the bench this week is a prime example of this …

Reviving a Hard Ridden Savinelli Freehand Bent Dublin

Enjoying an Inaugural Smoke in my Dominik Ring Grain Sandblasted Dublin with a Pencil Shank


Blog by Steve Laug

I fired up my first bowl of tobacco in my UNSMOKED Hand Carved Dominik Kobryń Pencil Shank Dublin this weekend. I rubbed out some Seattle Pipe Club Christmas Spirit Plug. The pipe is stunning and feels great in my hand. The beautiful ring blast gives the pipe a very light weight and very tactile sense that will only be more when it heats up during a smoke. The pencil shank pipe is a dainty 5 inches long and 2 inches tall. It weighs in under 1 ounce at .95 ounces or 27 grams. I have included a few photos of the pipe before I loaded it up and smoked it. If Dominik pipes are new to you I am including what I learned when I worked on the first pipe of this brand. When I started I knew nothing about the carver other than he did beautiful work so I turned to Pipedia to see what I could find (https://pipedia.org/wiki/Dominik_Pipes). There was a listing for Dominik Pipes. He is a Polish Carver and I have included the short article in its entirety below.

Dominik pipes are made by Dominik Kobryń. His journey with pipes began in 1993 at a flea market, where he bought his first pipe. From that time his collection has grown a lot. He made his first pipe in December 2016. Dominik credits Wojtek Pastuch as his mentor, and is very grateful for that!

Dominik uses briar from Mimmo Romeo. He makes his stems by hand, mainly from Ebonite and Cumberland rods, but occasionally acrylic. He focuses on unique pipes that are well done technically.

From there I clicked on a link at the bottom of the page that took me to his Pipe sales website (http://www.dominikpipes.com/). Interestingly the site contained almost word for word the information that I had found on Pipedia.

My name is Dominik Kobryń. My journey with pipes began in 1993 on a flea market, where I bought my first pipe. From that time my collection has grown a lot.

I made my first pipe in December 2016. Wojtek Pastuch has taught me a lot about pipemaking and I am very grateful for that!

I use briar from Domenico Romero (Mimmo). I make stems by hand, mainly from ebonite rods and Cumberland, sporadically acrylic. I pay much attention to create unique pipes, well done technically. The tobacco I chose for the inaugural smoke is a limited-edition version of Seattle Pipe Club’s Plum Pudding pipe tobacco called Christmas Spirit. I love the Plum Pudding tobacco so when this tobacco was released I got a hold of a tin of Christmas Spirit 2023. The tobacco had been cured with Apple Brandy and there was a cut piece of the wooden Brandy barrel in the tin. It is described by the sellers as a holiday mixture perfect for the season even though I am smoking it out of season. It builds upon a foundation of Plum Pudding Special Reserve — complete with mature Orientals, Latakia, Virginias, Perique, and Black Cavendish —and is aged in apple brandy barrels. I cut a chunk off the plug and rubbed out a bowl worth of the tobacco. It smelled divine and my mouth watered in expectation. I pressed the tobacco into the bowl leaving it slightly springy so air can be drawn through the tobacco. I did the first light with my lighter to singe the surface of the tobacco. I followed that with the second light to. The draught on the stem was perfect so I drew on the stem and pulled the smoke through the stem and into my mouth. The smoking of the pipe was effortless and once it was lit it burned evenly through the bowl. I enjoyed a flavourful smoke that was very good for a first bowl. The bowl coating that had been used did not affect the flavour or diminish it at all. It was a great smoke.I took the loaded pipe up to my front porch and sat on chair there and enjoyed the amazing taste of a new to me tobacco. The draught on the pipe was flawless and the sandblast ring grain made the bowl a very cool smoking pipe even as it worked down the bowl. The smoke lasted most of an hour and I enjoyed the relaxing ambience of the front porch, above the passersby on the sidewalk below. It is a great pipe and one that I will smoke again and again. If you have not looked at them on the Polish Pipe Makers Section of the rebornpipes store you should take a look there are some real beauties available there. You might find one that delivers the kind of smoke you would enjoy. Thanks.