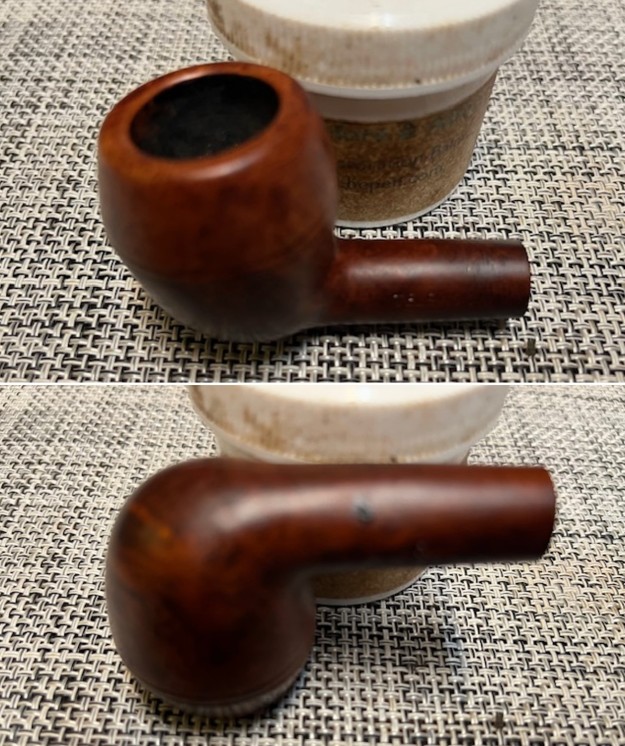
Monthly Archives: December 2023

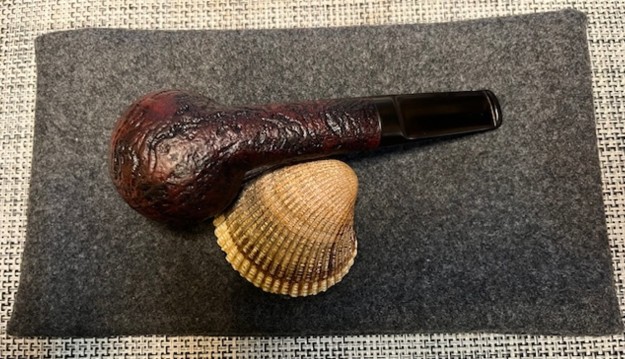
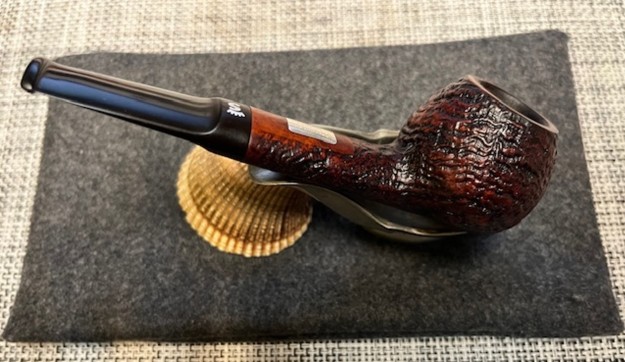
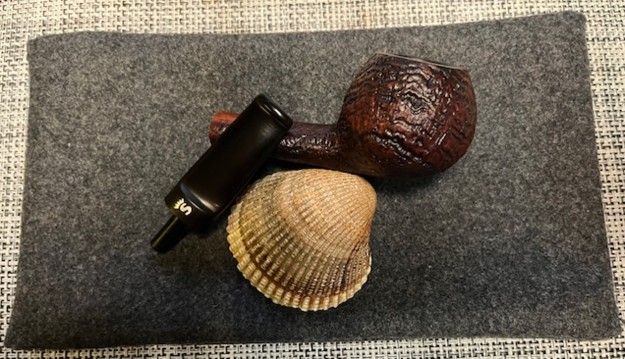
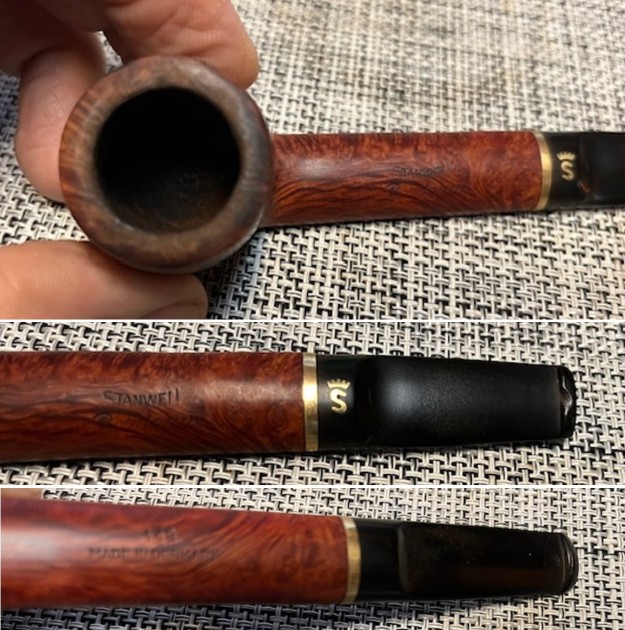
Someone Must Have Loved Smoking This Stanwell POY 1997 Billiard


Blog by Steve Laug

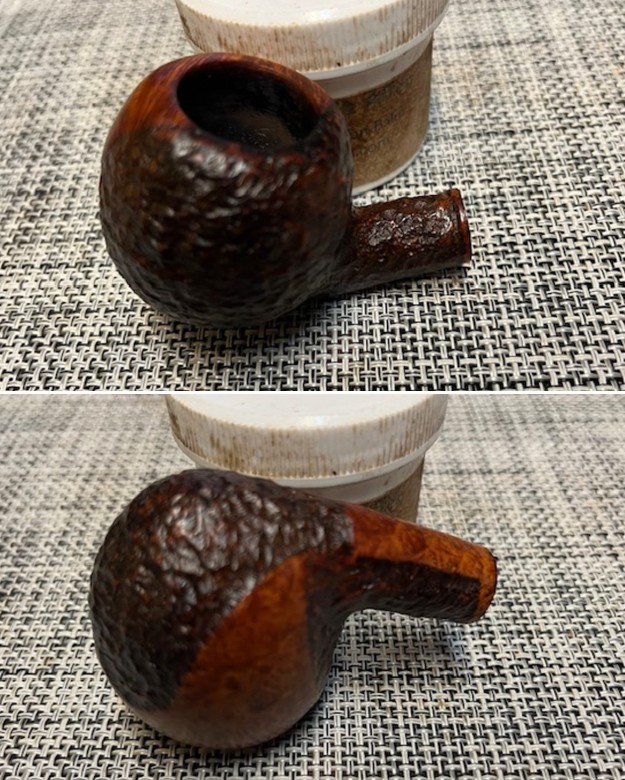
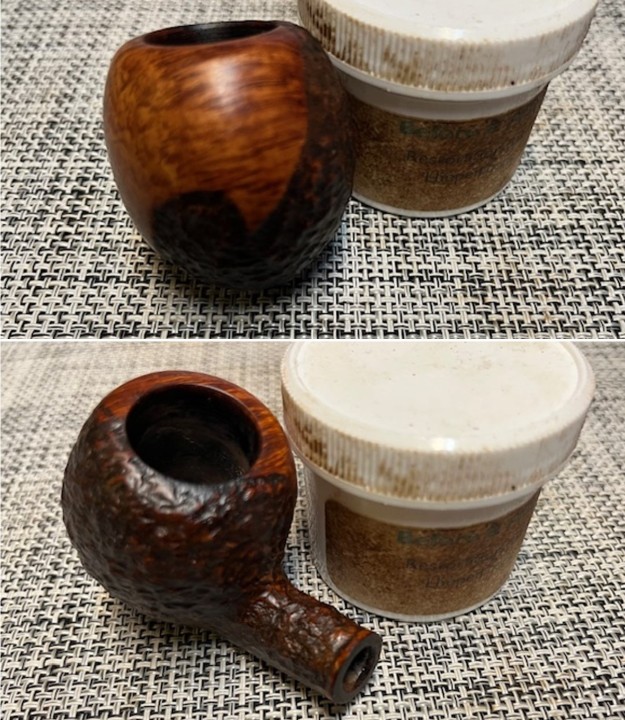
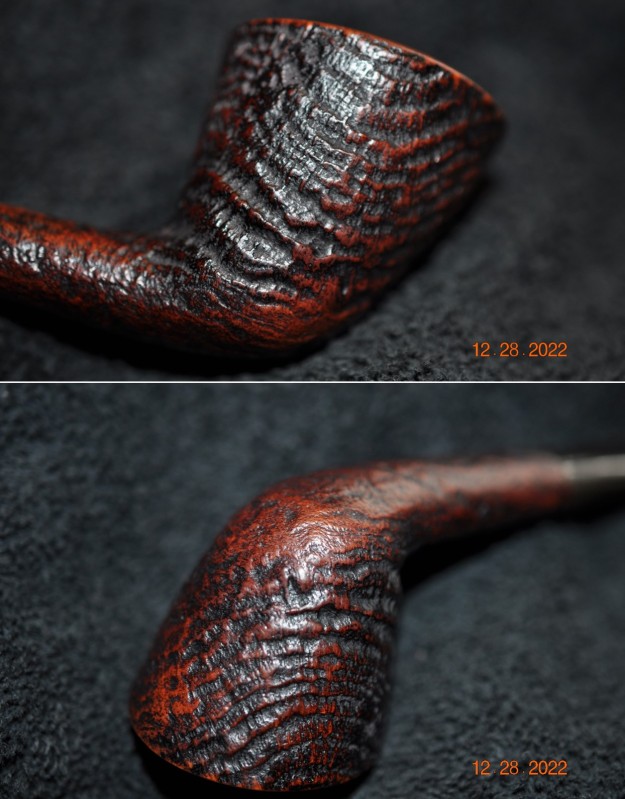
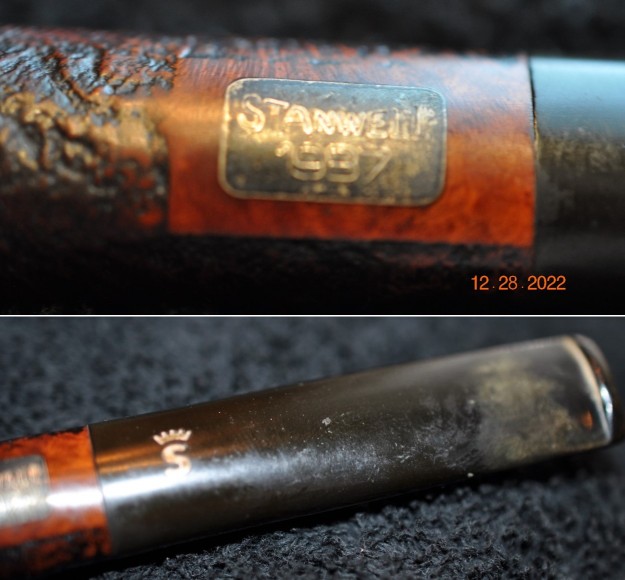
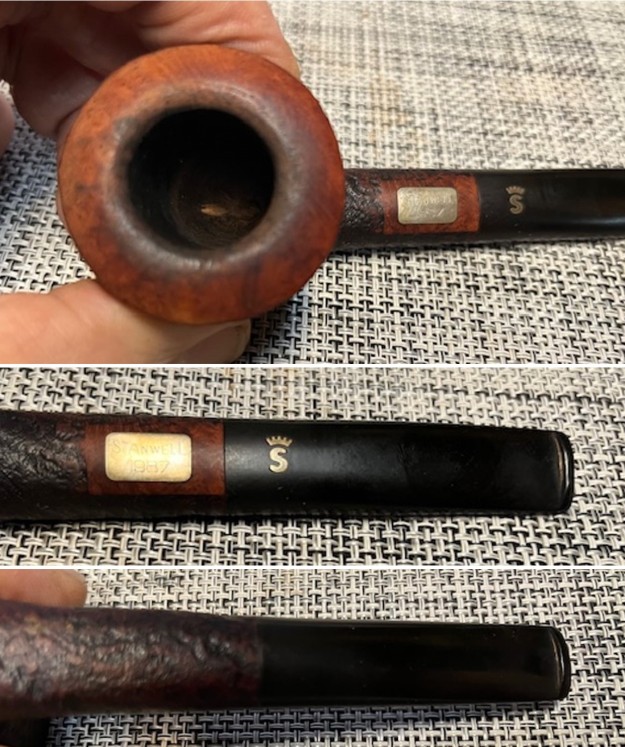
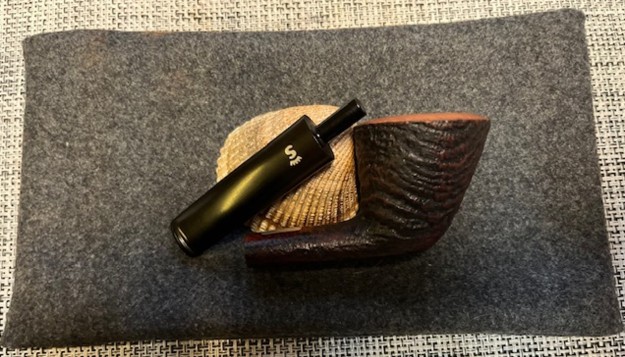
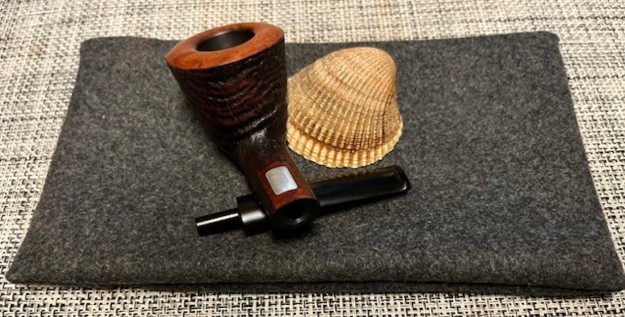
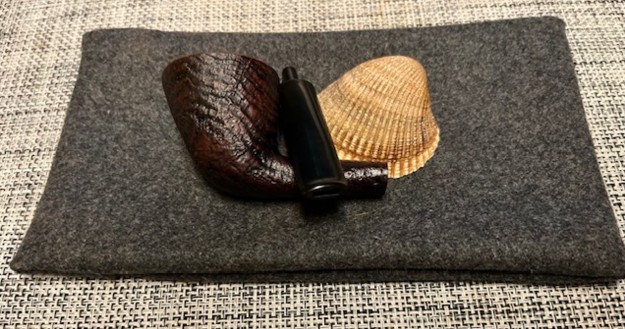
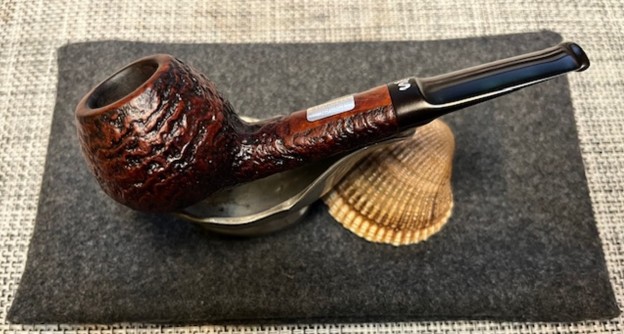
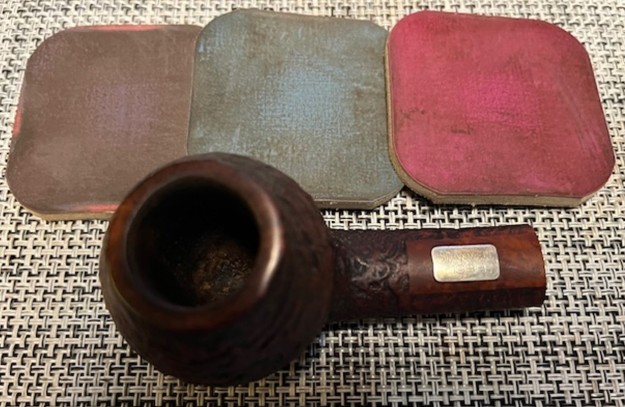
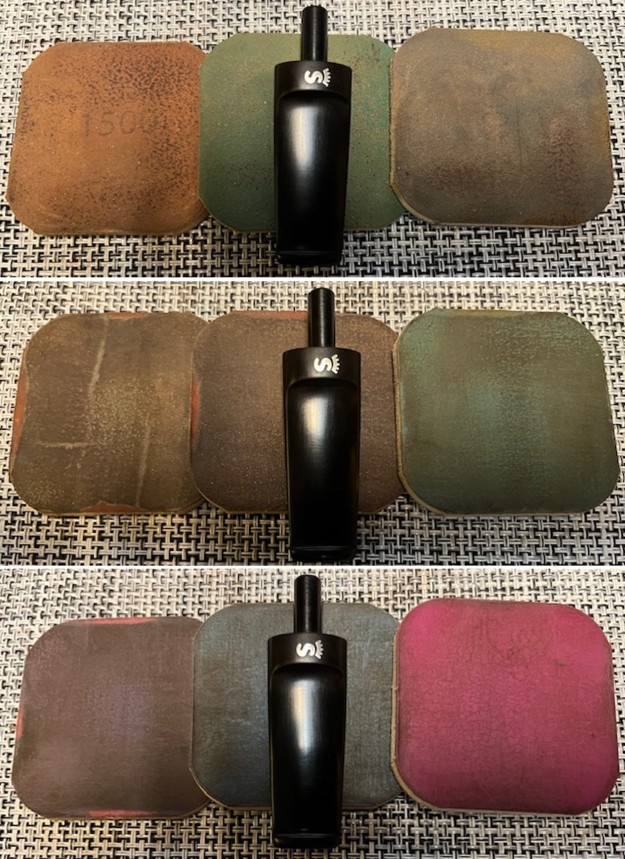
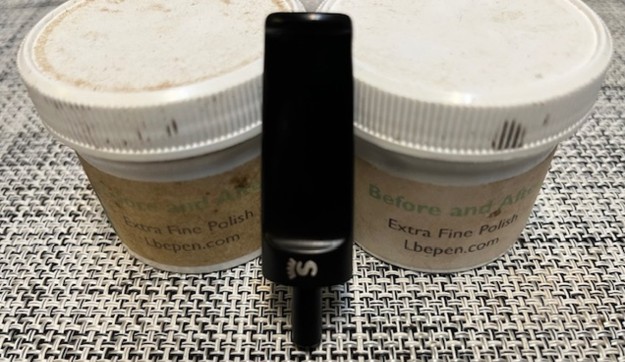
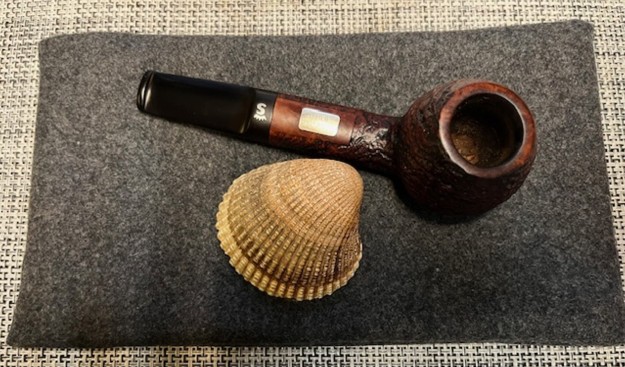
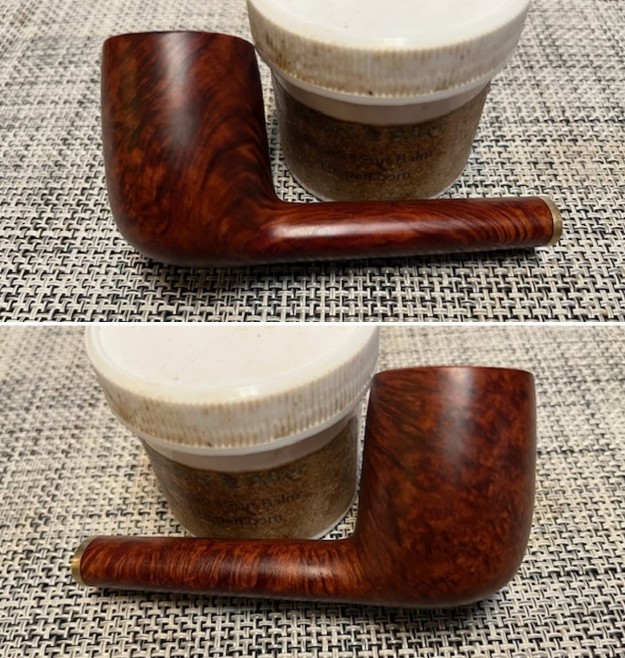
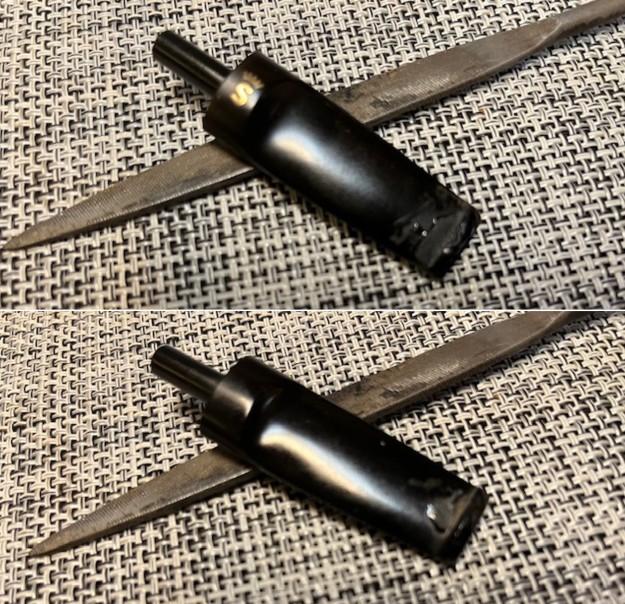
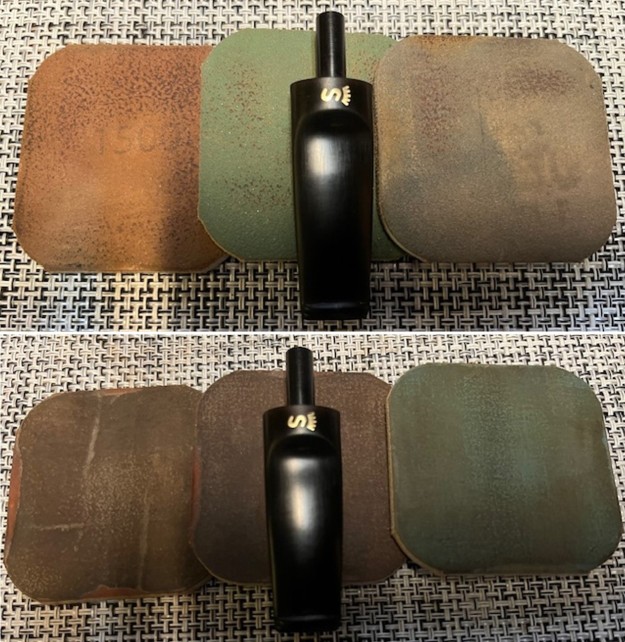
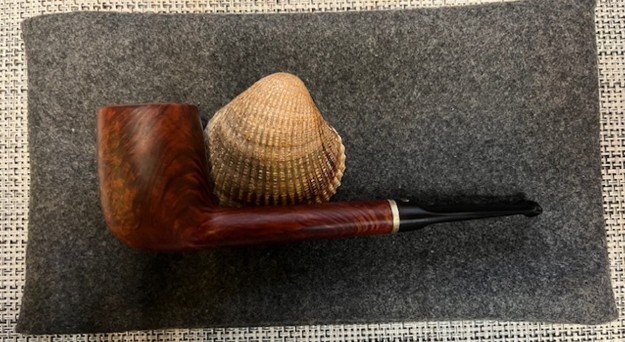
The next pipe I am working on was purchased on 12/13/2022 as part of a group of pipes from a fellow in Copenhagen, Denmark. This was another dirty pipe with a lot of wear and tear and obviously it had been someone’s favourite smoker. The pipe has an identifying plate on the left side of the shank that reads Stanwell [over] 1997. There was no other stamping on the shank and the silver plate confirmed for me that it was a Stanwell Pipe of the Year. The dirty sandblast finish was not able to hide the beauty in the grime. There were tars and oils ground into the surface of the briar. The bowl had a very thick cake that flowed over the top of the smooth rim in a heavy lava coat. The inner edge was so heavily coated that it to assess its condition. The stem was a black vulcanite taper stem with a silver Crown S on the left side. It had some light tooth marks and chatter on both sides ahead of the button. There was oxidation and calcification on both sides but it had a lot of potential. Jeff took photos of the pipes before he started his clean up work. Jeff took photos of the rim and bowl to show the heavy cake and heavy lava coat covering the rim top. The inner edge of the rim was so thickly caked that it was not possible to know what the condition was. It really was a dirty pipe but still a beauty. He also took photos of the stem surfaces to show its overall condition when it arrived. The photos of the sides and heel of the bowls show a deep blast and some beautiful grain around the bowl and shank sides. The brown stain on the briar adds depth finish on the pipe and makes the grain really stand out on the smooth parts. It shows some promise. He also took a photo of the stamped silver plate on the left side of the shank. It reads as noted above.I turned to the internet to find out information about the Stanwell Pipe of the Year. I came across this interesting article and shape chart on the Blue Room Briars site where they listed a collection of the POYs (https://www.blueroombriars.com/blogs/news/the-stanwell-pipe-of-the-year-collection). I have included the shape chart and part of the article below for the information that it contains..…Recently, Blue Room Briars acquired a complete Stanwell Pipe of the Year (POY) collection spanning from 1980 – 2017. Looking at these pipes in detail reveals some interesting insights into Stanwell’s production, although it should be noted that these findings are not the final say on when a particular pipe was made, but we hope you can use it as a guide when trying to determine the era of manufacture for Stanwell pipes made after 1980. 

The first pipe of note is the 1980 POY. This pipe does not come with the engraved silver plaquette. The pipe also sports a traditional vulcanite mouthpiece.

Between 1981 and 1998, the Stanwell pipes from the POY collection have the addition of silver plaquettes denoting the year, a traditional vulcanite mouthpiece, and also have a Teflon lined mortise. This is an interesting feature that creates a very stable connection between the mortise and tenon, as well as allowing the mortise to be swabbed out easily for maintenance. It wouldn’t be unwarranted to believe that other Stanwell pipes with a Teflon sleeved mortise were probably made between the 1980s to late 1990s. This additional, and costly, feature demonstrates Stanwell’s commitment to quality manufacturing even into the last portion of the 20th century.

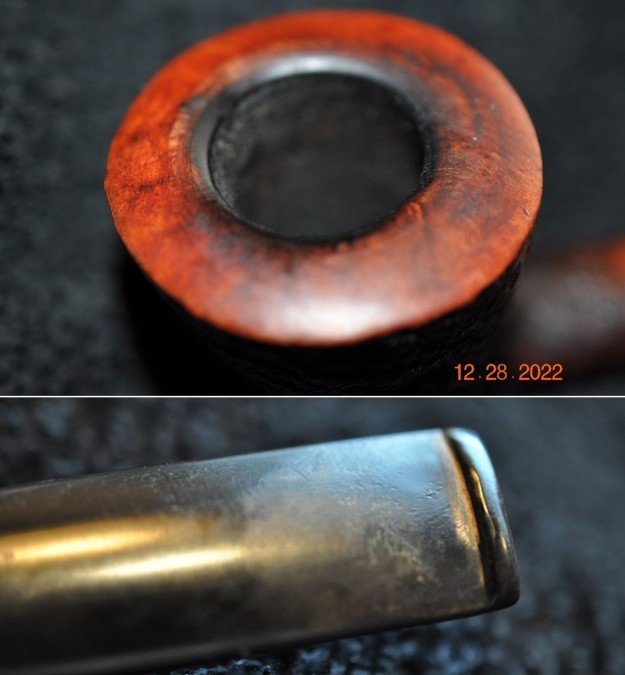
Jeff cleaned up the pipe for me. He reamed the bowl with a PipNet pipe reamer and cleaned it up with a Savinelli Fitsall Pipe Knife. He scrubbed the exterior with Murphy’s Oil Soap and a tooth brush to clean off the grime off the finish and the overflow of lava on the rim top. The cleaning had removed the grime on the rim top. He cleaned up the internals of the shank, mortise and stem with pipe cleaners, cotton swabs and alcohol to remove all of the oils and tars in the pipe. He soaked the stem in Briarvilles Pipe Stem Deoxidizer and was able to remove much of the oxidation, calcification. When it arrived here in Vancouver it was a clean pipe and I knew what I had to work with. I took photos of it before I started my part of the restoration. I took a photo of the lightly crowned rim top and the stem to show their condition once it arrived in Canada. Jeff was able to clean up the cake and the lava overflow that was shown in the rim and bowl photos above. The rim top looked very good but there seemed to be light damage and darkening to the top and inner edge of the bowl. The stem looked better, though there were light tooth marks and chatter on both sides near the button. I took a photo of the stamping on the silver plate on the left side of the shank to show that it was readable and undamaged by the cleanup work. I removed the stem from the shank and took a photo of the parts to give a sense of what the pipe looks like.I started my work on the inner edge and rim top with a folded piece of 220 grit sandpaper. It took some work but I was able to remove the damage and the darkening. It looked much better.I started polishing the smooth rim top with micromesh sanding pads. I dry sanded it with 1500-12000 grit pads. I wiped the bowl down after each pad with a damp cloth. The smooth rim top began to take on a rich shine and grain was beginning to stand out. I sanded with all of the pads and wiped the bowl down after each pad with a soft cloth. I rubbed the bowl and shank down with Before & After Restoration Balm to deep clean the finish on the bowl and shank. The product works to clean, enliven and protect the briar. I worked it in with my fingers to get it into the briar. I used a horsehair shoe brush to work it into the sand blast. I let it sit for 10 minutes then I wiped it off and buffed it with a soft cloth. The briar really began to have a rich shine. I took some photos of the bowl at this point to mark the progress in the restoration. It is a beautiful bowl. I polished the silver plaque on the left side of the shank with a jewellers cloth to remove the slight remaining oxidation and to protect and preserve it.I set the bowl aside and worked on the stem at this point in the process. I sanded out the chatter and marks on the stem surface with a set of 2 inch sanding pads for 320-3500 grit sanding pads. They work amazingly well and are easy to manage and sand close to the sharp edge of the button. I polished light tooth marks and chatter out of the stem with micromesh sanding pads – dry sanding with 1500-12000 grit pads. I wiped the stem down after each sanding pad with Obsidian Oil. I polished the stem with Before & After Pipe Stem Polish – both Fine and Extra Fine. I gave it a coat of Obsidian Pipe Stem Oil. It works to protect the stem from oxidizing. I set it aside to dry. I put the stem back on the Stanwell Pipe of the Year 1997 Danish Style Billiard and took it to the buffer. I buffed the bowl and stem with Blue Diamond to polish the briar and the vulcanite. Blue Diamond does a great job on the smaller scratches that remain in both. I gave the bowl multiple coats of Conservator’s Wax and the stem several coats of carnauba wax and buffed the pipe with a clean buffing pad to raise the shine. I hand buffed it with a microfiber cloth to deepen the shine. I am amazed at how well it turned out. The finished pipe is shown in the photos below. This is a beautiful Stanwell POY 1997 – the vulcanite taper stem and smooth rim top and sandblast finish combine to give the pipe a great look. The polished black, vulcanite stem looks really good with the rich browns standing out in the sandblast. The dimensions of the pipe are Length: 5 ½ inches, Height: 1 ¾ inch, Outside diameter of the bowl: 1 ¼ inch, Chamber diameter: ¾ of an inch. The weight of the pipe is 1.27 ounces/36 grams. This is another pipe that I will be putting on the rebornpipes online store in the Danish Pipe Pipemaking Companies Section shortly, if you are interested in adding it to your collection. Thanks for walking through the restoration with me on this beauty!

As always, I encourage your questions and comments as you read the blog. Thanks to each of you who are reading this blog. Remember we are not pipe owners; we are pipe men and women who hold our pipes in trust until they pass on into the trust of those who follow us. 

Stanwell POY 1991 Apple/Pot with a Vulcanite Taper Stem


Blog by Steve Laug

The next pipe I am working on was purchased on 12/13/2022 as part of a group of pipes from a fellow in Copenhagen, Denmark. This was another dirty pipe with a lot of wear and tear and obviously it had been someone’s favourite smoker. The pipe has an identifying plate on the left side of the shank that reads Stanwell [over] 1991. There was no other stamping on the shank and the silver plate confirmed for me that it was a Stanwell Pipe of the Year. The dirty sandblast finish was not able to hide the beauty in the grime. There were tars and oils ground into the surface of the briar. The bowl had a moderate cake that flowed over the top of the smooth rim in a light lava coat. The inner edge had some damage that left is rough and damaged. The stem was a black vulcanite taper stem with a silver Crown S on the left side. It had some light tooth marks and chatter on both sides ahead of the button. There was oxidation and calcification on both sides but it had a lot of potential. Jeff took photos of the pipes before he started his clean up work. Jeff took photos of the rim and bowl to show the moderate cake and spotty lava coat covering the rim top. The inner edge of the rim was rough and had some darkening around the bowl. It really was a dirty pipe but still a beauty. He also took photos of the stem surfaces to show its overall condition when it arrived. The photos of the sides and heel of the bowls show beautiful grain around the bowl and shank sides. The sandblast is nicely done and highlights the grain. The brown stain on the briar adds depth finish on the pipe and makes the grain really stand out on the smooth parts. It shows some promise. He also took a photo of the stamped silver plate on the topside of the shank. It reads as noted above.I turned to the internet to find out information about the Stanwell Pipe of the Year. I came across this interesting article and shape chart on the Blue Room Briars site where they listed a collection of the POYs (https://www.blueroombriars.com/blogs/news/the-stanwell-pipe-of-the-year-collection). I have included the shape chart and part of the article below for the information that it contains..…Recently, Blue Room Briars acquired a complete Stanwell Pipe of the Year (POY) collection spanning from 1980 – 2017. Looking at these pipes in detail reveals some interesting insights into Stanwell’s production, although it should be noted that these findings are not the final say on when a particular pipe was made, but we hope you can use it as a guide when trying to determine the era of manufacture for Stanwell pipes made after 1980. 

The first pipe of note is the 1980 POY. This pipe does not come with the engraved silver plaquette. The pipe also sports a traditional vulcanite mouthpiece.

Between 1981 and 1998, the Stanwell pipes from the POY collection have the addition of silver plaquettes denoting the year, a traditional vulcanite mouthpiece, and also have a Teflon lined mortise. This is an interesting feature that creates a very stable connection between the mortise and tenon, as well as allowing the mortise to be swabbed out easily for maintenance. It wouldn’t be unwarranted to believe that other Stanwell pipes with a Teflon sleeved mortise were probably made between the 1980s to late 1990s. This additional, and costly, feature demonstrates Stanwell’s commitment to quality manufacturing even into the last portion of the 20th century.

Jeff cleaned up the pipe for me. He reamed the bowl with a PipNet pipe reamer and cleaned it up with a Savinelli Fitsall Pipe Knife. He scrubbed the exterior with Murphy’s Oil Soap and a tooth brush to clean off the grime off the finish and the overflow of lava on the rim top. The cleaning had removed the grime on the rim top. He cleaned up the internals of the shank, mortise and stem with pipe cleaners, cotton swabs and alcohol to remove all of the oils and tars in the pipe. He soaked the stem in Briarvilles Pipe Stem Deoxidizer and was able to remove much of the oxidation, calcification. When it arrived here in Vancouver it was a clean pipe and I knew what I had to work with. I took photos of it before I started my part of the restoration.

I took a photo of the rim top and the stem to show their condition once it arrived in Canada. Jeff was able to clean up the cake and the lava overflow that was shown in the rim and bowl photos above. The rim top looked very good but there seemed to be light damage and darkening to the top and inner edge of the bowl. The stem looked better, though there were light tooth marks and chatter on both sides near the button. I took a photo of the stamping on the silver plate on the left side of the shank to show that it was readable and undamaged by the cleanup work. I removed the stem from the shank and took a photo of the parts to give a sense of what the pipe looks like.I started my work on the inner edge and rim top with a folded piece of 220 grit sandpaper. It took some work but I was able to remove the damage and the darkening. It looked much better.I started polishing the smooth rim top with micromesh sanding pads. I dry sanded it with 1500-12000 grit pads. I wiped the bowl down after each pad with a damp cloth. The smooth rim top began to take on a rich shine and grain was beginning to stand out. I sanded with all of the pads and wiped the bowl down after each pad with a soft cloth. I rubbed the bowl and shank down with Before & After Restoration Balm to deep clean the finish on the bowl and shank. The product works to clean, enliven and protect the briar. I worked it in with my fingers to get it into the briar. I used a horsehair shoe brush to work it into the sand blast. I let it sit for 10 minutes then I wiped it off and buffed it with a soft cloth. The briar really began to have a rich shine. I took some photos of the bowl at this point to mark the progress in the restoration. It is a beautiful bowl. I polished the silver plaque on the left side of the shank with a jewellers cloth to remove the slight remaining oxidation and to protect and preserve it. I set the bowl aside and worked on the stem at this point in the process. I sanded out the chatter and marks on the stem surface with a set of 2 inch sanding pads for 320-3500 grit sanding pads. They work amazingly well and are easy to manage and sand close to the sharp edge of the button.I polished light tooth marks and chatter out of the stem with micromesh sanding pads – dry sanding with 1500-12000 grit pads. I wiped the stem down after each sanding pad with Obsidian Oil. I polished the stem with Before & After Pipe Stem Polish – both Fine and Extra Fine. I gave it a coat of Obsidian Pipe Stem Oil. It works to protect the stem from oxidizing. I set it aside to dry.I put the stem back on the Stanwell Pipe of the Year 1991 Danish Style Pot and took it to the buffer. I buffed the bowl and stem with Blue Diamond to polish the briar and the vulcanite. Blue Diamond does a great job on the smaller scratches that remain in both. I gave the bowl multiple coats of Conservator’s Wax and the stem several coats of carnauba wax and buffed the pipe with a clean buffing pad to raise the shine. I hand buffed it with a microfiber cloth to deepen the shine. I am amazed at how well it turned out. The finished pipe is shown in the photos below. This is a beautiful Stanwell POY 1991 – the vulcanite taper stem and smooth rim top and sandblast finish combine to give the pipe a great look. The polished black, vulcanite stem looks really good with the rich browns standing out in the sandblast. The dimensions of the pipe are Length: 5 ½ inches, Height: 1 ½ inches, Outside diameter of the bowl: 1 1/8 inch, Chamber diameter: ¾ of an inch. The weight of the pipe is 1.31 ounces/37 grams. This is another pipe that I will be putting on the rebornpipes online store in the Danish Pipe Pipemaking Companies Section shortly, if you are interested in adding it to your collection. Thanks for walking through the restoration with me on this beauty!

As always, I encourage your questions and comments as you read the blog. Thanks to each of you who are reading this blog. Remember we are not pipe owners; we are pipe men and women who hold our pipes in trust until they pass on into the trust of those who follow us. 

Restoring a Fascinating Peterson Deluxe 595


Blog by Kenneth Lieblich

This is a pipe belonging to the father of a good friend. He told me there was nothing especially wrong with it, but it did need some spiffing up. The gentleman in question is a fine pipe smoker and has been in the “briar brigade” (I just made that up) for many years. I was happy to help him out. He said that the pipe had been given to him by his then-girlfriend (now wife) when they were courting in the 1960s. It was the first pipe he ever owned. The pipe is a Peterson Deluxe 595 bulldog. It’s a really handsome pipe — very classic-looking, well-smoked, and well-cared for. The markings on the pipe read Peterson’s [over] DeLuxe on the left of the shank. On the right side is Made in the [over] Republic [over] of Ireland, and next to that, the shape number 595. On the left side of the stem is the beautiful, stylized P of the Peterson company. That P must have had some colouring in it at some point, but it was long gone. It was hard to find any information about the 595. I was trying to research it and ended up circling around to a blog post that Steve did in 2020 about a 595 he worked on. That pipe and this pipe are very similar, but there are two crucial differences which I’ll mention in a moment. In Steve’s article of May 2020, he quotes from some email correspondence he had with Peterson expert, Mark Irwin, from Peterson Pipe Notes. I quote Irwin here regarding the 595:

Hey Steve, this is from the 500 shape group, although I’ve not documented the 595 before. It’s an upsized-version of the 80s. Peterson would call this shape a Rhodesian, incidentally, saving bulldog for their round shanks. You can see more 500s at https://petersonpipenotes.org/the-peterson-500-shapes-and-new-old-stock/. The POY 2019 for Peterson was taken from this group as well. I make the argument in that blog post that these shapes were made in the late 1970s and early 1980s when they owned their own US distributor, Allied, and were going after the US market. c. 1980-85, so Late Republic Era, 1969-1990.

If you read Steve blog post (found here), you’ll notice the two differences. First, the pipe I’ve got has the three-line version of “Made in the Republic of Ireland,” whereas Steve’s says “Made in Ireland”. Second, the pipe I’ve got has the P on the stem, whereas Steve’s does not.

However, there’s another wrinkle in this story. As I indicated earlier, the gentleman received this pipe in the 1960s in Hong Kong! I have no doubt that he is telling the truth, but I wasn’t able to square it with the information above. Due to my own ignorance, I also emailed Mark Irwin to clarify what was confusing me. He very kindly responded with the clarifying information. Among other things, he wrote

The 595 goes back to at least 1947’s catalog, and perhaps even before. I’ve attached that catalog for you, where you’ll find your pipe on p. 5.

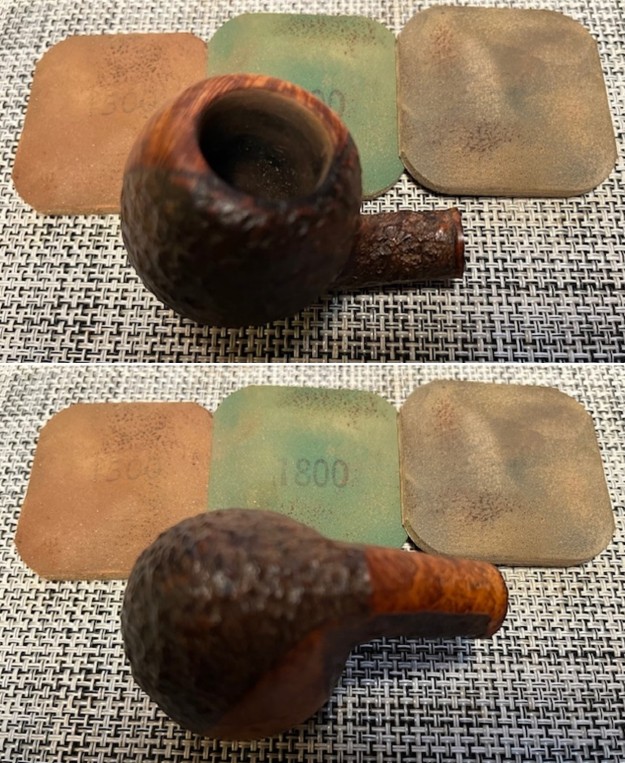
I have included that page below. Thanks to Mark (and the original owner), I can confirm that this pipe dates from the early to mid-1960s.Let’s have a look at the pipe. The stem had several tooth marks, plus some oxidation and calcification. Also, an extra bit of the end of the tenon was broken – I’d have to take a closer look at that. The stummel was in nice condition, no real scratches or damage — except on the rim. That had lots of lava, and what looked like considerable burning, but I’d have to check more closely later. Inside the bowl was a good amount of cake that would need to be cleaned out. On to work – I started with a BIC lighter and ‘painted’ the stem with its flame in order to lift the few bite marks and dents. This was not particularly successful in raising the damage, but did help a little.Next, I took a closer look at the broken tenon end. I’m not sure what happened there, but it was badly damaged and the only reasonable option was to remove it, as it could cause further problems. I then sanded down the end of the tenon to make it smooth and flat. Then I wiped the outside down with Murphy’s Oil Soap on some cotton pads and the inside with pipe cleaners and lemon-infused isopropyl alcohol. Once this process was done, the stem went for an overnight soak in the Pipe Stem Oxidation Remover. The next day, I wiped down the stem with SoftScrub cleaner and some cotton rounds to remove surface oxidation. After that, I used some gold Rub’n’Buff to fill in the P on the stem. This P would have been gold coloured originally.I also built up the tooth dents (pun intended) on the stem with cyanoacrylate adhesive and let them fully cure.  I then sanded the adhesive down – first with a small file, then with 400-grit sandpaper to meld seamlessly into the stem. I then used all nine Micromesh pads (1,500 through 12,000 grit) to bring out the lovely black lustre on the stem. I also used Obsidian Pipe Stem Oil in between each pad scrubbing. Moving on to the stummel, I used the PipNet Reamer to remove the built-up cake and followed that with 220-grit sandpaper taped to a dowel to eliminate as much as I could. I took the chamber down to bare briar, as I wanted to ensure there were no hidden flaws in the wall. Fortunately, there were none. Next, I took a dental tool and gently ran it along the grooves of the outside of the bowl to clear out any filth in there. In order to save as much of the rim as possible, I used a piece of machine metal to very delicately scrape away as much burnt material as I could. I do this before automatically jumping to my topping board; this gentle scraping revealed far more burn damage than I had anticipated, so it would need more work later.For now, I proceeded to clean out the insides of the shank with Q-tips, pipe cleaners, and lemon-infused isopropyl alcohol. There was quite a bit of filth inside this stummel and it took a fair amount of cotton to get it clean. That done, I decided to de-ghost the pipe in order to remove any lingering smells of the past. I thrust cotton balls into the bowl and the shank and saturated them with 99% isopropyl alcohol. I let the stummel sit overnight. This caused any remaining oils, tars and smells to leach out into the cotton. The bowl was nice and clean after this.I followed that up by cleaning the outside with Murphy’s and the insides with some Castile soap and tube brushes. After all this cleaning, I took a closer look at the damage to the rim. As the photo shows, the damage was considerable. At this point, I asked the owner if he wanted me to remove all the burn marks, which would entail significant removal of briar, or simply deal with the surface damage and leave the wood intact. He opted for the latter (correctly, in my view). The burns would remain on this pipe, but they are part of its story – and that is just fine.In order to remove some remaining burns on the rim, I did ultimately “top” the pipe – that is to say, I gently and evenly sanded down the rim on a piece of 220-grit sandpaper. This effectively removed the surface damage, without altering the look of the pipe.I also took a wooden sphere, wrapped a piece of 220-grit sandpaper around it, and sanded the inner side of the chamber. This achieved two things: first, it removed some of the burn marks on the inner edge of the rim; and second (and more importantly), the circular shape and motion of the sphere gradually returned the edge to a perfect circle.With all that done, I polished it up with all nine of my Micromesh pads. After that, a light application of Before & After Restoration Balm brought out the best in the stummel’s grain. Of course, the final step is buffing with some White Diamond and a few coats of carnauba wax.This is a beautiful pipe with an interesting history. I was delighted and honoured to be a part of it! I hope you enjoyed reading the story of this pipe as much I as I did restoring it. If you are interested in more of my work, please follow me here on Steve’s website or email me directly at kenneth@knightsofthepipe.com. The approximate dimensions of the pipe are as follows: length 5¼ in. (134 mm); height 1½ in. (37 mm); bowl diameter 1½ in. (39 mm); chamber diameter ¾ in. (18 mm). The weight of the pipe is 1⅛ oz. (34 g). Thank you very much for reading and, as always, I welcome and encourage your comments.

Have a look at this restored Danish Stanwell POY 1995 Saddle Stem Billiard


Blog by Steve Laug

The next pipe I am working on was purchased on 12/13/2022 as part of a group of pipes from a fellow in Copenhagen, Denmark. This was another dirty pipe with a lot of wear and tear and obviously it had been someone’s favourite smoker. The pipe has an identifying plate on the topside of the shank that reads Stanwell [over] 1995. There was no other stamping on the shank and the silver plate confirmed for me that it was a Stanwell Pipe of the Year. The dirty sandblast finish was not able to hide the beauty in the grime. There were tars and oils ground into the surface of the briar. The bowl had a thick cake that flowed over the top of the smooth rim in lava making it hard to assess the condition of the inner edge. The stem was a black vulcanite saddle stem with a silver Crown S on the left side. It had some tooth marks and chatter on both sides ahead of the button. There was oxidation and calcification on both sides but it had a lot of potential. Jeff took photos of the pipes before he started his clean up work.  Jeff took photos of the rim and bowl to show the moderate cake and spotty lava coat covering the rim top. It really was a dirty pipe but still a beauty. He also took photos of the stem surfaces to show its overall condition when it arrived. The photos of the sides and heel of the bowls show beautiful grain around the bowl and shank sides. The sandblast is nicely done and highlights the grain. The brown stain on the briar adds depth finish on the pipe and makes the grain really stand out on the smooth parts. It shows some promise. He also took a photo of the stamped silver plate on the topside of the shank. It reads as noted above.I turned to the internet to find out information about the Stanwell Pipe of the Year. I came across this interesting article and shape chart on the Blue Room Briars site where they listed a collection of the POYs (https://www.blueroombriars.com/blogs/news/the-stanwell-pipe-of-the-year-collection). I have included the shape chart and part of the article below for the information that it contains..…Recently, Blue Room Briars acquired a complete Stanwell Pipe of the Year (POY) collection spanning from 1980 – 2017. Looking at these pipes in detail reveals some interesting insights into Stanwell’s production, although it should be noted that these findings are not the final say on when a particular pipe was made, but we hope you can use it as a guide when trying to determine the era of manufacture for Stanwell pipes made after 1980. 

The first pipe of note is the 1980 POY. This pipe does not come with the engraved silver plaquette. The pipe also sports a traditional vulcanite mouthpiece.

Between 1981 and 1998, the Stanwell pipes from the POY collection have the addition of silver plaquettes denoting the year, a traditional vulcanite mouthpiece, and also have a Teflon lined mortise. This is an interesting feature that creates a very stable connection between the mortise and tenon, as well as allowing the mortise to be swabbed out easily for maintenance. It wouldn’t be unwarranted to believe that other Stanwell pipes with a Teflon sleeved mortise were probably made between the 1980s to late 1990s. This additional, and costly, feature demonstrates Stanwell’s commitment to quality manufacturing even into the last portion of the 20th century.

Jeff cleaned up the pipe for me. He reamed the bowl with a PipNet pipe reamer and cleaned it up with a Savinelli Fitsall Pipe Knife. He scrubbed the exterior with Murphy’s Oil Soap and a tooth brush to clean off the grime off the finish and the overflow of lava on the rim top. The cleaning had removed the grime on the rim top. He cleaned up the internals of the shank, mortise and stem with pipe cleaners, cotton swabs and alcohol to remove all of the oils and tars in the pipe. He soaked the stem in Briarvilles Pipe Stem Deoxidizer and was able to remove much of the oxidation, calcification. When it arrived here in Vancouver it was a clean pipe and I knew what I had to work with. I took photos of it before I started my part of the restoration. I took a photo of the rim top and the stem to show their condition once it arrived in Canada. Jeff was able to clean up the cake and the lava overflow that was shown in the rim and bowl photos above. The rim top looked very good but there seemed to be light damage and darkening to the top and inner edge of the bowl. The stem looked better, though there were light tooth marks and chatter on both sides near the button. I took a photo of the stamping on the silver plate on the left side of the shank to show that it was readable and undamaged by the cleanup work. I removed the stem from the shank and took a photo of the parts to give a sense of what the pipe looks like. I started my work on the inner edge and rim top with a folded piece of 220 grit sandpaper. It took some work but I was able to remove the damage and the darkening. It looked much better.I started polishing the smooth rim top with micromesh sanding pads. I dry sanded it with 1500-12000 grit pads. I wiped the bowl down after each pad with a damp cloth. The smooth rim top began to take on a rich shine and grain was beginning to stand out. I sanded with all of the pads and wiped the bowl down after each pad with a soft cloth. I rubbed the bowl and shank down with Before & After Restoration Balm to deep clean the finish on the bowl and shank. The product works to clean, enliven and protect the briar. I worked it in with my fingers to get it into the briar. I used a horsehair shoe brush to work it into the sand blast. I let it sit for 10 minutes then I wiped it off and buffed it with a soft cloth. The briar really began to have a rich shine. I took some photos of the bowl at this point to mark the progress in the restoration. It is a beautiful bowl. I polished the silver plaque on the topside of the shank with a jewellers cloth to remove the slight remaining oxidation and to protect and preserve it. I set the bowl aside and worked on the stem at this point in the process. I sanded out the chatter and marks on the stem surface with a set of 2 inch sanding pads for 320-3500 grit sanding pads. They work amazingly well and are easy to manage and sand close to the sharp edge of the button.I polished light tooth marks and chatter out of the stem with micromesh sanding pads – dry sanding with 1500-12000 grit pads. I wiped the stem down after each sanding pad with Obsidian Oil. I polished the stem with Before & After Pipe Stem Polish – both Fine and Extra Fine. I gave it a coat of Obsidian Pipe Stem Oil. It works to protect the stem from oxidizing. I set it aside to dry. I put the stem back on the Stanwell Pipe of the Year 1995 Danish Style Billiard and took it to the buffer. I buffed the bowl and stem with Blue Diamond to polish the briar and the vulcanite. Blue Diamond does a great job on the smaller scratches that remain in both. I gave the bowl multiple coats of Conservator’s Wax and the stem several coats of carnauba wax and buffed the pipe with a clean buffing pad to raise the shine. I hand buffed it with a microfiber cloth to deepen the shine. I am amazed at how well it turned out. The finished pipe is shown in the photos below. This is a beautiful Stanwell POY 1995 – the vulcanite taper stem and smooth rim top and sandblast finish combine to give the pipe a great look. The polished black, vulcanite stem looks really good with the rich browns standing out in the sandblast. The dimensions of the pipe are Length: 5 inches, Height: 1 ¾ inches, Outside diameter of the bowl: 1 inch, Chamber diameter: ¾ of an inch. The weight of the pipe is 1.38 ounces/39 grams. This is another pipe that I will be putting on the rebornpipes online store in the Danish Pipe Pipemaking Companies Section shortly, if you are interested in adding it to your collection. Thanks for walking through the restoration with me on this beauty!

As always, I encourage your questions and comments as you read the blog. Thanks to each of you who are reading this blog. Remember we are not pipe owners; we are pipe men and women who hold our pipes in trust until they pass on into the trust of those who follow us. 

A Henry Leonard & Thomas Inc. Royalton Crown Billiard Restoration


Nice job on that one John. I like these odd pipes that are apart of the quest for a cooler, drier smoke.

Written and photographed by John M. Young I love to read old pipe advertisements from the 1940s and 1950s.  Where else can you find gems like “bitter…

A Henry Leonard & Thomas Inc. Royalton Crown Billiard Restoration

Restoring a Family Heirloom Brigham Select Canada Two Dot 289 Bent Acorn


Blog by Steve Laug

The pipe on the table is a rusticated Brigham Bent Acorn that came to me for restoration from a Alex who shipped it to me from Quebec. He had written recently to ask about restoring the pipe. Here is what he wrote at that point.

Hello,

I was gifted a Brigham from my grandfather who passed away in 1982.

The pipe still has the filter and had tobacco that I tossed out. It has heavy cake, the bottom of the bowl is now V shape and not U shape.

Also, I can’t get a pipe cleaner to pass the shank and get into the bowl, yet I can get air when I sip it.

How much would it cost to restore this pipe?

Thanks, Alex

We discussed what it would cost and chatted back and forth through emails. I asked him to send me some photos of the pipe so I could see what I would be dealing with. He sent the photos that I have included below that really give a clear picture of the pipe and what needs to be done with it. I told him I would take it on and he dropped it into the post for me to work on. The pipe arrived in Vancouver in this morning’s post. I opened the box and I examined the pipe carefully and no additional issues arose that I had not seen in the photos that Alex sent. I wrote Alex an email regarding what I saw. Here is my assessment:

  1. The bowl is thickly caked as you noted and it is hard cake. No issues that I can see there though. Once I ream it I will know what the briar is like on the inside.
  2. Rim top has a thick lava overflow on the top along the back and the inner edge. Will know more about the condition of the edge once I ream it.
  3. The finish on the bowl was very dirty with grime and grit ground into the rustication on the finish. The smooth portions had sticky spots of tars and oils on the surface.
  4. The stem fit very tightly due to a thick tar coating on the inside of the shank but no issues there. No cracks in the shank.
  5. The filter is as you guessed garbage but once I have cleaned the pipe I will replace it with a new one.
  6. Aluminum tenon/holder for the filter is dirty and has some oxidation at the stem end.
  7. The inside of the stem is filthy but easy to clean.
  8. Stem is badly oxidized but the tooth marks are very light and the tooth chatter is also very light.

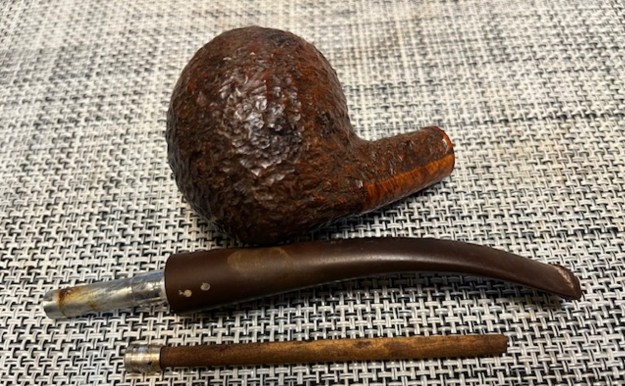
This Brigham is stamped on a smooth panel on the underside of the shank and reads 289 (shape number) followed by Brigham in script (over) Canada. There was a thick cake in the bowl leaving it almost conical as Alex noted. There was a lava overflow on the smooth rim top that was heavier on the back side of the top. The inner edge of the bowl were in good condition with a few small nicks and some darkening. The rusticated finish is dirty and dusty. The stem was oxidized and spotty on the top and underside and around the shank end. The stem did not have tooth marks or chatter. There were two brass dots on the left side of the taper stem. I took photos of the pipe before I started my cleanup work on it. I took a close-up photo of the bowl and rim top to show the cake in the bowl. The rim top shows the thick lava on the back half of the rim top. The inner edge of the bowl shows an overflow of thick lava and cake. I took photos of the top and underside of the stem surface and button to show its general condition. It looked very good under the spotty oxidation. I took a photo of the stamping on the underside of the shank on the smooth patch. It is very clear and readable.I removed the stem from the shank and was not surprised to see the Brigham Hard Maple filter in the metal tenon. You can see the two brass dots on the left side of the stem in the photo below. I thought it would be helpful to give you all the background of the brand for those unfamiliar with the brand. I am including the information from Pipedia on Brigham pipes. It is a great read in terms of the history and background on the pipes (https://pipedia.org/wiki/Brigham_Pipes). Charles Lemon (Dadspipes) has recently published a book on the history of the brand. If you can get a hold of a copy it is a great read. The Pipedia article is a good summary. I have included it below.

Roy Brigham, after serving an apprenticeship under an Austrian pipesmith, started his own pipe repair shop in Toronto, in 1906. By 1918 the business had grown to include five other craftsmen and had developed a reputation across Canada for the high quality of workmanship. After repairing many different brands of pipes over the years, Roy noted certain recurring complaints by pipe smokers, the most common referred to as “tongue bite”. Tongue bite is a burning sensation on the smoker’s tongue, previously thought to be due to the heat of the smoke (i.e. a “hot smoking pipe”).

He soon began manufacturing his own pipes, which were lightweight, yet featured a more rugged construction, strengthening the weak points observed in other pipes. The problem of tongue bite intrigued him, and he decided to make overcoming it a future goal.

About 1938, Roy’s son Herb joined him to assist in the business. The business barely survived the great depression because pipes were considered to be a luxury, not a necessity, and selling pipes was difficult indeed. In approximately 1937 [1], after some experimentation, Roy and Herb discovered that tongue bite was in fact a form of mild chemical burn to the tongue, caused by tars and acids in the smoke. They found that by filtering the smoke, it was possible to retain the flavour of the tobacco and yet remove these impurities and thereby stop the tongue bite.

Just as Thomas Edison had searched far and wide for the perfect material from which to make the first electric light bulb filaments, Roy & Herb began experimenting with many materials, both common and exotic, in the quest for the perfect pipe filter. Results varied wildly. Most of the materials didn’t work at all and some actually imparted their own flavour into the smoke. They eventually found just two materials that were satisfactory in pipes: bamboo and rock maple. As bamboo was obviously not as readily available, rock maple then became the logical choice.

They were able to manufacture a replaceable hollow wooden tube made from rock maple dowelling, which when inserted into a specially made pipe, caused absolutely no restriction to the draw of the pipe, yet extracted many of the impurities which had caused tongue bite. The result was indeed a truly better smoking pipe…

Charles Lemon has also written a great article on the stamping and marking on the Brigham pipes that fit into a time line that he has drafted. It is well worth a read and is fascinating. (https://pipedia.org/wiki/Brigham_Pipes_%E2%80%93_A_Closer_Look_at_Dots,_Dates_and_Markings). I quote from the pertinent section on the time frame for this pipe.

I have dubbed the decades between 1980 and 2000 the Late Canadian Era, a period that saw several changes at Brigham that are of note to the collector. First, the traditional 8-grade pinning system (the famous Brigham “Dots” which denoted the quality of the pipe) was changed to a 7-grade system to simplify pinning (more on this below), and the Norsemen and Valhalla series were merged to form the President Series, which represented the very finest pipes coming out of the Toronto factory. Early pipes from this era (left, below) are stamped with a shape number and “Brigham” over “Canada”; later pipes (late 1980s+, on right below) are stamped simply with a shape number and the Brigham logo.

This solidly places the pipe I am working on in the period of Brigham production that Charles calls the Late Canadian Era (1980-2000). It is a great looking pipe with a slightly different rustication pattern than some of the early Brighams I have worked on.

Charles also put together a chart that helps the restorer to understand the Brigham dot system. I quote from the same link on Pipedia as noted above. Since this pipe could be from the 1980s I have included the chart below.

The Original Brigham Dot System 1938 – 1980

Brigham pipes are renown in the pipe world for their famous “Brigham Dots”, a system of brass pins inset in the stem to denote the grade of each pipe. The original 8-grade pinning system, used for 42 years between 1938 and 1978 (spanning the Patent, Post-Patent and Canadian Eras) looked like this:

With the information from Charles’ article and the chart above I knew what I was dealing with in terms of the stamping and the age of this pipe. The pipe was made between in 1970-1980 because of the style of the stamping noted above. The 2 dots on the pipe told me that it was a Brigham Select. Now it was time to work on the pipe.

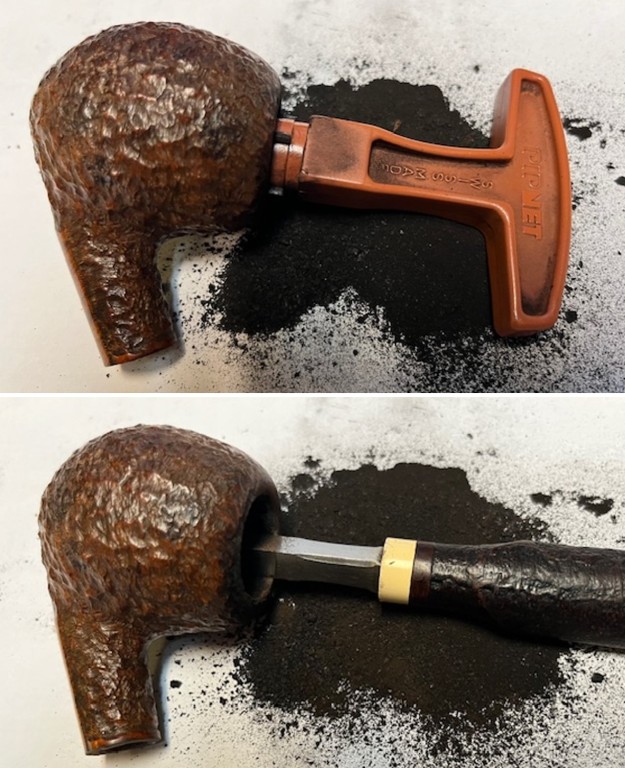
I began my work by reaming the bowl with a PipNet pipe reamer using the third cutting head to take the cake back to bare briar. I cleaned up the reaming with a Savinelli Fitsall Pipe Knife. I sanded the bowl walls with 220 grit sandpaper wrapped around a piece of dowel. The walls were clean and showed no damage from heat. I scrubbed the exterior of the bowl and the rim a tooth brush and undiluted Murphy’s Oil Soap. It looked much better and the dust and debris was gone. I used a brass bristle wire brush to cleanup the thick cake on the rim top. It worked very well to remove the remnant on the top of the rim. It looks much better.I scrubbed out the internals with 99% isopropyl alcohol, pipe cleaners and cotton swabs until the shank and the airway into the bowl and the stem were clean. I worked on the rim top and inner edge of the bowl with a folded piece of 220 grit sandpaper to remove the damage and marks.I polished the smooth rim top and smooth patches on the bowl sides with 1500-12000 grit micromesh sanding pads. I wiped it down with a damp cloth after each pad. The rim top and patches took on a deep shine that highlighted the grain. I worked some Before & After Restoration Balm into the surface of the briar with my fingertips and a horsehair shoe brush to clean, enliven and protect the briar. I let the balm sit for 15 minutes and then buffed with a cotton cloth to raise the shine. The photos show the bowl at this point in the restoration process. With that done, the bowl was finished other than the final buffing. I set it aside and turned my attention to the stem. I scrubbed the surface of the stem with Soft Scrub to remove the oxidation on the surface of the vulcanite. It came out looking much better.I sanded out the remaining oxidation and the tooth marks with 320-3500 grit sanding pads. They take the surface from rough to shiny by the time I use the 3500 grit pad. Before polishing the stem further, I decided to fit it with a new Rock Maple Distillator.I polished the stem with micromesh sanding pads – wet sanding with 1500-12000 grit sanding pads. I wiped it down after each sanding pad with Obsidian Oil. I finished polishing it with Before & After Pipe Stem Polish – both Fine and Extra Fine and buffed it off with a cotton cloth. I gave it a coat of Obsidian Oil to preserve and protect the stem. I am excited to finish this Brigham Canada 289 Bent Acorn. I put the pipe back together and buffed it with Blue Diamond on the buffing wheel. I gave the bowl multiple coats of Conservator’s Wax and the stem multiple coats of carnauba wax. I buffed the pipe with a clean buffing pad to raise the shine and hand buffed it with microfiber cloth to deepen the shine. It is fun to see what the polished bowl looks like with the rusticated finish. Added to that the polished black vulcanite stem with the shining brass pins was beautiful. This mixed grain on the rusticated Brigham Select 2 Dot 289 Bent Acorn is nice looking and the pipe feels great in my hand. It is light and well balanced. Have a look at it with the photos below. The dimensions are Length: 6 inches, Height: 2 inches, Outside diameter of the bowl: 1 ½ inches, Chamber diameter: ¾ of an inch. The weight of the pipe is 1.69 ounces/48 grams. It is a beautiful pipe and one that will be heading back to Alex to smoke in memory of his Grandfather. Thanks for walking through the cleanup with me as I worked over this pipe.

As always, I encourage your questions and comments as you read the blog. Thanks to each of you who are reading this blog. Remember we are not pipe owners; we are pipe men and women who hold our pipes in trust until they pass on into the trust of those who follow us.

Restoring a Stanwell Pipe of the Year 1987 Dublin


Blog by Steve Laug

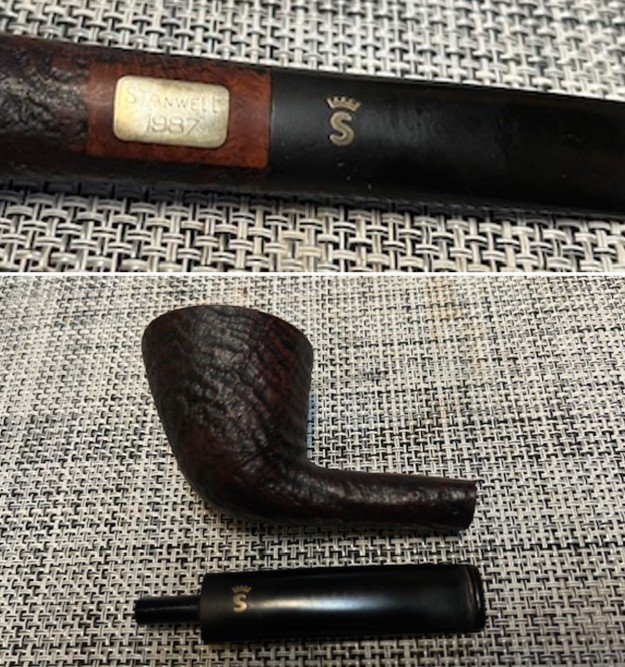
The next pipe I am working on was purchased on 12/13/2022 as part of a group of pipes from a fellow in Copenhagen, Denmark. This was a dirty pipe with a lot of wear and tear and obviously it had been someone’s favourite smoker. The pipe has an identifying plate on the topside of the shank that reads Stanwell [over] 1987. There was no other stamping on the shank and the silver plate confirmed for me that it was a Stanwell Pipe of the Year. The dirty sandblast finish was not able to hide the beauty in the grime. There were tars and oils ground into the surface of the briar. The bowl had a moderate cake that flowed over the top of the smooth rim in a spotty coat of a lava and it was hard to assess the condition of the inner edge. The stem was a black vulcanite taper stem with a silver Crown S on the topside. It had some tooth marks and chatter on both sides ahead of the button. I had a lot of oxidation and calcification on both sides of the stem. It had a lot of potential. Jeff took photos of the pipes before he started his clean up work. Jeff took photos of the rim and bowl to show the moderate cake and spotty lava coat covering the rim top. There appeared to be a fill in a flaw on the rim top and inner edge at the left rear of the bowl. It really was a dirty pipe but still a beauty. He also took photos of the stem surfaces to show its overall condition when it arrived. The photos of the sides and heel of the bowls show beautiful grain around the bowl and shank sides. The sandblast is nicely done and highlights the grain. The brown stain on the briar adds depth finish on the pipe and makes the grain really stand out on the smooth parts. It shows some promise. He also took a photo of the stamped silver plate on the topside of the shank. It reads as noted above. The silver crown “S” inlay on the top of the stem is tarnished but a beauty.I turned to the internet to find out information about the Stanwell Pipe of the Year. I came across this interesting article and shape chart on the Blue Room Briars site where they listed a collection of the POYs (https://www.blueroombriars.com/blogs/news/the-stanwell-pipe-of-the-year-collection). I have included the shape chart and part of the article below for the information that it contains.…Recently, Blue Room Briars acquired a complete Stanwell Pipe of the Year (POY) collection spanning from 1980 – 2017. Looking at these pipes in detail reveals some interesting insights into Stanwell’s production, although it should be noted that these findings are not the final say on when a particular pipe was made, but we hope you can use it as a guide when trying to determine the era of manufacture for Stanwell pipes made after 1980. 

The first pipe of note is the 1980 POY. This pipe does not come with the engraved silver plaquette. The pipe also sports a traditional vulcanite mouthpiece.

Between 1981 and 1998, the Stanwell pipes from the POY collection have the addition of silver plaquettes denoting the year, a traditional vulcanite mouthpiece, and also have a Teflon lined mortise. This is an interesting feature that creates a very stable connection between the mortise and tenon, as well as allowing the mortise to be swabbed out easily for maintenance. It wouldn’t be unwarranted to believe that other Stanwell pipes with a Teflon sleeved mortise were probably made between the 1980s to late 1990s. This additional, and costly, feature demonstrates Stanwell’s commitment to quality manufacturing even into the last portion of the 20th century.

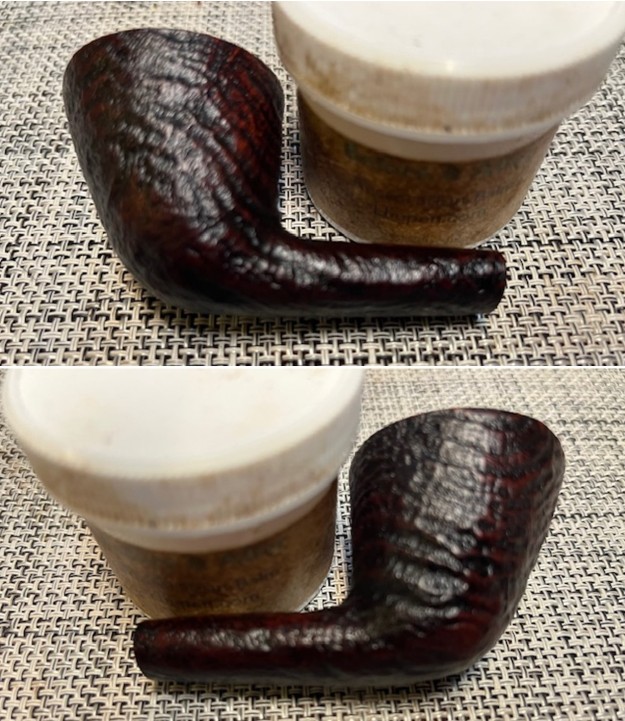
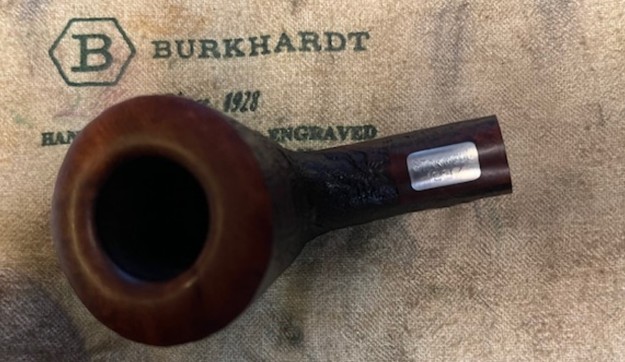
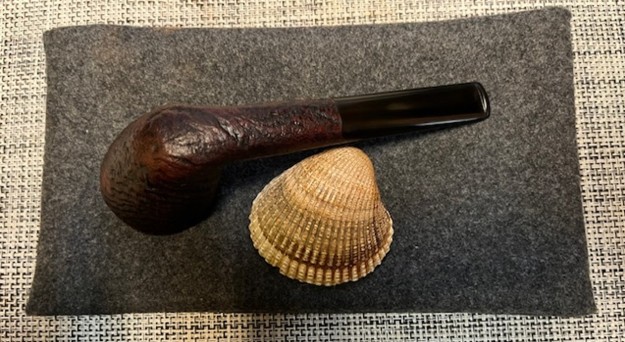
Jeff cleaned up the pipe for me. He reamed the bowl with a PipNet pipe reamer and cleaned it up with a Savinelli Fitsall Pipe Knife. He scrubbed the exterior with Murphy’s Oil Soap and a tooth brush to clean off the grime off the finish and the overflow of lava on the rim top. The cleaning had removed the grime on the rim top. He cleaned up the internals of the shank, mortise and stem with pipe cleaners, cotton swabs and alcohol to remove all of the oils and tars in the pipe. He soaked the stem in Briarvilles Pipe Stem Deoxidizer and was able to remove much of the oxidation, calcification. When it arrived here in Vancouver it was a clean pipe and I knew what I had to work with. I took photos of it before I started my part of the restoration. I took a photo of the rim top and the stem to show their condition once it arrived in Canada. Jeff was able to clean up the cake and the lava overflow that was shown in the rim and bowl photos above. The rim top looked very good but there seemed to be light damage and darkening to the top and inner edge of the bowl. The stem looked better, though there were light tooth marks and chatter on both sides near the button. I took a photo of the stamping on the silver plate on the topside of the shank to show that it was readable and undamaged by the cleanup work. I removed the stem from the shank and took a photo of the parts to give a sense of what the pipe looks like.I started my work on the inner edge and rim top with a folded piece of 220 grit sandpaper. I also used a wooden ball and a piece of 220 grit sandpaper to clean up the inner bevel of the rim. It took some work but I was able to remove the damage and the darkening. It looked much better. I started polishing the smooth rim top with micromesh sanding pads. I dry sanded it with 1500-12000 grit pads. I wiped the bowl down after each pad with a damp cloth. The smooth rim top began to take on a rich shine and grain was beginning to stand out. You can also see the fill on the left rear of the rim top. I sanded with all of the pads and wiped the bowl down after each pad with a soft cloth. I rubbed the bowl and shank down with Before & After Restoration Balm to deep clean the finish on the bowl and shank. The product works to clean, enliven and protect the briar. I worked it in with my fingers to get it into the briar. I used a horsehair shoe brush to work it into the sand blast. I let it sit for 10 minutes then I wiped it off and buffed it with a soft cloth. The briar really began to have a rich shine. I took some photos of the bowl at this point to mark the progress in the restoration. It is a beautiful bowl. I polished the silver plaque on the topside of the shank with a jewellers cloth to remove the slight remaining oxidation and to protect and preserve it. I set the bowl aside and worked on the stem at this point in the process. I “painted” the stem surface with the flame of a Bic Lighter to lift the tooth marks on both sides. I was able to lift the majority of them. I filled in one mark on each side of the stem ahead of the button. I used a small file to flatten out the repairs. I sanded the stem surface with a folded piece of 220 grit sandpaper. I polished the vulcanite stem surface and repairs near the button with a new product I am using. I ordered a set of 2 inch sanding pads for 320-3500 grit sanding pads from Amazon. They work amazingly well and are easy to manage and sand close to the sharp edge of the button. I polished light tooth marks and chatter out of the stem with micromesh sanding pads – dry sanding with 1500-12000 grit pads. I wiped the stem down after each sanding pad with Obsidian Oil. I polished the stem with Before & After Pipe Stem Polish – both Fine and Extra Fine. I gave it a coat of Obsidian Pipe Stem Oil. It works to protect the stem from oxidizing. I set it aside to dry.I put the stem back on the Stanwell Pipe of the Year 1987 Dublin pipe and took it to the buffer. I buffed the bowl and stem with Blue Diamond to polish the briar and the vulcanite. Blue Diamond does a great job on the smaller scratches that remain in both. I gave the bowl multiple coats of Conservator’s Wax and the stem several coats of carnauba wax and buffed the pipe with a clean buffing pad to raise the shine. I hand buffed it with a microfiber cloth to deepen the shine. I am amazed at how well it turned out. The finished pipe is shown in the photos below. This is a beautiful Stanwell POY 1987 – the vulcanite taper stem and smooth rim top and sandblast finish combine to give the pipe a great look. The polished black, vulcanite stem looks really good with the rich browns standing out in the sandblast. The dimensions of the pipe are Length: 5 ½ inches, Height: 1 ½ inches, Outside diameter of the bowl: 1 ½ inch, Chamber diameter: ¾ of an inch. The weight of the pipe is 1.20 ounces/34 grams. This is another pipe that I will be putting on the rebornpipes online store in the Danish Pipe Pipemaking Companies Section shortly, if you are interested in adding it to your collection. Thanks for walking through the restoration with me on this beauty!

As always, I encourage your questions and comments as you read the blog. Thanks to each of you who are reading this blog. Remember we are not pipe owners; we are pipe men and women who hold our pipes in trust until they pass on into the trust of those who follow us. 

New Life for a Stanwell Pipe of the Year 1988 Apple


Blog by Steve Laug

The next pipe I am working on was purchased on 12/13/2022 as part of a group of pipes from a fellow in Copenhagen, Denmark. This was a dirty pipe with a lot of wear and tear and obviously it had been someone’s favourite smoker. The pipe has an identifying plate on the topside of the shank that reads Stanwell [over] 1988. There was no other stamping on the shank and the silver plate confirmed for me that it was a Stanwell Pipe of the Year. The dirty sandblast finish was not able to hide the beauty in the grime. There were tars and oils ground into the surface of the briar. The bowl had a thick cake that flowed over the top of the smooth rim in a thick coat of a lava and it was hard to assess the condition of the inner edge. The stem was a black vulcanite saddle stem with a silver Crown S on the topside of the saddle. It had some tooth marks and chatter on both sides ahead of the button. I had a lot of oxidation and calcification on both sides of the stem. It had a lot of potential. Jeff took photos of the pipes before he started his clean up work. Jeff took photos of the rim and bowl to show the moderate cake and spotty lava coat covering the rim top. It really was a dirty pipe but still a beauty. He also took photos of the stem surfaces to show its overall condition when it arrived. The photos of the sides and heel of the bowls show beautiful grain around the bowl and shank sides. The sandblast is nicely done and highlights the grain. The brown stain on the briar adds depth finish on the pipe and makes the grain really stand out on the smooth parts. It shows some promise. He also took a photo of the stamped silver plate on the topside of the shank. It reads as noted above. I turned to the internet to find out information about the Stanwell Pipe of the Year. I came across this interesting article and shape chart on the Blue Room Briars site where they listed a collection of the POYs (https://www.blueroombriars.com/blogs/news/the-stanwell-pipe-of-the-year-collection). I have included the shape chart and part of the article below for the information that it contains.…Recently, Blue Room Briars acquired a complete Stanwell Pipe of the Year (POY) collection spanning from 1980 – 2017. Looking at these pipes in detail reveals some interesting insights into Stanwell’s production, although it should be noted that these findings are not the final say on when a particular pipe was made, but we hope you can use it as a guide when trying to determine the era of manufacture for Stanwell pipes made after 1980. 

The first pipe of note is the 1980 POY. This pipe does not come with the engraved silver plaquette. The pipe also sports a traditional vulcanite mouthpiece.

Between 1981 and 1998, the Stanwell pipes from the POY collection have the addition of silver plaquettes denoting the year, a traditional vulcanite mouthpiece, and also have a Teflon lined mortise. This is an interesting feature that creates a very stable connection between the mortise and tenon, as well as allowing the mortise to be swabbed out easily for maintenance. It wouldn’t be unwarranted to believe that other Stanwell pipes with a Teflon sleeved mortise were probably made between the 1980s to late 1990s. This additional, and costly, feature demonstrates Stanwell’s commitment to quality manufacturing even into the last portion of the 20th century.

Jeff cleaned up the pipe for me. He reamed the bowl with a PipNet pipe reamer and cleaned it up with a Savinelli Fitsall Pipe Knife. He scrubbed the exterior with Murphy’s Oil Soap and a tooth brush to clean off the grime off the finish and the overflow of lava on the rim top. The cleaning had removed the grime on the rim top. He cleaned up the internals of the shank, mortise and stem with pipe cleaners, cotton swabs and alcohol to remove all of the oils and tars in the pipe. He soaked the stem in Briarvilles Pipe Stem Deoxidizer and was able to remove much of the oxidation, calcification. When it arrived here in Vancouver it was a clean pipe and I knew what I had to work with. I took photos of it before I started my part of the restoration. I took a photo of the rim top and the stem to show their condition once it arrived in Canada. Jeff was able to clean up the cake and the lava overflow that was shown in the rim and bowl photos above. The rim top looked very good but there seemed to be light damage and darkening to the top and inner edge of the bowl. The stem looked better, though there were light tooth marks and chatter on both sides near the button. I took a photo of the stamping on the silver plate on the left side of the shank to show that it was readable and undamaged by the cleanup work. I removed the stem from the shank and took a photo of the parts to give a sense of what the pipe looks like. I started my work on the inner edge and rim top with a folded piece of 220 grit sandpaper. I was able to remove the damage and the darkening. It looked much better.I started polishing the smooth rim top with micromesh sanding pads. I dry sanded it with 1500-12000 grit pads. I wiped the bowl down after each pad with a damp cloth. The smooth rim top began to take on a rich shine and grain was beginning to stand out. I sanded with all of the pads and wiped the bowl down after each pad with a soft cloth. I rubbed the bowl and shank down with Before & After Restoration Balm to deep clean the finish on the bowl and shank. The product works to clean, enliven and protect the briar. I worked it in with my fingers to get it into the briar. I used a horsehair shoe brush to work it into the sand blast. I let it sit for 10 minutes then I wiped it off and buffed it with a soft cloth. The briar really began to have a rich shine. I took some photos of the bowl at this point to mark the progress in the restoration. It is a beautiful bowl. I polished the silver plaque on the topside of the shank with a jewellers cloth to remove the slight remaining oxidation and to protect and preserve it. I set the bowl aside and worked on the stem at this point in the process. I “painted” the stem surface with the flame of a Bic Lighter to lift the tooth marks on both sides. I was able to lift the majority of them. I filled in one mark on each side of the stem ahead of the button. I used a small file to flatten out the repairs. I sanded the stem surface with a folded piece of 220 grit sandpaper. I polished the vulcanite stem surface and repairs near the button with a new product I am using. I ordered a set of 2 inch sanding pads for 320-3500 grit sanding pads from Amazon. They work amazingly well and are easy to manage and sand close to the sharp edge of the button. I polished light tooth marks and chatter out of the stem with micromesh sanding pads – dry sanding with 1500-12000 grit pads. I wiped the stem down after each sanding pad with Obsidian Oil.I polished the stem with Before & After Pipe Stem Polish – both Fine and Extra Fine. I gave it a coat of Obsidian Pipe Stem Oil. It works to protect the stem from oxidizing. I set it aside to dry.I put the stem back on the Stanwell Pipe of the Year 19888 Apple pipe and took it to the buffer. I buffed the bowl and stem with Blue Diamond to polish the briar and the vulcanite. Blue Diamond does a great job on the smaller scratches that remain in both. I gave the bowl multiple coats of Conservator’s Wax and the stem several coats of carnauba wax and buffed the pipe with a clean buffing pad to raise the shine. I hand buffed it with a microfiber cloth to deepen the shine. I am amazed at how well it turned out. The finished pipe is shown in the photos below. This is a beautiful Stanwell POY 1988 – the vulcanite saddle stem and smooth rim top and sandblast finish combine to give the pipe a great look. The polished black, vulcanite stem looks really good with the rich browns standing out in the sandblast. The dimensions of the pipe are Length: 5 inches, Height: 1 ½ inches, Outside diameter of the bowl: 1 inch, Chamber diameter: ¾ of an inch. The weight of the pipe is 1.31 ounces/37 grams. This is another pipe that I will be putting on the rebornpipes online store in the Danish Pipe Pipemaking Companies Section shortly, if you are interested in adding it to your collection. Thanks for walking through the restoration with me on this beauty!

As always, I encourage your questions and comments as you read the blog. Thanks to each of you who are reading this blog. Remember we are not pipe owners; we are pipe men and women who hold our pipes in trust until they pass on into the trust of those who follow us. 

Restoring a Chonowitch Designed Stanwell Bordeaux 148 Canadian


Blog by Steve Laug

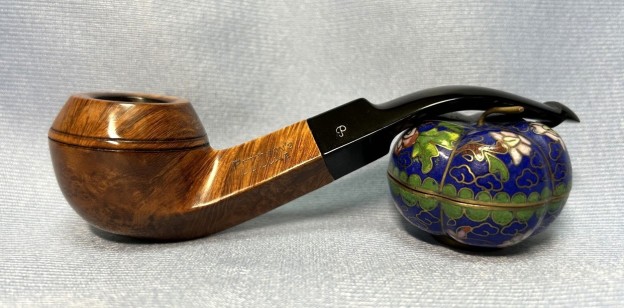
The next pipe on the table to work on is one that was purchased on 01/26/2023 in a lot of pipes that came to us from Copenhagen, Denmark. This is a oval shank Canadian with a smooth finish and a thin brass band on the shank. It is another Made in Denmark Stanwell. The smooth finish on this pipe, around the bowl and shank has a mix of grain highlighted by the reddish brown stain. The pipe is stamped on the topside of the shank and reads STANWELL [over] Bordeaux. On the underside of the shank the shape number 148 is stamped [over] Made In Denmark. The pipe was a well used pipe when Jeff received it. There was dust and grime ground into the finish on the sides of the bowl. The mixture of brown stains highlights some mixed grain under the dirt. The bowl was moderately caked and there was an overflow of lava on the smooth rim top. The condition of the inner edge was hard to know due to the lava coat. The saddle stem is vulcanite and was dirty, oxidized and had light tooth marks, chatter and scratches on both sides ahead of the button and on the button itself. There is a brass Crown S logo inlaid on the topside of the saddle stem. Jeff took photos of the pipe before he started his clean up work on it. He took photos of the bowl and rim top to show what they looked like before his clean up. You can see the cake in the bowl and the lava on the rim top and inner edges. It is hard to know what the condition of the inner edge looks like. He also took some of the stem to show the condition of both sides. There are tooth marks on the surface of the stem ahead of the button and on the button surface itself. The photos of the sides and heel of the bowl show the grain around the bowl and shank. The mixture of brown stains adds depth finish on the pipe. Even under the grime it is a real beauty. The stamping on this one was around the bamboo horizontally and is shown in the photo below. It is clear and readable as noted above. The second photo shows the white stamped crown S on the stem side. Before I started my work on the pipe I wanted to see if I could find any information that would help me get a sense of the line. I turned to Pipephil to see if there was any listing on the Bordeaux Line (http://pipephil.eu/logos/en/logo-stanwell.html). There was nothing listed.

I then turned to Pipedia (https://pipedia.org/wiki/Stanwell) for more information. The article is great and gives a lot of history on the brand. There were also links to a shape article by Bas Stevens that I originally published on rebornpipes. I looked up the 148 shape number to see who had designed that shape (https://pipedia.org/wiki/Stanwell_Shape_Numbers_and_Designers). I quote the information below.

  1. Canadian, short saddle mouthpiece by Jess Chonowitsch.

Now it was time to work on the pipe.

Jeff had thoroughly cleaned up the pipe. He reamed the pipe with a PipNet Pipe Reamer and cleaned up the remnants with a Savinelli Fitsall Pipe Knife. He scrubbed the bowl with undiluted Murphy’s Oil Soap with a tooth brush. He rinsed it under running warm water to remove the soap and grime. He cleaned out the inside of the shank and the airway in the stem with alcohol, cotton swabs and pipe cleaners. He scrubbed the exterior of the stem with Soft Scrub to remove the grime and calcification. He soaked the stem in Before & After Deoxidizer and rinsed it off with warm water. The pipe looked very good when it arrived here in Vancouver. I took close up photos of the bowl, rim and the stem. You can see the damage and the darkening on rim top and inner edge. The vulcanite saddle stem is in good condition with light tooth marks and some chatter as noted above. There are some deep tooth marks on the button surface as well.I took photo of the stamping on the underside of the shank. It is readable as noted above. I removed the stem from the shank and took a photo to give a sense of the proportions of the pipe. The briar is quite beautiful and the dark and medium stains really make it stand out. I worked on the damage to the inner edge and the rim top with a folded piece of 220 grit sandpaper to bring the edge back into round and smooth out the scratches on the top. By the end it looked much better.I polished the bowl and shank with micromesh sanding pads – dry sanding with 1500-12000 grit pads. I wiped the bowl down after each pad to remove the grit. The bowl began to take on a rich shine. It is a beauty. I rubbed the bowl down with Before & After Restoration Balm. I worked it into the briar with my finger tips. I let it sit for 10 minutes and the Balm did its magic. It enlivens, cleans and preserves the briar. It certainly brought this bowl back to life. I buffed it off with a clean cloth and took the following photos. I set the bowl aside and turned my attention to the stem. I filled in the tooth marks on the surface and in the button edges. I used black CA glue and rebuilt the deep tooth marks on both side and on both top and underside button. I set the stem aside to cure. I used a small file to flatten the repair and to also cut the sharp edge of the button. I started sanding it smooth with a folded piece of 220 grit sandpaper. I polished the vulcanite stem surface and repairs near the button with a new product I am using. I ordered a set of 2 inch sanding pads for 320-3500 grit sanding pads from Amazon. They work amazingly well and are easy to manage and sand close to the sharp edge of the button. I polished the stem with micromesh sanding pads – 1500-12000 grit pads. I wiped it down with a damp cloth after each sanding pad. I used Before & After Pipe Polish – both Fine and Extra Fine to further polish the stem. This Stanwell Bordeaux 148 Canadian with a vulcanite saddle stem is a great looking pipe now that it has been restored. The mix of stains once cleaned up really highlights the grain and the polished sandblast finish is stunning. I put the stem back on the bowl and carefully buffed the pipe with Blue Diamond on the buffing wheel. I gave the bowl and the stem multiple coats of carnauba wax on the buffing wheel and followed that by buffing the entire pipe with a clean buffing pad. I hand buffed the pipe with a microfiber cloth to deepen the shine. The finished Stanwell Bordeaux 148 Canadian fits nicely in the hand and feels great. Give the finished pipe a look in the photos below. The dimensions of the pipe are Length: 5 ½ inches, Height: 1 ¾ inches, Outside diameter of the bowl: 1 1/8 inches, Chamber diameter: ¾ of an inch. The weight of the pipe is 31 grams / 1.09 ounces. I will be adding the pipe to the Danish Pipe Makers Section of the rebornpipes store. If you are interested in purchasing this pipe send me a message or an email.

As always, I encourage your questions and comments as you read the blog. Thanks to each of you who are reading this blog. Remember we are not pipe owners; we are pipe men and women who hold our pipes in trust until they pass on into the trust of those who follow us. 

Cleaning up a Television Imported Briar Italian Made Churchwarden


Blog by Steve Laug

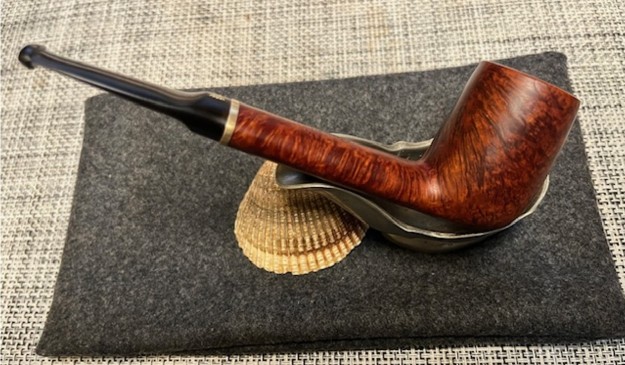
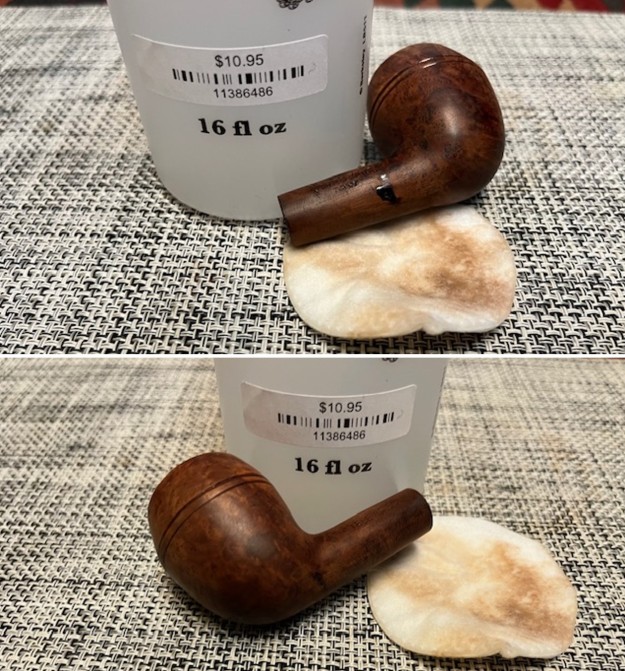
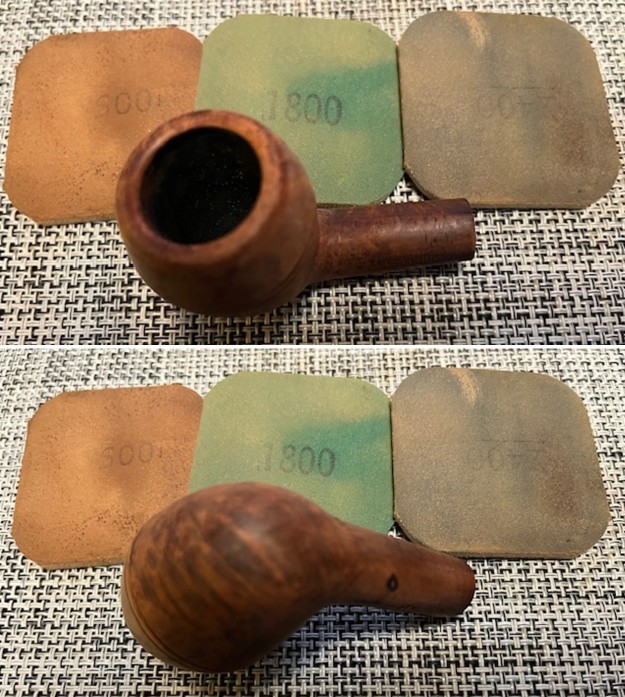
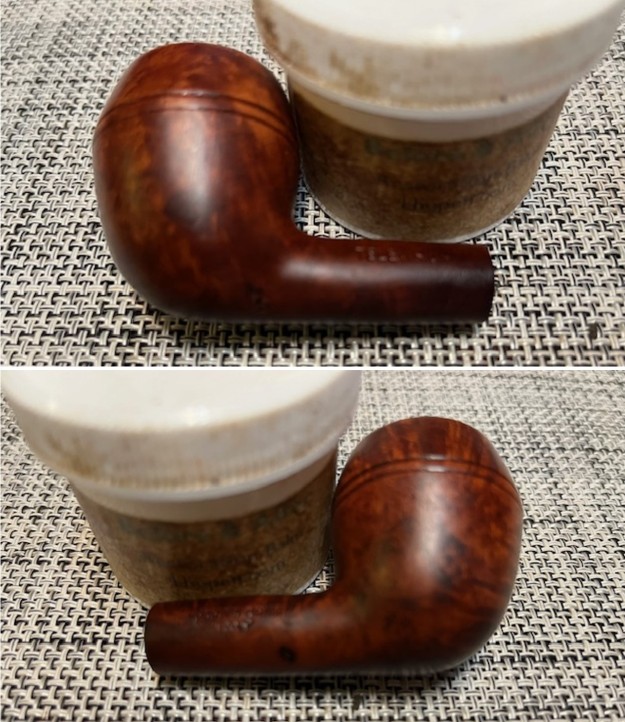
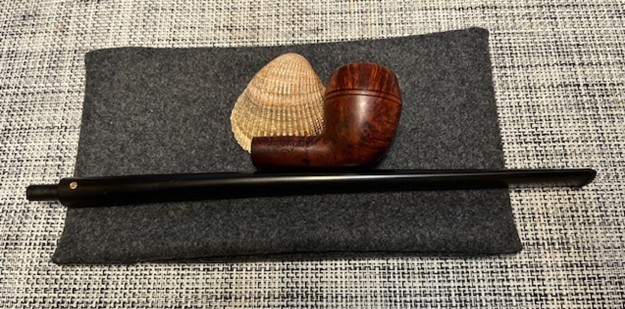
The next pipe on the table was purchased from a fellow in St. Leonard, Maryland, USA on 03/24/2018. It is a nice looking Smooth Rhodesian Churchwarden with twin rings around the cap on the bowl and a long straight stem. It is stamped on the left side of the shank and reads TELEVISION. On the right side it is stamped Imported Briar [over] Italy. The stamping is very clear and readable. The finish had a spotty coat of varnish around the rim, sides and shank and several small fills on the left side of the shank and underside. The bowl had a thin cake and dust and debris. The rim top had spots of lava on it and was dirty. The rest of the bowl and shank. The stem was acrylic and in decent condition with some ripples in the underside from when it had been heated to bend it. It had some tooth chatter and marks on both sides near the button was also dirty and covered with bubbly varnish and debris. Jeff took photos of the pipe when he unpacked it and before he started his clean up work. It is a great looking piece of briar.Jeff took photos of the bowl and rim top to show the cake in the light cake bowl and the debris in the finish. He also took photos of the stem to show the nicks and dents stem surface s well as the light tooth marks and chatter on the vulcanite stem. He took photos of the bowl and heel to show the condition of the finish. Though the photos show the spotty varnish coat the grain underneath actually looks very good underneath. Jeff took photos of the stamping on the sides of the shank. It read as noted above and was readable. You can also see the spots and crackle in the varnish coat on the shank. There is also a gold disc on the left side of the taper shank with an R stamped in the disc. I have worked on quite a few Television Pipes over the years – old timers, billiards and several Churchwarden pipes. I checked all the usual sites for information and I could find nothing about the brand. I decided to leave the hunt behind and just work on the pipe.

I took some photos of the pipe as I took it out of the box. Here is what I saw. I slid it out of the wrapper around it. I could see that Jeff had cleaned it well. The bowl had been reamed with a PipNet reamer and Savinelli Fitsall Pipe Knife. He had scrubbed the exterior with undiluted Murphy’s Oil Soap. He rinsed it with warm water. He cleaned out the internals with alcohol, cotton swabs and pipe cleaners. He cleaned out the airway in the stem with pipe cleaners and alcohol. The grain on the bowl is quite nice with just a few small fills that are solid and well blended in with the surrounding briar. I took photos of the pipe before I started my work on it. The rim top had cleaned up very well and the rim top and edges looked very good. There were still shiny spots on the rim and in the rings. The stem was in decent condition other than light tooth chatter on both sides at the button. The stem also has some nicks on the sides midstem. The stem was vulcanite and has some light oxidation remaining. I took a photo of the stamping on the smooth panel on the left side of the shank. It is clear and readable as noted above. I removed the stem and took a photo of the pipe to show the proportion of the stem to the bowl. It is a nice looking pipe.I took some photos of the fills in the underside and up the side of the shank next to the bowl junction. They both were damaged and shrunken.I repaired the two fills with clear CA glue and some briar dust. Once the repairs hardened I sanded them with 220 grit sandpaper to smooth them out and start blending them into the surface.I wiped down the bowl with acetone to remove the s potty varnish on the briar. I avoided wiping down the two repaired areas so the acetone would not dissolve the repairs. I sanded the bowl with a Medium and a Fine sanding sponge to remove the varnish coat that remained. I also worked over the repaired areas and they began to look very good against the rest of the briar. I polished the bowl with micromesh sanding pads – dry sanding with 1500-12000 grit sanding pads. I wiped the bowl down with a damp cloth after each sanding pad. It began to look much better. I worked some Before & After Restoration Balm into the surface of the briar and into the twin rings around the bowl cap. I rubbed it on with my fingertips and let it sit doing it is job for 10 minutes. The product works to clean, rejuvenate and preserve the briar. I buffed it off with a soft cloth after the ten minutes. It looked much better at this point. I set the bowl aside and turned my attention to the stem. I removed the stinger and then filled in the deep gouge marks on the stem surface with black CA glue. Once the repairs cured I sanded the stem with the new 320-3500 grit sanding pads to blend the repairs into the stem surface and also to remove the slight oxidation. I polished the stem with micromesh sanding pads – 1500-12000 grit pads. I wiped it down with Obsidian Oil after each sanding pad. I used Before & After Pipe Polish – both Fine and Extra Fine to further polish the stem. I gave it a final coat of Obsidian Oil and set it aside to dry. Once I finished working on the stem and put it back together you can see that this Television Imported Briar Italy Churchwarden is another beautiful pipe. The rusticated briar around the bowl is clean and really tactile. The rim top and edges are in great condition. The rich brown stains gave the grain a sense of depth with the polishing and waxing. The depth of the rustication really stood out. I put the acrylic stem back on the bowl and carefully buffed the pipe with a clean buffing pad to raise the shine. I hand buffed the pipe with a microfiber cloth to deepen the shine. The finished Television Italian Churchwarden is a beauty and feels great in the hand and looks very good. Give the finished pipe a look in the photos below. The dimensions of the pipe are Length: 11 inches, Height: 1 ½ inches, Outside diameter of the bowl: 1 ¼ inches, Chamber diameter: ¾ of an inch. The weight of pipe is 1.66 ounces /47 grams. It is another one that is much more beautiful in person than these photos can capture. I will be putting it on the rebornpipes store soon. Look for it in the Italian Pipe Makers section. If you would like to add it to your collection let me know. Thanks for walking through the restoration with me. NB: This morning I received a note from a good friend of rebornpipes regarding this pipe. I thought I would include it here as it is very helpful.

Hope your Christmas holiday was a grand one!

Your latest blog post got me curious.  I’d never seen or heard of a Television pipe.  So, I did a little looking and came up with some interesting tidbits – nothing definitive, but …   It looks like Television is a pipe type, not brand.  And apparently the reason why it’s called a Television is because it’s long enough or bent enough to smoke without obscuring one’s view of a TV screen.  Very odd.  The first mention I find is in a 1951 newspaper ad.  Seems they were advertised (made by several makers) through at least the end of the 1950s.

The most frequent ads I saw were for Mastercraft and House of Robertson.  Mastercraft, of course, imported their pipes for a variety of makers/countries, one of which was the Rovera Brothers.  They had a brand mark for their Roverart brand which looks very similar to your Television “R” mark.  https://pipedia.org/wiki/Roverartg

I took screenshots of a few of the ads and a couple of short quotes “explaining” Television pipes.

Thought you might find this interesting!