Monthly Archives: January 2018

Product review: Grout whiteners


Great tool for the arsenal. Thanks Mark for the review. Had to share it the rebornpipes readers.

Lone Star Briar Works Blog

20180129_041125

I use grout whitener to refresh the letter or logo on a vulcanite stem. My procedure is to get the oxidation off the stem and return it to jet black. The grooves of the stamping must be cleaned out under magnification using dental picks and probes. The job usually involves deepening the recesses with the same tools. Shake the pen for 2 minutes and apply a small amount over the area. After setting up for a minute I  use a toothpick to roll across the area and soaking up the excess liquid, leaving the grooves filled. After hardening awhile, i can buff it with carnuba wax to protect and seal the work. I prefer the Miracle grout pen over the Rustoleum brand. I find the Rustoleum is too watery.

PicsArt_01-27-09.16.5620170409_154154.jpg

Thanks for looking!

View original post

Is it a meerschaum? Looks like one, feels like one, but….


Blog by Steve Laug

Not too long ago I received an email contact from a fellow, Craig on the rebornpipes blog. He sent me the following message: I was recently given a bag of pipes… Literally, a BAG of 20 or so pipes that are 50+yrs in age and VERY used. I was wondering if you would have time to either Skype or FaceTime with me, and go through what I have in order to determine which are worth sending to you to have them refurbished. If you would be so kind, I’d really appreciate it. I was interested in seeing what he had been given so we arranged a Facetime call. I was in Idaho with my brother so we both sat in on the call and had a look at his pipes. It was literally a big bag of pipes – all thrown into a plastic grocery bag with no rhyme or reason. The bag was filled with many no name or low end drug store pipes. There was really nothing stellar in the lot except for an old WDC Campaign pipe and maybe a Grabow Starfire. We went through the bag via Facetime and excluded most of the pipes. The amount of work necessary to bring them back was not worth the price. However, we picked some of the lot that were worth cleaning up for sure as they would make nice rack additions for a budding rotation. There were five that we pulled to work on.

  1. A No Name Meerschaum that looked interesting
  2. A Dr. Grabow Starfire 39 that had great grain
  3. A WDC Campaign underslung pipe
  4. A Wally Frank Bulldog marked Natural Unvarnished lacking a stem
  5. A leather clad billiard marked R20 and bearing a shield

With that he packed up the pipes and through in the rest of the bags for me to scavenge parts from and put the box in the mail. It did not take too long for it to arrive in Vancouver and when it did I opened the box and had a look. Here are pics of what I saw – there were two bags inside. One bag held the discards for the scrap pile and the other held the five pipes he wanted restored. I chose to work on the No Name ?Meerschaum? first. It was very dirty and he was not even sure it was a meer. He thought it might be a painted pipe but I wondered about it. When it arrived I checked it out and the inside of the bowl that was visible looked like meer and the shank end with the threaded tenon looked like meer. From the look of the rim I wondered if it was not a pressed meerschaum – in fact it probably was. The bowl had a cake in it – not too thick but bothersome and the rim to had some darkening and some tan spots. The bowl was extremely dirty on the outside and there were black scuff marks on both sides. There were scratches and nicks on the bottom of the bowl. There was no stamping or identifying marks on the pipe. The stem was soft acrylic or plastic. There were tooth marks and chatter on both sides near the button. The exterior was dirty and dull looking. The slot had tars built up reducing the size of the slot by half. The pipe smelled like Half and Half tobacco – kind of that anise smell that clings to a pipe that has smoked that blend. I took close up photos of the bowl and rim top as well as the stem. The rim top had some overflow on the inner bevel and there was some odd coloration on part of the rim. It was almost as if the top coat of polished meer was compromised but it was hard to know. This area made me wonder about whether I was dealing with painted briar. The stem was another story – it was in decent shape with tooth marks and chatter on both sides near the button. There was a metal tenon like a spear tip on the end of the stem. It was very dirty.I used a Savinelli Fitsall Pipe Knife to clean out the cake and tobacco remnants from the bowl. As I worked on it I was even more certain that the tobacco of choice to the person who had smoked the pipe in the past was Half and Half.I polished the meerschaum bowl with micromesh sanding pads. The way the bowl acted with the micromesh and the sanding dust that came off on the pads it seemed to point to meerschaum. There was one spot on the underside of the bowl that had the same coloration as the rim top. The rest of the bowl cleaned up nicely and the black marks and surface scratching disappeared and was replaced by a shine. I wet sanded with 1500-2400 grit pads and dry sanded with 3200-12000 grit pads. I wiped the bowl down after each grit with a damp cotton pad to remove the dust. The more I worked with it the more I am convinced that I was dealing with a pressed meerschaum pipe. It acts like pressed meer and feels like in the hand. I repaired the deep tooth marks on both sides of the stem with clear super glue. Once the repair had cured I sanded them smooth with 220 grit sandpaper to blend them into the surface of the stem. I polished the stem with micromesh sanding pads – wet sanding with 1500-2400 grit pads and dry sanding with 3200-12000 grit pads. After each pad I wiped the stem down with Obsidian Oil. When I finished with the last pad I gave it a final coat of the oil and let it dry. When I finished polishing the stem and it dried I put it back on the bowl and took it to the buff. I gently buffed both the bowl and stem with Blue Diamond. I did not want to damage the bowl and the plastic material of the stem is very soft so I did not want to make more work for myself with it overheating and melting. I gave the bowl and stem several coats of carnauba wax and buffed them with a clean buffing pad to raise the shine. I hand buffed the pipe with a microfiber cloth to deepen the shine. This is the first restoration of the pipes Craig sent me. I look forward to the rest of them. I think he will enjoy this one when I send it back. The finished pipe is shown below. Thanks for looking.

Reworking & Restemming Last of Mark’s Uncle’s Pipes – a Kaywoodie Custom Grain Dublin


Blog by Steve Laug

This is the last one of Mark’s uncle’s pipes and when I finish this one the lot of seven are complete and ready to go back to him. This last one is another Kaywoodie. I have repeatedly written how much I am enjoying working on these pipes for Mark. For me an important part of the restoration project is to know the history behind the pipe I am working on. When I find out the story it really adds another dimension to the pipe repair or restoration work.

I have finished six of the seven pipes that Mark sent me and have written about them. As I have worked on each pipe the pipeman who originally owned these pipes was with me through Mark’s story of his life. The links to the blog on each pipe is listed below if you want to read about the work on each of them.

  1. The Ropp Cherrywood De Luxe (https://rebornpipes.com/2018/01/17/cleaning-and-restoring-a-ropp-cherrywood-de-luxe-805/)
  2. The Doodler (https://rebornpipes.com/2018/01/19/restoring-a-beautiful-the-doodler-bullmoose/)
  3. A newer three hole stinger Kaywoodie Super Grain Billiard S-L (https://rebornpipes.com/2018/01/21/restoring-marks-uncles-third-pipe-a-kaywoodie-super-grain-s-l-billiard/)
  4. a Savinelli Churchwarden (https://rebornpipes.com/2018/01/22/restoring-marks-uncles-savinelli-churchwarden-aged-briar-2002/).
  5. A Tally Ho 33 Pot made by Hardcastle’s (https://rebornpipes.com/2018/01/25/restoring-and-restemming-marks-uncles-5th-pipe-a-tally-ho-33-pot/)
  6. A Kaywoodie Signet Rhodesian/Round shank Bulldog https://rebornpipes.com/2018/01/27/reworking-marks-uncles-6th-pipe-a-kaywoodie-signet-rhodesian/

Here are some pictures of the pipes.The pipe I am working on now is the fourth pipe down in the above photo and the fourth from the left in the photo below. It is a Dublin shaped pipe with a major piece missing from the button on the stem and the Kaywoodie logo missing from the stem. One last time I am going to include a bit of what Mark’s sent me about his uncle. I have included much of this in each of the past pipe restorations to give you a sense of the information that always in behind the desire to clean up and restore this set of old pipes. Mark wrote…

…My Uncle John, raised in an Appalachian Mountain family (think Hatfield and McCoy), was a large man with an affable personality – although this had limits and he could be quite formidable.

During WWII he left home and enlisted in the US Army where he was assigned to Patton’s 3rd Army as an ambulance driver.  After Germany surrendered, he was transported back to the US on a converted ocean liner troop ship (I believe it was the Queen Mary).  Upon reaching the US, his unit was immediately sequestered on a troop train for transport to the West Coast to be shipped to the Pacific for the invasion of Japan.  About half way across the country (possibly somewhere in Texas), the train stopped and the troops informed that Japan had capitulated – WWII was over.

Before the Korean War began, my uncle re-enlisted in the US Air Force.  He as assigned to a Photo Mapping unit as an Aircraft Mechanic.  He worked his way up to Crew Chief and served in Photo Mapping until he medically retired in the mid 60’s due to heart problems.

Being part of an Air Force family, I did not get to spend much time with my uncle while growing up.  However, I was able to stay a couple of summers with him at his West Palm Beach home while in my teens.  On a desk in his Florida Room sat collection of old used pipes in a walnut pipe rack / humidor combo (very similar the Decatur Industries 6 pipe Rack and humidor combination shown in the rebornpipes store).  There were a couple of packages of old dried up commercial brand tobacco in the humidor – one was cherry, I think.  I never saw my uncle smoke and never discussed the pipes with him, but I was intrigued by the pipe collection.  They were old, dirty, and well used – some with chewed through stems.  Obviously, the pipes had been smoked by a devoted pipe enthusiast.  As a young boy, I loved the smell of pipe tobacco, which you could occasionally smell in public way back then.  I started smoking an occasional pipe in college.  When my uncle passed away a few years later, I asked for his pipe collection and have stored it away since then.  The pipes are just as I received them some thirty years ago.

While I will never know for sure, I believe my uncle purchased the pipes in various PX’s and smoked them while an Air Crew Member.  The PX’s would have sold common commercially available pipe brands at a good price, nothing too expensive or exotic – consistent with the pipes in my uncle’s collection.  As a Photo Mapping Air Crew Member / Chief my uncle traveled the world extensively, and was stationed at many bases  – including “permanent” stations in West Palm Beach, Warner Robins, and Goose Bay Labrador, to name a few.  Smoking a pipe would have been a relaxing way to spend a few monotonous hours on the flight line or in the air.  After his heart problems, he must have given up pipe smoking and the pipes sat unused thereafter.  If the bowls look like they were recently scraped, it would have been over fifty years ago, most likely with a Case hardware store folding knife. If dirty, it is due to sitting for many years in the back room.  If well used and chewed it is due to many hours of smoking enjoyment.

I’m looking forward to seeing my Uncle John’s pipes in restored condition.  I know they are not “collectors” items, but they bring back priceless memories of my uncle and the times we spent together sharing “war stories”…

With the old pipeman almost standing over my work table, I turned my attention to the last of his pipes – a Kaywoodie Custom Grain Dublin shaped pipe. The pipe was stamped on the left side of the shank with the word Kaywoodie over Custom Grain over Imported Briar. On the right side of the shank is the shape number 08. I wrote about the various shape numbers of Kaywoodie and Yello-Bole pipe on the blog. I include that link now if you would like to have a look. https://rebornpipes.wordpress.com/wp-admin/post.php?post=39480&action=edit. I am also including the portion of the chart on the blog that shows the shape number of this old pipe and the years it was produced. I have boxed the shape number in red for quick reference. The exterior of the pipe was dirty and grimy with a few small dents in the sides of the bowl. The rim top was dirty and had some tar and lava overflowing the inside of the bowl. The right front of the bowl had burn damage where it looked like Mark’s uncle had repeatedly lit his pipe. The bowl itself did not have a thick cake but there was a still a thin cake in the bowl. The pipe looked like it had been reamed not too long before the last bowls were smoked. Overall the finish was in the worst condition of all of the pipes in this lot. It was dirty and dusty. The stem was oxidized and there was a large chunk of the vulcanite missing on the top end of the stem where it had been chewed through or broken off. The logo was missing from the inset on the left side of the stem. I took photos of the pipe before I started restoring it. I took a close up photo of the rim top to show the remnants of cake in the bowl and the lava buildup on the rim top. I took the photo at a bit of a different angle to show some of the damage to the rim top. The inner and outer edges were in rough shape. The front right outer edge was very worn. I have circled it in red to highlight it in the poor photo below. The top of the rim was also spotty and had tars and lava as well as nicks and scratches. I took some close up photos of the stem to show the size of the missing vulcanite chunk near the button on the underside. The oxidized metal three hole stinger on the stem needed polishing but otherwise it looked good.Since the stem was not only chomped on the underside but in examining it I found it was also cracked. I went through my can of stems and found one that was close to the same diameter and length. I had a decision to make – drill out the mortise to receive a push stem or transfer the stinger from the damaged stem and fitting it to the new stem. I chose the latter. I heated the tenon with a lighter while holding it with a pair of pliers. It did not take too long for the glue to heat up enough for me to turn the stem off of the stinger. I used a brass bristle brush to polish off the tars and oils that had hardened on the stinger. With the stinger removed it was time to work on the new stem to make it ready to take the stinger. Notice that the crack in original stem gave way in the first photo. The first thing that had to go on the new stem was the tenon. I cut it off with a hack saw as close to the end of the stem as possible. Once the tenon was gone I faced the end of the stem on the topping board to smooth out any rough or high spots that remained. I wanted a flush fit against the shank of the pipe. Once the tenon was gone I needed to drill the airway open to receive the stinger apparatus. The base of the stinger had a diameter of ¼ inch but I did not start drilling with that. I started with a bit slightly larger than the airway in the stem and worked my way up. I marked the bit with a permanent marker so that I would not drill too deep. I used a cordless drill at slow speed. To pull the bit out I reversed the drill and let it work it out slowly. This leaves a clean wall on the inside of the new stem.I cleaned out the new hole with cotton swabs and alcohol to remove all of the dust from drilling. I blew air through the stem to dry it out. I swabbed it with a clean and dry cotton swab. I lined the stinger upright with the hole on top and glued it in place with all-purpose glue. While it was still soft I threaded it into the shank and lined everything up so that it would dry straight. I set it aside and worked on something else while the glue dried. I took photos of the pipe to show the new stem in place after the glue dried. After the glue in the stem had set I removed the bowl from the stem and worked on it. It needed a lot of work. I wiped the bowl down with acetone on cotton pads to remove the remnants of the finish. Once I had the briar cleaned off I topped the bowl on the topping board with 220 grit sandpaper. I wanted to minimize the damage from the burn on the right front. I could not take it down to remove all of the burn without compromising the shape. I worked until it was less visible and then called it quits.The bowl was out of round and the inner edge of the bowl was damaged. I worked it over with a folded piece of sandpaper to minimize the damage and bring it back to round. I also worked on the outer edge of the rim to smooth it out as well. The second photo below shows the cleaned up rims – both inner and outer.I wiped the bowl down again with acetone on a cotton pad to remove the rest of the finish and clean up the briar. I took photos of the bowl at this point to show its condition. I polished the bowl with micromesh sanding pads – wet sanding it with 1500-2400 grit pads and dry sanding with 3200-12000 grit pads. I wiped the bowl down after each pad with acetone to clean off the sanding dust. The photos show the progress of the polishing. I wiped the bowl down with alcohol and then stained it with a medium brown aniline stain. I flamed the stain to set it and repeated the process until the coverage was what I was looking for. I washed down the bowl with alcohol on a cotton pad to make the stain a bit more transparent. I wanted to blend in the burn mark and still leave the grain showing through. I worked some Before & After Restoration Balm into the surface of the briar with my finger tips to deep clean the finish, enliven and protect the wood. I worked the balm into the rim top and inner bevel of the rim to polish the cleaned up area. I let it sit for a few minutes and then buffed it with a cotton cloth. The grain in the wood came alive and there was a rich shine to the briar. I took some photos of the bowl at this point to mark the progress in the restoration. I set the bowl aside and worked on fitting the stem to the shank. I repeatedly put it on the shank to check the diameter and clean up the fit. I worked on it with 180 grit sandpaper and 220 grti sandpaper to shape the stem to match the diameter of the shank all the way around. I wiped it down each time I finished sanding and then tried the fit. I repeated the process until the transition was smooth between the shank and the stem. It took a lot of sanding to get the fit correct but once it was there the stem was ready to polish with micromesh sanding pads. I gave the bowl several coats of Conservator’s Wax to clean it and give it a light shine. I rubbed the stem down with Obsidian Oil to highlight what I needed to work on.  I also wanted to get an idea of what the pipe was going to look like once it was finished. I worked over the stem with micromesh sanding pads. I polished out the sanding scratches and marks from the reshaping work. I wet sanded it with 1500-2400 grit pads and dry sanded it with 3200-12000 grit pads and wiped it down with Obsidian Oil after each one. When I finished with the 12000 grit pad I gave it a final coat of oil and let it dry. With the stem replaced and polished I put it back on the pipe and buffed the entire pipe again with Blue Diamond polish on the buffing wheel. I carefully buffed the new button with a light touch so as not to damage it. I gave the entire pipe several coats of carnauba wax and buffed it with a clean buffing pad to raise the shine. I hand buffed it with a microfibre cloth to raise the shine. The new stem and the original stem looked good to me and the bend was just right. The bowl polished up pretty nicely. The finished pipe is shown with the original stem in the photos below. This is the final pipe – number seven of Mark’s uncle’s pipes. Now I just need to pack these up as well as he did when he sent them to me and get them out to him. I am looking forward to what he will think once he has them in hand. Thanks for walking through these seven restorations with me. I am thinking Mark’s uncle would be proud of his pipe and glad that his nephew is carrying on the pipeman’s trust with them. Cheers.

Restoring the second of three Jobey Gourd Calabashes with a Briar Shank Extension


Blog by Steve Laug

My brother Jeff has really gotten good at finding Gourd Calabash pipes on his recent “treasure” hunts. He picked up this batch recently. I posted about the large calabash in the middle of the right hand column recently and it is available on the rebornpipes store. It is by far the largest of the five calabash pipes that he found. I am working on the second one of these. It is the one on the right side at the bottom circled in blue. It is another unique looking Calabash to me in that it is a nicely shaped gourd with a briar shank extension on the end of the gourd. It bears the Jobey brass oval logo on the side of the briar extension. As I mentioned before, when I first looked these Jobey calabashes I wondered if any of them had the Jobey system tenon that I have come to expect on Jobey pipes. However, this was not the case on any of the three Jobey Gourd Calabashes in the bunch. All of them have the mortise drilled in the briar extension and is made for a push stem. Once again, I had never seen Jobey Gourd Calabashes before learned that they were probably made by Wally Frank. Here is the link to the first of the pipes I worked on – the one circled in red in the photos below:  https://rebornpipes.com/2018/01/09/restoring-a-full-bent-jobey-gourd-calabash-with-a-briar-shank-extension/

Once again Jeff took some photos of the pipe before he did his cleanup work on it. The photos below show it in the condition he found it in on one of his hunts. The gourd was dull looking and generally dirty. It had spots of sticky label material on the sides of the bowl. The briar shank extension was also dull and lifeless looking and there was a gummy substance in the brass logo on the shank extension. The meerschaum bowl on this pipe was also unique. It is light weight and appeared to be block meerschaum but it is rusticated and has flecks of colour shot throughout the entirety of the bowl. There was a thick cake in the bowl and the rim had a coat of lava that went almost all the way around the inner edge of the chamber onto the rim top. The chair leg style stem was oxidized and dirty. There were tooth marks and tooth chatter on both sides of the stem at the button. The next two photos show the condition of the meerschaum cup. The rim top of the meer was rusticated and there was some lava overflow on the rim top. There is also darkening around the inner edge of the bowl and cake in the bowl.The next two pictures show the condition of the underside of the bowl and the tars and oils on the walls of the gourd. The underside of the meerschaum cup was dirty but in good condition. There were tars and oils spotted on the underside of the bowl. The cork gasket on the inside edges of the gourd was in good condition but dried out. It needed some grease to liven it up.  The briar shank extension was dirty and there was debris around the outside of the oval and in the letters stamped in the brass.The stem had light oxidation and tooth marks and chatter on both sides near the button. It also had the same price tag glue on the top and underside of the stem.Jeff did a thorough cleanup on the meerschaum bowl, the inside of the gourd and the stem. He carefully scraped the cake in the bowl with a Savinelli Fitsall Pipe Knife. He cleaned the internals with alcohol, pipe cleaners and cotton swabs – scrubbing out the mortise as it was dirty. He scrubbed the exterior of the meerschaum cup and the gourd with Murphy’s Oil soap and a tooth brush and was able to remove all of the oils and dust ground into the gourd. He was able to remove all of the lava and overflow from the top of the meerschaum bowl and left it looking very clean. Once he had removed the lava on the rim top and inner edge they were cleaner than I expected. The scratches in the meerschaum were quite shallow and would be easy to polish out. He cleaned internals of the stem with alcohol. When it arrived I took some photos of it to show how it looked before I did the restoration. He did a great job of cleaning up the rim top including the tars and lava. The bowl is clean and smooth with all cake removed. The photo below shows the condition of the bowl and rim at this point.The stem had cleaned up nicely with relatively little oxidation. The tooth marks on the top and underside along with the chatter were still present.I took the stem and put in a bath of Before & After Pipe Stem Deoxidizer. I let it soak while I worked on the rest of the pipe.I took the bowl off the gourd to have a look at the inside of the pipe. The gourd was very clean. The cork gasket was dry but that could be remedied easily enough. The mottled appearance carried through to the inside of the meerschaum bowl and can be seen in the photos.I used my fingers to rub the gourd and briar extension down with Before & After Restoration Balm to bring life to both and to remove any residual dust or dirt in the surface of the calabash. I wiped it off with a cotton cloth and buffed it with a shoe brush. The next few photos show the gourd at this point in the process. I used some Vaseline petroleum jelly to lubricate the cork gasket and soften it. I have done this for years and I really like the effect of the jelly on the cork. I used 1500 grit micromesh sanded off the spots along the surface of the meerschaum cup where it sat against the cork and the top of the gourd to ensure a smooth fit.I checked the pliability of the cork gasket, rubbed a little more Vaseline into it and put the bowl back on the gourd. The fit of the cup against the gasket was snug but not hard to insert. It was perfect. The pipe was beginning to look finished. The shine on the gourd and the rim looked good. The briar extension had its own shine as well. I took the stem out of the bath, rinsed it off with warm water and dried it off with a coarse cotton towel to dry it and remove the remaining oxidation. The tooth chatter on both sides of the stem at the button is visible. The oxidation is gone other than some small amounts in the grooves of the stem.I sanded the stem with 220 grit sandpaper to remove the tooth chatter on the top and underside near the button. I sanded the rest of the stem to remove the remaining oxidation. I rolled the sandpaper to fit into the chair leg grooves on the stem and worked over the oxidation there until it was gone. I rubbed the stem down with Obsidian Oil at this point and let it sit for a little while.I cleaned out the airway in the stem with pipe cleaners and alcohol to remove any residual bath and also the sanding dust from the work on the stem surface and tooth chatter.I polished the vulcanite stem with micromesh sanding pads – wet sanding with 1500-2400 grit pads and dry sanding with 3200-12000 grit pads. I rubbed the stem down with Obsidian Oil between each sanding pad. After using the 12000 grit pad I buffed the stem with Blue Diamond to give a deep and rich shine. I polished the stem with Before & After Pipe Polish using both the fine and the extra fine product. I gave it a final coat of Obsidian Oil and set it aside to dry. Normally at this point I put the stem back on the bowl and take the pipe to the buffing wheel to work it over. This time I took the parts to the buffing wheel. I gently buffed the meerschaum cup and rim with Blue Diamond to lightly polish the meer. I carefully buffed the gourd base and briar shank extension with Blue Diamond being cautious about the pressure I put on the gourd. I buffed the stem with Blue Diamond to raise the gloss on the vulcanite. I took the pipe back to the work table and gave the gourd multiple coats of Conservator’s Wax. I gave the stem several coats carnauba wax. I buffed the parts of the pipe with a clean buffing pad to raise the shine. I hand buffed it with a microfiber cloth to deepen the shine. The finished pipe is shown in the photos below. Mark is adding this one to his uncle’s pipes when I send it back to him. It is a beautiful pipe. I think that he is going to really enjoy the unique look of his new pipe. Thanks for looking.

Restemming, Repairing and Reconditioning a Ben Wade Golden Walnut Freehand


Blog by Steve Laug

When Mark sent me his uncle’s seven pipes to restore, he also sent several of his own pipes to be restored. The first pipe was the Italian made acorn with a sea rock style finish that I worked on earlier (https://rebornpipes.com/2018/01/20/breathing-new-life-into-an-italian-made-%c2%bc-bent-acorn/). The second pipe was a very nice looking Ben Wade Golden Walnut Freehand. It had some great grain on the sides, front and back. It had a flat area on the bottom of the bowl and could stand up without the stem. The shank end and the top of the rim had areas of plateau that were stained darker than the rest of the pipe. It is stamped on the underside of the shank Ben Wade over Golden Walnut. Underneath that it is stamped Hand Made in Denmark. The briar was dirty and there was grime into the grooves and crevices on the plateau top and end of the shank. There was grime and oils ground into the sides of the bowl and shank. The original stem with the broken tenon came in the bag that he sent the pipe in. It had snapped off cleanly at the flare in the stem. The stem itself was oxidized and had tooth chatter and marks on the top and underside near the button. There were scratches around the golden crown on the top of the stem. The crown was faded and worn. I decided I was going to try to put a new tenon on the original stem so I dropped it in the Before & After Deoxidizer bath to soak. I figured it would be easier to work on cleaned up. I added it to the photo after I took the photo below but it sat with the rest of the stems from the uncle’s pipes in the soak over night.While the original stem soaked I worked on an acrylic stem that Mark had chosen. I had sent him a photo of several options and he liked the brown and cream swirled acrylic. I used the PIMO tenon turner to reduce the diameter of the tenon to fit in the shank. It did not take too much to remove the excess material. The photos below show the stem on the tenon turner and the finished stem after turning.I took the stem out of the bath and rinsed it under warm water and rubbed it down with a coarse cloth to remove the oxidation. I took a photo of the two stems and the bowl to get a send of how the stem would look.I inserted a pipe cleaner in the airway and used a heat gun to soften the stem enough that I could bend it. I bent it at the same angle as the original stem. I cooled it with running water to set the bend in the stem. The photos below show the process and the final bent stem. I took some photos of the pipe with the new stem in place. The colour and the shape look good with Ben Wade. With the new stem fitted it was time to work on the cleanup of the briar. I worked on the insides of the bowl and shank to remove the tars and oils. I scraped out the inside of the mortise with a pen knife to remove the buildup in that area. I cleaned out the mortise and the airway in the shank with alcohol, pipe cleaners and cotton swabs.I scrubbed the exterior of the bowl and rim with a tooth brush and Murphy’s Oil Soap to remove the buildup of grime and oils in the briar and in the plateau areas of the shank and rim top. I rinsed it off the pipe under running water and scrubbed it under the water flow. I dried it off with a cotton cloth and buffed it lightly to raise a shine. I sanded the buildup on the inner edge of the rim on the back of the bowl with 1500-2400 grit micromesh sanding pads to remove the tars that remained in those areas. I polished the rim top with 3200-6000 grit pads.I worked some Before & After Restoration Balm into the surface of the briar with my finger tips to deep clean the finish, enliven and protect the wood. I worked the balm into the plateau on the rim top and the end of the shank to polish the cleaned up area. I buffed the pipe with a horsehair shoe shine brush to get it into the grooves of the plateau. I let it sit for a few minutes and then buffed it with a cotton cloth. The grain in the wood came alive and there was a rich shine to the briar. I took some photos of the bowl at this point to mark the progress in the restoration. Ah now I was making progress. I had finished the acrylic stem and the cleaning and polishing of the bowl. It was time to address the original stem and see if I could put a new tenon on the freehand stem. I used the topping board to flatten the broken end of the stem using 220 grit sandpaper. I set up my cordless drill, put in a bit that was slightly larger than the airway in the stem. I slowly drilled the airway larger. I slowly moved up to larger bits to make the opening the same size as the threaded end of the new Delrin tenon.I used a needle file to clean up the opening in the end of the stem and even out the sides so that when the new tenon was in place it would align all the way around. I used the Dremel and sanding drum to take down the threads on the end of the new tenon to fit right in the hole. I did not want to drill it further and affect the structure of the stem. Once the threads were smoothed out slightly, it fit in nicely. I had to be careful in drilling the stem to not go to deep and drill through the top or underside of the stem. I also reduced the diameter of the rest of the tenon with the Dremel and sanding drum to fit in the mortise of the pipe.I pushed the tenon into the shank and smoothed out the transition between it and the rest of the stem with 220 grit sandpaper. Once I had it smooth I glued the tenon in the stem with super glue.I inserted the tenon into the stem a little less than previously to match the length of the original tenon. I mixed a batch of charcoal powder and super glue to fill in the gap between the new tenon and the stem.When the repair had cured I used a rasp and file to smooth out the repair to the connection. I sanded the repaired area with 180 and 220 grit sandpaper and was able to make the transition taper correctly. It would take more sanding but you can see the progress in the next photos. I worked over the stem with micromesh sanding pads. I polished out the sanding scratches and marks in the vulcanite and the rebuilt tenon area – wet sanding it with 1500-2400 grit pads and wiping it down with Obsidian Oil. After the 2400 grit pad I applied some Rub’n Buff Antique Gold gold to the crown stamp on the top of the stem. I rubbed it on and off leaving the gold in the stamping. I dry sanded the stem with 3200-12000 grit pads and wiped it down with Obsidian Oil after each pad. When I finished with the 12000 grit pad I gave it a final coat of oil and let it dry. Once it had dried, I polished it with Before & After Pipe Stem Polish Fine and Extra Fine. I rubbed it down with final coat Obsidian Oil and took the following pictures. Since I had polished the bowl and the acrylic stem I decided to put it all together. I took photos of the finished pipe with the acrylic stem. The golds, browns and cream coloured swirls work well with the grain on the briar. The old Ben Wade Hand Made Golden Walnut looks good with a different kind of stem. It will give Mark an option to have both an acrylic and the original stem to choose from – almost like having two different pipes. Here are the photos of the pipe with the acrylic stem. I finished the repairs on the original stem, repaired and polished it. I put it back on the pipe and buffed the entire pipe again with Blue Diamond polish on the buffing wheel. I gave the entire pipe several coats of carnauba wax and buffed it with a clean buffing pad to raise the shine. I hand buffed it with a microfibre cloth to raise the shine. The new stem and the original stem looked good to me and the bend was just right. The bowl polished up pretty nicely. The finished pipe is shown with the original stem in the photos below. I will be adding to Mark’s package along with his uncle’s pipes when I have finished all of them and send it to him shortly. Thanks for looking.

Reworking Mark’s Uncle’s 6th pipe – a Kaywoodie Signet Rhodesian


Blog by Steve Laug

I have one more of Mark’s uncle’s pipes left after this one. The one on the table now is one of the Kaywoodies. I am really enjoying working on these and I think it is because of the known history behind these old pipes. To me one of the fun parts of this hobby is the history or backstory on the pipes. If I can find out about that it gives another dimension to the pipe repair or restoration work. I have finished five of the seven pipes that Mark sent me. The Ropp Cherrywood De Luxe (https://rebornpipes.com/2018/01/17/cleaning-and-restoring-a-ropp-cherrywood-de-luxe-805/), The Doodler (https://rebornpipes.com/2018/01/19/restoring-a-beautiful-the-doodler-bullmoose/), newer three hole stinger Kaywoodie Super Grain Billiard S-L (https://rebornpipes.com/2018/01/21/restoring-marks-uncles-third-pipe-a-kaywoodie-super-grain-s-l-billiard/), a Savinelli Churchwarden (https://rebornpipes.com/2018/01/22/restoring-marks-uncles-savinelli-churchwarden-aged-briar-2002/) and a Tally Ho 33 Pot made by Hardcastle’s (https://rebornpipes.com/2018/01/25/restoring-and-restemming-marks-uncles-5th-pipe-a-tally-ho-33-pot/) are completed and I have posted them on the blog. I mentioned in each previous blog that I think about the pipeman who used these pipes as a daily part of his life while I am working on them. Here are some pictures of the pipes.The pipe I am working on now is the third pipe down in the above photo and the third from the left in the photo below. It is a Rhodesian or round shank bulldog pipe with a major piece missing from the button on the stem.I have included a bit of the history of Mark’s uncle with each of the past pipe restorations to give you a sense of the information that always in behind the desire to clean up and restore this set of old pipes. Mark wrote…

…My Uncle John, raised in an Appalachian Mountain family (think Hatfield and McCoy), was a large man with an affable personality – although this had limits and he could be quite formidable.

During WWII he left home and enlisted in the US Army where he was assigned to Patton’s 3rd Army as an ambulance driver.  After Germany surrendered, he was transported back to the US on a converted ocean liner troop ship (I believe it was the Queen Mary).  Upon reaching the US, his unit was immediately sequestered on a troop train for transport to the West Coast to be shipped to the Pacific for the invasion of Japan.  About half way across the country (possibly somewhere in Texas), the train stopped and the troops informed that Japan had capitulated – WWII was over.

Before the Korean War began, my uncle re-enlisted in the US Air Force.  He as assigned to a Photo Mapping unit as an Aircraft Mechanic.  He worked his way up to Crew Chief and served in Photo Mapping until he medically retired in the mid 60’s due to heart problems.

Being part of an Air Force family, I did not get to spend much time with my uncle while growing up.  However, I was able to stay a couple of summers with him at his West Palm Beach home while in my teens.  On a desk in his Florida Room sat collection of old used pipes in a walnut pipe rack / humidor combo (very similar the Decatur Industries 6 pipe Rack and humidor combination shown in the rebornpipes store).  There were a couple of packages of old dried up commercial brand tobacco in the humidor – one was cherry, I think.  I never saw my uncle smoke and never discussed the pipes with him, but I was intrigued by the pipe collection.  They were old, dirty, and well used – some with chewed through stems.  Obviously, the pipes had been smoked by a devoted pipe enthusiast.  As a young boy, I loved the smell of pipe tobacco, which you could occasionally smell in public way back then.  I started smoking an occasional pipe in college.  When my uncle passed away a few years later, I asked for his pipe collection and have stored it away since then.  The pipes are just as I received them some thirty years ago.

While I will never know for sure, I believe my uncle purchased the pipes in various PX’s and smoked them while an Air Crew Member.  The PX’s would have sold common commercially available pipe brands at a good price, nothing too expensive or exotic – consistent with the pipes in my uncle’s collection.  As a Photo Mapping Air Crew Member / Chief my uncle traveled the world extensively, and was stationed at many bases  – including “permanent” stations in West Palm Beach, Warner Robins, and Goose Bay Labrador, to name a few.  Smoking a pipe would have been a relaxing way to spend a few monotonous hours on the flight line or in the air.  After his heart problems, he must have given up pipe smoking and the pipes sat unused thereafter.  If the bowls look like they were recently scraped, it would have been over fifty years ago, most likely with a Case hardware store folding knife. If dirty, it is due to sitting for many years in the back room.  If well used and chewed it is due to many hours of smoking enjoyment.

I’m looking forward to seeing my Uncle John’s pipes in restored condition.  I know they are not “collectors” items, but they bring back priceless memories of my uncle and the times we spent together sharing “war stories”…

With that reminder of the old pipeman, I turned my attention to the sixth of Mark’s uncle’s pipes – a Kaywoodie Signet bulldog/Rhodesian shaped pipe. The pipe was stamped on the left side of the shank with the word Kaywoodie over the word Signet. There were no shape numbers on the right side or underside of the shank. The was an oxidized aluminum end cap threaded to hold the stinger/tenon apparatus. The exterior of the pipe was dirty and grimy with a few small dents in the sides of the bowl. The rim top was dirty and had some tar and lava overflowing the inside of the bowl. The bowl itself did not have a thick cake but there was a thin cake and remnants of tobacco in the bowl. The pipe looked like it had been reamed not too long before the last bowls were smoked. Overall the finish was in good condition but it was dirty and dusty. The stem was oxidized and there was a large chunk of the vulcanite missing on the top end of the stem where it had been chewed through or broken off. The stem was also slightly underclocked to the left. I took photos of the pipe before I started restoring it. I took a close up photo of the rim top to show the remnants of cake in the bowl and the lava buildup on the rim top. It appeared that the pipe may have been reamed or cleaned at some point very recently. The inner and outer edges of the rim were in good condition. But I would know more once I removed the lava overflow. I took some close up photos of the stem to show the size of the missing vulcanite chunk near the button on the top side. The oxidized metal fitment on the shank end needed polishing but otherwise it looked good.The stinger apparatus in the shank had three holes in the ball at the end of the piece. It was covered in tars and oils and was quite dirty. The great thing was that there was nothing missing on the stinger and there were no deep scratches or gouges in the aluminum.I used a Savinelli Fitsall Pipe Knife to scrape away the remnants of cake and tobacco on the walls of the bowl. I used a rolled piece of 220 grit sandpaper to sand the walls of the pipe and smooth out all the remaining bits. The bowl looked good once it was cleaned.Because it was the original stem and there was thickness to it, and because the stinger was intact in the stem I decided to do something a little different. I cut off the end of the damaged stem with a Dremel and sanding drum until I had solid vulcanite to work with. I cleaned off the stinger with 0000 steel wool to remove all of the tars and oils. I heated the stinger until the glue had softened and realigned the stem with the shank.I took the stem off the pipe and cleaned the exterior, especially focusing on the end that I was going to rebuild. I mixed up a batch of charcoal powder and black super glue (2 capsules of charcoal powder were mixed together with the super glue) to make a paste to use in rebuilding the button. I applied it to the area where the button would be with a dental spatula. I made it thicker than it needed to be so that I could shape and contour the finished look once the repair had cured. I sprayed the repair with accelerator and set it aside to dry. While the repair cured I worked on the aluminum shank end to polish out the oxidation. I worked on it with 1500-2400 grit micromesh to get it to the point is in the photos below. Once the new button area had cured and the repair was hard, I shaped it with a rasp and a needle file. I matched the two sides of the button – the top and bottom in terms of shape and width. I cut the sharp edge of the button square with the files and shaped the top and underside in front of the button with 220 grit sandpaper. I still need to open up the slot in the button at this point as well as round the edges of the button itself but it is coming along nicely.I turned my attention to opening the slot in the end of the new button. The first photo shows the look of the slot and button at this point. The second shows the new slot that has been opened in the button end using needle files.I cleaned out the airway inside the stem and stinger with pipe cleaners and alcohol. I want to remove the grime but also the dust that would be present from my shaping of the button and slot. I was surprised at how clean the inside of the airway was. I also cleaned out the metal mortise and shank with pipe cleaners, cotton swabs and alcohol.I cleaned off the tars on the top of the rim and polished it with 1500-2400 grit micromesh sanding pads. Once I had it smooth and unscratched I stained it with a dark brown stain pen. I hand buffed it with a soft cloth to blend the stain into the rest of the bowl.I polished the aluminum end of the shank with micromesh sanding pads to raise a shine. I wet sanded it with 1500-2400 grit pads and dry sanded it with 3200-12000 grit pads. I wiped it down with a damp cotton pad after each grit of micromesh. I worked over the stem with micromesh sanding pads. I polished out the sanding scratches and marks in the vulcanite and the rebuilt button – wet sanding it with 1500-2400 grit pads and dry sanding it with 3200-12000 grit pads and wiped it down with Obsidian Oil after each one. When I finished with the 12000 grit pad I gave it a final coat of oil and let it dry. Once it had dried, I polished it with Before & After Pipe Stem Polish Fine and Extra Fine. I rubbed it down with final coat Obsidian Oil and took the following pictures. With the stem repaired and polished I put it back on the pipe and buffed the entire pipe again with Blue Diamond polish on the buffing wheel. I carefully buffed the new button with a light touch so as not to damage it. I gave the entire pipe several coats of carnauba wax and buffed it with a clean buffing pad to raise the shine. I hand buffed it with a microfibre cloth to raise the shine. The new stem and the original stem looked good to me and the bend was just right. The bowl polished up pretty nicely. The finished pipe is shown with the original stem in the photos below. This is pipe number six of Mark’s uncle’s pipes. One left to finish up and then it will head back home to him. Thanks for looking.

The Guildhall 284 Rhodesian Restoration


By Al Jones

This is the 2nd “The Guildhall” shape that I’ve restored in the past few years. Fans of Comoy’s pipes will instantly recognize that very rare shape number. When a shape 284 Comoy’s pops up on Ebay or elsewhere, it is usually very hotly contested. This one failed to sell twice on Ebay, I believe because the shape number was inverted (248). It appeared to be in decent shape, with mint nomenclature, but it also could have help some hidden issues. I took the gamble and received the pipe in the condition below.

The stem was in great shape and it fit snugly. There was one tiny tooth indention, some chatter and it was lightly oxidized. The bowl had a moderate cake and the typical build-up on the bowl top. The briar had numerous marks on the bowl that I hoped could be steamed out.

The cake was removed with my Pipenet reamer and I found the bowl to be in excellent shape. I used a worn piece of worn Scotch-brite to remove the top layer of build-up on the bowl top, followed by 6,000 micromesh sheet and finally 2,000 grade paper. Using an electric iron and a wet cloth, folded twice over, I steamed out the dents. Most of them came out nicely, the steam really works miracles. The bowl was soaked with alcohol and sea salt. After the soak, the briar was buffed with White Diamond and several coats of Carnuba wax.

The stem was mounted and oxidation removed with 800, 1,500 and 2,000 grade papers, followed by 8,000 and 12,000 micromesh sheets. The stem was then buffed with White Diamond and Meguiars Plastic polish.

Below is the finished pipe.

?

?

Back for a New Stem – Big Ben Nautic 252 Take Two


Blog by Steve Laug

It was not too long ago that I repaired a stem for a fellow here in Vancouver. It was a Big Ben Nautic apple and it came to me looking like it had never been cleaned. I repaired the stem and suggested that the pipeman use a Softee bit to protect his stem from his incessant chomping. I even went so far as to put the rubber protector on the bit for him. It lasted may be a month and it is back for a restem. Here is the previous blog on the stem repair on this pipe. It was a lot of work to get it back to workable. https://rebornpipes.com/2017/12/22/restoring-repairing-a-damaged-stem-on-a-big-ben-nautic-252/. I have included before and after pictures from the previous blog to show what the pipe looked like when I started and when he picked it up. The pipeman and I were both very happy with the look of the pipe with the repaired stem and we were hoping that the warning and the rubber Softee bit would extend its life for a while. I had finished replacing the stem on his second pipe and I called him to come and pick it up and during the conversation he told me that he had chomped through the repair already – not even a month had passed and it was back to its original state. He dropped it off when he came to pick up his other pipe. It had not only broken but the bowl was already caking heavily. The shank and stem were filling up with tars once again and the rim top had darkened and was beginning to have a lava coat on it. We talked and decided it was time to make a new stem for this one. I reminded him that I could not do anything with the metal on the stem as it was unmovable at this point in its life. He was good with that and wanted his pipe workable. We were good to go. I went through my can of stems and found a likely candidate. It was acrylic and was a filter stem just like the one it would replace. It was a little longer but I think that it would work and look good. In the photo below you can see the two stems. Notice the chomped original stem.The tenon was slightly thicker in circumference than the original so I used a Dremel and sanding drum to take it down to the right size. The Dremel will not reach the end of the tenon as the stem so I used a rasp and needle file to clean it up. It did not take too much work to bring it down to size. I cleaned it up with 220 grit sandpaper and polished it with 1500-2400 grit micromesh sanding pads. I put it in the shank to check the fit and I was pleased with how it fit. I took photos of the stem in place on the pipe. It still needed to be bent but it would work nicely. The stem was not new – it was one of my scavenged stems so it had some tooth chatter on the surface on both sides near the button. It also had slight remnants of a logo on the top side that needed to be smoothed out. I sanded out the chatter and the remnants of the logo with 220 grit sandpaper.It is a rainy night in Vancouver so I did not want to do the stem bending out on the porch so I set up my heat gun on the top of the dryer. I put a pipe cleaner in the airway of the stem to protect the airway when I bent it. I did not want any kinks or collapsed areas in the stem. I heated it until the acrylic was pliable and bent it to the angle that I thought would look good on the stem. I set the bend with running water. I put the stem in the shank and took photos of the new look. I wanted to check out the bend and make sure it was sufficient. I smoothed out more of the areas around the button and the shank/stem junction with 220 grit sandpaper and then polished the stem with micromesh sanding pads. I wet sanded it with 1500-2400 grit pads and wiped it down with a damp cotton pad and dry sanded it with 3200-12000 grit pads and wiped it down after each pad with the damp cotton pad. With the stem polished I put it back on the pipe and buffed the entire pipe with Blue Diamond polish on the buffing wheel. I gave the entire pipe several coats of carnauba wax and buffed it with a clean buffing pad to raise the shine. I hand buffed it with a microfibre cloth to raise the shine. The new stem looked good to me and the bend was just right. The bowl polished up pretty nicely. I left the rim top pretty much as it was when it came to me this time. I wiped it down a bit with a cotton pad to clean off the tars but the darkening was left behind. The finished pipe is shown in the photos below. I will be calling the pipeman to pick it up this weekend. Thanks for looking.

Restoring and Restemming Mark’s Uncle’s 5th pipe – a Tally Ho 33 Pot


Blog by Steve Laug

I have two more of Mark’s uncle’s pipes left after this one. Both of them are Kaywoodies. I am really enjoying working on these and I think it is because of the known history behind these old pipes. To me one of the fun parts of this hobby is the history or backstory on the pipes. If I can find out about that it gives another dimension to the pipe repair or restoration work. I have finished four of the seven pipes that Mark sent me. The Ropp Cherrywood De Luxe (https://rebornpipes.com/2018/01/17/cleaning-and-restoring-a-ropp-cherrywood-de-luxe-805/), The Doodler (https://rebornpipes.com/2018/01/19/restoring-a-beautiful-the-doodler-bullmoose/), newer three hole stinger Kaywoodie Super Grain Billiard S-L (https://rebornpipes.com/2018/01/21/restoring-marks-uncles-third-pipe-a-kaywoodie-super-grain-s-l-billiard/) and a Savinelli Churchwarden (https://rebornpipes.com/2018/01/22/restoring-marks-uncles-savinelli-churchwarden-aged-briar-2002/) are completed and I have posted them on the blog. As I mentioned in a previous blog I often think about the pipeman who used these pipes as a daily part of his life while I am working on it. Here are some pictures of the pipes.The pipe I am working on now is the fifth pipe down in the above photo and the fifth from the left in the photo below. It is a delicate pot shaped pipe with a major piece missing from the button on the stem.I am including a part of that history to give you a sense of the information that fed the desire to clean up and restore this set of old pipes. Mark wrote…

…My Uncle John, raised in an Appalachian Mountain family (think Hatfield and McCoy), was a large man with an affable personality – although this had limits and he could be quite formidable.

During WWII he left home and enlisted in the US Army where he was assigned to Patton’s 3rd Army as an ambulance driver.  After Germany surrendered, he was transported back to the US on a converted ocean liner troop ship (I believe it was the Queen Mary).  Upon reaching the US, his unit was immediately sequestered on a troop train for transport to the West Coast to be shipped to the Pacific for the invasion of Japan.  About half way across the country (possibly somewhere in Texas), the train stopped and the troops informed that Japan had capitulated – WWII was over.

Before the Korean War began, my uncle re-enlisted in the US Air Force.  He as assigned to a Photo Mapping unit as an Aircraft Mechanic.  He worked his way up to Crew Chief and served in Photo Mapping until he medically retired in the mid 60’s due to heart problems.

Being part of an Air Force family, I did not get to spend much time with my uncle while growing up.  However, I was able to stay a couple of summers with him at his West Palm Beach home while in my teens.  On a desk in his Florida Room sat collection of old used pipes in a walnut pipe rack / humidor combo (very similar the Decatur Industries 6 pipe Rack and humidor combination shown in the rebornpipes store).  There were a couple of packages of old dried up commercial brand tobacco in the humidor – one was cherry, I think.  I never saw my uncle smoke and never discussed the pipes with him, but I was intrigued by the pipe collection.  They were old, dirty, and well used – some with chewed through stems.  Obviously, the pipes had been smoked by a devoted pipe enthusiast.  As a young boy, I loved the smell of pipe tobacco, which you could occasionally smell in public way back then.  I started smoking an occasional pipe in college.  When my uncle passed away a few years later, I asked for his pipe collection and have stored it away since then.  The pipes are just as I received them some thirty years ago.

While I will never know for sure, I believe my uncle purchased the pipes in various PX’s and smoked them while an Air Crew Member.  The PX’s would have sold common commercially available pipe brands at a good price, nothing too expensive or exotic – consistent with the pipes in my uncle’s collection.  As a Photo Mapping Air Crew Member / Chief my uncle traveled the world extensively, and was stationed at many bases  – including “permanent” stations in West Palm Beach, Warner Robins, and Goose Bay Labrador, to name a few.  Smoking a pipe would have been a relaxing way to spend a few monotonous hours on the flight line or in the air.  After his heart problems, he must have given up pipe smoking and the pipes sat unused thereafter.  If the bowls look like they were recently scraped, it would have been over fifty years ago, most likely with a Case hardware store folding knife. If dirty, it is due to sitting for many years in the back room.  If well used and chewed it is due to many hours of smoking enjoyment.

I’m looking forward to seeing my Uncle John’s pipes in restored condition.  I know they are not “collectors” items, but they bring back priceless memories of my uncle and the times we spent together sharing “war stories”…

With that reminder of the old pipeman, I turned my attention to the fifth of Mark’s uncle’s pipes – a Tally Ho pot shaped pipe. The pipe was stamped on the left side of the shank with the words Tally Ho wrapped with a swirled line almost like ribbon around the words. On the right side of the shank is stamped Made in London England and next to the shank/bowl junction is the shape number 33. The exterior of the pipe was dirty and grimy with a few small dents in the sides of the bowl. The rim top was dirty and had some light buildup on the top edge. The bevel on the inner edge was darkened and dirty. The bowl itself looked recently reamed and was clean. Overall the finish was in good condition but it was dirty and dusty. The stem was oxidized and there was a large chunk of the vulcanite missing on the top end of the stem where it had been chewed through or broken off. I knew that on this one the stem would need to be replaced. I took photos of the pipe before I started restoring it. I took a close up photo of the rim top to show the lack of cake in the bowl and the light buildup on the rim top. It appeared that the pipe may have been reamed or cleaned at some point very recently. The inner and outer edges of the rim were in good condition. There was some darkening and tar on the inner beveled rim.  I took some close up photos of the stem to show the size of the missing vulcanite chunk near the button on the top side.I went through my collection of stems and found an estate stem that was very close in length and diameter to the original stem. The button was different to some degree but it would work well. I would need to sand down the tenon to make it fit properly but it would not take too much work to get a decent fit on it.Once the tenon was resized to fit I put the stem in place and sanded the stem diameter with 220 grit sandpaper to fit it to the shank. The new stem was going to look really good once it was polished and the fit perfected.

At this point I took a bit of time to have a look and see what I could find out about the brand. I checked on Pipedia and did not find anything. I went on to look on the Pipephil Logos and Stampings site and there I found what I needed. The brand was listed and linked to Hardcastle Pipes. It was an English made pipe as the stamping clearly showed. It was evidently a sub-brand of the Hardcastle line. http://www.pipephil.eu/logos/en/logo-t2.html

I took some photos of the stamping on the left, right and underside of the shank. The stamping is quite readable. The Tally Ho stamping in the above photo is identical to the stamping on the left side of the shank. The Made In London over England and the placement of the shape number 33 stamp also is a match. The placement of the Patent number on the underside of the shank is the same and the number Pat. No.227665 is also the same. I am not sure what the patent refers to but my guess would be some inner tube or stinger apparatus designed to remove moisture from the smoke as it is drawn into the mouth. I used a small blade pen knife to scrape out the tars and oils on the inside of the mortise. Once it was removed I cleaned out the mortise and the airway in the shank and the stem with alcohol, cotton swabs and pipe cleaners until they came out clean.I used a folded piece of 220 grit sandpaper to work on the inner bevel of the rim. I removed the tars and oils that had built up in that place. I used 1500-2400 grit micromesh sanding pads to clean up the top of the rim and smooth out the debris that was stuck on top.I used a folded piece of 220 grit sandpaper to work on the inner bevel of the rim. I removed the tars and oils that had built up in that place. I used 1500-2400 grit micromesh sanding pads to clean up the top of the rim and smooth out the debris that was stuck on top.I worked some Before & After Restoration Balm into the surface of the briar with my finger tips to deep clean the finish, enliven and protect the wood. I worked the balm into the rim top and inner bevel of the rim to polish the cleaned up area. I let it sit for a few minutes and then buffed it with a cotton cloth. The grain in the wood came alive and there was a rich shine to the briar. I took some photos of the bowl at this point to mark the progress in the restoration. I adjusted the fit of the stem to the shank with a bit more sanding. I put the stem in the shank and sanded with the stem in place to make the transition smooth to touch. Once the transition was smooth I worked it over the stem with micromesh sanding pads. I polished out the sanding scratches and marks in the vulcanite – wet sanding it with 1500-2400 grit pads and dry sanding it with 3200-12000 grit pads and wiped it down with Obsidian Oil after each one. When I finished with the 12000 grit pad I gave it a final coat of oil and let it dry. I used micromesh sanding pads (1500-12000 grit) to polish the sanding end of the shank to remove the scratches left behind by the sandpaper. I stained it with a dark brown stain pen to blend it into the colour of the rest of the bowl and shank. Once it dried I rubbed it down with some Conservator’s Wax and buffed it with a soft cloth to polish it. I took the following photos to show the bowl at this time. I put the stem back on the bowl and took the pipe to the buffing wheel to work it over. I buffed the bowl and stem with Blue Diamond to polish them. I gave the bowl and stem multiple coats of carnauba wax. I buffed the entire pipe with a clean buffing pad to raise the shine. I hand buffed it with a microfiber cloth to deepen the shine. The finished pipe is shown in the photos below. The briar really shines and the dark stain looks beautiful. The vulcanite stem came out quite nice with a deep shine. The pipe and new stem look very good. Just two more of the uncle’s pipes to finish up and then these will be heading back to the US. Thanks for looking.


A Sad Day and a Good Day Wrapped as one – Visiting Sir Winston’s in Bellingham


Blog by Steve Laug

Today I found myself in Bellingham, Washington once again for a lunch meeting for work. Whenever I have to go to Bellingham I try to head down a bit early to stop by and visit my favourite pipe shop in town. The owner had become a friend. His name was Mike and he was the owner and operator of both the Senate Tobacconist and Smoke Shop on Holly Street and the Fairhaven Smoke Shop in old Fairhaven. My friend and I parked up the street from where the Senate shop was and walked down the street to the shop.  I was utterly dumbfounded that the building was empty and the Mike and Senate Smoke Shop were gone. The last time I visited he had spoken of how hard it was in the anti-smoking environment of Washington to keep his business going and that he was going to close up shop. He spoke of closing down within a year as he was tired of the hassle. But with my traveling I had not been back for a visit for about 7-8 months. I missed the closing. Today was a sad day – generally I make it a habit every time I head south from Vancouver to pay Mike a visit. I stood there wondering what had happened to Mike and his stock of pipes and tobacco he had. I wonder how he is doing. I am going to have to see what I can find out.

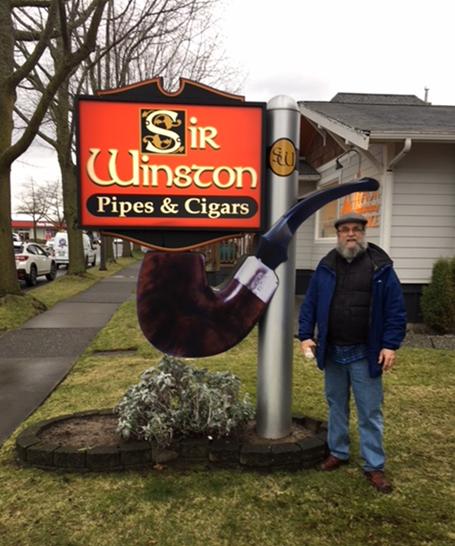
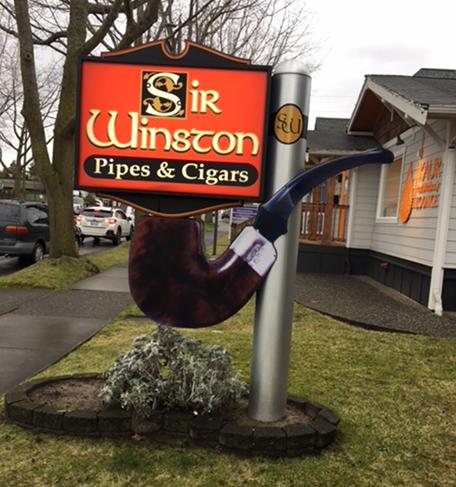
I googled pipe shops in Bellingham and there was one that came up that was not too far away from the old Senate location. In fact the app said it was a 7 minute drive. It said the shop did not open until 11am so we stopped by a coffee shop and relaxed while we waited for the shop to open. While we sat there I read some of the online reviews of the shop and looked through the photos. The shop was called Sir Winston Pipes & Cigars. The photos showed some bulk tobacco. As we got closer to 11 o’clock we headed over to the shop. It was located at 2122 James St. in Bellingham, WA. It was an interesting neighbourhood – residential dwellings surrounded by light industrial buildings. It was on a busy four lane street. We found the address and a parking place in front of the house. The sign in the front yard caught my attention. It was bright red sign that read Sir Winston Pipes & Cigars. It hung by its right side from what looked like a silver cigar tube with the SW (Sir Winston) label on the tube. There was a large Peterson’s style system pipe hanging below the sign – dark brown bowl, silver ferrule and a black stem.

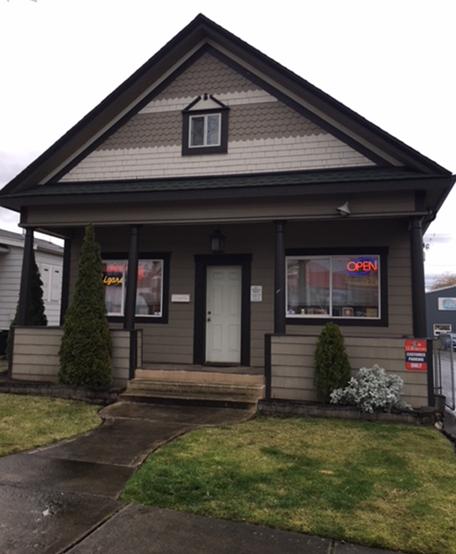
The shop itself was a small house with a large front porch. It was nicely laid out and had a well laid out yard with sidewalk leading to the front door. There was a parking lot behind the shop and a rear entrance that also lead into the shop. We arrived a little before 11 and the shop keeper was opening the front door and turning on the “Open” sign in the front window on the right as you came up the sidewalk. I turned the handle on the door and open it inward. The sales counter was to my left as I came in the door. I asked the shop keep if the shop was open and she said, “Just about… but come on in”. My friend and I came in the shop and had a look around.

What had started as a very sad day – with finding out that the Senate Shop had closed – had just changed a bit. I was surprised at what I saw. The inside of this shop was a real old fashioned tobacco shop. There were no glass pipes, bongs and the like on the counters or walls. There were no fruit flavoured cigars on the counter and not a lot of drug store tobaccos. Those were my first impressions as I opened the door to the shop. It looked and smelled like a tobacco shop. I could almost imagine the days, not that long ago when you could walk into a shop like this and see old timers sitting in the back of the shop around the fireplace, under the television set enjoying a pipe or cigar. Sitting and chatting with each other wreathed in tobacco smoke and chatting and laughing. There would have been a coffee pot going and maybe a refrigerator with some drinks. None of those were there now but the space was there and the memory was still present in my mind as I looked things over. I think I had found my replacement for the Senate Shop and walking into this place reminded me of a small shop where I used to shop in Vista, California when I lived there.

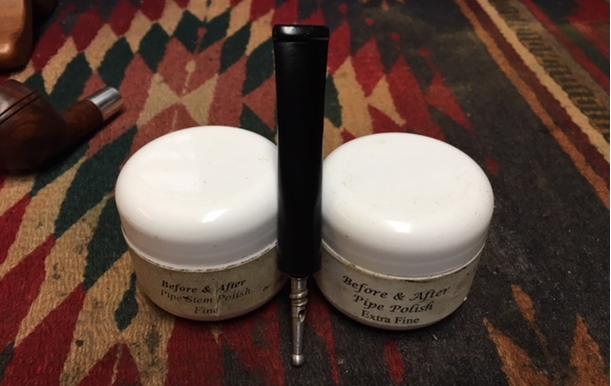
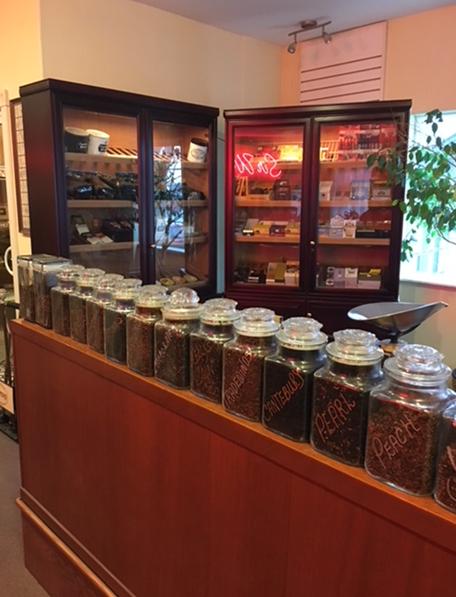
On my right as I entered the shop there was a half wall lined with jars of bulk tobacco. They bore names like Scottish Blend, The Queen’s Choice, Peach, Pearl, Canterbury, Tradewinds, Shippers blend and others. There was a scale on the counter behind the jars. On the walls behind the jars were several humidors. One had a few tins of tobacco – Dunhill, Petersons, Escudo, Ashtons and some others. The shop keeper said she had ordered more as she had sold many over the Christmas season. On the shelves above the tins were some pouches and bags of tobacco along with some large cans of Sail, Mixture 79 and Captain Black. The humidor next to the pipe tobaccos held some packaged cigars and cigarillos. There were cigar cutters, cigar lighters and punches. Next to the second humidor was a window and on the other side were display shelves that had pipe pouches, tobacco pouches, polishes for stems and briar. There were also lighters, polishing cloths, Medico paper filters, Savinelli Balsa filters and other pipe accessories.

Continuing down the hallway was a nice cedar lined walk in humidor, softly lit with sliding glass doors on my right. On the three walls around the inside of the humidor there were shelves lined with cedar boxes of cigars – there was a large variety of brands that I recognized. I think that there was something for everyone there if you are a cigar smoker. Personally I am more interested in pipes and pipe tobaccos than cigars so I did not open the humidor and walk in. I just stood at the door looking through and seeing the variety. The floor of the humidor was lined with red clay bricks. I think that I must have looked like that proverbial kid in a candy shop that always comes with me when I visit pipe and tobacco shops.

I continued down the hallway from the walk in humidor and came to the end of the road. Through the arch at the end of the hallway there was a door that went out to the back parking lot. There were washrooms (or what they call a rest rooms in the US) on either side of the doorway. On the walls were framed and unframed cigar and pipe smoking advertisements. I turned around and made my way back toward the front of the shop. There was a waist high shelving unit on the left. On top of the unit there were a variety of well finished Cherry, Walnut and Oak wood desktop humidors. These were in different sizes and shapes and were designed to hold different quantities of cigars. Each humidor had the humidity meters and humidifying pouches inside. They were some beautiful pieces. There were also smaller, decorative humidors that were made to hold a smaller quantities of cigars. Behind the shelving unit were some folding panels that screened off another room behind them. In that area there was a fireplace, television and a few chairs that I think must have originally been the smoking area of the shop when the state laws allowed that privilege. I stood there for a few minutes thinking about what that must have been like when the room was filled with pipe and cigar men enjoying their favourite smokes with a television in the background while the chatted and talked tobacco, politics, children and all the things regarding families, wives and children. Those gatherings were living communities where young men were introduced to art of pipe and cigar smoking and learned lessons that are no longer taught in the halls of these old shops that are becoming fewer and fewer as the years go by and the laws become more anti-tobacco and smoking.

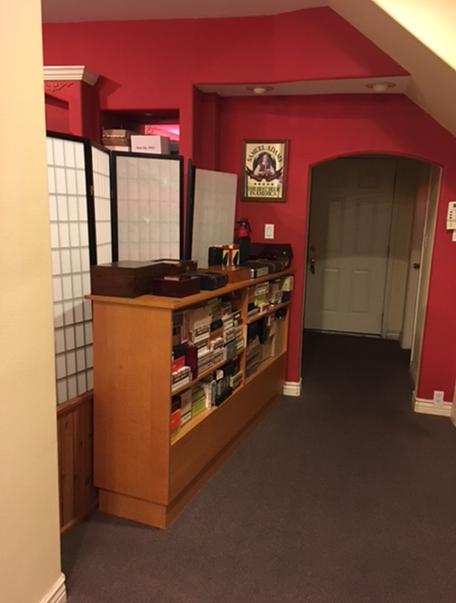
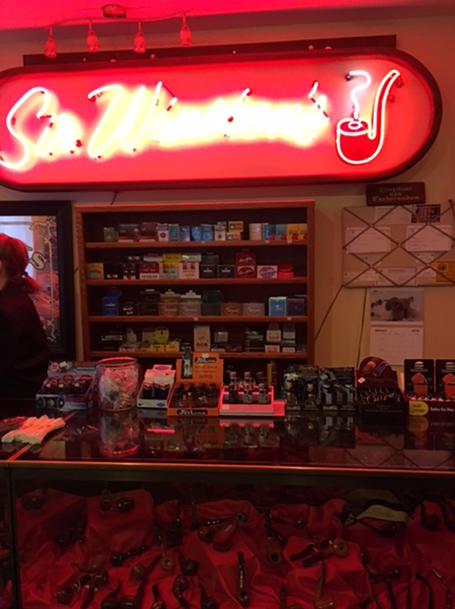
Walking further up the hallway toward the front of the shop, across from the walk in humidor was a series of shelves set in the wall. The walls inside the shelves matched the red colour of the rest of the walls in the shop. The shelves displayed pocket cigar holders, ash trays with and without cork pipe knockers, lighter, pipe rests, pocket flasks, tobacco trays and ceramic pipe tobacco humidors in a variety of shapes and sizes. The display was nicely laid out and looked good together.I proceeded down the hallway and turned toward my right. There was a small display case there that held a large selection of zippo lighters with and without pipe inserts. To the left of that was a display counter that had bulk pipe cleaners in fluffy, regular and bristle formats. Inside the case were various pipe tampers, reamers and tools that gave a wide range of options for the pipe smoker. Behind the counter was another folding screen blocking off what used to be the smoking lounge. The shop keeper’s dog was lying down behind the screen and barked her greetings. To the left behind the counter on the wall was a shelf with a large selection of packaged cigarette tobaccos and rolling papers. The rosy hue to the pictures of the counter area was caused by a red, neon Sir Winston sign hanging on the wall behind the counter. The walls in the rear of the shop were a bright red and as you came into the front they were more of a cream colour. It is a cozy shop that makes you feel comfortable.

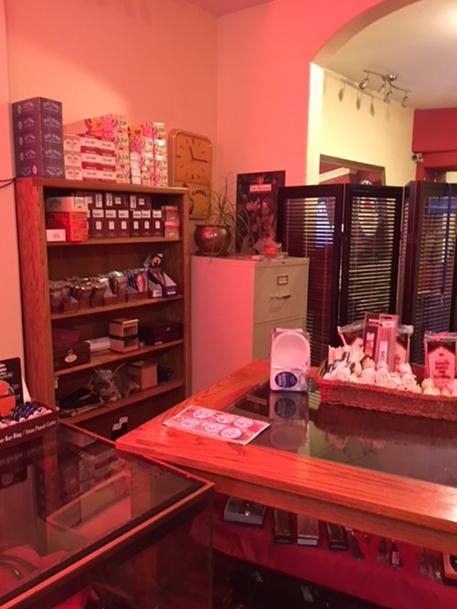
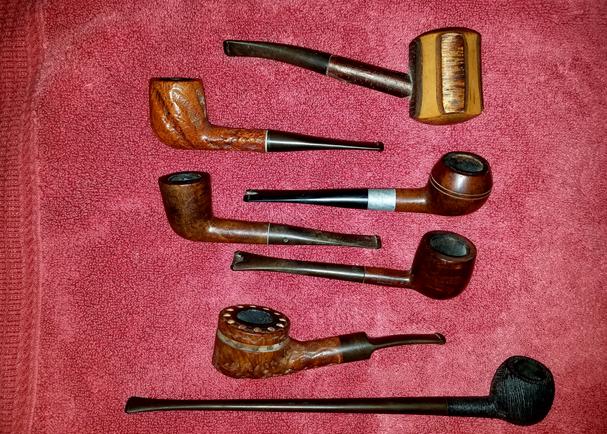
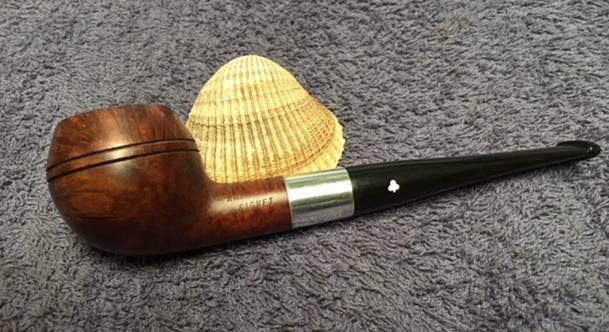
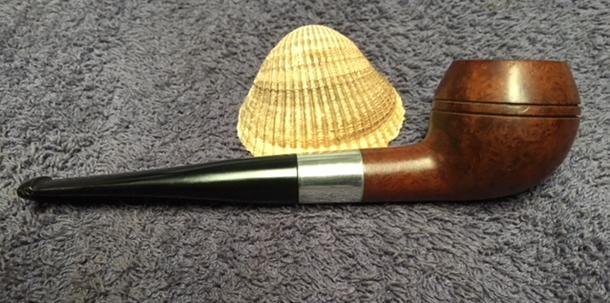
In the counter on that side of the room is where there was a large display of pipes for sale. The pipes can be seen in the next series of photos of the counter area next to the door. There were many different Italian made mid ranged priced pipes. There were what looked like Savinellis and possibly Mario Grande pipes. There was also some Italian made Stanwell pipes. I did not see any Peterson pipes or even higher end English pipes such as Dunhill or even lower end Cadogan made pipes that are often in the shops. The pipes were beautifully laid out for the buyer to see.

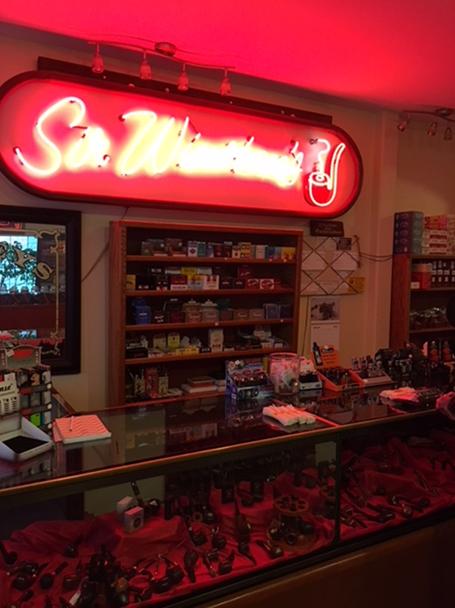
Next to the door and over the door were some more pipes. The ones over the door were a large variety of corn cob pipes in different shapes and sizes. It was a great display of Missouri Meerschaum pipes. The prices for the cobs was what I have come to expect. Below that and to the right of the door was a large basket of “basket” pipes. There were all shapes and sizes in the basket and also various finishes. There were some nicer pipes and some that were obviously cheaper and not as nice. There were rusticated and smooth pipes all having a shiny coat of varnish on the bowl. The stems were all rubber and there were both filter and non-filter pipes.

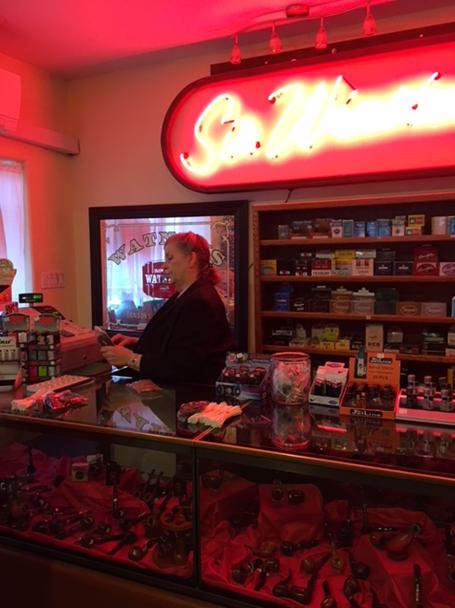
On the wall behind the counter and under the neon Sir Winston sign was the select of tailor made cigarettes from around the world. There was also a large Watney’s  Ale mirror on the wall that added a nice touch and gave the proprietress a good view of the shop when she was at here counter.

After my ramble through the shop I took time to talk with the shop keeper. She turned out to be the owner. She had run this shop for 30 years and knew her stuff. Turned out she was a pipe smoker so we talked about the various blends that she had and the ones that were on order and had not come in to fill in her inventory after the Christmas season. Her name was Robbie and she really knew her stuff. We talked about the changes in the laws and the impact that had on her shop. She talked about the changes in the tobacco that was available for her to order. She remembered the days when her walls were lined with English and European tobaccos as well as a wide range of American ones. Those days she said had passed and it was hard to get any variety.

I decided to pick up some pipe cleaners so I put them on the front counter. My friend and I wanted to purchase some of her bulk tobaccos so she went over to the shelf and had Robbie weigh out some for us. I picked a couple of ounces of her Scottish Blend and my friend got some of that and some of the Queen’s Blend. She bagged our tobaccos and carried them over to the counter. My friend picked up a pipe pouch made by Comoy’s that would hold his pipe, tobacco, tampers and lighter. While we were looking several other customers who were obviously old friends came into the shop and purchased tobacco and other items from her. It was good to see that the place was still a living and working shop with a following that was known and made to feel at home.

My friend and I had a great visit and I asked Robbie about various tobaccos that she did not have. She felt that the next shipment would arrive soon and there would be a lot of options on her shelf. I knew then that another trip would happen sooner rather than later. I paid for my tobacco and bundles of pipe cleaners and my friend paid for his new pouch, two tobaccos and pipe cleaners.

I have to say to you that if you find yourself in the Bellingham area, I would heartily recommend that you stop by the shop and have a visit. The shop is called Sir Winston Pipes & Cigars and is located at 2122 James St. in Bellingham, WA. The phone number is 360-734-1433. The shop has a great selection of pipes and cigars as well as house blends and tinned tobacco to purchase. The proprietor Robbie is a great lady – personable, knowledgeable and genuinely interested in serving the pipe and cigar smoking public. Stop by and say hi. In this anti-smoking state of Washington in the anti-smoking climate of our world it was great to see a tobacco shop that has kept its doors open to serve the smoking clientele. Tell her you read about her on rebornpipes. Who knows we may run into each other at the shop. Until then enjoy your pipe!