Blog by Dal Stanton
 The Kaywoodie now on the worktable is the second of 3 pipes that Skeet commissioned after seeing them in the virtual ‘Help Me Baskets’ in the ‘For “Pipe Dreamers” Only!’ collection. This large collection of pipes I’ve acquired from antique/secondhand shops, antique malls, and from online sellers – and some have been gifts. The Kaywoodie was part of a lot of 13 pipes that caught my eye from a seller in Nevada a few years back. There were some interesting shapes and system pipes that I had not seen before – a LHS Purex (9 o’clock), a Demuth SnapKleen 34 (5:30 o’clock) and a Cyclone London England (1 o’clock). These specific pipes were new to me. The Kaywoodie that beckoned Skeet is situated at the 4:30 o’clock place on the pipe dial.
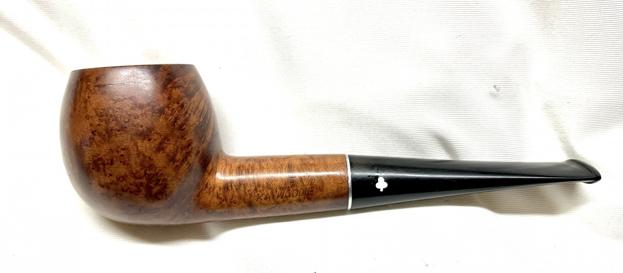
The first pipe Skeet commissioned benefiting the Daughters of Bulgaria came out well. The grain on the French Jeantet Superior (see: LINK) was striking and met with Skeets approval. Here is a picture of the Jeantet that Skeet commissioned after its completion.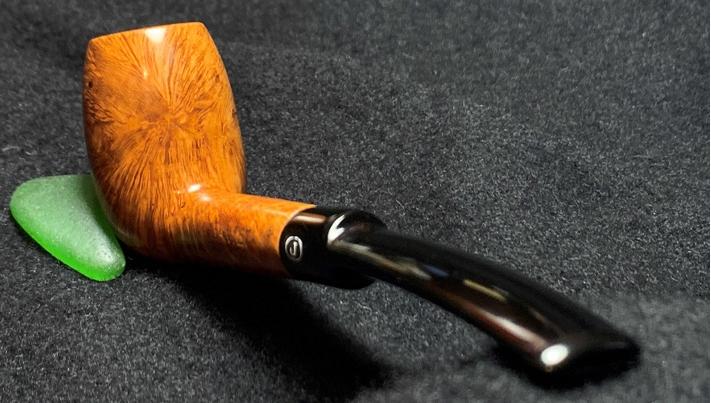 I was moved by Skeet’s appreciative words after reading the Jeantet’s writeup and seeing the results. He wrote:
Dear friend Dal,
I just read the write up and saw the pictures! There are tears in my eyes! How beautiful it is! Thank you and most assuredly YES! I want to take possession! (I suppose I use too many exclamation points but I’m extremely excited!) Thank you so much for your beautiful work and also your faithful stewardship you the Daughters of Bulgaria! As long as I can I will continue to support you in that work. Thank you so much!
Skeet
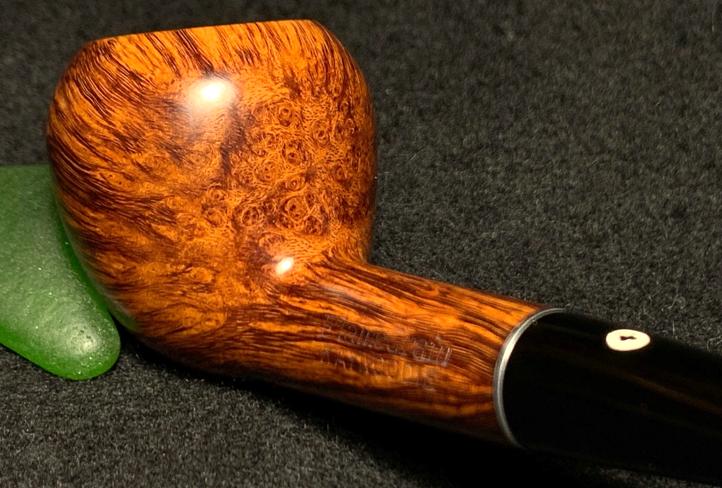
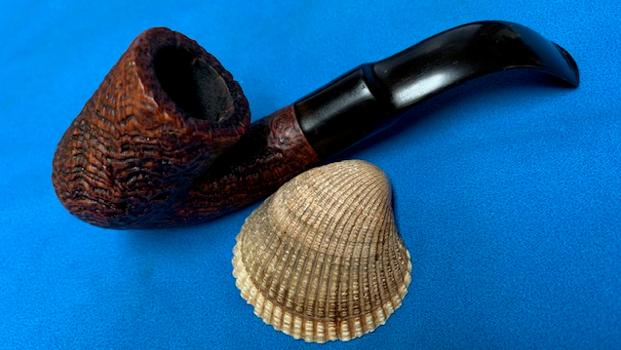
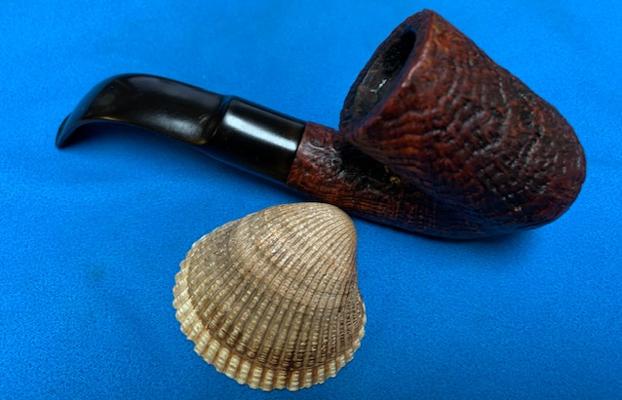
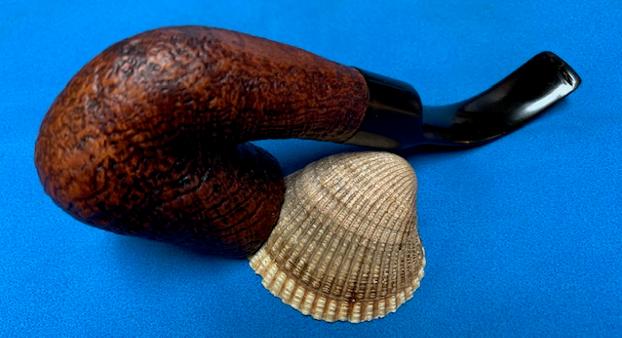
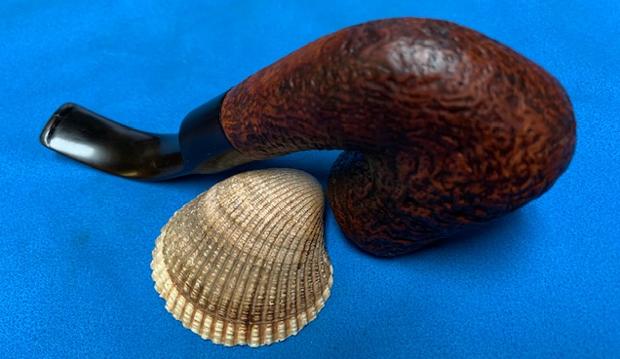
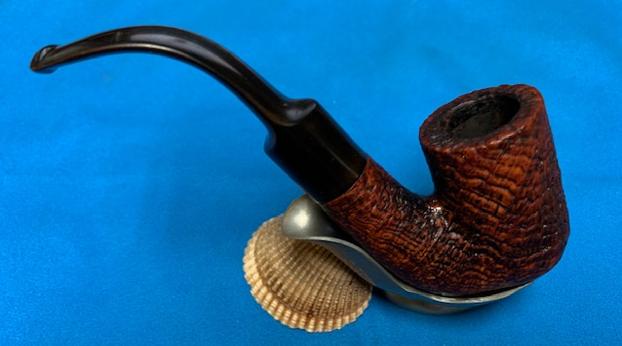
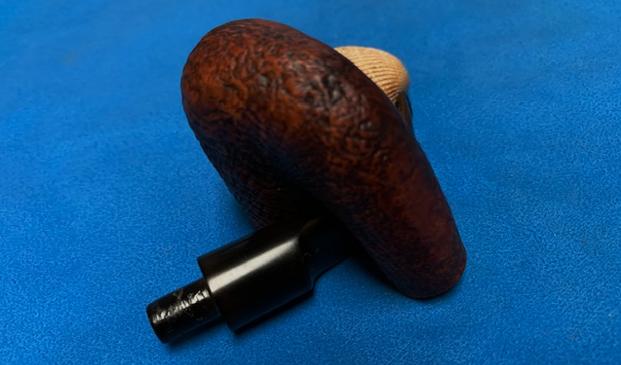
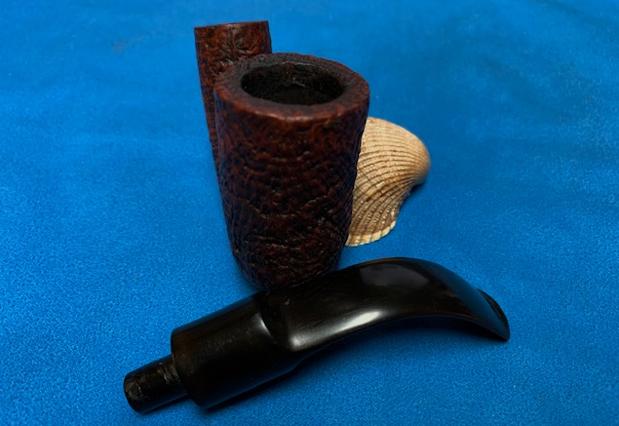
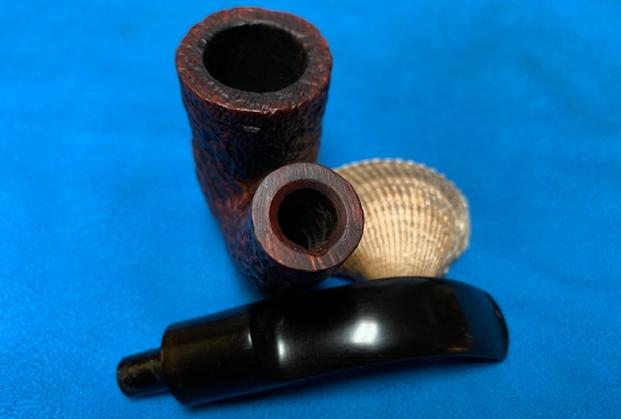
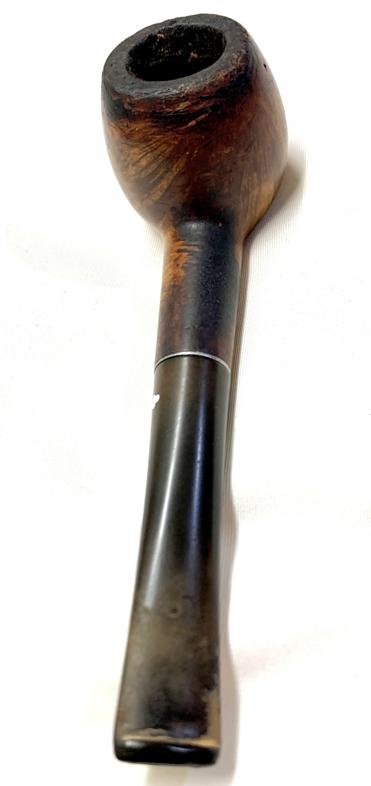
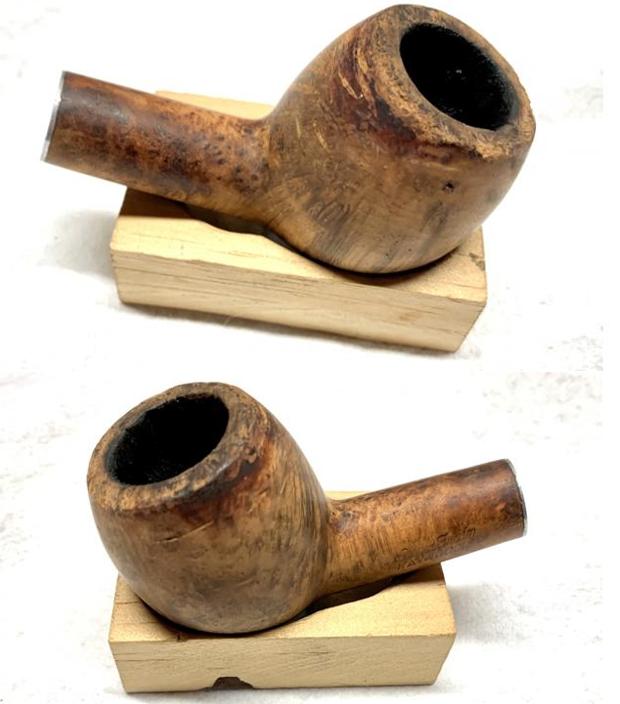
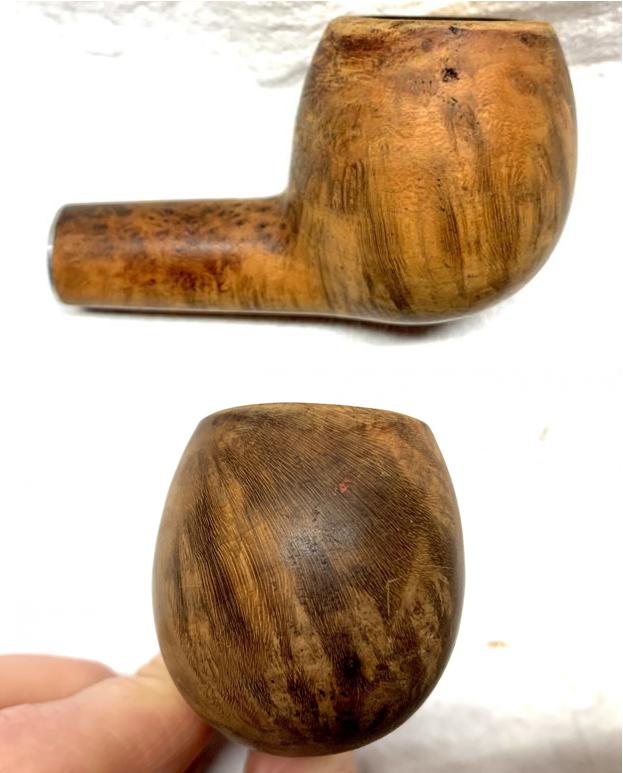
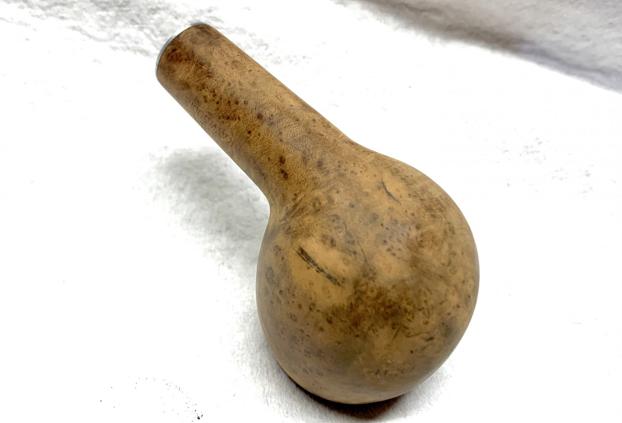
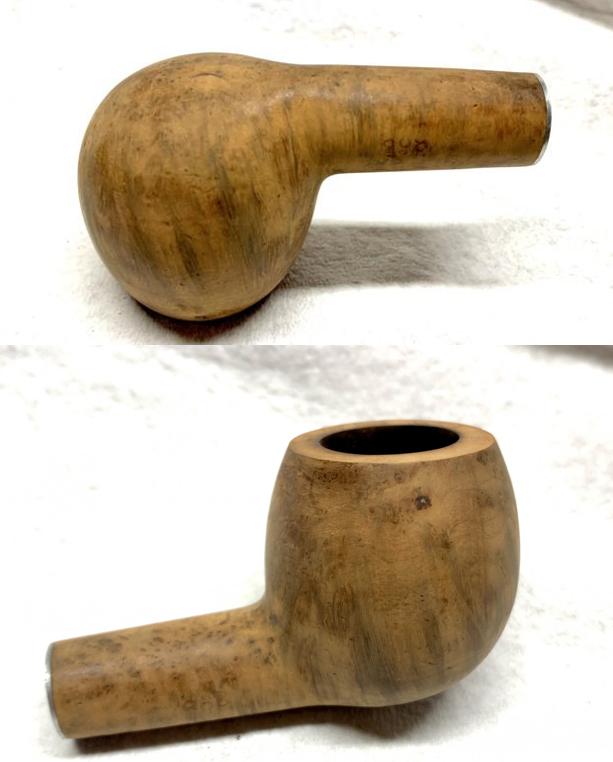
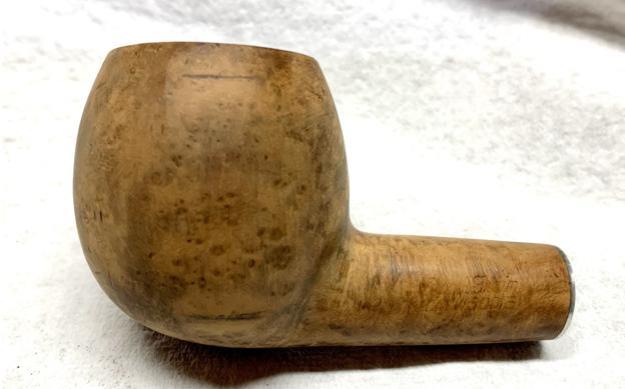
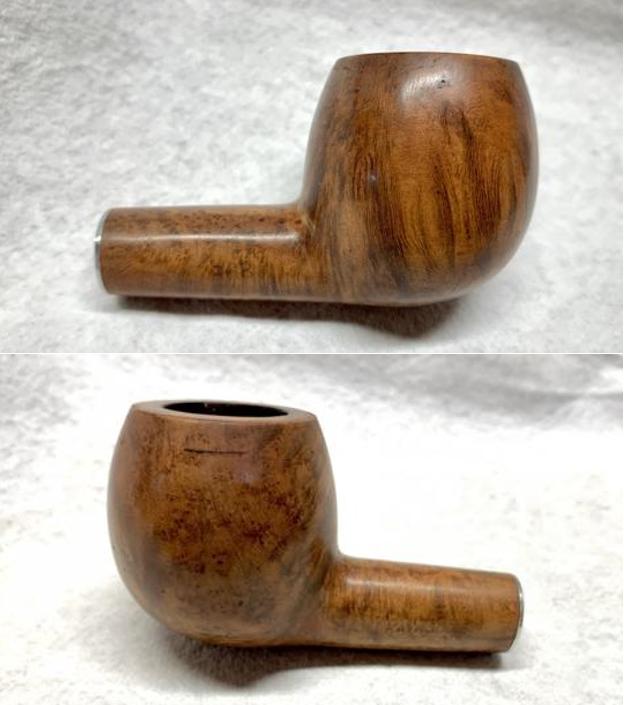
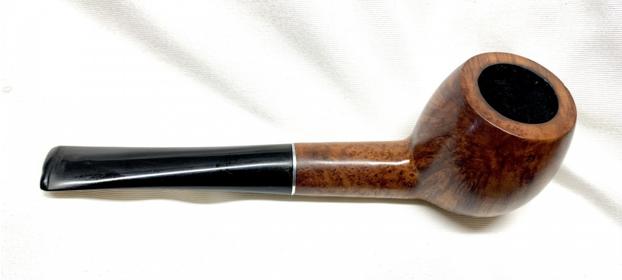
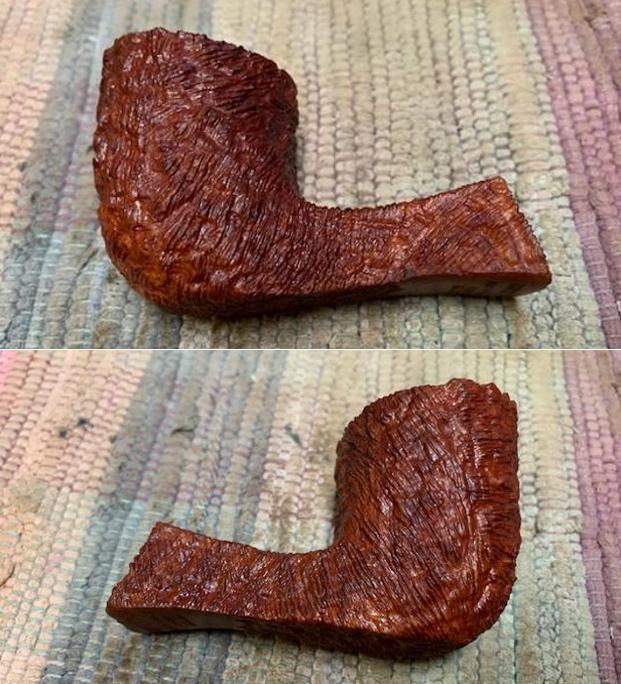
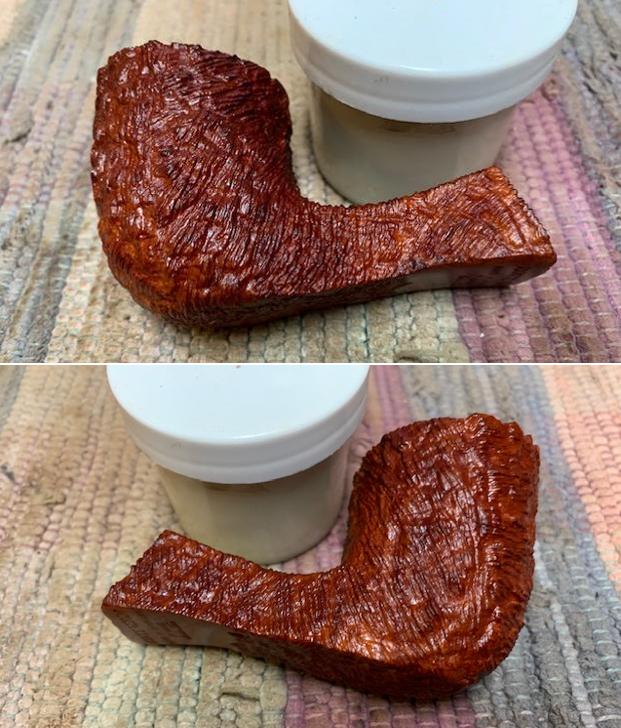
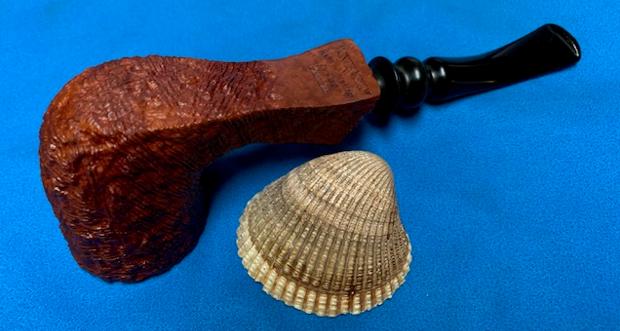
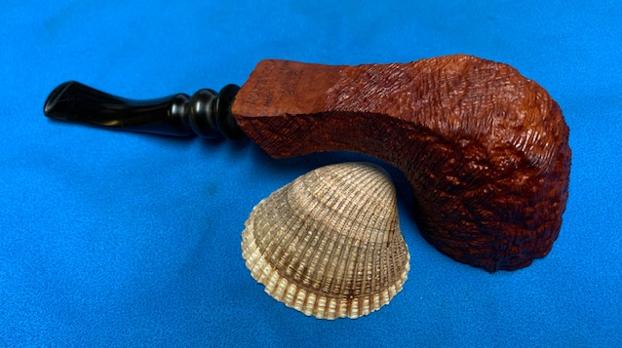
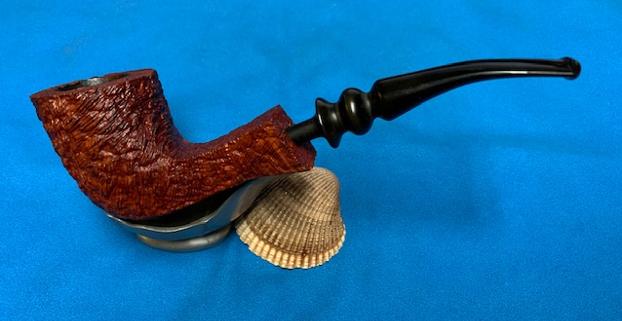
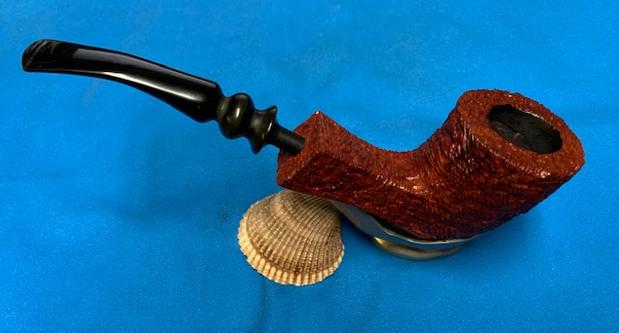
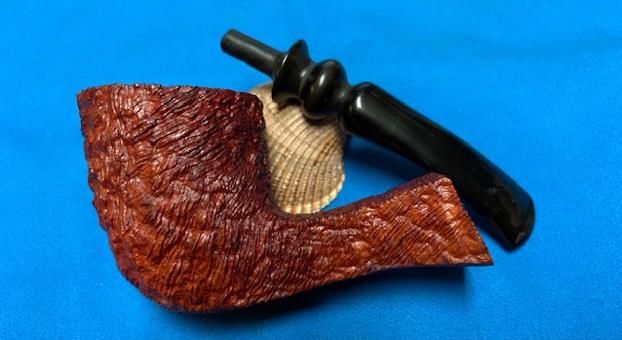
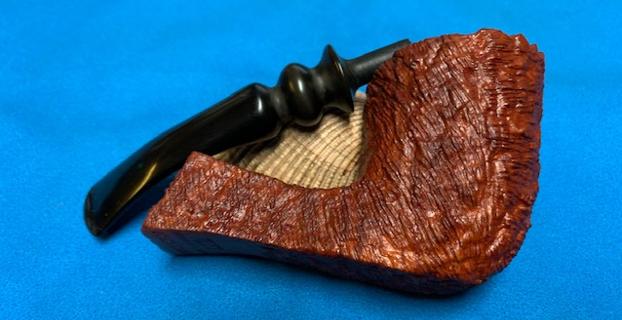
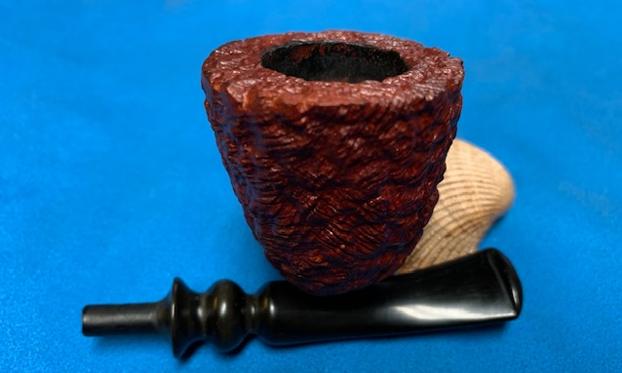
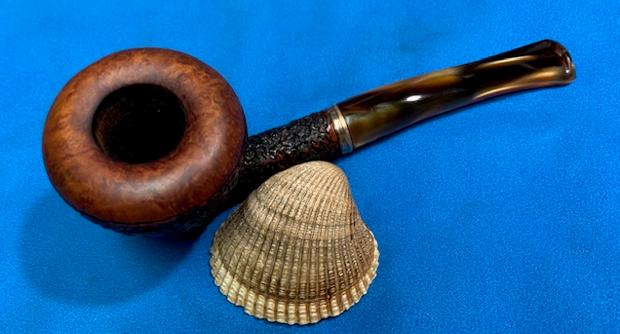
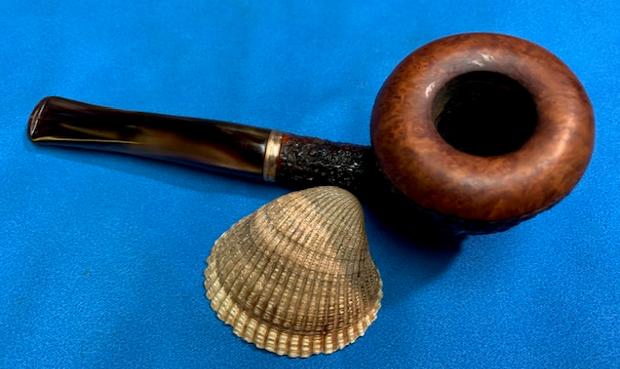
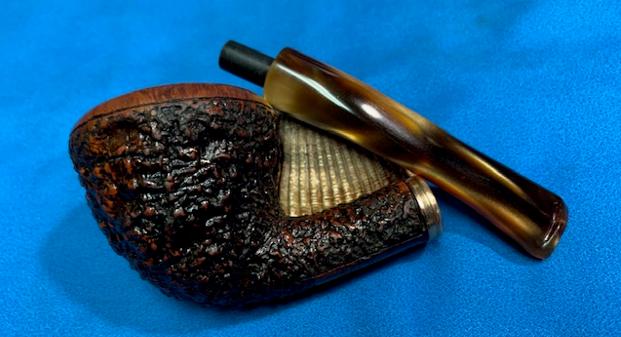
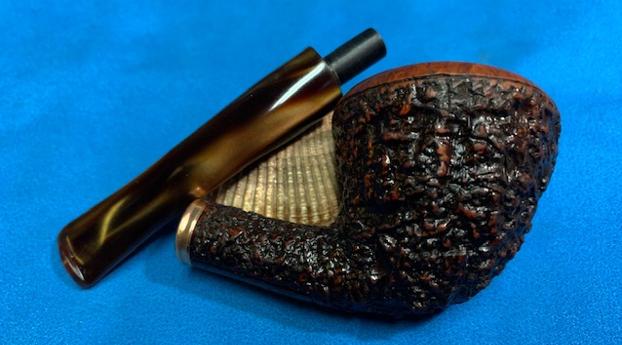
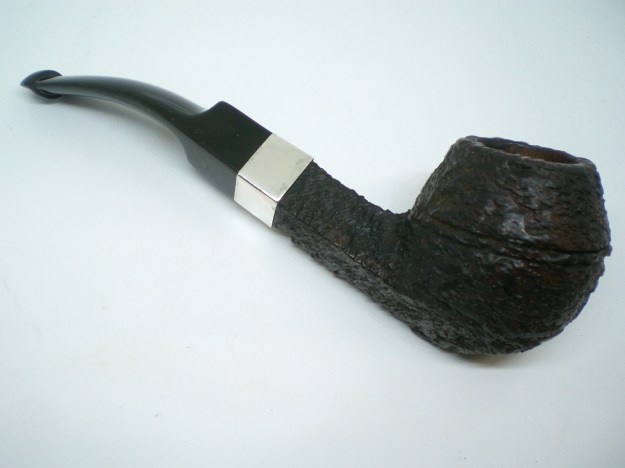
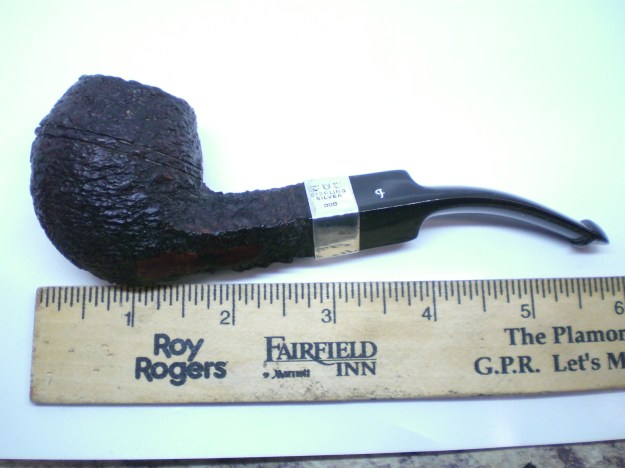
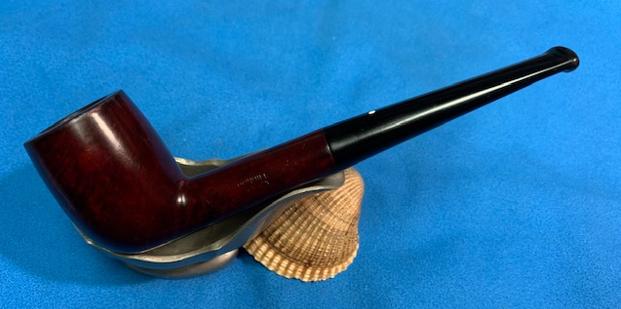
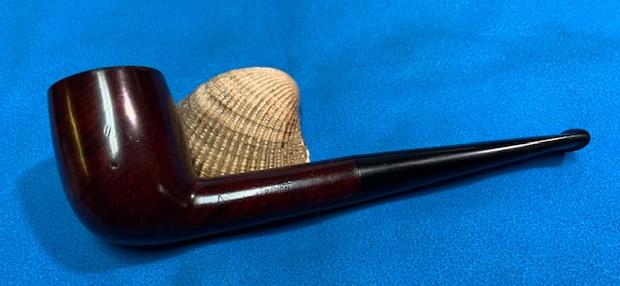
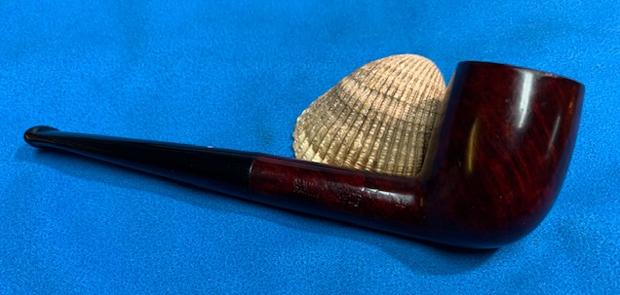
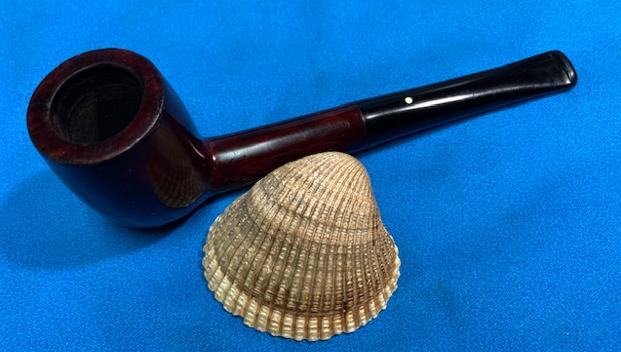
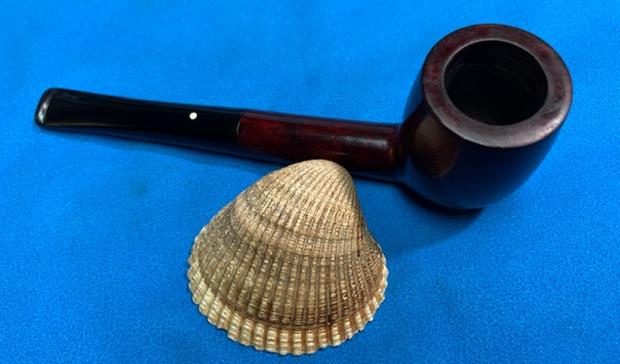
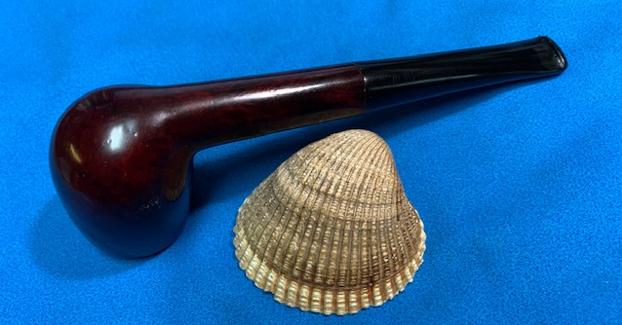
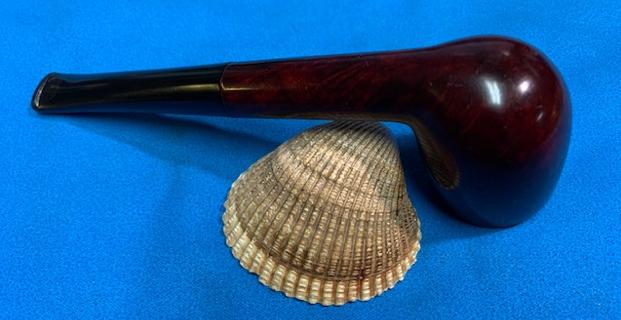
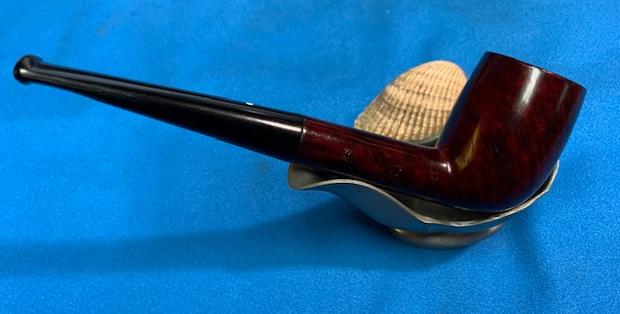
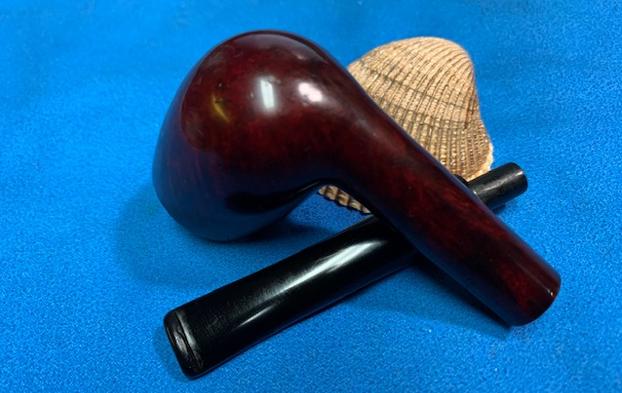
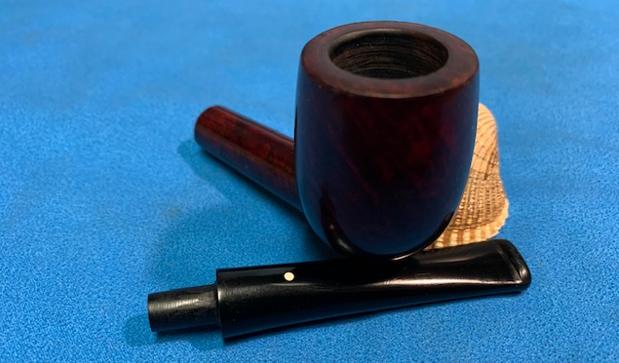
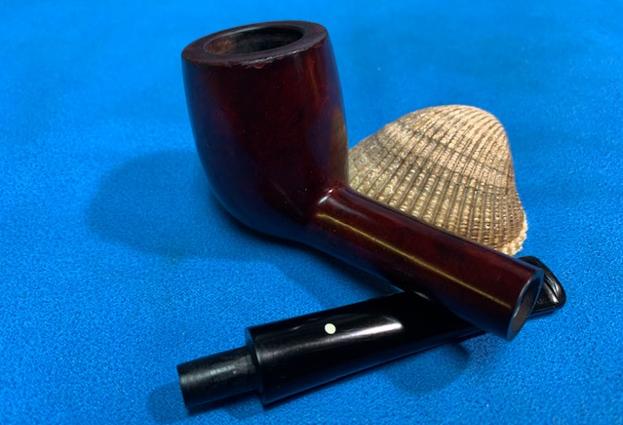
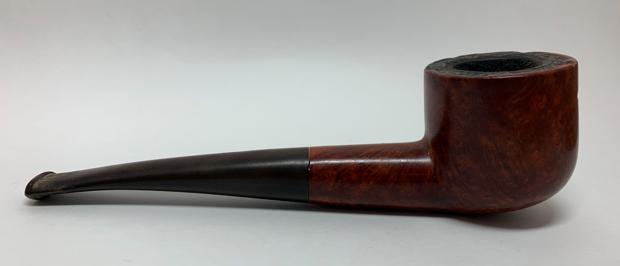
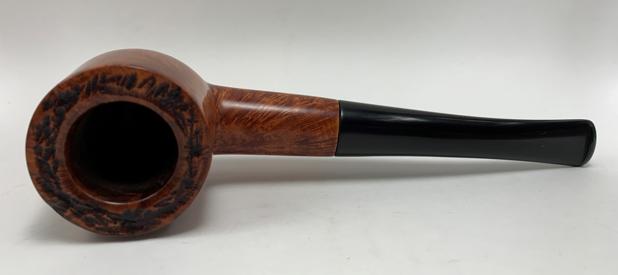
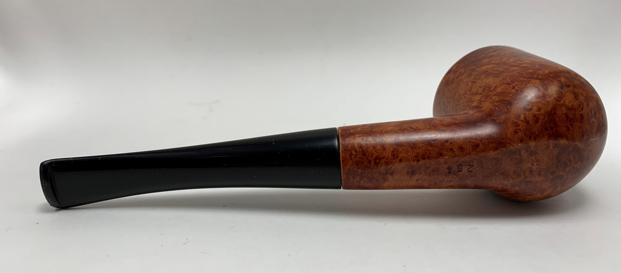
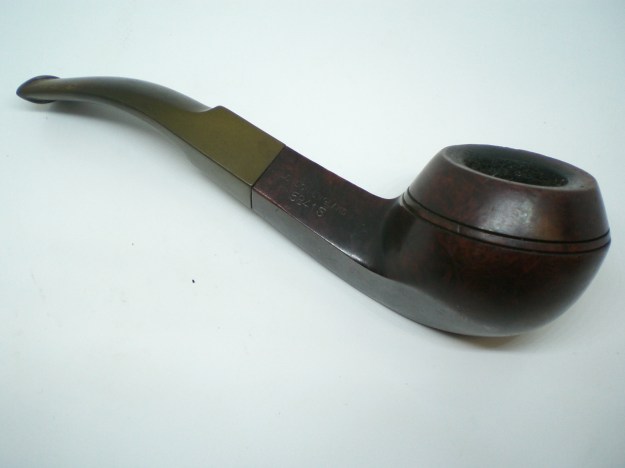
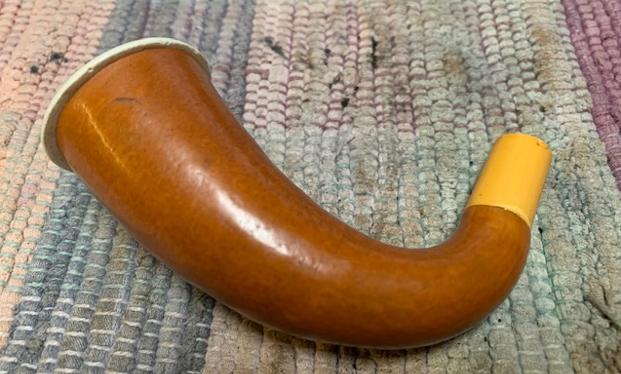
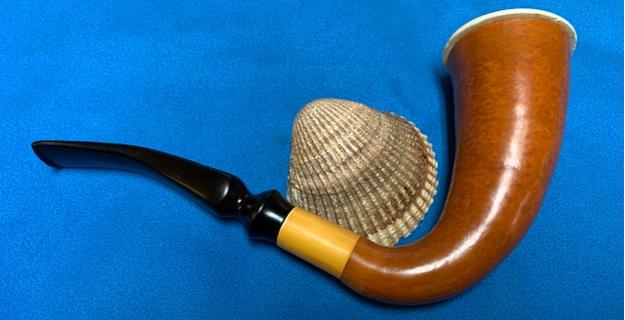
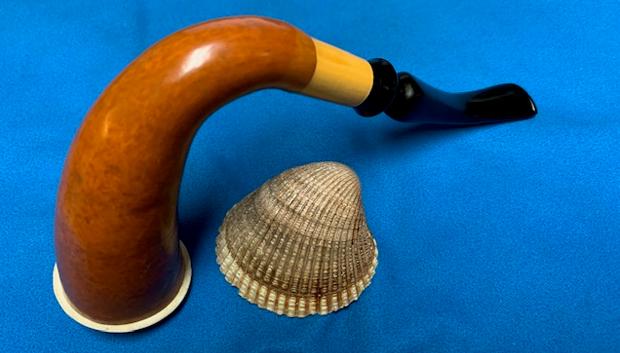
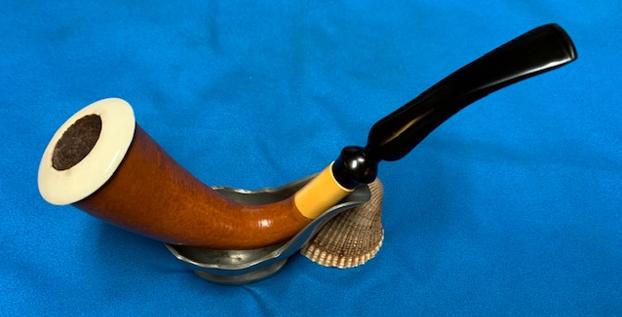
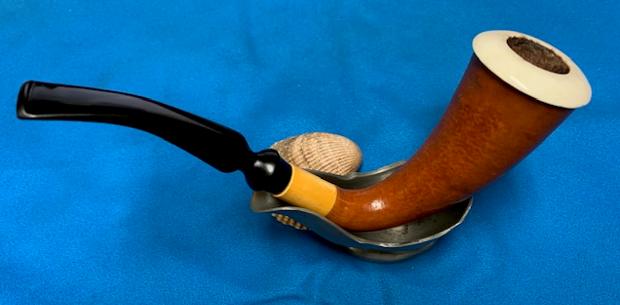
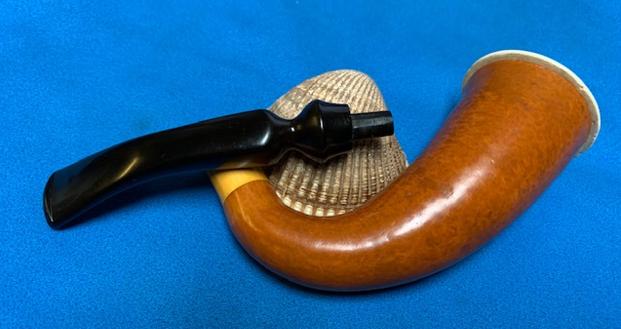
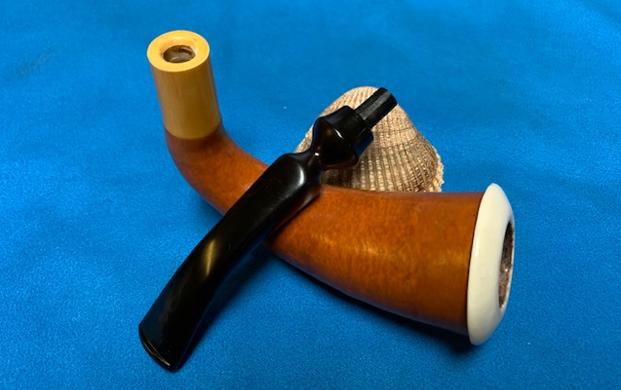
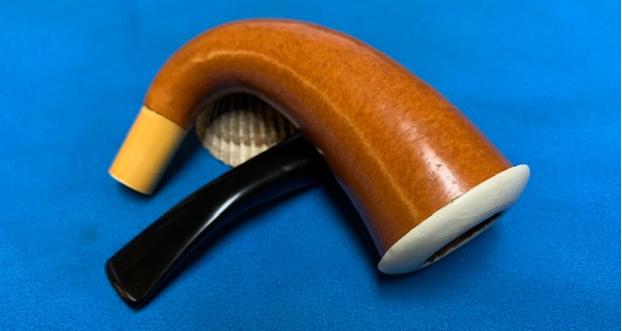
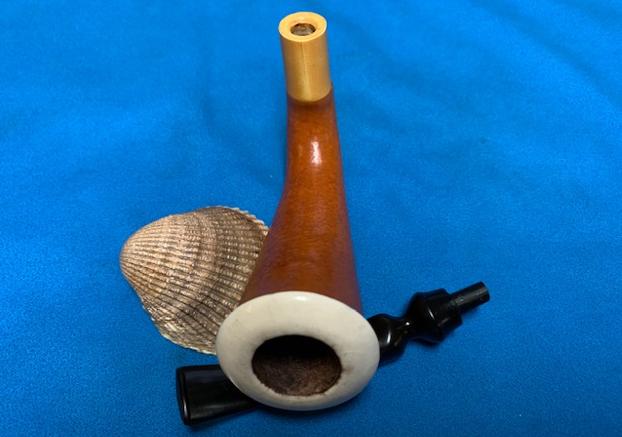
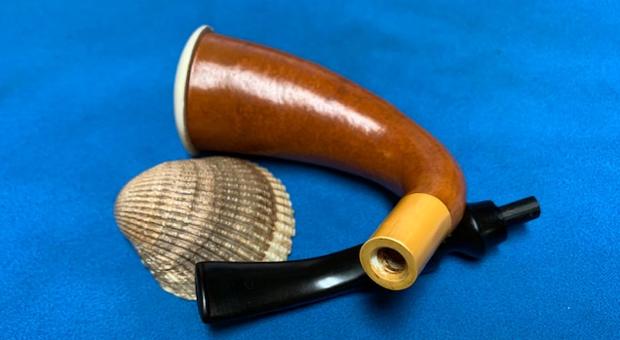
Thank you, Skeet! Through our communications back and forth, I have learned a bit about Skeet. He resides in my birth state, Illinois. He also drives a school bus with children under his care. He is a man of faith, pastoring a small church with the care of souls under his charge during times which have unique challenges to us all. He and I also share the experience of being close to the same stage of life – having a greater awareness that there are statistically fewer days awaiting us to walk tomorrow than the days we have already traveled. Like us, the vintage Kaywoodie now on the worktable has also traversed many days. Here are a few pictures to look at this Kaywoodie ‘ole timer’ that Skeet commissioned.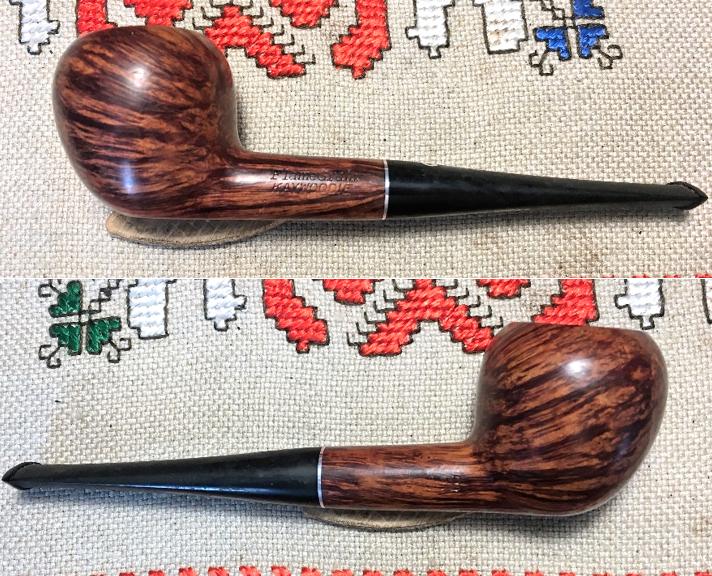

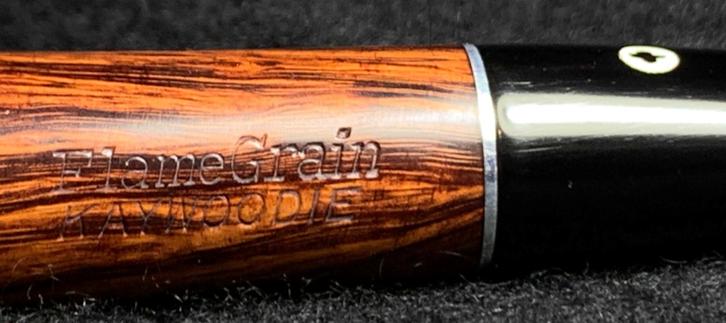
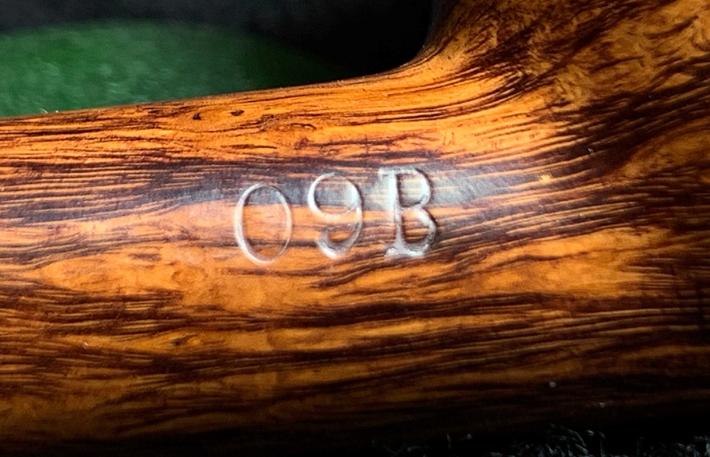
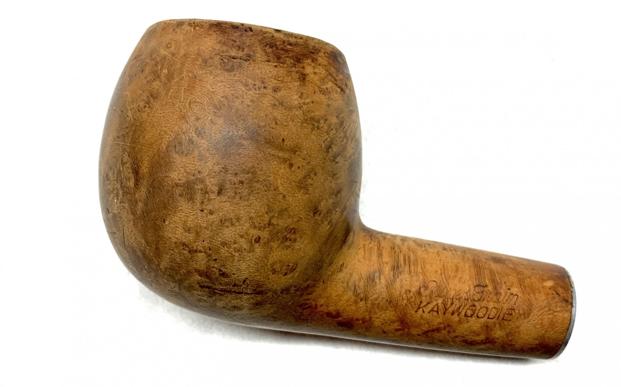
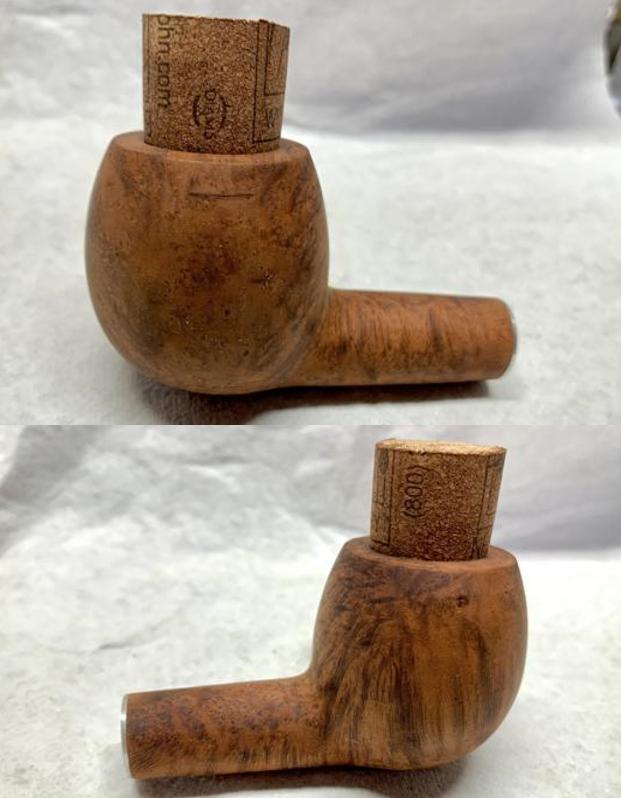
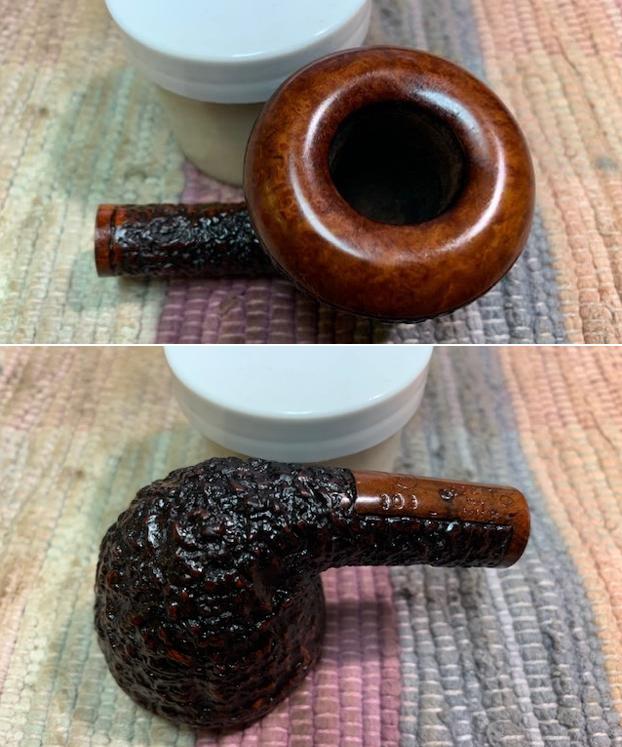
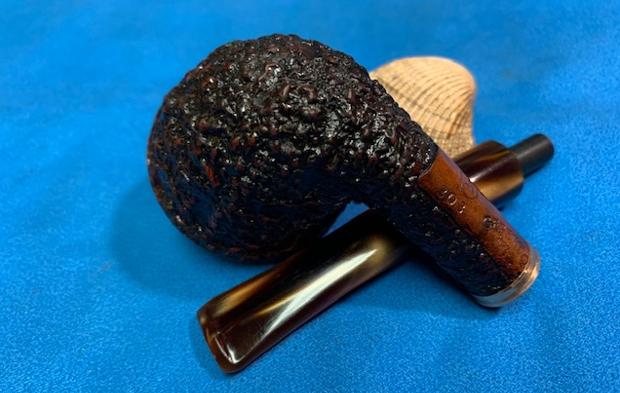
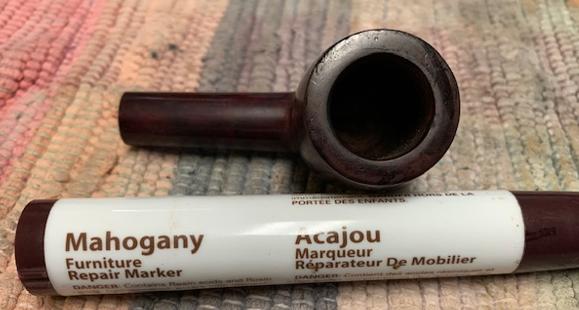
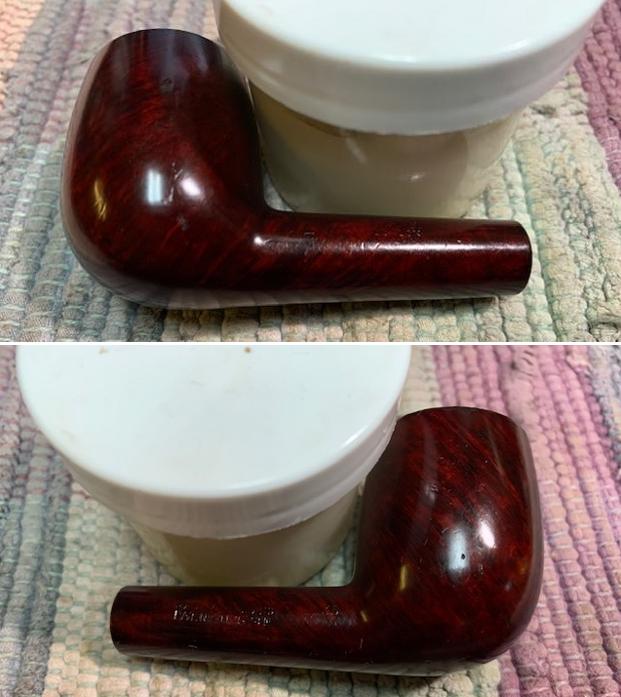
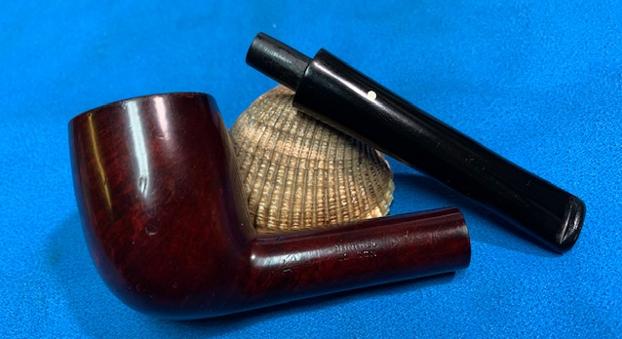
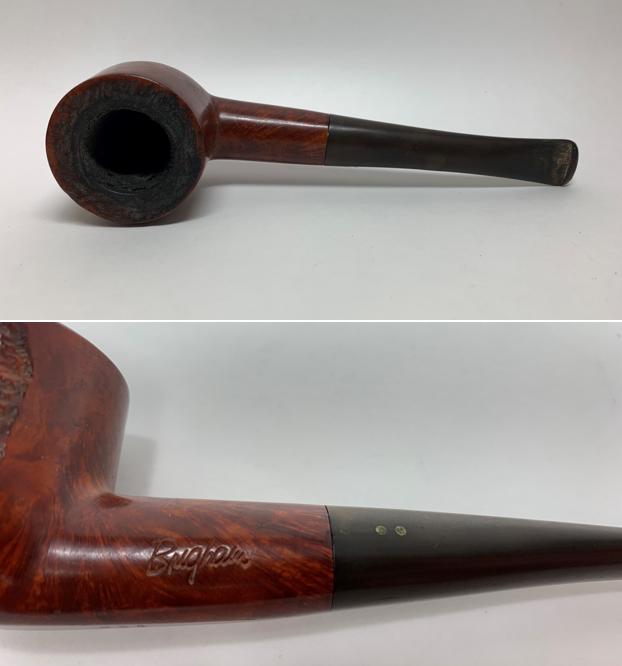
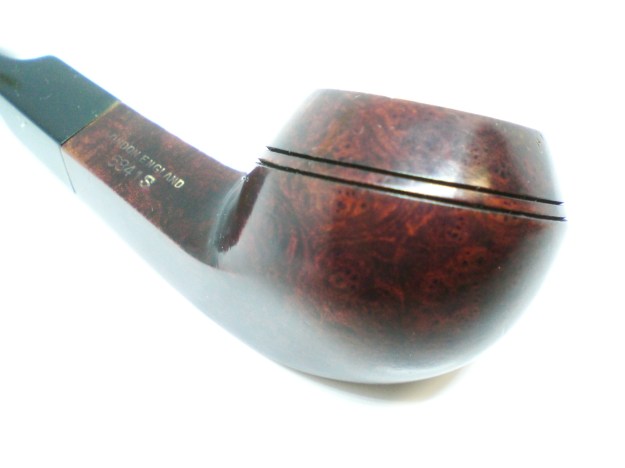
 The nomenclature stamped on the left shank flank is, FlameGrain [over] KAYWOODIE. The right side of the shank holds the shape number, 09B. The shape number described in the Kaywoodie Pipe Shapes listing from the Kaywoodie Forum posted in 2013 by the kwguy, Bill Feuerbach, of the S. M. Frank & Co., is that the 09B is a Medium Pear shape that was produced during the broad period of 1936 to 1972. The goal will be to hone in on this span by looking for other factors and clues that help date Kaywoodie pipes.
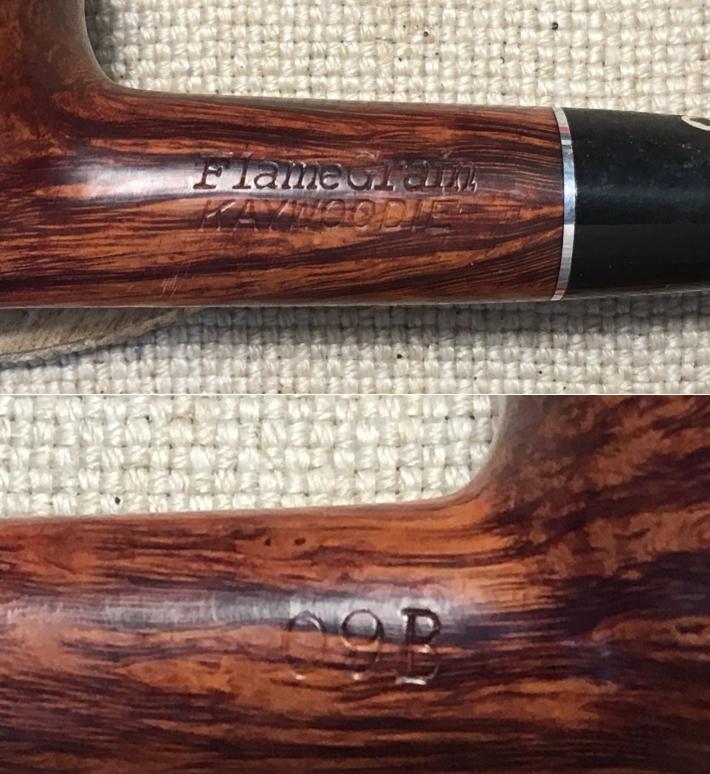 Other distinct markers helping to date the Kaywoodie are there. In another posting on Kaywoodie shapes in 2014 on the Kaywoodie Forum, Bill Feuerbach provides additional information about the history of shape numbering comparing the ‘New 3 digit #’, the ‘Kaywoodie 2 digit #’ and the ‘Original Medico #’. He wrote:
Maybe a little background is in order. In 1972, we closed the West New York factory having completed construction of our new 197,000 square foot factory in Yapank on Long Island. The plan was to move all pipe production there, but in the interim, the Medico factory in Richmond Hill Queens would handle the final sanding and finishing of all of the Kaywoodie, Yello-Bole and Medico pipes. The thought was eventually those operations would also shift to Yapank as skilled workers could be trained to handle those operations. (A down turn in the pipe market in the seventies doomed the new plant, but that’s another story)
Having the three lines being finished in one building, would create confusion if there were two shape numbering systems. So a new 3 digit system was adopted. The Medico 3 digit system was also changed at this time. This list will have three columns of numbers. The first will be the “new” three digit number, used on all Kaywoodie and Medico pipes from 1972-1980. (We stopped stamping shape numbers in 1980) The second column is the Kaywoodie two-digit number and the third column is the original Medico 3 digit number, all of which refer to the same shape.
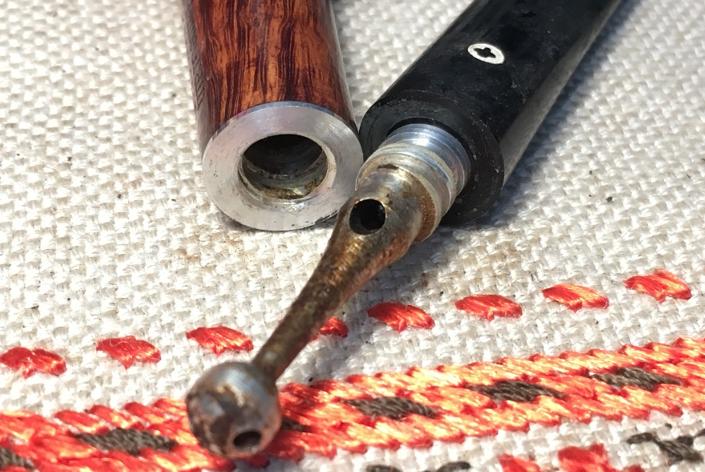
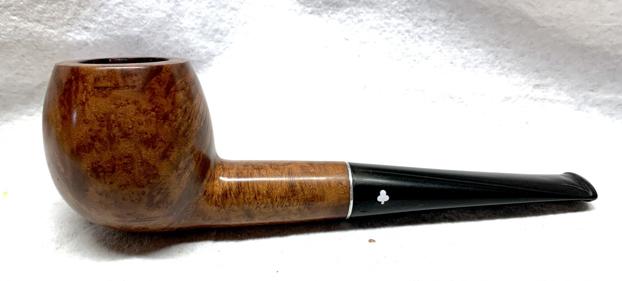
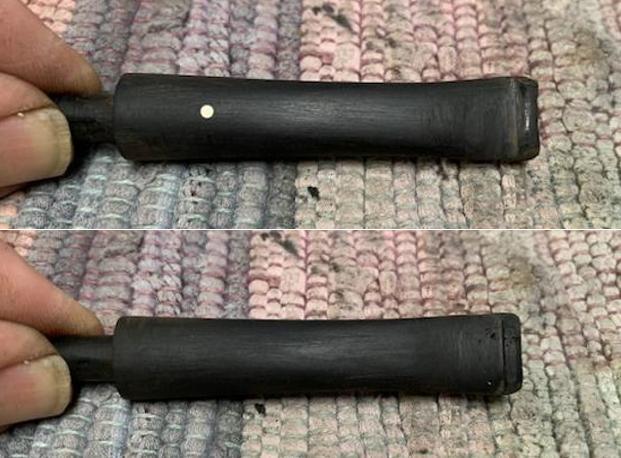
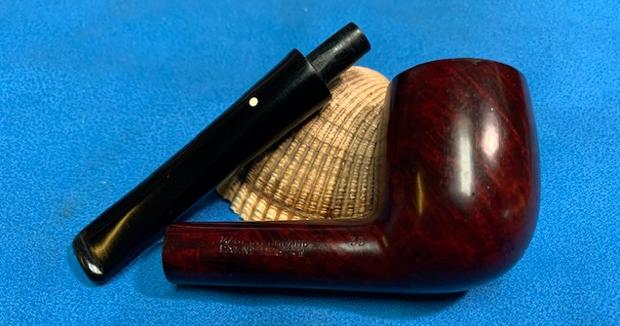
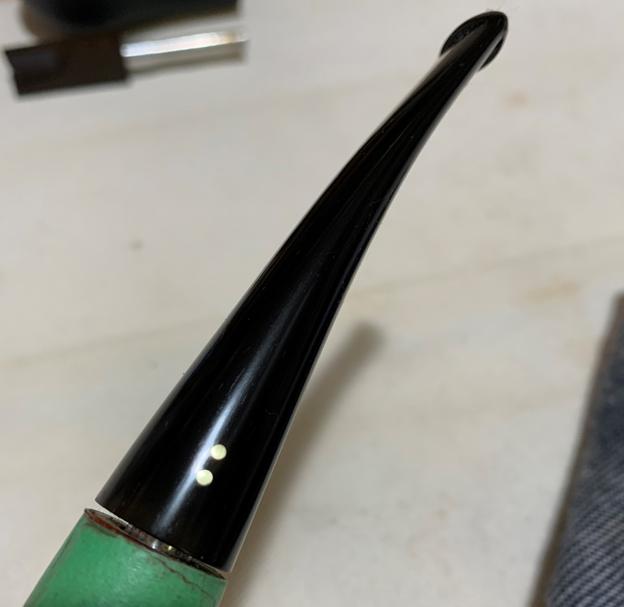
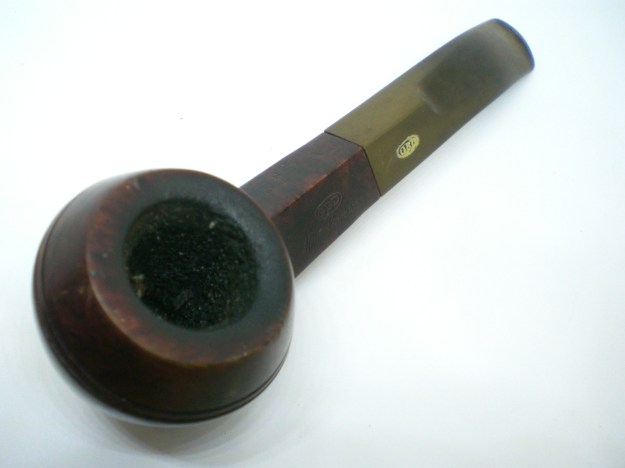
In this chart the ‘09B’ is in the ‘Kaywoodie 2 digit #’ column and is described as a “Standard Pear” produced between 1927 and 1972. I do not know what the ‘B’ attached to the shape number indicates. It hasn’t come up in anything I’ve read thus far. With this question in mind, I decide to send a quick email to Bill Feuerbach, aka ‘kwguy’ in the Kaywoodie Forums and the head of Kaywoodie. Bill helped me last year with information when I was restoring a striking Kaywoodie Natural Burl which came out great. He dug into plastic tubs in his own home looking for relevant printed information to help with my research! To read about this special Kaywoodie go to this link: Bringing to Life a Unique Kaywoodie Natural Burl 33 – Another Legacy Pipe of a Great Grandfather. 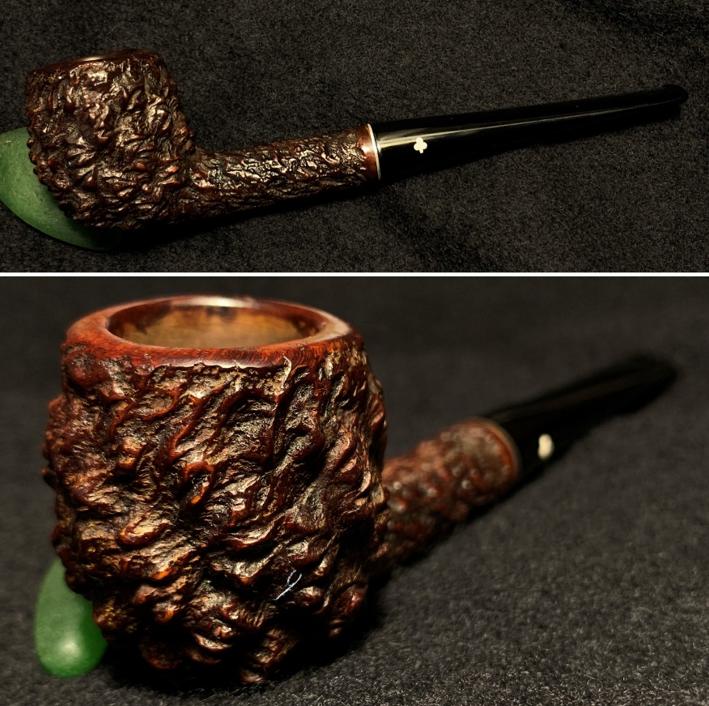 Two additional dating factors of the Flame Grain Pear are first, the inlaid white dot with the black clover inside situated on top of the stem and secondly, the 4 holed stinger. These point to an earlier period dating of this Kaywoodie. Generally, 4-holed stingers were phased out by the 1960s (with exceptions) replaced by the more common, 3 holed stingers.
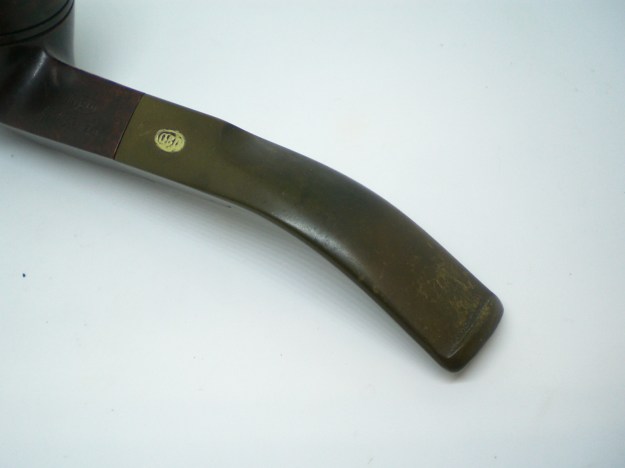
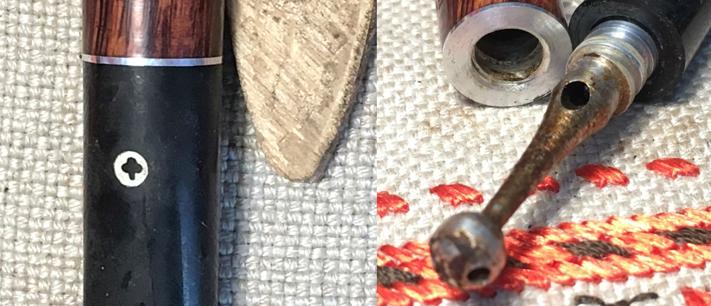 Looking to Pipephil.eu I find additional information looking at Kaywoodie’s ‘Flame Grain’ line which is listed among the several examples of Kaywoodie offerings over the years. The following Flame Grain panel was clipped.
 From this additional information, the nomenclature points to an earlier period of production. The Kaywoodie on the worktable is stamped Flame Grain over Kaywoodie – on earlier Flame Grains. Interestingly, there is no ‘Imported Briar’ on our pipe as well, which was never the case before 1935, but after 1935 this designation was sporadic. One more indicator of dating comes from Pipephil’s information about the Kaywoodie cloverleaf logo.
 The genesis of the inlaid white dot with the black clover coincides with when the Flame Grain line started. This logo was used on all ‘upper grade’ pipes up to the late 40s. Another important indicator is the clover being on top of the stem. This is the final piece of information that helps put dating brackets around this Kaywoodie Flame Grain. With the clover being on the top of the stem, the latest dating for this Kaywoodie would be the early 50s. We can say then that the dating of the Kaywoodie Flame Grain on the worktable is most probable between 1937 and the late 40s, but perhaps to the early 50s – 1953?
Armed with this dating information, I look through the old Kaywoodie catalogs and flyers from the jpeg repository of the defunct Chris Keene’s, ‘PipePages’ website. This poking and digging proved helpful! I find a ‘Kaywoodie Pipes’ flyer dated 1947 – the correct period. It contains Flame Grain listings for both briar and Meerschaum lined pipes. I found interesting also in the front/back panels below are the charges for repairs and replacement parts Kaywoodie was asking in 1947! 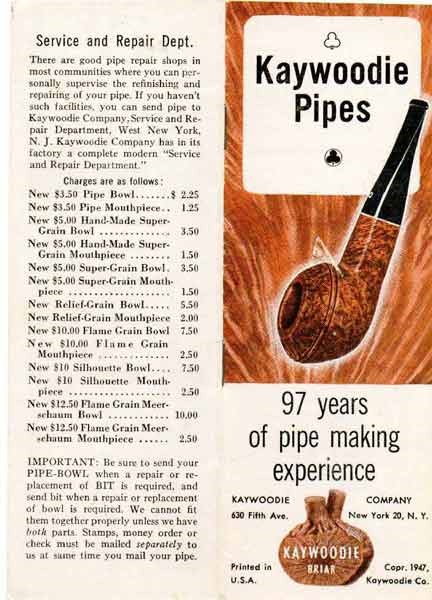 This next page of the flyer shows the Flame Grain offerings with the briars marked with a $10 price tag. Curious about what that Kaywoodie might do to my pocket book new today, I went to a site that computes the value of $10 in 1947 to the value it would have today. Amazingly, in 1947 $10 would have the purchasing power of $116.80 today according to this site! I would consider this a high-end pipe! The Flame Grain Apple example below also carries the cloverleaf logo on the top of the stem like our Pear.
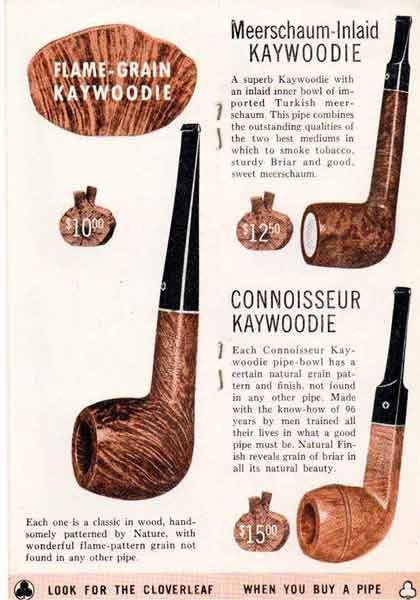
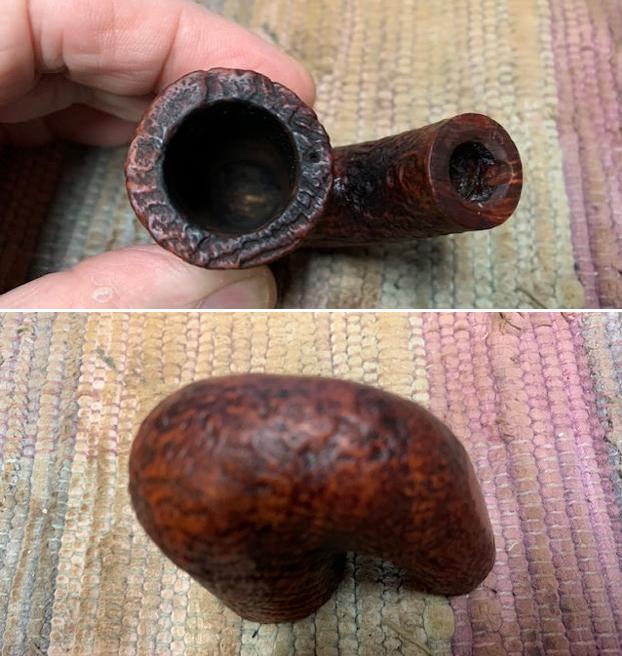
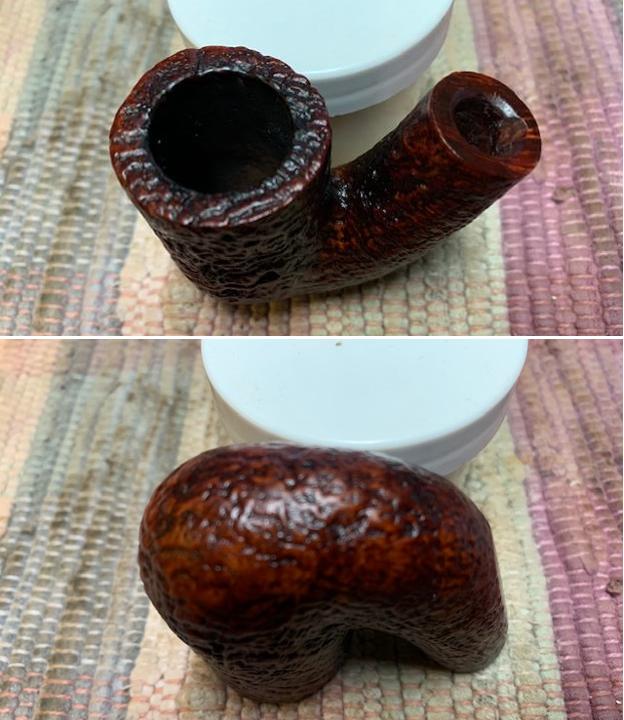
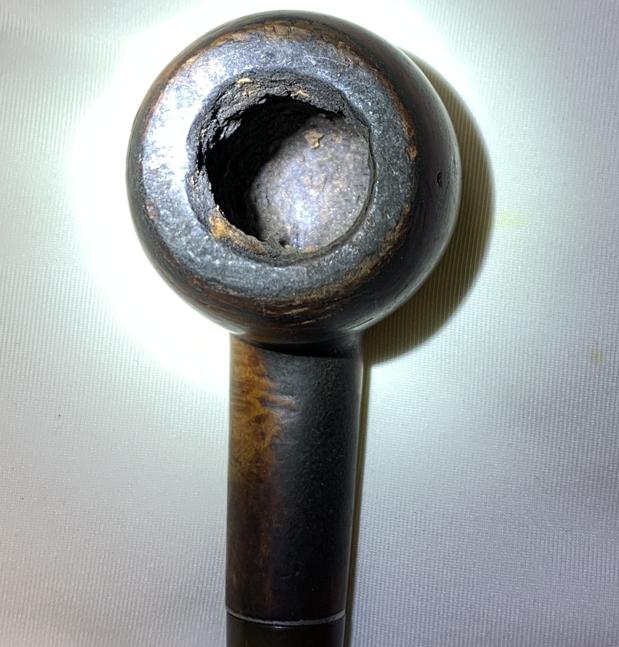
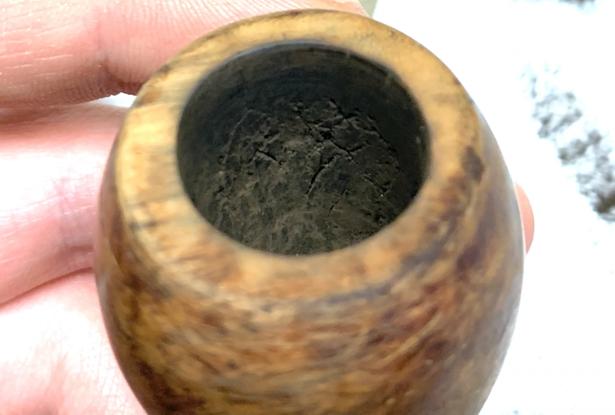
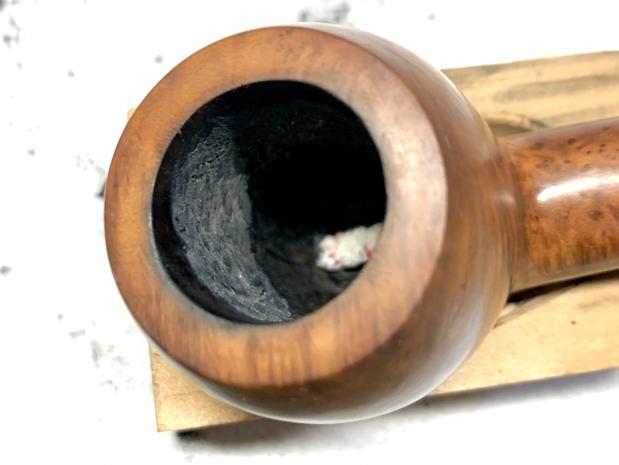
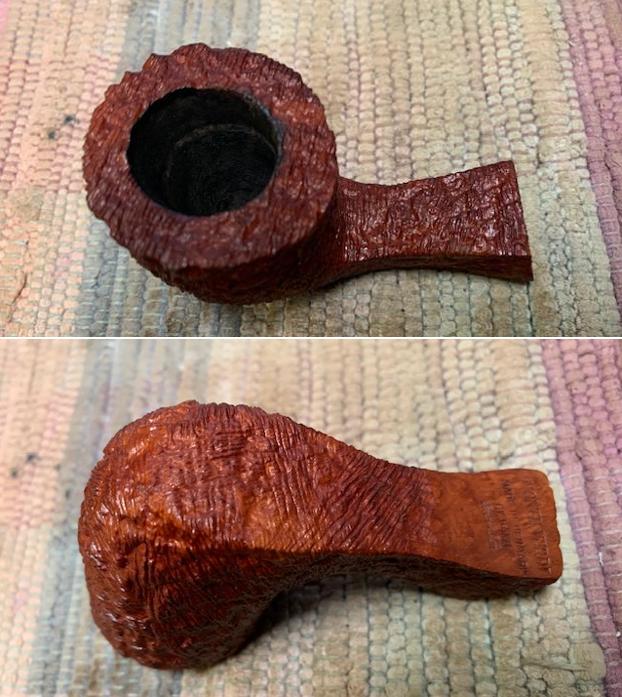
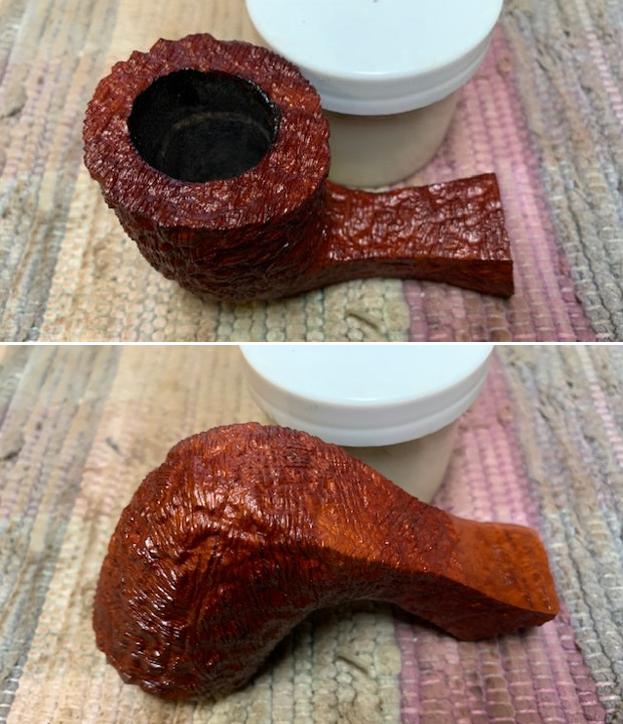
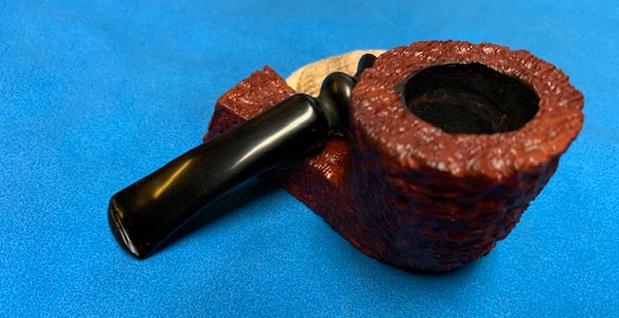
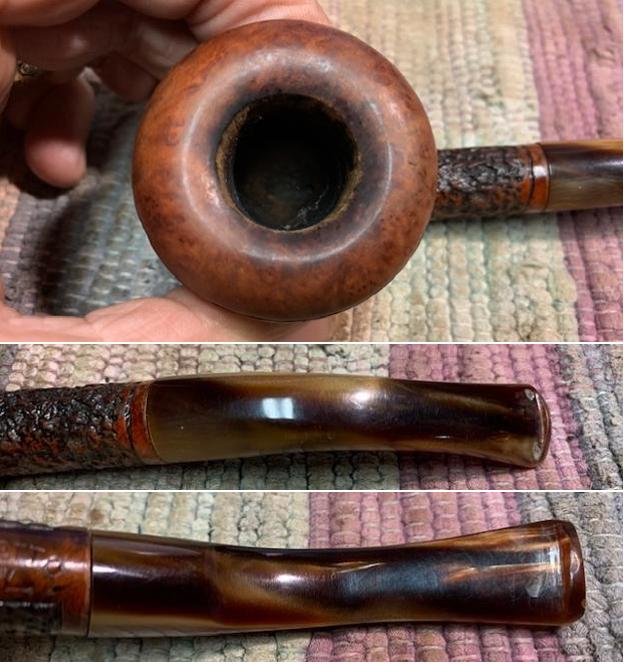
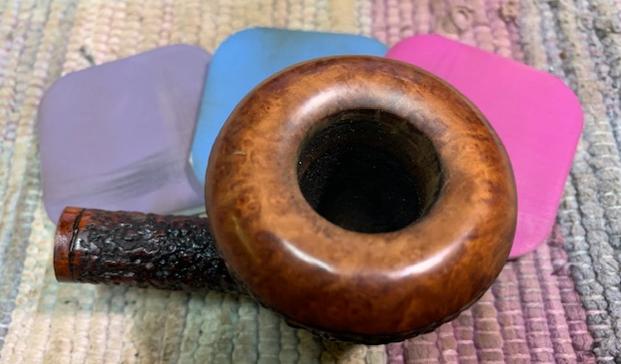
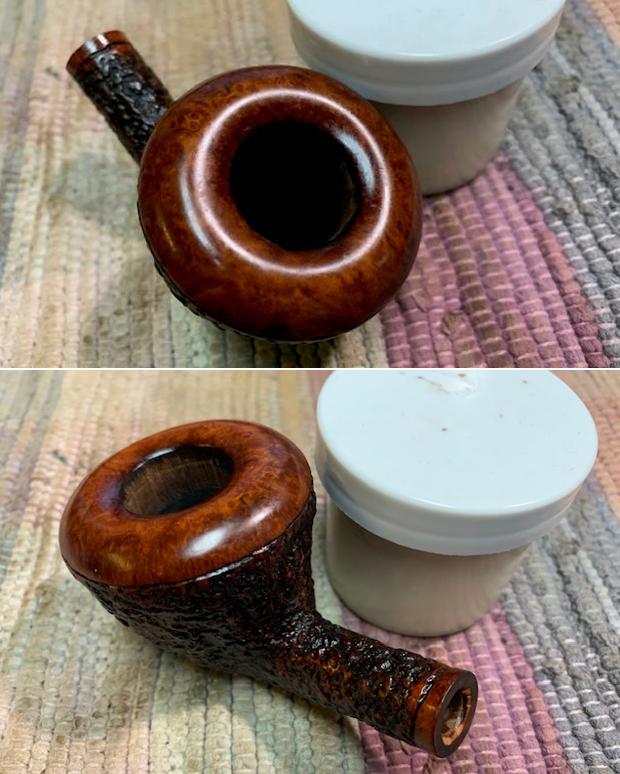
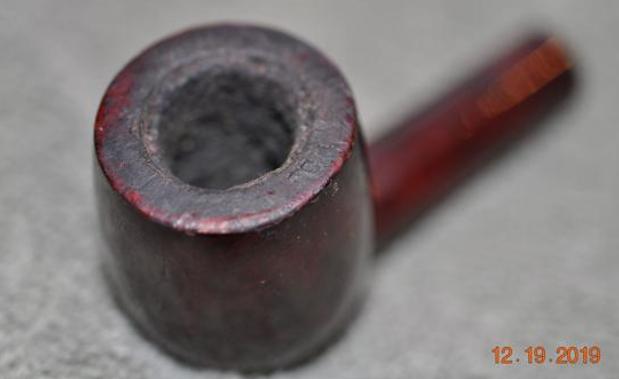
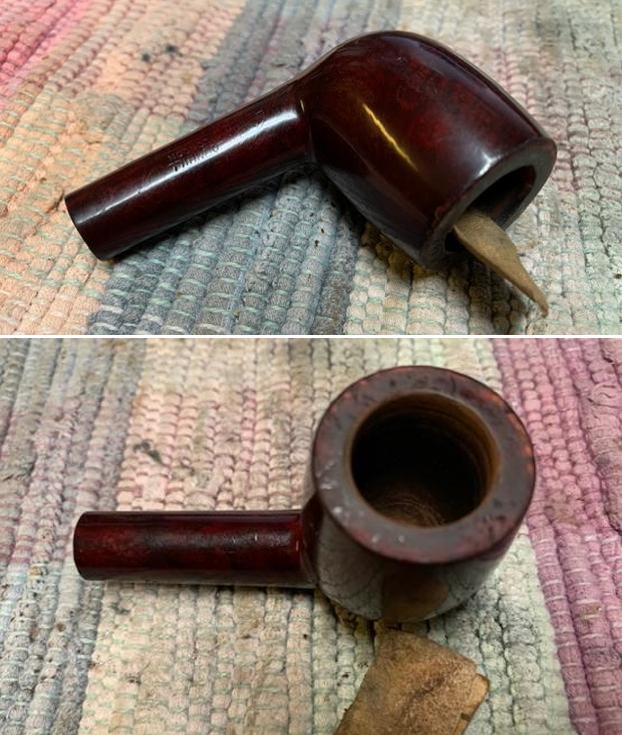
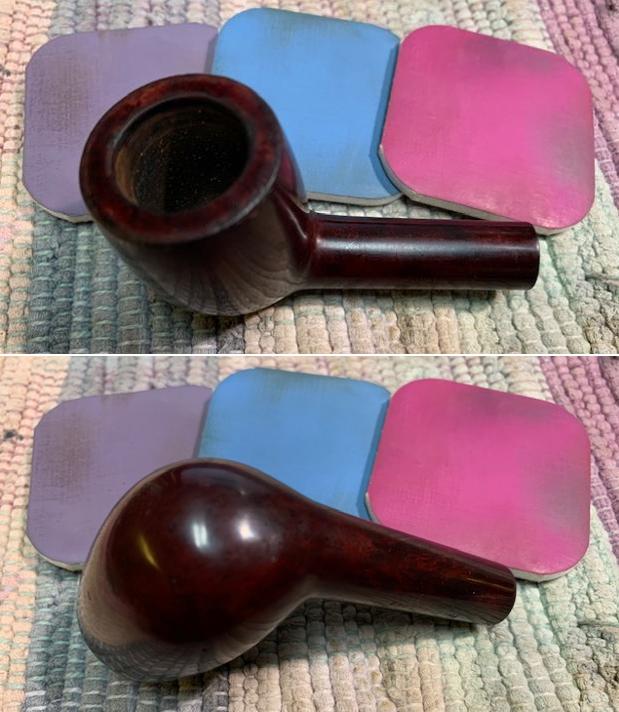
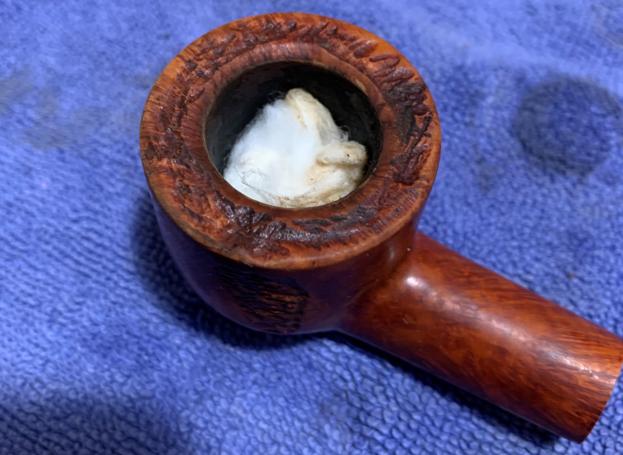
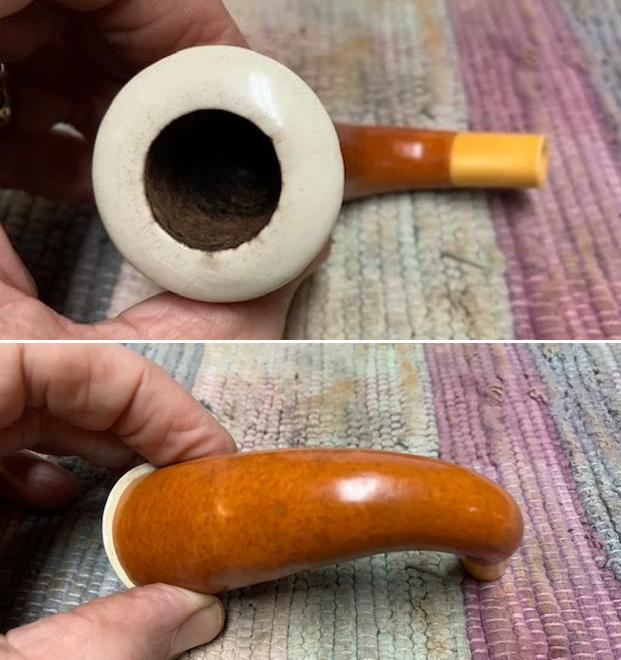
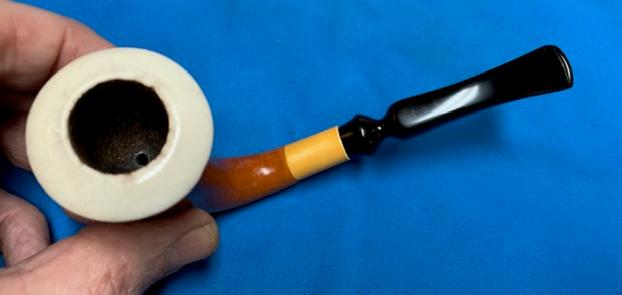
One final contribution from this 1947 Kaywoodie flyer is in the final pages of the flier showing all the possible shapes available. The 09B is pictured and labeled, ‘Pear’. The small text box on the top right side of the page below gives a guide for the dimensions – ‘Each square on the page represents 1 inch’. The reproduction of the page does not show this 1-inch marker – I can’t see it, but it encourages me to provide the dimensions of the Kaywoodie Pear – Length: 5 3/16 inches, Height: 1 1/4 inches, Bowl width: 1 3/8 inches, Chamber width: 3/4 inches, Chamber depth: 1 1/4 inches.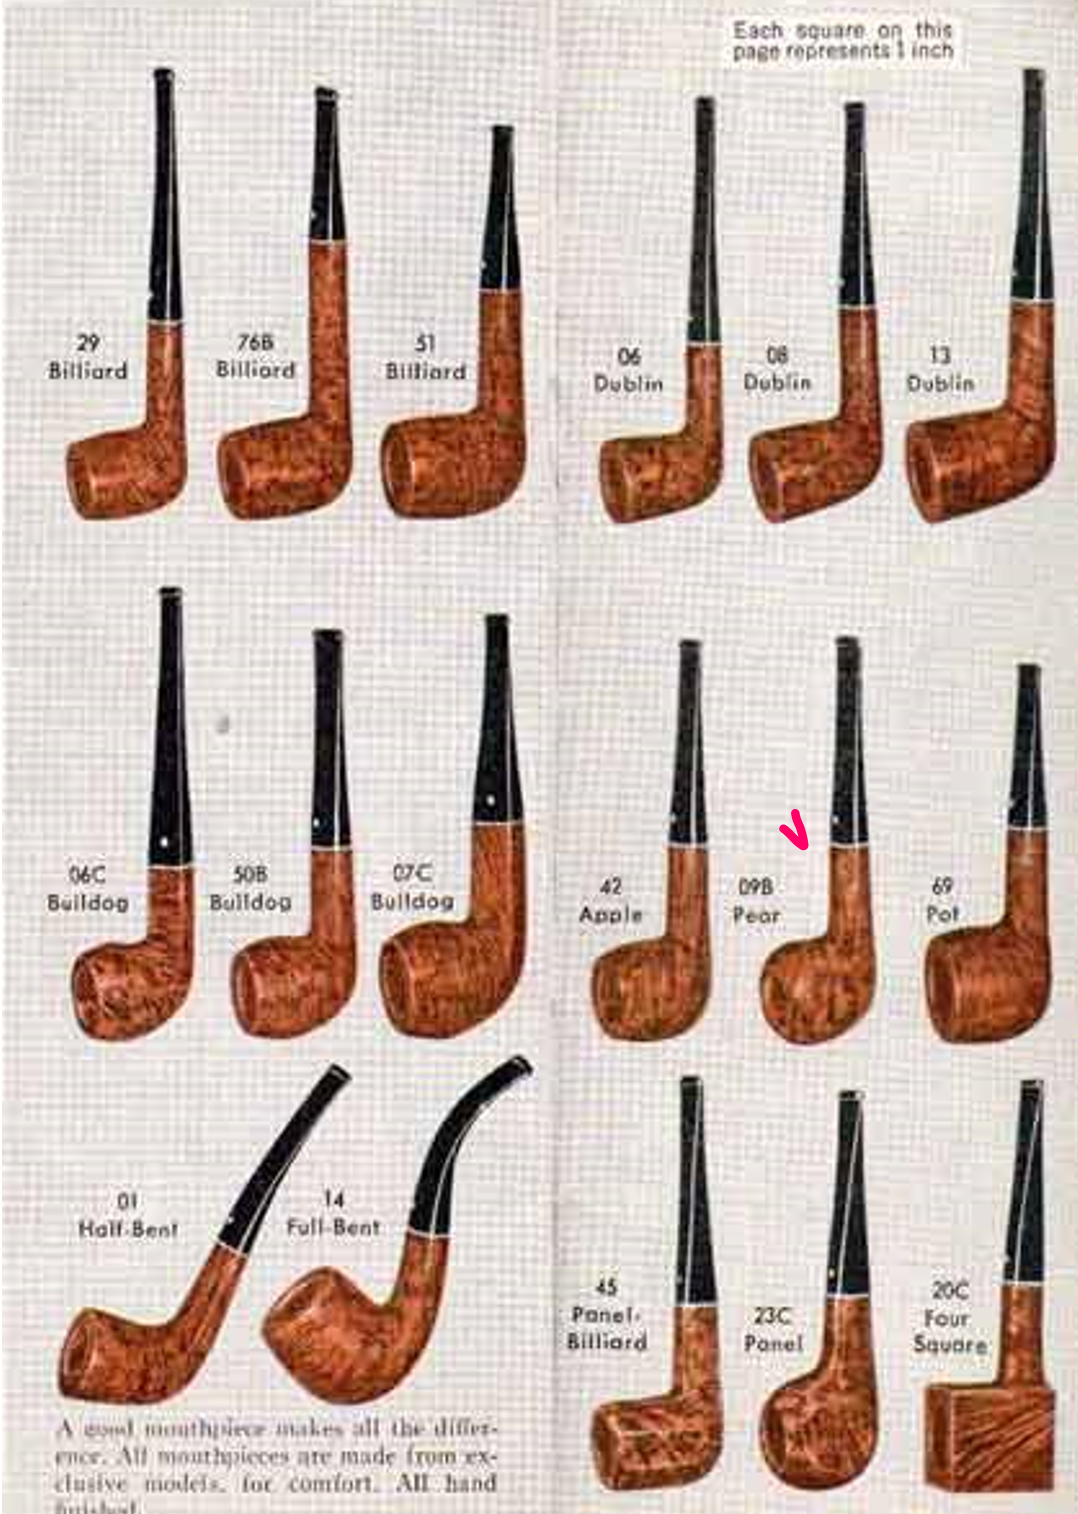 With a greater appreciation for the vintage Kaywoodie Flame Grain Pear on the worktable, I take a closer look at the issues. The pipe is in exceptionally good shape – surprisingly for an ole timer! The chamber has some cake buildup, and the internally beveled rim is darkened from lava flow from lighting practices on the back side of the rim.
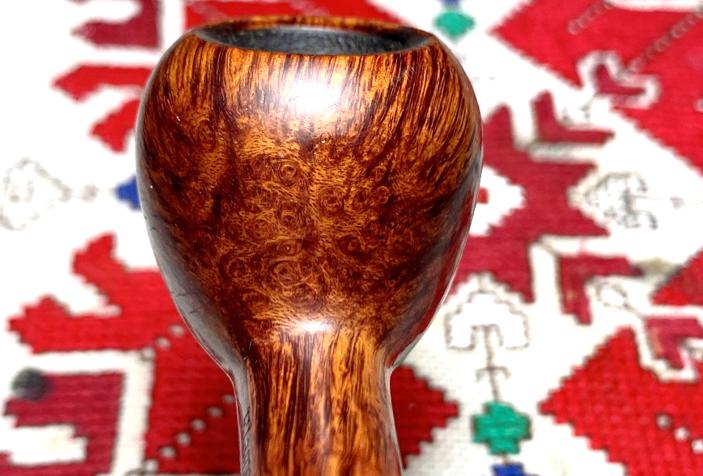
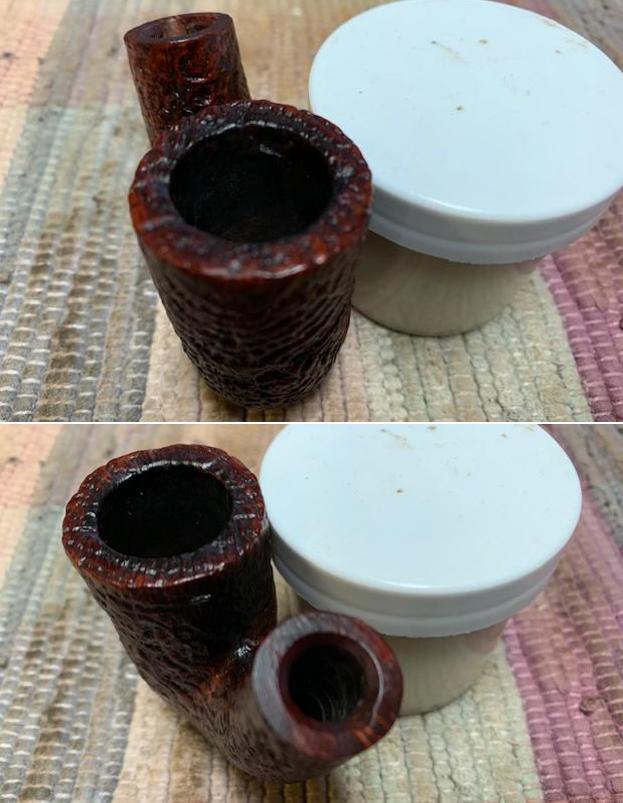
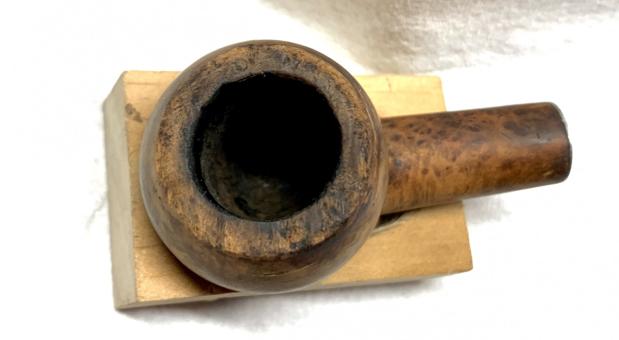
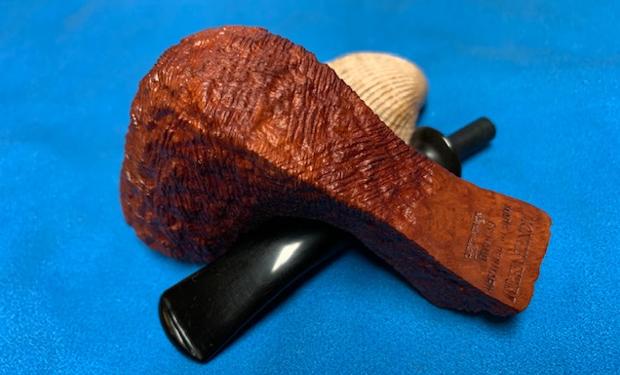
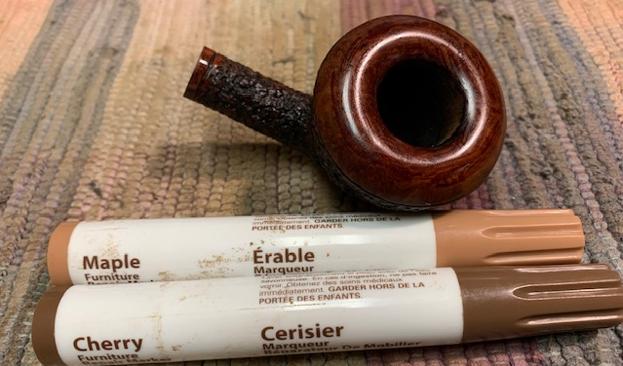
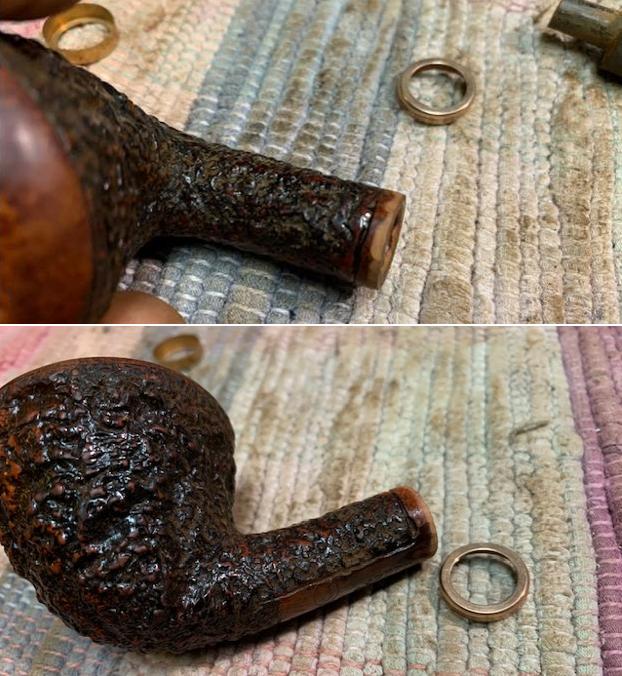
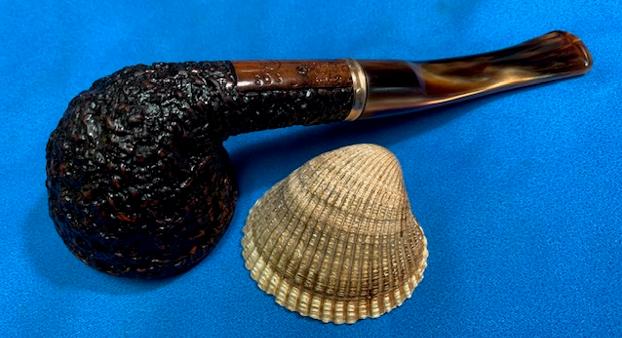
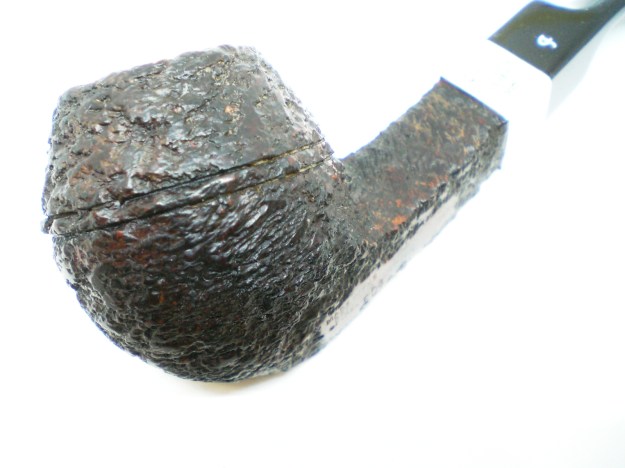
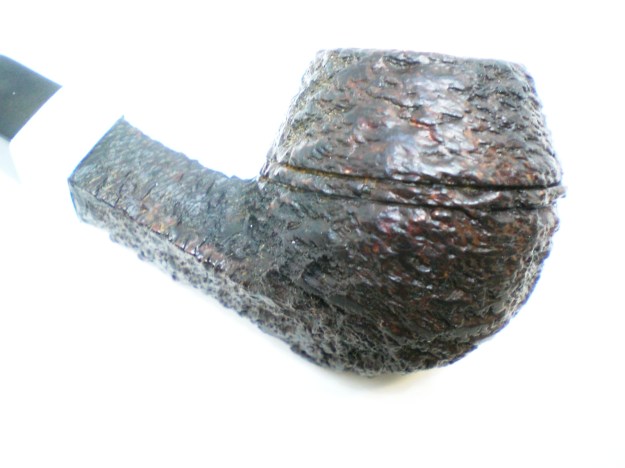
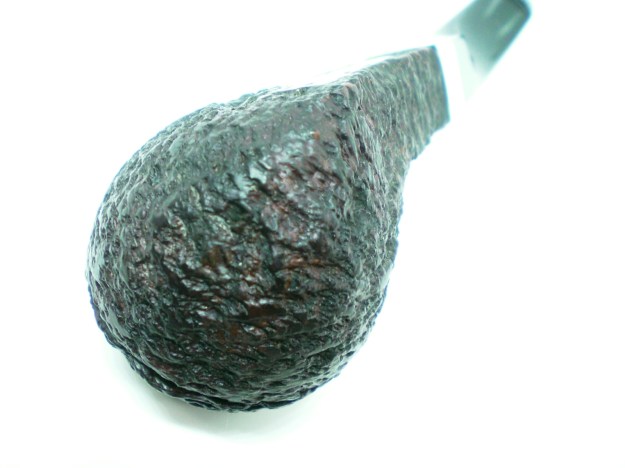
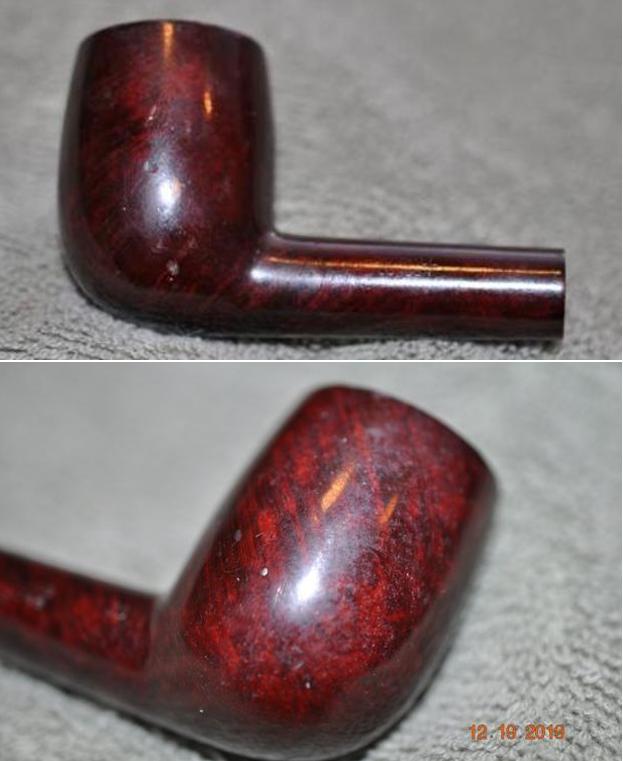
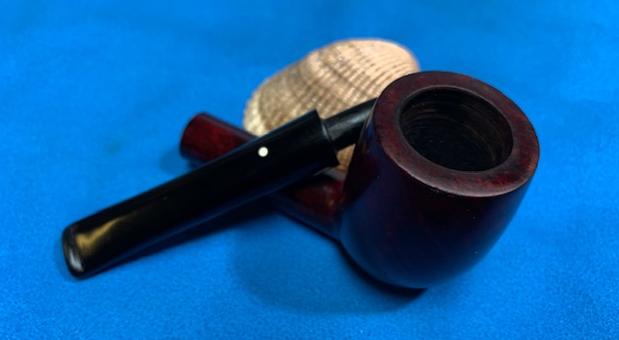
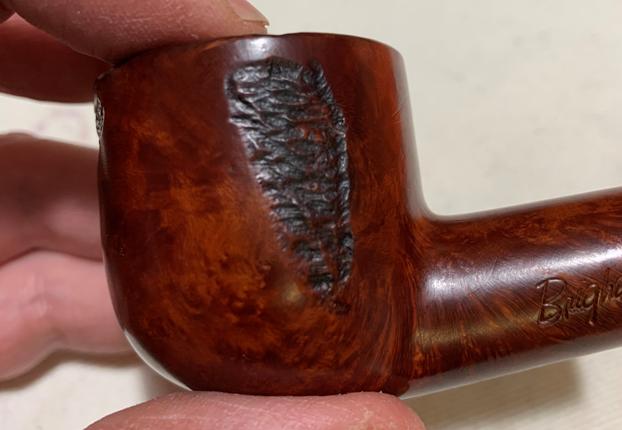
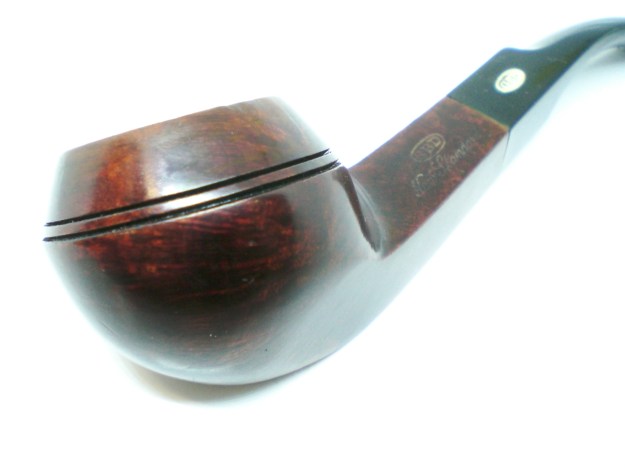
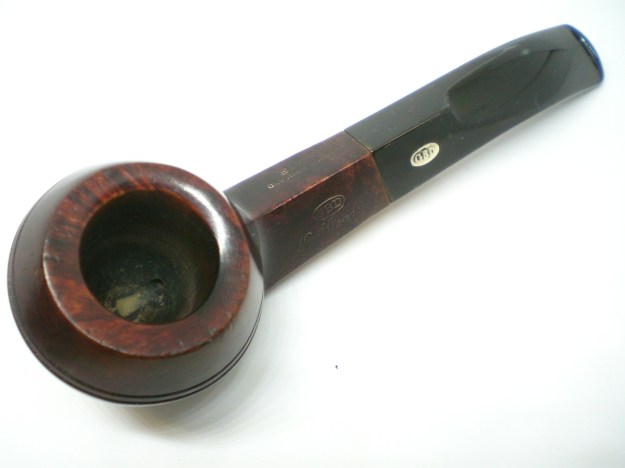
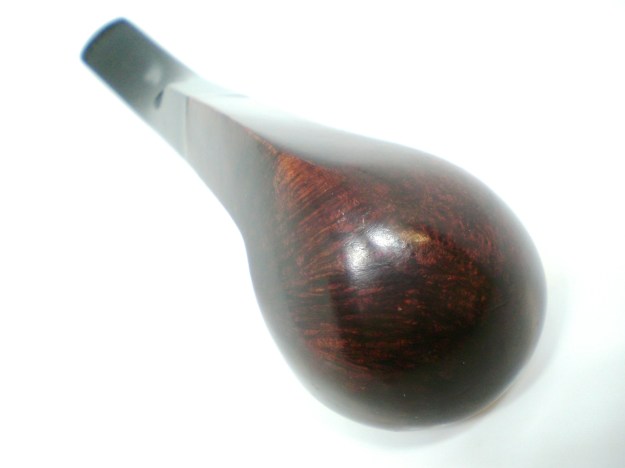
 The stummel has spectacular horizontal flame grain on the sides of the bowl reaching through the shank. When I first looked at this pipe seriously when it reached the worktable, the grain struck me as so distinctive that it was fake! It reminded me of adhesive vinyl wood print contact paper that looks too good to be the real deal – like artificial plants and flowers! Well, this fire grain is the real deal. As one would expect with such distinctive horizontal grain, very defined bird’s eye grain emerges on the front and aft side of the bowl. Bird’s eye grain is the cross-cut perspective of linear grain pattern. After inspecting the briar surface, I find no fills. There are nicks and small scratches from normal wear and after cleaning the stummel, we’ll see how things look.
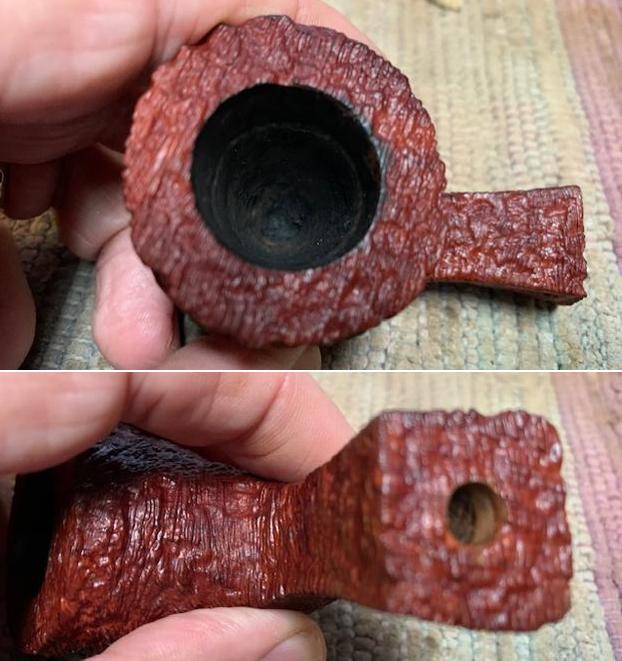
 While I was inspecting the stummel, I had not seen this before. On the flattened heel of the bowl there appears to be a random stamping: ‘H Z (‘. I’ve never seen this before and I decide to send a picture to Steve to get his take on these hieroglyphs! I decide to send another note out seeking information, but this time to Steve to find out if he has an idea what these ‘glyphs’ are? Steve’s response came quickly:
I have seen odd stamping but it’s generally on the underside of the shank. Never could figure it out. You might check with Bill Feuerbach at Kaywoodie. He is a wealth of info and does not seem to hesitate to help. I contact him through the website.
When trying to unlock the mysteries surrounding Kaywoodie pipes, Bill Feuerbach is the holder of the keys. Without having received a reply from my first inquiry, I launch another with glyph pictures included to kwguy. 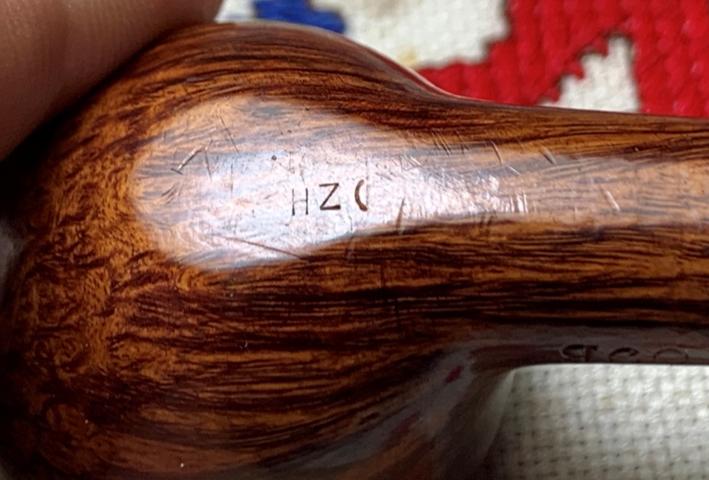 Amazingly, within minutes after launching my second inquiry for a ‘double intrusion’, I received a reply from Bill. This is what he wrote:
Dal
No worries about any double intrusion. Always glad to attempt an answer. First the easy one regarding the shape number 09B. Letters following the two digit number were necessary because of the sheer volume of shapes that were produced in the early years and not wanting to duplicate shape numbers if one had been used previously and discontinued. Although sometimes that happened.
The second question regarding those other characters on the bottom of the flat on the shank are a mystery to me I am afraid. Clearly an H and a Z and what looks like half of an O or a C but I don’t know their meaning. I’m sorry I couldn’t help you out with this. Could have been an aftermarket addition denoting the original selling shop out there or original owners initials, I just don’t know.
Best regards
Bill
Two mysteries resolved. The ‘B’ attached to the Pear 09 shape number was simply to distinguish and not duplicate other “09” shapes produced through the years. Solved. The glyph question is resolved but not solved. Bill’s explanation of the markings of a specific shop selling the Kaywoodie or a steward putting his mark on the pipe – both seem very possible and only this Kaywoodie Flame Grain knows for sure – if he could only talk! My thanks again to Bill Feuerbach for his help!
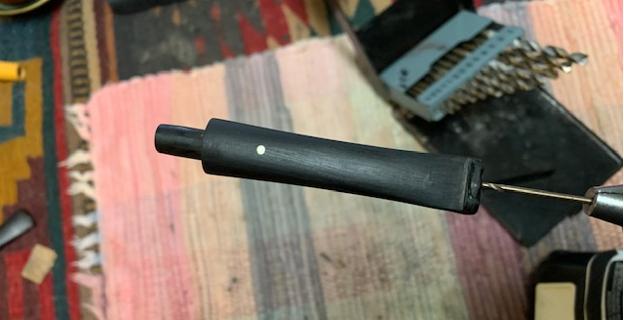
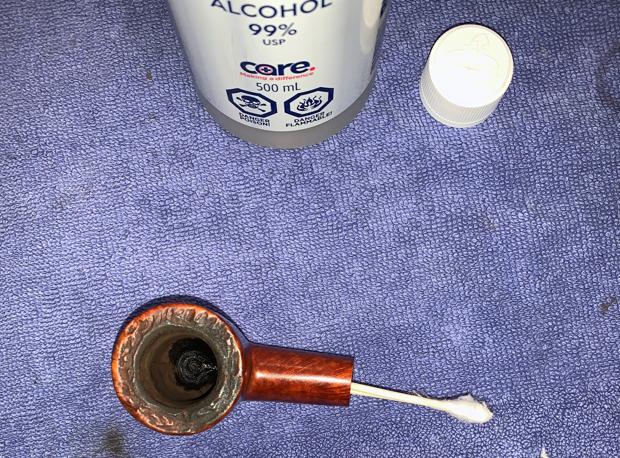
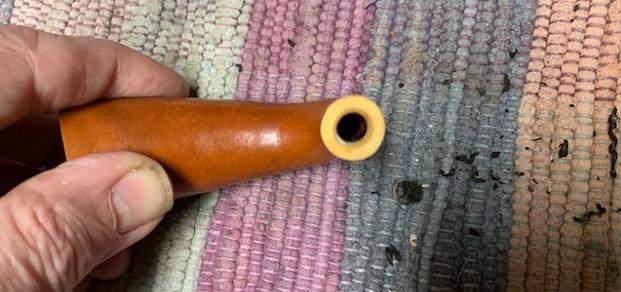
After all the mysteries and communications, my survey of the Kaywoodie’s condition continues. The stem has minor oxidation, and the vulcanite is rough. There is a good bit of light tooth chatter on the bit – upper and lower. This will need to be addressed. 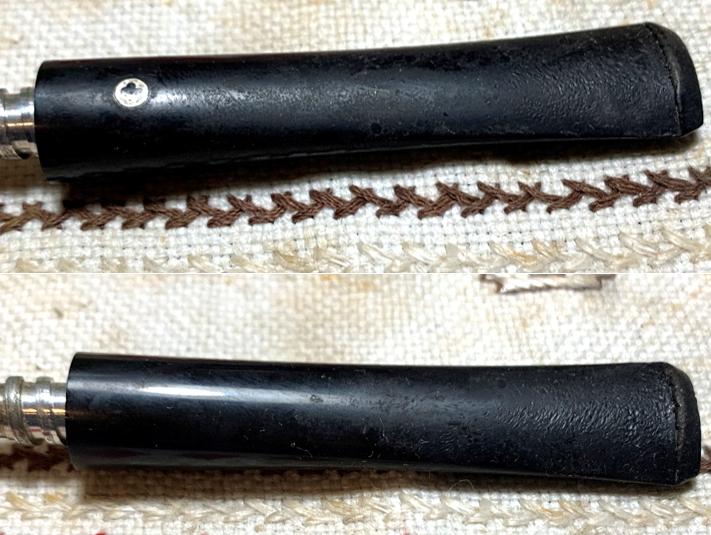 With the evaluation completed, the revitalization of this venerable Kaywoodie starts with the stem. The airway is cleaned with pipe cleaners dipped in isopropyl 99%. It’s not easy cleaning through the 4-holed stinger with the small air slot, and this, therefore, is why many stewards cut off the Kaywoodie stinger. Navigating with pipe cleaners is difficult but is possible.
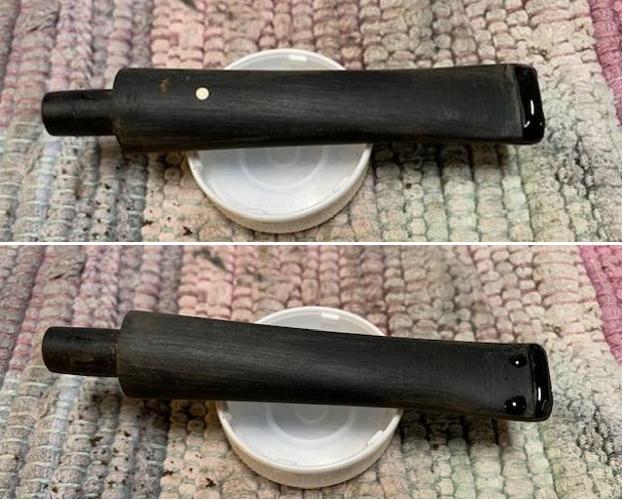
 Next, to address the minor oxidation, in preparation of putting the stem in a soak of Before & After Deoxidizer, 0000 grade steel wool wetted with Soft Scrub is applied to the stem. This hopefully helps to break up the oxidation and to smooth the rough vulcanite surface. During the scrubbing with steel wool, I’m careful to be a bit gentler over the cloverleaf logo. The nickel stinger also enjoys some attention from the steel wool to clean it.
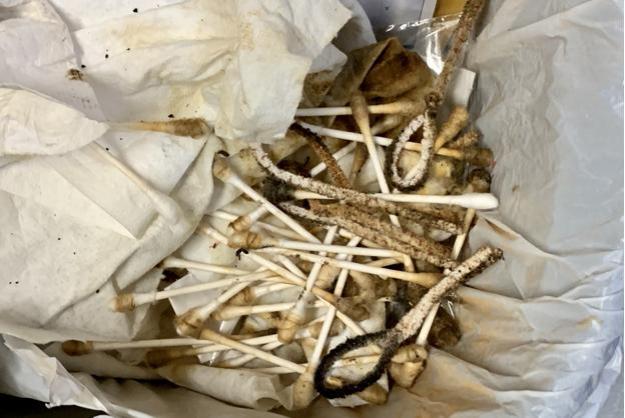
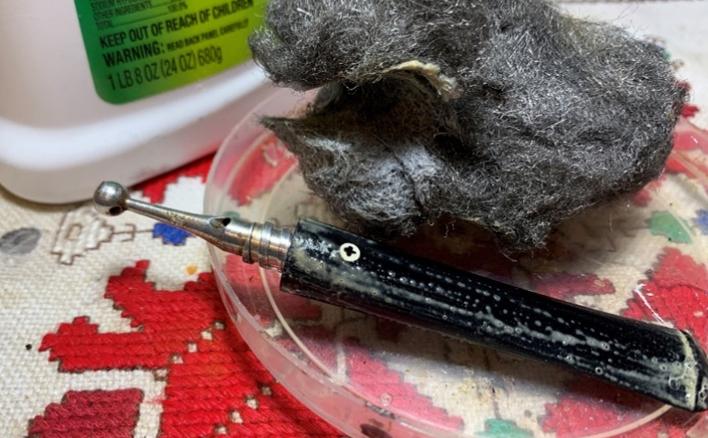 After rinsing the stem, it joins other of Skeet’s commissioned pipes in a soak of Before & After Deoxidizer. I leave the Kaywoodie stem soaking for several hours allowing the Deoxidizer to do its thing.
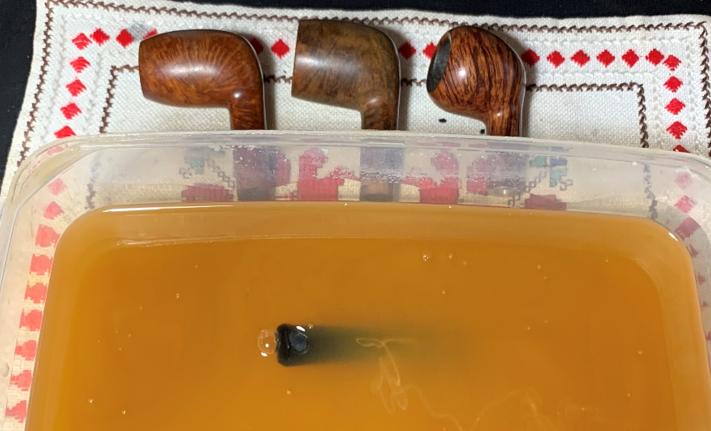 After several hours – actually, the next day, the Kaywoodie stem is fished out of the Deoxidizer and drained. I help the draining process by squeegeeing the pipe with my fingers and inserting pipe cleaners wetted with alcohol through the airway to clear the Deoxidizer. Cotton pads wetted with alcohol are used to scrub the surface to remove raised oxidation.
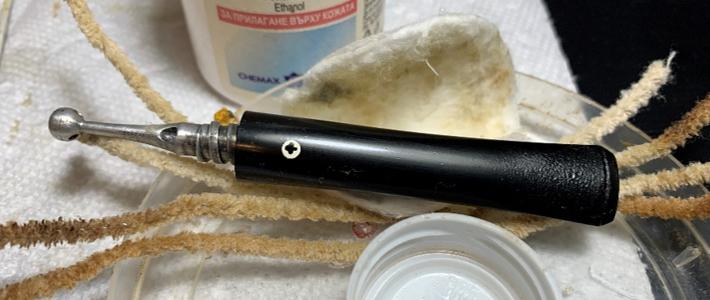 To further condition the stem paraffin oil is applied. The vulcanite already looks healthier.
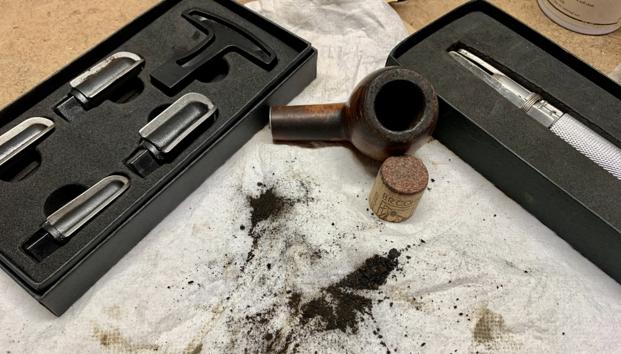
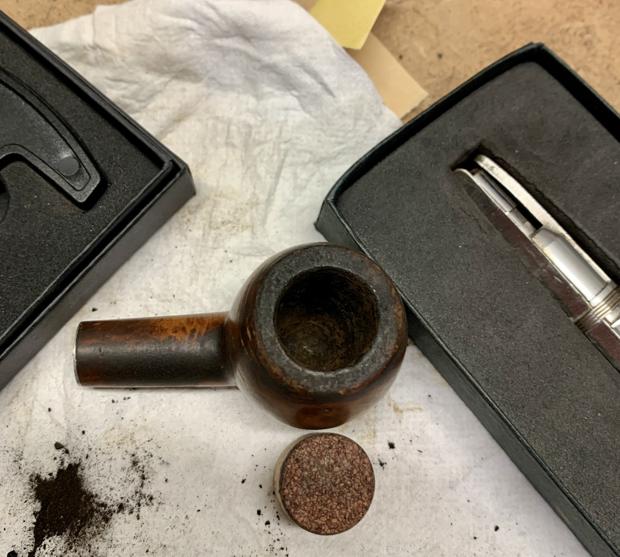
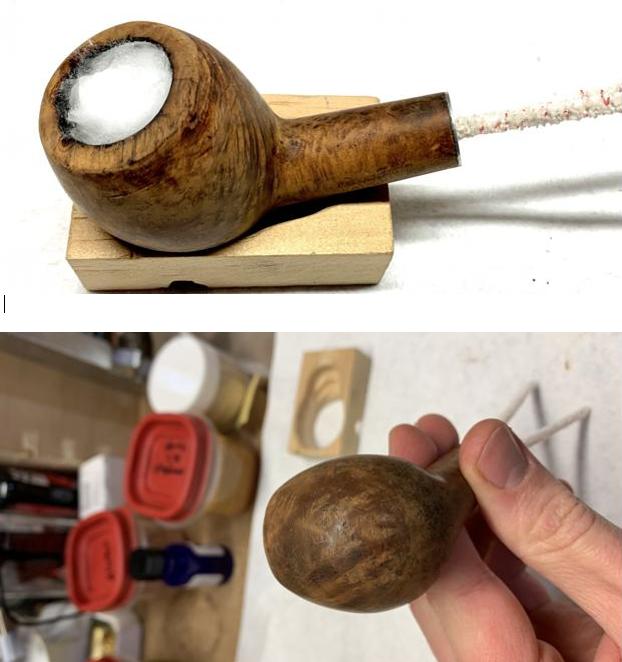
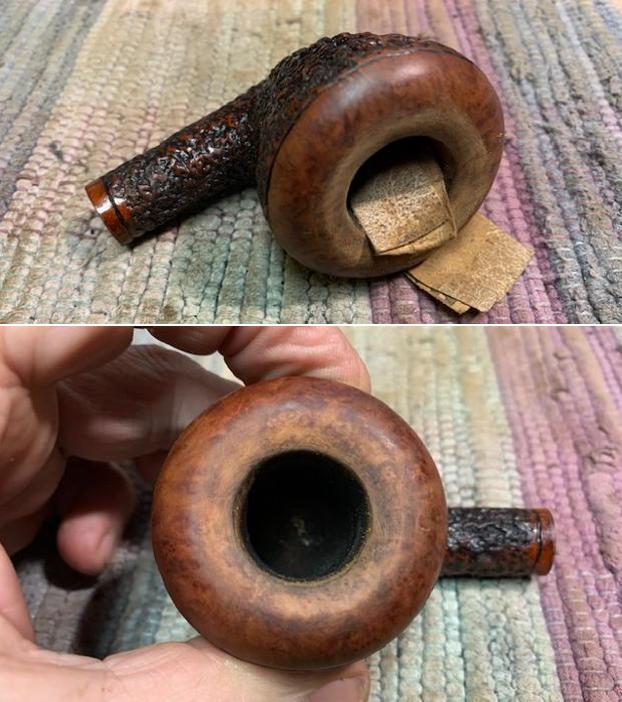
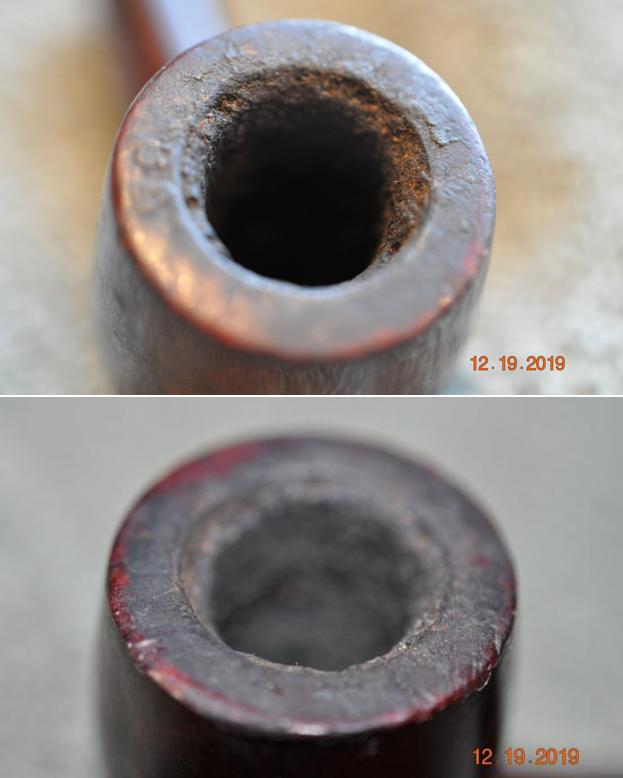
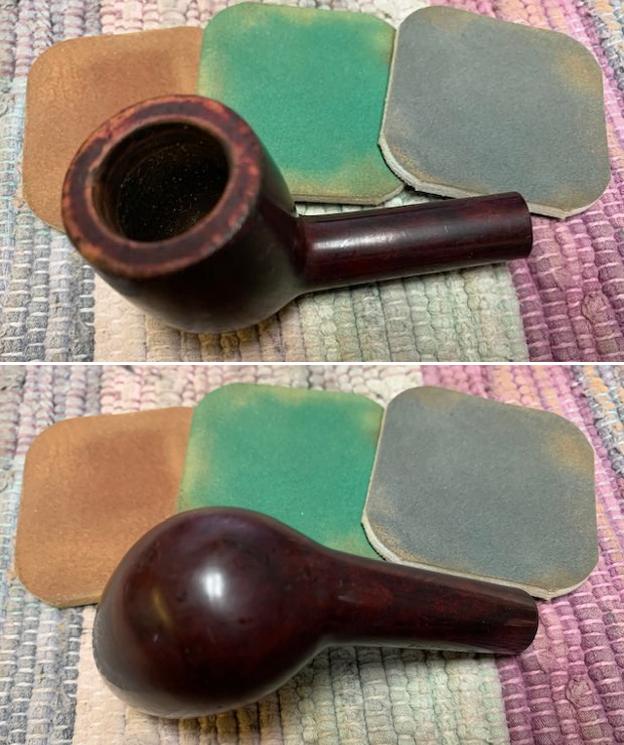
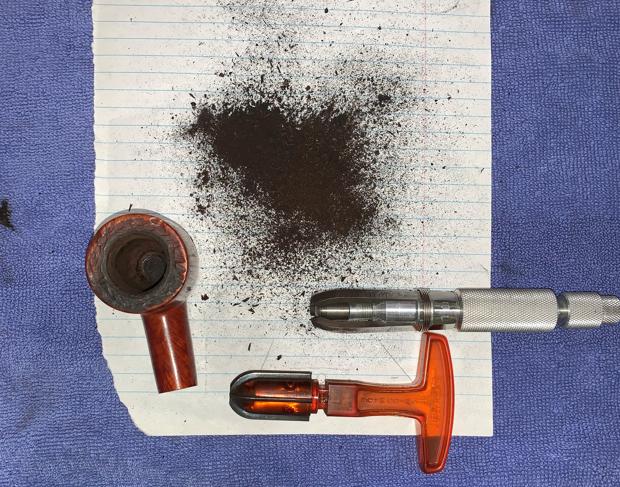
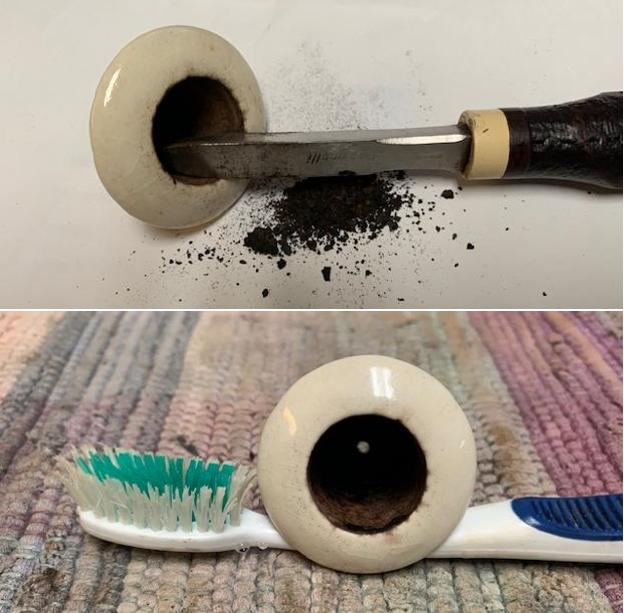
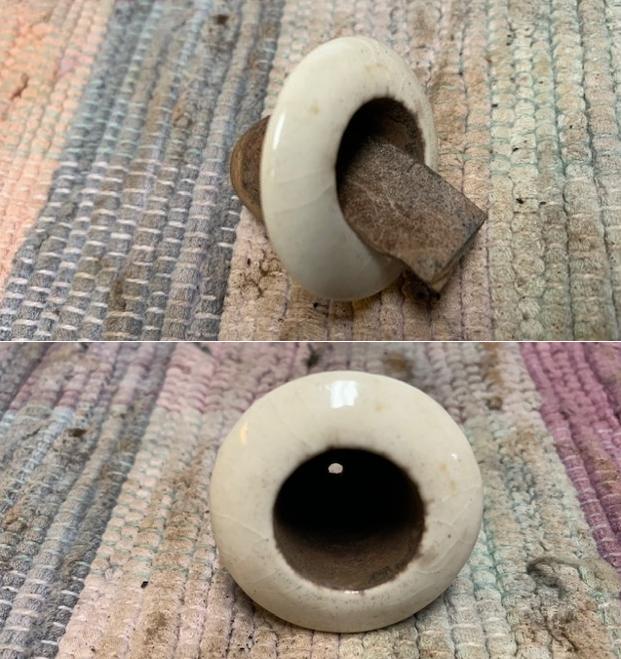
 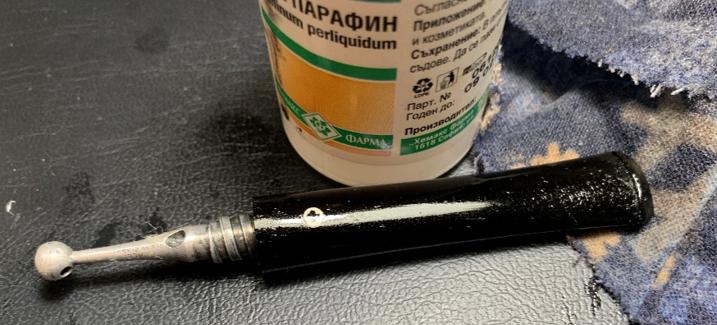 Turning now to the stummel, the Pipnet Reaming Kit is utilized to ream the chamber to give the briar a fresh start and to inspect the chamber condition. A starting picture is taken and only the smallest of the 4 blade heads is accommodated by the chamber.
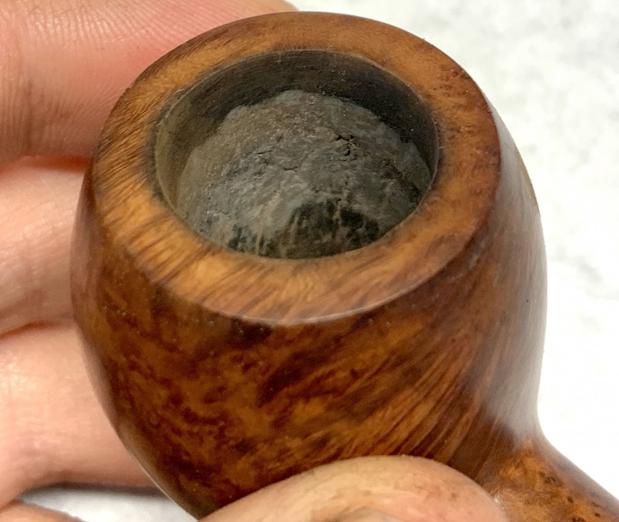
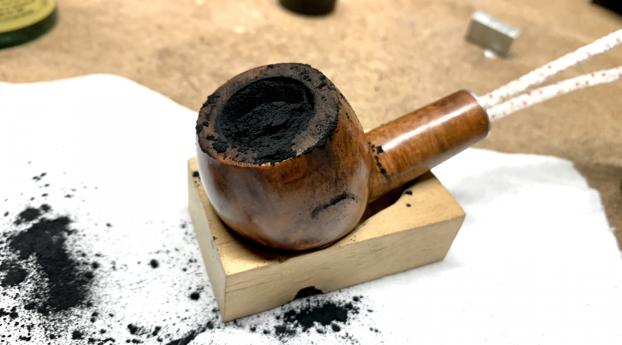
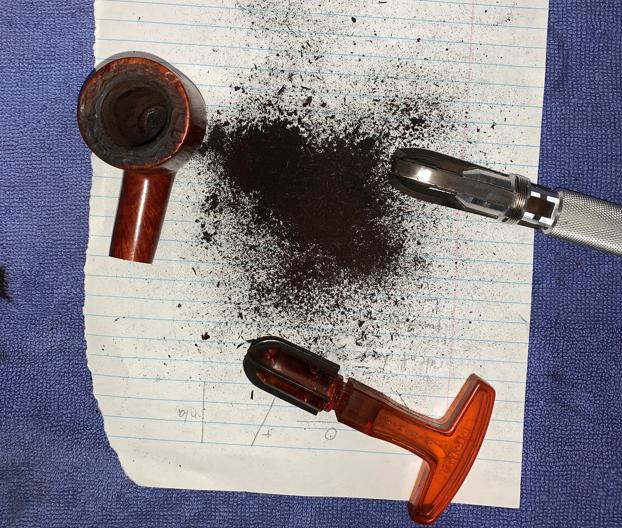
 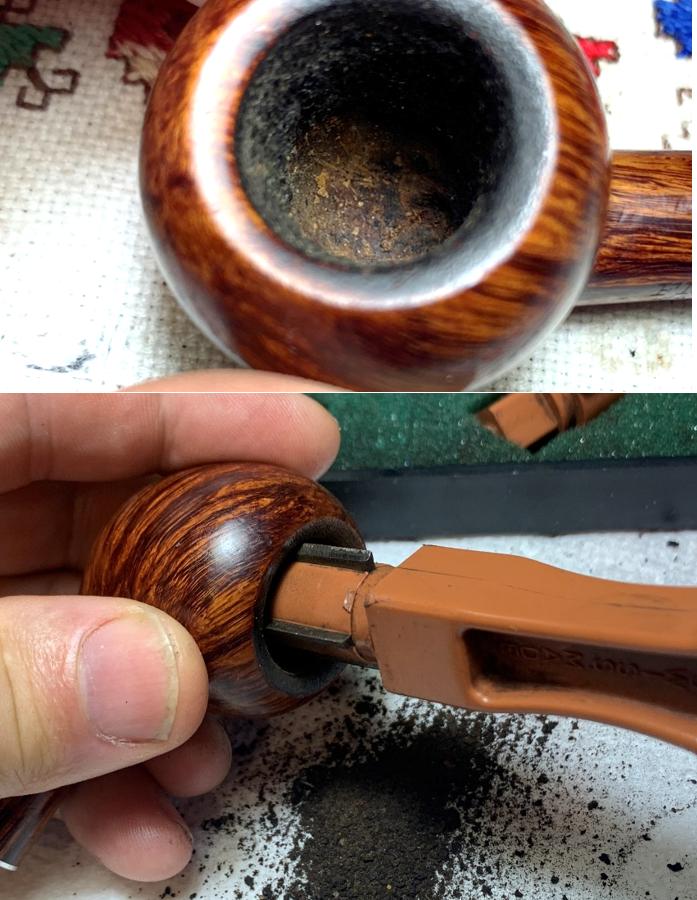 Next, the Savinelli Fits All Tool is used to scrape the chamber walls removing additional carbon cake buildup. Finally, 240 grade sanding paper wrapped around a Sharpie Pen is used to sand the chamber.
 An inspection of the chamber reveals healthy briar – no heating problems or cracking. I move on.
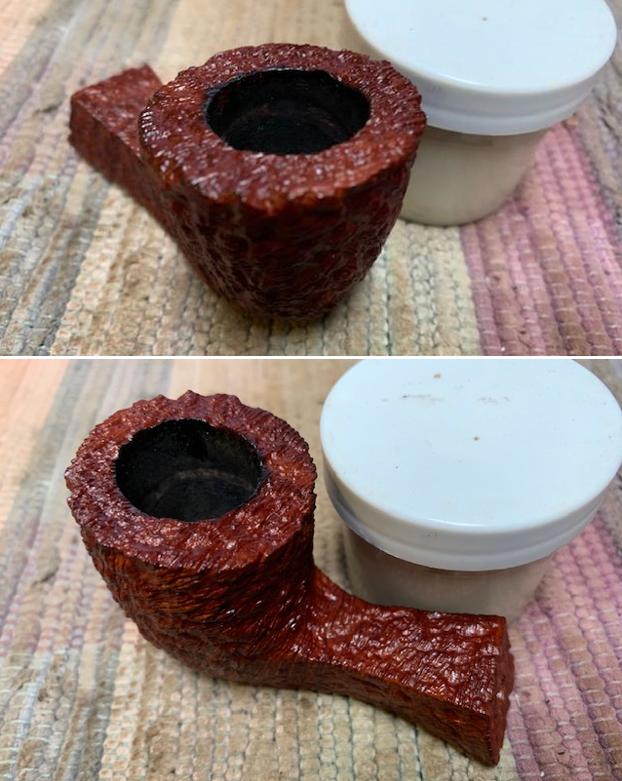
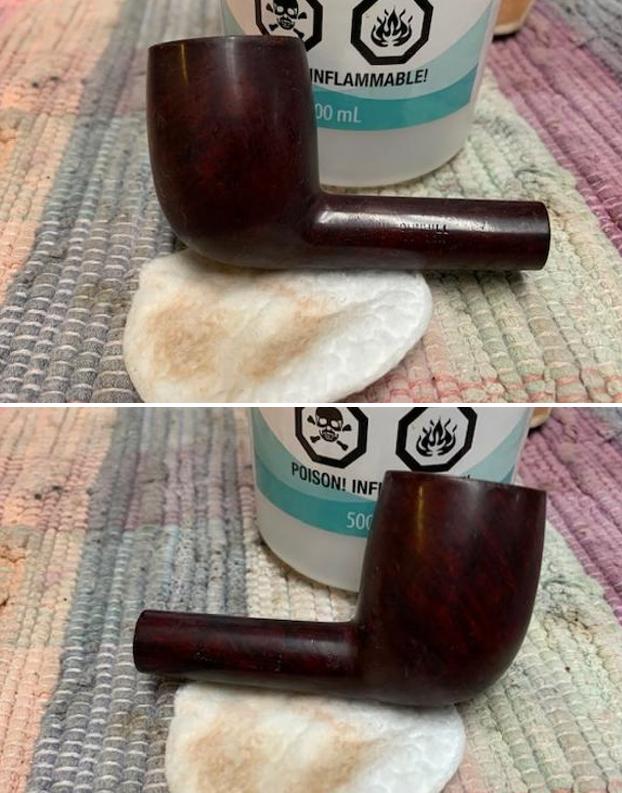
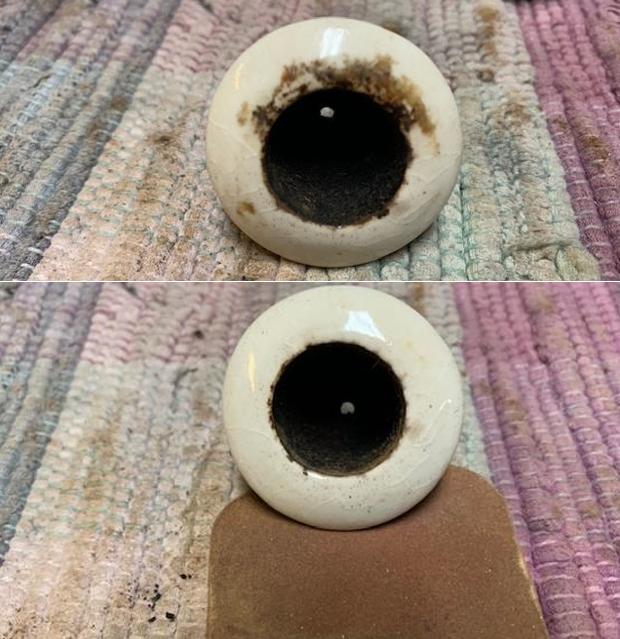
 To continue the cleaning, the external surface is cleaned with undiluted Murphy’s Oil Soap using a cotton pad to do the scrubbing. A brass bristled brush is especially helpful in addressing the crusted lava flow over the back side of the rim. It does a good job of cleaning but not adversely impacting the briar.
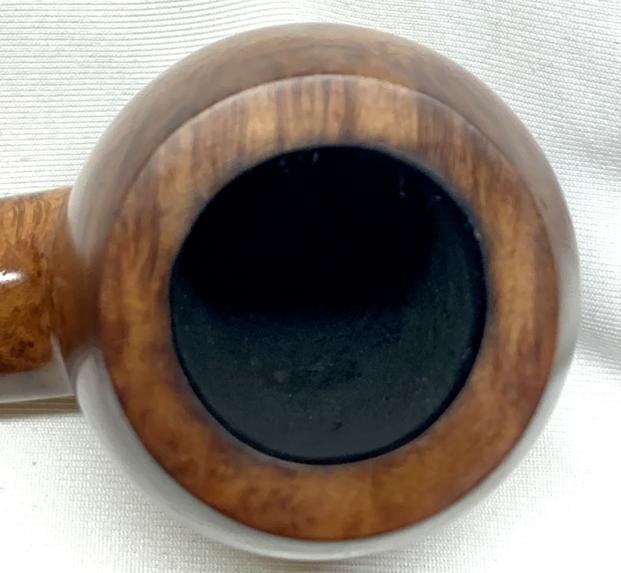
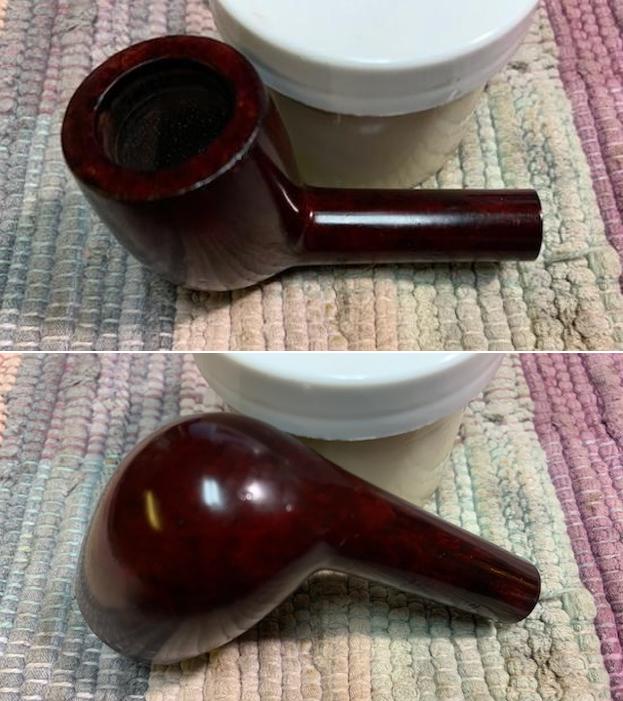
 The stummel is then taken to the sink in the laundry room to continue the cleaning using shank brushes and anti-oil liquid dish soap. Using warm to hottish water, the internal mortise is scrubbed with the shank brushes. After scrubbing, the stummel is thoroughly rinsed to remove soap and taken back to the worktable. Wow! The rim looks great and the Flame Grain continues to be sharp and distinct.
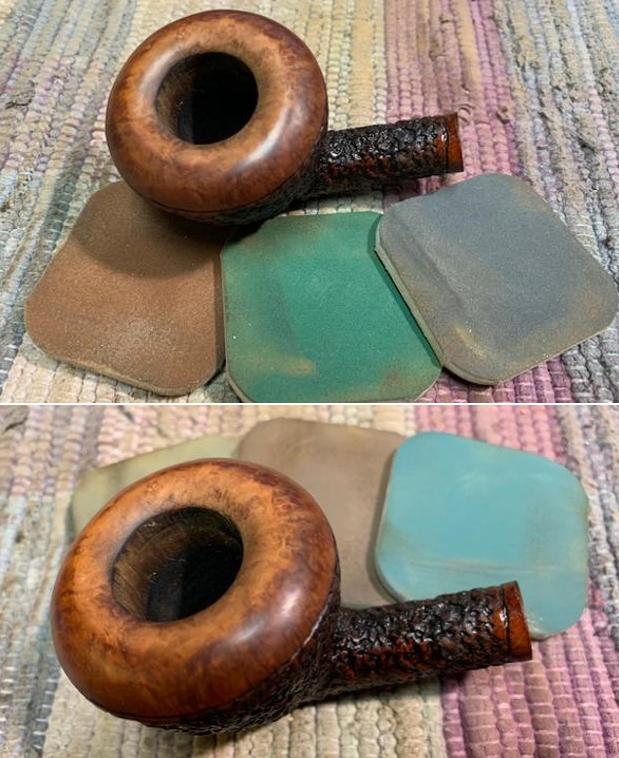
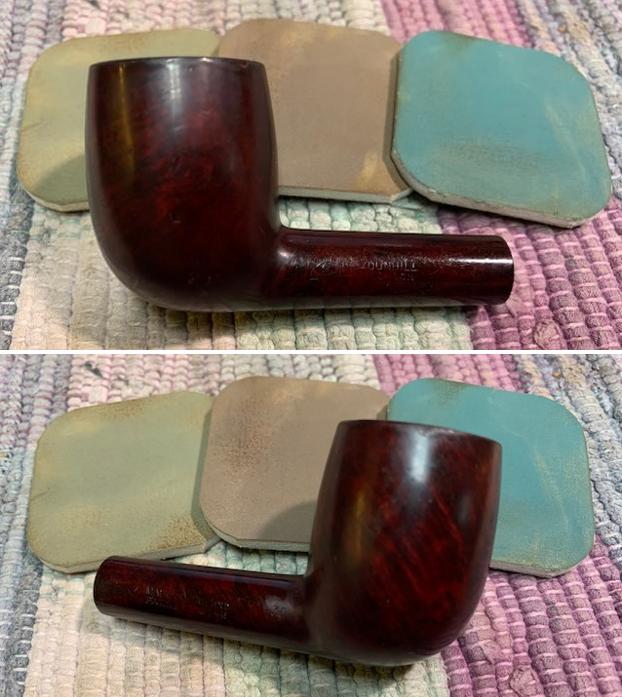
 Next, I use micromesh pads to clean further the surface of the minor nicks and scratches from normal wear over the years. Dry sanding with the micromesh pads, which are less abrasive and contribute to the polishing, will help avoid losing the patina the briar has. With the first 3 pads, 1500 to 2400, I avoid the nomenclature on both sides of the shank as they are more abrasive. With pads 3200 to 4000 and pads 6000 to 12000, the entire stummel is sanded. As I started this phase, I had decided that whatever nicks and scratches might survive the micromesh process would remain as a badge of the years this Kaywoodie has served. When the micromesh pads were completed, I was amazed at the beauty of the grain that emerged.
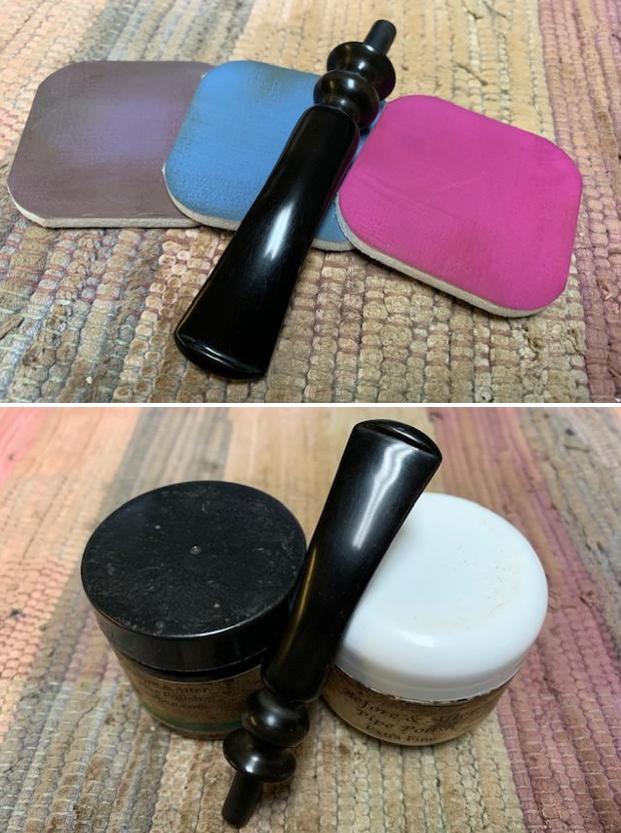
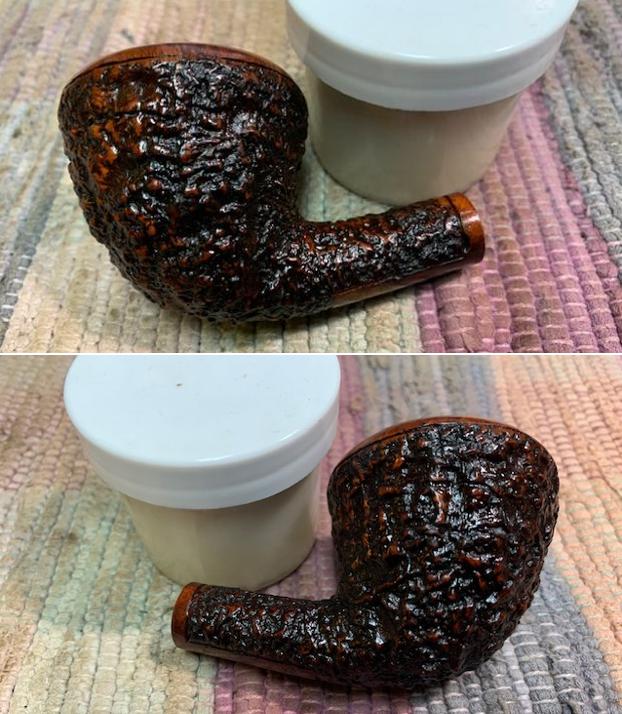
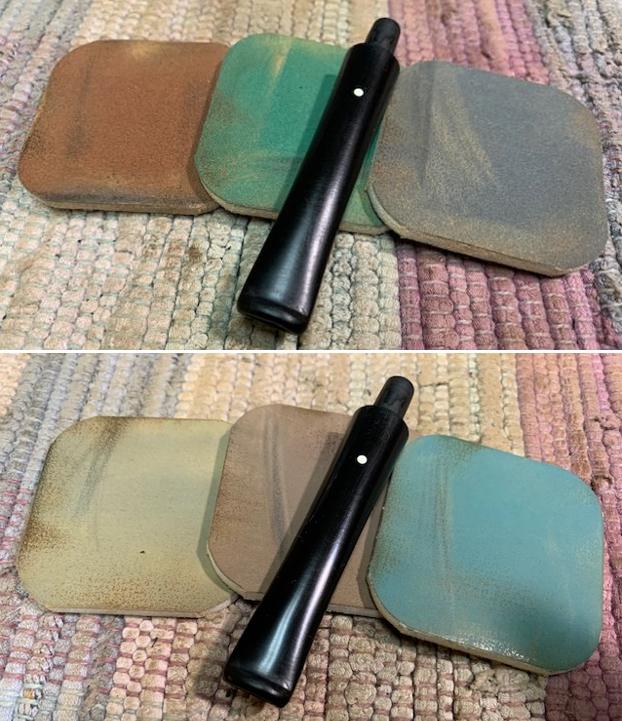
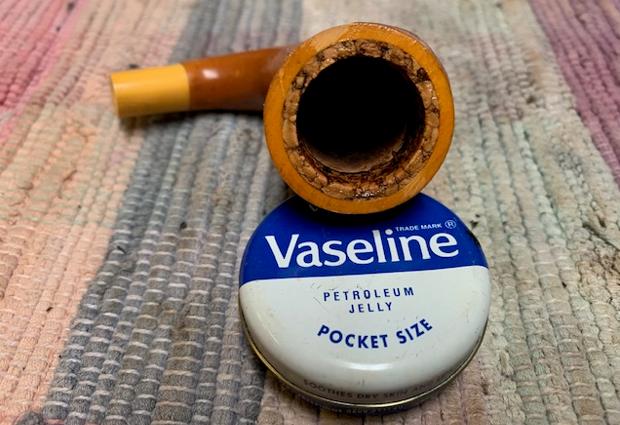
 Before turning to the stem, Before & After Restoration Balm is applied to the Kaywoodie Flame Grain briar surface. This product of Mark Hoover is especially useful in teasing out the deeper, natural hues of the briar. After putting some of the Balm on my fingers, I rub it into the briar surface. As I’ve described previously, the cream-like consistency of the Balm when first applied gradually transforms to a wax-like consistency as it’s worked into the briar. After thoroughly applying the Balm, the stummel is put aside for 20 or so minutes for the Balm to be absorbed and do its work (pictured below). Whenever I apply the Balm to a pipe I’m working on, I never wipe off my fingers with the excess Balm! I run over to my collection and grab a pipe and apply the excess Balm to it – no wasting this liquid gold 😊.
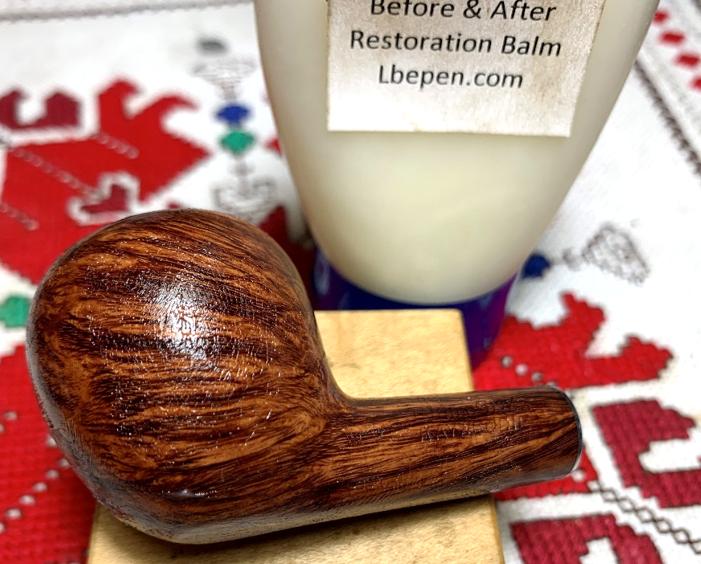 After the minutes accumulate, I use a dedicated microfiber cloth for the initial wiping off of the excess Restoration Balm then follow with another dedicated microfiber cloth, same color, that buffs up the surface. As expected, the Restoration Balm deepened an already impressive patch of briar.
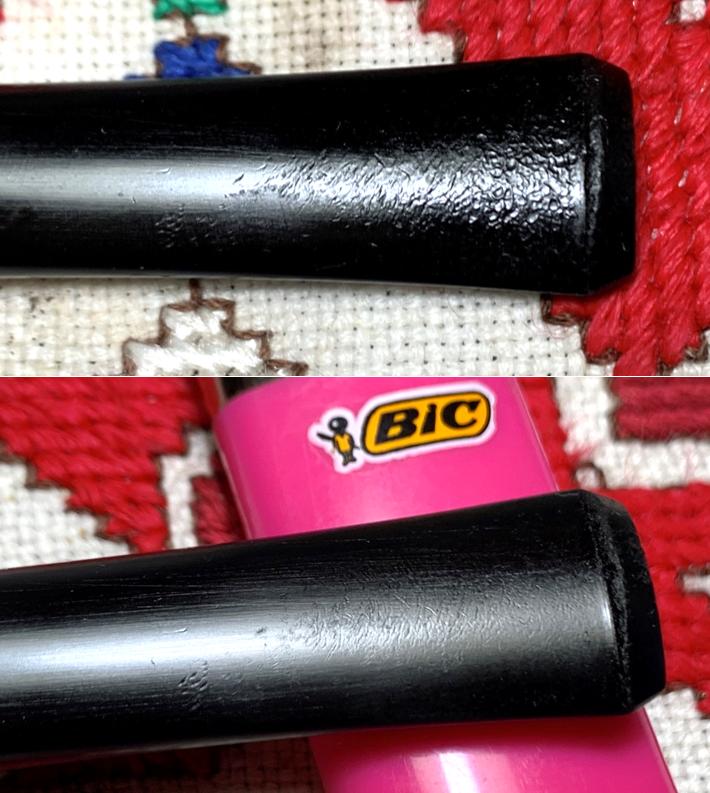
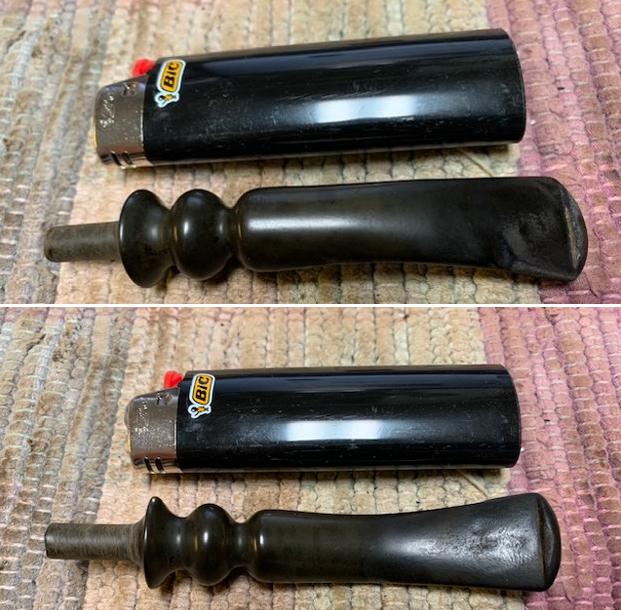
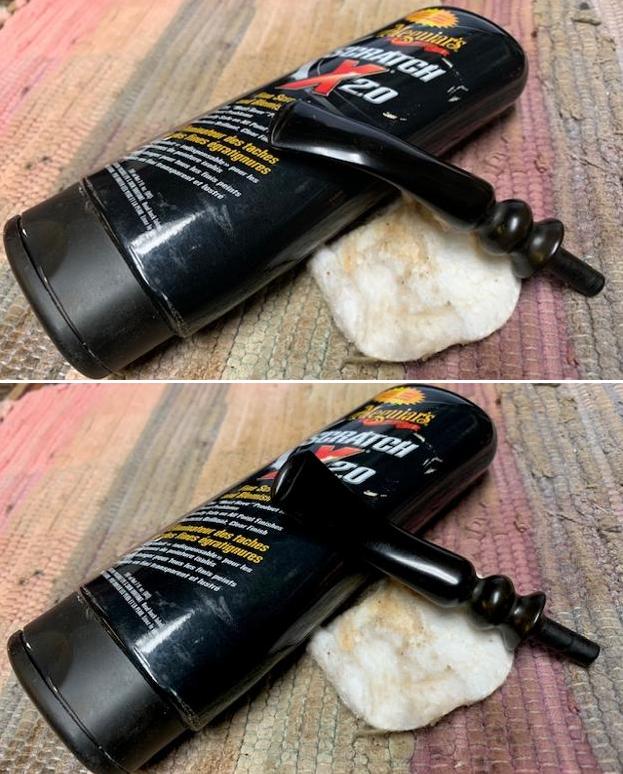
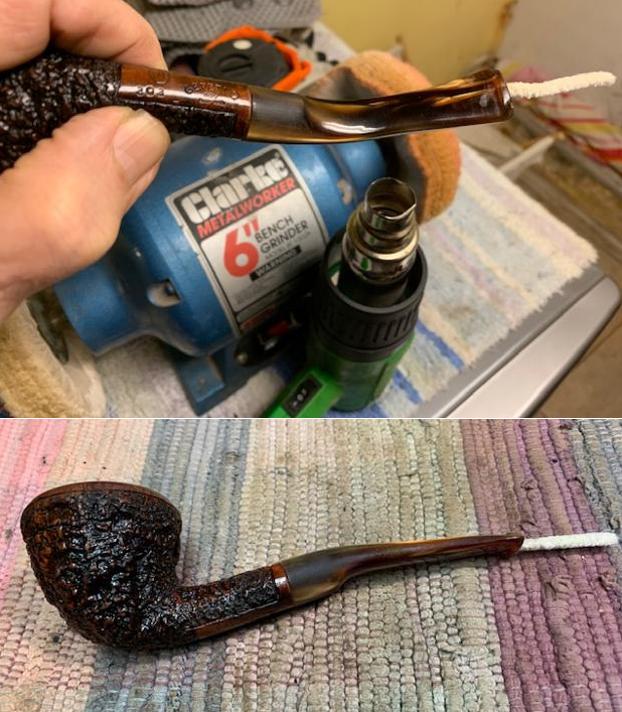
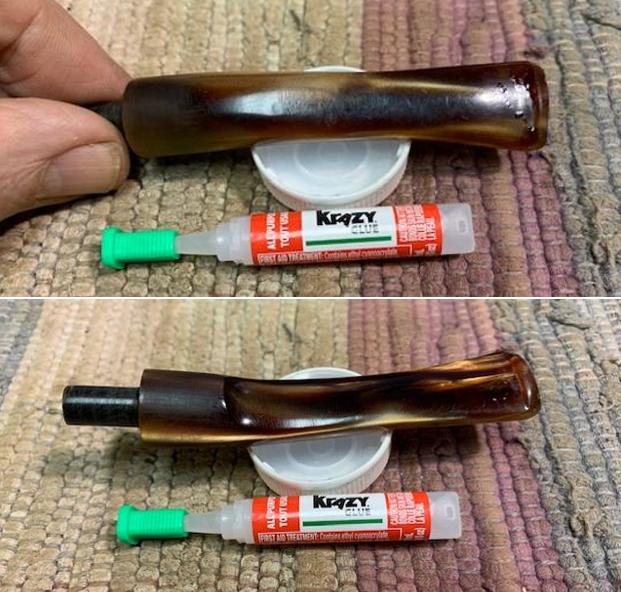
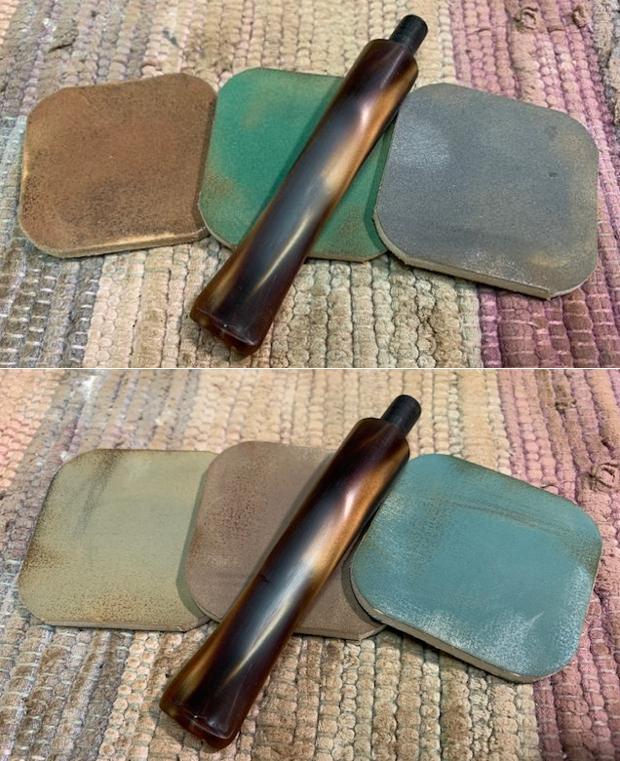
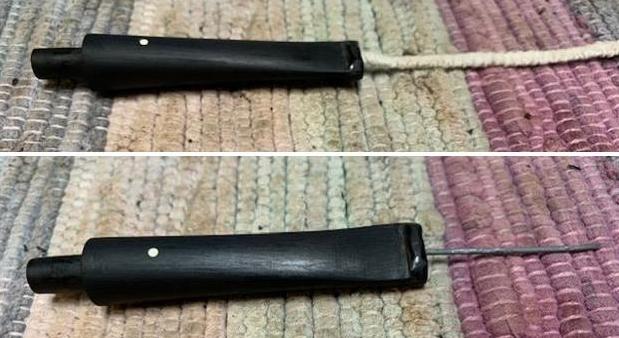
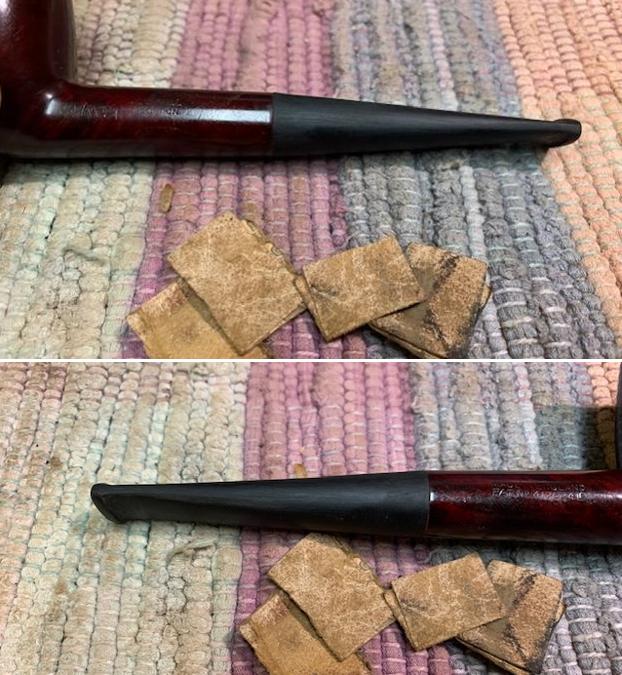
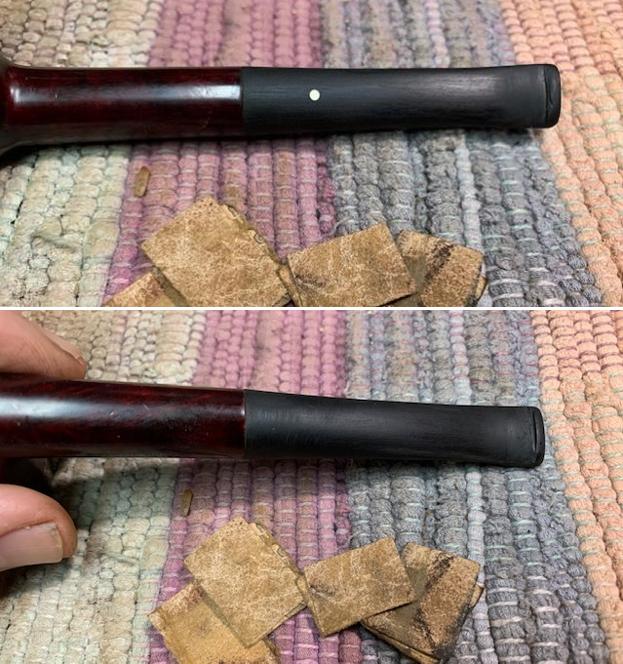
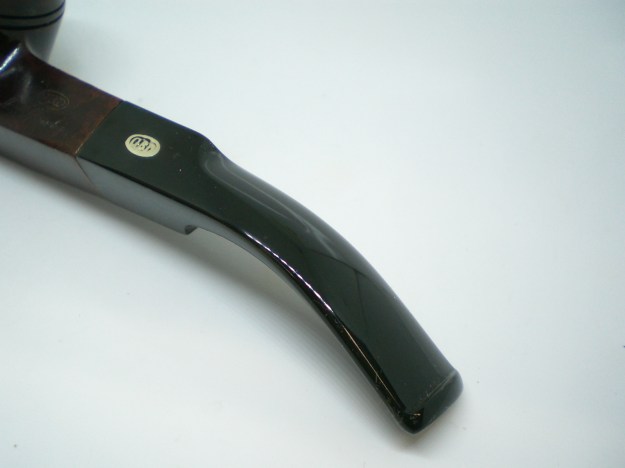
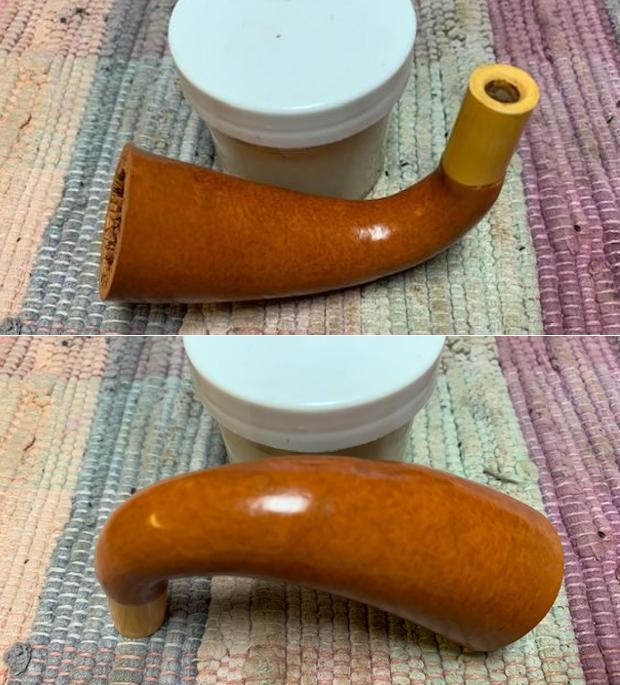
 The stem is waiting for attention. The earlier treatment for oxidation seems to have done well. The bit, both upper and lower, has significant light tooth chatter. My approach to rectify this is using a Bic lighter and paint the bit with flames. The flame is moved rapidly, back and forth, over the surface. To hold the flame too still can burn the rubber and if this happens, it becomes brittle without luster – I’ve learned this from experience. As the vulcanite heats it expands and reclaims all or some of its original condition. Pictures are taken before starting to compare the results after heating. The results are good! It’s interesting that different stems respond to the heating method differently. Not all vulcanite is the same. This stem responded very well whereas others, seemingly not at all or little. The pictures show the comparison.
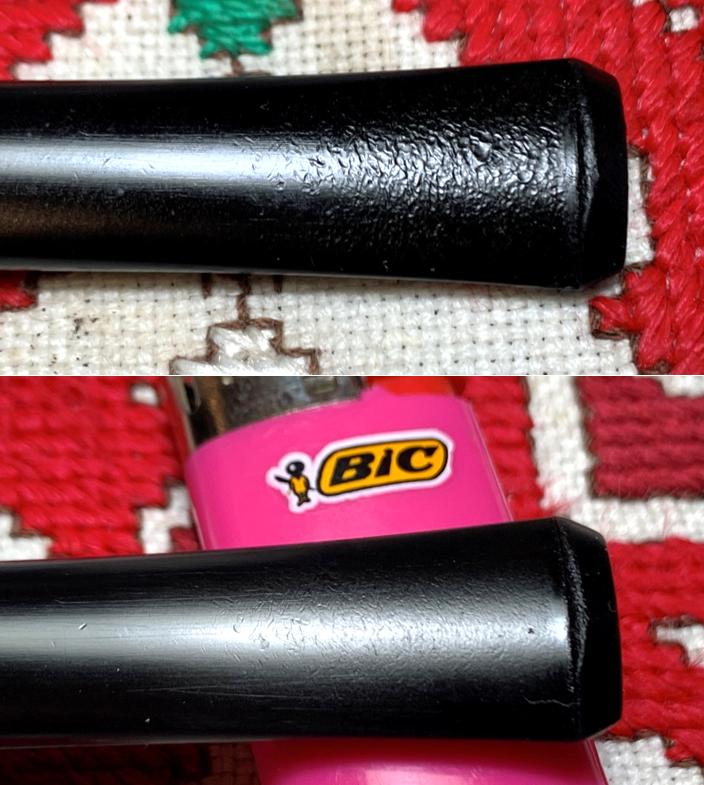
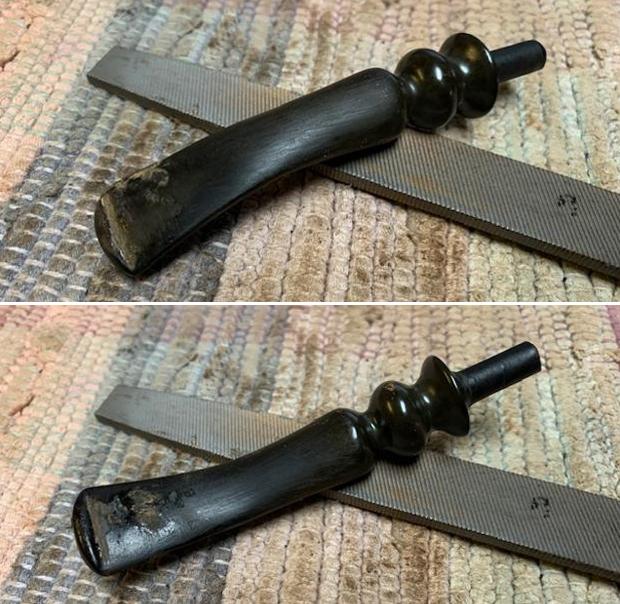
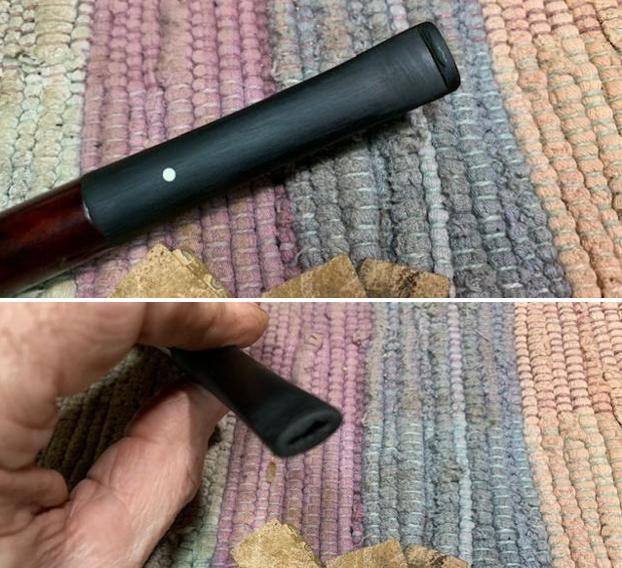
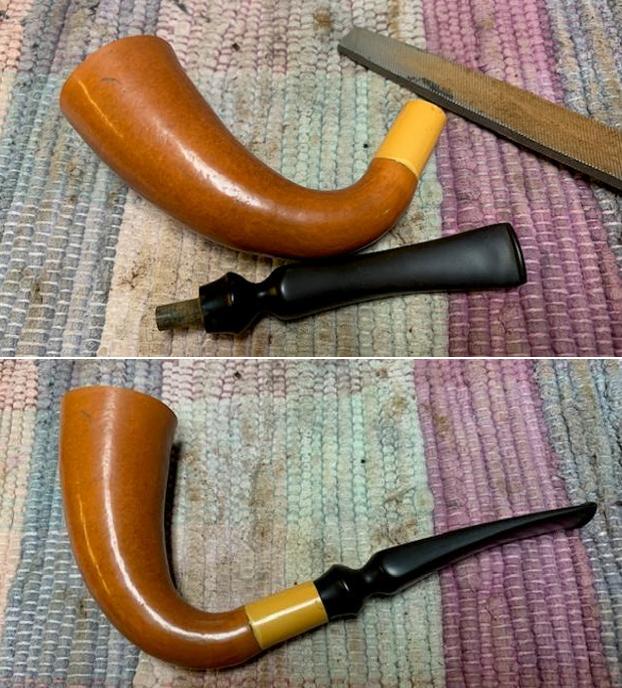
 Only minor sanding will be necessary, along with refreshing the button. Starting with a flat needle file, with the flat edge against the lip of the button, the file refreshes and sharpens the bite ledge. I’m careful to keep the file off the stem surface while doing this on the upper and lower button.
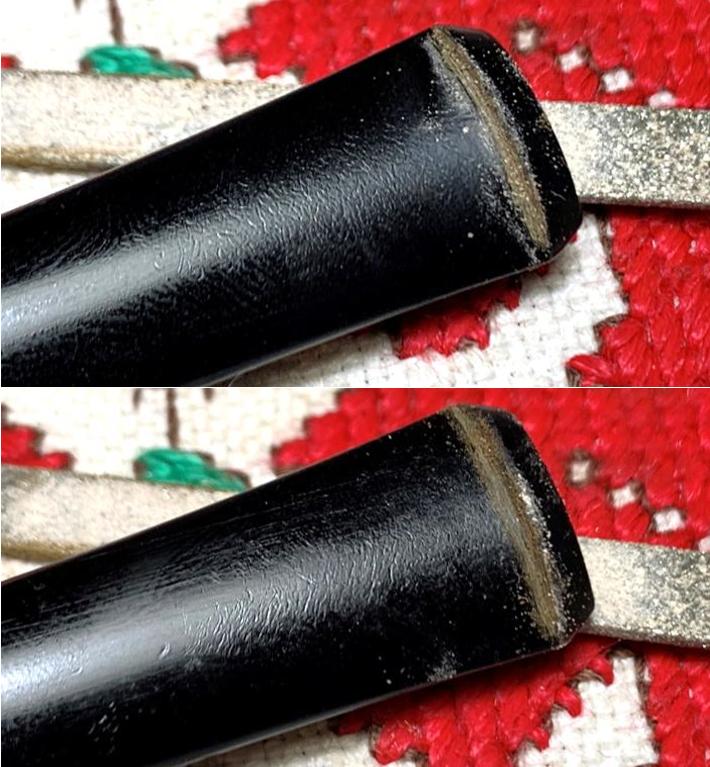 Next, 240 grade paper removes the roughness left from the tooth chatter and smooths the button. The sanding is expanded to remove small nicks on the rest of the stem staying clear of the cloverleaf on the upper side of the stem. A plastic disk is used on the stinger side of the stem to keep the end of the stem facing sharp – to avoid shouldering.
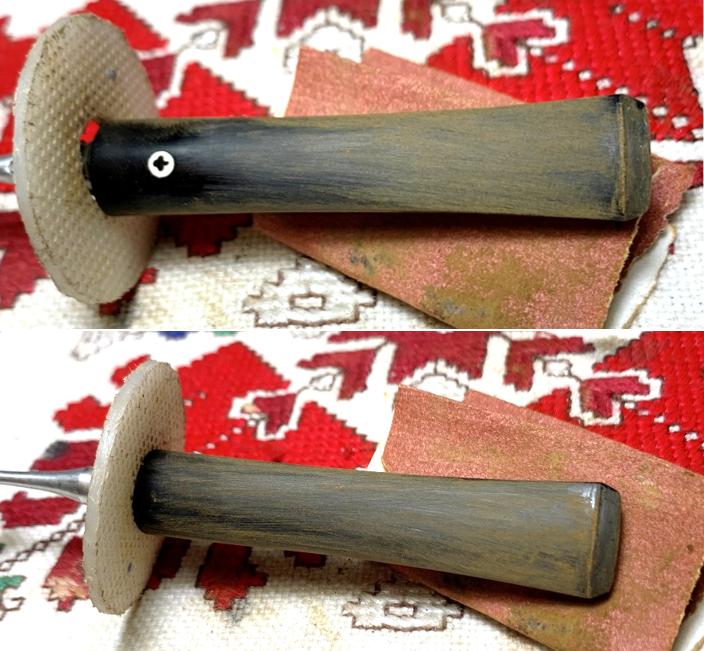 With the heaviest sanding done, wet sanding with 600 grade paper follows and then 0000 grade steel wool is applied to smooth the stem surface further.
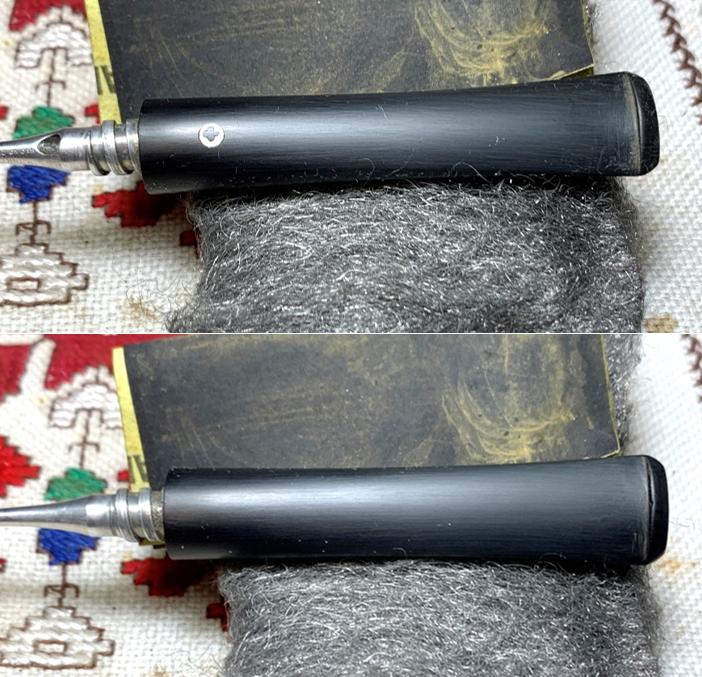 After completing the steel wool polishing, I notice a pit in the middle of the lower lip of the button – ugh…
 I return to the flat needle file to file down a bit more the lip edge without impacting the surrounding vulcanite. The pit is erased.
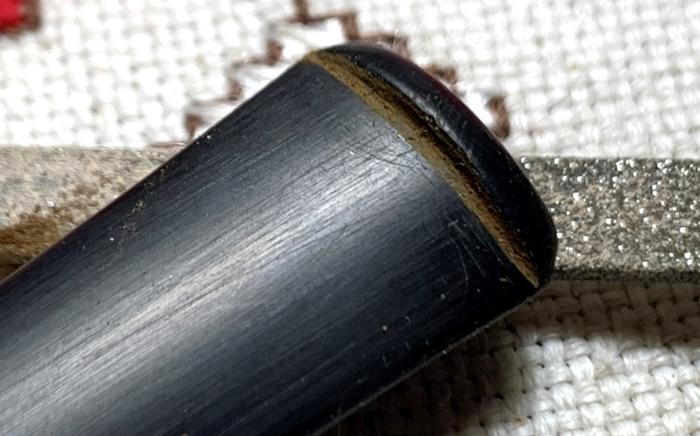 As before, the file is followed by 240, 600 and 0000 steel wool – detour completed and did not take too long.
 Next, the stem receives sanding from all the micromesh pads starting with wet sanding with pads 1500 to 2400. This is followed with dry sanding with pads 3200 to 4000 and 6000 to 12000. Between each set of 3 pads, Obsidian Oil is applied. Obsidian Oil does not remove oxidation if it already is present in the stem but helps prevent oxidation from developing.
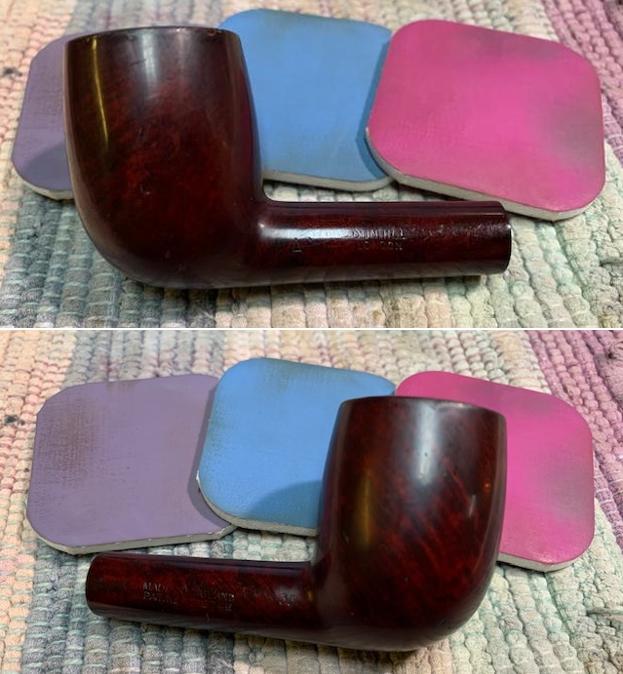
 Now the home stretch. A cotton cloth buffing wheel is mounted on the rotary tool with speed set at about 40% full power. The fine abrasive, Blue diamond compound, is then applied to both stem and stummel.
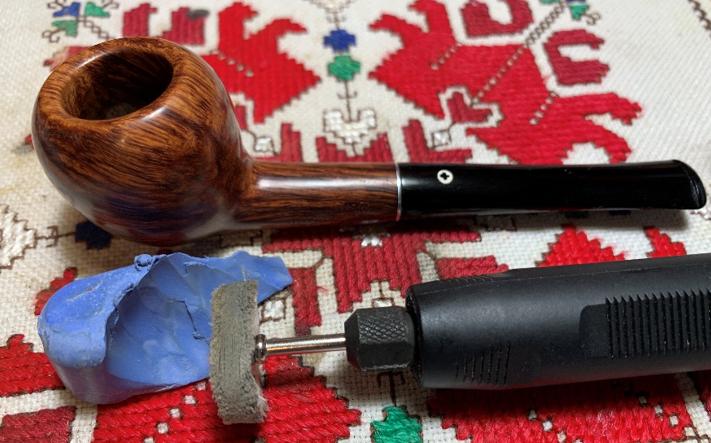 Changing again to another cotton cloth buffing wheel dedicated to metals, Blue Diamond compound is also applied to the nickel Kaywoodie 4-holed stinger as well as to the shank facing. This shines these fitments nicely.
 Next, again changing the buffing wheel to another wheel dedicated to wax, maintaining the same speed, carnauba wax is applied to the pipe. When thoroughly applied, a microfiber cloth provides a rigorous hand buffing to remove excess wax and to raise the shine.
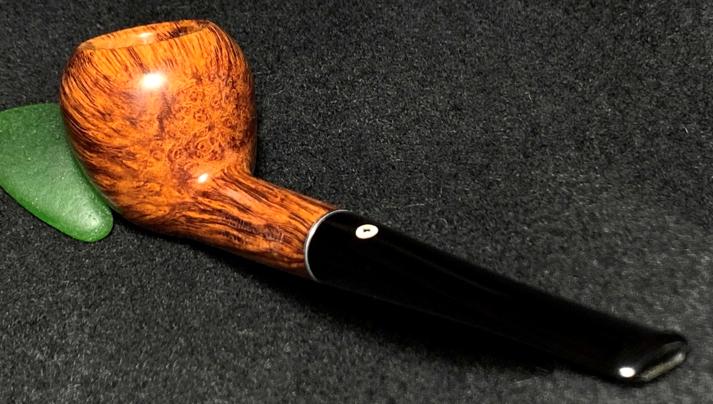
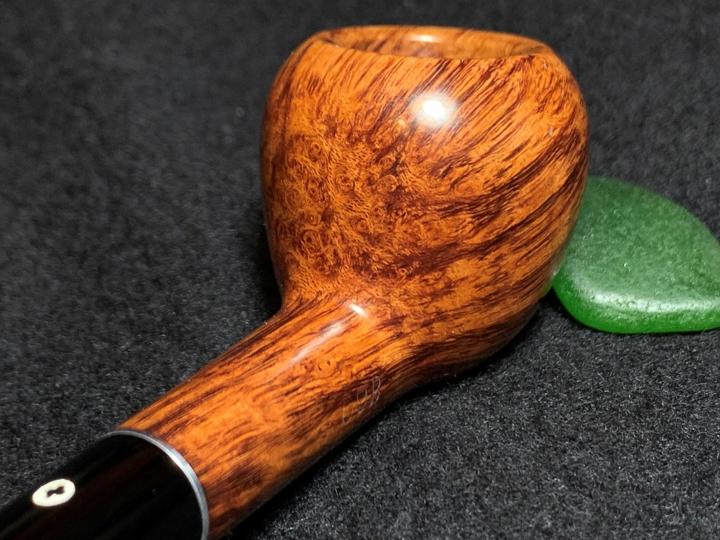
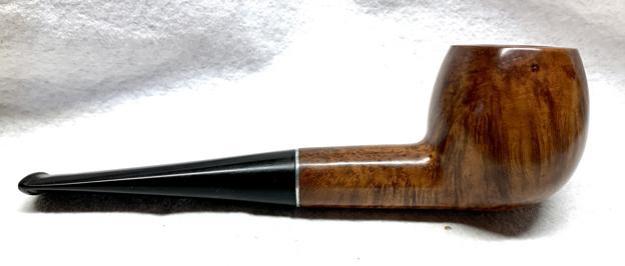
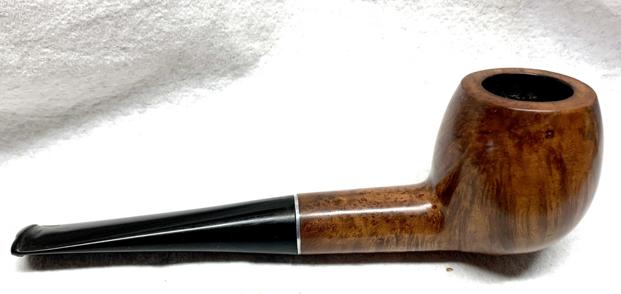
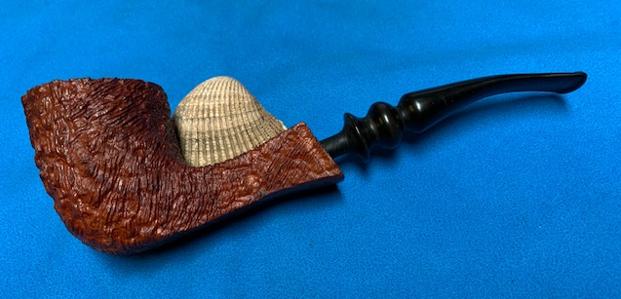
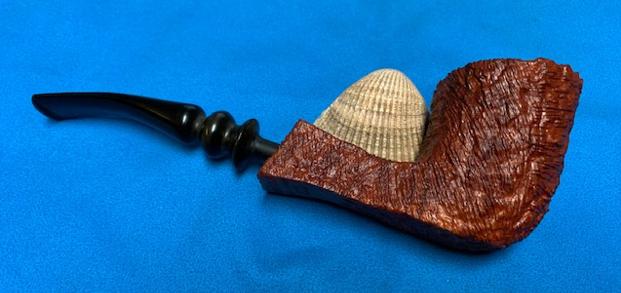
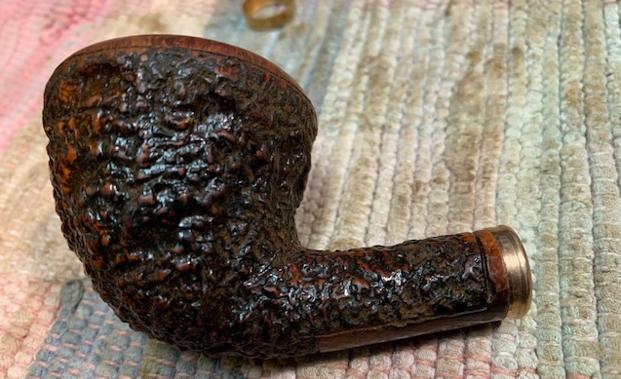
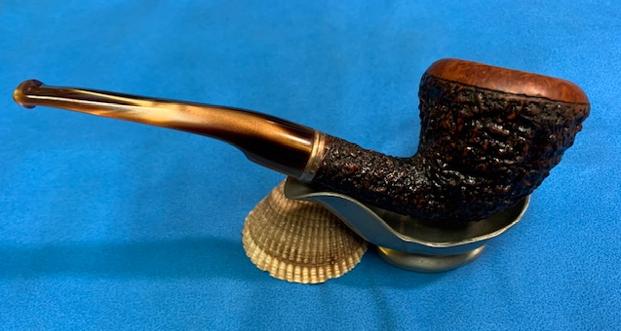
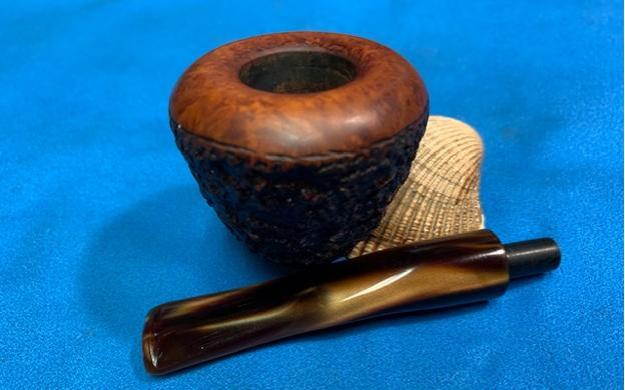
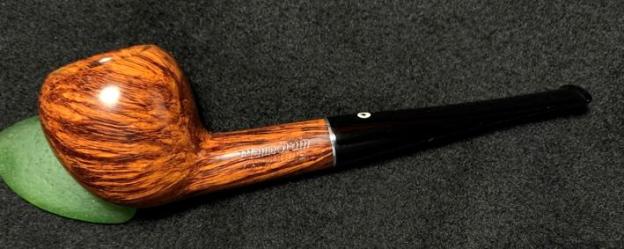
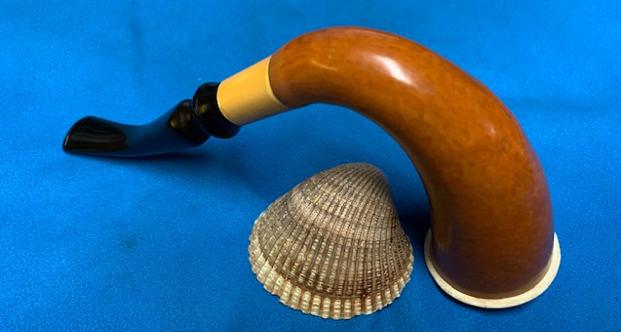
 This Kaywoodie Flame Grain 09B Pear is striking. It’s vintage spans from 1937 to probably the late 40s. The quality of the grain is amazing – the bold, distinct flame grain flowing laterally through the bowl is complemented by remarkable bird’s eye pattern. This bird’s eye grain forms a kaleidoscope of cross-cut veins on the fore and aft of the bowl. This Kaywoodie Flame Grain is certainly a collectable pipe and a treasure to add to one’s collection. Skeet commissioned this pipe and will have the first opportunity to acquire it in The Pipe Steward Store benefiting the Daughters of Bulgaria. Thanks for joining me!
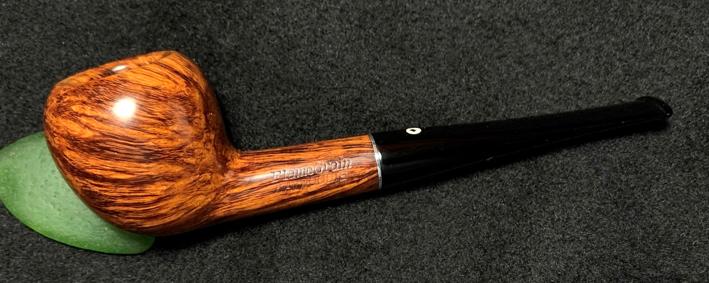


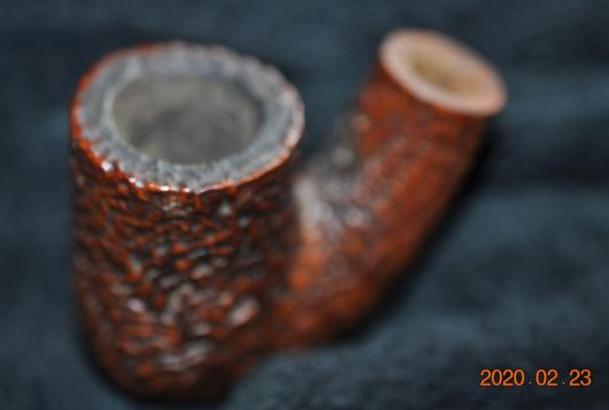
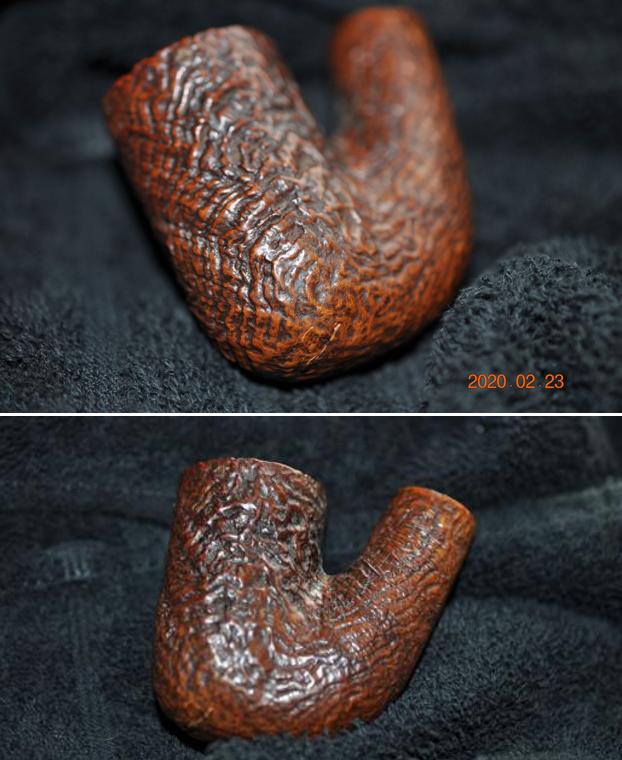
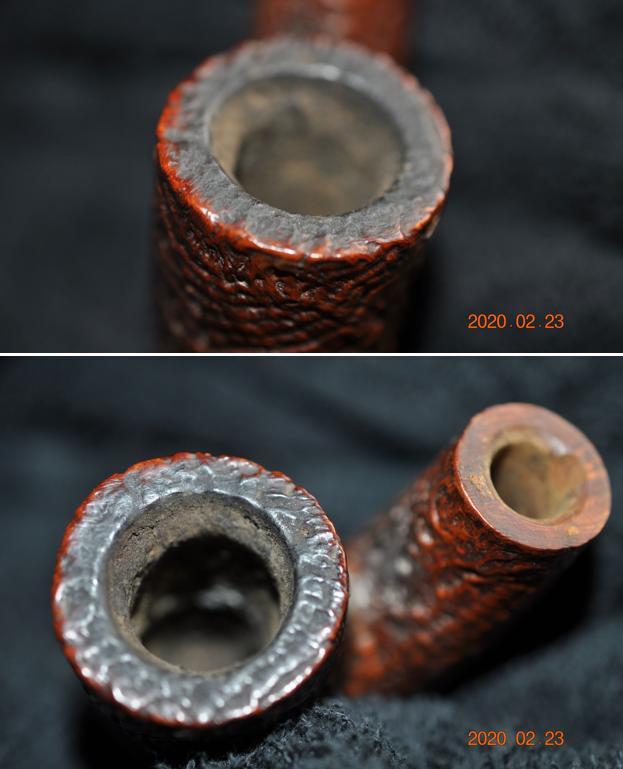
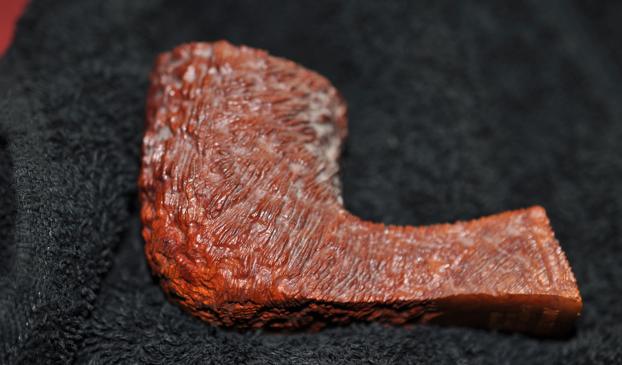
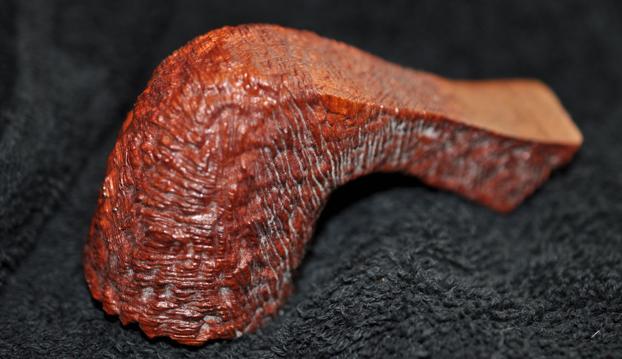
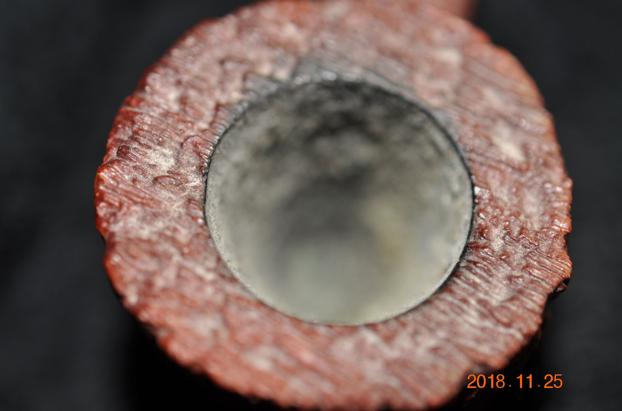
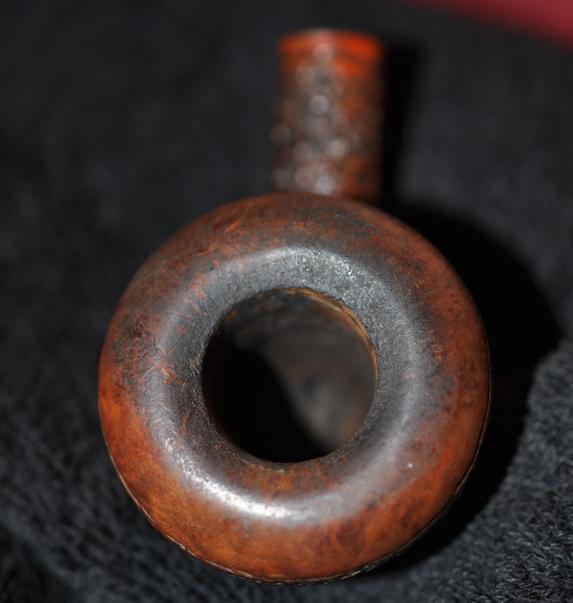
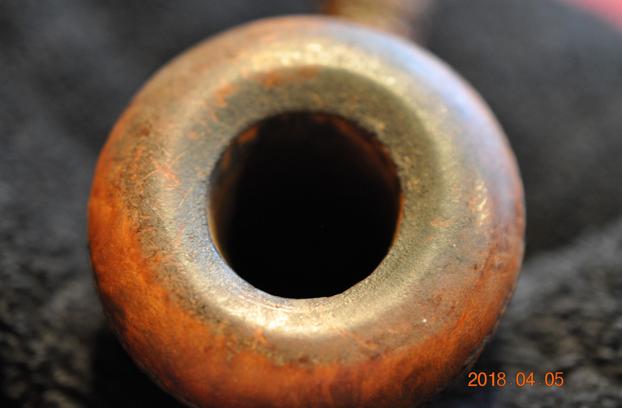
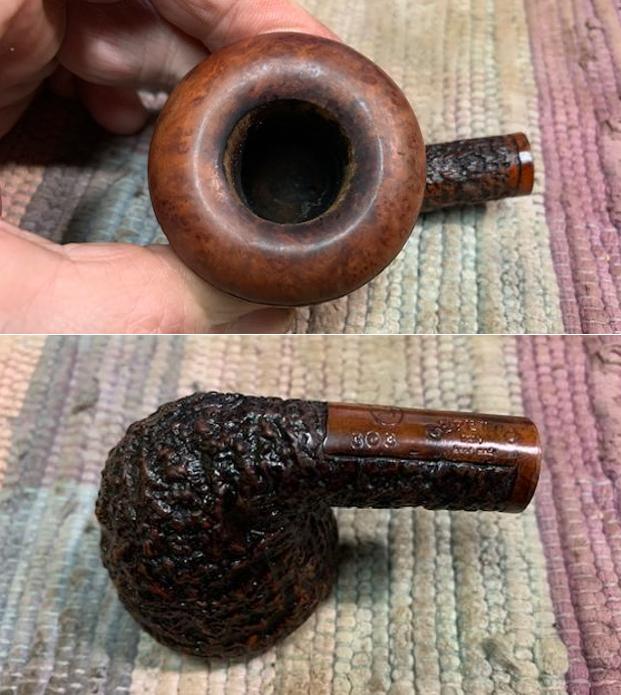
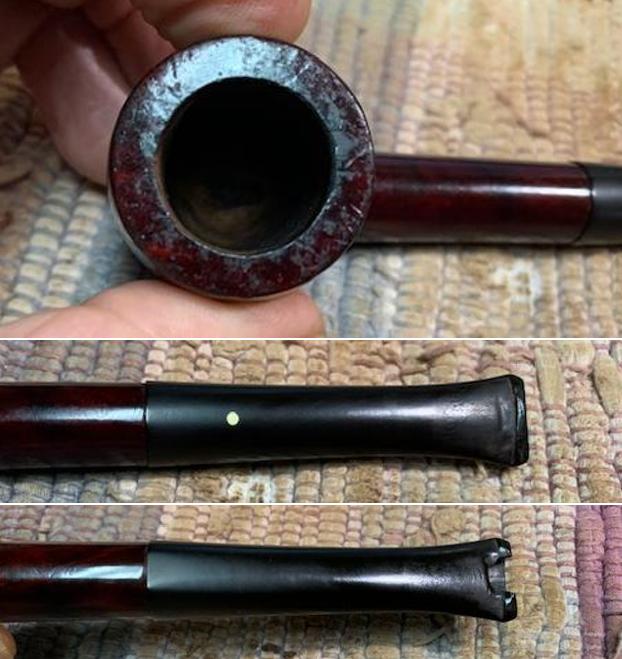
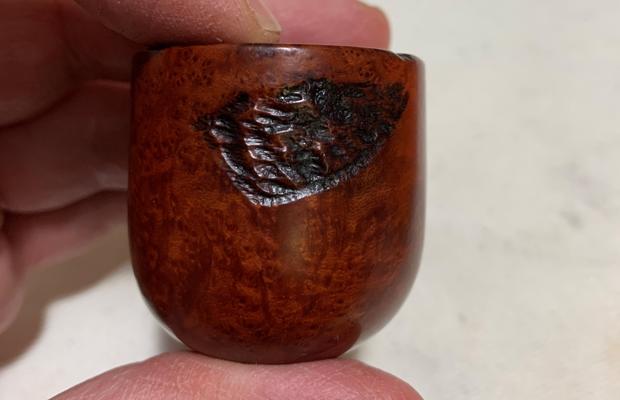
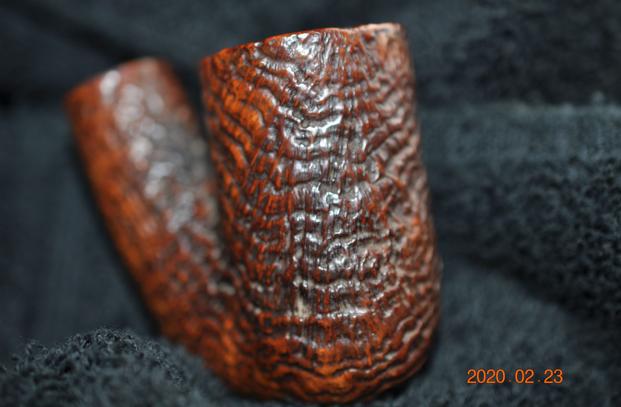 The next three close up photos show the condition of the bowl and rim top. You can see the lava coat on the inner edge of the bowl and the debris in the rustication of the rim top.
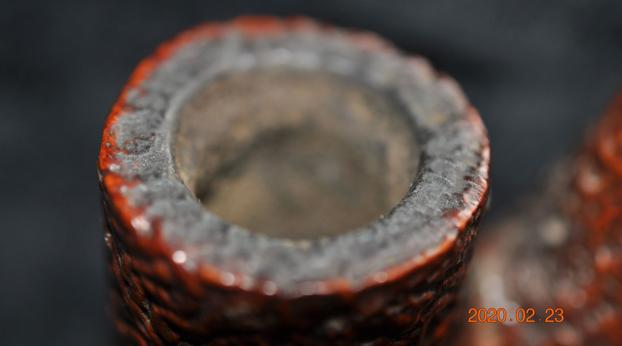
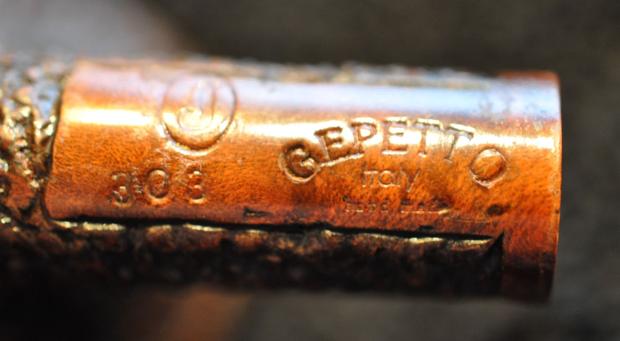
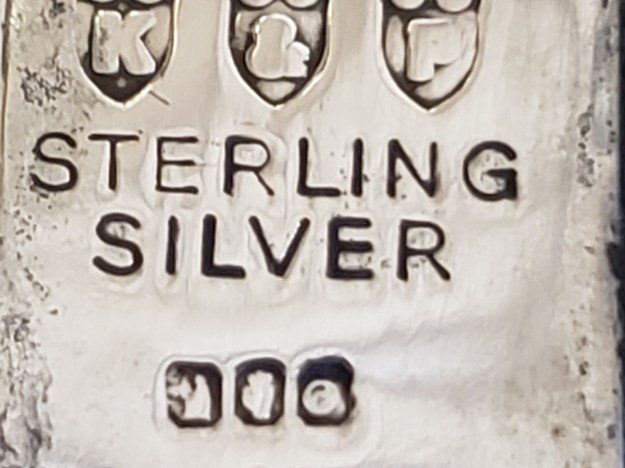
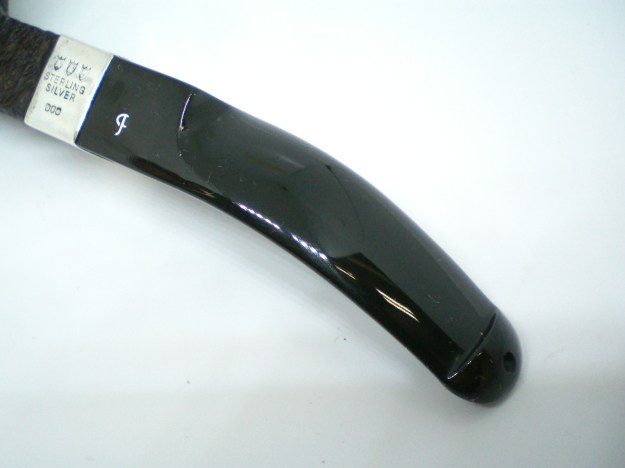
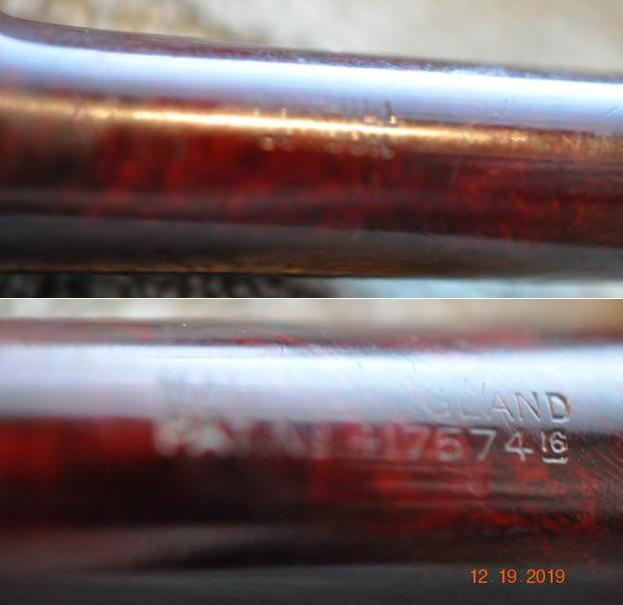
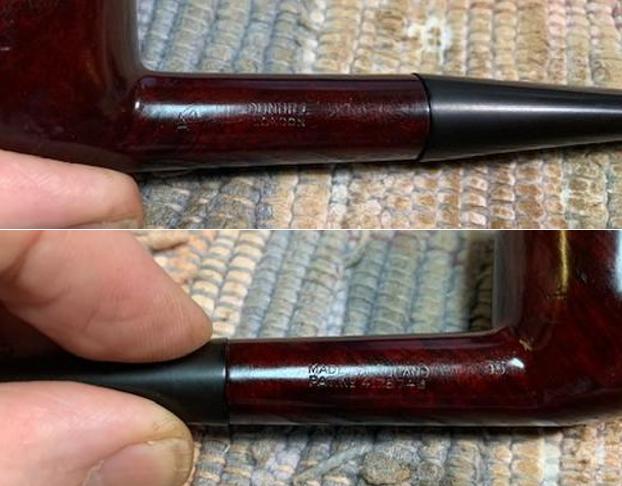
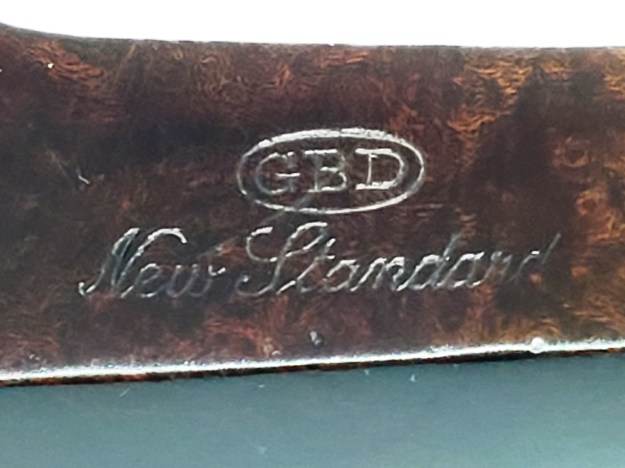
 Jeff took a photo of the stamping on the underside of the shank. It read as noted above and is faint and readable.
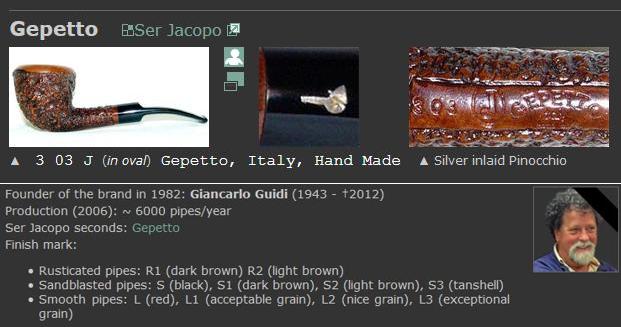
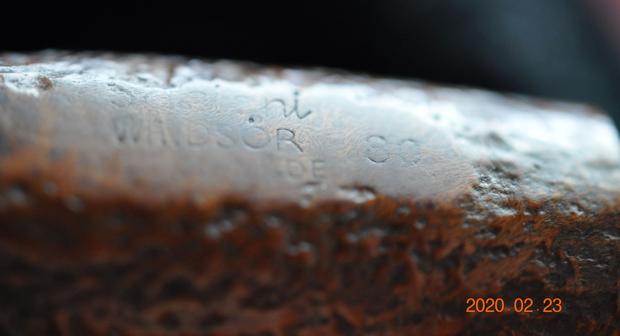 I turned to Pipephil’s site to get a read on the Sasieni Windsor line to see if I could find out more about the stamping (http://pipephil.eu/logos/en/logo-sasieni2.html). The pipe was in the section on the site as a Sasieni seconds and sub-brands. The pipe in the second photo had very similar stamping to the bowl I was working on. I did a screen capture of the section on Pipephil. I have included it below.
 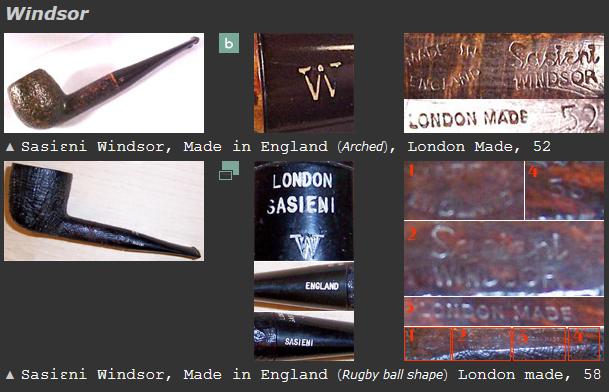 There were also photos that were included on Pipephil of what the sandblast looked like on the Sasieni Windsor originally.The third photo of the underside of the shank shows a similar stamping to the pipe I am working on. The pipe originally had a saddle vulcanite stem. The stem was long gone when Jeff and I picked it up so I had some decisions to make about the stem I would use to restem it.
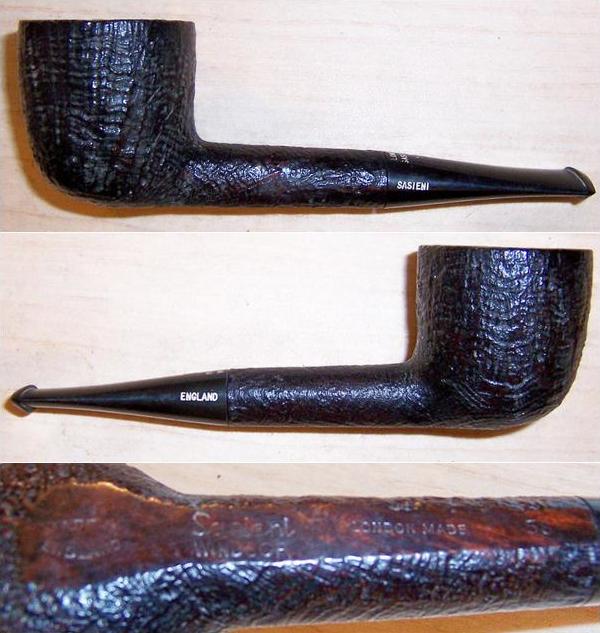 I turned to work on the pipe itself. Jeff had carried out his usual thorough cleanup of the pipe. He had reamed it with a PipNet reamer to remove the cake and cleaned the reaming up with a Savinelli Fitsall Pipe Knife. He scrubbed the internals of the bowl and stem with alcohol, cotton swabs and pipe cleaners. He scrubbed the externals with undiluted Murphy’s Oil Soap and rinsed the bowl off with running water. The pipe looked very clean when I received it.
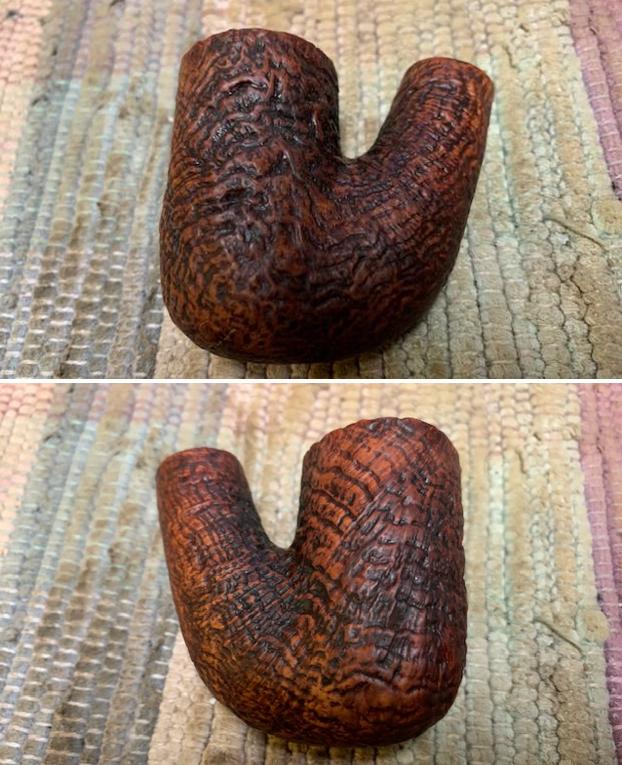
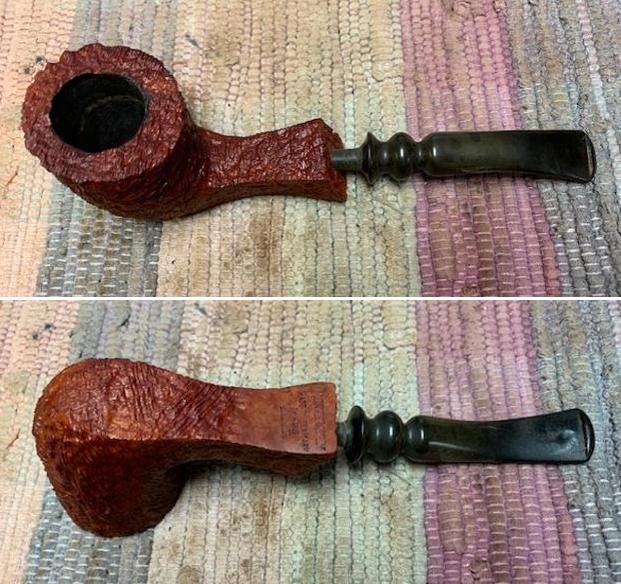
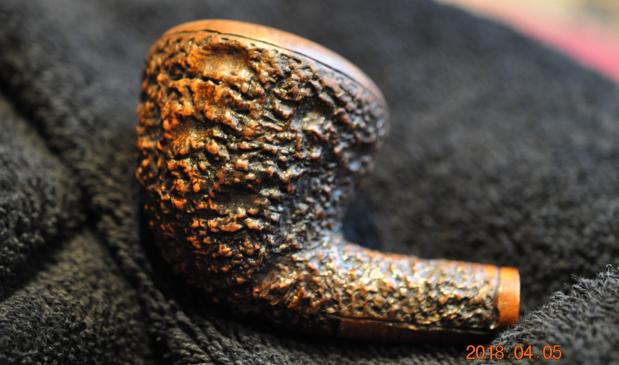
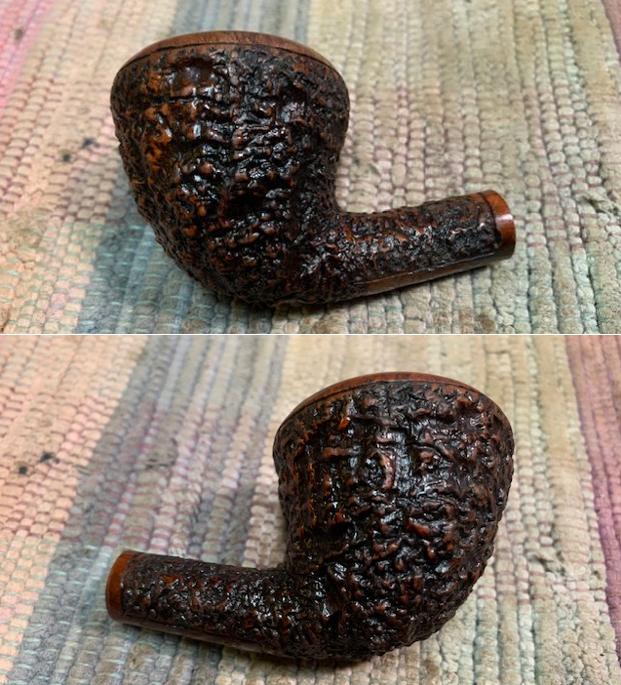
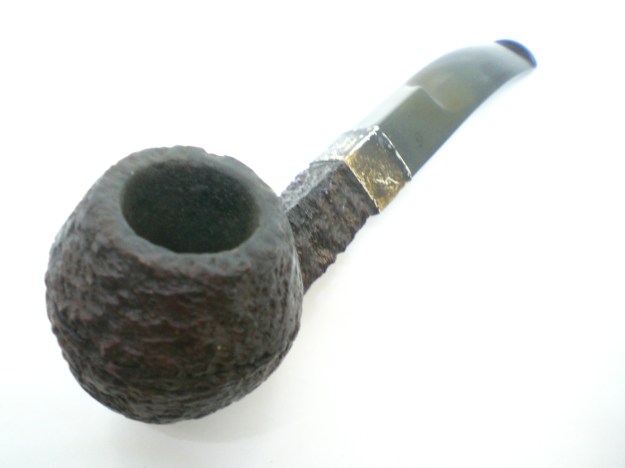
 The rim top cleaned up really well as can be seen in the close up photos below.
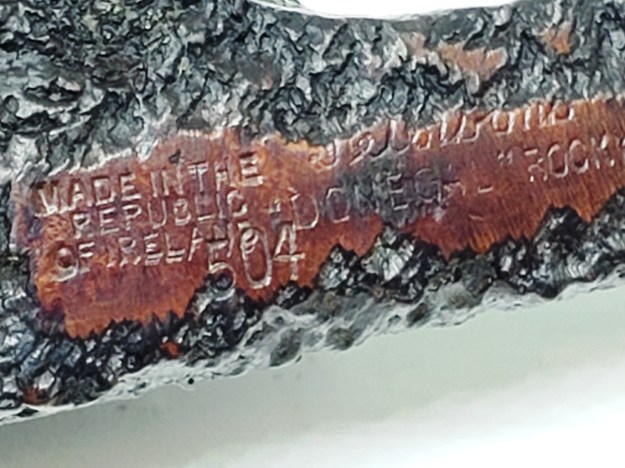
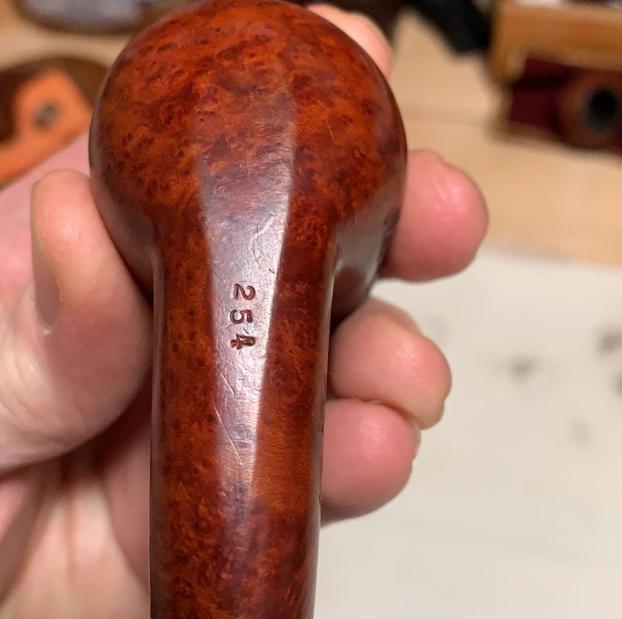
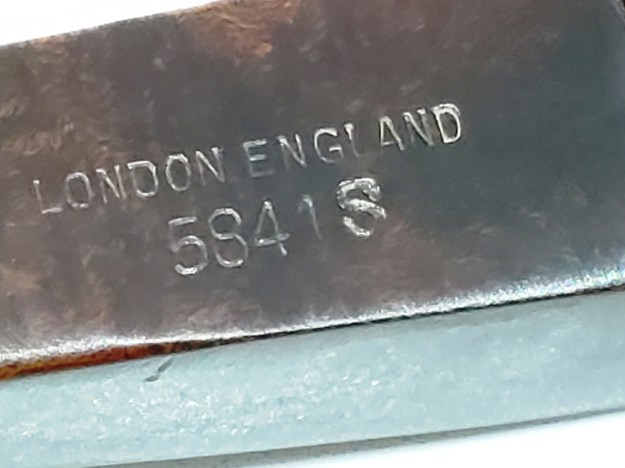
 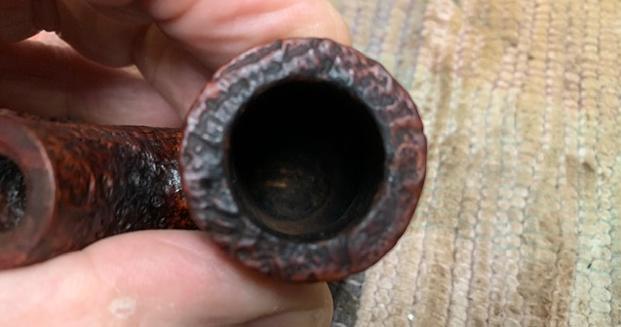 I took a photo of the stamping on the underside of the shank. It really is faint but readable.
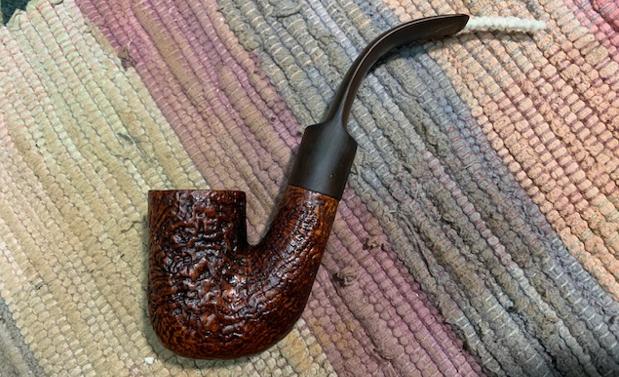
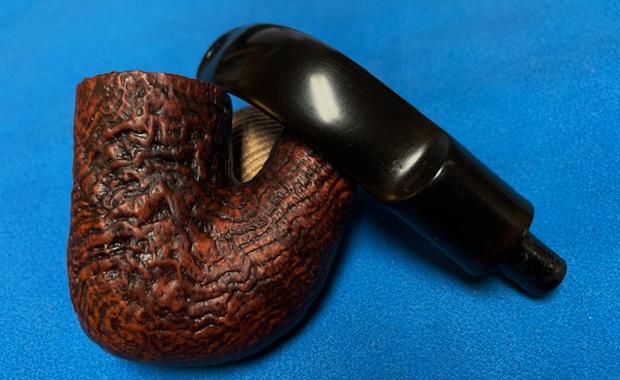
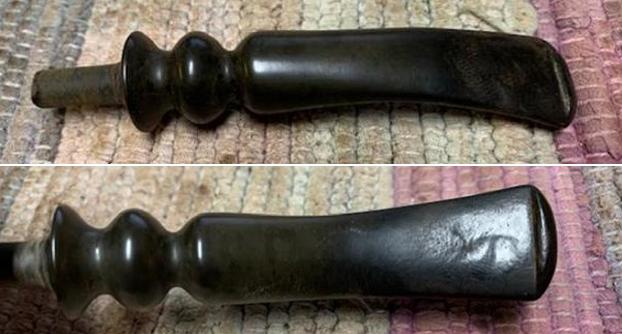
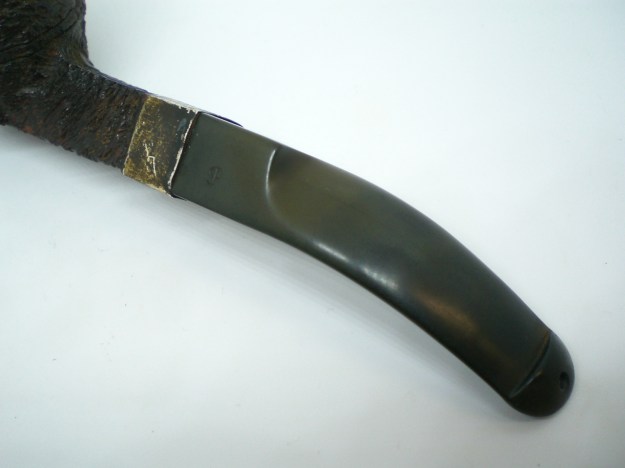
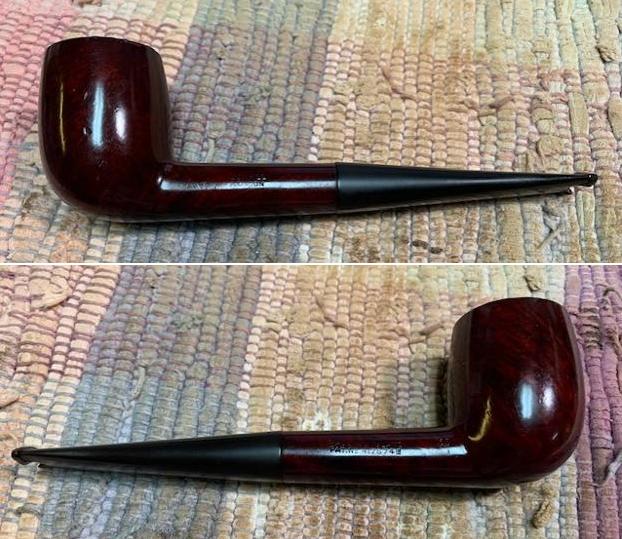
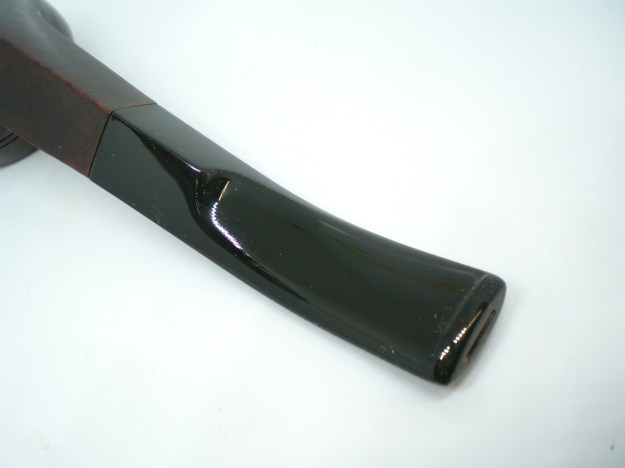
 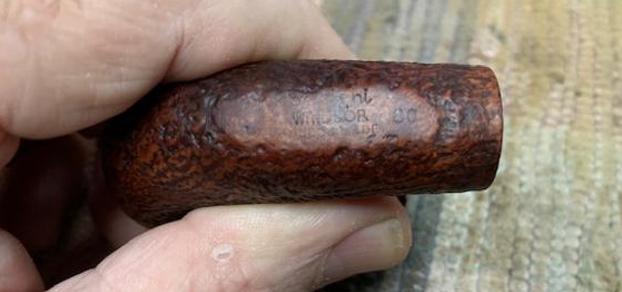 I went through my can of stems and found turned freehand style vulcanite stem that would work well with the bowl and shank. The bend in it was a little too high and would need to be heated and bent for the Oom Paul shape. There were tooth marks in surface of the top and underside of the stem at the button that would need to be dealt with in the restoration.
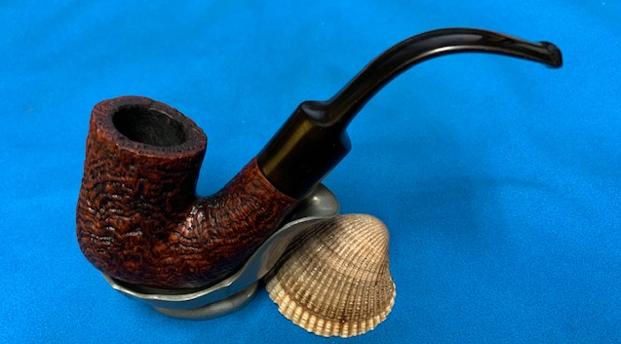
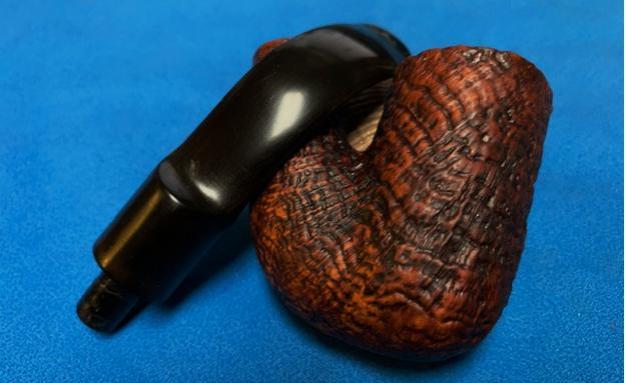
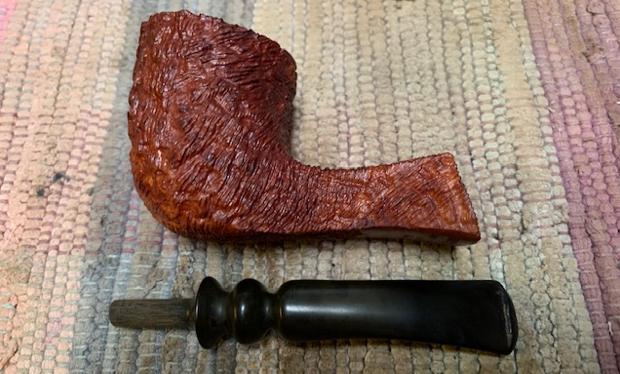
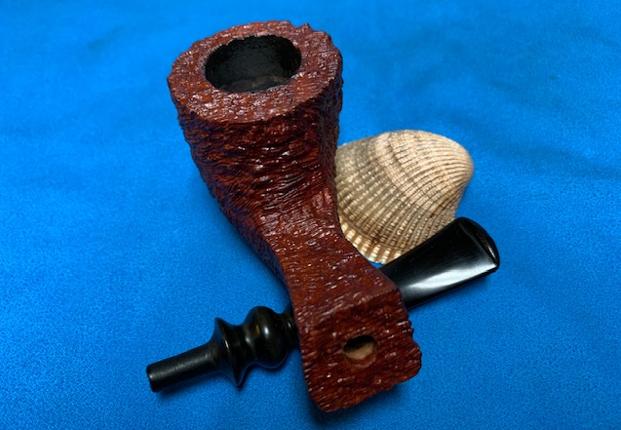
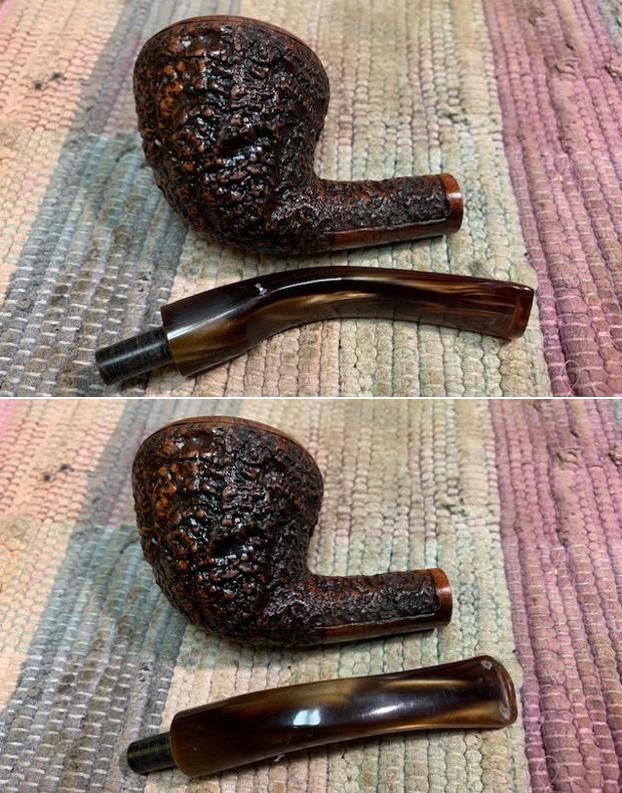
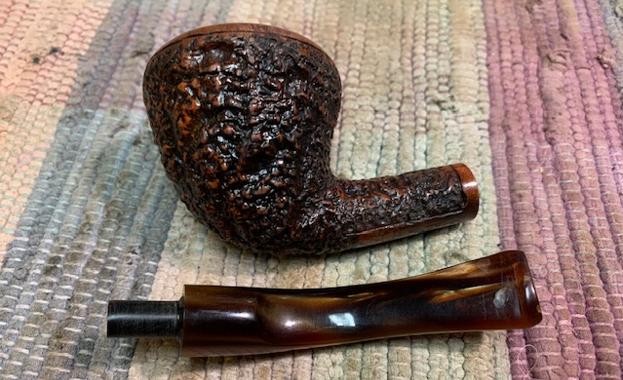
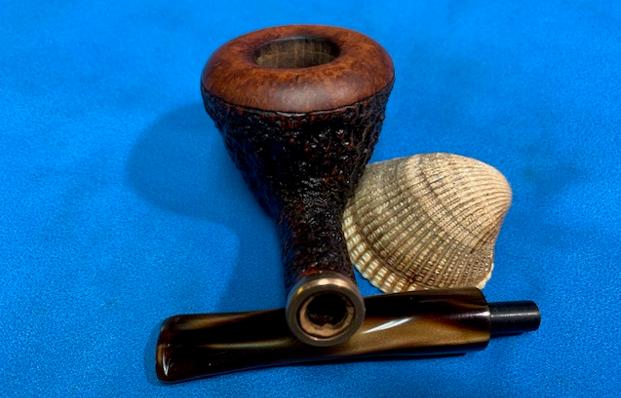
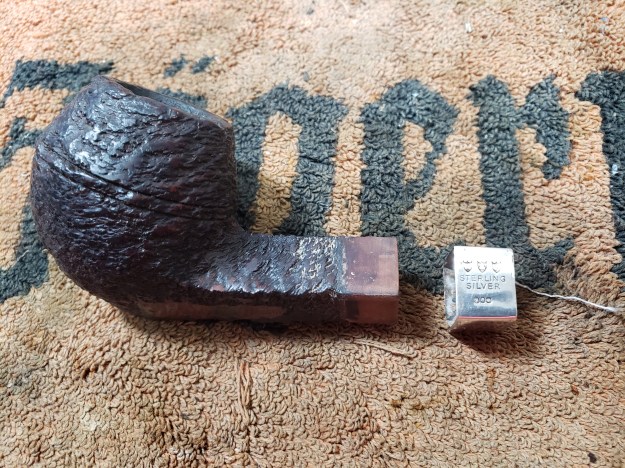
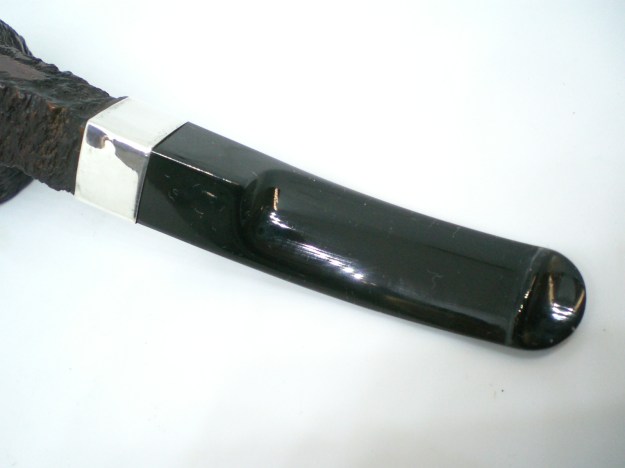
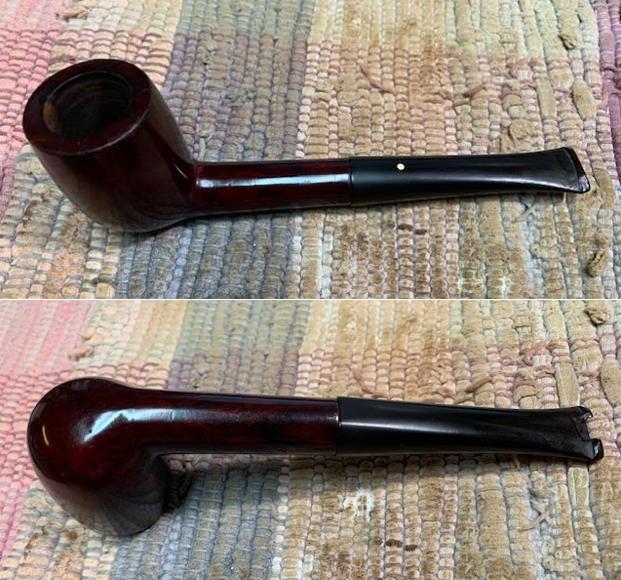
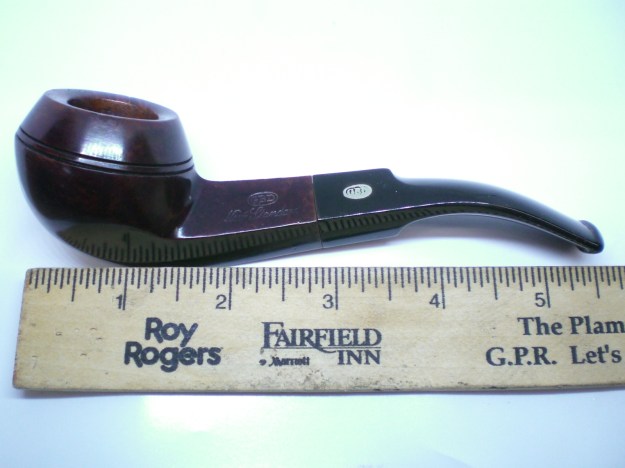
 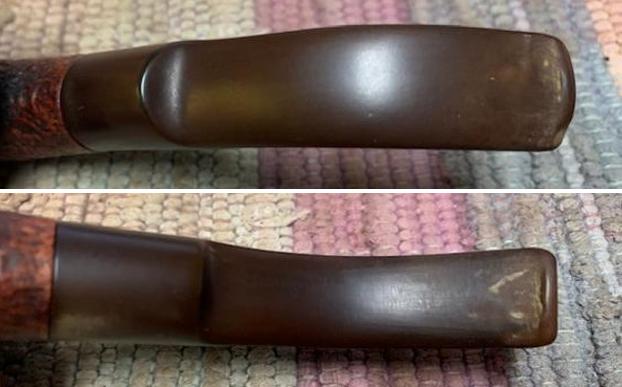 I took a photo of the stem and bowl together to give a sense of the look of the pipe and the proportion of the stem.
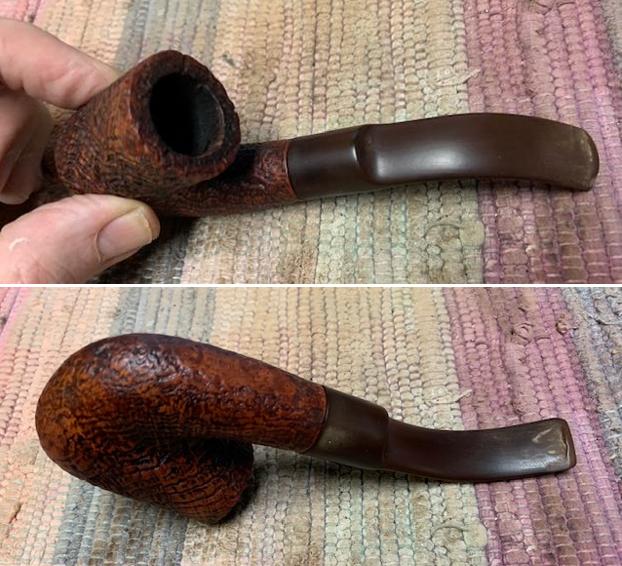
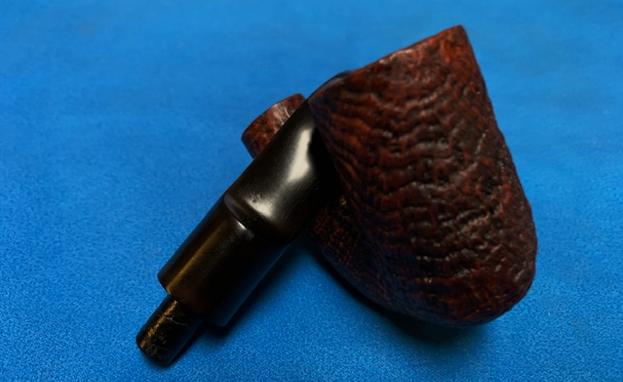
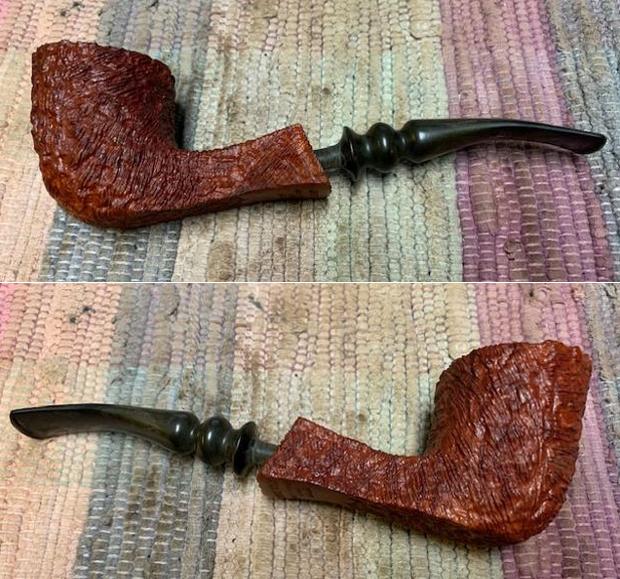
 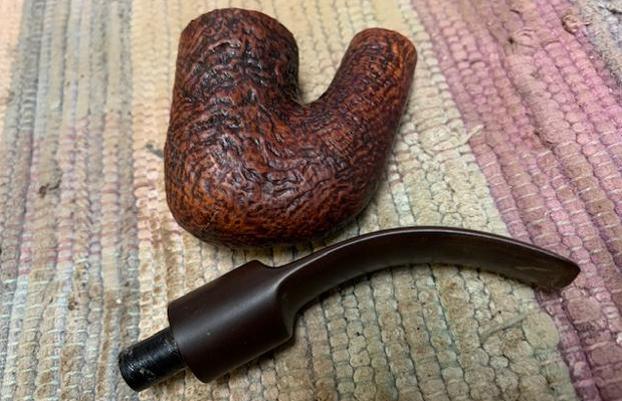 I put the stem in place on the shank and took photos of combination of the bowl and stem. It is going to look very good once it is cleaned up.
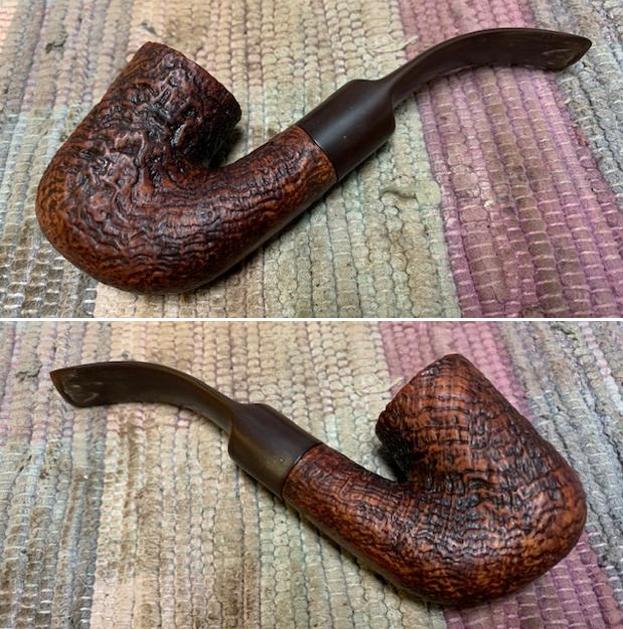
 I rubbed the briar down with Before & After Restoration Balm. I worked it into the briar with my fingertips and a horsehair shoe brush. The product works to clean, enliven and preserve the briar. I let it sit for 15 minutes while I worked on the stem. After the time passed I buffed it with a cotton cloth to deepen the shine. The briar really comes alive with the balm.
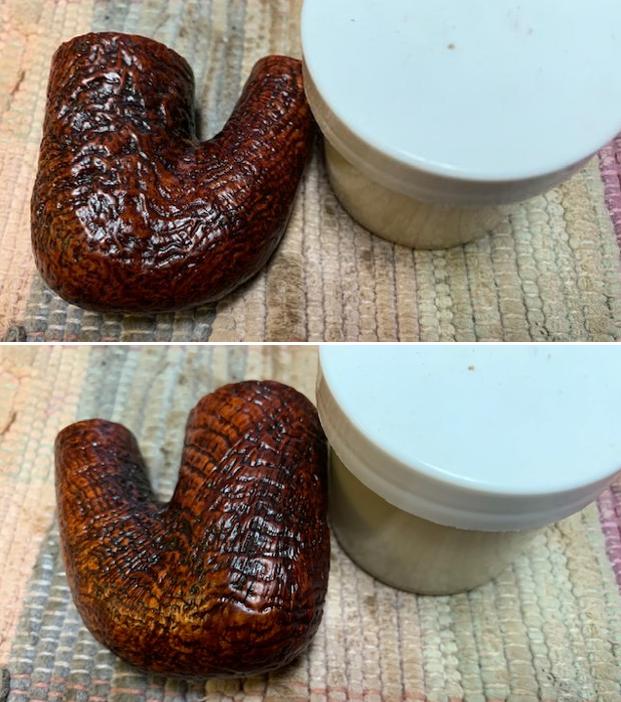
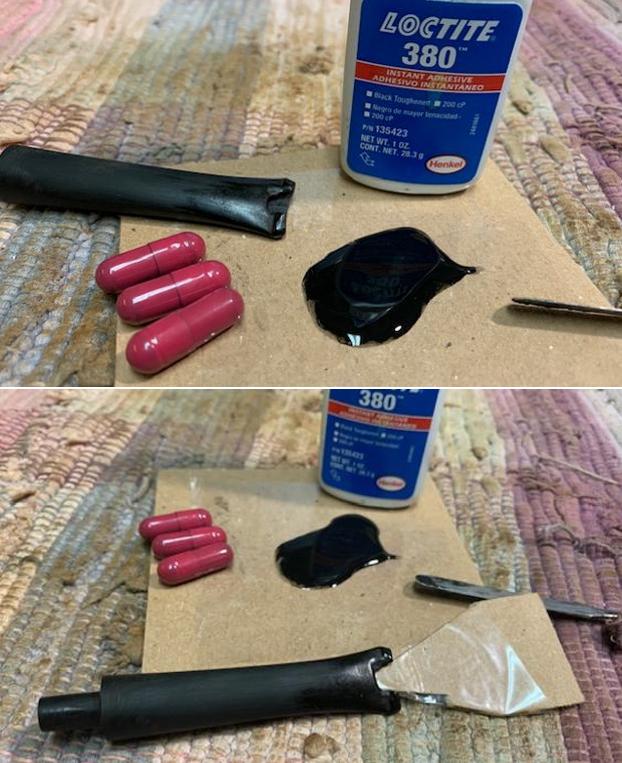
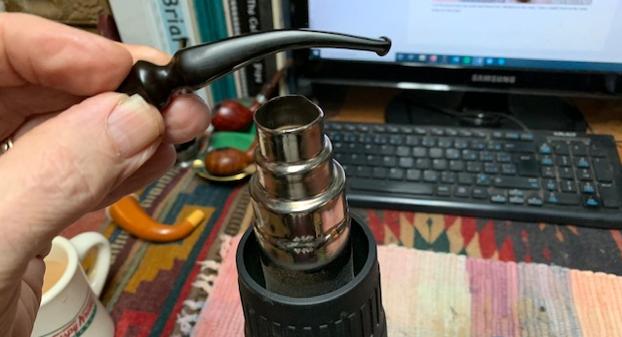
 I set the bowl aside and turned my attention to the stem. I put a pipe cleaner in the stem and then heated the stem with my heat gun until the vulcanite was supple. I bent it to the angle that matched the bowl.
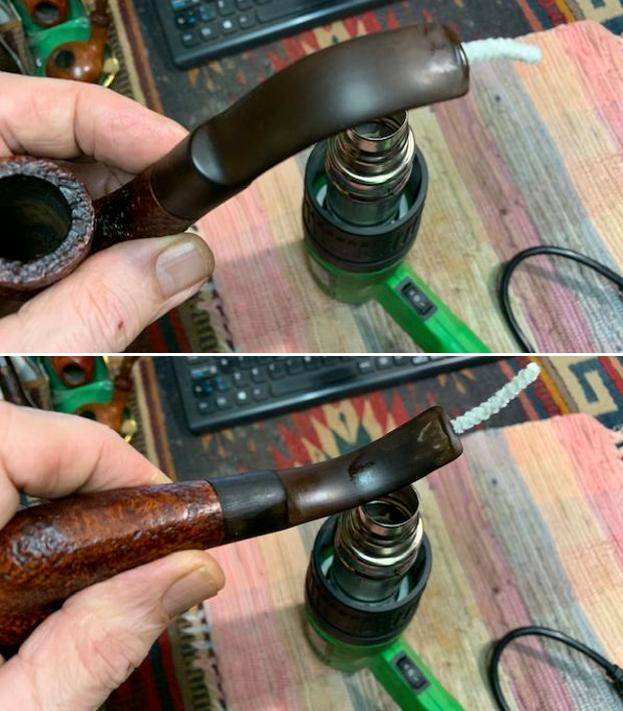
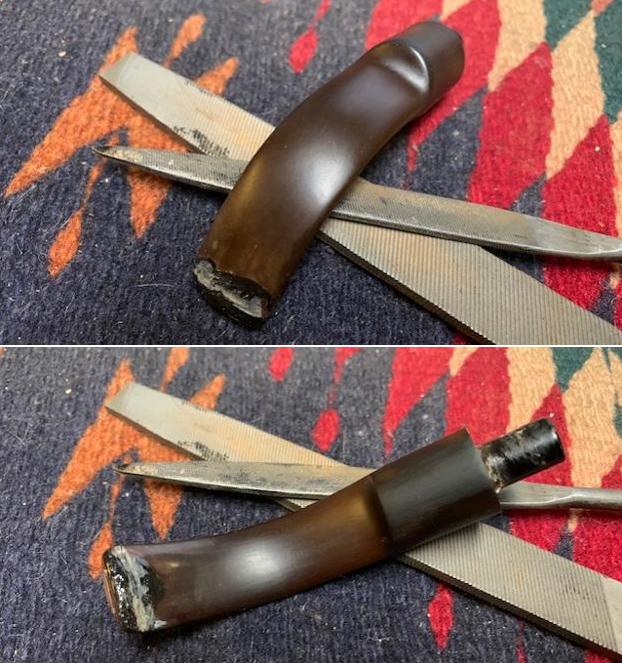
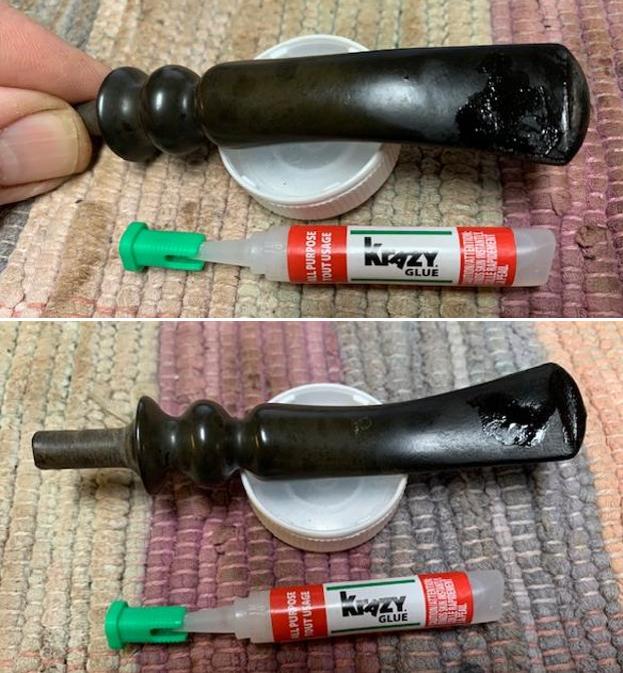
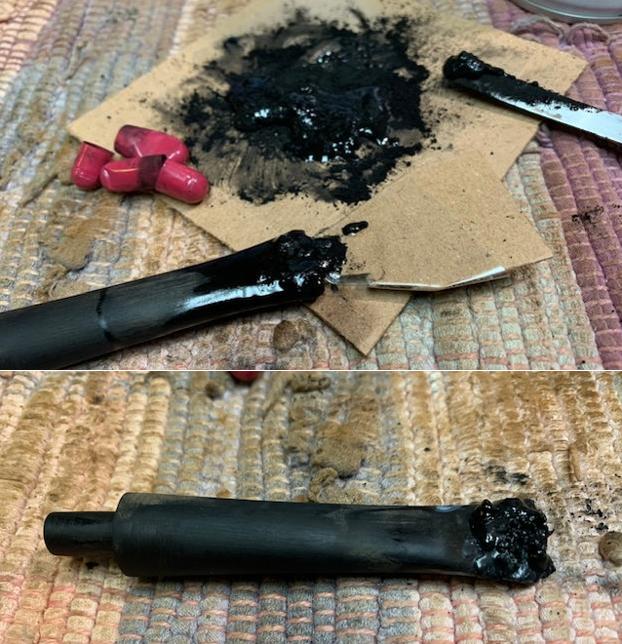
 I filled in the tooth marks and rebuilt the button top with black super glue and set it aside to cure. Once it had cured I used files to reshape the edge of the button and flatten the repairs on the stem surface. I blended the repairs into the surface of the vulcanite with 220 grit sandpaper. I started polishing the stem with 400 grit wet dry sandpaper. The stem was looking much better.
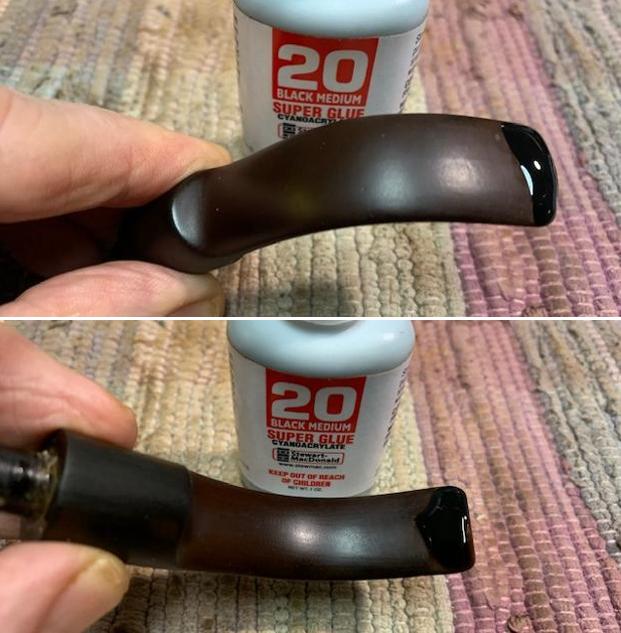
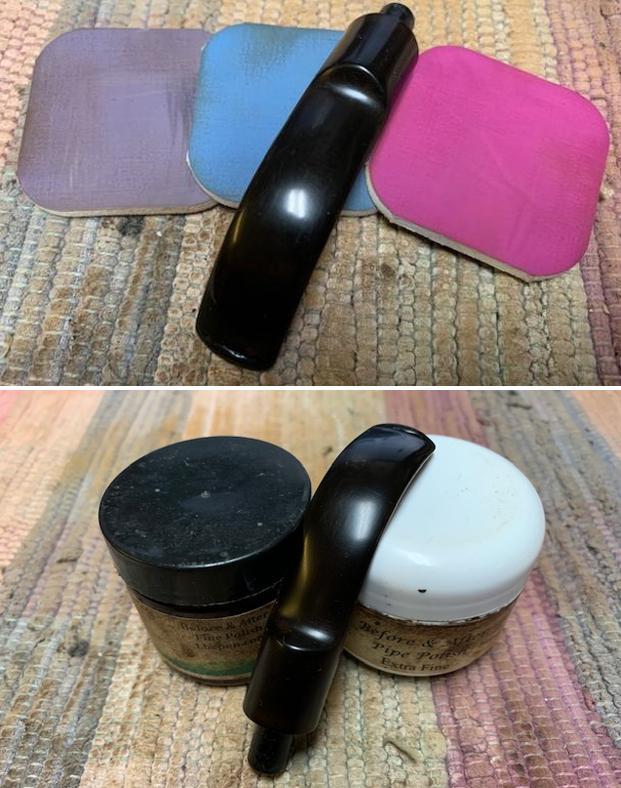
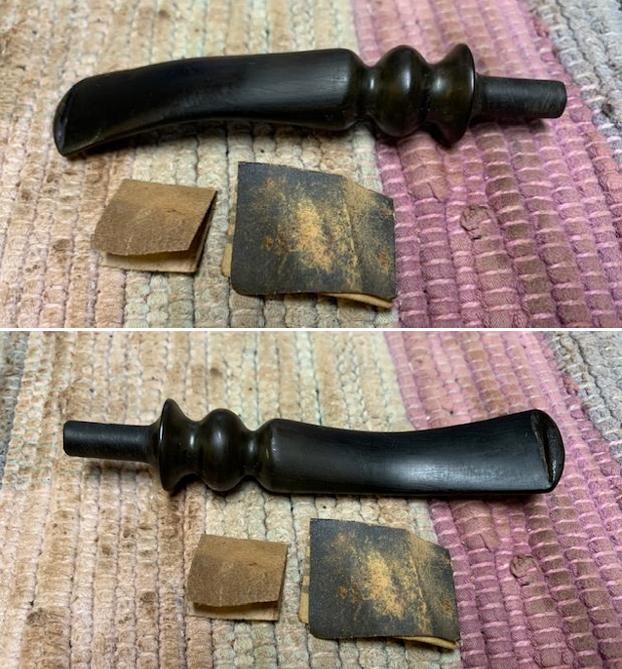
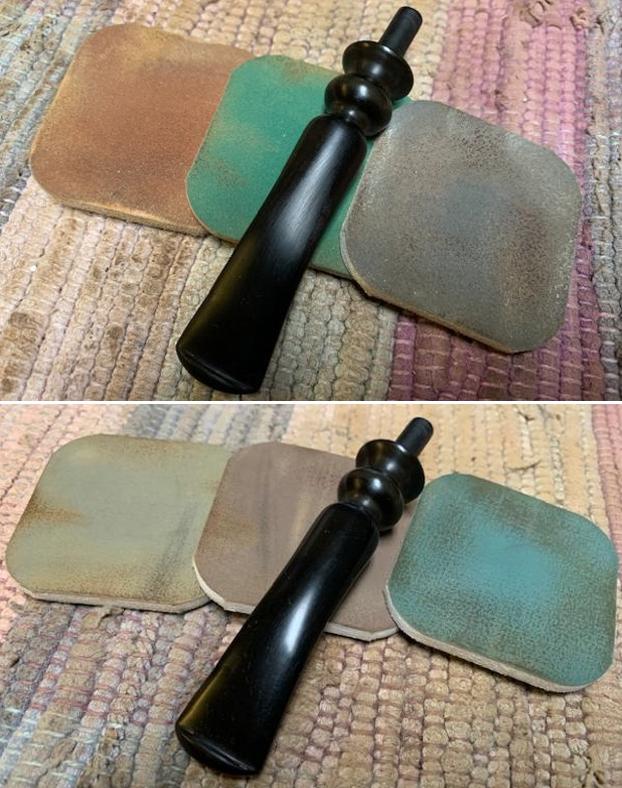
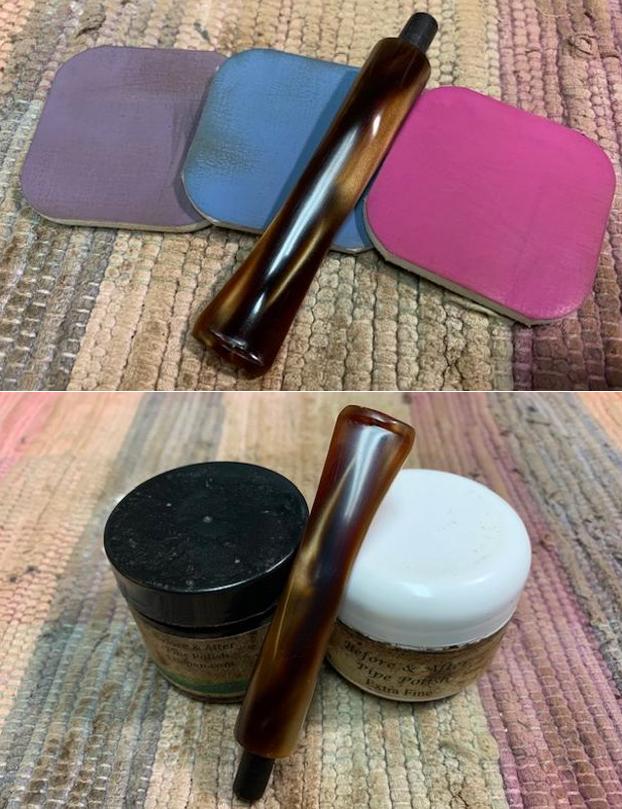
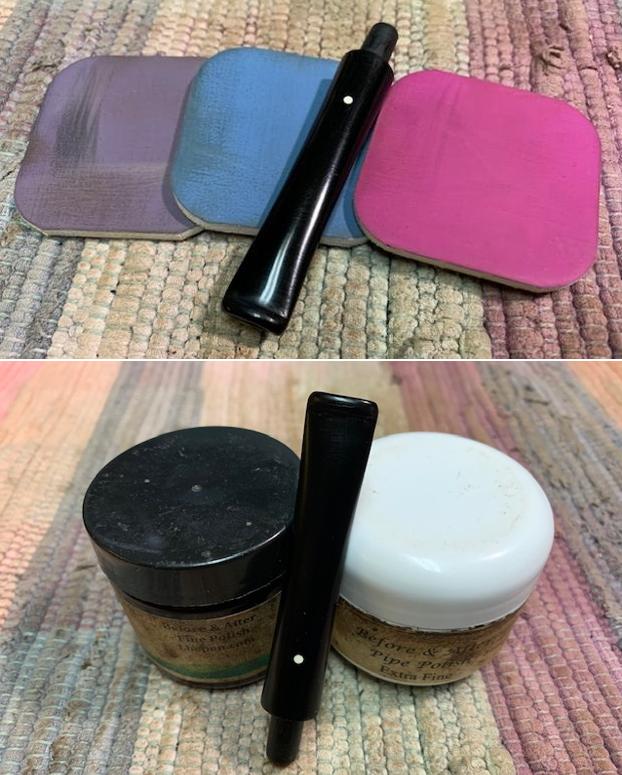
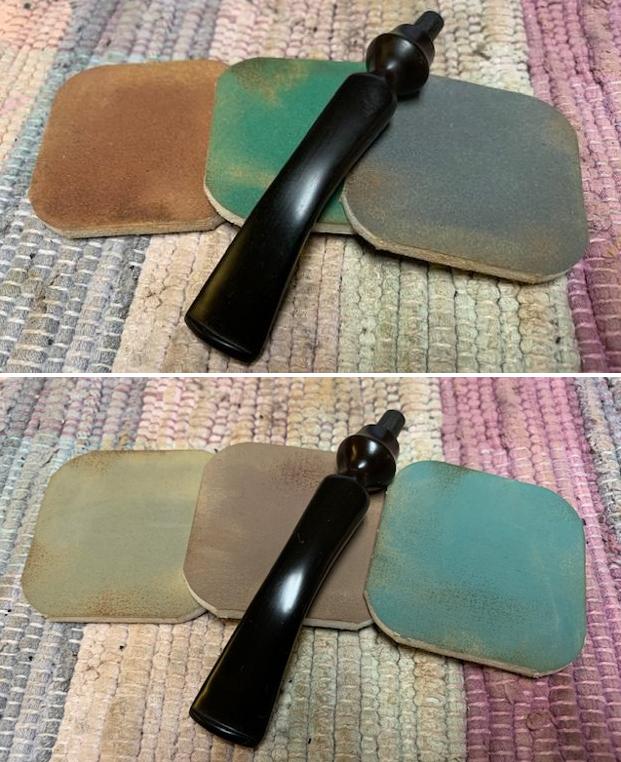
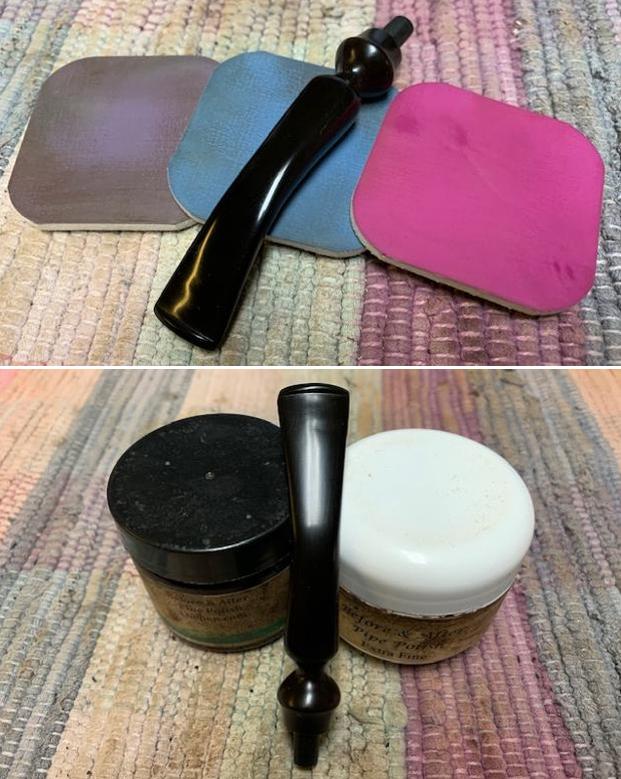
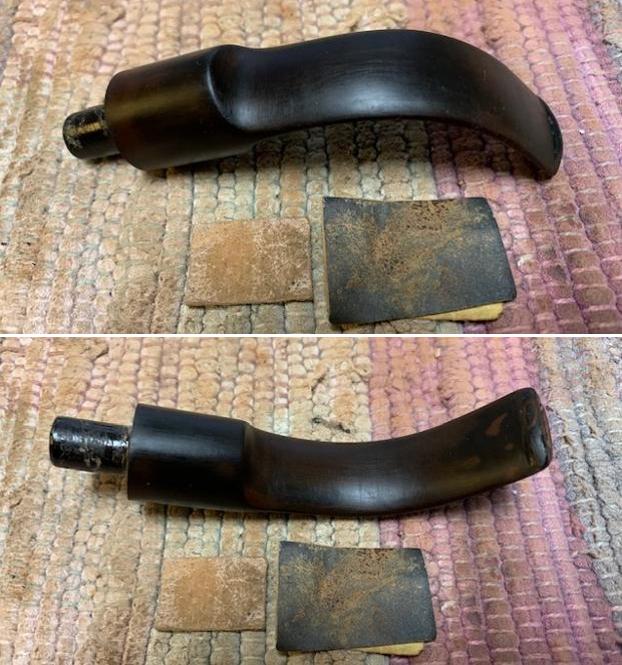 I polished the vulcanite with micromesh sanding pads – 1500-12000 grit pads. I wiped it down with Obsidian Oil after each sanding pad. I used Before & After Pipe Polish – both Fine and Extra Fine to further polish the stem.
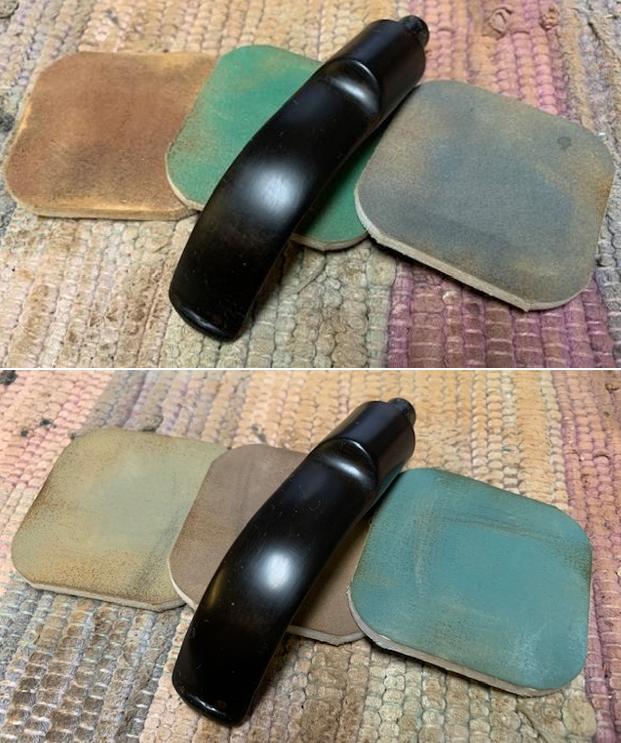
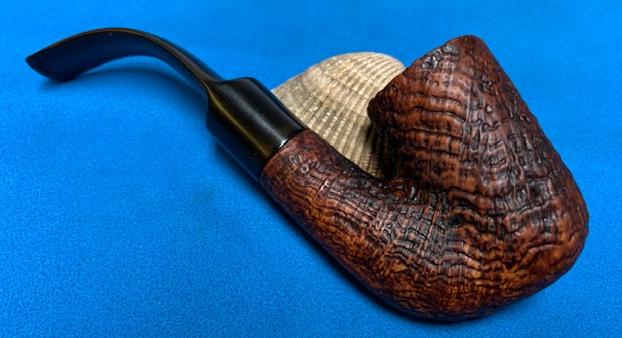
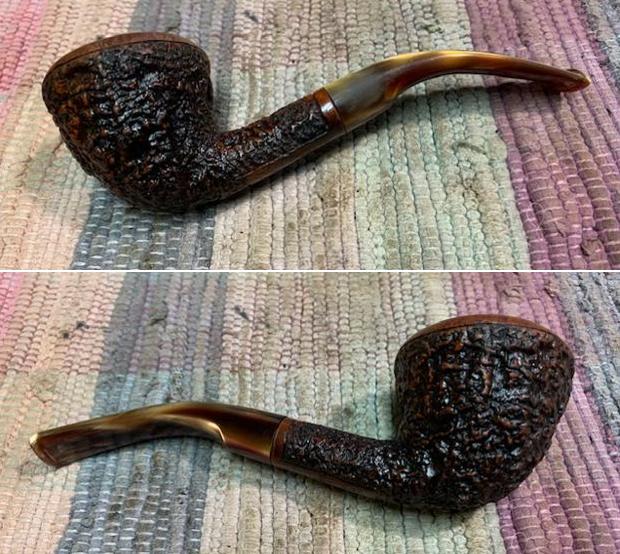
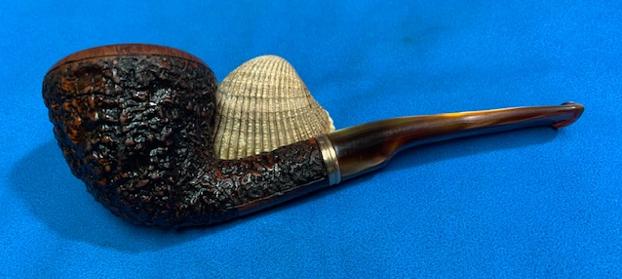
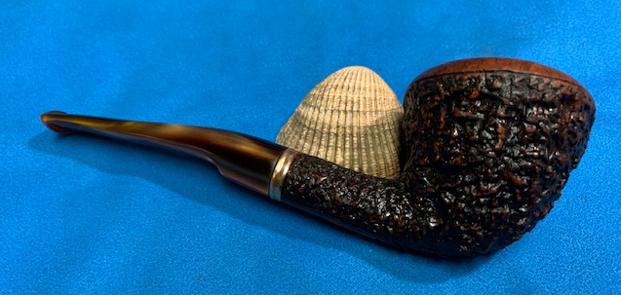
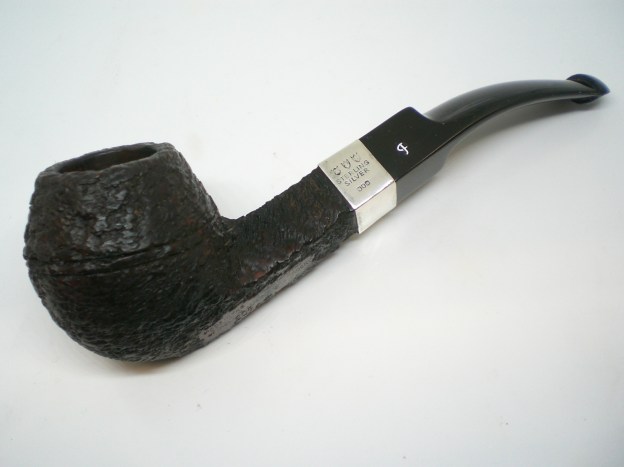
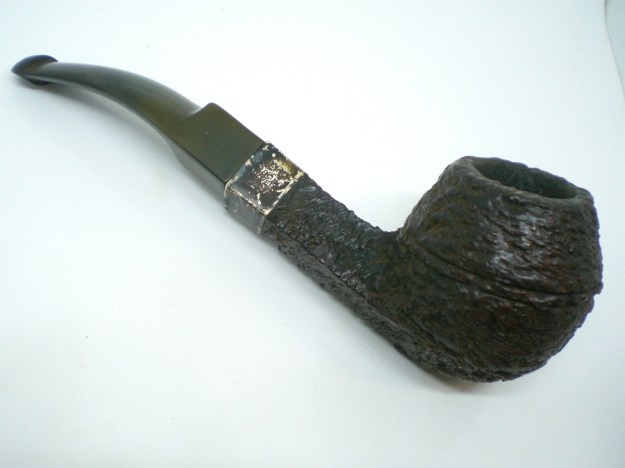
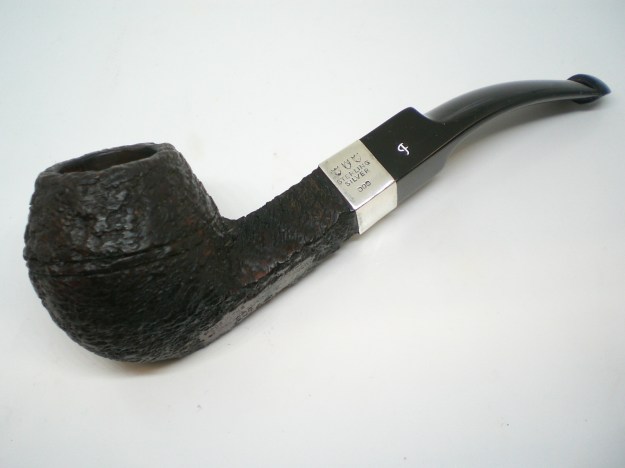
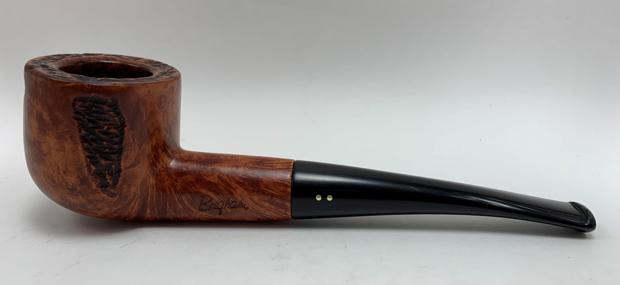
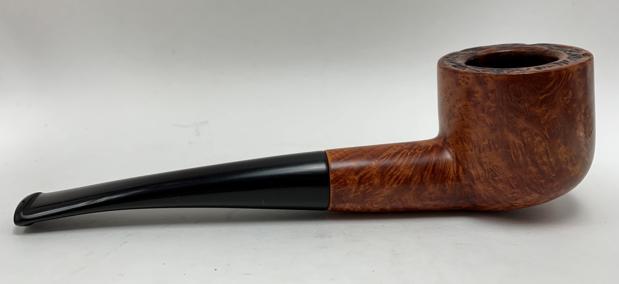
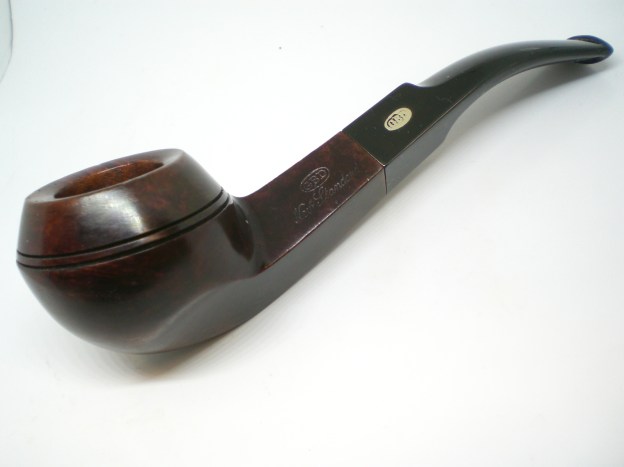
 This restemmed, sandblasted Sasieni Windsor 80 Oom Paul is a beautiful looking pipe. The brown stains on the bowl work well to highlight the finish. The polished black vulcanite saddle stem adds to the mix. I put the finished stem on the bowl and buffed it with Blue Diamond on the buffing wheel being careful to not buff the stamping. I gave the bowl multiple coats of Conservator’s Wax and the stem multiple coats of carnauba wax on the buffing wheel and followed that by buffing it with a clean buffing pad. I hand buffed the pipe with a microfiber cloth to deepen the shine. The finished Sasieni Windsor 80 is quite nice and feels great in the hand. Give the finished Oom Paul a look in the photos below. I can only tell you that it is much prettier in person than the photos capture. The dimensions of the pipe are Length: 5 ½ inches, Height: 2 inches, Outside diameter of the bowl: 1 ¼ inches, Chamber diameter: ¾ of an inch. The weight of the pipe is 46grams/1.62oz. It will soon be added to the British Pipe Makers section on the rebornpipes store. Thanks for walking through the restoration with me as I worked over another beautiful pipe. Remember we are not pipe owners; we are pipemen and women who hold our pipes in trust until they pass on into the trust of the next generation.
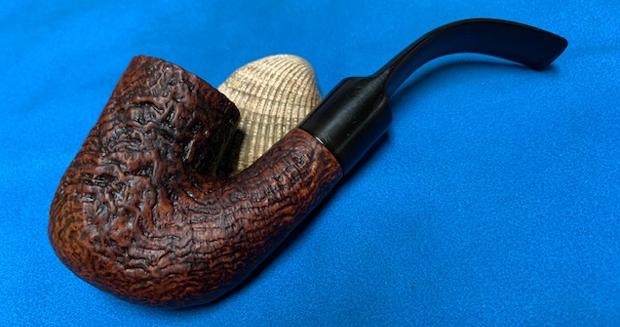


