Monthly Archives: May 2022

My Methods for Reworking a Bowl, Rim Top and Edges


Blog by Steve Laug

I thought it might be worth taking time to talk about my methods of cleaning and restoring a rim top and edges of the bowl. I will address the process in the blog below by starting with the least intrusive method and work my way through the options and conclude with the most intrusive. I think if you were to just read the blogs you would default to topping a bowl and beveling a rim edge to deal with damage while there are actually several other options available to you. Obviously, some of the bowls that I have to deal with have a lot of rim top and edge damage so those restorations go into quite a bit of detail on that process. So if you are ready and interested let’s work through the process together.

1. I begin with the least intrusive method for smooth rim tops. For all intents and purposes this really is a cleaning and reconditioning process.

  • Ream the bowl and clean it up while carefully paying attention to the rim edges. You do not want to add damage to the shape of the bowl or edges by the reaming. I use a PipNet pipe reamer with four different cutting heads to fit a variety of bowls. I touch up that cleaning with a Savinelli Fitsall Pipe Knife.
  • Carefully scrape off the thick lava coat on the rim top and edges with a Savinelli Fitsall Pipe knife. I work to get the thick coating off as gently as possible with the knife.
  • Scrub the rim top and edges using Murphy’s Oil Soap (undiluted) and a Scotch Brite pad. It works well to remove buildup on the top without scratching the rim top. I use it to also scrub the inner edge of the rim to carefully remove the darkening and build up there. The goal is to keep the rim as round as possible and still smooth out the edge.
  • Scrub the entire bowl with the Murphy’s Oil Soap (undiluted) and a tooth brush to remove any residual grime on the bowl, rim top and edges.
  • Rinse bowl exterior and top with warm water to remove residue left behind by the soap and scrubbing.
  • Dry the bowl off and check for residue on the rim top and edges. Repeat to take care of those spots as necessary. Don’t worry too much about the lightening of the stain on the rim top at this point. We just want it clean.
  • If the stain has lightened considerably from the cleaning, buff the rim top to make sure the polishing does not bring the briar to match. If not, it can be restained to match the rest of the bowl using stain pens that are available on line.

2. We will look at modifications to the above procedure to arrive at the least intrusive method for plateau/sandblast/rusticated rim tops. Again, for all intents and purposes this is a deep cleaning process of the surfaces as described.

    • Ream the bowl and clean it up while carefully paying attention to the rim edges. You do not want to add damage to the shape of the bowl or edges by the reaming. I use a PipNet pipe reamer with four different cutting heads to fit a variety of bowls. I touch up that cleaning with a Savinelli Fitsall Pipe Knife.
    • Carefully work over the rim top with a brass bristle brush (brass bristle brushes are much softer than a regular wire brush and do not do damage to the finish. These are available at most Walmart stores or small auto parts stores and are used for cleaning.) I use the brush dry and carefully work over the rim top with the goal of removing the thickest and most pervasive lava. Once it is finished the finish begins to take on its original appearance.
    • Scrub the rim top and edges using Murphy’s Oil Soap (undiluted) and a Scotch Brite pad. It works well to remove the remaining buildup on the top without damaging the plateau/sand blast/rusticated finish on the rim top. I use it to also scrub the inner edge of the rim to carefully remove the darkening and build up there. The goal is to keep the rim as round as possible and still smooth out the edge.
    • Scrub the entire bowl with the Murphy’s Oil Soap (undiluted) and a tooth brush to remove any residual grime on the bowl and rim top and edges.
    • Rinse bowl exterior and top with warm water to remove residue left behind by the soap and scrubbing.
    • Dry the bowl off and check for residue on the rim top and edges. Repeat to take care of those spots as necessary. Don’t worry too much about the lightening of the stain on the rim top at this point. We just want it clean.
    • If the stain has lightened considerably from the cleaning different procedures are used for the various surfaces.

a) Plateau surfaces if lightened generally will come back alive with polishing. I tend to stain the crevices in the plateau with a black Sharpie Pen to give some contrast to the rim top when polished. I will also often use the pen to colour the inner edge of the bowl.
b) Sandblast surfaces – I have found that a good buff will often bring this back to match the bowl. If not, it can be restained. I work to find a match the rest of the bowl with a variety of stain pens are available. These can be purchase online or at hardware stores.
c) Rusticated surfaces – Buff the surface to see what the finish looks like after buffing. It may well match the rest of the bowl with just that work. If not you can restain it in the same manner as the sandblast surfaces.

If the rim top and edges look good at this point proceed as usual to buff and wax them with the rest of the bowl.

3. Let’s move on to moderate intrusion when the above procedures do not work to address the issues on a smooth rim top and there is still damage to the inner edge of the bowl. The process below carries on from where you left off above in 1.

  • The rim top has been cleaned and the edges cleaned as noted above. The inner edge of the bowl is out of round and has darkening and burn damage that remains.
  • I use a folded piece of 220 grit sandpaper to give the edge a slight bevel and remove the damage from burning or nicks. The angle of the bevel varies depending on the depth of the damage, as the idea is to minimize it and bring the bowl back to round.
  • Sometimes that is all it takes -sand a slight bevel and bring the bowl back to round and clean up the edges.
  • Sometimes you have to decide how far to go – a bevel generally covers a lot of issues in shaping the edges of the bowl.
  • Polish the sanded rim edge with micromesh sanding pads to smooth it out.
  • Reclean the bowl and edge with a clean cloth. If the edge matches the rest of the bowl you are finished and can buff and wax the pipe.
  • If they do not blend in then use a stain pen and match the stain as much as possible to the rim top and bowl. Then buff, wax and polish on the wheel.

4. Let’s move on to moderate intrusion when the above procedures do not work to address the issues on a plateau/sandblast/rusticated rim top and there is still damage to the inner edge of the bowl. The process below carries on from where you left off in 2 above .

  • The rim top has been cleaned and the edges cleaned as noted above. The inner edge of the bowl is out of round and has darkening and burn damage that remains.
  • I use a folded piece of 220 grit sandpaper to bevel the rim edge inward and remove the damage from burning or nicks. The angle of the bevel varies depending on the depth of the damage and the overall structure of the bowl. The idea is to minimize the damage and bring the bowl back to round.
  • Sometimes that is all it takes – sand a slight bevel and bring the bowl back to round and clean up the edges.
  • Sometimes you have to decide how far to go – a bevel generally covers a lot of issues in shaping the edges of the bowl.
  • Polish the sanded rim edge with micromesh sanding pads to smooth it out. Remember on all three of these types of finishes a smooth inward bevel can add a real touch of finesse to the rim top that is stunning.
  • Reclean the bowl and edge with a clean cloth. If the edge matches the rest of the bowl you are finished and can buff and wax the pipe.
  • If they do not blend in then use a stain pen and match the stain as much as possible to the rim top and bowl. Then buff, wax and polish on the wheel.

If the rim top and edges look good at this point proceed as usual to buff and wax them with the rest of the bowl. If the damage is even more extensive than originally thought after proceeding through the steps and procedures above then more intrusive measures will be required to bring the bowl back to round and the rim top to undamaged condition. Once again, how far you go with this process depends on choices that only you can make. As a general rule I will not change the visual profile of the pipe regardless of the work I do and that sets the limits for the degree of work I will do.

5. Let’s move on to the most intrusive methods when the above procedures do not work to address the issues on a smooth rim top and there is still damage to the inner edge of the bowl. The process below carries on from where you left off above in 1 and 3.

  • On a smooth rim top where there is damage to the top itself as well as the inner and outer edges several methods are available to try.
  • If you have cleaned up the edges already and the top has burn damage or is dented and nicked the first step is to steam out the dents with a damp cloth and a hot knife or small steam iron. I wet the cloth and lay it on top of the dent then apply the heat source that generates steam and lifts the dents. I repeat until the surface is smooth. That leaves the burn marks to address.
  • If the steaming has left behind damage that could not addressed using the method then it is time to move forward. If the damage is on the inner edge of the bowl then I generally use a wooden ball or darning egg wrapped with a piece of sandpaper (220 grit) to give the inner edge more of a bevel (deeper bevel) to accommodate the damage and minimize it. (both the bevel and the following topping will minimize burn damage).
  • If the damage is to the rim top itself then I use a topping board and 220 grit sandpaper to top the bowl and carefully remove the damaged part. Topping does not have to be too deep or drastic. I always proceed slowly checking often to see if the surface is smoothing out. Remember it is easier to remove than to put wood back. 😉
  • If all is done and you still feel the burn damage is too intrusive you can make a wash of oxalic acid and warm water and use a cotton pad or paper towel to apply it to the burn damaged area. Repeat until you are convinced that no more damage can be removed.
  • When finished smoothing out the rim top polish it and the edges with micromesh sanding pads (1500-12000 grit pads). You can either wet sand or dry sand. As you polish the rim top it should begin to shine. That may be enough if it matches the bowl sides and you can buff and wax it.
  • If it does not match then you will need to restain the rim top and edges to match the rest of the bowl. This can be down with an aniline based stain like Feibings or even with the small Stain Pens I have referred to above.
  • Buff the bowl and rim with a buffer and a polish like Blue Diamond and then generously wax the briar with carnauba wax and buff with a clean buffing pad.
  • At this point the rim top will likely look very good and match the bowl well. The damage from burn marks or nicks and dents will have disappeared and the edges will look like they were meant to be as they are now.

6. Let’s move on to the most intrusive methods when the above procedures do not work to address the issues on a plateau, sandblast or rusticated rim top and there is still damage to the inner edge of the bowl. The process below carries on from where you left off above in 2 and 4. Each of these take slight variations to accommodate the finish.

When the damage on a plateau rim top is beyond the work listed above in sections 2 and 4. If the damage is on the plateau top itself then I proceed as follows.

  • I used the brass bristle wire brush more aggressively than I did in previous sections above to remove all of the loose char and burn damage on the plateau itself. Once all is removed I wipe it down with a damp cloth.
  • I wipe down the damaged area with a mix of oxalic acid and water on cotton swabs and pads to get deeply in the grooves. I repeat until I am not getting any coloration on the cotton pads. I wipe it off with a damp cloth.
  • I work over the inner edge with 220 git sandpaper again to remove the damage that remains and reshape it. I stain it at the same time as the plateau.
  • Generally a plateau rim is darker than the bowl colour so it can be safely stained with a black or a dark brown stain. That will take care of most of the damage on the top of the bowl.
  • Buff and wax rim top and edges with a buffing pad and Blue Diamond and then coat generously with carnauba wax. Buff the top with a clean buffing pad to deepen the shine.

When the damage on the rusticated rim top remains after the work in sections 2 and 4 above.

  • I used the brass bristle brush more aggressively than I did previously above to remove as much of the loose char as possible. If that does not make better then and even more aggressive fix is needed.
  • I top the bowl on a topping board with 220 grit sandpaper to remove the damage and even out the rim top. Sometimes it takes removing all of the rustication but sometimes it does not. Once I have it cleaned up I wipe it down with alcohol to remove the sanding dust.
  • I even out the inner edge of the bowl with a folded piece of 220 grit sandpaper. I wipe it down with alcohol.
  • I use a Dremel and burrs to replicate the rustication pattern from the bowl sides on the rim top. I used several burrs – ball, cone and cylinder to work over the rim top to match the previous rustication. When I am happy with it I use a brass bristle wire brush to knock of the high spots and any loose debris.
  • I restain the rim top with a stain pen to match the bowl. Sometimes I darken the inner edge with a black stain pen.
  • Buff and wax rim top and edges with a buffing pad and Blue Diamond and then coat generously with carnauba wax. Buff the top with a clean buffing pad to deepen the shine.

When the damage on the sandblast rim top remains after the work in sections 2 and 4 above.

  • I used the brass bristle brush more aggressively than I did previously above to remove as much of the loose char as possible. If that does not make better then and even more aggressive fix is needed.
  • I top the bowl on a topping board with 220 grit sandpaper to remove the damage and even out the rim top as I do with the rusticated rim top. Sometimes it takes removing all of the sandblast but sometimes it does not. Once I have it cleaned up I wipe it down with alcohol to remove the sanding dust.
  • I even out the inner edge of the bowl with a folded piece of 220 grit sandpaper. I wipe it down with alcohol.
  • I use a Dremel and burrs to replicate the sandblast pattern from the bowl sides on the rim top. I used several burrs – ball, cone and cylinder to work over the rim top to match the previous blast. I use smaller burrs and work to keep the pattern close and tight like a sandblast. When I am happy with it I use a brass bristle wire brush to knock of the high spots and any loose debris.
  • I restain the rim top with a stain pen to match the bowl. Sometimes I darken the inner edge with a black stain pen.
  • Buff and wax rim top and edges with a buffing pad and Blue Diamond and then coat generously with carnauba wax. Buff the top with a clean buffing pad to deepen the shine.

That is the process I generally follow. As with any restoration, refurbishing you have to make a decision how far you want to go. My goal is to minimize the damage without changing the bowl profile or shape. I want the pipe to still retain the marks of its maker not me. Have fun in the process.


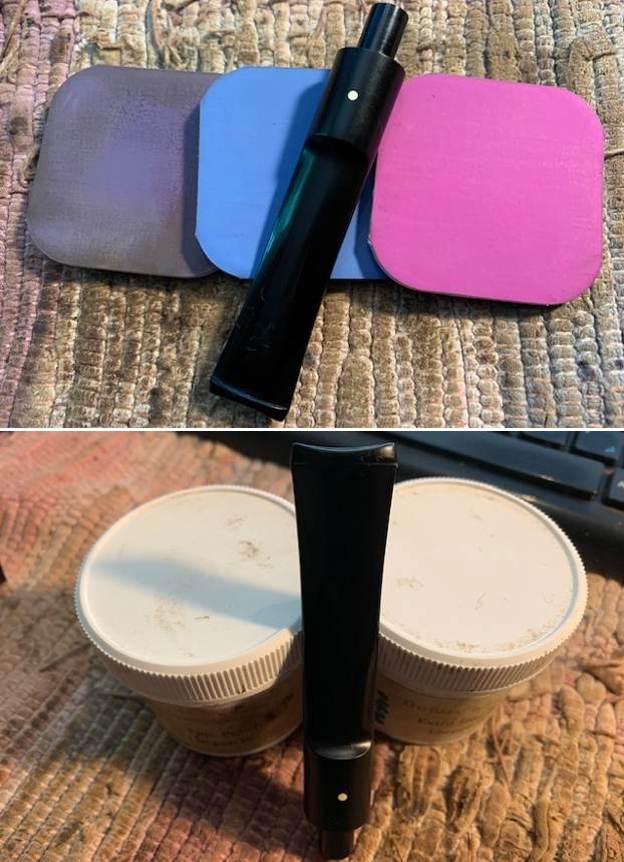
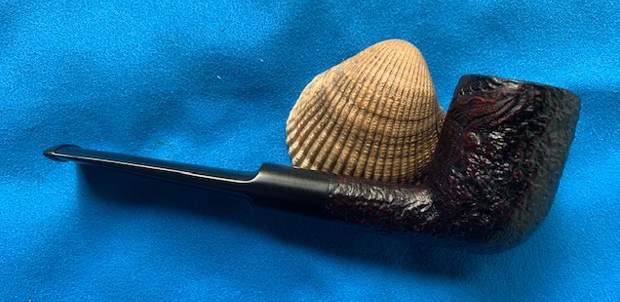
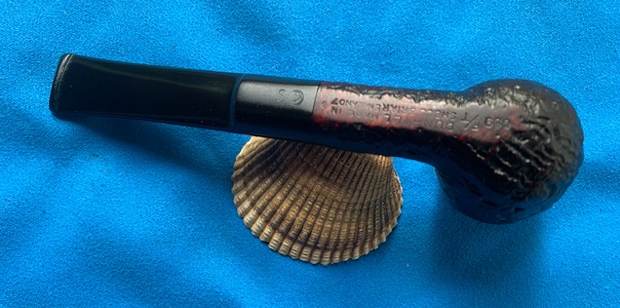
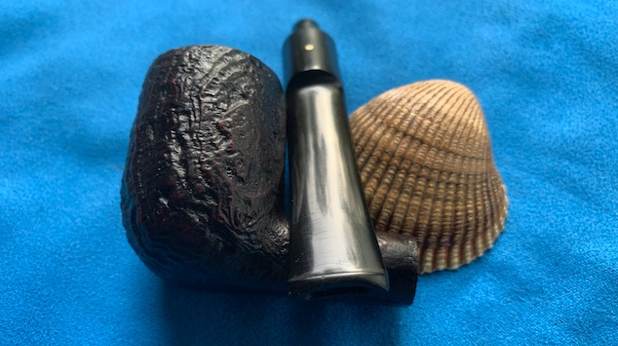
A New System Stem for a Patent Era Brigham 229 Author


I love these restems of Brigham pipes. Charles you have this down to an art! Well don on that old warrior.

The Brigham System has been on the market since 1938 when it was patented by Roy Brigham in Toronto, Canada. The original system consisted of a long aluminum tenon/filter holder into which fit a tube of untreated Rock Maple, which absorbed moisture from the smoke stream as it passed through the stem. Pipes from this period (1938 – 1955) were stamped with the Brigham logo and the “CAN PAT” patent number.

The Patent Era Brigham pipe on the worktable today arrived as a lone stummel, marked with the stamps listed above and a three-digit shape code, “229” indicating a “Brigham Select” grade, Shape 29 (Author) pipe. In later years the grade name would simply be referred to as a “2 Dot” pipe.

As you can see in this series of pics, the stummel was in overall quite good estate condition. The smooth finish was clean and even, although the briar…

View original post 1,133 more words

Renascence of a stunning billiard from Butz-Choquin


Early this morning I received an email from Joris about posting a restoration on rebornpipes. I wrote back and this is what he sent me. It is a great restoration and one that is only fitting to share with our global restoration community of rebornpipes. Welcome Joris. Thanks for your work and your post.

Blog by Joris De Sutter

Hi everyone. I’m a pipe restorer from Flanders, the northern half of Belgium, where I live in the beautiful town of Brugge (Bruges). It’s only once in a while that I restore old pipes to their former glory. I’m a bit of a Canadian and Lumberman fan and within those shapes I tend to specialize in the French brand Butz-Choquin. So when purchasing the pipes I like, occasionally other shapes are present in those lots. This particular pipe was one of those. I picked up this rather big billiard from a French second hand website, together with four other promising briars. They apparently all formerly belonged to the same gentleman, judging from the identical signs of use. And boy: they were used! The current pipe shows this quite clearly… The general shape of the pipe is a really handsome Billiard. It was apparently one of the favorite pipes of its previous owner. He seems to have loved his pipes, but perhaps not to the level that he really cared for them. What a mess! How does one even reach such a thick cake build up in the chamber? The dirty bowl with those black patches of grime around it? The heavily oxidized stem with all that calcification? I wonder how one is able to let it come to that. Didn’t the previous steward have the need to clean his pipe once in a while? Whatever. I did notice the extraordinary pipe underneath all that muck.

The markings on this pipe are quite standard for a Butz-Choquin. On the left side of the shank is the standard curved Butz-Choquin logo. Just underneath this logo the name of the series appears in all capitals : PRELUDE. And then in the lower right hand corner is the word Extra at an angle. This Extra stamping indicates that the wood of this pipe has no flaws and there are no fills present. This was indeed the trigger for me to purchase this pipe despite its sorry state. At the same height on the stem there is an engraving of the two BC letters forming the Butz-Choquin abbreviation. They were once filled white, but now only a hint of this remains at the bottom of the B. The letters themselves are however quite deep enough to allow for a full restoration. From the 1970’s onward, Butz-Choquin used an acrylic round insert on her stems for the higher end pipes they produced. If this pipe would have been made in the seventies or later, it surely would have had that acrylic insert on its stem. Since it is not present, I’m assuming this pipe dates from the 1960’s. The shape number on the right side of the stem reads 1398. On top of that it reads ST CLAUDE – FRANCE. Finally underneath the shape number is an A. I can only speculate on this solitary A, but since this pipe is clearly top of the line I suspect it to indicate just that.

The Butz-Choquin brand is one of the oldest in France. Most people unfortunately associate it with cheap basket pipes. They did indeed make plenty of those, but likewise they also made really good high quality pipes and those were sold at accordingly high prices.

The bowl is always first on my list. If the bowl turns out to be too far gone to justify a full restoration, then why would I still put some effort in the stem? I start by taking my own manufactured reaming knife and carefully scrape the top rim of the bowl. There is quite some lava coming off of it.   Now the most daunting part: addressing the very thick cake in the bowl. This took me about an hour, carefully scraping away all that carbonized tobacco till the briar became visible again. I do own the commonly available reaming tools, but I hardly ever use them anymore. My own tool turns out to be just the perfect reamer. The picture hardly illustrates the amount of carbon cake that came out of the bowl. That mountain was almost as high as it is wide! Not shown in the pictures is the condition of the briar underneath. It was excellent! No heat fissures, no burns.

From here, I always open up the draught hole. I like my pipes to have a 4mm draught hole. Most BC pipes are drilled at 4mm, but since this pipe was so extensively smoked, there must be a lot of tars in there. Drilling those out before further cleaning helps a lot. I have two drill bits for this. One has a tapered tip, while the other is a standard, although very long, 4mm straight drill. First the one with the tapered tip. I clamp the drill bit in my bench vise and then carefully turn the bowl by hand. Never ever use a power drill for this. The tapered drill bit is ideal to find the way through possible clogging inside the draught hole. If the straight bit would be used before the tapered bit, the clogging could steer the straight bit into the briar. After clearing the draught hole, a dentist tool is used to scrape away hardened tars from inside the mortise. And then both bowl and stem go into the water. I use an oil based black soap to clean the stummel and stem inside out. Some drops of soap on the bowl and stem, and then an old tooth brush together with some effort cleans both parts. A piece of very fine steel wool is used to remove the last remaining lava from the bowl’s top rim. Luckily it revealed that the previous owner didn’t knock his pipes on hard surfaces to remove ash and dottle.While I still have that piece of steel wool at hand, I use it to remove the calcification from the stem and already some of the oxidation. The biggest part of oxidation removal will follow later. I can now already notice to my relief that there are no tooth marks on the stem, apart from a small notch like indentation on the upper part of the button.To finish off the wet part of the cleaning, I have some fine round plastic bristle brushes. I use them to roughly clean out the insides of both stem and shank. This will make the process of deep cleaning later a lot easier since the water will already soften the tars a little bit.I let the stummel dry a bit and then proceed into the preparations of deep cleaning it. For this I use two main ingredients: isopropyl alcohol and paper towels. Notice the absence of cotton wool or salt? I used to do this with cotton wool in the past, as is shown on this blog and others, but found that my own method yields far better results. From the paper towel, I turn a corner of the towel into a wick. I turn this wick into the draught hole from the mortise and make sure it extends into the chamber. Then I slightly turn it into the other direction and push onto it. This way it will also fill the mortise completely. I then cut the excess that sticks out of the mortise. Then I make a small wad of the same towel and put it at the bottom of the chamber covering the small bit of the wick that protrudes from the draught hole into the chamber. Now I put the isopropyl alcohol onto the wad in the chamber until the wad is completely drowned, but not much more than that. This amount of alcohol is sufficient to percolate into the wick and do its work.Is it necessary to completely fill the chamber with cotton wool (or salt for that matter) to have the chamber also deep cleaned with the alcohol? I have done some experimentation on this in the past and found that the deep cleaning with alcohol is mostly important for the draught hole, not so much for the chamber. The reason is quite simple: While smoking your tobacco, the oils, tars and other volatile components of the tobacco will either get burned or lower down with the smoke. They will hardly stick to the chamber’s walls due to the heat and the cake build up. They will however primarily condensate in the draught hole.The result after some three hours of soaking. The wick end has turned into a nice brown colour. The wad in the chamber however remains white. Let’s see what happens when the wick gets removed.Wow! The wick part that was inside the draught hole has turned to black! Lots of tar have been removed. The new wick that is present in the picture is then used to immediately turn it inside the pipe again. Since the previous wick has been soaking in alcohol for three hours, the draught hole is still moist with it. The new wick can then easily take up another load of softened tars. So stick it in, turn and turn and pull it out. Look at the blackness that came out on that second wick in the following picture. A third wick is then prepared to put inside. This time the alcohol treatment of three hours is repeated. The following picture shows the result of that third wick. Not so black as the first one. And the fourth wick cleans up a bit more after it. This continues until the wick comes out without muck on it. With this pipe I had to do four full alcohol soaks of three hours. That means eight wicks in total, of which the bottom wick shows that it came out clean.Don’t I use normal pipe cleaners then? Sure, but not for this deep cleaning itself. Sometimes in between I enter a normal pipe cleaner soaked in alcohol to check on the remaining work. But other than that I use normal pipe cleaners primarily for the stem, not so much on the stummel.

To finish off the work on the insides of the stummel, I sanded the inside of the chamber with a piece of 220 grit sand paper wrapped around a dowel. I prefer doing that step of the process after the deep cleaning of the draught hole to avoid the black grinding dust to stick onto the tars and thus worsening the cleaning afterwards. That’s all for the stummel for now. Let’s first give the stem some attention. The outside of the stem was already washed with the black soap and a light scrubbing with the fine steel wool. Before I start to clean it any further, I decided to improve its mortise end by giving it a tapered air inlet. This will reduce turbulence during smoking so that the pipe doesn’t have the tendency to gurgle. Then the insides can be cleaned. I used two types of pipe cleaners. One hard type and a soft type. Starting with the hard one soaked in isopropyl alcohol. Some blackness came out of there, but much less than I anticipated.I then cut of the black part of the pipe cleaner, soaked the remaining cleaner in alcohol and entered it again in the stem. It now came out a lot cleaner already. Time to finish it off with the soft pipe cleaner. It came out clean! Quite amazing when compared to the state of the stummel. I guess the previous owner must have at least used some pipe cleaners once in a while. Once this process was done, it was time to address the outside of the stem. I don’t use any liquid pipe stem oxidation remover. I only use micromesh sanding pads. It will take a bit more effort, but the end result is just as good. I always use these micromesh pads with water. The first pad is the most important one. That’s the one which will remove most of the oxidation. Look at the colour of the water before and after that first pad…The following pads then follow in quick succession with clean water. After the last pad the stem almost looks as good as new. I then proceed to the buffer. I don’t have the need for a semi-professional buffing station with large cotton wheels and variable speeds. Would be nice, but a bit of an overkill for my needs. So this simple old Philips power drill will do. A small cotton wheel is fitted and white diamond buffs the stem to a bright shine.Time to restore the two BC letters on the stem. I paint the area carefully and let it fully set before proceeding. The BC ultimately emerged from the restoration quite satisfactory. After this I oil the stem with some mineral oil and let it sit a few hours before hand buffing with a microfibre rag. Back to the stummel. The washing and cleaning had left the outside quite dull. To address this, I use special micromesh pads for wood working. The first one is a 1200 grit pad. This is followed by a 2000 and finally a 3000 grit pad. The bowl begins to take a shine and the grain begins to pop into view showing all its glory. To end work on the stummel it needs a carnauba finish. For this I have fitted a felt wheel on my power drill. I have found that a felt wheel is better at transferring the wax onto the pipe. The dimensions of this beautiful Butz-Choquin Billiard are as follows: length 165 mm/6 ½ inches; height 60 mm/2 ½ inches; bowl diameter 40 mm/1 ½ inches; chamber diameter 21 mm/ ¾ of an inch. The weight of the pipe is 58 grams/2.04 ounces. I hope you enjoyed reading the story of this restoration as much as I did in the work itself and writing it down. Thank you very much for reading and I welcome and encourage your comments.

Restoring a 1967 Dunhill Shell Briar 659F/T 4S Saddle Stem Billiard


Blog by Steve Laug

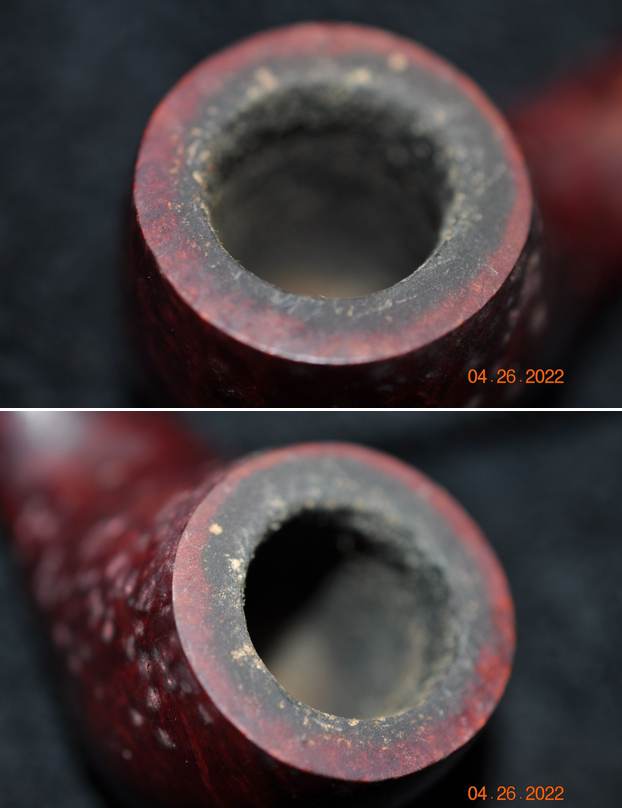
The next pipe on the table is a Dunhill Group 4 Shell Briar Saddle Stem Billiard that is proportionally well done. It has a three digit the shape number that I will define below. Jeff and I purchased a group of pipes on 04/26/2022 from a woman who contacted us from Cleveland, Ohio, USA. They had belonged to her husband’s father. We spent time chatting with her and arrived at a price and she sent the pipes to Jeff. It included 28+ pipes including this one.

This Dunhill Billiard is stamped on the underside and reads 659F/T followed by Dunhill over Shell Briar followed by Made in England7 (two lines). A circle 4 followed by S is stamped on the flat underside of the saddle stem. The numbers and stamping tell me that the pipe is a Shell Briar and the size is a Group 4. The F/T refers to the Fish Tail style stem. The finish was very dirty with spots of grime and debris stuck on it. The bowl had a thick cake in the bowl and heavy lava overflowing onto the rim top. The rim top and inner edge appeared to have some damage. The stem had calcification, oxidation and tooth marks and chatter on both sides ahead of the button. The button itself appeared to be in good condition. Jeff took photos of the pipe before he started his clean up work on it.He took photos of the bowl and rim top to show the condition. You can see the thick cake in the bowl and rim top and edges. The lava is so thick that is hard to know what the edges and top look like underneath. The sandblast on the rim top is also completely filled in with tar and lava. The stem was heavily oxidized, calcified and has tooth marks and chatter on both sides ahead of the button. Overall the pipe is a real mess. Jeff took photos of the sandblast finish around the bowl sides and heel. It was nice looking if you can see through the grime ground into the rugged, deep blast. He took photos of the stamping on the underside of the bowl, shank and stem. The stamping is readable but filthy. It reads as noted above.Now it was time to begin to work on the stamping on the pipe. Pipedia had some great information on the Shell Briar finish and dates and how the finish was made (https://pipedia.org/wiki/Dunhill#Bruyere). The first quote below give the short version of the finish. I quote from both below.

Shell – A deep craggy sandblast with a black stain finish (usually made using Algerian briar) – the color of the stain used has varied over the years. Although there is some doubt as to them being the first to sandblast pipes, Dunhill’s Shell pipes, and the sandblasting techniques developed to create them are considered one of Dunhill’s greatest and most lasting contributions to the art of pipe making.

The documented history of Dunhill’s inception of the Shell is largely limited to patent applications — there are no catalog pages or advertisements promoting blasted pipes at the time. The preliminary work on the English patent (No. 1484/17) was submitted on October 13, 1917. The patent submission was completed half a year later, on April 12, 1918, followed by the granting of the English patent on October 14, 1918. This was less than a month before the end of The Great War on November 11th.

In 1986 Dunhill released a line of premium Shell finish pipes – “RING GRAIN”. These are high-quality straight grain pipes which are sandblasted. Initially only Ring Grain, but now in two different finishes. In 1995 the “Shilling” was introduced with Cumberland finish – it is an extremely rare series. These pipes exhibit a deeper blast characteristic of that of the 1930’s – mid-1960’s (and the limited ‘deep blast’ pipes of the early 1980s) and show a fine graining pattern. These are considered the best new Dunhills by many enthusiasts today and are very rare. The finish is sometimes described as tasting like vanilla at first, with the taste becoming more normal or good as the pipe breaks in.

With that information clear for me I wanted to identify the shape number and try to pin that down (https://pipedia.org/wiki/Dunhill_Shape_Chart). I turned to the section on the older 3 digit Shape Numbers and read it. I quote it below.

3-digit system – A 3-digit system (“Interim”) was developed that showed a logical approach to identify pipes in terms of size, mouthpiece, and shape, with the 1st digit being the size, the 2nd digit the mouthpiece, and the 3rd digit the shape, i.e. the old “85” became a “321” which was a group 3 Apple with taper mouthpiece. This was soon to be replaced by a more detailed, formal 4- and 5-digit system around 1978.

This interim numbering system is a bit confusing as the next paragraph and picture will illustrate. It says that the first digit is the size which in this case should have been a 6 but the pipe is stamped with a size 4 number. The second digit is supposed to point to the mouthpiece which is not clear to me. The third digit refers to the shape but again that is not clear. The paragraph below states that the shape number 577 has no special meaning accept for it being the model for that particular pipe.

The first image on the right, (with the shape number 577)  falls into this system, so 577 has no special meaning apart from describing/ being the model for that particular pipe shape (in this case a specific group 2 Billiard with saddle mouthpiece). Around 1973, with the introduction of computers, new categories were introduced that indicated size, mouthpiece, and shape. As for the “T”, in 1952 a full-size “T” was added after the circled group size stamp to further describe the Tanshell finish (in 1953 the “T” was reduced to about half the size). So this pipe dates from 1952.

With the information on the 3 digit stamp not making clear enough the meaning of the number I turned to another link on Pipedia (https://pipedia.org/wiki/Dunhill_Shapes_List) to a shape list that Eric Boehm put together for Dunhills. It is amazing to see the sheer number of variations on the Billiard shape. I copied the three of the three digit numbers in the list as it includes the shape 659 Billiard.

Billiards:

659 Billiard, saddle bit 4 5½” 1950, 1969 3

660 Billiard, saddle bit 4 5½” 1950, 1969 3

710 Billiard, tapered bit 4 5½” 1950, 1969 3

659F/T Billiard with a saddle bit. (This is the pipe I am working on. It is a tapered bit Billiard with an F/T or Fish Tail bit.)

I turned next to dating the pipe. There is a 7 following the D in ENGLAND on the right side of the shank. I turned to the dating chart on Pipephil to pin down the date on this twin (http://pipephil.eu/logos/en/dunhill/cledat-en1a.html). I did a screen capture of Part 2 of the Dunhill Dating Key and included it below. I drew a red box around the section dating this pipe. It is clear that the pipe was made after 1954 so that is why I went to Part 2. Once again, because the year suffix is a 7 that is the same size and on line with D in England that tells me that the pipe was made in 1960+7 for a date of 1967.Armed with that information I turned to work on the pipe itself. Before he sent it to me, Jeff had done an amazing job cleaning the pipe. It almost looked like a different pipe after his work. He reamed the pipe with a PipNet pipe reamer and removed the rest of it with a Savinelli Fitsall Pipe Knife. He scrubbed the bowl with undiluted Murphy’s Oil Soap with a tooth brush. He rinsed it under running warm water to remove the soap and grime. He cleaned out the inside of the shank and the airway in the stem with isopropyl alcohol, cotton swabs and pipe cleaners. He soaked the stem in Briarville’s Pipe Stem Deoxidizer and then rinsed it off with warm water. He scrubbed the stem with Soft Scrub and a tooth brush and rinsed it off with warm water. It looked amazing when I took it out of the package of pipes he shipped me. I took photos of the pipe before I started my part of the restoration work. The rim top was cleaner and the inner edge of the bowl looked rough. There was burn damage all the way around but heavier on the front and the back of the bowl on the top and inner edge. The bowl was slightly out of round. The stem surface looked good with the oxidation gone and light but visible tooth chatter on either side of the stem.  I took a photo of the stamping on the underside of the shank and the saddle portion of the stem. It is clear and readable as noted above.I took the stem off the shank and took a photo of the parts of the pipe. The overall look of the pipe is quite nice.I started my portion of the work on this pipe by addressing the damage to the inner edge of the bowl. I used a folded piece of 220 grit sandpaper to smooth out the edge and give it a slight bevel to deal with the chipping and cutting on the inner edge. It cleaned up remarkably well. With polishing and buffing it would look even better.I used an Walnut Stain Pen to restain the rim top and the inner bevel of the rim edge. Once it dried I buffed it with a cotton cloth and the match was very good. It looked much better with the work on the rim edge.The bowl looked very good at this point so I rubbed it down with Before & After Restoration Balm. I worked it into the surface of the bowl and shank with my fingertips and a horse hair shoe brush to clean, enliven and protect the briar. I let the balm sit for about 10-15 minutes and buffed with a cotton cloth to raise the shine. I set the bowl aside and turned my attention to the stem. I “painted” the surface of the vulcanite stem with the flame of the lighter. I was able to lift almost all of the tooth marks and chatter except one on the top side that I needed to fill in with drop of clear CA glue. I sanded the repair and the remaining tooth chatter with 220 grit sandpaper. I started polishing the stem with 400 grit wet dry sandpaper to start the polishing.I polished the vulcanite stem with micromesh sanding pads – dry sanding with 1500-12000 grit pads. I wiped it down with Obsidian Oil after each sanding pad. I used Before & After Pipe Polish – both Fine and Extra Fine to further polish the stem and gave it a final coat of Obsidian Oil to finish it. This Deeply Sandblasted Dunhill Shell Briar 659F/T Saddle Stem 4S is a great looking pipe now that it has been restored. The rich Shell Briar sandblast finish that highlights the grain and works well with the polished vulcanite stem. I put the stem back on the bowl and carefully buffed the pipe with Blue Diamond on the buffing wheel using a light touch on the briar. I gave the bowl and the stem multiple coats of carnauba wax on the buffing wheel and followed that by buffing the entire pipe with a clean buffing pad. I hand buffed the pipe with a microfiber cloth to deepen the shine. The finished Dunhill Shell Briar Saddle Stem Billiard is a Group 4 size pipe that will be a great smoker. Give the finished pipe a look in the photos below. The dimensions of the pipe are Length: 5 ½ inches, Height: 1 ¾ inches, Outside diameter of the bowl: 1 ¼ inches, Chamber diameter: ¾ of an inch. The weight of the pipe is 34 grams/1.20 ounces. I will be adding the pipe to the British Pipemakers Section of the rebornpipes store shortly. If you are interested in adding it to your collection be sure to let me know. I take a moment to remind myself and each of us that we are trustees of pipes that will outlive us and the lives of many other pipe men and women who carry on the trust of their care and use. Thanks for reading this blog and my reflections on the pipe while I worked on it.

Restoring Another Lovely 1958 Dunhill Root Briar 34F/T 2R Billiard


Blog by Steve Laug

The next pipe on the table is another Dunhill group 2 sized Billiard. It is a small Root Briar Billiard that is proportionally well done. It has a two digit the shape number that I will define below. It is identical in stamping, shape, size and condition to the previous Root Briar 34F/T I worked on yesterday (https://rebornpipes.com/2022/05/27/168579/). Jeff and I purchased the pipes on 04/26/2022 from a woman who contacted us from Cleveland, Ohio, USA. We spent time chatting with her and arrived at a price and she sent the pipes to Jeff. It included 28+ pipes along with this one.

This Dunhill Billiard is stamped on the left side and reads 34 F/T followed by Dunhill over Root Briar and on the right side is stamped Made in England8 (two lines) followed by a circle 2 followed by R. The numbers and stamping tell me that the pipe is a Root Briar and the size is a Group 2. The F/T refers to the Fish Tail style stem. The finish was very dirty with spots of grime and debris stuck on it. The bowl had a thick cake in the bowl and heavy lava overflowing onto the rim top. The rim top had burned area on the left front top and inner and outer edges. There was darkening and burn damage on the inner edge all the way around. There were burn marks toward the back of the rim top. The stem had calcification, oxidation and tooth marks and chatter on both sides ahead of the button. The button itself appeared to be in good condition. The pipe came to us in a meerschaum pipe case (just like is twin). The case was not original. Jeff took photos of the pipe before he started his clean up work on it. He took photos of the bowl and rim top to show the condition. You can see the thick cake in the bowl and the burn damage on the rim top and edges of the bowl. It is the kind of damage that come from repeated lighting in the same place. The stem was heavily oxidized, calcified and has tooth marks and chatter on both sides ahead of the button. Overall the pipe is a real mess. Jeff took photos of the grain and finish around the bowl sides and heel. It was nice looking if you can see through the grime ground into the finish. He took a photo of the stamping on the left side of the shank. There is no photo of the right side stamping that gives the Made in England date code. The stamping is readable but filthy.Now it was time to begin to work on the stamping on the pipe. Because I had just finished working on a twin to this pipe I used the information that I had dug up on that one. I quote below.

Pipedia had some great information on the Root Briar finish and dates and how the finish was made (https://pipedia.org/wiki/Dunhill#Bruyere). The first quote below give the short version of the finish. I quote from both below.

Root Briar – Introduced in 1931 and highly prized because the grain is more pronounced in this finish (usually made using Corsican briar – was made exclusively from that briar into the 60s). The Root Briar finish requires a perfectly clean bowl with excellent graining. Therefore, it is the most expensive of the Dunhill pipes. Corsican briar was most often used for the Root finish since it was generally more finely grained. This is a rare finish, due to the scarcity of briar suitable to achieve it. These pipes are normally only available at Company stores, or at Principle Pipe Dealers. Straight grained pipes were formerly graded A through H, but are now only “Dr’s” and graded with one to six stars, with the letters G and H still used for the very finest pieces.

“Dunhill introduced its third major finish, the Root finish, in 1931. Corsican mountain briar is characteristically beautifully grained and the Root was made exclusively from that briar into the 1960s. The pipe was finished with a light natural stain to allow the beauty of the graining to show through. Although always available with a traditional black vulcanite bit, the Root was introduced in either 1930 or more likely 1931 and fitted with a marble brown dark and light grained vulcanite bit that has since become known as the ‘bowling ball’ bit because of the similarity in appearance between the bit’s finish and that of some bowling balls of the time. With the war, however, the bowling ball bit was dropped from production. Through 1954 (and after) the Root pipe nomenclature (including shape numbers) was identical to that of the Bruyere except that instead of the “A” of the Bruyere, the Root was stamped with an “R”. In 1952 when the finish rather then LONDON was placed under DUNHILL, ROOT BRIAR rather then BRUYERE was used for the Root.” Loring, J. C., The Dunhill Briar Pipe, The Patent Years and After (self-published, Chicago, 1998).

With that information clear for me I wanted to identify the shape number and try to pin that down (https://pipedia.org/wiki/Dunhill_Shape_Chart). I turned to the section on the older 2 digit Shape Numbers and read it. I quote it below and added a chart on the numbers.

The original skus/model numbers from the 1920’s until the early 1970’s stood for very specific shapes and bowls. For example, the codes 31, 34, 59, 111, 113, 117, 196, LB, LBS… were all different types of Billiard shaped pipes and there were about 50(!), such codes for the Billiard shape alone.

There was a link there (https://pipedia.org/wiki/Dunhill_Shapes_List) to a shape list that Eric Boehm put together for Dunhills. It is amazing to see the sheer number of variations on the Billiard shape. I copied the first three in the list as it includes the shape 34 Billiard.

Billiards:

31 Billiard, tapered bit 1 4¾” 1928, 1950 3

32 Billiard, tapered bit 1 5″ 1928, 50, 60, 69 3

34 Billiard, tapered bit (Dental) 2 5½” 1928, 50, 60, 69 3. (This is the pipe I am working on. It is a tapered bit Billiard. It does not have a Dental bit as noted above. Rather than the Dental bit it has a F/T or Fish Tail bit.)

I turned next to dating the pipe. There is a superscript 8 following the D in ENGLAND on the right side of the shank. I turned to the dating chart on Pipephil to pin down the date on this twin (http://pipephil.eu/logos/en/dunhill/cledat-en1a.html). I did a screen capture of Part 2 of the Dunhill Dating Key and included it below. I drew a red box around the section dating this pipe. It is clear that the pipe was made after 1954 so that is why I went to Part 2. Once again, because the year suffix is 8 that tells me that the pipe was made in 1950+8 for a date of 1958.Armed with that information I turned to work on the pipe itself. Before he sent it to me, Jeff had done an amazing job cleaning the pipe. It almost looked like a different pipe after his work. He reamed the pipe with a PipNet pipe reamer and removed the rest of it with a Savinelli Fitsall Pipe Knife.  He scrubbed the bowl with undiluted Murphy’s Oil Soap with a tooth brush. He rinsed it under running warm water to remove the soap and grime. He cleaned out the inside of the shank and the airway in the stem with isopropyl alcohol, cotton swabs and pipe cleaners. He soaked the stem in Briarville’s Pipe Stem Deoxidizer and then rinsed it off with warm water. He scrubbed the stem with Soft Scrub and a tooth brush and rinsed it off with warm water. It looked amazing when I took it out of the package of pipes he shipped me. I took photos of the pipe before I started my part of the restoration work.  The rim top was cleaner and the inner edge of the bowl looked rough. There was burn damage all the way around but heavier on the front and the back of the bowl on the top and inner and outer edges. There was also darkening on the rim top. The stem surface looked good with the oxidation gone and light but visible tooth chatter on either side of the stem. I took photos of the stamping on the sides of the shank. It is clear and readable as noted above.I took the stem off the shank and took a photo of the parts of the pipe. The overall look of the pipe is quite nice.I started my portion of the work on this pipe by addressing the damage to the rim top and inner edge of the bowl. I topped the bowl on a board with 220 grit sandpaper to take down the damage on the top of the rim and outer edges. I used a folded piece of 220 grit sandpaper to smooth out the edge and give it a slight bevel to deal with the chipping and cutting on the inner edge. It cleaned up remarkably well. With polishing and buffing it would look even better. I polished the briar with micromesh sanding pads – dry sanding with 1500-12000 grit pads. I wiped the bowl down with a damp cloth after each pad. The rim top looked very good and the bowl began to take on a rich glow. I used an Oak Stain Pen to restain the rim top and the inner bevel of the rim edge. Once it dried I buffed it with a cotton cloth and the match was very good. There was some darkening on the back inner edge of the bowl but it is in far better condition.The bowl looked very good at this point so I rubbed it down with Before & After Restoration Balm. I worked it into the surface of the bowl and shank with my fingertips to clean, enliven and protect the briar. I let the balm sit for about 10-15 minutes and buffed with a cotton cloth to raise the shine. I set the bowl aside and turned to work on the stem. I polished the vulcanite stem with micromesh sanding pads – 1500-12000 grit pads. I wiped it down with Obsidian Oil after each sanding pad. I used Before & After Pipe Polish – both Fine and Extra Fine to further polish the stem and gave it a final coat of Obsidian Oil to finish it.  This 2nd beautiful 1958 Dunhill Root Briar 34F/T 2R is a great looking pipe now that it has been restored. The rich Root Briar finish that highlights the grain and works well with the polished vulcanite stem. I put the stem back on the bowl and carefully buffed the pipe with Blue Diamond on the buffing wheel using a light touch on the briar. I gave the bowl and the stem multiple coats of carnauba wax on the buffing wheel and followed that by buffing the entire pipe with a clean buffing pad. I hand buffed the pipe with a microfiber cloth to deepen the shine. The finished Dunhill Root Briar Billiard is a small pipe that will be great for sitting and reading. Give the finished pipe a look in the photos below. The dimensions of the pipe are Length: 5 inches, Height: 1 ¾ inches, Outside diameter of the bowl: 1 ¼ inches, Chamber diameter: ¾ of an inch. The weight of the pipe is 27 grams/.95 ounces. I will be adding the pipe to the British Pipemakers Section of the rebornpipes store shortly. If you are interested in adding it to your collection be sure to let me know. I take a moment to remind myself and each of us that we are trustees of pipes that will outlive us and the lives of many other pipe men and women who carry on the trust of their care and use. Thanks for reading this blog and my reflections on the pipe while I worked on it.

Breathing Life a Peterson’s African Block Meerschaum Bent Pipe


Blog by Steve Laug

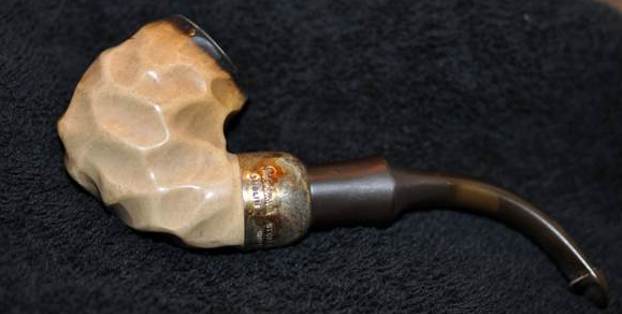
The next pipe I have chosen is a multi-faceted finish Peterson’s African Block Meerschaum pipe. This one is a Bent Meerschaum pipe that has facets around the bowl and shank. The rim top is flumed as was the style of the 60s and 70s. This pipe was purchased on 12/08/21 from Facebook Marketplace in Durham, North Carolina, USA.  This faceted bowl and shank adds a touch of depth to the pipe. The pipe was dusty in the meerschaum ridges and flat spots on the bowl and shank. The contrast of the colouration/patina developing on the high spots and shank with the flumed top looks very good. The bowl had a moderate cake and there was lava on the rim top and inner edge of the bowl. The Sterling Silver ferrule is oxidized and dirty. It is stamped Peterson’s [over] Dublin followed by Sterling [over] Silver. On the underside are three hallmark stamps – 1. Seated Hibernia (Ireland) 2. The Harp (symbol for the silver quality) 3. The lower case letter “l” for the date of the pipe. The stem was oxidized, calcified and had light tooth chatter on the top and underside on and near the button. Jeff took photos of the pipe before his cleanup work. They tell the story and give a glimpse of the pipe. Jeff took photos of the rim top and stem to show the general condition of the pipe. The bowl is moderately caked and the rim top and edges have lava overflowing on to them. The stem is oxidized, calcified and has light tooth marks on the top and underside near the button. Jeff took photos of the bowl sides and heel to show the faceted finish around this bowl. It is a nice looking pipe. He took photos of the Sterling Silver ferrule to show the stamping around it. You can see that it reads as noted above. He did not capture the hallmarks on the underside.I took some time to remind myself of the provenance of these Peterson’s Dublin Meerschaum pipes. I am pretty sure the pipe was made by the Laxey Pipe Ltd. on the Isle of Man for Peterson’s in Ireland (https://pipedia.org/wiki/Laxey_Pipes_Ltd). I quote from the Pipedia article in full:

Laxey Pipe Ltd. resided in a historical 19th century four-storey Man stone building at The Quay, Old Laxey, Isle of Man, which thankfully has been preserved. The company specialized in the production of Meerschaum Pipes using the Meerschaum mined by the Tanganyika Meerschaum Corporation in the Amboseli basin in Tanganyika (since 1964 part of the United Republic of Tanzania). Please note: you may often find names like “Manx Pipes Ltd.”, “Man Pipe Co.” and others more, but there is no indication of another Isle of Man pipe producer other than Laxey Pipe Ltd. at any time!

Laxey Pipe Ltd. marketed own brands like “Manxpipe”, “Manxman”, “Manxland” e.c. Names like “John Bull”, “White Knight” (unwaxed), “Domino” (black, or lined) indicated some shapes / colours of Laxey’s own series. The stems either showed the astronomical sign for “male” or “man” (circle + arrow), or the crest of the Isle of Man, the 3-legged X in a circle. Manxpipes and Laxey’s other brands were available through pipe retailers in general, but also were sold (mainly) to tourists through their own shop in Laxey.

Furthermore Laxey Pipe Ltd. manufactured the meer bowls for Peterson, Barling, Nørding and others from the later 1960’s until 2001. Man Pipe e.g. was a brand distributed by Comoy’s. The bowls usually showed no nomenclature indicating the orderer. “Genuine Block Meerschaum” was engraved frequently. Often, just the stems were different, while bowls were the same.

Supply of meer from East Africa run out (Kenya / Tanzania exhausted, Somalia inaccessible), and thus the last Laxey meers were supplied to trade in May, 2001. Laxey Pipe Ltd. tried to survive continuing with briar pipes – mainly in the Danish style -, but to no success. It closed down business in July, 2002.

As noted above the silver is stamped Peterson’s [over] Dublin followed by Sterling [over] Silver. On the underside are three hallmark stamps – 1. Seated Hibernia (Ireland) 2. The Harp (symbol for the silver quality) 3. The lower case letter “l” for the date of the pipe. I have included the Peterson’s Hallmark chart below as it is a very helpful tool that I have used repeatedly to date my Peterson pipes.I found a larger photo of the letter section of the above chart. The letter stamp is a lower case “l” which dates the pipe to 1977.

I know that the pipe was made on the Isle of Man by Laxey Pipe Ltd. out of African Meerschaum. It was made for export for Peterson’s of Dublin. From the hallmarks on the silver I know that the pipe (or at least the silver) was made in 1977. That fits the flumed top on the bowl and the faceted carving around the bowl and shank. That was as much as I could figure out.

Jeff had done a great job cleaning up the pipe as usual. He reamed the pipe with a PipNet reamer and cut back the cake back to the bare meerschaum. He cleaned up the walls with a Savinelli Fitsall Pipe Knife. He scrubbed the interior of the bowl and shank with pipe cleaners, cotton swabs and alcohol to remove the tars and oils. He scrubbed the exterior of the pipe with Murphy’s Oil Soap and a tooth brush to remove the grime from the finish. He worked on the rim top lava and darkening with the soap and tooth brush. He cleaned up the tarnish on the silver ferrule. He scrubbed the inside of the stem with alcohol and pipe cleaners. He scrubbed the exterior with Soft Scrub and then soaked it in Briarville Pipe Stem Deoxidizer. He washed it off with warm water to remove the Deoxidizer. The pipe looked very good when it arrived. I took some close up photos of the rim top and also of the stem surface. I wanted to show how well it had cleaned up. The rim top and edges looked very good. The stem showed some light tooth marks and chatter on the surface near the button.I took a photo of the stamping on the silver ferrule. You can see that once the tarnish was  removed it is stamped as noted above. It is clear and readable.  I took the pipe apart and took a photo of the pipe. It is a good looking pipe and has an interesting style of rustication around the bowl.I polished the meerschaum bowl and shank with micromesh sanding pads. I dry sanded it with 1500-12000 grit pads and wiped it down with a damp cloth after each pad. I polished the Sterling Silver ferrule with a jeweler’s cloth to shine and slow down the process of oxidation. The ferrule really looks good even with a few worn spots around it. Once it was polished with the Before & After Balm and buffed with a microfiber cloth the stain would blend perfectly. I rubbed the meerschaum down with Before & After Restoration Balm. I worked it into the surface of the meerschaum with my fingertips to clean, enliven and protect it. I let the balm sit for 15 minutes and then buffed with a cotton cloth to raise the shine. Mark Hoover’s Balm is a product that I have come to appreciate and one I use on every pipe I have been working on. I set the bowl aside and turned to work on the stem. I polished the stem with micromesh sanding pads – wet sanding with 1500-12000 grit sanding pads. I wiped it down after each sanding pad with Obsidian Oil. I polished it with Before & After Pipe Stem Polish – both Fine and Extra Fine.  As usual at this point in the restoration process I am excited to be on the homestretch. I look forward to the final look when it is put back together, polished and waxed. I put the bowl and stem of this Peterson’s Meerschaum back together. I polished the bowl and stem with Blue Diamond to polish out the scratches in the meerschaum and the vulcanite. I gave the bowl multiple coats of Conservator’s Wax and the stem multiple coats of carnauba wax. I buffed the pipe with a clean buffing pad to raise the shine. I hand buffed it with a microfiber cloth to deepen the shine. The pipe polished up pretty nicely. The meerschaum has a rich glow with the wax and polish. The shiny black vulcanite stem is a beautiful contrast to the rich developing patina of the bowl and the polished silver ferrule. This Peterson’s meerschaum was made by the Laxey Pipe Ltd. on the Isle of Mann. The faceted finish on this pipe made it another fun pipe to work. It really is a quite stunning pipe whose shape and finish make it stand out. The thick/chubby shank makes it a very comfortable pipe to hold in the hand. The finished pipe is shown in the photos below. The dimensions are Length: 5 inches, Height: 1 ¾ inches, Outside diameter of the bowl: 1 inches, Chamber diameter: 5/8 of an inch. The weight of the pipe is 44 grams/1.52 ounces. It is a beautiful pipe and one that will be on the Irish Pipe Makers Section of the rebornpipes store soon. If you are interested in adding it to your collection let me know. Thanks for walking through the restoration with me as I worked over this pipe. Thanks to each of you who are reading this blog.

Repairing a Chipped stem on a Savinelli Trevi 311KS Poker


Blog by Steve Laug

I still receive referrals for repairs from a local pipe and cigar shop and this week I received and email from a fellow about his new pipe. The story is one of those that make you cringe and grimace for if it has not happened to you sometime in your “pipehood” it very well may happen. This is the email I received:

Hi. I just picked up a new Sav 311KS and promptly proceeded to drop it and chip the stem before even getting a chance to smoke it…. Sad day. Could you give me a quote on what a repair/ replacement would set me back? — Josh

I wrote him back and asked for photos of the pipe so I could see what he was referring to. He wrote again and sent the following note and the photos.

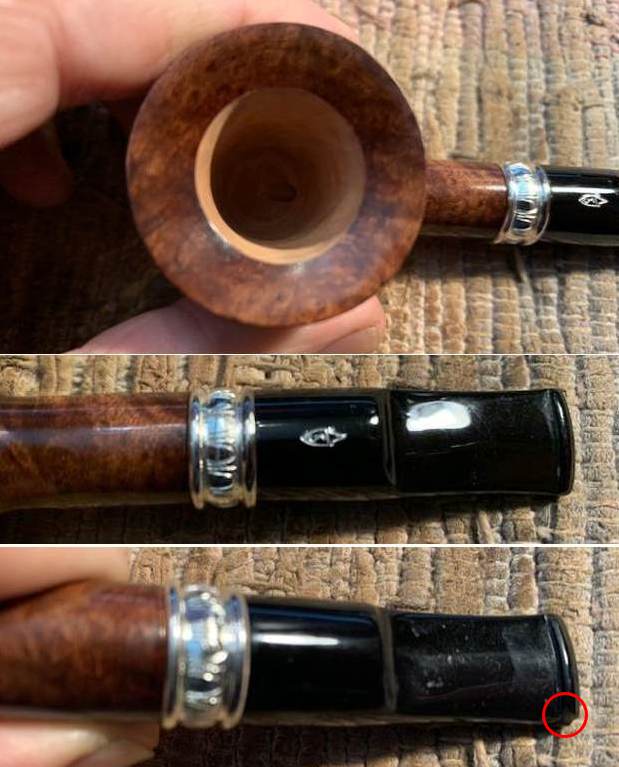
It’s just a little chip but annoying.We wrote back and forth and I let him know I could fix it. Yesterday Josh dropped off the pipe at my house for repair. This morning I decided to tackle the repair on this pipe. The fact that he had never smoked it and that it was new really touched me and decided it would be the next pipe on the worktable. I took photos of the pipe to give a sense of the beauty of the piece. It is a smooth finished Poker with what looks like a Walnut finish. The band on the shank is silver. The stem is acrylic with a silver Savinelli logo on the top of the saddle. The shank is stamped on the left side and read Savinelli [over] Trevi. On the right side it had the Savinelli Shield S followed by 311KS [over] Italy. The pipe had an inwardly beveled rim top and the bowl was smooth, unsmoked briar. The pipe had a Savinelli Balsa Filter in the tenon. I took a photo of the rim top and bowl to give a sense of the shape and finish of the bowl. It is a pretty pipe. I also took photos of the acrylic stem to show the general condition apart from the chipped right underside of the button and the stem (encircled in red in the photo below).I took photos of the stamping to try and capture it. The shiny varnish finish reflects light so much that the stamping is not clear in the photos. It reads as noted above.I removed the stem and took a photo of the pipe. It is a proportionally nice looking pipe.Now it was time to work on the stem. I cleaned off the chipped area with alcohol and a cotton swab to remove any debris. I took photos of the chipped area before I started working on it. You can see the damage. Though it is small it is rough to the touch and would certainly be rough to the mouth. I have drawn a red box around the damage in the photos below.I carefully filled in the chipped area with black CA glue and pressed it into the chipped spots with a tooth pick. I laid the stem aside to let the repair cure. Once the repair cured I reshaped the button with a piece of 220 grit sandpaper. I worked over the right edge and the button to match what was on the other side of the stem. Once finished it looked better. I started polishing the acrylic with 400 grit wet dry sandpaper. I set the bowl aside and turned to work on the stem. I polished the acrylic stem with micromesh sanding pads – 1500-12000 grit pads. I wiped it down with Obsidian Oil after each sanding pad. I used Before & After Pipe Polish – both Fine and Extra Fine to further polish the stem and gave it a final coat of Obsidian Oil to finish it. With the stem repaired on this Savinelli Trevi 311KS Poker it is ready to go back to Josh so he can enjoy his first bowl in his new pipe. It is a great looking pipe with a rich walnut finish that highlights the grain and works well with the silver band and the polished acrylic stem. I put the stem back on the bowl and carefully buffed the pipe with Blue Diamond on the buffing wheel using a light touch on the briar. I gave the bowl and the stem multiple coats of carnauba wax on the buffing wheel and followed that by buffing the entire pipe with a clean buffing pad. I hand buffed the pipe with a microfiber cloth to deepen the shine. I have email Josh and let him know it is ready to pick up. I take a moment to remind myself and each of us that we are trustees of pipes that will outlive us and the lives of many other pipe men and women who carry on the trust of their care and use. Thanks for reading this blog and my reflections on the pipe while I worked on it.

Restoring a lovely 1958 Dunhill Root Briar 34F/T 2R Billiard


Blog by Steve Laug

The next pipe on the table is another Dunhill that is a group 2 sized Billiard. It is a small Root Briar Billiard that is proportionally well done. It has a two digit the shape number that I will define below. Jeff and I purchased on 04/26/2022 from a woman who contacted us from Cleveland, Ohio, USA. We spent time chatting with her and arrived at a price and she sent the pipes to Jeff. It included 28+ pipes along with this one.

But now this Dunhill Billiard. On the left side it is stamped 34 F/T followed by Dunhill over Root Briar and on the right side is stamped Made in England8 (two lines) followed by a circle 2 followed by R. The numbers and stamping tell me that the pipe is a Root Briar and the size is a Group 2. The F/T refers to the Fish Tail style stem. The finish was very dirty with spots of grime and debris stuck on it. The bowl had a thick cake in the bowl and heavy lava overflowing onto the rim top. The rim top had burned area on the left front top and inner and outer edges. There was darkening and burn damage on the inner edge all the way around. There were a few burn marks toward the back of the rim top. The stem had calcification, oxidation and tooth marks and chatter on both sides ahead of the button. The button itself appeared to be in good condition. The pipe came to us in a meerschaum pipe case from the owner. It was not original. Jeff took photos of the pipe before he started his clean up work on it. He took photos of the bowl and rim top to show the condition. You can see the thick cake in the bowl and the burn damage on the rim top and edges of the bowl. It is the kind of damage that come from repeated lighting in the same place. The stem was heavily oxidized, calcified and has tooth marks and chatter on both sides ahead of the button. Overall the pipe is a real mess. Jeff took photos of the grain and finish around the bowl sides and heel. It was nice looking if you can see through the grime ground into the finish. He took a photo of the stamping on the left side of the shank. There is no photo of the right side stamping that gives the Made in England date code. It is readable but filthy.Now it was time to begin to work on the stamping on the pipe. I turned first to Pipedia as I remembered they had some great information on the Root Briar finish and dates and how the finish was made (https://pipedia.org/wiki/Dunhill#Bruyere). The first quote below give the short version of the finish. The second link goes into more detail. I quote from both below.

Root Briar – Introduced in 1931 and highly prized because the grain is more pronounced in this finish (usually made using Corsican briar – was made exclusively from that briar into the 60s). The Root Briar finish requires a perfectly clean bowl with excellent graining. Therefore, it is the most expensive of the Dunhill pipes. Corsican briar was most often used for the Root finish since it was generally more finely grained. This is a rare finish, due to the scarcity of briar suitable to achieve it. These pipes are normally only available at Company stores, or at Principle Pipe Dealers. Straight grained pipes were formerly graded A through H, but are now only “Dr’s” and graded with one to six stars, with the letters G and H still used for the very finest pieces.

“Dunhill introduced its third major finish, the Root finish, in 1931. Corsican mountain briar is characteristically beautifully grained and the Root was made exclusively from that briar into the 1960s. The pipe was finished with a light natural stain to allow the beauty of the graining to show through. Although always available with a traditional black vulcanite bit, the Root was introduced in either 1930 or more likely 1931 and fitted with a marble brown dark and light grained vulcanite bit that has since become known as the ‘bowling ball’ bit because of the similarity in appearance between the bit’s finish and that of some bowling balls of the time. With the war, however, the bowling ball bit was dropped from production. Through 1954 (and after) the Root pipe nomenclature (including shape numbers) was identical to that of the Bruyere except that instead of the “A” of the Bruyere, the Root was stamped with an “R”. In 1952 when the finish rather then LONDON was placed under DUNHILL, ROOT BRIAR rather then BRUYERE was used for the Root.” Loring, J. C., The Dunhill Briar Pipe, The Patent Years and After (self-published, Chicago, 1998).

With that information clear for me I wanted to identify the shape number and try to pin that down (https://pipedia.org/wiki/Dunhill_Shape_Chart). I turned to the section on the older 2 digit Shape Numbers and read it. I quote it below and added a chart on the numbers.

The original skus/model numbers from the 1920’s until the early 1970’s stood for very specific shapes and bowls. For example, the codes 31, 34, 59, 111, 113, 117, 196, LB, LBS… were all different types of Billiard shaped pipes and there were about 50(!), such codes for the Billiard shape alone.

There was a link there (https://pipedia.org/wiki/Dunhill_Shapes_List) to a shape list that Eric Boehm put together for Dunhills. It is amazing to see the sheer number of variations on the Billiard shape. I copied the first three in the list as it includes the shape 34 Billiard.

Billiards:

31 Billiard, tapered bit 1 4¾” 1928, 1950 3

32 Billiard, tapered bit 1 5″ 1928, 50, 60, 69 3

34 Billiard, tapered bit (Dental) 2 5½” 1928, 50, 60, 69 3. (This is the pipe I am working on. It is a tapered bit Billiard. It does not have a Dental bit as noted above. Rather than the Dental bit it has a F/T or Fish Tail bit.)

I turned next to dating the pipe as it would be more straightforward than the numbering on the shank. There is a superscript 8 following the D in ENGLAND on the right side of the shank. I turned to the dating chart on Pipephil (http://pipephil.eu/logos/en/dunhill/cledat-en1a.html). I did a screen capture of Part 2 of the Dunhill Dating Key and included it below. I drew a red box around the section dating this pipe. It is clear that the pipe was made after 1954 so that is why I went to Part 2. Because the year suffix is 8 that tells me that the pipe was made in 1950+8 for a date of 1958. Armed with that information I turned to work on the pipe itself. Before he sent it to me, Jeff had done an amazing job cleaning the pipe. It almost looked like a different pipe after his work. He reamed the pipe with a PipNet pipe reamer and removed the rest of it with a Savinelli Fitsall Pipe Knife.  He scrubbed the bowl with undiluted Murphy’s Oil Soap with a tooth brush. He rinsed it under running warm water to remove the soap and grime. He cleaned out the inside of the shank and the airway in the stem with isopropyl alcohol, cotton swabs and pipe cleaners. He soaked the stem in Briarville’s Pipe Stem Deoxidizer and then rinsed it off with warm water. He scrubbed the stem with Soft Scrub and a tooth brush and rinsed it off with warm water. It looked amazing when I took it out of the package of pipes he shipped me. I took photos of the pipe before I started my part of the restoration work.   The rim top was cleaner and the inner edge of the bowl looked rough. There was burn damage all the way around but heavier on the front of the bowl on the top and inner and outer edges. There was also darkening on the back rim top and edge. The stem surface looked good with the oxidation gone and light but visible tooth chatter on either side of the stem.   I took photos of the stamping on the sides of the shank. It is clear and readable as noted above.I took the stem off the shank and took a photo of the parts of the pipe. The overall look of the pipe is quite unique. The stem shorter than the bowl and shank but looks quite good.I started my portion of the work on this pipe by addressing the damage to the rim top and inner edge of the bowl. I topped the bowl on a board with 220 grit sandpaper to take down the damage on the top of the rim and outer edges. I used a folded piece of 220 grit sandpaper to smooth out the edge and give it a slight bevel to deal with the chipping and cutting on the inner edge. It cleaned up remarkably well. With polishing and buffing it would look even better. I polished the briar with micromesh sanding pads – dry sanding with 1500-12000 grit pads. I wiped the bowl down with a damp cloth after each pad. The rim top looked very good and the bowl began to take on a rich glow. I used an Oak Stain Pen to restain the rim top and the inner bevel of the rim edge. Once it dried I buffed it with a cotton cloth and the match was very good.The bowl looked very good at this point so I rubbed it down with Before & After Restoration Balm. I worked it into the surface of the bowl and shank with my fingertips to clean, enliven and protect the briar. I let the balm sit for about 10-15 minutes and buffed with a cotton cloth to raise the shine. I set the bowl aside and turned to work on the stem. I polished the vulcanite stem with micromesh sanding pads – 1500-12000 grit pads. I wiped it down with Obsidian Oil after each sanding pad. I used Before & After Pipe Polish – both Fine and Extra Fine to further polish the stem and gave it a final coat of Obsidian Oil to finish it. This beautiful 1958 Dunhill Root Briar 34F/T 2R is a great looking pipe now that it has been restored. The rich Root Briar finish that highlights the grain and works well with the polished vulcanite stem. I put the stem back on the bowl and carefully buffed the pipe with Blue Diamond on the buffing wheel using a light touch on the briar. I gave the bowl and the stem multiple coats of carnauba wax on the buffing wheel and followed that by buffing the entire pipe with a clean buffing pad. I hand buffed the pipe with a microfiber cloth to deepen the shine. The finished Dunhill Root Briar Billiard is a beauty. Give the finished pipe a look in the photos below. The dimensions of the pipe are Length: 5 inches, Height: 1 ¾ inches, Outside diameter of the bowl: 1 ¼ inches, Chamber diameter: ¾ of an inch. The weight of the pipe is 24 grams/.85 ounces. I will be adding the pipe to the British Pipemakers section of the rebornpipes store shortly. If you are interested in adding it to your collection be sure to let me know. I take a moment to remind myself and each of us that we are trustees of pipes that will outlive us and the lives of many other pipe men and women who carry on the trust of their care and use. Thanks for reading this blog and my reflections on the pipe while I worked on it.

Brothers in Arms


Blog by Kenneth Lieblich

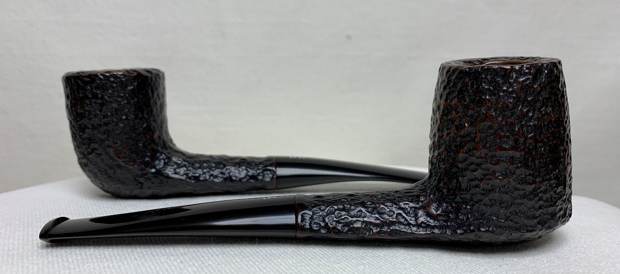
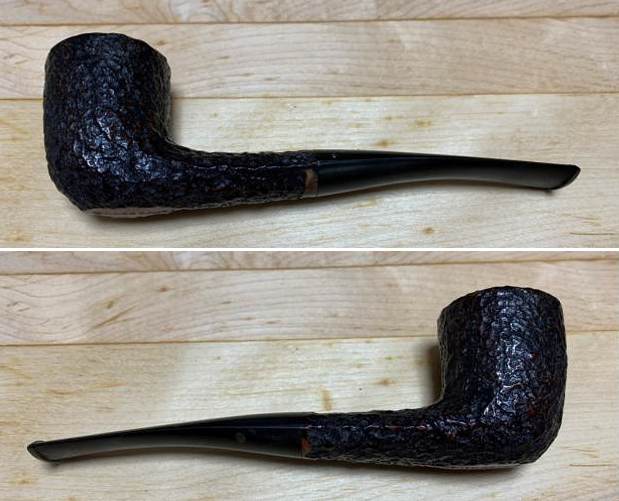
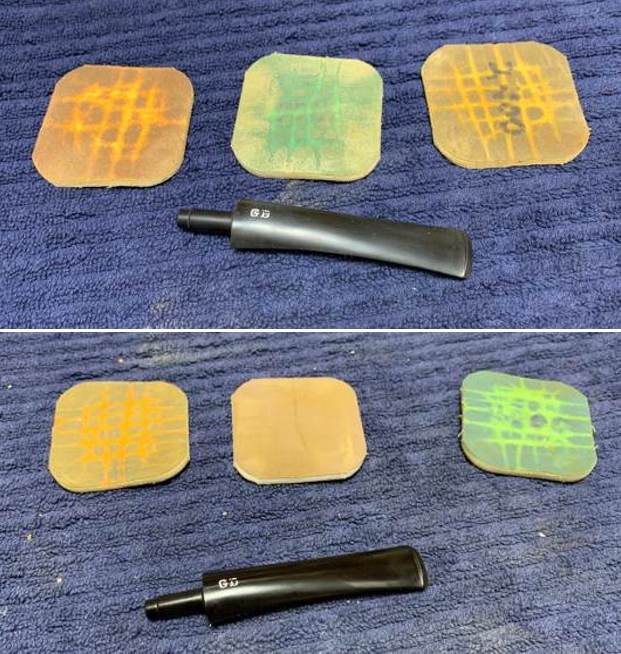
Next on the chopping block is a lovely pair of pipes, formerly belonging to an old gentleman from Winnipeg. I acquired them in a lot of pipes from a relative of his here in Vancouver. The two pipes are both sub-brands of the famous Savinelli factory. The slightly bent Dublin is a Gulden Dansk; the stylized poker/sitter is a Silveren Dansk. They are really handsome pipes and clearly well-loved by their previous owner. The markings on these pipes are quite interesting. On the Dublin, the markings on the underside of the pipe read Gulden Dansk, followed by a model number which is obscured by the rustication. The number might be 4130, but it’s difficult to tell. On top of the stem are engraved the two letters GD, obviously referring to Gulden Dansk. Meanwhile, the Silveren Dansk’s underside shows the words Silveren Dansk, next to the model number 33 [over] Italy; the ‘s’ and ‘i’ have vanished into the rustication, however. Like its sibling, the top of the stem has the initials SD for Silveren Dansk, of course. These pipes were evidently cut from the same cloth (or block of wood?), as you can see in the pictures. The rustication and colour are the same on both. The rustication is actually quite well done, and there is a combination of both black and brown colour on the wood, which I will attempt to replicate.

The brands Gulden Dansk and Silveren Dansk are ones about which there is very little information. I cobbled together as much information as I could, and I will do my best to record that here. Both brands are sub-brands of Savinelli, according to smokingpipes.com. You can see in the photo below that smokingpipes.com states this clearly, and they are quite knowledgeable.Pipedia had no information at all regarding these brands. Meanwhile, pipephil.eu had precious little info (see below). One small clue is their reference to Italy in the Gulden Dansk image. Comments from some old pipe forums suggest that the brand(s) might be made for the Canadian market and came to full prominence in the early 1980s. See below.The newspaper ad above (sorry for the poor quality) is taken from the Montreal Gazette, November 1st, 1980. It shows that, in addition to pipes, they also sold tobacco.Furthermore, I found Canadian trademark registrations for both brands. I have shown some of that information below. For reasons unknown, the Silveren Dansk trademark is still active, whilst the Gulden Dansk one has expired. I also found an Australian trademark registration for the same, but it was noted on the Australian site that the origin of the application was Canada. In short, we can say a few things about both Gulden Dansk and Silveren Dansk. They were both made by Savinelli, probably for the Canadian market (and perhaps other markets). The Canadian connection obviously fits with the gentleman in Winnipeg. They made pipes and tobacco, and all the comments I could find on the quality of the pipes were very positive. If you have any further details on these brands, I would love to hear from you.

On to the pipes: both were in decent condition — they just looked a little shabby. Both pipes’ stems were dirty and had some oxidation, but the damage from tooth marks was minimal on both. Similarly, the bowls were dirty and definitely needed a cleaning, but there wasn’t any notable damage. The stems were first on my list. I wiped down the outside of the stem with Murphy’s Oil Soap on some cotton pads. I also took a BIC lighter and ‘painted’ the stems with its flame in order to lift the few bite marks and dents. Then I cleaned out the insides with pipe cleaners and isopropyl alcohol. They were fairly dirty, but not too bad and I only went through a handful of pipe cleaners to finish each one. Once this process was done, the stems went for an overnight soak in the Pipe Stem Oxidation Remover. The following day, I cleaned all of the de-oxidizing mess off with alcohol, pipe cleaners, et cetera. The oxidation had migrated to the surface and would be fairly straightforward to remove. I scrubbed with SoftScrub on some cotton pads to remove the leftover oxidation on each stem. After this, I used some nail polish to restore the two letters on each stem. I painted the area carefully and let it fully set before proceeding. It’s worth noting that the GD ultimately emerged from the restoration far better than the SD. Presumably, the SD had been rubbed more over time and lost some of its groove (literally, not figuratively).Then I sanded the stems down with 220-, 400-, and 600-grit sandpapers. Finally, I used all nine Micromesh pads (1,500 through 12,000 grit) to bring out the lovely black lustre on the stems. I also used Obsidian Pipe Stem Oil in between each pad scrubbing.On to the stummels, and the usual cleaning procedures were in order for these two. Firstly, I decided to ream out the bowls. I used the PipNet Reamer on Gulden and the KleenReem on Silveren to remove the built-up cake and followed that with 220-grit sandpaper to eliminate as much as I could. I took the two chambers down to bare briar, as I wanted to ensure there were no hidden flaws in the walls. Fortunately, there were none. I then proceeded to clean out the insides of the two shanks with Q-tips, pipe cleaners, and isopropyl alcohol. There was quite a bit of filth inside these stummels, and it took a lot of cotton to get them clean. I followed that up by cleaning the insides with some dish soap and tube brushes. I used a wire brush and some Murphy’s Oil Soap to remove the lava on the rims of the two pipes. This worked very well. I then moved on to cleaning the rustication on the outside of the stummels with Murphy’s and a toothbrush. That removed any latent stains that blighted the wood. A de-ghosting session also seemed in order, so I thrust cotton balls into the bowls and the shanks and saturated them with 99% isopropyl alcohol. I let the stummels sit overnight. This caused the oils, tars and smells to leach out into the cotton. The bowls were nice and clean after this.I wanted to redo the finish on the pipes: it may have looked good once upon a time, but no longer. So, I opted to soak the stummels in isopropyl alcohol overnight. This will usually remove some of the deteriorating finish I was faced with. When I took the stummels out of the alcohol bath, I scrubbed the wood with a brush (to remove any remnants) and left it to dry. At this point, I rubbed some Before & After Restoration Balm into the briar and left it to sit for 10 or 15 minutes. It really does wonderful things to the wood. On to the staining. This turned out to be an unnecessarily laborious and error-strewn procedure. As I don’t want to bore you with the details of my minor blunders, I will simply give you the quick and dirty version of the staining procedure. I began by applying a layer of Fiebing’s Black Leather Dye to both pipes. After applying the dye, flaming it with a BIC, and letting it set for a few hours, I wiped the stummels down with isopropyl alcohol to remove much of the dye. I wanted to achieve a two-tone effect of black and brown to replicate what had been there originally. Then it was time for the second round of staining. To do this, I applied some of Fiebing’s Medium Brown Leather Dye over both stummels. As before, I applied flame from a BIC lighter in order to set the colour. I then used all nine Micromesh pads (1,500 through 12,000 grit) on the stummels to polish the surface. I then added a second coat – just to make sure. It looked so much better with a richer colour. Once again, I wiped the stummels down with isopropyl alcohol to remove any excess. After that, a light application of Before & After Restoration Balm brought out the best in the stummels’ grain. These siblings are a good-looking pair and they feel great in the hand!  Then it was off for a trip to the bench polisher. A dose of White Diamond and a few coats of Conservator’s Wax (from Lee Valley) were just what these two pipes needed. Boy – that wax really makes these pipes pop! The lovely shine made the wood look absolutely beautiful. The Gulden Dansk and Silveren Dansk look fantastic and are ready to be enjoyed again by the next owner. I am pleased to announce that these pipes are for sale! You can buy them either individually or as a set (as you wish). If you are interested in acquiring them for your collection, please have a look in the “Italy” pipe section of the store here on Steve’s website. You can also email me directly at kenneth@knightsofthepipe.com. The approximate dimensions of the Gulden Dansk Dublin are as follows: length 5⅛ in. (130 mm); height 1¾ in. (45 mm); bowl diameter 1⅜ in. (35 mm); chamber diameter ¾ in. (19 mm). The weight of the pipe is 1¼ oz. (35 g). The approximate dimensions of the Silveren Dansk poker/sitter are as follows: length 5⅝ in. (143 mm); height 2 in. (51 mm); bowl diameter 1⅛ in. (29 mm); chamber diameter ¾ in. (19 mm). The weight of the pipe is 1½ oz. (44 g). I hope you enjoyed reading the story of this restoration as much as I did restoring them. If you are interested in more of my work, please follow me here on Steve’s website or send me an email. Thank you very much for reading and, as always, I welcome and encourage your comments.

What would you call this Dunhill Bruyere 54791 – a Scoop?


Blog by Steve Laug

The next pipe on the table is another Dunhill but one that I am not sure how to identify the shape. It is kind of a scoop with a long oval shank but the shape number is not on any charts that I have looked at. Even though it has five digits the number is the same as a four digit number. The extra digit defines the bowl style. Anyone have any idea what to call this or perhaps can give me a chart that shows the number? Much appreciated. Jeff and I purchased on 04/26/2022 from a woman who contacted us from Cleveland, Ohio, USA. We spent time chatting with her and arrived at a price and she sent the pipes to Jeff. It included another 28+ pipes with this one.

But now this Dunhill is the question. On the left side it is stamped 54791 followed by Dunhill over Bruyere and on the right side is stamped Made in England19. I know that it is a Bruyere finish but the shape number still is a mystery. It has a long oval shank, scoop like bowl and a ¼ bent taper stem. The finish was very dirty with spots of grime and debris stuck on it. The bowl had a thick cake in the bowl and heavy lava overflowing onto the rim top. It was hard to know the condition of the top and edges without removing the lava. The stem had calcification, oxidation and tooth marks and chatter on both sides ahead of the button. The button itself appeared to be in good condition. Jeff took photos of the pipe before he started his clean up work on it. He took photos of the bowl and rim top to show the condition. You can see the thick cake in the bowl and the lava overflowing onto the rim top. It appears to me that the rim is damaged but I will not know for sure until it is reamed and cleaned. It is also hard to know the condition of the rim top at this point. The outer edge of the bowl looks to be okay. The stem was heavily oxidized, calcified and has tooth marks and chatter on both sides ahead of the button. Overall the pipe is a real mess.Jeff took photos of the grain and finish around the bowl sides and heel. It was nice looking if you can see through the grime ground into the finish. He took a photo of the stamping on the left side of the shank. There is no photo of the right side stamping that gives the Made in England date code. It is readable but filthy.Now it was time to begin to work on the stamping on the pipe. I turned first to Pipedia as I remembered they had some great information on the Bruyere finish and dates and how the finish was made (https://pipedia.org/wiki/Dunhill#Bruyere). The first quote below give the short version of the finish. The second link goes into more detail. I quote from both below.

Bruyere – The original finish produced (usually made using Calabrian briar), and a big part of developing and marketing the brand. It was the only finish from 1910 until 1917. A dark reddish-brown stain. Before the 1950s, there were three possible finishes for Dunhill pipes. The Bruyere was a smooth finish with a deep red stain, obtained through two coats, a brown understain followed by a deep red.th

https://pipedia.org/wiki/Dunhill_Bruyere

Initially, made from over century-old briar burls, classified by a “B” (denoted highest quality pipe); “DR” (denoted straight-grained) and an “A” (denoted first quality), until early 1915. After that, they became a high-end subset to the Dunhill ‘Bruyere’. The DR and B pipes, a limited production, they should be distinguished as hand-cut in London from burls as opposed to the Bruyere line which was generally finished from French turned bowls until 1917, when the Calabrian briar started to be used, but not completely. Only in 1920 Dunhill took the final step in its pipe making operation and began sourcing and cutting all of its own bowls, proudly announcing thereafter that “no French briar was employed”.

Bruyere pipes were usually made using Calabrian briar, a very dense and hardy briar that has a modest grain but does very well with the deep red stain.

“Before the 1950s, there were three possible finishes for Dunhill pipes. The Bruyere was a smooth finish with a deep red stain, obtained through two coats, a brown understain followed by a deep red. The Shell finish was the original sandblast with a near-black stain (though the degree to which it is truly black has varied over the years). Lastly, the Root finish was smooth also but with a light brown finish. Early Dunhill used different briars with different stains, resulting in more distinct and identifiable creations… Over the years, to these traditional styles were added four new finishes: Cumberland, Dress, Chestnut and Amber Root, plus some now-defunct finishes, such as County, Russet and Red Bark.”

With that information clear for me I wanted to identify the shape number and try to pin that down (https://pipedia.org/wiki/Dunhill_Shape_Chart). I turned to the section on the Five Digit Shape Numbers and read it. I quote it below and added a chart on the numbers.

The 5th digit indicated the style of the bowl within the group of a similar classification, each identified by the last digit, which could be any number between 1-9.

While e.g. within the Gp.4 Billiard there were 5 different styles of bowls (5th digit being either 1,2,3,4, or 9), for a Gp.1 Billiard there were only 3 styles used (5th digit being 1, 2, or 9).

Although the 5-digit code was stamped on the pipe and thus was visible to the consumer, it was mostly used for internal production planning purposes and to a lesser extent for retail staff. The system proved to be quite complex.

The elimination of the 5th digit on the pipes (in 1984) resulted in better management of the pipe stock as there were less skus and it also facilitated the work for the sales staff in the retail shops as the complexity and number of skus was considerably reduced.

Notes:

When 5 digits occur, the meaning of the 4 first remain the same. 5 digit shape numbers was added in 1976 and ended in 1984.I turned next to dating the pipe as it would be more straightforward than the numbering on the shank. There is a superscript 19 following the D in ENGLAND on the right side of the shank. I turned to the dating chart on Pipephil (http://pipephil.eu/logos/en/dunhill/cledat-en1a.html). I did a screen capture of Part 2 of the Dunhill Dating Key and included it below. It is clear that the pipe was made after 1954 so that is why I went to Part 2. Because the year suffix is 19 that tells me that the pipe was made in 1960+19 for a date of 1979.Armed with that information I turned to work on the pipe itself. Before he sent it to me, Jeff had done an amazing job cleaning the pipe. It almost looked like a different pipe after his work. He reamed the pipe with a PipNet pipe reamer and removed the rest of it with a Savinelli Fitsall Pipe Knife.  He scrubbed the bowl with undiluted Murphy’s Oil Soap with a tooth brush. He rinsed it under running warm water to remove the soap and grime. He cleaned out the inside of the shank and the airway in the stem with isopropyl alcohol, cotton swabs and pipe cleaners. He soaked the stem in Briarville’s Pipe Stem Deoxidizer and then rinsed it off with warm water. He scrubbed the stem with Soft Scrub and a tooth brush and rinsed it off with warm water. It looked amazing when I took it out of the package of pipes he shipped me. I took photos of the pipe before I started my part of the restoration work.  The rim top was cleaner and the inner edge of the bowl looked rough. There was burn damage all the way around but heavier on the left half of the bowl. There was also darkening on the edge. The outer edge looked good. The stem surface looked good with the oxidation gone and light but visible tooth marks and chatter on either side of the stem. I took photos of the stamping on the sides of the shank. It is clear and readable as noted above.I took the stem off the shank and took a photo of the parts of the pipe. The overall look of the pipe is quite unique. The stem shorter than the bowl and shank but looks quite good.I started my portion of the work on this pipe by addressing the damage to the rim top and inner edge of the bowl. I used a folded piece of 220 grit sandpaper to smooth out the edge and give it a slight bevel to deal with the chipping and cutting on the inner edge. It cleaned up remarkably well. With polishing and buffing it would look even better.I polished the briar with micromesh sanding pads – dry sanding with 1500-12000 grit pads. I wiped the bowl down with a damp cloth after each pad. The rim top looked very good and the bowl began to take on a rich glow. The bowl looked very good at this point so I rubbed it down with Before & After Restoration Balm. I worked it into the surface of the bowl and shank with my fingertips to clean, enliven and protect the briar. I let the balm sit for about 10-15 minutes and buffed with a cotton cloth to raise the shine. I set the bowl aside and turned to work on the stem. I “painted” the surface of the stem ahead of the button with the flame of a lighter to raise the tooth chatter and marks. It worked exceptionally well and all were lifted enough that sanding what remained removed them. I sanded the stem surface with 220 grit sandpaper and started polishing it with 400 grit wet dry sandpaper. I polished the vulcanite stem with micromesh sanding pads – 1500-12000 grit pads. I wiped it down with Obsidian Oil after each sanding pad. I used Before & After Pipe Polish – both Fine and Extra Fine to further polish the stem and gave it a final coat of Obsidian Oil to finish it. This beautiful and unique 1979 Dunhill Bruyere 54791 Scoop is a great looking pipe now that it has been restored. The rich Bruyere finish that highlights the grain and works well with both the polished vulcanite stem. I put the stem back on the bowl and carefully buffed the pipe with Blue Diamond on the buffing wheel using a light touch on the briar. I gave the bowl and the stem multiple coats of carnauba wax on the buffing wheel and followed that by buffing the entire pipe with a clean buffing pad. I hand buffed the pipe with a microfiber cloth to deepen the shine. The finished Dunhill Bruyere Scoop is a large pipe that will be great for sitting and reading. Give the finished pipe a look in the photos below. The dimensions of the pipe are Length: 7 inches, Height: 1 ¾ inches, Outside diameter of the bowl: 1 ¼ inches, Chamber diameter: 7/8 of an inch. The weight of the pipe is 55 grams/1.94 ounces. I will be adding the pipe to the British Pipemakers section of the rebornpipes store shortly. If you are interested in adding it to your collection be sure to let me know. I take a moment to remind myself and each of us that we are trustees of pipes that will outlive us and the lives of many other pipe men and women who carry on the trust of their care and use. Thanks for reading this blog and my reflections on the pipe while I worked on it.