Tag Archives: Butz Choquin Pipes

Refurbishing An Early Butz Choquin “A Metz” Bent Billiard


Blog by Paresh Deshpande

This pipe too came to me in that lot of 40 pipes purchased from Etsy.fr of which I have restored a few, the ROPP PNEUMATIC being the latest project. This pipe is a large billiard with a swan neck like graceful bend to the shank that extends over to the horn stem. The stummel appears dull and lifeless and yet through this, beautiful cross grains can be faintly made out over the sides of the stummel with bird’s eye grain at the foot. A copper band adorn the shank end with it’s crimped shank end edges covering the shank face. It is stamped over the left shank surface as “BUTZ-CHOQUIN” over “A” over “METZ”. The copper band has minuscule cartouche with some mysterious stampings that are neither visible under bright light nor under magnification.A couple of years ago, I had worked on an early Butz Choquin pipe that was very similarly stamped. I had studied the brand then and also before that when I had refurbished my inherited CHOQUIN PIPE from first era 1858. Given below is the link to the write up on the similarly stamped pipe. For the sake of brevity, I have avoided reproducing the information and implore readers to follow the link for better understanding the brand and establishing the provenance of the pipe (https://rebornpipes.com/2022/04/17/restoring-a-beautiful-older-butz-choquin-a-metz-pipe/).

After reading through the material and correlating the dates, I can, with certainty, claim that this pipe (broadly) is from pre 1951 when Berrod- Regad took over Butz Choquin and moved production from Metz to St. Claude as evidenced from the A METZ stamping.

Further narrowing down the period, I strongly feel that this pipe dates to pre 1920. This conclusion is based on the fact that; firstly, the stem and tenon material used is horn and bone respectively which were the preferred material after Amber during this period for making stems as hard rubber/ vulcanite gained prominence during 1920s. Secondly, the round orifice at the stem end was commonly used until 1920s when vulcanite/ hard rubber with elliptical slot end gained prominence subsequently. Thirdly, use of cork lining inside the mortise to firmly seat the bone tenon in to the mortise.

Any inputs and corrections to my above understanding are solicited and encouraged. Such healthy discussions not only promote interaction between us but also enhance knowledge about pipes and establishing its provenance by sharing information.

Initial Visual Inspection
The elegant swan neck shape of the shank that extends into the stem is the USP of this pipe. The chamber appears to have an even thin layer of cake that appears to have been meticulously maintained by the previous owner. There are a few minor dings to both the inner and outer rim edges. The stummel boasts of beautiful cross grains over the surface with bird’s eye grains at the foot of the stummel. The briar looks dull and lifeless. The mortise has residual old oils and gunk making the draw hard. The horn stem with bone tenon is dull, dry and shows signs of beginnings of cracks over the surface. Both the tenon and orifice slot are clogged with old tars and grime. This one will require a ton of work to spruce it up to its former glory. Following pictures should provide a better understanding of the condition of the pipe before I begin my work. Detailed Visual Inspection
The first impression that I got at a glance of the chamber was an even well maintained layer of cake with practically no darkening of the rim surface or accumulation of carbon overflow. This definitely was either a well cared for pipe or the seller had done so for bargaining a better price. There a few dings on the right and left side of the outer rim edge (encircled in blue). The inner rim edge is intact save for some very minor divots that should be easily addressed with a couple of passes of a piece of 180 grit sandpaper along the edge. The rim top is nicely even and clean, requiring no topping, which I tend to avoid as much as possible. The stummel is dull, lifeless and lacklustre. Under all the dullness and poor appearance, lurks some beautiful cross grains and bird’s eye over the feet of the stummel awaiting exposure. The stummel has developed a deep dark patina from all the years of smoking and handling. There is one fill (encircled in yellow) that would need to be refreshed. Also a couple of minor divots (encircled in red) mark the stummel surface. The mortise is chock-a-block with old oils, tars and gunk and this leads me to the conclusion that it was the seller who had reamed the cake and cleaned the rim surface to ask for a better price. The copper band at the shank end is dull and covered in dust, grime and oxidation. The first issue that I noticed on close examination of the stem surface were a number of cracks all over the upper and lower surfaces. I drew out my magnifying glass and had a hard look at the cracks under bright light. Thankfully, almost all of these cracks were minor and very superficial, save for a few (encircled in red) over the upper surface and would need to be addressed. These cracks are caused because of drying of the horn material due to lack of usage and hot weather conditions. These cracks would need to be stabilized, repaired and hydrated. There are deep tooth indentations in the bite zone, very close to the button edges on either surface of the stem. The long bone tenon has darkened considerably and is covered in grime with the opening showing accumulation of oils, tars and gunk. This condition is similar at the orifice slot. The seating of the stem in to the mortise is very loose. The Restoration Process
The process of this restoration started with stem repairs. I first cleaned the stem airway by running a few hard bristled and regular pipe cleaners dipped in isopropyl alcohol followed by further cleaning with anti oil dish washing soap and thin shank brushes. The pipe cleaners pictured below and the gunk that was removed while cleaning with the shank brushes of which pictures were not clicked, tell a story of how dirty the stem internals were. I continued cleaning of the stem air way till white foam was seen coming out from the air way. I also scrubbed the stem surface with a Scotch Brite pad and soap. The next step was to stabilize the cracks on the top surface of the stem. Using a 1 mm drill bit mounted on a hand held rotary tool, I drilled counter holes at the start and end points of these cracks. These counter holes prevent the further expansion of the cracks in either directions. I filled these holes, cracks and the tooth indentations in the bite zone with CA superglue and set it aside for the glue to harden. I was still sometime away from hitting the sack and with the stem set aside for the repairs to cure; I decided to work the stummel. I began with reaming the chamber with size 1 head followed by size 2 head of the PipNet reamer. The heap of dislodged carbon did surprise me as I had anticipated a far less cake formation along the walls. I further scraped the chamber walls with my fabricated knife to remove the remaining carbon deposits where the reamer head could not reach. Once the cake was reamed back to the bare briar, I used a 220 grit sand paper to remove all the traces of remaining cake and also to smooth out the inner walls of the chamber surface. Finally, to remove the residual carbon dust, I wiped the chamber with a cotton pad wetted with 99.9% pure isopropyl alcohol. The chamber walls are solid without any heat lines or fissures.While I was handling the bowl, the copper band at the shank end came loose and it was then that I saw the cork lining along the walls of the mortise that was in place to ensure a snug fit of the long bone tenon in to the mortise. This cork lining has dried and needs to be revitalized. This lining also means that I would have to be careful while I clean the mortise so as not to erode and break the cork thus disturbing the seating of the stem.As observed above, the mortise is completely clogged with old oils, tars and ash resulting in a very hard and laborious draw. This was the issue that I addressed next. Using dental tools and fabricated poker, I scraped out the entire gunk from the walls of the mortise taking care that the cork lining is not damaged in the process. I used the drill bit from the Kleen Reem to remove and open up the shank airway. It was a tedious and time consuming work, but well worth the caution and efforts. The heap of crud extracted from the shank confirms the reason for the hard and laborious draw. I ran a few hard and regular pipe cleaners dipped in alcohol through the mortise and airway to remove residual gunk. The mortise is now clean with a much better open and easy draw. I shall continue with the cleaning process when I clean the stummel surface.The last agenda for the night was the external cleaning of the bowl and further internal cleaning of the mortise. I cleaned the external surface with a hard-bristled toothbrush and concentrated Murphy’s oil soap. I scrubbed the rim top and stummel surface with the soap and Scotch Brit pad. I rinsed the stummel under warm running water and dried it with paper towels and soft cotton cloth. The grains are now clearly visible and awaiting a nice polish to pop out. This cleaning also brought a few dents and scratches over the stummel surface and outer rim edge to the fore that would need to be addressed and the fill observed near the foot has loosened that would need to be refreshed. I extended my work time for a while and cleaned out the shank internals. I cleaned the shank walls by scrubbing it with shank brushes and anti-oil dish washing soap while being careful around the cork! The bowl is now clean and fresh. I set the bowl aside to dry under a heat lamp.The next evening with the stummel now dry and the stem repairs completely cured, I had the option of either working on the stummel or the stem. There was this small step that was needed to address the fill that required to be refreshed and that is where I began. With sharp dental tool, I removed the old fill and cleaned the area with alcohol. Next, I mixed briar dust with CA superglue to form putty and applied this mix over the area to be filled. I set the stummel aside for an hour or so for the mix to harden, which is almost instantaneous over the surface.I set the stummel aside and worked on the stem repairs next. The repairs had completely hardened and all that needed to be done was to blend in these repairs with the rest of the stem surface. I began by sanding the fills with a flat needle file to achieve a rough match followed by sanding the entire stem with a worn folded piece of 180 grit sandpaper. The button edges were also evened out and sharpened during the process. The fills will be further blended during the polishing cycle using various grit sandpapers and micromesh pads. I applied a generous layer of EVO and massaged it in to the horn stem to hydrate it and set it aside for the oil to be absorbed into the horn.Using the same tools and sandpaper, I blend in the stummel fill with the rest of the briar surface. This blending of the fill will be further fine-tuned when I sand the stummel surface with 220 grit sandpaper to address the issue of dings and scratches over the surface.I addressed the dents and dings to the outer rim edge by creating a bevel with a folded piece of 180 grit sandpaper pinched between fingers and running them evenly over the outer edge surface. I am quite happy with the appearance of the bowl with the bevelled outer rim. Next, I cleaned the copper ferrule at the shank end with “Pitambari”, a powder that is available all across India that is used to clean and shine brass, copper and silver ware. This compound is a very fine powder and is least abrasive with fantastic results. The band is now a nice shining piece and will provide a nice contrast between the shining horn stem and the dark brown stummel. I attached the band at the shank end with all-purpose glue.The next step was to sand the entire stummel surface with sandpaper to remove the scratches and dings that are visible. I used a well worn piece of 180 grit sandpaper to sand the surface. The sanding marks that are now visible will not be so once the bowl is subjected to polishing regime with micromesh pads and compounds. There are a couple of dings and scratches that are still visible, but I shall let them be as part of the pipe’s century old existence! I followed it by wet sanding the entire stummel with 1500 to 12000 grit micromesh pads, wiping frequently with a moist cloth to check the progress. I rubbed a small quantity of “Before and After Restoration Balm” deep in to the briar with my finger tips and let it rest for a few minutes. The balm almost immediately works its magic and the briar now has a nice vibrant appearance with the beautiful grain patterns displayed in their complete splendor. The contrast of the dark browns of the Bird’s eye and cross grains with the natural patina of the rest of the stummel adds an interesting dimension to the appearance of the stummel which cannot be sufficiently described in words and be rather seen in person. I really like the looks of the stummel at this point in restoration. The grains and the clean lines of this piece of briar is really appreciable. With the stummel set aside, I polished the stem by wet sanding, starting with 400 and progressing through 600, 800, 1000, 1500 and 2000 grit sandpapers. I rubbed a good amount of EVO in to the stem surface and set it aside to be absorbed.A few hours later, I wiped the stem surface with paper towels and began the polishing cycle using micromesh pads. I wet sanded the stem surface going through 1500 to 12000 grit pads. I set the stem aside after rubbing it down with EVO again.To complete the restoration, I mount a cotton cloth buffing wheel on to my hand held rotary tool and polished the stummel and stem with Blue Diamond compound. This compound helps to remove the minor scratch marks that remain from the sanding. With another cotton buffing wheel that I have earmarked for carnauba wax, I applied several coats of the wax. I finished the restoration by giving the entire pipe a rigorous hand buffing using a microfiber cloth to raise the shine further. The finished pipe looks amazingly beautiful and is ready to join my collection. I only wish it could share with me its life story of the past years while I enjoy smoking my favorite Virginia blend in it or maybe an English blend or maybe just keep admiring it! Big thank you to all the readers who have joined me on this path by reading this write up as I restored and completed this project.

Life-Support for a Butz-Choquin Oom Paul Egg


Blog by Kenneth Lieblich

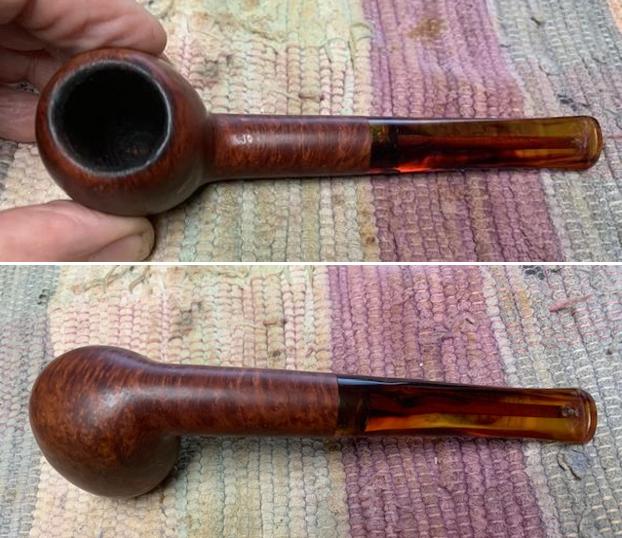
Another pipe in my ongoing “French Collection”, this new addition came in a lot of pipes from France (appropriately). I pulled it out of the pile of filthy pipes and found it quite charming. This pipe is an Oom Paul Egg shape. It was made by the famous and long-standing French pipe maker Butz-Choquin and is a small, wounded, but very attractive pipe. On the left side of the shank, it reads Butz-Choquin [over] Cocarde (which is the model name). On the right side of the shank, it reads St Claude [over] France [over] 1307. On the left side of the stem is the company’s logo, a “BC”. The logo is badly worn and will be difficult to restore.Both Pipedia and Pipephil have good write-ups on the history of Butz-Choquin and I encourage you to read both. Also, Steve has restored quite a few and it’s worth having a look at his writings too. For the moment, here is some information from Pipedia:

The pipe, from Metz to Saint-Claude.

Jean-Baptiste Choquin of Metz started out as a tobacconist. This enterprise was prosperous; he had several employees. Among those, there was a certain Gustave Butz who was its first workman and who became his son-in-law by marrying Choquin’s daughter Marie in 1858.

In 1858 Jean-Baptiste Choquin created, in collaboration with Gustave Butz, the Choquin pipe. This bent pipe with a flat-bottomed bowl was finished with an albatross-bone mouthpiece, fixed with silver rings.

In 1858, still in Metz, Gustave Butz built an establishment for the manufacture of the Choquin pipe which took the name of . In 1951, the Berrod-Regad company bought the trademark, continuing manufacture until 2002. Departing from Metz, the workshop was relocated to Saint-Claude, then also called “the world capital of the briar pipe”, under the Berrod-Regad group. The Berrod-Regad group would go on to completely rebuild the network of representatives until finally entering the export market in 1960 and has since won several prizes, as well as the Gold Cup of French good taste.

In a few years, the brand’s collection increased from ten to seventy series. 135 years after it was founded, the pipe is still well-known not only in France but throughout the world. In 2002, the Berrod family, wishing to preserve manufacture of pipes in Saint-Claude, handed over the company to Fabien Guichon, a native of the area, who will continue to develop the brand during the 21st century.

Meanwhile, Pipephil says this:

The origin of the brand reaches back to 1858 when Jean-Baptiste Choquin in collaboration with his son-in-law Gustave Butz created their first pipe in Metz (France). Since 1951 Butz-Choquin Site officiel Butz Choquin, pipes de Saint-Claude jura. BC pipe de bruyere luxe is a brand of the Berrod-Regad group (Saint-Claude, France).

Jean Paul Berrod managed the company from 1969 to 2002 when he retired and sold the corporate to Mr Fabien Gichon. Denis Blanc, allready owner of EWA, took over the S.A. Berrod-Regad in 2006.

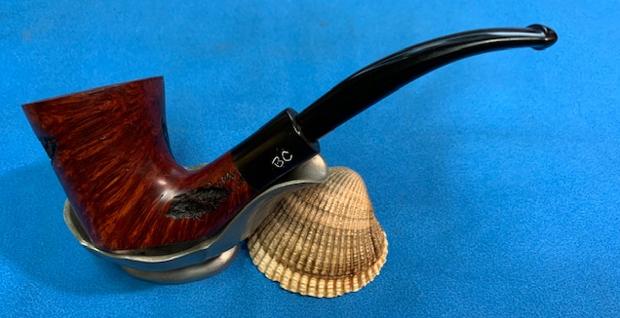
In an old Butz-Choquin catalogue, I found the pipe shape in question, listed with its requisite number:This is an older pipe, and is heavily used, though the stem is in reasonably good shape, compared to the stummel. There are a few minor tooth marks, some oxidation and calcification, but nothing too serious. Additionally, over the decades, the stem has straightened somewhat, so it will need to be bent back into place. The stummel is a different kettle of fish. The wood is very nice, but it has several fills on the outside of the bowl, there are nicks around the rim, the wood is filthy, and there are scratches around the bowl. It just looks tired and worn. The stem was first on my list. . .  This stem has a stinger in it – and it was being quite stubborn about coming out! The goo had glued the stinger into the tenon, so I opted to warm the stem and stinger with my heat gun and this provided just enough softening of the internal gunk to allow me to pull it out. It then went for a soak in some lemon-infused isopropyl alcohol. I let it sit for several hours and then cleaned it off and it looked much improved. I then finished it with some metal cleanser and moved on. Next, I wiped the outside down with Murphy’s Oil Soap on some cotton pads. I also took a BIC lighter and ‘painted’ the stem with its flame in order to lift the few bite marks and dents. Then I cleaned out the inside with pipe cleaners and isopropyl alcohol. It was pretty dirty, and I went through a good amount of pipe cleaners. I then wiped down the stem with SoftScrub cleaner to remove surface oxidation. Once this process was done, the stem went for an overnight soak in the Pipe Stem Oxidation Remover. This allows me to clean the oxidation off in a couple of ways: by applying a mild cleaner to the surface and sanding the stem. The next day, I used SoftScrub again with some cotton rounds. After this, I used some nail polish to restore the logo on the stem. I painted the area carefully and let it fully set before proceeding. I built up the dents on the stem with black cyanoacrylate adhesive and let them fully cure. I then sanded the adhesive down then with 220-, 400-, and 600-grit sandpapers to meld seamlessly into the stem. As I previously mentioned, the stem had straightened itself out over the years; so I used my heat gun to warm the stem and return it to its original shape.I then used all nine Micromesh pads (1,500 through 12,000 grit) to bring out the lovely black lustre on the stem. I also used Obsidian Pipe Stem Oil in between each pad scrubbing.On with the stummel! I decided to ream out the bowl. I used the PipNet Reamer and the KleenReem to remove the built-up cake and followed that with 220-grit sandpaper taped to a dowel to eliminate as much as I could. I took the chamber down to bare briar, as I wanted to ensure there were no hidden flaws in the wall. Fortunately, there were none. I used cotton rounds and some Murphy’s Oil Soap to scrub the outside of the stummel and a toothbrush with Murphy’s for the lava on the rim of the pipe.I then proceeded to clean out the insides of the shank with Q-tips, pipe cleaners, and lemon-infused isopropyl alcohol. The shank was absolutely caked with debris and I went through an extraordinary amount of cotton to clean it out. With all the filth in this pipe, I opted for an alcohol bath to clean it thoroughly. I followed that up by cleaning the insides with some dish soap and tube brushes. I decided to de-ghost the pipe in order to remove any lingering smells of the past. I thrust cotton balls into the bowl and the shank and saturated them with 99% isopropyl alcohol. I let the stummel sit overnight. This caused any remaining oils, tars and smells to leach out into the cotton. The bowl was nice and clean after this.Having completed that, I was able to address the blemishes to the outside of the bowl. First, I repaired the half-dozen fills with CA glue and briar dust. For the nicks on the rim and bowl, I dug out my iron and a damp cloth to raise the nicks. The hot and moist steam can often cause the wood to swell slightly and return to shape. A little unusually, this technique worked brilliantly and the next two photos (before and after) show a good example of what the iron can do. Now I could address the burn on the rim. I took some sandpaper and my Micromesh pads to sand and smooth everything out. After that, a light application of Before & After Restoration Balm brought out the best in the stummel’s grain, then took it to the buffer. A dose of White Diamond and a few coats of carnauba wax were just what this pipe needed. This little pipe looks fantastic again and is ready to be enjoyed again by the next owner! I am pleased to announce that this pipe is for sale! If you are interested in acquiring it for your collection, please have a look in the ‘French’ pipe section of the store here on Steve’s website. You can also email me directly at kenneth@knightsofthepipe.com. The approximate dimensions of the pipe are as follows: length 4 in. (100 mm); height 3¾ in. (94 mm); bowl diameter 1⅜ in. (36 mm); chamber diameter ¾ in. (19 mm). The weight of the pipe is 1⅜ oz. (41 g). I hope you enjoyed reading the story of this pipe’s restoration as much as I did restoring it. If you are interested in more of my work, please follow me here on Steve’s website or send me an email. Thank you very much for reading and, as always, I welcome and encourage your comments.

Fresh Life for a Beautiful Butz-Choquin Maitre Pipier Flamme Extra Horn


Blog by Steve Laug

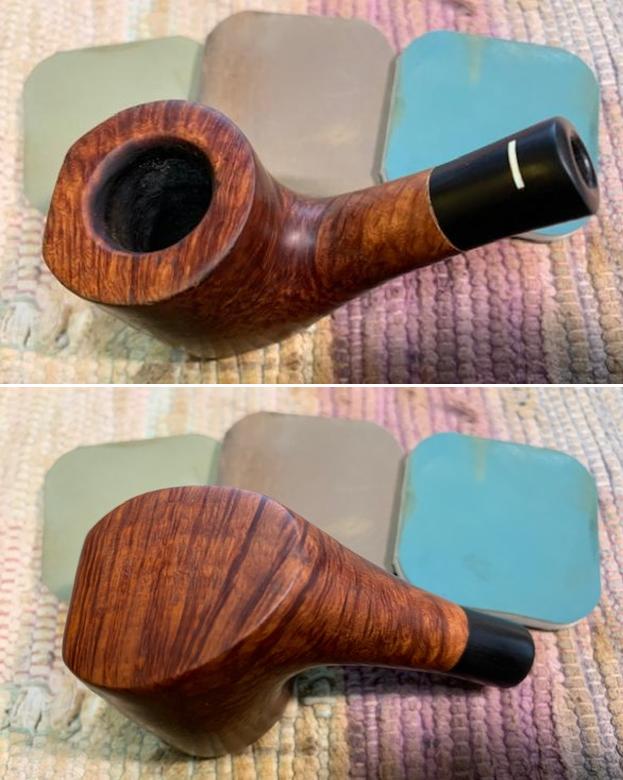
The next pipe in the queue came from a group of pipes a friend here in Vancouver passed on to me to restore and sell for him. The pipe is a beautiful Butz Choquin Maitre Pipier Flamme Extra pipe. It is almost a Danish shaped horn/scoop with a triangular shank and a uniquely shaped bowl. The entire pipe had some beautiful flame grain around the bowl and birdseye grain on bottom and top of the shank. The rim top was clean other than some burn or darkening damage on the back inner edge of the bowl. I could see that the carver had done an amazing job utilizing the block of briar to maximize the grain. The pipe is stamped on the left side of the shank and reads Butz-Choquin [over] Maitre Pipier [over] Flame [over] Extra. On the right side of the shank it is stamped Fait Main over St. Claude France. On the underside of the shank it is stamped J Berrod. The stem is vulcanite and has the inset BC circle on the left side of the uniquely fit triangular taper stem. I took photos of the rim top and edges and the stem surfaces. The rim top looked very good with some great birdseye. The inner edge had some burn damage and some darkening on the back inner edge. The stem had some oxidation, calcification and tooth marks and chatter on both sides ahead of the button. I took photos of the stamping on the sides of the shank. It read as noted above and is very clear. I removed the stem from the bowl and took a picture of the pipe to show the general look and proportion of the pipe. It is quite pretty in terms of grain and shape. The stem is definitely a fitted blank rather than a hand cut one. I have worked on another Maitre Pipier not too long ago and wrote up a blog on it. It was a nice looking Calabash (https://rebornpipes.com/2019/02/14/a-butz-choquin-maitre-pipier-hand-made-calabash/). On that blog I included some overall information on the brand and I will repeat it here to set the stage.

Butz-Choquin was a brand that I was familiar with having worked on quite a few of them over the years. I decided to check on a few sites to refresh the memory of the brand. I turned first to Pipephil and as usual the site gives a great summary (http://www.pipephil.eu/logos/en/logo-butzchoquin.html). I quote:

The origin of the brand reaches back to 1858 when Jean-Baptiste Choquin in collaboration with his son-in-law Gustave Butz created their first pipe in Metz (France). Since 1951 Butz-Choquin Site officiel Butz Choquin, pipes de Saint-Claude jura. BC pipe de bruyere luxe is a brand of the Berrod-Regad group (Saint-Claude, France).

I also found the line of Fait Main Maitre Pipier pipes listed. The pipe I am working on is stamped the same way as the one in the screen capture below. The shape is different but the rest is the same. The capture has a small paragraph on the line that reads as follows: Pipes of the “Maitre Pipier” séries were crafted by Paul Lanier until he retired and after him by Alain Albuisson.I turned then to Pipedia to see what I could find out there (https://pipedia.org/wiki/Butz-Choquin). I quote the article in its entirety as it gives a clear history.

The pipe, from Metz to Saint-Claude. Jean-Baptiste Choquin of Metz started out as a tobacconist. This enterprise was prosperous; he had several employees. Among those, there was a certain Gustave Butz who was its first workman and who became his son-in-law by marrying Choquin’s daughter Marie in 1858.

In 1858 Jean-Baptiste Choquin created, in collaboration with Gustave Butz, the Choquin pipe. This bent pipe with a flat-bottomed bowl was finished with an albatross-bone mouthpiece, fixed with silver rings.

In 1858, still in Metz, Gustave Butz built an establishment for the manufacture of the Choquin pipe which took the name of . In 1951, the Berrod-Regad company bought the trademark, continuing manufacture until 2002. Departing from Metz, the workshop was relocated to Saint-Claude, then also called “the world capital of the briar pipe,” under the Berrod-Regad group. The Berrod-Regad group would go on to completely rebuild the network of representatives until finally entering the export market in 1960 and has since won several prizes, as well as the Gold Cup of French good taste.

In a few years, the brand’s collection increased from ten to seventy series. 135 years after it was founded, the pipe is still well-known not only in France but throughout the world. In 2002, the Berrod family, wishing to preserve manufacture of pipes in Saint-Claude, handed over the company to Fabien Guichon, a native of the area, who will continue to develop the brand during the 21st century.

I reamed the bowl with a Savinelli Fitsall Pipe Knife to scrape out the thin cake in the bowl. There was not much there but enough that it had to go. I also sanded the bowl walls with a piece of 220 grit sandpaper wrapped around a piece of dowel. The bowl walls were smooth when I finished the work.  I wiped the bowl down with acetone to remove the shiny varnish coat as it was spotty on the sides and rim top. With it removed the grain really stood out clearly. It is a great looking piece of briar. I cleaned out the shank and the airway in the mortise and stem with pipe cleaners, cotton swabs and isopropyl alcohol. It was quite a bit dirtier than I expected from just the appearance. With the cleaning the pipe smelled cleaner. I worked over the inner edge with a folded piece of 220 grit sandpaper to smooth out the damage and to give the edge a slight bevel to remove the burn damage. I polished the briar with micromesh sanding pads – polishing it with 1500-12000 grit pads. By the time I was finished the briar had a great shine. The grain on the pipe is quite beautiful.  I rubbed the bowl and shank down with Before & After Restoration Balm to deep clean the finish on the bowl and shank. The product works to clean, enliven and protect the briar. I worked it into the finish with my fingers. After it sat for 15 minutes I wiped it off with a soft cloth. The briar really began to have a rich shine. I took some photos of the bowl at this point to mark the progress in the restoration. It is a beautiful bowl.  I set the bowl aside and turned my attention to the stem. I “painted” the surface with the flame of a lighter to lift the tooth marks and chatter. It worked very well and I sanded out the remnants and oxidation on the top and underside with 220 grit sandpaper and started polishing it with 400 grit wet dry sandpaper.   I polished the stem with micromesh sanding pads – dry sanding with 1500-12000 grit pads. I wiped the stem down after each pad with a damp cloth to remove the sanding dust. I used the Before & After Pipe Polish to remove the small minute scratches left in the vulcanite. I finished by wiping the stem down with a final coat of Obsidian Oil and set it aside to dry.   As usual at this point in the restoration process I am excited to be on the homestretch. I look forward to the final look when it is put back together, polished and waxed. I put the bowl and stem back together. I polished the bowl and stem with Blue Diamond to polish out the scratches in the briar and the vulcanite. I gave the bowl and the stem multiple coats of carnauba wax. I buffed the pipe with a clean buffing pad to raise the shine. I hand buffed it with a microfiber cloth to deepen the shine. The pipe polished up pretty nicely. The grain really pops with the wax and polish. The shiny black vulcanite stem is a beautiful contrast to the browns of the bowl and thick shank. This Butz-Choquin Maitrie Pipier Flamme Extra Scoop was another fun pipe to work on. It is a nice piece of briar whose shape follows the flow of the briar. The pipe is comfortable pipe to hold in the hand. The finished pipe is shown in the photos below. The dimensions of the pipe are Length: 5 ½ inches, Height: 1 ½ inches, Outside diameter of the bowl: 1 ½ inches, Chamber diameter: ¾ of an inch. The weight of the pipe is 1.45 ounces/41 grams. I will be putting this pipe on the rebornpipes store in the French Pipe Makers section. Thanks for reading this blog and my reflections on the pipe while I worked on it.

Renascence of a stunning billiard from Butz-Choquin


Early this morning I received an email from Joris about posting a restoration on rebornpipes. I wrote back and this is what he sent me. It is a great restoration and one that is only fitting to share with our global restoration community of rebornpipes. Welcome Joris. Thanks for your work and your post.

Blog by Joris De Sutter

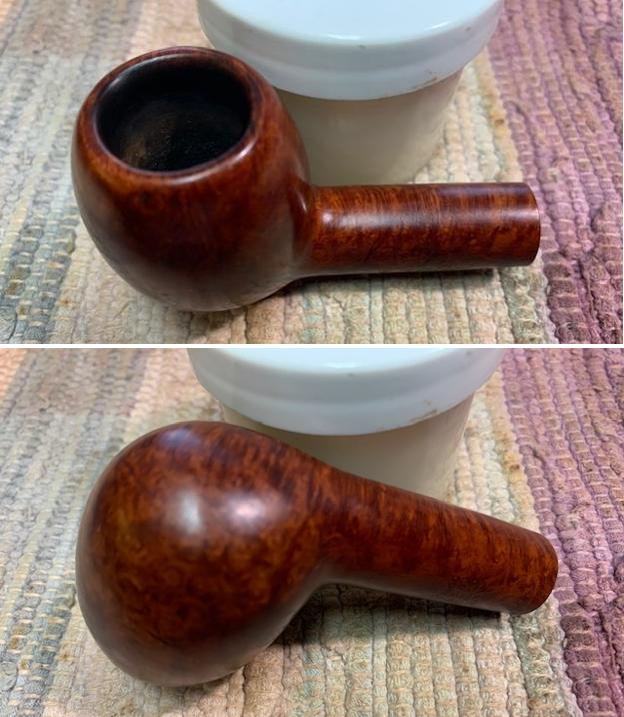
Hi everyone. I’m a pipe restorer from Flanders, the northern half of Belgium, where I live in the beautiful town of Brugge (Bruges). It’s only once in a while that I restore old pipes to their former glory. I’m a bit of a Canadian and Lumberman fan and within those shapes I tend to specialize in the French brand Butz-Choquin. So when purchasing the pipes I like, occasionally other shapes are present in those lots. This particular pipe was one of those. I picked up this rather big billiard from a French second hand website, together with four other promising briars. They apparently all formerly belonged to the same gentleman, judging from the identical signs of use. And boy: they were used! The current pipe shows this quite clearly… The general shape of the pipe is a really handsome Billiard. It was apparently one of the favorite pipes of its previous owner. He seems to have loved his pipes, but perhaps not to the level that he really cared for them. What a mess! How does one even reach such a thick cake build up in the chamber? The dirty bowl with those black patches of grime around it? The heavily oxidized stem with all that calcification? I wonder how one is able to let it come to that. Didn’t the previous steward have the need to clean his pipe once in a while? Whatever. I did notice the extraordinary pipe underneath all that muck.

The markings on this pipe are quite standard for a Butz-Choquin. On the left side of the shank is the standard curved Butz-Choquin logo. Just underneath this logo the name of the series appears in all capitals : PRELUDE. And then in the lower right hand corner is the word Extra at an angle. This Extra stamping indicates that the wood of this pipe has no flaws and there are no fills present. This was indeed the trigger for me to purchase this pipe despite its sorry state. At the same height on the stem there is an engraving of the two BC letters forming the Butz-Choquin abbreviation. They were once filled white, but now only a hint of this remains at the bottom of the B. The letters themselves are however quite deep enough to allow for a full restoration. From the 1970’s onward, Butz-Choquin used an acrylic round insert on her stems for the higher end pipes they produced. If this pipe would have been made in the seventies or later, it surely would have had that acrylic insert on its stem. Since it is not present, I’m assuming this pipe dates from the 1960’s. The shape number on the right side of the stem reads 1398. On top of that it reads ST CLAUDE – FRANCE. Finally underneath the shape number is an A. I can only speculate on this solitary A, but since this pipe is clearly top of the line I suspect it to indicate just that.

The Butz-Choquin brand is one of the oldest in France. Most people unfortunately associate it with cheap basket pipes. They did indeed make plenty of those, but likewise they also made really good high quality pipes and those were sold at accordingly high prices.

The bowl is always first on my list. If the bowl turns out to be too far gone to justify a full restoration, then why would I still put some effort in the stem? I start by taking my own manufactured reaming knife and carefully scrape the top rim of the bowl. There is quite some lava coming off of it.   Now the most daunting part: addressing the very thick cake in the bowl. This took me about an hour, carefully scraping away all that carbonized tobacco till the briar became visible again. I do own the commonly available reaming tools, but I hardly ever use them anymore. My own tool turns out to be just the perfect reamer. The picture hardly illustrates the amount of carbon cake that came out of the bowl. That mountain was almost as high as it is wide! Not shown in the pictures is the condition of the briar underneath. It was excellent! No heat fissures, no burns.

From here, I always open up the draught hole. I like my pipes to have a 4mm draught hole. Most BC pipes are drilled at 4mm, but since this pipe was so extensively smoked, there must be a lot of tars in there. Drilling those out before further cleaning helps a lot. I have two drill bits for this. One has a tapered tip, while the other is a standard, although very long, 4mm straight drill. First the one with the tapered tip. I clamp the drill bit in my bench vise and then carefully turn the bowl by hand. Never ever use a power drill for this. The tapered drill bit is ideal to find the way through possible clogging inside the draught hole. If the straight bit would be used before the tapered bit, the clogging could steer the straight bit into the briar. After clearing the draught hole, a dentist tool is used to scrape away hardened tars from inside the mortise. And then both bowl and stem go into the water. I use an oil based black soap to clean the stummel and stem inside out. Some drops of soap on the bowl and stem, and then an old tooth brush together with some effort cleans both parts. A piece of very fine steel wool is used to remove the last remaining lava from the bowl’s top rim. Luckily it revealed that the previous owner didn’t knock his pipes on hard surfaces to remove ash and dottle.While I still have that piece of steel wool at hand, I use it to remove the calcification from the stem and already some of the oxidation. The biggest part of oxidation removal will follow later. I can now already notice to my relief that there are no tooth marks on the stem, apart from a small notch like indentation on the upper part of the button.To finish off the wet part of the cleaning, I have some fine round plastic bristle brushes. I use them to roughly clean out the insides of both stem and shank. This will make the process of deep cleaning later a lot easier since the water will already soften the tars a little bit.I let the stummel dry a bit and then proceed into the preparations of deep cleaning it. For this I use two main ingredients: isopropyl alcohol and paper towels. Notice the absence of cotton wool or salt? I used to do this with cotton wool in the past, as is shown on this blog and others, but found that my own method yields far better results. From the paper towel, I turn a corner of the towel into a wick. I turn this wick into the draught hole from the mortise and make sure it extends into the chamber. Then I slightly turn it into the other direction and push onto it. This way it will also fill the mortise completely. I then cut the excess that sticks out of the mortise. Then I make a small wad of the same towel and put it at the bottom of the chamber covering the small bit of the wick that protrudes from the draught hole into the chamber. Now I put the isopropyl alcohol onto the wad in the chamber until the wad is completely drowned, but not much more than that. This amount of alcohol is sufficient to percolate into the wick and do its work.Is it necessary to completely fill the chamber with cotton wool (or salt for that matter) to have the chamber also deep cleaned with the alcohol? I have done some experimentation on this in the past and found that the deep cleaning with alcohol is mostly important for the draught hole, not so much for the chamber. The reason is quite simple: While smoking your tobacco, the oils, tars and other volatile components of the tobacco will either get burned or lower down with the smoke. They will hardly stick to the chamber’s walls due to the heat and the cake build up. They will however primarily condensate in the draught hole.The result after some three hours of soaking. The wick end has turned into a nice brown colour. The wad in the chamber however remains white. Let’s see what happens when the wick gets removed.Wow! The wick part that was inside the draught hole has turned to black! Lots of tar have been removed. The new wick that is present in the picture is then used to immediately turn it inside the pipe again. Since the previous wick has been soaking in alcohol for three hours, the draught hole is still moist with it. The new wick can then easily take up another load of softened tars. So stick it in, turn and turn and pull it out. Look at the blackness that came out on that second wick in the following picture. A third wick is then prepared to put inside. This time the alcohol treatment of three hours is repeated. The following picture shows the result of that third wick. Not so black as the first one. And the fourth wick cleans up a bit more after it. This continues until the wick comes out without muck on it. With this pipe I had to do four full alcohol soaks of three hours. That means eight wicks in total, of which the bottom wick shows that it came out clean.Don’t I use normal pipe cleaners then? Sure, but not for this deep cleaning itself. Sometimes in between I enter a normal pipe cleaner soaked in alcohol to check on the remaining work. But other than that I use normal pipe cleaners primarily for the stem, not so much on the stummel.

To finish off the work on the insides of the stummel, I sanded the inside of the chamber with a piece of 220 grit sand paper wrapped around a dowel. I prefer doing that step of the process after the deep cleaning of the draught hole to avoid the black grinding dust to stick onto the tars and thus worsening the cleaning afterwards. That’s all for the stummel for now. Let’s first give the stem some attention. The outside of the stem was already washed with the black soap and a light scrubbing with the fine steel wool. Before I start to clean it any further, I decided to improve its mortise end by giving it a tapered air inlet. This will reduce turbulence during smoking so that the pipe doesn’t have the tendency to gurgle. Then the insides can be cleaned. I used two types of pipe cleaners. One hard type and a soft type. Starting with the hard one soaked in isopropyl alcohol. Some blackness came out of there, but much less than I anticipated.I then cut of the black part of the pipe cleaner, soaked the remaining cleaner in alcohol and entered it again in the stem. It now came out a lot cleaner already. Time to finish it off with the soft pipe cleaner. It came out clean! Quite amazing when compared to the state of the stummel. I guess the previous owner must have at least used some pipe cleaners once in a while. Once this process was done, it was time to address the outside of the stem. I don’t use any liquid pipe stem oxidation remover. I only use micromesh sanding pads. It will take a bit more effort, but the end result is just as good. I always use these micromesh pads with water. The first pad is the most important one. That’s the one which will remove most of the oxidation. Look at the colour of the water before and after that first pad…The following pads then follow in quick succession with clean water. After the last pad the stem almost looks as good as new. I then proceed to the buffer. I don’t have the need for a semi-professional buffing station with large cotton wheels and variable speeds. Would be nice, but a bit of an overkill for my needs. So this simple old Philips power drill will do. A small cotton wheel is fitted and white diamond buffs the stem to a bright shine.Time to restore the two BC letters on the stem. I paint the area carefully and let it fully set before proceeding. The BC ultimately emerged from the restoration quite satisfactory. After this I oil the stem with some mineral oil and let it sit a few hours before hand buffing with a microfibre rag. Back to the stummel. The washing and cleaning had left the outside quite dull. To address this, I use special micromesh pads for wood working. The first one is a 1200 grit pad. This is followed by a 2000 and finally a 3000 grit pad. The bowl begins to take a shine and the grain begins to pop into view showing all its glory. To end work on the stummel it needs a carnauba finish. For this I have fitted a felt wheel on my power drill. I have found that a felt wheel is better at transferring the wax onto the pipe. The dimensions of this beautiful Butz-Choquin Billiard are as follows: length 165 mm/6 ½ inches; height 60 mm/2 ½ inches; bowl diameter 40 mm/1 ½ inches; chamber diameter 21 mm/ ¾ of an inch. The weight of the pipe is 58 grams/2.04 ounces. I hope you enjoyed reading the story of this restoration as much as I did in the work itself and writing it down. Thank you very much for reading and I welcome and encourage your comments.

Restoring A Beautiful Older Butz-Choquin ‘A Metz’ Pipe


Blog by Paresh Deshpande

The next project that I selected to work on is a beautiful Horn shaped pipe with a horn stem and nickel ferrule. This pipe came to be in my possession as a part of 40 odd estate pipes that I had purchased from a French Seller a few years ago. Unfortunately, I had neither chronicled nor taken pictures of this lot when it reached us, as at that point in time I had no intention of passing these restored pipes in to the trust (as my Mentor Steve points out) of fellow Pipers.

This beautiful elegantly shaped pipe on my work table has stunning cross grains and swirls over the sides and back of the stummel while the front and lower surface boasts of distinct bird’s eye grains. It is stamped as “BUTZ- CHOQUIN” over “A” over “METZ”. The nickel ferrule bears three faux hallmark stampings and a rhombus with two letters. All these markings on the ferrule are severely worn out and do not contribute in any which way in establishing the provenance of this pipe.I have previously worked on Butz- Choquin pipes with A METZ stamping and from what I recollect; this stamp was used when BC pipes were made out of the French town of A Metz, i.e. prior to 1950s. To refresh my memory, I visited the write up that I had posted on rebornpipes. Here is the link to the write up (https://rebornpipes.com/2020/10/19/restoring-an-early-butz-choquin-a-metz-no-2/).

I have reproduced some of the information from the write up and also arrive at an approximate date based on this information.

I searched pipedia.org to see if it contained the details that I sought. The site has very scant information about the brand with lots of pictures, but what is available makes it an interesting read and I quote;

“The pipe, from Metz to Saint-Claude. Jean-Baptiste Choquin of Metz started out as a tobacconist. This enterprise was prosperous; he had several employees. Among those, there was a certain Gustave Butz who was its first workman and who became his son-in-law by marrying Choquin’s daughter Marie in 1858.

In 1858 Jean-Baptiste Choquin created, in collaboration with Gustave Butz, the Choquin pipe. This bent pipe with a flat-bottomed bowl was finished with an albatross-bone mouthpiece, fixed with silver rings. (The above describes the CHOQUIN A METZ pipe I had worked on earlier dating it to 1858)

In 1858, still in Metz, Gustave Butz built an establishment for the manufacture of the Choquin pipe which took the name of Butz-Choquin. In 1951, the Berrod-Regad company bought the trademark, continuing manufacture until 2002. Departing from Metz, the workshop was relocated to Saint-Claude, then also called “the world capital of the briar pipe,” under the Berrod-Regad group. The Berrod-Regad group would go on to completely rebuild the network of representatives until finally entering the export market in 1960 and has since won several prizes, as well as the Gold Cup of French good taste.

In a few years, the brand’s collection increased from ten to seventy series. 135 years after it was founded, the pipe is still well-known not only in France but throughout the world. In 2002, the Berrod family, wishing to preserve manufacture of pipes in Saint-Claude, handed over the company to Fabien Guichon, a native of the area, who will continue to develop the brand during the 21st century.”

From the above reading, this pipe is pre-1951 when Berrod- Regad purchased the trademark and relocated the workshop to Saint- Claude. The stampings of A METZ is the proof pointing towards pre-1951, the birth town of Butz- Choquin pipes. Secondly, the horn stem with the round orifice points towards the early 1920s when vulcanite was the preferred choice of material for making stems. However, it is equally true that during World War II, since rubber was an essential war material and was difficult to obtain it for making stems, horns/ bone stem came in to favor again till the end of the Great War. Thus I think that this pipe is either from the period 1939 to 1945 (higher probability) or from between the era 1910 to 1920s.

Initial Visual Inspection
The pipe currently on my work table is an excellent example of quality craftsmanship using equally high quality briar wood. It appears that the carver followed the grains in the briar to decide on the shape and not the other way round. There is a thin layer of cake in the chamber with no overflowing lava over the rim top, in fact, the rim top is clean. The stummel surface is dull and lackluster and would benefit from a nice cleaning and polishing regime. The cross grains and the bird’s eye grains will come to the fore once the stummel is polished. The inner rim edge is beveled and is smooth and even. The outer rim edge is uneven with a couple of deeper dents and dings along the edge. The tapered horn stem has bite marks on both surfaces in the bite zone. The seating of the longish wood tenon in to the mortise is loose but otherwise in good condition. The nickel band is oxidized and sans any damage. Below are pictures of the pipe before I started my restoration work. Detailed Inspection
The chamber has a very thin layer of even and crumbly cake. It seems that the chamber was reamed prior to the pipe being put away. The rim top surface is clean with no signs of lava overflow or charring. The inner edge has a slight bevel which I think is not original to the pipe. However it has been well carved and does not detract from the beauty of the pipe. The outer rim edge has a number of dents and ding most likely caused due to striking the rim edge against a hard edge. The rim top surface has circular scratches akin to sanding marks left behind after topping the surface. The chamber has very little odor and the little ghost smells that remain will be eliminated once the stummel internals are cleaned. The stummel is covered in oils that have attracted dust and grime and the stummel appears dull and lackluster. The cross grains and bird’s eye and swirls across the briar surface that can be seen through from under all the grime. The stummel surface does show a few scratches, noticeably to the front and foot of the stummel. There is a small chip off from the upper shank surface near the nickel band. The mortise shows remnants of old oils, tars and ash, but not stinking stuff!! The nickel shank band itself is oxidized and all the faux markings are well rubbed and worn out. I am especially not too worried about the worn out stampings of the band as these are just for decorative purpose only. The tapered horn stem has tooth marks on both the upper and lower surface of the stem in the bite zone. The button lips, however, are sans any damage. I was unsure, from the appearance, if the tenon was a bone or made of wood. To confirm, I ran a sharp thin blade over the surface. The movement was smooth and easy without any bite. This confirmed that the hard surface could only be bone!! The round slot and tenon end opening has old residual oils and tars. The seating of the stem in to the mortise is not flush and very loose. The Process
I started the process of refurbishing by reaming the chamber first. Using reamer head sizes from 1 to 3 of the PipeNet pipe reamer, I took the cake down to the bare briar. The amount of carbon that was dislodged from the chamber was really surprising as I had appreciated a thin layer of carbon and the quantity of carbon that was removed was anything but a thin layer. With my fabricated knife, I removed all the cake and took it down to the bare briar. I further sand the chamber wall with a folded piece of 180 grit sandpaper to smooth out the wall and remove the last bit of stubborn carbon that remained stuck to the chamber. To finish the reaming process, I wiped the chamber walls with a cotton swab dipped in alcohol to clean the last traces of residual carbon dust. I was happy to note a clean and well seasoned solid chamber. Next I cleaned out the shank internals. Early on, I realized that I could not pass a pipe cleaner trough the draught hole due to blockages in the shank airway. I used the drill bit of a Kleen Ream reamer to dislodge this block of dried oils and gunk. I further scraped out all the dried and crumbly oils and tars from the walls of the mortise with my fabricated tool. I cleaned out the mortise and shank walls with q-tips and pipe cleaners dipped in alcohol. I shall continue further cleaning of the shank and mortise while going through the other processes.I kept the stummel aside and cleaned the internals of the stem with a thin shank brush and anti-oil dish washing soap. This ensures a thorough cleaning of the stem airway while saving me number of pipe cleaners, elbow grease and most importantly, time. With the stem internals cleaned, I scrubbed the external surface with the dish soap and Scotch Brit pad. I was particularly careful while cleaning the tenon surface as the old residual oils and tars were deeply embedded in to the surface. I rinsed the stem under warm running water and wiped it with a paper napkin to dry it.I addressed the tooth chatter in the bite zone by sanding the bite zone with a folded piece of 150 grit sand paper followed by 220 grit sand paper. I could have filled the tooth indentation with clear superglue, sanded and polished the stem, but decided against this since the stem was thick and the tooth chatter was superficial enough to be addressed just by sanding it out.Next, I cleaned the exterior of the stummel. I used a hard bristled tooth brush, Scotch Brit pad and Murphy’s Oil soap to scrub the stummel. After the scrub with oil soap, I washed the stummel, stem and shank extension under running warm water with anti oil dish washing detergent till the surface was clean and dried it using paper towels and soft cotton cloth. I simultaneously cleaned the internals of the shank with the detergent and hard bristled shank brush and set the stummel aside to dry out naturally. The stummel surface has cleaned up nicely with the beautiful grain patterns on full display. Following the external clean up of the stummel, I spot filled the small chipped off surface from the shank’s upper surface near the nickel band and also the dings that were seen over the outer edge of the rim with CA superglue. I set the stummel aside for the glue to cure.While the stummel repair was curing, I dry sand the horn stem with 220, 320, 400 and 600 grit sandpapers followed by wet sanding with 800 and 1000 grit sandpapers. I applied a small quantity of EVO to the stem and set it aside to be absorbed by surface.With the stem set aside, using a flat head needle file, I sand the repairs over the upper shank surface and the outer rim edge to achieve a rough match with the rest of the stummel surface. I further blend in the repairs by sanding the entire stummel surface with 220 grit sandpaper.To bring a nice shine and eliminate the scratch marks left behind by the abrasive sandpaper, I wet sand the entire stummel with 1500 to 12000 grit micromesh pads, wiping frequently with a moist cloth to check the progress. I rubbed a small quantity of “Before and After Restoration Balm” deep in to the briar with my finger tips and let it rest for a few minutes. The balm almost immediately works its magic and the briar now has a nice vibrant appearance with the beautiful grain patterns displayed in their complete splendor. I further buffed it with a horse hair brush. The contrast of the dark browns of the grains with the natural patina of the rest of the stummel adds an interesting dimension to the appearance of the stummel. I completed the mundane but equally important task of polishing the nickel band. I used a local product that is available only in India to polish the band. The liquid polish was applied to the band and wiped it out after a few seconds. The polish completely removed the oxidation and gave a nice shine to the band by polishing it with a jeweler’s cloth.This brings me to the most important process indicating the completion of this restoration which is imparting a high gloss finish to the pipe by polishing. I mounted a cotton cloth buffing wheel onto my hand held rotary tool and polished the stummel and stem with Blue Diamond compound. This compound helps to remove the minor scratch marks that remain from the sanding. Next, I mounted another cotton buffing wheel that I have earmarked for carnauba wax and applied several coats of the wax. I mounted a clean cotton cloth buffing wheel and gave the entire pipe a once over buff. I finished the restoration by giving the entire pipe a rigorous hand buffing using a microfiber cloth to raise the shine further. The finished pipe with the aged patina to the briar looks amazingly beautiful. P.S.: Astute readers must have noticed that there were two issues that I had brought out during my detailed visual inspection, first was the loose seating of the stem in to the shank and the second was that this seating was not flush, but does not find a mention in the entire process of repairs/ restoration. Well, truth be told, I had not addressed these issues specifically. However, somewhere along the way these issues resolved themselves.

Let me explain. The reason for loose seating of the stem in to the mortise was primarily due to drying up of the briar wood and the bone tenon from years of disuse. When the internal and external surfaces of the stummel were cleaned and rinsed using warm water, the briar absorbed some moisture causing the briar to swell and ultimately resulting in a snug fit of the stem in to the mortise.

The reason for the stem face not seating flush with the shank face was the old oils and gunk that had accumulated in the mortise and along the shank walls. Once the mortise and shank internals were thoroughly cleaned and the shank briar wood was adequately moistened, the seating was flush and snug.

This pipe had caught the fancy of a fellow piper here in India and has now reached him. I wish him many happy and blissful smokes in the years ahead.

I wish to thank all esteemed readers for your time in reading through the write up and being a part of this project. Looking forward to your comments…

New Life for a Butz-Choquin Regate 1282 Zulu


Blog by Steve Laug

The next pipe on the table is one that came to us from Australia. It went to Jeff first then was shipped to me. It is a well traveled pipe that was purchased in 2020 from the estate of a fellow pipeman in Australia, shipped to the US and then to Canada. The shape is very nice, with the forward canted bowl and the quarter bent stem. It is a great shape with a taper vulcanite stem. The finish was dirty with grime ground into the finish around the bowl sides. There was a thick cake in the bowl and lava overflow on the top of the rim – heavier on the backside of the rim top but nonetheless on the entire rim top. There was some burn damage on the right front inner beveled edge of the bowl. The pipe is stamped on the left side of the shank and reads Butz-Choquin at an angle [over] Regate. On the right side it reads St. Claude – France [over] the shape number 1282. The stem was lightly oxidized and there were tooth marks and chatter on both sides near the button. The taper stem also has a BC stamped on the left side. Jeff took some photos of the pipe before he started the clean up work. He took photos of the rim top and bowl to give a clear picture of the thickness of the cake and well as the nicks, lava and darkening on the rim top. The inner edges showed some burn damage on the inner bevel of the bowl. The outer edges of the bowl appeared to be in great condition. He also took photos of the top and underside of the stem to show the light oxidation and the chatter and tooth marks. Jeff took a photo the sides and heel of the bowl to give a picture of the beautiful grain around the bowl and shank. There were also shiny spots of varnish around the bowl and shank sides. The stamping on the sides of the shank is clear and readable and read as noted above. There is also BC stamp on the left side of the stem. I turned to Pipephil’s site and looked for information on the Butz – Choquin Regate I was working on (http://pipephil.eu/logos/en/logo-butzchoquin.html). As always there was a good, brief description of the history of the brand.

I turned to Pipedia (https://pipedia.org/wiki/Butz-Choquin) to see what I could find on the brand that the Regate line there. I found a catalogue page from Doug Valitchka on the Regate that listed the pipe line and a description (https://pipedia.org/wiki/File:BC10.jpg). I have captured that image below. The description under the Regate heading reads –

Regate (and the description below is in both French and English)

Les veines classique qui rallie les suffrages de la plupart des fumeurs

A great classic which meets with the approval of the majority of smokers.

I have also included another picture from Doug Valitchka that shows the shape of the pipe that I am working on (https://pipedia.org/wiki/File:BC06.jpg). It is the second shape that is shown on the page – Shape 1282. The shape is called a Genoises. Now it was time to work on the pipe. Jeff had cleaned up the pipe following his usual procedures. He reamed the pipe with a PipNet pipe reamer and cleaned up the remnants with a Savinelli Fitsall Pipe Knife. He cleaned out the inside of the shank and the airway in the stem with 99% isopropyl alcohol, cotton swabs and pipe cleaners. He scrubbed the exterior of the bowl with undiluted Murphy’s Oil Soap and a tooth brush. He rinsed it under running warm water to remove the soap and grime. He soaked the stem in Before & After Deoxidizer and rinsed it off with warm water. I took photos of the pipe once I received it.  The rim top cleaned up really well. But the cleaning revealed some serious burn damage on the rim top and front inner edge toward the right side. The stem surface looked good and the light tooth marks and chatter would be easy to address. The stamping on the sides of the shank is readable and reads as noted above.I removed the stem and took a photo of the pipe to give a sense of the shape and the grain on the bowl and shank. It was a great looking shape and would be a beautiful pipe when I was finished. I decided to start my work on the pipe by wiping the bowl down with acetone on a cotton pad to remove the heavy stain around parts of the bowl sides. I wanted really be able to see the grain on the bowl. I dealt with the damage to the rim top by topping it on a topping board with 220 grit sandpaper. I cleaned up the beveled inner edge of the rim with 220 grit sandpaper to remove as much of the burn damage as possible. I polished the bowl with micromesh sanding pads – 1500-12000 grit pads. I wiped it down with a damp cloth after each sanding pad.  It was beginning to look good to my eyes. I stained the inner edge and rim top with an Oak Stain Pen to match the rest of the surrounding bowl. It helps to blend in the burned area some more. The rim top and edges definitely look better than when I started.I rubbed the bowl and shank down with Before & After Restoration Balm. I worked it into the surface of the bowl sides and shank with my fingertips to clean, enliven and protect the briar. I let the balm sit for ten minutes then buffed the bowl with a cotton cloth to raise the shine. I set the bowl aside and turned my attention to the stem. I “painted” both sides of the stem with the flame of a lighter to lift the tooth marks. It did a great job and left only one deep mark on the underside and some lighter tooth marks on the topside along the button. I filled them in with clear CA glue and once it cured I used a small file to sharpen the edge of the button and smooth out the repair. I sanded the stem with 220 grit sandpaper to smooth out the repairs. I started polishing it with 400 grit sandpaper.  I used some white acrylic fingernail polish to touch up the BC stamp on the left side of the stem. I painted it on with the brush and once it dried scraped it off and sanded it with a 1500 grit micromesh sanding pad.I polished the stem with micromesh sanding pads – 1500-12000 grit pads. I wiped it down with Obsidian Oil after each sanding pad. I used Before & After Pipe Polish – both Fine and Extra Fine to further polish the stem. This Butz-Choquin Regate 1282 Zulu is a great looking pipe now that it has been restored. The combination of various brown stains around the bowl is quite beautiful and highlights grain very well. The finish works well with the polished curved vulcanite taper stem. I put the stem back on the bowl and carefully buffed the pipe with Blue Diamond on the buffing wheel using a light touch on the briar. I gave the bowl and the stem multiple coats of carnauba wax on the buffing wheel and followed that by buffing the entire pipe with a clean buffing pad. I hand buffed the pipe with a microfiber cloth to deepen the shine. The finished Butz-Choquin Regate Zulu sits nicely in the hand and feels great. Give the finished pipe a look in the photos below. The dimensions of the pipe are Length: 6 inches, Height: 1 ¾ inches, Outside diameter of the bowl: 1 ¼ inches, Chamber diameter: ¾ inch. The weight of the pipe is 35 grams/1.23 ounces. I will be putting it on the French Pipemakers section of the rebornpipes store shortly. If you are interested in adding this pipe to your collection send me a message or an email. Thanks for reading this blog and my reflections on the pipe while I worked on it. There are many more to come! 

Resurrecting a Tired Warrior – a Butz-Choquin Casino 1575 Spigot Billiard


Blog by Steve Laug

The next pipe on the table is a Butz-Choquin Spigot style pipe with a polished nickel ferrule and a polished nickel stem end. The pipe had classic shape and at first glance looked very good. We purchased this from an online auction late in 2020 in Elgin, South Carolina, USA. It had a rich finish somewhere underneath all of the debris, grime and damage to rim edges and sides. There was a thick cake in bowl and lava on the rim top. The rim top was uneven with dips and burns on the top. The front of the bowl had significant burn damage from the rim top down into the surface of the briar on the front. The left side had the same issue and had been worn away over time so that it was canted inward making that part of the bowl thinner on the side. The pipe is stamped on the left side of the shank Butz-Choquin at an angle [over] Casino and on the right side it was stamped St Claude in an arch over France [over] the shape number 1575. The nickel ferrule and stem end were oxidized and scratched. The stem was oxidized but had deep tooth marks on the top and underside near the button. The deepest marks were on the underside with one that was almost a bite through. The BC logo on the topside was faded and needed to be touched up. Jeff took photos of the pipe before he started his clean up work. I like to have an idea of how the pipe was smoked before we got it and what the bowl and rim top looked like. Jeff always takes some photos of the bowl and rim from various angles to show what it looked like. This bowl and rim top were in rough condition. The stem was a real mess with deep tooth marks and damage on both sides. He took a photo of the nickel ferrule and stem end to give a picture of their condition when we received the pipe. It definitely needs work. He took photos of the sides and heel of the bowl to give a sense of the grain on the pipe. You can also see the damage around the top front and sides in the photos. Jeff captured the burn damage on the front of the bowl in the next photo and some of the nicks and gouges in the sides of the bowl in the second photo. There is work to do on this one!The next photos show the stamping on the left and right side of the shank. It is clear and readable as noted above. Jeff also captured the BC stamp on the topside of the stem. I turned to Pipephil.eu and read through the listing on the brand. It is always a quick reminder to me of the basics of a brand. The Casino line was not listed there. I include the short summary of the history below.

The origin of the brand reaches back to 1858 when Jean-Baptiste Choquin in collaboration with his son-in-law Gustave Butz created their first pipe in Metz (France). Since 1951 Butz-Choquin  is a brand of the Berrod-Regad group (Saint-Claude, France).

Jean Paul Berrod managed the company from 1969 to 2002 when he retired and sold the corporate to Mr Fabien Gichon. Denis Blanc, already owner of EWA, took over the S.A. Berrod-Regad in 2006.

I could not find anything specific in Pipedia about the Casino line, but a simple search on the internet will show many different shapes available in the Casino line from Butz-Choquin.   Now it was time to work on the pipe.

Jeff had done a great cleanup on the pipe. He reamed the bowl with a PipNet pipe reamer and followed up with a Savinelli Fitsall pipe knife to remove the cake. He scrubbed out the mortise and the airway in the shank and the stem with alcohol, cotton swabs and pipe cleaners. He scrubbed the bowl exterior with a tooth brush and Murphy’s Oil Soap to remove the grime on the finish of the bowl and the lava from the rim top. He rinsed it under running water. One of the benefits of this scrub is that it also tends to lift some of the scratches and nicks in the surface of the briar. He dried it off with a soft cloth. He cleaned the internals and externals of the stem with alcohol, pipe cleaners and cotton swabs. He soaked the stem in Briarville’s Pipe Stem Deoxidizer and rinsed it off with warm water and cleaned out the airway in the stem with alcohol. When I received it the pipe looked very good.  I took a photo of the rim top and stem to show the condition. The rim top and the inner edge of the bowl were in rough shape. The outer edge had a lot of burn damage on the front and the left side. The rim top and inner edge also has significant burn damage and was not flat. The stem was vulcanite and there were some deep tooth marks and chatter on both sides ahead of the button. The stamping on the pipe is clear and readable as noted above. The BC logo on the stem is deep and needs to be repainted with white (as seen in the photo of the top of the stem above).I started my work on this pipe by dealing with the damage to the outer edge of the bowl and rim top. I topped the bowl first on a topping board with 220 grit sandpaper. I flattened out the rim top and made the top of the rim consistently flat. I removed much of the burn damage to the bowl top. I worked on the damaged areas on the left side and front of the bowl by building them up with briar dust and clear super glue. I built up the left side of the inner edge with super glue and briar dust as well. There the burn damage was shallow but it made the bowl out of round. I topped it once again to smooth out the repair on the rim top. I used a piece of dowel wrapped in sandpaper to sand the inner edge of the rim and smooth out the repair in that area. It worked well.I smoothed out the repairs on the left and front of the bowl with 220 grit sandpaper and blended them into the surrounding briar.I gave the inner edge of the bowl a slight bevel with 220 grit sandpaper to help reshape it and bring it back to round. The rim top and edges looked good at this point in the process.I restained the pipe with a light brown aniline stain. I applied it with a dauber and flamed it with a Bic lighter to set it in the grain. I repeated the process until I was happy with the coverage.Once the stain had dried I wiped the bowl down with 99% isopropyl alcohol to make it a bit more transparent. I find that doing a wipe down at this point evens the finish before I start polishing it with micromesh.I polished the briar with 1200-1500 micromesh sanding pads and wiping it down with damp cloth after each sanding pad. As I worked through the cycle of pads the shine developed with each change of pad. The damage on the rim sides looks better. I left some of the nicks and sandpits as they really are a part of the pipe’s story. I rubbed the bowl and shank down with Before & After Restoration Balm. I worked it into the surface of the bowl sides and shank with my fingertips to clean, enliven and protect the briar. I let the balm sit for 10 minutes, then buffed with a cotton cloth to raise the shine. The Balm did its magic and the grain stood out on the briar. I set the bowl aside and turned my attention to the stem. I decided to address the tooth marks on the stem. They were ragged, with sharp edges and heat did not lift them at all. I filled them in with clear super glue. I let the repairs cure and once they hardened I flattened and shaped them with a small file. I sanded them with 220 grit sandpaper to blend them into the surface of the stem. I started the polishing of the stem with 400 grit wet dry sandpaper. I touched up the BC stamp on the left side of the stem with white acrylic nail polish. I worked it into the stamp with a tooth pick and then sanded off the excess once it had dried with a 1500 micromesh sanding pad.I polished it with micromesh sanding pads – 1500-12000 grit pads. I wiped it down with Obsidian Oil after each sanding pad. I used Before & After Pipe Polish – both Fine and Extra Fine to further polish the stem. The photos below show the polished stem. This Butz-Choquin Casino 1575 Spigot Billiard with a polished nickel ferrule and stem cap on a vulcanite stem is a great looking pipe now that it has been restored. It was a lot of work and I took a decision to leave some of the journey of the pipe in the finish so it is far from flawless but it is a beauty. The rich browns of the stain made the grain come alive with the polishing and waxing. I put the stem back on the bowl and carefully buffed the pipe with Blue Diamond on the buffing wheel using a light touch on the briar. I gave the bowl and the stem multiple coats of carnauba wax on the buffing wheel and followed that by buffing the entire pipe with a clean buffing pad. I hand buffed the pipe with a microfiber cloth to deepen the shine. The finished BC Casino 1575 Spigot really is a beauty and fits nicely in the hand and looks very good. Give the finished pipe a look in the photos below. The dimensions of the pipe are Length: 6 ¼ inches, Height: 1 ¾ inches, Outside diameter of the bowl: 1 ¼ inches, Chamber diameter: ¾ of an inch. The weight of the pipe is 1.87oz./53grams. This beauty will be going off to its new trustee in Michigan along with several other nice pipes. Thanks for reading this blog and my reflections on the pipe while I worked on it. There are many more to come!

A Butz-Choquin Optimal 122 sitter that can sit flat on the heel or on the bowl front


Blog by Steve Laug

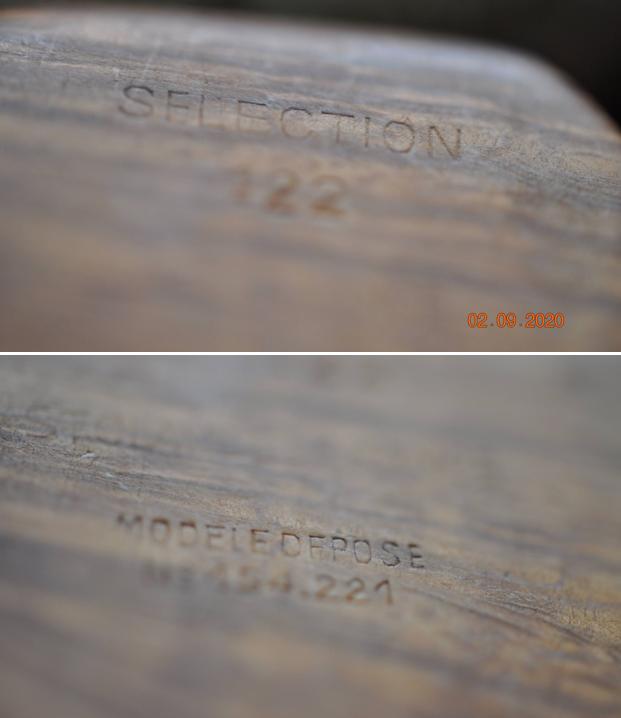
The next pipe that I chose to work on is an interesting looking short pipe that Jeff and I picked up this pipe in 2019 from an antique mall in Airdrie, Alberta. We finally got around to cleaning it up a year later and restoring it two years later. That is what happens when you have a lot of pipes to work on around you every day. It has a flat bottom making it a sitter. It also was flattened on the front of the bowl which allows the smoker to stand it on the front as well. The pipe was stamped on the flat front of the bowl and reads Optimal [over] Butz-Choquin [over] des.J. Colombo. On the heel of the bowl it is stamped: Selection [over] 122 [over] Made in France [over] Modele Depose [over] No.154221. The finish was dirty and tired looking but had some great grain poking through the grime. The bowl had a thick cake inside and a lava overflow on the rim edges and top. The vulcanite shank extension was oxidized and the glue anchoring it to the shank end had dried and it come loose. It had a white bar inlay going horizontally across the top.  The short, stubby vulcanite saddle stem was oxidized and had tooth marks and chatter on both sides near the button. Jeff took photos of the pipe before his cleanup. He took photos of the rim top to show the condition of the top and edges of the bowl. The thick cake in the bowl, the lava on the rim top and the wear on the edges are visible. The stem had light tooth marks and chatter on both sides ahead of the button. Jeff took photos of the shank extension removed from the shank  and also the stem removed from the extension.He took photos of the sides and heel of the bowl to show the grain around the bowl and the condition of the pipe. It is a very unique looking pipe. He took photos of the stamping on the front and heel of the bowl. It is clear and readable as noted above. I turned first to Pipephil’s site to have a look at what was listed there and did a screen capture of the section (http://www.pipephil.eu/logos/en/logo-butzchoquin.html). In the side bar of the listing on the Optimal I found that pipes that were stamped like the one I was working on with des. J. Colomo dated from the 1960s and were designed by Joe Colombo. There was a photo of the designer on the site that gave an good look at the designer. It was a nice plus to be able to connect the stamping to the man who had designed the pipe.

I turned to Pipedia (https://pipedia.org/wiki/Butz-Choquin) to see what I could learn. I found a great read on the history of the brand but nothing on the specific Optimal brand.

I knew that I was dealing with a pipe that was designed by Joe Colombo and was made in the 1960s. He had designed some unique looking pipes and I was fortunate to be working on this unusual sitter. Knowing that I had a new appreciation for the brand and it was time to work on the pipe itself.

As usual Jeff had done a thorough cleanup on the pipe. He reamed the bowl with a PipNet pipe reamer and followed up with a Savinelli Fitsall pipe knife to remove the cake. He scrubbed out the mortise and the airway in the shank and the stem with alcohol, cotton swabs and pipe cleaners. He scrubbed the exterior of the bowl, rim, shank and stem with a tooth brush and Murphy’s Oil Soap to remove the oils and tars on the rim and the grime on the finish of the bowl. He rinsed it under running water. One of the benefits of this scrub is that it also tends to lift some of the scratches and nicks in the surface of the briar. He dried it off with a soft cloth. He cleaned the internals and externals of the stem with alcohol, pipe cleaners and cotton swabs. He soaked the stem in Briarville’s Pipe Stem Deoxidizer and rinsed it off with warm water and cleaned out the airway in the stem with alcohol. When I received it the pipe looked very good.  I took a photo of the rim top and stem to show the condition. The rim top and the inner edge of the bowl were in good condition. There were some nicks on the inner edge of the bowl and some nicks in the rim top but otherwise it looked good. The shank extension was loose and would need to be reglued. The stem was vulcanite and there were some tooth marks and chatter on both sides ahead of the button.The stamping on the front of the bowl and the heel are clear and readable as noted above.I removed the stem from the shank and took a photo of the pipe to give a sense of the whole. It is a unique looking Canadian and I am looking forward to seeing what I can do with it.I started working on the pipe by reattaching the shank extension to the shank. I painted the shank extension tenon with white all purpose glue and aligned the part in the shank. I pressed it home in the shank end and wiped off the excess glue that squeezed out. I set it aside for the glue to cure.During their separation the shank somehow was slightly larger in diameter than the extension. It was not a huge difference but it was bothersome to me. I sanded shank and the extension to remove the excess on the shank itself. I used a folded piece of 220 to smooth out the transition. It took a bit of work but it was finally suitable. I worked over the damage on the rim top and on the inside of the rim edge with a folded piece of 220 grit sandpaper. With a bit of effort the rim top and edge were in good order.I sanded the bowl and vulcanite shank extension with micromesh sanding pads, dry sanding with 1500-12000 grit sanding pads and wiping it down with damp cloth after each sanding pad. As I worked through the cycle of pads the shine developed with each change of pad. The pipe looks very good.I rubbed the bowl and shank down with Before & After Restoration Balm. I worked it into the surface of the bowl sides and shank with my fingertips to clean, enliven and protect the briar. I rubbed it into the vulcanite shank extension to we what it would do. I let the balm sit for 10 minutes, then buffed with a cotton cloth to raise the shine. The Balm did its magic and the grain stood out on the briar and the vulcanite shank extension took on a rich shine. I set the bowl aside and turned my attention to the stem. I heated the stem with the flame of a lighter until the vulcanite softened. Once it was soft I bent it so that it was like the bend in the one in the photo from Pipephil’s site.I sanded the stem surface with 220 grit sandpaper blend in the tooth marks and scratches into the surrounding surface of the stem and started polishing the stem with 400 grit wet dry sandpaper. I polished the stem with micromesh sanding pads – 1500-12000 grit pads. I wiped it down with Obsidian Oil after each sanding pad. I used Before & After Pipe Polish – both Fine and Extra Fine to further polish the stem. The photos below show the polished stem. This smooth finished Butz-Choquin Optimal Selection 122 Sitter designed by Joe Columbo with a flat heel and flat bowl front on which it could be laid or stood on a flat top. The rich medium brown finish looked amazing and with the polishing it really came alive with buffing and waxing. I put the stem back in the shank extension on the bowl and carefully buffed the pipe with Blue Diamond on the buffing wheel using a light touch on the briar. I gave the bowl and the stem multiple coats of carnauba wax on the buffing wheel. I buffed the pipe with a clean buffing pad to raise the shine. I hand buffed the pipe with a microfiber cloth to deepen the shine. The finished Butz-Choquin Optimal Sitter is a beauty and feels great in the hand and looks very good. Give the finished pipe a look in the photos below. The dimensions of the pipe are Length: 5 inches, Height: 1 ¾ inches, Outside diameter of the bowl: 1 ½ inches, Chamber diameter: ¾ of an inch.The weight of the pipe is 2.12 ounces/60 grams. This pipe will soon be on the French Pipe Makers section of the rebornpipes store if you are interested in adding it to your rack. Thanks for reading this blog and my reflections on the pipe while I worked on it. There are many more to come!

Restoring a Butz-Choquin C’est bon 1689 Apple with an amber acrylic stem


Blog by Steve Laug

The next pipe on the table – a Butz-Choquin Apple with a smooth finish purchased from Mandy Valsinger about a year ago when she was closing her husband’s estate. It came to us from Australia. The shape of the bowl is an apple with an acrylic stem. The pipe was in overall good condition but was very tired and dirty. It is stamped on the left side of the shank and reads Butz-Choquin at an angle [over] C’est bon. On the right side of the shank it is stamped St. Claude France [over] the number 1689. The finish was dull and lifeless and a little dirty from sitting around. There was a thick cake in the bowl and an overflow of lava on the rim top toward the back. There were scratches around the sides of the bowl where it appeared that the pipe had been dropped. The amber acrylic stem had a deep tooth marks on both sides with a bit through on the underside ahead of the button. The BC logo inset in black acrylic and set on the left side of the taper stem. Jeff took the following photos before he started his cleanup work on the pipe. Jeff took close-up photos of the bowl and rim top from various angles to capture the condition of the bowl and rim top edges. You can see the cake in the bowl and the lava on the inner of the rim and the top at the back of the bowl. The photos of the stem show the general condition of the stem. He took the stem out of the shank and revealed a Delrin tenon with a lot of tars and oils on on the end of the tenon.He took photos of the sides and heel of the bowl to show condition of the briar. You can see the swirls of grain in the smooth bowl – both birdseye and cross grain around the sides and shank. There are scratches on the right side of the bowl. The stamping is very clear on both sides of the pipe. The third photo shows the BC inlay on the left side of the taper stem.I turned to Pipedia (https://pipedia.org/wiki/Butz-Choquin) and found a great read of the history of the brand. I did find a shape chart however, that had the 1689 shape. I have included that below.Now it was time to look at it up close and personal. Jeff had great job in cleaning up this BC C’est bon Apple. He had reamed the bowl with a PipNet Pipe Reamer and cleaned up the remnants with a Savinelli Fitsall Pipe Knife. He took the cake back to bare briar so we could check the walls for damage and also see the condition of the inner edge of the rim. He scrubbed the exterior of the bowl with Murphy’s Oil Soap and a tooth brush to remove the grime on the bowl and rim and was able to remove much of the grime and dirt. He cleaned out the interior of the bowl and shank with pipe cleaners, cotton swabs and alcohol until they came out clean. The rim top looked much better. The bowl looked very good. He cleaned the stem with Soft Scrub to remove the grime on the interior and the exterior and rinsed it off with warm water to remove the product. He cleaned out the airway with alcohol, cotton swabs and pipe cleaners. I took some photos of the pipe as I saw it. To show how clean the rim top and stem really was I took a close-up photo of the rim and stem. The bowl was clean and cake free. The rim top is quite clean the inner and outer edges were darkened. The surface and the button edge of the stem had tooth marks and chatter on the top near the button on both sides. What I thought was a hole all the way through the stem on the underside turned out not to be that deep.I took some photos of the stamping on the sides of the shank. It is clear and readable as noted above.I removed the stem from the shank and took a photo of the pipe from the left side to give a clear picture of the beauty of this particular pipe.I turned to Pipephil (http://pipephil.eu/logos/en/logo-butzchoquin.html) and found the C’est bon pipe shown below. I did a screen capture of the of the listing and have included it below.I started working on the pipe by dealing with the damage and darkening to the rim top and inner edge of the bowl. I sanded it with 220 grit sandpaper to remove the damage.I used to some clear CA glue to fill in the deep scratches on the right side of the bowl. Once the repairs cured I sanded them smooth with a folded piece of 220 grit sandpaper. I started polishing the areas of the repair with 400 grit wet dry sandpaper. I stained the sanded area with a Maple Stain pen. I polished the briar with micromesh sanding pads – dry sanding with 1500-12000 grit pads. I wiped the bowl down after each sanding pad with a damp cloth to remove the dust and debris. The began to take on a deep shine. I worked some Before & After Restoration Balm into the surface of the bowl with my finger tips. The product is incredible and the way it brings the grain to the fore is unique. It works to clean, protect and invigorate the wood. I greased a pipe cleaner with Vaseline and inserted it in the button. I did not see the hole going through the stem but I put a pipe cleaner in just in case there was. I then built up the tooth marks and chatter on both sides with clear CA glue. I used a small file to reshape the button edge on both side and smooth out the repairs. I then sanded the repaired areas with 220 grit sandpaper until they were smooth and blended it into the surrounding acrylic. I started the polishing with a 400 grit wet dry sandpaper. I polished the stem with micromesh sanding pads – wet sanding it 1500-12000 pads. I wiped it down with a damp cloth to remove the dust and polishing debris. I polished it with Before  After Pipe Polish – both Fine and Extra Fine. I gave it a final coat of Obsidian Oil and set it aside to dry. I am really happy with the way that this Butz-Choquin C’est bon Apple with an Amber Acrylic Stem turned out. It really is a great looking pipe with character. The rich brown stains gave the grain a sense of depth with the polishing and waxing. The grain really popped. I put the stem back on the bowl and carefully buffed the pipe with Blue Diamond on the buffing wheel using a light touch. I gave the bowl and the acrylic stem multiple coats of carnauba wax on the buffing wheel. I buffed the pipe with a clean buffing pad to raise the shine. I hand buffed the pipe with a microfiber cloth to deepen the shine. The finished Butz-Choquin C’est bon Apple really is a beauty and feels great in the hand and looks very good. Give the finished pipe a look in the photos below. The dimensions of the pipe are Length: 5 ¾ inches, Height: 1 ¾ inches, Outside diameter of the bowl: 1 inches, Chamber diameter: ¾ of an inch. The weight of the pipe is 44 grams/1.55 oz. The pipe will be going on the rebornpipes store soon. It will be in the section on French Pipe Makers if you would like to add it to your collection.Thanks for reading this blog and my reflections on the pipe while I worked on it. It was a fun one to work on!

What an interesting Butz-Choquin Roquebrune 1710 Cherrywood


Blog by Steve Laug

So when this Butz-Choquin Cherrywood with a mixed finish carved and smooth showed up in an online auction Jeff was watching we went for it and picked it up. This pipe was purchased from in 2018 from a seller in Barbourville, Kentucky, USA. The shape of the bowl is a cherrywood sitter with a vulcanite shank extension. The bowl has carved spots that almost look like leaves around the bowl and shank. The pipe was in overall good condition. It is stamped on the left side of the shank and reads Butz-Choquin at an angle [over] Roquebrune. On the right side of the shank it is stamped St. Claude France [over] the number 1710. The mixed finish was dull and lifeless and a little dirty from sitting around. There was dust and debris in the carvings. There was a thick cake in the bowl and an overflow of lava on the rim top toward the back. The vulcanite shank extension was lightly oxidized along with the stem. The stem had a scratch on the top side mid stem and some tooth chatter on both sides near the stem. Jeff took the previous and the following photos before he started his cleanup work on the pipe. Jeff took close-up photos of the bowl and rim top from various angles to capture the condition of the bowl and rim top edges. You can see the cake in the bowl and the lava on the inner of the rim and the top at the back of the bowl. The photos of the stem show the general condition of the stem and the vulcanite shank extension. He took photos of the sides and heel of the bowl to show condition of the briar. You can see the swirls of grain in the smooth bowl side and the carvings on the front, sides and shank. The stamping is very clear on both sides of the pipe. Interestingly the stamping on the left side of the shank is over the carving there so it is blurred in spots. The third photo shows the stamping on the side of the shank extension. I turned to Pipedia to see if I could learn anything about the Roquebrune line of carved finishes but there was nothing listed. I also turned to Pipedia (https://pipedia.org/wiki/Butz-Choquin) and found a great read of the history of the brand. There was nothing there on the line either. I did find a shape chart however, that had the 1710 shape. I have included that below.Now it was time to look at it up close and personal. Jeff had great job in cleaning up this Origine. He had reamed the bowl with a PipNet Pipe Reamer and cleaned up the remnants with a Savinelli Fitsall Pipe Knife. He took the cake back to bare briar so we could check the walls for damage and also see the condition of the inner edge of the rim. He scrubbed the exterior of the bowl with Murphy’s Oil Soap and a tooth brush to remove the grime on the bowl and rim and was able to remove much of the grime and dirt. He cleaned out the interior of the bowl and shank with pipe cleaners, cotton swabs and alcohol until they came out clean. The rim top looked much better. The bowl and shank extension looked very good. He cleaned the stem with Soft Scrub to remove the grime on the exterior. He soaked it in Briarville’s Stem Deoxidizer and rinsed it off with warm water to remove the product. He cleaned out the airway with alcohol, cotton swabs and pipe cleaners. I took some photos of the pipe as I saw it. To show how clean the rim top and stem really was I took a close-up photo of the rim and stem. The bowl was clean and cake free. The rim top is quite clean the inner and outer edges were clean with just some light scratching. The vulcanite shank extension looks very good. The surface and the button edge of the stem look really good. There are no issues that are there to address other than the scratch on the stem top.I took some photos of the stamping on the sides of the shank. It is clear and readable as noted above.I remove the stem from the shank and took a photo of the pipe from the left side to give a clear picture of the beauty of this particular pipe. I polished the briar with micromesh sanding pads – dry sanding with 1500-12000 grit pads. I wiped the bowl down after each sanding pad with a damp cloth to remove the dust and debris. The began to take on a deep shine. I worked some Before & After Restoration Balm into the surface of the briar of the bowl with my finger tips and a horse hair shoe brush to work it into the grooves of the carving. The product is incredible and the way it brings the grain to the fore is unique. It works to clean, protect and invigorate the wood. I touched up the BC stamp on the vulcanite extension with some white acrylic nail polish. I rubbed into the stamp with a tooth pick to get it into the grooves. I polished off the excess with a 1500 grit micromesh sanding pad. I took a photo of the reworked stamp below. It is a beauty. I polished the stem with micromesh sanding pads – wet sanding it 1500-12000 pads. I wiped it down with some Obsidian Oil each pad to remove the dust and polishing debris. I polished it with Before  After Pipe Polish – both Fine and Extra Fine. I gave it a final coat of Obsidian Oil and set it aside to dry. I am really happy with the way that this Butz-Choquin Roquebrune 1710 Cherrywood turned out. It really is a great looking pipe with character. The vulcanite shank extension is a unique feature of this pipe gives the stem the look of a military bit. The finish and carvings really came alive with the buffing. The rich brown stains and black carvings gave the grain a sense of depth with the polishing and waxing. The grain really popped. I put the stem back on the bowl and carefully buffed the pipe with Blue Diamond on the buffing wheel using a light touch. I gave the bowl and the stem multiple coats of carnauba wax on the buffing wheel. I buffed the pipe with a clean buffing pad to raise the shine. I hand buffed the pipe with a microfiber cloth to deepen the shine. The finished Butz-Choquin Roquebrune Cherrywood really is a beauty and feels great in the hand and looks very good. Give the finished pipe a look in the photos below. The dimensions of the pipe are Length: 5 ½ inches, Height: 1 ¾ inches, Outside diameter of the bowl: 1 ½ inches, Chamber diameter: ¾ of an inch. The weight of the pipe is 40 grams/1.41 oz. The pipe will be going on the rebornpipes store soon. It will be in the section on French Pipe Makers if you would like to add it to your collection.Thanks for reading this blog and my reflections on the pipe while I worked on it. It was a fun one to work on!