Monthly Archives: February 2024

Clearing Up Some Birks Confusion


Blog by Kenneth Lieblich

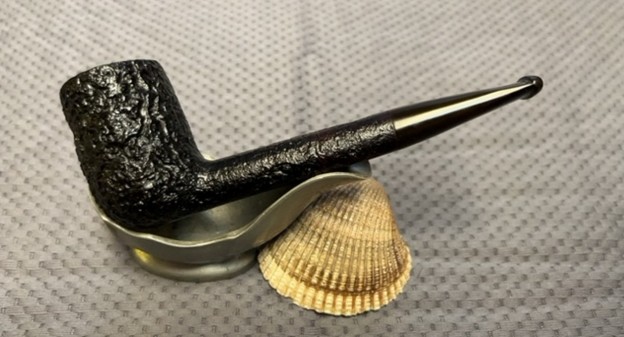
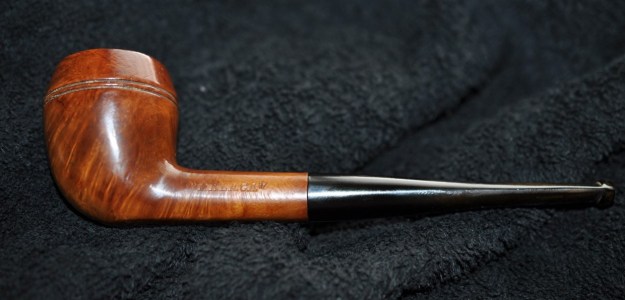
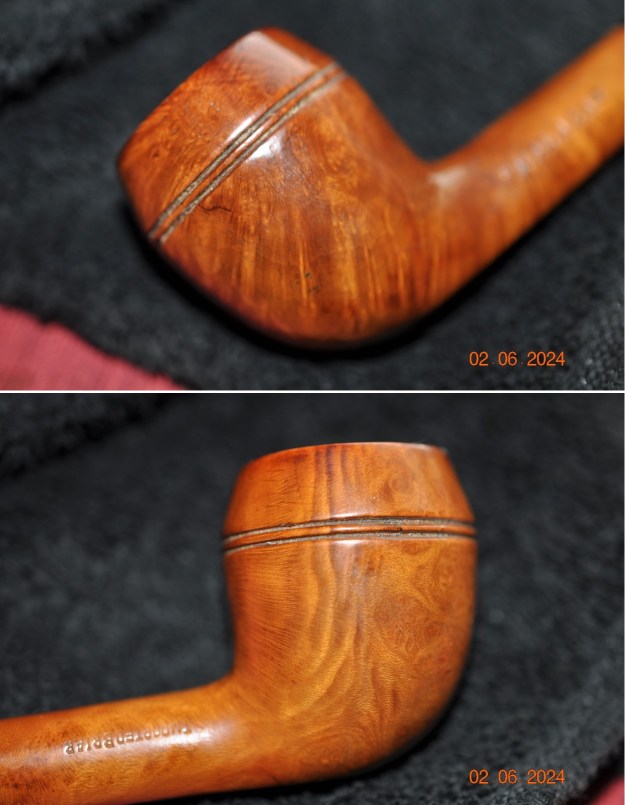
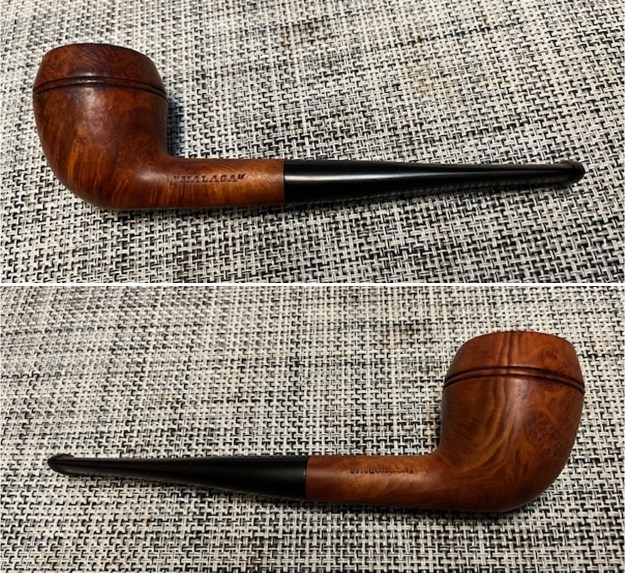
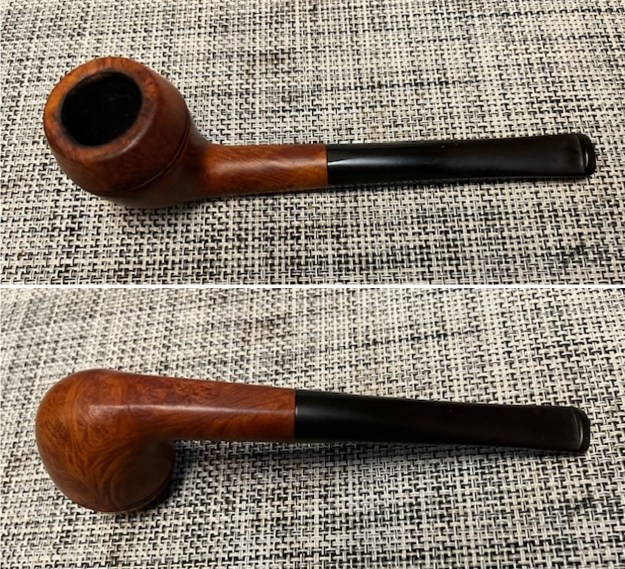
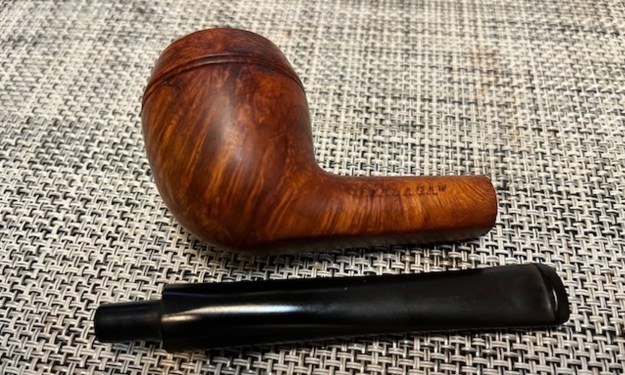
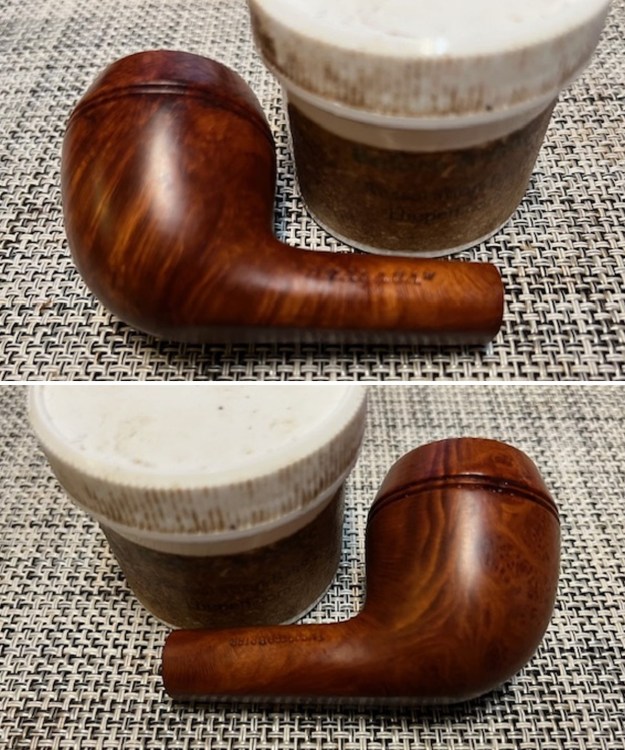
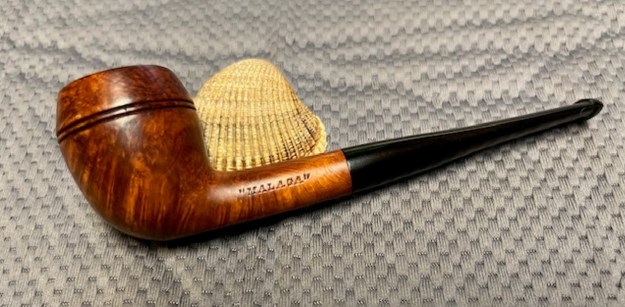
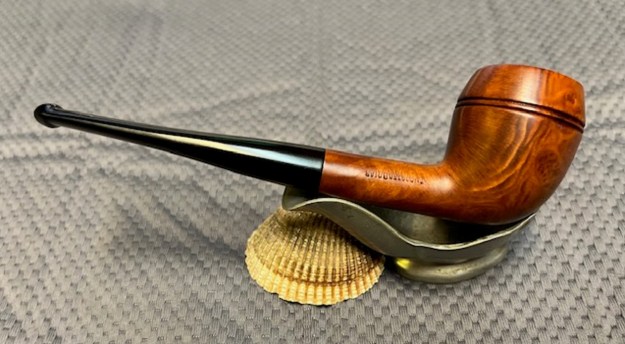
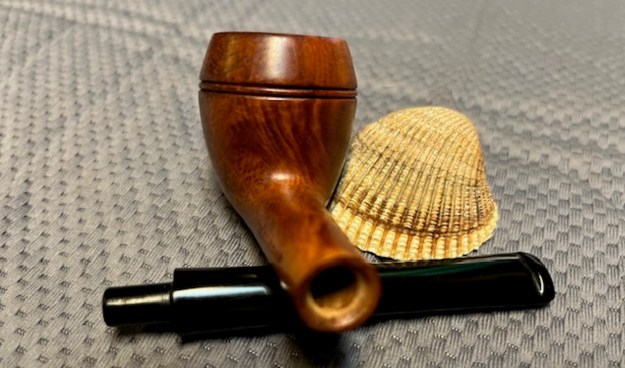
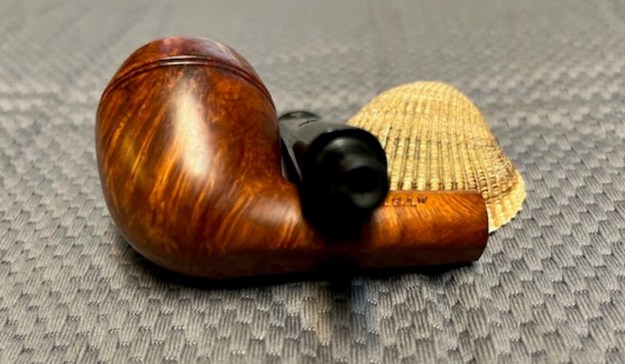
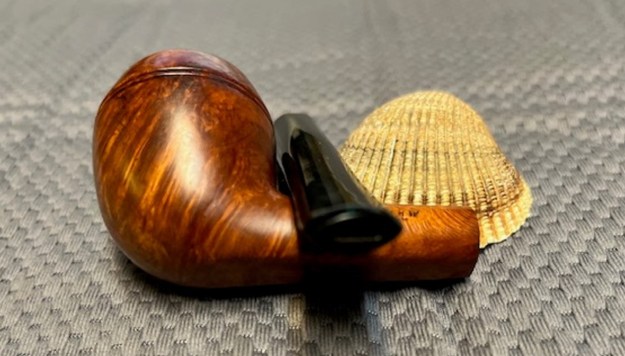
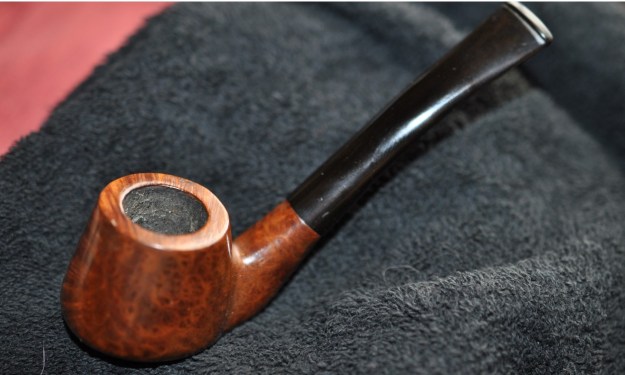
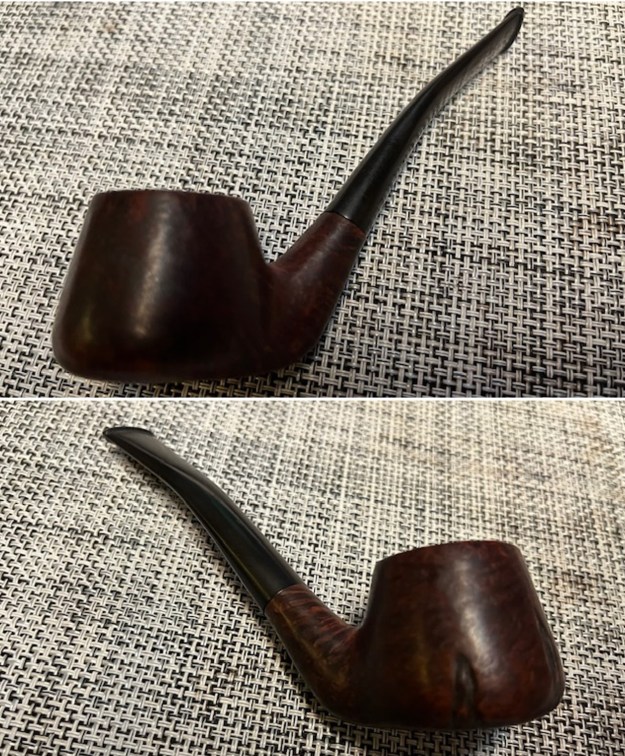
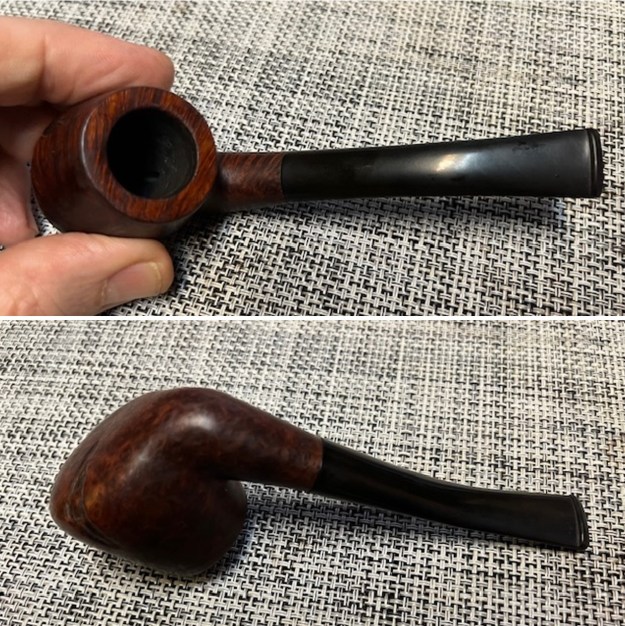
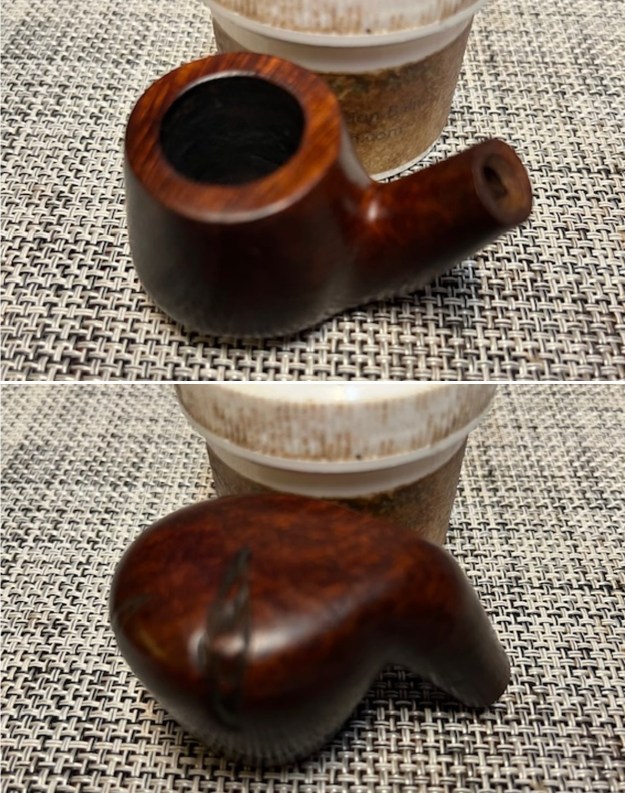
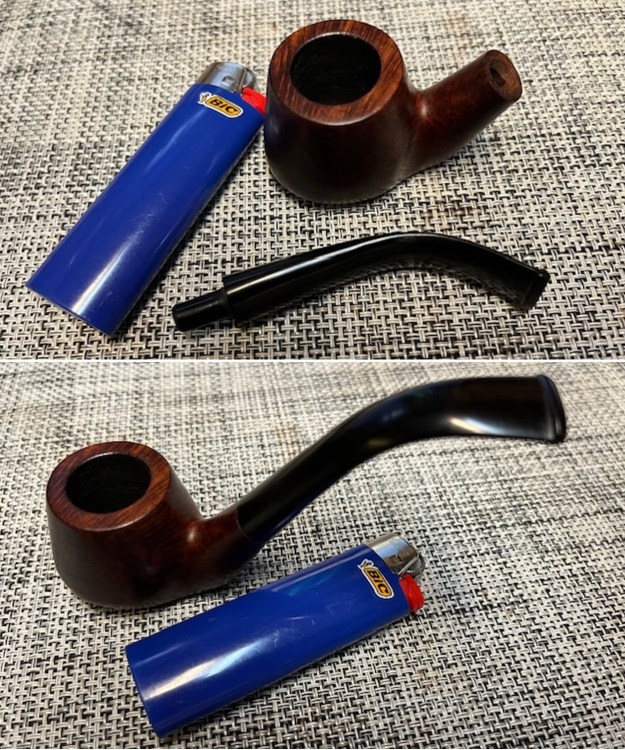
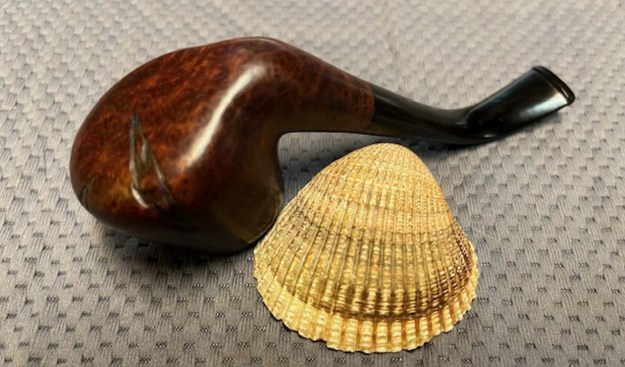
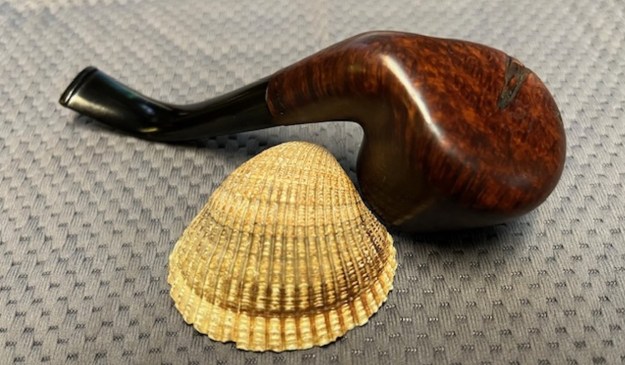
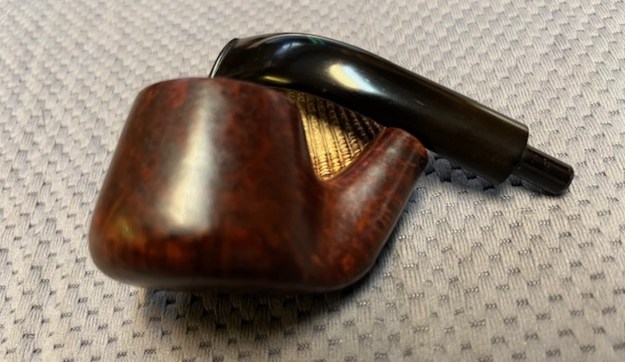
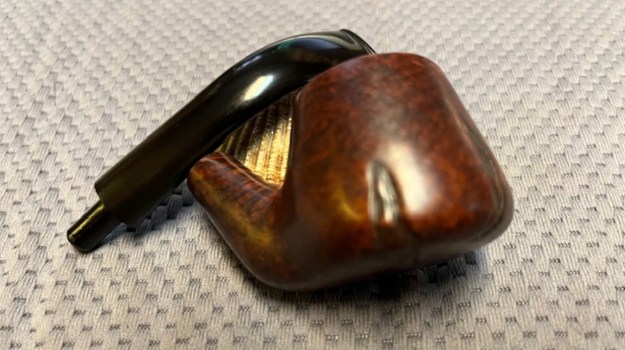
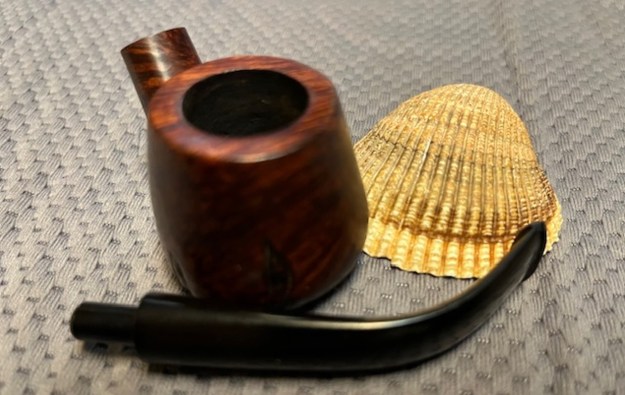
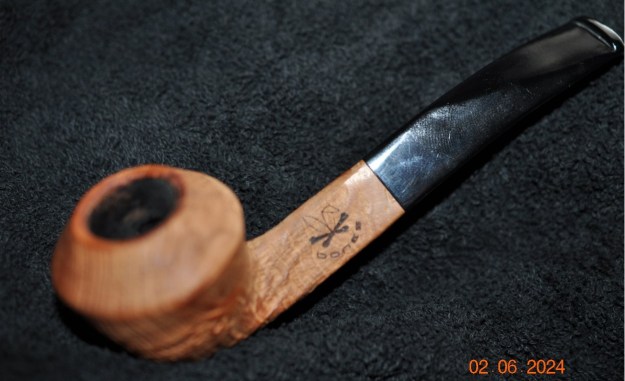
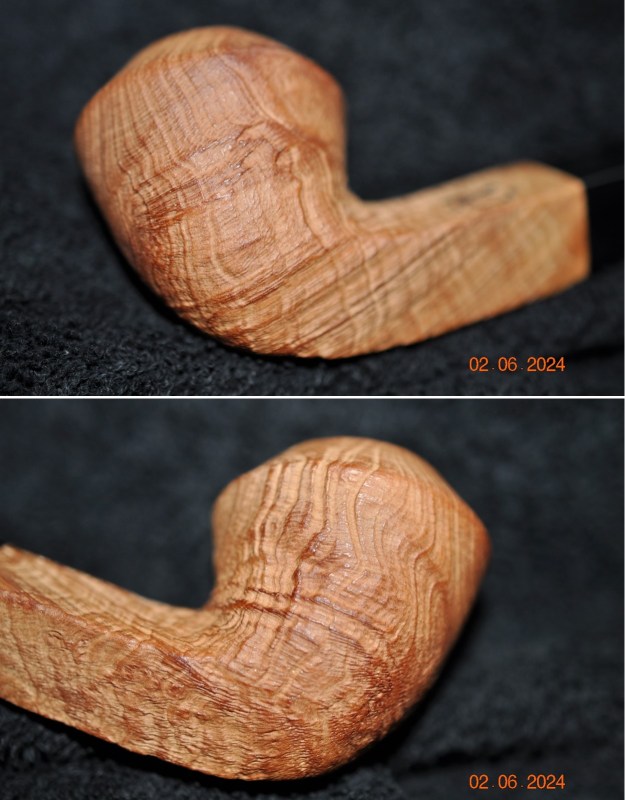
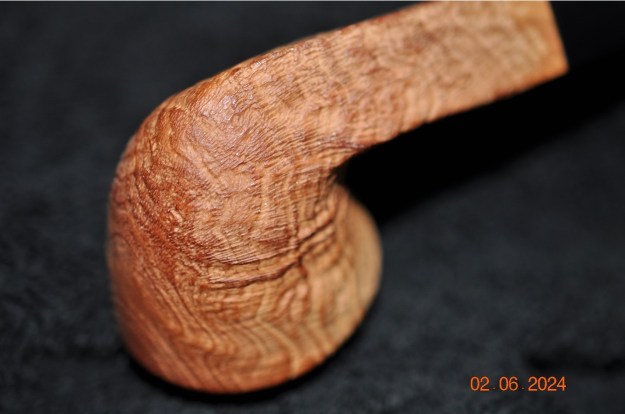
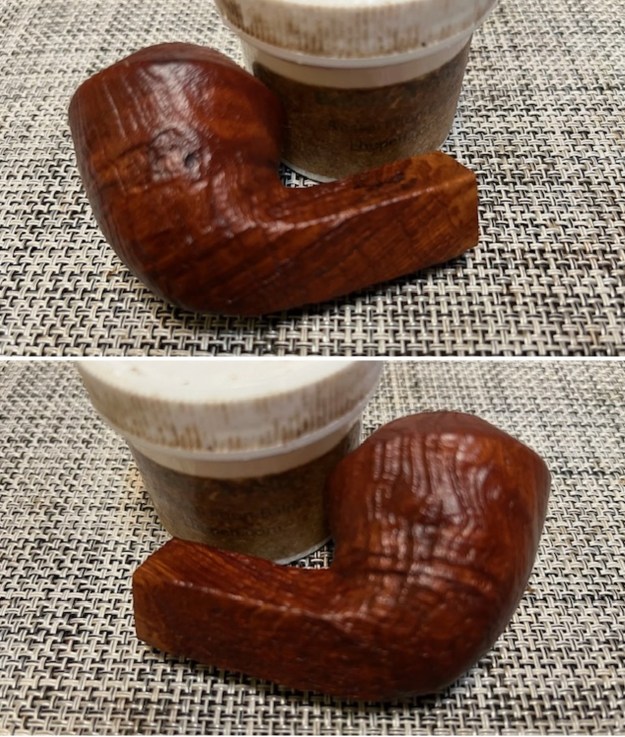
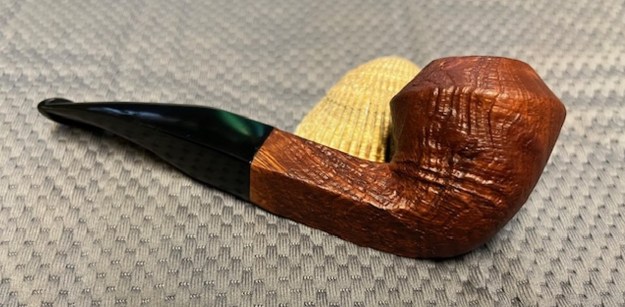
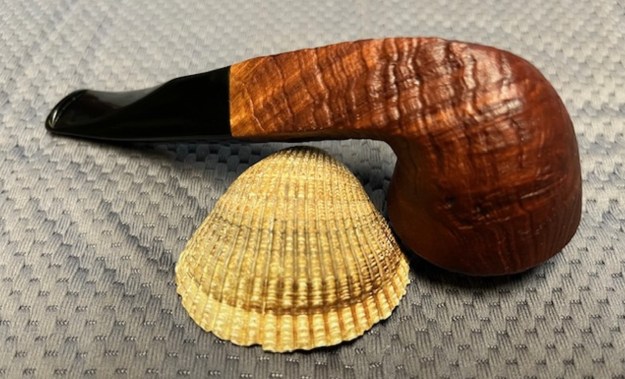
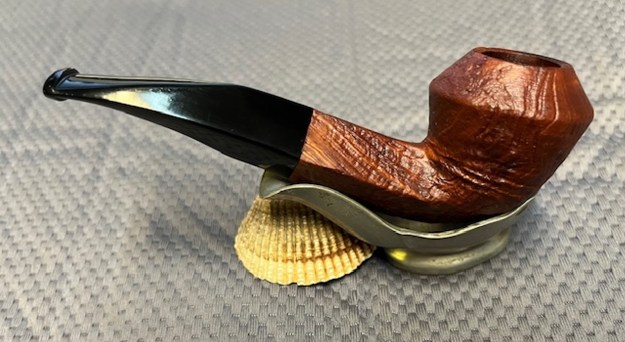
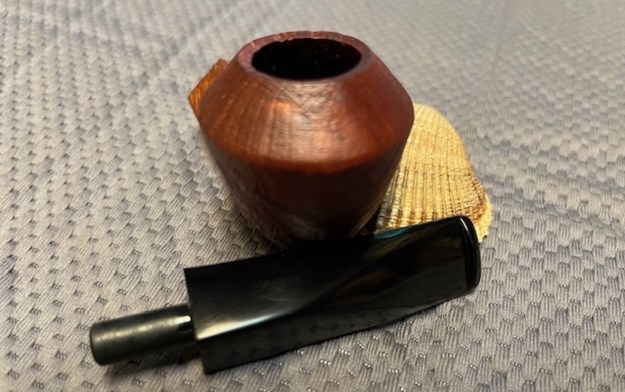
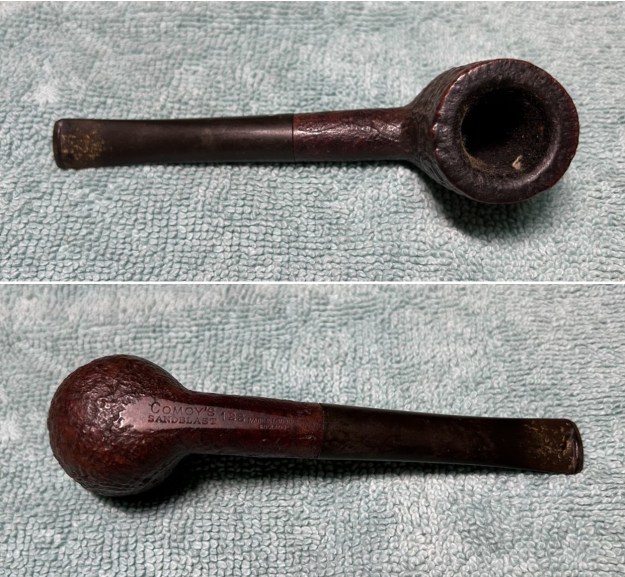
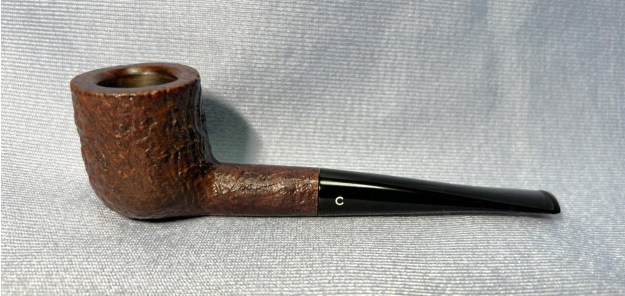
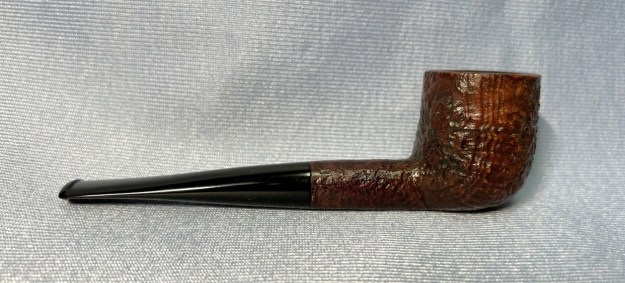
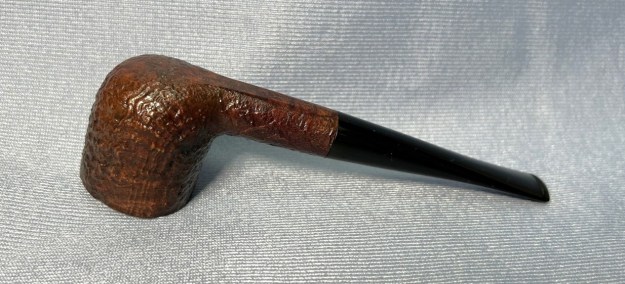
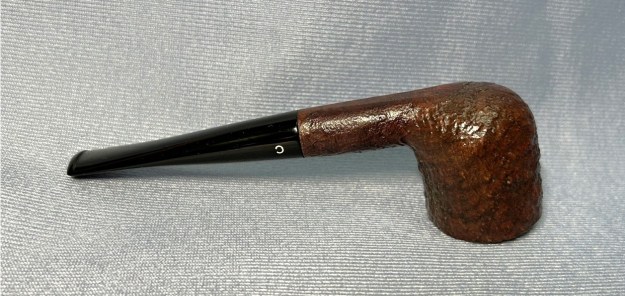
This happy little fellow is a sandblasted, stylized bent Zulu by Birks. My cousin gave me three pipes to repair – this is the first one I grabbed. I was interested in it for two reasons. First there was a cracked shank, and I always like giving life back to a pipe with a cracked shank. Second, the pipe comes with the name of the famous Canadian jewellery house, Birks. I’m interested in this because I have several Birks pipes in my workshop and they’re all a little different. More on that in a moment. 
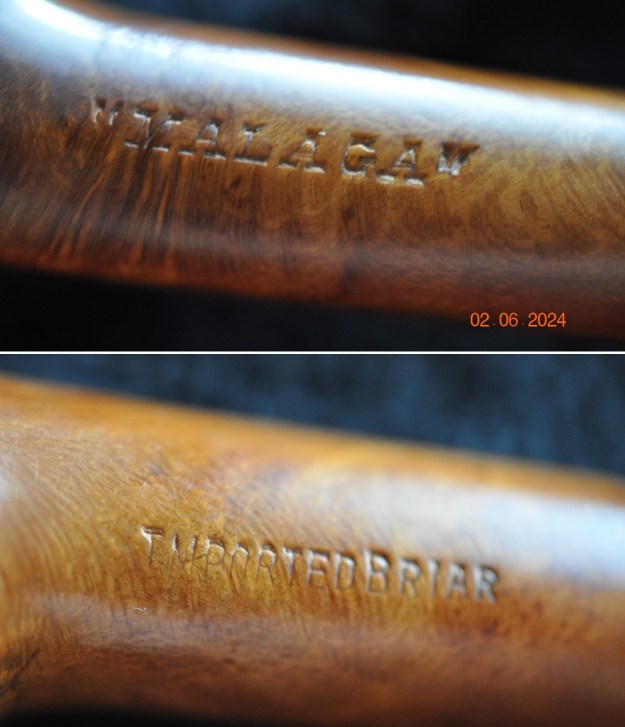
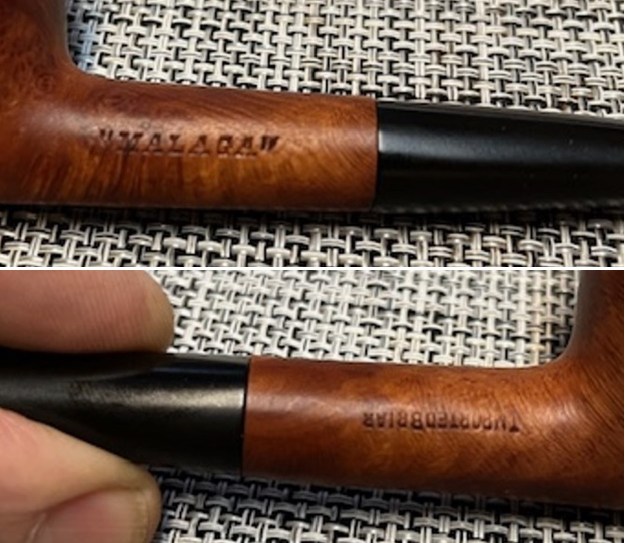
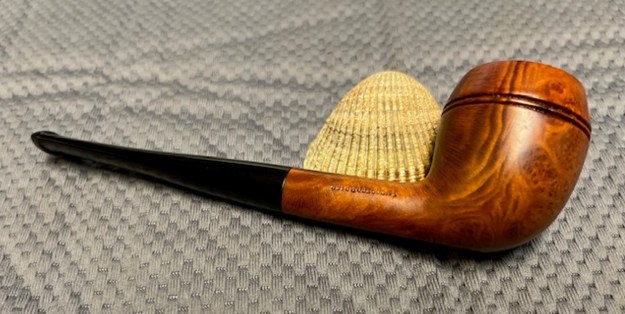
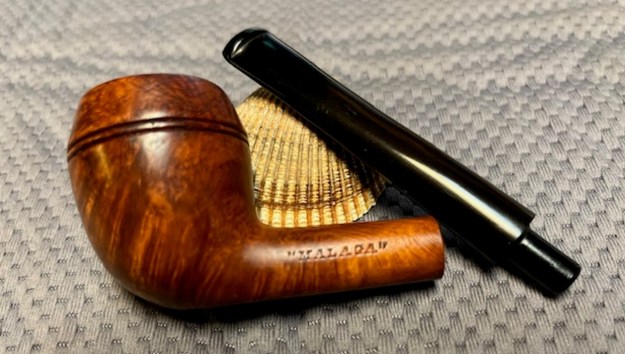
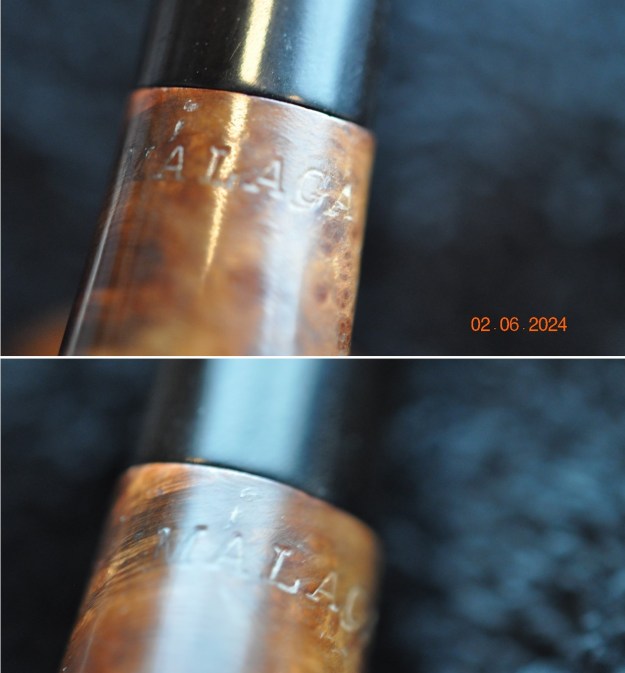
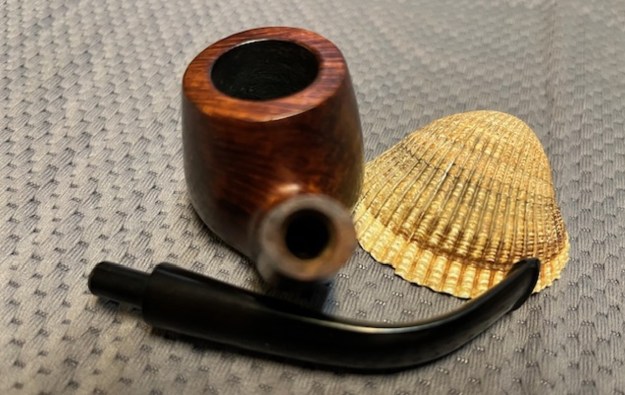
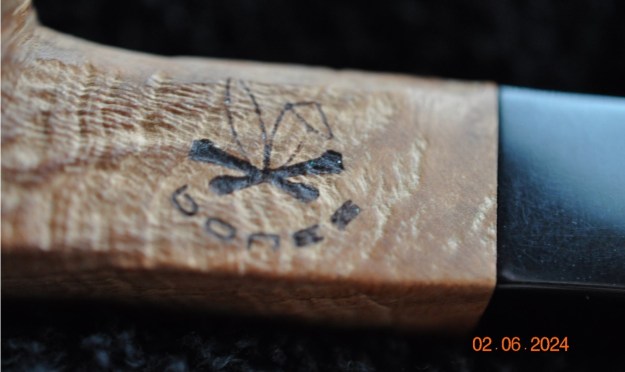
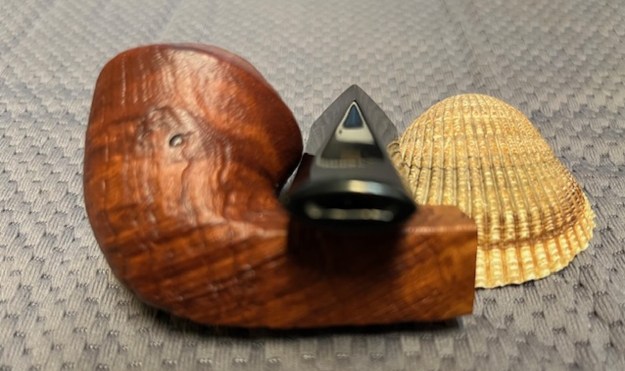
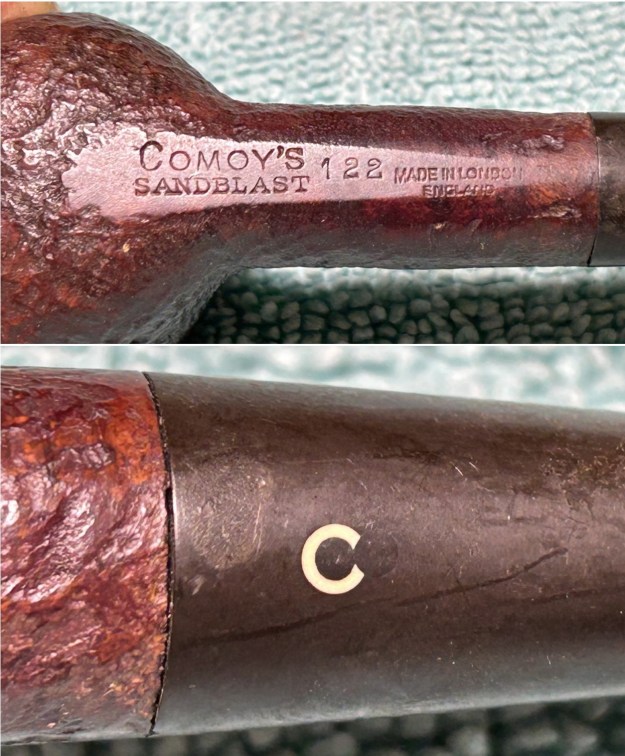
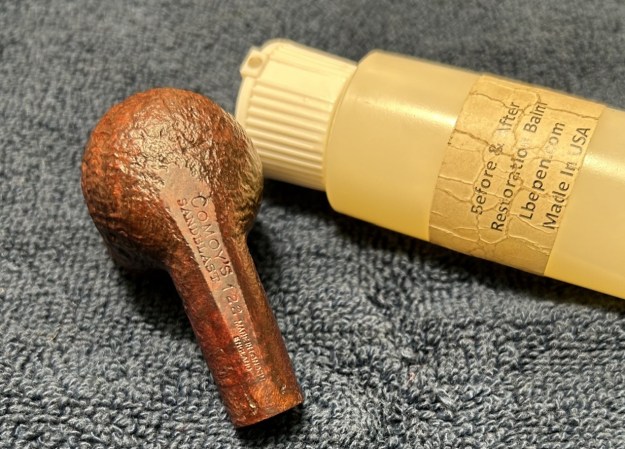
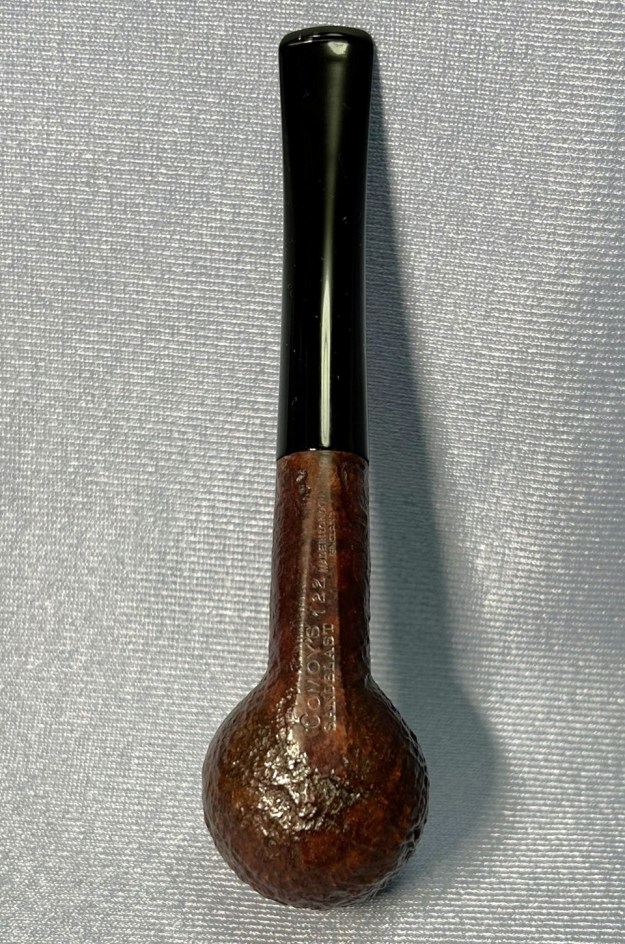
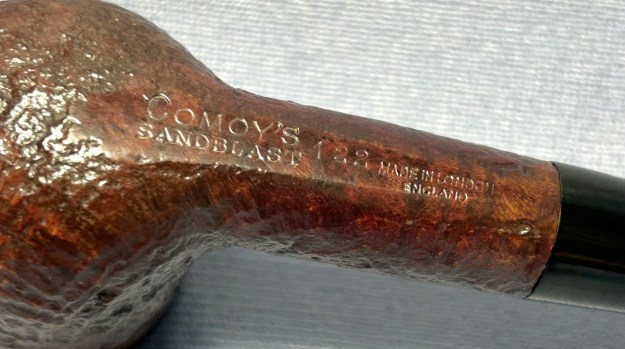
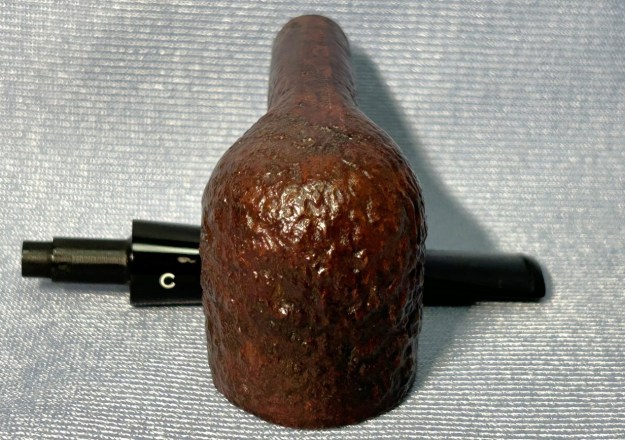
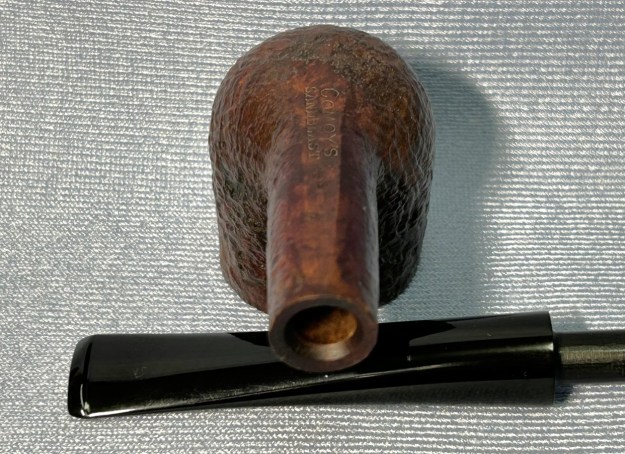
The markings on the pipe don’t tell us much – but they tell us enough. The only markings are on the underside of the stummel and they read Birks [over] Regency. To the left of that are the words Made in England. Allow me to explain some of this.Birks refers to Henry Birks & Sons, a venerable and well-known luxury store based in Canada (now known as Maison Birks). It has focused primarily on jewellery throughout its history, but also other luxury items like watches, silverware, etc. There has been some discussion in pipe circles about whether Birks sold pipes or not – and whether Birks actually refers to an English company (as Wilczak and Colwell suggested in Who Made That Pipe?). I can say definitively that Henry Birks & Sons sold pipes. They did not manufacture their own, but had others make them for sale at Birks’ stores. Steve has already restored some Birks-branded pipes made by Savinelli. I have Birks-branded pipes made in England and in Denmark.Two further points about this. First, I wonder if Wilczak and Colwell were thinking of an English razor company (also called Birks) that frequently used a maker’s mark that was in the shape of a pipe (rather unhelpfully). For more on that, click here. Second (as I mentioned earlier), this particular pipe has the word Regency on it. Regency specifically refers to a Henry Birks line of silverware, china, etc. – so that makes sense.

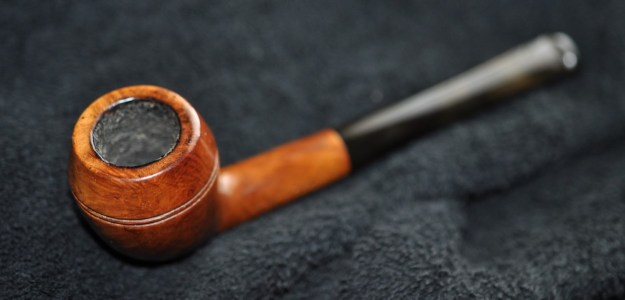
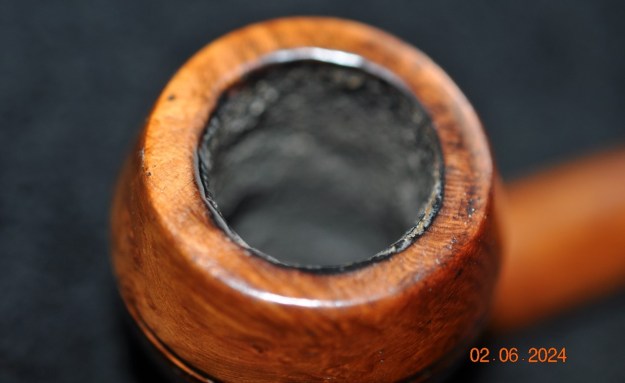
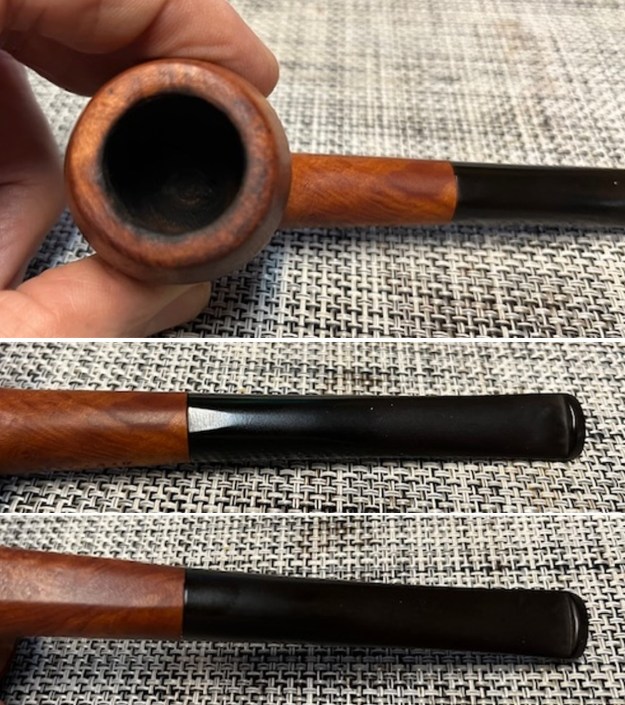
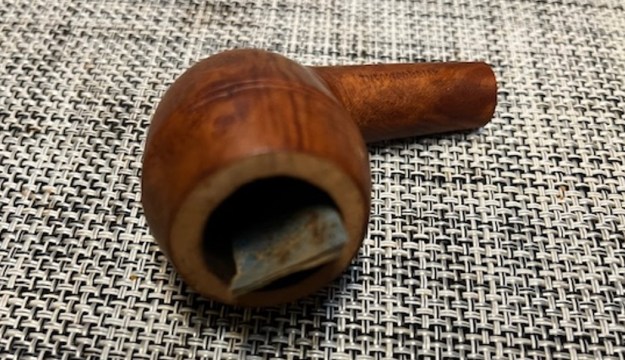
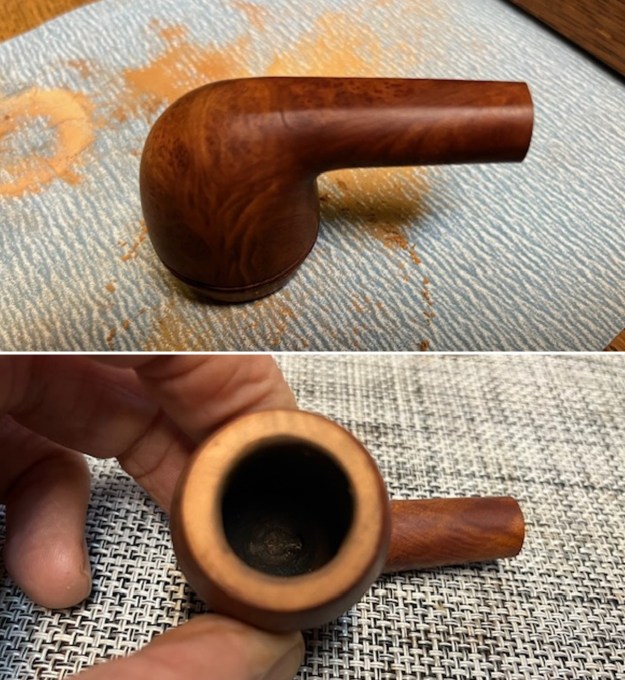
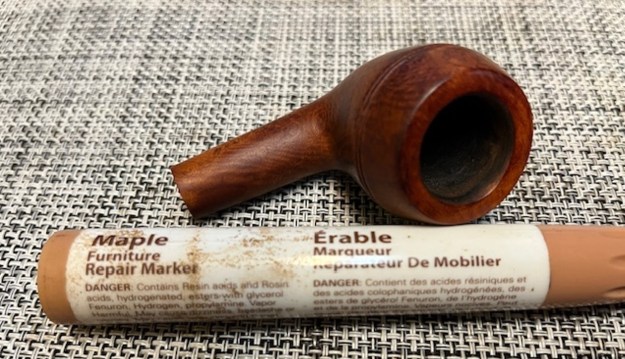
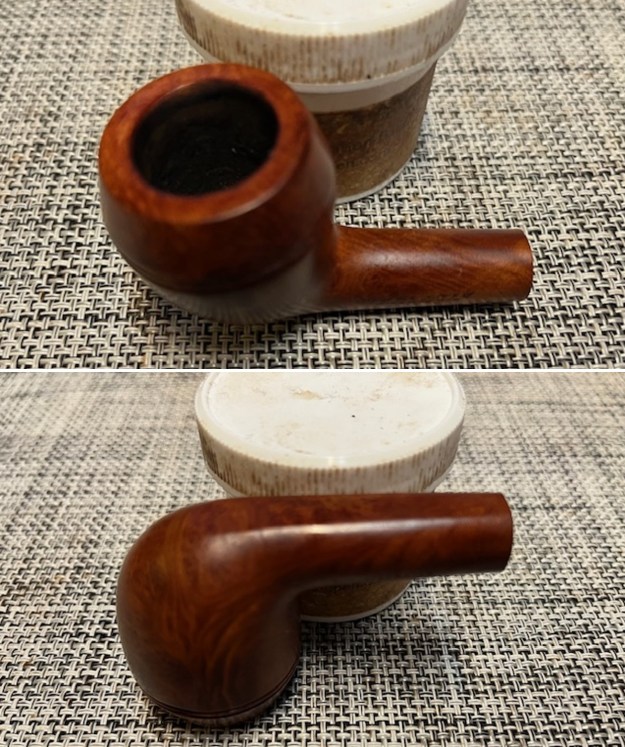
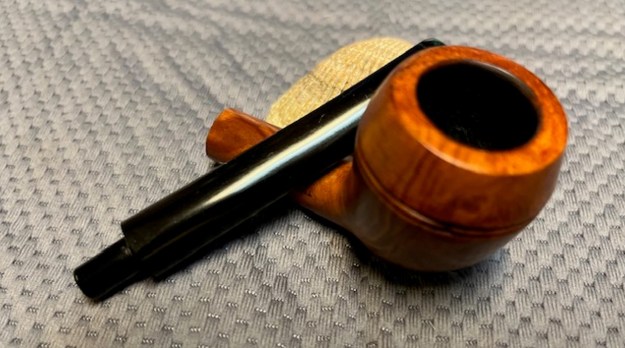
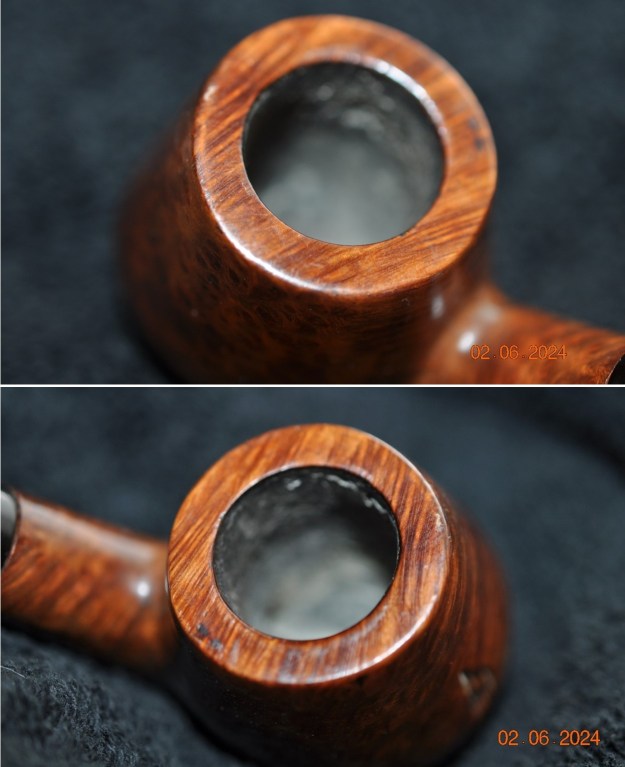
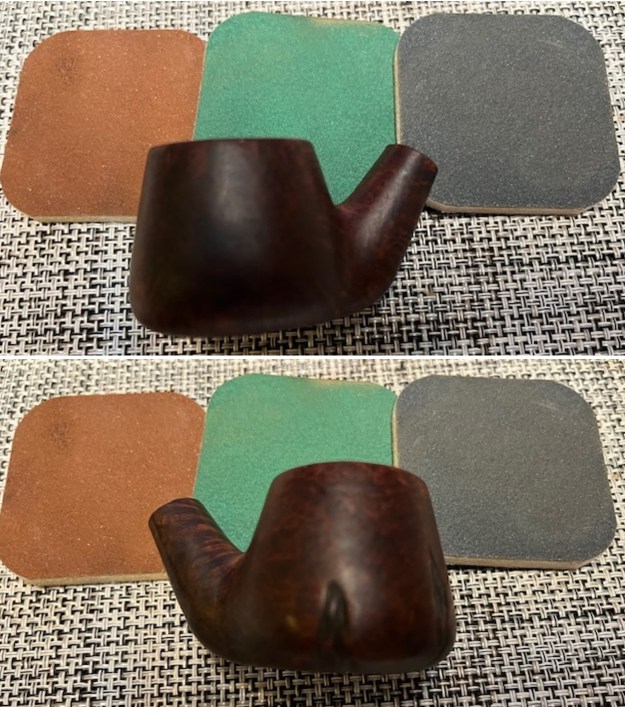
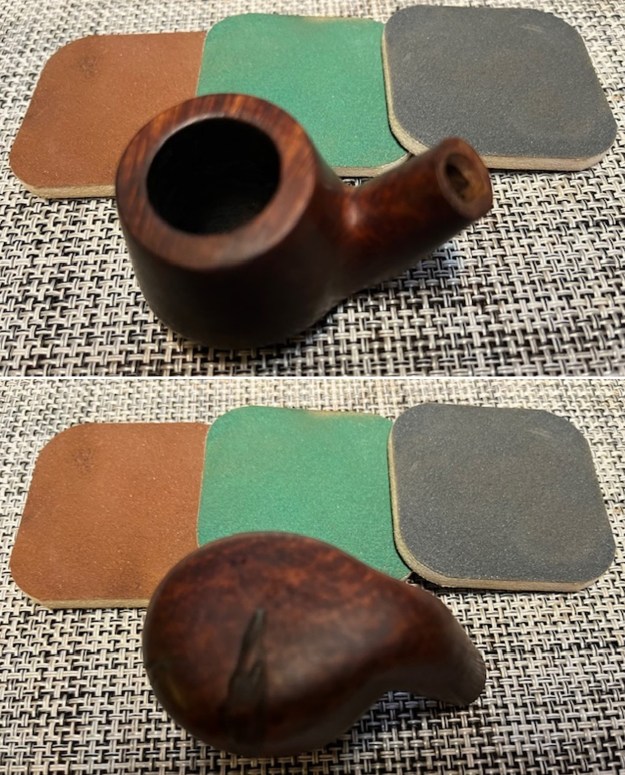
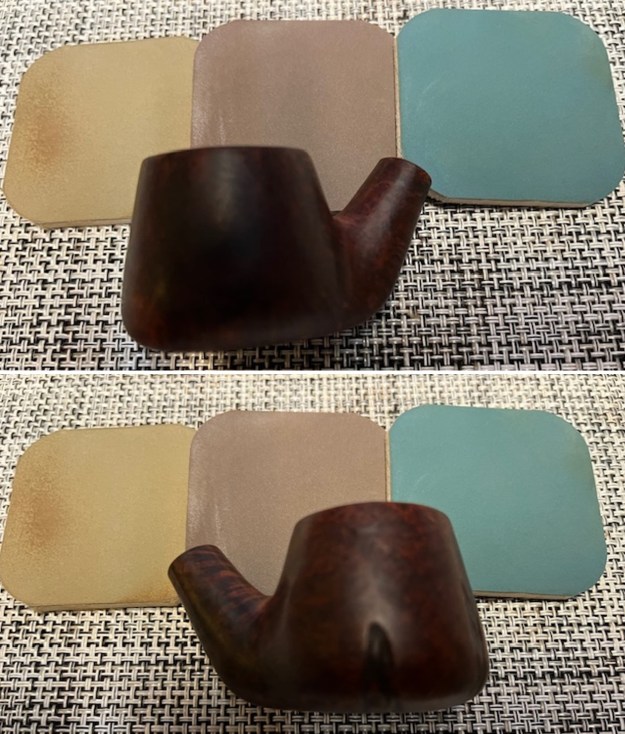
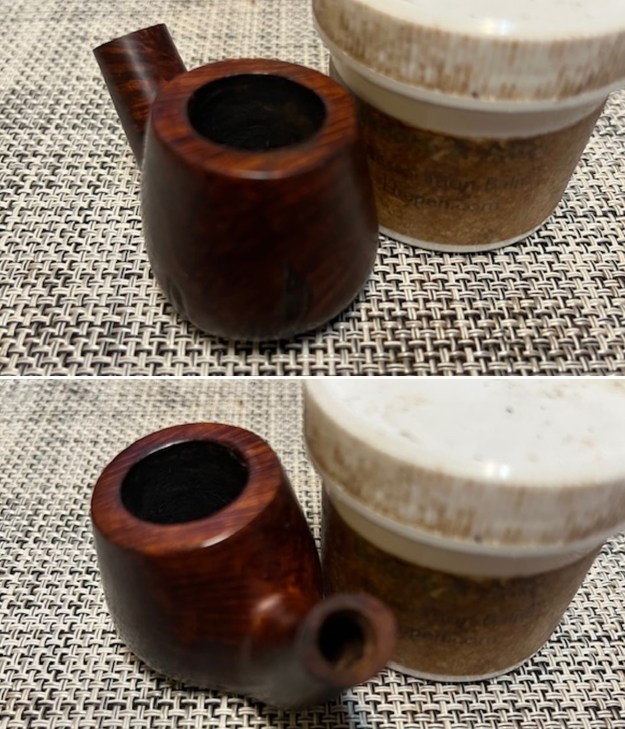
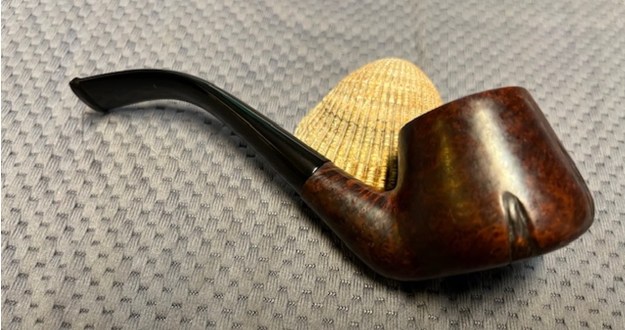
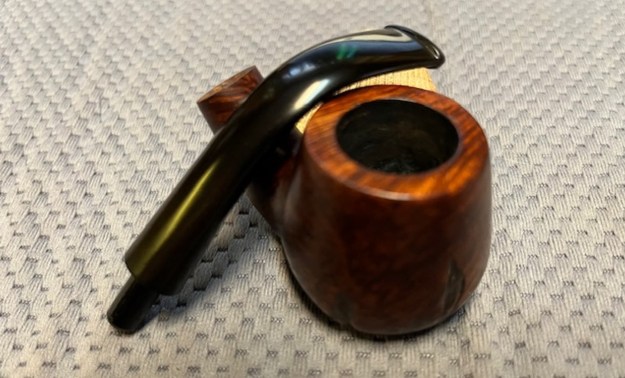
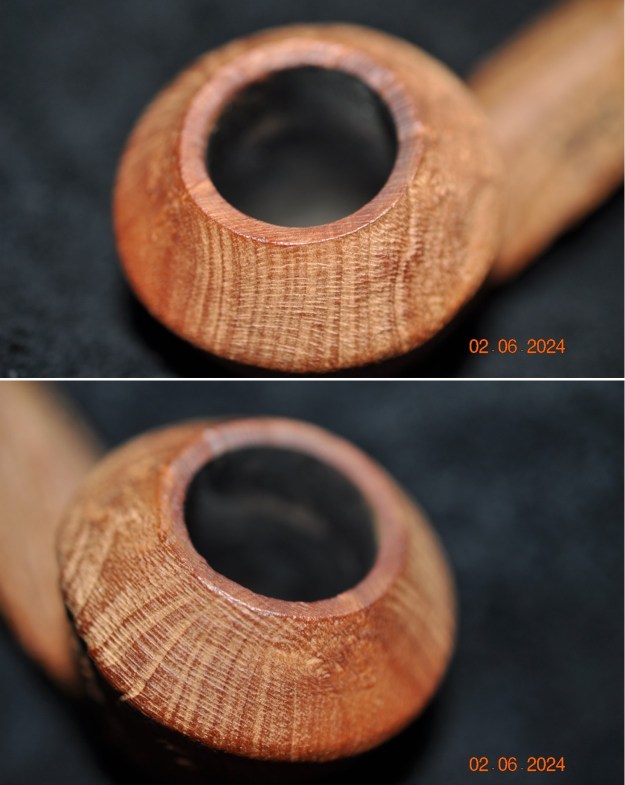
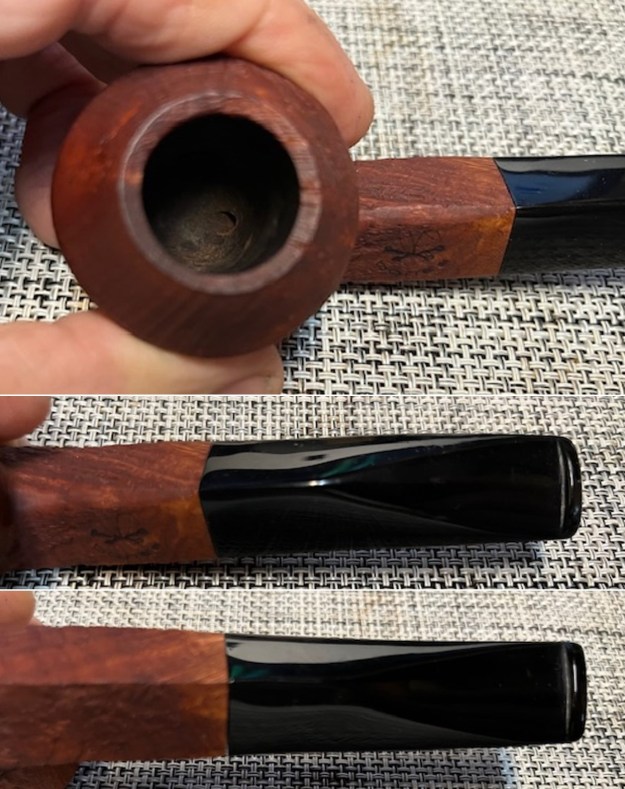
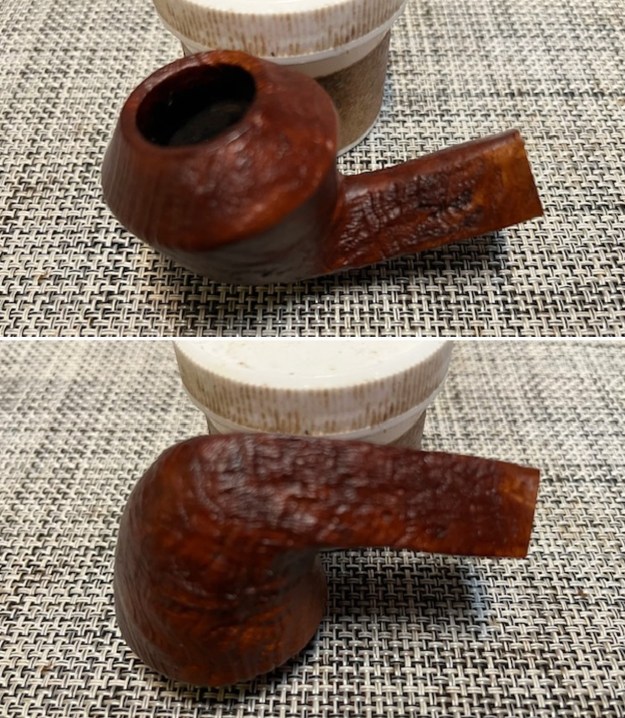
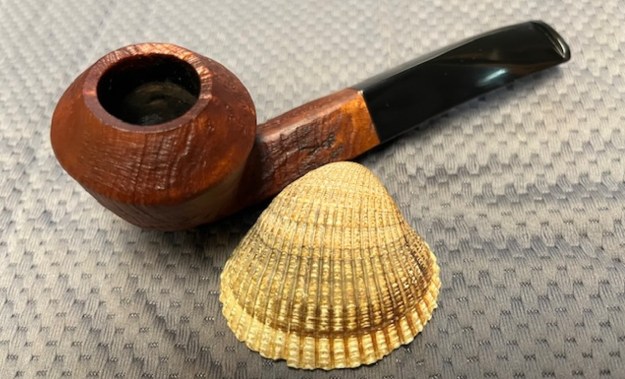
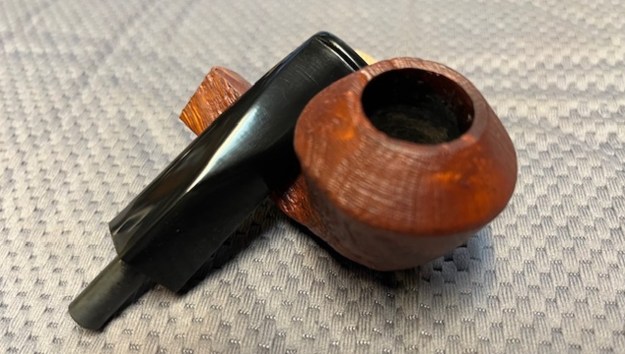
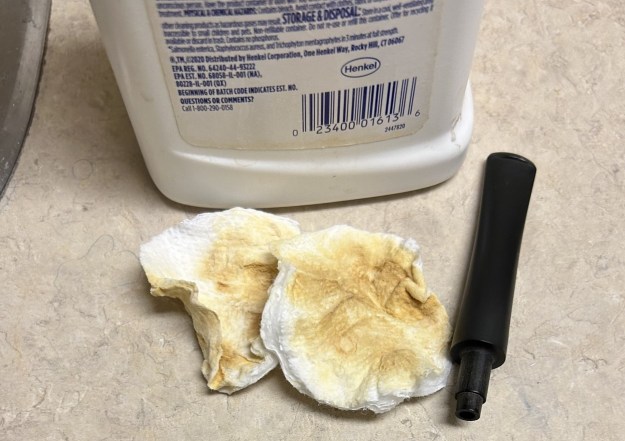
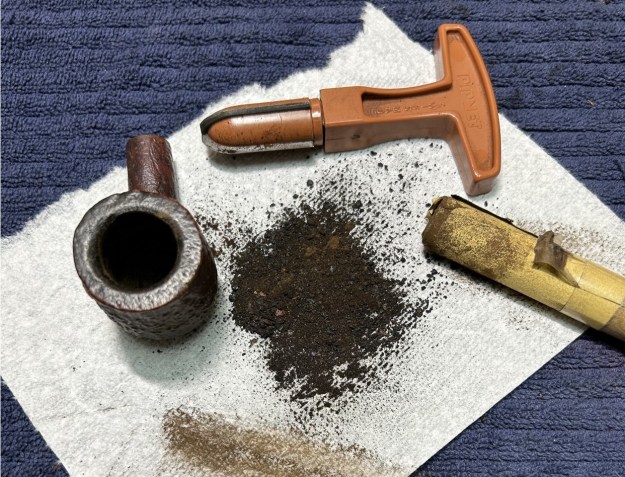
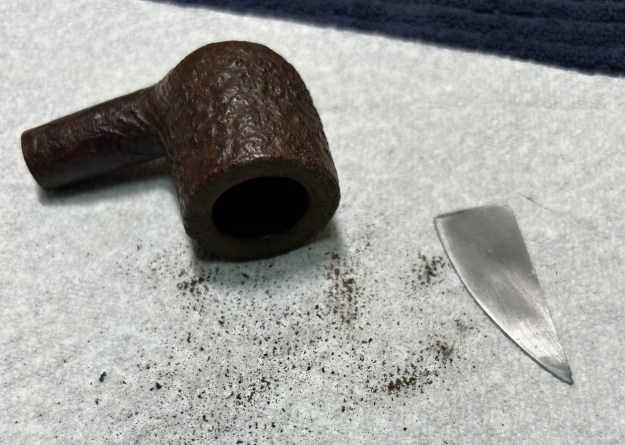
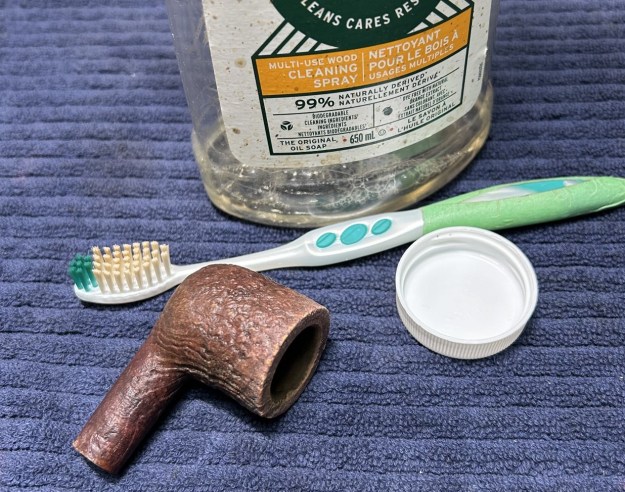
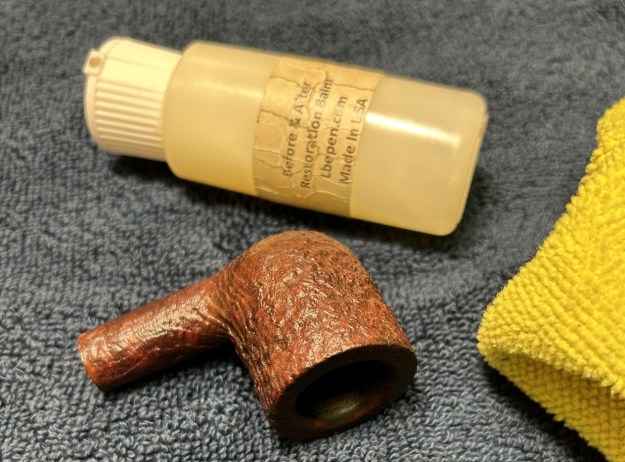
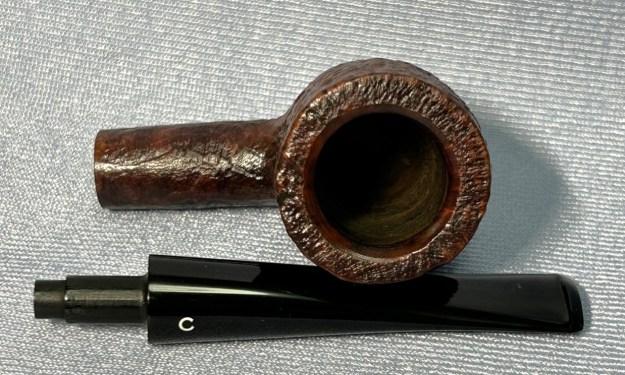
The stummel was surprisingly clean when I took hold of it. I did use a few cotton swabs and pipe, cleaners, along with isopropyl alcohol, but it didn’t take much to finish it. I followed that up with some Castile soap, and tube brushes to really scrub the insides. Came out beautifully. I’ve then took some Murphy’s, and a toothbrush and gently scrubbed the years of filth and oil, etc. off of the sandblast. It certainly looked much cleaner after that, albeit much more faded. A new coat of stain will be required, I think. 
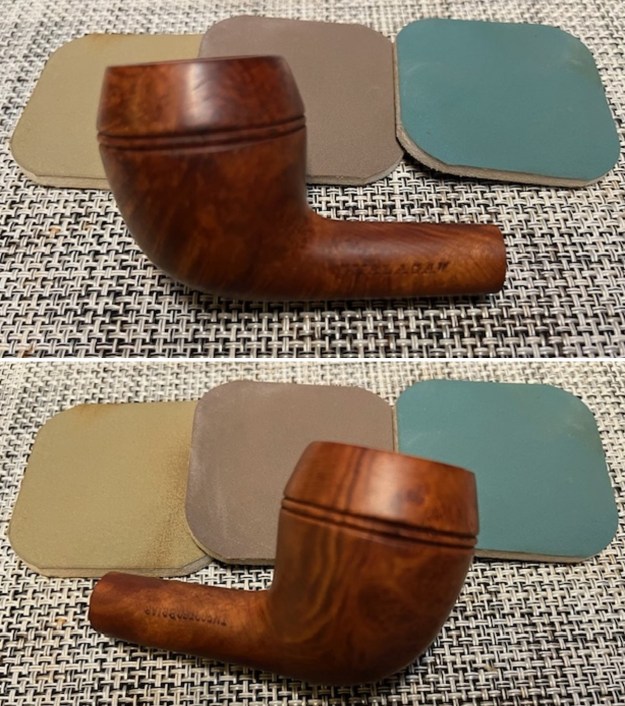
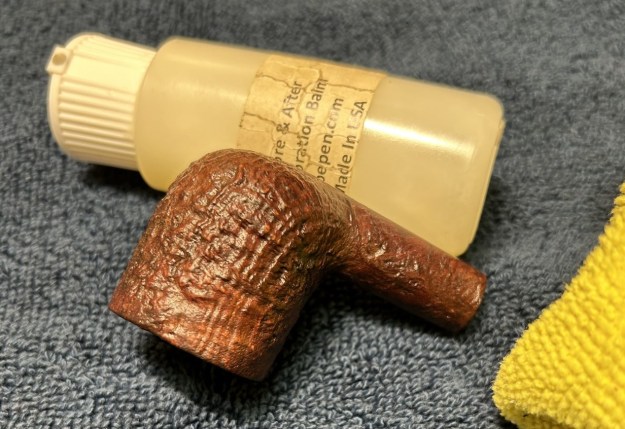
As a result, I took the opportunity to wipe down the stummel, with alcohol to remove some excess old stain, and make sure everything was clean for the repair to the crack in the shank. 
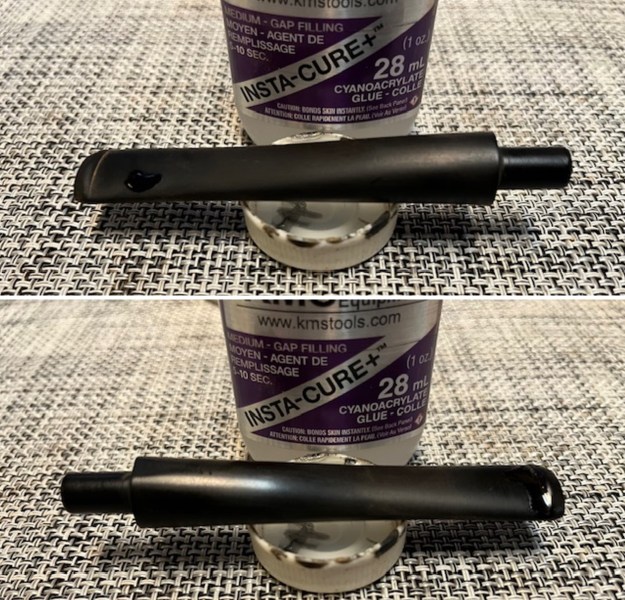
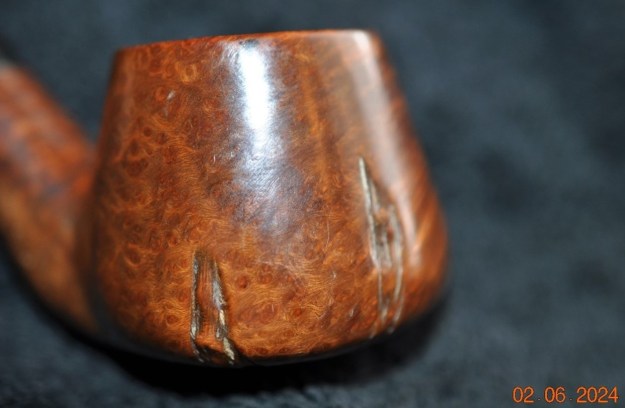
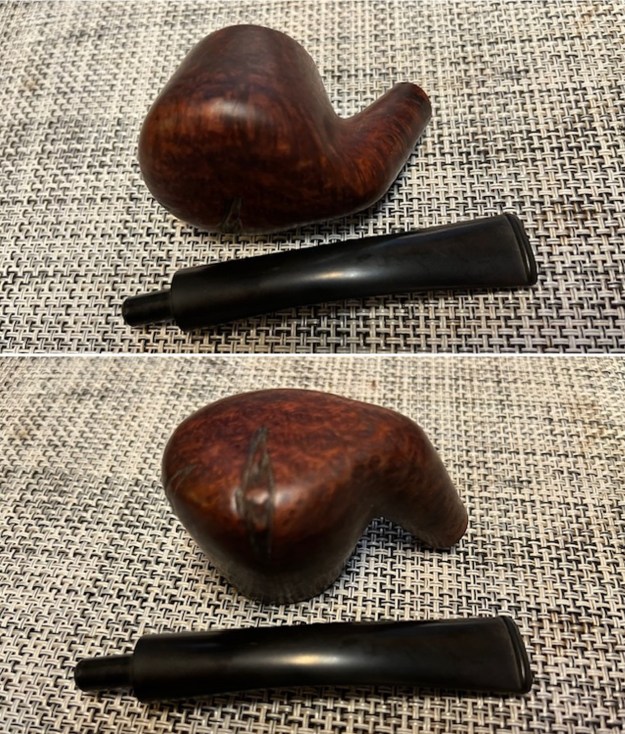
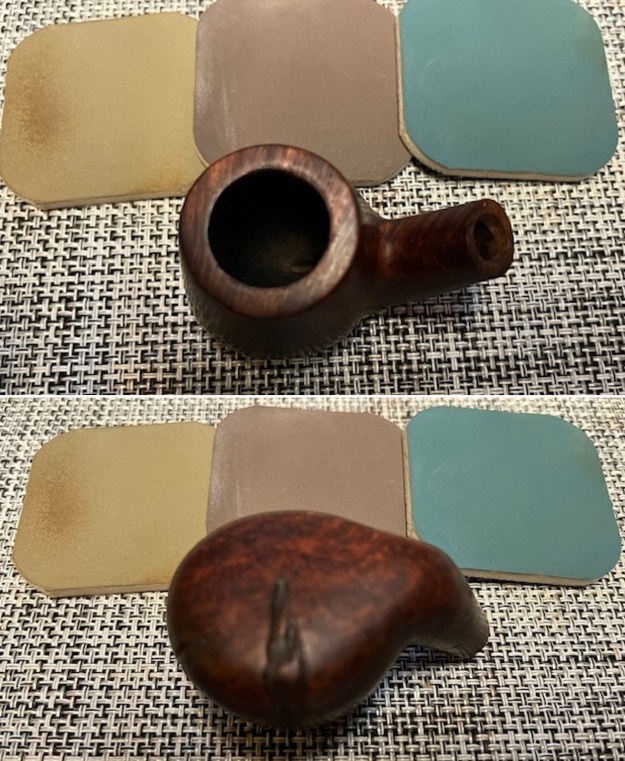
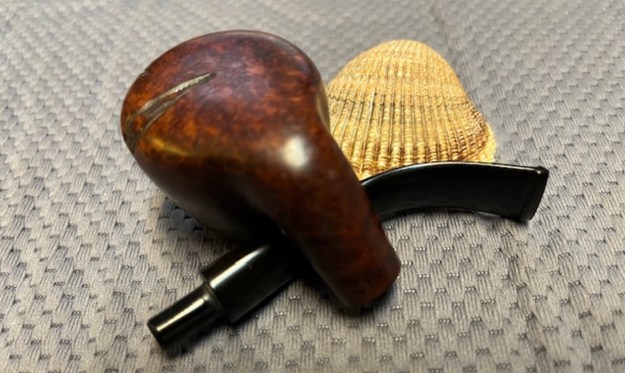
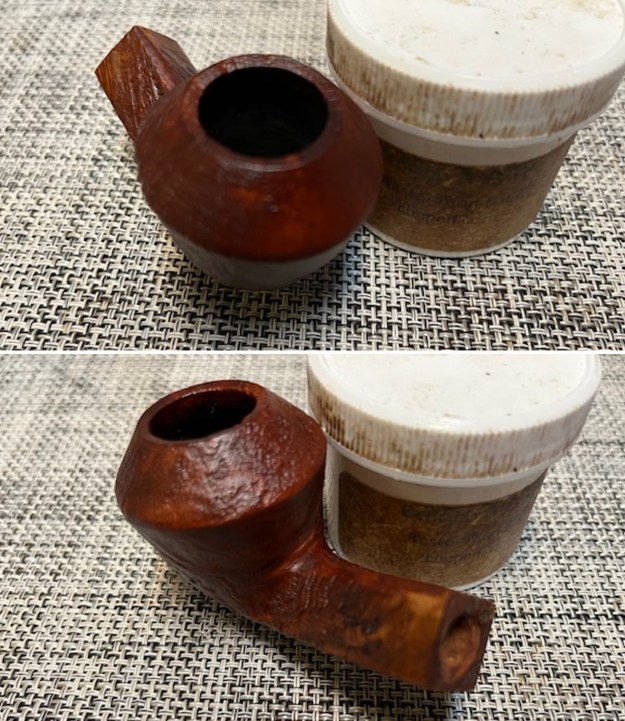
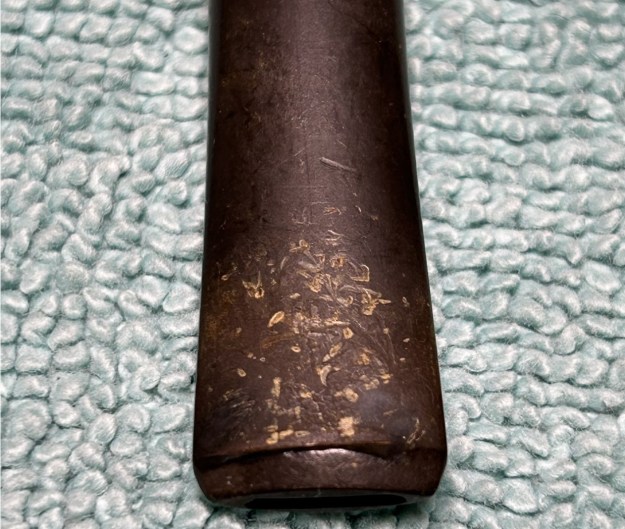
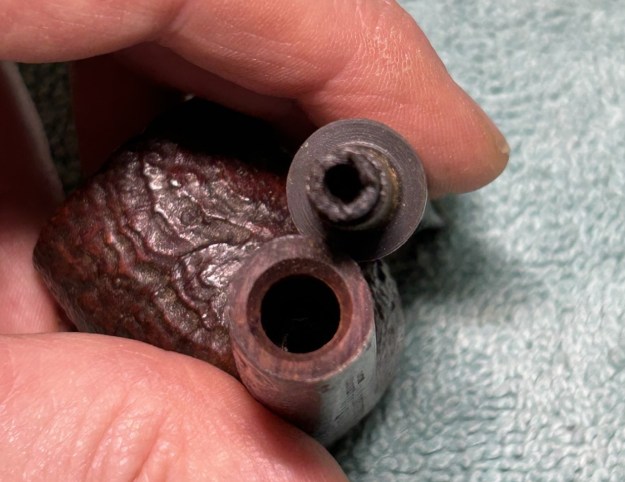
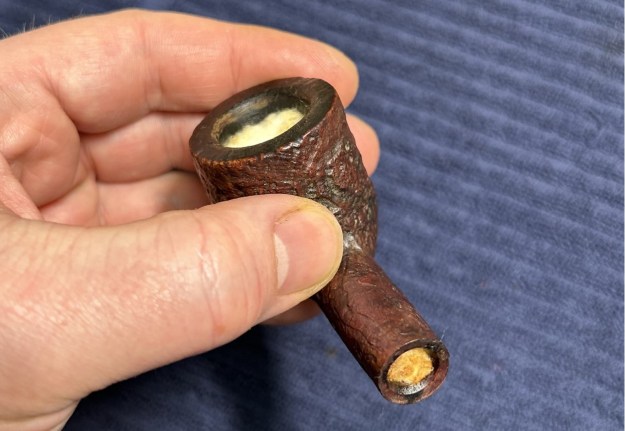
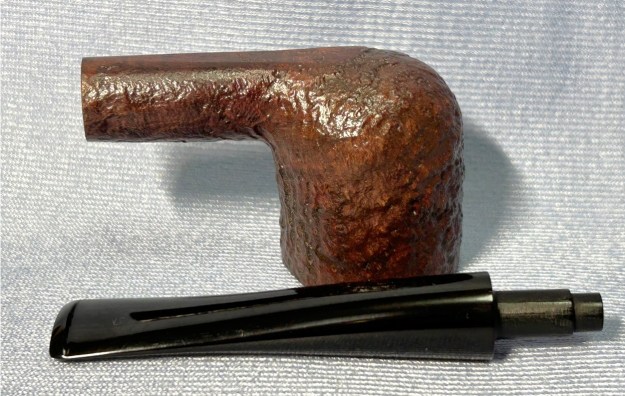
Let’s move onto the primary repair to this pipe: that crack in the shank. First of all, I took the most micro of micro drill bits and drilled a hole with my Dremel right through the shank wall into the airway. This is an important step as it stops the crack from extending later on in life. The drill bit is so thin that it’s always a bit nerve-racking, because I fear snapping the bit through such hardwood. Fortunately, it worked like a charm this time. I also stuffed the mortice with pipe cleaners coated in Vaseline, so that if – God forbid – any cyanoacrylate adhesive drip into the mortise, it can be easily removed by the petroleum jelly. I ran a thin bead of cyanoacrylate adhesive along the length of the crack, and then held the two sides of the crack together with some vice grips. I let it sit for a few hours to cure. 
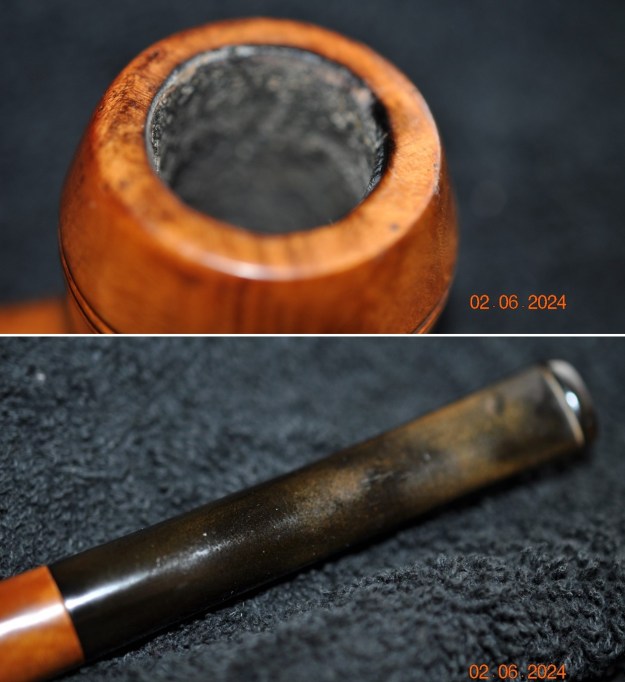
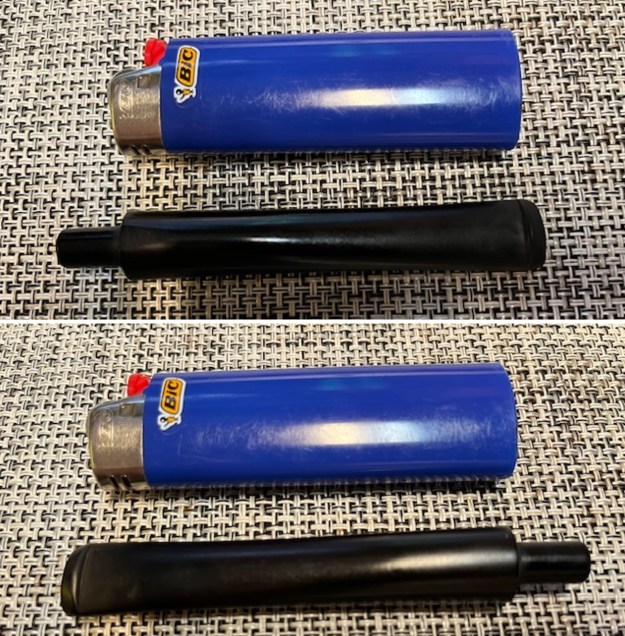
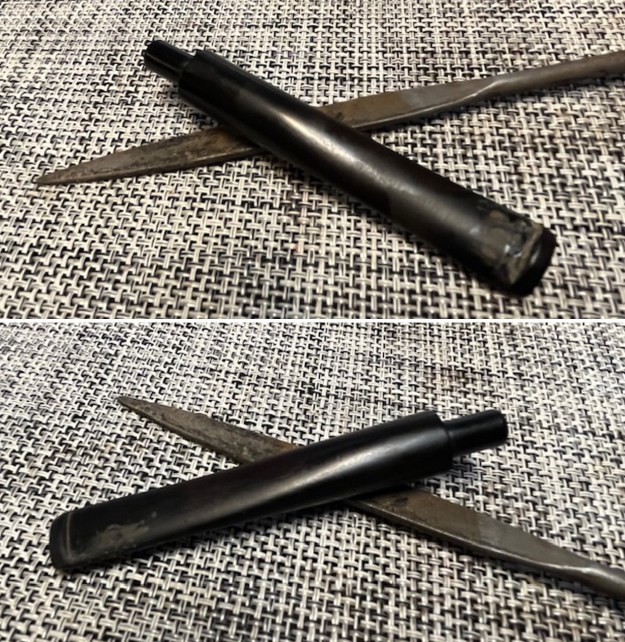
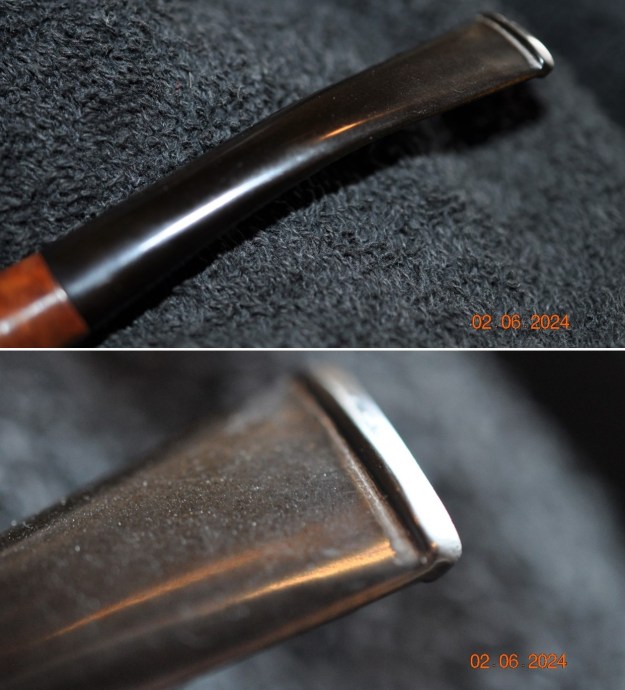
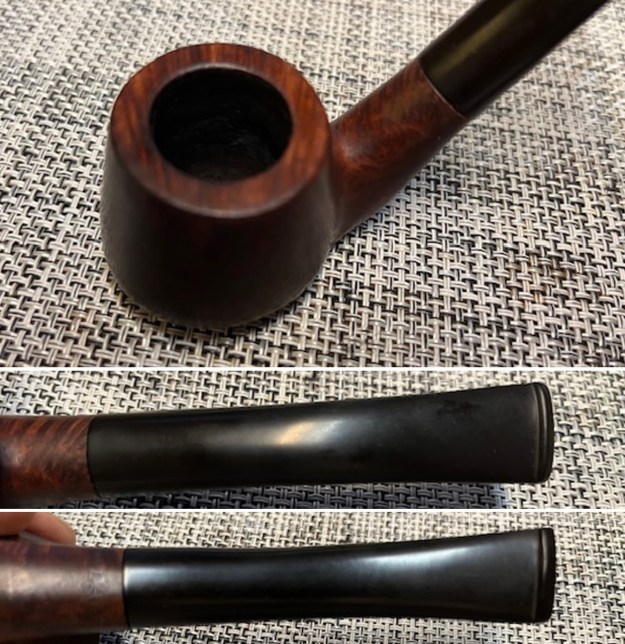
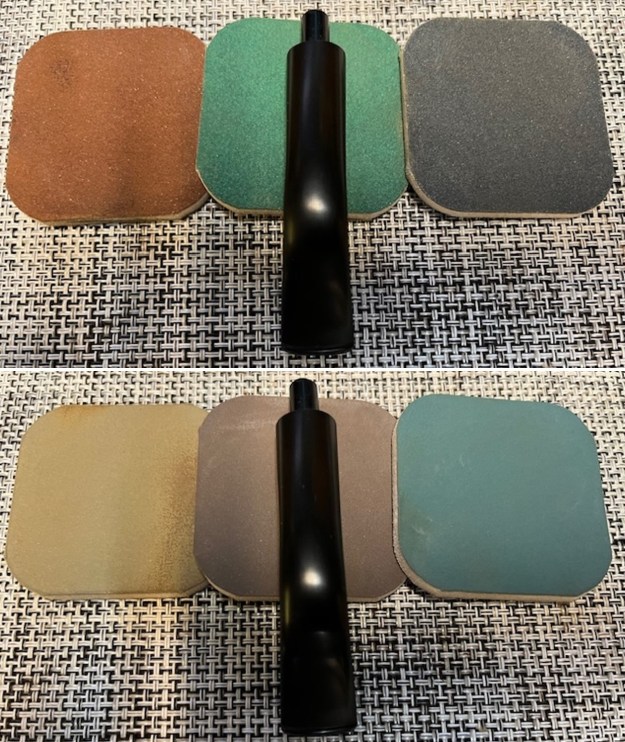
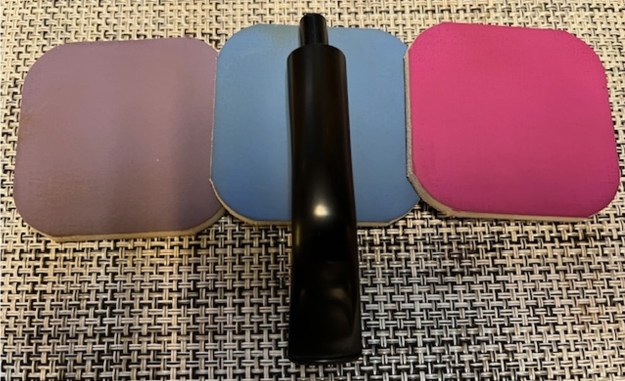
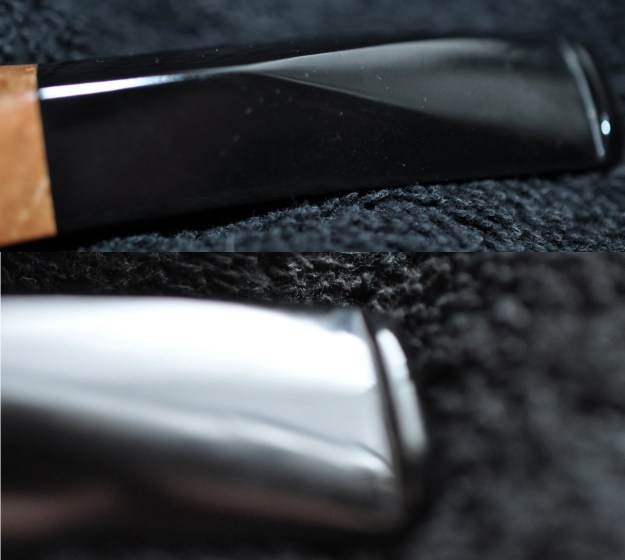
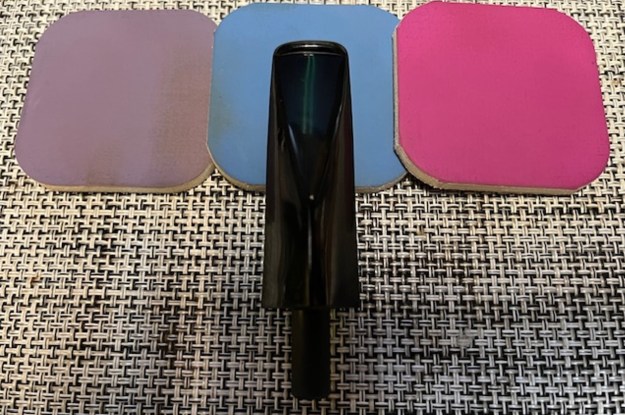
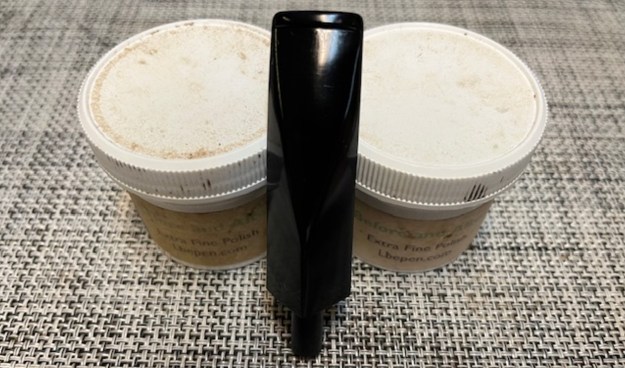
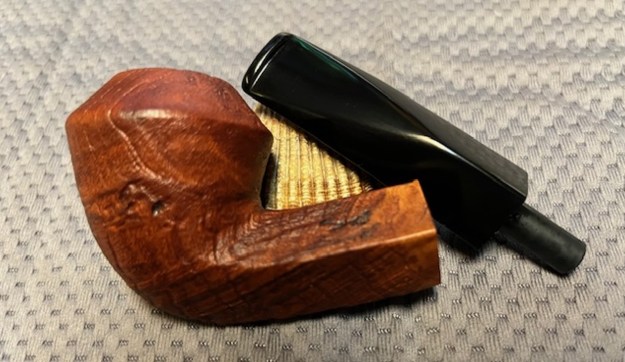
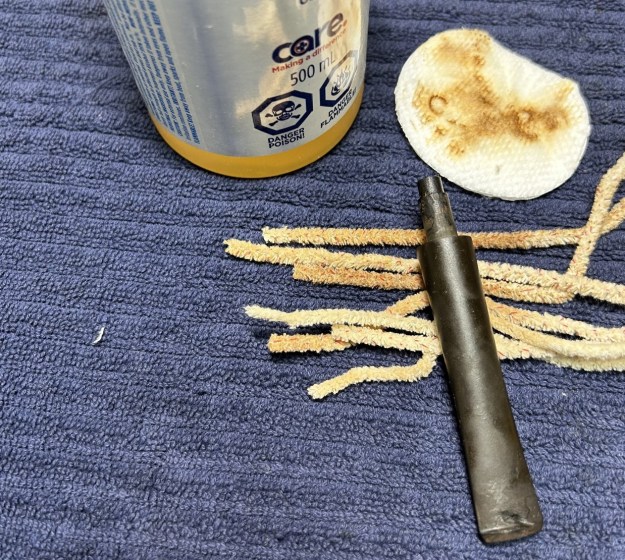
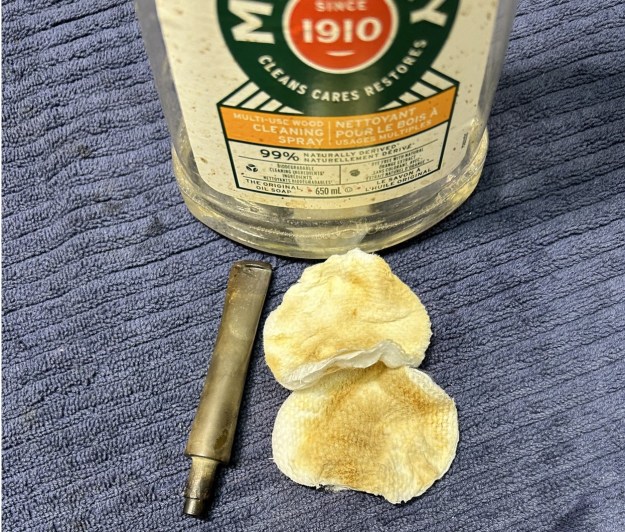
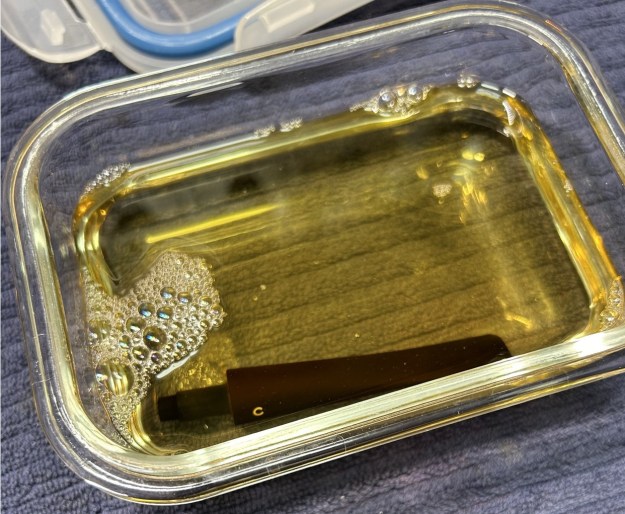
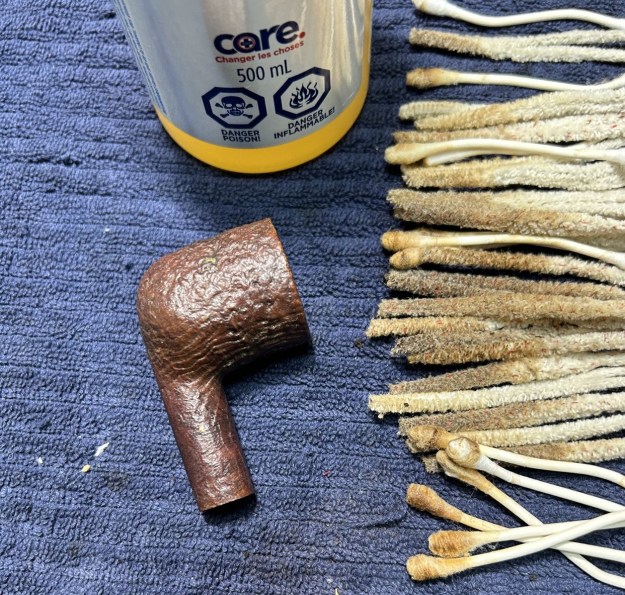
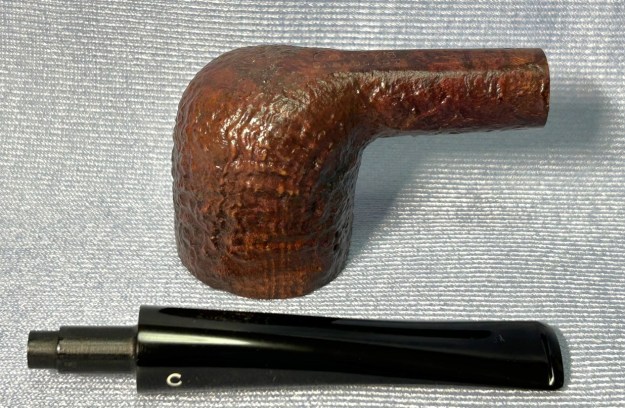
Moving along to the stem. Like the stummel, it was also quite clean, but needed a few more pipe cleaners to finish the job. Of course, I used isopropyl alcohol with them. I then wiped down the stem with Murphy’s on a cotton round. Once done, I put the stem in the deoxidizing fluid, even though there wasn’t much oxidation to speak of. It can’t hurt, and it’ll remove what little there is. 
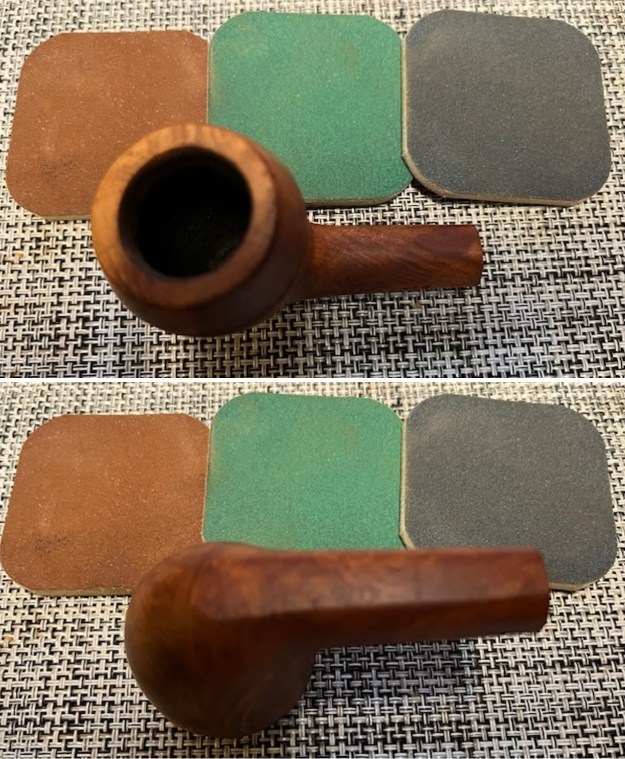
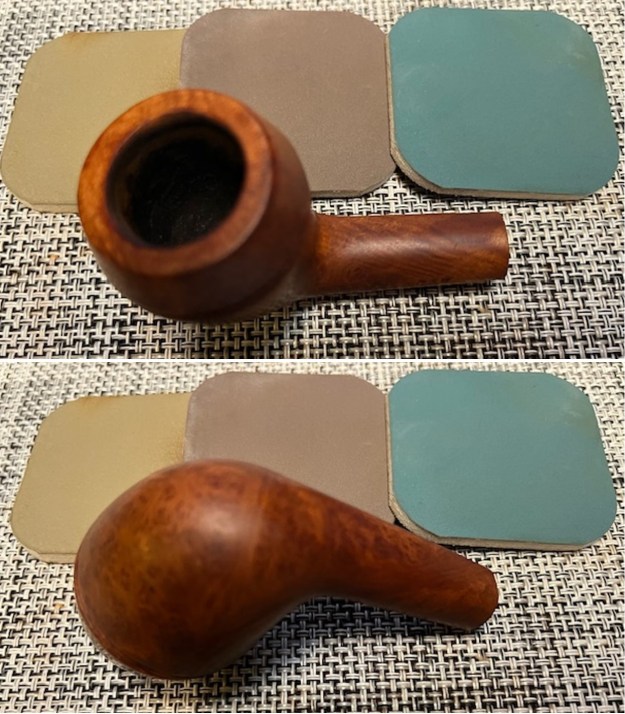
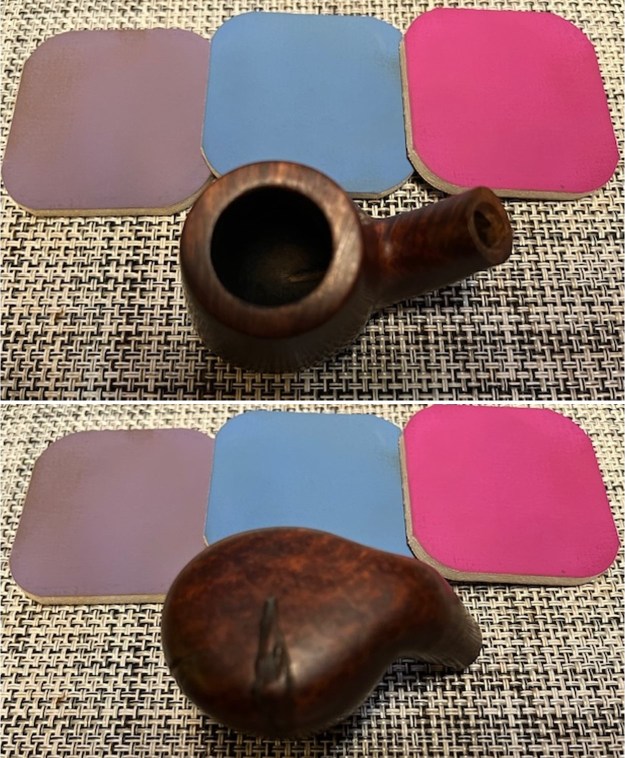
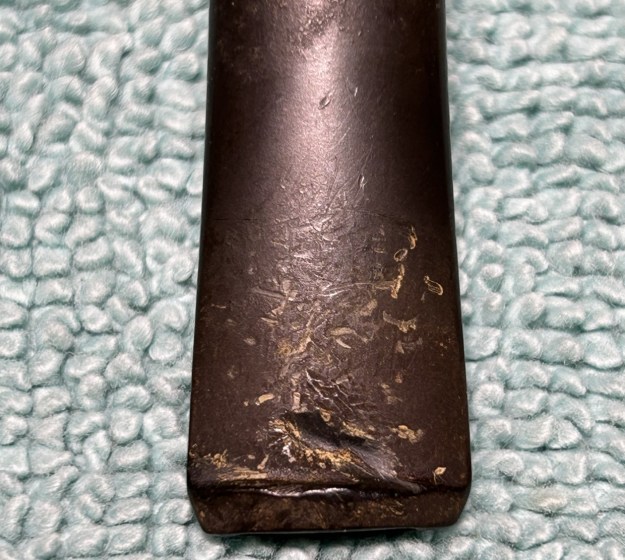
After the adhesive cured on the shank, I set about sanding the underside of the stummel because there were a lot of scratches there. I also needed to sand down the bead of adhesive that I put there. It was tricky, because there wasn’t much room to move, with the markings so nearby. I started out by masking those markings with hockey tape, which is a perfect masking material as it is extremely scratch resistant. However, it ended up being more trouble than it was worth given the tight spaces to work in. Instead, I just sanded the area down, freehand, so to speak. 
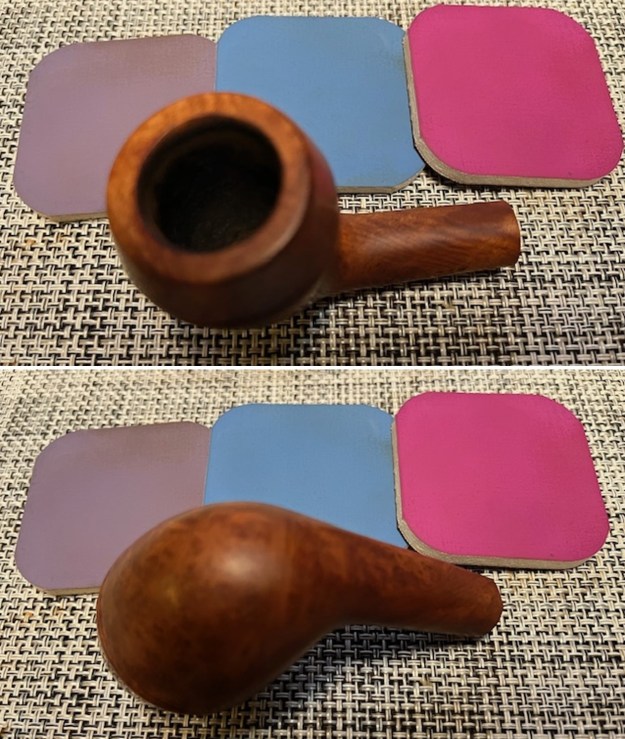
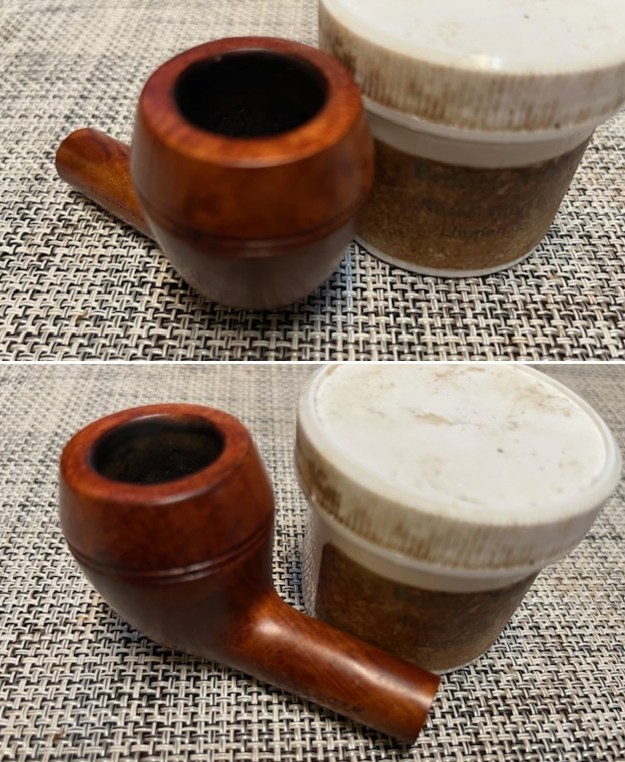
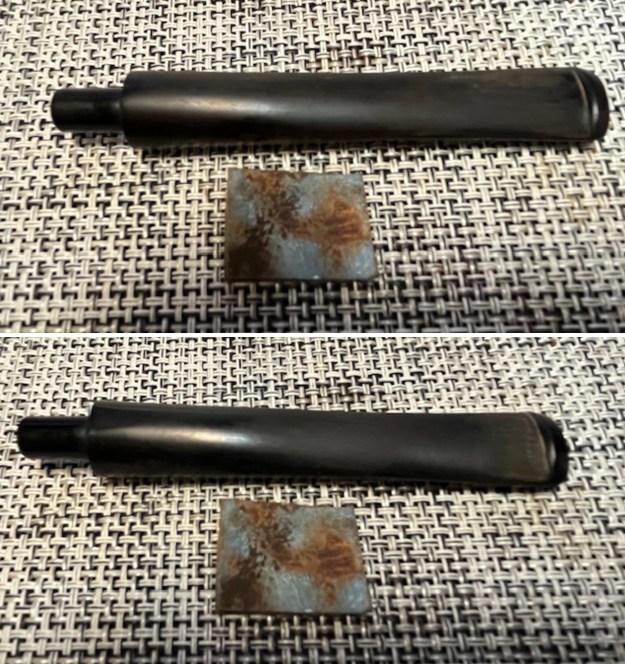
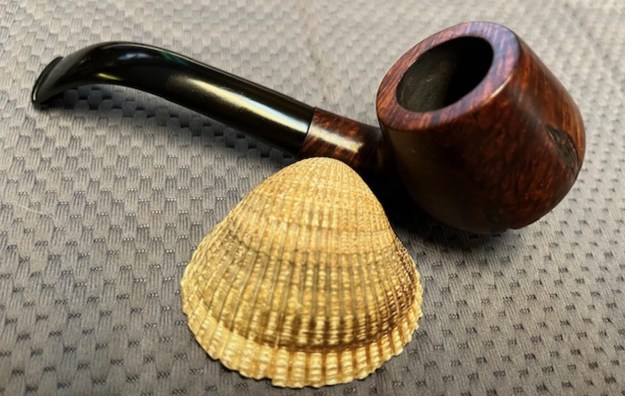
It was time to stain the pipe, so I took out my Fiebling’s black leather dye. I thoroughly coated the stummel with a dauber, then flamed it with my BIC lighter to set the color. I repeated this process three more times to ensure a really deep, rich, black colour. it worked a treat.
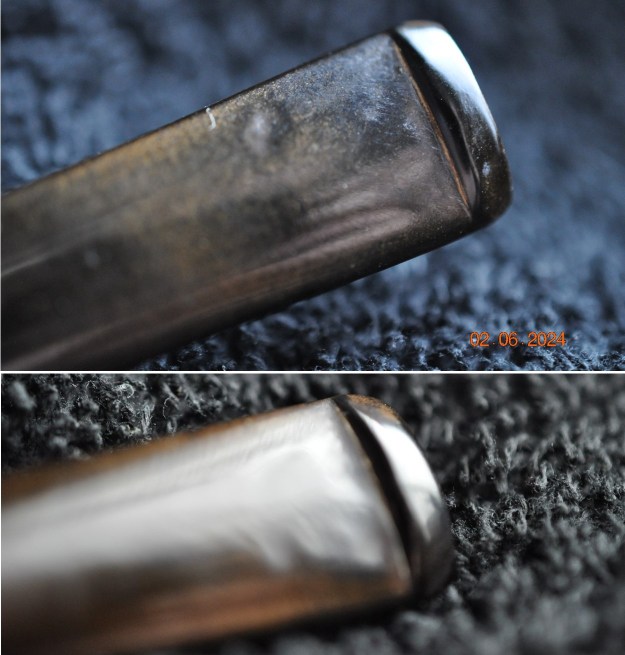
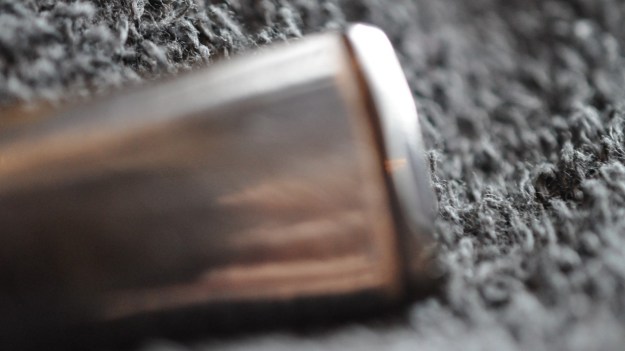
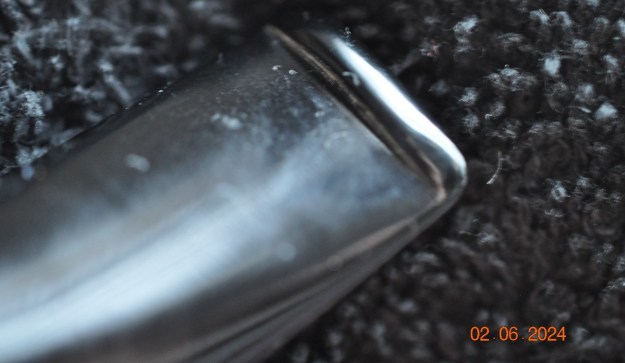
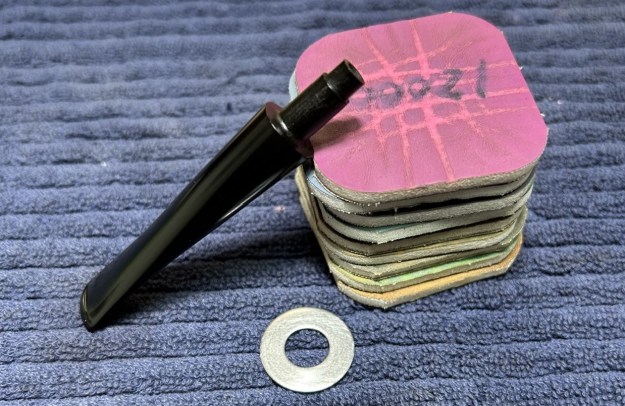
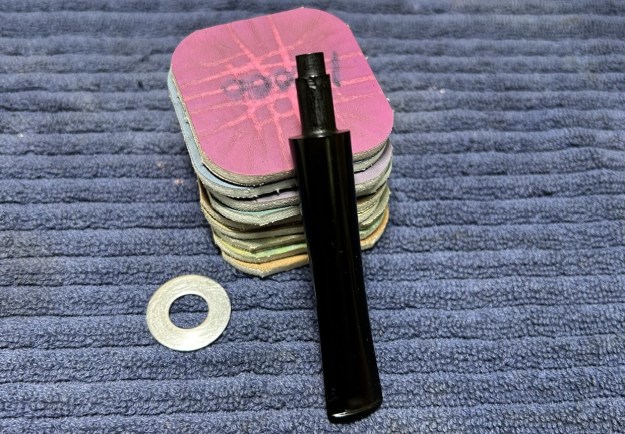
In order to ensure the crack in the shank doesn’t open up again, I decided to add a band to the shank to secure everything in place. The bands always look a little dull when they come out of my drawer, so I polished it up with my micromesh sanding pads. Naturally, I did the same to the stem. Came out beautifully. 
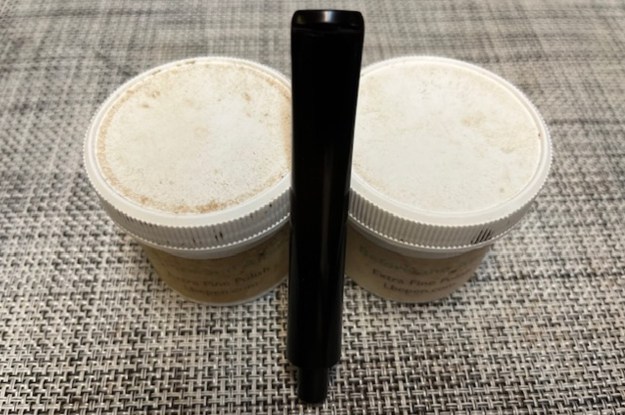
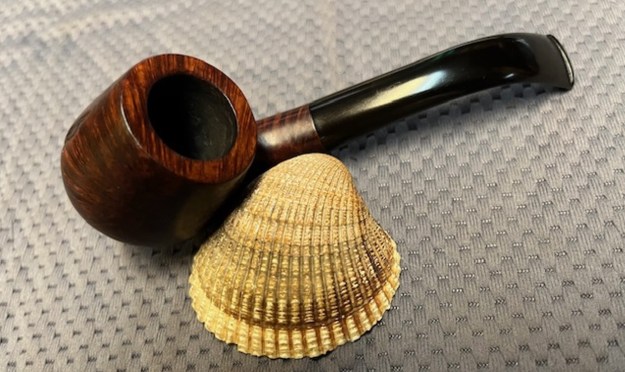
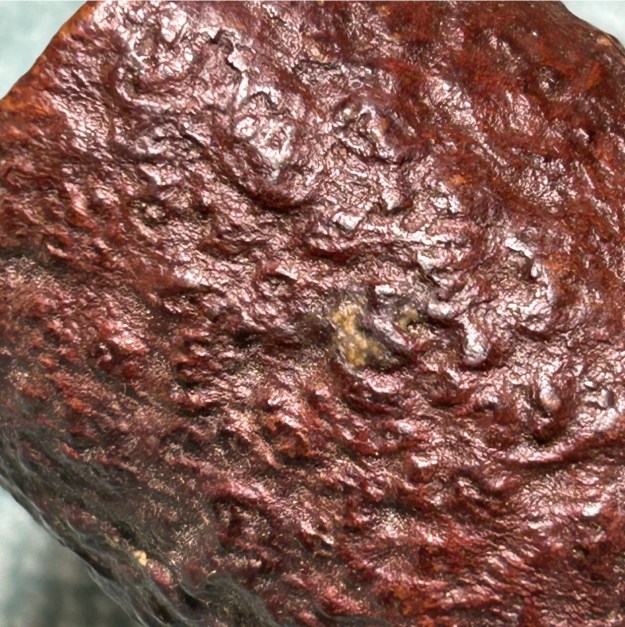
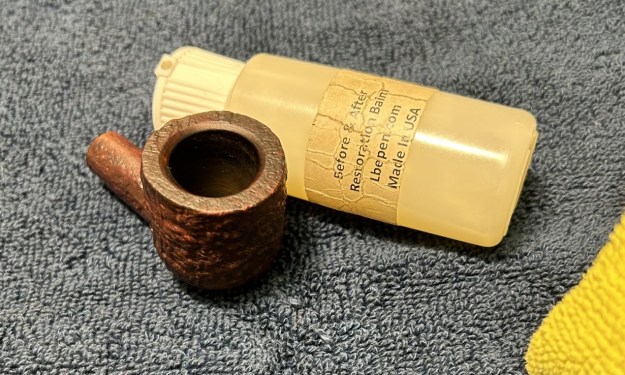
The next step, of course, was adding the restoration balm to the wood. This not only enriches and enlivens the briar, but helps add a protective layer to the dye in the wood. 
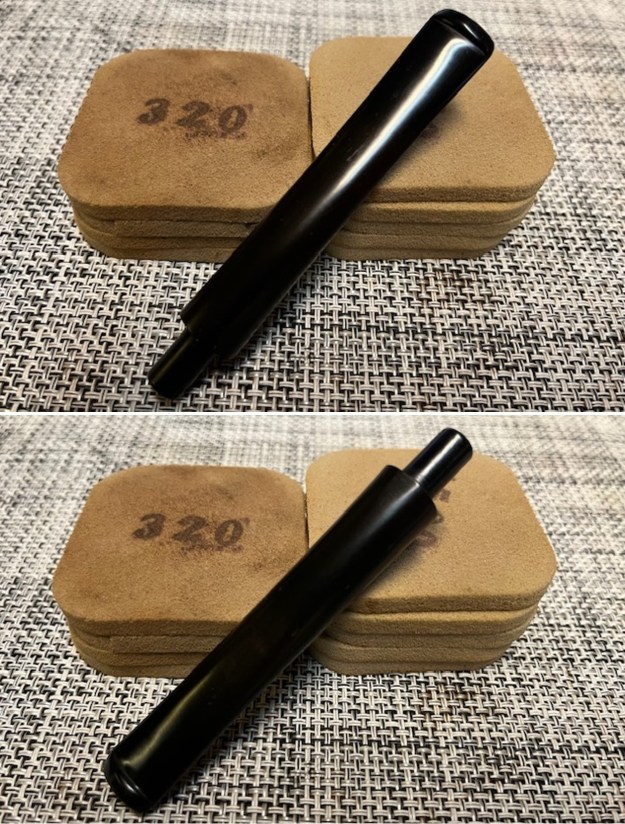
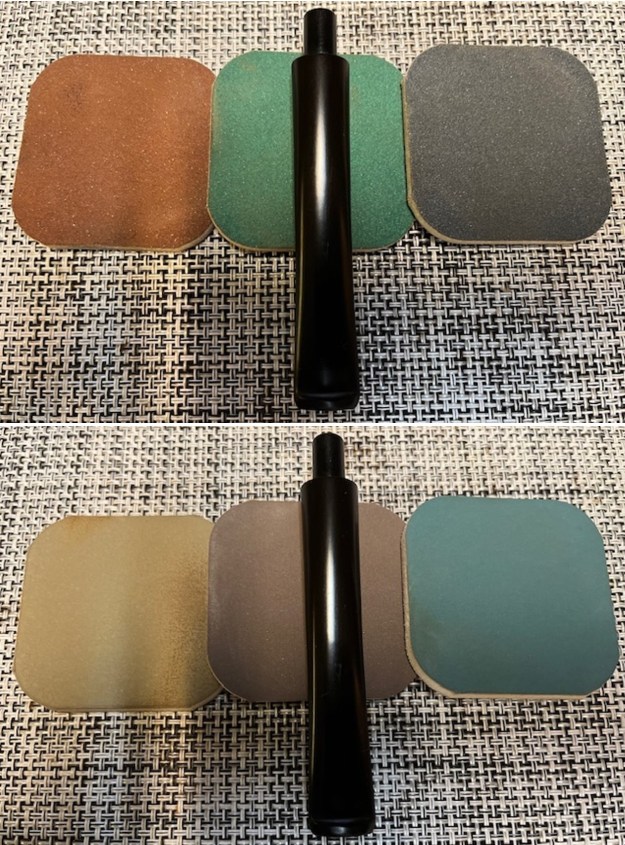
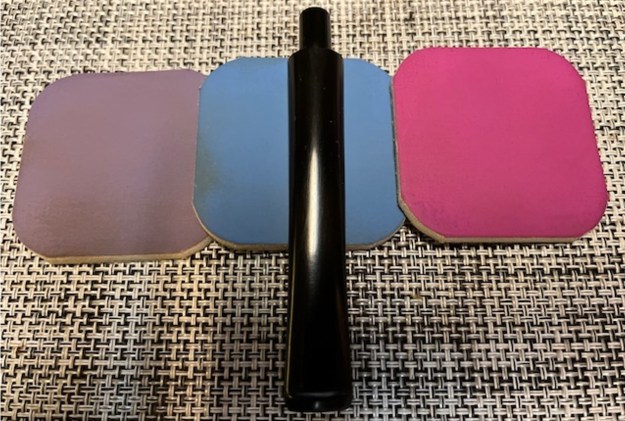
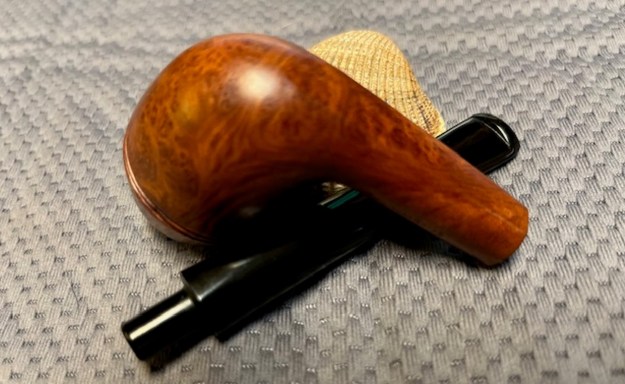
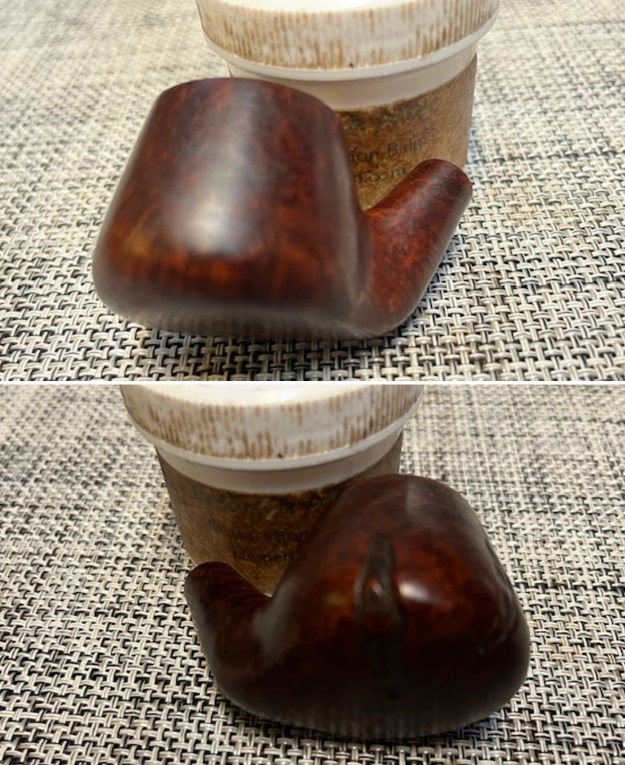
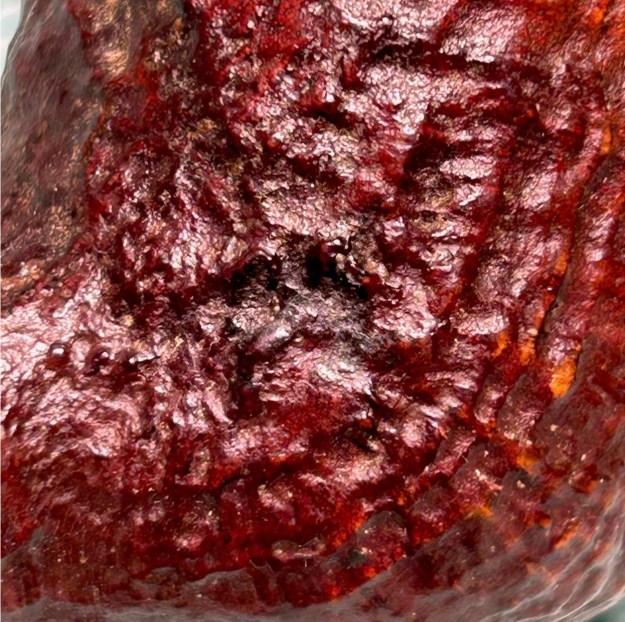
Off to my bench polisher! As usual, I used white diamond as my first compound, but instead of the regular conservator’s wax that I would use on sandblasted or rusticated pipes, I opted to use Halcyon II this time. It also gives a nice polish to the pipe, but slightly less shiny than normal – which is what I was aiming for.
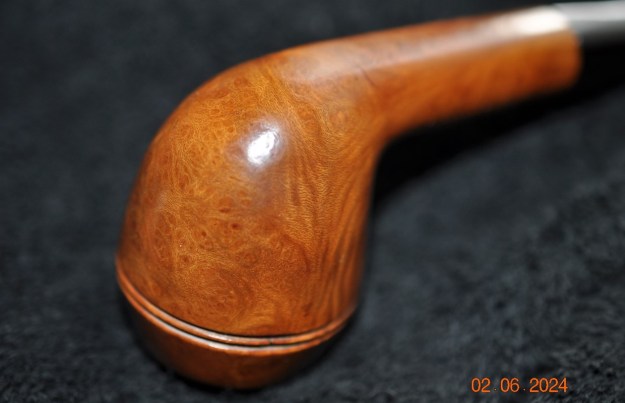
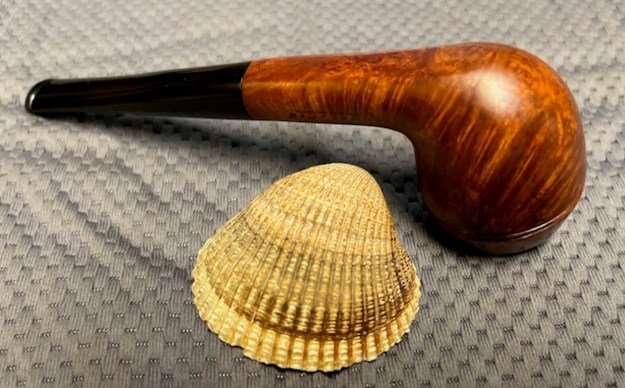
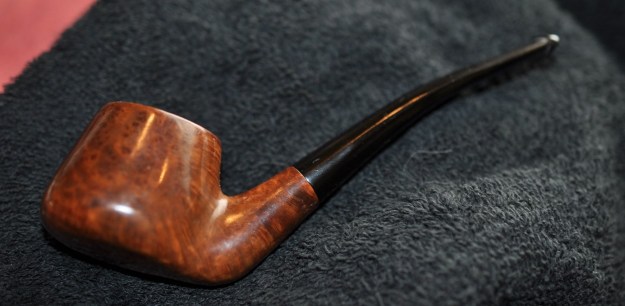
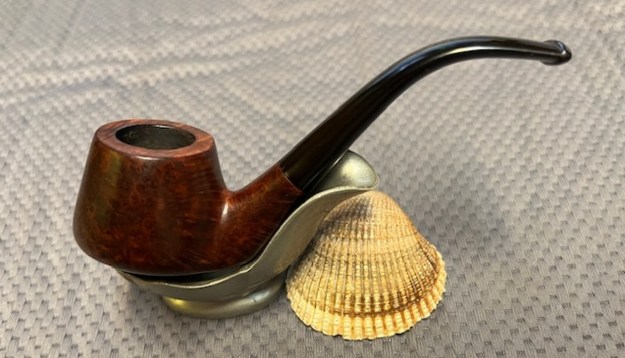
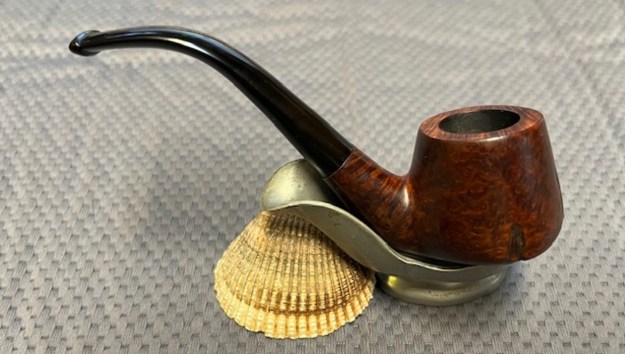
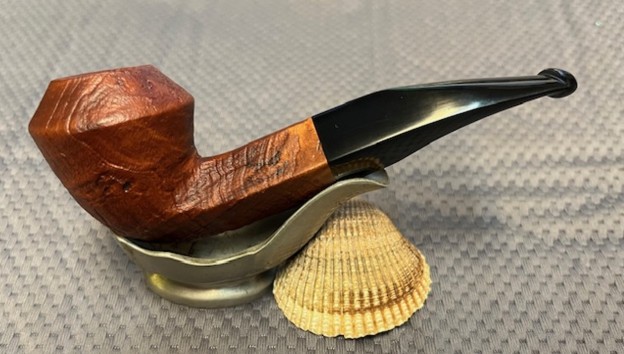
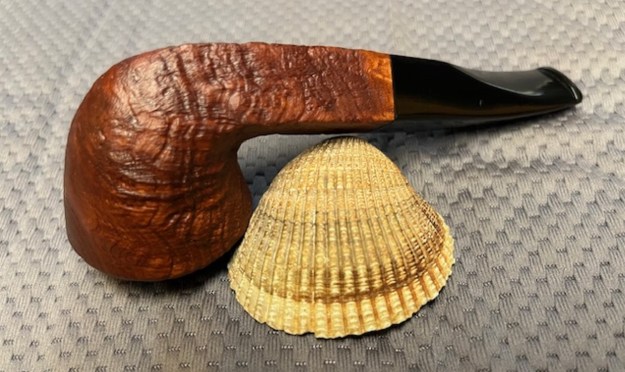
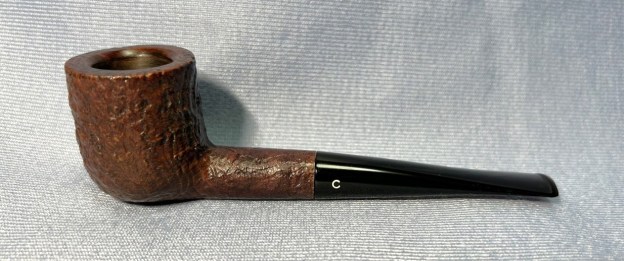
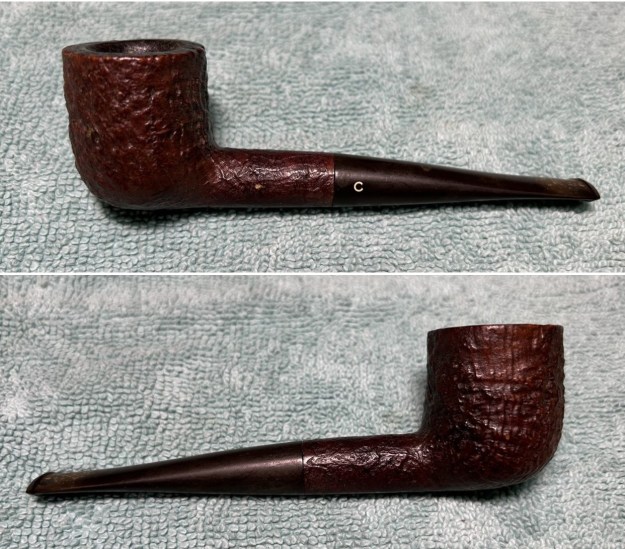
This Birks Bent Zulu looks beautiful once again. I’m sure my cousin will love it. I hope you enjoyed reading the story of this pipe as much I as I did restoring it. If you are interested in more of my work, please follow me here on Steve’s website or email me directly at kenneth@knightsofthepipe.com. Thank you very much for reading and, as always, I welcome and encourage your comments.

Restoring a Lovely 1982 Dunhill Shell 31101 Liverpool


Blog by Steve Laug

The next pipe on the table came to us from a group of pipes that Jeff and I purchased from a fellow in Copenhagen, Denmark on December 9, 2023. It is a Dunhill Shell Liverpool that is in good condition. It is stamped on a smooth panel on the underside of the shank with the shape number 31101 followed by Dunhill Shell [over] Made in England. Next to the D in England it is stamped the date number 22. The second number is faint but I believe it is a 2. There is nothing stamped after that – no circle number or letter. The stamping is clear and readable as noted above. The pipe has a mix of black, cordovan and brown stains on a sandblast finish and some amazing grain that the shape follows well. The finish was dusty around the nooks and crannies of the sandblast but otherwise fairly clean. The bowl had a thick cake and there was some light lava on the sandblasted rim top or edges. The taper stem was oxidized, calcified, dirty and had light tooth marks and chatter ahead of the button. Jeff took photos of the pipe to show what it looked like before he started working on it. He took photos of the bowl and rim top to show their condition and of the stem to show the condition of both sides of the stem. The photos of the sides and heel of the bowl show the deep sandblast grain on the pipe. It is a beauty. The stamping on the underside of the shank is shown in the photo below. It looks very good and faint but readable. It reads as noted and explained above. Jeff captured the detail in the photos below. One of the first things I like to do is to unpack the stamping and understand each element in it. I turned to Pipephil helpful site (http://pipephil.eu/logos/en/dunhill/shell-briar1.html). The stamping is interpreted as follows: The number 31101 is the shape number for a Liverpool. The Dunhill Shell is the finish. The shape number tells me that the bowl size is 3, the 11 tells me it is a Liverpool shape and the 01taper stem. The superscript, underlined 22 following the D of England gives the date the pipe as 1982. Pipephil also has some helpful dating keys on the site that are basically flow charts that you can walk through to date your pipe (http://pipephil.eu/logos/en/dunhill/cledat-en1.html). I turned to Part 1 of the Dating Key and followed the chart. This pipe has a suffix of underlined, superscript 22 following the D in England. That number took me to the section on the chart below (column one) which instructed me that the pipe could be dated as being made posterior to 1954.I followed the link following the “Your pipe is posterior to 1954. Narrow down your dating”. That took me to Page 2 of the dating key (http://pipephil.eu/logos/en/dunhill/cledat-en1a.html).   The second column (suffix 1…4 or 11…39) led me to the section the 22 suffix. There was a directive for dating the pipe spelled out as follows: 1960 + suffix which gives the pipe a date of 1982.I then turned to Pipedia’s section on Dunhill Root Briar to get a bit of background on the Dunhill finishes (https://pipedia.org/wiki/Dunhill#Root_Briar). I quote:

Shell
A deep craggy sandblast with a black stain finish (usually made using Algerian briar) – the color of the stain used has varied over the years. Although there is some doubt as to them being the first to sandblast pipes, Dunhill’s Shell pipes, and the sandblasting techniques developed to create them are considered one of Dunhill’s greatest and most lasting contributions to the art of pipe making.

The documented history of Dunhill’s inception of the Shell is largely limited to patent applications — there are no catalog pages or advertisements promoting blasted pipes at the time. The preliminary work on the English patent (No. 1484/17) was submitted on October 13, 1917. The patent submission was completed half a year later, on April 12, 1918, followed by the granting of the English patent on October 14, 1918. This was less than a month before the end of The Great War on November 11th.

In 1986 Dunhill released a line of premium Shell finish pipes – “RING GRAIN”. These are high-quality straight grain pipes which are sandblasted. Initially only Ring Grain, but now in two different finishes. In 1995 the “Shilling” was introduced with Cumberland finish – it is an extremely rare series. These pipes exhibit a deeper blast characteristic of that of the 1930’s – mid-1960’s (and the limited ‘deep blast’ pipes of the early 1980s) and show a fine graining pattern. These are considered the best new Dunhills by many enthusiasts today and are very rare. The finish is sometimes described as tasting like vanilla at first, with the taste becoming more normal or good as the pipe breaks in.

I have also included a chart from the site from Dunhill spelling out the Standard Pipe Finishes and giving short information and a timeline. I turned to work on the pipe itself. Jeff had done an amazing cleanup of the pipe. He reamed the light cake with a PipNet reamer and cleaned up that with a Savinelli Fitsall Pipe Knife. He scrubbed the internals of the bowl and stem with alcohol, cotton swabs and pipe cleaners. He scrubbed the externals with undiluted Murphy’s Oil Soap and rinsed the bowl off with running water. He soaked the stem in Briarville’s Pipe stem Deoxidizer and once it had soaked rinsed it off with warm water to remove the residual solution. He dried it off and rubbed it down to remove any oxidation that was still on the stem. The pipe looked very good when I received it. I took a photo of the rim top to show the condition. You can see the clean bowl. The bowl is in excellent condition and looks very good. The stem came out looking quite good. There are some light tooth marks and chatter on both sides ahead of the button. I took a photo of the underside of the shank to show the stamping. The photo clearly shows the stamping and is actually more readable in person. I removed the stem from the shank and took a photo of the pipe parts to show what I was working with. It is a nice looking pipe.I worked on the inner edge of the bowl to bring it back to round using a folded piece of 220 grit sandpaper. I gave it a slight bevel to accommodate the damage. I stained the edge of the bowl with a Walnut stain pen to match the rest of the bowl.The bowl was in such good condition that I had to do some minimal work with it. I rubbed the briar down with Before & After Restoration Balm. I worked it into the briar with my fingertips and a horsehair shoe brush to work it into the nooks and crannies of the sandblast finish. The product works to clean, enliven and preserve the briar. I let it sit for 10 minutes then I buffed it with a cotton cloth to deepen the shine. The briar really comes alive with the balm. The stem marks were light enough that I polished the vulcanite with micromesh sanding pads – 1500-12000 grit pads. I wiped it down with Obsidian Oil after each sanding pad. I used Before & After Pipe Polish – both Fine and Extra Fine to further polish the stem. This 1982 Dunhill Shell Briar 31101 Taper Stem Liverpool has a beautiful, unique Dunhill Sandblast finish that is very deep and craggy. The dark mixed black/brown/red finish highlights some great grain around the bowl and shank. It has some great rugged sandblast that Dunhill specialized in making. The polished black vulcanite taper stem adds to the mix. I put the stem back on the bowl and buffed the pipe with Blue Diamond on the buffing wheel being careful to not buff the stamping. I gave the bowl multiple coats of Conservator’s Wax and the stem multiple coats of carnauba wax on the buffing wheel and followed that by buffing it with a clean buffing pad. I hand buffed the pipe with a microfiber cloth to deepen the shine. The finished Dunhill Shell Briar 31101 Liverpool is quite nice and feels great in the hand. Give the finished pipe a look in the photos below. The dimensions of the pipe are Length: 5 inches, Height: 1 ¾ inches, Outside diameter of the bowl: 1 1/8 inches, Chamber diameter: ¾ of an inch. The weight of the pipe is .81 ounces/23 grams. Thanks for walking through the restoration with me as I worked over another beautiful pipe. If you are interested in adding it to your collection I will be adding it to the British Pipe Makers Section of the rebornpipes store. Thanks for your time.

New Life for a “Malaga” Apple with a Taper Vulcanite Stem


Blog by Steve Laug

I have three more Malaga Pipes that Jeff sent me to work on. The third of those on the table this afternoon is an interesting Malaga shape I would call an Apple. Jeff saw it on eBay and purchased it on 12/15/2023 from a seller in Tecumseh, Michigan, USA. The grain on this pipe is quite nice. Once again it was obviously someone’s favourite smoker. It is stamped on the left side of the shank and read “MALAGA” and on the right side it is stamped Imported Briar. The smooth bowl and shank were dirty and worn. There were tars and oils ground into the surface of the briar. The bowl had a thick cake that flowed over the top of the smooth rim in a spotty lava coat. There were also nicks and dents in the rim top surface. It was hard to clearly assess the condition of the inner edge. The condition of the rim edge and top would become clear in the cleaning process. The outer edge looked very good. The taper stem was vulcanite. There were light tooth marks on the top and the underside of the stem ahead of the button. Jeff took photos of the pipes before he started his clean up work. Jeff took photos of the rim and bowl to show the cake and the spotty lava on the rim top and edges. The inner edge of the rim showed thick cake coming up to the top and flowing over the edge. The outer edge showed some deep damage on the back side of the bowl. It was a dirty pipe but still a beauty. The vulcanite taper stem had deep tooth marks and chatter on the top and underside of the stem ahead of the button. The photos of the sides and heel of the bowl show some stunning and unique grain all around the pipe. The oil curing/finish makes the grain really stand out on the bowl and shank. Jeff took a photo of the stamping on the left side of the shank. On the left it read MALAGA as noted above. He did not take a photo of the right side but it read Imported Briar. The stamping was clear and readable.For those of you who are unfamiliar with the brand, I am also including the link to a blog that I wrote that gives some of the history of the Malaga brand and the Malaga Pipe Shop in Royal Oak, Michigan in the USA. Here is the link – https://rebornpipes.com/2013/02/09/george-khoubesser-and-malaga-pipes/. That blog also includes links to a catalogue and the history of the pipemaker George Khoubesser. If you are interested to learn more then I invite you to follow the link to get a feel for the brand and the pipemaker.

I am also am including a link to some printed material on the Malaga brand that came to me from the daughter of George Koch (we purchased George’s pipes from his daughter) to help identify the particular stamping on the pipe. The link takes you to the entire collection of materials that were sent to me (https://rebornpipes.com/2019/02/27/malaga-pipes-catalogue-of-pipes-and-tobaccos/).

Jeff had cleaned up the pipe using his usual procedure. He reamed the pipe with a PipNet pipe reamer and removed the rest of it with a Savinelli Fitsall Pipe Knife. He scrubbed the bowl with undiluted Murphy’s Oil Soap with a tooth brush. He rinsed it under running warm water to remove the soap and grime from around the bowl sides. It looked much better. He cleaned out the inside of the shank and the airway with alcohol, cotton swabs and pipe cleaners. The stem looked much better and the light tooth marks on both sides were still visible and would need a little work. I took photos of the pipe once I received it.  I took a photo of the rim top and the stem to show their condition. Jeff was able to clean up the cake and the lava overflow that was shown in the rim and bowl photos above. The rim top was clean and looked good. There was some darkening and damage on the rim top and inner and outer edges of the bowl (particularly on the back side of the bowl). The grain on it was quite nice. The stem looked better, though there were deep tooth marks and chatter on both sides ahead of the button. I took photos of the stamping on the shank to show that the clean up had not damaged them at all. It looked good. I removed the stem from the shank and took a photo of the parts to give a sense of what the pipe looks like. I started my work on the pipe by addressing the damage on the back outer edge and the rim top. I sanded the inner edge of the bowl and the top surface with a folded piece of 220 grit sandpaper. I was able to remove some of the darkening. I repaired the damage on the back of the bowl with briar dust and clear CA glue. I lightly topped the bowl on a topping board with 220 grit sand paper and blended the repairs on the top. I also sanded the repair on the back of the bowl. I sanded the bowl and the repairs with the 2 inch square 320-3500 grit sanding pads. I wiped down the briar after each sanding pad. I was able to smooth out the repair and blend them into the rest of the bowl and it looked very good. I restained the rim top with a Maple Stain Pen. The colour of the stain matched the rest of the bowl exterior. Once the stain cured I continued polishing the bowl and the stem with micromesh sanding pads. I polished the bowl sides and the smooth rim top with micromesh sanding pads. I dry sanded it with 1500-12000 grit micromesh pads. I wiped it down after each pad. It really began to be beautiful. I rubbed the bowl and shank down with Before & After Restoration Balm to deep clean the finish on the bowl and shank. The product works to clean, enliven and protect the briar. I worked it in with my fingers to get it into the briar. I worked it into the twin rings in the bowl cap with a shoe brush to get deep in the grooves. I let it sit for 10 minutes then I wiped it off and buffed it with a soft cloth. The briar really began to have a rich shine. I took some photos of the bowl at this point to mark the progress in the restoration. It is a beautiful bowl. I set the bowl aside and turned my attention to the stem. There were several deep tooth marks that I filled with black CA glue. I also built up the sharp edge of the button as well. Once the glue hardened I recut the button edge and flattened the repairs with a small file. I sanded them with 220 grit sandpaper to blend them further into the surface of the stem. I sanded the stem with the 2 inch square 320-3500 grit sanding pads. I wiped down the stem after each sanding pad. I was able blend in the repairs on both sides with the pads. The stem looked very good.I polished the stem with micromesh sanding pads – dry sanding with 1500-12000 grit pads. I wiped the stem down after each sanding pad with Obsidian Oil. I did a final hand polish of the stem with Before & After Pipe Stem Polish – both Fine and Extra Fine. I gave it a coat of Obsidian Pipe Stem Oil. It works to protect the stem from oxidizing. I set it aside to dry. I put the stem back on the “MALAGA” Imported Briar Apple and took it to the buffer. I buffed the bowl and stem with Blue Diamond to polish the briar and the vulcanite. Blue Diamond does a great job on the smaller scratches that remain in both. I gave the bowl and the stem several coats of carnauba wax and buffed the pipe with a clean buffing pad to raise the shine. I hand buffed it with a microfiber cloth to deepen the shine. I am amazed at how well it turned out. The finished pipe is shown in the photos below. This is beautiful smooth finished “MALAGA” Imported Briar Apple and the vulcanite taper stem combine to give the pipe a great look. The dimensions of the pipe are Length: 6 inches, Height: 1 ½ inches, Outside diameter of the bowl: 1 ¼ inches, Chamber diameter: ¾ of an inch. The weight of the pipe is 1.27 ounces/36 grams. This is another pipe that I will be putting on the rebornpipes online store in the American Pipe Makers and Pipemaking Companies Section shortly, if you are interested in adding it to your collection. Thanks for walking through the restoration with me on this beauty!

As always, I encourage your questions and comments as you read the blog. Thanks to each of you who are reading this blog. Remember we are not pipe owners; we are pipe men and women who hold our pipes in trust until they pass on into the trust of those who follow us.

A Senlar Billiard restoration


I have been John’s restorations of the three Senlar pipes. It was a brand I knew nothing about. Thanks for educating me about them.

Written and Photographed by John M. Young Over the past week I have restored two of the three Senlar pipes that I came into my possession.  The first…

A Senlar Billiard restoration

What an Interesting Malaga Imported Briar Rhodesian


Blog by Steve Laug

I have three more Malaga Pipes that Jeff sent me to work on. The second of those on the table this afternoon is an interesting Malaga I would call a Rhodesian. Jeff saw it on eBay and purchased the threesome on 12/22/2023 from a seller in Greensboro, North Carolina, USA. The grain on this pipe is quite nice. Once again it was obviously someone’s favourite smoker. It is stamped on the left side of the shank and read “MALAGA” and on the right side it is stamped Imported Briar. The smooth bowl and shank were dirty and worn. There were tars and oils ground into the surface of the briar. The bowl had a thick cake that flowed over the top of the smooth rim in a spotty lava coat. It was hard to clearly assess the condition of the inner edge. The condition of the rim edge and top would become clear in the cleaning process. The outer edge looked very good. The taper stem was vulcanite. There were light tooth marks on the top and the underside of the stem ahead of the button. Jeff took photos of the pipes before he started his clean up work. Jeff took photos of the rim and bowl to show the cake and the spotty lava on the rim top and edges. The inner edge of the rim showed thick cake coming up to the top and flowing over the edge. It was a dirty pipe but still a beauty. The vulcanite taper stem had light tooth marks and chatter on the top and underside of the stem ahead of the button. The photos of the sides and heel of the bowl show some stunning and unique grain all around the pipe. The oil curing/finish makes the grain really stand out on the bowl and shank. Jeff took photos of the stamping on the sides of the shank. On the left it read MALAGA as noted above. On the right it read Imported Briar. The stamping was clear and readable.For those of you who are unfamiliar with the brand, I am also including the link to a blog that I wrote that gives some of the history of the Malaga brand and the Malaga Pipe Shop in Royal Oak, Michigan in the USA. Here is the link – https://rebornpipes.com/2013/02/09/george-khoubesser-and-malaga-pipes/. That blog also includes links to a catalogue and the history of the pipemaker George Khoubesser. If you are interested to learn more then I invite you to follow the link to get a feel for the brand and the pipemaker.

I am also am including a link to some printed material on the Malaga brand that came to me from the daughter of George Koch (we purchased George’s pipes from his daughter) to help identify the particular stamping on the pipe. The link takes you to the entire collection of materials that were sent to me (https://rebornpipes.com/2019/02/27/malaga-pipes-catalogue-of-pipes-and-tobaccos/).

Jeff had cleaned up the pipe using his usual procedure. He reamed the pipe with a PipNet pipe reamer and removed the rest of it with a Savinelli Fitsall Pipe Knife. He scrubbed the bowl with undiluted Murphy’s Oil Soap with a tooth brush. He rinsed it under running warm water to remove the soap and grime from around the bowl sides. It looked much better. He cleaned out the inside of the shank and the airway with alcohol, cotton swabs and pipe cleaners. The stem looked much better and the light tooth marks on both sides were still visible and would need a little work. I took photos of the pipe once I received it.  I took a photo of the rim top and the stem to show their condition. Jeff was able to clean up the cake and the lava overflow that was shown in the rim and bowl photos above. The rim top was clean and looked very good. There was some darkening on the front outer edge. The grain on it was quite nice. The stem looked better, though there were tooth marks and chatter on both sides ahead of the button. I took photos of the stamping on the shank to show that the clean up had not damaged them at all. It looked good. I removed the stem from the shank and took a photo of the parts to give a sense of what the pipe looks like. I started my work on the pipe by addressing the damage on the front inner edge and the rim top. I sanded the inner edge of the bowl and the top surface with a folded piece of 220 grit sandpaper. I was able to remove some of the darkening. I lightly topped the bowl on a topping board with 220 grit sand paper and removed the rest of the damage. I polished the bowl sides and the smooth rim top with micromesh sanding pads. I dry sanded it with 1500-12000 grit micromesh pads. I wiped it down after each pad. It really began to be beautiful.I paused the polishing after the 2400 grit sanding pad and restained the rim top with a Maple Stain Pen. The colour of the stain matched the rest of the bowl exterior. Once the stain cured I continued polishing the bowl and the stem with micromesh sanding pads. I rubbed the bowl and shank down with Before & After Restoration Balm to deep clean the finish on the bowl and shank. The product works to clean, enliven and protect the briar. I worked it in with my fingers to get it into the briar. I worked it into the twin rings in the bowl cap with a shoe brush to get deep in the grooves. I let it sit for 10 minutes then I wiped it off and buffed it with a soft cloth. The briar really began to have a rich shine. I took some photos of the bowl at this point to mark the progress in the restoration. It is a beautiful bowl. I set the bowl aside and turned my attention to the stem. I “painted” the tooth marks with the flame of a lighter to lift them. I was able to lift them significantly. There were several deeper ones that I filled with clear CA glue. Once the glue hardened I flattened them with a small file. I sanded them with 220 grit sandpaper to blend them further into the surface of the stem. I sanded the stem with the 2 inch square 320-3500 grit sanding pads. I wiped down the stem after each sanding pad. I was able to remove the tooth marks and chatter on both sides with the pads. The stem looked very good.I polished the stem with micromesh sanding pads – dry sanding with 1500-12000 grit pads. I wiped the stem down after each sanding pad with Obsidian Oil. I did a final hand polish of the stem with Before & After Pipe Stem Polish – both Fine and Extra Fine. I gave it a coat of Obsidian Pipe Stem Oil. It works to protect the stem from oxidizing. I set it aside to dry. I put the stem back on the “MALAGA” Imported Briar Rhodesian and took it to the buffer. I buffed the bowl and stem with Blue Diamond to polish the briar and the vulcanite. Blue Diamond does a great job on the smaller scratches that remain in both. I gave the bowl and the stem several coats of carnauba wax and buffed the pipe with a clean buffing pad to raise the shine. I hand buffed it with a microfiber cloth to deepen the shine. I am amazed at how well it turned out. The finished pipe is shown in the photos below. This is beautiful smooth finished “MALAGA” Imported Briar Rhodesian and the vulcanite taper stem combine to give the pipe a great look. The dimensions of the pipe are Length: 6 inches, Height: 1 ¾ inches, Outside diameter of the bowl: 1 ¼ inches, Chamber diameter: ¾ of an inch. The weight of the pipe is 1.13 ounces/32 grams. This is another pipe that I will be putting on the rebornpipes online store in the American Pipe Makers and Pipemaking Companies Section shortly, if you are interested in adding it to your collection. Thanks for walking through the restoration with me on this beauty!

As always, I encourage your questions and comments as you read the blog. Thanks to each of you who are reading this blog. Remember we are not pipe owners; we are pipe men and women who hold our pipes in trust until they pass on into the trust of those who follow us.

Would you call it a Bent Volcano?


Blog by Steve Laug

I have three more Malaga Pipes that Jeff sent me to work on. The first of those on the table this afternoon is an interesting Malaga in a shape I would call a Volcano. Jeff saw it on eBay and purchased the threesome on 12/22/2023 from a seller in Greensboro, North Carolina, USA. The grain on this pipe is quite nice. Once again it was obviously someone’s favourite smoker. The pipe is stamped on the underside of the shank and reads MALAGA. The smooth bowl and shank were dirty and worn. There were tars and oils ground into the surface of the briar. The bowl had a moderate cake that flowed over the top of the smooth rim in a spotty lava coat. The cake in the bowl extended up to the top of the rim. It was hard to clearly assess the condition of the inner edge. The condition of the rim edge and top would become clear in the cleaning process. The outer edge looked very good. The taper stem was vulcanite. It had originally been bent and when it sat as a sitter the stem would have angled to match the rim top. However, over time the stem had straightened a lot and would need to be bent again. There were light tooth marks on the top and the underside of the stem ahead of the button. Jeff took photos of the pipes before he started his clean up work. Jeff took photos of the rim and bowl to show the cake and the spotty lava on the rim top and edges. The inner edge of the rim showed thick cake coming up to the top and flowing over the edge. It was a dirty pipe but still a beauty. The vulcanite taper stem had light tooth marks and chatter on the top and underside of the stem ahead of the button. The photos of the sides and heel of the bowl show some stunning and unique grain all around the pipe. There are also two carved “leaves” or loose lines on the right side and the front of the bowl at the bottom edge. The oil curing/finish makes the grain really stand out on the bowl and shank. Jeff took a photo of the stamping on the underside of the shank. It read MALAGA as noted above. The stamping was clear and readable.For those of you who are unfamiliar with the brand, I am also including the link to a blog that I wrote that gives some of the history of the Malaga brand and the Malaga Pipe Shop in Royal Oak, Michigan in the USA. Here is the link – https://rebornpipes.com/2013/02/09/george-khoubesser-and-malaga-pipes/. That blog also includes links to a catalogue and the history of the pipemaker George Khoubesser. If you are interested to learn more then I invite you to follow the link to get a feel for the brand and the pipemaker.

I am also am including a link to some printed material on the Malaga brand that came to me from the daughter of George Koch (we purchased George’s pipes from his daughter) to help identify the particular stamping on the pipe. The link takes you to the entire collection of materials that were sent to me (https://rebornpipes.com/2019/02/27/malaga-pipes-catalogue-of-pipes-and-tobaccos/).

Jeff had cleaned up the pipe using his usual procedure. He reamed the pipe with a PipNet pipe reamer and removed the rest of it with a Savinelli Fitsall Pipe Knife. He scrubbed the bowl with undiluted Murphy’s Oil Soap with a tooth brush. He rinsed it under running warm water to remove the soap and grime from around the bowl sides. It looked much better. He cleaned out the inside of the shank and the airway with alcohol, cotton swabs and pipe cleaners. The stem looked much better and the light tooth marks on both sides were still visible and would need a little work. I took photos of the pipe once I received it. I took a photo of the rim top and the stem to show their condition. Jeff was able to clean up the cake and the lava overflow that was shown in the rim and bowl photos above. The rim top was clean and looked very good. There was some darkening on the front outer edge. The grain on it was quite nice. The stem looked better, though there were tooth marks and chatter on both sides ahead of the button. I removed the stem from the shank and took a photo of the parts to give a sense of what the pipe looks like.I polished the bowl sides and the smooth rim top with micromesh sanding pads. I dry sanded it with 1500-12000 grit micromesh pads. I wiped it down after each pad. It really began to be beautiful. I rubbed the bowl and shank down with Before & After Restoration Balm to deep clean the finish on the bowl and shank. The product works to clean, enliven and protect the briar. I worked it in with my fingers to get it into the briar. I let it sit for 10 minutes then I wiped it off and buffed it with a soft cloth. The briar really began to have a rich shine. I took some photos of the bowl at this point to mark the progress in the restoration. It is a beautiful bowl.  I set the bowl aside and turned my attention to the stem. I polished the stem with micromesh sanding pads – dry sanding with 1500-12000 grit pads. I wiped the stem down after each sanding pad with Obsidian Oil. Before polishing the stem with the final polished I decided to bend it. I heated the stem with the flame of a lighter to soften the vulcanite and once soft I bent the stem to match the flow of the top of the bowl.I did a final hand polish of the stem with Before & After Pipe Stem Polish – both Fine and Extra Fine. I gave it a coat of Obsidian Pipe Stem Oil. It works to protect the stem from oxidizing. I set it aside to dry.I put the stem back on the MALAGA Bent Volcano and took it to the buffer. I buffed the bowl and stem with Blue Diamond to polish the briar and the vulcanite. Blue Diamond does a great job on the smaller scratches that remain in both. I gave the bowl and the stem several coats of carnauba wax and buffed the pipe with a clean buffing pad to raise the shine. I hand buffed it with a microfiber cloth to deepen the shine. I am amazed at how well it turned out. The finished pipe is shown in the photos below. This is beautiful smooth finished MALAGA Bent Volcano and the vulcanite taper stem combines to give the pipe a great look. The dimensions of the pipe are Length: 5 inches, Height: 1 ¼ inches, Outside diameter of the bowl: 1 1/8 inches, Chamber diameter: ¾ of an inch. The weight of the pipe is 1.23 ounces/35 grams. This is another pipe that I will be putting on the rebornpipes online store in the American Pipe Makers and Pipemaking Companies Section shortly, if you are interested in adding it to your collection. Thanks for walking through the restoration with me on this beauty!

As always, I encourage your questions and comments as you read the blog. Thanks to each of you who are reading this blog. Remember we are not pipe owners; we are pipe men and women who hold our pipes in trust until they pass on into the trust of those who follow us.

What Great Bones on this nice Sandblast Straight Bulldog


Blog by Steve Laug

This interesting sandblast Bulldog pipe was purchased from an estate in Nampa, Idaho, USA on 11/09/2023. It is a natural sandblast briar with great grain around the bowl and shank. The stem is an acrylic taper stem. The sandblast finish had some oils and grime on the surface and in the grooves. It had begun to darken in spots around the bowl sides. The bowl was lightly smoked with raw briar on the lower half of the bowl. The rim top was quite clean and the inner and outer edge looked very good. The pipe is stamped on the left side of the shank and has crossed bone and rabbit ears [over] BONES. The acrylic stem had no stamping on the sides. It had scratches, light tooth marks and chatter on both sides ahead of the button. It was really an interesting sandblast with twists and turns in the briar. Jeff took photos of it before he worked his magic in the cleanup process. The exterior of the pipe was soiled with oils and dust but still looked very good. The rim top was in very good condition. The bowl itself had a was quite clean but there was a light cake on the sides of the top half. The lower half of the bowl was raw briar. The acrylic taper stem surface had some light scratches and marks on both sides. Jeff took photos of the sides of the bowl and shank to give a better feel for the condition of the bowl. You can see the interesting grain on the bowl side and front. He took a photo of the stamping on the left side of the shank. It is clear and reads as noted above.I took a few moments before working on the pipe to do a bit of research on the Bones pipes line. I knew they were made by Morgan Pipes so I started there. I looked up the Morgan Pipes site  (https://morganpipes.com/collections/bones) and quote from there:

Bones Pipes are pipes – Thats it – No fancy stuff… If you want a pipe to start with or just build your collection, Bones are the pipes for you. Toss it in a tackle box or a backpack and go. These pipes are, simply put, the absolute least expensive honest briar pipe on the market. A simple smoking machine.

I Googled and found a great link to Cupojoes tobacco shop (https://www.cupojoes.com/tobacco-pipes/morgan-bones/). They had a great description of the line from the perspective of the seller. I have included that below.

Chris Morgan began making pipes in 2006, and has since become renowned name within the pipe smoking community. The reason being: the world famous Bones Pipe. The Bones pipe is exactly what it sounds like, the bare naked skeleton of a pipe, that we often never get a chance to see. While other companies rely heavily on staining and sandblasting techniques, the Bones comes in a truly unfinished, natural beauty, making each one (even if the same shape) unique. Praised for their affordability, Bones pipes are the perfect pipe for travel & on the go, often small enough to fit into pockets. Chris offers other lines such as the impeccably built Black Jack series, and the famous patented cigar style pipe called the “Briar Cigar”.

Now it was time to do my work on the pipe. Jeff reamed it with a PipNet pipe reamer and cleaned up the remaining cake in the bowl with a Savinelli Fitsall Pipe Knife. He scrubbed out the internals with alcohol, pipe cleaners and cotton swabs until the pipe was clean. He scrubbed the exterior of the bowl with Murphy’s Oil Soap and a tooth brush to remove the grime and grit on the bowl and on the rim top. The finish looks very good with good looking grain around the bowl and shank. The finish is also a bit darker than when started. The rim top looked very good. He scrubbed the stem surface with Soft Scrub to remove the grime on the acrylic. When the pipe arrived here in Vancouver for the second stop of its restoration tour it looked a lot better. I took photos before I started my part of the work. I took a photo of the bowl and rim top to show how well it had cleaned up. The top and the edges of the bowl are in very good condition. The stem had some light marks and chatter on both sides ahead of the button.I took a photo of the stamping on the shank and took the stem off the pipe to give a sense of the proportions of the pipe. It is a nice one.I started the simple cleanup work by rubbing Before & After Restoration Balm deep into the smooth finish to clean, enliven and protect the briar. The briar was in excellent condition so I hand rubbed it with my fingers and worked it into the finish with a shoe brush. I set it aside to dry for 10-15 minutes. I wiped it off with a soft cloth. I buffed the bowl with a cotton cloth to polish it. It really began to have a deep shine in the briar. I took some photos of the bowl at this point to mark the progress in the restoration. The grain on the bowl stands out with interesting lines moving across the sides of the bowl. I set the bowl aside and turned my attention to the stem. I polished the acrylic stem with micromesh sanding pads – dry sanding it with 1500-12000 grit pads. I wiped the stem down after each sanding pad with Obsidian Oil and set it aside to dry. I polished it further with Before & After Pipe Polish – using both the Fine and Extra Fine Polishes. I gave it a rubdown with Obsidian Oil one last time and set it aside. I put the Chris Morgan made Bones ¼ Bent Bulldog back together and worked the pipe over on the buffing wheel using Blue Diamond to lightly polish the bowl and the acrylic stem. I buffed the bowl and stem to raise the gloss on the briar and the acrylic. I gave the pipe multiple coats of carnauba wax. I buffed the entire pipe with a clean buffing pad to raise the shine. I hand buffed it with a microfiber cloth to deepen the shine. The finished the Bones Bulldog is shown in the photos below. The natural sandblast finish had taken on a patina and the Bulldog shaped bowl works well with the rich black acrylic stem. It looked quite amazing! The dimensions of the pipe are: Length: 5 ½ inches, Height: 2 inches, Outside Diameter: 1 ¾ inches, Diameter of the chamber: ¾ of an inch. The weight of the pipe is 43 grams/1.48 ounces. This is an sandblast on the bowl and shank that reveals the grain underneath. I really like how the briar and the acrylic work well together. This one will soon be on the rebornpipes store in the American (US) Makers Section. If you are interested in adding this Bones pipe to your collection this may well be the one for you. Thanks for walking with me through the restoration process.

Just a Beautiful Comoy’s


Blog by Kenneth Lieblich

Sometimes one comes across a pipe that oozes comfort and class – this is that pipe. It’s a Comoy’s 122 Sandblast pot and it could hardly be more handsome. This pipe is so attractive that it practically demands to be caressed and smoked. I got it sometime ago from a lot of fine pipes that belonged to an old fellow who had gone to meet his maker. And speaking of makers, let’s talk about Comoy’s. There is plenty of history to be had on this company and I would encourage you to read Pipedia’s article here and Pipephil’s article here. The markings on the pipe are straightforward. On the underside of the shank, we see Comoy’s [over] Sandblast. Immediately to the right of that is the shape number: 122. Again, immediately to the right of that is Made in London [over] England. In addition, the left side of the stem has the so-called three-piece “C”.

Comoy’s shape number chart lists the number 122 as being a medium-sized, straight-stemmed pot and that just about sums it up. I consulted with the dating guide on Pipedia to narrow down the date of this pipe. If you want to read along, please have a look at https://pipedia.org/wiki/Comoy%27s_Dating_Guide in order to see what I’m taking about. This pipe dates from the 1950s onwards and corresponds to the first variant of Comoy’s stamp during this period, which is

A simple block-letter style without serifs but with the C larger than the other letters and the apostrophe before the “S”.

You can see that this matches my markings. One thing that is interesting (and has not been noted anywhere in this guide) is that the letters in “Comoy’s” are indeed without serifs EXCEPT for the “S”. If you look closely, you’ll see that the S after the apostrophe does indeed have serifs. I don’t know what this indicates, but if YOU do, please tell us in the comments below. In addition, the “Made in” stamp also corresponds to the same time period as above.The three-piece “C” on the stem also dates from the 1950s onwards and was discontinued in the early 1980s, when Cadogan took over. So we know this pipe is before the Cadogan era. We are left with the rather vague date of somewhere between 1950 and 1980. I am making an assumption that because this pipe corresponds to the first stamping variant listed in the guide, it is of an earlier part of that range. However, I have reason to make that assumption. I looked at Greg Pease’s writeup on Comoy’s and his dating information is basically the same as the Pipedia stuff above. Pease, however, adds this important tidbit:

Sometime in the 60’s, it the serifs were returned to the “COMOY’S” lettering, though, as mentioned above, the typeface is not as fancy as the earlier one. It appears that some grades carried different stamps or at least that the stamping changed in different years for some grades. At this point, this is highly speculative, as my sample size is too small to verify it.

Based on this, I am going to suggest that this pipe probably (but not definitely) dates from the 1950s. Once again, if you can shed some light on this, please do. Moving on to the pipe itself…Let’s have a closer look at the stem. It’s certainly dirty and has obviously been well loved. There are a few scratches from teeth and a few dents. The button will need a bit of work. There’s definitely some calcification on the stem and a little bit of oxidation nothing too bad. The stummel was also in nice condition. It had a few small blemishes, but very minor. I was sure I could make it beautiful again.I started out by cleaning the inside of the stem with lemon-infused 99% isopropyl alcohol and some pipe cleaners. It was dirty, but not too bad. I also cleaned the stem with some Murphy’s on some cotton rounds. As you can see, the stem was pretty dirty, and will need a good soaking. I took my BIC lighter to the stem, in order to try and raise the tooth dents. I knew full well this wasn’t going to be fully successful, but it was worth a shot. The top side of the stem came out pretty well, but the underside was not so good.After all that, the stem went for a dip in the stem oxidation remover. I let it sit overnight, to allow all the oxidation to rise to the surface of the stem. The next day, I cleaned up the stem with some cleanser on some cotton pads. This worked very nicely. I then repaired the tooth dents with some carbon-and-rubber-imbued black cyanoacrylate adhesive. Forgot to take a photo though. Onto the stummel. In order to clean out the cake in the bowl, I used the Pipnet reamer and followed that up with a piece of sandpaper taped to a wooden dowel. I sanded down the cake until I hit the briar walls, so that I could inspect them for potential damage. Everything looked good on the inside, which is great.I proceeded to clean out the inside of the shank with 99% isopropyl alcohol and pipe cleaners and cotton swabs. It was surprisingly dirty in there! But I got it clean in the end.When that was done, I set up to de-ghost the pipe. I put some cotton balls into the bowl and the shank and soaked them with 99% isopropyl alcohol. I let that sit overnight so that any remaining smells and/or filth would leach out into the cotton.Meanwhile, back to the stem. The cyanoacrylate glue worked well, and I sanded down those spots to bring them close to level with the surrounding vulcanite. I then took my nine Micromesh pads and sanded the whole stem until it was shining like new. I also used my pipe stem oil in between the pads to bring out some extra lustre. And back to the stummel! It was in very nice shape, although the rim did have some lava on it. I used a piece of machine metal to gently scrape off as much of this as I could so as to avoid damaging the rim. A good amount of debris came off, which was nice to see.I then set the rim to soak in some lightly diluted Murphy’s to soften up some of that stuff. After soaking for 10 minutes or so, I brushed the rim with a toothbrush to loosen up that gunk. I also brushed some Murphy’s all over the stummel in order to clean it.Some spots had lightened over the course of this pipe’s life, so I used one of my furniture pens to simply dot the areas that were missing colour. It blended in perfectly. I then took my Before and After Balm, rubbed it in the wood and let it sit for about 20 minutes. This balm is fantastic stuff and does wonderful things to nourish the wood. After letting it sit, I used a microfibre cloth and buffed it. Off to the bench polisher to put the final touches on this pipe. I first gave it a thorough (but light-handed) going-over with White Diamond compound. One doesn’t want to use too much for fear of gumming up the sandblast. Following that, several coats of conservator’s wax created a beautiful, glossy seal on the pipe.All done! This Comoy’s 122 Sandblast pot looks fantastic and is ready to be enjoyed again by the next owner. I am pleased to announce that this pipe is for sale! If you are interested in acquiring it for your collection, please have a look in the “British” section of the store here on Steve’s website. You can also email me directly at kenneth@knightsofthepipe.com. The approximate dimensions of the pipe are as follows: length 5⅜ in. (137 mm); height 1⅝ in. (41 mm); bowl diameter 1⅓ in. (34 mm); chamber diameter ¾ in. (20 mm). The weight of the pipe is 1⅛ oz. (33 g). I hope you enjoyed reading the story of this pipe’s restoration as much as I did restoring it. If you are interested in more of my work, please follow me here on Steve’s website or send me an email. Thank you very much for reading and, as always, I welcome and encourage your comments.