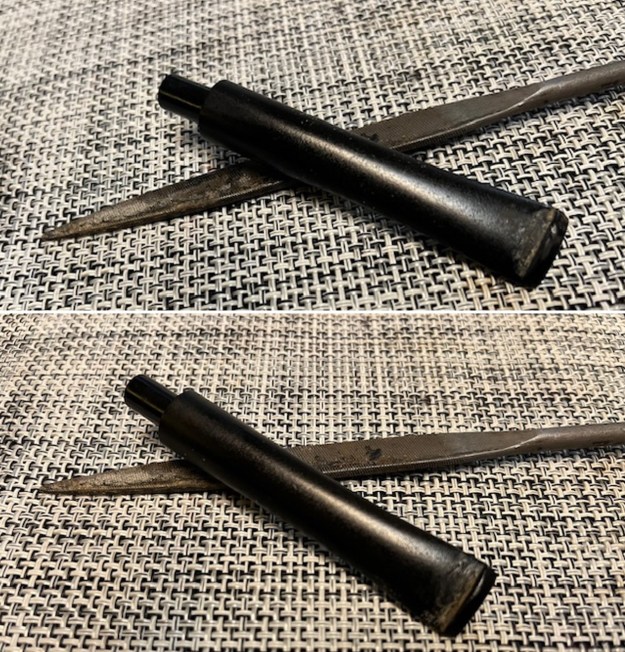
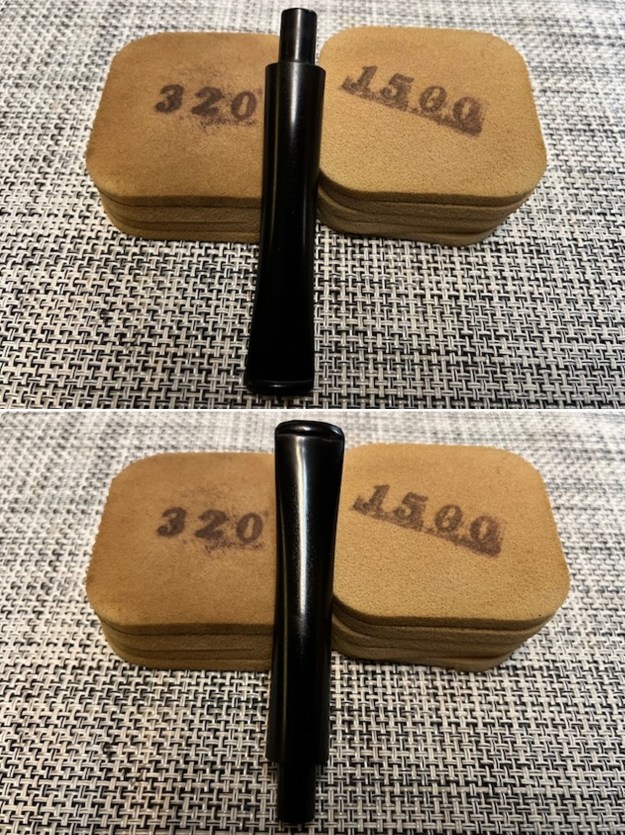
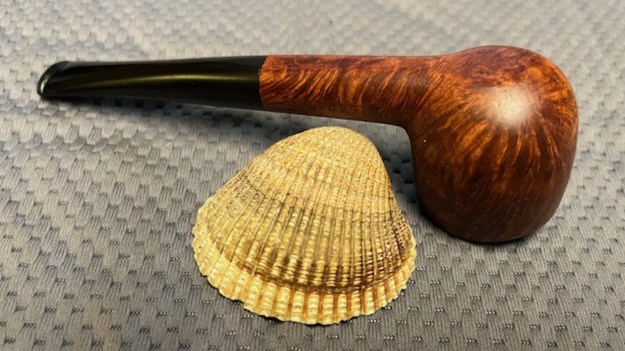
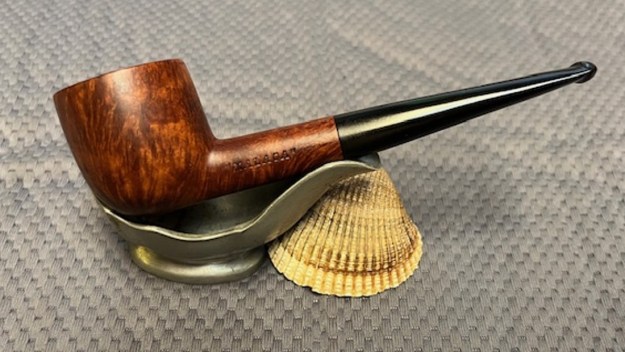
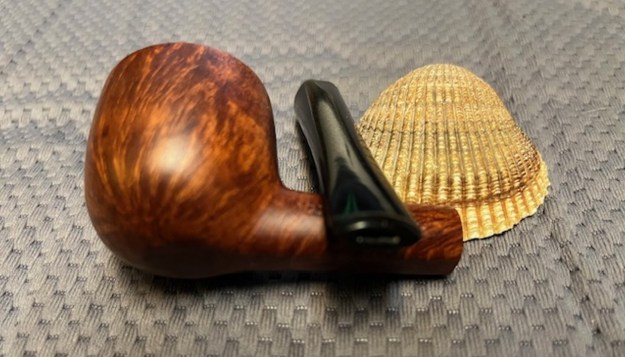
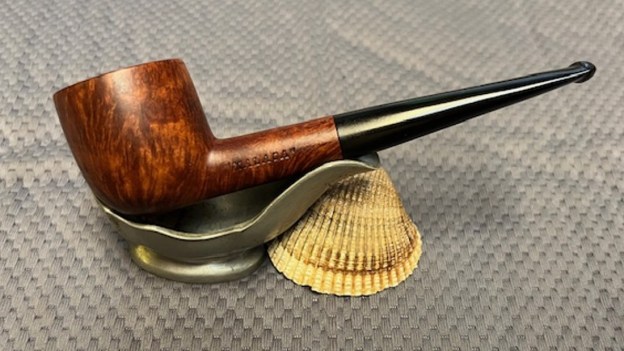
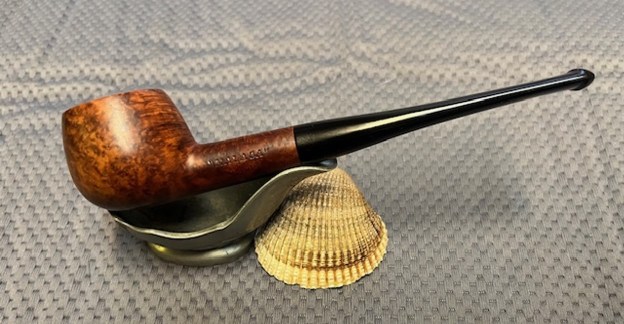
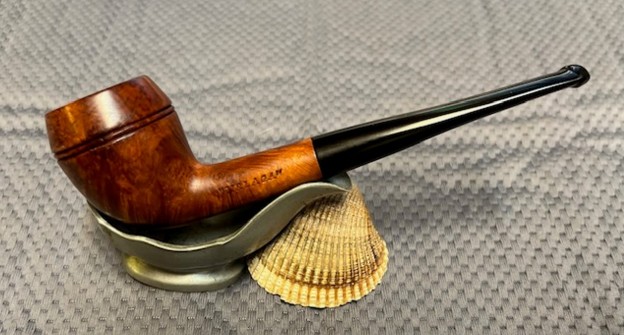
Tag Archives: Malaga Briar pipes

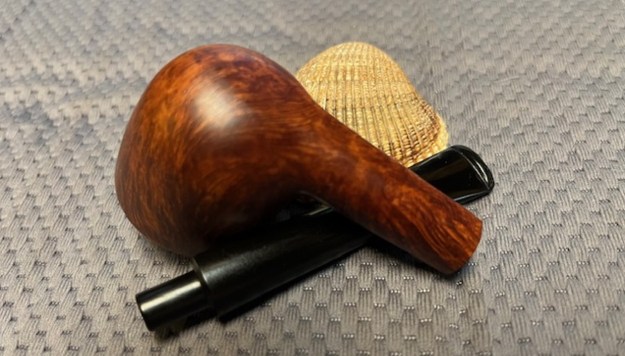
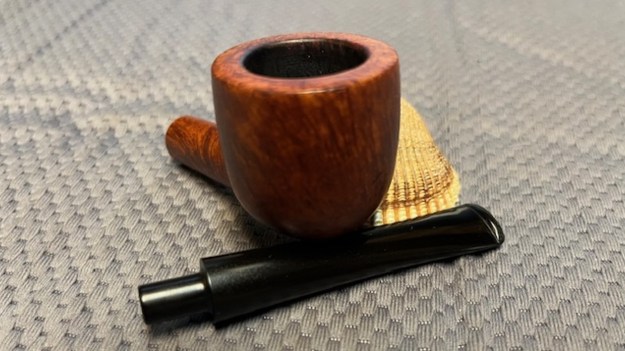
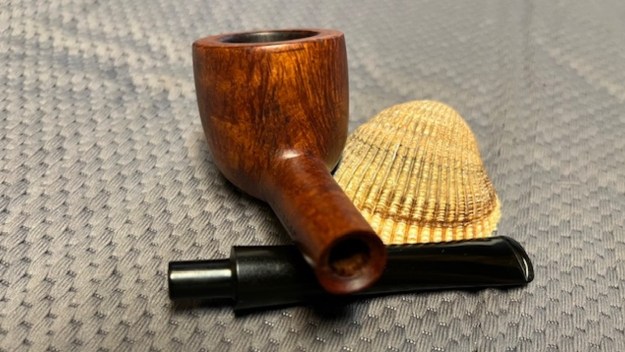
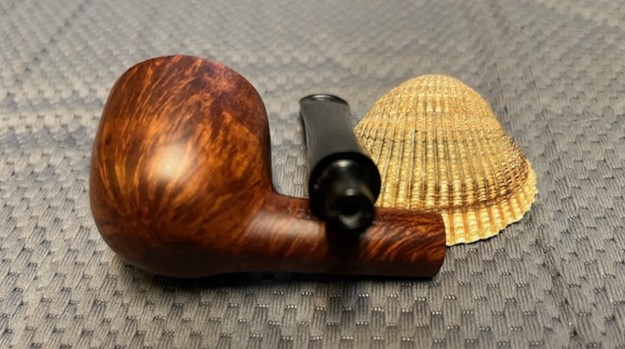
New Life for a beautiful “Malaga” Algerian Briar Pot


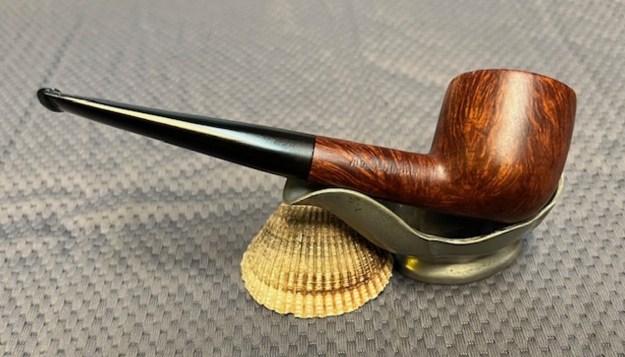
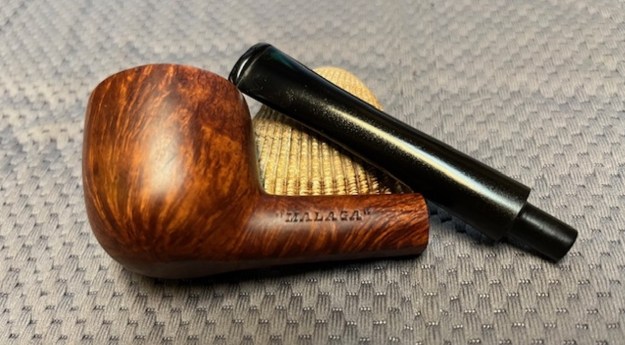
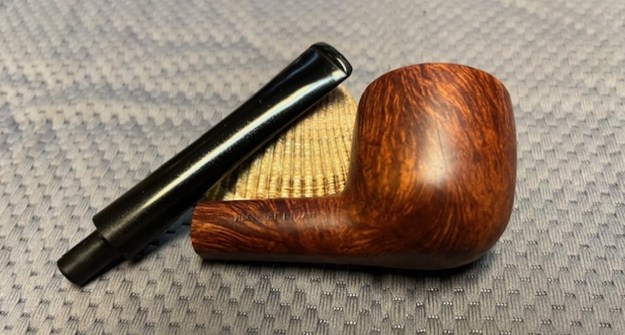
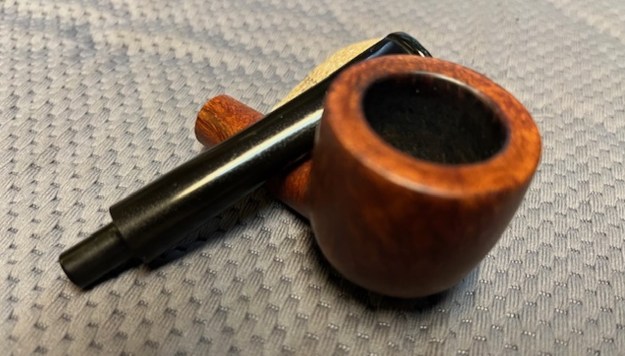
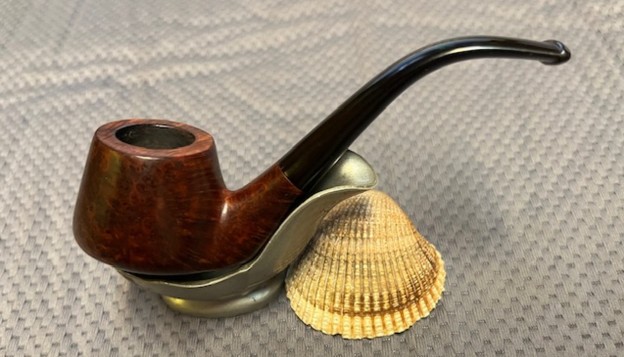
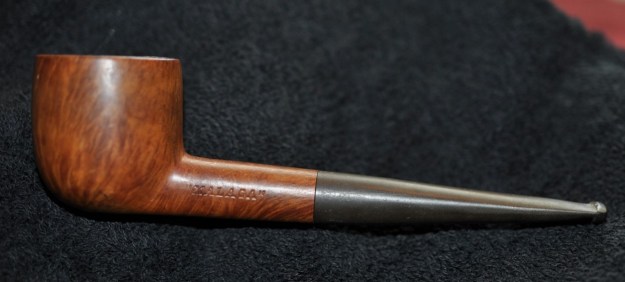
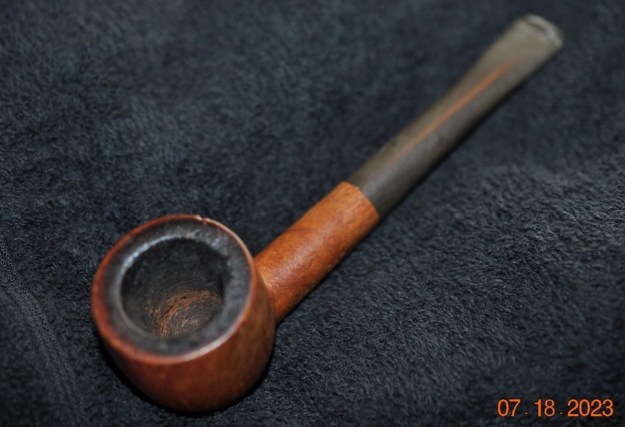
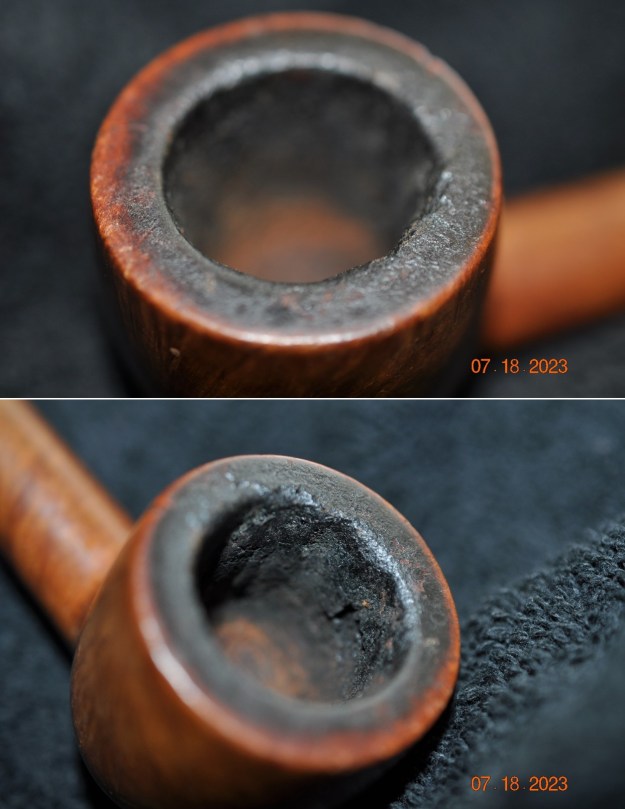
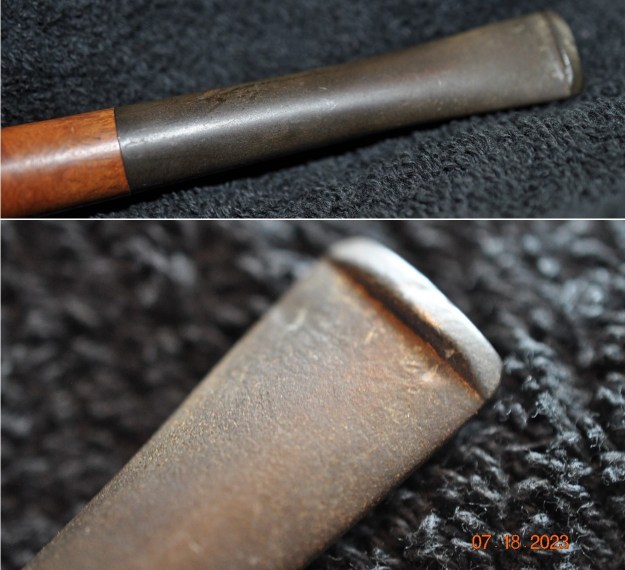
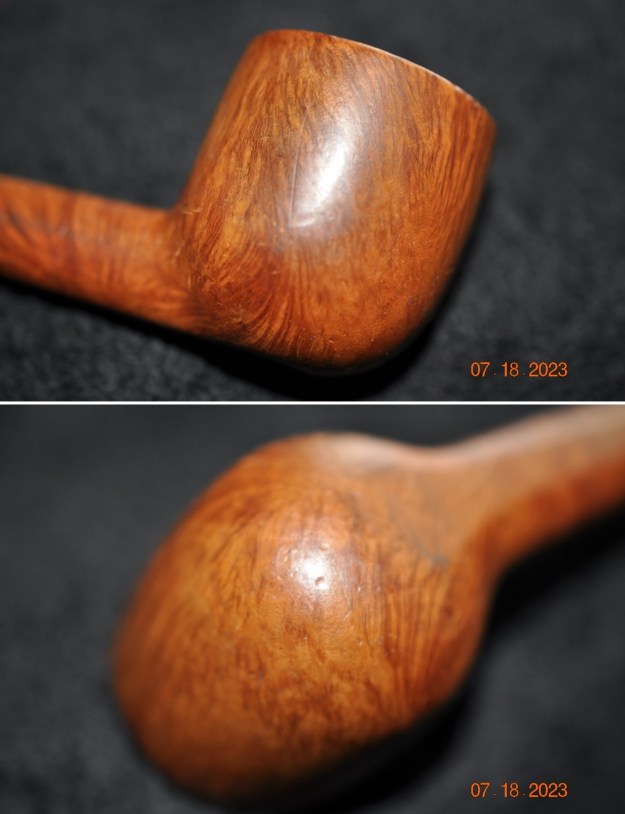
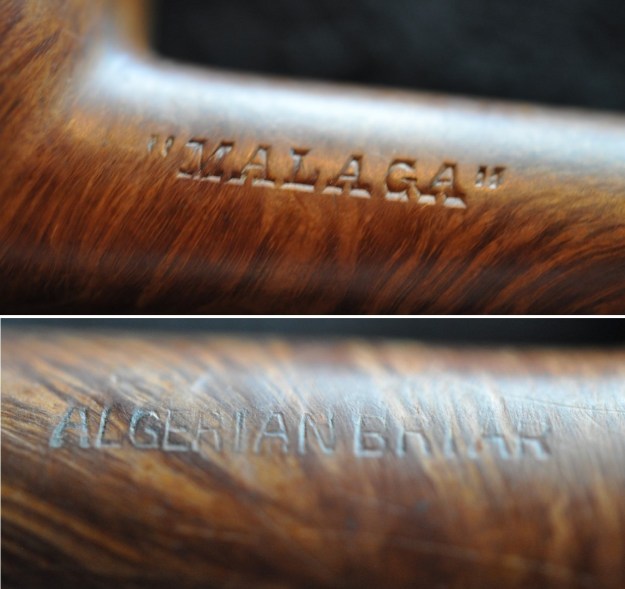
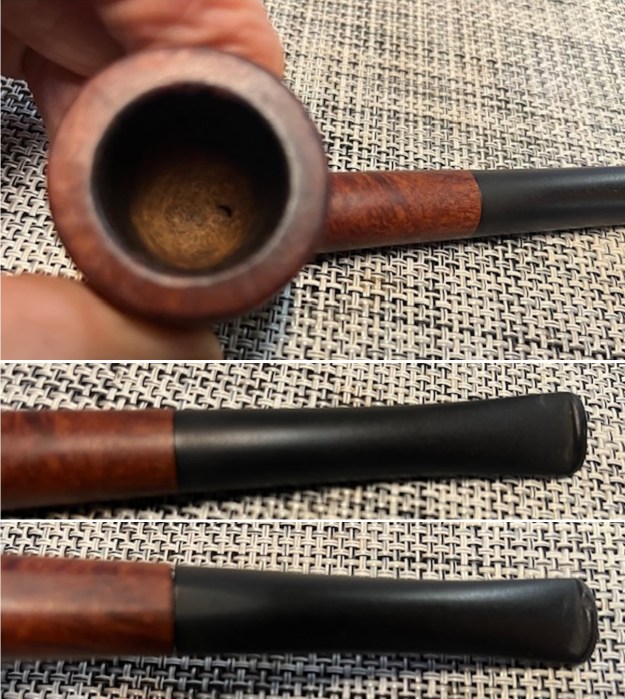
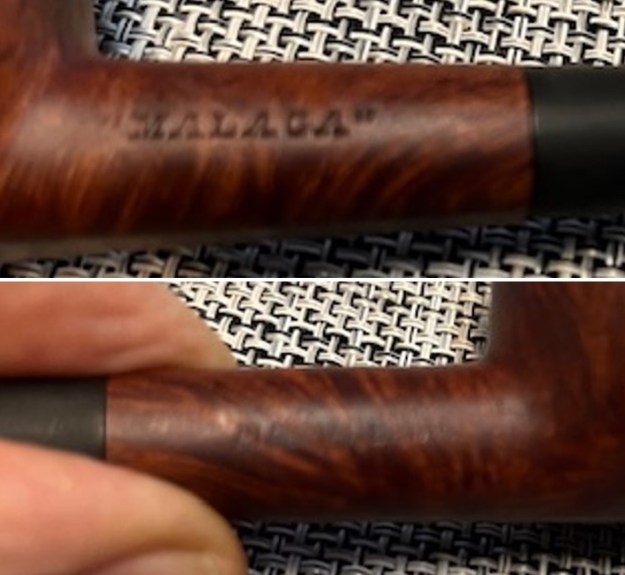
I have another Malaga Pipe that Jeff sent me to work on. It is a Malaga shape I would call a Pot. Jeff saw it on eBay and purchased it on 07/12/2023 from a seller in Point Pleasant Beach, New Jersey, USA. The grain on this pipe is quite nice. Once again it was obviously someone’s favourite smoker. It is stamped on the left side of the shank and read “MALAGA” and on the right side it is stamped Algerian Briar. The smooth bowl and shank were dirty and there were tars and oils ground into the surface of the briar. The bowl had a thick cake that flowed over the top of the smooth rim in a thick lava coat. It was hard to clearly assess the condition of the inner edge. The condition of the rim edge and top would become clear in the cleaning process. The outer edge looked very good. The taper stem was vulcanite. There were light tooth marks on the top and the underside of the stem ahead of the button. Jeff took photos of the pipes before he started his clean up work. Jeff took photos of the rim and bowl to show the cake and the lava on the rim top and edges. The inner edge of the rim showed thick cake coming up to the top and flowing over the edge. The outer edge showed some deep damage on the back side of the bowl. It was a dirty pipe but still a beauty. The vulcanite taper stem had light tooth marks and chatter on the top and underside of the stem ahead of the button. The photos of the sides and heel of the bowl show some stunning and unique grain all around the pipe. The oil curing/finish makes the grain really stand out on the bowl and shank.Jeff took a photo of the stamping on the left side of the shank. On the left it read “MALAGA” as noted above. He did not take a photo of the right side but it read Algerian Briar. The stamping was clear and readable.For those of you who are unfamiliar with the brand, I am also including the link to a blog that I wrote that gives some of the history of the Malaga brand and the Malaga Pipe Shop in Royal Oak, Michigan in the USA. Here is the link – https://rebornpipes.com/2013/02/09/george-khoubesser-and-malaga-pipes/. That blog also includes links to a catalogue and the history of the pipemaker George Khoubesser. If you are interested to learn more then I invite you to follow the link to get a feel for the brand and the pipemaker.
I am also am including a link to some printed material on the Malaga brand that came to me from the daughter of George Koch (we purchased George’s pipes from his daughter) to help identify the particular stamping on the pipe. The link takes you to the entire collection of materials that were sent to me (https://rebornpipes.com/2019/02/27/malaga-pipes-catalogue-of-pipes-and-tobaccos/).

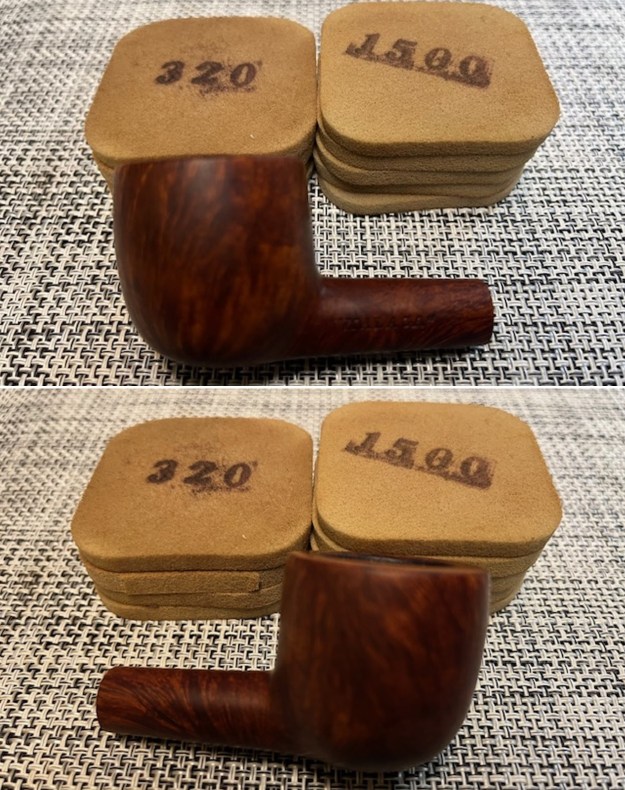
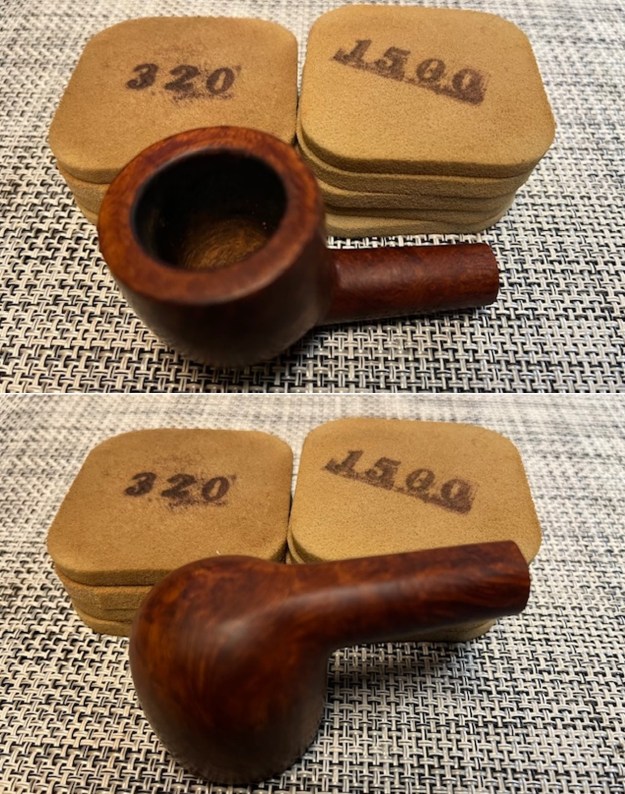
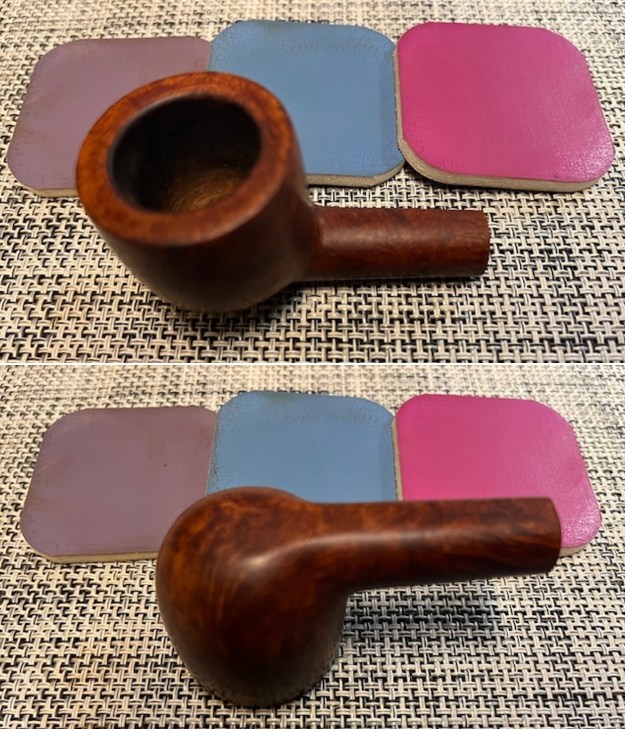
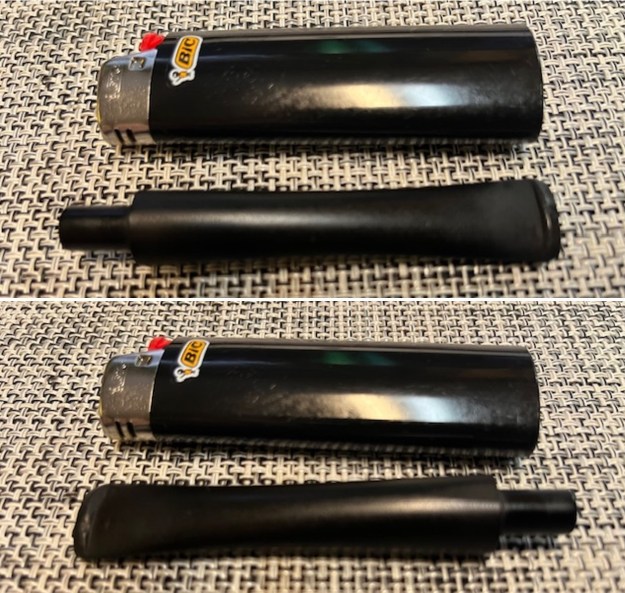
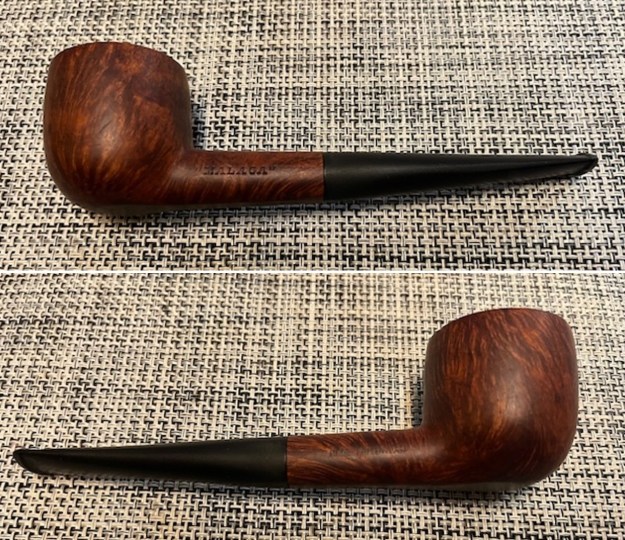
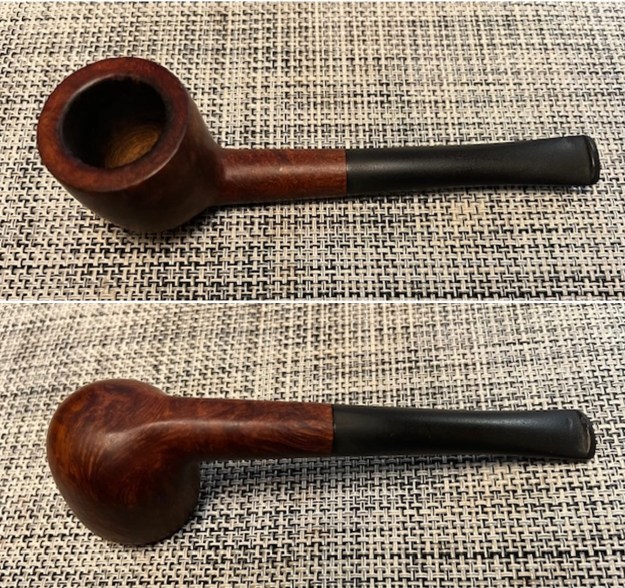
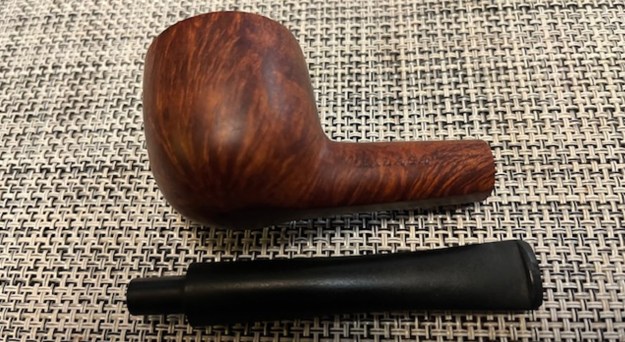
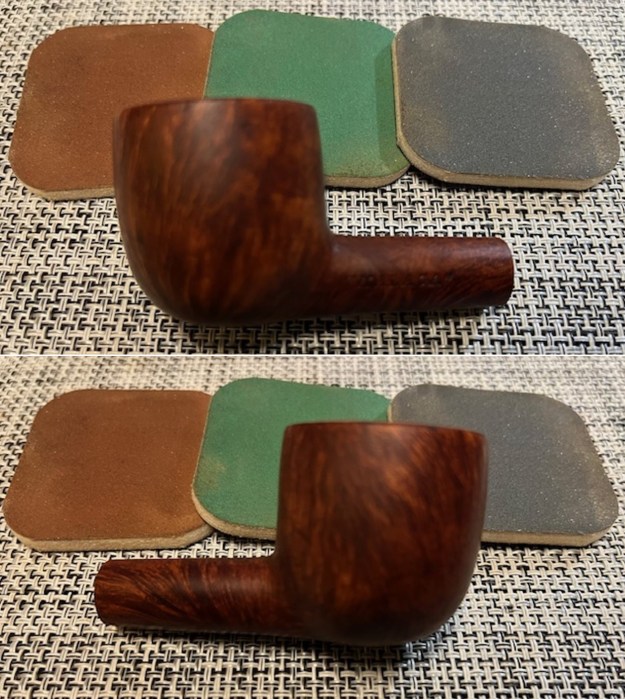
Jeff had cleaned up the pipe using his usual procedure. He reamed the pipe with a PipNet pipe reamer and removed the rest of it with a Savinelli Fitsall Pipe Knife. He scrubbed the bowl with undiluted Murphy’s Oil Soap with a tooth brush. He rinsed it under running warm water to remove the soap and grime from around the bowl sides. It looked much better. He cleaned out the inside of the shank and the airway with alcohol, cotton swabs and pipe cleaners. The stem looked much better and the light tooth marks on both sides were still visible and would need a little work. I took photos of the pipe once I received it. I took a photo of the rim top and the stem to show their condition. Jeff was able to clean up the cake and the lava overflow that was shown in the rim and bowl photos above. The rim top was clean and looked good. There was some darkening and damage on the rim top and inner and outer edges of the bowl (particularly on the back side of the bowl). The grain on it was quite nice. The stem looked better, though there were deep tooth marks and chatter on both sides ahead of the button.I took photos of the stamping on the shank to show that the clean up had not damaged them at all. It looked good. I removed the stem from the shank and took a photo of the parts to give a sense of what the pipe looks like. I started my work on the pipe by sanding the rim top and the finish around the bowl with the 2-inch square 320-3500 grit sanding pads. I wiped down the briar after each sanding pad. The bowl began to look very good. I polished the bowl sides and the smooth rim top with micromesh sanding pads. I dry sanded it with 1500-12000 grit micromesh pads. I wiped it down after each pad. It really began to be beautiful. I rubbed the bowl and shank down with Before & After Restoration Balm to deep clean the finish on the bowl and shank. The product works to clean, enliven and protect the briar. I worked it in with my fingers to get it into the briar. I worked it into the twin rings in the bowl cap with a shoe brush to get deep in the grooves. I let it sit for 10 minutes then I wiped it off and buffed it with a soft cloth. The briar really began to have a rich shine. I took some photos of the bowl at this point to mark the progress in the restoration. It is a beautiful bowl. I set the bowl aside and turned my attention to the stem. There were several deep tooth marks that I filled with CA glue. Once the glue hardened I recut the button edge and flattened the repairs with a small file. I sanded the stem with the 2 inch square 320-3500 grit sanding pads. I wiped down the stem after each sanding pad. I was able blend in the repairs on both sides with the pads. The stem looked very good.I polished the stem with micromesh sanding pads – dry sanding with 1500-12000 grit pads. I wiped the stem down after each sanding pad with Obsidian Oil. I did a final hand polish of the stem with Before & After Pipe Stem Polish – both Fine and Extra Fine. I gave it a coat of Obsidian Pipe Stem Oil. It works to protect the stem from oxidizing. I set it aside to dry. I put the stem back on the “MALAGA” Algerian Briar Pot and took it to the buffer. I buffed the bowl and stem with Blue Diamond to polish the briar and the vulcanite. Blue Diamond does a great job on the smaller scratches that remain in both. I gave the bowl and the stem several coats of carnauba wax and buffed the pipe with a clean buffing pad to raise the shine. I hand buffed it with a microfiber cloth to deepen the shine. I am amazed at how well it turned out. The finished pipe is shown in the photos below. This is beautiful smooth finished “MALAGA” Algerian Briar Pot and the vulcanite taper stem combine to give the pipe a great look. The dimensions of the pipe are Length: 5 ½ inches, Height: 1 ½ inches, Outside diameter of the bowl: 1 3/8 inches, Chamber diameter: 7/8 of an inch. The weight of the pipe is 1.09 ounces/31 grams. This is another pipe that I will be putting on the rebornpipes online store in the American Pipe Makers and Pipemaking Companies Section shortly, if you are interested in adding it to your collection. Thanks for walking through the restoration with me on this beauty!
As always, I encourage your questions and comments as you read the blog. Thanks to each of you who are reading this blog. Remember we are not pipe owners; we are pipe men and women who hold our pipes in trust until they pass on into the trust of those who follow us.

New Life for a “Malaga” Apple with a Taper Vulcanite Stem


Blog by Steve Laug

I have three more Malaga Pipes that Jeff sent me to work on. The third of those on the table this afternoon is an interesting Malaga shape I would call an Apple. Jeff saw it on eBay and purchased it on 12/15/2023 from a seller in Tecumseh, Michigan, USA. The grain on this pipe is quite nice. Once again it was obviously someone’s favourite smoker. It is stamped on the left side of the shank and read “MALAGA” and on the right side it is stamped Imported Briar. The smooth bowl and shank were dirty and worn. There were tars and oils ground into the surface of the briar. The bowl had a thick cake that flowed over the top of the smooth rim in a spotty lava coat. There were also nicks and dents in the rim top surface. It was hard to clearly assess the condition of the inner edge. The condition of the rim edge and top would become clear in the cleaning process. The outer edge looked very good. The taper stem was vulcanite. There were light tooth marks on the top and the underside of the stem ahead of the button. Jeff took photos of the pipes before he started his clean up work. Jeff took photos of the rim and bowl to show the cake and the spotty lava on the rim top and edges. The inner edge of the rim showed thick cake coming up to the top and flowing over the edge. The outer edge showed some deep damage on the back side of the bowl. It was a dirty pipe but still a beauty. The vulcanite taper stem had deep tooth marks and chatter on the top and underside of the stem ahead of the button. The photos of the sides and heel of the bowl show some stunning and unique grain all around the pipe. The oil curing/finish makes the grain really stand out on the bowl and shank. Jeff took a photo of the stamping on the left side of the shank. On the left it read MALAGA as noted above. He did not take a photo of the right side but it read Imported Briar. The stamping was clear and readable.For those of you who are unfamiliar with the brand, I am also including the link to a blog that I wrote that gives some of the history of the Malaga brand and the Malaga Pipe Shop in Royal Oak, Michigan in the USA. Here is the link – https://rebornpipes.com/2013/02/09/george-khoubesser-and-malaga-pipes/. That blog also includes links to a catalogue and the history of the pipemaker George Khoubesser. If you are interested to learn more then I invite you to follow the link to get a feel for the brand and the pipemaker.

I am also am including a link to some printed material on the Malaga brand that came to me from the daughter of George Koch (we purchased George’s pipes from his daughter) to help identify the particular stamping on the pipe. The link takes you to the entire collection of materials that were sent to me (https://rebornpipes.com/2019/02/27/malaga-pipes-catalogue-of-pipes-and-tobaccos/).

Jeff had cleaned up the pipe using his usual procedure. He reamed the pipe with a PipNet pipe reamer and removed the rest of it with a Savinelli Fitsall Pipe Knife. He scrubbed the bowl with undiluted Murphy’s Oil Soap with a tooth brush. He rinsed it under running warm water to remove the soap and grime from around the bowl sides. It looked much better. He cleaned out the inside of the shank and the airway with alcohol, cotton swabs and pipe cleaners. The stem looked much better and the light tooth marks on both sides were still visible and would need a little work. I took photos of the pipe once I received it.  I took a photo of the rim top and the stem to show their condition. Jeff was able to clean up the cake and the lava overflow that was shown in the rim and bowl photos above. The rim top was clean and looked good. There was some darkening and damage on the rim top and inner and outer edges of the bowl (particularly on the back side of the bowl). The grain on it was quite nice. The stem looked better, though there were deep tooth marks and chatter on both sides ahead of the button. I took photos of the stamping on the shank to show that the clean up had not damaged them at all. It looked good. I removed the stem from the shank and took a photo of the parts to give a sense of what the pipe looks like. I started my work on the pipe by addressing the damage on the back outer edge and the rim top. I sanded the inner edge of the bowl and the top surface with a folded piece of 220 grit sandpaper. I was able to remove some of the darkening. I repaired the damage on the back of the bowl with briar dust and clear CA glue. I lightly topped the bowl on a topping board with 220 grit sand paper and blended the repairs on the top. I also sanded the repair on the back of the bowl. I sanded the bowl and the repairs with the 2 inch square 320-3500 grit sanding pads. I wiped down the briar after each sanding pad. I was able to smooth out the repair and blend them into the rest of the bowl and it looked very good. I restained the rim top with a Maple Stain Pen. The colour of the stain matched the rest of the bowl exterior. Once the stain cured I continued polishing the bowl and the stem with micromesh sanding pads. I polished the bowl sides and the smooth rim top with micromesh sanding pads. I dry sanded it with 1500-12000 grit micromesh pads. I wiped it down after each pad. It really began to be beautiful. I rubbed the bowl and shank down with Before & After Restoration Balm to deep clean the finish on the bowl and shank. The product works to clean, enliven and protect the briar. I worked it in with my fingers to get it into the briar. I worked it into the twin rings in the bowl cap with a shoe brush to get deep in the grooves. I let it sit for 10 minutes then I wiped it off and buffed it with a soft cloth. The briar really began to have a rich shine. I took some photos of the bowl at this point to mark the progress in the restoration. It is a beautiful bowl. I set the bowl aside and turned my attention to the stem. There were several deep tooth marks that I filled with black CA glue. I also built up the sharp edge of the button as well. Once the glue hardened I recut the button edge and flattened the repairs with a small file. I sanded them with 220 grit sandpaper to blend them further into the surface of the stem. I sanded the stem with the 2 inch square 320-3500 grit sanding pads. I wiped down the stem after each sanding pad. I was able blend in the repairs on both sides with the pads. The stem looked very good.I polished the stem with micromesh sanding pads – dry sanding with 1500-12000 grit pads. I wiped the stem down after each sanding pad with Obsidian Oil. I did a final hand polish of the stem with Before & After Pipe Stem Polish – both Fine and Extra Fine. I gave it a coat of Obsidian Pipe Stem Oil. It works to protect the stem from oxidizing. I set it aside to dry. I put the stem back on the “MALAGA” Imported Briar Apple and took it to the buffer. I buffed the bowl and stem with Blue Diamond to polish the briar and the vulcanite. Blue Diamond does a great job on the smaller scratches that remain in both. I gave the bowl and the stem several coats of carnauba wax and buffed the pipe with a clean buffing pad to raise the shine. I hand buffed it with a microfiber cloth to deepen the shine. I am amazed at how well it turned out. The finished pipe is shown in the photos below. This is beautiful smooth finished “MALAGA” Imported Briar Apple and the vulcanite taper stem combine to give the pipe a great look. The dimensions of the pipe are Length: 6 inches, Height: 1 ½ inches, Outside diameter of the bowl: 1 ¼ inches, Chamber diameter: ¾ of an inch. The weight of the pipe is 1.27 ounces/36 grams. This is another pipe that I will be putting on the rebornpipes online store in the American Pipe Makers and Pipemaking Companies Section shortly, if you are interested in adding it to your collection. Thanks for walking through the restoration with me on this beauty!
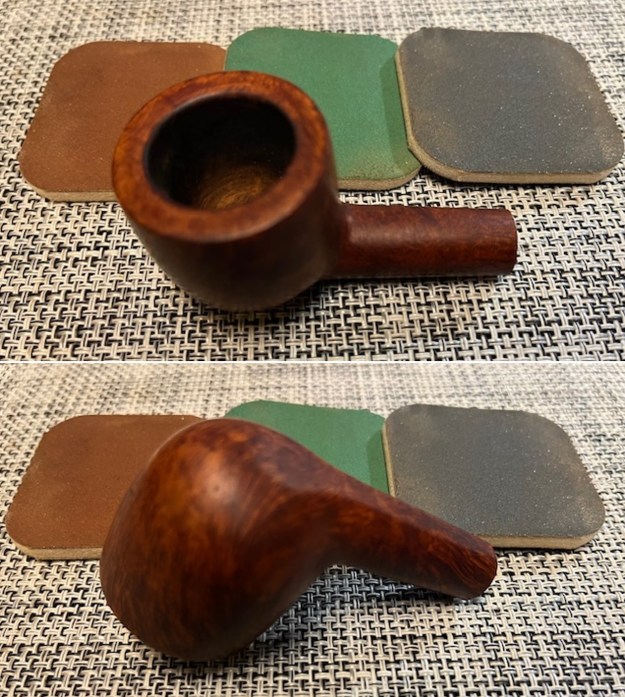
As always, I encourage your questions and comments as you read the blog. Thanks to each of you who are reading this blog. Remember we are not pipe owners; we are pipe men and women who hold our pipes in trust until they pass on into the trust of those who follow us.

What an Interesting Malaga Imported Briar Rhodesian


Blog by Steve Laug

I have three more Malaga Pipes that Jeff sent me to work on. The second of those on the table this afternoon is an interesting Malaga I would call a Rhodesian. Jeff saw it on eBay and purchased the threesome on 12/22/2023 from a seller in Greensboro, North Carolina, USA. The grain on this pipe is quite nice. Once again it was obviously someone’s favourite smoker. It is stamped on the left side of the shank and read “MALAGA” and on the right side it is stamped Imported Briar. The smooth bowl and shank were dirty and worn. There were tars and oils ground into the surface of the briar. The bowl had a thick cake that flowed over the top of the smooth rim in a spotty lava coat. It was hard to clearly assess the condition of the inner edge. The condition of the rim edge and top would become clear in the cleaning process. The outer edge looked very good. The taper stem was vulcanite. There were light tooth marks on the top and the underside of the stem ahead of the button. Jeff took photos of the pipes before he started his clean up work. Jeff took photos of the rim and bowl to show the cake and the spotty lava on the rim top and edges. The inner edge of the rim showed thick cake coming up to the top and flowing over the edge. It was a dirty pipe but still a beauty. The vulcanite taper stem had light tooth marks and chatter on the top and underside of the stem ahead of the button. The photos of the sides and heel of the bowl show some stunning and unique grain all around the pipe. The oil curing/finish makes the grain really stand out on the bowl and shank. Jeff took photos of the stamping on the sides of the shank. On the left it read MALAGA as noted above. On the right it read Imported Briar. The stamping was clear and readable.For those of you who are unfamiliar with the brand, I am also including the link to a blog that I wrote that gives some of the history of the Malaga brand and the Malaga Pipe Shop in Royal Oak, Michigan in the USA. Here is the link – https://rebornpipes.com/2013/02/09/george-khoubesser-and-malaga-pipes/. That blog also includes links to a catalogue and the history of the pipemaker George Khoubesser. If you are interested to learn more then I invite you to follow the link to get a feel for the brand and the pipemaker.

I am also am including a link to some printed material on the Malaga brand that came to me from the daughter of George Koch (we purchased George’s pipes from his daughter) to help identify the particular stamping on the pipe. The link takes you to the entire collection of materials that were sent to me (https://rebornpipes.com/2019/02/27/malaga-pipes-catalogue-of-pipes-and-tobaccos/).

Jeff had cleaned up the pipe using his usual procedure. He reamed the pipe with a PipNet pipe reamer and removed the rest of it with a Savinelli Fitsall Pipe Knife. He scrubbed the bowl with undiluted Murphy’s Oil Soap with a tooth brush. He rinsed it under running warm water to remove the soap and grime from around the bowl sides. It looked much better. He cleaned out the inside of the shank and the airway with alcohol, cotton swabs and pipe cleaners. The stem looked much better and the light tooth marks on both sides were still visible and would need a little work. I took photos of the pipe once I received it.  I took a photo of the rim top and the stem to show their condition. Jeff was able to clean up the cake and the lava overflow that was shown in the rim and bowl photos above. The rim top was clean and looked very good. There was some darkening on the front outer edge. The grain on it was quite nice. The stem looked better, though there were tooth marks and chatter on both sides ahead of the button. I took photos of the stamping on the shank to show that the clean up had not damaged them at all. It looked good. I removed the stem from the shank and took a photo of the parts to give a sense of what the pipe looks like. I started my work on the pipe by addressing the damage on the front inner edge and the rim top. I sanded the inner edge of the bowl and the top surface with a folded piece of 220 grit sandpaper. I was able to remove some of the darkening. I lightly topped the bowl on a topping board with 220 grit sand paper and removed the rest of the damage. I polished the bowl sides and the smooth rim top with micromesh sanding pads. I dry sanded it with 1500-12000 grit micromesh pads. I wiped it down after each pad. It really began to be beautiful.I paused the polishing after the 2400 grit sanding pad and restained the rim top with a Maple Stain Pen. The colour of the stain matched the rest of the bowl exterior. Once the stain cured I continued polishing the bowl and the stem with micromesh sanding pads. I rubbed the bowl and shank down with Before & After Restoration Balm to deep clean the finish on the bowl and shank. The product works to clean, enliven and protect the briar. I worked it in with my fingers to get it into the briar. I worked it into the twin rings in the bowl cap with a shoe brush to get deep in the grooves. I let it sit for 10 minutes then I wiped it off and buffed it with a soft cloth. The briar really began to have a rich shine. I took some photos of the bowl at this point to mark the progress in the restoration. It is a beautiful bowl. I set the bowl aside and turned my attention to the stem. I “painted” the tooth marks with the flame of a lighter to lift them. I was able to lift them significantly. There were several deeper ones that I filled with clear CA glue. Once the glue hardened I flattened them with a small file. I sanded them with 220 grit sandpaper to blend them further into the surface of the stem. I sanded the stem with the 2 inch square 320-3500 grit sanding pads. I wiped down the stem after each sanding pad. I was able to remove the tooth marks and chatter on both sides with the pads. The stem looked very good.I polished the stem with micromesh sanding pads – dry sanding with 1500-12000 grit pads. I wiped the stem down after each sanding pad with Obsidian Oil. I did a final hand polish of the stem with Before & After Pipe Stem Polish – both Fine and Extra Fine. I gave it a coat of Obsidian Pipe Stem Oil. It works to protect the stem from oxidizing. I set it aside to dry. I put the stem back on the “MALAGA” Imported Briar Rhodesian and took it to the buffer. I buffed the bowl and stem with Blue Diamond to polish the briar and the vulcanite. Blue Diamond does a great job on the smaller scratches that remain in both. I gave the bowl and the stem several coats of carnauba wax and buffed the pipe with a clean buffing pad to raise the shine. I hand buffed it with a microfiber cloth to deepen the shine. I am amazed at how well it turned out. The finished pipe is shown in the photos below. This is beautiful smooth finished “MALAGA” Imported Briar Rhodesian and the vulcanite taper stem combine to give the pipe a great look. The dimensions of the pipe are Length: 6 inches, Height: 1 ¾ inches, Outside diameter of the bowl: 1 ¼ inches, Chamber diameter: ¾ of an inch. The weight of the pipe is 1.13 ounces/32 grams. This is another pipe that I will be putting on the rebornpipes online store in the American Pipe Makers and Pipemaking Companies Section shortly, if you are interested in adding it to your collection. Thanks for walking through the restoration with me on this beauty!

As always, I encourage your questions and comments as you read the blog. Thanks to each of you who are reading this blog. Remember we are not pipe owners; we are pipe men and women who hold our pipes in trust until they pass on into the trust of those who follow us.

Would you call it a Bent Volcano?


Blog by Steve Laug

I have three more Malaga Pipes that Jeff sent me to work on. The first of those on the table this afternoon is an interesting Malaga in a shape I would call a Volcano. Jeff saw it on eBay and purchased the threesome on 12/22/2023 from a seller in Greensboro, North Carolina, USA. The grain on this pipe is quite nice. Once again it was obviously someone’s favourite smoker. The pipe is stamped on the underside of the shank and reads MALAGA. The smooth bowl and shank were dirty and worn. There were tars and oils ground into the surface of the briar. The bowl had a moderate cake that flowed over the top of the smooth rim in a spotty lava coat. The cake in the bowl extended up to the top of the rim. It was hard to clearly assess the condition of the inner edge. The condition of the rim edge and top would become clear in the cleaning process. The outer edge looked very good. The taper stem was vulcanite. It had originally been bent and when it sat as a sitter the stem would have angled to match the rim top. However, over time the stem had straightened a lot and would need to be bent again. There were light tooth marks on the top and the underside of the stem ahead of the button. Jeff took photos of the pipes before he started his clean up work. Jeff took photos of the rim and bowl to show the cake and the spotty lava on the rim top and edges. The inner edge of the rim showed thick cake coming up to the top and flowing over the edge. It was a dirty pipe but still a beauty. The vulcanite taper stem had light tooth marks and chatter on the top and underside of the stem ahead of the button. The photos of the sides and heel of the bowl show some stunning and unique grain all around the pipe. There are also two carved “leaves” or loose lines on the right side and the front of the bowl at the bottom edge. The oil curing/finish makes the grain really stand out on the bowl and shank. Jeff took a photo of the stamping on the underside of the shank. It read MALAGA as noted above. The stamping was clear and readable.For those of you who are unfamiliar with the brand, I am also including the link to a blog that I wrote that gives some of the history of the Malaga brand and the Malaga Pipe Shop in Royal Oak, Michigan in the USA. Here is the link – https://rebornpipes.com/2013/02/09/george-khoubesser-and-malaga-pipes/. That blog also includes links to a catalogue and the history of the pipemaker George Khoubesser. If you are interested to learn more then I invite you to follow the link to get a feel for the brand and the pipemaker.

I am also am including a link to some printed material on the Malaga brand that came to me from the daughter of George Koch (we purchased George’s pipes from his daughter) to help identify the particular stamping on the pipe. The link takes you to the entire collection of materials that were sent to me (https://rebornpipes.com/2019/02/27/malaga-pipes-catalogue-of-pipes-and-tobaccos/).

Jeff had cleaned up the pipe using his usual procedure. He reamed the pipe with a PipNet pipe reamer and removed the rest of it with a Savinelli Fitsall Pipe Knife. He scrubbed the bowl with undiluted Murphy’s Oil Soap with a tooth brush. He rinsed it under running warm water to remove the soap and grime from around the bowl sides. It looked much better. He cleaned out the inside of the shank and the airway with alcohol, cotton swabs and pipe cleaners. The stem looked much better and the light tooth marks on both sides were still visible and would need a little work. I took photos of the pipe once I received it. I took a photo of the rim top and the stem to show their condition. Jeff was able to clean up the cake and the lava overflow that was shown in the rim and bowl photos above. The rim top was clean and looked very good. There was some darkening on the front outer edge. The grain on it was quite nice. The stem looked better, though there were tooth marks and chatter on both sides ahead of the button. I removed the stem from the shank and took a photo of the parts to give a sense of what the pipe looks like.I polished the bowl sides and the smooth rim top with micromesh sanding pads. I dry sanded it with 1500-12000 grit micromesh pads. I wiped it down after each pad. It really began to be beautiful. I rubbed the bowl and shank down with Before & After Restoration Balm to deep clean the finish on the bowl and shank. The product works to clean, enliven and protect the briar. I worked it in with my fingers to get it into the briar. I let it sit for 10 minutes then I wiped it off and buffed it with a soft cloth. The briar really began to have a rich shine. I took some photos of the bowl at this point to mark the progress in the restoration. It is a beautiful bowl.  I set the bowl aside and turned my attention to the stem. I polished the stem with micromesh sanding pads – dry sanding with 1500-12000 grit pads. I wiped the stem down after each sanding pad with Obsidian Oil. Before polishing the stem with the final polished I decided to bend it. I heated the stem with the flame of a lighter to soften the vulcanite and once soft I bent the stem to match the flow of the top of the bowl.I did a final hand polish of the stem with Before & After Pipe Stem Polish – both Fine and Extra Fine. I gave it a coat of Obsidian Pipe Stem Oil. It works to protect the stem from oxidizing. I set it aside to dry.I put the stem back on the MALAGA Bent Volcano and took it to the buffer. I buffed the bowl and stem with Blue Diamond to polish the briar and the vulcanite. Blue Diamond does a great job on the smaller scratches that remain in both. I gave the bowl and the stem several coats of carnauba wax and buffed the pipe with a clean buffing pad to raise the shine. I hand buffed it with a microfiber cloth to deepen the shine. I am amazed at how well it turned out. The finished pipe is shown in the photos below. This is beautiful smooth finished MALAGA Bent Volcano and the vulcanite taper stem combines to give the pipe a great look. The dimensions of the pipe are Length: 5 inches, Height: 1 ¼ inches, Outside diameter of the bowl: 1 1/8 inches, Chamber diameter: ¾ of an inch. The weight of the pipe is 1.23 ounces/35 grams. This is another pipe that I will be putting on the rebornpipes online store in the American Pipe Makers and Pipemaking Companies Section shortly, if you are interested in adding it to your collection. Thanks for walking through the restoration with me on this beauty!
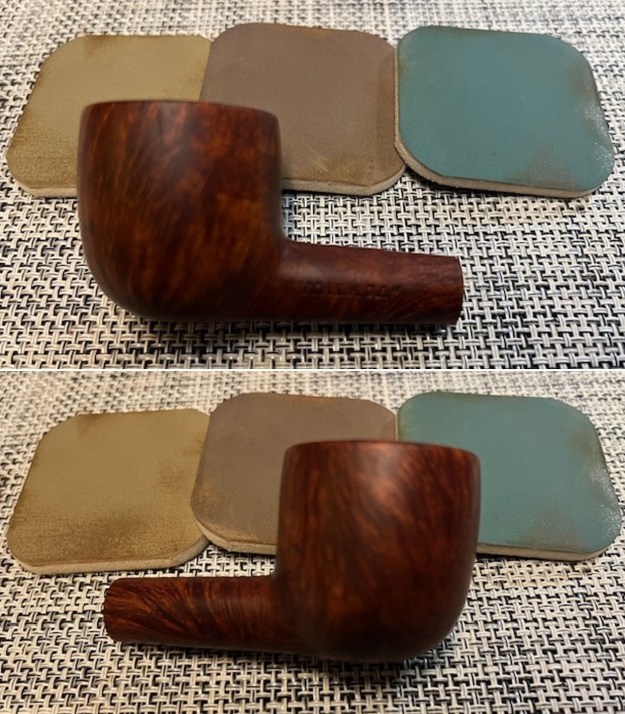
As always, I encourage your questions and comments as you read the blog. Thanks to each of you who are reading this blog. Remember we are not pipe owners; we are pipe men and women who hold our pipes in trust until they pass on into the trust of those who follow us.

Breathing Life into a Classic “Malaga” Imported Briar Straight Bulldog


Blog by Steve Laug

For the next little while I am working on some Malaga Pipes. I have several in queue to work on so I tend to pick them by what catches my eye. The next pipe on the table is an interesting Malaga Bulldog. Jeff saw it on eBay and purchased it on 12/22/2023 from a seller in Greensboro, North Carolina, USA. The grain on this pipe is quite nice. Once again it was obviously someone’s favourite smoker. The pipe is stamped on the left side of the shank and reads “MALAGA”. On the right side of the shank it reads Imported Briar. The smooth bowl and shank were dirty and worn. The twin rings around the rim cap look very good. There were tars and oils ground into the surface of the briar. The bowl had a very thick cake that flowed over the top of the smooth rim in a lava coat. The cake in the bowl was thick right up to the top of the rim. It was hard to fully assess the condition of the inner edge. The condition of the rim edge and top would become clear in the cleaning process. The outer edge looked very good. The saddle stem was vulcanite. There were light tooth marks on the top and the underside of the stem ahead of the button. Jeff took photos of the pipes before he started his clean up work. Jeff took photos of the rim and bowl to show the heavy cake and lava on the rim top and edges. The inner edge of the rim showed thick cake coming up to the top and flowing over the edge. It was a dirty pipe but still a beauty. The vulcanite saddle stem had tooth marks and chatter on the top and underside of the stem ahead of the button. The photos of the sides and heel of the bowl show some stunning and unique grain all around the pipe. The oil curing/finish makes the grain really stand out on the bowl and shank. Jeff took photos of the stamping on the sides of the shank. It read “Malaga” on the left side as noted above. On the right side it read Imported Briar. The stamping was clear and readable.For those of you who are unfamiliar with the brand, I am also including the link to a blog that I wrote that gives some of the history of the Malaga brand and the Malaga Pipe Shop in Royal Oak, Michigan in the USA. Here is the link – https://rebornpipes.com/2013/02/09/george-khoubesser-and-malaga-pipes/. That blog also includes links to a catalogue and the history of the pipemaker George Khoubesser. If you are interested to learn more then I invite you to follow the link to get a feel for the brand and the pipemaker.

I am also am including a link to some printed material on the Malaga brand that came to me from the daughter of George Koch (we purchased George’s pipes from his daughter) to help identify the particular stamping on the pipe. The link takes you to the entire collection of materials that were sent to me (https://rebornpipes.com/2019/02/27/malaga-pipes-catalogue-of-pipes-and-tobaccos/).

Jeff had cleaned up the pipe using his usual procedure. He reamed the pipe with a PipNet pipe reamer and removed the rest of it with a Savinelli Fitsall Pipe Knife. He scrubbed the bowl with undiluted Murphy’s Oil Soap with a tooth brush. He rinsed it under running warm water to remove the soap and grime from around the bowl sides. It looked much better. He cleaned out the inside of the shank and the airway with alcohol, cotton swabs and pipe cleaners. The stem looked much better and the light tooth marks on both sides were still visible and would need a little work. I took photos of the pipe once I received it.  I took a photo of the rim top and the stem to show their condition. Jeff was able to clean up the cake and the lava overflow that was shown in the rim and bowl photos above. The rim top was clean but there were chips and nicks around the rim top and the edges of the bowl. There was also some darkening on the flat surface of the rim. It is visible in the first photo below. The stem looked better, though there were tooth marks and chatter on both sides ahead of the button. I took photos of the stamping on the shank sides to show that it was readable and undamaged by the cleanup work. I removed the stem from the shank and took a photo of the parts to give a sense of what the pipe looks like.I worked on the rim top and edges of the bowl to remove the damage and darkening on the surface or edges of the bowl. I lightly topped the bowl to smooth out the nicks and cuts in the top. I worked over it with 320-1000 grit sanding pads and worked on the inner edge with a folded piece of 220 grit sandpaper. I wiped it down with a damp cloth and it looked better. I polished the smooth panels on the bowl sides and the smooth rim top with micromesh sanding pads. I dry sanded it with 1500-2400 grit sanding pads and wiped the bowl down with a damp cloth after each sanding pad. I touched up the clean rim top with a Maple Stain Pen. After the staining I continued sanding the rim top and bowl with 3200-12000 grit micromesh pads. I wiped it down after each pad. It really began to be beautiful. I rubbed the bowl and shank down with Before & After Restoration Balm to deep clean the finish on the bowl and shank. I worked it into the twin rings around the bowl cap with a horsehair shoe brush. The product works to clean, enliven and protect the briar. I worked it in with my fingers to get it into the briar. I let it sit for 10 minutes then I wiped it off and buffed it with a soft cloth. The briar really began to have a rich shine. I took some photos of the bowl at this point to mark the progress in the restoration. It is a beautiful bowl. I set the bowl aside and turned my attention to the stem. I started the polishing of the stem with 2 x 2 inch sanding pads – dry sanding with 320-3500 grit pads and wiping it down after each pad. I was able to remove the light tooth marks and chatter on the stem surface on both sides. I polished the stem with micromesh sanding pads – dry sanding with 1500-12000 grit pads. I wiped the stem down after each sanding pad with Obsidian Oil. I did a final hand polish of the stem with Before & After Pipe Stem Polish – both Fine and Extra Fine. I gave it a coat of Obsidian Pipe Stem Oil. It works to protect the stem from oxidizing. I set it aside to dry.I put the stem back on the “Malaga” Imported Briar Classic Bulldog and took it to the buffer. I buffed the bowl and stem with Blue Diamond to polish the briar and the vulcanite. Blue Diamond does a great job on the smaller scratches that remain in both. I gave the bowl and the stem several coats of carnauba wax and buffed the pipe with a clean buffing pad to raise the shine. I hand buffed it with a microfiber cloth to deepen the shine. I am amazed at how well it turned out. The finished pipe is shown in the photos below. This is a beautiful “Malaga” Classic Bulldog and the hard rubber taper stem and smooth finish combine to give the pipe a great look. I honestly have no idea why it is labeled a second as there are no fills or flaws in the briar. The dimensions of the pipe are Length: 5 ½ inches, Height: 1 ½ inches, Outside diameter of the bowl: 1 ¼ inches, Chamber diameter: ¾ of an inch. The weight of the pipe is 1.02 ounces/28 grams. This is another pipe that I will be putting on the rebornpipes online store in the American Pipe Makers and Pipemaking Companies Section shortly, if you are interested in adding it to your collection. Thanks for walking through the restoration with me on this beauty!
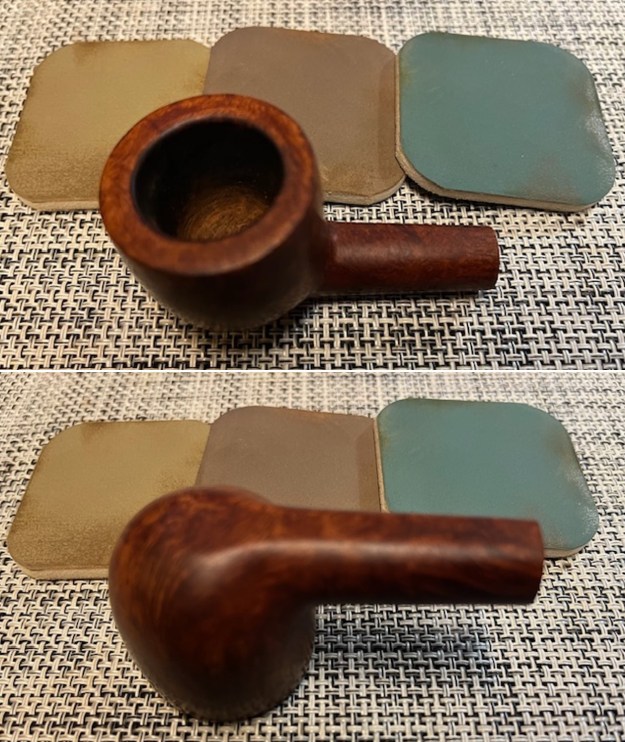
As always, I encourage your questions and comments as you read the blog. Thanks to each of you who are reading this blog. Remember we are not pipe owners; we are pipe men and women who hold our pipes in trust until they pass on into the trust of those who follow us.

This Rare and Beautiful “Malaga” Raskassa Cutty cleaned up extremely well


Blog by Steve Laug

For the next little while I am working on some Malaga Pipes. I have several in queue to work on so I tend to pick them by what catches my eye. The next pipe on the table is an interesting Malaga Raskassa Large Cutty. Jeff saw it on eBay and purchased it on 10/05/2023 from a seller in Pomona, Missouri, USA. The grain on this pipe is very stunning. It was obviously someone’s favourite smoker. The pipe is stamped on the left side of the shank and reads RASKASSA. The smooth bowl and shank were dirty and worn. There were tars and oils ground into the surface of the briar. The bowl had a very thick cake that flowed over the top of the smooth rim in a spotty lava coat. The cake in the bowl was thick right up to the top of the rim. It was hard to fully assess the condition of the inner edge. The rim top and inner edge of the bowl appeared to have some damage but more would become clear in the cleaning process. The outer edge had chips and dents from knocking the pipe against a hard surface. The taper stem appeared to be either vulcanite or hard rubber. There were tooth marks on the top and the underside ahead of the button. Jeff took photos of the pipes before he started his clean up work.Jeff took photos of the rim and bowl to show the heavy cake and lava spots on the rim top and edges. The bevelled inner edge of the rim showed some darkening and had some cake on it. The grain on the rim top is quite stunning. It was a dirty pipe but still a beauty. The hard rubber stem had tooth marks and chatter on the top and underside of the stem ahead of the button. The photos of the sides and heel of the bowl show some stunning and unique grain all around the pipe. The oil curing/finish makes the grain really stand out on the bowl and shank. Jeff took a photo of the stamping on the left side it read Raskassa as noted above. It was clear and readable.For those of you who are unfamiliar with the brand, I am also including the link to a blog that I wrote that gives some of the history of the Malaga brand and the Malaga Pipe Shop in Royal Oak, Michigan in the USA. Here is the link – https://rebornpipes.com/2013/02/09/george-khoubesser-and-malaga-pipes/. That blog also includes links to a catalogue and the history of the pipemaker George Khoubesser. If you are interested to learn more then I invite you to follow the link to get a feel for the brand and the pipemaker.

I am also am including a link to some printed material on the Malaga brand that came to me from the daughter of George Koch (we purchased George’s pipes from his daughter) to help identify the particular stamping on the pipe. The link takes you to the entire collection of materials that were sent to me. I have included a screen capture of one particular page that helps identify the RAS KASSA stamping on the pipe (https://rebornpipes.com/2019/02/27/malaga-pipes-catalogue-of-pipes-and-tobaccos/). I have enclosed the section on the brand in a red box in the picture above. To summarize, it basically says that the stamping is applied to pipes with special rare grain patterns in the briar. These appear to be straight grain, birdseye, swirled grains etc. that are tight patterns. They are rare – 1 or 2 in every hundred pipes. This pipe is one of those. You can read the description in the detailed explanation below.

Jeff had cleaned up the pipe using his usual procedure. He reamed the pipe with a PipNet pipe reamer and removed the rest of it with a Savinelli Fitsall Pipe Knife. He scrubbed the bowl with undiluted Murphy’s Oil Soap with a tooth brush. He rinsed it under running warm water to remove the soap and grime. He cleaned out the inside of the shank and the airway with alcohol, cotton swabs and pipe cleaners. The shank had an inset to take in the tenon and the end of the stem so I would need to fit a stem to sit in the shank. I took photos of the pipe once I received it. I took a photo of the rim top and the stem to show their condition. Jeff was able to clean up the cake and the lava overflow that was shown in the rim and bowl photos above. The rim top was clean but there were chips and nicks around the inner edge of the bowl and nicks on the outer edge. There was also some darkening on the flat surface of the rim. It is visible in the first photo below. The stem looked better, though there were tooth marks and chatter on both sides near the button and on the button surface itself.I took a photo of the stamping on the left side of the shank to show that it was readable and undamaged by the cleanup work. I removed the stem from the shank and took a photo of the parts to give a sense of what the pipe looks like.It was time to start my work on the pipe. I started with the rim top and edges of the bowl. I sanded the inner and the outer edge of the bowl. I used a topping board and 220 grit sandpaper to clean up the rim top and darkening. Once I was finished with the light topping the grain on the rim top looked very good. I polished the smooth panels on the bowl sides and the smooth rim top with micromesh sanding pads. I dry sanded it with 1500-2400 grit sanding pads and wiped the bowl down with a damp cloth after each sanding pad. I touched up the clean rim top with a Maple Stain Pen. After the staining I continued sanding the rim top and bowl with 3200-12000 grit micromesh pads. I wiped it down after each pad. It really began to be beautiful. I rubbed the bowl and shank down with Before & After Restoration Balm to deep clean the finish on the bowl and shank. The product works to clean, enliven and protect the briar. I worked it in with my fingers to get it into the briar. I let it sit for 10 minutes then I wiped it off and buffed it with a soft cloth. The briar really began to have a rich shine. I took some photos of the bowl at this point to mark the progress in the restoration. It is a beautiful bowl. I set the bowl aside and turned my attention to the stem. I filled in the tooth marks on both sides with black CA glue. I set it aside to cure. Once the repairs hardened I used a small needle file to flatten out the repairs. I smoothed them out with 220 grit sandpaper to blend them into the rest of the surrounding vulcanite. I set the finished bowl aside and we back to the stem. I started the polishing of the stem with 2 x 2 inch sanding pads – dry sanding with 320-3500 grit pads and wiping it down after each pad.I polished the stem with micromesh sanding pads – dry sanding with 1500-12000 grit pads. I wiped the stem down after each sanding pad with Obsidian Oil. I did a final hand polish of the stem with Before & After Pipe Stem Polish – both Fine and Extra Fine. I gave it a coat of Obsidian Pipe Stem Oil. It works to protect the stem from oxidizing. I set it aside to dry.I put the stem back on the “Malaga” Beautifully Grained Raskassa Large Cutty and took it to the buffer. I buffed the bowl and stem with Blue Diamond to polish the briar and the vulcanite. Blue Diamond does a great job on the smaller scratches that remain in both. I gave the bowl and the stem several coats of carnauba wax and buffed the pipe with a clean buffing pad to raise the shine. I hand buffed it with a microfiber cloth to deepen the shine. I am amazed at how well it turned out. The finished pipe is shown in the photos below. This is a beautiful “Malaga” Large Raskassa Cutty and the hard rubber taper stem and smooth finish combine to give the pipe a great look. I honestly have no idea why it is labeled a second as there are no fills or flaws in the briar. The dimensions of the pipe are Length: 7 inches, Height: 2 ¼ inches, Outside diameter of the bowl: 1 ½ inches, Chamber diameter: 7/8 of an inch. The weight of the pipe is 1.98 ounces/56 grams. This is another pipe that I will be putting on the rebornpipes online store in the American Pipe Makers and Pipemaking Companies Section shortly, if you are interested in adding it to your collection. Thanks for walking through the restoration with me on this beauty!
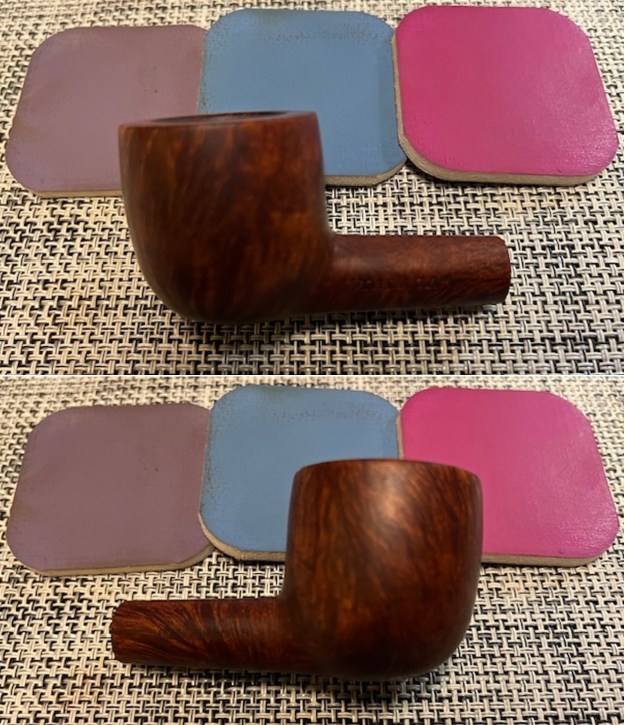
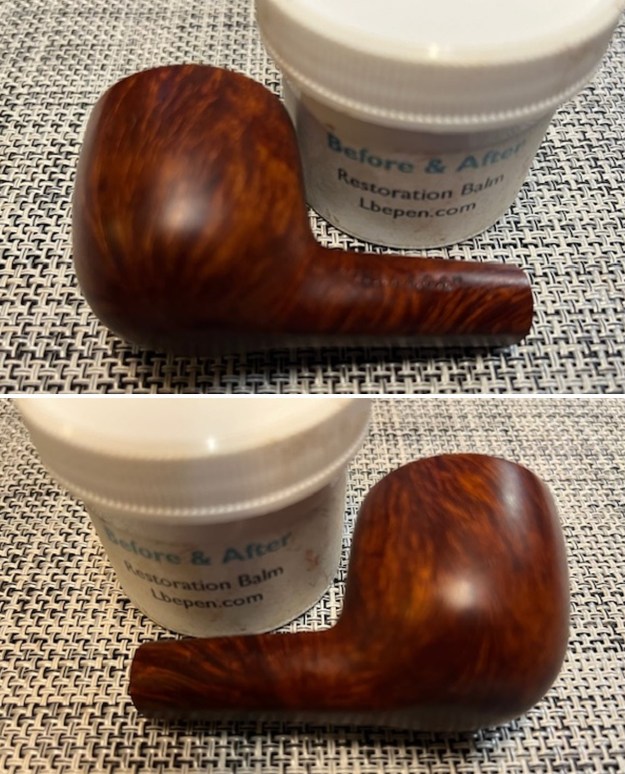
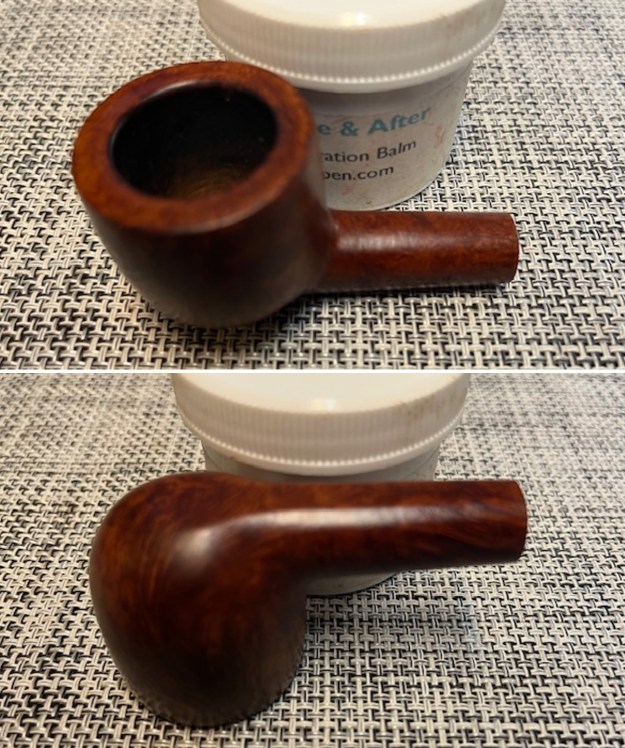
As always, I encourage your questions and comments as you read the blog. Thanks to each of you who are reading this blog. Remember we are not pipe owners; we are pipe men and women who hold our pipes in trust until they pass on into the trust of those who follow us.

This Amazing Magnum “Malaga” Rusticated Billiard cleaned up extremely well


Blog by Steve Laug

The next pipe on the table is an interesting Rusticated Malaga Magnum Billiard. Jeff saw it on eBay and purchased it on 12/22/2023 from a seller in Greensboro, North Carolina, USA. It was a large and dirty pipe with grit and grime in the grooves of the rustication. It was obviously someone’s favourite smoker. The pipe is stamped on a smooth panel on the left side of the shank and reads “Malaga”. The rusticated bowl surface had a smooth rim edge and rim top and down about 1/8 inch down the outside of the bowl. There were smooth panels on all sides of the bowl and on the left and right side of the shank. There were tars and oils ground into the surface of the briar. The bowl had a very thick cake that flowed over the top of the smooth rim in a spotty lava coat. The cake in the bowl was thick right up to the top of the rim. It was hard to fully assess the condition of the inner edge. There was a fill on the front of the rim top from the inner edge half way into the rim top. There were also burn marks on the left side of the top edge band on the rim and onto the edge of the smooth panel on the left side. There was a crack in the shank on the right side toward the bottom of the shank. The taper stem appeared to be either vulcanite or hard rubber. There were tooth marks on the top and the underside ahead of the button. Jeff took photos of the pipes before he started his clean up work. Jeff took photos of the rim and bowl to show the heavy cake and lava spots on the rim top. The inner edge of the rim had some cake on it. There was also a flaw in the briar on the rim top at the front of the bowl extending from the inner edge to the middle of the rim top. It was a dirty pipe but still a beauty. The hard rubber stem had tooth marks and chatter on the top and underside of the stem ahead of the button. The photos of the sides and heel of the bowl show a unique rusticated finish with smooth panels on the pipe and makes the grain really stand out on the bowl and shank. This bowl shows real promise. Jeff took a photo of the stamping on the left side of the shank centred on the smooth panel. It read “Malaga” as noted above. It was clear and readable.He took a photo of the crack on right side lower on the shank. It is about an inch long and extended from the shank end inward to the rustication.I am including the link to a blog that I wrote that gives some of the history of the Malaga brand and the Malaga Pipe Shop in Royal Oak, Michigan in the USA. I have written an earlier blog to give a little history of the Malaga Brand and the pipemaker, George Khoubesser. Here is the link (https://rebornpipes.com/2013/02/09/george-khoubesser-and-malaga-pipes/). That blog also includes links to a catalogue and the history of the pipemaker George Khoubesser. Follow the link to get a feel for the brand and the pipemaker.

Jeff had cleaned up the pipe using his usual procedure. He reamed the pipe with a PipNet pipe reamer and removed the rest of it with a Savinelli Fitsall Pipe Knife. He scrubbed the bowl with undiluted Murphy’s Oil Soap with a tooth brush. He rinsed it under running warm water to remove the soap and grime. He cleaned out the inside of the shank and the airway with alcohol, cotton swabs and pipe cleaners. The shank had an inset to take in the tenon and the end of the stem so I would need to fit a stem to sit in the shank. I took photos of the pipe once I received it. I took a photo of the rim top and the stem to show their condition. Jeff was able to clean up the cake and the lava overflow that was shown in the rim and bowl photos above. The rim top looked very good but there was fill visible on the front of the bowl from the inner edge toward the middle of the rim top. It is visible in the first photo below. The stem looked better, though there were tooth marks and chatter on both sides near the button. I took a photo of the stamping on the left side of the shank to show that it was readable and undamaged by the cleanup work. I removed the stem from the shank and took a photo of the parts to give a sense of what the pipe looks like.I decided to start working on the pipe by dealing with the crack in the shank. I ran a thin bead of CA glue on the crack and pressed it together. I went through my bands and found a silver band that fit well on the shank. I heated the band with the flame of a lighter and pressed it onto the shank against the padded surface of my desk top. I took photos of the newly banded shank from a variety of angles to give a sense of what the pipe looked like with the bling. The crack in the shank was no longer visible. The band brought the crack back together and it was tight. The only issue once I repair a crack with a band is that the original tenon no longer fits in the shank. I sanded the tenon with a folded piece of 220 grit sandpaper until it fit snug in the shank. I put the stem in place and took photos of the stem in place. The pipe is looking good.I set the stem aside and worked on the bowl top. I repaired the fill and flaw with clear CA glue and briar dust. I worked it into flaw with a dental spatula. Once it had cured I sanded the inner edge to clean up the repair with 220 grit sandpaper. I used a topping board and 220 grit sandpaper to flatten the repair and blend it into the surrounding briar. Once it was flat I used a 600 grit sanding pad to smooth out the surface. I stained the rim top with a Maple stain pen to match the surrounding bowl and shank. I polished the smooth panels on the bowl sides and the smooth rim top with micromesh sanding pads. I dry sanded it with 1500-12000 grit sanding pads and wiped the bowl down with a damp cloth after each sanding pad. I rubbed the bowl and shank down with Before & After Restoration Balm to deep clean the finish on the bowl and shank. The product works to clean, enliven and protect the briar. I worked it in with my fingers to get it into the briar. I used a horsehair shoe brush to work it into the rustication. I let it sit for 10 minutes then I wiped it off and buffed it with a soft cloth. The briar really began to have a rich shine. I took some photos of the bowl at this point to mark the progress in the restoration. It is a beautiful bowl. I set the bowl aside and turned my attention to the stem. I filled in the tooth marks on both sides with black CA glue. I set it aside to cure. Once the repairs hardened I smoothed out the repairs with 220 grit sandpaper to blend them into the rest of the surrounding vulcanite. I set the finished bowl aside and we back to the stem. I started the polishing of the stem with 2 x 2 inch sanding pads – dry sanding with 320-3500 grit pads and wiping it down after each pad.I polished the stem with micromesh sanding pads – dry sanding with 1500-12000 grit pads. I wiped the stem down after each sanding pad with Obsidian Oil. I did a final hand polish of the stem with Before & After Pipe Stem Polish – both Fine and Extra Fine. I gave it a coat of Obsidian Pipe Stem Oil. It works to protect the stem from oxidizing. I set it aside to dry. I put the stem back on the “Malaga” Magnum Rusticated Billiard and took it to the buffer. I buffed the bowl and stem with Blue Diamond to polish the briar and the vulcanite. Blue Diamond does a great job on the smaller scratches that remain in both. I gave the bowl multiple coats of Conservator’s Wax and the stem several coats of carnauba wax and buffed the pipe with a clean buffing pad to raise the shine. I hand buffed it with a microfiber cloth to deepen the shine. I am amazed at how well it turned out. The finished pipe is shown in the photos below. This is a beautiful “Malaga” Magnum Billiard and the hard rubber taper stem and smooth finish combine to give the pipe a great look. I honestly have no idea why it is labeled a second as there are no fills or flaws in the briar. The dimensions of the pipe are Length: 8 inches, Height: 2 ¼ inches, Outside diameter of the bowl: 1 ½ inches, Chamber diameter: 1 inch. The weight of the pipe is 2.93 ounces/83 grams. This is another pipe that I will be putting on the rebornpipes online store in the American Pipe Makers and Pipemaking Companies Section shortly, if you are interested in adding it to your collection. Thanks for walking through the restoration with me on this beauty!
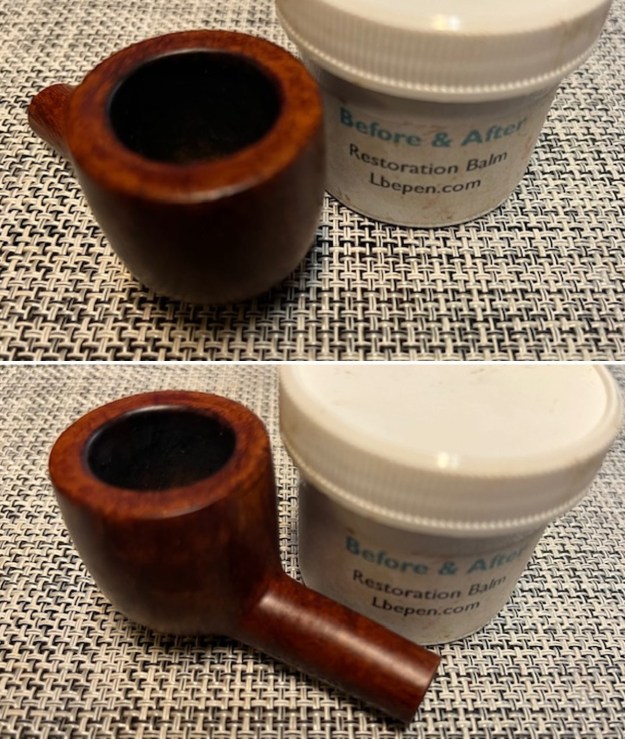
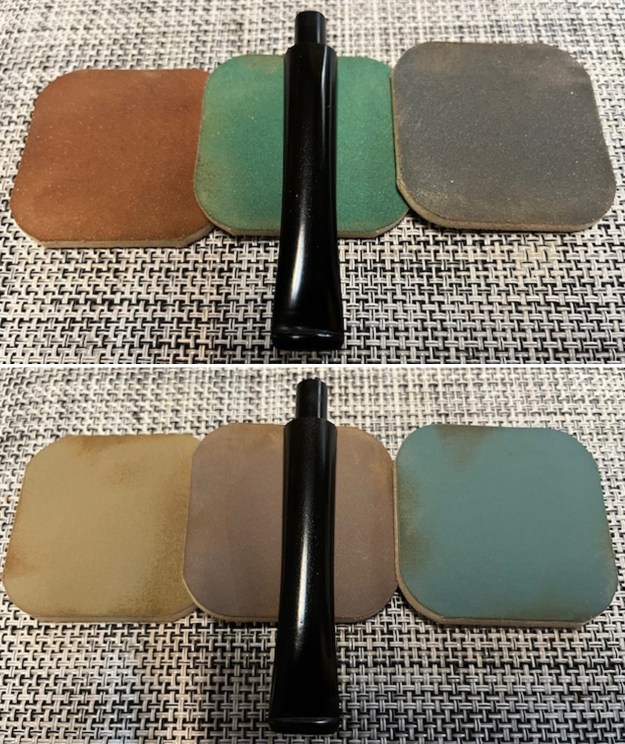
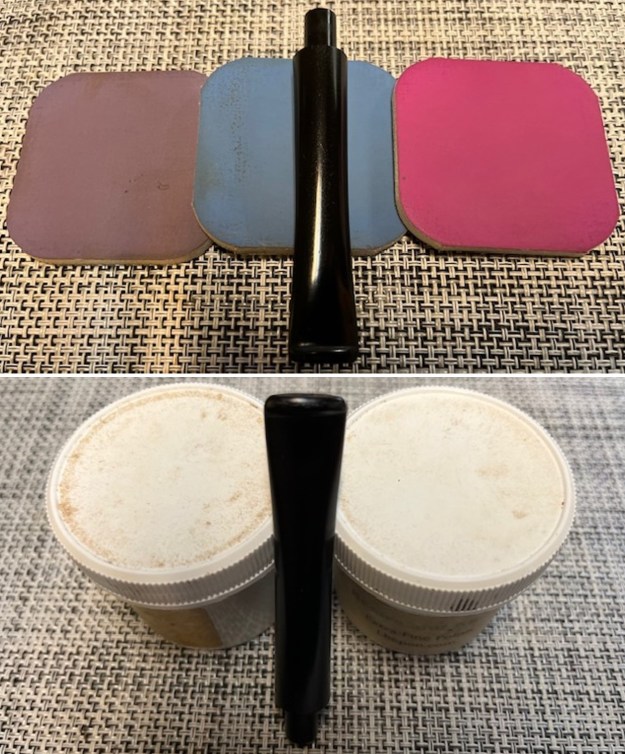
As always, I encourage your questions and comments as you read the blog. Thanks to each of you who are reading this blog. Remember we are not pipe owners; we are pipe men and women who hold our pipes in trust until they pass on into the trust of those who follow us.
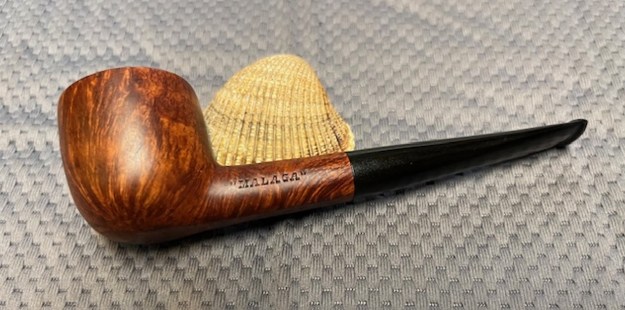
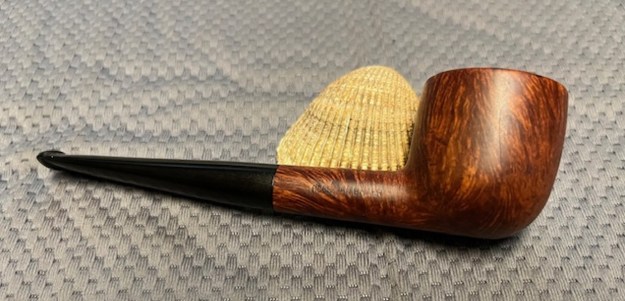
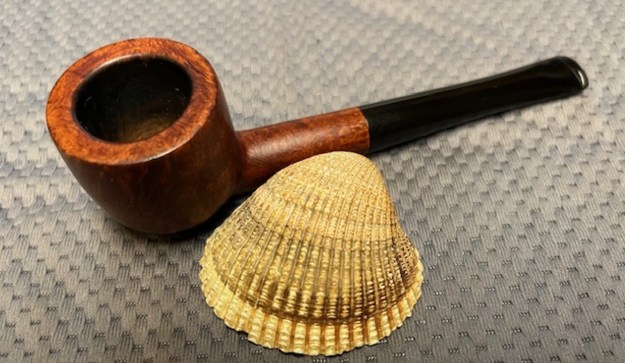
Jeff saw this Malaga Second Bowl sans stem, liked it and went for it


Blog by Steve Laug

The next pipe on the table is an interesting Malaga Freehand/Skater bowl. Jeff saw it on eBay and purchased it on 12/01/2023 from a seller in Swartz Creek, Michigan, USA. It was dirty pipe with a lot of wear and tear and obviously it had been someone’s favourite smoker. The pipe is stamped on the underside of the shank and reads Malaga [over] Second. The dirty smooth finish was not able to hide the beauty of the grain around the bowl and shank. There were tars and oils ground into the surface of the briar. The bowl had a very thick cake that flowed over the top of the smooth rim in a heavy lava coat. The cake in the bowl was thick right up to the top of the rim. It was hard to fully assess the condition of the inner edge. The outer edge of the bowl showed some nicks and dents. There was also a tar/lava build up on the shank end as well. The pipe was a mess. The stem was missing so it would need to be fitted with a new stem. Jeff took photos of the pipes before he started his clean up work. Jeff took photos of the rim and bowl to show the heavy cake and heavy lava coat covering the rim top. The inner edge of the rim was so thickly caked that it was not possible to know with certainty the condition. It really was a dirty pipe but still a beauty. The photos of the sides and heel of the bowls show some beautiful grain around the bowl and shank sides. Malaga pipes are oil cured and you can see that it adds depth to finish on the pipe and makes the grain really stand out on the bowl and shank. This bowl shows real promise. Jeff captured the inset on the shank end and the grime and tars built up on the surface of the briar.Jeff captured the stamping on the underside of the shank with the next photo. It was clear and readable and read as noted above. The grain below the stamp is also quite nice. I am including the link to a blog that I wrote that gives some of the history of the Malaga brand and the Malaga Pipe Shop in Royal Oak, Michigan in the USA. I have written an earlier blog to give a little history of the Malaga Brand and the pipemaker, George Khoubesser. Here is the link (https://rebornpipes.com/2013/02/09/george-khoubesser-and-malaga-pipes/). That blog also includes links to a catalogue and the history of the pipemaker George Khoubesser. Follow the link to get a feel for the brand and the pipemaker.

Jeff had cleaned up the pipe using his usual procedure. He reamed the pipe with a PipNet pipe reamer and removed the rest of it with a Savinelli Fitsall Pipe Knife. He scrubbed the bowl with undiluted Murphy’s Oil Soap with a tooth brush. He rinsed it under running warm water to remove the soap and grime. He cleaned out the inside of the shank and the airway with alcohol, cotton swabs and pipe cleaners. The shank had an inset to take in the tenon and the end of the stem so I would need to fit a stem to sit in the shank. I took photos of the pipe once I received it. I took a photo of the stamping on the underside of the shank. It is quite clear and easy to read.I went through my can of stems and found this acrylic taper stem. The diameter of the stem portion was a little too large in diameter to fit in the inset of the shank. I would need to sand the stem diameter to get a good fit to the inset.  I started my cleanup of the bowl and rim top by using a folded piece of 220 grit sandpaper to smooth out the inner rim edge and remove the darkening on the rim top around the edge. It worked very well and the cleaned-up rim and top looked much better.With all my sanding and trying various stems I was concerned about the dust and debris in the shank. I wanted to clean it up and also the inside of the airway in the stem. I used isopropyl alcohol, pipe cleaners and cotton swabs.I polished the bowl and the rim top with micromesh sanding pads. I dry sanded it with 1500-12000 grit pads. I wiped the bowl down after each pad with a damp cloth. The pipe began to take on a rich shine and grain was beginning to stand out. I worked on the diameter of the stem with 220 grit sandpaper so that it would fit in the inset on the shank end. It would take a regular tenon in the mortise and the portion of the stem above the tenon would fit in the inset. I sanded the diameter of the stem to match the diameter of the inset. Once it fit snug in the shank it was ready to be polished. Once I had adjusted the diameter of the stem I fit it in the inset shank end and took photos of the look of the pipe with the new stem in place. I like the grey brown acrylic stem and its flow with the shape of the pipe. I still need to polish the stem but it is looking good. I put the stem aside to finish later and returned to the bowl. To finish it at this point I rubbed the bowl and shank down with Before & After Restoration Balm to deep clean the finish on the bowl and shank. The product works to clean, enliven and protect the briar. I worked it in with my fingers to get it into the briar. I let it sit for 10 minutes then I wiped it off and buffed it with a soft cloth. The briar really began to have a rich shine. I took some photos of the bowl at this point to mark the progress in the restoration. It is a beautiful bowl.I set the finished bowl aside and we back to the stem. I started the polishing of the stem with 2 inch sanding pads – dry sanding with 320-3500 grit pads and wiping it down after each pad.I set the bowl aside and worked on the stem at this point in the process. I polished the stem with micromesh sanding pads – dry sanding with 1500-12000 grit pads. I wiped the stem down after each sanding pad with Obsidian Oil. I polished the stem with Before & After Pipe Stem Polish – both Fine and Extra Fine. I gave it a coat of Obsidian Pipe Stem Oil. It works to protect the stem from oxidizing. I set it aside to dry. I put the new stem back on the Malaga Second Freehand and took it to the buffer. I buffed the bowl and stem with Blue Diamond to polish the briar and the acrylic. Blue Diamond does a great job on the smaller scratches that remain in both. I gave the bowl and the stem several coats of carnauba wax and buffed the pipe with a clean buffing pad to raise the shine. I hand buffed it with a microfiber cloth to deepen the shine. I am amazed at how well it turned out. The finished pipe is shown in the photos below. This is a beautiful Malaga Second Freehand – the acrylic taper stem and smooth finish combine to give the pipe a great look. I honestly have no idea why it is labeled a second as there are no fills or flaws in the briar. The dimensions of the pipe are Length: 6 ½ inches, Height: 2 inches, Outside diameter of the bowl: 1 ½ inches wide x 2 inches long, Chamber diameter: 7/8 of an inch. The weight of the pipe is 1.48 ounces/43 grams. This is another pipe that I will be putting on the rebornpipes online store in the American Pipe Makers and Pipemaking Companies Section shortly, if you are interested in adding it to your collection. Thanks for walking through the restoration with me on this beauty!

As always, I encourage your questions and comments as you read the blog. Thanks to each of you who are reading this blog. Remember we are not pipe owners; we are pipe men and women who hold our pipes in trust until they pass on into the trust of those who follow us.
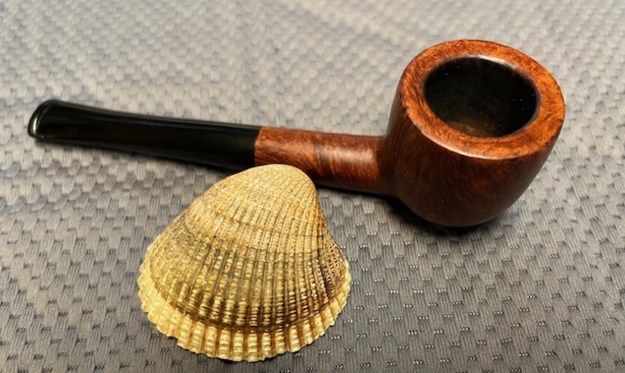
Restoring a Unique “Malaga” Custom Carved Fluted Bent Egg


Blog by Steve Laug

Jeff and I have been picking up Malaga pipes for a very long time. It does not seem that long ago that we picked them up for $4 – $5USD each. We purchased an estate of more than 30+ Malaga pipes. It was not long before the brand had our attention. The pipes are very well made and all are oil cured with a “secret” recipe and process.

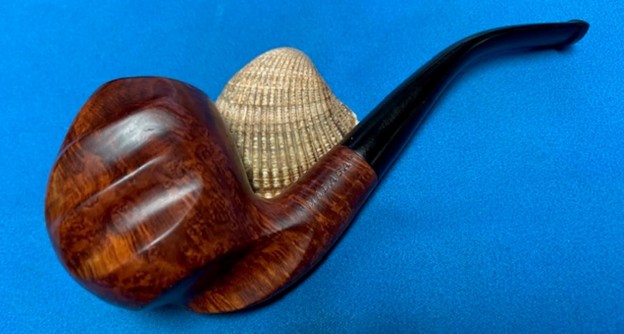
The next pipe on the table is a “Malaga” pipe that is made in a shape that I would define as a Twisted Bent Egg. We picked it up from a seller on eBay in Bristol, Indiana, USA. It has some great cross and birdseye grain and a tapered vulcanite bent stem. The grain around the bowl and shank combined with the stem make it a stunning pipe. The carver did a great job of uniquely shaping the pipe to follow the grain on the briar. The twists and turns in the bowl are well done and almost seem to be carved for fingers to fit against the bowl either left or right handed. The bowl had a thick cake that overflowed with lava onto the rim and there were scratches and nicks on the top and edges under the grime. The sides of the bowl and shank are very dirty with grime and oils from prolonged use. The stamping on the left side of the shank read “MALAGA” in quotations. On the right side it is stamped in script and reads CUSTOM CARVED. The vulcanite stem had light tooth dents and chatter on the top and the underside of the stem. The button was worn on both sides. Jeff took these photos before he started the cleanup work on the pipe.Jeff took a closeup photo of the bowl and rim to capture the condition of the pipe before he started his cleanup work. The rim top had some lava overflow and darkening on the back of the bowl. There are nicks around the inner outer edges of the bowl and rim top. The stem is oxidized and dirty and there is tooth marks (dents) and chatter on the button edges and surfaces ahead of the button. The shank was too dirty for the stem to fit snugly and it looks like it is poorly fit. I will know more once I have it in hand. He also took photos of the sides and bottom of the bowl and shank to show the beautiful grain around the bowl. The photos show the general condition of the bowl and wear on the finish. It is very dirty but this is another beautiful pipe. Jeff took a photo to capture the stamping on the shank. The photos show the stamping “MALAGA” on the left side of the shank and CUSTOM CARVED on the right side. The stamping is very readable.I am including the link to a blog that I wrote that gives some of the history of the Malaga brand and the Malaga Pipe Shop in Royal Oak, Michigan in the USA. I have written an earlier blog to give a little history of the Malaga Brand and the pipemaker, George Khoubesser. Here is the link – (https://rebornpipes.com/2013/02/09/george-khoubesser-and-malaga-pipes/). That blog also includes a catalogue and the history of the pipemaker George Khoubesser. Follow the link to get a feel for the brand and the pipemaker.

Jeff reamed the bowl with a PipNet pipe reamer and followed up with a Savinelli Fitsall pipe knife to remove the cake. He scrubbed out the mortise and the airway in the shank and the stem with alcohol, cotton swabs and pipe cleaners. He scrubbed the exterior of the bowl, rim, shank and stem with a tooth brush and Murphy’s Oil Soap to remove the oils and tars on the rim and the grime on the finish of the bowl. He rinsed it under running water. He dried it off with a soft cloth. He was able to remove the lava build up on the rim top and the flat surface of the rim looked very good. The inner edge of the rim has some serious burn damage on the front inner edge. The outer edge looked very good. He soaked the stem in Before & After Deoxidizer and rinsed it with hot water. I took photos of the pipe to show its condition before I started my work on it. Note that I will need to bend the stem slightly to fit the bend of the shank.  I took close up photos of the bowl and rim top as well as the stem. You can see the condition of the rim top and bowl in the first photo. Jeff was able to remove all of the tar and oils but you can now see the on the rim top and edges. The vulcanite stem had tooth chatter on both sides near and on the button surface.I took a photo of the stamping on the shank to show how good the condition is. It shows the “MALAGA” stamp on the left side and CUSTOM CARVED on the right side. The stamping is very legible. I took a photo of the pipe with the stem removed to give a clear picture of the character of the pipe. I started my work on the pipe by addressing the darkening on the inner edge of the bowl and the scratching and nicks on the rim top. It looked much better than when I started.I polished the rim top and the briar with micromesh sanding pads. I wet sanded the bowl with 1500-2400 grit sanding pads to prepare the rim top for staining. I wiped the bowl down after each pad with a damp cloth to remove the sanding dust. I worked some Before & After Restoration Balm into the surface of the briar with my fingertips to clean, enliven and protect it. I let the balm sit for a little while and then buffed with a cotton cloth to raise the shine. The following photos show the bowl at this point in the restoration process. I am very happy with the results. I turned to the stem to address the issues on the surface of both sides at the button. I painted the surface of the stem with the flame of a lighter to lift the tooth marks from the surface. I was able to lift them to some degree but they would need to be repaired. I also heated the stem with the flame to soften the vulcanite and bend the stem to match the angles on the bowl. I filled in the tooth marks in the top and underside of the stem with black rubberized CA glue. I set it aside to cure. Once it cured I use a small file to flatten the repairs and blend them into the stem surface. I sanded the stem surface with 220 grit sandpaper to flatten the repairs and blend them into the surface. I started the polishing with 600 grit wet dry sandpaper. I also cleaned up the tenon for a better fit to the shank. I polished the stem with micromesh sanding pads – wet sanding with 1500-2400 grit pads and dry sanding with 3200-12000 grit pads. I wiped the stem down after each pad with Obsidian Oil. I finished the hand polishing of the stem with Before & After Pipe Polish – both the Fine and Extra Fine polishes. I gave it a final coat of Obsidian oil and set it aside to dry.This Malaga Custom Carved Twisted Fluted/twisted Bent Egg with a vulcanite tapered stem turned out to be a real beauty. It has great grain around the bowl and the carver really maximized that with the shape of the pipe. Everything about the pipe – the shape of the bowl, the thin flat rim top and the cut of the briar work well to highlight the grain around the bowl sides. I polished stem and the bowl with Blue Diamond polish on the buffing wheel and the grain just popped and came alive. I gave the bowl and the stem multiple coats of carnauba wax. I buffed the pipe with a clean buffing pad to raise the shine. I hand buffed it with a microfiber cloth to deepen the shine. The pipe polished up pretty nicely. The grain took on life with the buffing. The rich oil cured colour works well with the polished vulcanite stem. The finished Malaga Custom Carved Fluted Bent Egg has a rich look that is quite catching. Have a look at it with the photos below. The shape, finish and flow of the pipe and stem are very well done. The dimensions are Length: 6 inches, Height: 2 inches, Outside diameter of the bowl: 1 ¼ inches, Chamber diameter: ¾ of an inch. I will be adding the pipe to the rebornpipes store in the American Pipemakers Section shortly. If you are interested in adding this pipe to your rack send me an email or message on Facebook. Thanks for walking through the restoration with me as I worked over another estate pipe.

As always, I encourage your questions and comments as you read the blog. Thanks to each of you who are reading this blog. Remember we are not pipe owners; we are pipe men and women who hold our pipes in trust until they pass on into the trust of those who follow us.
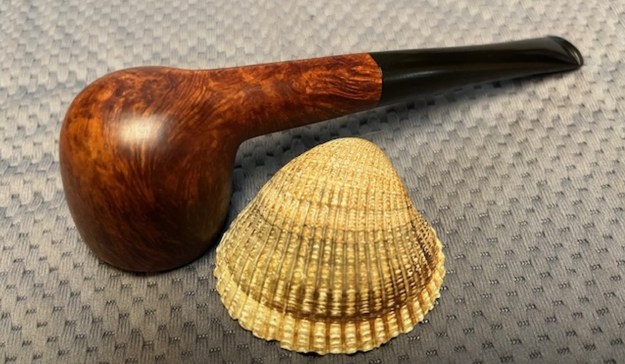
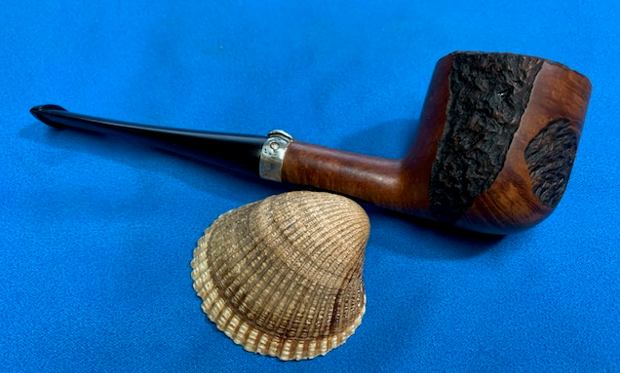
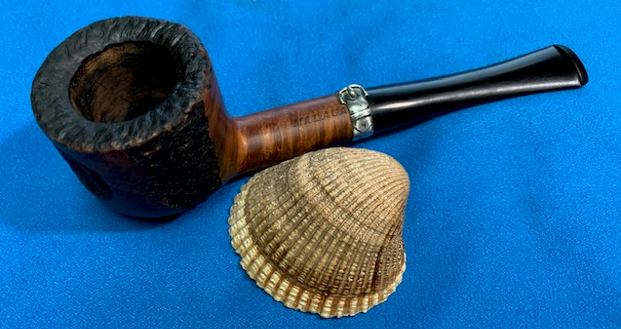
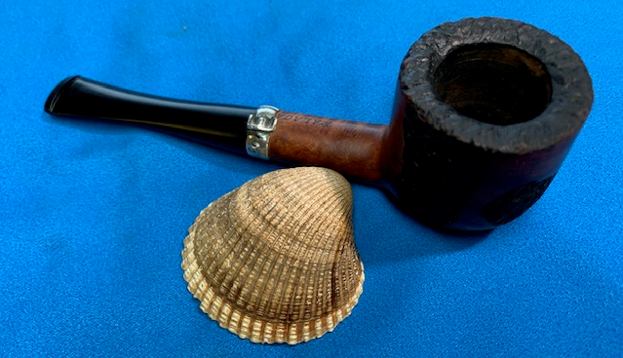
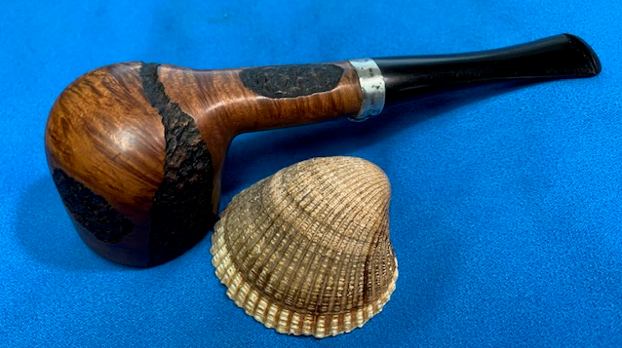
Restemming & Restoring a Malaga Mixed Finish Pot  


Blog by Steve Laug

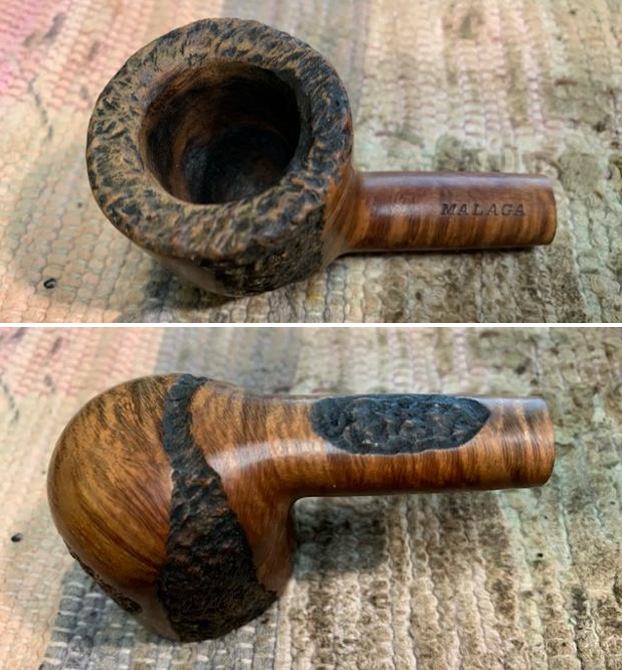
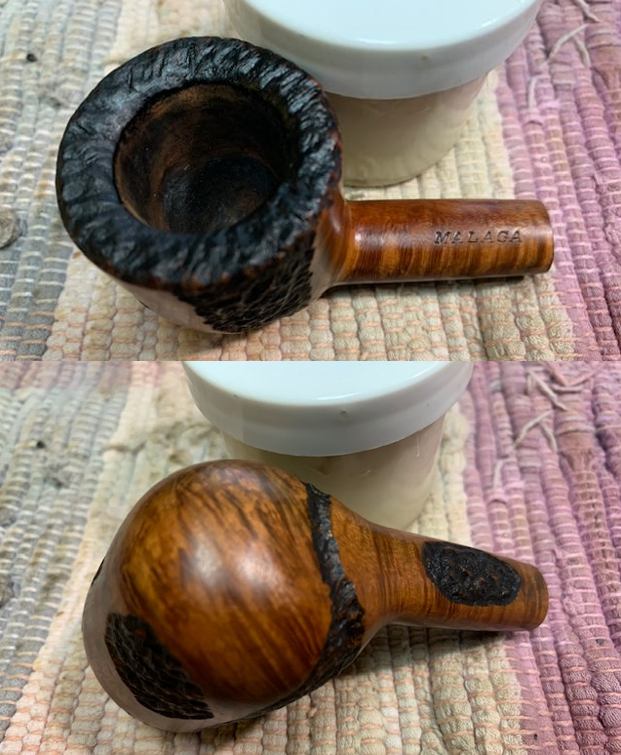
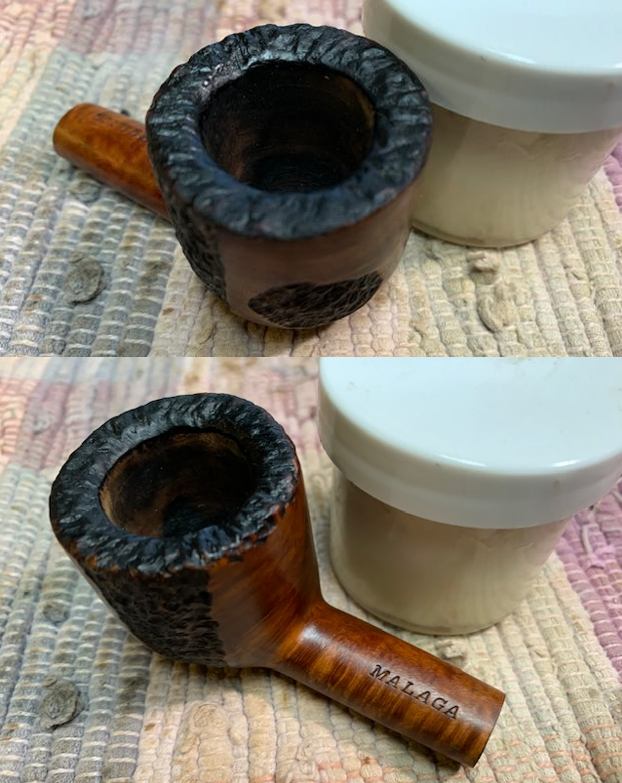
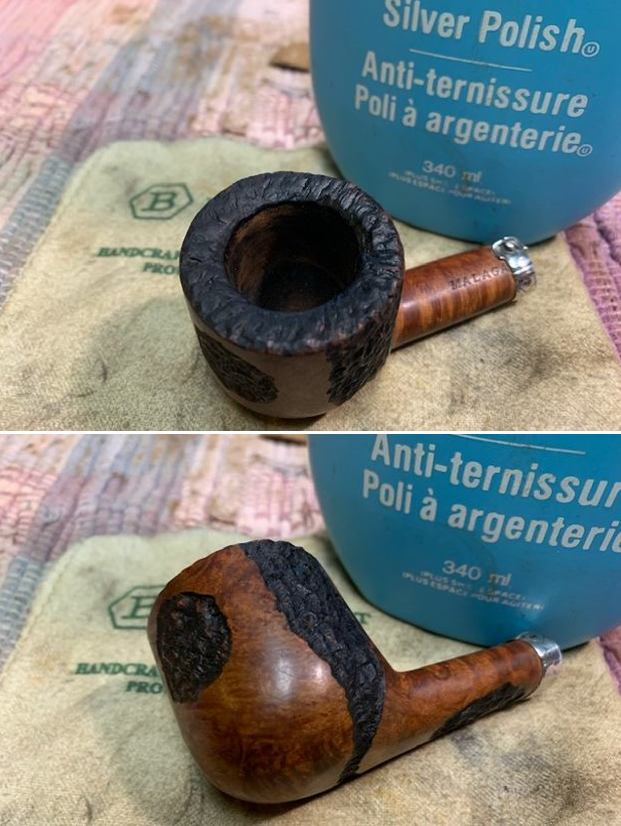
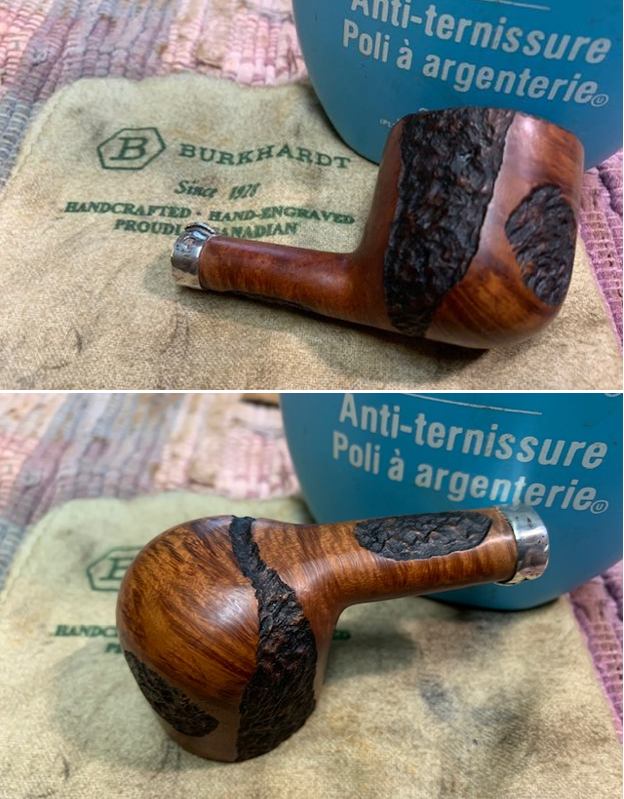
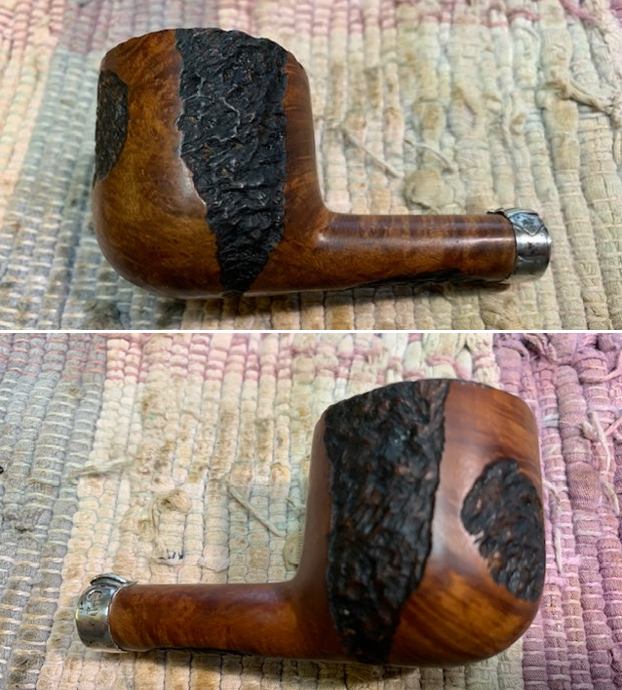
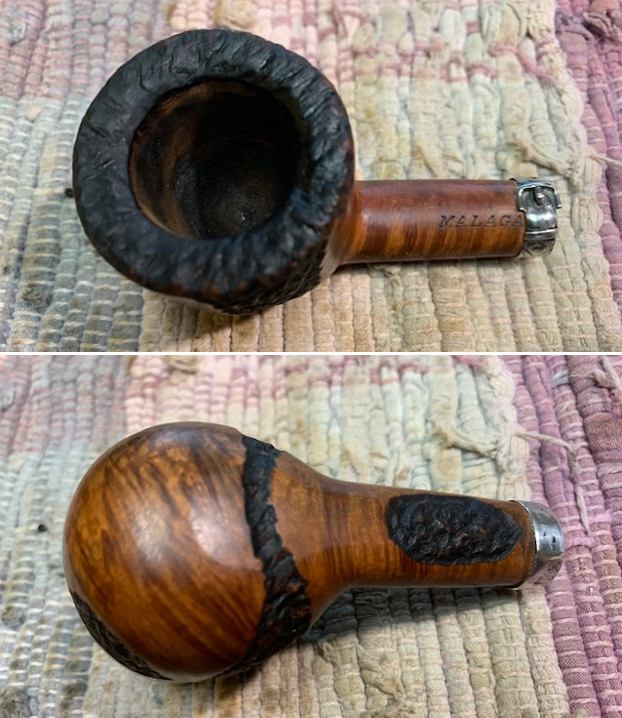
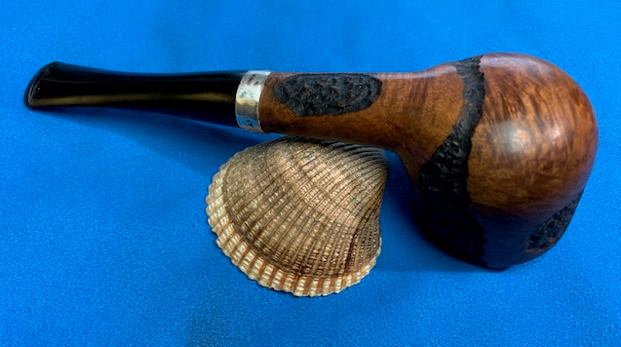
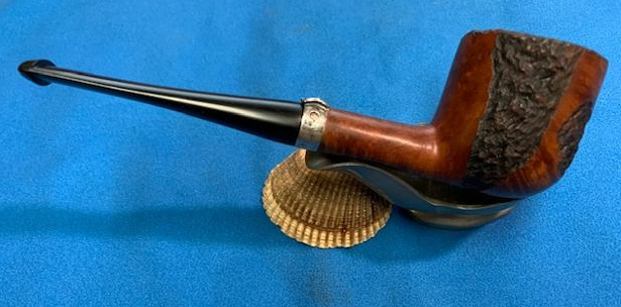
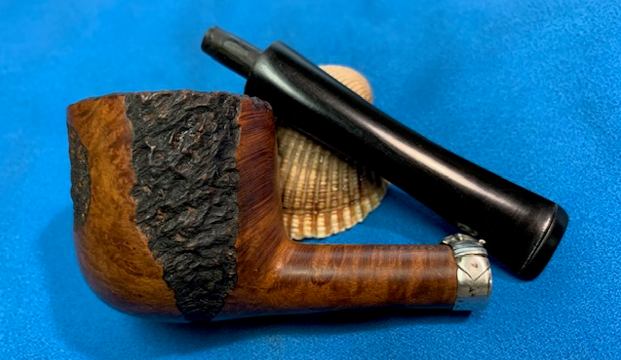
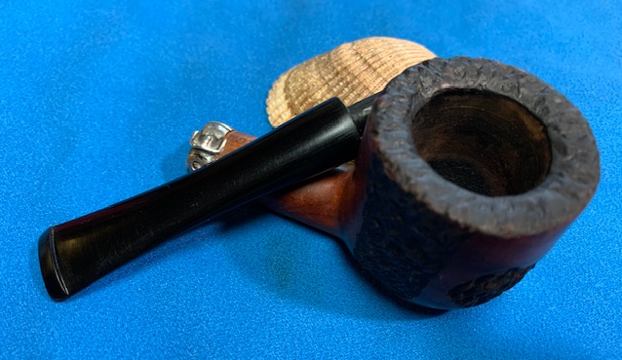
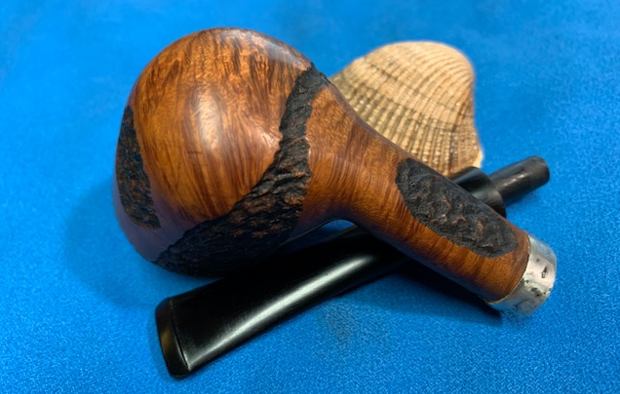
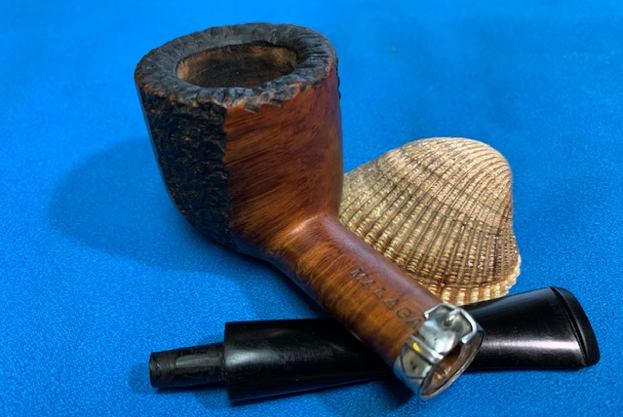
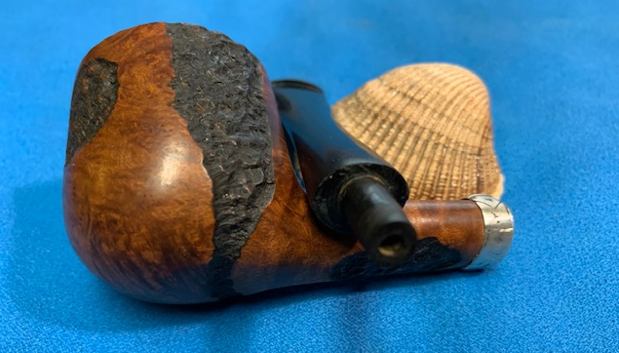
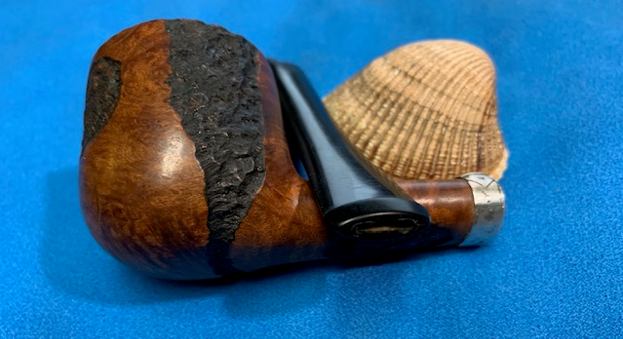
This morning I went through my box of stummels (bowls) here and picked out a Pot shaped bowl that had some promise to me. I went through my can of stems and found an oval shaped stem with the casting marks on the sides and button end. The pipe I chose to work on is an interesting Malaga Pot with a mixture of rusticated portions and smooth portions on the bowl and shank sides. I have worked on a lot of Malaga pipes in the past so I am not a stranger to the brand. I have included the link below to a bit of history on the brand that I compiled.

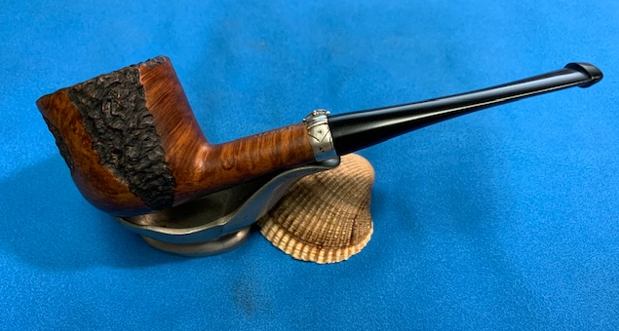
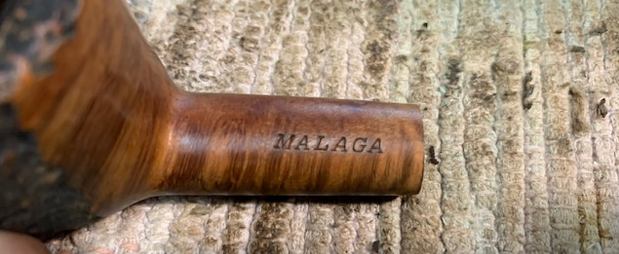
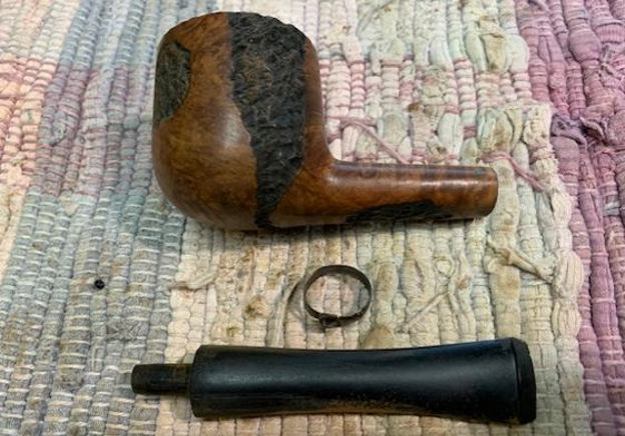
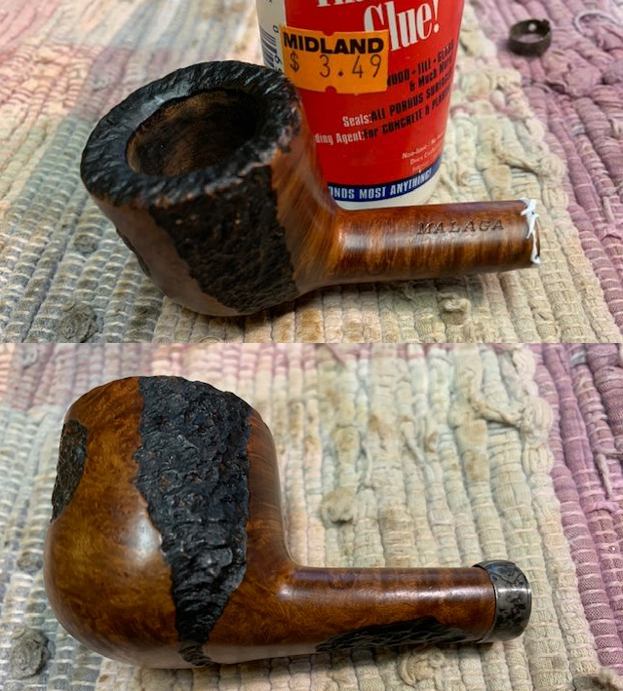
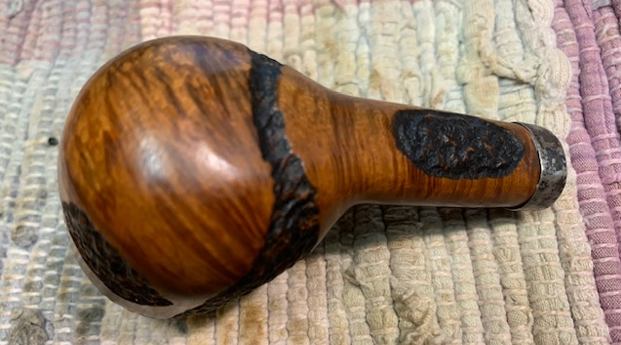
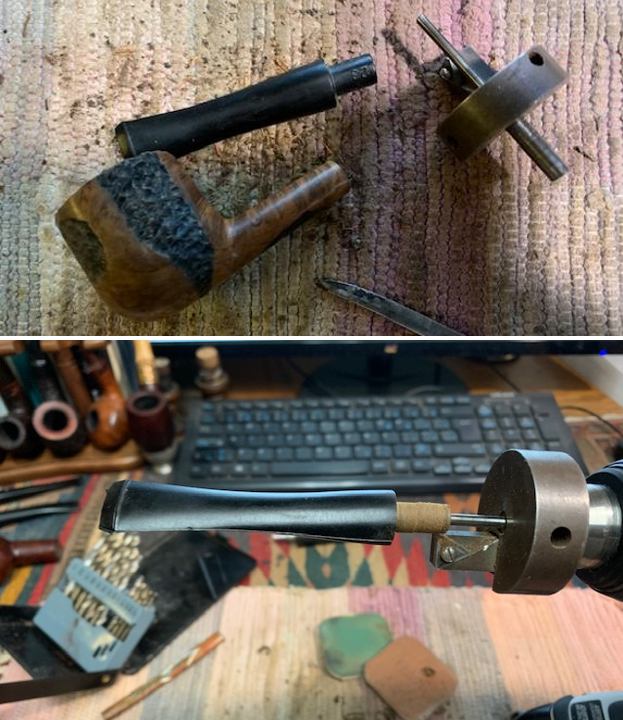
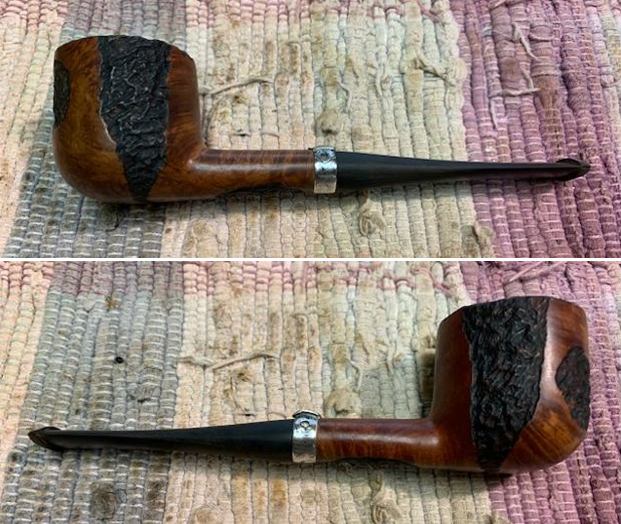
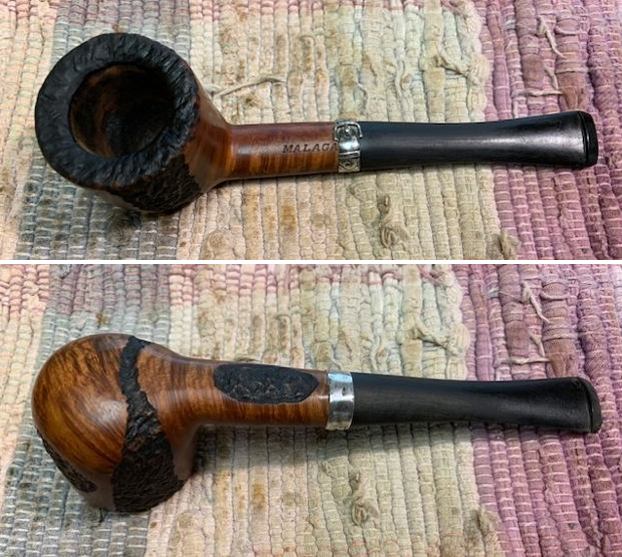
The bowl looked very good. The grain around the sides was quite nice and a mix of flame and birdseye grain. The rim top was rusticated as were some patches on the front, the sides and the bottom of the shank. The inner edge of the bowl showed some wear. There was a hairline crack on the underside of the shank that extended about ¼ inch up the shank. The interior of the bowl was clean and there were not any chips, cracks or checking on the walls. Examining the mortise there was a snapped off tenon in the shank. It was crumbling and would need to be pulled. The finish was washed out and bit and tired but still quite redeemable. The stamping on the pipe was clear and readable. On the topside it read MALAGA and no other stamping was on the shank. I took some photos of the bowl before I started to work on it. I took a photo of the stamping on the topside of the shank. It reads as noted above and is clear and readable. I went through some of stems and found an oval vulcanite stem blank. It was the right diameter and once I turned the tenon it would fit the shank. It has casting marks on the sides and on the button end. I also found a unique sterling silver band that fit the shank. It was shaped like a belt and buckle and would look very good.I have worked on quite a few Malaga pipes and blogged their restorations, so rather than repeat previous blogs, I am including the link to one that gives some of the history of the Malaga brand and the Malaga Pipe Shop in Royal Oak, Michigan in the USA from a catalogue. It gives a sense of the brand and the history in their own words. Follow the link to get a feel for the brand and the pipemaker – https://rebornpipes.com/2013/02/09/george-khoubesser-and-malaga-pipes/.

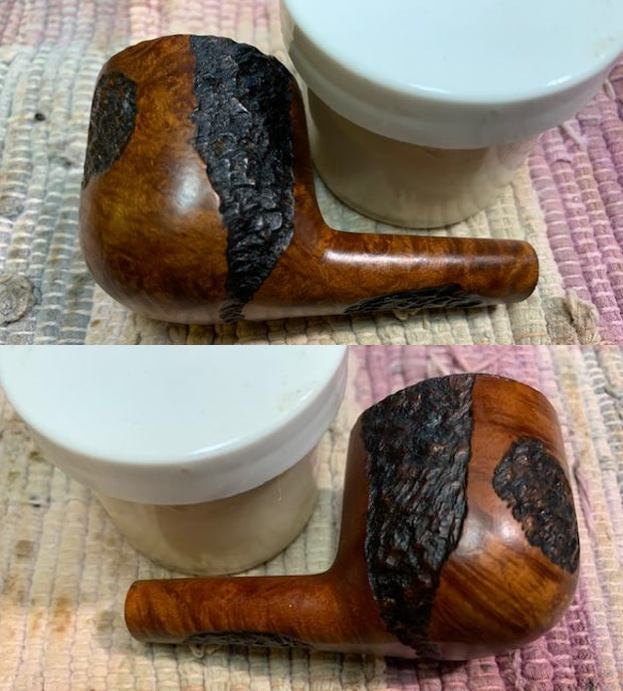
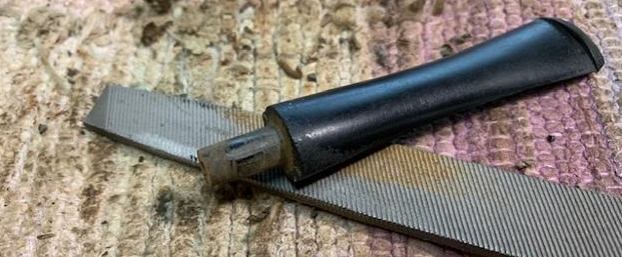
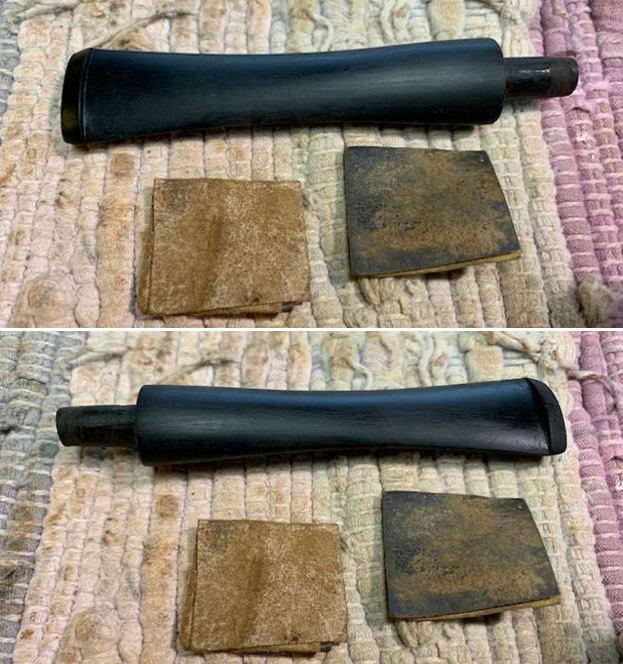
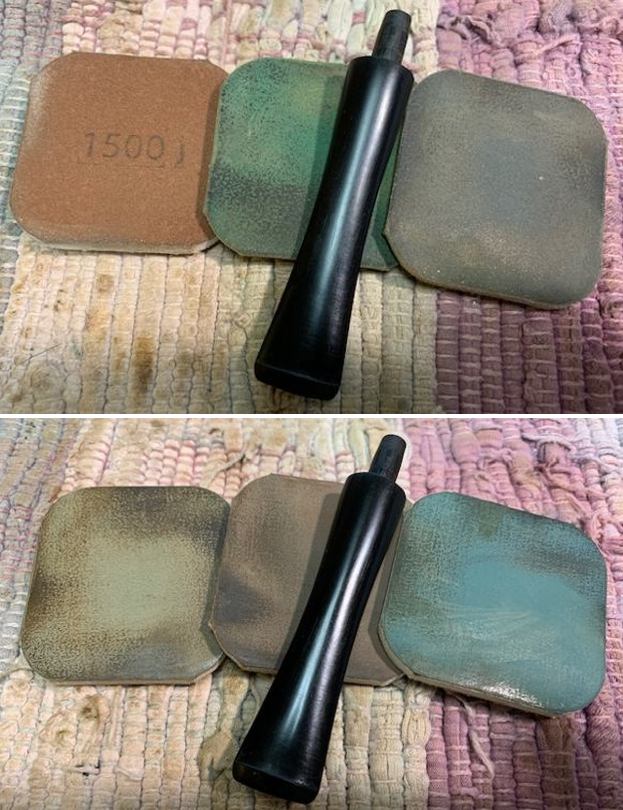
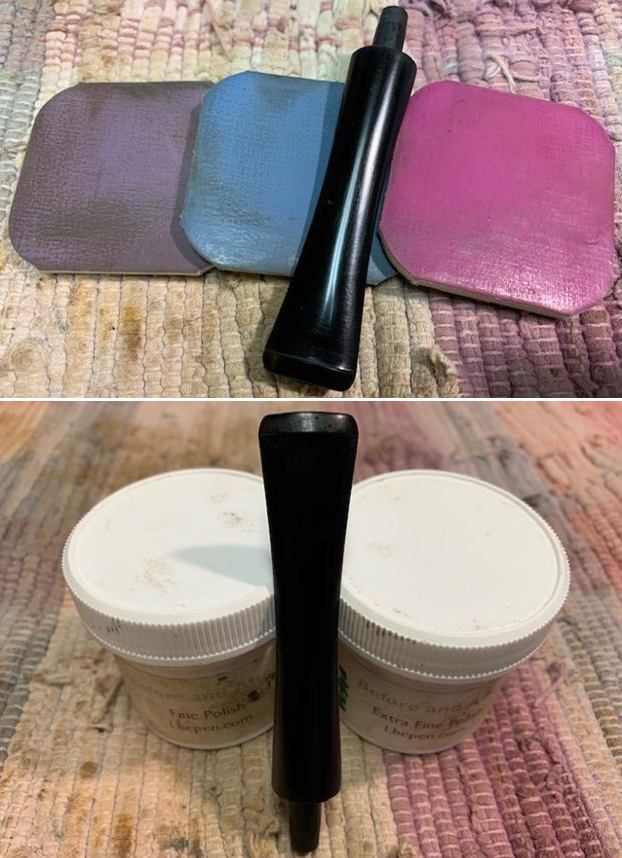
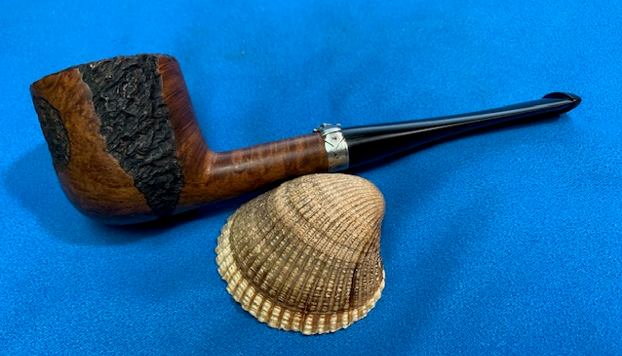
With that information in hand I turned to work on the bowl. There was a broken off tenon in the shank. I tried to pull it with a screw and then moved on to drill it out. I started with a bit a little larger than the tenon in the airway and worked my way up to the size of the shank. When I removed the bit the pieces of tenon fell out on the table top. With the mortise clean I was ready to move on to the next part of the clean up.I cleaned up the rustication on the rim top with a brass bristle wire brush to remove the debris in the rustication. It cleaned up well. I used a Black Sharpie Pen to restain the rustication on the rim top and the sides of the bowl. I rubbed the bowl and shank down with Before & After Restoration Balm. I worked it into the surface of the bowl sides and shank with my fingertips and a horsehair shoe brush to clean, enliven and protect the briar. I let the balm sit for 10 minutes then buffed with a cotton cloth to raise the shine. The grain really came alive. It looks better than when I began. The crack on the underside of the shank was a mere hairline what was not long or wide so it would be an easy repair with a bit of glue and a band. I painted the shank end with some all-purpose white glue. I spread it with a dental spatula and pressed the band in place on the shank.I polished the Sterling Silver belt band with some silver polish and a jeweler’s cloth. I was able to remove the tarnish and the band looked very good. I took pictures of the banded shank to show the look of it. Notice that the belt buckle is on the top and the A of the Malaga is perfectly framed on the right side by the buckle. With the bowl finished it was time to focus on the stem. I took out the stem and the Pimo tenon turning tool and set up the tool in my cordless drill. I put the guiding pin in the airway on the stem and adjusted the cutting head. I held the stem in place and carefully turned the tool on the tenon. I used a flat file to smooth out the tenon to fit in the shank. I put the stem in shank for a sense of the look of the pipe. The stem fit well and it looked like it belonged. I sanded the castings off the edges of the stem and the button with 220 grit sandpaper before I took the photo.I removed the stem and worked on it next. I smoothed out remnants of the castings and the scratches in the surface of the vulcanite with 220 grit sandpaper. I started polishing the stem with 400 grit wet dry sandpaper.I polished the stem with micromesh sanding pads – dry sanding with 1500-12000 grit pads. I wiped the stem down after each pad with a cloth and Obsidian Oil. I finished the polishing with Before & After Pipe Stem Polish – both Fine and Extra Fine. I gave it a final coat of Obsidian Oil. I put the pipe back together – the bowl with its new stem. This restored Malaga Oil Cured Pot with rusticated panels is a real beauty and I think the Sterling Silver Belt band and the chosen stem works well with it. The grain on the bowl came alive with the buffing. I used Blue Diamond on the buffing wheel on both the bowl and stem. I gave both multiple coats of carnauba wax on the wheel then buffed it with a clean buffing pad to raise the shine. I hand buffed it with a microfibre cloth to deepen the shine. The Malaga Pot feels great in the hand. It is lightweight and the contrast in the browns of the briar, the Silver band and the polished vulcanite stem with the popping grain on the mixed brown stained bowl is quite amazing. The dimensions of the pipe are Length: 6 inches, Height: 1 ¾ inches, Outer diameter of the bowl: 1 ½ inches, Chamber diameter: 1 inch. The weight of the pipe is 1.59 ounces/45 grams. It really is a beauty. I will be putting it on the rebornpipes store in the American (US) Pipe Makers section shortly if you are interested in adding it to your collection. Thanks for walking through the restemming and the restoration with me. Cheers.