Blog by Robert M. Boughton
Copyright © Reborn Pipes and the Author except as cited
https://www.roadrunnerpipes2k.com/
https://www.facebook.com/roadrunnerpipes/
Something in the way she moves
Attracts me like no other lover
Something in the way she woos me
I don’t want to leave her now
You know I believe and how
— “Something,” by George Harrison, The Beatles, 1969
INTRODUCTION
 Mark Oberman is one of the best men I’ve ever known, a man of true faith who walks the way he talks, in a calm, quiet search for his own meaning and place in the world. He works as a private psychologist in the community and for the local police department’s crisis intervention unit, meaning he puts his life on the line to help desperate folks avoid doing things that might harm themselves or others, but he never talks about that unless there’s a need. I only found out not long ago, eight years after we met, when someone I know well had been a subject of what police call constant involvement for violent psychological behavior during the previous year and was upgraded to an official investigation. Mark has helped me under far less serious scenarios, and I consider him to be a good friend. I’ll have to tell him that sometime.
Mark signaled me, near the end of our monthly pipe club meeting last week, that he wanted a word in private. Curious, I stepped aside with him, and noticed he appeared uncertain how to get to the point. I could sense his mind grasping for the right words, and it made me nervous. At last, he spoke.
“Do you do stem work?” he asked. I have to say, it was the last thing I expected, and my face might have betrayed me, or maybe my initial silence. “Could you clean up a few stems and pipes?”
I smiled, knowing full well he didn’t need to ask and not yet understanding where he was going.
“I could do that,” I said.
I think Mark’s hands must have been behind his back, because I was almost startled by the suddenness with which he produced three pipe sleeves that weren’t empty. Really, he could have been a magician. We were already whispering when his voice dropped another notch, lest someone else hear his plan.
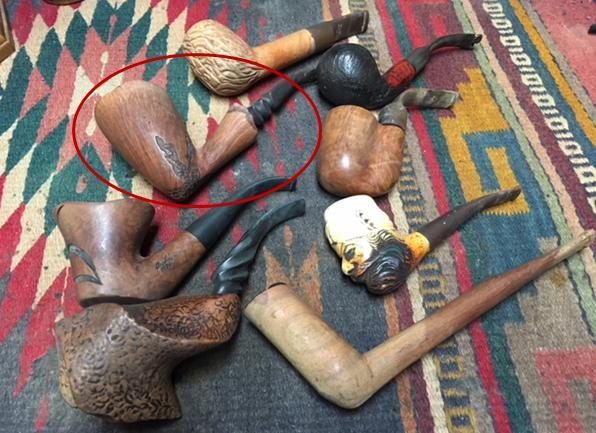
“I have these three pipes I’d like to donate for the next raffle,” Mark continued before making an inexplicable return to his original question, still avoiding whatever was on his mind. “Could you clean up the stems, the pipes?”
I knew he wasn’t asking whatever question was most important to him and didn’t get it, and so I responded with my same original answer that, when repeated with a slight twist of emphasis, became ambiguous.
“I could definitely do that.”
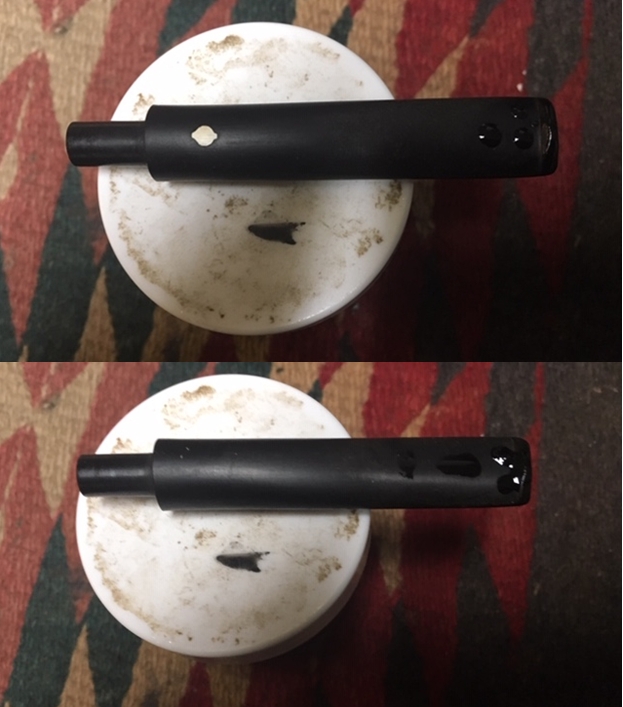
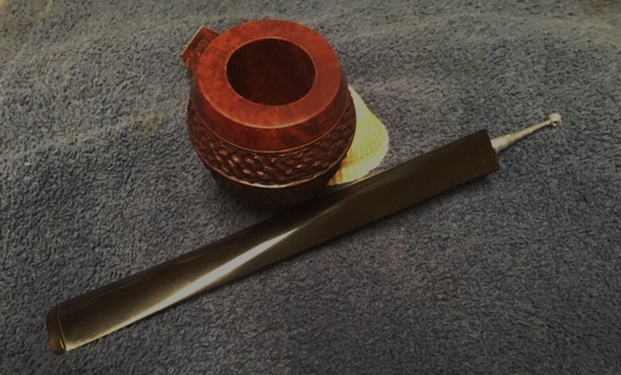
This is getting bizarre, I thought, and felt the sudden need to retrieve a Brigham sandblasted pot sitter (#118) as corroboration. I had restored the stummel and inappropriate three-dot stem with which it came. The stem should have had only one dot, corresponding with the 100 series of the shape, and also appeared to have been pummeled and lacerated until the top lip was weak and the bottom masticated into nothingness. A hole on the bottom gave poignant testimony to its treatment. I handed the whole thing to Mark, who couldn’t tell where the stem hole and weak lips once were, and it was shiny black again. [I’m still looking to trade it for a one-dot, BTW.]
Mark just looked at me, his eyes piercing. It was as though he beamed the thought to me, and I grokked him.
“I’ll be happy to do it,” I said with a grin. “To give something back to the club for everything it’s done.”
Mark took a deep breath and smiled in relief. I guess there was something he didn’t know about me, also.
In that night’s raffle, for example, for three tickets at a dollar a piece, I won a nice corncob and a 100-gram bag of some leafy stuff called Spilman Mixture by the E. Hoffman Company. Mark donated both of them and more.
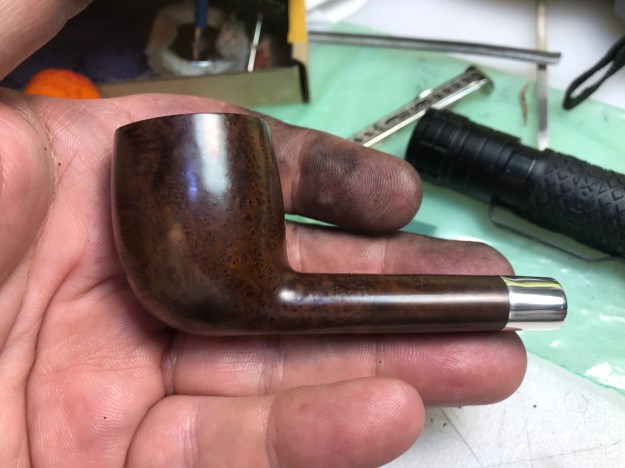
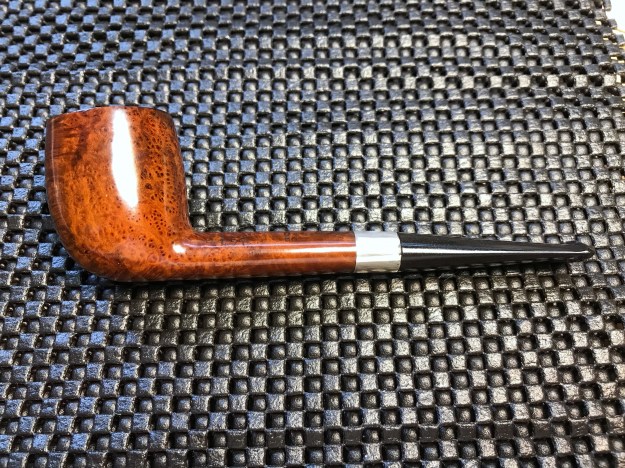
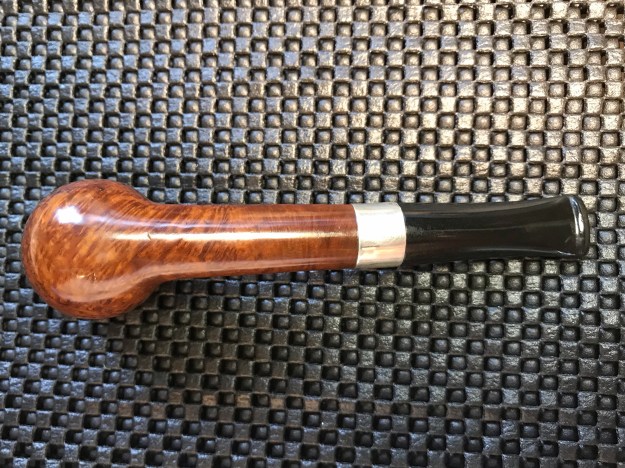
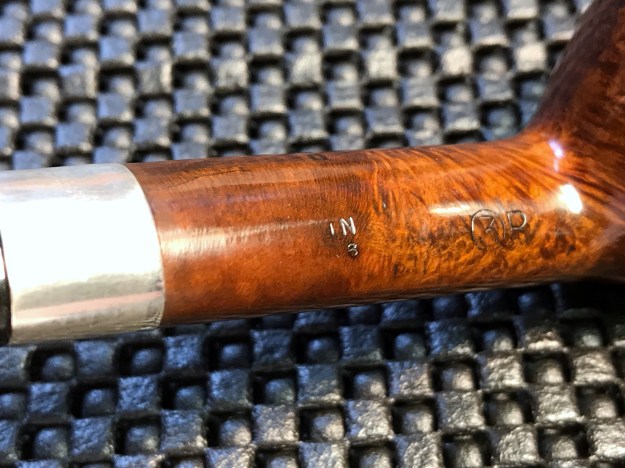
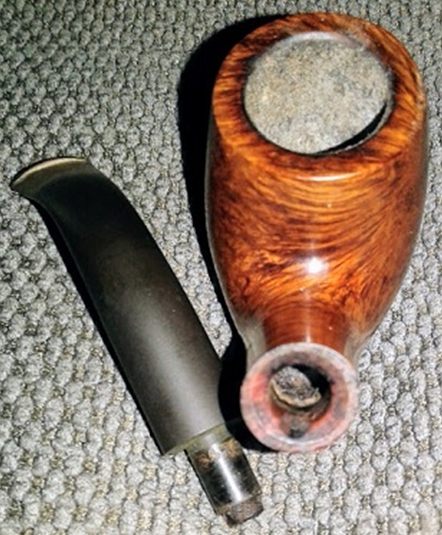
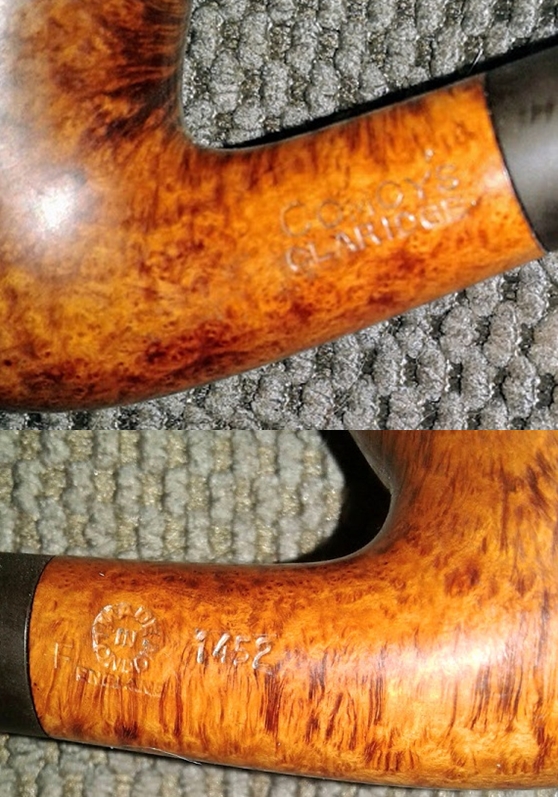
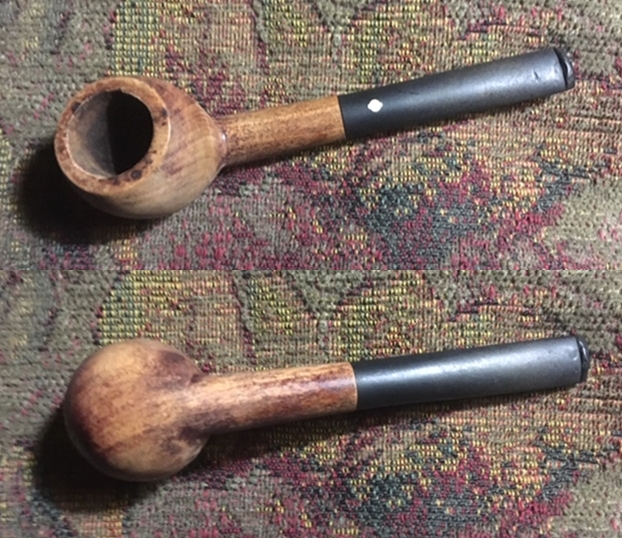
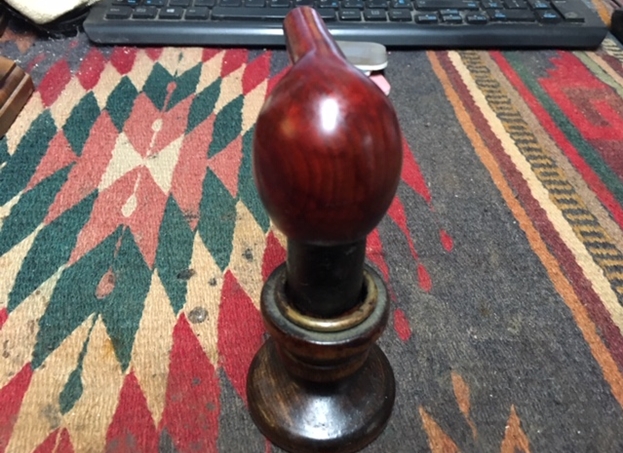
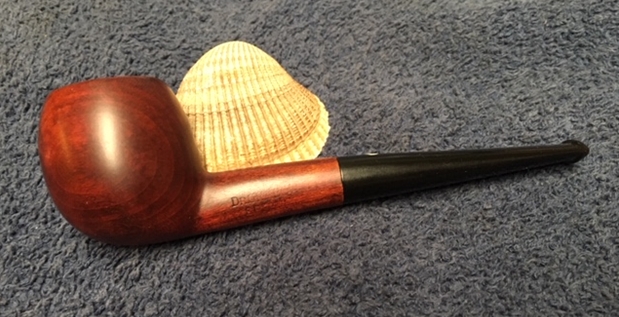
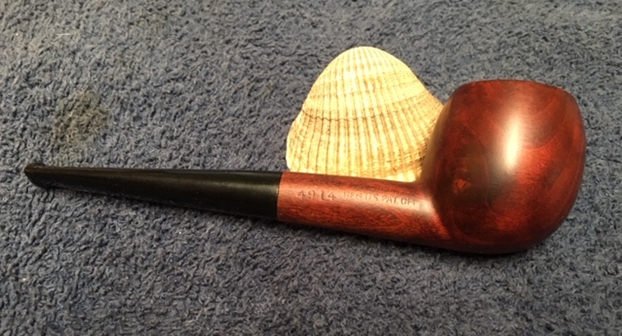
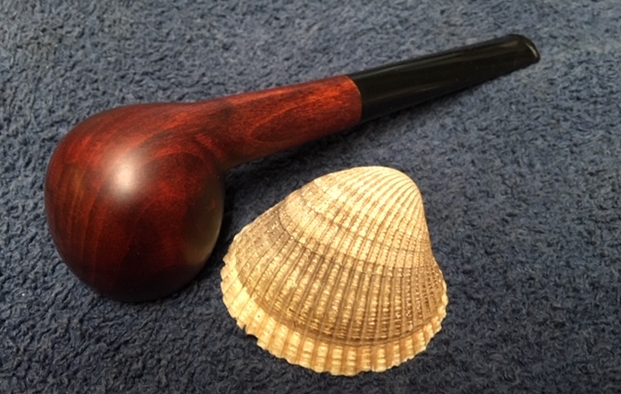
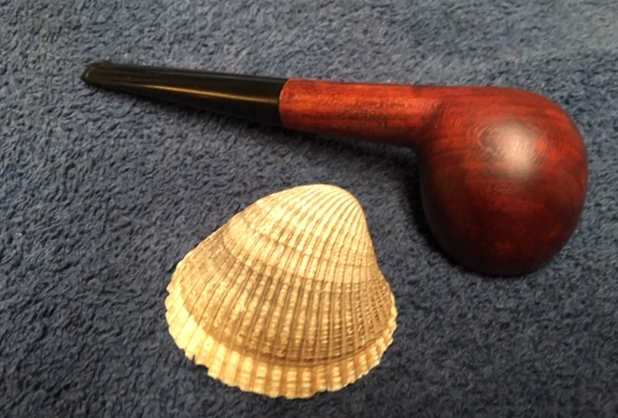
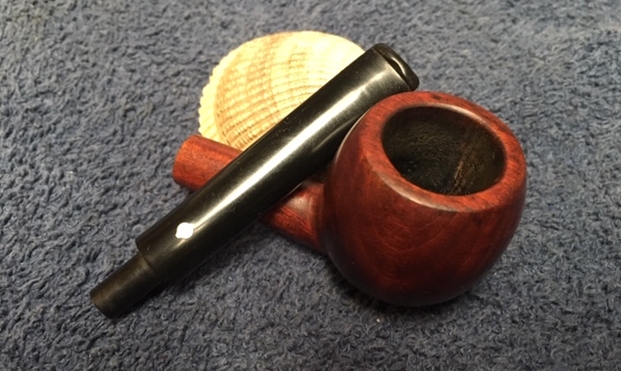
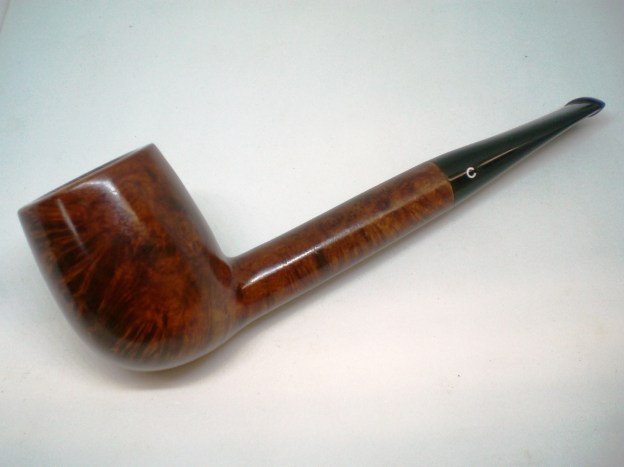
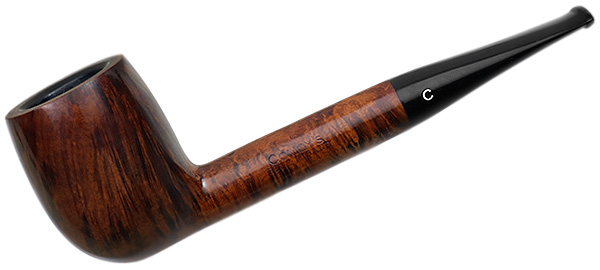
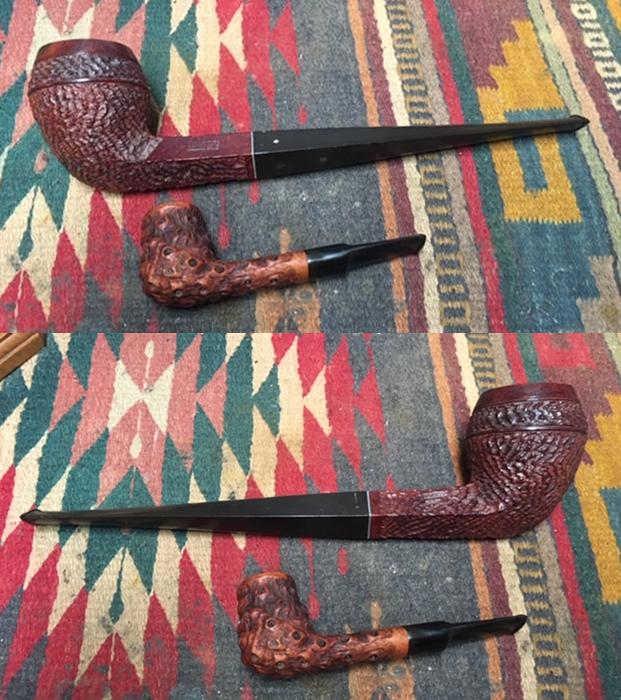
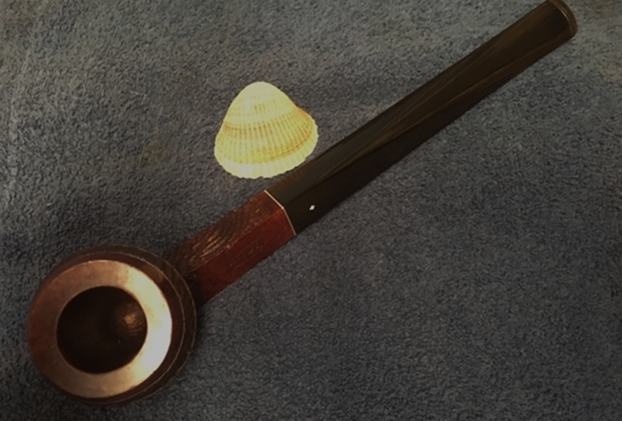
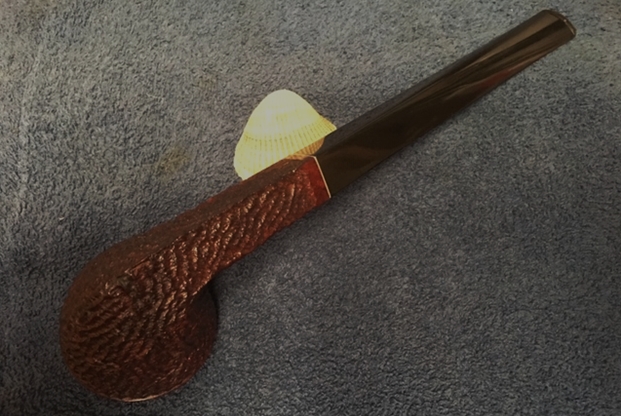
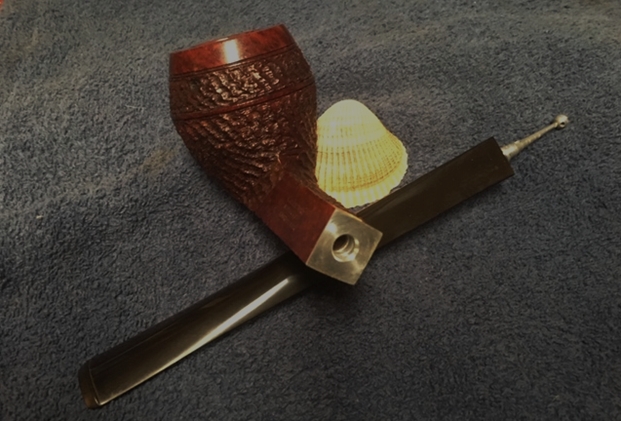
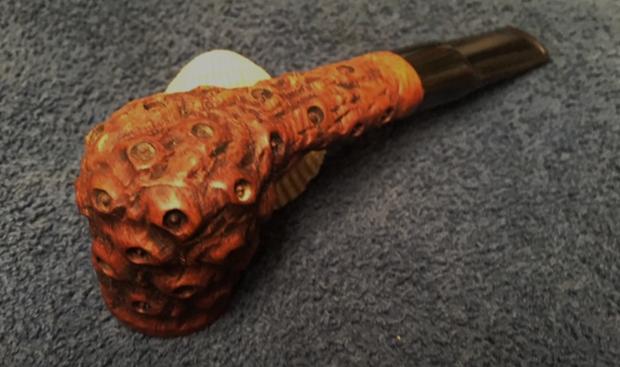
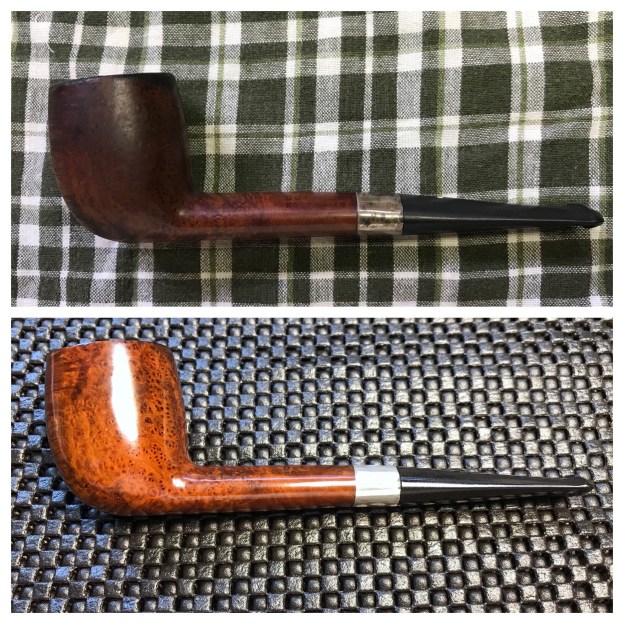
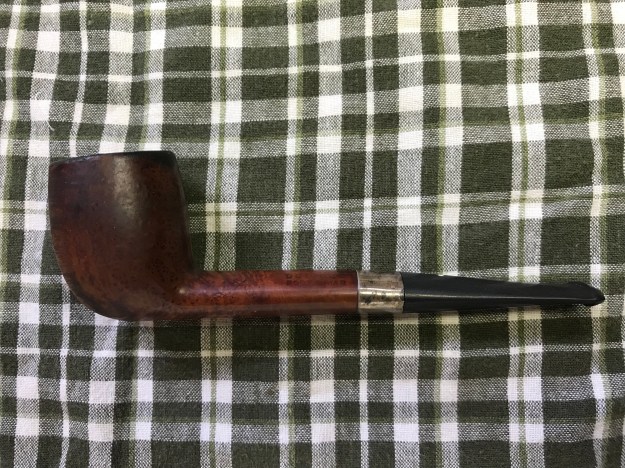
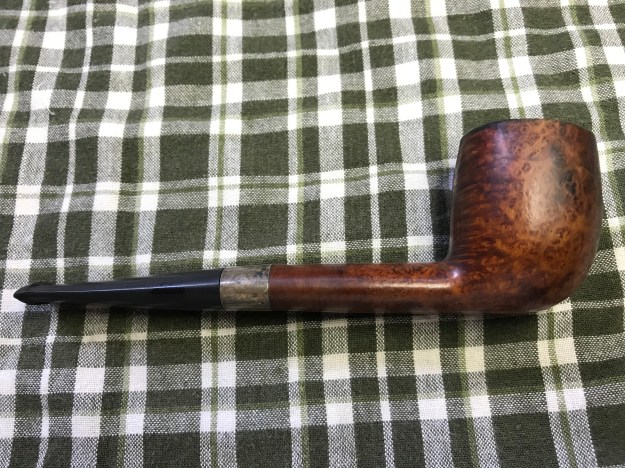
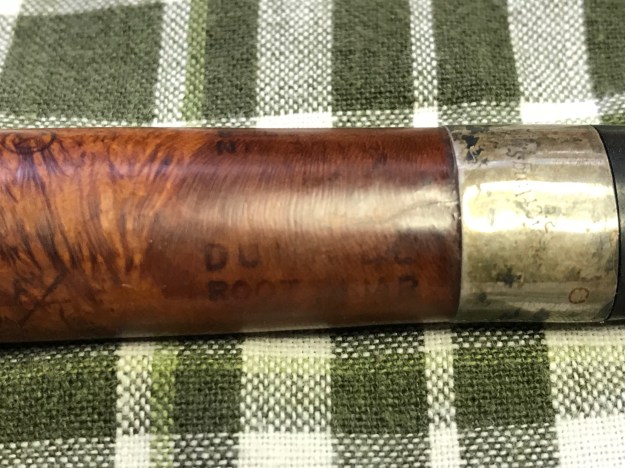
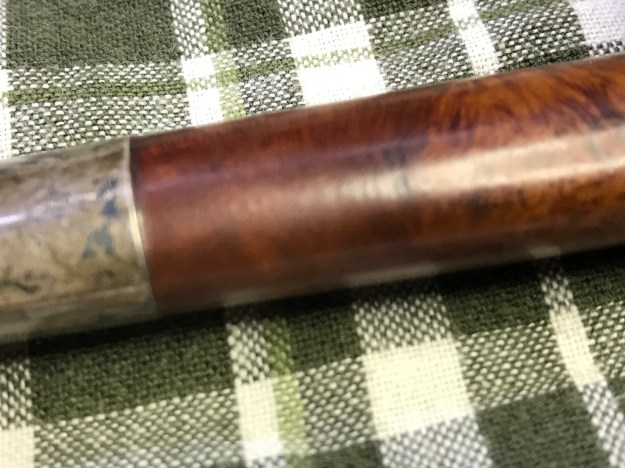
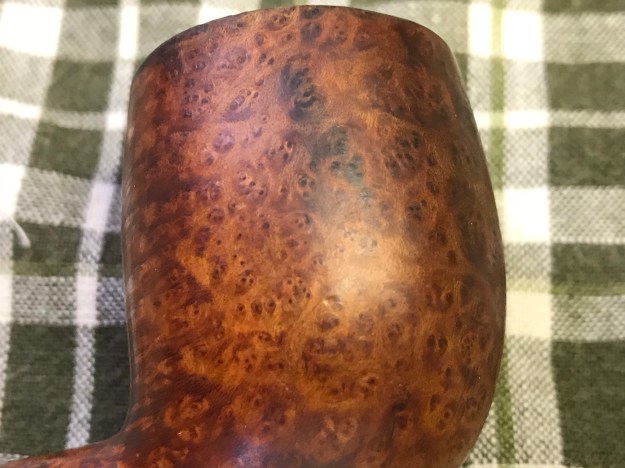
And that was when I had my first sight of a smooth easy-bent billiard that grabbed my heart on the spot, even though I didn’t yet know it. I recognized at a glance its obvious British pedigree but was still surprised by the clean, crisp Comoy’s nomenclature on either side of the shank.
Claridge, I learned when I was home with the three pipes and could examine them in good light, is sometimes listed as a Comoy’s second. I’m not so sure. After all, parent companies don’t tend to stamp their own names on their children’s pipes, and when they do, it’s more in the way of introducing a special line, as in Bing’s and Clark’s Favorites, each a “Savinelli Product,” but not considered a second.
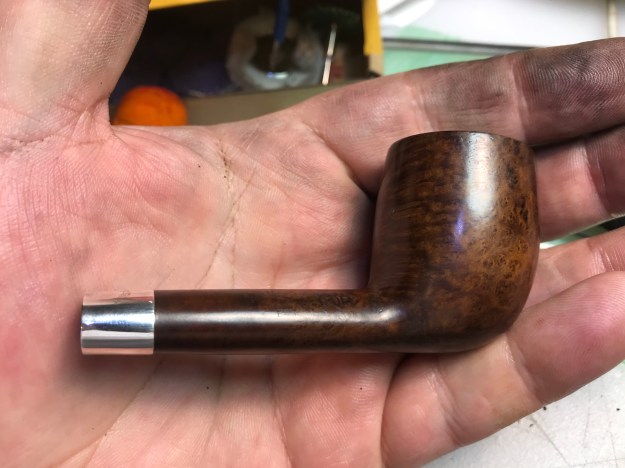
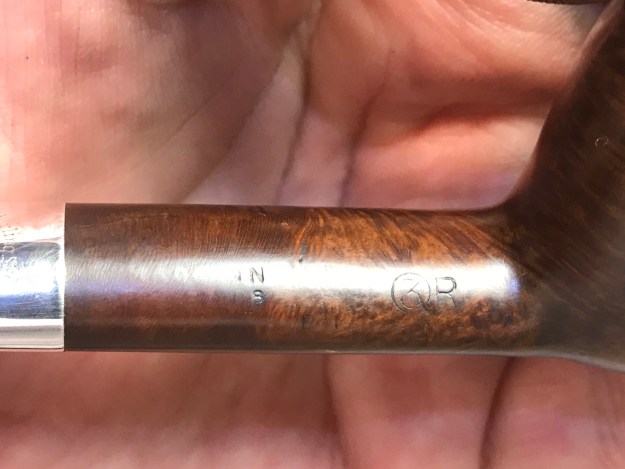
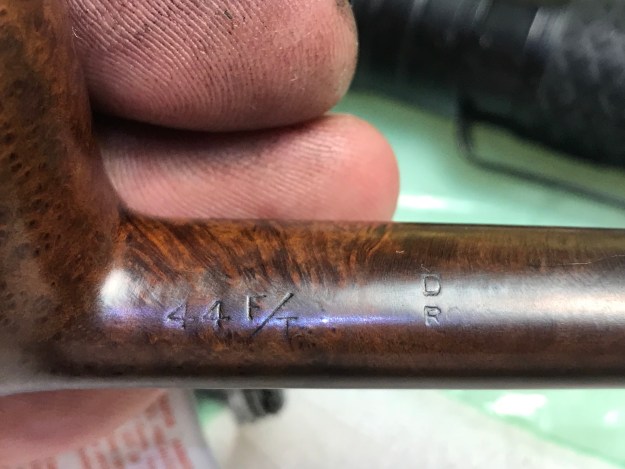
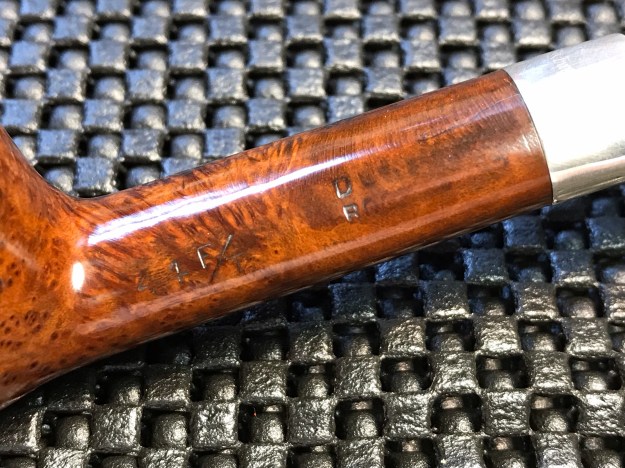
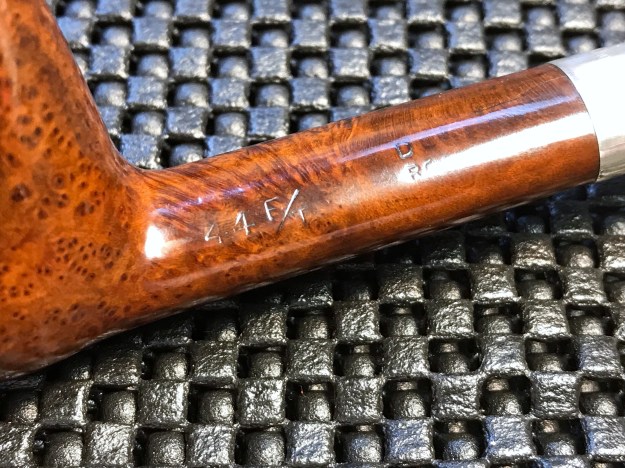
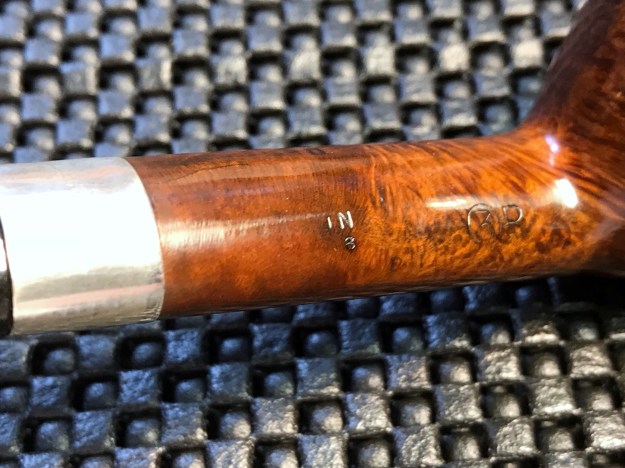
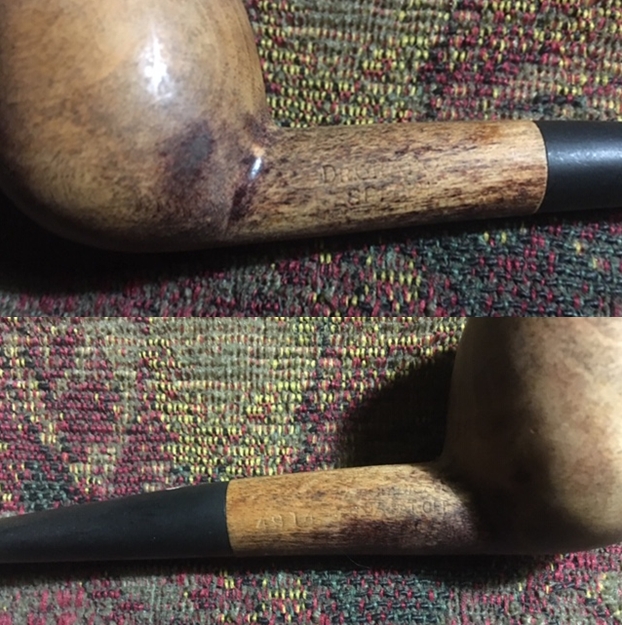
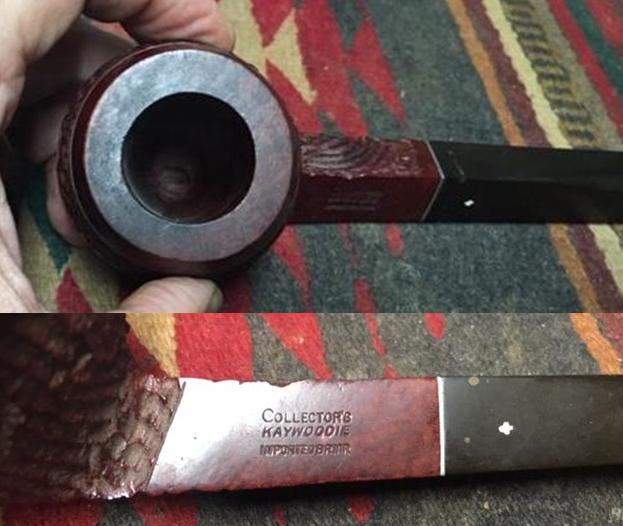
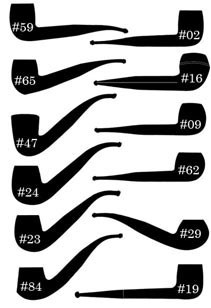
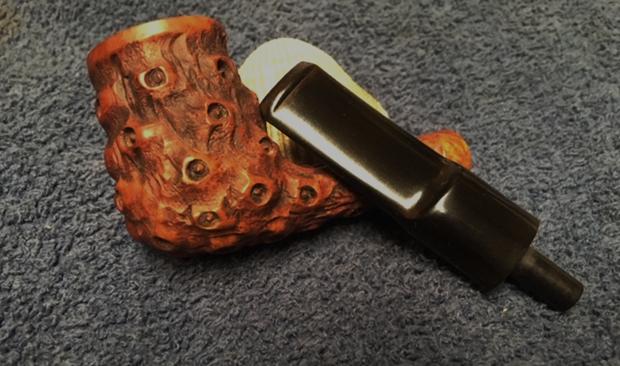
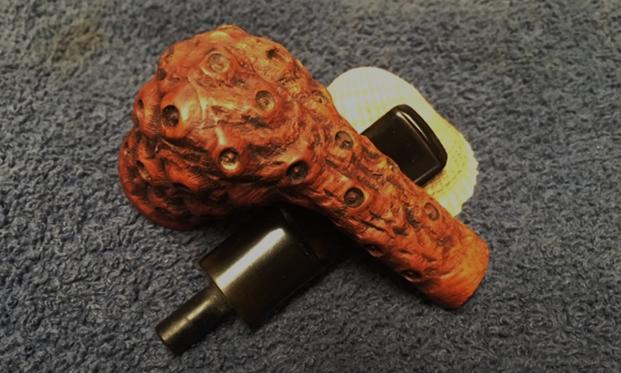
The Claridge easy-bent billiard #1452 that wooed me as I worked out its small kinks with slow, gentle rubbing and left it radiant and refreshed again has the following nomenclature: on the left shank, COMOY’S above CLARIDGE; on the right, a small F (for fishtail, indicating that was the original stem type) followed by the much larger, famous round mark with MADE over the top, IN snug in the middle, LONDON completing the circle and ENGLAND straight below it, then 1452.
As a final note on the pipe and its line designation, this billiard was named for two people, a man and woman, husband and wife: William and Marianne Claridge of Mayfair, London, who owned a small hotel there in the mid-19th century. Wishing to expand, they did so in style, buying the five adjacent properties in 1854 and, two years later, opening Claridge’s London. In a short time, the hotel became “London’s hotel,” according to the first issue of Baedeker Guide. Today it is still sometimes called the “annex to Buckingham Palace” because of the frequency of royal visits.
RESTORATION


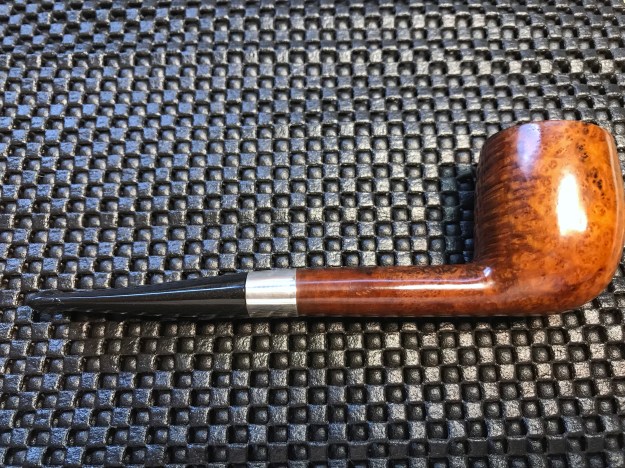
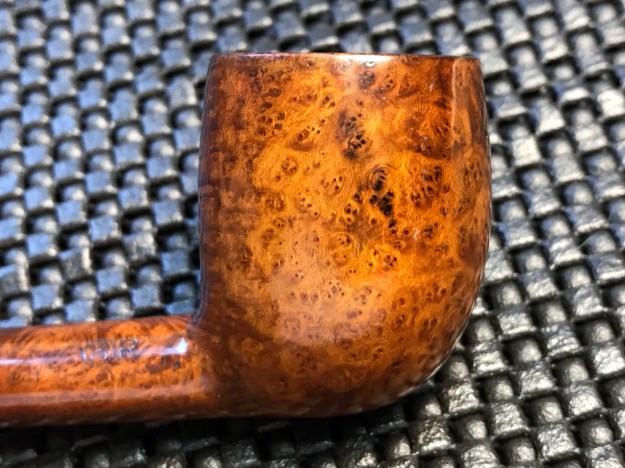
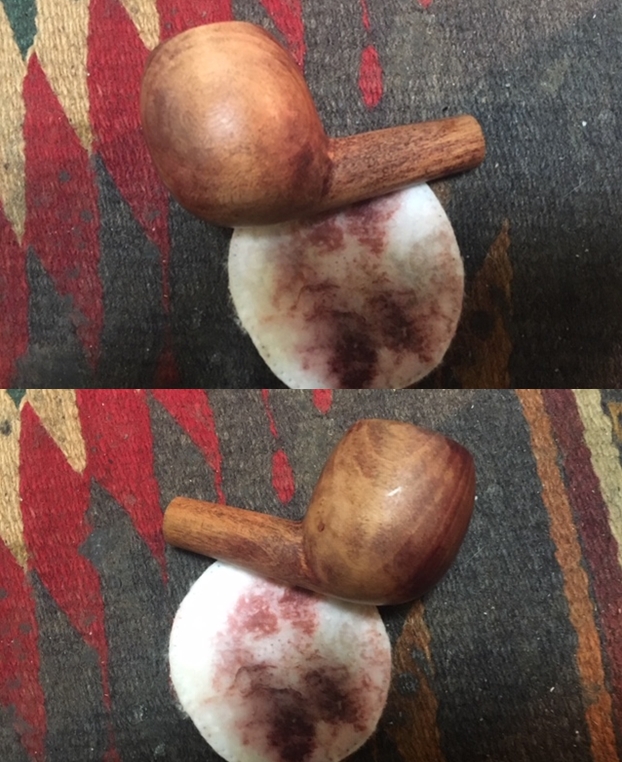
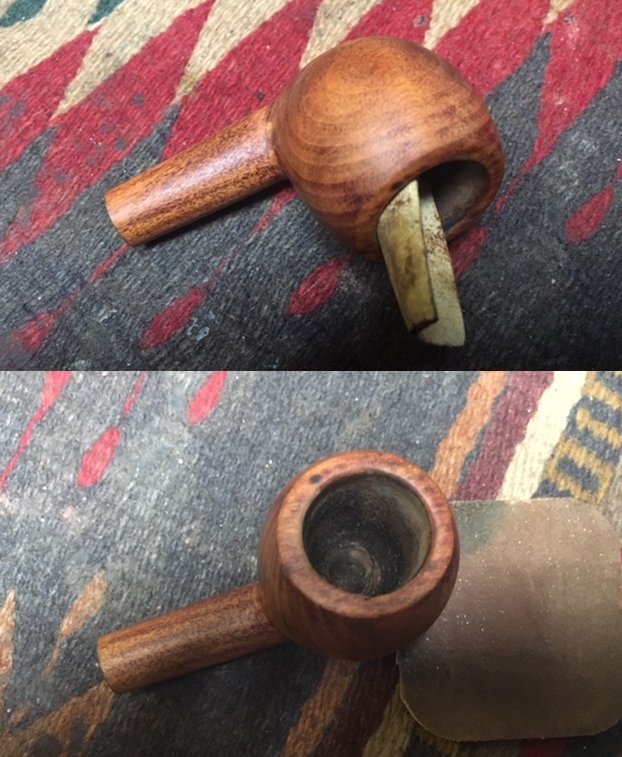
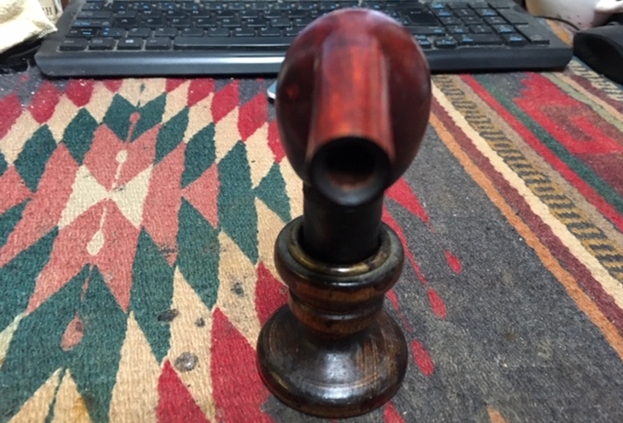
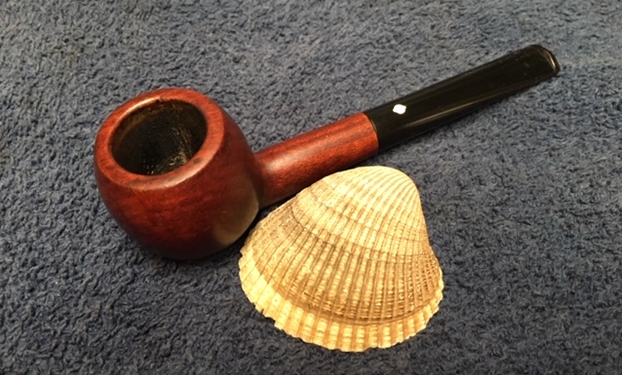
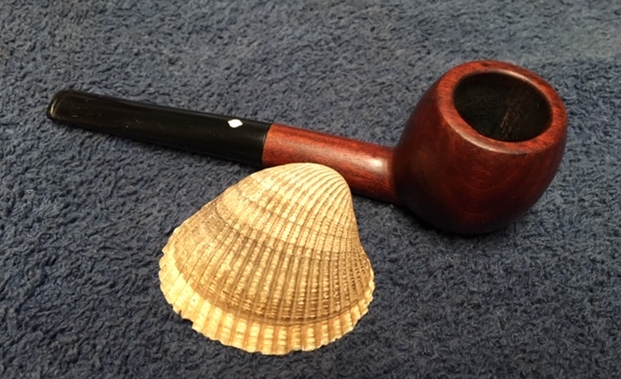
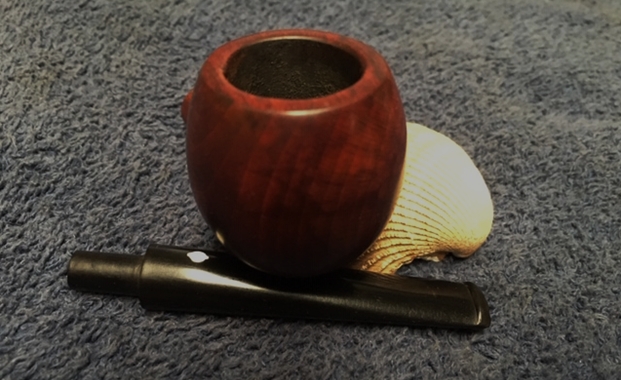
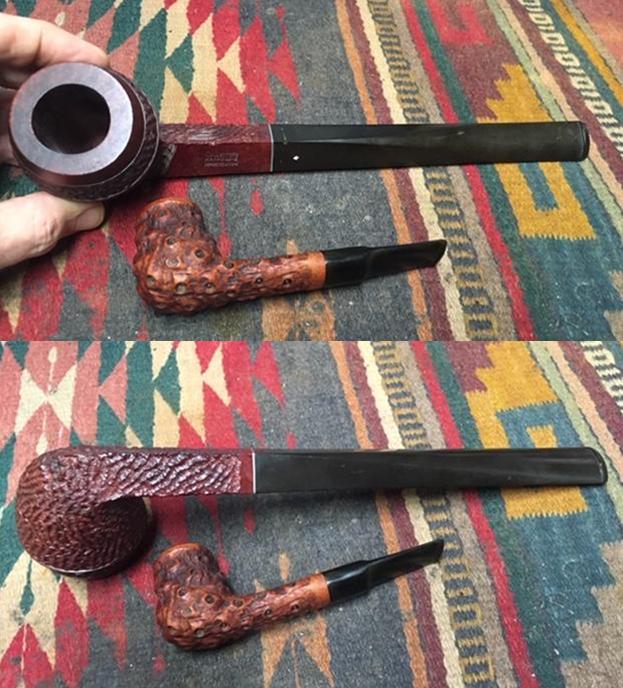
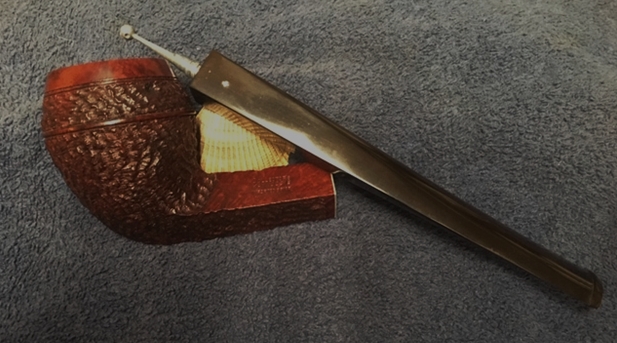
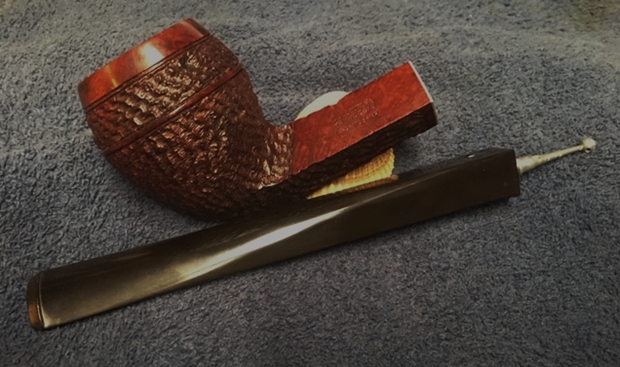
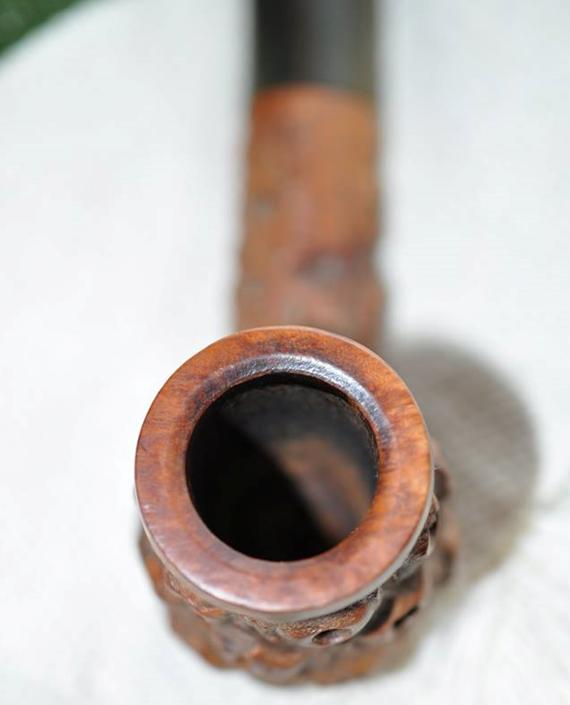
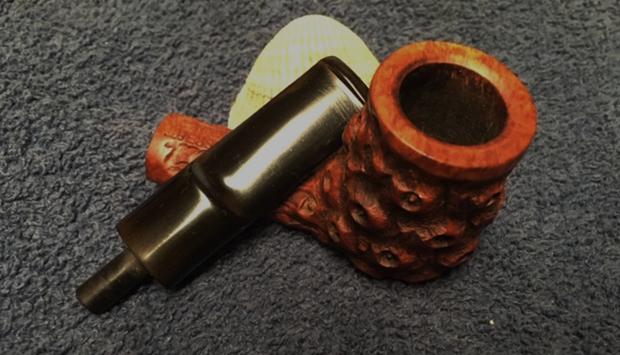
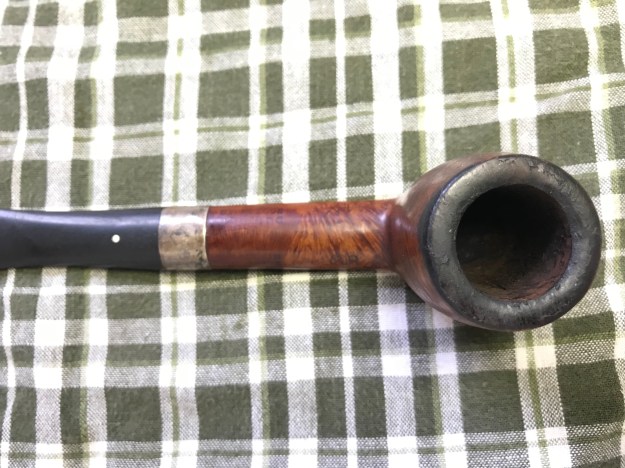
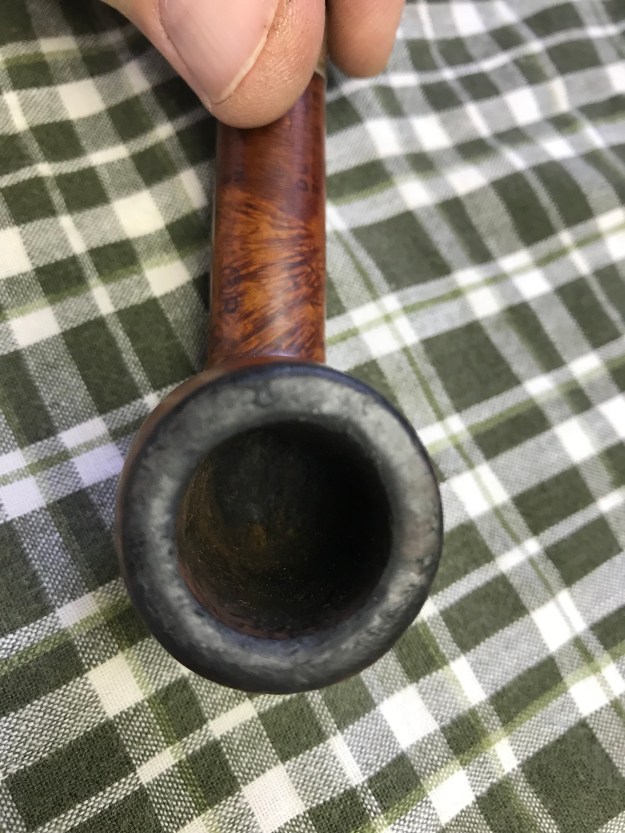
 Other than the need for minor cleaning, I didn’t notice anything wrong with the Claridge until I took it home and examined it close-up in good light. That’s when I spotted the small but insidious furrow starting at the top outer right edge of the rim and extending down the side of the bowl.
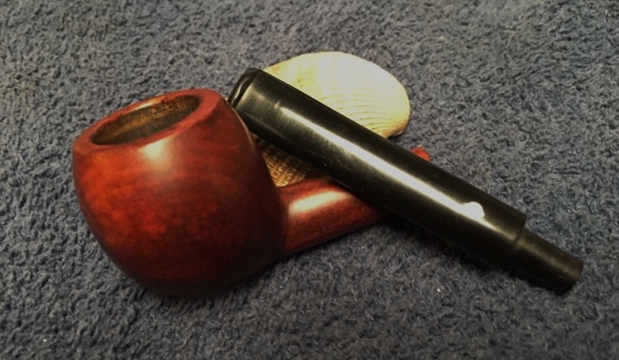
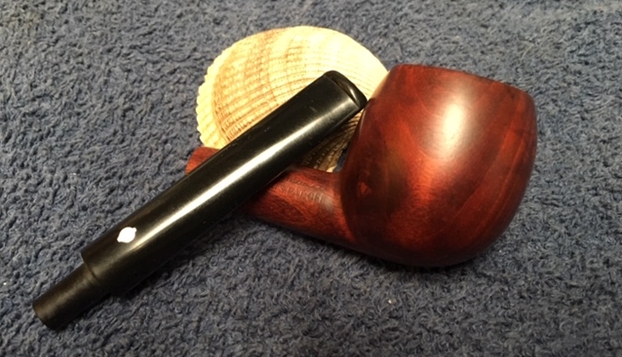
 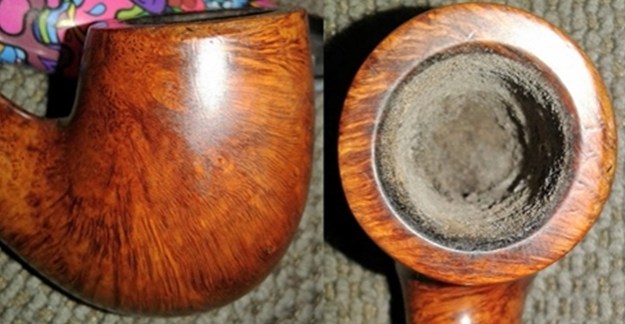 My heart leapt at the sight of the blemish. I considered ignoring the relative trifle. After all, I reasoned, Mark only asked me to clean the pipes and stems! I had made three previous attempts at repairing uneven rims, all of them very grave cases, and two with what I’d call success. The other was the best I could do under the circumstances. All of them involved filing to begin, and I knew I would never subject this beauty to such an invasive procedure. While I pondered the problem I suppose is obvious I couldn’t help tackling, I put the stem in an OxiClean bath.
 Hoping to get rid of the dent and make the rim more uniform by sanding, I started slow, patient brushing, front to back, left to right and crosswise, using a 150-/180-grit pad.
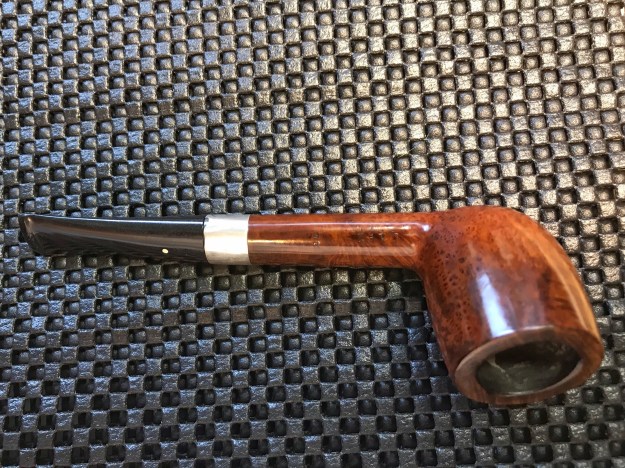
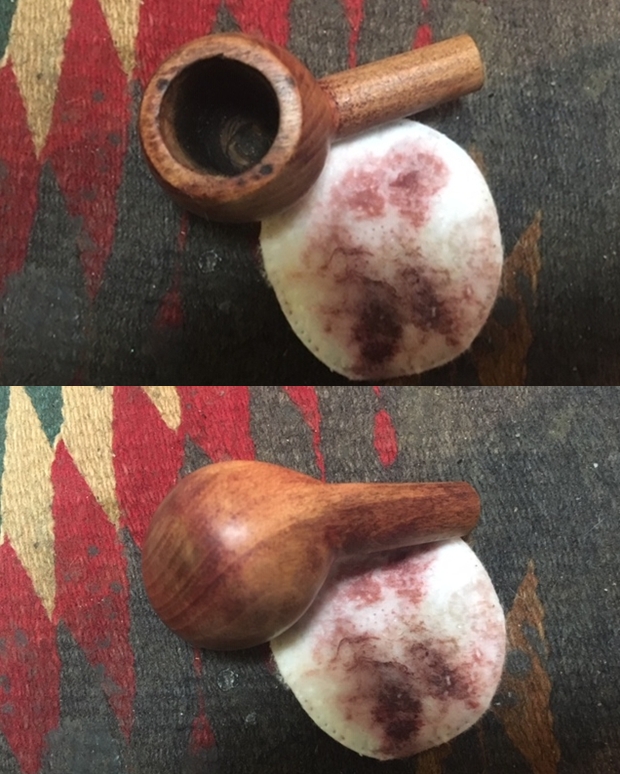
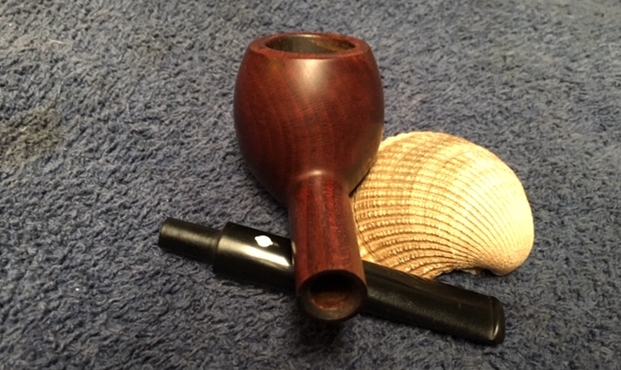
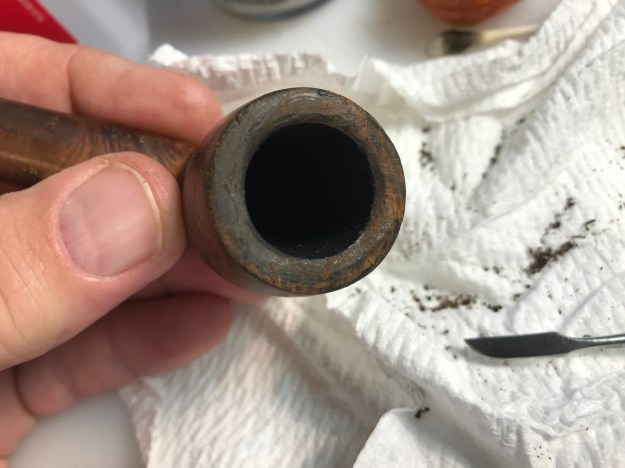
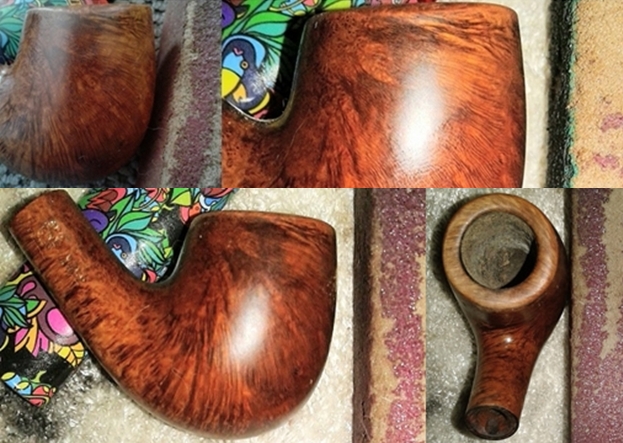 That part took about an hour, but at the end of it I was surprised and pleased with the results thus far. The chamber needed to be cleared of carbon buildup and smoothed, so I commenced that stage with my Senior Reamer. I thought it might help equalize the rim diameter a little more, also, and it did.
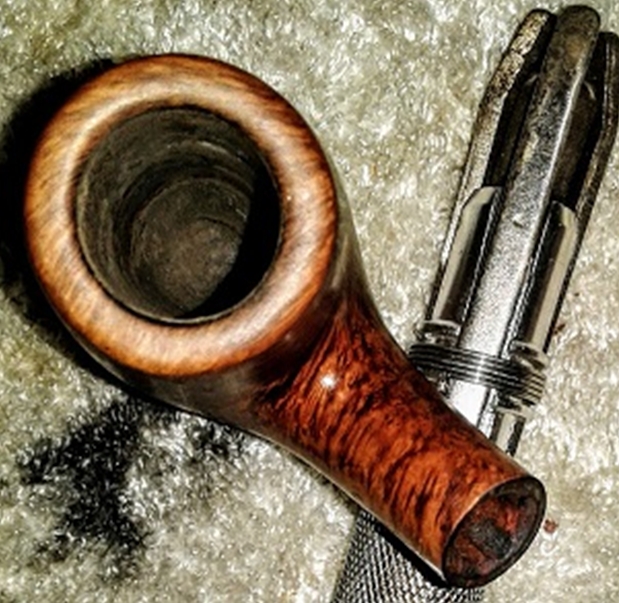 Then I turned to 150-git paper before 220. Sometimes that will be enough, but this pipe needed to progress almost all the way up from there: 320-, 400-, 600- and 1000-grit papers. All of that done, I soaked a small piece of paper cloth in alcohol and cleaned the remaining soot and wood powder from the chamber.
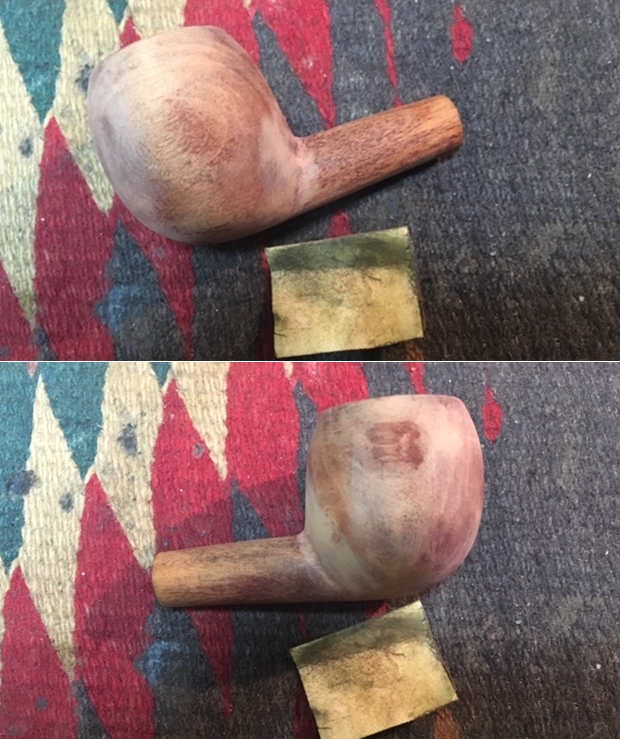
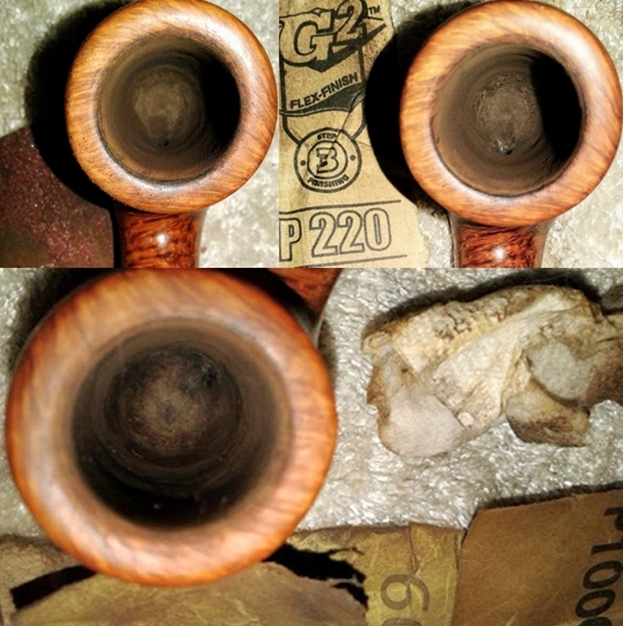 Seeing what looked like a single scratch on the left side of the bowl, I was afraid I might have to put some paper to it for a spot-sand, and I really wanted to do this job in as minimalist a way as possible. After all of that gripping and turning of the beautiful piece of bird’s-eye briar in dirty hands, I washed mine in the sink and used a little purified water on a paper towel to clean the outer stummel.
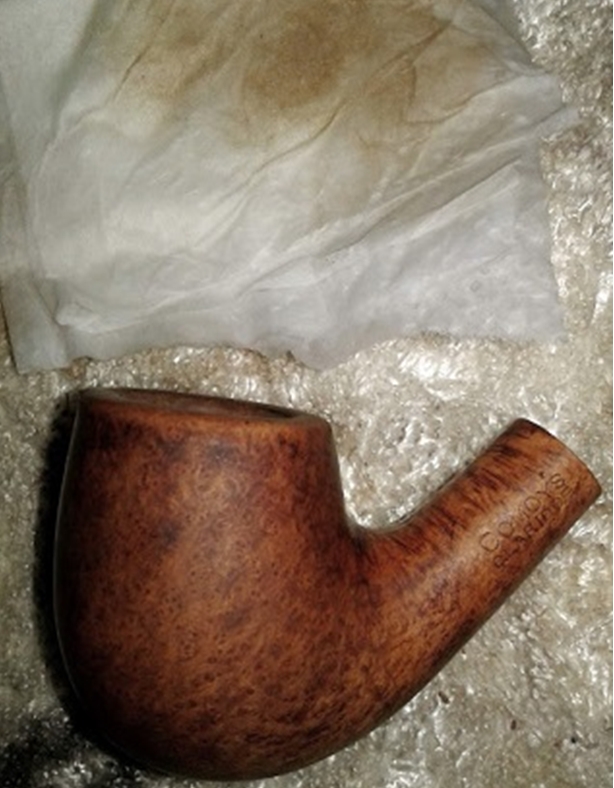 I can only assume that what I saw and felt as a scratch was in fact only a tiny piece of detritus transferred to the wood from my hands that had become somewhat grubbier than usual.
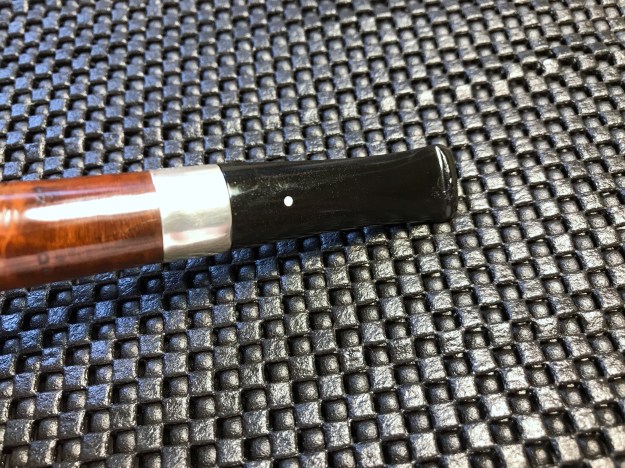
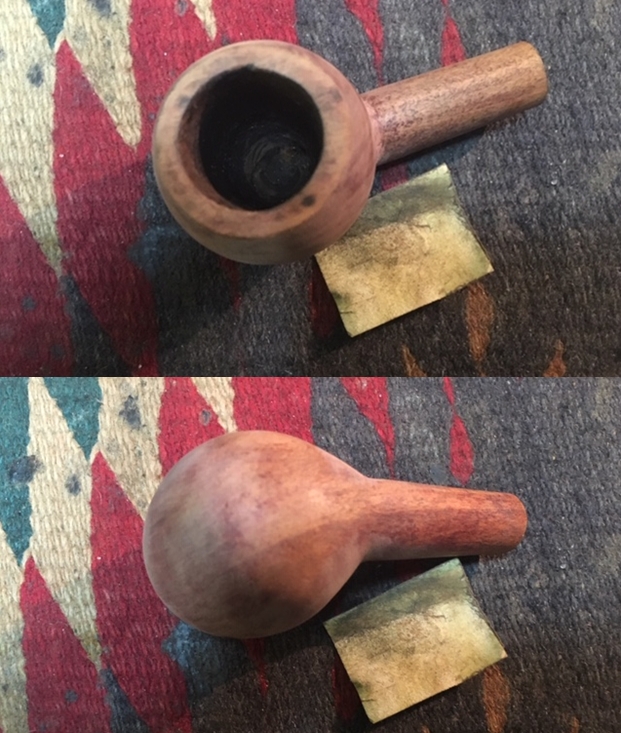
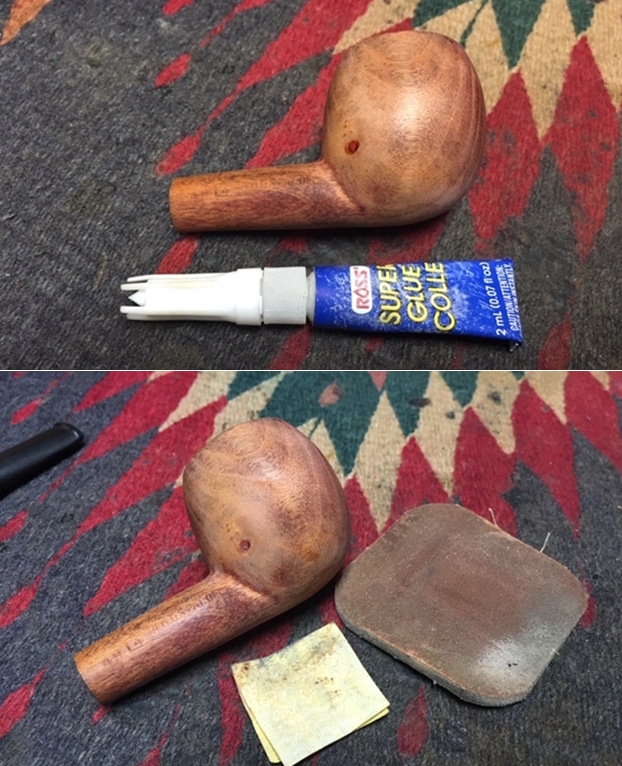
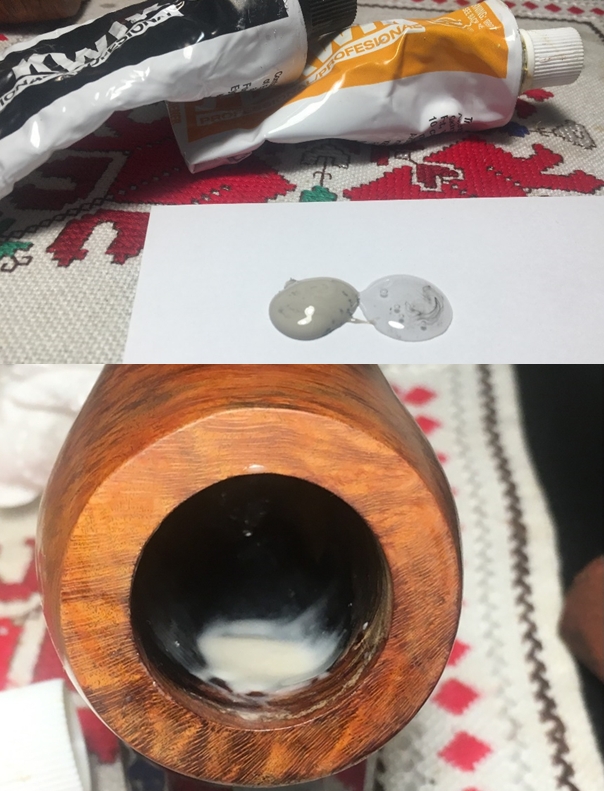
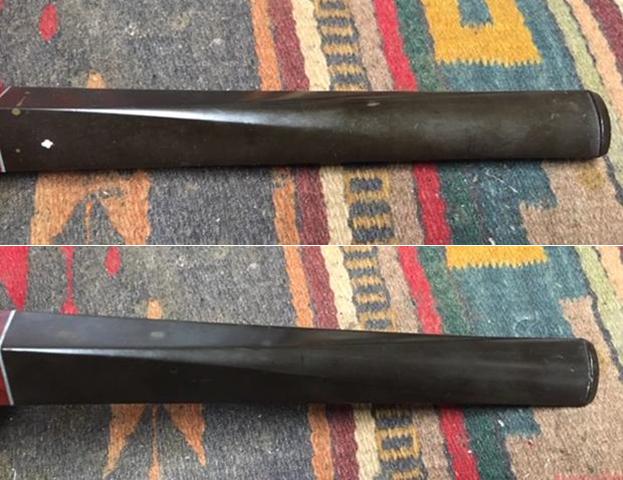
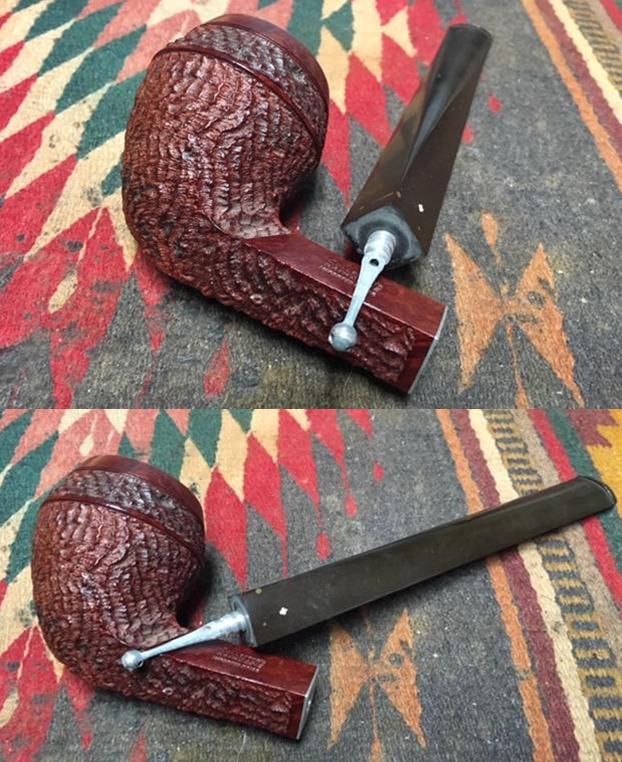
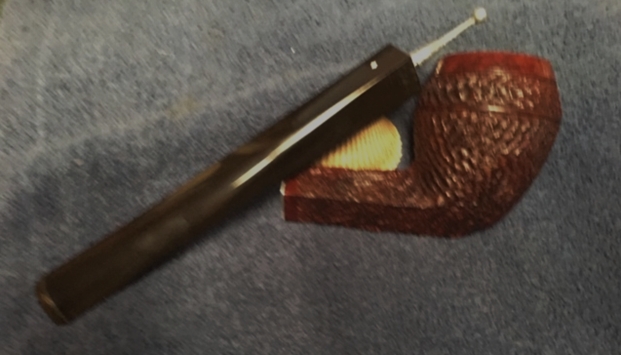
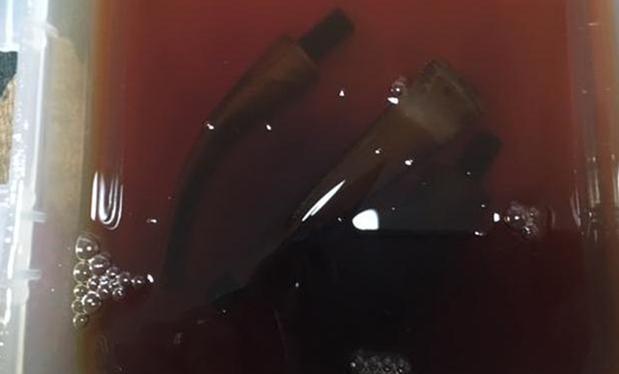
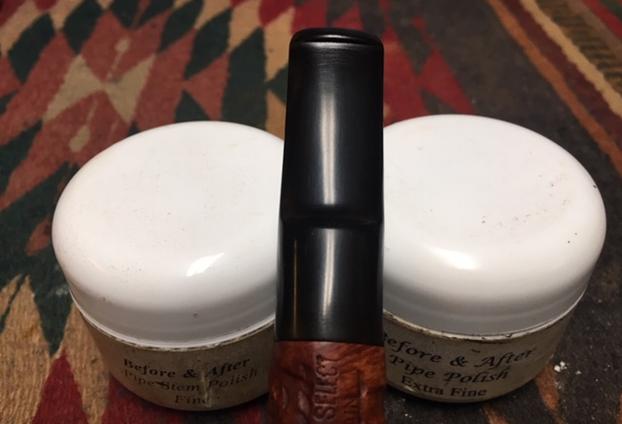
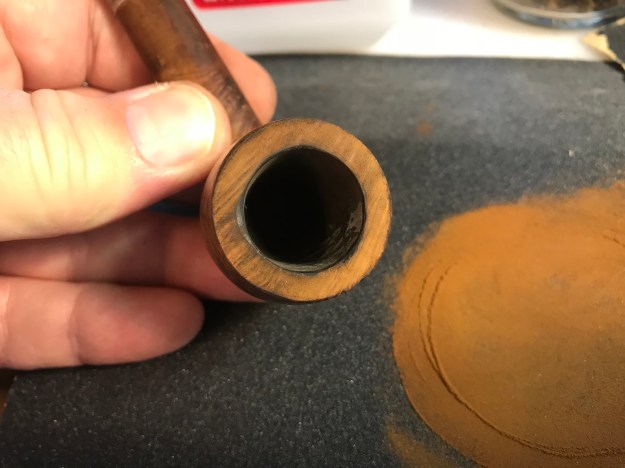
At this point, I started going back and forth between the stem and stummel. Removing the stem from its bath, I rinsed it, stuck a pipe cleaner through the airhole and let it dry. Thanks to some lessons from my friend Don Gillmore (dba Don Warren, or dwpipes) concerning how to refinish a pipe in dress black, after five years working on pipes the idea occurred to me to see if 1000-grit paper would clear away the leftover white coat of whatever residual substance remains. And indeed it did. If anyone can tell me what that stuff is, by the way, please do so! 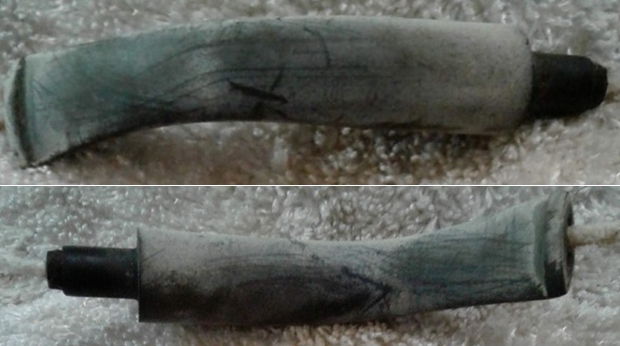
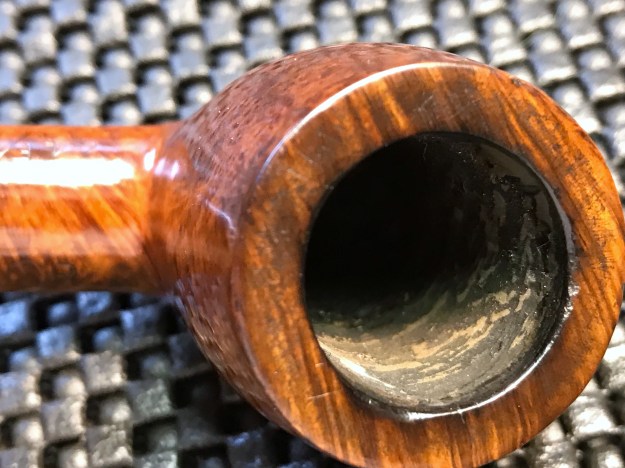
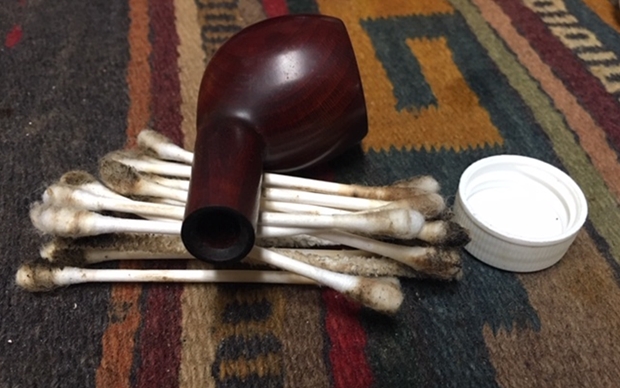
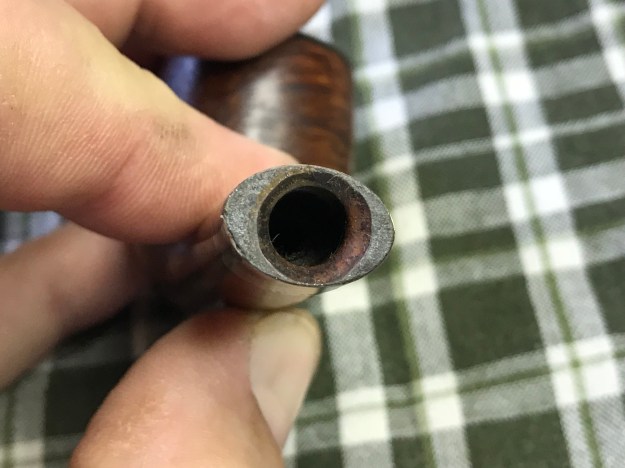
 Then I prepped the shank with alcohol-soaked pipe cleaners and a nylon brush before retorting the pipe.
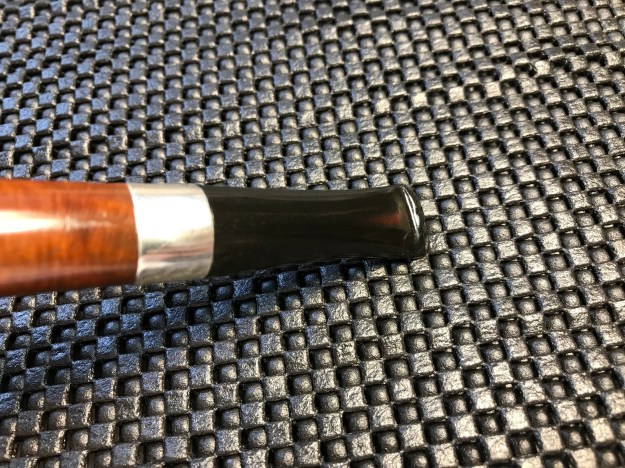
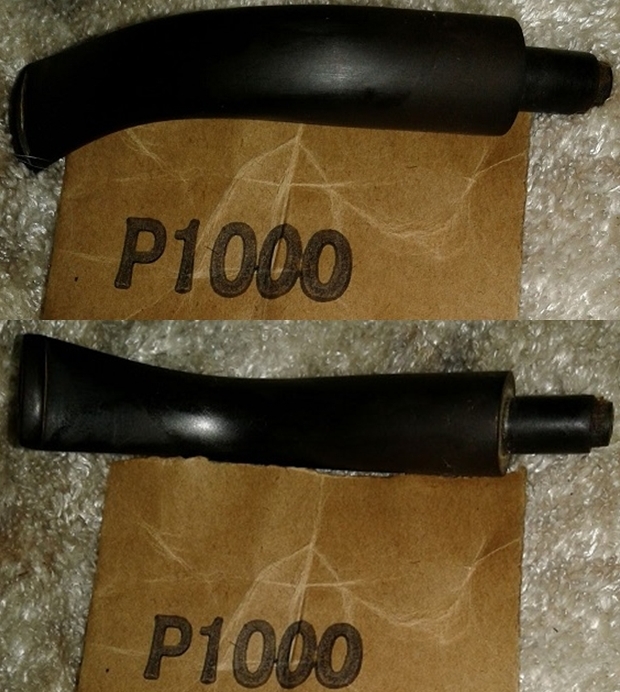
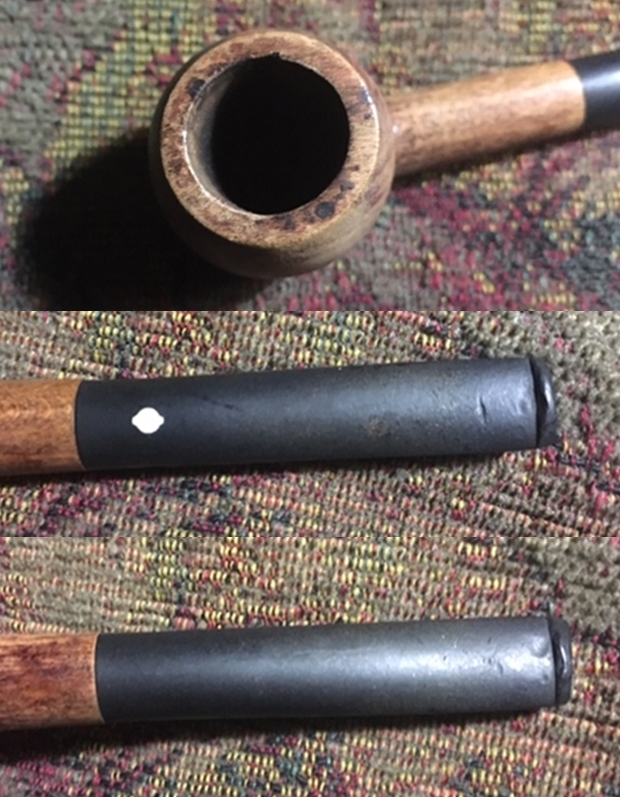
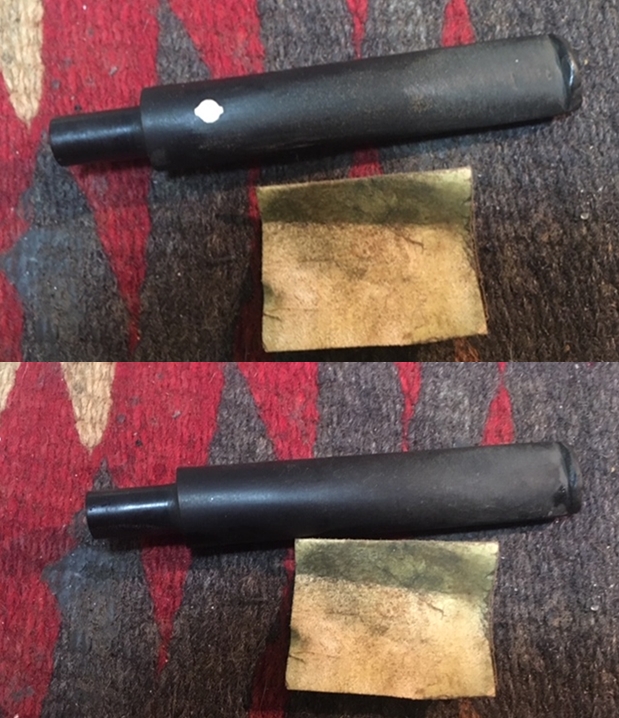
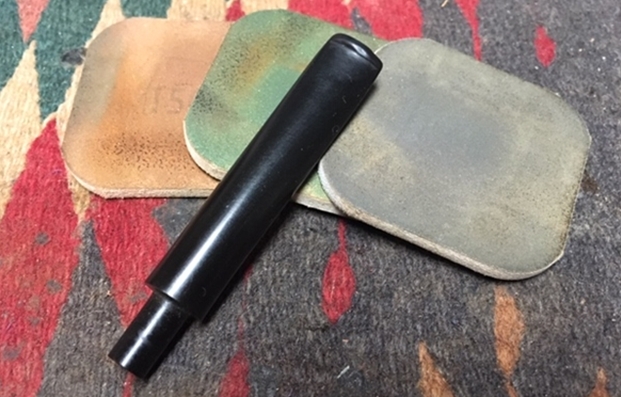
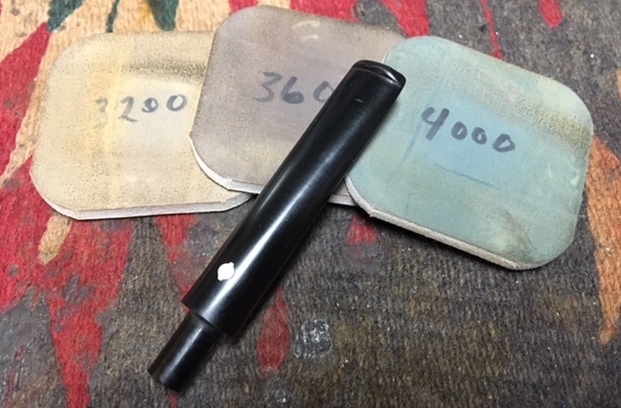
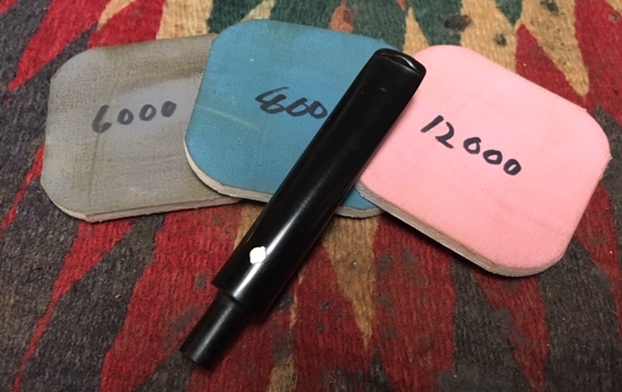
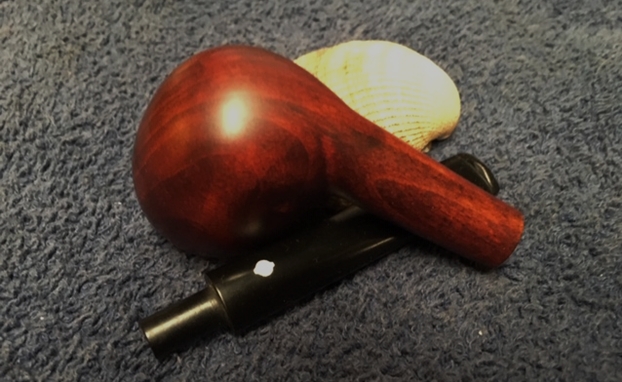
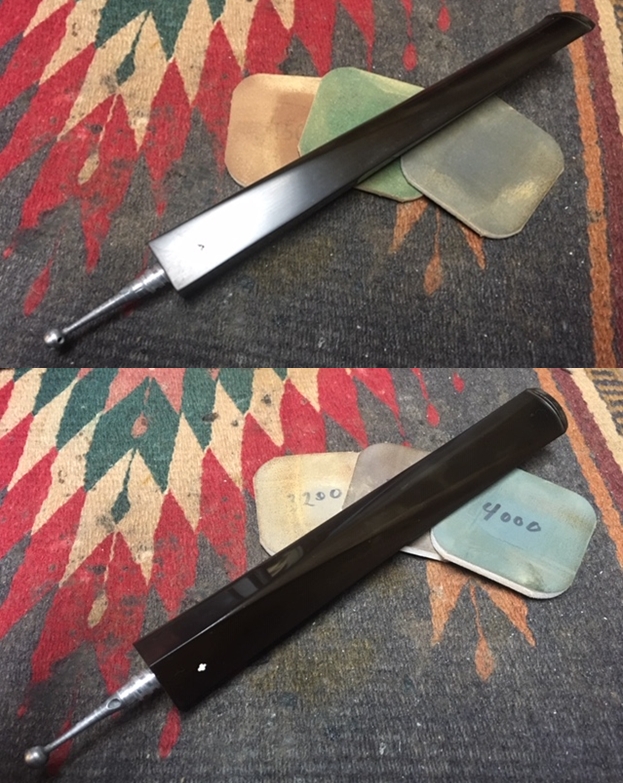
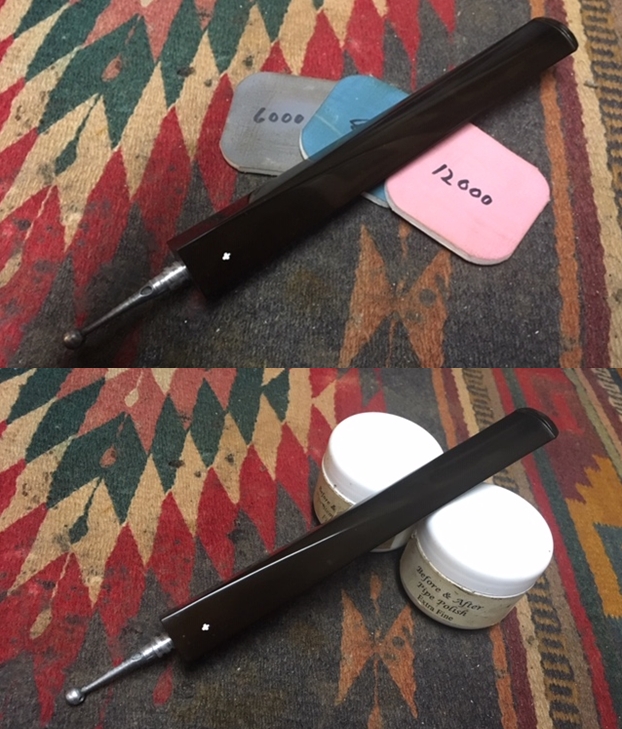
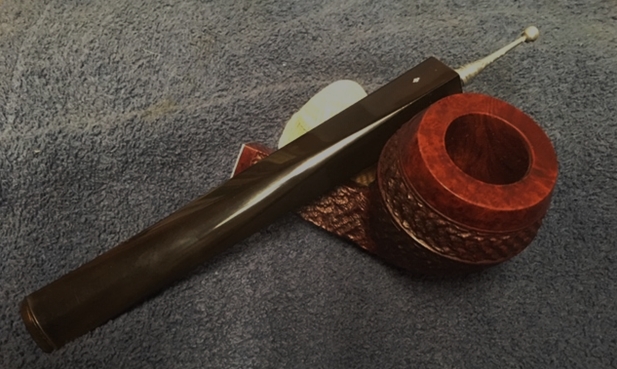
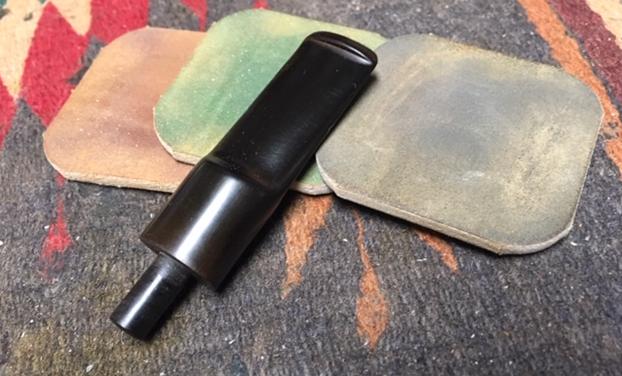
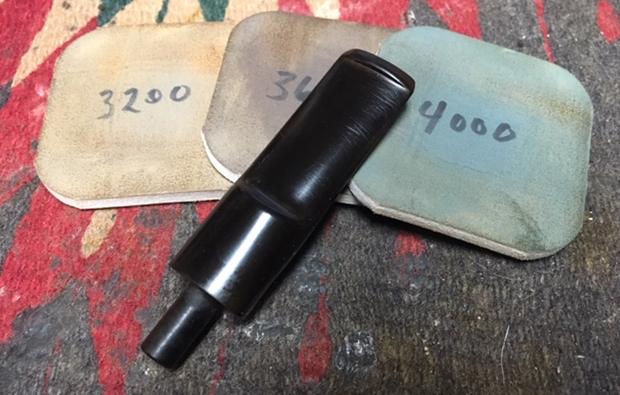
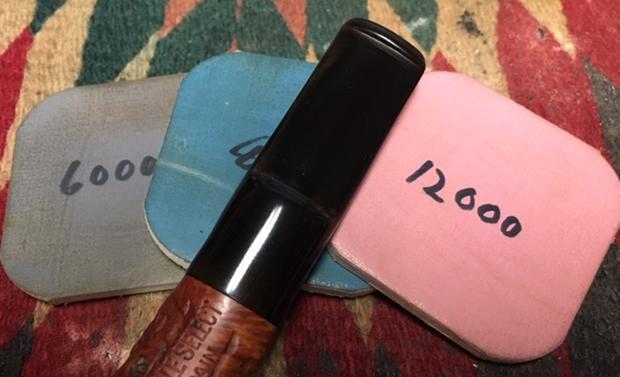
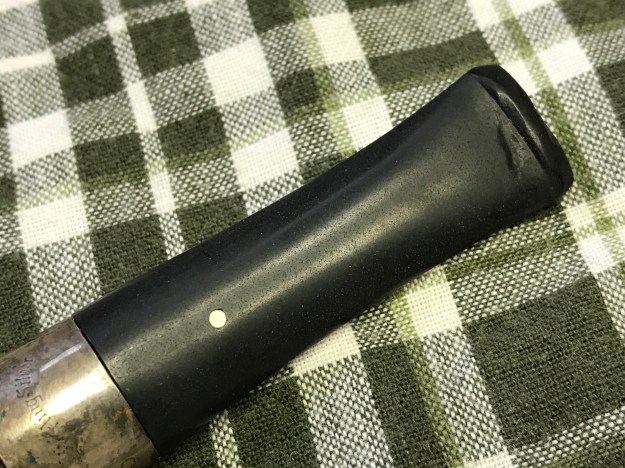
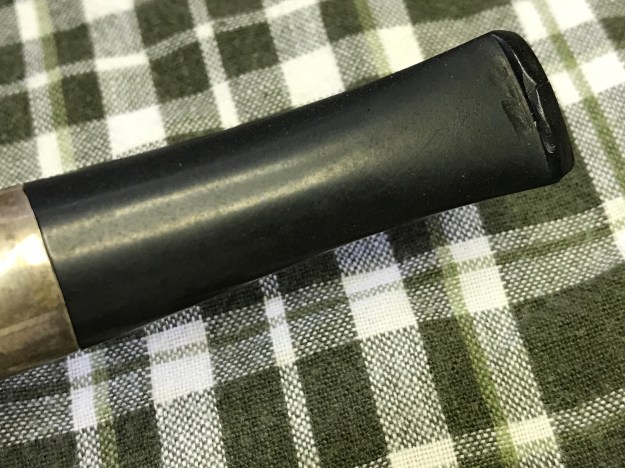
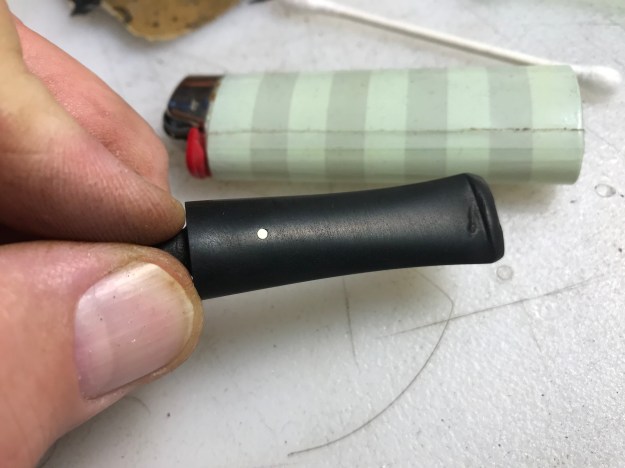
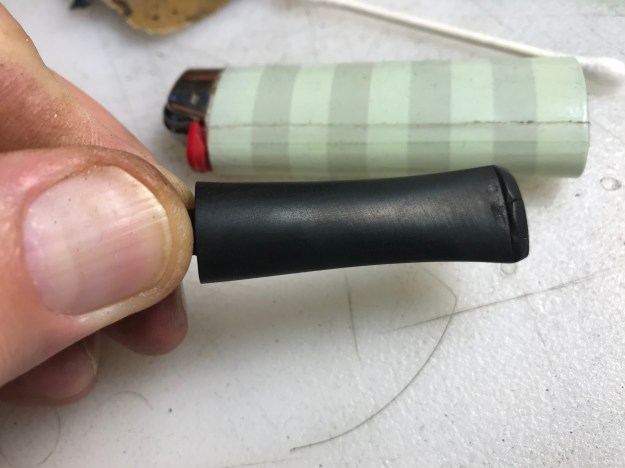
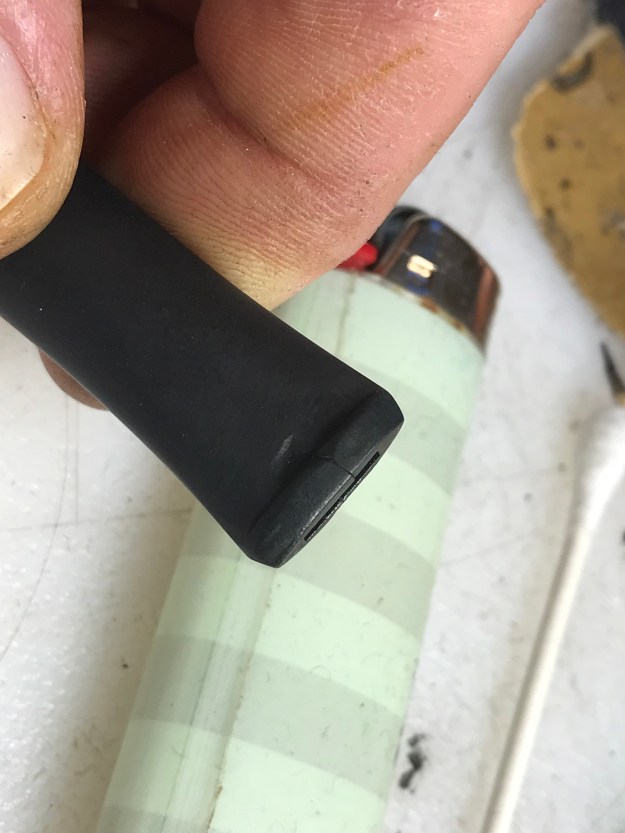
 Back to the stem, I did a full wet micro mesh progression with my old pads followed by a full dry run with my newer kit. The difference can be seen even with these cell phone pics.
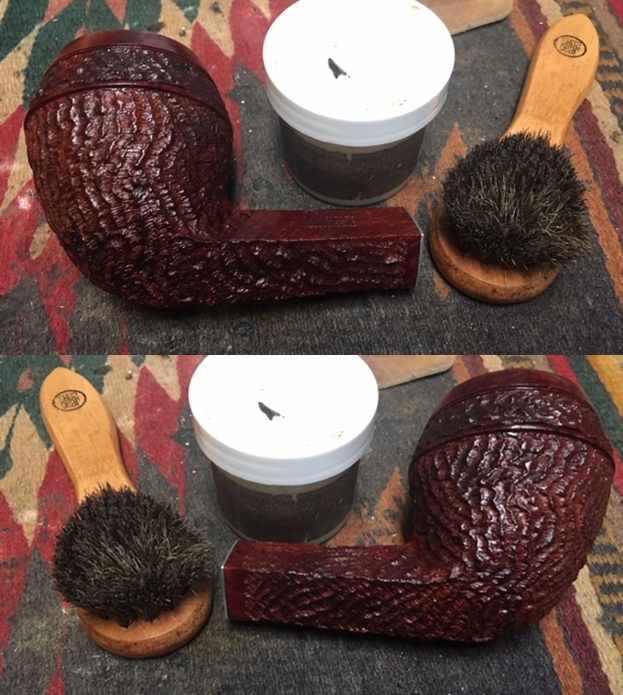
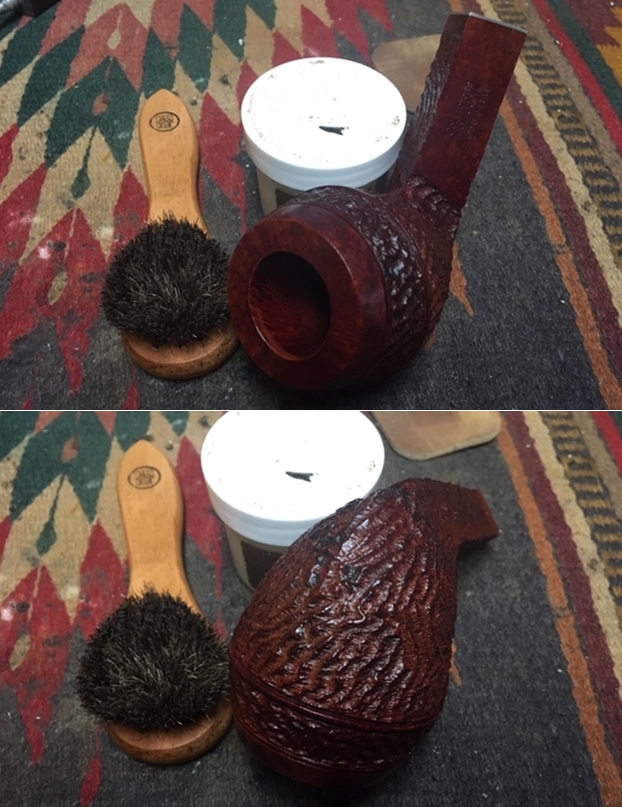
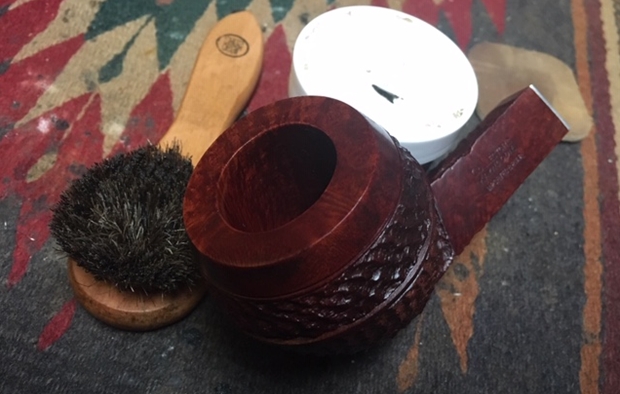
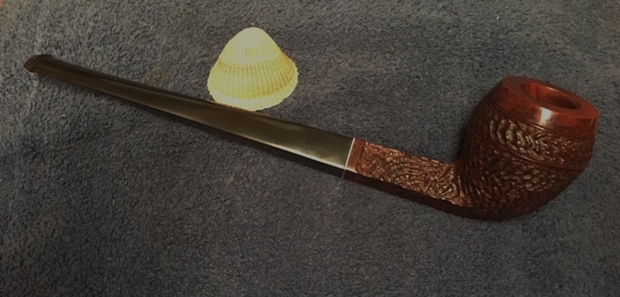
 After only about an hour and a half of concerted effort, I was ready to take the stem and stummel to the electric buffer wheels. For the ebonite, I used red and white Tripoli, and for the briar I chose White Diamond and carnauba.


 CONCLUSION
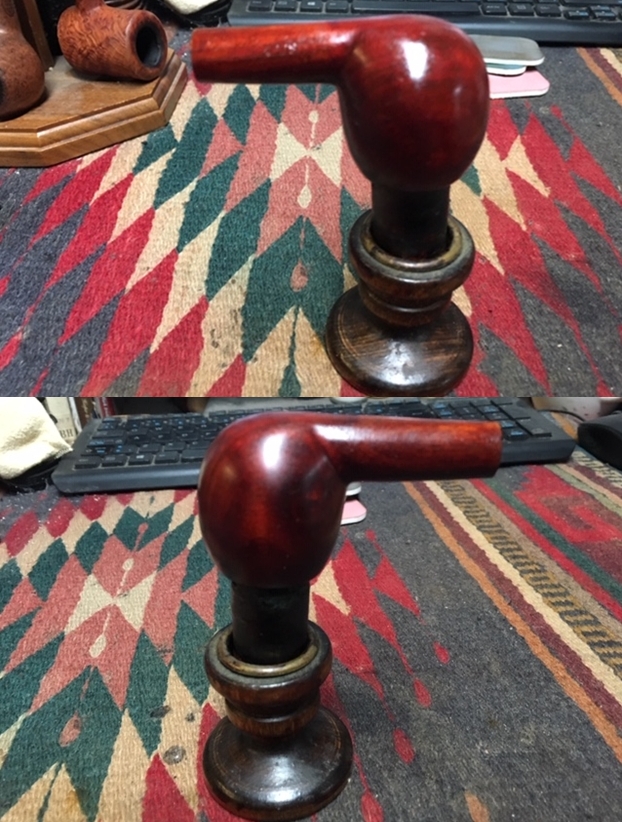
As soon as I finished the Claridge, I emailed Mark the photos of the finished pipe and confessed my predicament, that I’d fallen for the lovely, graceful billiard. The half of my mind that could reason knew Mark and therefore assured me he would accept my plea to sell me the pipe and allow me to donate one of my own to the raffle in its place. The other half, alas, was louder, and so for the two days before Mark replied all I could do was look at and sometimes hold in my hands and covet the pretty thing.
When at last Mark replied, all he wrote was, “Absolutely it is yours.” Of course I was more than happy and relieved, and I dashed off a reminder to him to think of a price before the 1st of November, when I would pay him. I knew it would be a good deal but never expected his answer.
“Here is a fair price: $0.00. I expect it at the next meeting. 😊”
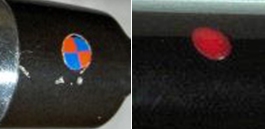
Now, that’s an offer I can’t refuse. But I’m still going to donate a pipe to next month’s raffle – and it’s going to be a good one. I’m also going to keep my eye out for a Claridge fishtail stem with one of these logos, courtesy of Pipephil.
SOURCES
http://www.pipephil.eu/logos/en/logo-comoy.html
https://www.worthpoint.com/worthopedia/savinelli-clarks-favorite-semi-churchwarden-brand
http://www.pipephil.eu/logos/en/logo-savinelli1.html
https://pipedia.org/wiki/Comoy%27s_Shape_Number_Chart
https://www.claridges.co.uk/about-the-hotel/history-heritage/
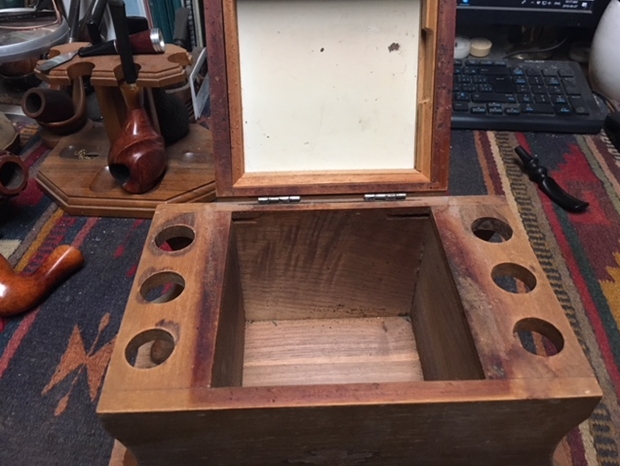
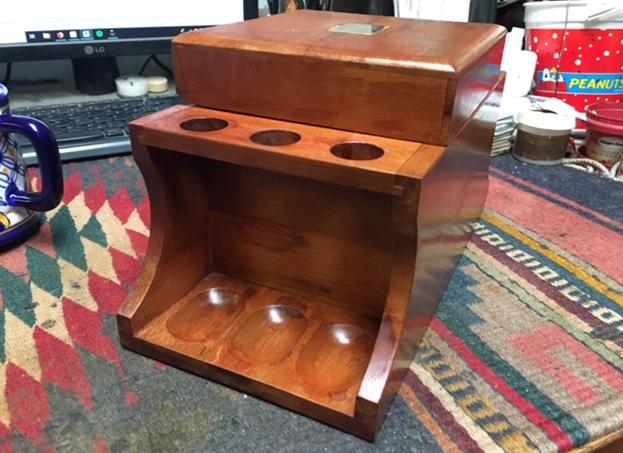
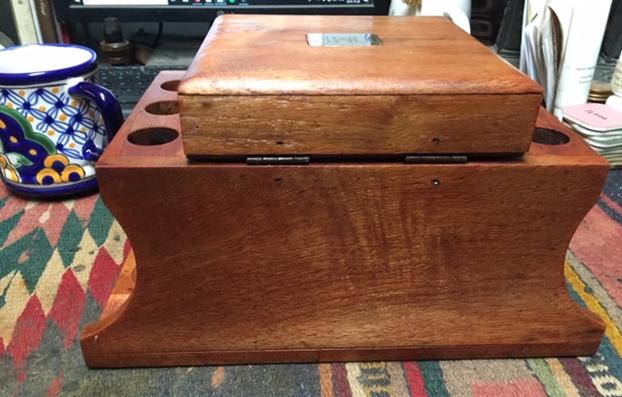
 When he received the pipes back in his home he contacted me about a rack that he believes his father made. While I am not sure of that (it is very much like the box humidor 6 pipe racks I have seen in the past) it certainly needed a lot of work. I don’t usually work on pipe racks but I thought this would be a worthy exception. When it arrived it had a tarnished brass plate on the top of the lid with his father’s initials engraved in it. There were water stains/damage marks on the top, front and sides of the rack. The finish was gone and the condition of the outside was very rough. The base that held the pipes also was worn and water damaged. The inside of the box had a metal base held in the box by removal cedar panels. I could slide out the sides and remove the metal base. The pictures below show what it looked like when I unpacked it and had removed the dust and debris on exterior. All totaled it was a mess. The water damage had left some deep stain marks and I had no idea if I could minimize them.
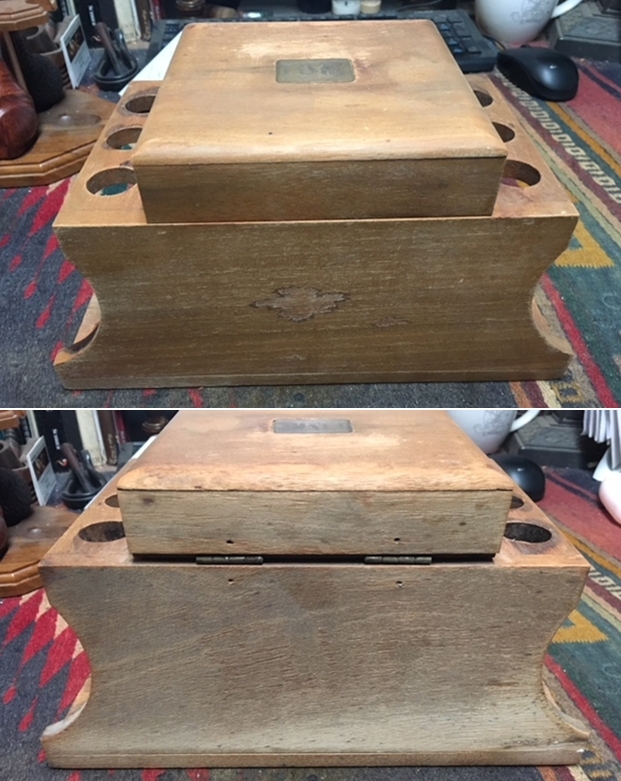
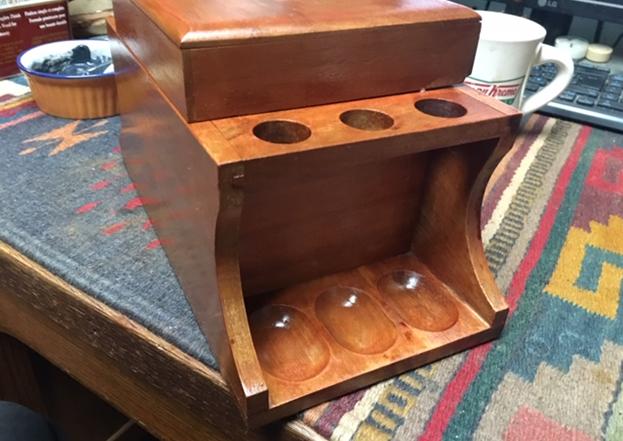
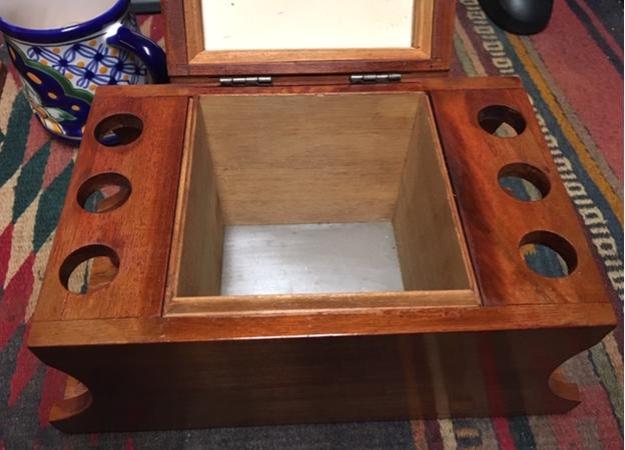
 I took the cedar plates out of the box, removed the metal plate from the bottom of the box. I also took out the humidor disk from the lid and took pictures of the parts and their condition. Note the rust on the metal base. The second photo below shows the box with the lining removed.
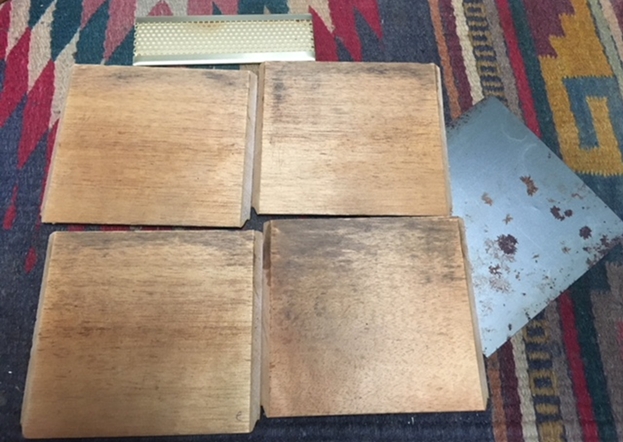
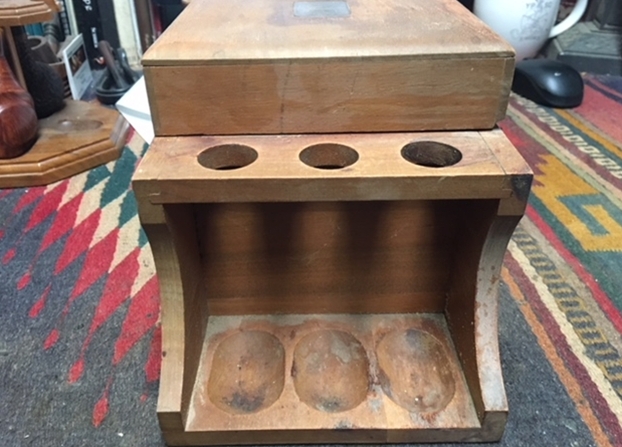
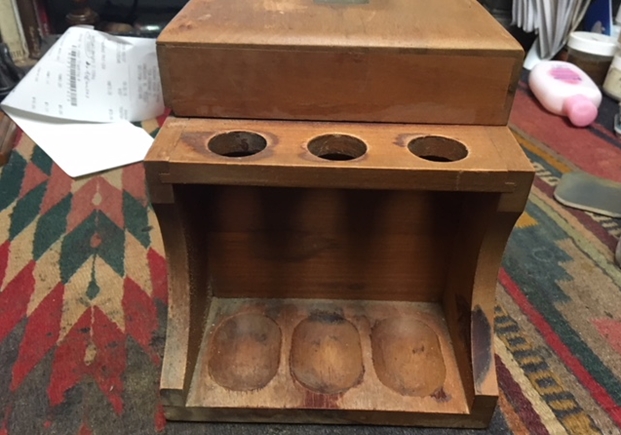
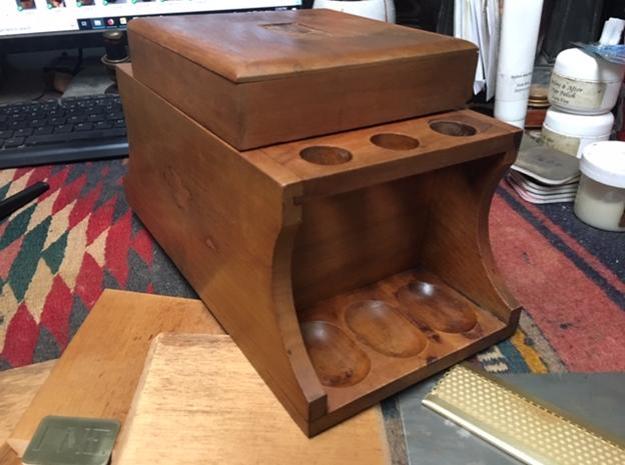
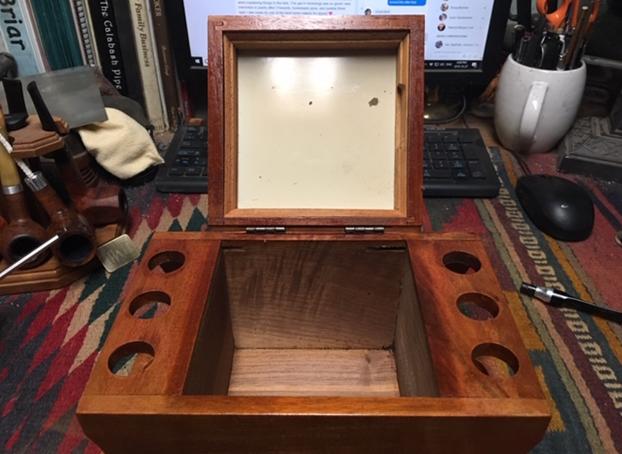
 I left it sitting in pieces for a week or more and an email from Anthony spurred me to do some more work on it. I cleaned all of the parts with Murphy’s Oils Soap and rinsed the box and parts down with warm water and a damp cloth. I took photos of the box at this point to show progress. I lifted the brass plate off the lid so I could polish it as well. The cleaned rack sat in this dismantled condition for several months. I just did not have time to work on it at all and to be honest I also did not have the desire.
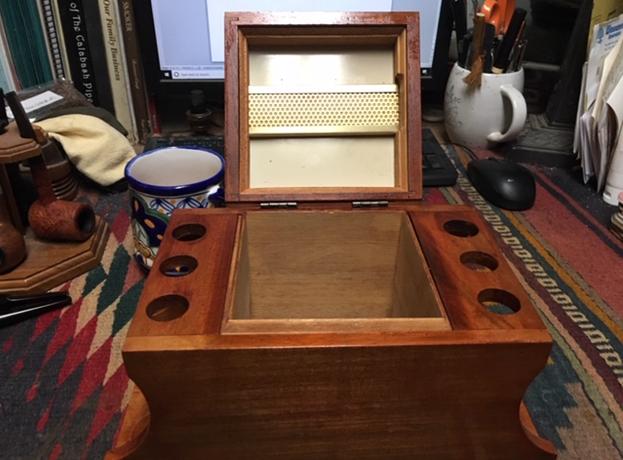
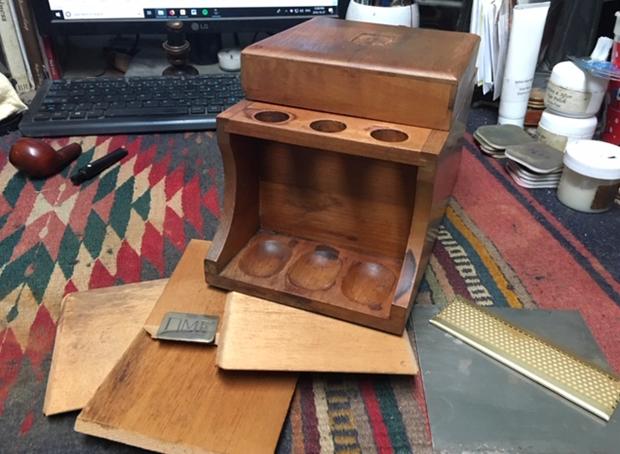 Fast forward to last week. My father was visiting and wanted to help me with some of the work I was doing on pipes. I looked at the rack and I thought why not it would be a great Father/son project. So we tackled it together and began the restoration of this rack. Dad worked on it quite a bit, sanding and working on the divots and the stains trying to remove the damage. We were having very little success. Then I remembered the oxalic acid could be used to remove water stains so I ordered some from our local pharmacist. I picked up 500 grams of the crystals and my father mixed it with water and began to scrub the exterior of the rack. He worked on the water damaged spots and scrubbed the entire rack with the acid mixture. It took repeated scrubbing but the water damage began to fade and in some places it disappeared entirely. Even where it did not all disappear it was lightened significantly and looked far better.
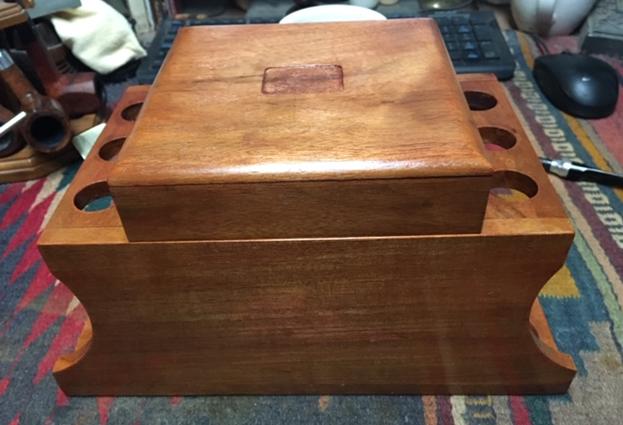


 After the acid wash, Dad sanded the entire rack down with a medium and a fine grit sanding sponge to smooth out the grain in preparation for staining. We stained the rack with Danish Oil Cherry stain. We rubbed it into the finish and wiped it off with a cloth. We repeated the process four times to get good coverage and a smoother look to the rack. Between each coat of stain we sanded it with a fine grit sanding sponge to remove and bubbles or roughness. While Dad was working on that I polished the brass monogram plate on the buffing wheel and with 6000-12000 grit micromesh sanding pads. I put some white glue on the underside of the plate and reinserted it in the space on the cover. It too is not flawless but it looks better.


 The rim was damaged under the lava, as I expected it to be; it would need to be topped. I decided here that I would take off as little wood as possible when I topped the bowl since I wanted to keep the shape as true as possible. I also decided that this wouldn’t be an attempt to make the pipe perfect; it (like me) had battle the scars of it’s life and I wanted to retain that character, too.
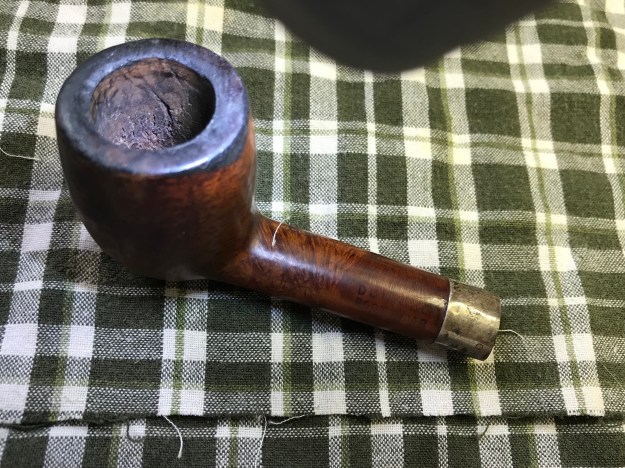
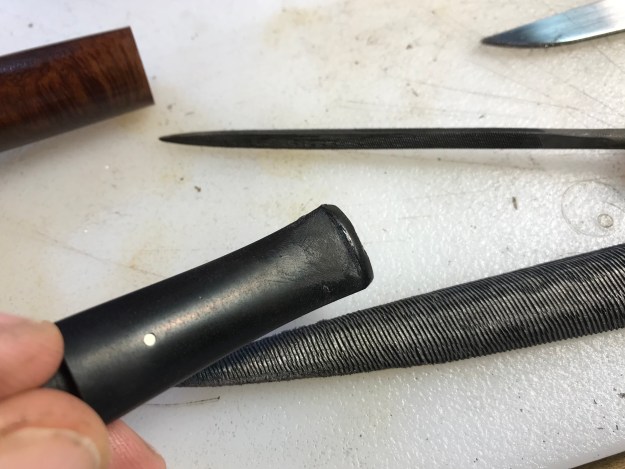
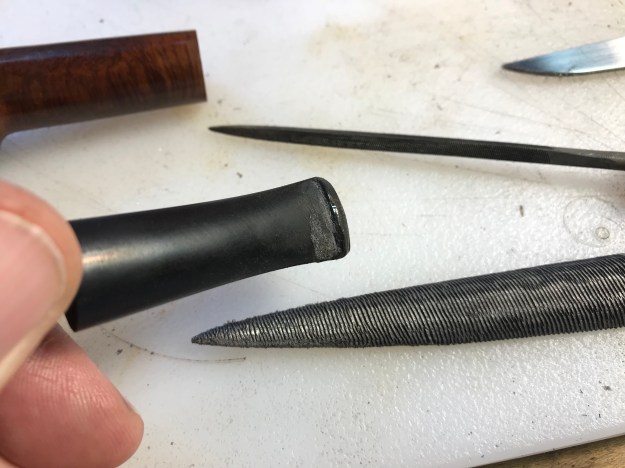
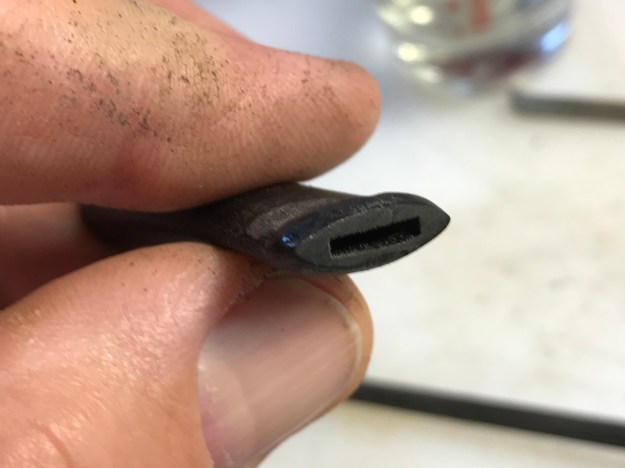
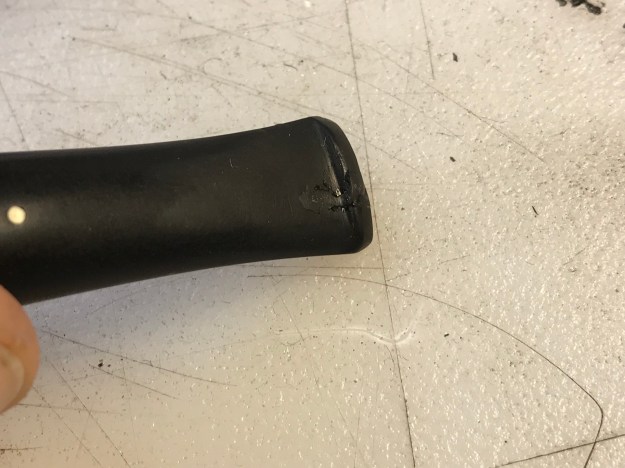
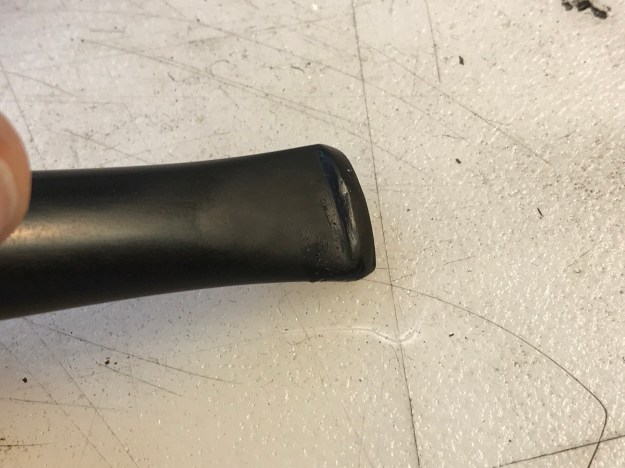
 You can see in the photos that there were still significant dents after flaming the stem. A crack in the underside of the button also appeared after the flaming. I began filling the dents and repairing the crack/button with black CA glue at this point. The climate has been very humid here so the CA glue cured extremely slowly.