Monthly Archives: January 2014

Refurbishing a Pipe for a New Pipe Smoker – A Straight Grain Apple


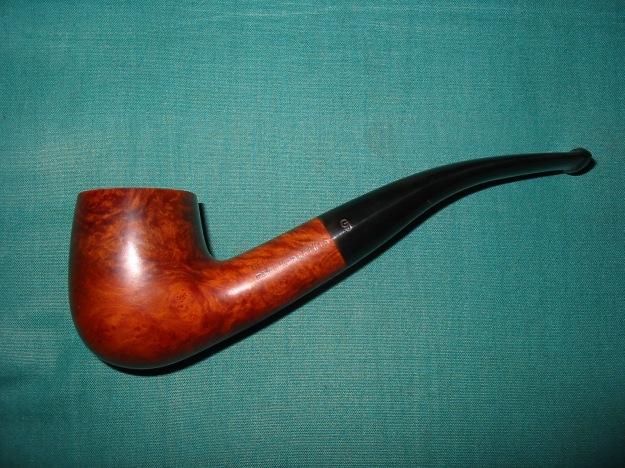
This past weekend I was in Lethbridge, Alberta as the speaker at a retreat for a friend of mine. As usual I took along my pipe and some tobacco and planned to sit on his front porch and enjoy a few bowls during the course of the weekend. We were sitting one night in his living room enjoying good conversation and a pint when he commented that he had been thinking of smoking a pipe. He wanted to know if I would teach him the ropes. Of course I agreed and the next afternoon we visited a couple of antique shops in search of a pipe for him. My experience in helping a newbie start is to find a seasoned pipe that is in good shape and use it to introduce the art of pipe smoking. The seasoned or estate pipe is already broken in and if it has been cared for is not too difficult to clean up and restore. We found just the pipe at the third shop we visited. It is a nice apple shaped pipe that was in fairly decent shape. He paid the $9 price on the pipe and we took it home.

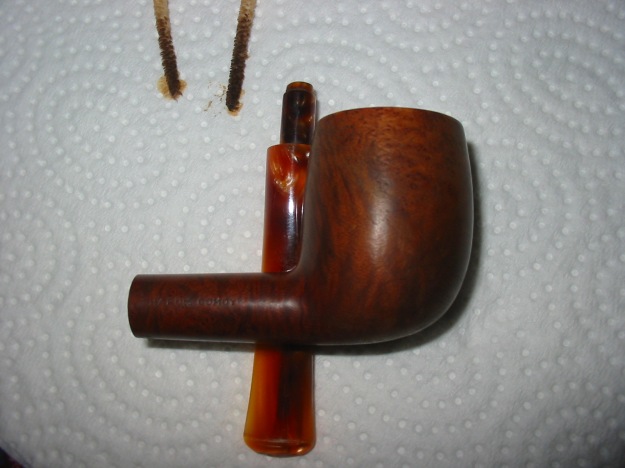
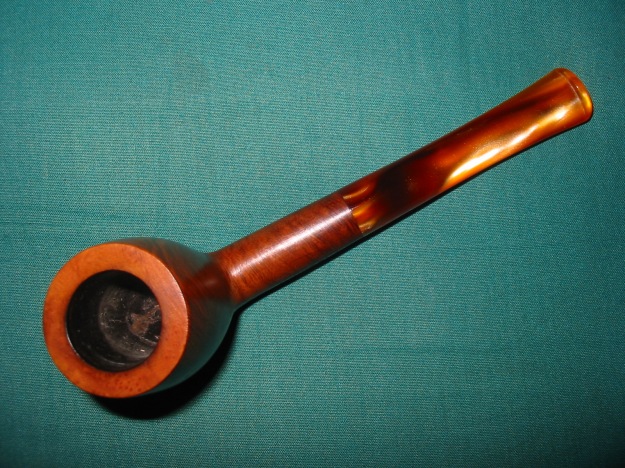
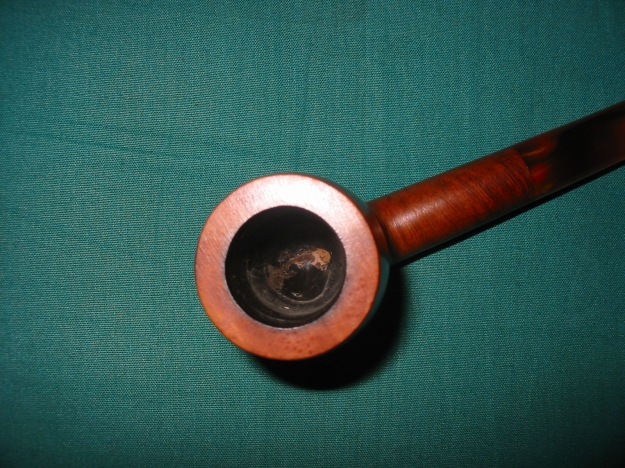
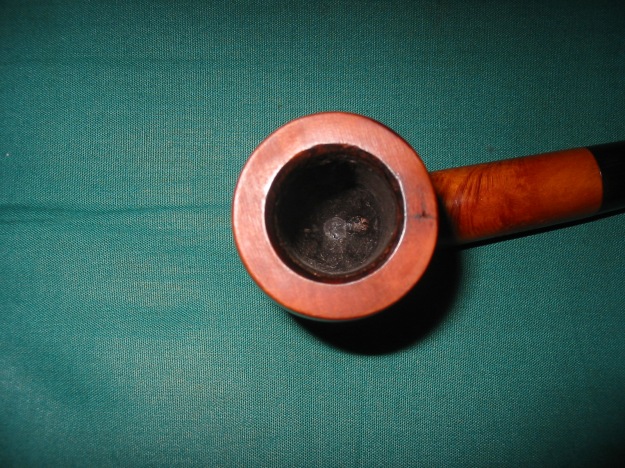
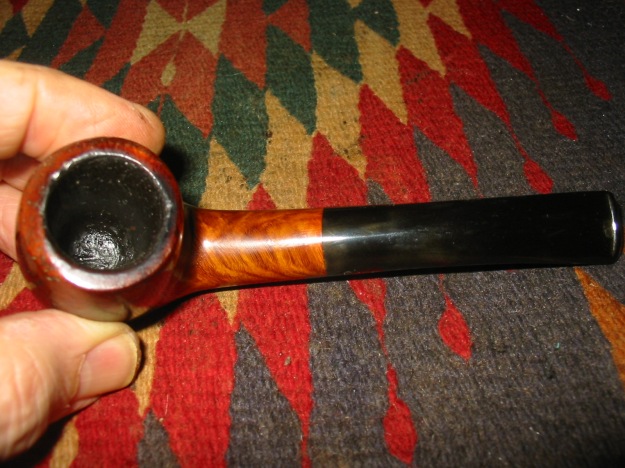
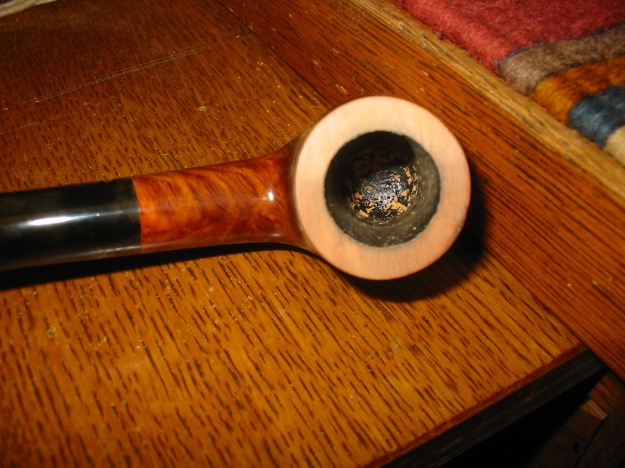
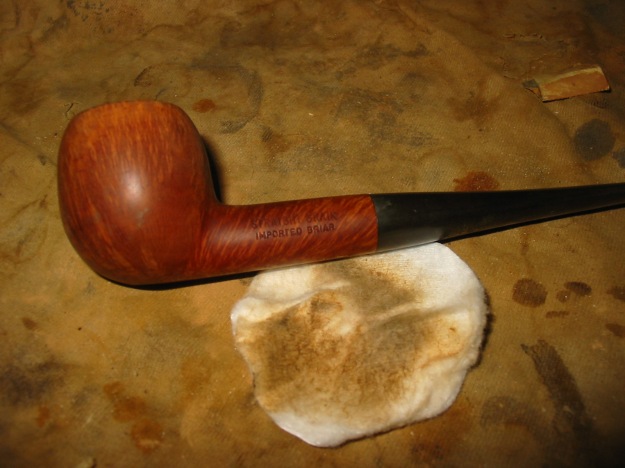
I asked him for some isopropyl alcohol, some cotton swabs, cotton makeup pads, and a sharp knife. I had some pipe cleaners with me so that we could field dress the pipe and clean it enough that he could smoke a bowl with me. The pipe had a slight burn on the front right of the bowl toward the bottom from having laid it in an ashtray and having it come in contact with a cigarette. The rim was caked and dirty with buildup but undamaged. The bowl was caked and had some burnt tobacco in it. The stem was lightly oxidized and there was light tooth chatter near the button. There was a stinger apparatus in the tenon of the stem. The stamping on the pipe was on the left side and read Straight Grain over Imported Briar. There was no other stamping on the pipe.

I carefully reamed the bowl with the pocket knife to remove a large portion of the cake. I scrubbed the top of the rim with the cotton pads and saliva until I removed the buildup on the rim. I cleaned out the inside of the shank with the pipe cleaners and the cotton swabs and isopropyl alcohol. I removed the stinger, threw it away and scrubbed the exterior and the interior of the stem to make it ready for him to smoke. Once finished we loaded a bowl of tobacco – a light English blend and headed to his front porch to have a bowl. It took some work to get the hang of lighting and keeping the bowl lit but it worked well after several tries. We enjoyed the visit and the smoke and then headed back inside.

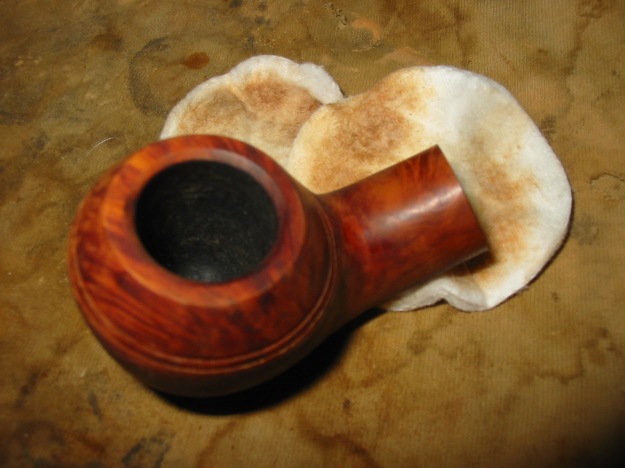
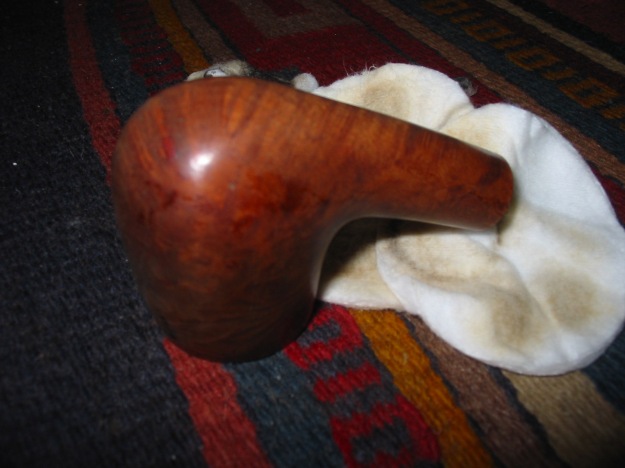
When I headed back to Vancouver I took the pipe with me to give it a more thorough cleaning and polish. The photos below show the pipe when I put it on the work table to give it a thorough work over.
IMG_4615

IMG_4616

IMG_4617

IMG_4618

The next photo shows the cigarette burn mark on the bowl. It was not too deep and did not char the wood but it was deep enough that it could not be sanded out without damaging the shape of the bowl.
IMG_4620

I sanded the burn mark and the rim to clean up the burn on the front inner edge. I used 220 grit sandpaper to start with and followed that with a medium grit sanding sponge.
IMG_4621

IMG_4622

I wiped the bowl down with acetone on cotton pads to remove the finish from the bowl and to prepare it for new staining.
IMG_4623

IMG_4624

IMG_4625

IMG_4627

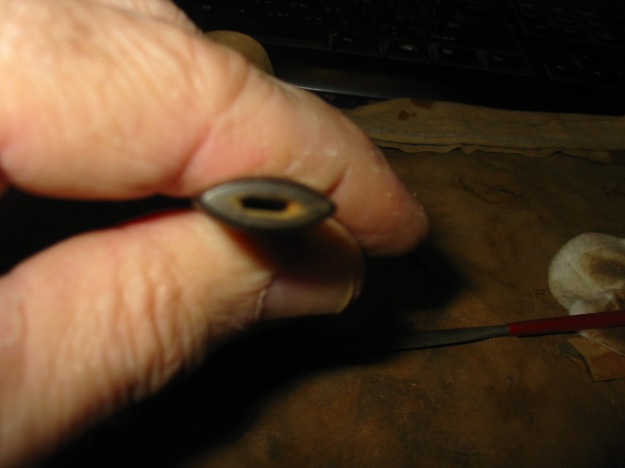
The slot in the stem was tight and hard to get a pipe cleaner to pass through easily so I decided to open the slot open with needle files. I shaped it and opened it and then sanded it with a folded piece of 220 grit sandpaper.
IMG_4628

IMG_4629

IMG_4631

IMG_4632

I reamed the bowl and cleaned out the shank with isopropyl alcohol and then used pipe cleaners. I used the drill bit in the KleenReem pipe reamer to open up the airway into the bowl from the shank. The tars had clogged the airway so the drill bit opened it and cleaned up the buildup on the sides of the airway.
IMG_4633

IMG_4634

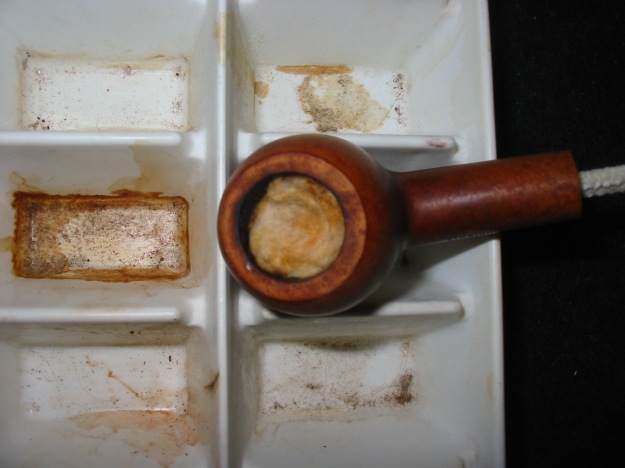
I decided to do a cotton boll and alcohol soak on the bowl. I stuffed the bowl with cotton and used an ear syringe to fill it with Everclear. I set the bowl in an old ice cube tray to let it soak while I was at work. The alcohol leaches out the tars in the bowl into the cotton and leaves the pipe fresh inside.
IMG_4635

IMG_4636

It sat in the tray for about 10 hours soaking. The cotton boll was soaked and brown coloured from the tars that leached out of the bowl.
IMG_4639

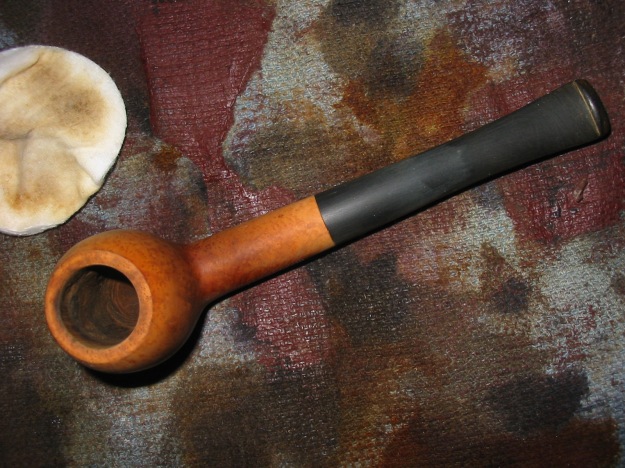
I took the cotton out of the bowl and then lit the alcohol remaining in the bowl with a lighter. It quickly burned the alcohol out and left the bowl dry. I used a folded piece of sandpaper to work on the inner edge of the rim to remove the burned spot on the front inner edge. I also used a PipNet reamer to remove the remaining cake that I had missed earlier. I wiped the bowl down a final time with acetone on cotton pads to remove the grit and grime that came out with the cleaning of the bowl.
IMG_4640

IMG_4641

IMG_4642

IMG_4643

I stained the bowl with an oxblood stain as an undercoat. I applied it and then flamed it. I hand buffed the bowl once the stain was dry.
IMG_4644

IMG_4645

IMG_4646

For the second coat of stain I used a dark brown aniline stain thinned 2:1 with isopropyl alcohol. I hand buffed the bowl with a soft cloth and then took the pipe to the buffer and buffed it with White Diamond.
IMG_4649

IMG_4650

IMG_4651

IMG_4648

Once the staining of the pipe was finished I worked on the stem with my usual array of micromesh sanding pads – wet sanding with 1500-2400 grit pads and dry sanding with 3200-12,000 grit pads. I rubbed the stem down with Obsidian Oil and let it dry.
IMG_4652

IMG_4653

IMG_4656

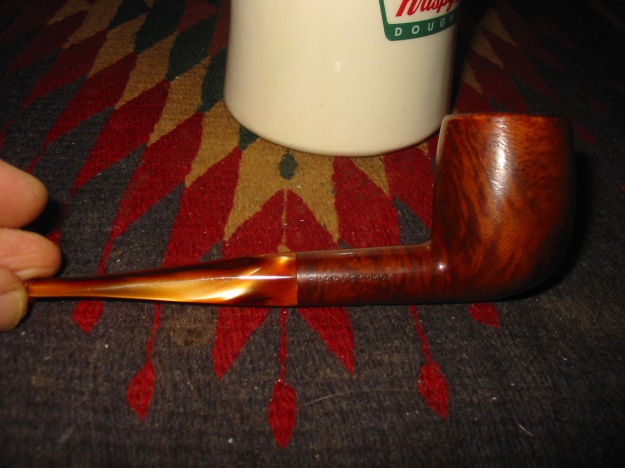
I took the pipe to the buffer and buffed it with White Diamond and then gave it multiple coats of carnauba wax. I finished by buffing it with a clean flannel buffing pad. The pictures below show the finished pipe. It is ready to send back to my buddy in Lethbridge. I think I will put a few samples of tobacco in the package with the “new pipe”. I think he will enjoy the improved version of his pipe.
IMG_4665

IMG_4666

IMG_4667

IMG_4668

Restoring a Larry Roush Bent Billiard


My friend Dave has a real knack for acquiring some very interesting pipes and occasionally they make their way to my workbench for cleaning. Dave posted this one on the Brothers of Briar forum and I was immediately drawn to it. In the sellers pictures, it looked in great shape, but when Dave had it in had there was some ghosting and it needed a general clean up – that was my good fortune!

At a casual glance, this Grade 7 Carved pipe didn’t impress me, but as I started to work on the various areas, the craftsmanship was really apparent. The pipe had a pretty heavy cake, the stem was bit faded and curiously it has a small dent on the side and a scratch on the other side. The stem had a small tooth indention on the top and bottom of the stem. These were very shallow and I knew they would be challenging to remove completely.

I managed to lose my “Before” photos, but the seller supplied these to Dave.

Larry_Roush_Before 2

Larry_Roush_Before 1

The good news for Dave was that someone really loved this pipe!

I reamed the heavy cake from the pipe and then used the retort, as Dave had mentioned it had heavy ghosting. To be completely sure the ghosting was removed, I also soaked the bowl with alcohol and sea salt. I was pretty confident that I had removed the ghosting, but only a smoke would determine my ultimate success. The more I handled the “carved” bowl, the more it grew on me.

The pipe had a beautiful silver ring that was stamped “Roush” and “Sterling”. I love slim stem rings and think this is a lovely aspect to the pipe. The shank/stem junction was polished and even chamfered a bit. The pipe had what appeared to be a Delrin tenon which was nicely finished as well.

The small side dent and scratch on the vulcanite stem took some 800 grit wet paper to remove. The stem was then polished with 2000 grit paper and then 8000 and 12000 grit micromesh paper. I was able to diminish the two teeth dents, but not completely remove them. I tried to cover them with the black Stew-Mac Superglue, but they were to shallow for it to adhere well.

I polished the bowl top with some White Diamond and then several coats of Carnuba wax. I waxed the bowl by hand with some Halycon wax and an old tooth brush. I used some metal polish the brighten the sterling silver ring.

I sent the finished pipe back to Dave and he reports that I was successful in removing the ghosts. Larry Roush pipes command premium prices and after examining one quite closely, I came away very impressed with his work.

Roush_Dave_J (6)

Roush_Dave_J

Roush_Dave_J (1)

Roush_Dave_J (3)

Roush_Dave_J (4)

Roush_Dave_J (5)

Reworking a Bad Reshaping of a GBD International 9438 Rhodesian


Blog by Steve Laug

I am working on a pipe for Mark and in exchange he sent me a GBD 9438 pipe – one of my all time favourite shapes. It is stamped on the left side of the shank GBD in an oval over International over London Made. On the right side of the shank it is stamped with the Made in London Circle (with in centered in the circle) over England in a straight line. Next to that it is stamped 9438. The stamping makes it clear that this is a newer GBD pipe from the Cadogan era. The stem has a gold decal on it – an oval with GBD in the center. It is not a roundel just a decal that is applied to the surface of the stem. The shape of the stem is slightly wider and flared as it moves away from the saddle area. It is slightly different in shape from my other 9438 pipes. It was in very good shape and the bowl was also clean and undamaged. The rim was unmarked on both the top and outer edges as well as the inner bevel. There was no rim darkening or damage. The only issue was that someone had decided to make it a sitter and flattened the bottom of the shank so that it would sit on a table without tipping. The finish was virtually gone and the flattened area was heavily scratched with little or no sanding to smooth out the work. It appeared to be a quick job of pressing the pipe against a sanding disk or orbital sander.
IMG_4576

IMG_4577

IMG_4578

IMG_4579

I removed the stem and began to reshape the flattened portion of the bowl and shank. Fortunately the sanding was done behind the drilling of the bowl so it did not thin the bottom of the bowl at all. The person who did the sanding had carefully sanded only the thickest part of the bowl and shank. I sanded the briar with a sanding drum on a Dremel to smooth out the sharp edges of the bottom and then used a folded one inch pieces of 220 grit sandpaper to further smooth out the abrupt edges of the flattened area. I used a medium grit sanding sponge to continue to remove the scratches left behind by the sandpaper.
IMG_4581

IMG_4582

IMG_4583

I wiped the bowl down with acetone on cotton pads to remove the finish so that I could more easily blend in the stain with the newly sanded bottom of the shank and bowl.
IMG_4584

IMG_4585

IMG_4586

I sanded the reshaped shank and bottom of the bowl with 1500 and 1800 grit micromesh sanding pads. I wiped it down a final time with acetone.
IMG_4587

IMG_4588

IMG_4589

IMG_4590

I cleaned out the shank and the bowl with Everclear and cotton swabs. I also used a pipe cleaner to clean out the stem. The slot in the button was very tight and would not allow even a thin pipe cleaner to pass through so I used needle files to open the slot. Once it was open and allowed a pipe cleaner to slide in with ease I used a folded piece of 220 grit sandpaper to sand the inside edges of the slot and smooth it out from the files. The first photo below shows the slot before my work with the files. The remaining three photos show the progressive opening of the slot with the files and sandpaper.
IMG_4591

IMG_4592

IMG_4593

IMG_4594

I decided to give the bowl two coats of stain for contrast. For the first coat I used a dark brown aniline stain and applied it to the bowl and flamed it to set it in the grain. I hand buffed it with a soft cotton cloth and then gave it a buff on the buffer with red Tripoli.
IMG_4595

IMG_4596

IMG_4597

IMG_4599

I then gave it the second/top coat of stain. I used a medium walnut MinWax stain to highlight the grain further on this pipe. I applied it with a cotton pad and rubbed it off with a soft cotton cloth. The contrasting stain gave depth to the finish on the pipe and made the grain and stamping stand out clearly.
IMG_4602

IMG_4603

IMG_4604

IMG_4605

The next three photos show close up views of the reworked bottom of the bowl. My goal was to round out the edges of the flattened area and shape the bottom of the shank and bowl back as close as possible to the original shape before the previous owner flattened them.
IMG_4612

IMG_4613

IMG_4614

I rubbed on Obsidian Oil on the stem and carefully worked on the area around the decal on the stem. Some oxidation remains in that area but I would have to sacrifice the decal to remove the oxidation and I chose to leave it. I buffed the pipe with White Diamond and then gave the finished pipe multiple coats of carnauba wax. I buffed it with a clean flannel buffing pad to give it a finished shine. The reworked pipe is picture in the next series of four photos. It is ready for its place in my collection of GBD 9438 pipes.
IMG_4606

IMG_4607

IMG_4610

IMG_4611

Repairing and Restoring a Lumberman Deluxe Canadian by Comoy’s


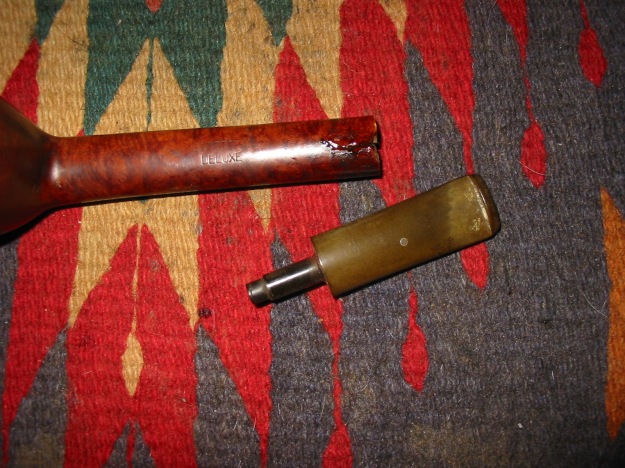
In a batch of pipes I was gifted by Andrew there was a pipe to repair. It is pictured below. The stamping on it was new to me. It is stamped LUMBERMAN over DELUXE on top of the shank and on the underside it is stamped Made and London arced in a circle with “in” at the center of the circle. It is also stamped 309X. I do not see an L after the X in the stamping of the shape number. The shank was cracked and looked like it had been taped from the sticky substance left around the shank and crack. It also was without a stem. Looking it over it appeared that the shank had also been cut off slightly and the cut was crooked. There was a chipped out portion at the end of the crack. All of that would need to be evened out in the repair. The bowl was caked toward the bottom and dirty with a buildup of carbon on the rim and the inner bevel of the rim. The finish was dirty and there were remnants of sticky tape that had been used to repair the shank on both the bowl and the end of the shank. It needed some TLC and work if it was going to be brought back to life.
IMG_4521

IMG_4522
The close up photo below shows the extent of the caking and the buildup on the rim. Note that the inner bevel was intact and the rim itself was undamaged – no nicks or dings on the outer edge and no burn marks. This one would clean up nicely.
IMG_4528

The Lumberman stamping was new to me. I had not heard of it before but it looked interesting in the photos that Andrew sent along. I asked him about the brand so he included some interesting information on the stamping that he had gleaned from a Mr. Can EBay listing. It certainly sheds some light on the brand. Here is how the listing read:

“This Collectible Briar pipe is unique, extremely rare Comoy’s 309XL – a classic Canadian Shape. It has the arched Comoy’s nomenclature stamped over Deluxe (just as it appeared in the early 1930’s) both of which were stamped over Lumberman. For anyone already familiar with the stamping of Comoy Canadians that is enough to recognize that this is a rare and collectible Comoy.”

It appeared that the pipe was made by Comoy’s and well worth the effort to restore it. Andrew also sent along three pages of background information that he had found on the brand. I believe that Mr. Can was also the source of this information. I have included some of it here as it is interesting to those of us who are curious regarding the history of the pipes we collect:

“During its history, Comoy’s has had three distinct sets of nomenclature, though they became somewhat blended in later years. The earliest Comoy nomenclature either had no Comoy stamping or a scripted, signature like forward leaning Comoy’s beneath which were featured names instead of shape numbers. Few of those names (Like Leman, Naval, Adelaide, and so on) are recognized even by the most ardent collectors. Then after World War I when Comoy began introducing what is sometimes called their Old Nomenclature (featuring the Prima, as the Top of the line with other lines like the Old Bruyere, Grand Slam, Lions Head, Lumberman, Lumberman Special and so forth) and arched Comoy’s stamping was used. In the 1930’s the Prima gave way to the Deluxe as the top of the line Comoy. Then just before World War II newer nomenclature started to appear (like Blue Riband, Specimen Straight Grain, and so on) and the Deluxe was replaced by the Royal Comoy. That New Nomenclature expanded dramatically after the War and blended with the modern nomenclature today.”

“The use of the arched Comoy’s ended with World War II and was replaced after the War with a straight line Comoy’s (along with the now famous country of origin stamping of a circular “Made In London” over a straight line “England”.”

“Prior to World War II with manufacturing facilities in both France and England, Comoy had pipes made in both locations. Most were easily identifiable by their country of origin stamping. There were several versions of Comoy’s Lumberman made in France and/or England. (They might have been the dame pipe but with different nomenclature.) “The Lumberman” and “The Lumberman Special were made in both factories. But none had the arched Comoy’s stamping.”

“After WWII Comoy’s reintroduced the Deluxe, discontinued the arched Comoy’s and continued various versions of the Lumberman. Perhaps Comoy’s best graded Lumberman was stamped Lumberman Deluxe – but it had no Comoy stamping. Lumber was always stamped over Deluxe.”

“Normally Comoy offered to Canadian sizes designated by shape numbers 296 and 309. The difference was in the length of the Canadians. The 309 shape was Comoy’s longest Canadian and the 296 was shorter. However, the extra long Canadians were upgraded with the additional stamping of XL and the very longest were sometimes stamped XXL. Either upgrade was rare.” – the above was taken from correspondence Andrew included when he sent the pipe to me.

Armed with that information I was ready to work on the pipe. I have included a series of photos below to show the cracked shank and the repair I did to it. In the first photo I inserted a dental pick in the shank to open the crack so that I could clean it out. Also included in that photo is the band that I would use to band the cracked shank.
IMG_4523

I wiped down the shank with acetone on a cotton pad to clean off the grime and build up of material left behind by the tape that had been used to repair the shank. Once it was clean I dripped some superglue into the crack of the shank and held it tightly together until the glue had dried. Once it had dried I inserted the end of the tenon of the stem I was going to fit to the shank of the pipe for the photos.
IMG_4532

IMG_4533

IMG_4534

IMG_4535

I sanded the repair and removed the excess glue from the surface of the top of the shank and wiped the area down with Everclear on cotton pads to clean up after sanding.
IMG_4539

I decided to ream the bowl and clean the rim before I went on to band the pipe. I cleaned the inside of the shank as well as I did not want the grime and build up to run when I heated the shank and the band for the pressure fit. I reamed it with a PipNet reamer and scrubbed the rim with saliva on a cotton pad and good old fashioned elbow grease.
IMG_4537

IMG_4538

I turned the tenon down to get a good fit in the mortise and against the end of the shank. I wanted to see what I was working with in terms of the cut off shank. I knew that it was not straight but I wanted to see how far off it was. I also wanted to see the damage to the shank from the crack. The next series of four photos shows the damage to the shank. I was able to smooth out some of the damage but the band would certainly help in making the end of the shank smooth. I did not want to cut off any of the length after reading the information that Andrew provided. From photos I looked at on the net the stem was the right shape, taper and angles to fit this age of pipe. The old stem I chose was one that had the BBB diamond stamped on the top of it. The stamping was faint so it was a good one to sacrifice for this Lumberman.
IMG_4540

IMG_4541

IMG_4542

IMG_4544

I removed the stem once it fit well and pressed the band onto the shank. I then heated it with a heat gun rotating the shank to evenly heat the band and keep the heat from burning the briar.
IMG_4546

IMG_4547

I pressed the band in place while it was still hot. I use a flat board and press down evenly until the band slides into place. This takes repeated heating until the fit is tight and straight against the end of the shank. In the case of this pipe after I pressed it in place I sanded the damaged end of the shank until it was even and then used a knife to cut a slight bevel on the inside edge of the mortise so that the stem would fit properly.
IMG_4548

IMG_4549

IMG_4550

IMG_4551

Once the band was in place I needed to sand down the tenon so that it would fit in the newly constricted airway. I used a folded piece of 220 grit sandpaper to sand down the excess vulcanite on the tenon so that the fit would be snug. The next three photos show the new stem in place with the band. The stem had been sanded with 220 grit sandpaper to match the lines of the shank and give a proper taper to the stem from the band to the button. I also sanded it with a medium grit sanding sponge.
IMG_4553

IMG_4555

IMG_4557

I sanded the area on the top of the shank where the repair extended slightly ahead of the band with 220 grit sandpaper and a medium grit sanding sponge. I followed that by sanding with micromesh sanding pads to smooth out the spot. I wiped down the bowl with acetone on a cotton pad until the surface was clean and free of debris and dust. I stained it with medium brown aniline stain that was thinned 2:1 with Isopropyl alcohol. I wanted the colour to match the tones that were present on the other Comoy’s that I had from this era and the photos I had seen on line. I applied the stain and flamed it. In the photos below the shine is from hand buffing the pipe with a soft cotton cloth.
IMG_4558

IMG_4559

IMG_4562

IMG_4563

I reinserted the stem and worked on the band and the stem with 1500 grit micromesh to begin the process of removing scratches and polishing. I took the pipe to the buffer and gave it a quick buff with red Tripoli and White Diamond.
IMG_4566

IMG_4567

IMG_4568

I worked on the stem with my usual array of micromesh sanding pads – wet sanding with 1500-2400 grit pads and dry sanding with 3200-12,000 grit pads.
IMG_4571

IMG_4570

IMG_4569

I rubbed the stem down with Obsidian Oil to protect it and when it had dried took the pipe to the buffer. I buffed the stem with White Diamond and gave the bowl and shank a light buff as well. I gave it multiple coats of carnauba wax and finished by buffing it with a clean flannel buff. The finished pipe is picture below.
IMG_4572

IMG_4573

IMG_4574

IMG_4575

Restoring a Chacom Festival Billiard


I have had this Chacom Billiard for quite a while and never done any work to it. It had a lot of rim damage and the outer edge had been rounded over. Looking at the brand online I could not find any with a rounded top so I decided to rework the top. It also had many dents and dings in the surface of the briar all around the bowl. It seemed like there were too many to be a onetime drop of the pipe but rather seemed like the pipe had been bumped around in a drawer or glove box in a car and picked up the dents. I have not smoked the pipe so I have no idea how it smokes but I have been in a mood to clean up many I have around that need a little more TLC. This one was also filthy inside the shank and the stem to the point that the airway in the stem was a black line like a stripe from the shank to the button. The stamping on the pipe is Chacom over Festival on the left side of the shank and Chapuis Comoy on the right. On the underside near the shank stem junction it bears the stamped numbers 291 – the shape designation. The 291 shape is a Comoy’s number. The acrylic stem is stamped CC on the left side near the shank. I am not clear on the relationship between Comoy’s and Chacom other than a few vague memories regarding the company separating and the Comoy’s moving to London and a portion staying in France and taking on the name Chacom. I do not recall the history or the connection.
IMG_4482

IMG_4483

I decided to do some research on the web to check out my vague recollections and gather details on Chacom pipes. I found a timeline for the brand on the Chacom website with a short history abbreviated. (http://www.pipechacom.com/en/pipes-traditionnelles/history.htm). It turned out that I was partly correct in my information regarding the connection but the timeline gives details to the name and the changes that it went through. I had no idea that Chacom was a combination of the first three letters of the Chapuis name and the first three letters of the Comoy’s name. I also had no idea of the detailed ongoing use of the two names that are stamped on my pipe. It appears that the dual name was stamped for many years and generations. I have copied some of the pertinent dates that give me data in understanding the stamping on this pipe. I have incluced portions that give a glimpse into the history of the brand. For more information or to follow-up on this I have also included the website above.

1870: Henri COMOY, prisoner of war in Switzerland met his cousins the Chapuis and together they consider the idea of an association.

1879: Henry COMOY immigrated to London with some of his technicians from Saint-Claude and establishes the first English pipe factory in England – H. COMOY & C° LTD. The Saint-Claude factory supplied them with briar and pipe bowls…

1922: After the First World War the association COMOY and CHAPUIS is realised and the Saint-Claude factory becomes CHAPUIS COMOY & Cie.

1924: Death of Henri COMOY. His sons Paul and Adrien assume the direction of the factories in Saint-Claude and London assisted by their cousins Emile and Louis Chapuis.

1928: London was able to produce their own pipes, and in order to develop the Saint-Claude factory, the brand CHACOM was created, using the first three letters of the COMOY and CHAPUIS family names. Up till 1939 CHACOM was offered only in France, Belgium and Switzerland in order not to cause confusion with the COMOY pipes which had the same shapes and qualities.

1932: The world economic crisis reached Saint-Claude. To weather this problem Chapuis Comoy & Cie joined with another company under the name of LA BRUYERE, forming the biggest pipe concern in the world with 450 workers. Big trucks were needed to transfer the briar blocks from the drying shed to the factory.

1945: After the Second World War CHACOM assumed its entire commercial liberty and launched a complete and modern range of pipes.

1946: Chacom became the principal brand in France and Belgium…

1957: In face of the commercial preponderance of the brand CHACOM the company La Bruyère returned to the name of CHAPUIS COMOY & Cie.

1964: Death of Adrien COMOY. His son Pierre succeeded him in London. Mr. REED was the Chairman and Managing Director in Saint-Claude…

1971: Having recovered its independence from COMOYS of London, Yves GRENARD, second cousin of Pierre COMOY, took over the Direction of Chapuis Comoy & Cie and at the same time the exclusive sale of H. COMOY & Ltd, in France…

1994: Chapuis-Comoy integrated ROPP Company.

As can be seen in the next series of photos below the rim was damaged and the outer edges were rounded over instead of sharply defined and the surface flat.
IMG_4485

IMG_4486

IMG_4487

IMG_4488

I set up my topping board and sandpaper and sanded the top of the bowl. I generally use a circular motion while pressing the top onto the sandpaper. I find that this minimizes the scratches and makes the easier to sand later. The next photo below shows the top after just a few rotations on the board and highlights the damages rim edges.
IMG_4489

I continued to sand the top until the surface was smooth and the edges sharp and defined. I wanted to remove all of the rounding that was present on the outer edges of the bowl. When I finished with the sandpaper I sanded the top with a medium and a fine grit sanding block to further smooth out the surface and remove the scratches left behind by the paper.
IMG_4490

I wiped down the bowl with acetone on cotton pads to remove the finish. In this case there were so many dents in the briar that I wanted to remove the finish before I steamed out the dents in the sides of the bowl.
IMG_4491

IMG_4492

IMG_4493

IMG_4494

IMG_4495

I took the pipe up to the kitchen to use the gas stove to heat a knife for steaming the dents. I generally try to do this when my wife is away as I use an old butter knife, a dish cloth and her stove for the work. I have found her hovering to make sure I don’t ruin her stove or knife or cloth for that matter, hard to deal with while I am focusing on the work at hand. It is far easier to do it when she is away – I avoid her concern and I find it goes more quickly!

The next photo below shows the tools I used. I put the wetted dish cloth on a plastic lid so that I do not damage the counter tops. The knife on the right side of the photo is my weapon of choice in this process as the blade is long and wide so it covers a lot of dents.
IMG_4496

The next photo shows the blade being heated with the gas flame. For some reason the flame is not visible in the photo but it is present. It does not take long to heat the knife to the temperature that works with the cloth to create steam.
IMG_4498

The next photo shows the next step in the process. When it is hot enough I place it against the wet cloth that I have placed over the dents and hold the hot knife blade against the cloth and pressed against the dented briar. The application of heat to the wet cloth creates the steam that is needed to raise the dent in the briar.
IMG_4499

The next series of photos show the bowl after steaming out the dents in the surface. The majority of the marks are gone after the process. Those that remain were minimal and I dealt with them by sanding the bowl. I used a medium grit sanding sponge and a fine grit sanding block to sand the briar of the bowl and smooth out the surface dents that remained.
IMG_4500

IMG_4501

IMG_4502

The airway on the acrylic stem was black. I thought at first this was a part of the striations in the acrylic but that turned out to be wrong. I cleaned the stem with a shank brush, many pipe cleaners and Everclear until the pipe cleaners finally came out clean. The shank brush cleans up easily with soap and water when I am finished. The airway looked far better when cleaned.
IMG_4504

The next three photos show the pipe, cleaned and ready to be stained. I wiped it down a final time with Everclear to remove any dust or grease from my hands and took it to my work table to restain it.
IMG_4505

IMG_4507

IMG_4509

I stained the pipe with MinWax – using a Medium Walnut stain first and then applying a Red Mahogany stain over that. The photos below show the bowl after I have stained it with Medium Walnut. Once applied the Red stain it blended very nicely with the darker colours in the acrylic of the stem.
IMG_4510

IMG_4511

IMG_4512

IMG_4513

I buffed the bowl with White Diamond and then stained it with the red stain. I buffed it a second time with White Diamond. I buffed the stem and pipe again with White Diamond and then gave the pipe multiple coats of carnauba wax to give it a shine. I liked the way the finish is almost matte and does not have a high gloss to it. The addition of the red stain brought out the red tones in the briar and they match those in the acrylic exceptionally well. The acrylic stem is one of the most comfortable ones that I have seen or experienced and that is a pleasant surprise. The following photos show the finished pipe ready to fire up and enjoy.
IMG_4514

IMG_4515

IMG_4516

IMG_4518

IMG_4519

Giving an Ugly, Worn Billiard a Makeover


I was given this older, truly ugly pipe a bit ago. It is stamped Astoria De Luxe on the left side of the shank and on the underside the number 8 is stamped near the shank/stem junction. The stem has the letter “A” stamped in the vulcanite. The bowl was coated with a thick coat of something like urethane that gave it a plastic feel. It also seemed to be an opaque coating that was a yellow tan colour. The coating complete hid the grain and the numerous fills on the sides of the bowl. The rim had been damaged from a knife wielding person who tried to ream the bowl. The inner edge had a slight bevel that was damaged and the outer rim had damage from a torch lighter. This time the heavy coating on the bowl protected it from charring but the coating had darkened to black and was pitted. The top of the rim was badly damaged from tapping the bowl out against something hard. This pipe was certainly one that normally I would not have bothered to work on, but there was a challenge there to see if I could do something with it. This one will also go in the box of pipes for the Vancouver Pipe Club.
IMG_4455

IMG_4456

IMG_4457

IMG_4458

I took a close-up photo of the top of the bowl to highlight the rim damage before I went to work on repairing it.
IMG_4459

I set up my topping board and sandpaper and sanded the top of the rim. I press it against the board and work it in a circle to remove the damaged briar. I continue until the top is once again flat and the damage minimized. In doing so I was able to remove much of the gouging of the inner edge of the rim and flatten the rim. It also removed the burn damage to the outer edges of the bowl. However, it also revealed a flaw in the top of the rim. I filled the flaw with briar dust and superglue and when dry topped it slightly more to remove the excess fill that I had made.
IMG_4460

I scrubbed bowl down with acetone on cotton pads but the coating did not come off. I sanded the bowl with a sanding sponge and broke the top seal on the coating and then continued to wipe it down with acetone and then sand repeatedly until the finish was virtually gone.
IMG_4461

IMG_4462

IMG_4463

IMG_4464

Last evening when I finished for the night I dropped the bowl in an alcohol bath overnight to further remove some of the stubborn spots on the coating. These were at the bowl shank union and at the end of the shank. There were spots on both sides of the bowl and the front that also resisted the combination of sanding and acetone. When I took it out of the bath this morning the finish was gone. I rubbed the bowl dry and gave it a quick buff with Tripoli to remove any remnants of the coating. I cleaned out the shank with cotton swabs and Everclear to remove the tars and oils that were inside. When it was clean, I wiped it down a final time with a cotton pad and Everclear and prepared it for staining. I decided to once again use the MinWax and gave the bowl a coat of Red Mahogany and then a coat of Medium Walnut stain. I hand buffed the bowl and then took it to the buffer and buffed it with Red Tripoli and White Diamond.
IMG_4465

IMG_4466

IMG_4467

IMG_4468

The combination of the two stains worked well and minimized the ugly fills that stood out around the bowl. Combined they gave the pipe a light reddish brown hue. The stem had some damage around the shank area so I sanded it lightly with a medium grit sanding sponge to remove those markings.
IMG_4469

IMG_4470

IMG_4471

IMG_4472

I further sanded the stem with the usual array of micromesh sanding pads – wet sanding with 1500-2400 grit pads and dry sanding with 3200-12,000 grit pads. I rubbed the stem down with Obsidian Oil and then buffed it with White Diamond.
IMG_4473

IMG_4474

IMG_4475

I reinserted the stem in the pipe and gave the entire pipe a final buff with the White Diamond and finished by giving it multiple coats of carnauba wax. I buffed the pipe with a clean flannel buff to raise a shine in the stem and bowl. The result of the work can be seen in the photos below. The old, ugly duckling billiard had a facelift and now was far more attractive than previously in my opinion. It is ready to go in the box for the pipe club. Hopefully the pipeman who takes it home eventually will get good use out of it and enjoy the Astoria De Luxe. The challenge was worth doing and in doing so I learned some more tricks on removing a thick urethane coating.
IMG_4476

IMG_4477

IMG_4478

IMG_4480

IMG_4481

A Book Review – The Five Laws of Pipe- Companioning by Mark Irwin


Blog by Steve Laug

Several weeks ago now I received a cryptic email from Mark telling me to keep an eye out for a small package coming from Luca at Neatpipes. Knowing Mark’s proclivity for pipes – Irish and Italian I was not sure what to expect. But I also know he writes a blog for Luca Neatpipes http://www.neatpipes.com/blog/list/diary-of-a-mad-padster/&id=1 so I wondered if there was not a new book on its way to Vancouver.
coda-companions
On the blog was a series of blog articles on what Mark called the Five Laws of Pipe-Companioning. I had read them earlier and enjoyed his writing and what he was proposing. Sure enough when the package came it contained a copy of Mark’s book on the subject. I was thrilled to be able to give it a read. It was published by Luca of Neatpipes and is a small pocket sized book. I know it is pocket sized because I have had it in my pocket several times over the past week and have taken it out for a read at lunch hour, coffee breaks, while standing and waiting in various queues. It is the perfect size for this kind of subterfuge. I am one of those guys who always has a book in the pocket of his jacket so regardless of where I have to wait I have something to make the wait endurable – bank lines, grocery lines, transit lines, you get the picture. Mark’s little book is perfect for my habit.

The Table of Contents gives a short version of the Five Laws and is a great summary of the content of the chapters that follow. I have learned a habit garnered from Mortimer Adler’s How to Read a Book many years ago now, of reading the Table of Contents and Preface of the book to get a feel for the author’s focus and purpose. Doing so this time around did not let me down. The chapters in this little book are as follows:

Preamble 7-9

Pipes are for use 11-17

Every pipeman his pipe 19-25

Every pipe its pipeman 27-33

Preserve the pipes 35-41

Your pipe community is a growing organism 43- 49

Afterword 51-57

Coda 59-67

While Mark writes the book from the Preamble to the last chapter, Rick Newcombe writes the Afterword and Luca Di Piazza writes the Coda.

As can be seen above the book is a brief 67 pages long and can be read in one sitting, but I have found myself reading and rereading the chapters and reflecting on the concepts that Mark proposes in them. It is not so much the profundity of the concepts as the turn of phrase that I have come to associate with Mark’s writing that brings me back again and again. It is a good read for that reason alone in my opinion. But certainly there is more grist for the mental mill than just the turn of phrase in this book – whose concepts go beyond the scope of the short 67 pages. They open a world of reflection for those with that bent. So, load a pipe, find a quiet spot and delve into the words and ideas of the Five Laws of Pipe-Companioning.

In his Preamble Mark spells out what he means by the use of the word, “laws”. Rather than explain it myself I will let Mark do it in his own words. The following comes from the Preamble: “I need to be clear that what follows aren’t “laws” in the sense of something we need to debate, argue about and legislate according to majority rule. They’re universal principles, viz., underlying operative conditions of our hobby…You’ll see beliefs and opinions – mostly mine – but these are not about the laws themselves, but about the way the laws can best be practiced (or observed), something always open to interpretation.” With those introductory words the Five Laws are applied and examined. The layout of the book is well done and draws the reader into the work. There is lots of white space making it easy on the eyes and some beautiful pipe photos inserted between chapters to add colour and “eye candy” for a break to ponder to the words that have just been read in the previous chapter. It is a beautiful little book.

The first chapter looks at the First Law, Pipes are for use. At first glance the concept seems clear to those of us who smoke pipes but in the chapter Mark puts folk on a continuum that extends from “absolute pipe smoker to absolute pipe collector. Most of us he says fall in between the poles in a broad field. He suggests that we are called pipe companioners – those who enjoy the company of their pipes. This is a concept that Mark and I have written to one another about as we discuss our love of the pipe. It views the relationship of the pipeman and the pipe as almost sacramental in nature. The pipe has the ability to lift the pipeman to a different plane and provide a connection to a separate reality. This particular chapter is chock-full of concepts that take time to ponder and savor. The ideas in this chapter alone are well worth the meager price of the book.

The second chapter looks at the Second Law, Every pipeman his pipe. This law acknowledges the diverse range of likes and dislikes of pipemen. Another way of saying this could be, “to each his own”. The idea developed in the application of this law is simply to build tolerance for another pipeman’s tastes. Each of us is drawn to the pipes that become our companions and generally move out those that do not fit our criteria. Tolerance and pleasure in the passions of another keep us from becoming elitist in our hobby. Life is far too short to not take pleasure in the joy of another’s discoveries.

The third chapter looks at the Third Law, Every pipe its pipeman. The idea here is that every pipe was made to be smoked by someone at sometime in its life. Mark explores the application of this law to the companioning of pipes (BM – Before Mark: collecting). This law shows the breadth of the room on the continuum between Absolute Pipe Smoker and Absolute Pipe Collector. I have never ceased to enjoy the wide variety of pipe collections that I have seen on my travels when I connect with other pipemen. I love to hear the stories they bring forth from their companioning to regale the beauties and joys of their particular pipes that have found a home with them. To me this is profundity of the application of the Third Law.

Chapter four looks at the Fourth Law – Preserve the pipes. This law is a pleasure for me to read. As a hobbyist pipe refurbisher I have come to believe that all of my pipes will certainly outlive me. All of the ones I have reclaimed and renewed will go on to the next generation of pipemen and give them the same pleasures that they have given me. Not only is there integrity in the pipe companioning in my cupboard but there is also an integrity that is cross generational as the pipes pass through my hands and experience into the hands of the still unknown next generation. Thank you Mark for your reflections on this. He covers the topic beyond my brief excursus above and looks at the application of the law in several different ways. Give it a read.

Chapter five reflects on the Fifth Law – Your pipe community is a growing organism. Mark looks at the idea that every pipe has a story and the fact that you too have a pipe story. To me this is a natural followup to the Law Four. My trust of a given pipe adds another layer to the story of the pipe and to my own pipe story. I am still pondering all of the implications of the application of this law in Mark’s book.

The Afterword by Rick Newcombe really gives the reader Rick’s take on the Five Laws and one can see in it the truth of what Mark mentions in his Preamble, “You’ll see beliefs and opinions – mostly mine – but these are not about the laws themselves, but about the way the laws can best be practiced (or observed), something always open to interpretation.” I appreciated Rick’s words as he walked through each of the Laws and gave us a look at pipe companioning through his eyes. The inclusion of this piece actually does exactly what the book purports to do. Thanks Rick.

The Coda by Luca is yet another application of the Laws from his perspective. He takes us into the world of his companions and we seem how he applies the laws. This too is a great inclusion and a good way to round out the concepts set forth in The Five Laws of Pipe-Companioning.

I certainly appreciated the work Mark has done in putting his thoughts on paper regarding a topic that has always been rattling around in my brain. The concepts explicated by these Laws have been something that I have explored in my own Father Tom stories and the various pieces I have written on the rebornpipes blog. If you are interested in reflecting on your own pipe “collection” and broadening your perspective on it or just interested in all things pipe related then by all means contact Neatpipes to purchase a copy of this great little companion.

James Upshall Bark (Unsmoked) Restoration


As my screen name for this blog implies, I’m a pretty big James Upshall fan. To this point, all of my Upshalls are smooth pipes of the various grades (P, S, B and ungraded). This pipe, my 8th Upshall, was advertised as “unsmoked”. The Ebay pictures were lousy, but the price was right and the seller took refunds, so I rolled the dice. I was pleasantly surprised with a beautiful Bark finish pipe and in perfect, unsmoked condition. Of course the stem was oxidized, which proved to be more stubborn than it appeared.

James_Upshall_Bark_Before (1)

James_Upshall_Bark_Before

James_Upshall_Bark_Before (3)

I didn’t want to soften or damage any of the stem edges on the saddle stem, so I started with a relatively fine, 2000 grit wet paper. I used a combination of popsicle stick and small, flat needle file to get the oxidation out of the creases. That took considerable effort, but I’m pleased with the results. I followed next with 8000 and 12000 grades of micromesh, also utilizing the sticks. Working around the small, stamped logo, was challenging. The stem was then buffed with white diamond and then plastic polish.

I worked in some Halycon II wax on the bowl, which was in mint condition. I used an old toothbrush to work the wax into the rough finish and then buffed it with a clean cloth.

I’m very excited to smoke this one, as it is my first unsmoked James Upshall. I’ve handled other Bark finish Upshalls in the past and some of the stem work was not to my liking. This one looks to have a good grade of vulacanite and has the feel I’m accustomed to on my polished Upshalls. The button is particularly appealing and has perfect mouth feel. I’m not a real clencher, so smaller profile buttons are to my liking. The Bark finish feels superb in my hand and it is a bit similar to the Sea Rock on my Castello. After the Rhodesian and Bulldog shapes, the classic Bent Billiard is next on my preferred shapes list.

I have several large Upshalls in my collection and I’m focusing on obtaining only smaller pipes now. Fortunately, this one isn’t too far out of my comfort zone at 60 grams. It is also about the same size as my Castello 4k pipe (also a bent billiard).

James_Upshall_Bark_Gallery (6)

James_Upshall_Bark_Gallery (1)

James_Upshall_Bark_Gallery (2)

James_Upshall_Bark_Gallery (3)

James_Upshall_Blasted - SAMPLE

A Review – A Commission for a Briar Sweat & Tears Rhodesian


I spoke with Todd Bannard of Briar Sweat and Tears last fall when I visited his shop about the possibility of him crafting a pipe for me. We talked in generalities with no particular focus in mind other than that I wanted a chubby apple or Rhodesian shaped pipe with a Cumberland stem. As I looked at the pipes he had on his table I really liked the sandblast finish that he was doing on those pipes so I decided that it would be sandblasted.Later in the fall I was gifted some birthday cash and also knew that some Christmas cash was coming so I called Todd and the process began. Through our emails back and forth we came to the conclusion that the shape would be his take on a Comoy’s 499 – a chubby shanked Rhodesian. With that shape in mind and the Cumberland stem I left it to his discretion regarding stain colours and the details. I was excited to see what he would come up with. There is something about having been in a pipe maker’s shop and seeing his tools and craftsmanship firsthand that gives another dimension to process of a commission that is not present through phone and emails conversations.I thoroughly enjoyed working with Todd on this pipe.

Those of you who have commissioned a pipe before will understand the excitement I had when I turned on the computer and found I had received an email from Todd regarding the pipe. When I saw the title and return I thought maybe it was more details regarding the pipe he was working on. But it was more than just details. It was a quick note about where he was at with the pipe and a photo of my pipe! I was thrilled with the look of the pipe at this stage. I have included that photo as a bit of a teaser to give you an idea of what it looked like at this stage in the process. The shape was perfect – it was exactly what I had wanted. The stain contrast was also very nice to my eye. The chunky shank and stem were also on target. And truly what can I say about the horizontal striations on the Cumberland stem. Wow. He still had work to do but wanted me to have an idea of what was coming.
Sasquatch1

With the arrival of that photo my impatience grew. I did not bug Todd because I hate having that done to me but I could not wait. Not long after the first photo another email arrived with the photo below of the finished pipe. We emailed back and forth a bit about it and I asked if he could do a bit more of a bend in the stem. Otherwise it was perfect.
Sasquatch2

He bent the stem slightly as I had asked and then later sent me the next photo of the pipe.
Sasquatch3

I answered Todd’s email and told him the pipe looked perfect except for the fact that it was not in my hands yet ;). The only thing that would have been better in this deal in my mind would have been for me to have been closer to the shop so that I could have driven over and picked it up. But such as it was I would have to wait for it to be shipped. I paid the bill and Todd packed it up and sent it to me via Canada Post. He packed a couple of samples of tobacco with the pipe so that when it arrived I would have something new to try out.

It did not take long before it arrived. I came home from work one afternoon to find the box sitting on my dining room table with a lot of other uninteresting mail. I opened the box, pushed aside the packing material and took out the two samples of tobacco. There, in the middle of the material sat a bright red pipe sock. It was here. I took the sock out of the box, opened it and took out my new pipe. My daughters laughed at my excitement. I was like a kid opening a present that held the gift he was waiting for inside of the wrappings. Once it was out I turned it over and over in my hands taking in its beauty. It was exactly as I had imagined it as Todd and I had talked about it. He had captured it well. I had to take a photo of it as it looked it when it arrived. The red of the pipe bag picked up the red in the stain on the pipe.
IMG_4176

I took the pipe apart, because it is my nature to see how things are made. The drilling was perfect and the stem airway lined up perfectly with the opening in the end of the mortise. The slight divot on the bottom of the mortise is from the drilling of the airway into the bowl. That drilling is a straight shot that comes out in the center of the back wall at the bottom of the bowl. I noticed that Todd had funneled the end of the tenon for good airflow. The tenon was very short – something I had not seen before on a handmade pipe. There was plenty of length for a good seat in the mortise as it too was also drilled more shallowly than I had seen. The fit against the end of the mortise was snug with no gap between the tenon end and the end of the mortise. Nicely done Todd. The drilling in the stem was clean and smooth. There were no rough edges in the tenon or stem. The tenon is an integral part of the Cumberland stem and not a Delrin tenon. The button was just the right thickness for me as I like it with a slight shelf to hold behind my teeth but not too thick. The slot was well made and a flattened oval at the end of a flared airway – thus keeping the airway consistent diameter from the bottom of the bowl to the end of the slot. The draught was easy and quiet. To pull air through the stem was effortless. This always bodes well for a new pipe.
IMG_4402

IMG_4403

I wrote Todd and asked about the short tenon and mortise and received this reply:“A short, fat (3/8″ rather than 1/4 or 5/16″) tenon allows a guy to have the same surface area for the mortise tenon fit (so the same “stiffness” of fit) but allows you to drill the airway dead center in the mortise (you can tip the drill more than if the mortise is an inch deep). So the integrity of the airway is not compromised, the pipe passes a cleaner, etc.” Interesting concept and one that seems to work well on this pipe.

I took the pipe to the worktable to look it over and just enjoy the craftsmanship before I loaded it up to smoke the inaugural bowl. I have to tell you the shape and finish went beyond what I had in mind when Todd and I talked about it. It is beautiful. The length of the pipe is 5 1/8 inches and the bowl height is 1 3/4 inches. The bowl diameter is 1 3/4 inches. The chamber diameter is 3/4 inches and depth is 1 1/2 inches. The lay of the shape to the grain is superb. The blast reveals that the grain on the sides of the bowl are nearly identical and the birdseye grain on the top and bottom of the bowl and shank are very nice. Todd did a shallow blast that revealed some of the intricacies of the briar but did not make the blast craggy or deep. The parallel rings around the cap on the Rhodesian are nicely done and close enough together to give the cap a classic look. The angle of the cap is perfect in my mind and captures the Comoy’s shape nicely.It looks to me that he used a dark brown stain on the undercoat to sit deep in the nooks and crannies of the blast and then an oxblood stain to cover that and give the pipe a warm hue.Whatever the combination, in real life it is a perfect match to the colours in the Cumberland stem as shown in the photo below.
IMG_4175

Earlier last year Todd cut a Cumberland stem for me from some material he had in the shop that had a horizontal flow to the Cumberland. I really liked the look of the stem then and asked him to use the same material here. Todd stained the pipe to match the colour of the stem. The overall flow of the bowl and shank is brilliant and the colours are beautifully matched from rim to the end of the shank. It has a gentle taper,both on the sides and the top and bottom, from the shank to the button. It has a slight bend to it that gives it a stylized look. Todd did a great job shaping the stem and capturing a shape that really works with this pipe. The stem is nicely finished with no marks or scratches in the Cumberland. The tenon is integrated with the stem and cut into the Cumberland. The fit in the mortise and against the shank is snug. He countersunk the end of the mortise to make for a snug fit of the stem to the shank. The end of the tenon is funneled slightly for a smooth transition from the mortise when it is in place.
IMG_4174

The overall construction of this pipe is very well done. It is light in the hand and in the mouth. It is well balanced and has a shape that fits well in my hand. There was one slight detail in the blast of the pipe that bothered me but it in no way affects its smoking ability. It was truly cosmetic in nature. It involved the shank/stem junction. When it first came it appeared that the stem diameter was bigger than that of the shank on the left side. It seemed that the stem was larger. It bugged me and my daughter who knows her father well suggested that I measure the diameter of both as it probably was an Illusion. I did that and upon closer inspection I found that there was a slight ridge on the shank itself and Todd had matched the stem to the ridge. I decided to fire him an email and ask him about it. I wrote this to him:“The stem fits very well against the shank – no light! Cool. When I first looked at it, it seemed like the left side of the stem was a bit larger in diameter as was the top of it… then when I took it off I found that there was a slight ridge in the briar from the blast and went aha!! How do you do the blast on the shank?”

Todd wrote back and replied: “The blast, going right to the stem, is something that I’m trying to work out, rather than have a band of smooth wood and then a “cutaway” where the blast starts. I’ve been told to “fake” the blast and sort of rusticate that part, but I think what I did worked pretty good, not perfect but next time! As for the rings, I taped them off, blasted the top, taped that off and blasted the bottom. I can’t stand fudgy blast work, and I’ll sacrifice depth of blast to keep the integrity of the shape. I have a Castello with a lovely blast but it’s just a molten lump of no real shape because of what they did to it.” Once I had done the work and received Todd’s response that solved the question for me.
IMG_4172

IMG_4173

For its inaugural smoke I loaded a bowl of McClelland’s Blue Mountain. I am not sure if I will make it a Virginia or an English tobacco pipe but for this smoke I chose this blend. I went for a walk along the river near my work and enjoyed a rare sunny day in Vancouver. The pipe draws well; lighting was not a problem and it delivered a smooth dry smoke. When I emptied the bowl the briar had coloured inside but not burned! That is always a fear of mine in breaking in a new pipe. I enjoyed the day and the dry cool smoke and I watched the ducks on the water. It seems like this pipe will take very little time to break it in as it already delivers an effortless smoke.

Thanks Todd for delivering a well-made pipe at a great price. It was great to work with you on the commission and I enjoyed the communication during the process. I am looking forward to this pipe being one of my favourites in the years ahead.It is certainly made to outlive me! If you have not tried one of Todd’s pipes they are worth purchasing. He makes a great pipe and is a pleasure to work with. Check out his work on his website http://briarsweatandtears.com/ If you don’t see something you like send him an email or give him a call. He can certainly carve a pipe for you that will exceed what you have in mind. You cannot go wrong with a Briar Sweat and Tears Handmade Pipe.

Topping a Badly Damaged Georg Jensen Bent Billiard


Blog by Steve Laug

In the process of going through the box of pipes for the Vancouver Pipe Club to put back the ones I had worked on, I found another that really needed attention. I just could not leave it in the box as the damage looked awful and I knew it could look so much better. It is an oddly shaped bent billiard to me but it had a quaint quality about it that I liked. It is stamped Georg Jensen over Made in Denmark Pipes on the left side and Zenta on the right side. On the underside of the shank it is stamped 525. I am assuming that is a shape number. The stem was oxidized around the shank. The bowl had been coated with varnish – even over the grit on the surface. There were also finger prints in the varnish. The worst part of the pipe was the rim. It was worn down on the front side and the varnish had covered the rough surface of the beat up briar. It was also burned on the back inner edge of the rim and onto the rim surface. The inner edge of the rim was also damaged and nicked and gouged out of round. The stem had one tooth mark on the topside near the button.
IMG_4431

IMG_4433

IMG_4434

IMG_4435

I have included the next two close-up photos to show the rim damage. The front edge is very worn, the back inner edge is burned and the inner edge of the rim is clearly gouged and marked. Fortunately the damage did not extend deeply into the bowl was limited to the top 1/8th inch of the bowl top. The bowl had also been coated with a black rubbery bowl coating. I chose to leave it as the bowl also had some gouges in the bottom from the knife that someone used to ream the bowl.
IMG_4436

IMG_4437

I set up my board and sandpaper that I use for topping pipe bowls and sanded the top of the rim. This one was a little tricky in that the front slope was lower than the rest of the rim. I worked the back half of the rim first to bring the height down to the same place as the highest portion of the front slope. Once I had that done it was an easy matter to proceed with topping the rest of the rim. I worked until I had removed the burn damage and the rough front edge and had a flat, smooth and rim with an even circumference.
IMG_4438

I wiped the bowl down with acetone on cotton pads to remove the varnish coat and the rest of the finish so that I could blend in the stain on the freshly topped rim with the rest of the pipe.
IMG_4439

IMG_4440

IMG_4441

IMG_4443

I used MinWax Red Mahogany stain to restain the pipe. I rubbed it on and then wiped it off several times until I had the even coverage I wanted on the bowl. I had buffed it with a cotton cloth to give it a slight shine and get a feel for the overall look of the stain on the bowl. I retouched the stain on the rim to darken it slightly. I lightly buffed the bowl with White Diamond and gave it an initial coat of carnauba wax.
IMG_4444

IMG_4445

IMG_4446

IMG_4447

The tooth mark on the top of the stem needed to be heated to lift it as much as possible and then I used some superglue to finish the repair. I sanded it with 220 grit sandpaper to feather it into the surface of the stem. I followed that with a medium and fine grit sanding sponge. I finished the stem with my usual array of micromesh sanding pads – wetsanding with 1500-2400 grit pads and dry sanding with 3200-12,000 grit pads. I rubbed the stem down with Obsidian Oil and then buffed the pipe with White Diamond. I gave it multiple coats of carnauba wax to finish. The completed pipe is shown in the photos below. I also included a photo of the top of the rim to show the repair. The pipe is now ready to join the rest of the ones heading to the Vancouver Pipe Club. It should provide years of service to the pipeman who takes it home.
IMG_4450

IMG_4451

IMG_4452

IMG_4453

IMG_4454