Blog by Dal Stanton
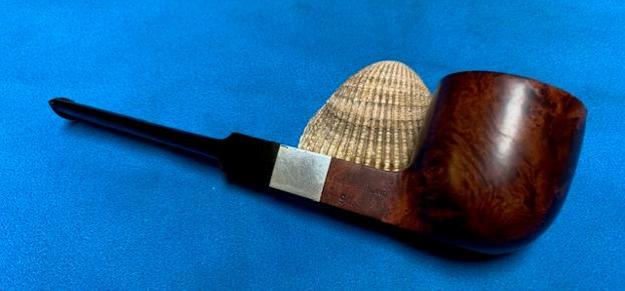
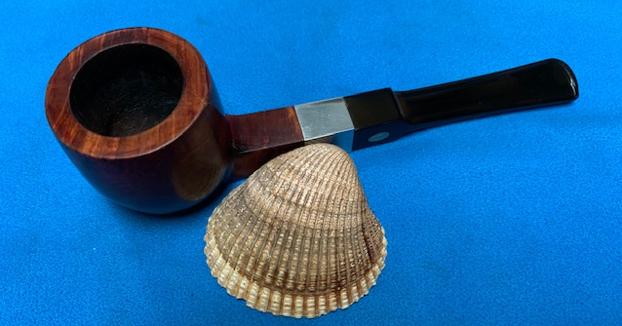
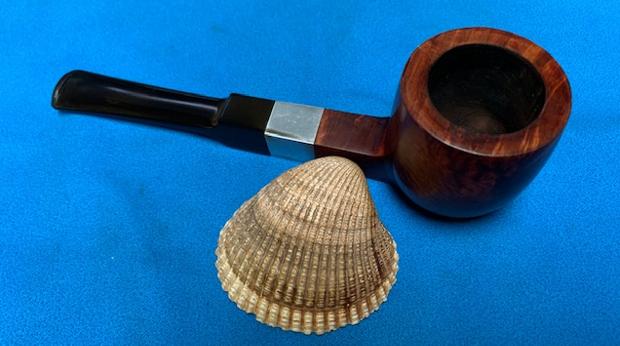
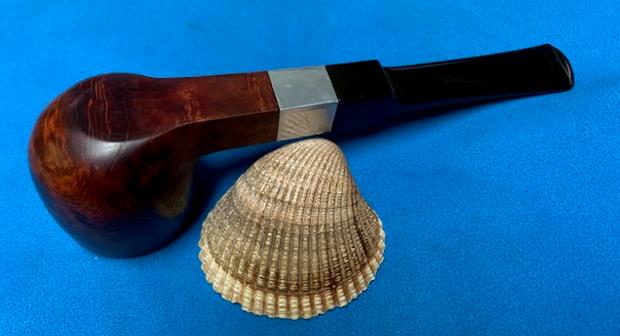
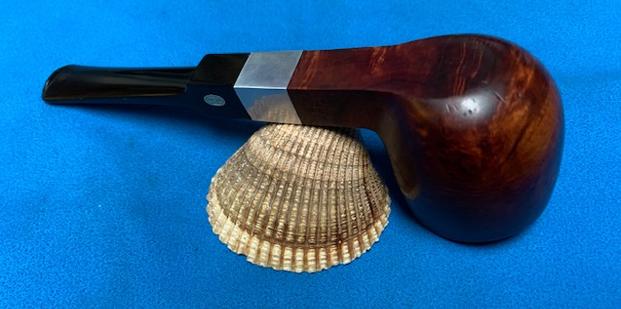
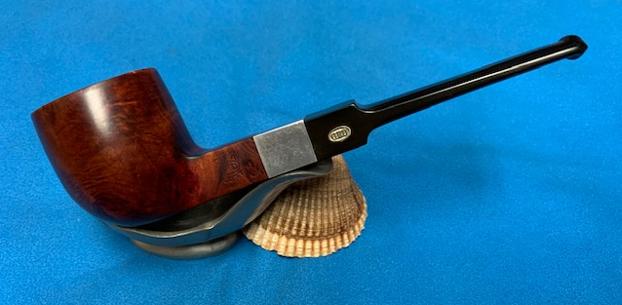
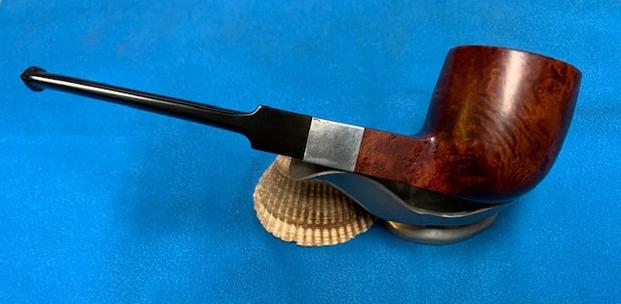
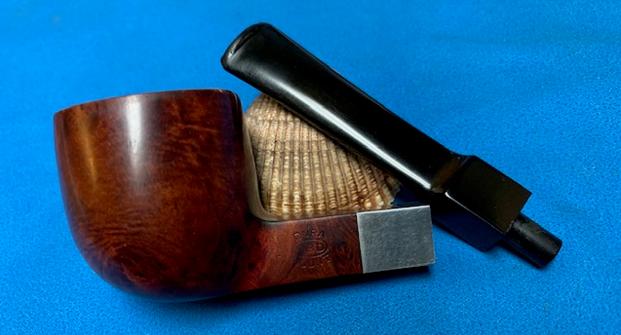
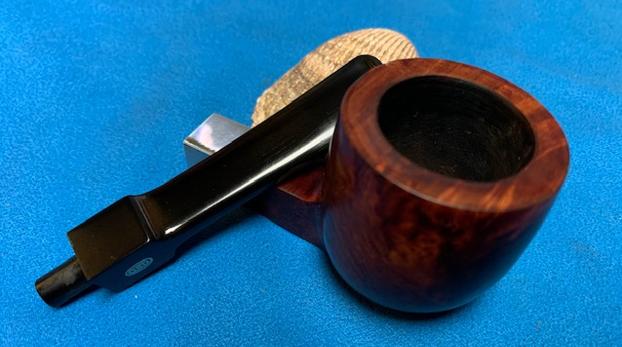
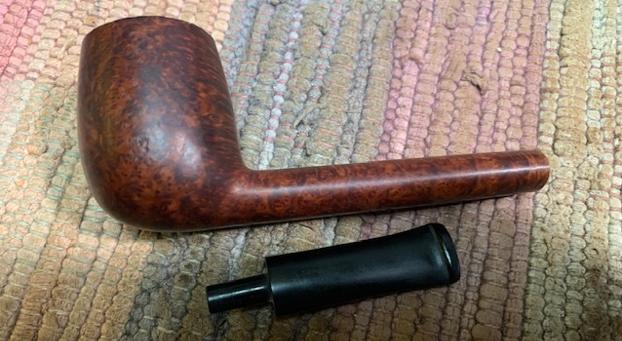
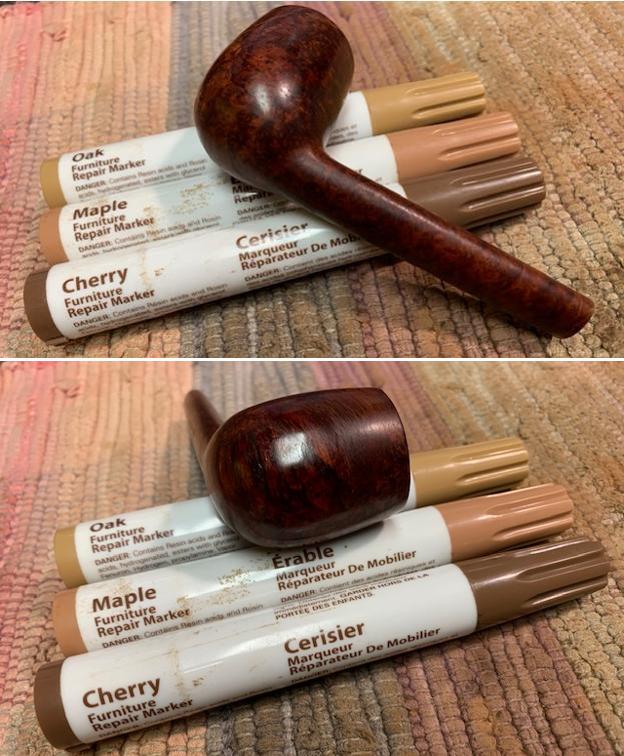
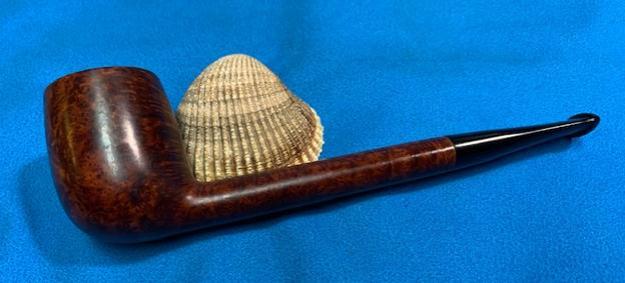
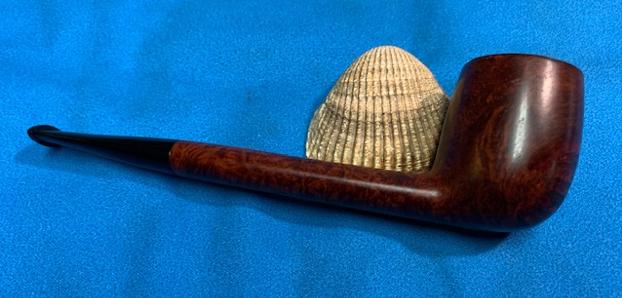
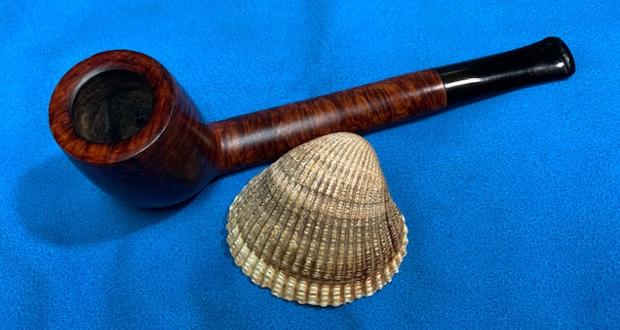
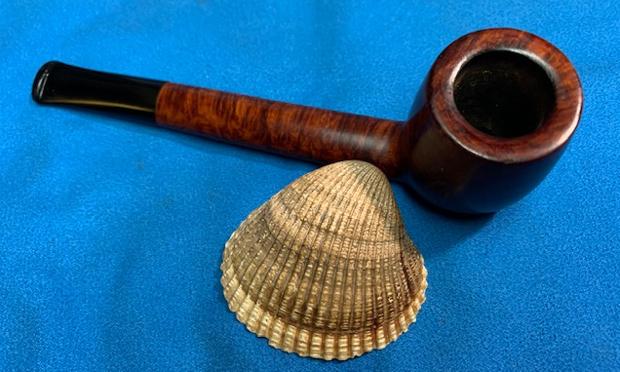
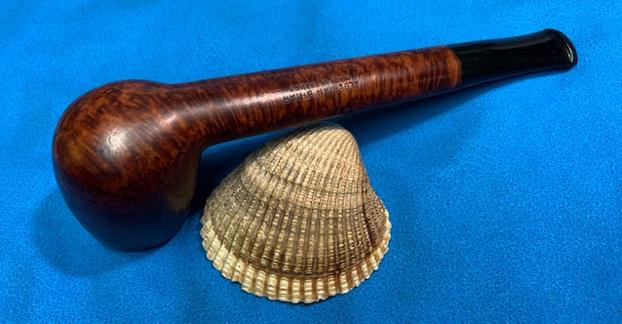
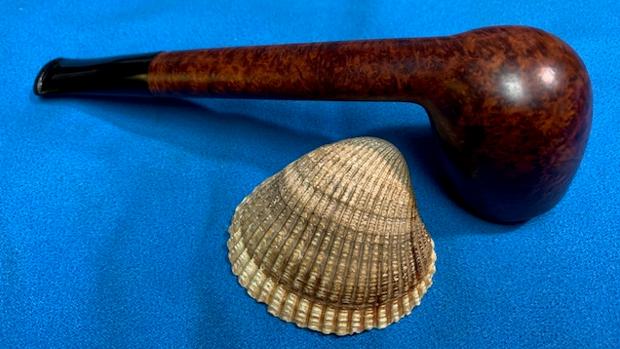
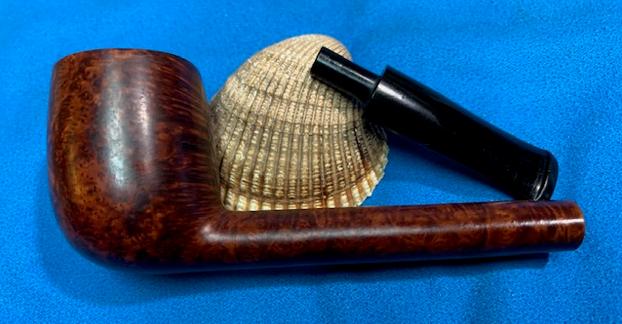
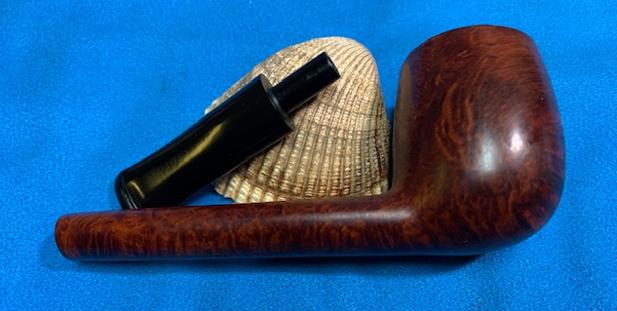
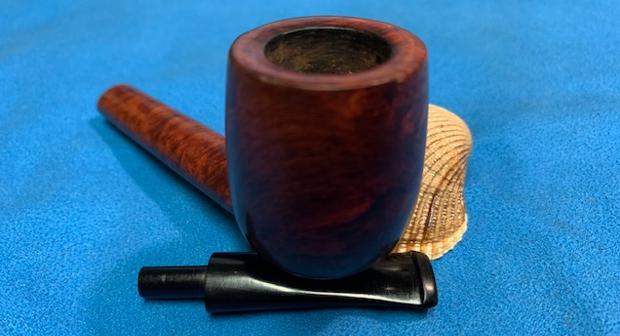
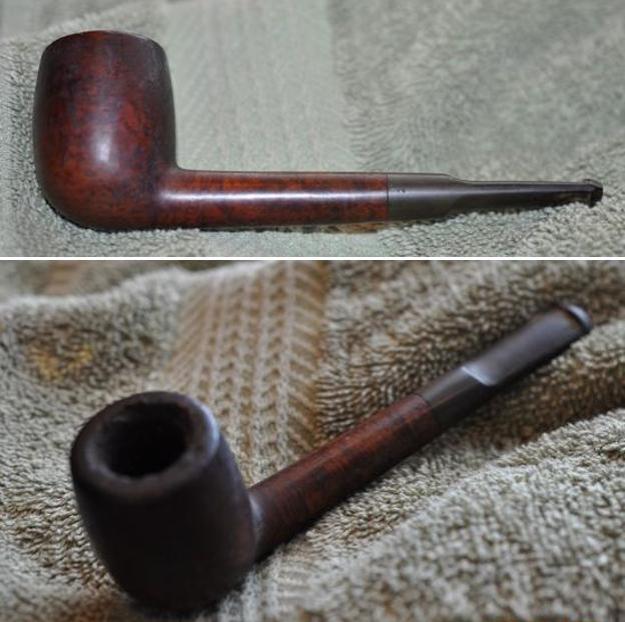
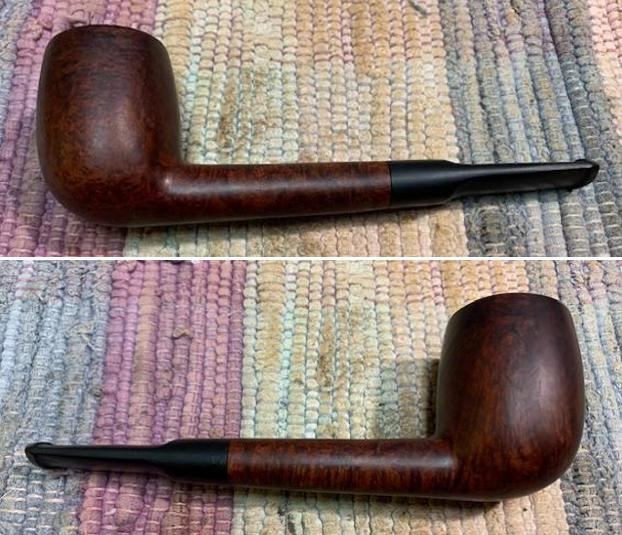
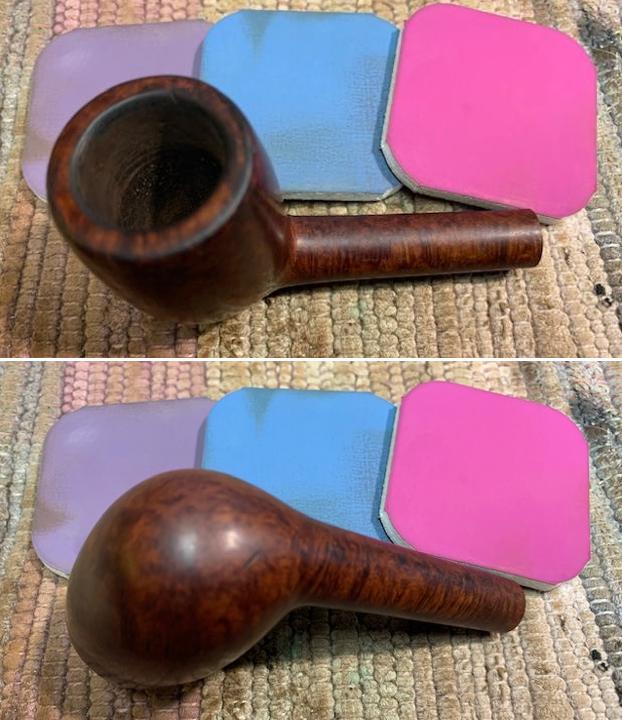
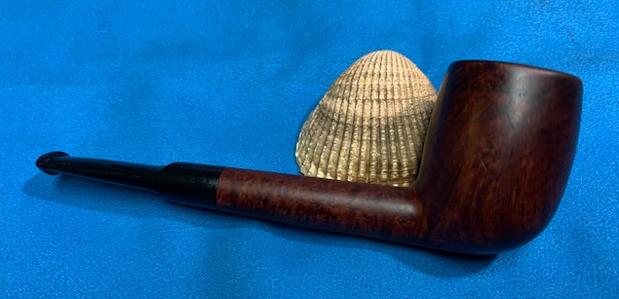
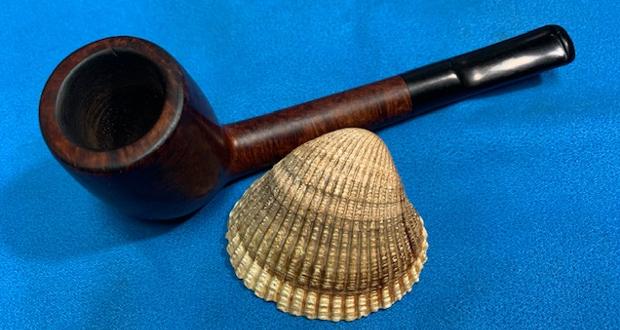
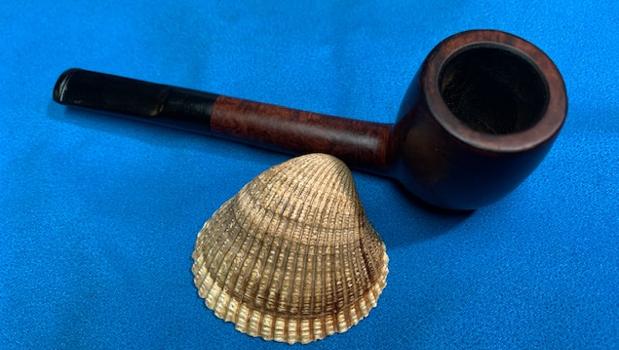
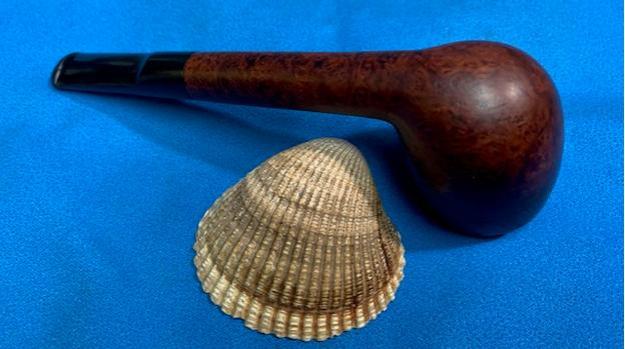
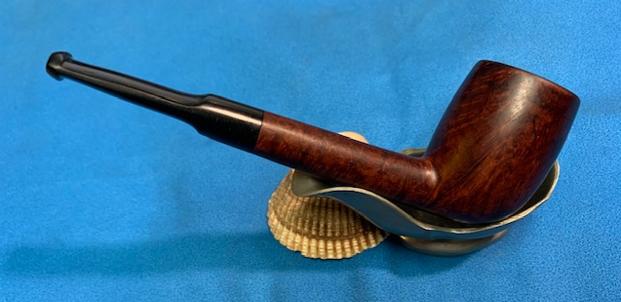
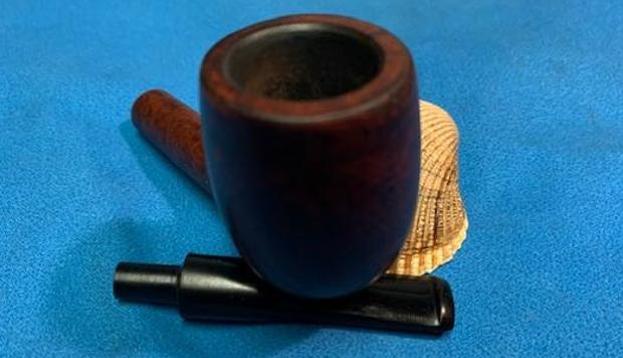
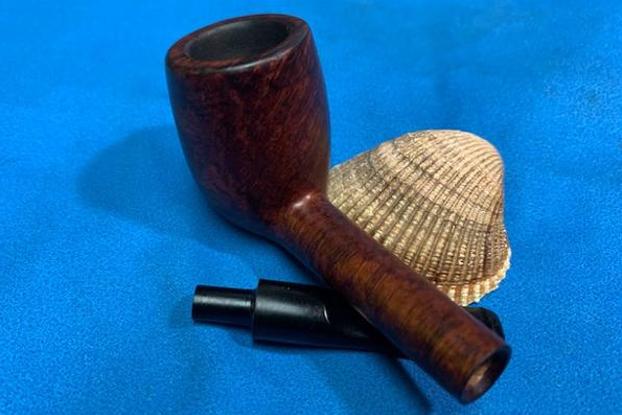
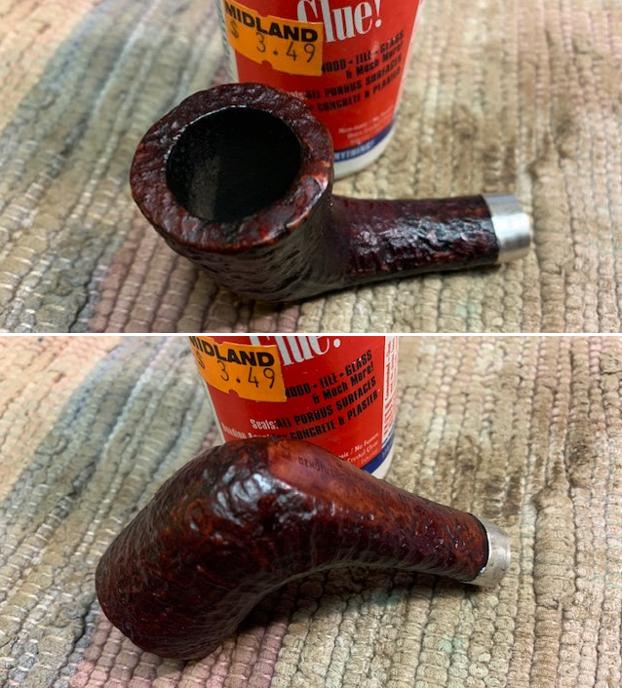
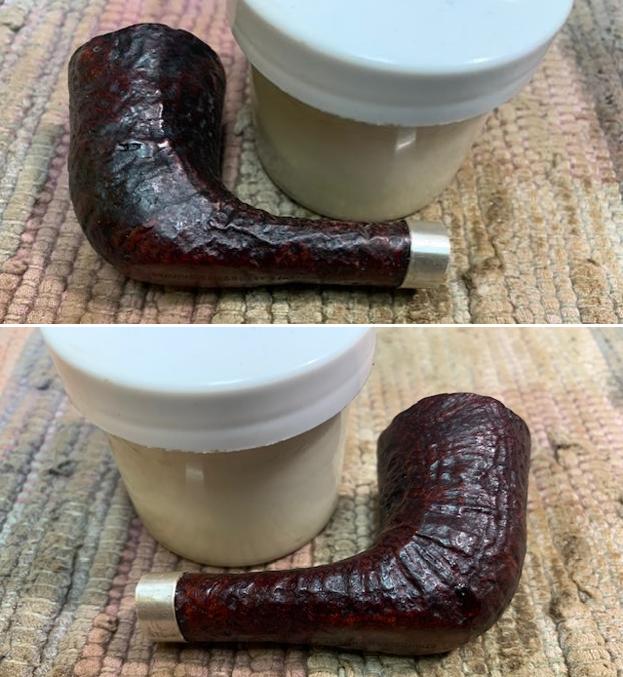
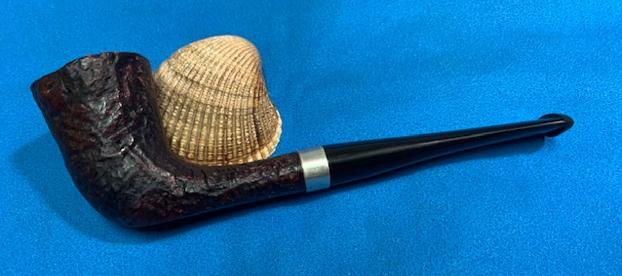
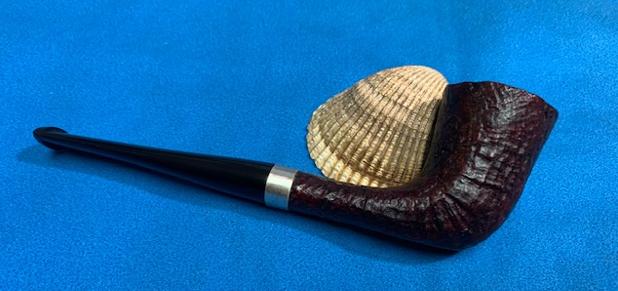
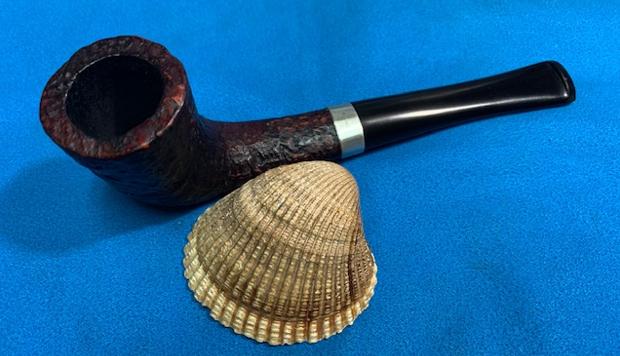
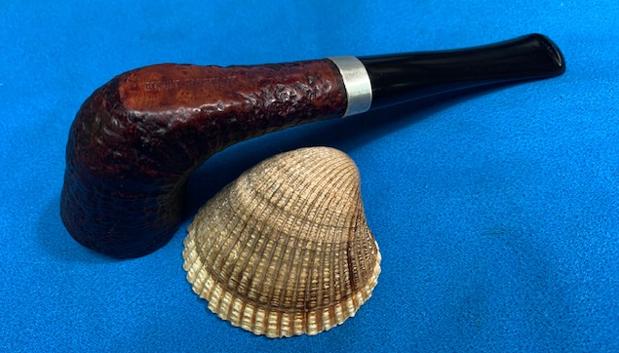
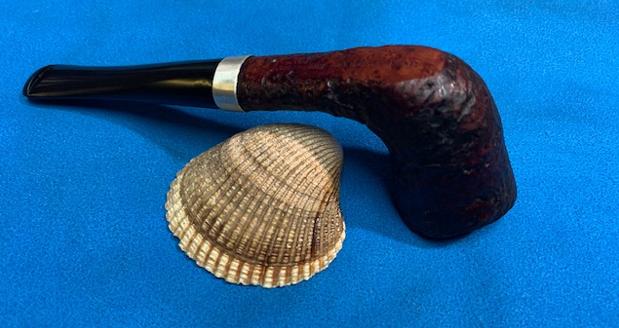
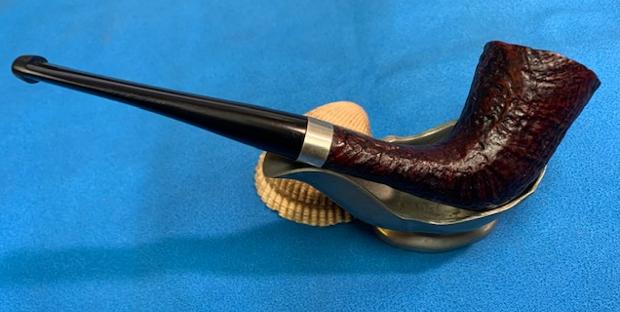
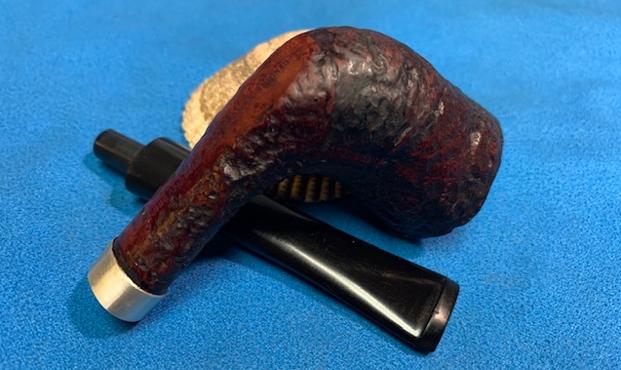
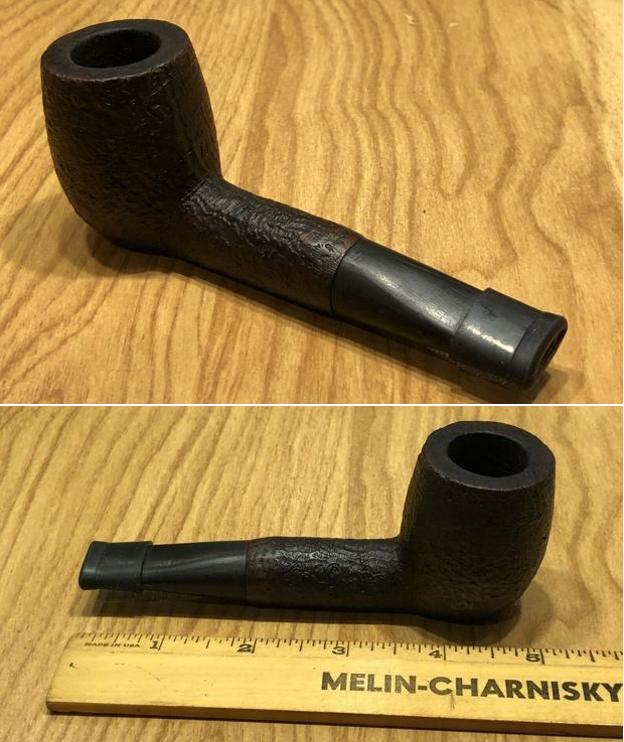
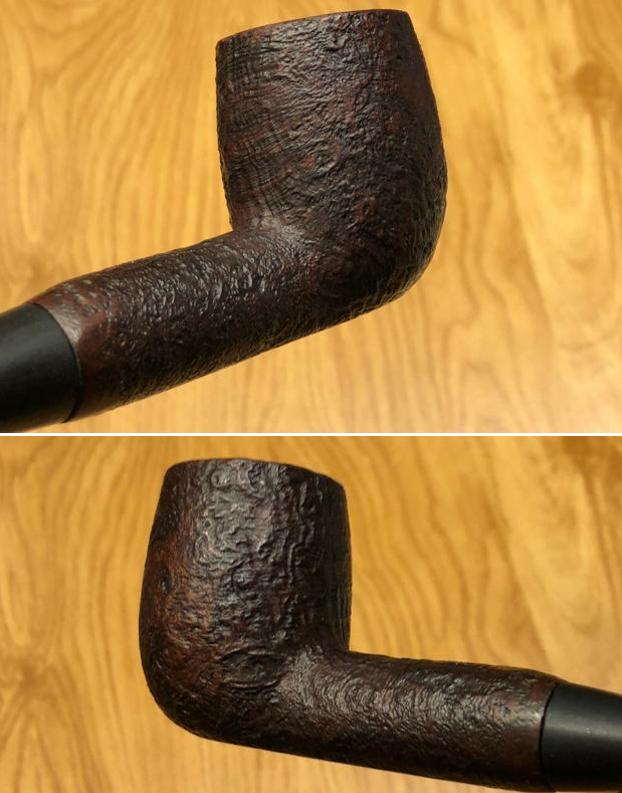
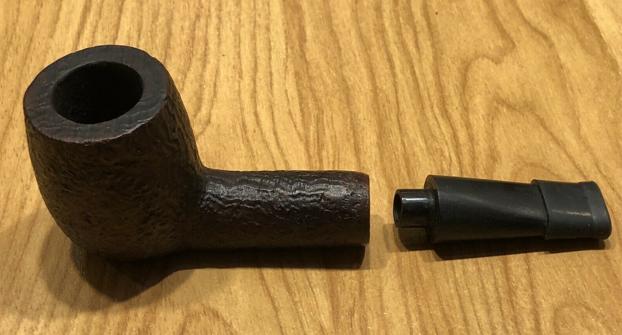
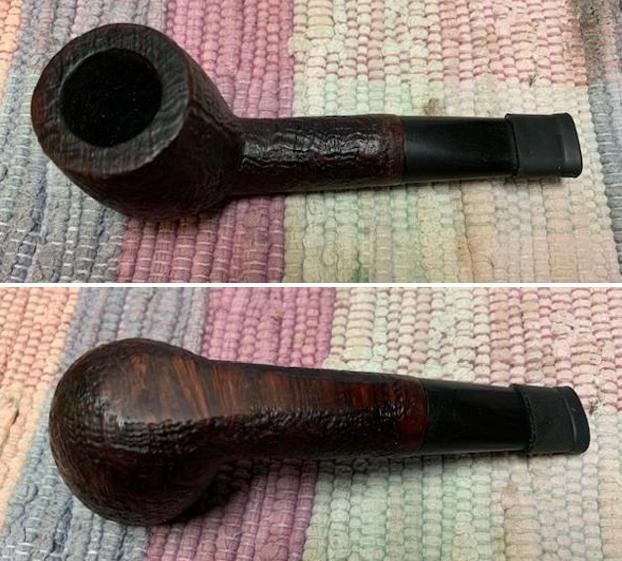
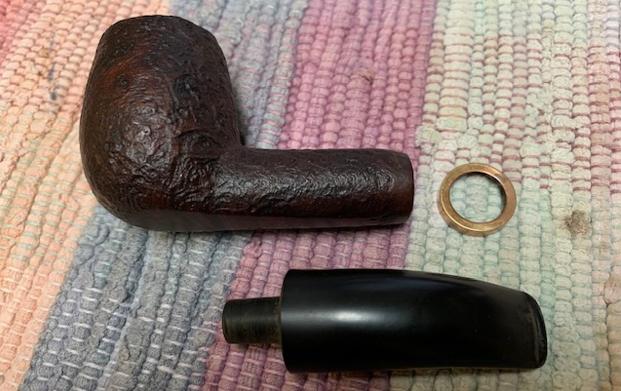
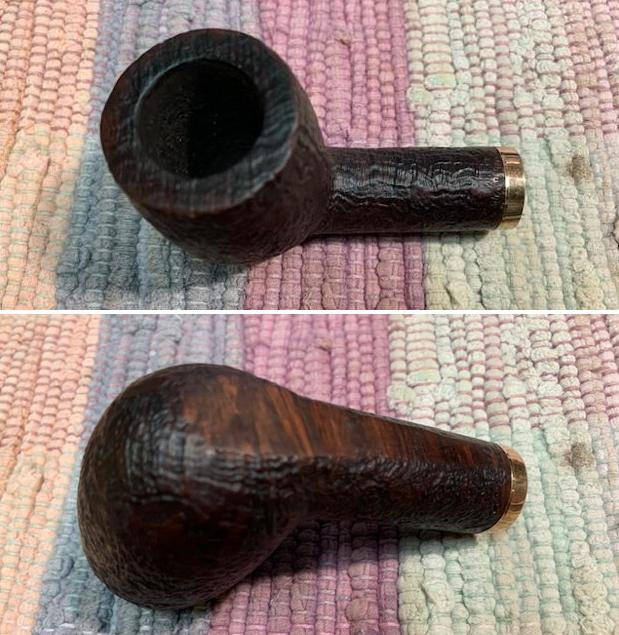
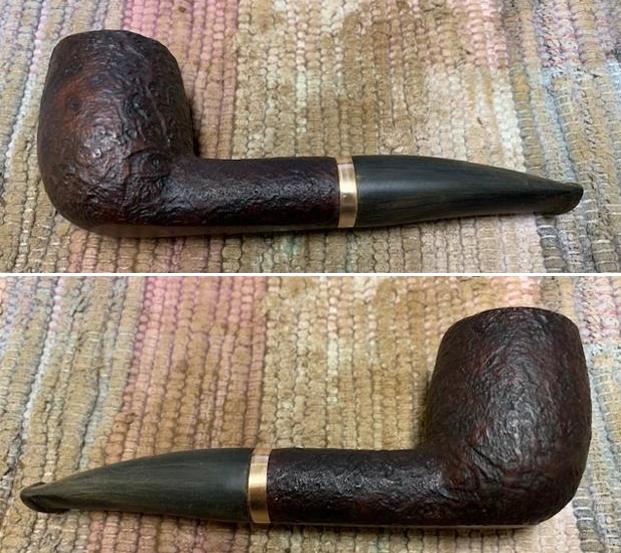
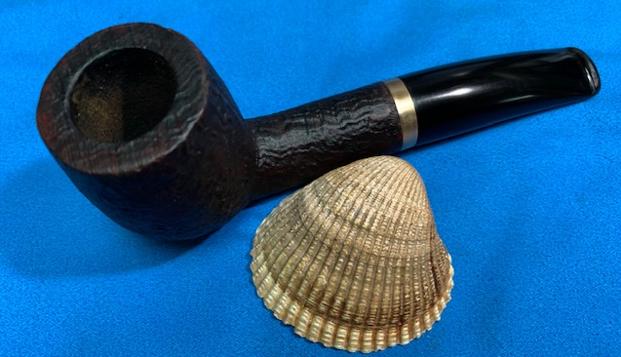
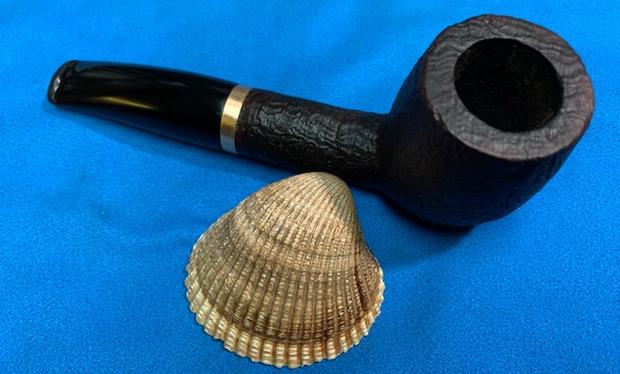
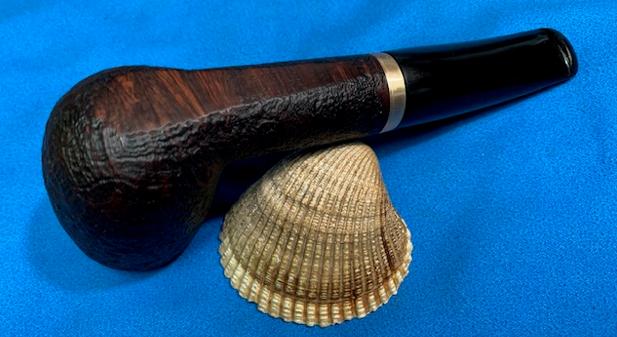
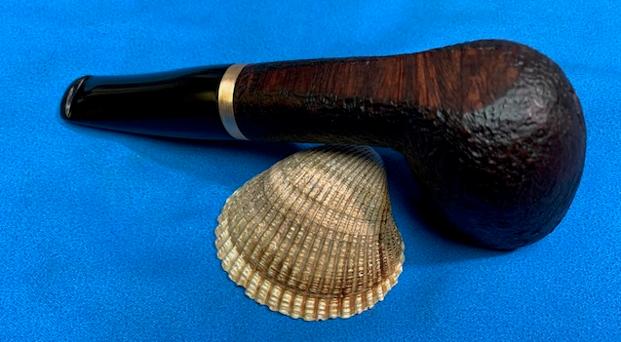
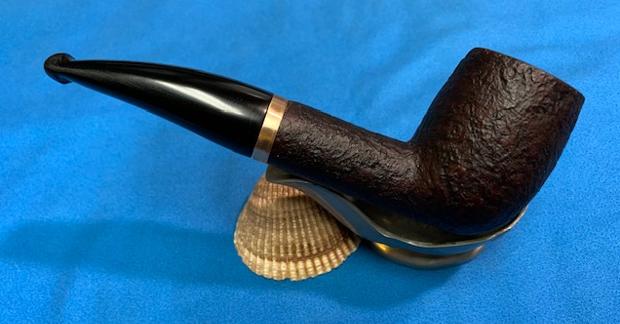
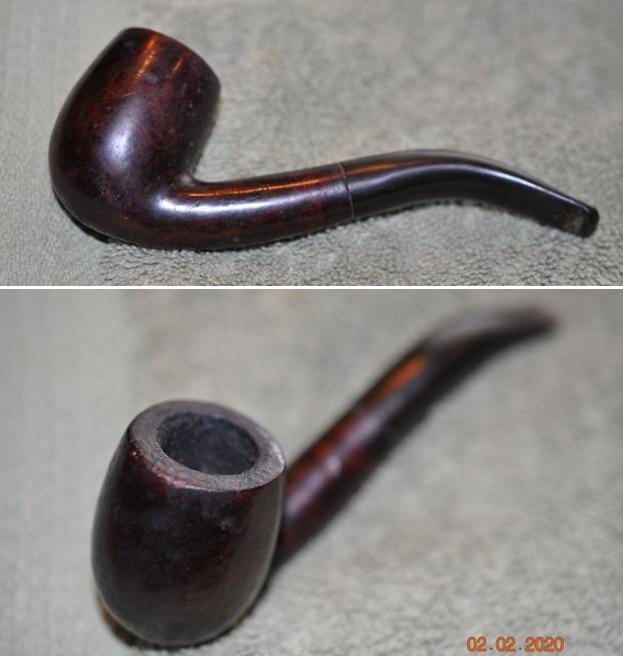
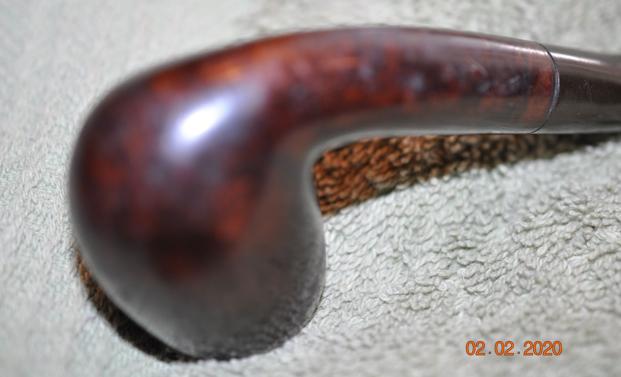
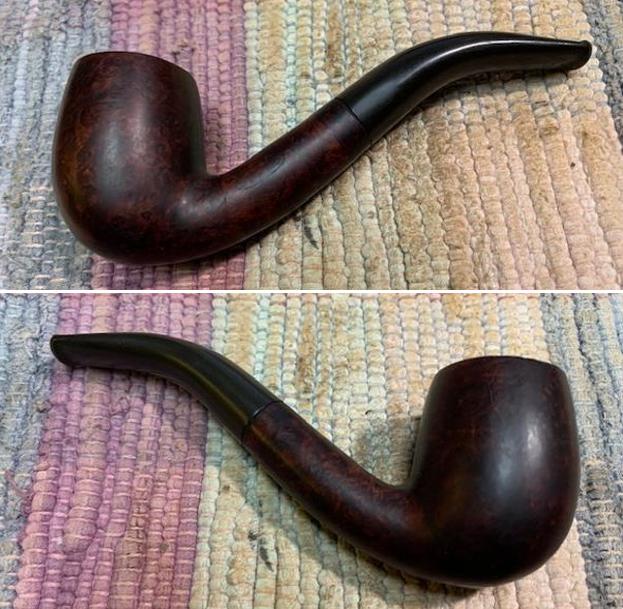
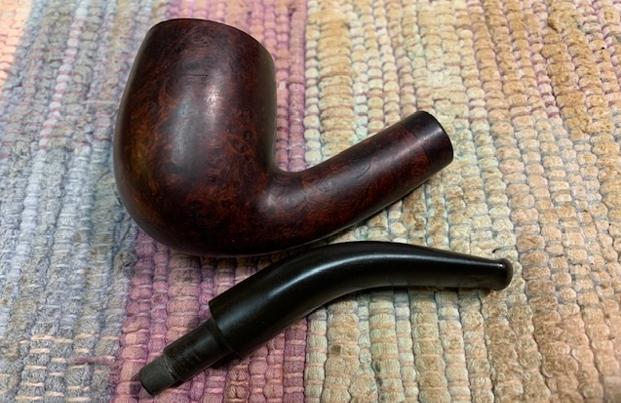
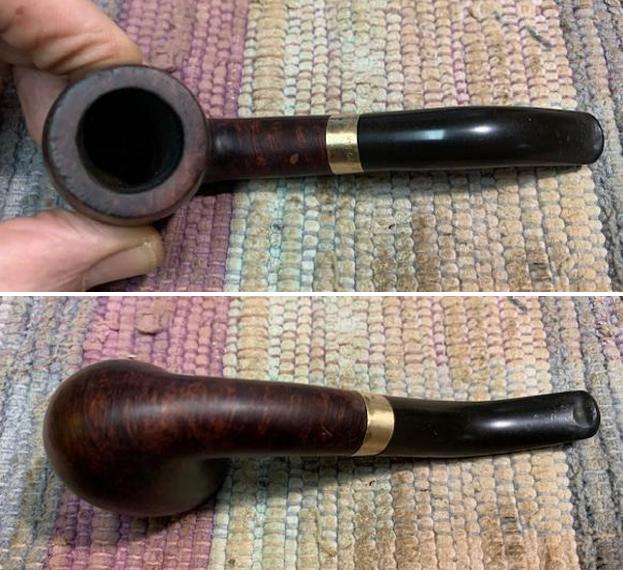
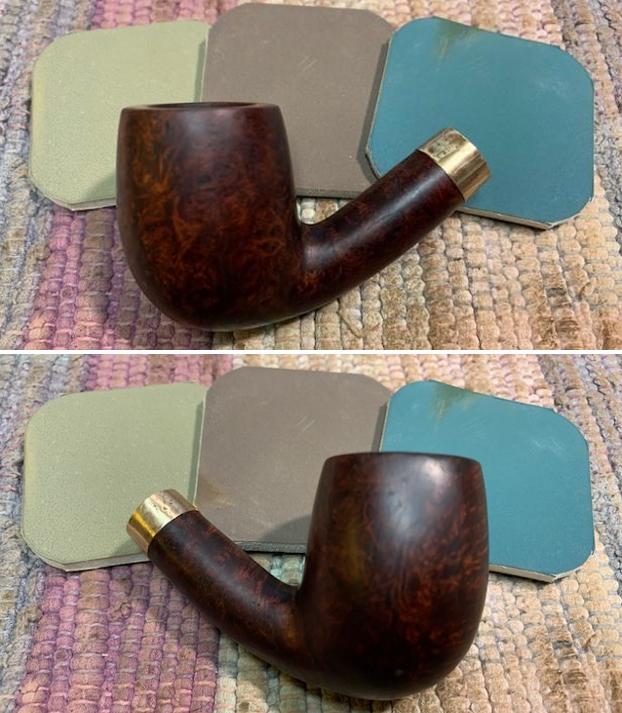
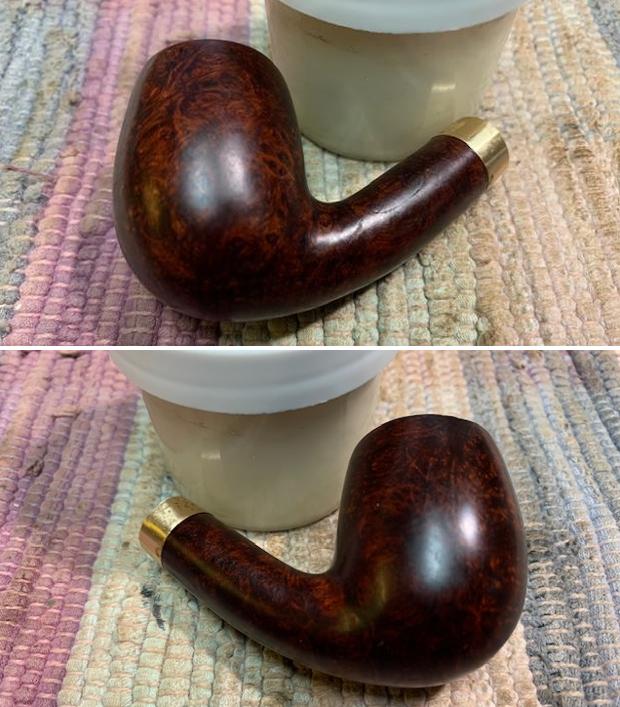
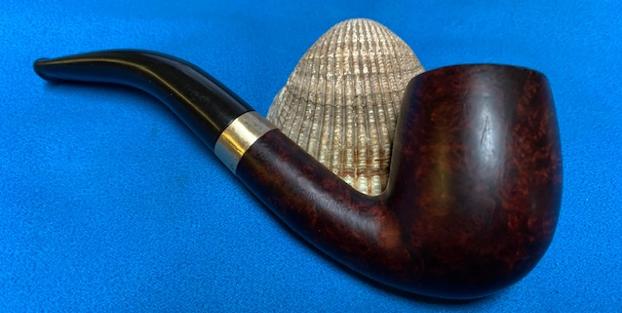
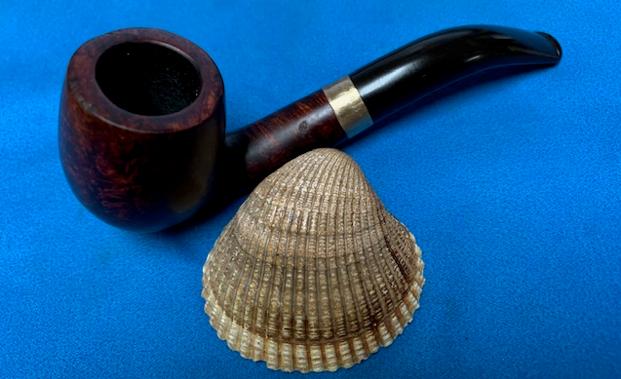
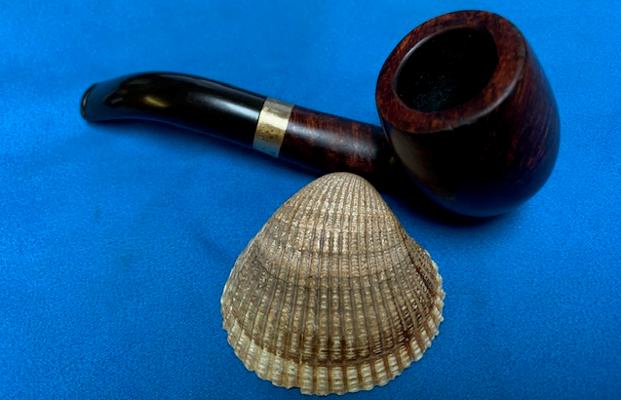
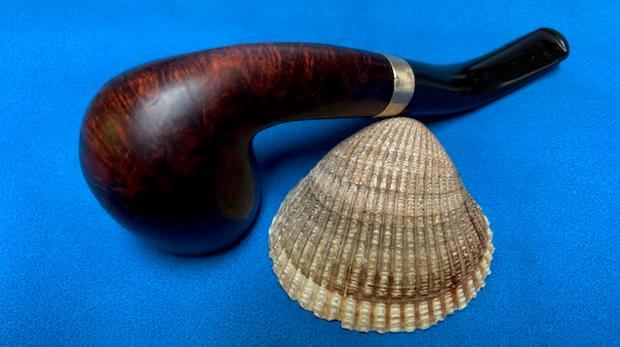
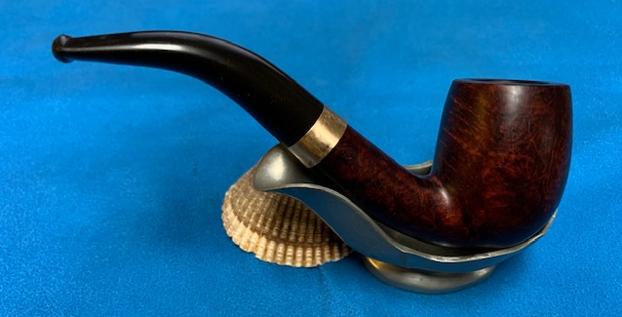
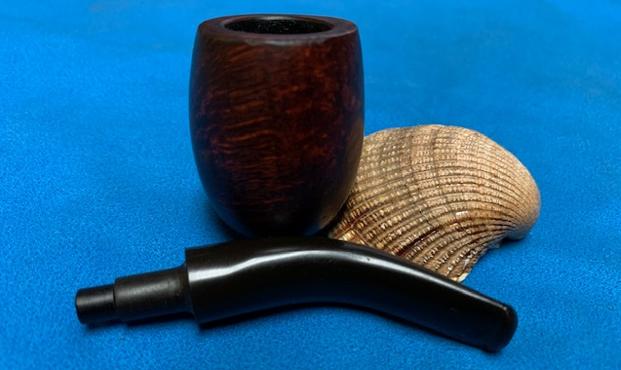
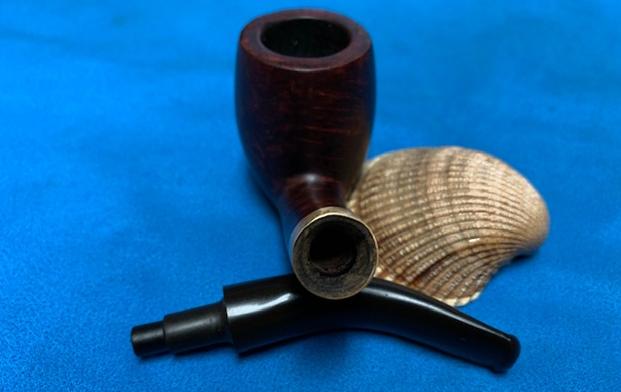
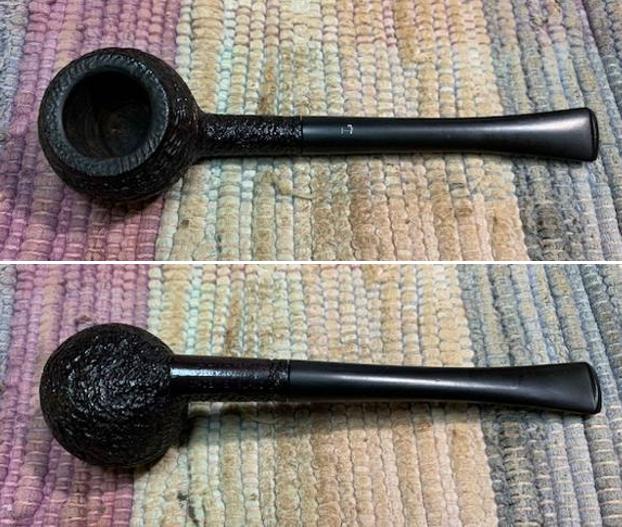
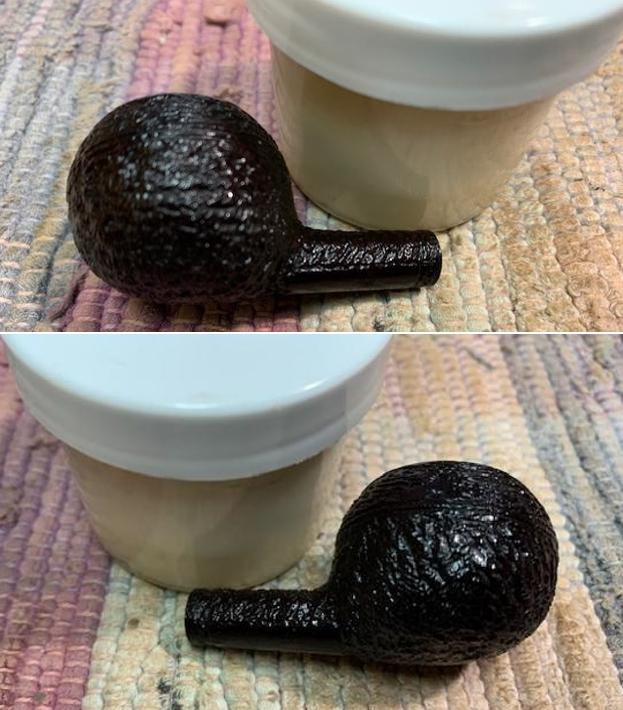
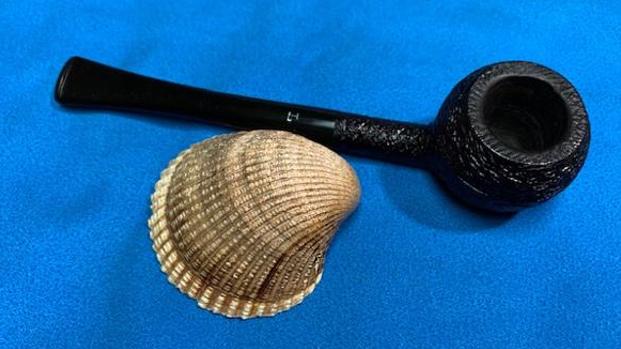
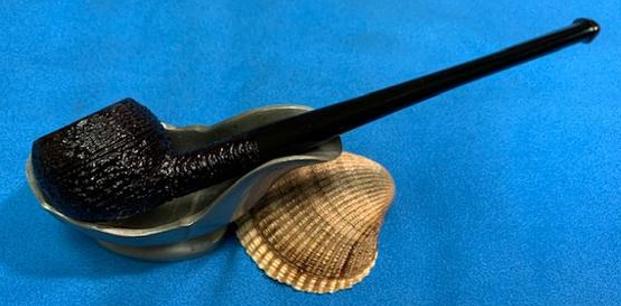
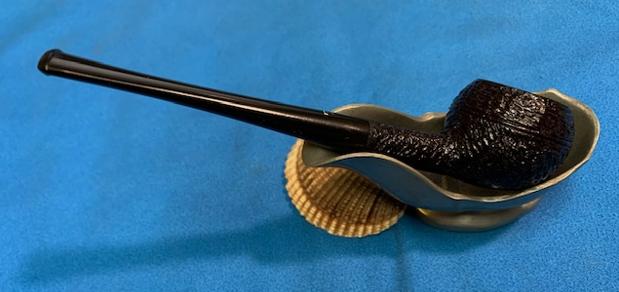
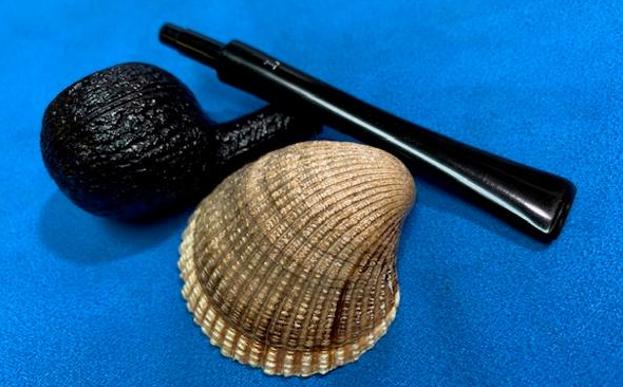
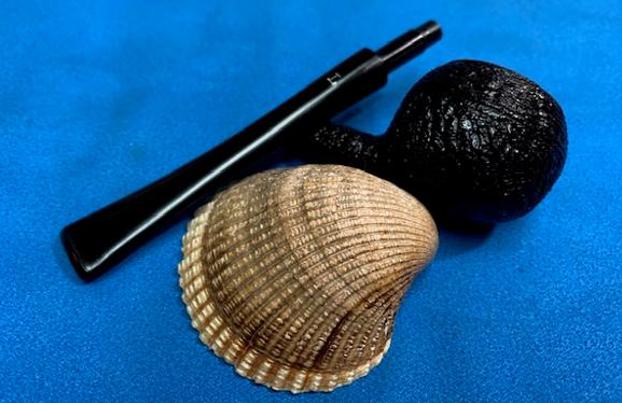
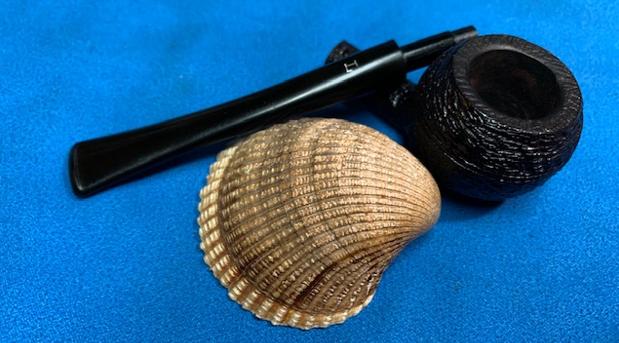
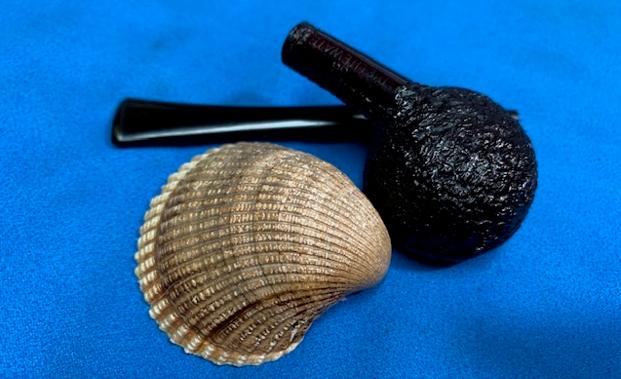
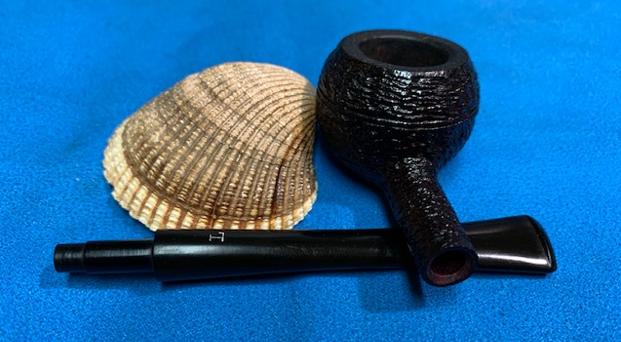
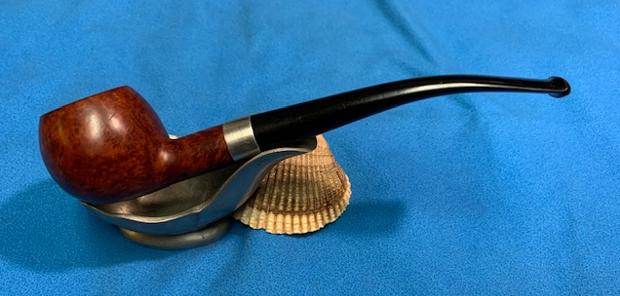
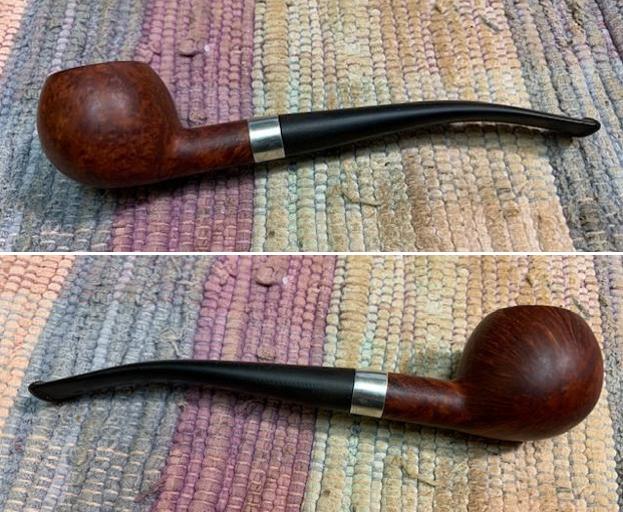
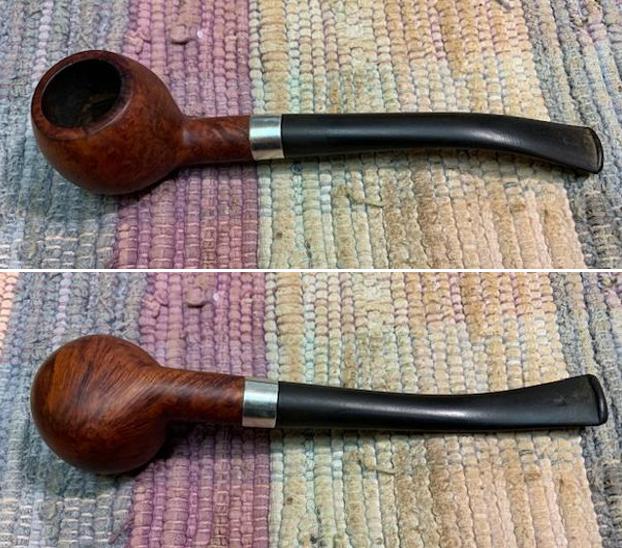
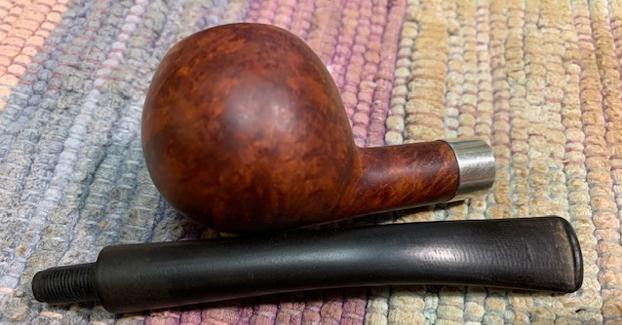
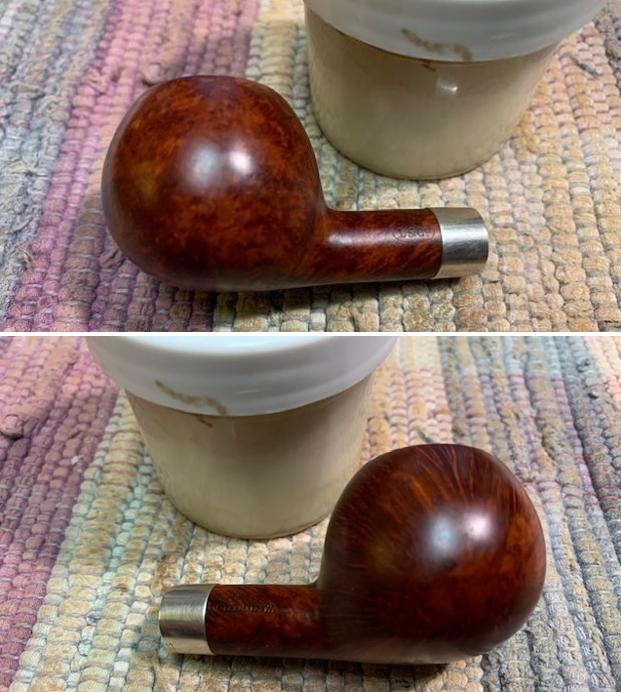
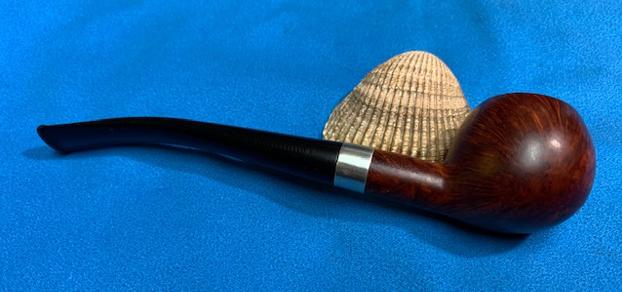
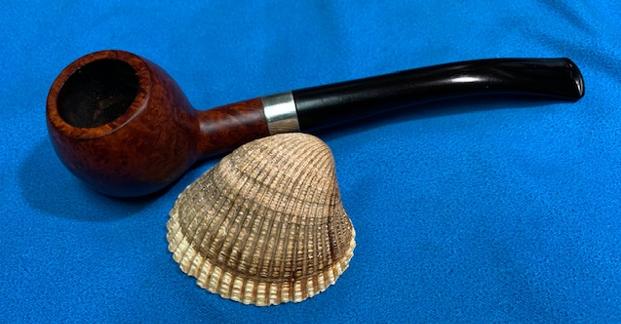
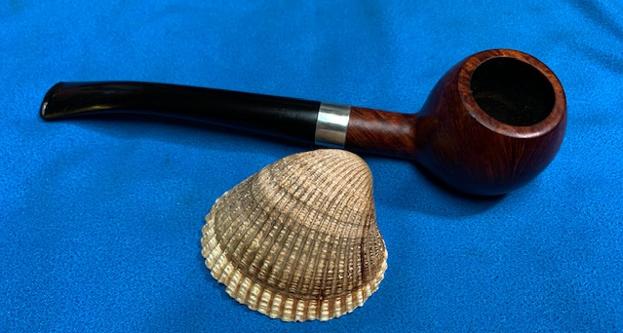
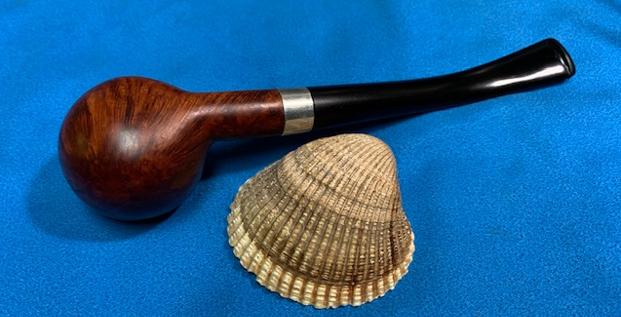
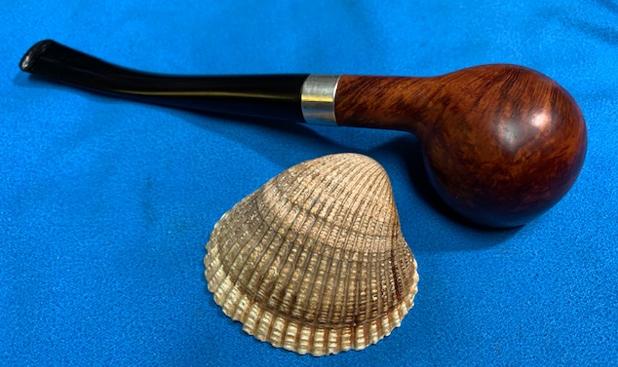
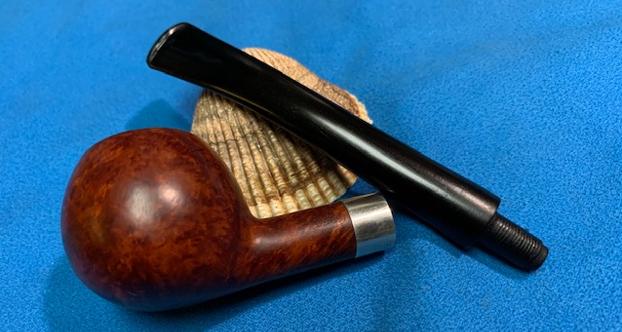
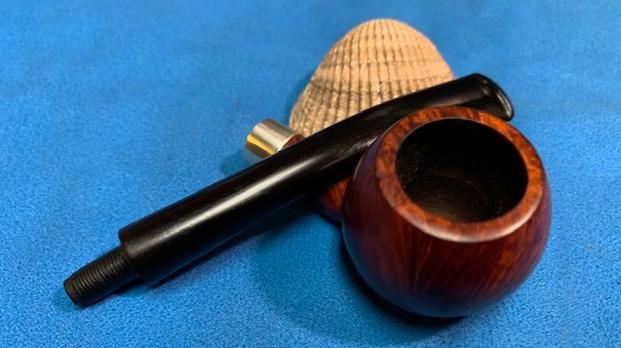
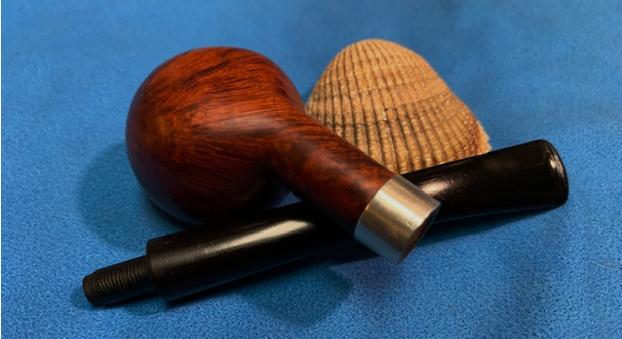
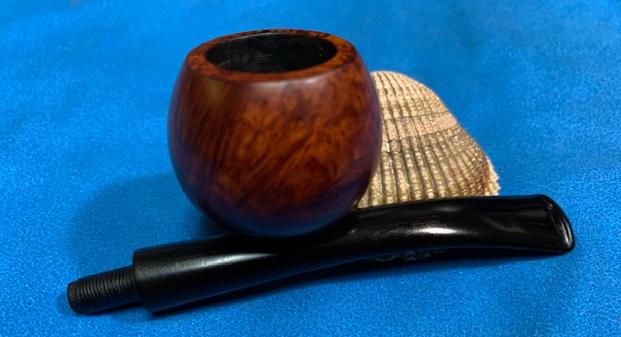
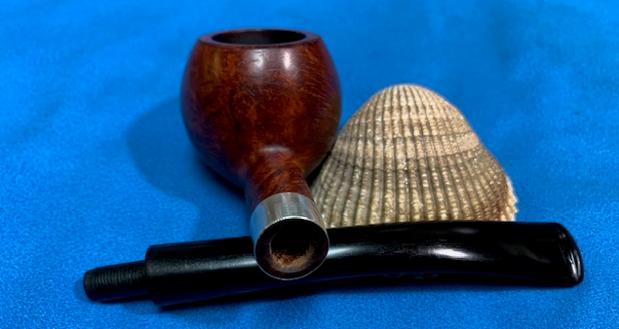
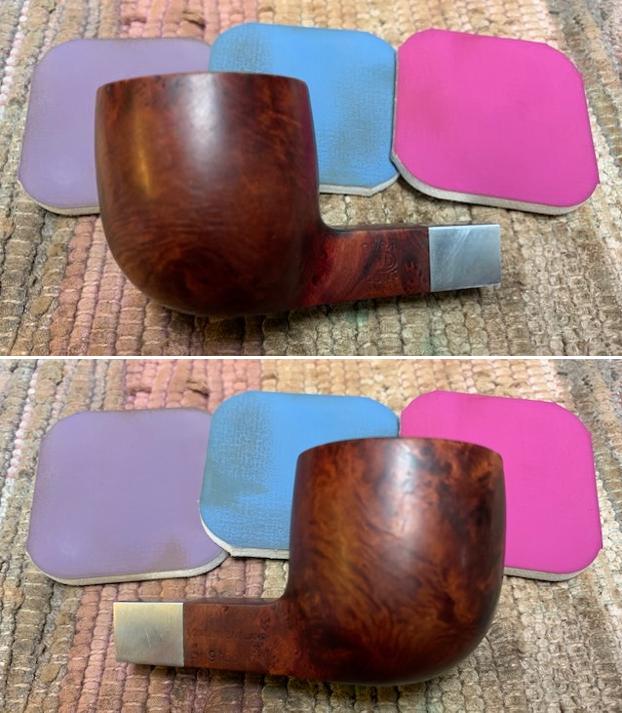
After having enough snow in Golden, Colorado, my wife and I packed up and decided that continuing to wait out COVID would be more enjoyable in sunny Florida. Staying a few weeks visiting family in Port St. Lucie, would mean thawing temperatures and sunshine. The next pipe on my mobile worktable is an attractive half bent Billiard that I acquired in December of 2017 on the auction block from a seller in Fort White, Florida. Fort White is a small town in north-central Florida that was named for a fort that was built there in the 1830s back when Florida was still wild and unsettled except by very rugged, tough folk and entrepreneurs who could see the possibilities. I was surprised to find that the nomenclature on the pipe also has its origins in Florida. Here are pictures of the Bennington Supreme Half Bent Billiard.

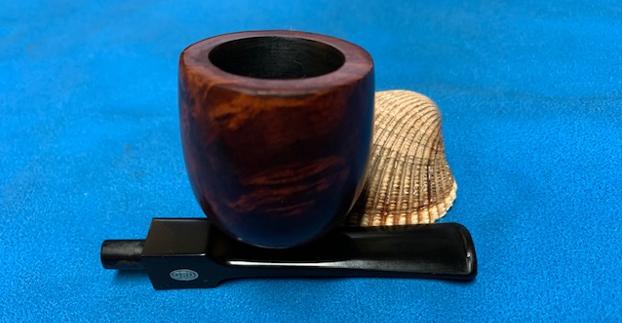
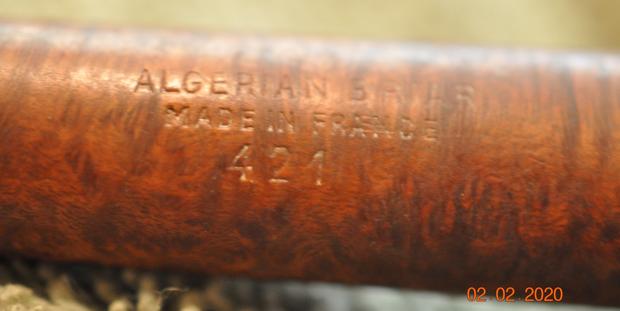
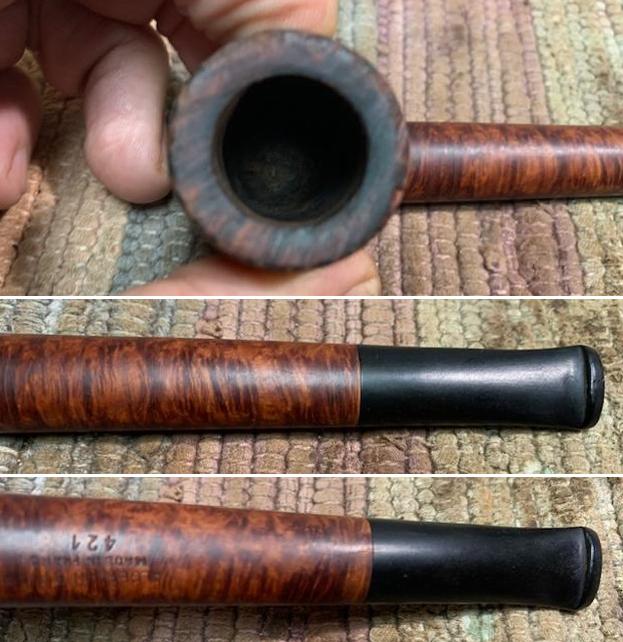
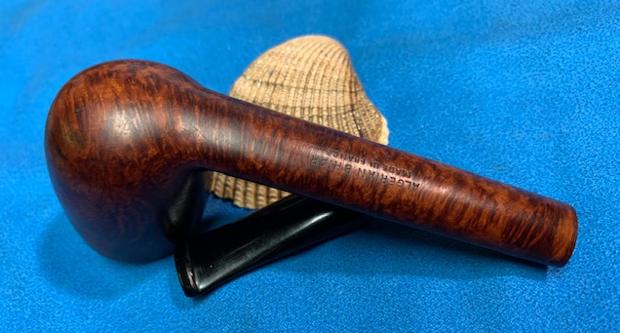
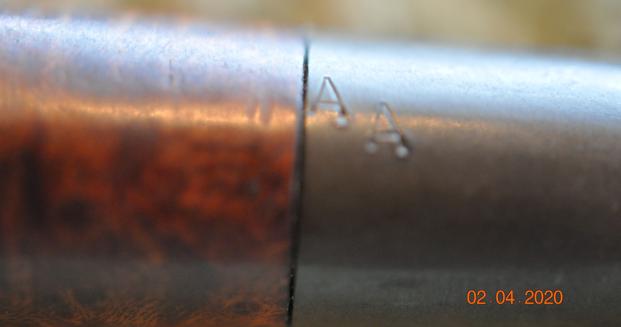
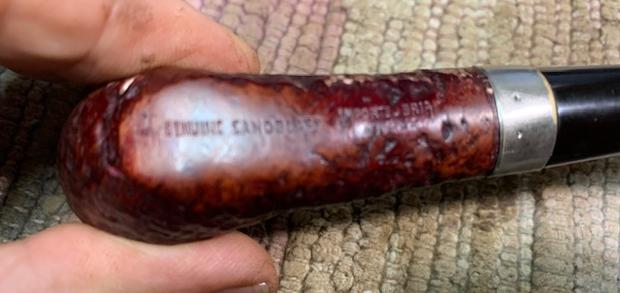
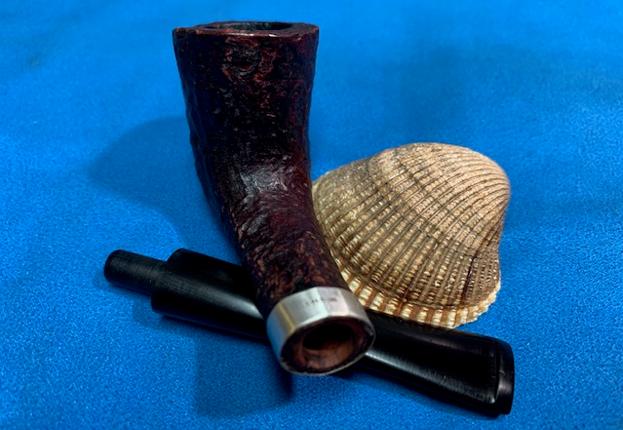
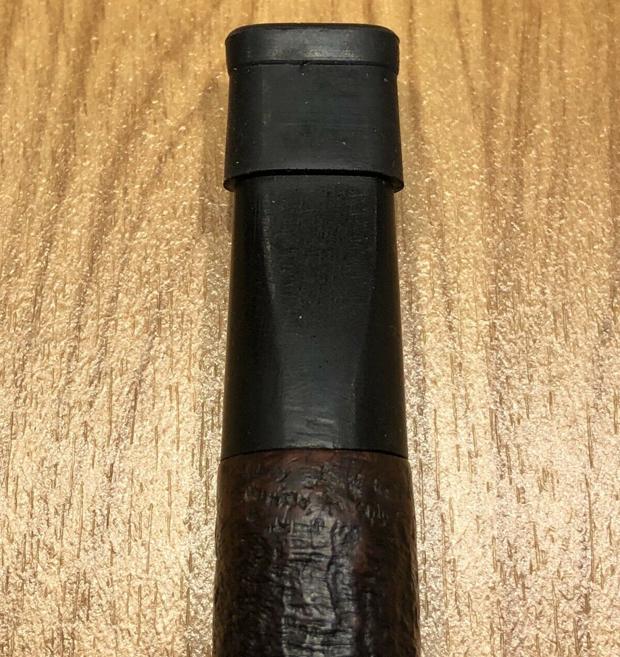
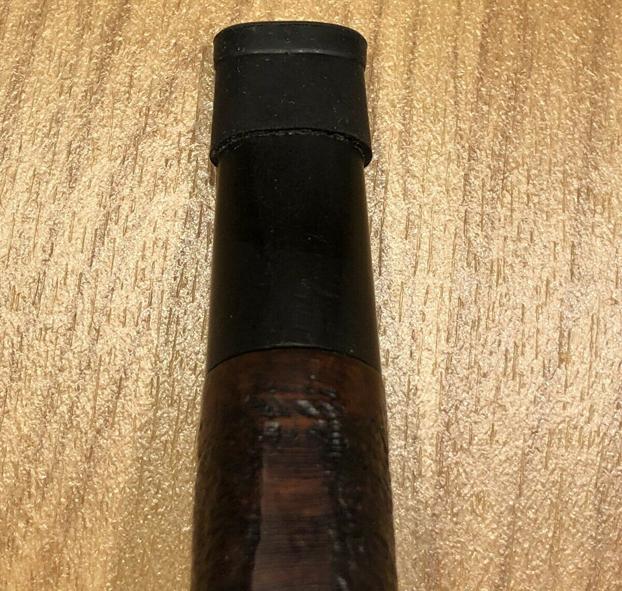
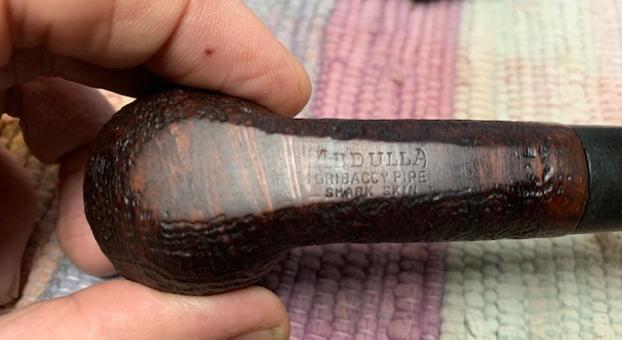
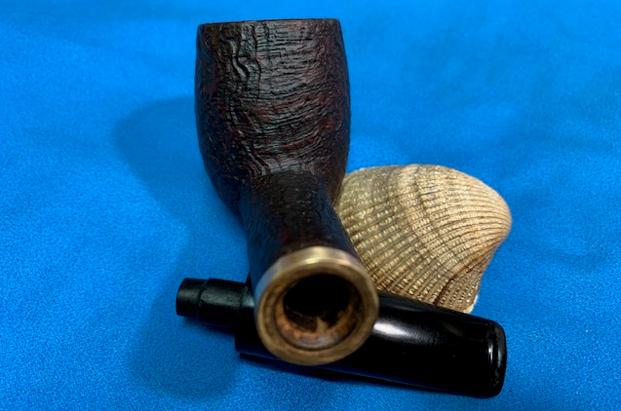
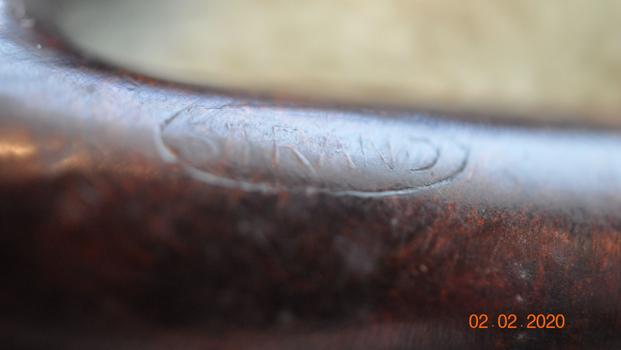
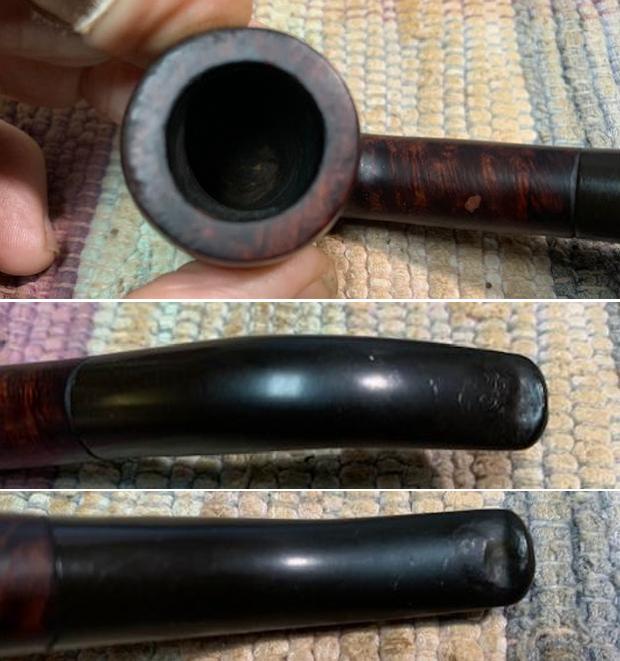
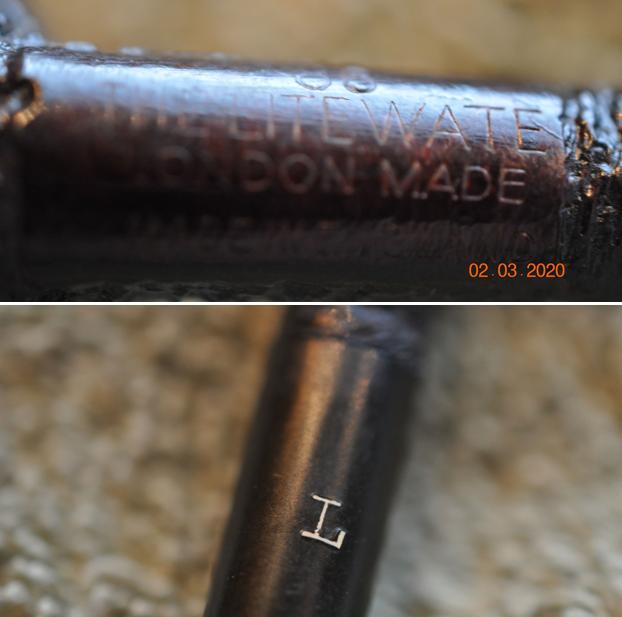
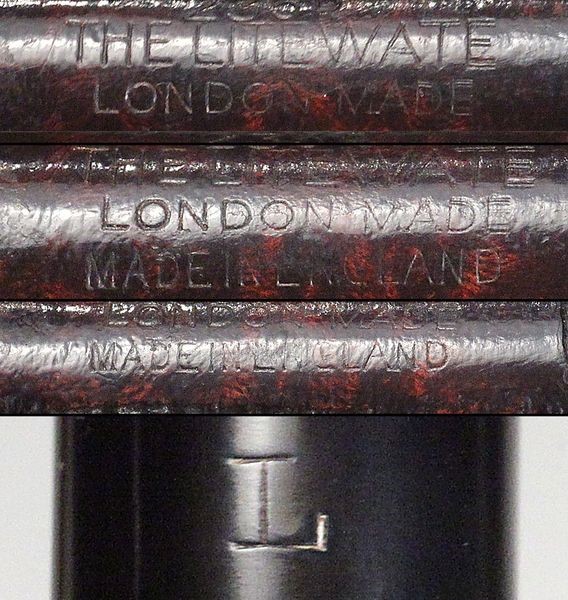
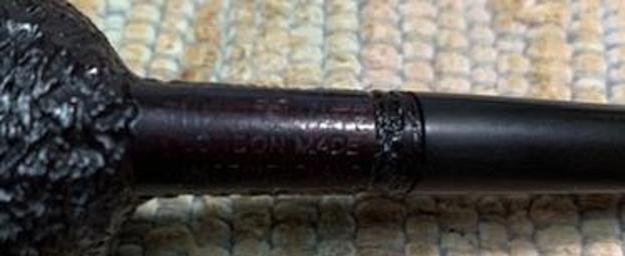
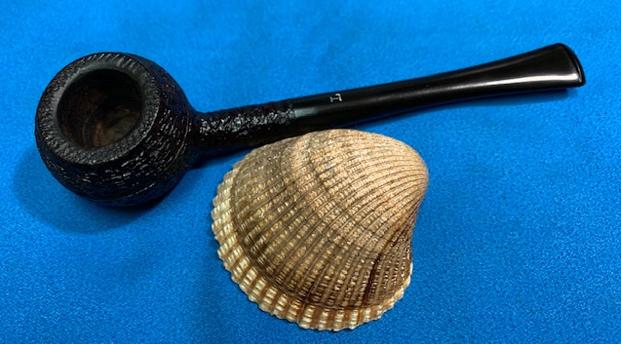
 The left flank of the shank is stamped with an old English script, ‘Bennington’ [over] SUPREME. The stem also has a ‘B’ logo stamping.
 Bill saw this attractive pipe in the For “Pipe Dreamers” Only collection and reached out to me. It was great to hear that Bill is a friend of Lizzy’s brother, Paul. Lizzy is a colleague we worked with in Bulgaria for many gratifying years. Lizzy’s family served in Czech Republic for several years when she was younger, and these seeds of adventure continued to fruition with her work today in Bulgaria. Her parents have returned to Czech after several years in the US and Lizzy’s brother also worked and studied in UK and recommended The Pipe Steward to Bill – the pipe world is a small world demonstrated again! Bill wrote these words:
I’m new to pipes, but like smoking and have always wanted one. I looked through the pipe dreamers section and found a few I like. I guess as a novice pipe smoker, is there any info I need to know before choosing one? I’m basically choosing based upon the look, not necessarily how easy a particular pipe might be to smoke or whatever other things there are to consider. I’d love some help.
I responded to Bill describing my philosophy of pipe acquisition: the Harry Potter approach:
Here’s the truth, the best way to start cultivating a collection of pipes is to simply choose one! I subscribe to the Harry Potter school of pipe choosing 😊. Like magic wands, the steward doesn’t choose the pipe but the pipe chooses the steward. You have listed two very similarly shaped pipes – both classic bent Billiards. Billiards are the most widely smoked pipes and the difference between a bent and straight billiard is obviously the stem, but more than that, the mood the steward is in. Each pipe has its own personality, and it takes time getting used to how they smoke and what they smoke best – types of tobacco. But your selections are great starter pipes. My choice would probably be the Bennington Supreme because of its provenance and it appears to be a higher quality pipe from a simple glance.
Bill commissioned the Bennington and added that Bennington, Vermont, had a special place in his affections so the Bennington Supreme would be a good match – the pipe has already been whispering to Bill! I have never worked on a ‘Bennington’ before and was unfamiliar with the name. I was surprised when Bennington popped up very quickly in Pipedia. The article about Bennington revealed that the pipe on the table was a shop pipe from a tobacconist based in Florida. I discovered that pictures on Pipedia had come from the Bennington website which was full of the shop’s history and offerings that would please both pipe men and women as well as cigar aficionados.  I include the entire Pipedia Bennington article which is cool – authentic tobacconists that mix tobaccos and provide the setting to enjoy the aromas and fellowship are an endangered part of tobacco pipe culture. The article reads:
Bennington Tobacconist is located in Sarasota and Boca Raton, Florida, and has sold several lines of pipes over the years made by fine companies, including the Bennington Royale, made by Savinelli, the Bennington Belfast, made by Peterson, and others.
 From the company website: William Bennington founded Bennington Tobacconist in 1965. With careful consideration, the location was determined. Saint Armands Circle in Sarasota, Florida. (On the West Coast). Mr. Bennington had the foresight to institute custom hand mixed tobacco blends and hand rolled cigars. Being a family-operated tobacco shop; his three sons, Jack, Jim, and Garry grew up in the business (twenty years of experience). They learned the meaning of service, quality, and hard work.
As the business grew, there was a need to expand the operation. A three-year search was conducted for the perfect location, which would represent the image and the market desired. The ultimate location was Boca Raton in Palm Beach County. (located on the east coast of Florida), since the city catered to an exclusively wealthy local and international clientele. An existing tobacco shop was obtained, which had been established for fifteen years in the heart of downtown Boca Raton. The shop was purchased in January 7,1980. This is where Jim Bennington became a notable presence not only in the community but in South Florida. Jim graduated from the University of Florida with a degree in Industrial Systems Engineering. Although he did give engineering a chance, the prospect of working in the family business presented a much more interesting challenge. Today anyone can pick up a phone, fax or in an e-mail put in an order in from anywhere in the World. Bennington Tobacconist is continually growing at an average rate of 20% a year. Their constant awareness of projecting the Bennington name and the quality of the product lines they carry has directed them into servicing hotels, restaurants, and country clubs. Bennington Tobacconist has extended itself very successfully in this area. Two of many, prestigious hotels now serviced are the Boca Raton Resort &Club (in Boca Raton) and the Doral Golf Resort & Spa (in Miami). Traditionally, Jim Bennington has continued to honor the family philosophy that quality products should be represented in a proper image.
 I found out reading through the Bennington website that the Boca Raton shop closed in 2015 apparently falling on hard times. The website also had links to a Facebook presence and Instagram postings, but these seemed dated with no new postings that I could see after 2017. Questions began to rise in my mind whether the Sarasota location mentioned was still in operation. With the website working, I assume that it is. Of most interest to me looking at the Bennington Supreme on my worktable was the statement at the beginning of the article. It describes Bennington shop pipes having been manufactured by name companies such as Peterson and Savinelli. It would be interesting to see if I could find out more information about the pipe on my table – Who manufactured it and when was it manufactured for Bennington Pipe & Tobacco? With the contact information provided in the Pipedia article (but not on the website) I decide to send an email to Bennington to see what I can find out:
Greetings, I restore vintage pipes and a beautiful Bennington half bent Billiard has come to my worktable. You can see the work I do at www.ThePipeSteward.com where pipes are commissioned that I have collected, and the full restoration process is recorded in a writeup that is then published online. The sales benefit the Daughters of Bulgaria a good cause that you can read about at my site. Part of my challenge when I restore a pipe is to try, as much as possible, the tell the story of the pipe which includes its provenance. I have read the information on Pipedia about the Bennington story (Bennington – Pipedia) and I do want to make this known in my write up. I have looked through your website and your Facebook presence to learn what I can. I have attached a couple pictures of the pipe I’m working on. I know that shop pipes are manufactured by other companies and my question is whether you may have an idea when you sold a Bennington Supreme and whether you might know who made it for you? I enjoy doing this research and have reached out to other Tobacconist and pipe names in the US and in Europe and have been very pleased at the kind and helpful responses I have received. I know that my questions are a shot in the dark but any information you can provide would be most appreciated. Thanks so much!
Happy piping, Dal Stanton
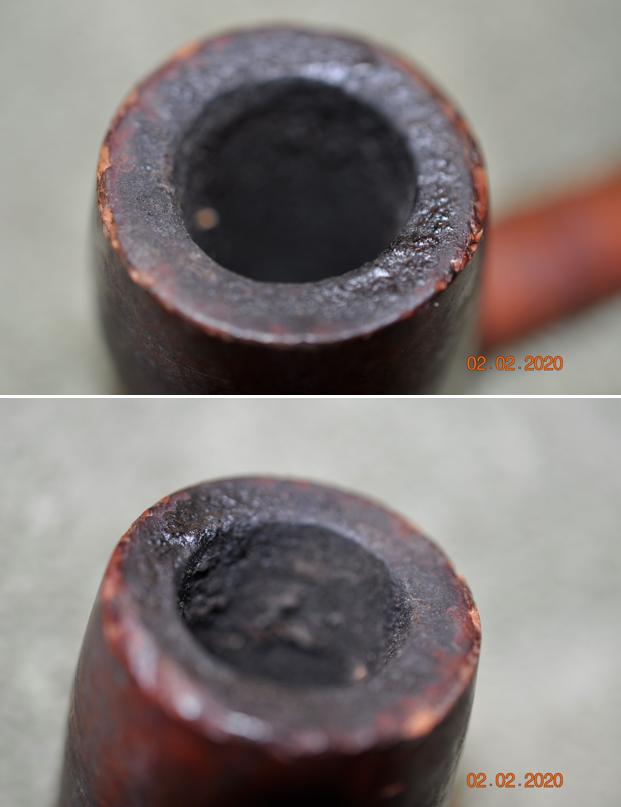
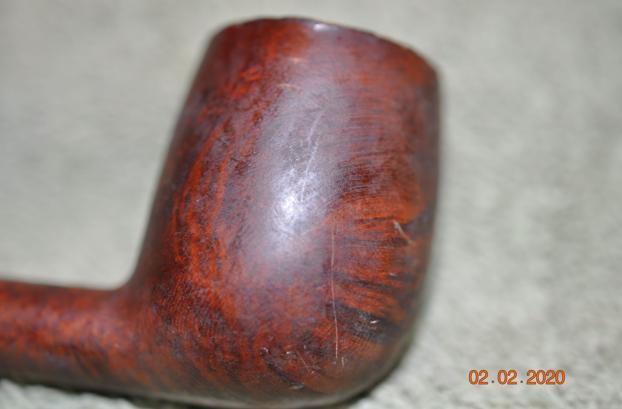
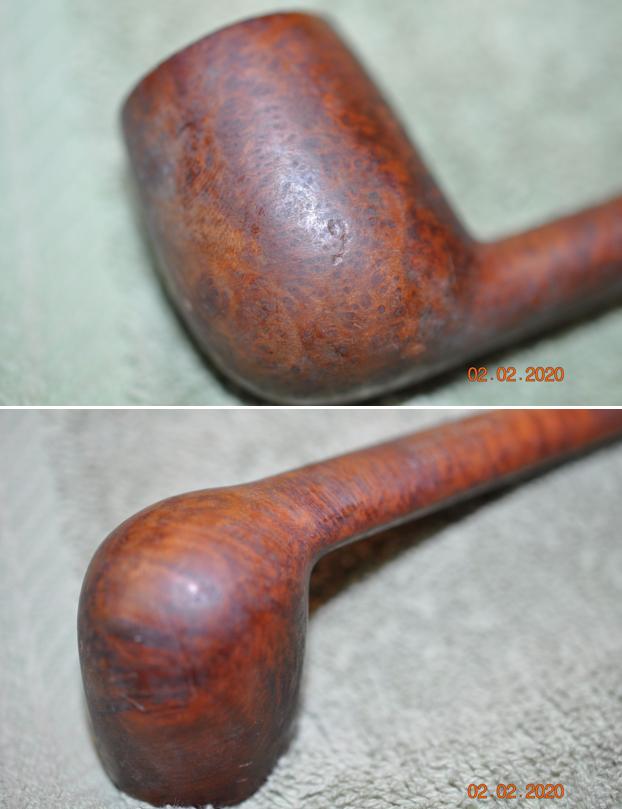
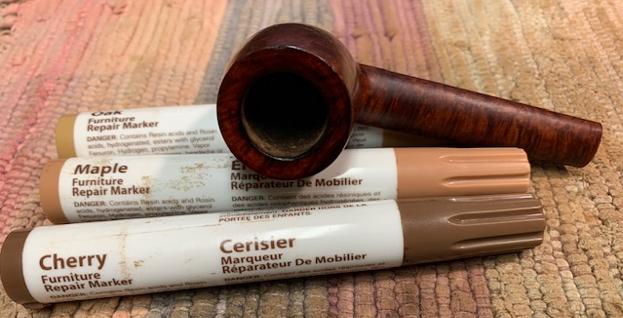
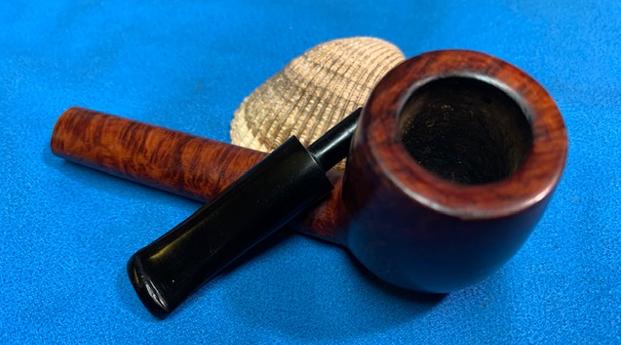
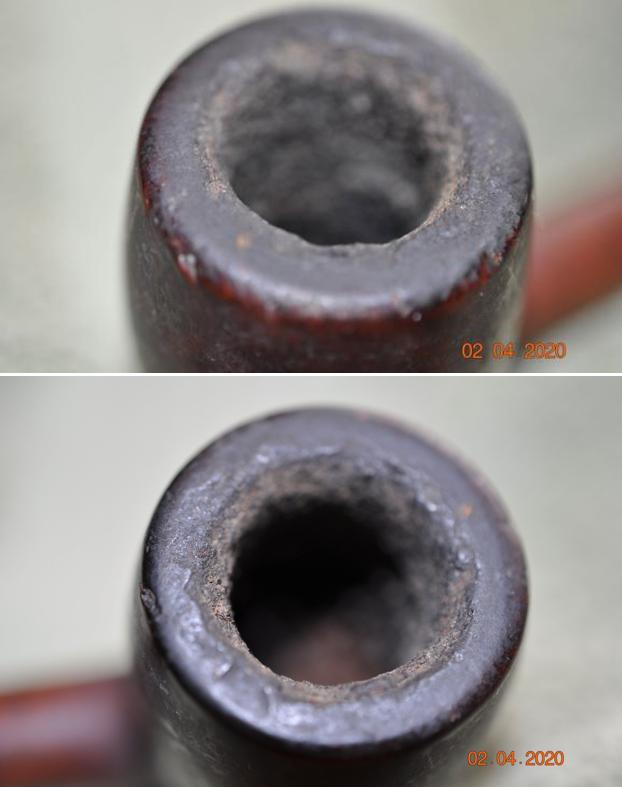
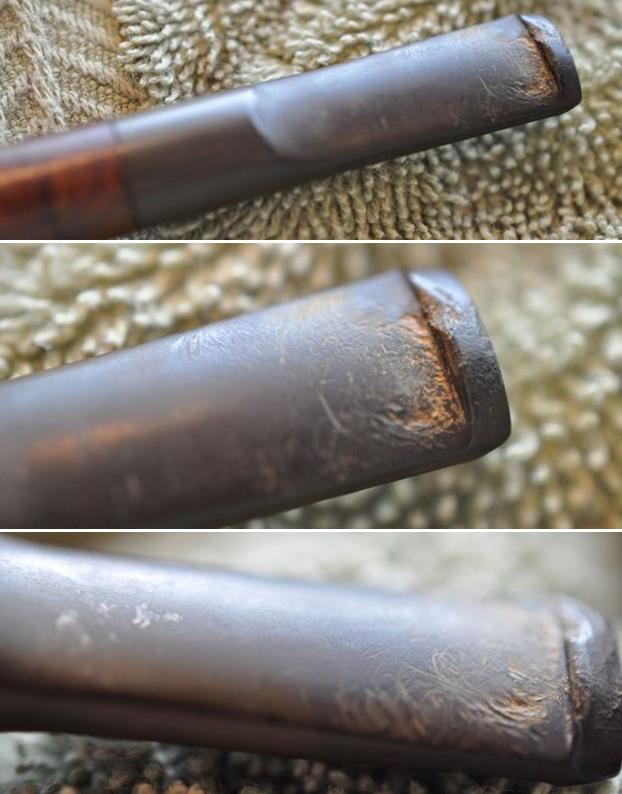
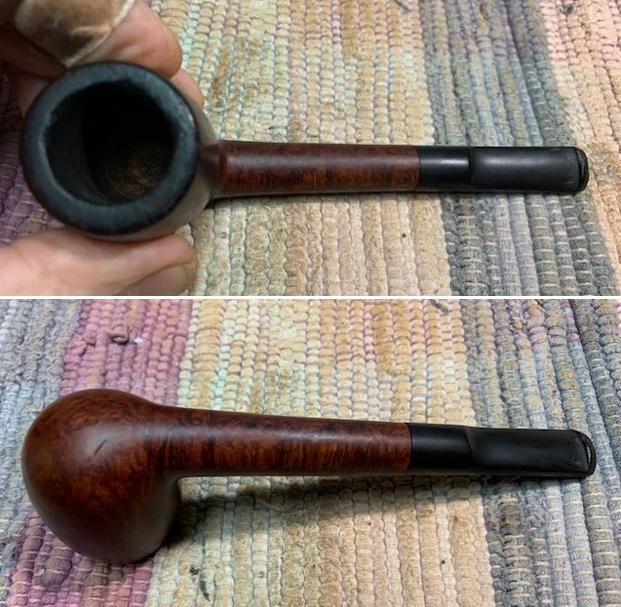
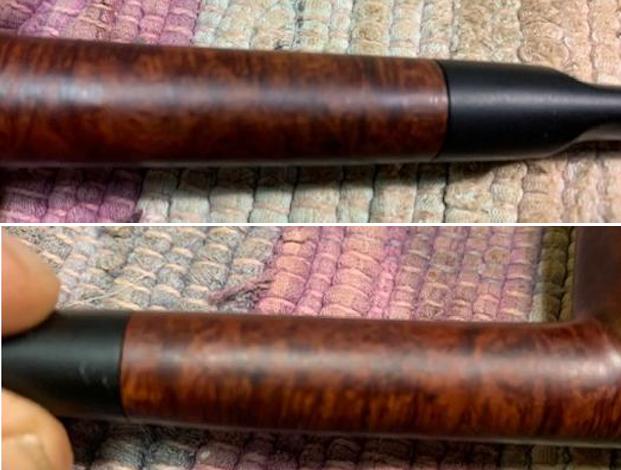
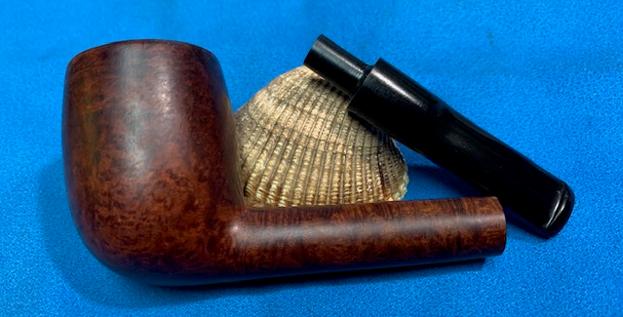
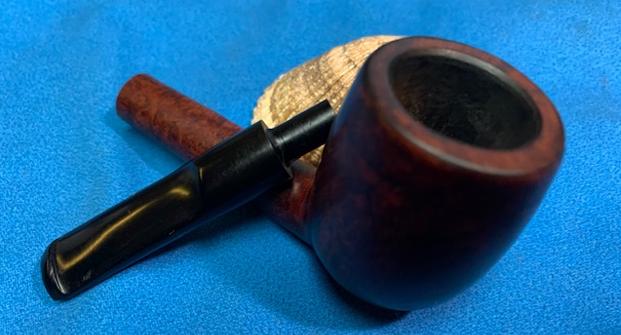
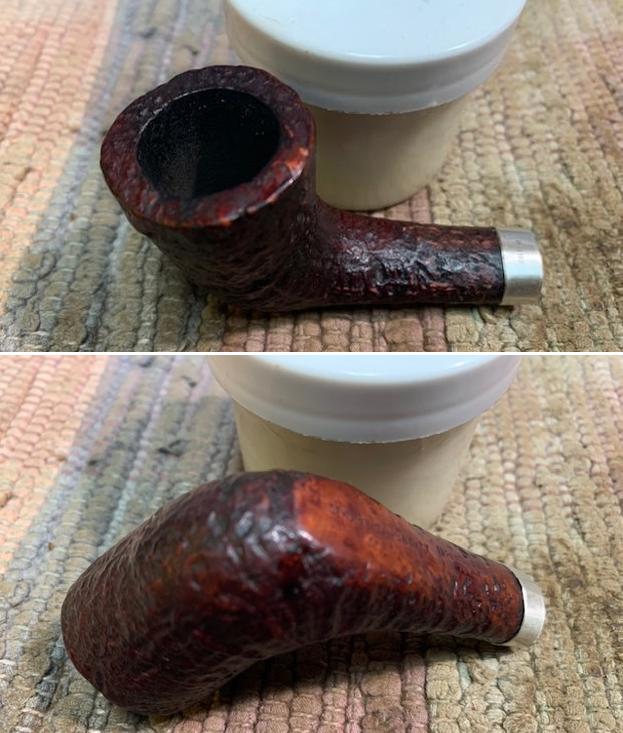
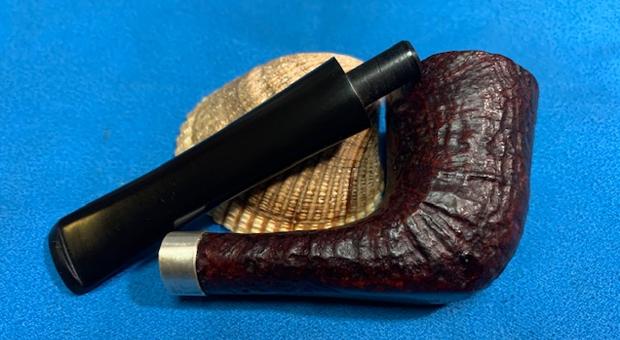
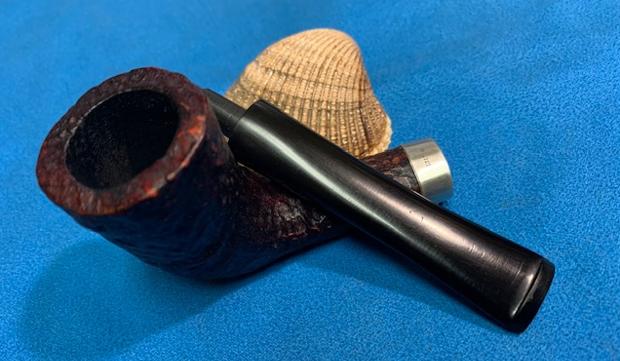
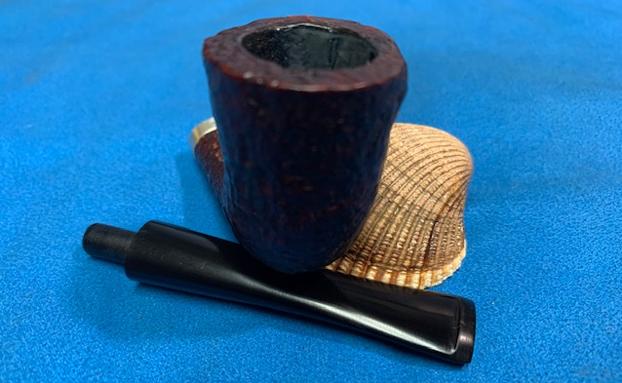
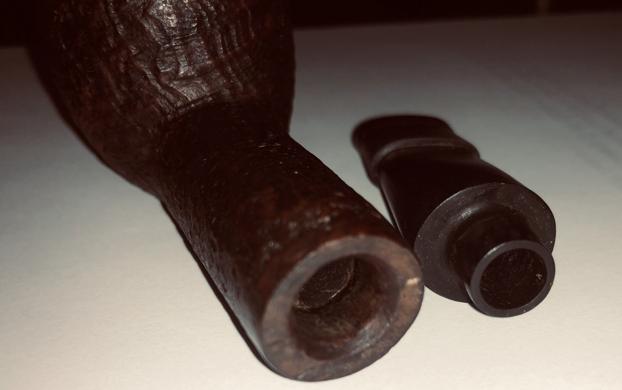
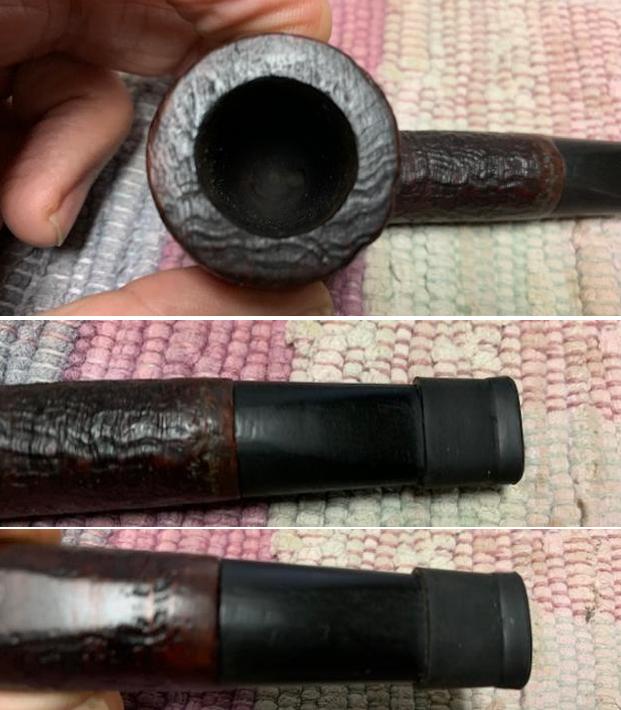
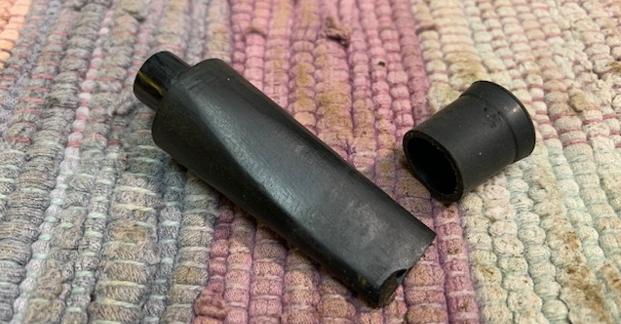
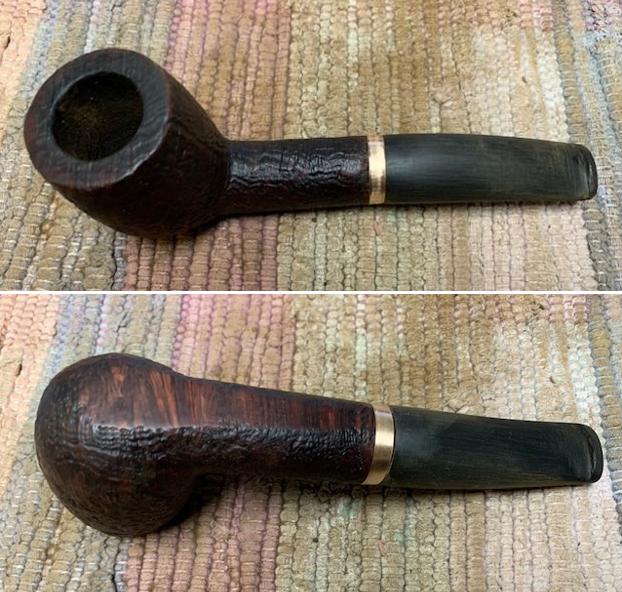
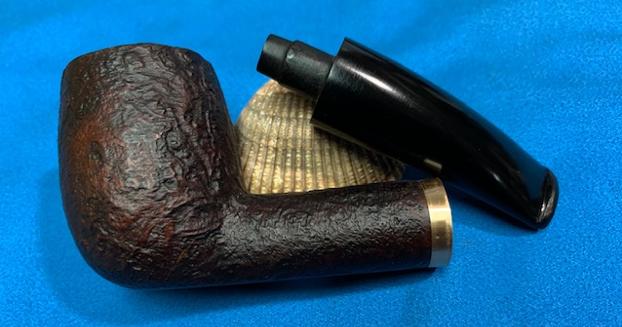
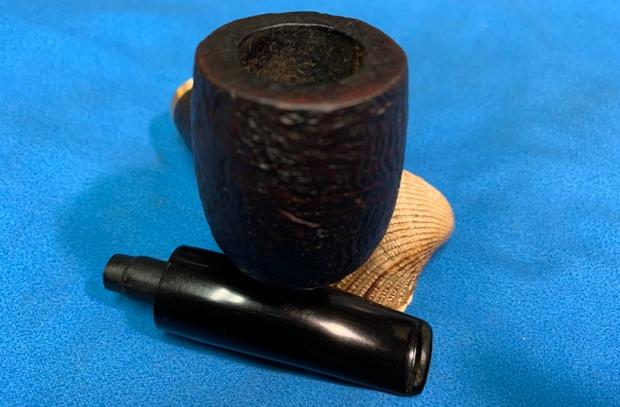
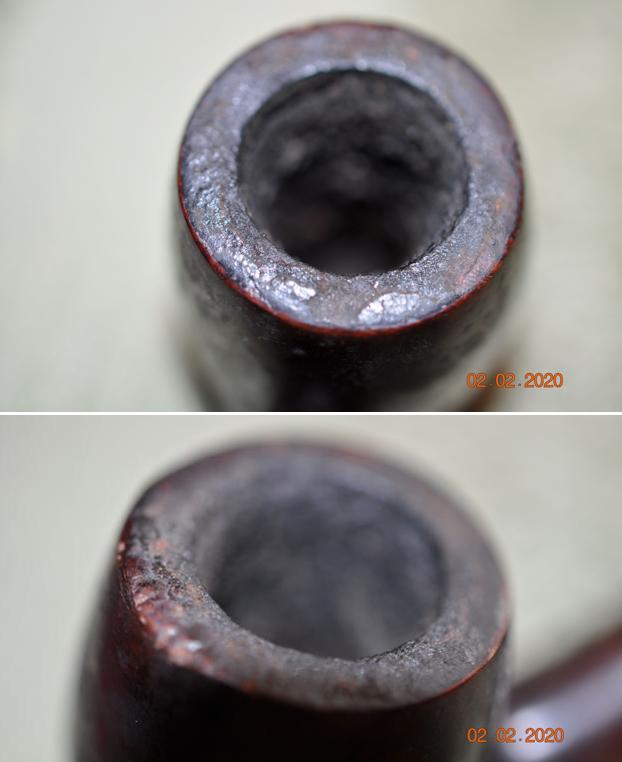
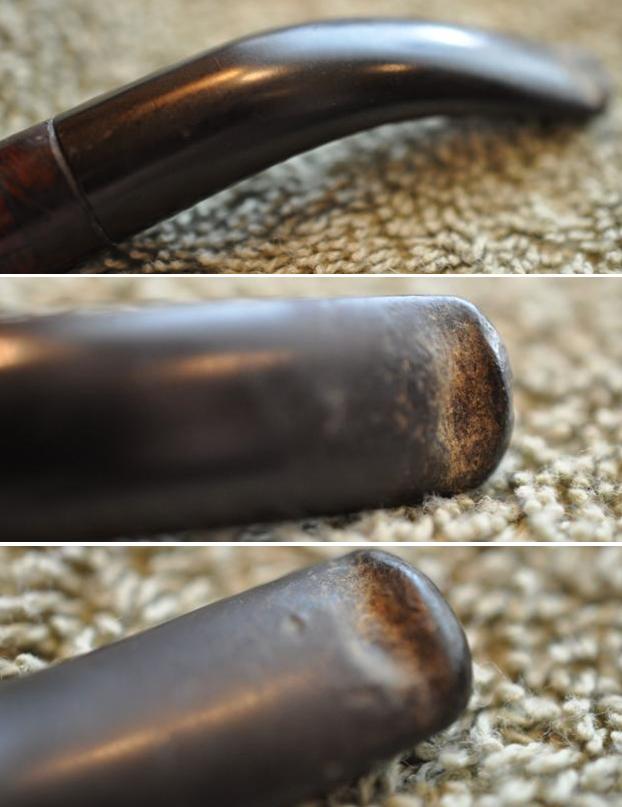
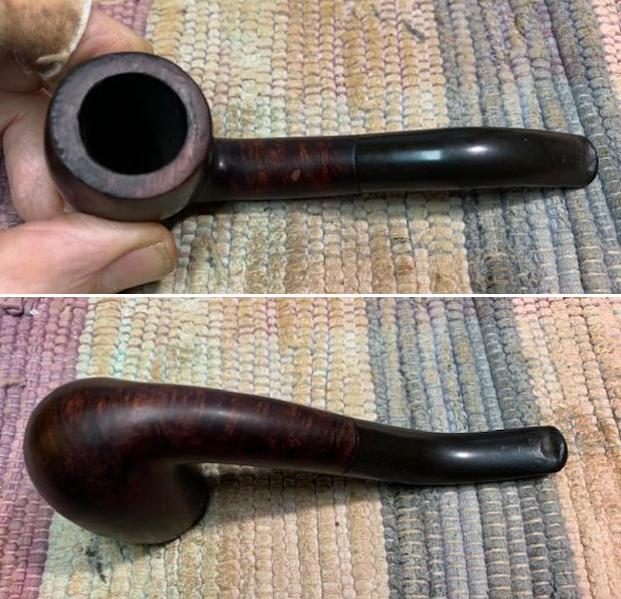
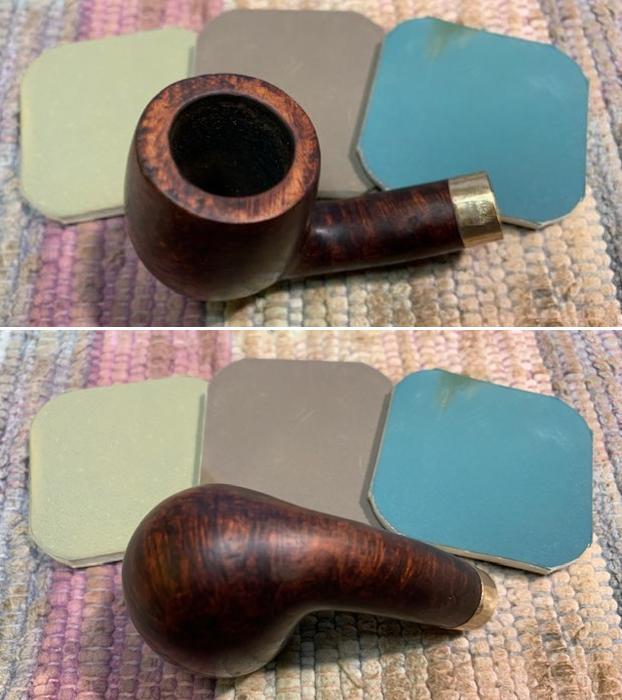
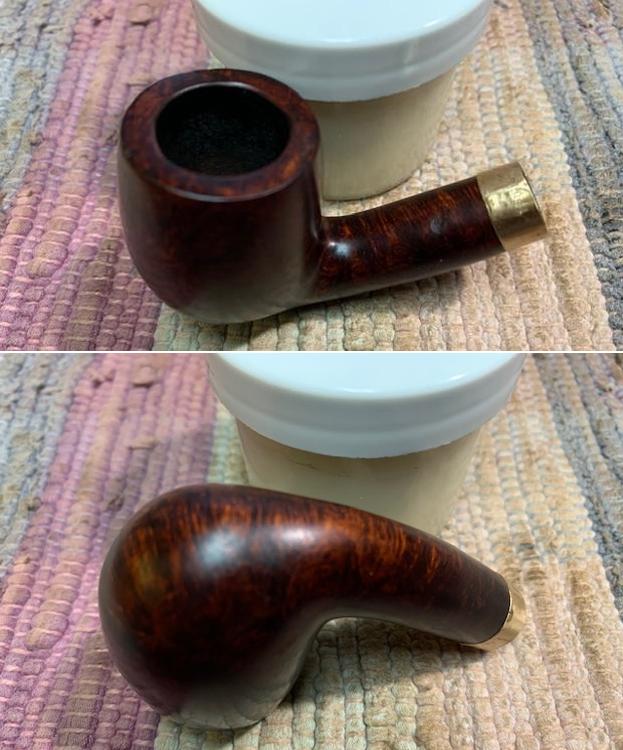
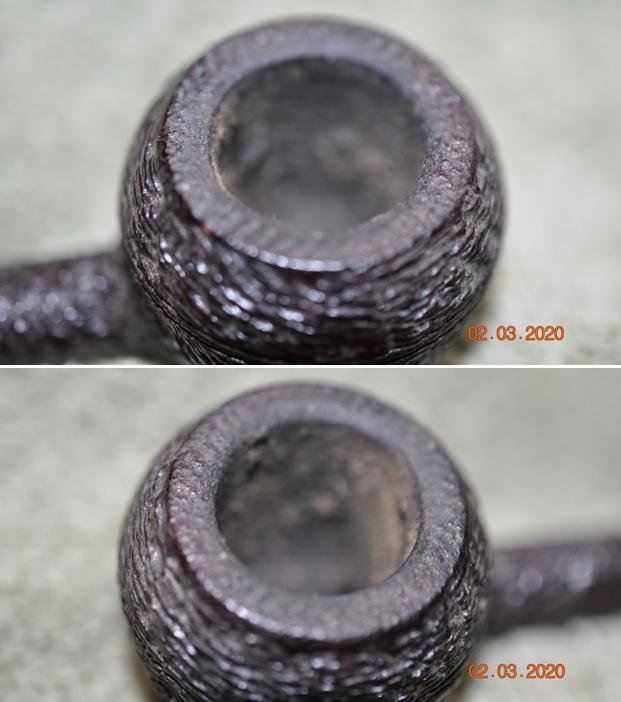
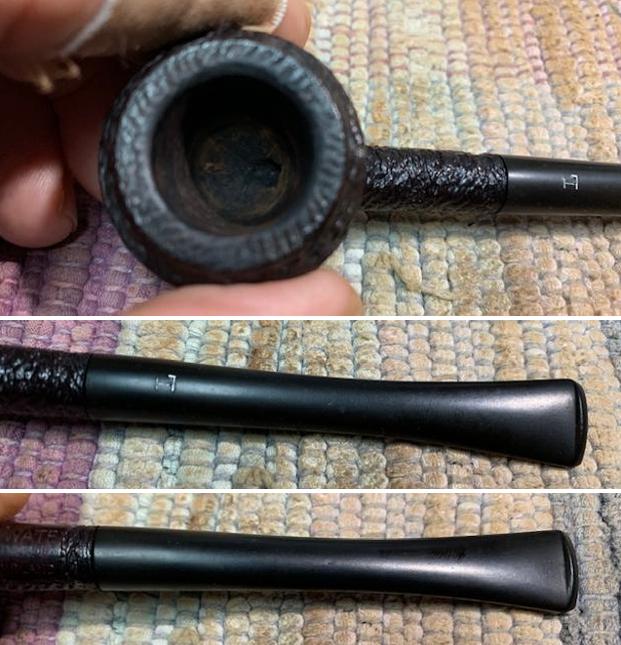
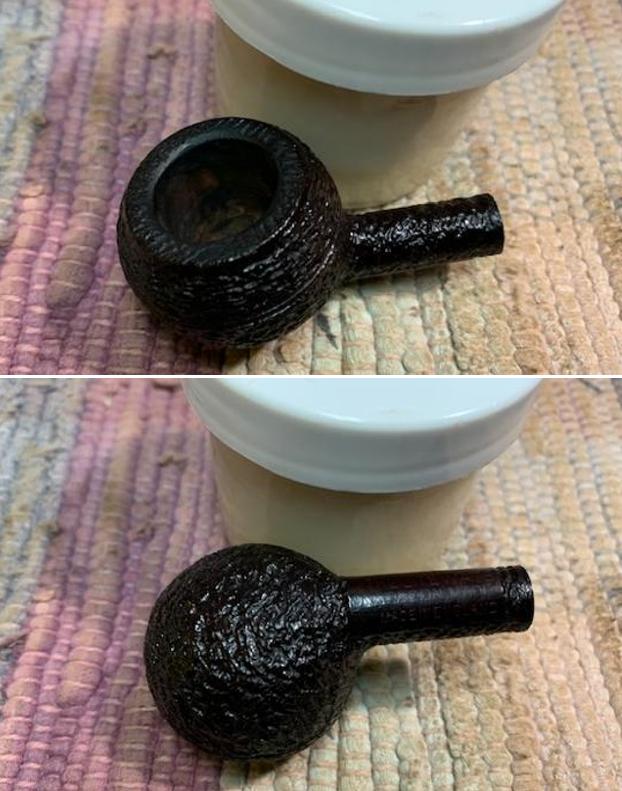
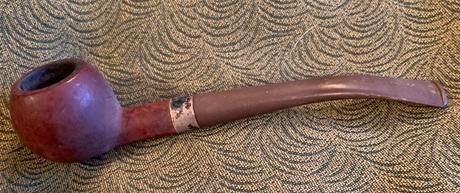
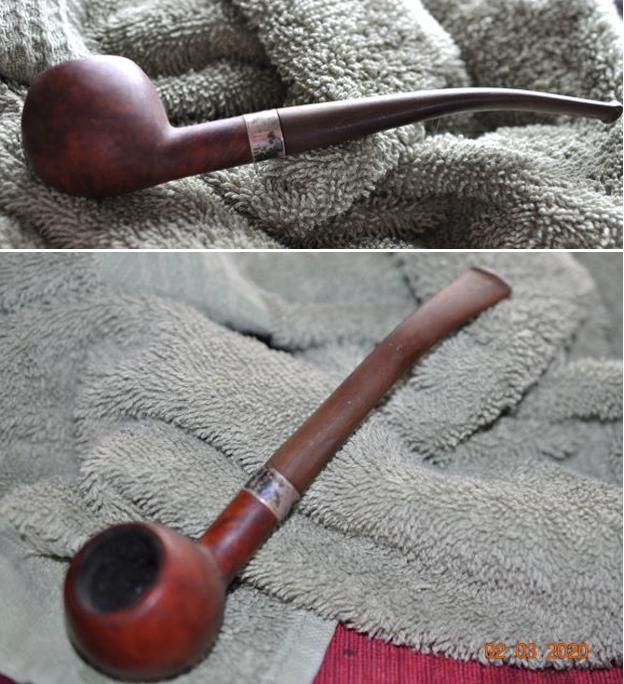
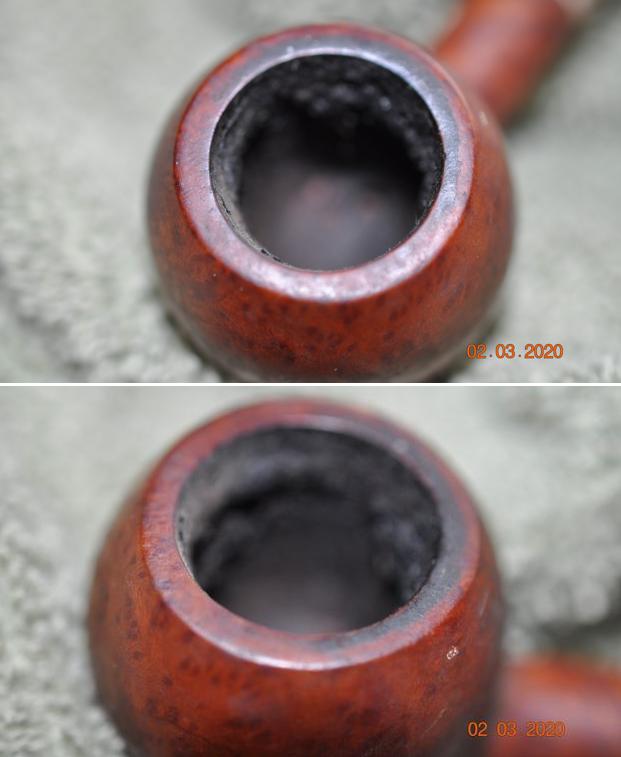
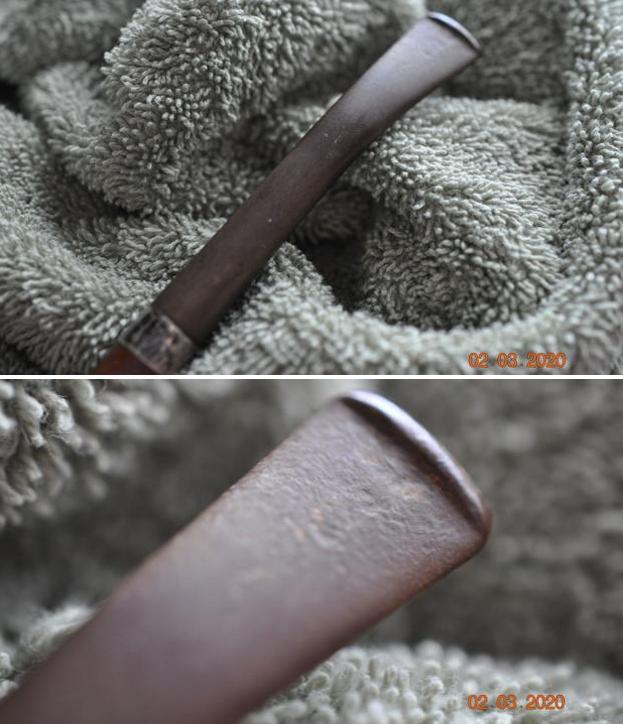
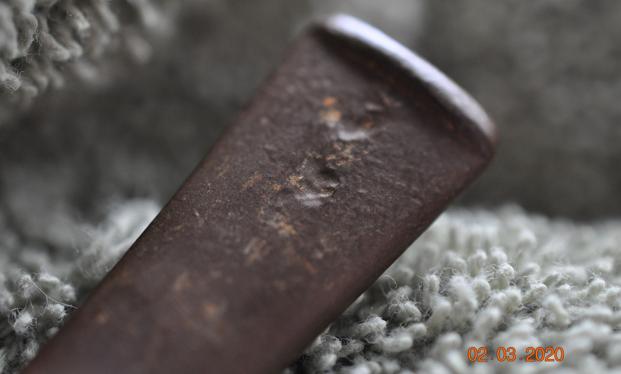
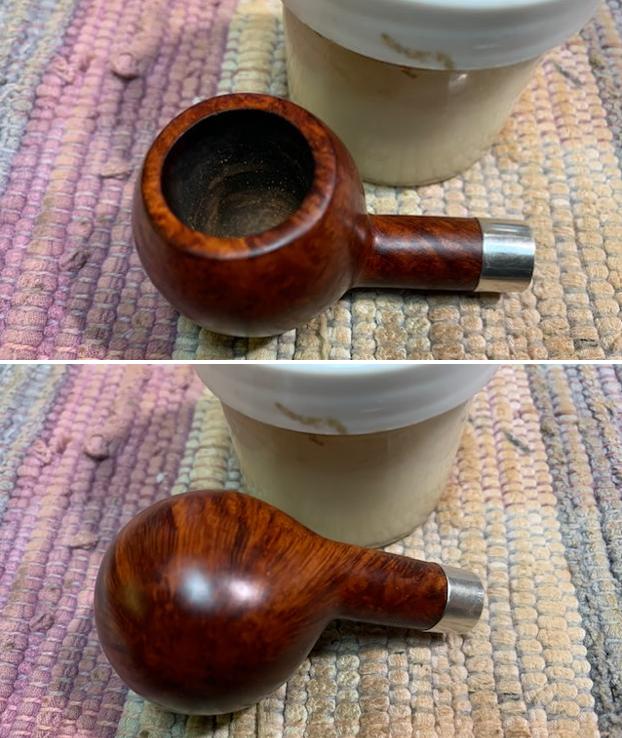
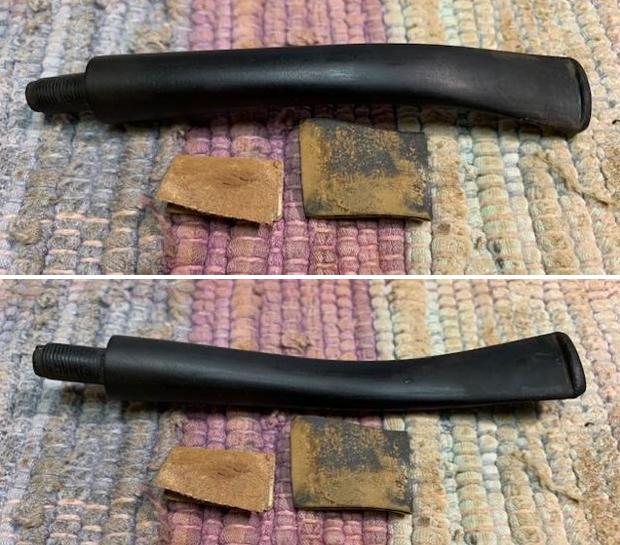
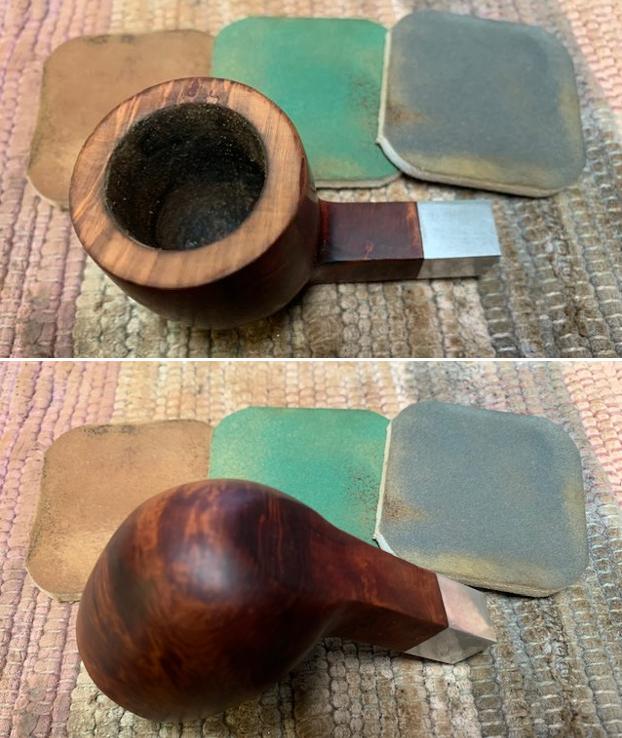
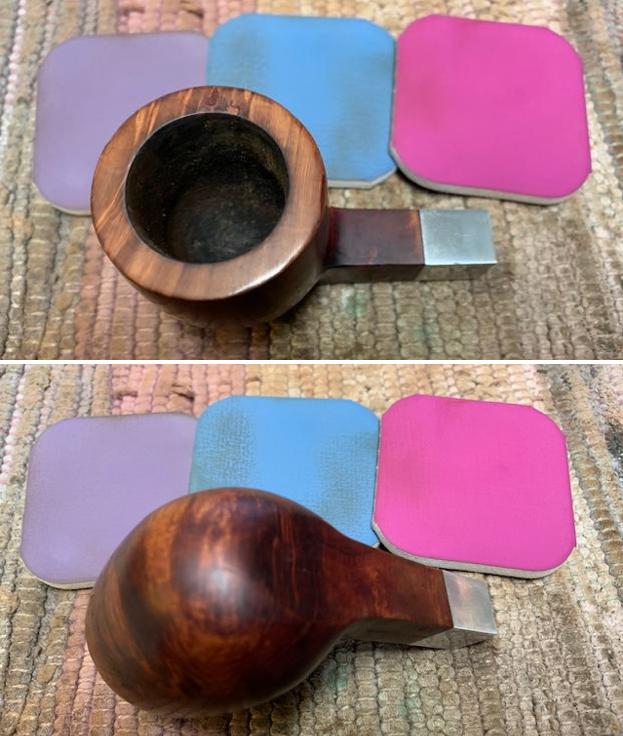
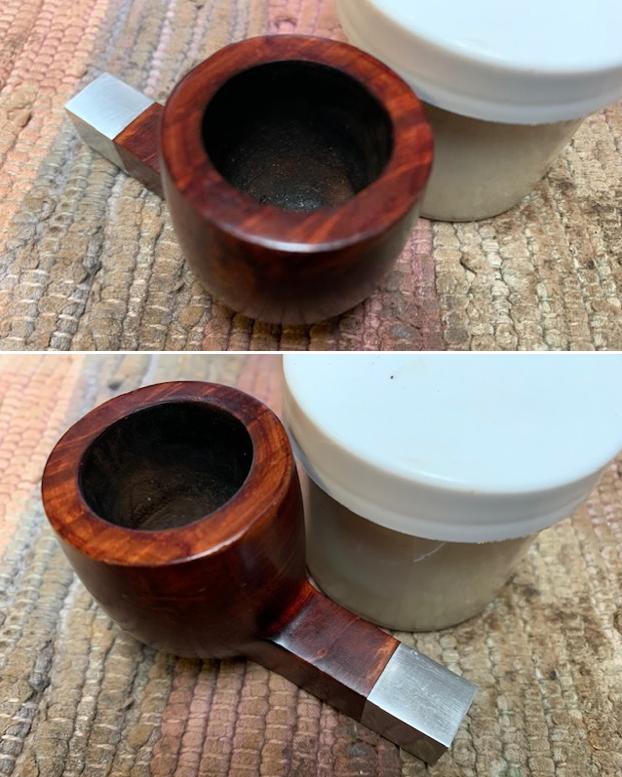
I’ll see if I get a response. In the meantime, looking more closely at the Bennington on the worktable, I’m impressed with the quality of the pipe. The grain of the bowl is asking to be released from under the tired, dull grime and dirt. The chamber has light cake build up and the rim has light lava flow covering it. The bowl looks like it should clean nicely. I take a few additional pictures showing dents and scratches on the bowl and the rim edge. The stem’s surface is rough with almost no tooth chatter and light oxidation. I begin the restoration of the Bennington Supreme with the cleaning of the stem. The airway is cleaned with pipe cleaners wetted with isopropyl 99%.
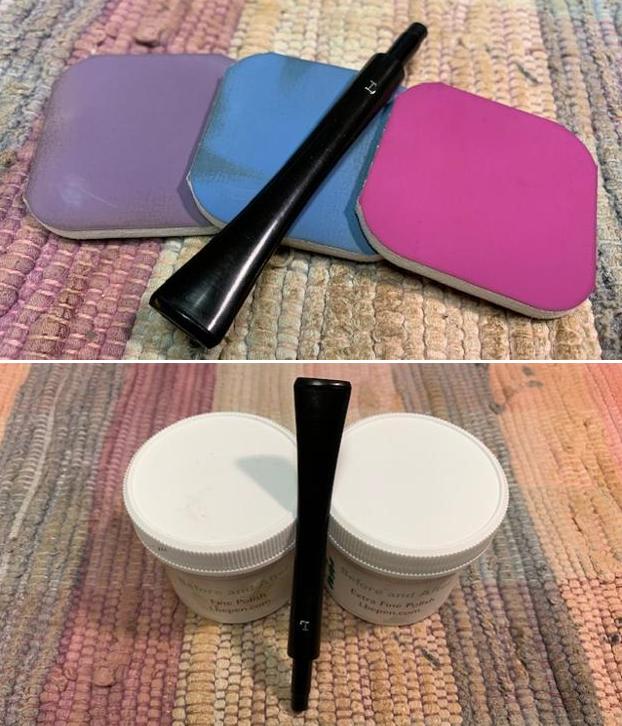
 To address the minor oxidation I see in the stem, I continue the testing of a deoxidation product I discovered on a Facebook thread discussion. The Briarville.com ‘Pipe Stem Oxidation Remover’ has performed well with the non-scientific testing I’ve done. So far, oxidation has been removed for the most part and the Bennington half bent stem joins the previous testing subjects. I put the stem in the bottle of Oxidation Remover liquid for several hours. The directions on the front label simply say to soak from 2 to 24 hours as needed.
 After the full 24-hour soak, the stem is removed from the liquid and first wiped with a dry cotton pad followed by a cotton pad wetted with alcohol. The cotton pads remove a lot of the raised oxidation. The airway is also cleaned with a few pipe cleaners wetted with isopropyl 99%. The oxidation seems to have been removed through the soaking process.
  Next, paraffin oil is applied to the stem to condition it and is set aside to absorb the oil.
 With the stem on the side, the cleaning is started on the Bennington stummel. Starting with the light carbon cake buildup, the chamber is reamed with 2 of the 4 blade heads available in the Pipnet Reaming Kit.
 I started using the 3rd larger blade head, which initially fit the chamber opening, but tightened too much for comfort. I do not want to create a ridge in the briar chamber wall nor break the blade! After reaming the chamber, the Savinelli Fitsall Tool is used to scrape the walls and then the chamber is sanded using 240 paper wrapped around a Sharpie Pen.
  After wiping the bowl with a cotton pad, an inspection of the chamber shows healthy briar. I move on.
 Next, the focus shifts to cleaning the external briar surface to address the lava on the rim and the grime on the bowl.
  Undiluted Murphy’s Oil Soap is used with a cotton pad to scrub. The cotton pad is joined by a brass bristled brush to address the rim. Brass is used because it is less invasive to the briar during cleaning but gives a bit more muscle for stubborn grime on rims.
 The stummel is then taken to the sink and the cleaning continues with hottish water and shank brushes with anti-oil liquid dishwashing soap. The internal mortise briar is scrubbed with the shank brushes. After the stummel is thoroughly rinsed, it is brought back to the worktable. The cleaning did a great job with the briar grain now being more distinct.
 Continuing with the internal cleaning, cotton buds and pipe cleaners wetted with isopropyl 99% are used. A small dental spoon is also used to scrape the mortise walls with little being excavated. The internals are not uber grungy and the pipe cleaners and buds gradually surface not as soiled. I stop the internal cleaning with the plan of continuing it later using a kosher salt and alcohol soak.
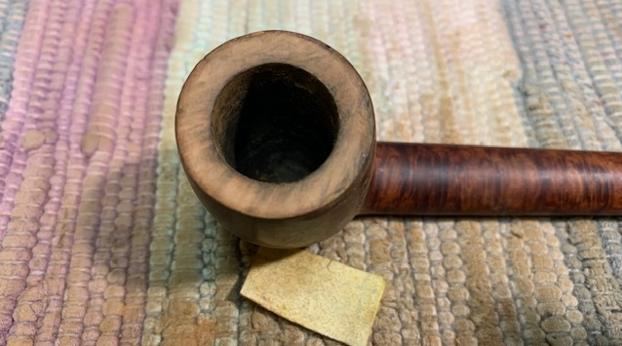
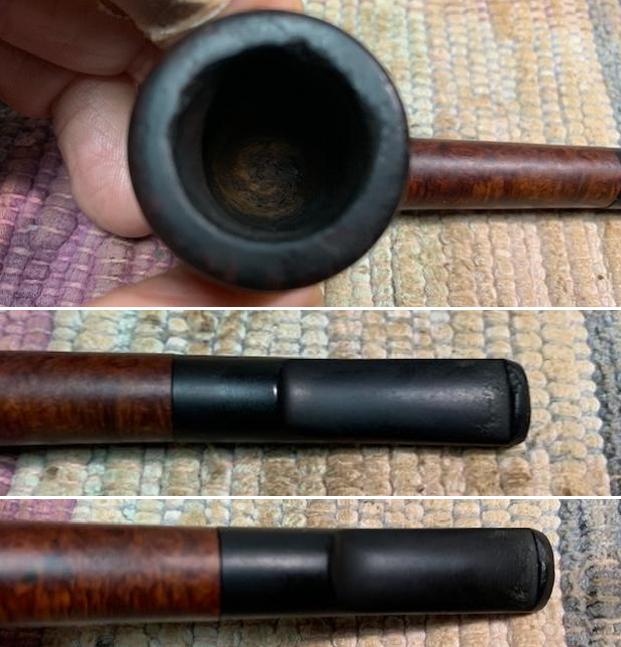
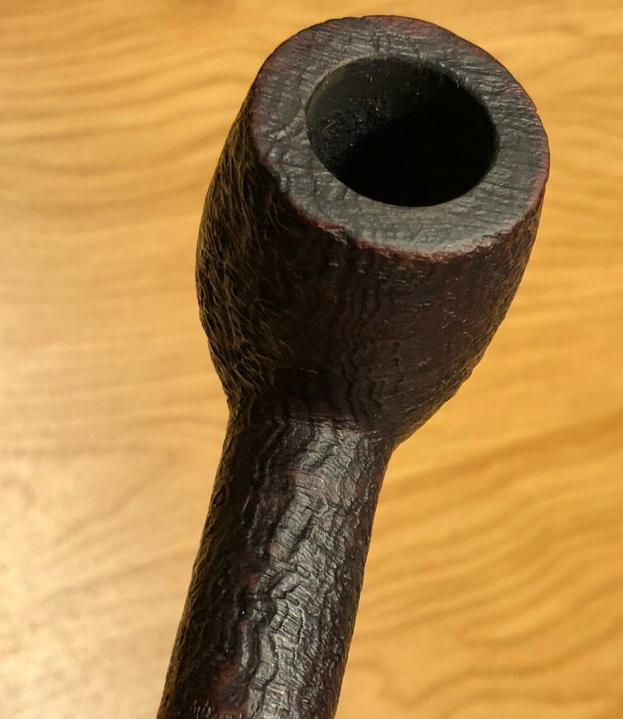
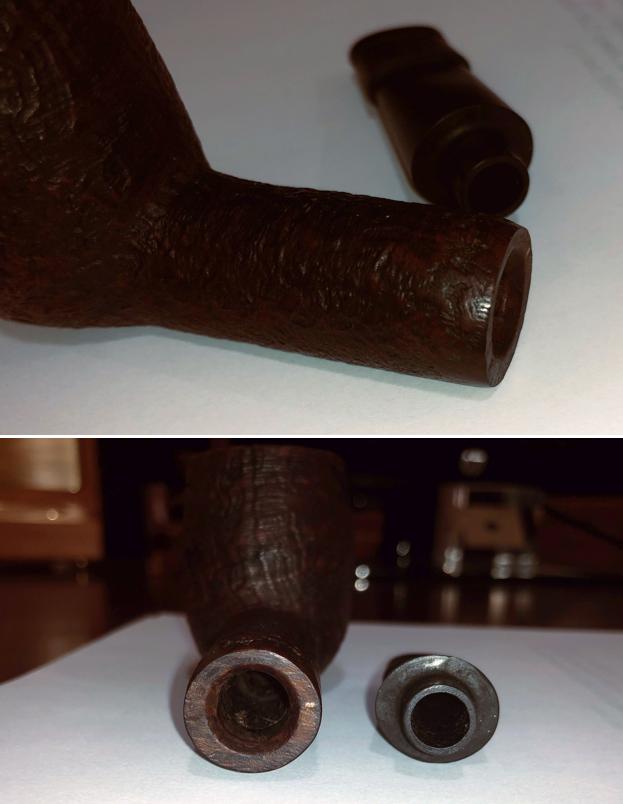
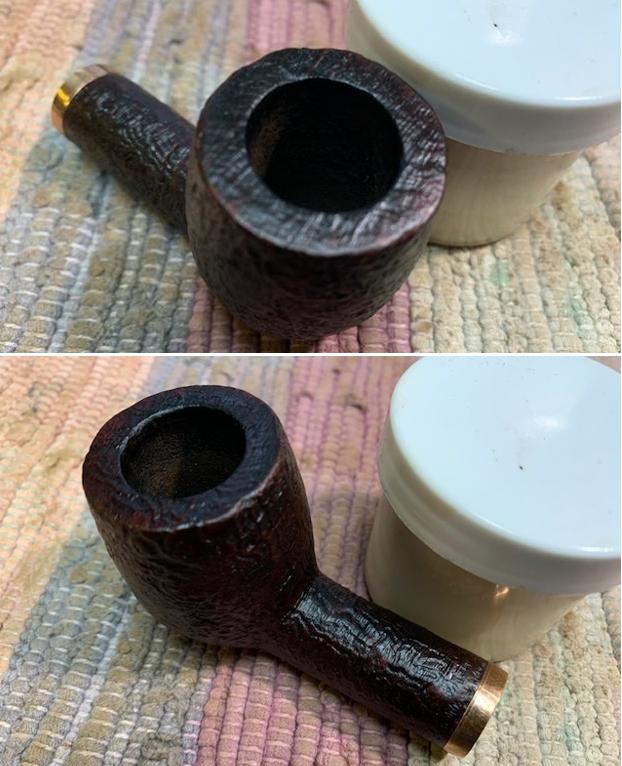
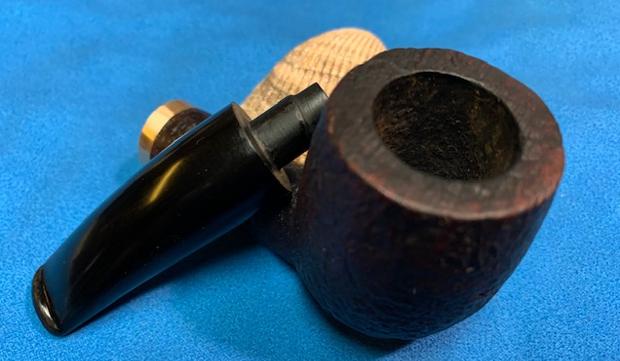
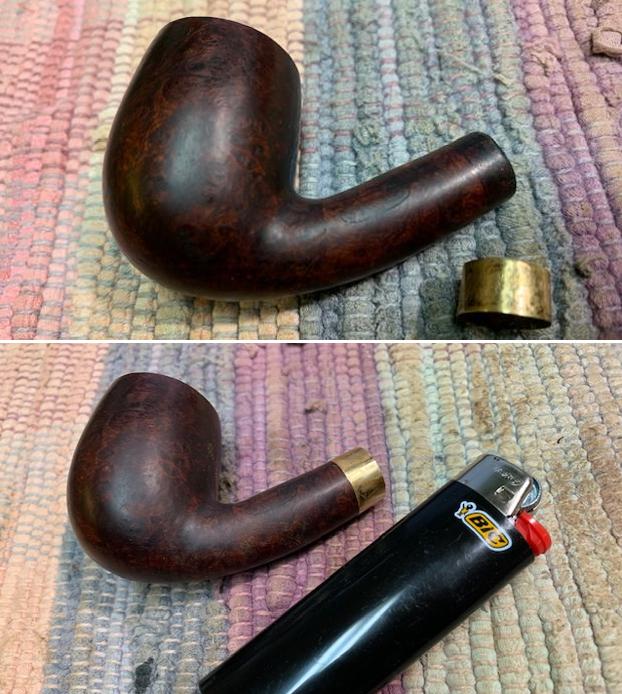
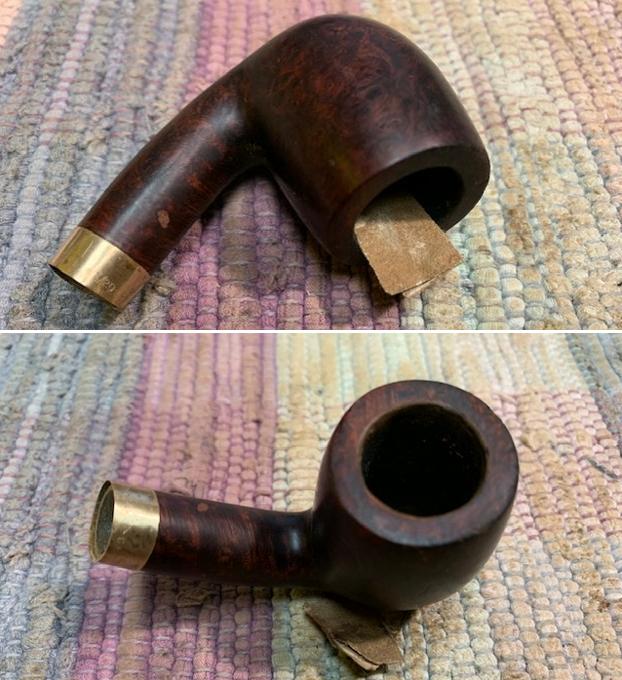
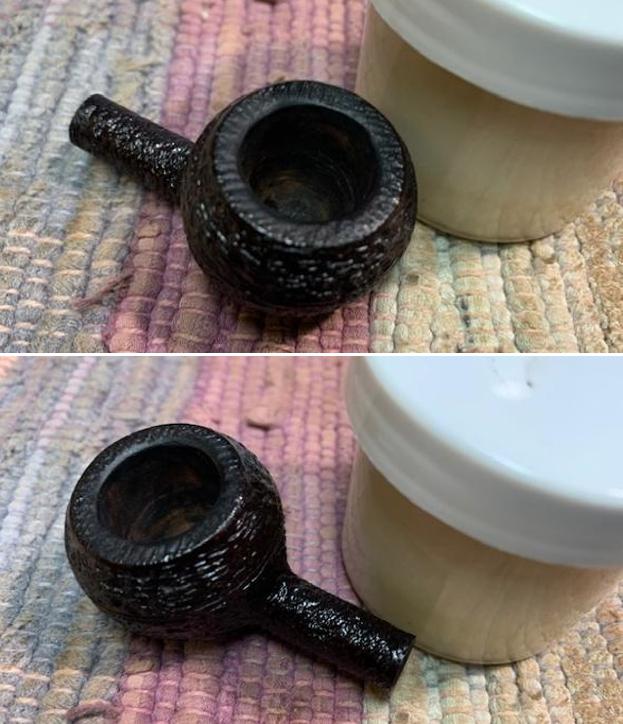
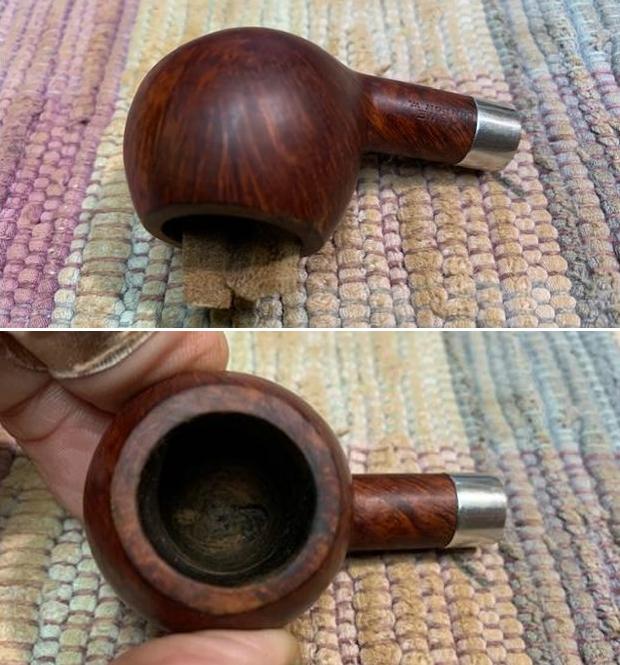
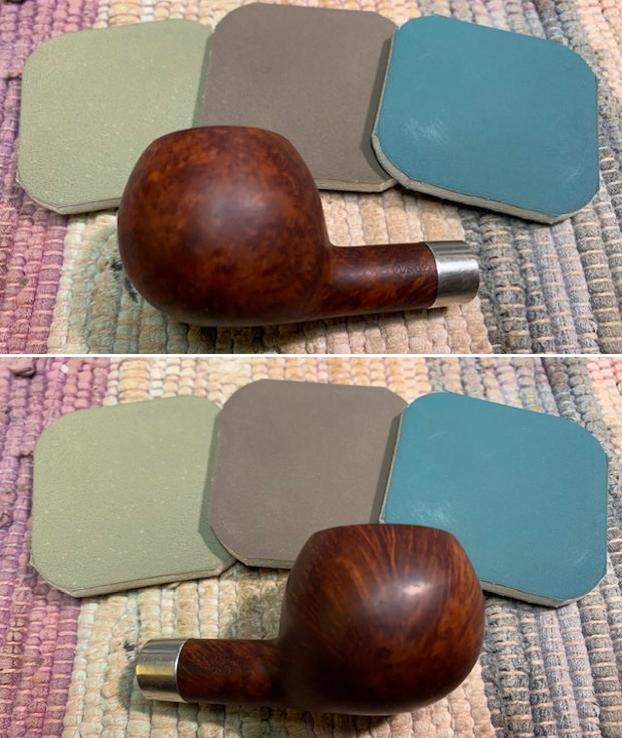
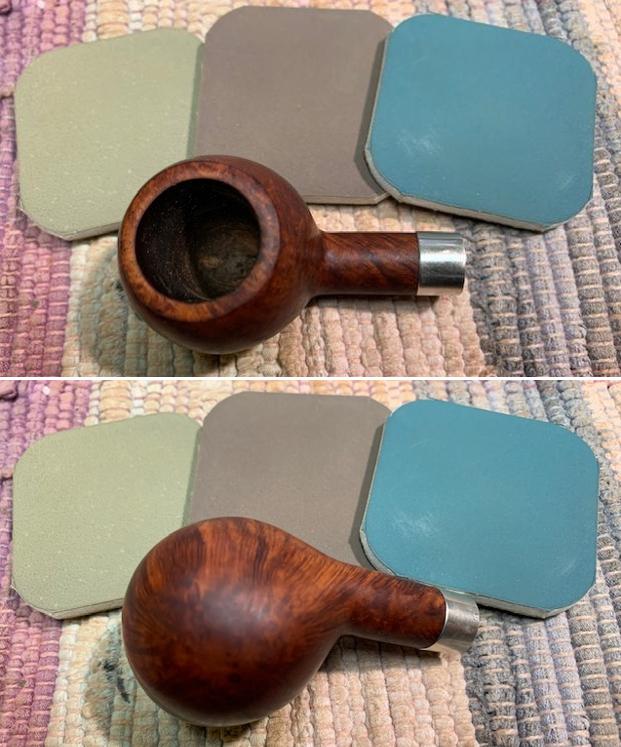
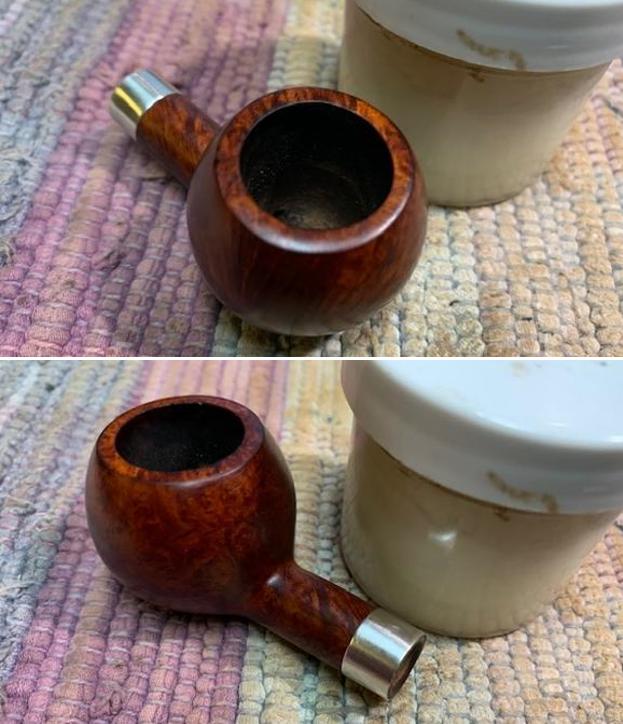
  After completing the main cleaning of the stummel, an inspection of the briar surface reveals a genuinely nice block of briar. The lava was successfully cleaned off the rim revealing raw, worn briar. Most of the old finish did not make it through the cleaning process. There is a slight thinning of the aft quadrant of the rim. The chamber is not in round with a few dents on the inner rim edge which create this. I’ve marked up the next picture to show this.
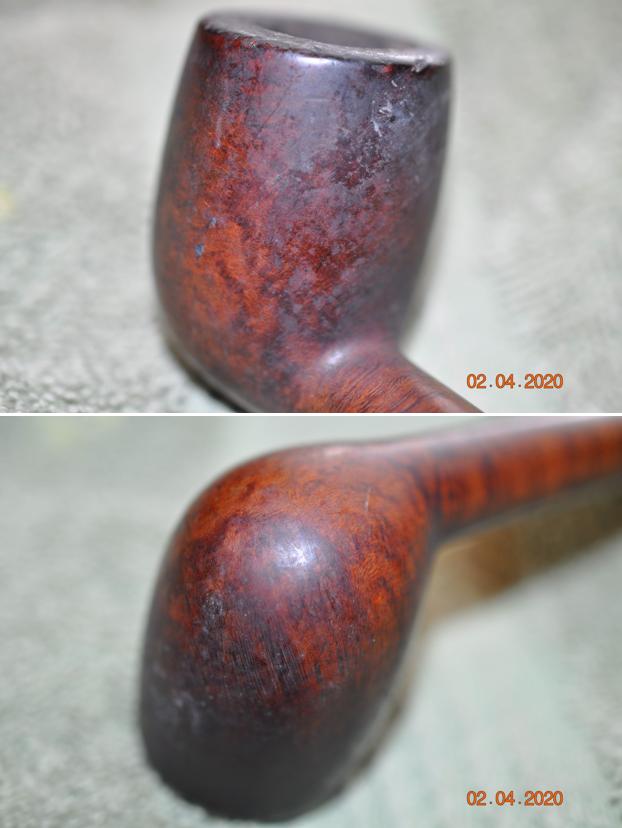
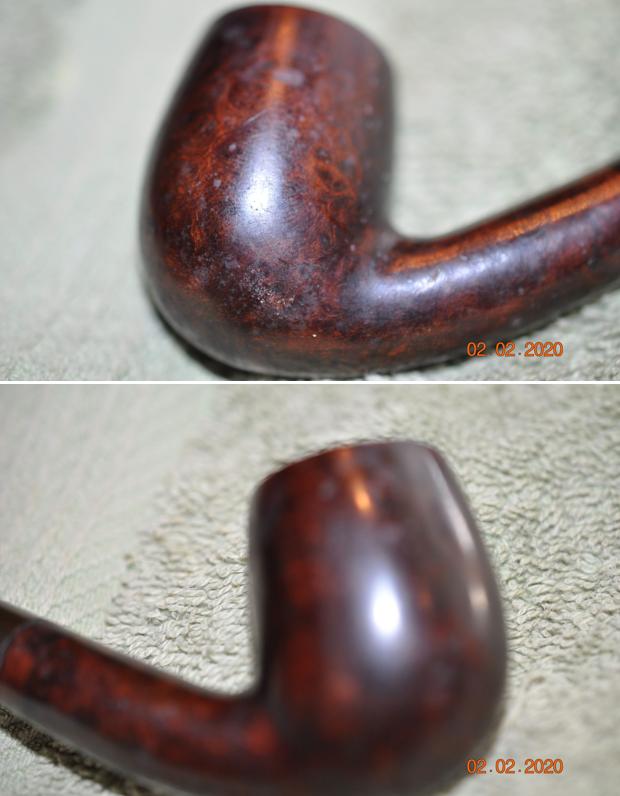
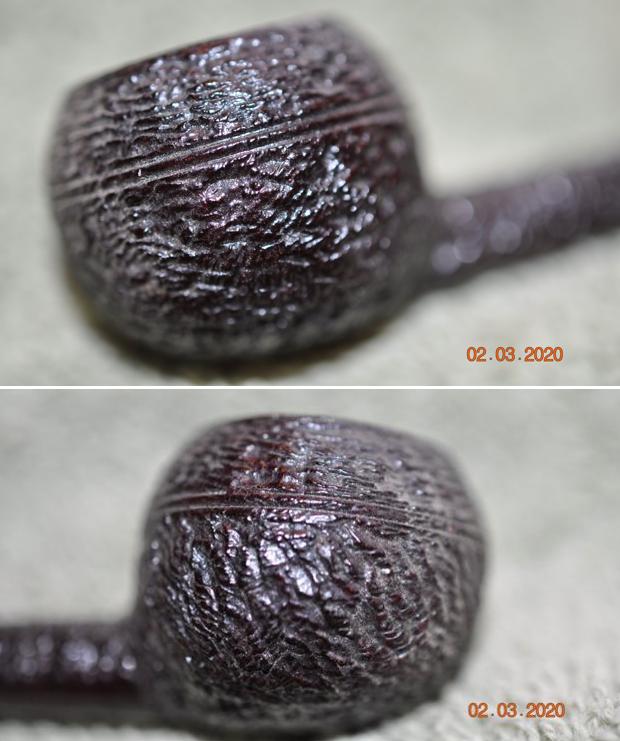
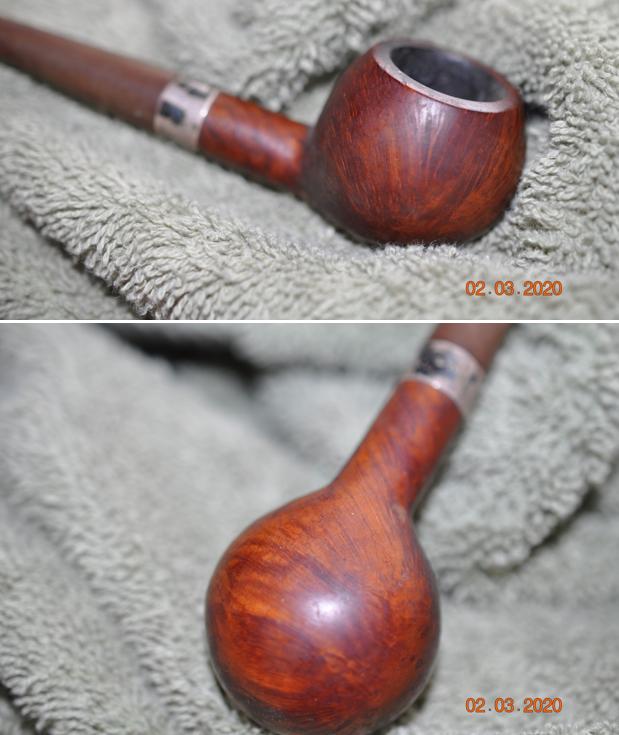
 The next few pictures show the briar grain that has popped out after the cleaning. I cannot see any fills and the potential of the grain being teased out even more is good. The Bennington Supreme appears to be a high-quality piece of briar.

 The rim has a slight cant toward the chamber. Before working on the stummel proper, I focus on the rim first by cutting a small smart bevel using 240 grade paper wedged with a hard backing of wood. This is followed by the same with 600 grade paper. The rounding of the chamber is improved, and the bevel freshens the inner rim lines. A start picture is taken then the progressions.
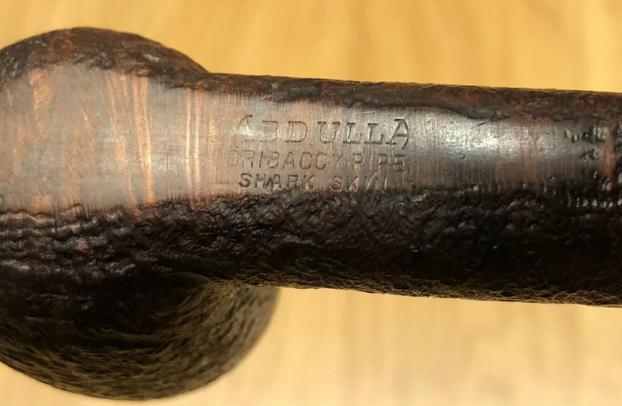
 Before working on the briar surface, the Bennington Supreme nomenclature is covered with painter’s tape to protect it from the sanding.
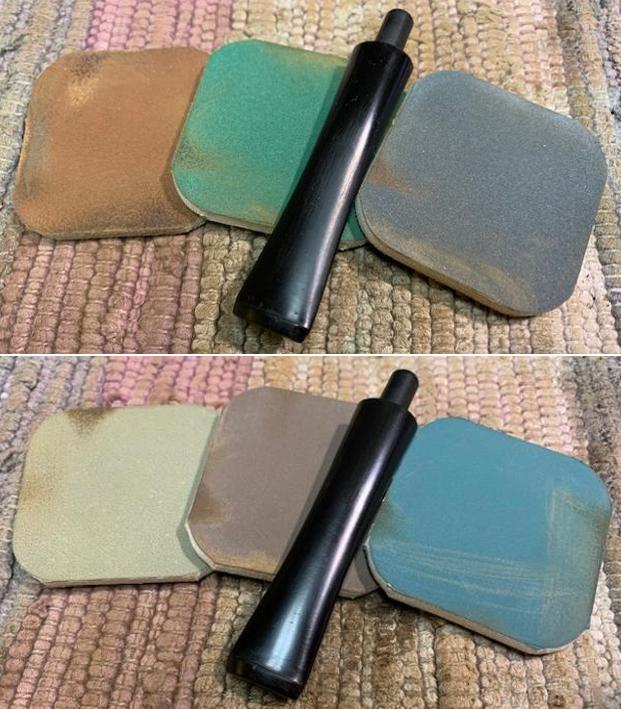
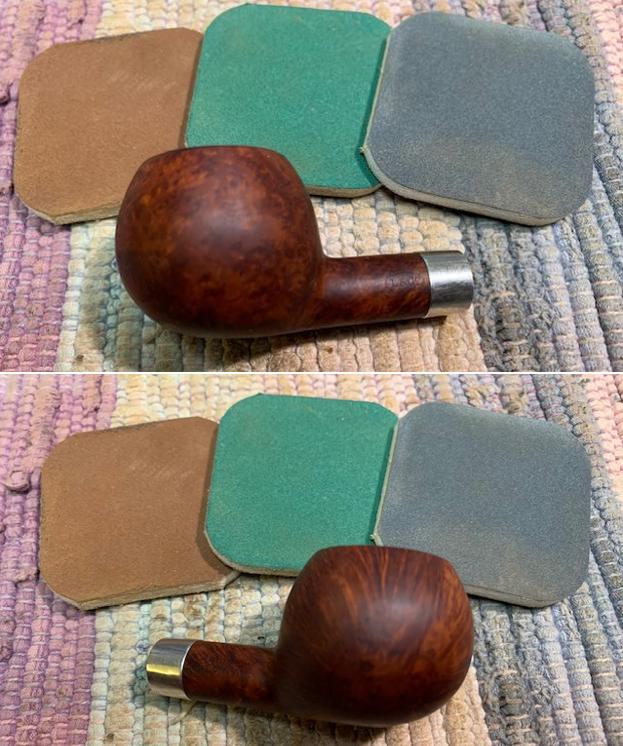
 Next, to clean the surface of nicks and cuts and to remove older finish patches, sanding sponges are used. I use 4 sponges, starting first with the coarsest grade, then less course, medium grade then finishing with a light grade.

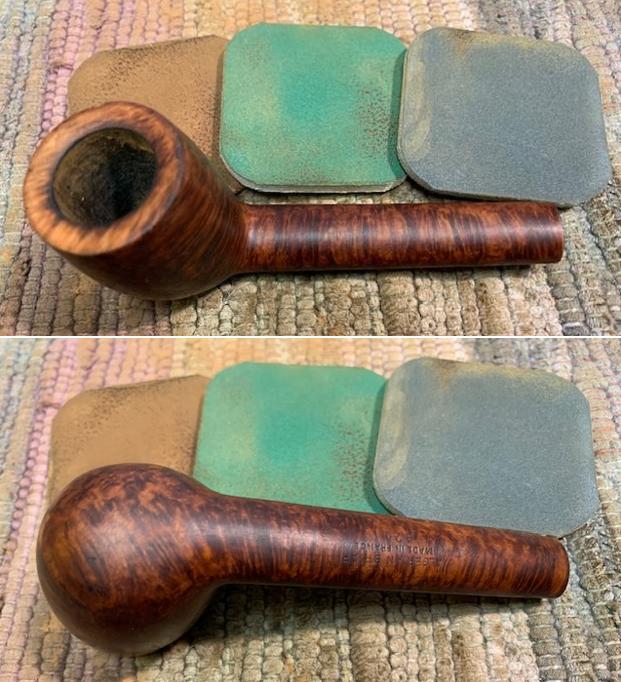
 After the sanding sponges, the full regimen of micromesh pads is applied. Starting with wet sanding, pads 1500 to 2400 are used followed with dry sanding with pads 3200 to 4000 and 6000 to 12000. After the first six pads are used, the painter’s tape is removed from the shank protecting the Bennington nomenclature. The final 3 pads help to blend the resulting ‘spot’ some.
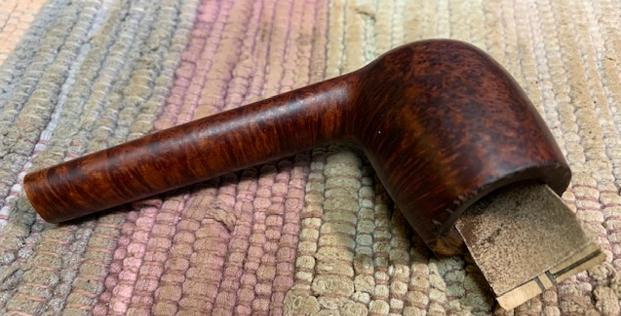
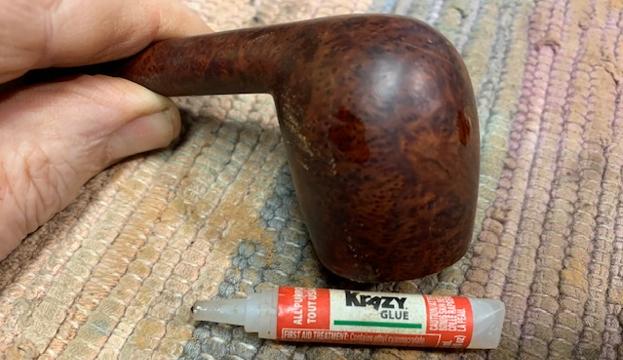
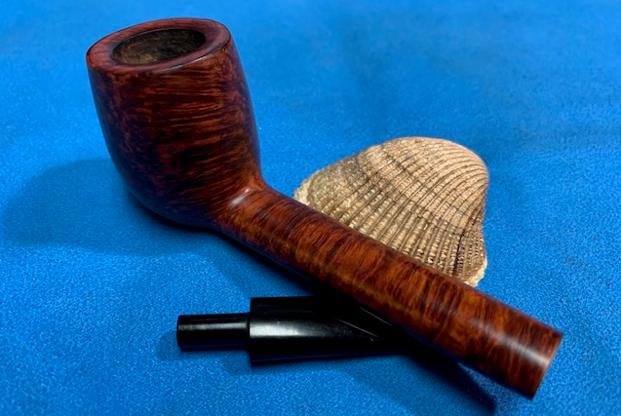
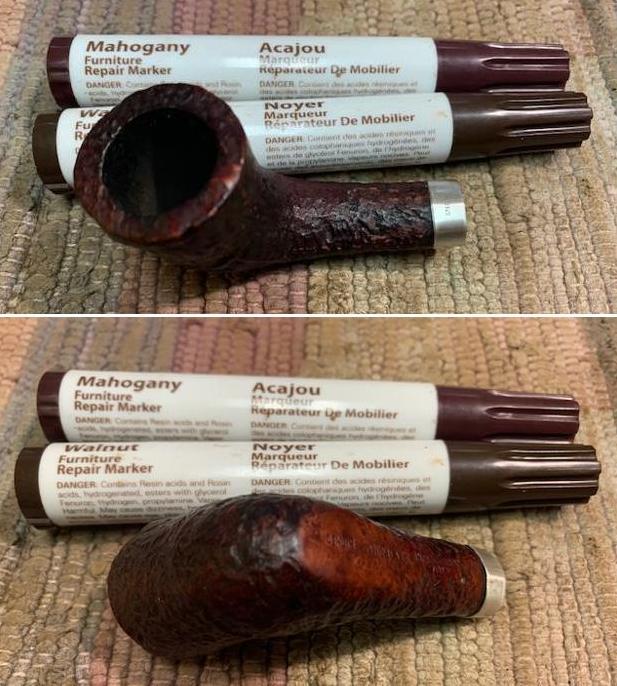
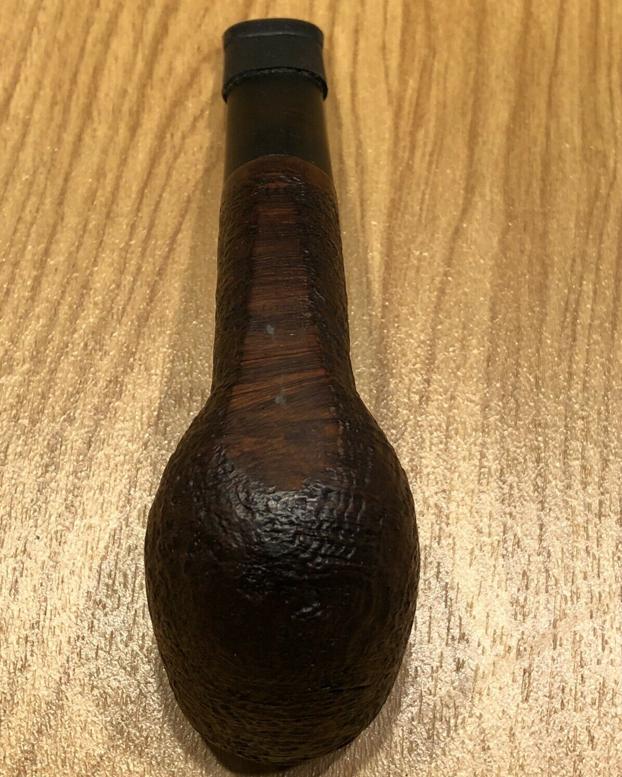
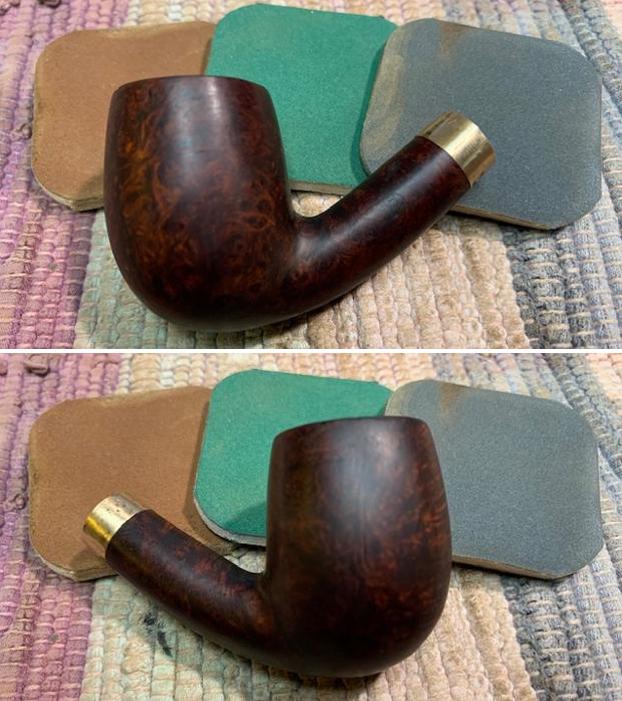
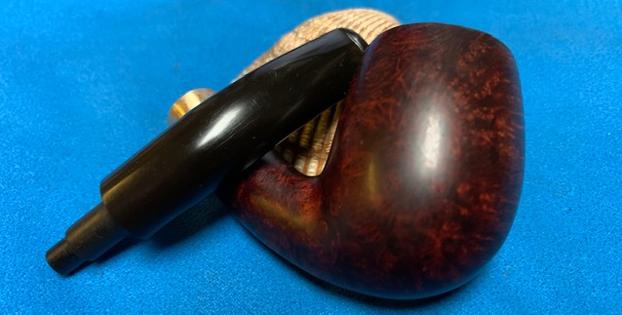
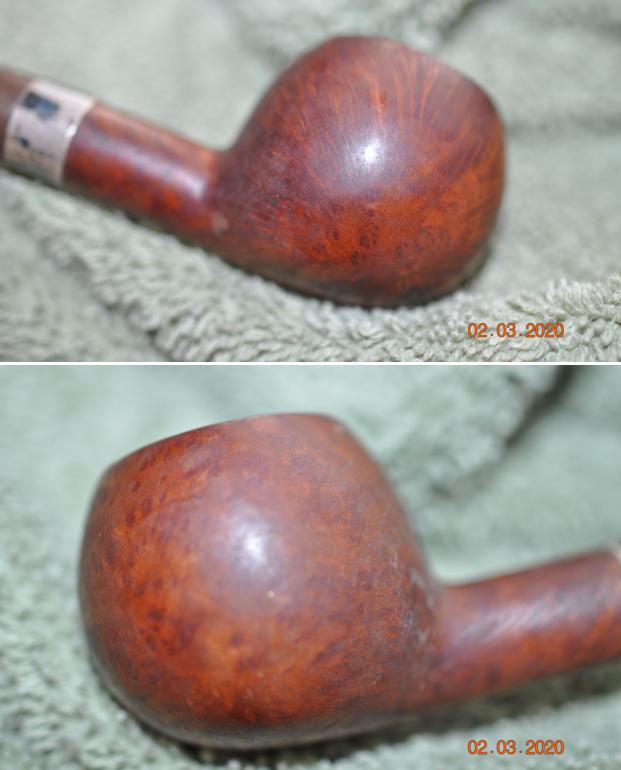
 Without doubt, the briar grain is exquisite and expressive. The right side of the stummel has a spider web pattern and the right side has a loose pattern of bird’s eye. The heel and moving up the underside of the shank are tightly woven bird’s eye patterns. The landscape has much to see. A decision point has arrived, and it doesn’t take long to decide. To protect the nomenclature by covering it with painter’s tape comes at a cost. The picture above shows the dark, almost unseemly black spot now covering the nomenclature. I tried mitigating the spot by wiping it with first, alcohol and then acetone to see if the old dark finish would be extracted. The picture below shows the somewhat lessened spot, but it’s still an eyesore.
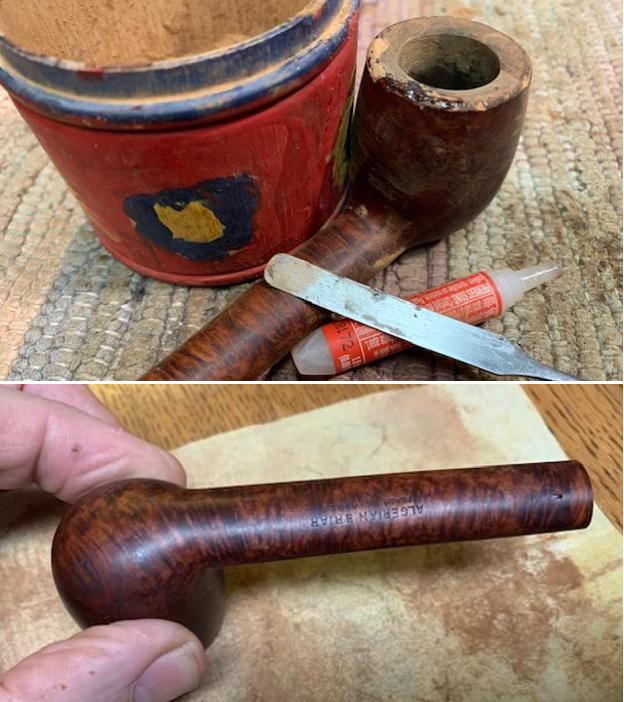
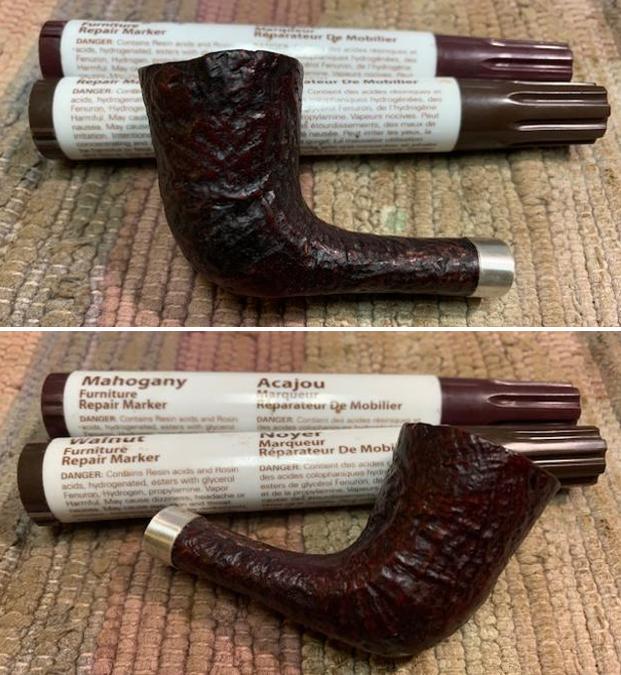
  Even with the spot needing to be blended, I had already contemplated applying a darker dye to the briar surface. The purpose of this is not so much to darken the stummel, but to darken the veins of the grain to give the grain more definition. To do this I apply Fiebing’s Dark Brown Leather Dye to the stummel to create the contrast. After assembling the necessary components on the mobile balcony worktable, the stummel is wiped with a cotton pad wet with alcohol to make sure it is clean. Then the stummel is warmed using the hot air gun.
  Warming the stummel expands the briar allowing the grain to be more receptive to the dye. Using a folded pipe cleaner, the dark brown dye is applied in sections to the stummel then immediately ‘flamed’ using a lit candle. The aniline dye is alcohol based and when the dye combusts the dye hue is left behind in the briar. The process of painting the dye and flaming it is methodically applied over the stummel and rim. When completed, the stummel is set aside to ‘rest’ for several hours – in this case, overnight.
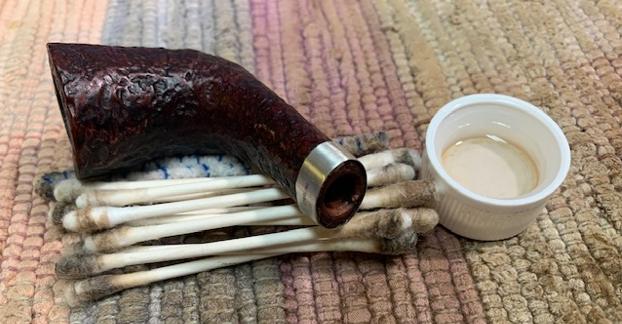
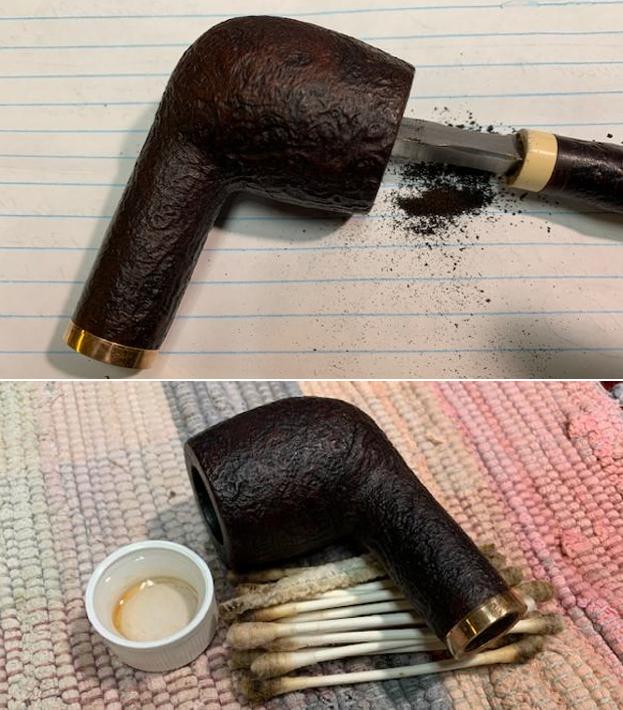
  After a few hours, the stummel can be handled with the hands and I multi-task through the night. In addition to the newly applied dye resting, the internal cleaning is continued using kosher salt and alcohol soak. A cotton ball is stretched and twisted to form a ‘wick’ that is guided down the mortise with the help of a stiff wire. The wick helps to draw the oils and tars from the briar through the soak.
 After putting the wick down the mortise to the draft hole, kosher salt is used to fill the bowl. Kosher salt is used because it leaves no aftertaste unlike regular iodized salt. The stummel is placed in the egg carton for stability, leveling the rim and the end of shank. The bowl is filled with isopropyl 99% using a large eye dropper until it surfaces over the salt.
 After about 15 minutes, the alcohol is absorbed into the salt and cotton wick and more alcohol is added to top off. The lights are switched off and the soak continues through the night.
  The next morning the soiling of the salt and cotton wick show the cleaning action going on through the night. After the expended salt is tossed in the waste, the bowl is wiped with a paper towel to remove all the remaining salt crystals. Blowing through the mortise also helps to dislodge crystals.
 To make sure all is clean and to clean any remaining residue, a single cotton bud and pipe cleaner wetted with isopropyl 99% reveals a clean and refreshed mortise awaiting a new steward. I move on.
 The stummel is now clean and the newly applied dye has rested through the night.
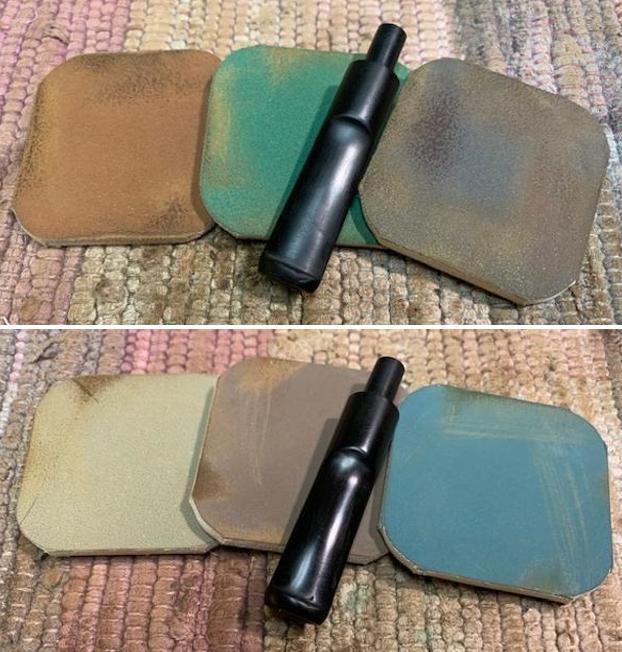
  The next step is to ‘unwrap’ the crusted shell left behind by the dying and firing process. To do this, a felt buffing wheel is mounted on the rotary tool with the speed set a bit slower at about 30% full power. Tripoli compound, a coarser abrasive compound, is applied with the felt wheel which creates more friction. The wheel is purged often with the edge of the chopping board that I use as a lap desk while using the rotary tool. Purging the felt wheel keeps the wheel from clogging up with the crusted dye and it softens the wheel.
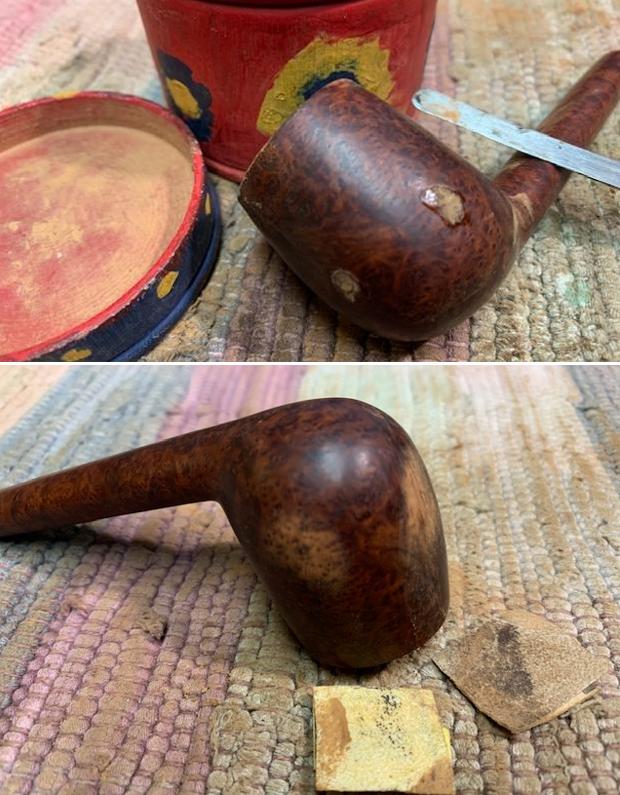
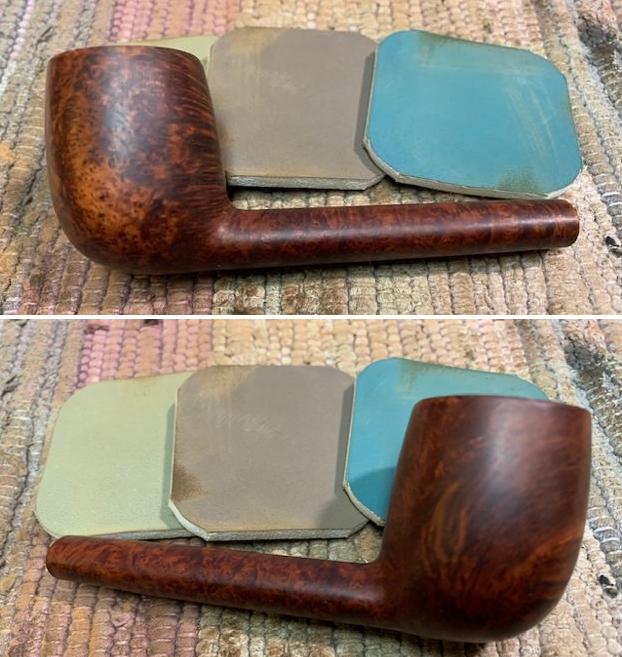
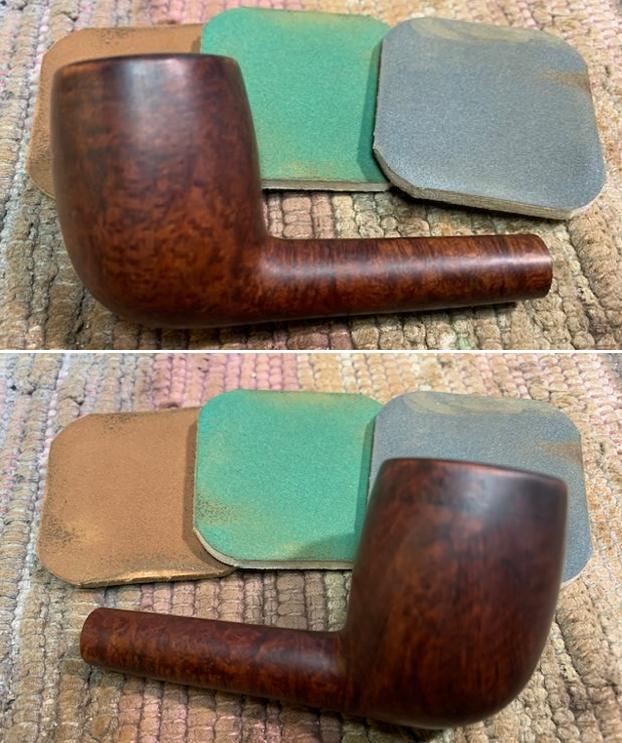
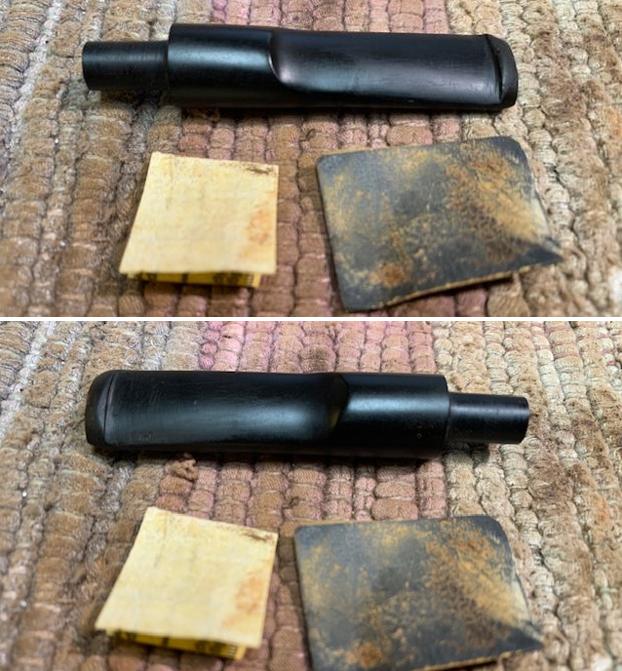
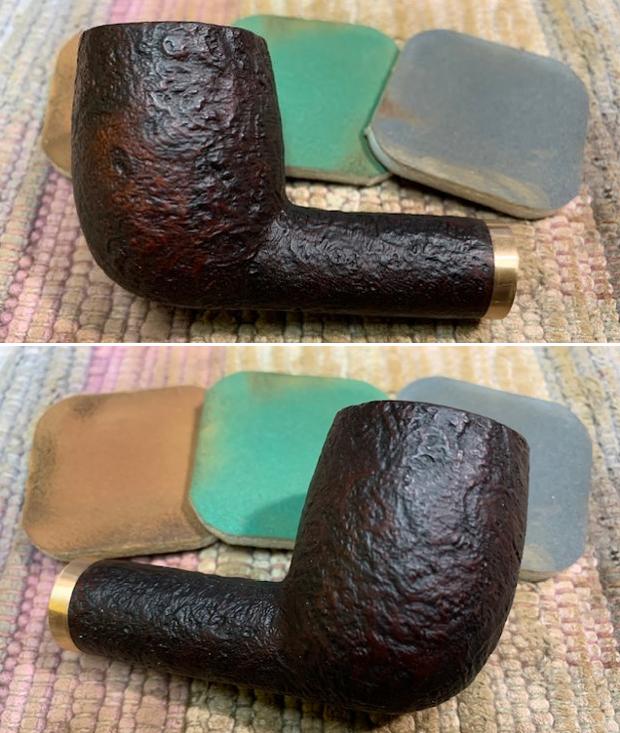
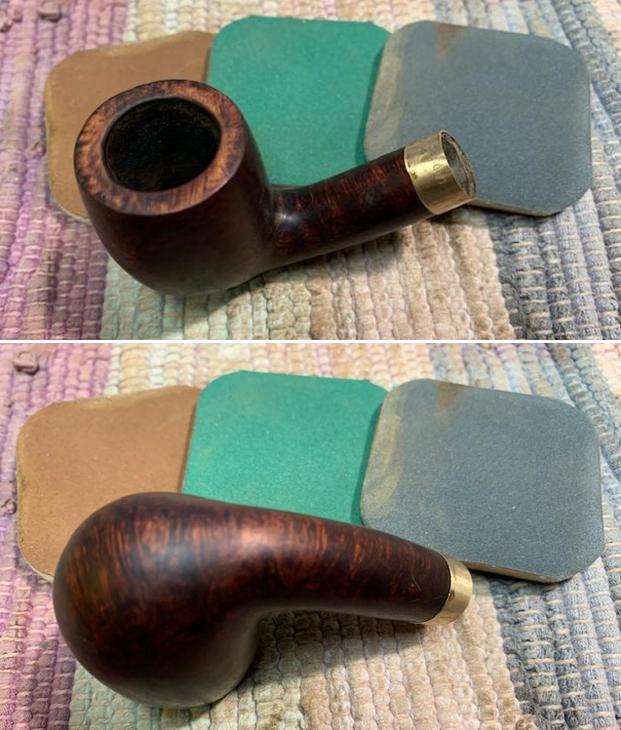
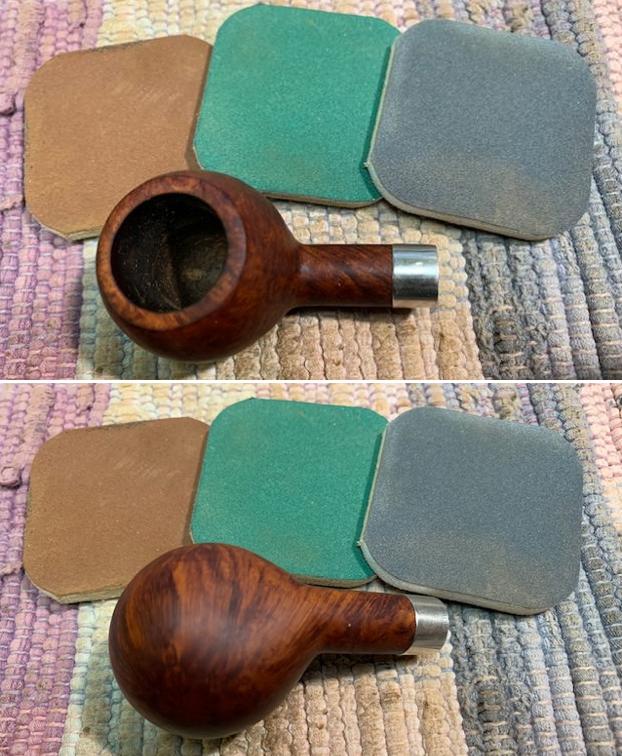
  I pause during the beginning of the unwrapping process to show the progress and results. In the picture below you can see what I call the 3 stages of unwrapping. On the far right of the inverted bowl, is stage one – the flamed excess dye in its original state. To the left of this is ‘stage 2’, the wood is dark from the dye that remains after ‘plowing’ or clearing off the initial crust of ‘phase 1’. You can see grain through this dark finish at this stage but it’s not crisp. When I first started restoring pipes and gaining experience at dying or staining briar, I thought that this ‘phase 2’ was the goal and therefore I left a lot of dye on the stummel which resulted in hiding the grain. I discovered that ‘phase 1’ emerged when the felt wheel and Tripoli compound continued to remove what I didn’t understand earlier, was excess dye which look like thick areas on the surface. The result of working further down to the veins of the grain is an unbelievable luminescence that grows as the contrasted veins (soft wood that absorbs the dye) contrasts with the lighter wood (the harder wood that resists the dye).
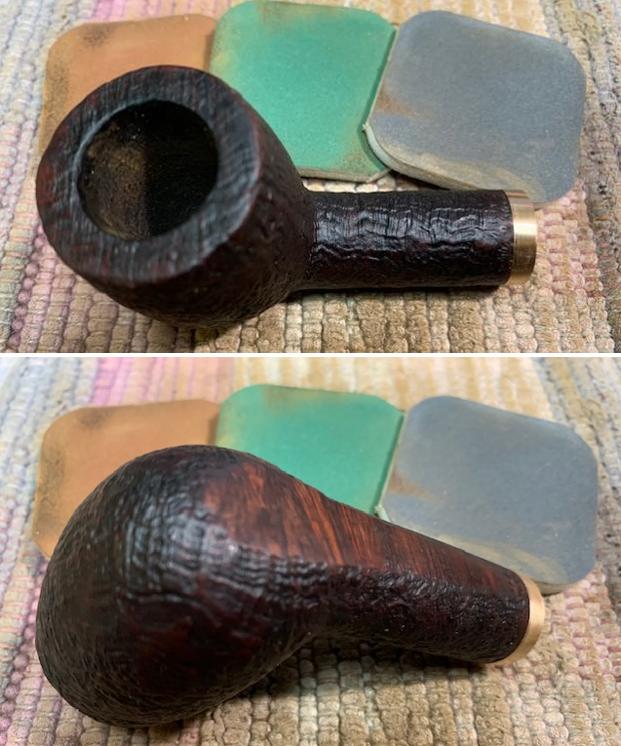
 After unwrapping most of the flamed crust, a smaller felt wheel is mounted on the rotary tool to reach the closed crook junction of the 1/2 bent shank and the bowl. The picture shows the dark area remaining to be unwrapped unreached by the larger felt wheel.
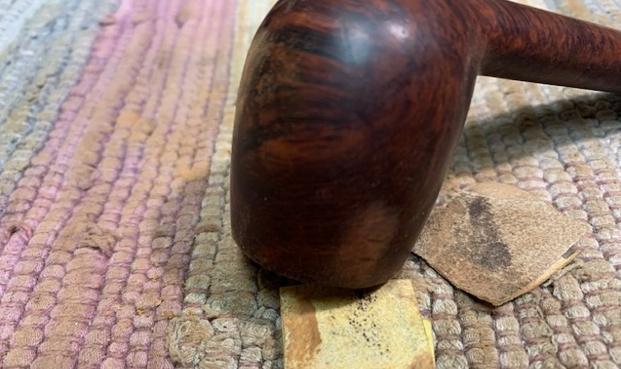
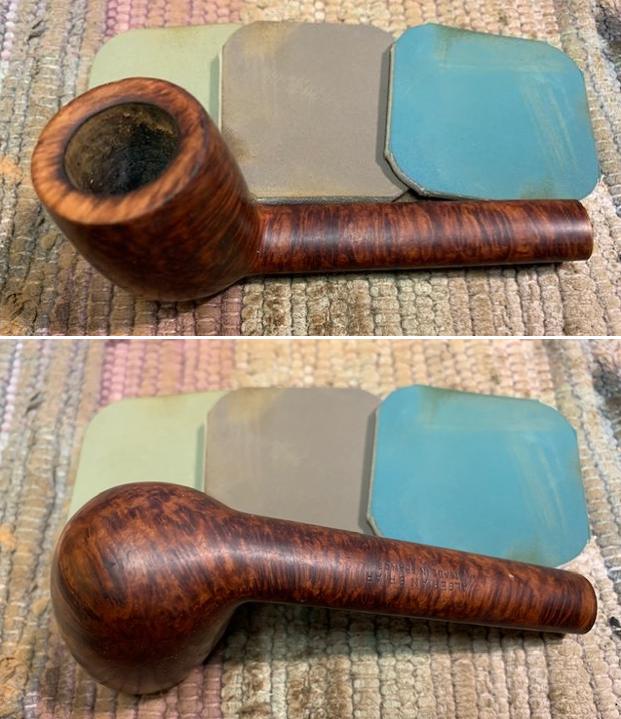
 One last step using the coarser Tripoli compound. Switching from a felt buffing wheel, a cotton cloth wheel is mounted on the rotary tool with the speed increased to about 40% full power. Again, Tripoli is applied to the stummel with the softer buffing wheel which has the effect of fine tuning the crispness of the grain vein lines.
 After completing the Tripoli compound, the bowl is wiped down with a cotton pad wetted with alcohol. This removed more excess dye as well as blend the dye on the stummel. After three rounds of Tripoli compound, the amount of dye removed by the cotton pad is not a lot. The entire process of unwrapping the stummel to point took me about 2 1/2 hours – it’s not a fast process!
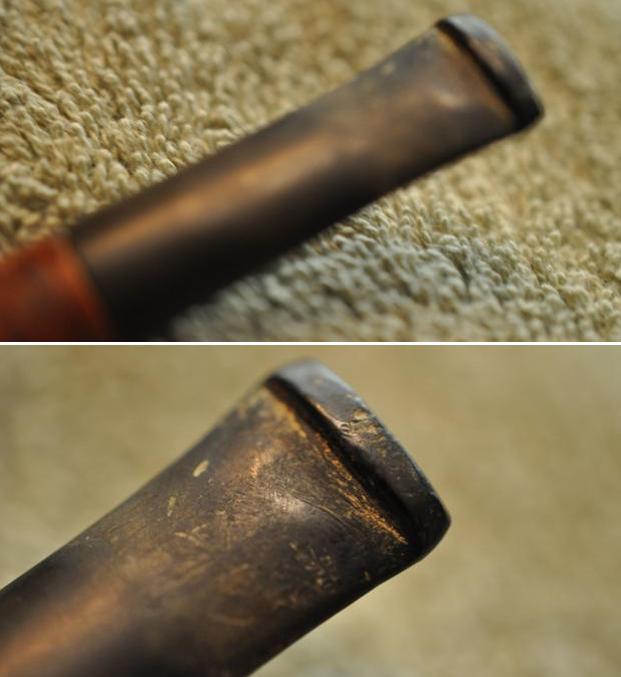
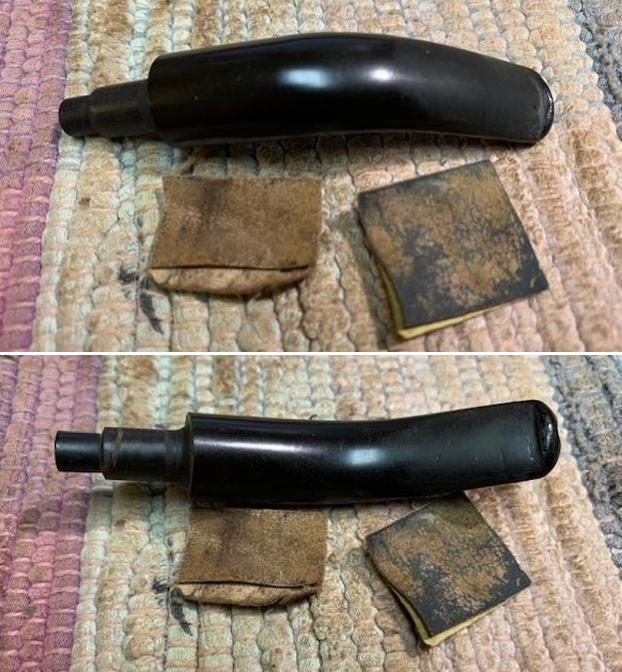
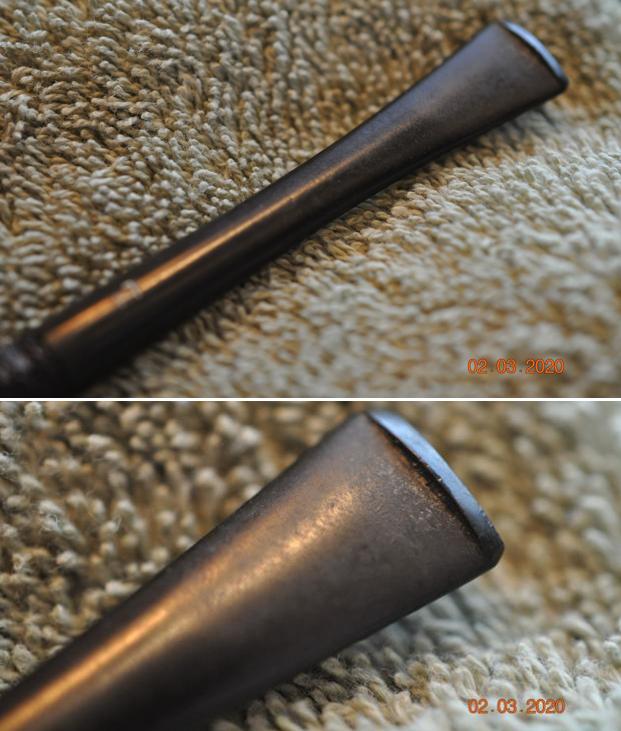
 The stem has been waiting for attention. The earlier soak in the Briarville Stem Oxidation Remover worked well. There is almost no tooth chatter but a small bite mark on both the upper and lower button. Simple sanding will address this.
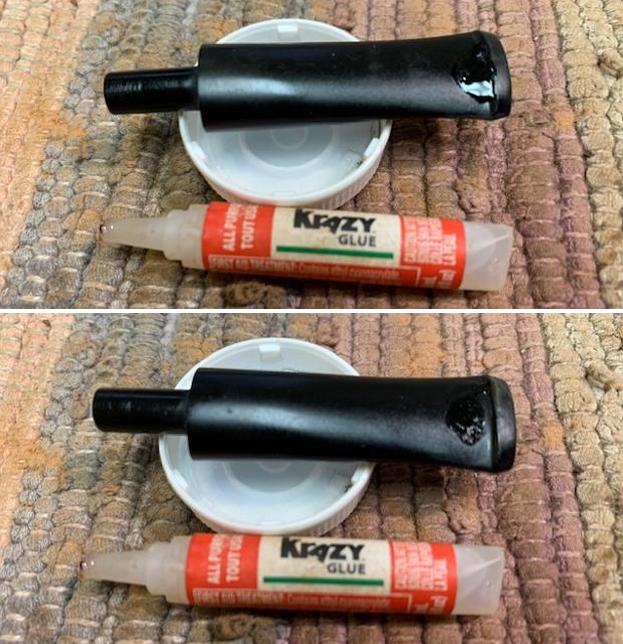
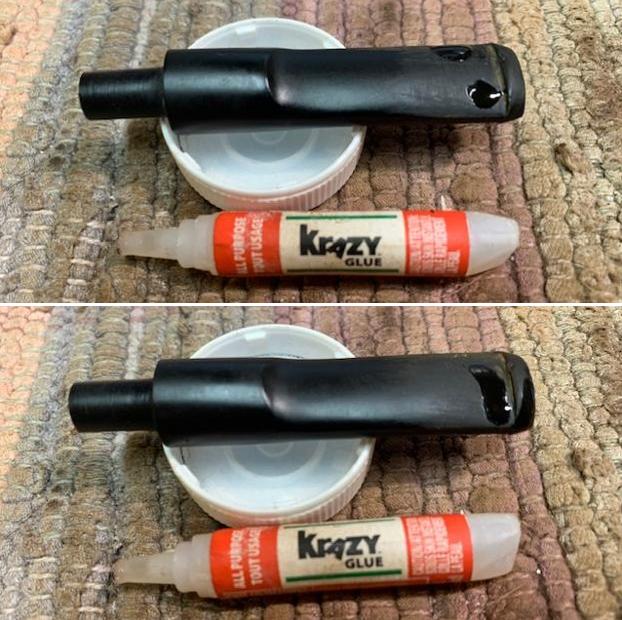
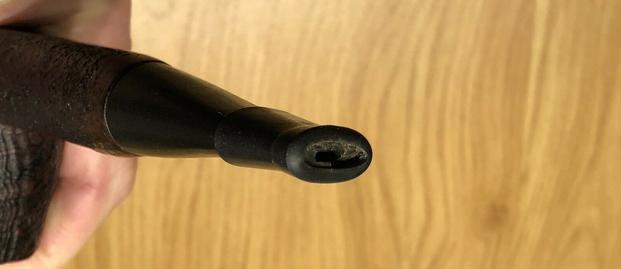
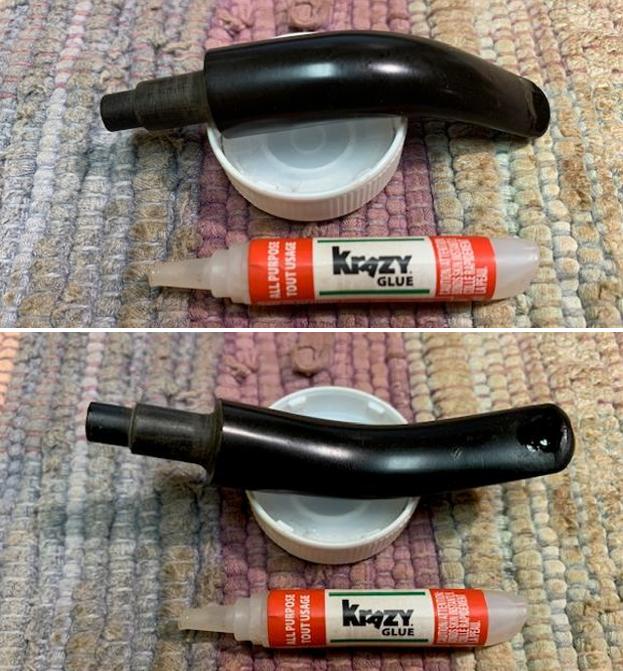
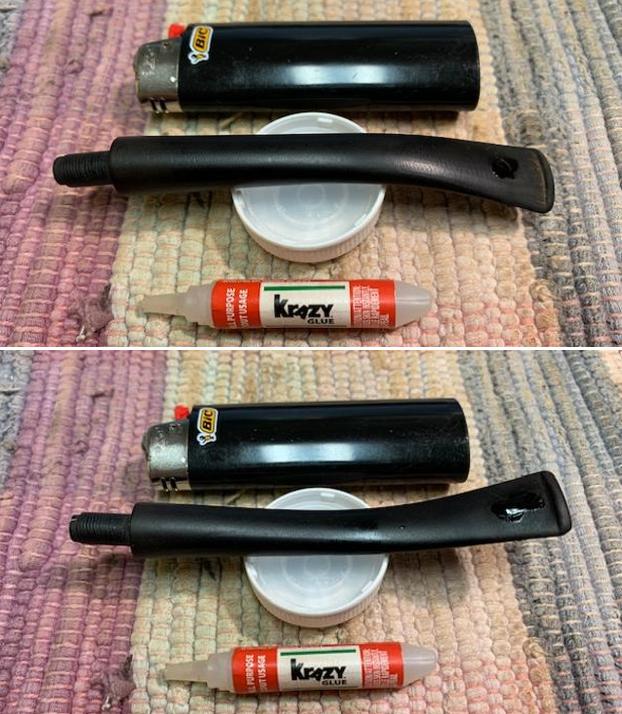
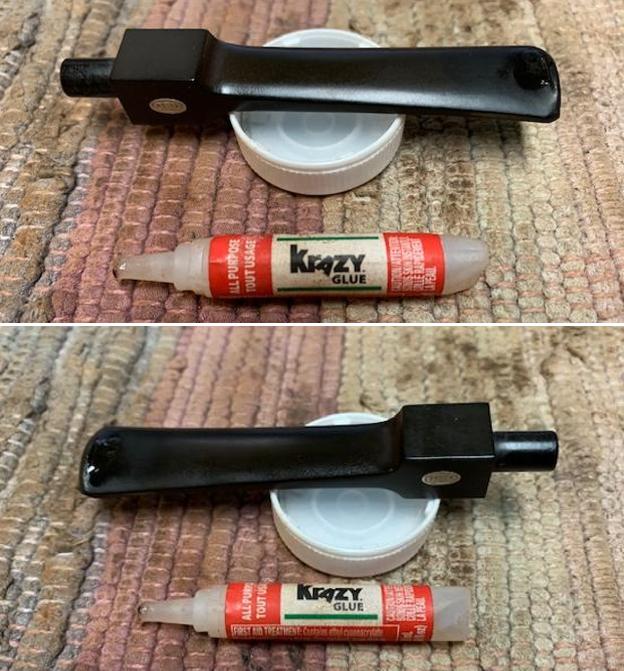
  There are two cuts in the side of the bit that appear to have happened in a coffee can or something. These will be mitigated using the heating method.
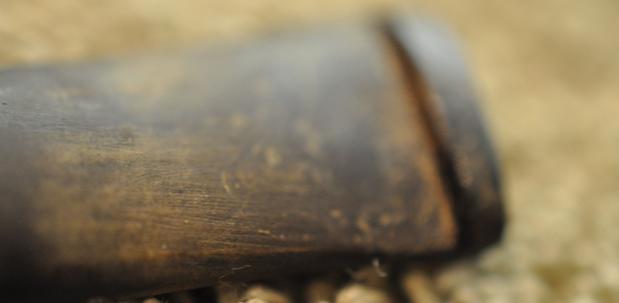
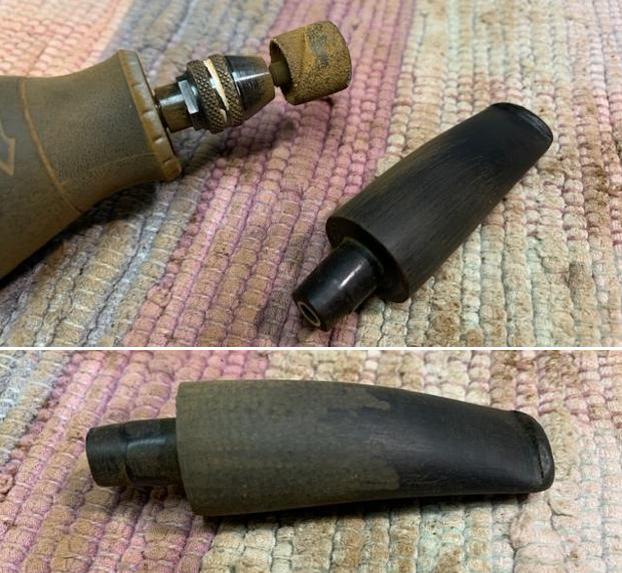
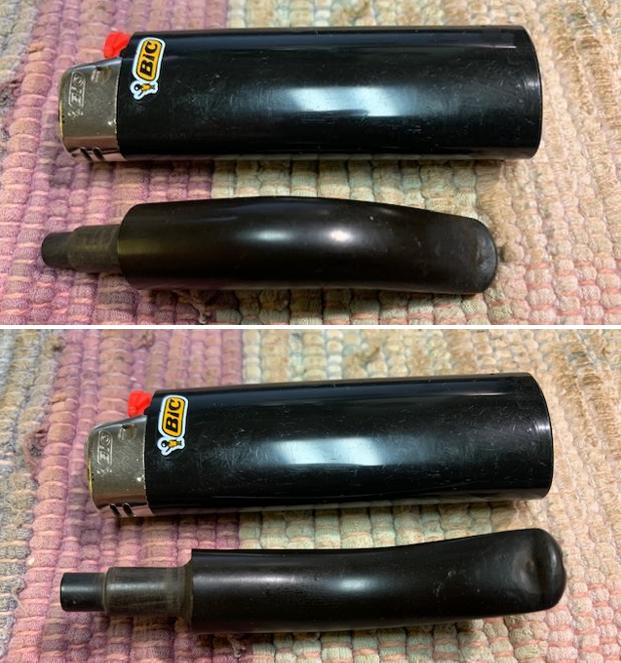
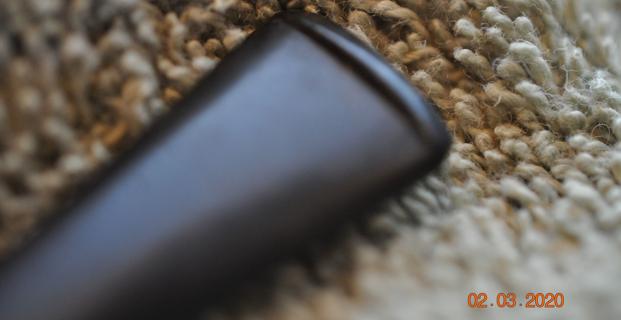
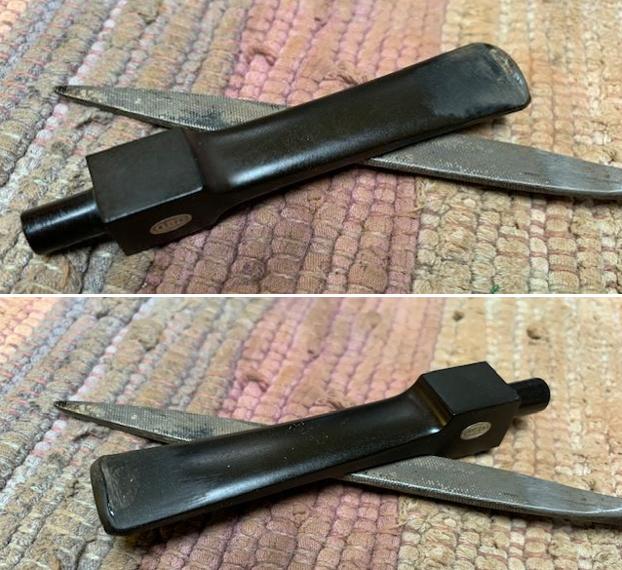
 The side of the bit is painted with the flame of a Bic lighter and as the vulcanite expands, it regains the original condition of the surface. With the stem flipped with the two cuts on the bottom in the picture below, the heating almost erases the marks.
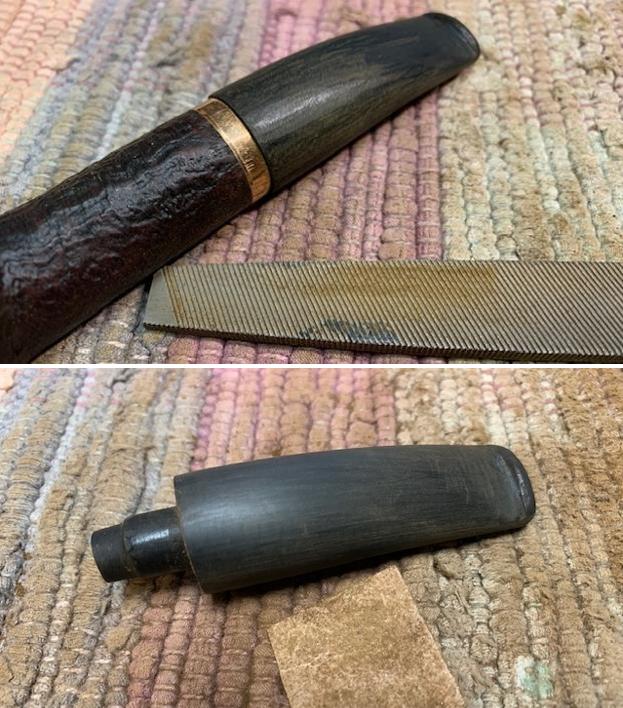
 Continuing now with the normal process of restoring the stem, the button is refreshed using a flat needle file – upper and lower.
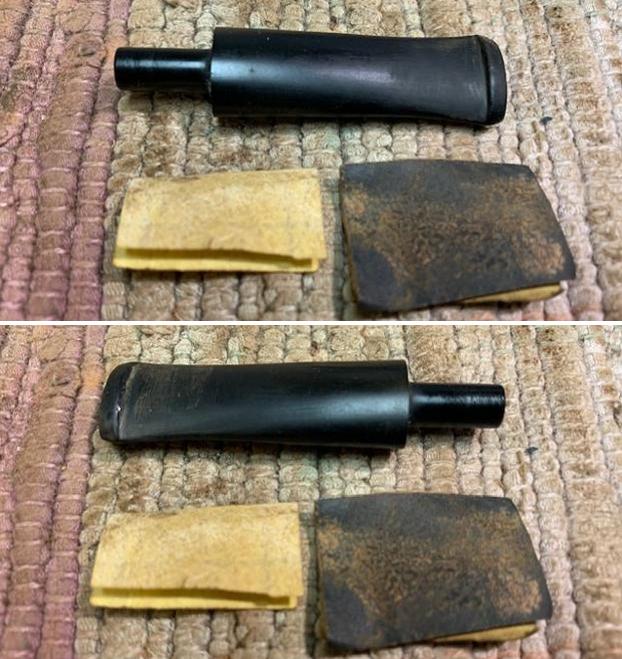
 Sanding with 240 grade paper quickly dispatches the dents on the button lips and the remaining marks of the cuts on the side of the bit.
  Along with the bit, the sanding is expanded over the entire stem to smooth the roughness of the vulcanite and to erase any other scratches. I plastic disk is used to protect the stem facing from sanding over the edge of the stem – shouldering the stem. Though the entire sanding process, care is given to avoiding the stamped ‘B’ stem logo.
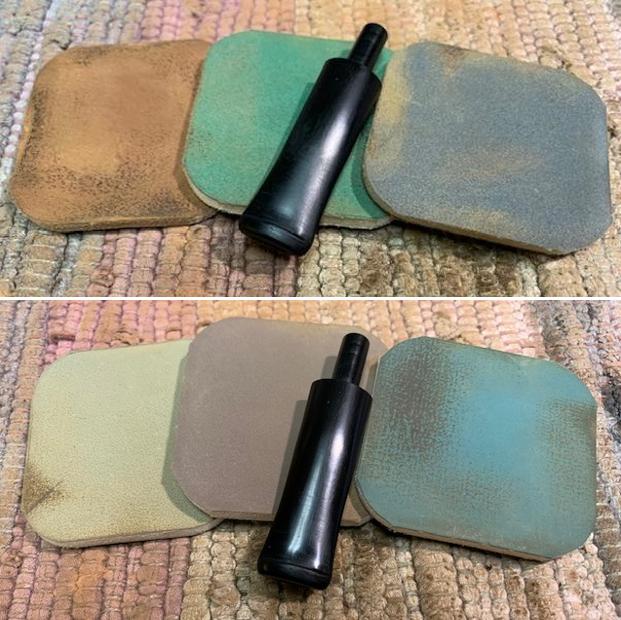
 The sanding is continued by wet sanding with 600 grade paper and then applying 0000 grade steel wool.
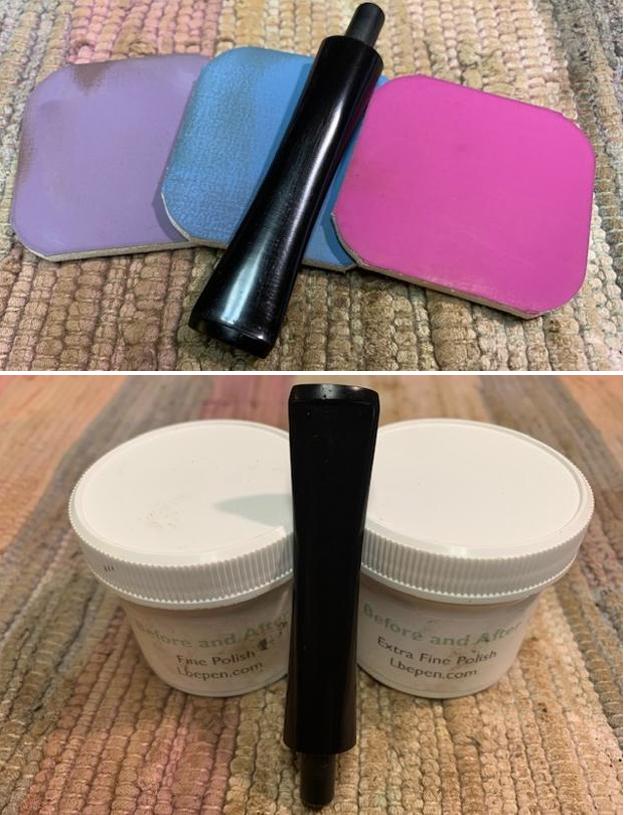
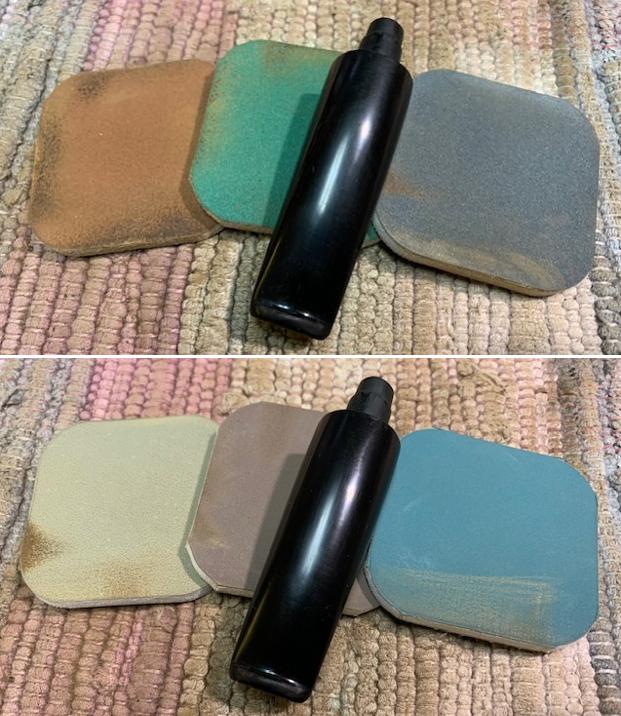
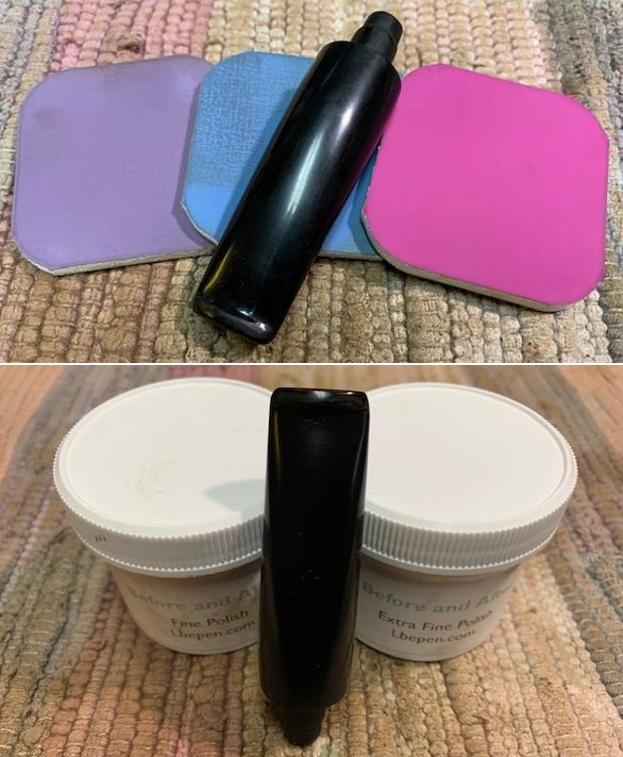
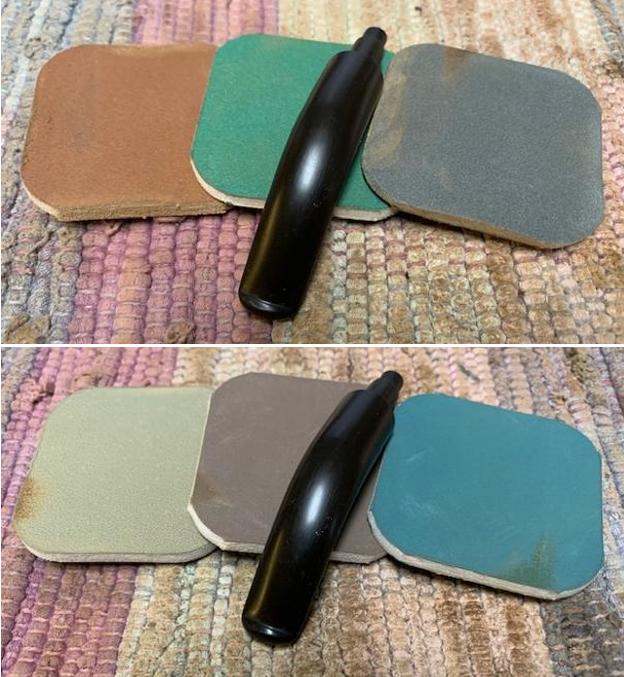
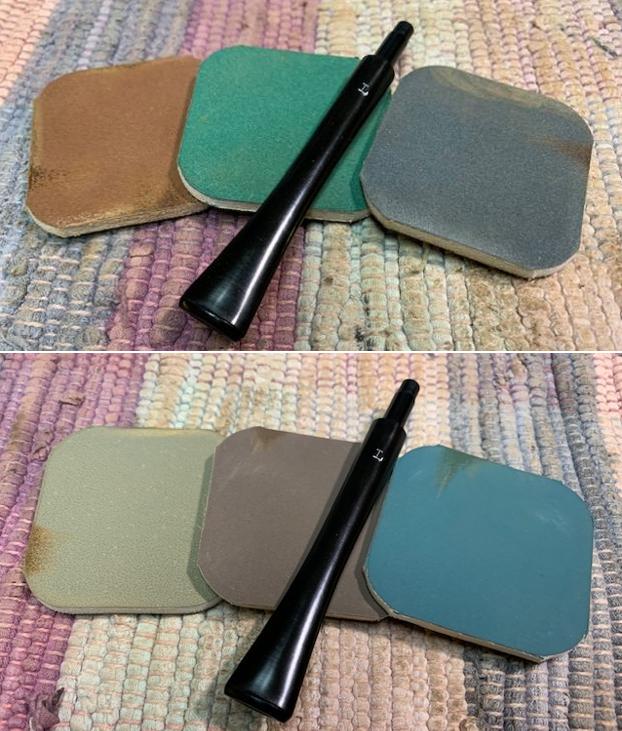
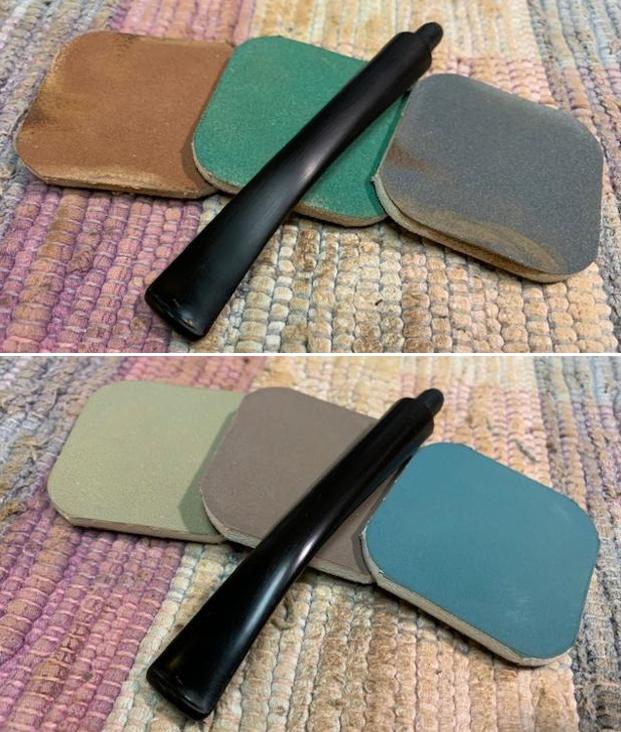
  On a roll, the sanding continues with the full regimen of 9 micromesh pads starting with wet sanding with pads 1500 to 2400. Following this, dry sanding with pads 3200 to 4000 and 6000 to 12000. Between each set of 3 pads, Obsidian Oil is applied to condition the stem and to guard against oxidation. I love the pop of newly sanded vulcanite!
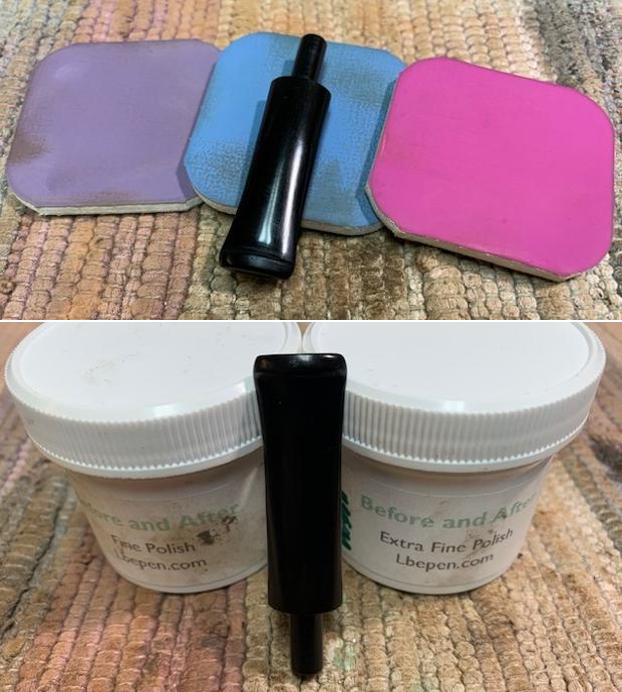
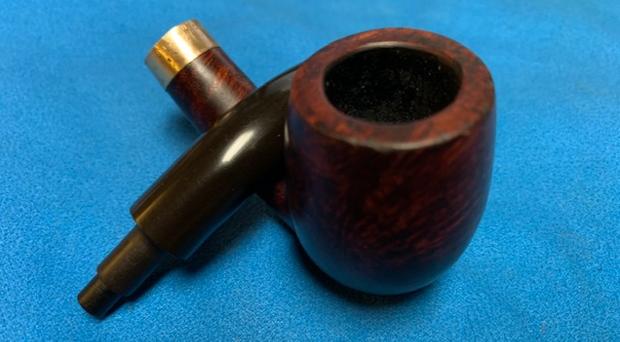
 The stem has caught up with the stummel in the sanding process. I attempt to reunite the stem and stummel to discover that the mortise fit was a bit too tight for the tenon. This often happens when the briar has been cleaned and expands.
 This is easily addressed using 240 sanding paper. I pinch the paper around the tenon and then rotate the stem in the grips of the sanding paper which creates the abrasion to help the fit. It doesn’t take much help. The tenon is snug but not overly tight. I always turn the stem the same way mounting or dismounting the stem.
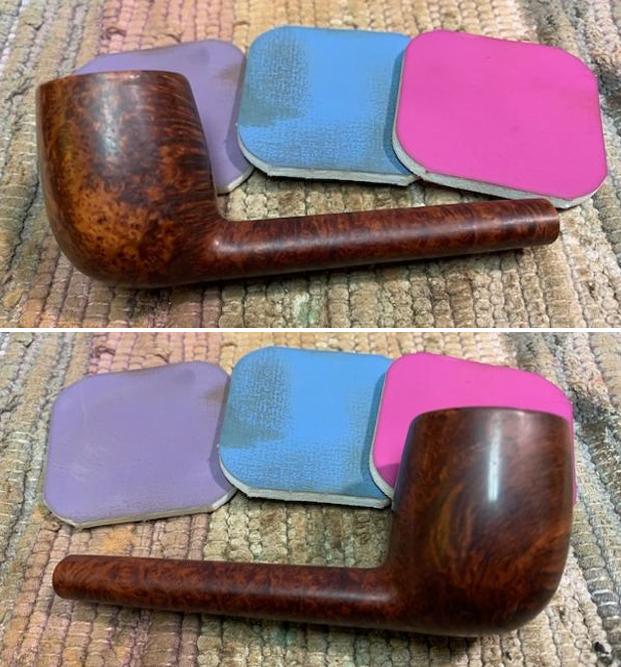
 With the stem and stummel rejoined, another cotton cloth buffing wheel is mounted to the rotary tool with speed set at about 40% full power. Blue Diamond compound is then applied to the entire pipe.
  After applying Blue Diamond, the pipe is wiped/buffed with a microfiber cloth (I forgot my felt cloth in Colorado!) to remove the vestiges of compound dust that can crust on the surface. I don’t want the compound dust mixing with the wax coming up.
 Before applying the wax, the Bennington ‘B’ stem logo needs refreshing.
 To do this, a small drop of white acrylic paint is applied and spread over the B.
 A cotton pad is this used to daub the wet paint to thin it and it dries quickly.
 The side of the pointed cotton bud is used to scrape off the excess paint with gentle strokes.
  The cotton pad finishes the job with a firm rubbing of the logo to clean the remaining excess paint. It looks good!
 Another cotton cloth buffing wheel is mounted to the rotary tool with the speed set at 40% full power. Carnauba wax is then applied to the pipe. Following this, the pipe is given a rigorous hand buffing using a microfiber cloth. This raises the shine and disperses wax residue remaining on the surface.
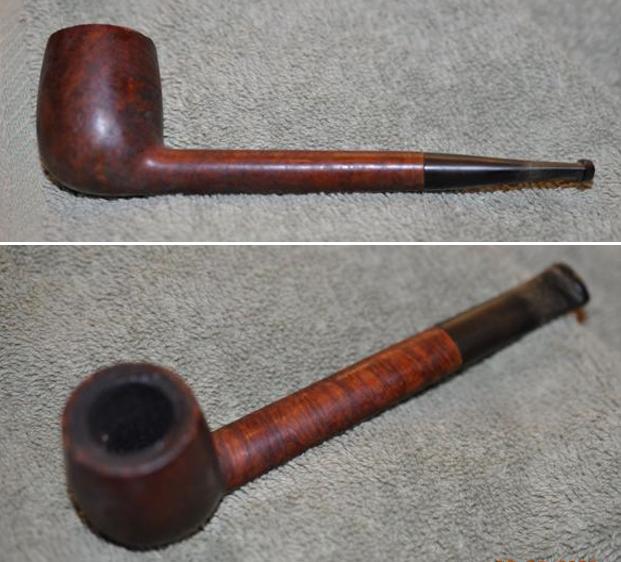
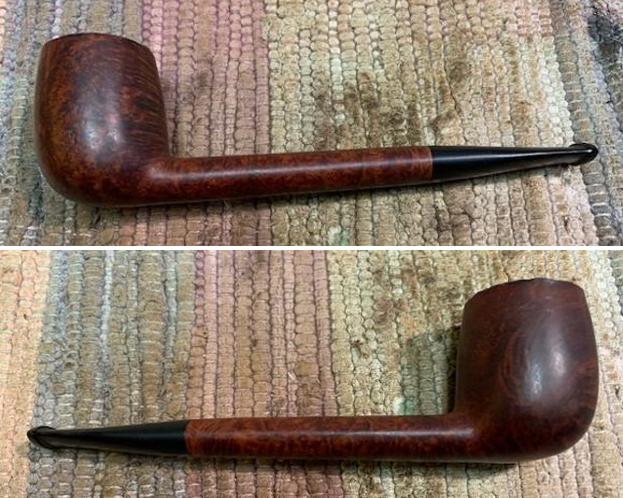
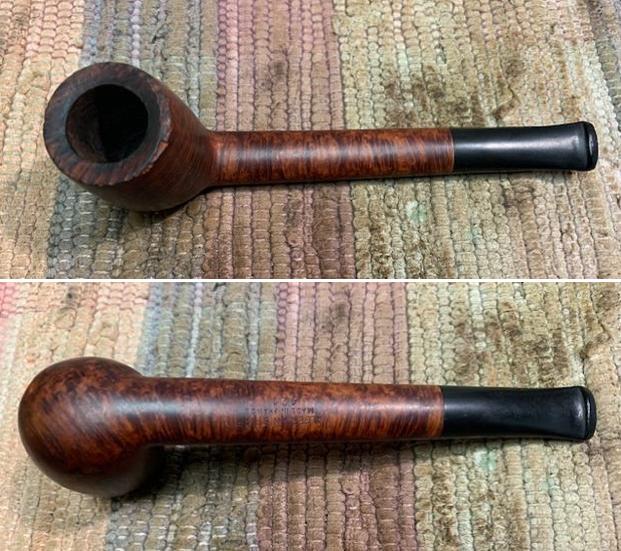
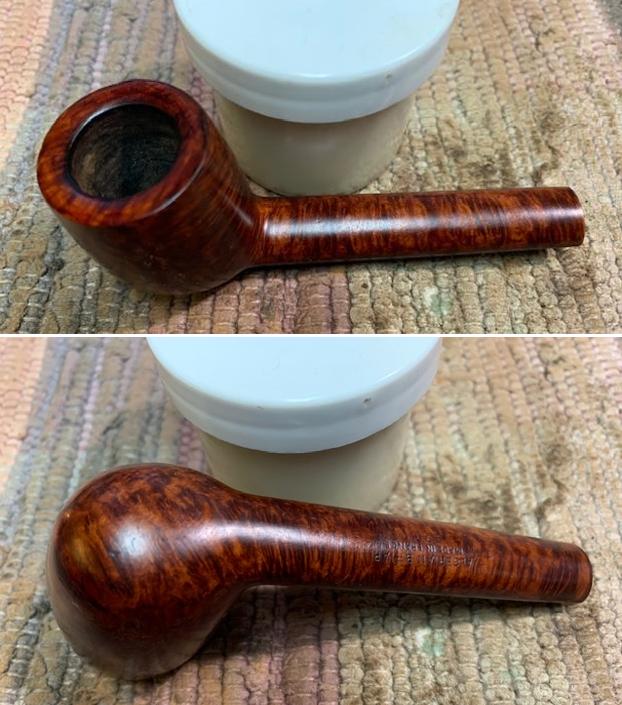
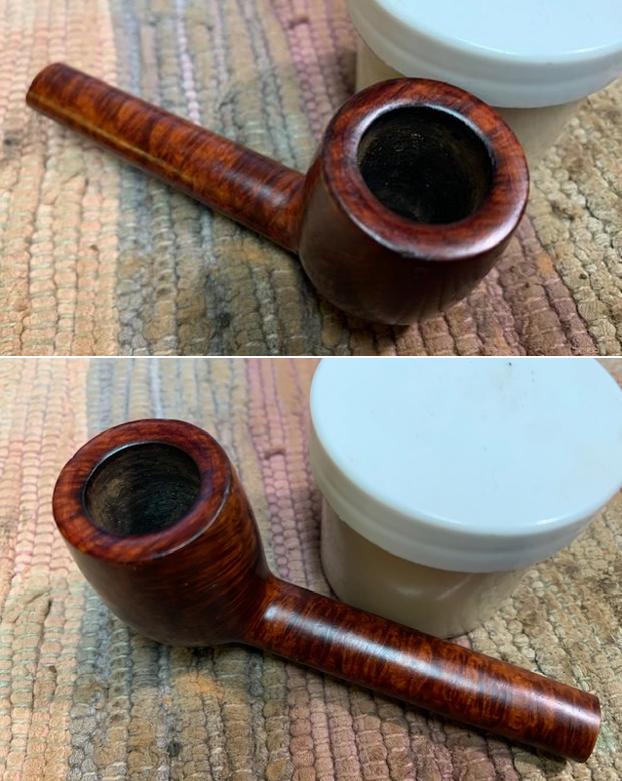
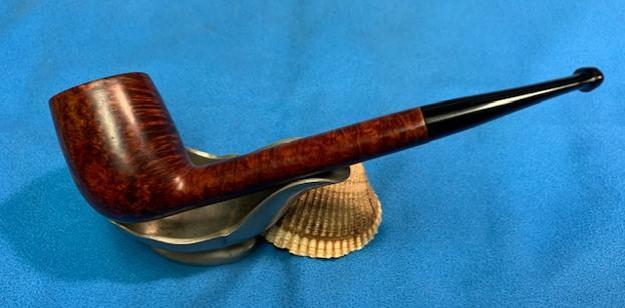
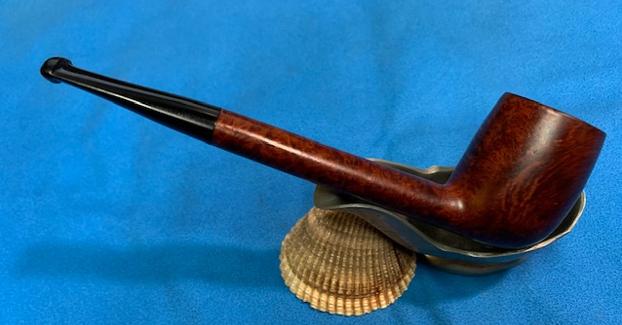
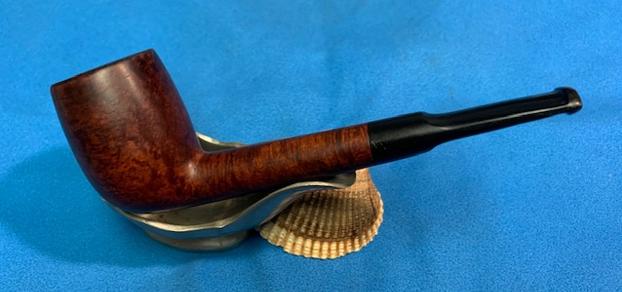
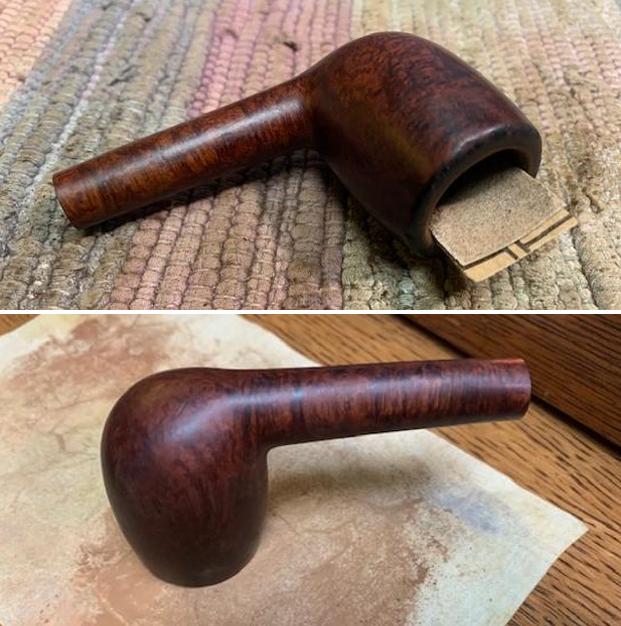
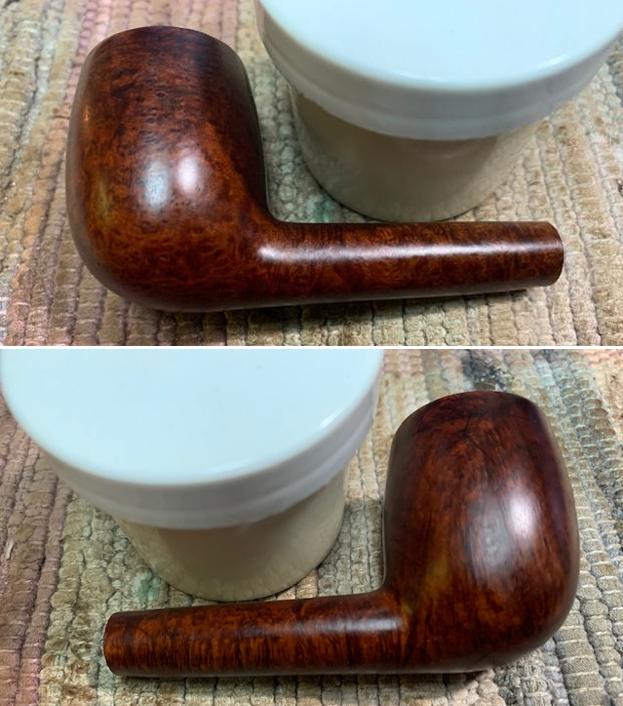
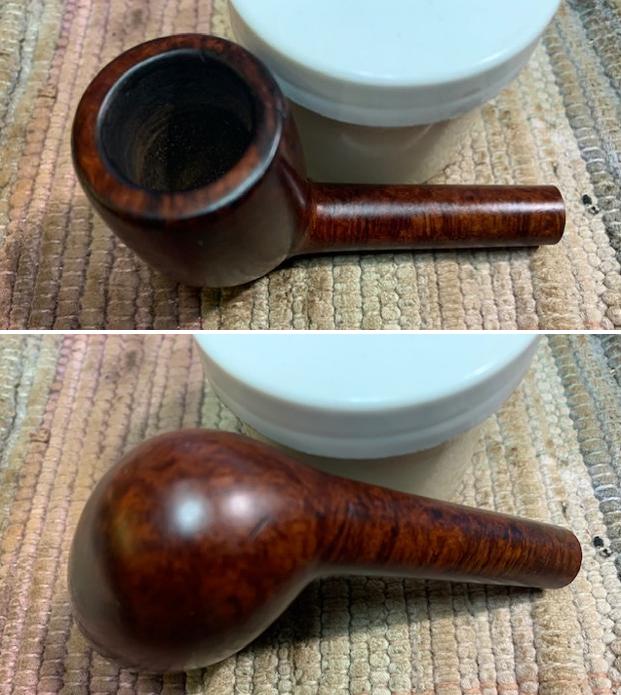
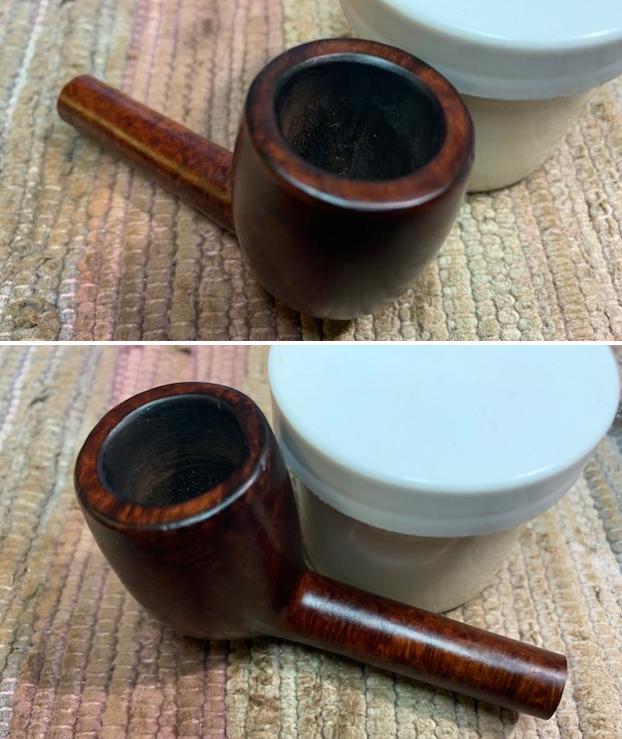
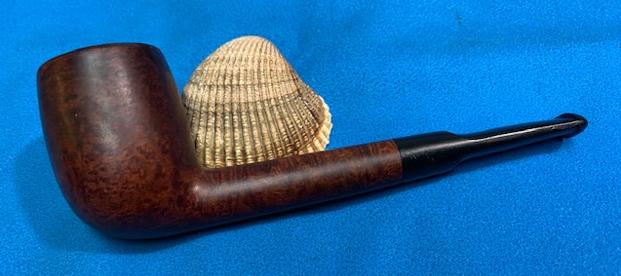
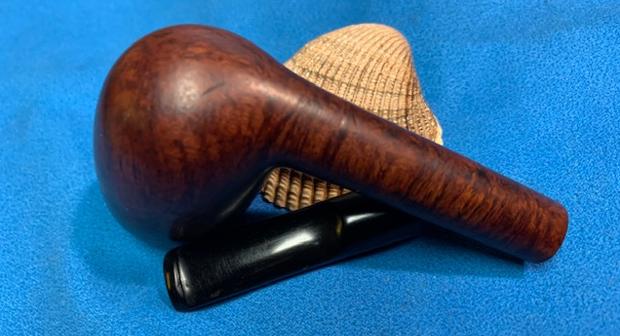
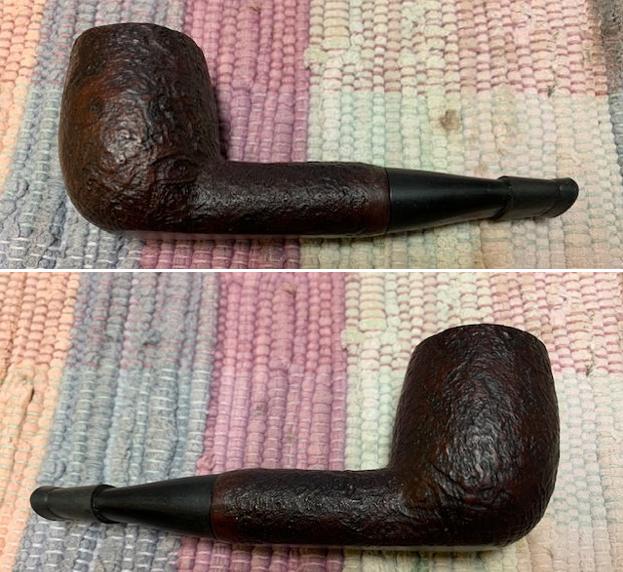
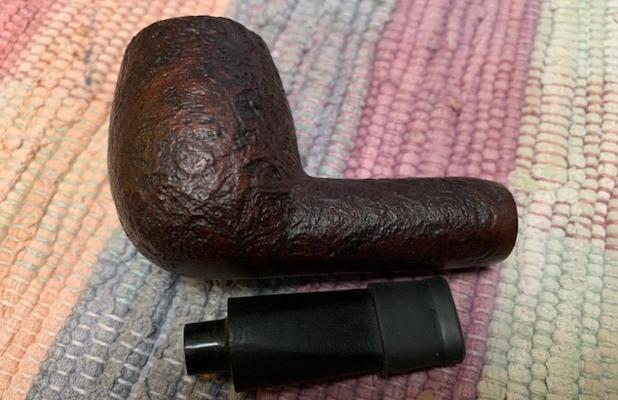
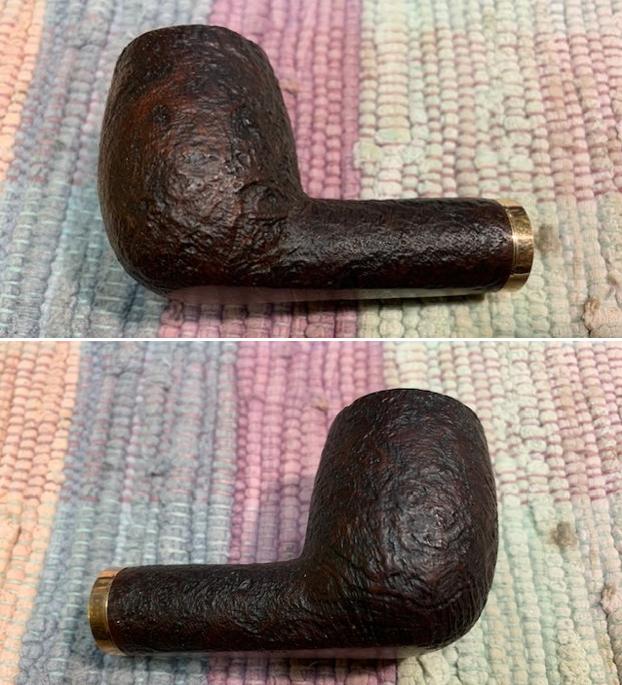
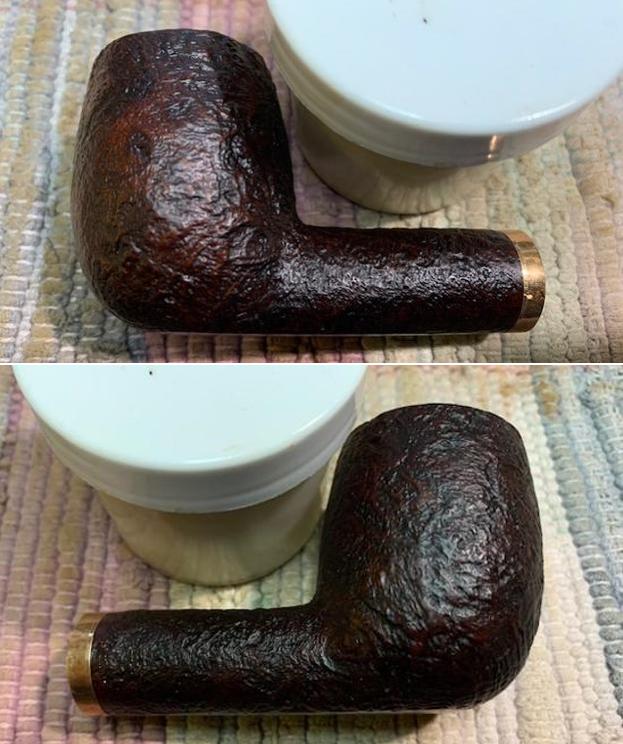
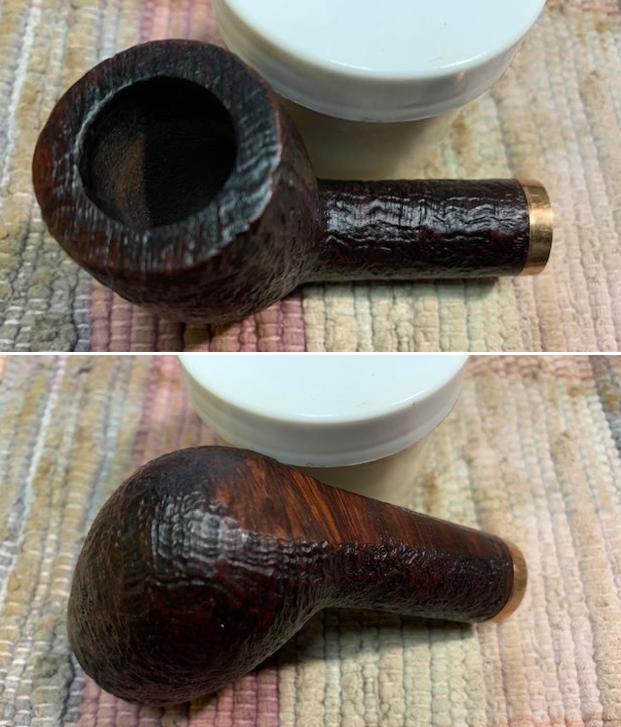
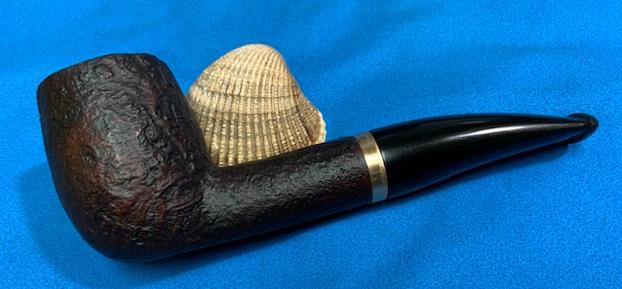
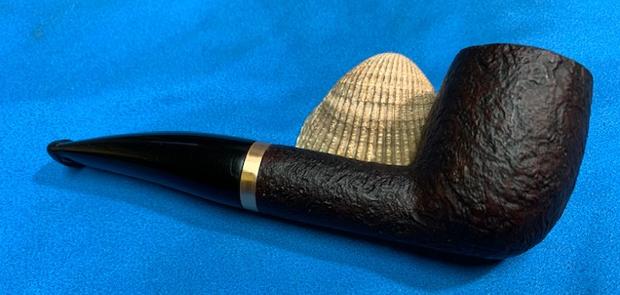
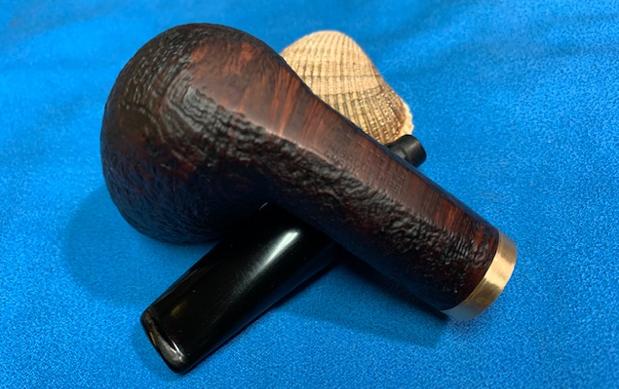
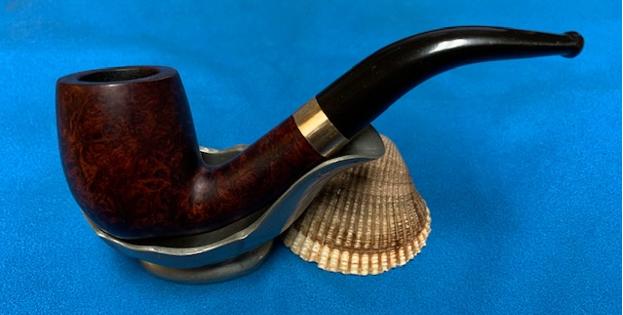
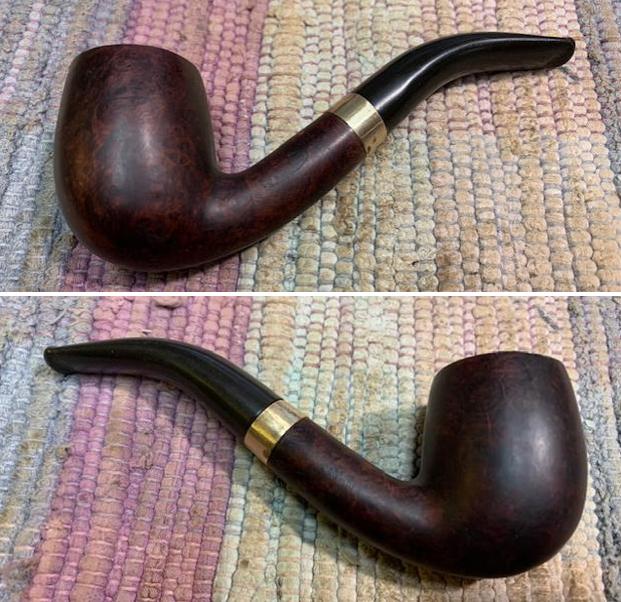
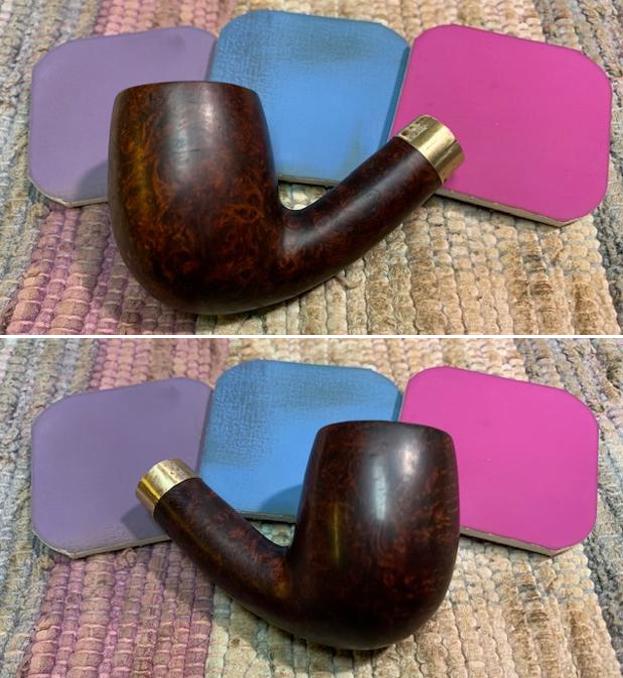
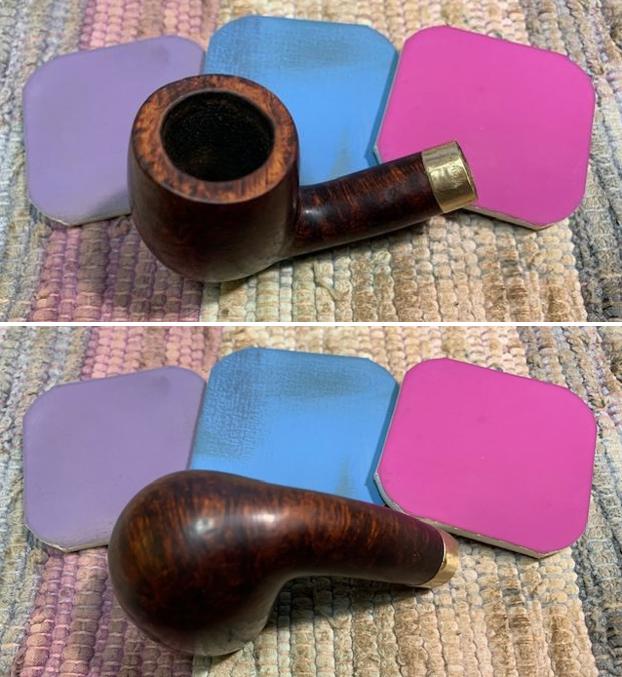
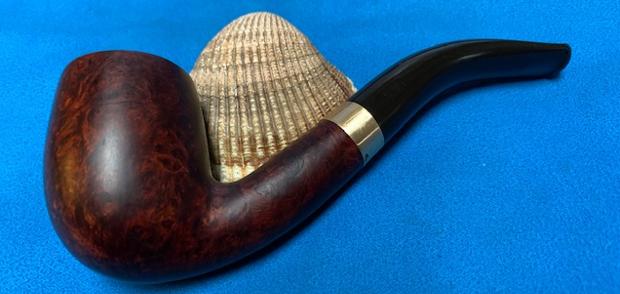
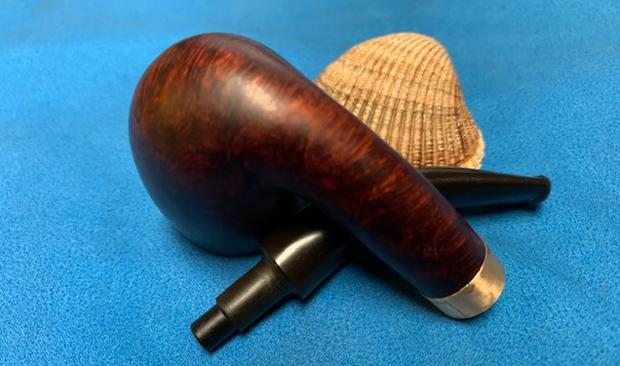
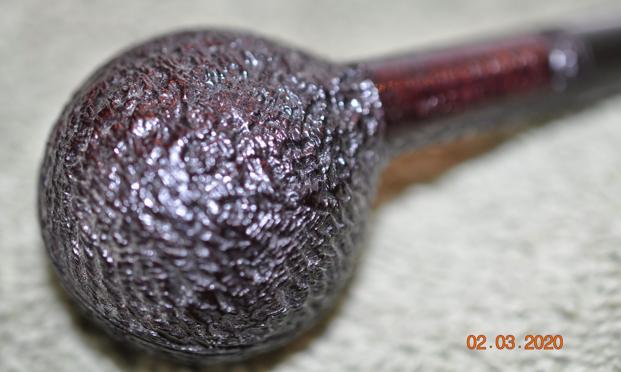
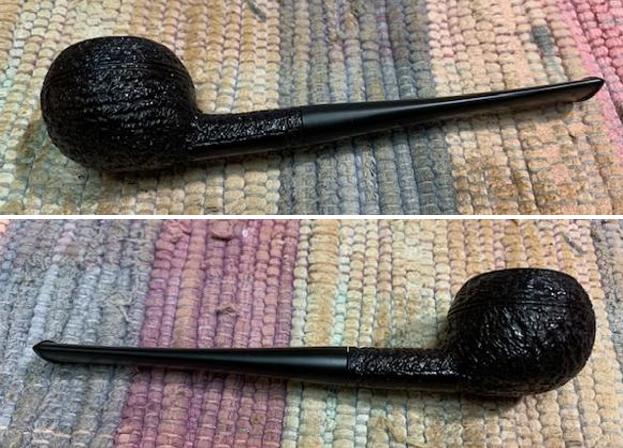
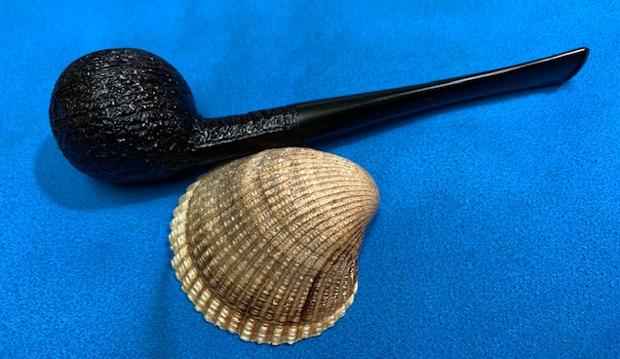
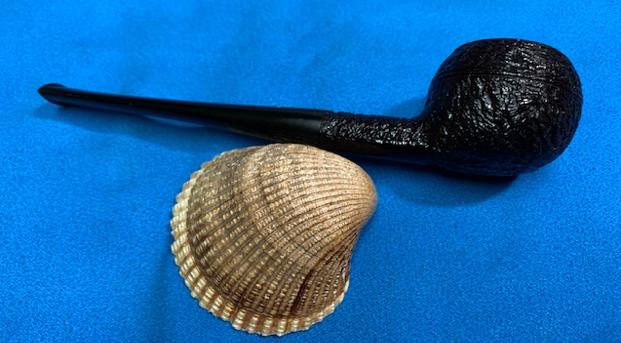
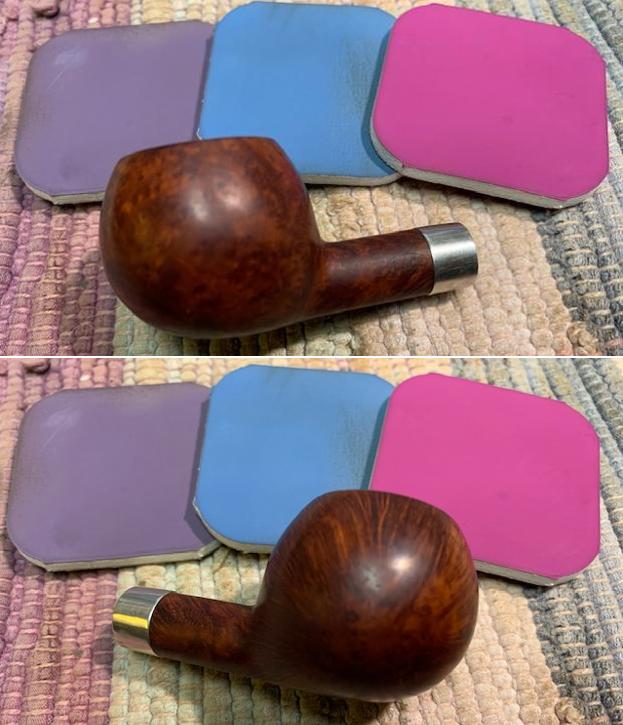
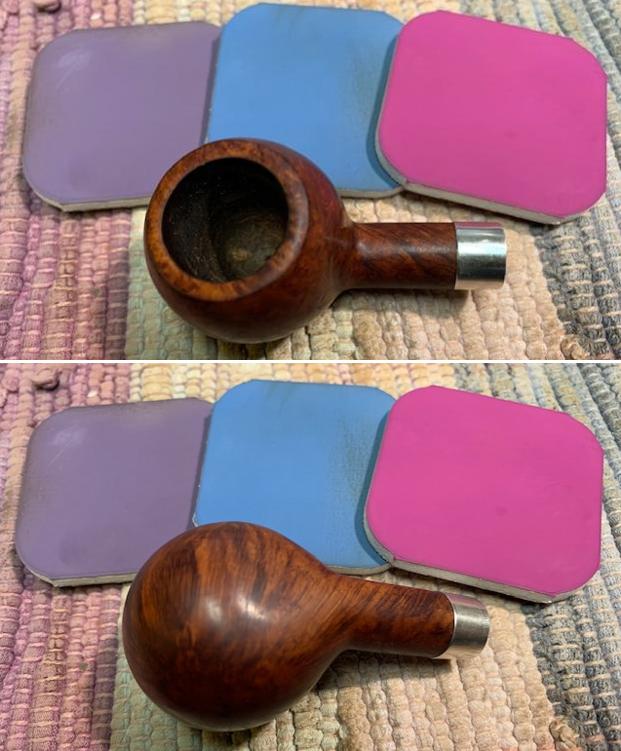
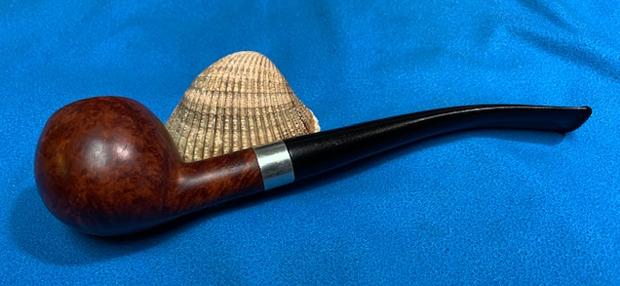
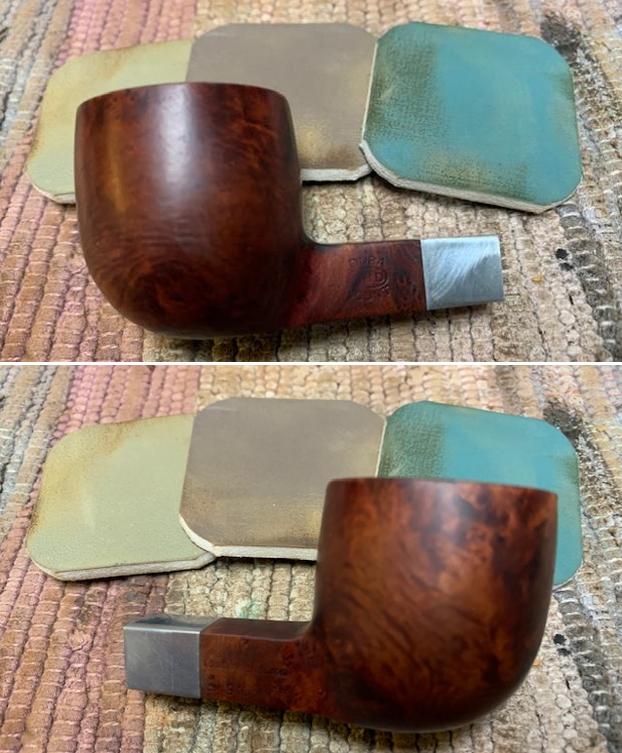
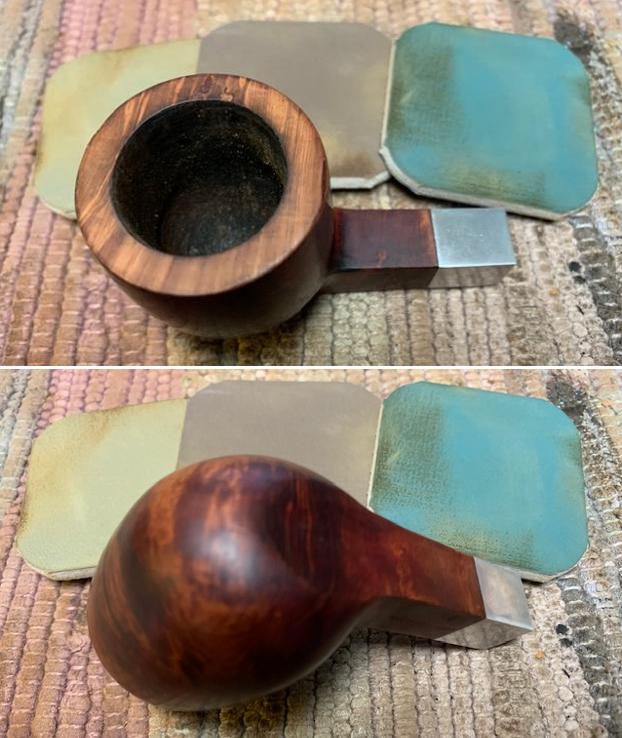
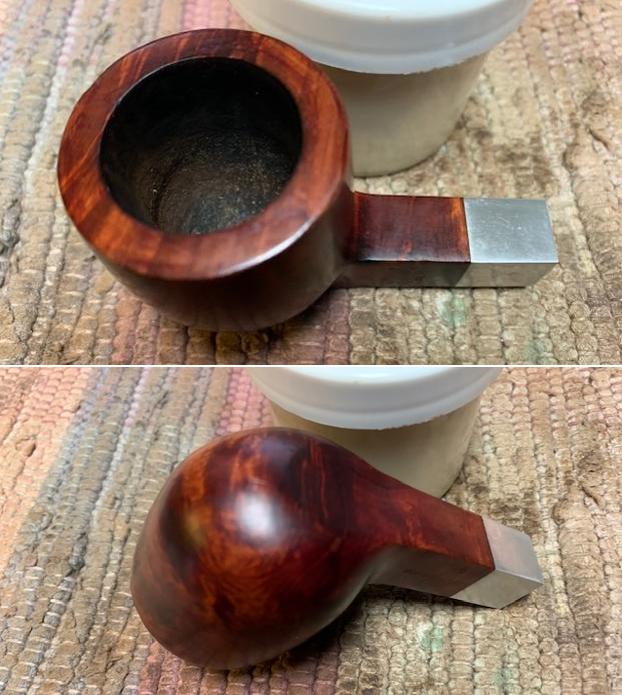
 Wow! The grain on this Bennington Supreme Half Bent Billiard came out beautifully and provides quite the showcase for the eyes! Earlier I sent an email to the Bennington email address listed in Pipedia to find out if I could find more information about this Bennington Supreme. I received no response. I called the phone number given to see if they were still in operation. Unfortunately, the phone rang but it was never picked up. I’m wondering if Bennington’s in Sarasota had the same fate as the shop in Boca. I’m pleased with the results of the Bennington Supreme. A classic Half Bent Billiard will serve a new steward well. As the commissioner, Bill has the first opportunity to claim the Bennington at The Pipe Steward Store benefiting the Daughters of Bulgaria – helping women and girls who have been trafficked and sexually exploited. Sometimes I like to start the presentation pictures with a ‘Before’ picture to appreciate fully the transformation. Thanks for joining me!


 ADDENDUM – I’m pleased to include this note which arrived after posting the write up. My gratitude and thanks to the Bennington Tobacconist in Sarasota:
Hello Dal,
We would be happy to tell you as much as possible. All we have to give is: The Supreme pipe was one of our Private label pipes which was made for us by Weber Pipes. From 1966-1984. Greek Briar, Moderately Priced. Discontinued after Weber Pipes went out of business. Hope this helps.
Thank You,
Bennington Tobacconist

 I have quite a few of the pipes in this collection that we purchased from the older gentleman. He sent me the photos and I was amazed at what I saw. You have seen many of the pipes that he had. These included Dunhill, BBB, Orlik, Barclay Rex, a cased Ben Wade, an H. Simmons all briar, Hardcastles and some Meerschaums. There were also some assorted others that I will get to in the days ahead. It was a great collection.
 Jeff took photos of the bowl, rim top to show the thickness of the cake in the bowl and the thick lava on the rim top. The rim top and both inner and outer edges are so thickly covered that it is hard to know their condition. It appears that there is a large chip on the outer edge at the back of the bowl that will require a bit of attention. All of the issues will become clearer after the clean up. He took photos of the top and underside of the vulcanite stem showing the oxidation, calcification, tooth marks, chatter and wear on the stem and button.
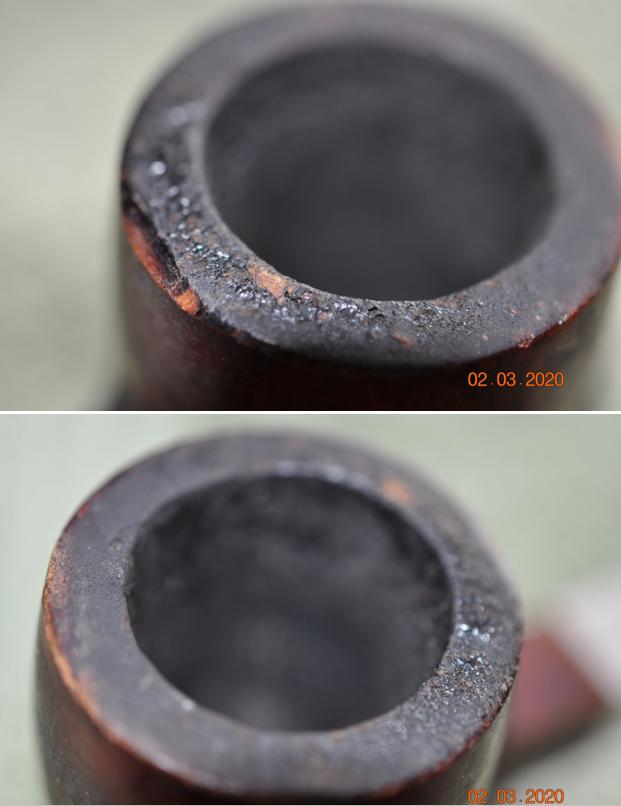

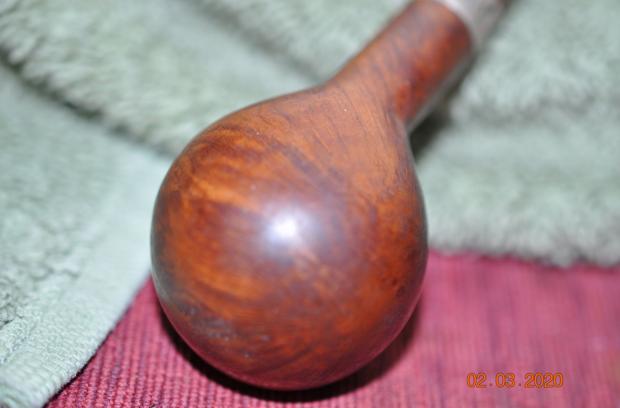
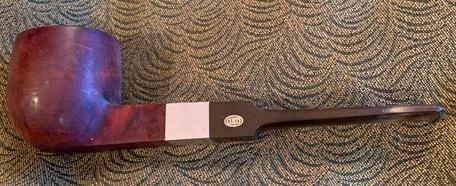
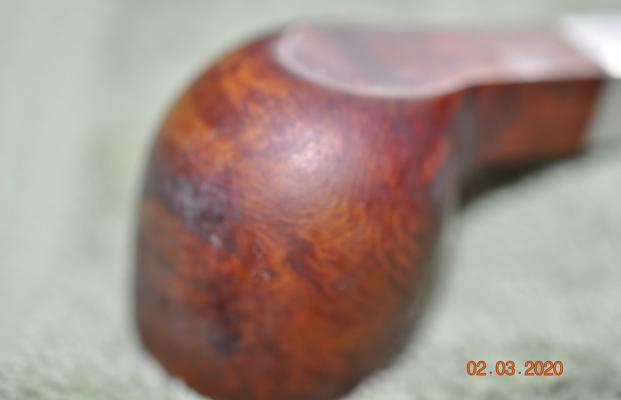
 Jeff took photos of the sides and heel of the bowl to show the condition of the briar. You can see the beautiful shape of the bowl and some interesting grain even through the dirt and debris of many years.
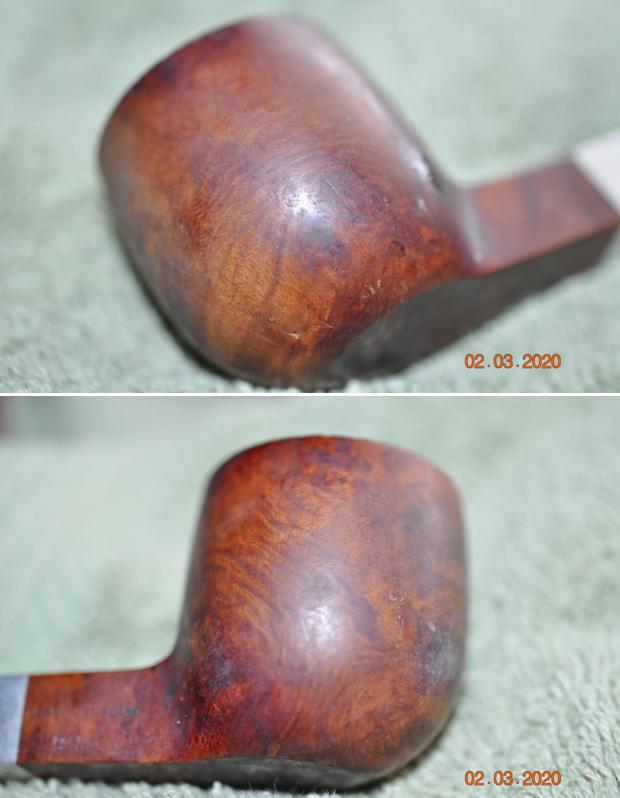
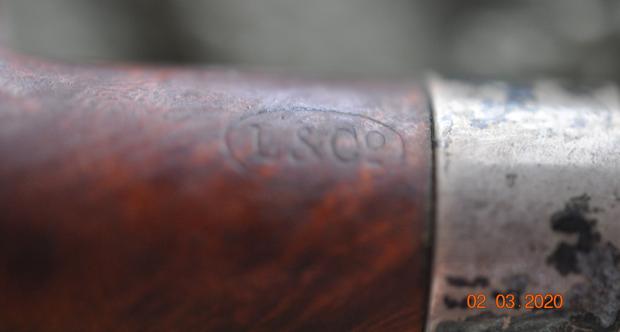
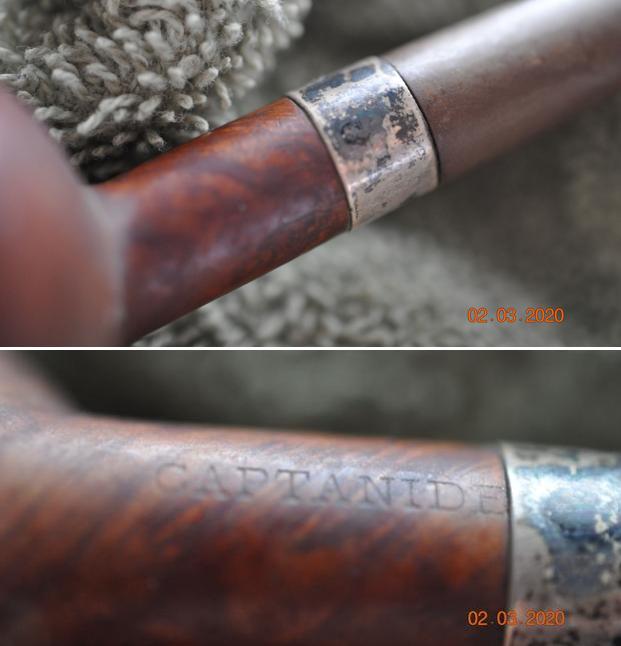
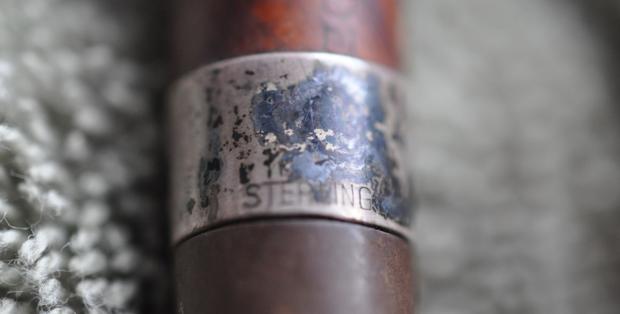
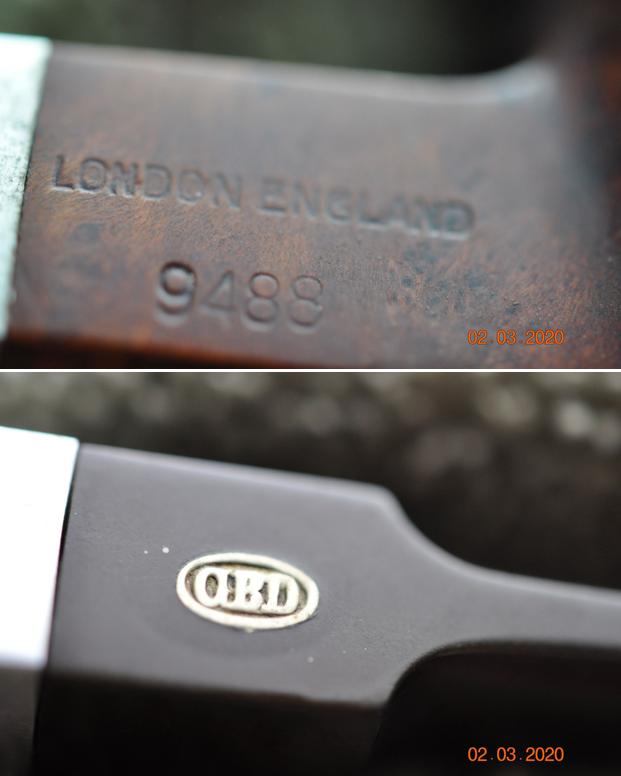
 Jeff took photos of the stamping on the sides of the shank to show the clarity and readability of the stamp. It reads as mentioned above. He also took a photo of the brass GBD logo on the stem.
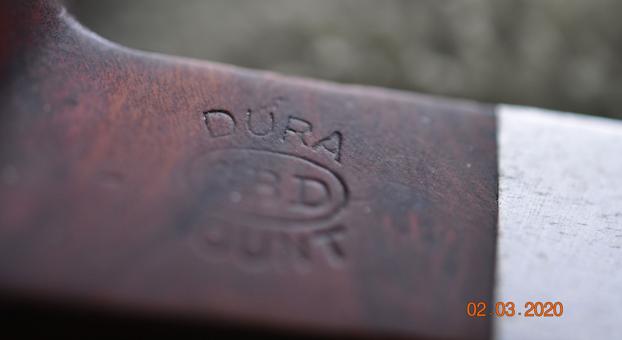
 I turned to Pipephil’s site and to the general GBD listing for the GBD Dura Mount pipe and other than a picture of the pipe and the stamping on Pipedia there was not any significant information on the line. I turned to the section on Pipedia on GBD Model Information to see what I could find (https://pipedia.org/wiki/GBD_Model_Information). There was one short line that I quote below.
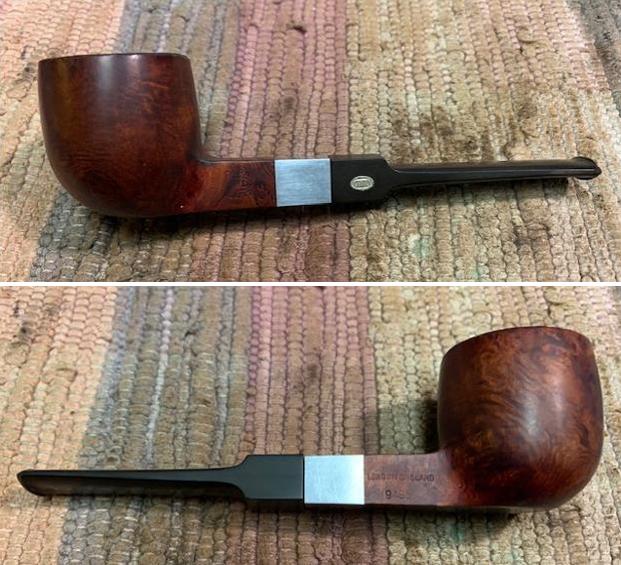
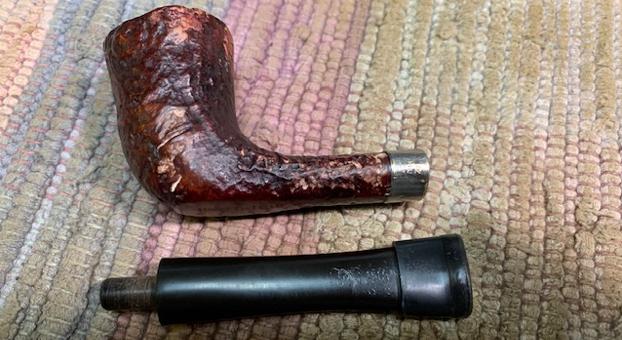
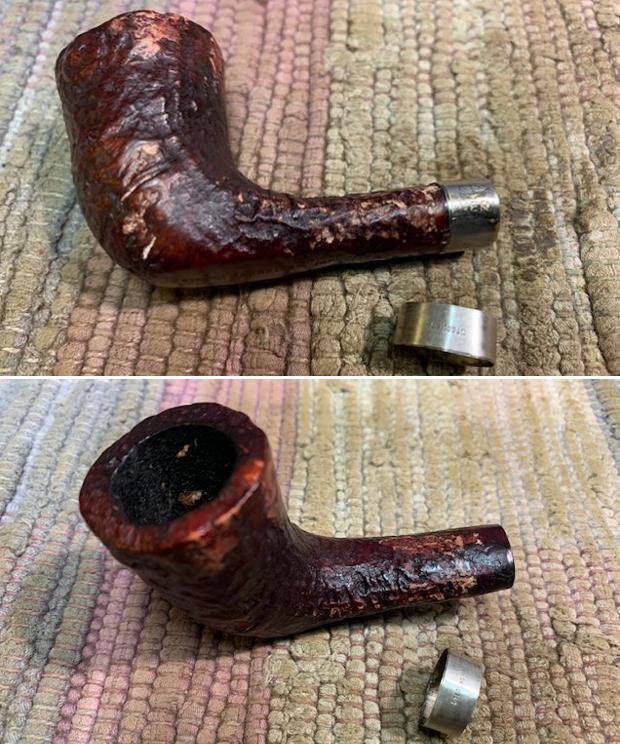
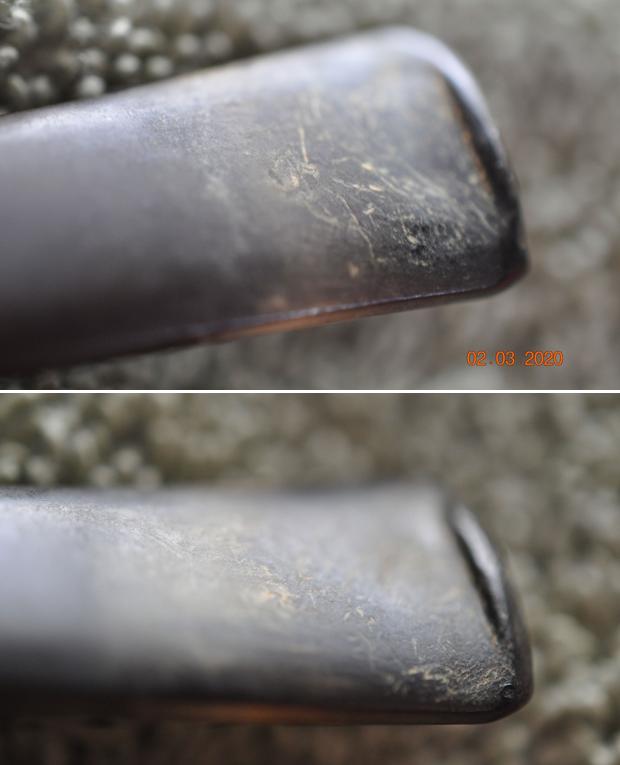
 I took some close up photos of the rim top and the stem surface. The top and inner and outer edge of the rim showed damage. There was serious damage back outer edge of the bowl. The stem had tooth marks just ahead of the button and on the button surface.
 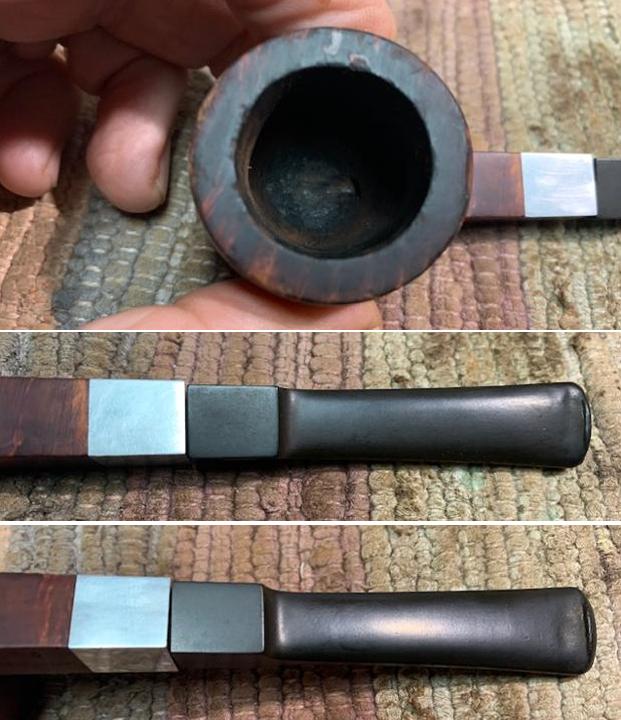 I took photos of the stamping on the sides of the shank. It is readable and clear.
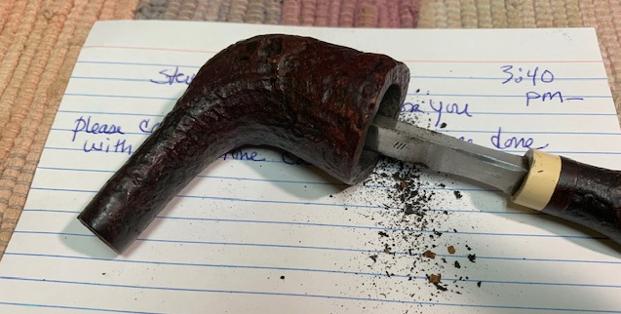
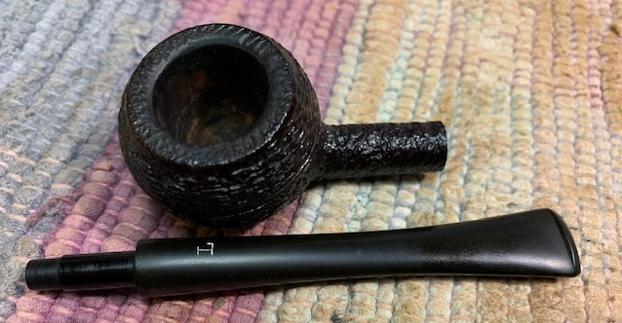
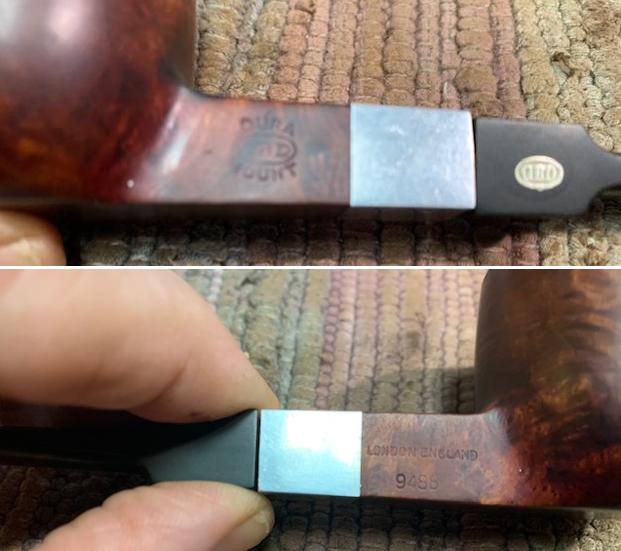 I removed the stem from the shank and took a photo of the parts of the pipe.
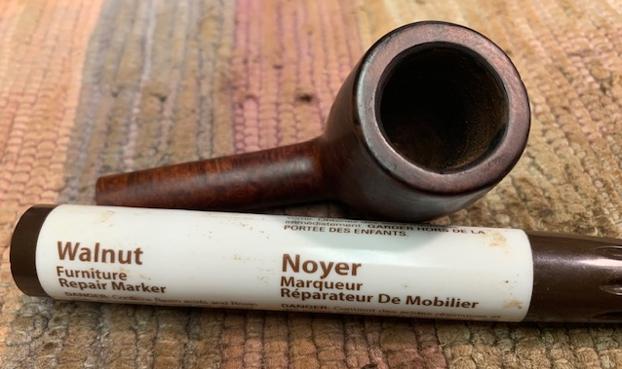
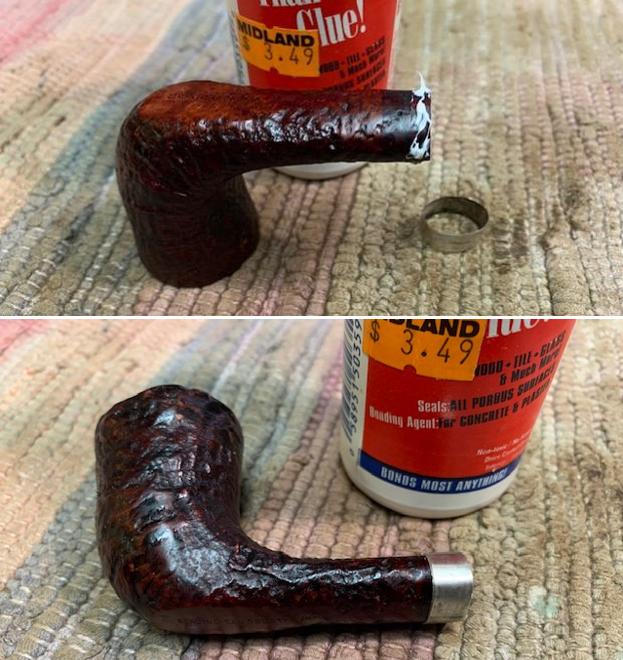
 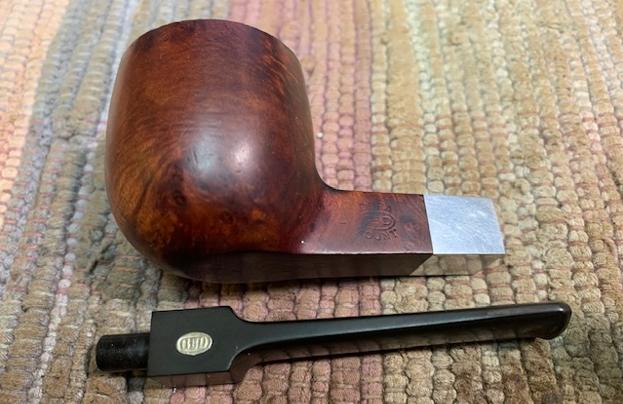 I started my work on the pipe by dealing with the damaged rim top and edges. I used a folded piece of 180 grit sandpaper to smooth out the nicks the inner edge of the bowl. I lightly sanded the rim top in preparation for the repair to the back outer edge. I stained the chipped area with a Maple stain pen to match the bowl and then built it up with clear CA glue. Once the glue cured I topped the bowl on a topping board with 220 grit sandpaper and sanded the outer edge with 220 at the same time. I took a photo of the rim top at this point in the process.
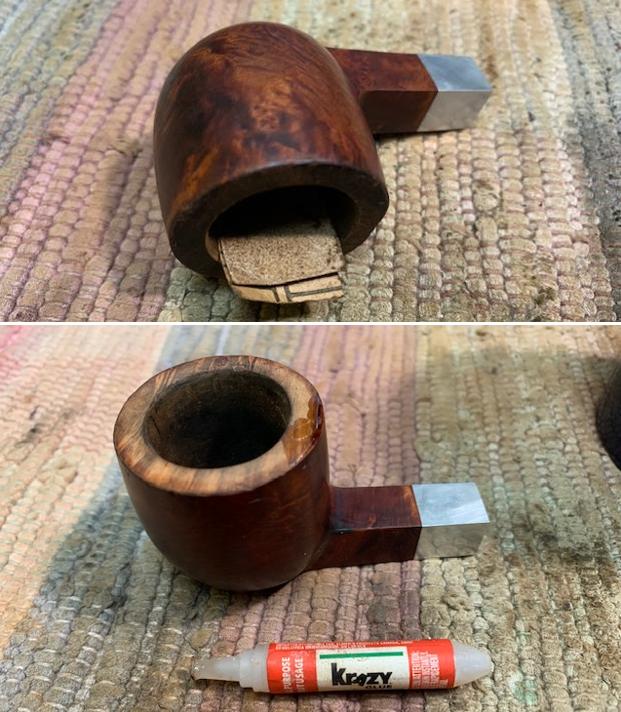
 I polished the briar and aluminum shank extension with micromesh sanding pads – dry sanding with 1500-12000 grit sanding pads. I wiped the bowl down after each pad with a damp cloth to remove the sanding debris.
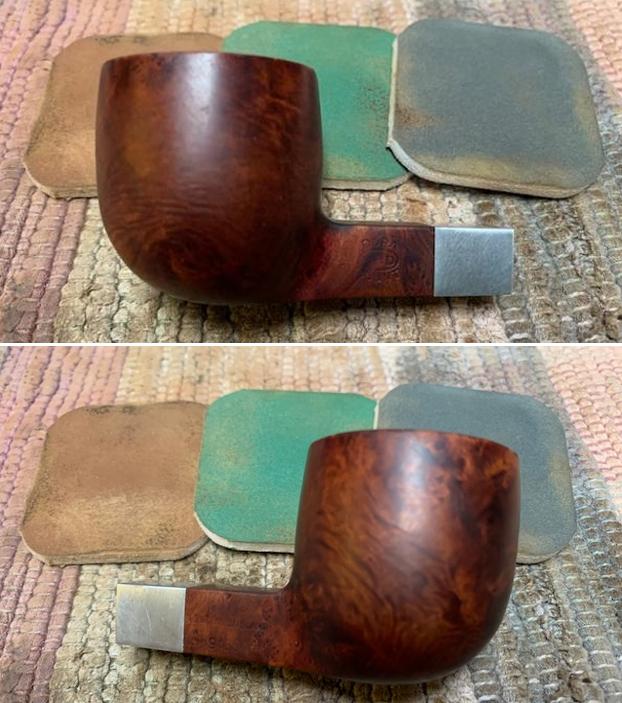
 I stained the rim top with a Maple and a Cherry Stain pen to match the surrounding briar. Once it is buffed the match should be perfect.
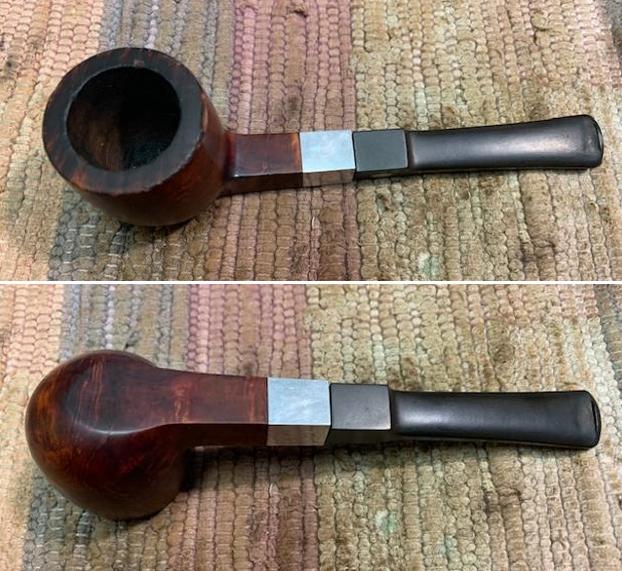
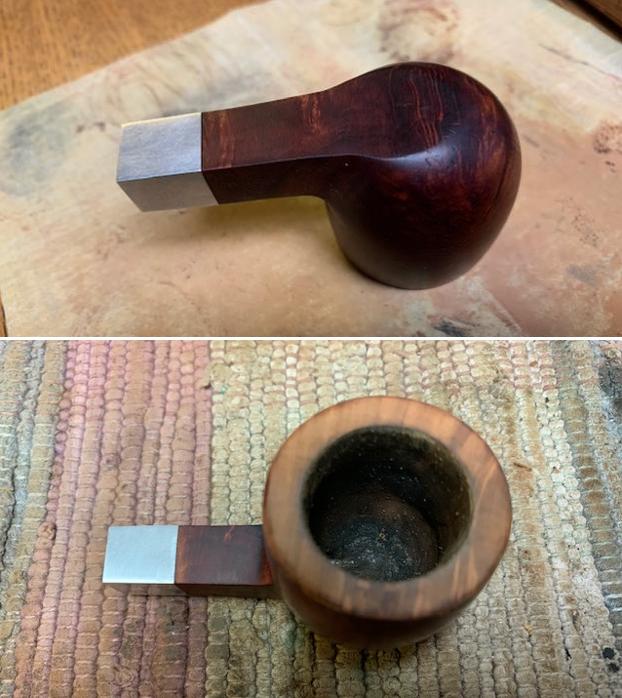
 I worked some Before & After Restoration Balm into the surface of the bowl and shank with my fingertips to clean, enliven and protect the briar. I let the balm sit for 15 minutes and then buffed with a cotton cloth to raise the shine. The photos show the bowl at this point in the restoration process.
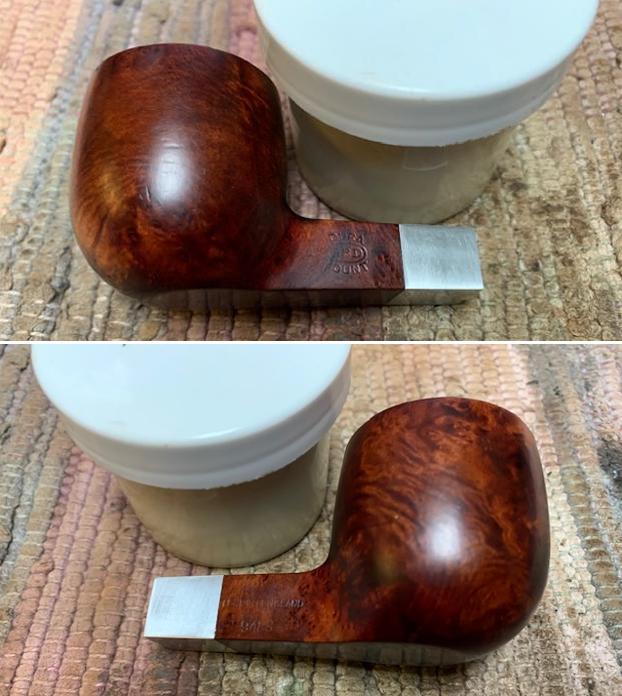
 I set the bowl aside and turned my attention to the stem. I “painted” the surface of the stem on both sides to lift the tooth marks. I was able to lift most of them. I filled in what remained next to the button with clear CA glue. Once the repairs cured, I sanded them with a folded piece of 220 grit sandpaper to smooth out the surface of the stem and reshape the button. I started polishing the stem with 400 grit wet dry sandpaper.
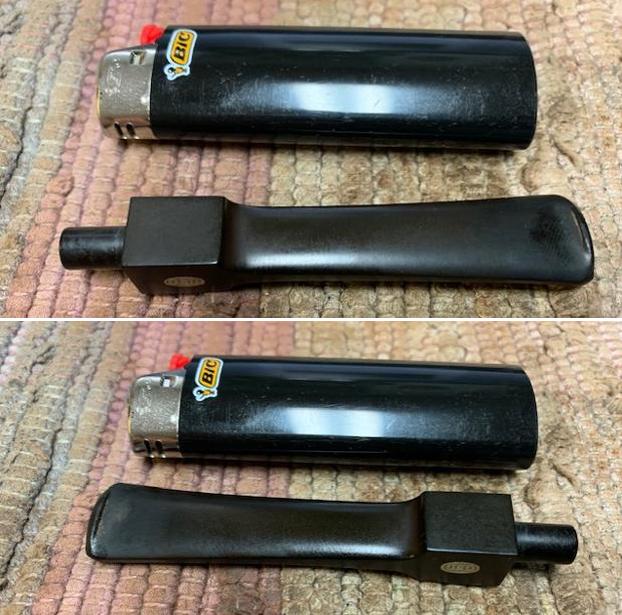
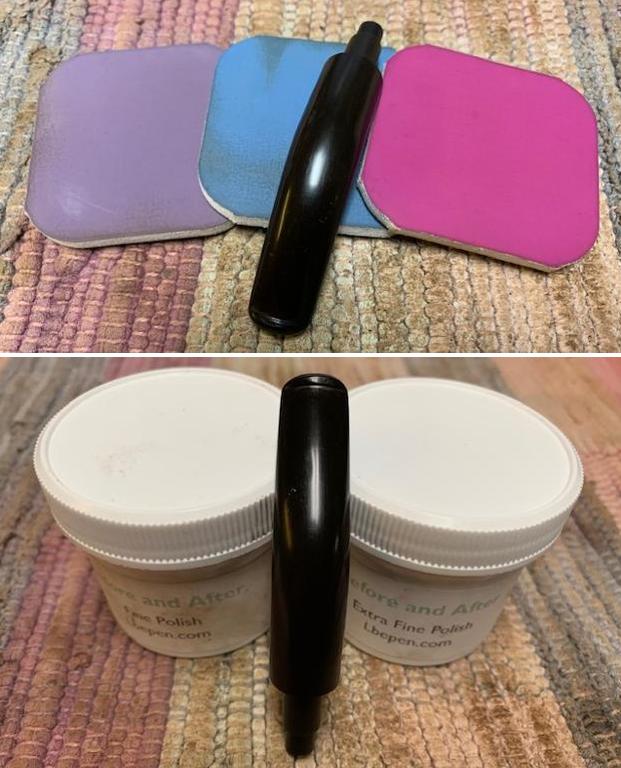
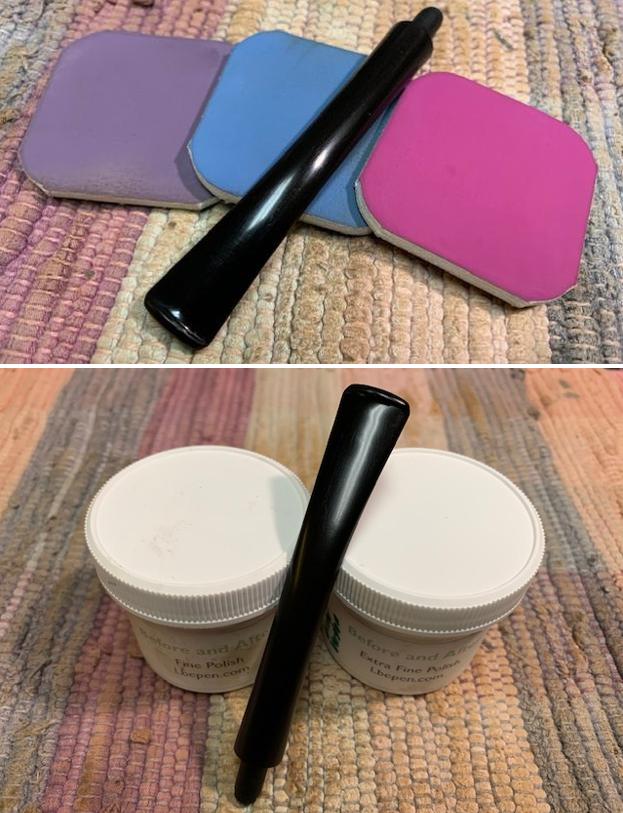
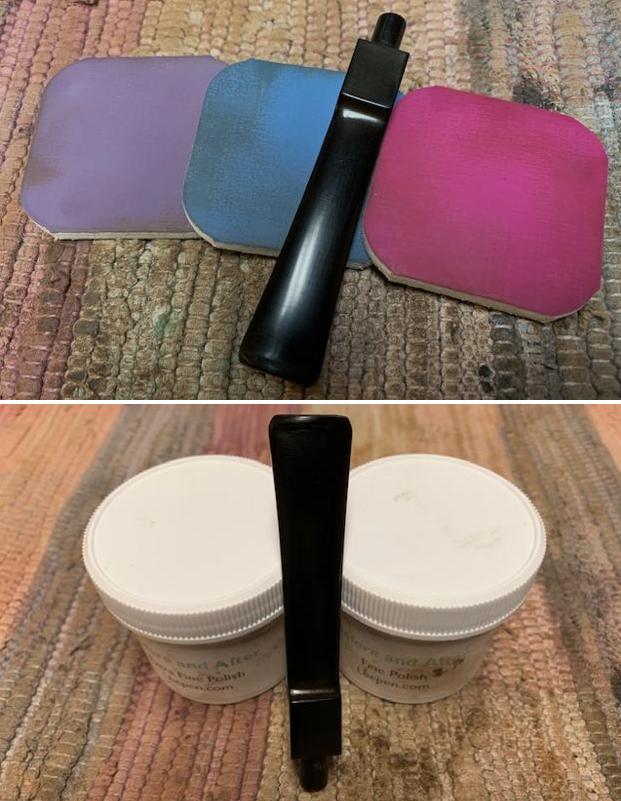
 I polished the stem with micromesh sanding pads – dry sanding with 1500-12000 grit sanding pads. I wiped it down after each sanding pad with Obsidian Oil. I polished it with Before & After Pipe Stem Polish – both Fine and Extra Fine. I gave it a final coat of Obsidian Oil.
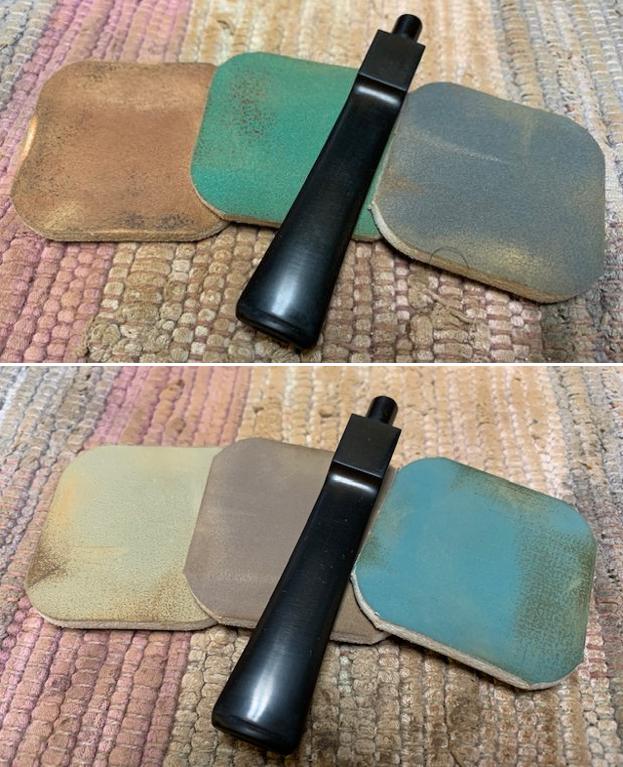
 With the bowl and the stem finished I put the beautiful GBD Dura Mount 9488 Pot back together and buffed it on the wheel using Blue Diamond to give it a shine. I gave the bowl and the stem multiple coats of carnauba wax on the wheel. I buffed it with a clean buffing pad to raise the shine. I hand buffed it with a microfiber cloth to deepen the shine. The grain on this pipe really is a great looking. The dimensions of the pipe are – Length: 5 ¾ inches, Height: 1 ¾ inch, Outside diameter of the bowl: 1 ½ inches, Chamber diameter: 1 of an inch. The weight of this large pipe is 1.34 ounces /39 grams. This GBD Dura Mount is another great find from this collection. It is much more beautiful in person than these photos can capture. I will be putting it on the rebornpipes store soon. If you would like to add it to your collection let me know. This is another pipe that has the possibility of transporting the pipe man or woman back to a slower paced time in history where you can enjoy a respite. Thanks for walking through the restoration with me.