Blog by Steve Laug
The next pipe on the work table came to me from the same friend who mailed me the Abdulla Billiard that I just restemmed (https://rebornpipes.com/2021/03/26/resurrecting-an-abdulla-dribaccy-shark-skin-chubby-billiard/). He included a letter in the box for me. Here is what he wrote about this next pipe that I am working on.
…If you’re able to squeeze in a small one, I would appreciate your attentions to the Dublin sandblast stamped “Genuine Sandblast/Imported Briar/Italy.” I picked it up at an estate sale in Florida long ago. It had no stem, but I had Mark Tinsky make one. On the left-hand side of the bowl, you’ll see a diagonal groove in the lower portion. That groove penetrates the bowl walls, as smoke would waft through it until a cake built up. If you can repair and refinish this, I will happily pay… Baker
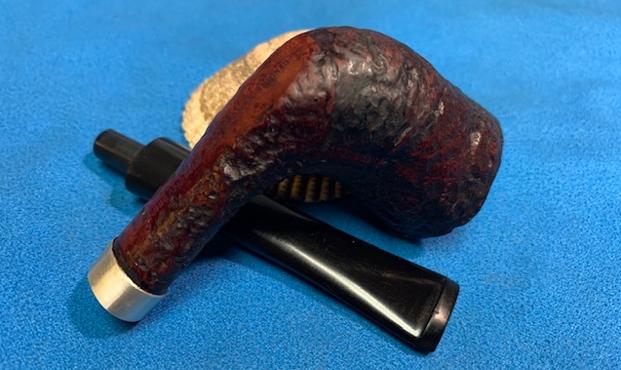
I took photos of what the pipe looked like when it arrived here in Vancouver. It looked like a bit of a workhorse that obviously must have been a great smoker. The fact that Baker had a stem made for it spoke of that fact. To me it was a pipe that I would smoke in the yard or while working on something at the work table. No worries of damaging its “delicate and costly” beauty with this pipe. It could be knocked about, dropped and stuck back in ones mouth without worrying about it. There were a lot of putty fills around the left side of the bowl and the back of the rim and on both sides and top of the shank. The bowl was thinner on the left side than the right and shank top was a bit sway back like an old horse. The band was bigger in external diameter than the shank and the end had been capped inward and had ridges on both sides that did not let the stem seat against the shank properly. The bowl had a light cake in it that I needed to remove to see where the leakage came from. The stem had a lot of tooth chatter on both sides going under the Softee bit protector. This was going to be a fun challenge. 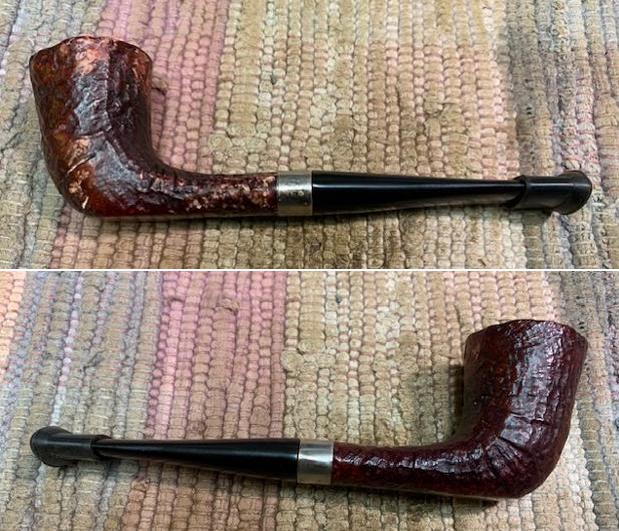
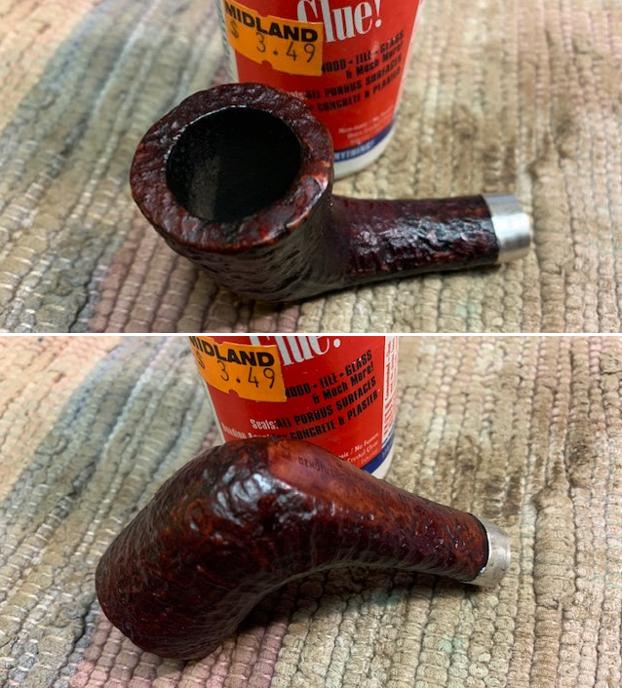
 I took photos of the rim top and bowl to give a clear picture of the condition of the bowl and rim but also to show what I meant by the thinner left side. The bowl is thinner in exactly the place with it is leaking smoke. It had a light cake in the bowl. He also took photos of the stem that was on the pipe. You can see that the shank and stem have different diameters. You can see the tooth chatter and marks on the stem surface on both sides running under the Softee bit.
  The stamping on the underside of the shank was clear and read as Baker noted in his letter. Though not much of a pedigree, there was still some charm to the pipe.
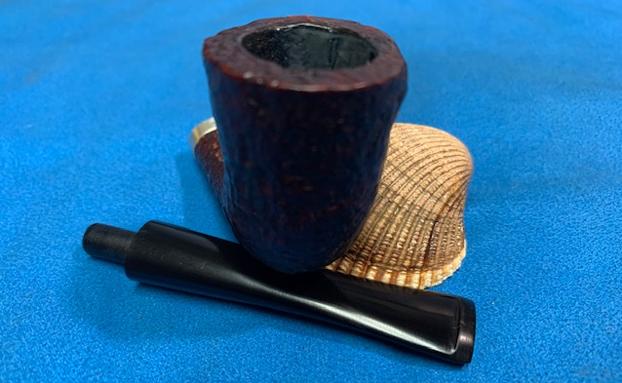
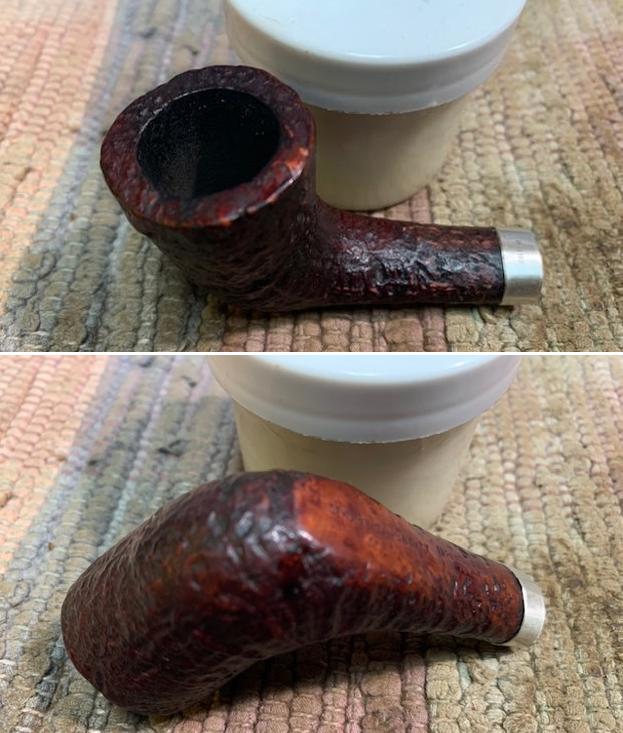
 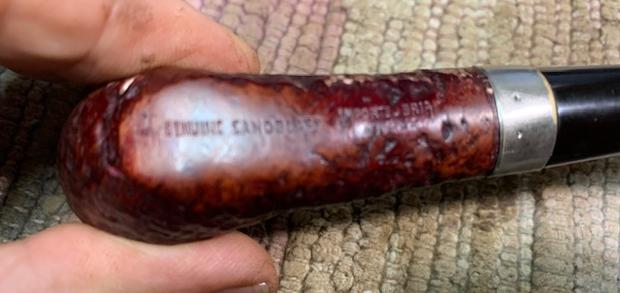 I took a photo of the bowl with the stem removed. The stem is well made.
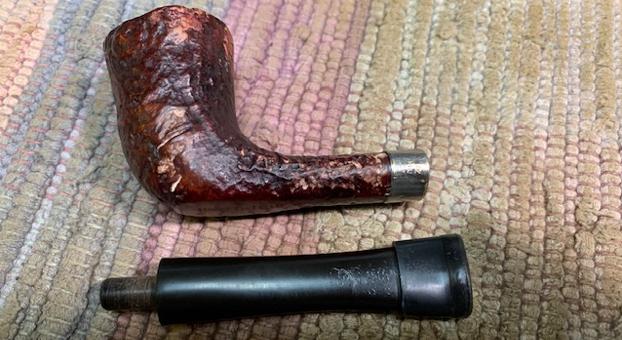 Now it was time to work on the pipe itself. I decided to remove the band on the shank and have a look to see if there were cracks or repairs there. It was loose and the way it was made did not allow the stem to seat properly against the shank end. It bugged me so I decided to deal with that. I went through my band and found a nice Sterling Silver band that was the right size and shape that would work. I set that aside for a bit to deal with the crack that was leaking. Once it repaired and restained the bowl and shank I would glue on the new band.
 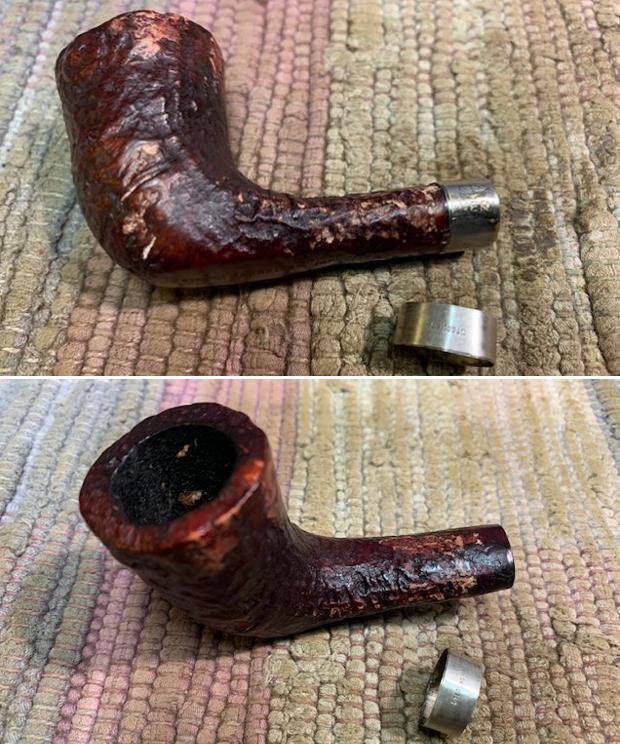 I scraped out the fill in the crack on the lower left side of the bowl. I have marked the spot with a red arrow in the photo below. I filled it in with clear CA glue and pressed it into the crack.
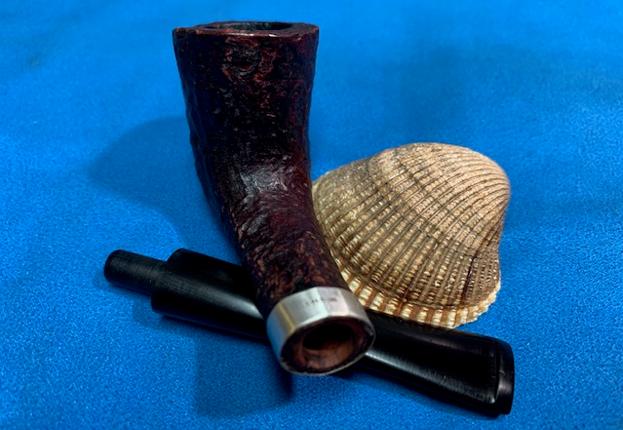
 Now it was time to clean the bowl and shank. I reamed out the light cake with a Savinelli Fitsall Pipe Knife and took it back to bare briar. I could see a small flaw in the left side of the bowl toward the lower 1/3 that matched the one on the outside of the bowl. It has spidered a bit so that the flaw was visible. I cleaned out the shank and airway to the bowl with pipe cleaners, cotton swabs and alcohol to remove the tars and oils.
 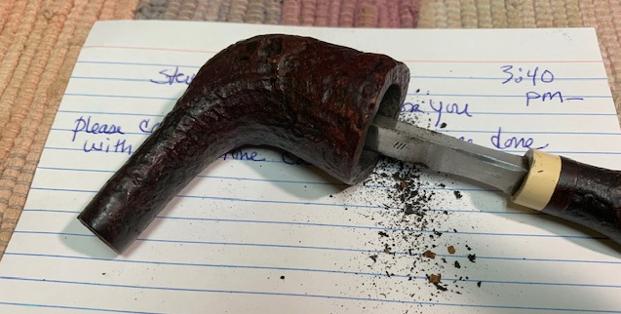 I used a tooth pick to coat the shank end with all-purpose glue and pressed the band on the shank so that the Sterling Mark was on the top of the shank. Once the glue cured I took photos of the newly banded shank. (At this point I still needed to rusticated the repaired area on the left side of the bowl).
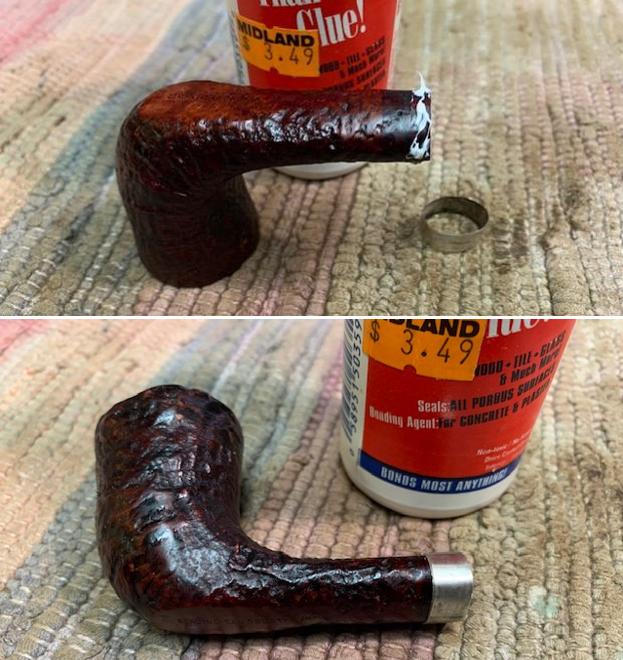
 I used a cylindrical burr on the Dremel to replicate the sandblast finish surrounding the repair on the side of the bowl. I also reworked the fills on the top edge of the bowl to lessen the white putty marks there a bit. I stained the bowl side and shank with a blend of Mahogany and Walnut stain pens to match the surrounding finish. The bowl is starting to look better.
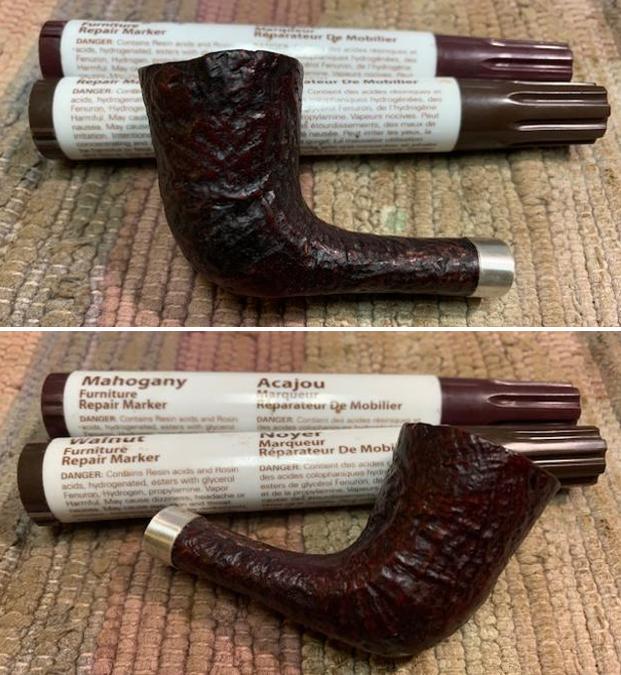
 I cleaned out the airway and mortise with alcohol, cotton swabs and pipe cleaners. To be honest I was on a roll and almost forgot to do this step (which is why it is coming this late in the process).
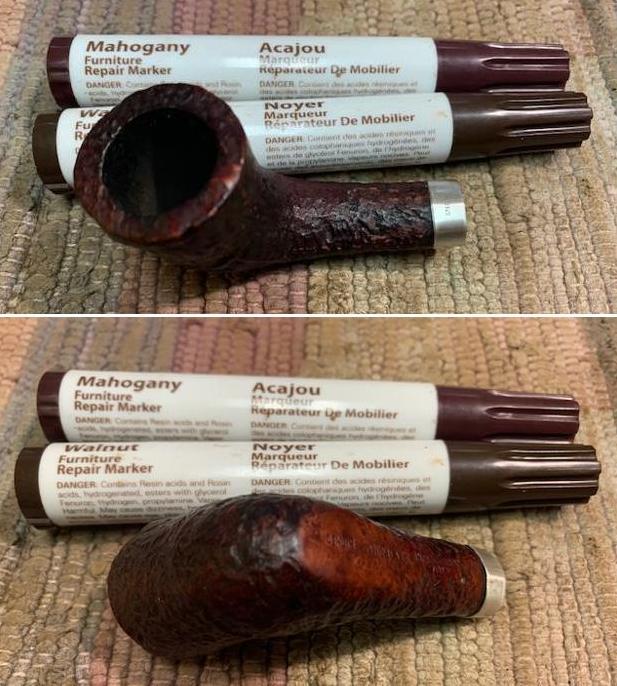
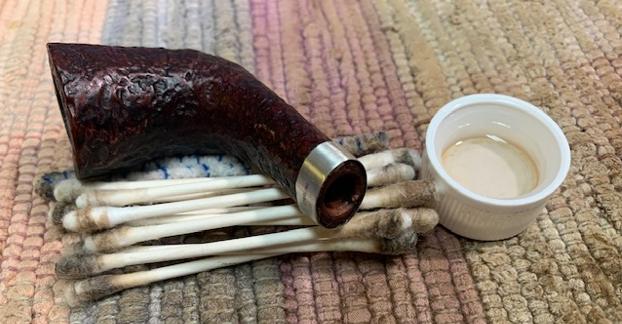 With the internals finished I turned to the small repair that needed to be done on the inside right wall of the bowl. I mixed a small batch of JB Weld and used my dental spatula to spread it over the small pit in the lower left wall of the bowl (shown in the second photo below). It matched the fill on the outside of the bowl. Because the flaw had spidered I covered the section of the wall with the mix. Once it cured I would sand it smooth with sandpaper wrapped around a dowel.
 I worked Before & After Restoration Balm into the surface of the bowl sides and shank with my fingertips and a horsehair shoe brush to clean, enliven and protect the briar. I let the balm sit for a little while and then buffed with a cotton cloth to raise the shine. The blasted finish came alive and the fills while visible look better than when I began.
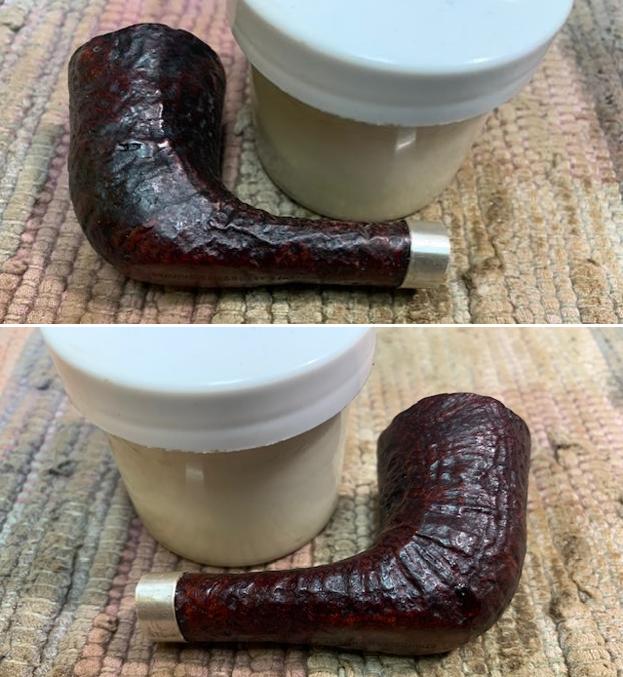
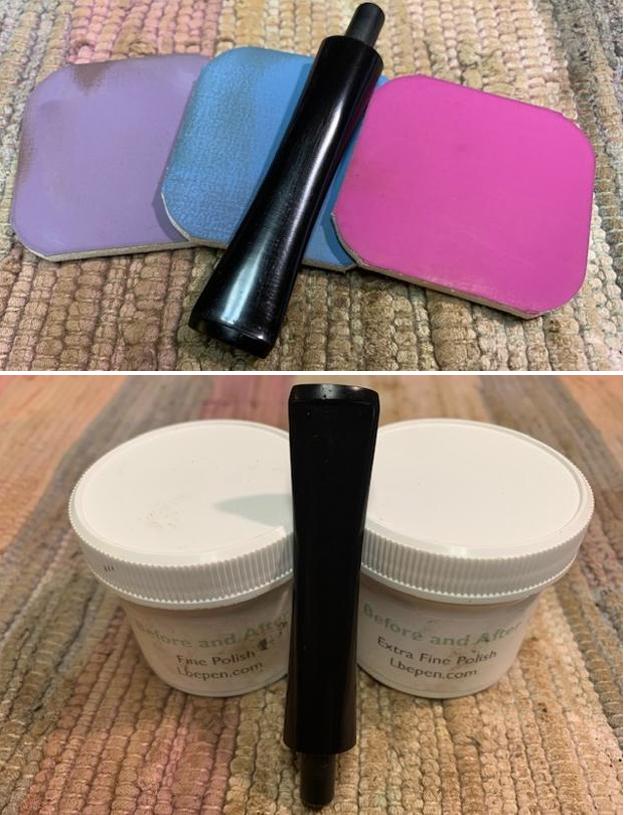
 I set the bowl aside and turned to work on the stem. I decided that I would remove the Softee Bit so I could remove the tooth chatter and marks. I sanded the stem surface with 220 grit sandpaper to smooth out the marks and started polishing the stem with 400 grit wet dry sandpaper.
  I polished the stem with micromesh sanding pads. I dry sanded it with 1500-12000 grit pads to polish it and bring out a shine in the rubber. I wiped it down with Obsidian Oil after each pad. I polished it with Before & After Fine and Extra Fine polishes and gave it a final coat of Obsidian Oil at the end. I was pleased with the look of the stem.
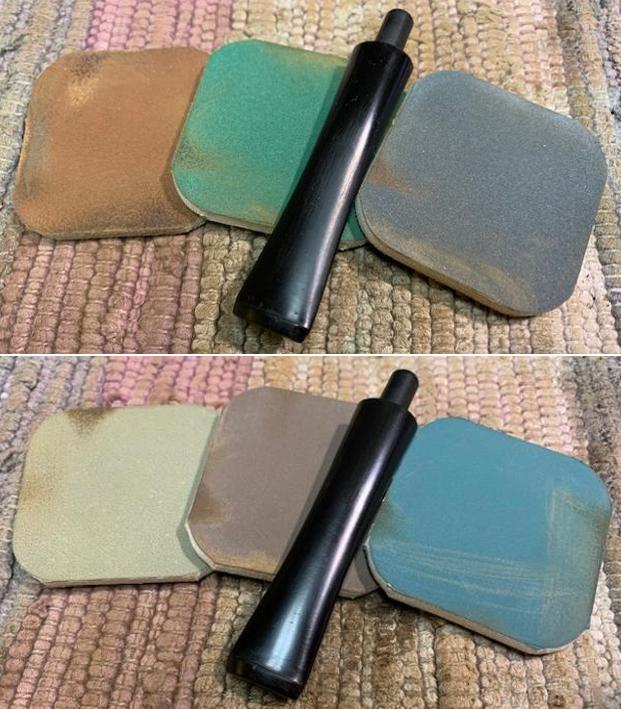
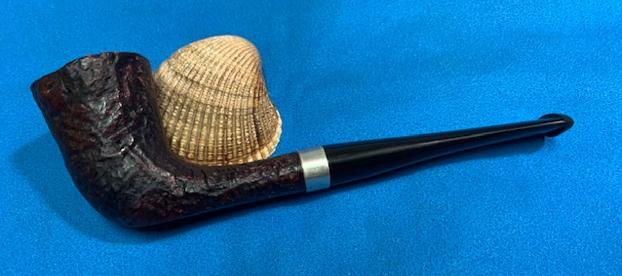
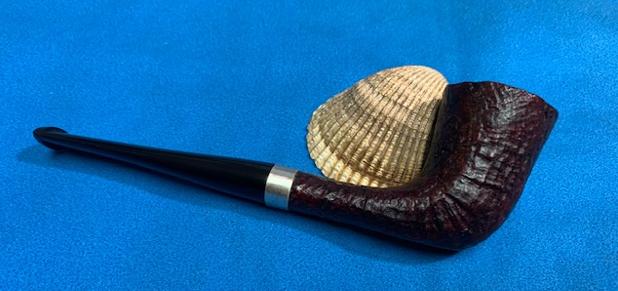
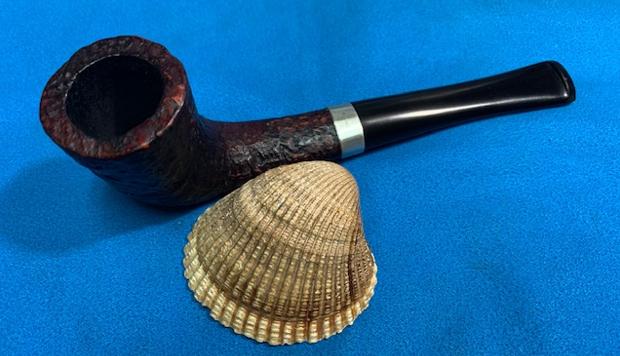
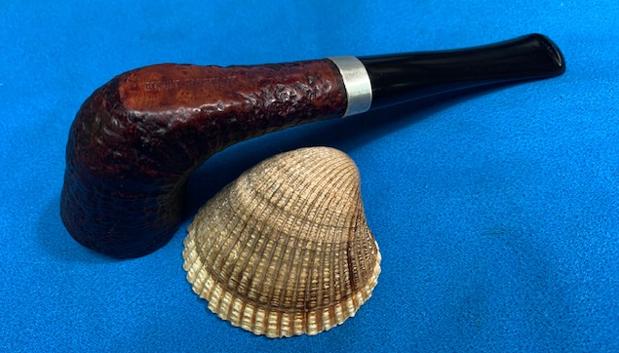
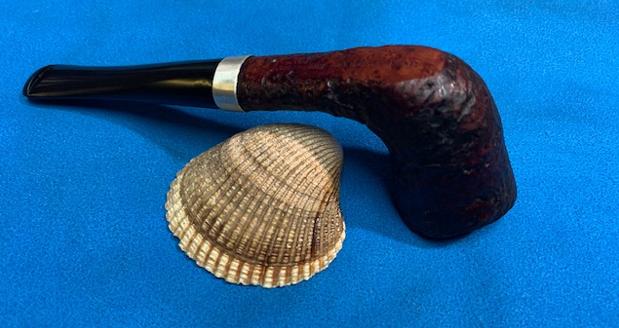
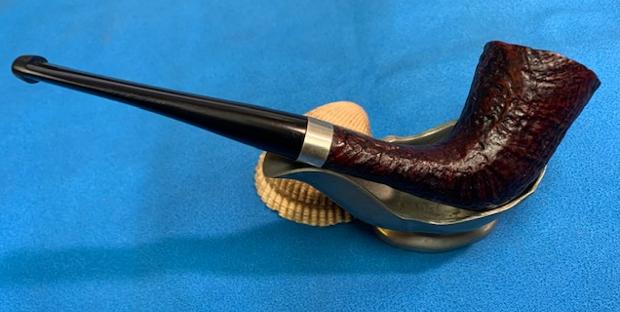
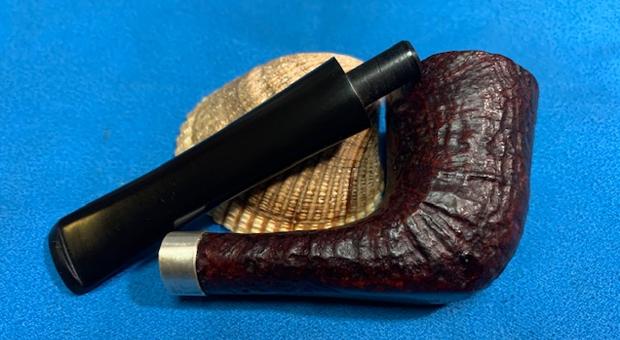
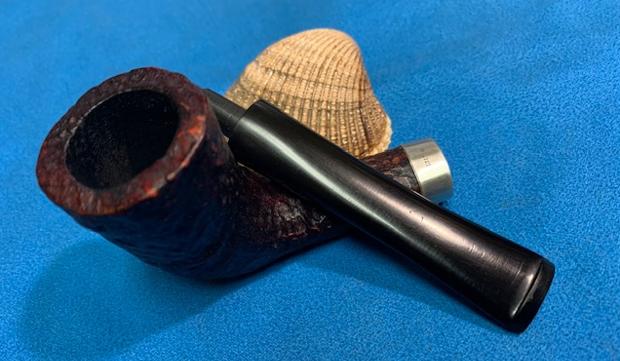
 This Italian Made Sandblast Dublin/Zulu is a great looking pipe now that it has been restored, repaired and rebanded. This old work horse has a lot of life in it still and should smoke well and this time out the top of the bowl rather than the top and side! The sandblast around the bowl is quite nice and highlights the grain and works well with the polished Sterling band and vulcanite taper stem. I put the stem back on the bowl and carefully buffed the pipe with Blue Diamond on the buffing wheel using a light touch on the briar. I gave the bowl several coats of Conservator’s Wax and the stem multiple coats of carnauba wax on the buffing wheel and followed that by buffing the entire pipe with a clean buffing pad. I hand buffed the pipe with a microfiber cloth to deepen the shine. The finished Sandblast Dublin//Zulu fits nicely in the hand and feels great. Give the finished pipe a look in the photos below. The dimensions of the pipe are Length: 5 ½ inches, Height: 1 ¾ inches, Outside diameter of the bowl: 1 ¼ inches, Chamber diameter: ¾ of an inch. The weight of the pipe is 26 grams/ .95 ounces. Now that I have finished this pipe I can pack it and the Abdulla for Baker and send them back to him to enjoy! Thanks for reading this blog and my reflections on the pipe while I worked on it. As always there are many more pipes to come!