Monthly Archives: May 2017

GBD 269 Virgin Bulldog Restoration


By Al Jones

This is the second GBD 269 shape that I have had on my workbench. The first, a Prehistoric model, was completed in 2016. So, I knew that the shape 269 was GBD’s oversized bulldog shape, but curiously it does not have any of the three oversize stamps (Collector, Conquest or Colossus). This one is a Virgin grade pipe, which I enjoy collecting. The pipe had some build-up on the rim and a heavily oxidized stem. The rest of the briar appeared to be free of any dings, etc. and the bead lines were perfect. Interestingly, this one weighs 51 grams, compared to 46 for the Prehistoric model.

I was able to exchange some communication with the seller, who said that he has owned the pipe for 45 years.

I used my Pipenet reamer to remove the mild cake. To finish the bowl clean-up, I wrap a small piece of 320 grit sandpaper around a suitable bit and remove the remaining carbon in that manner. I used a wet rag to rub of the worst of the build-up, then 8000 and 12000 grade micromesh. I was able to remove nearly all of the build-up without altering the bowl profile or breaking the stain. The bowl was then filled with sea salt and alcohol to soak for several hours. The shank was very clean, a surprise. While the bowl was soaking, I put a dab of grease on the rondell and soaked it in a mild Oxy-Clean solution.

I removed the salt and alcohol from the bowl and used a series of paper towels and a small bristle brush to clean the shank. The stem was mounted and the heavy oxidation removed first with 800 grit paper, followed by 1,500 and 2,000 grades. 8,000 and 12,000 micromesh sheets were used next, followed by buffing with White Diamond and Meguiars Plastic Polish.

Below is the finished pipe.

Sprucing Up a Blatter Bent Pot


I really like Blatter & Blatter pipes. Charles did a great job on this piece pipe history from Montreal.

I’m pushing this post out a little early this week. I head out tomorrow on a long-anticipated fishing trip with my brothers, but I wanted to make sure I left something for you to read while I’m (hopefully) reeling in some walleye!

This is the next pipe I worked on from the box of Blatter pipes sent to me for refurbishment. This one is a Bent Pot shape with a nicely blasted finish.

The pipe had been only lightly smoked. There was a thin layer of cake in the bowl, but apart from needing a general cleaning, the stummel was in good shape without cracks or dents. The stem was heavily oxidized to an ugly yellow-brown colour. Removing the oxidation to restore the stem’s deep black colour would be the major task with this pipe. The stem had no tooth dents to worry about, just light chatter that would smooth…

View original post 598 more words

Chacom Churchwarden Resurrected


Blog by Joshua Fairweather

I received an email from Joshua about one of the Gourd Calabashes and a grab bag of pipes for refurbishing that I was selling. We made a deal on the pipes. At the end of his email he included some photos of some of the pipes he had already refurbished. His work looked really good so I invited him to submit a write up of some of his work to rebornpipes. Here is the first of those pieces that he submitted. A warm welcome and a thank you Joshua for your contribution to the blog. – Steve

I came across this pipe at an antique mall in London, Ontario. I almost passed it by had it not been for the vendor who was cleaning his case, he was kind enough to say ‘hi’ and ask what I was looking for. He just so happened to have a few pipes hiding in a glass case in the back of his store.

As you can see from the picture the pipe is heavily oxidized with little to no chatter marks. The bowl has a thick cake and tar on the bowl rim. Overall the bowl was in great condition with a small white mark on the bottom of the bowl (I think it was glue). The wood grain of the bowl also had nice appeal.

The brand of the pipe was marked on the bowl – ‘Chacom coin osseu’.

Now, I want to walk you through how I cleaned and restored this pipe. Step 1
When a pipe has a heavy cake inside the bowl, I like to put it through a salt and alcohol treatment. This method does a great job at cleaning the pipe, softening the hardened cake making it easier to remove from the bowl. It also, freshens up the bowl and gets ride of any ghosting left from prior tobaccos smoked.

I fill the bowl to the brim with larger grained salt. Using the syringe, I add the alcohol to the salt, topping it up to the bowl brim. I usually leave this treatment in the bowl overnight.Step 2
I prefer to use my old trusty friend (pocket knife) to clean the cake from the bowl. It has a more rounded tip and I find it a perfect tool to clean out most pipes without damaging the bowl.Step 3
With the same alcohol I use cotton pads to remove the finish off the pipe. Alcohol also does a great job at removing tar from the bowl rim. If the tar is heavy then a light sanding works better.Step 4
I don’t know what it is about sanding that brings so much satisfaction; I think it is the results you get on the pipe finish; it looks like glass. I use these foam padded Micro-Mesh pads to bring out the best finish on the briar wood. Step 5
Two of my favourite household products that do a fantastic job at cleaning pipe stems are OxiClean and Vim. Soak the stem in an OxiClean bath for about an hour maybe two hours. It will depend on how oxidized the pipe stem is, a heavy oxidized stem, leave in the solution for longer. This stem needed a longer soak.

After the bath I use Vim and a dry clean rag to wipe clean. Vim has a corrosive component that acts like a sand paper to buff the pipe stem back to a clean black colour again.

I will say, if the pipe stem is heavily oxidized it will take more than just Vim to bring out that black finish. I refer back to the Micro-Mesh foam sanding pads, which also do an amazing job at bringing out that preferred finish. I use alcohol and pipe cleaners to remove left behind tar inside the pipe stem. I repeat this process until the pipe cleaners come out clean.Step 6
To bring out the beauty of the natural grains of the wood, I use a variety of products and natural substances to do this. For this pipe I used an extra virgin olive oil.

With the combination of the sanded finish, adding the olive oil turns the pipe a darker colour. Well you can see the finished results for yourself!Conclusion:
Overall, I am pleased with the results. This pipe I will probably put into my private collection, as I do not have a churchwarden styled pipe as of yet.

Hope you have enjoyed my process.

The Easiest Restoration in the Recent Estate Lot – A Savinelli Oscar 701 Lovat


Blog by Steve Laug

This little Savinelli Lovat is by far the easiest pipe I have cleaned up from the recent estate lot pipes that my brother purchased. It is a beautifully rusticated Lovat with an almost sandblast finish over the rustication. It is a oxblood stained pipe with a vulcanite stem. I wonder if it was not the last pipe that the pipeman purchased before his demise. The bowl had a light cake in it and the rim already had some overflow of lava on the top but the bowl had not been smoked to the bottom. The bottom of the bowl was raw briar. It had very few tooth marks and chatter. The stem was lightly oxidized and the finish was in great shape. It is stamped on the smooth portion on the underside of the shank with the words Oscar over Aged Briar on the heel of the bowl. Next to that it was stamped with the Savinelli S in a shield next to the shape number 701 over Italy. My brother took the following photos of the pipe when he brought it home from the sale.

I looked the shape up on the Savinelli Shape Chart and found it there in the right hand column. It is the second pipe circled in red below.

Jeff also took a photo of the rim top and the cake in the bowl. There is a light cake in the bowl and a lava overflow on the top of the rim and the bevel. It was not too thick so it would easily come off the surface. He took two photos of the underside of the shank. The first shows the 701 shape number and the second shows the remainder of the stamping. The contrast stain on the rustication pattern looks very good.The next two photos show the side and bottom of the bowl. The random pattern of the rustication almost looks like a sandblast pattern.On the left side of the saddle portion of the stem there is the characteristic Savinelli Oscar shooting star stamp. It is in excellent condition.The next two photos show the condition of the stem. The tooth marks and chatter on both sides of the stem near the button are not too deep in the surface of the vulcanite. They should be relatively easy to remove.

Jeff thoroughly cleaned out the internals of the pipe, reaming it with a PipNet reamer and removing all of the cake. He scrubbed the externals with Murphy’s Oil Soap and was able to remove all of the lava on the top of the rim. He rinsed the bowl in water to remove the debris of the cleaning. The stem soaked in Oxyclean to lift the light oxidation that was present. It came to the surface and would be easily remedied. The next four photos show the pipe when it arrived in Vancouver. It really was a delicate looking Lovat that showed real promise.

I had to have a picture of the cleaned up rim top. It was amazing how he had been able to get all of the lava off on the top and the bevel as well.The next two photos show the oxidation that I would have to deal with to get the stem back to its polished black glory.I sanded the stem with 220 grit sandpaper to break up the oxidation and remove the tooth chatter and marks.I ran a pipe cleaner with alcohol through the mortise and the airway in the shank and stem. It was very clean so nothing more needed to be done. The mortise was very clean.I hand buffed the bowl with a shoe brush to raise a shine. The next photos show the buffed bowl. It is really a nice looking pipe. I polished the stem with micromesh sanding pads – wet sanding with 1500-2400 grit pads and then rubbing it down with Obsidian Oil. I dry sanded with 3200-4000 grit pads, gave it another coat of oil then buffed it with red Tripoli. I brought it back to the work table and finished polishing with 6000-12000 grit micromesh pads. I gave it a final coat of Obsidian Oil and set it aside to dry. I buffed the bowl lightly with Blue Diamond to raise a shine. When buffing a rusticated bowl with Blue Diamond a soft touch is imperative or you will fill in the divots of the rustication with the polishing compound. I buffed the stem with the Blue Diamond as well, being careful around the shooting star logo so as not to damage it. I gave the stem multiple coats of carnauba wax and hand waxed the bowl with Conservator’s Wax. I buffed the pipe with a clean buffing pad to raise the shine and by hand with a microfibre cloth to deepen the shine. The dimensions of the pipe are Length: 5 ½ inches, Height: 1 ¾ inches, Outer diameter: 1 ¼ inches, Chamber diameter: ¾ inches. The finished pipe is shown in the photos below. It will soon be available on the rebornpipes store. If you wish to add it to your collection you can email me at slaug@uniserve.com or send me a private message on Facebook. Thanks for looking.

Restoring an Older Mystery Bulldog with a Bowl Liner


Blog by Steve Laug

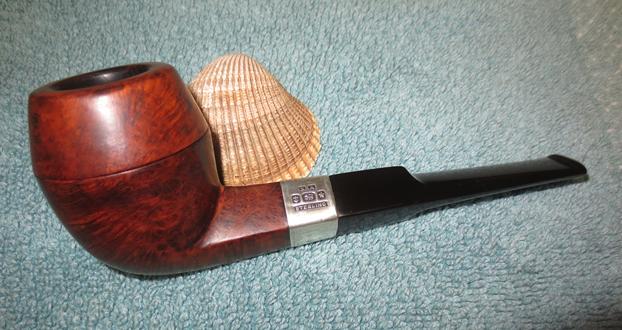
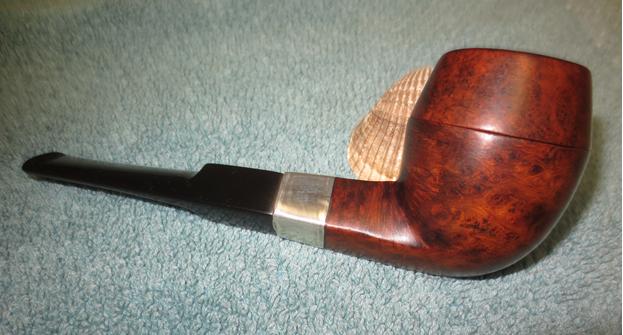
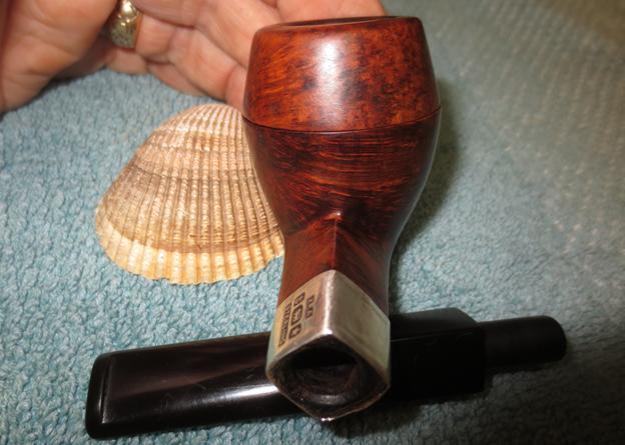
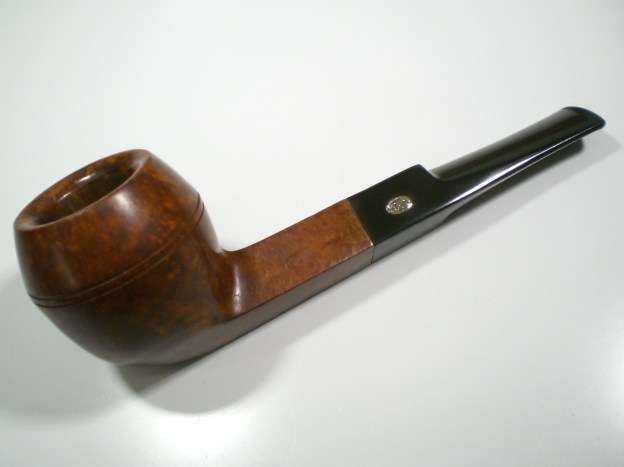
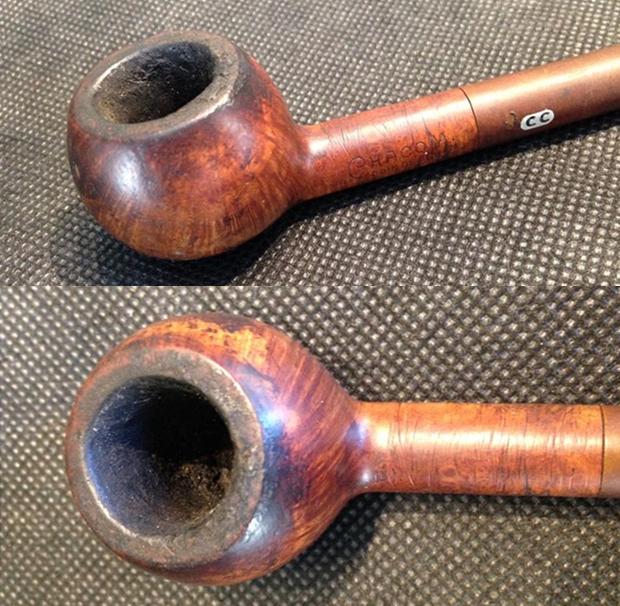
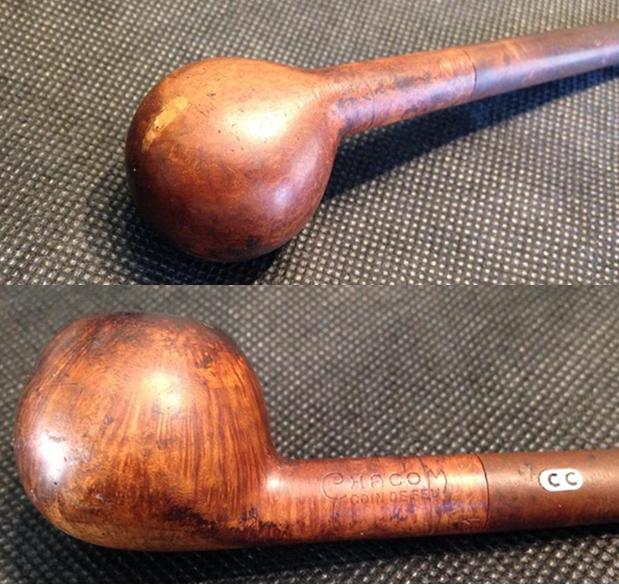
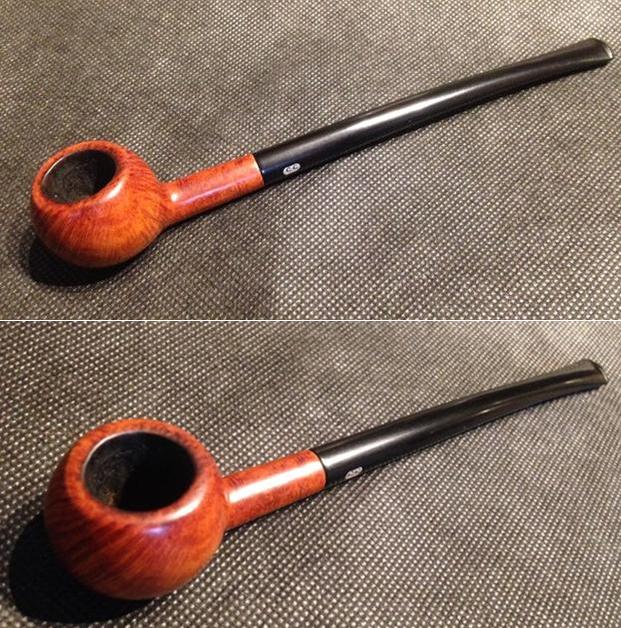
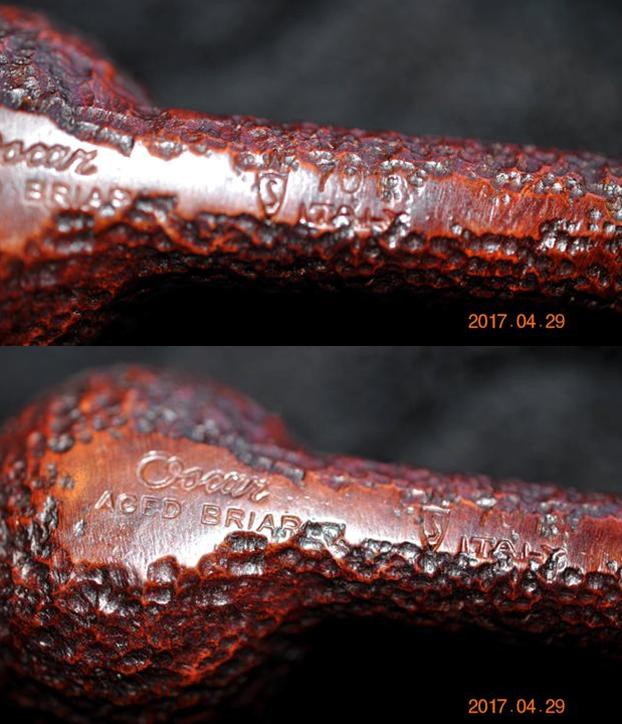
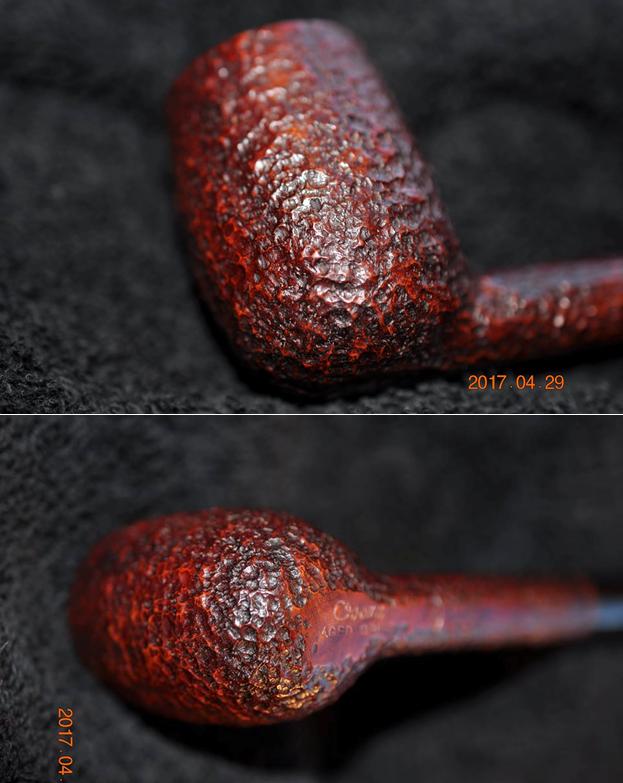
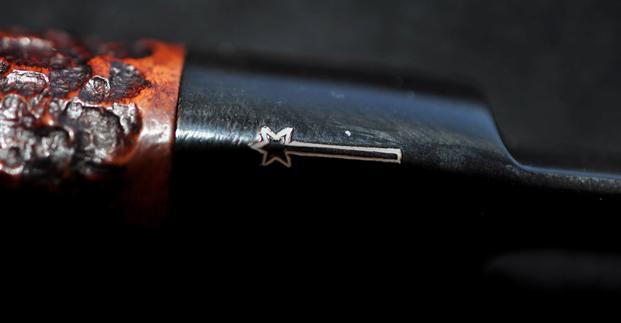
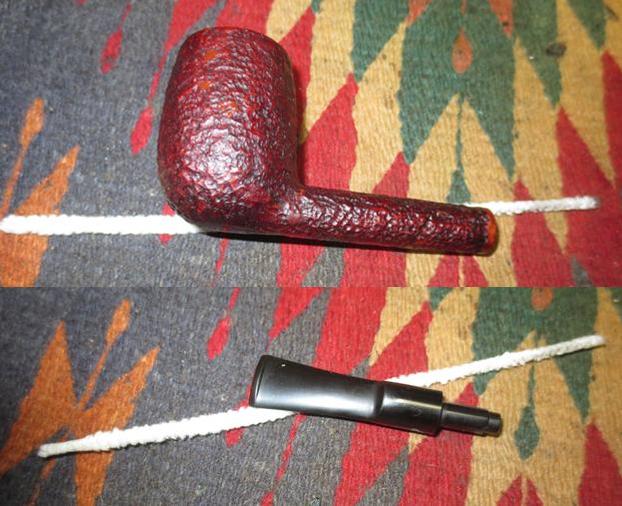
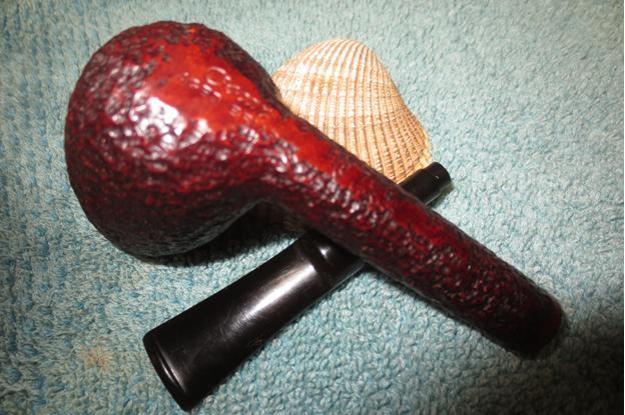
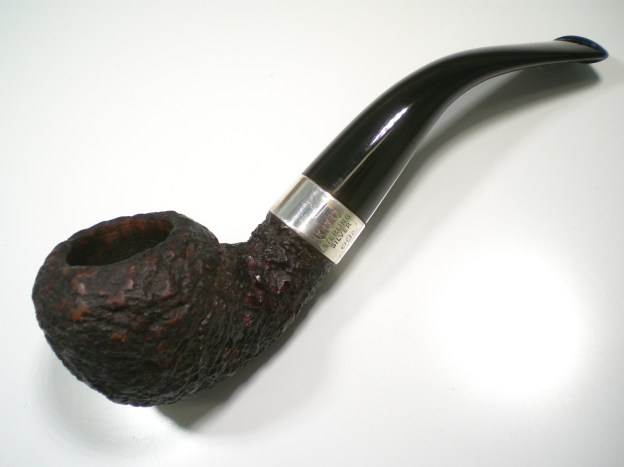
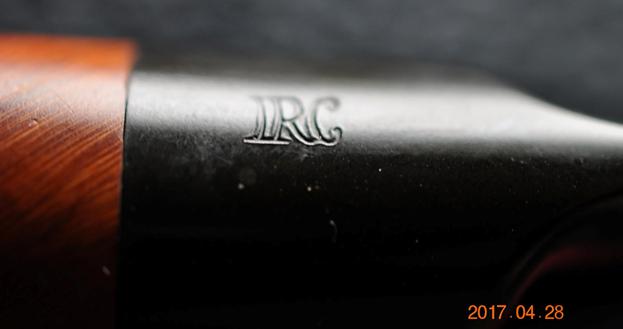
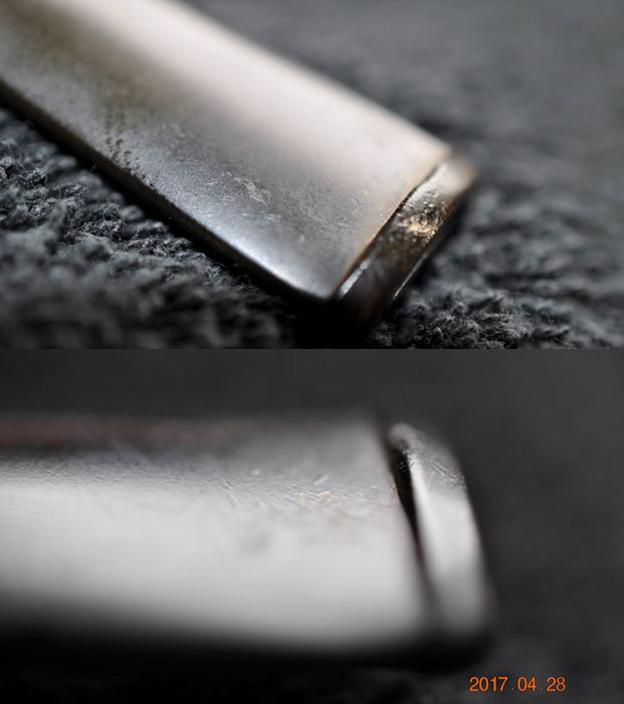
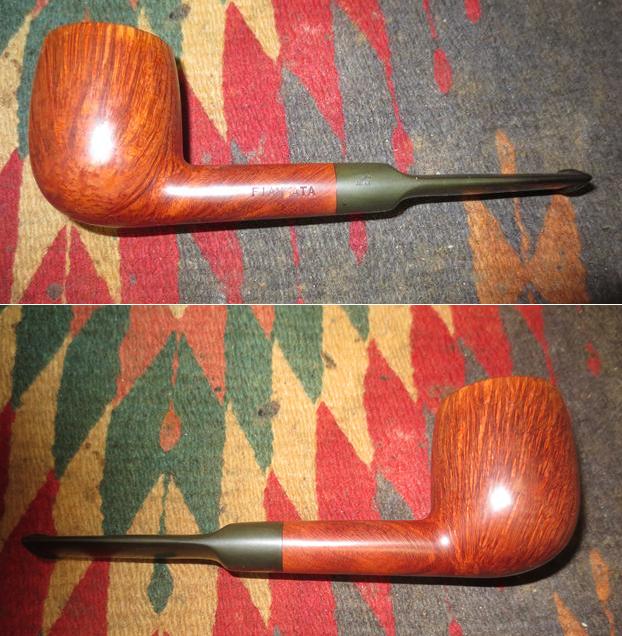
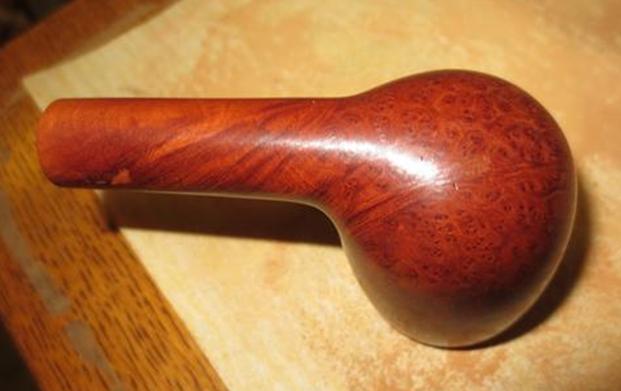
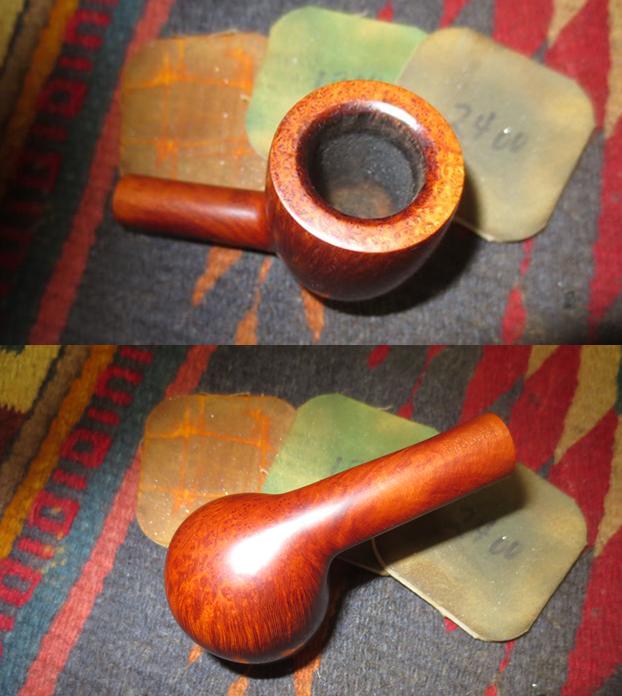
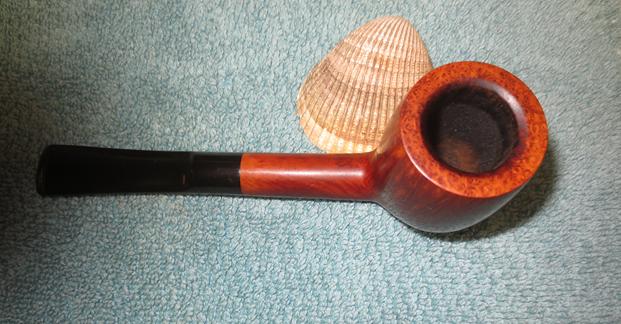
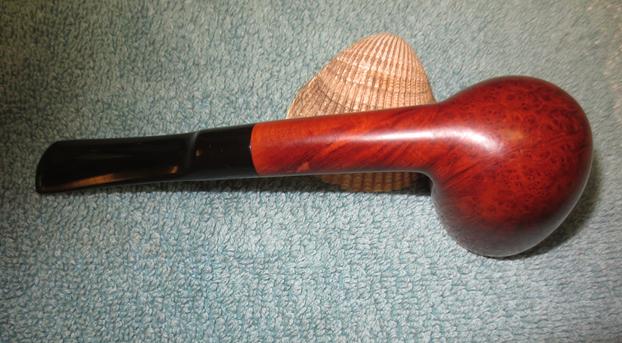
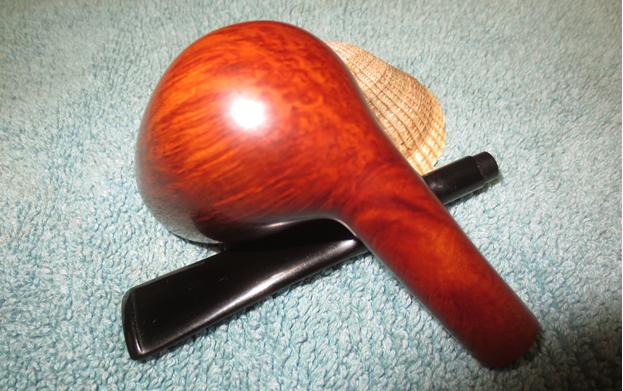
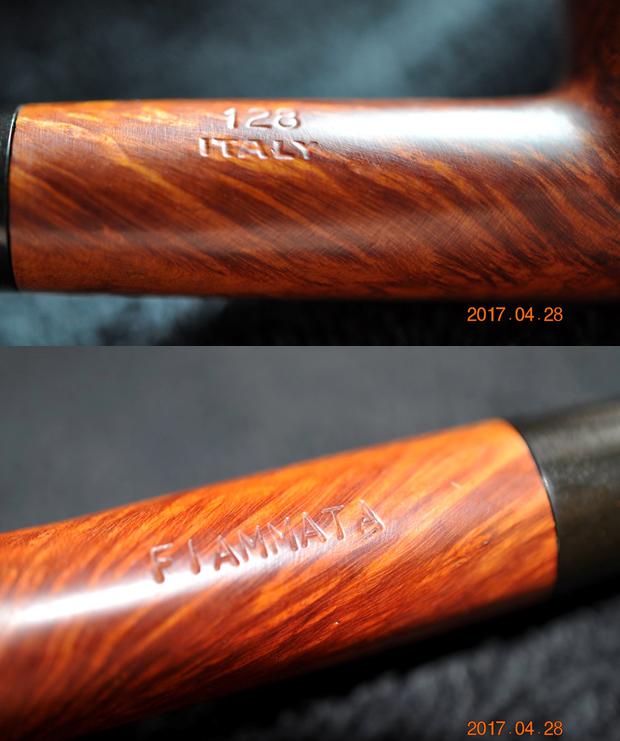
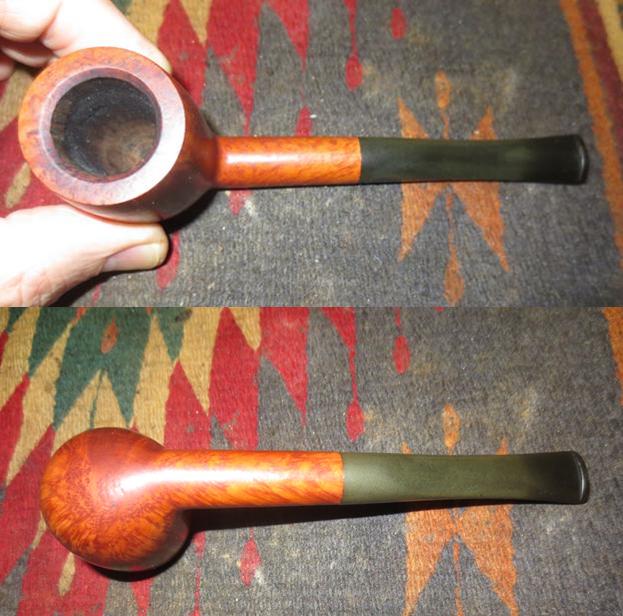
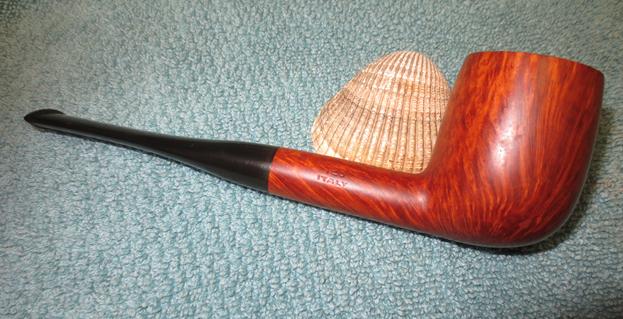
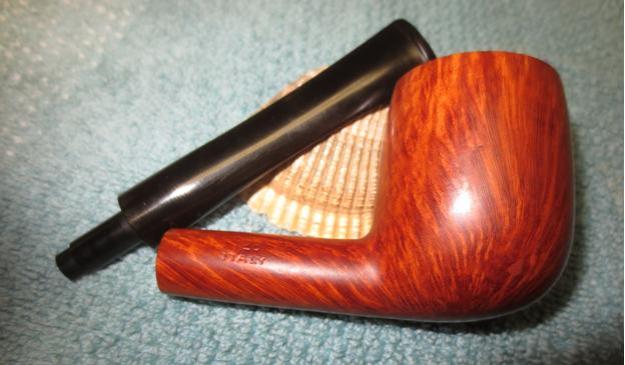
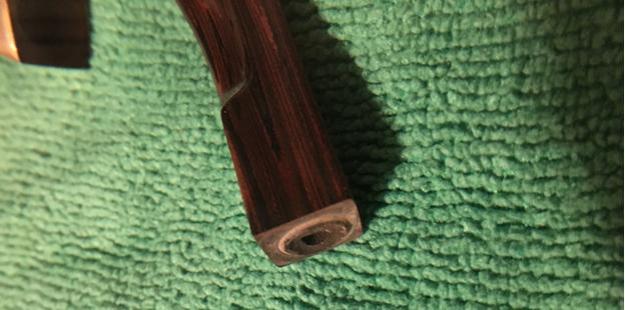
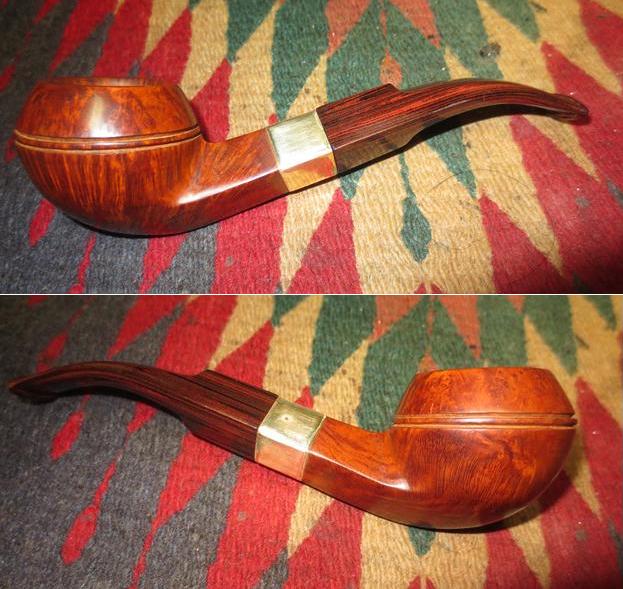
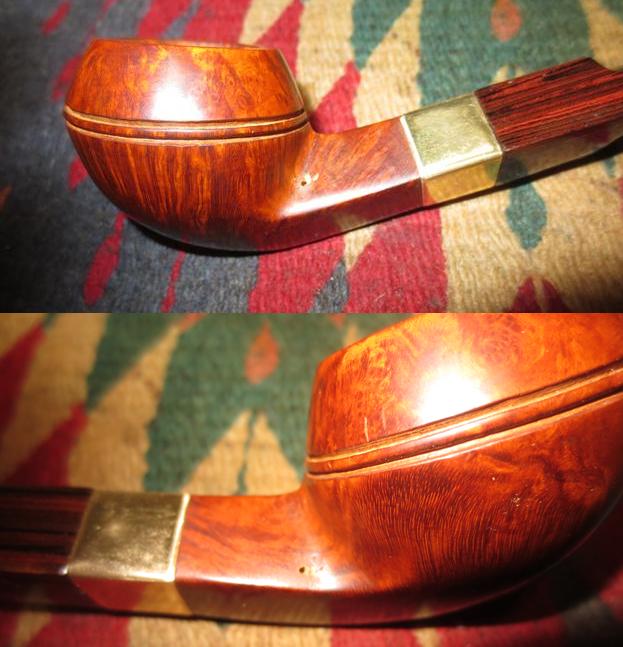
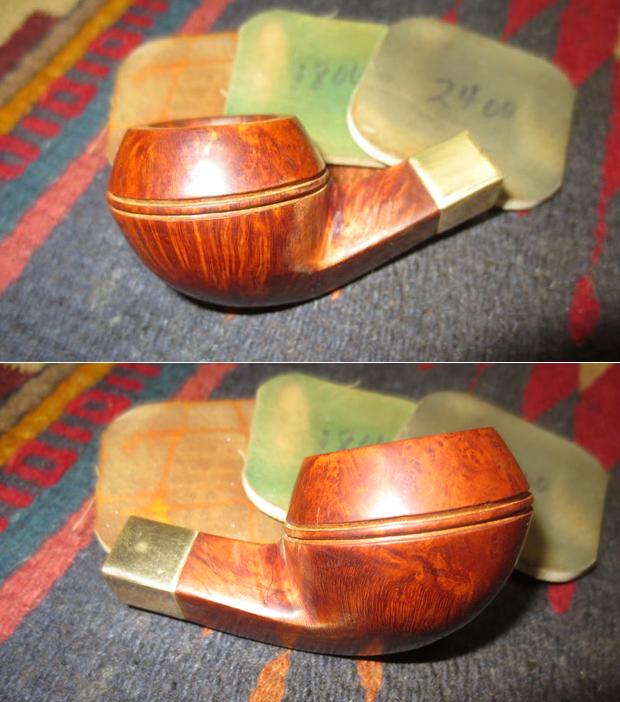
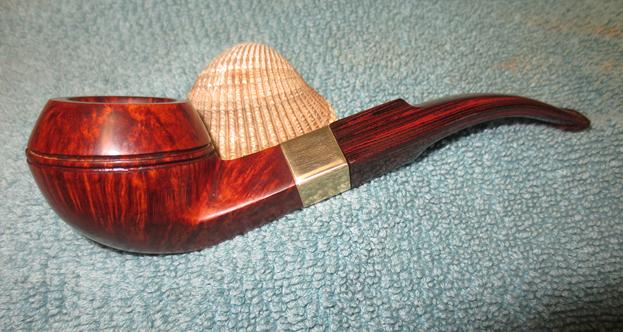
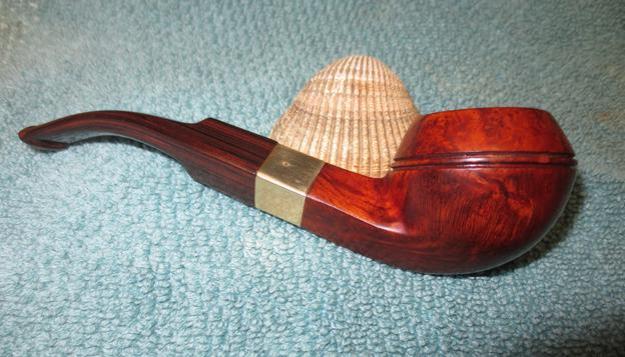
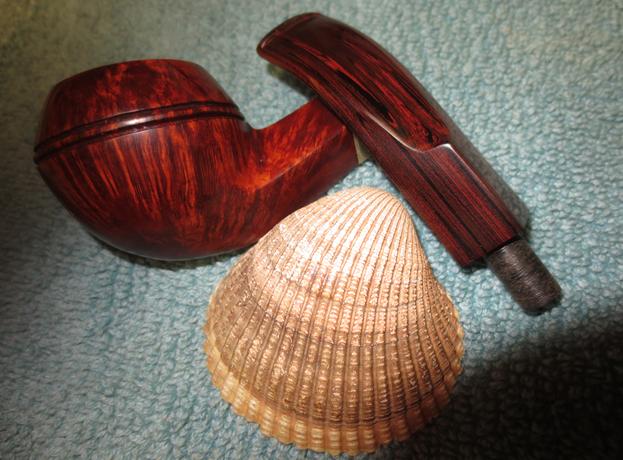
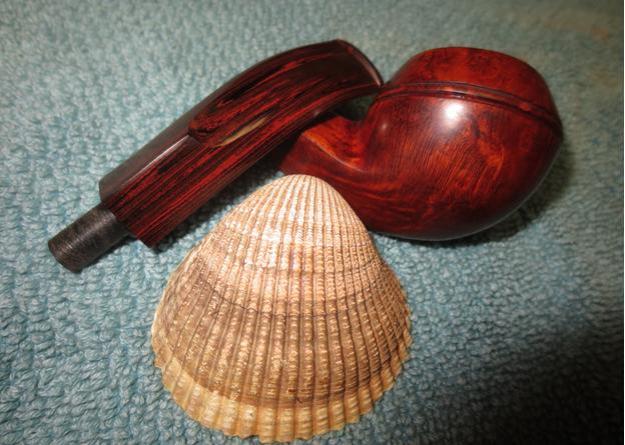
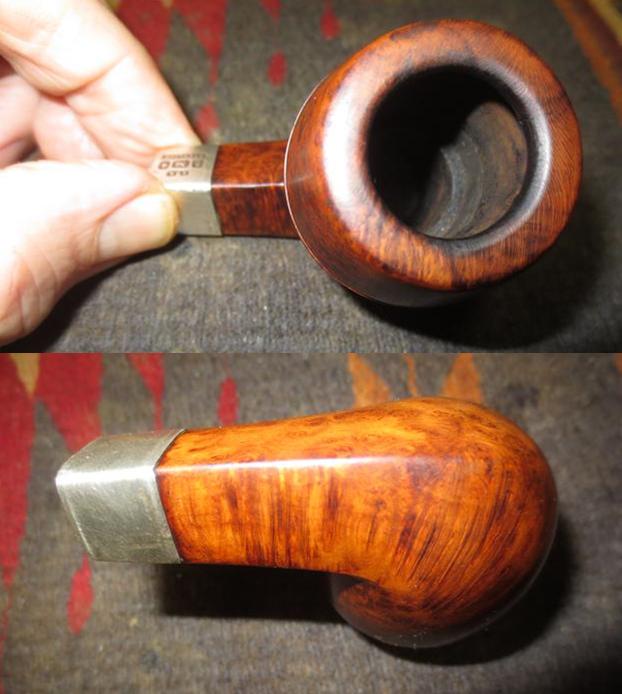
I received an email from a reader of rebornpipes asking about a pipe that he had picked up. He had an older bulldog with no external stamping on the briar. He sent the photos below so I could see the pipe and hallmarks on the band. He was wondering if the hallmarks could help date the pipe. The marks were an anchor, lion and a star. Normally, British hallmarks will have the anchor to designate Birmingham and the lion to designate that the band was assayed as Sterling silver. The star throws me though as I have never seen that on British pipes with Sterling bands. It seems to appear on pipes made in the USA and is a faux hallmark, thus meaning nothing. This pipe also has an XRA stamped in a rectangle above the hallmarks and Sterling in a rectangle below the hallmarks. The next two photos show the full pipe and the silver band. The briar and stem were clean on the outside. The silver band was oxidized.
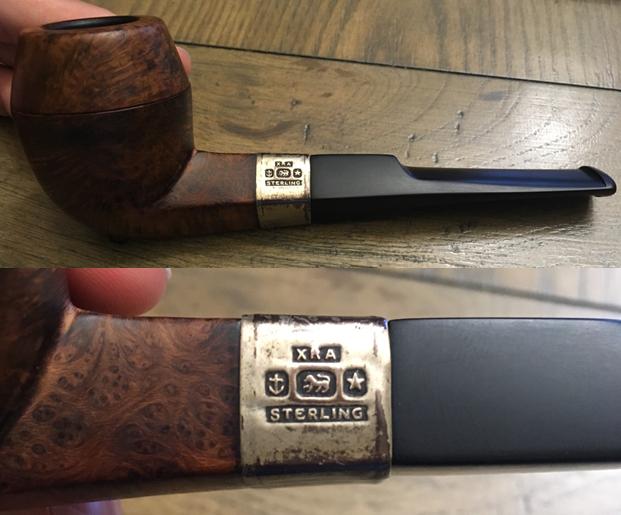
I wrote him back and told him what I thought about the stamping on the silver band being faux hallmarks and that they did not help date the pipe. I also asked him if he was interested in selling me the pipe. I liked what I saw and was curious to see if I could figure out what the inner tube lining of the bowl was made of. He said he would sell it to me if I wanted. We made the deal and I paid for the pipe. It was soon on its way to Vancouver. While I waited for its arrival I studied the photos that he had sent along with the two above. The next one shows the large size of the bowl in relation to the rest of the pipe. I was curious to see what it looked like in person.
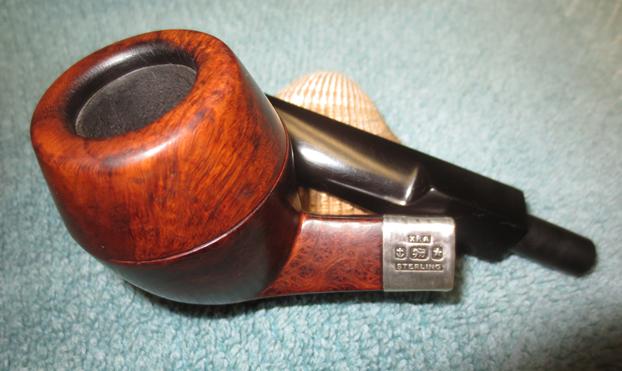
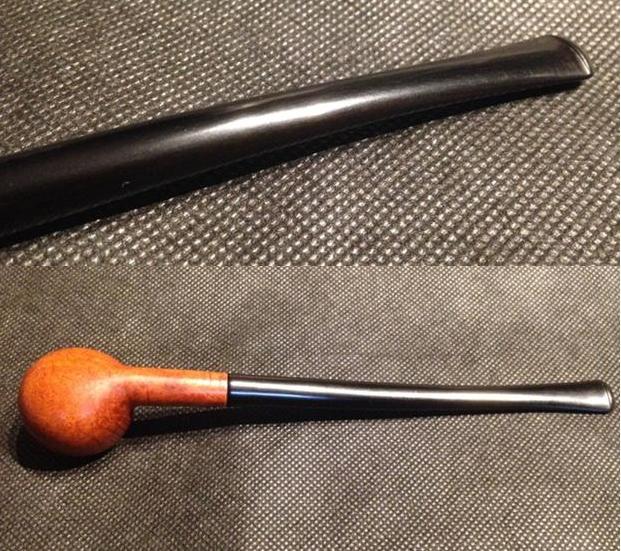
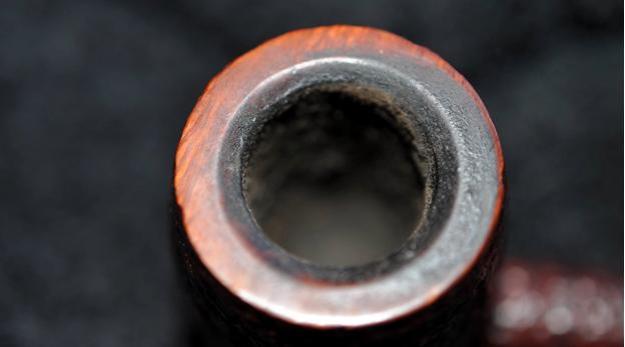
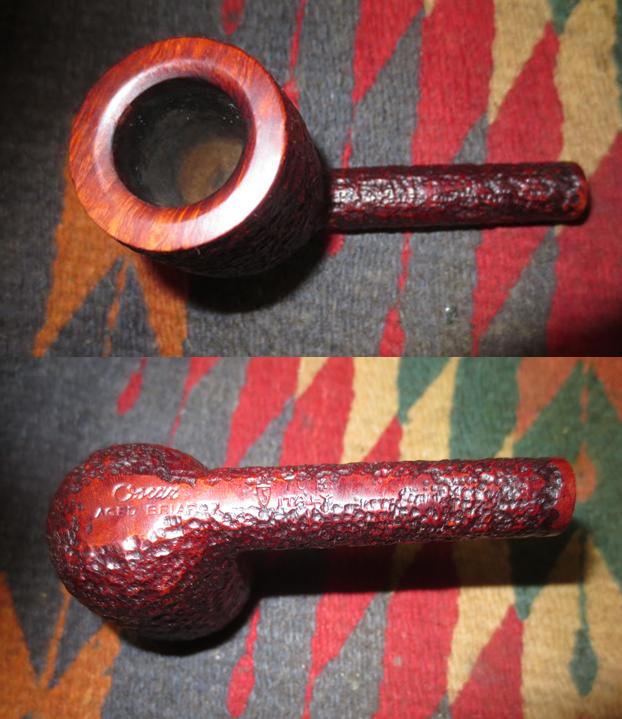
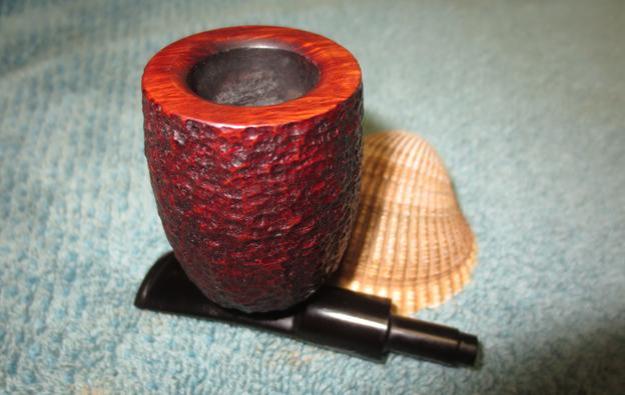
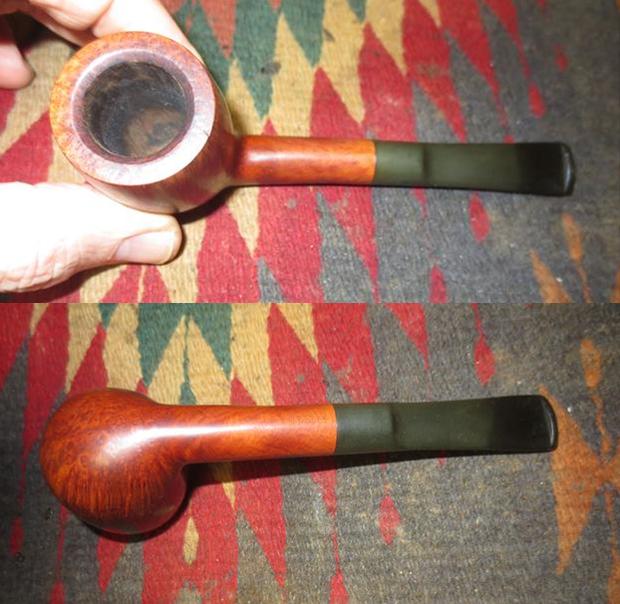
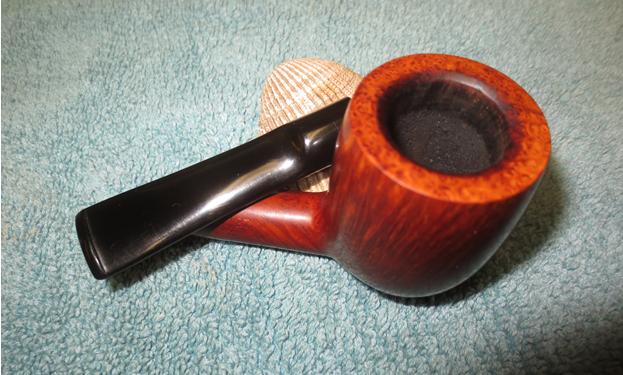
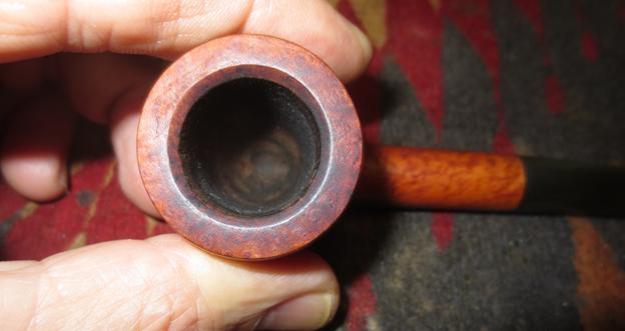
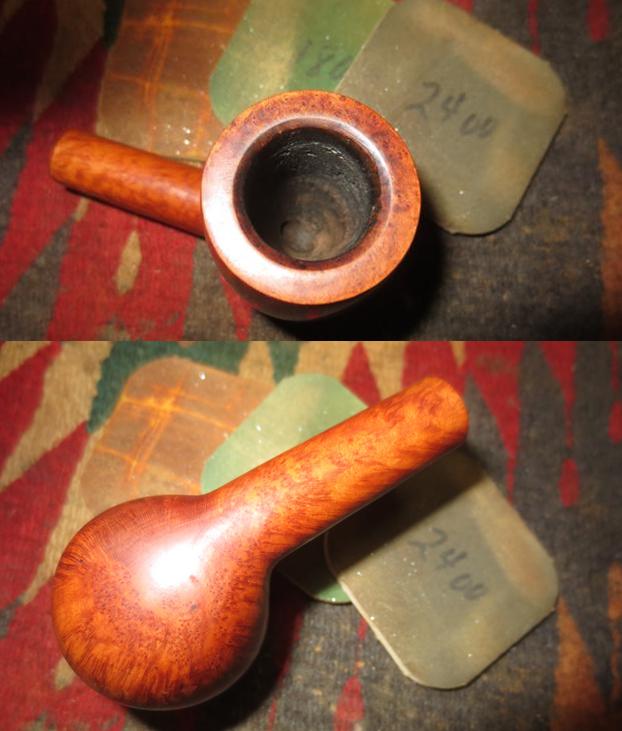
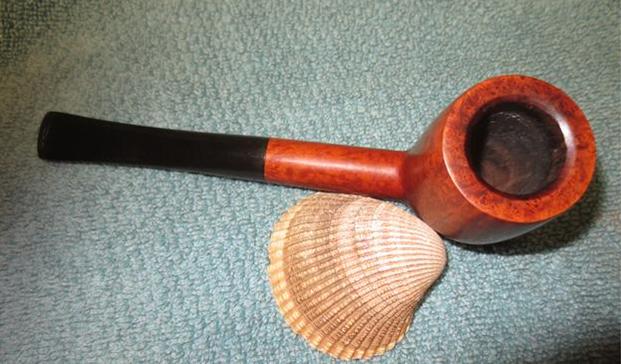
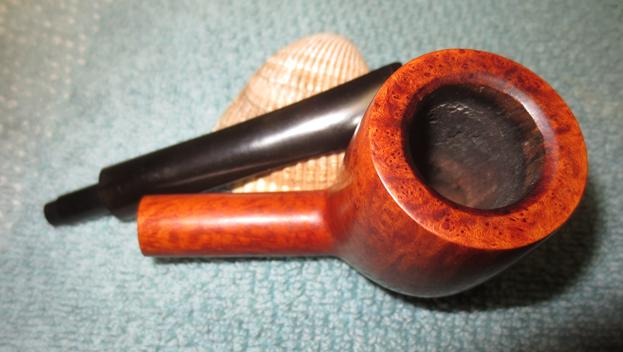
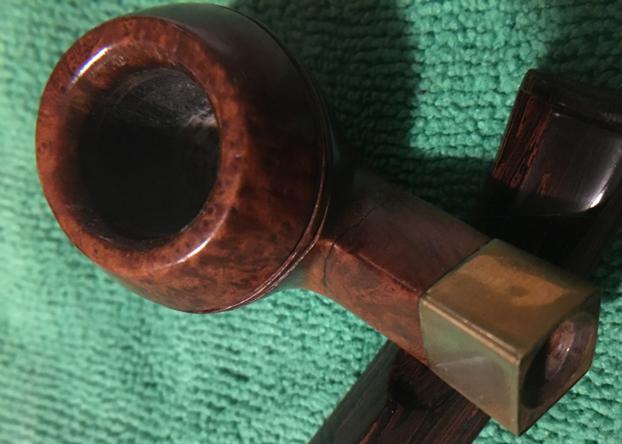
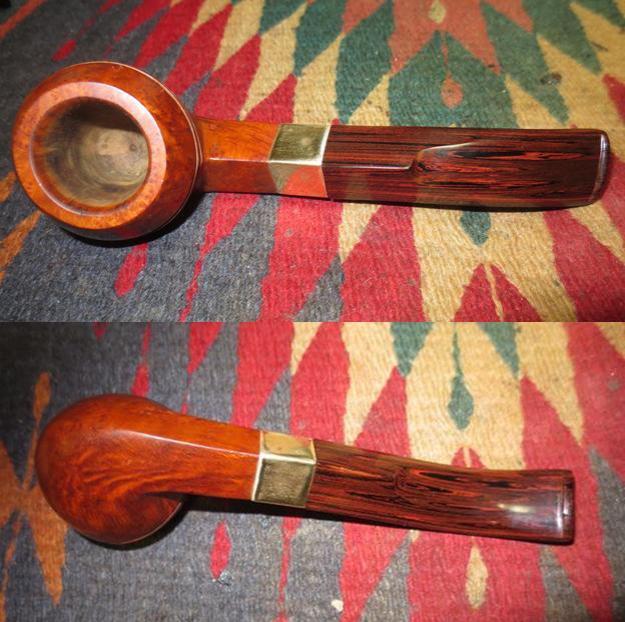
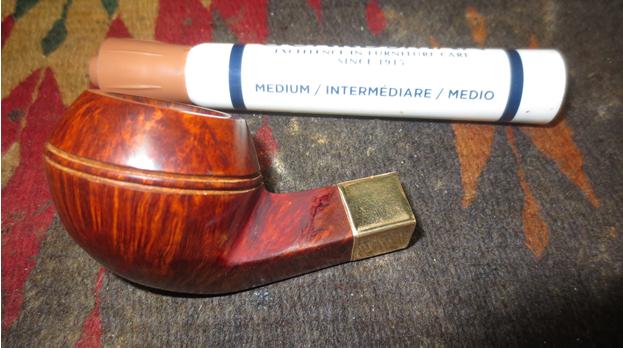
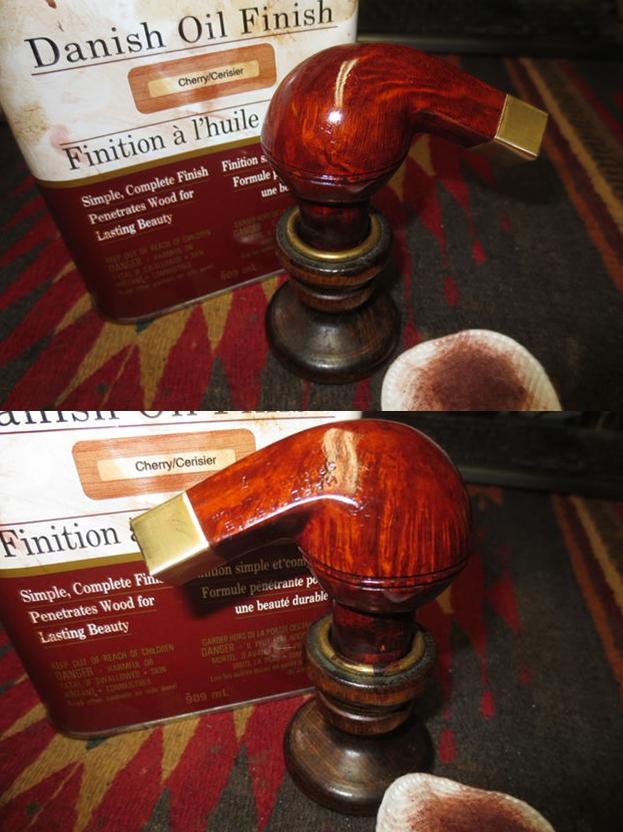
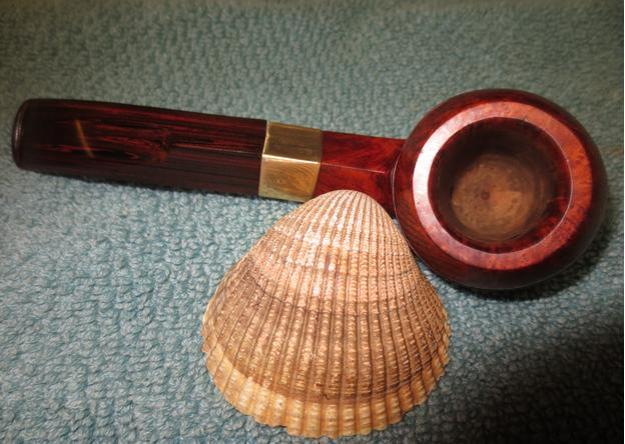
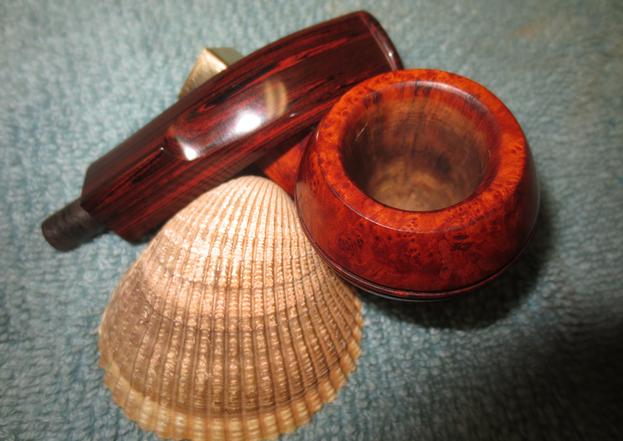
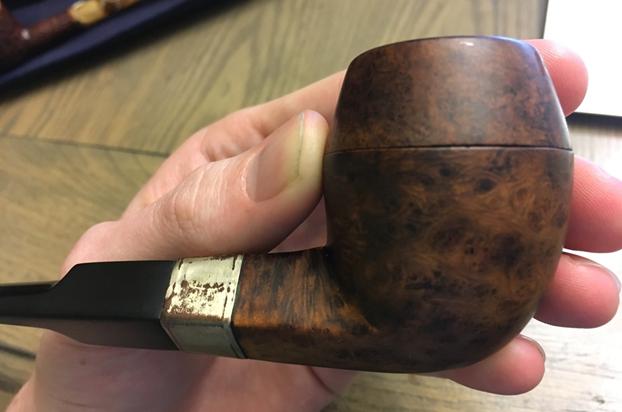
It was the top view of the pipe that intrigued me. The bulldog cap unscrewed from the base and there appeared to be a bowl insert in the base that had a perforated metal plate at the bottom. From this photo I could not tell what the insert was made of but further photos showed the pipe taken apart.
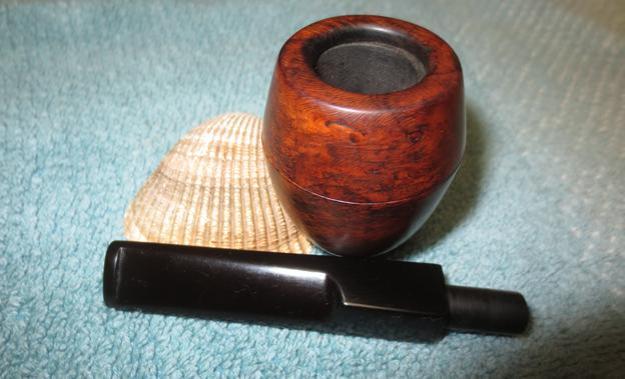
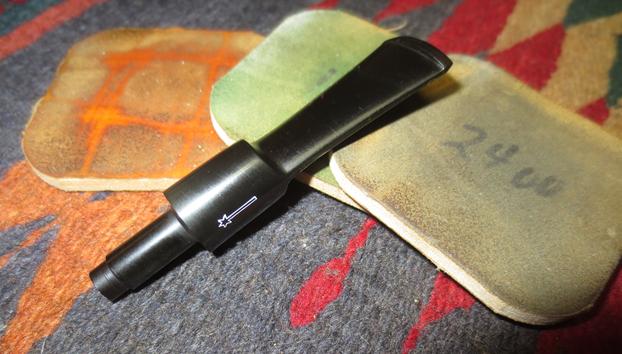
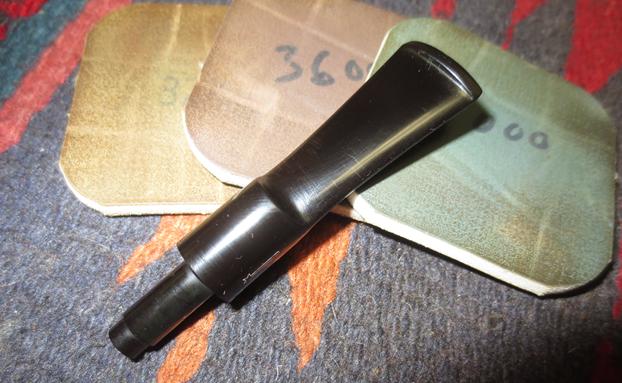
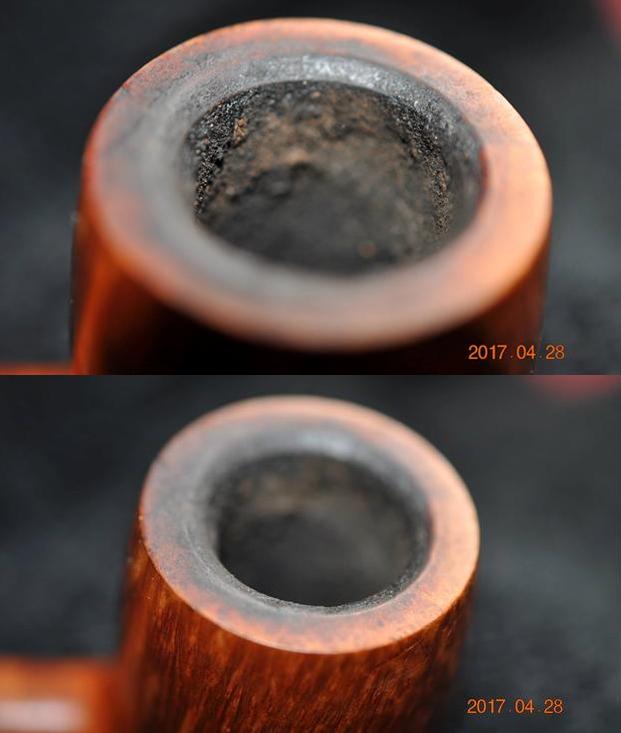
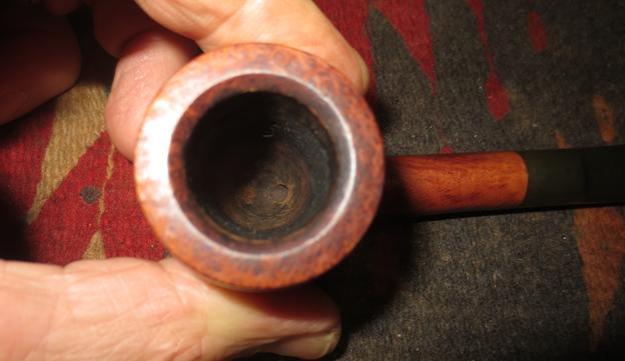
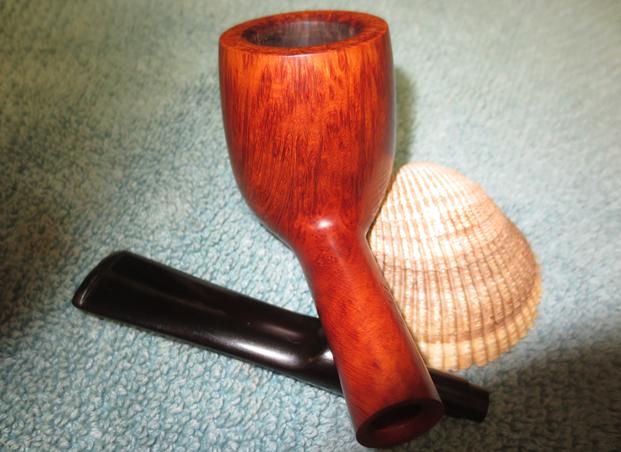
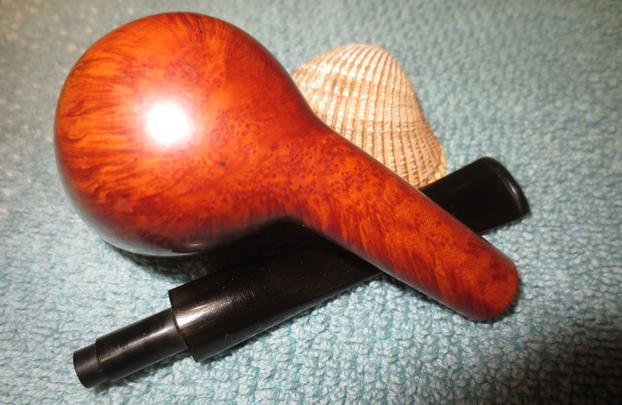
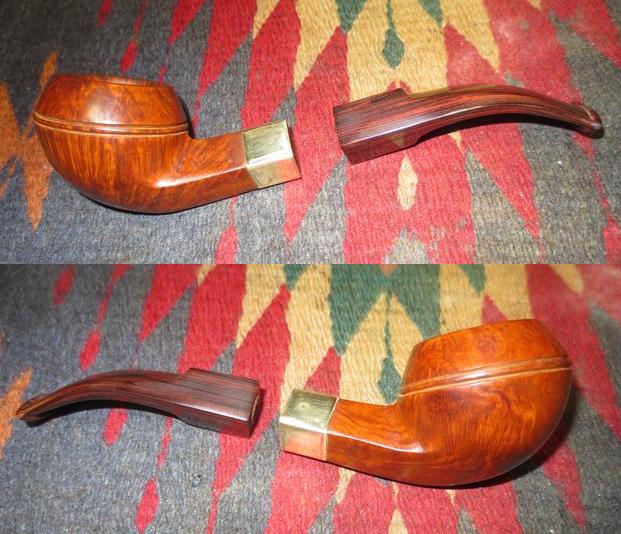
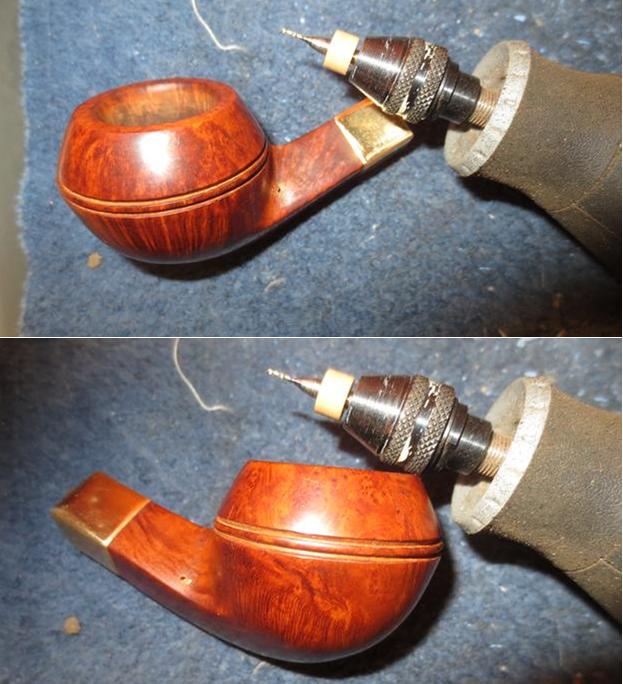
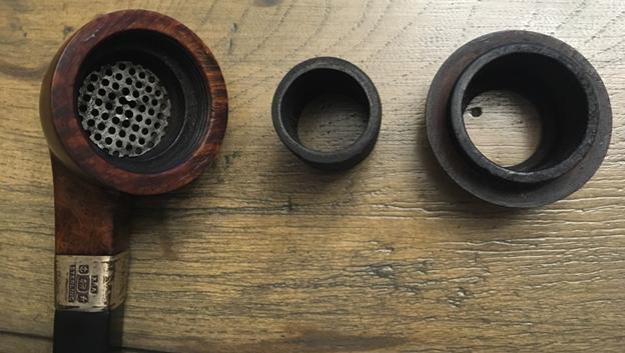
With the cap unscrewed from the bowl the insert was a tube that looked porous and dark grey/black in colour. The wooden threads on the cap and in the base seemed to be in excellent condition. I always wonder when I am dealing with briar threads being screwed and unscrewed how much damage there will be once I have it in hand. The second photo below shows the metal plate supported by a ridge around the inside of the base and another ridge above that which provided a ridge for the liner cylinder to sit on. The cap on the bulldog would hold the liner in place against the top and the ridge at the bottom. This keeps the liner in place and does not allow much play when the pipe is smoked. The third photo shows the parts side by side. I was very curious now what I had purchased and what the material was that made up the liner.
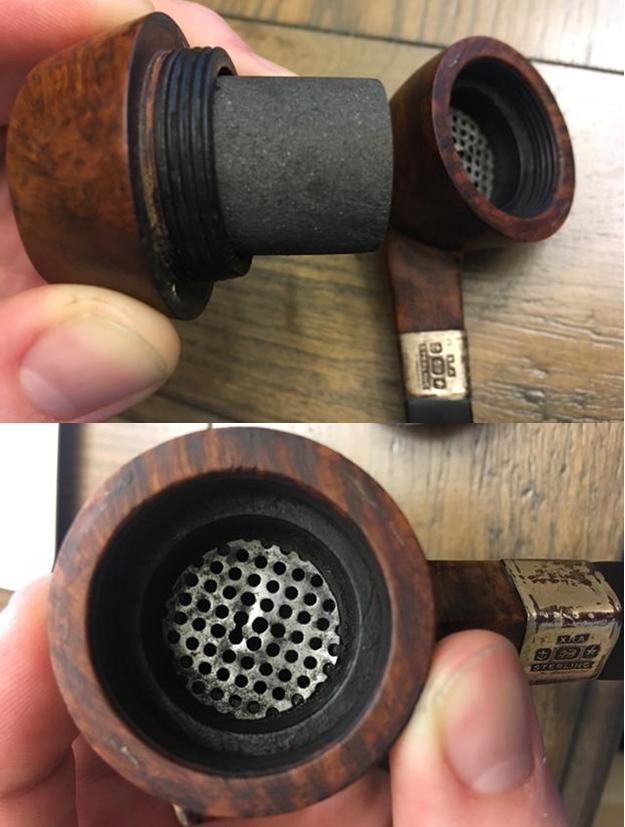
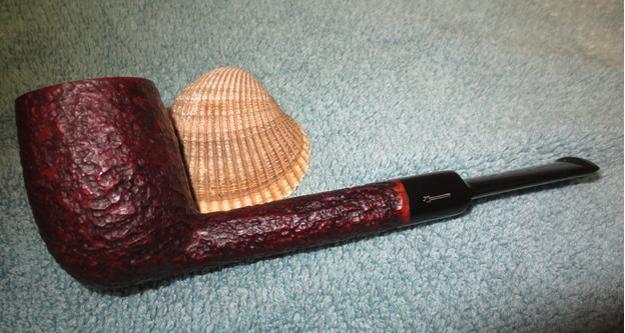
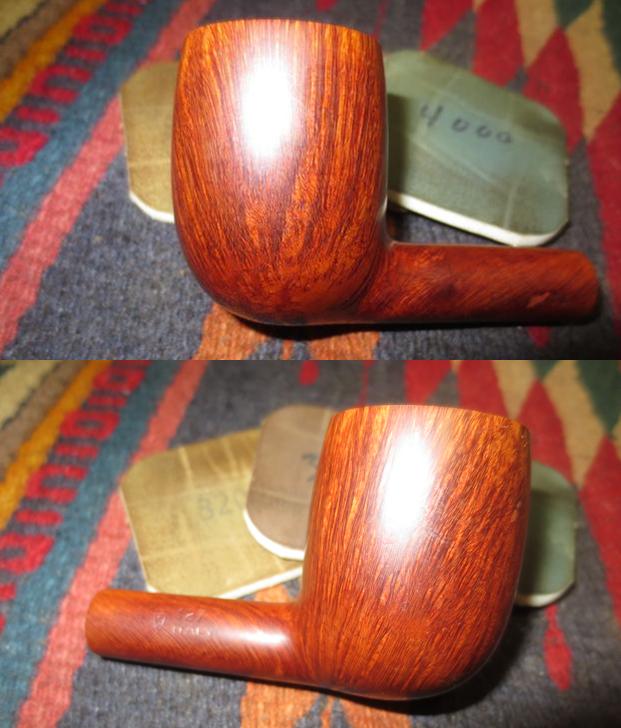
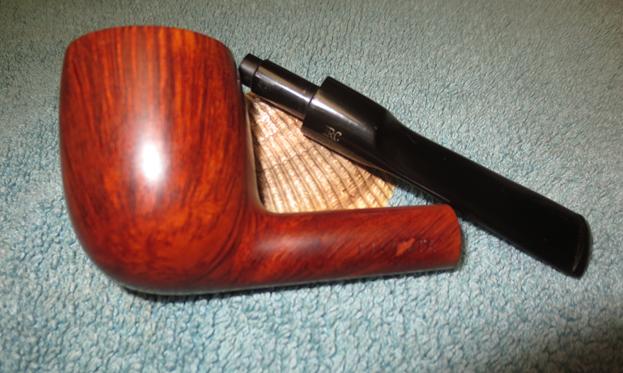
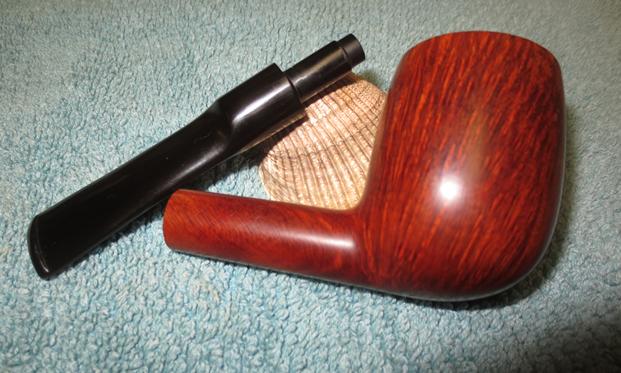
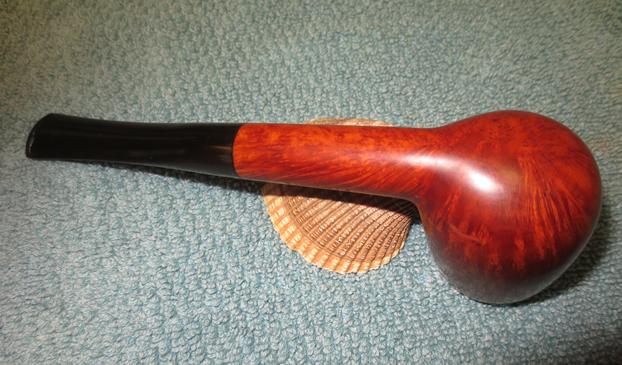
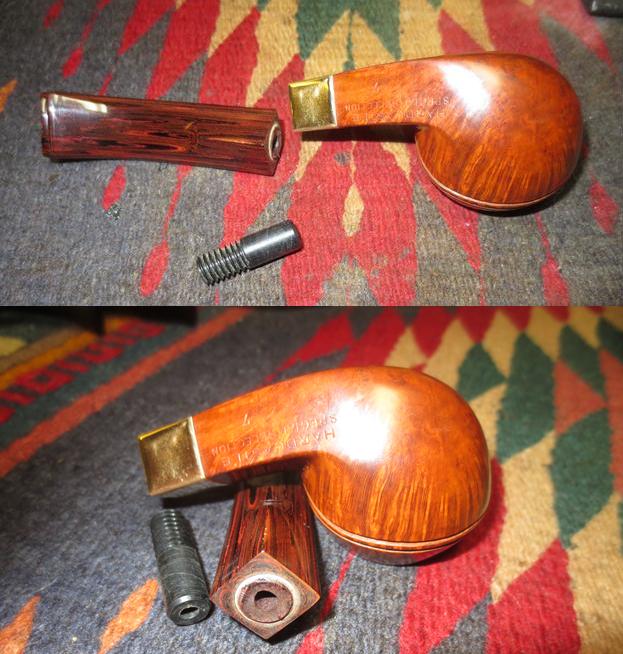
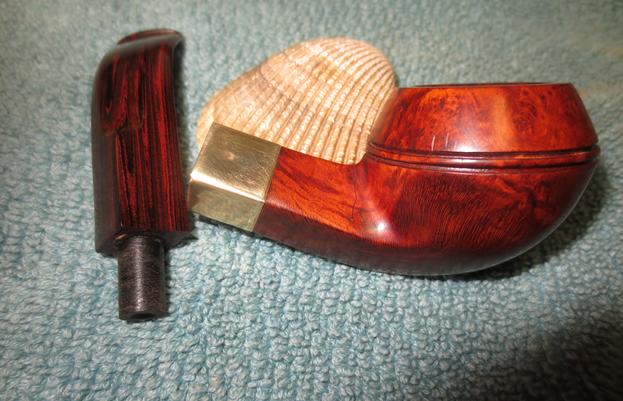
Surprisingly it did not take too long for the pipe to arrive. I was looking forward to working on it and trying to figure out what material formed the bowl liner. I removed the stem from the shank and took a photo of what the pipe looked like. I took the pipe apart and took a series of photos to show you what I saw on my work table. 
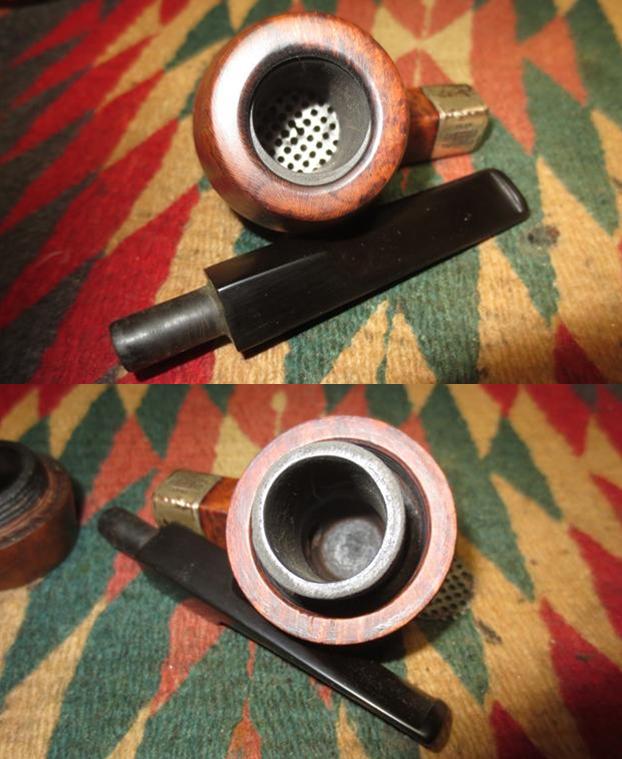
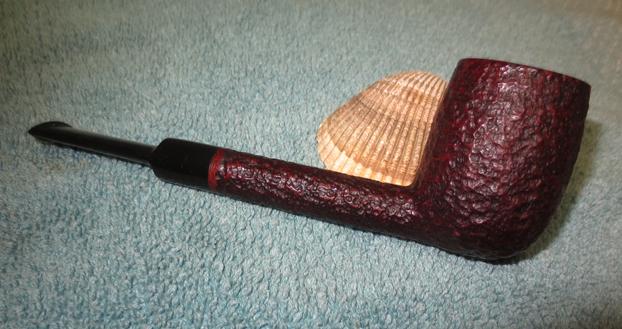
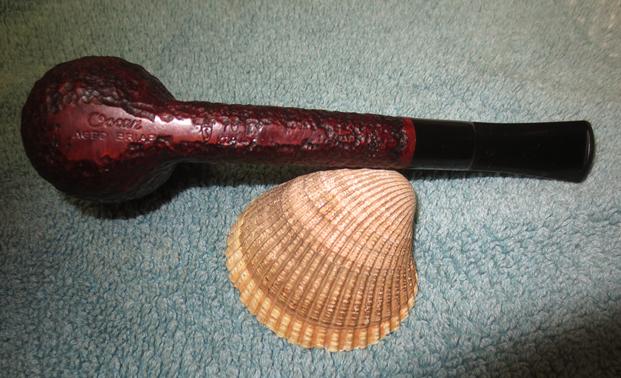
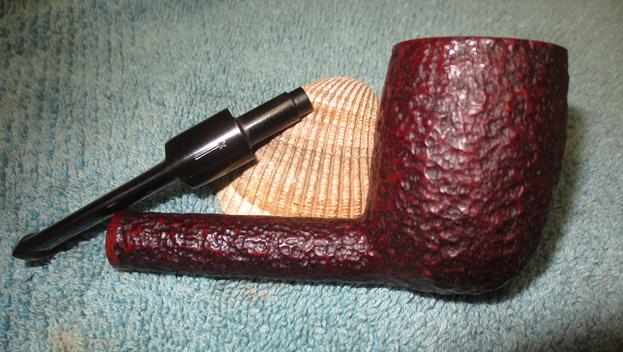
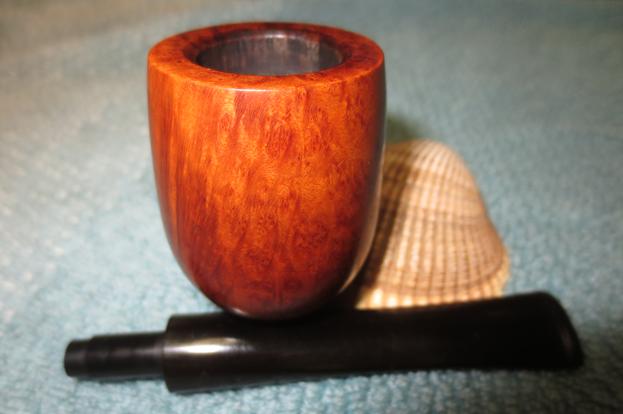
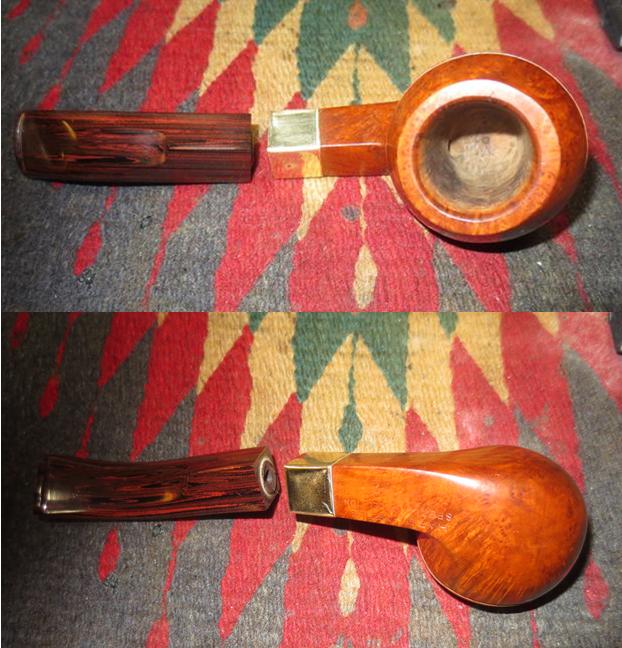
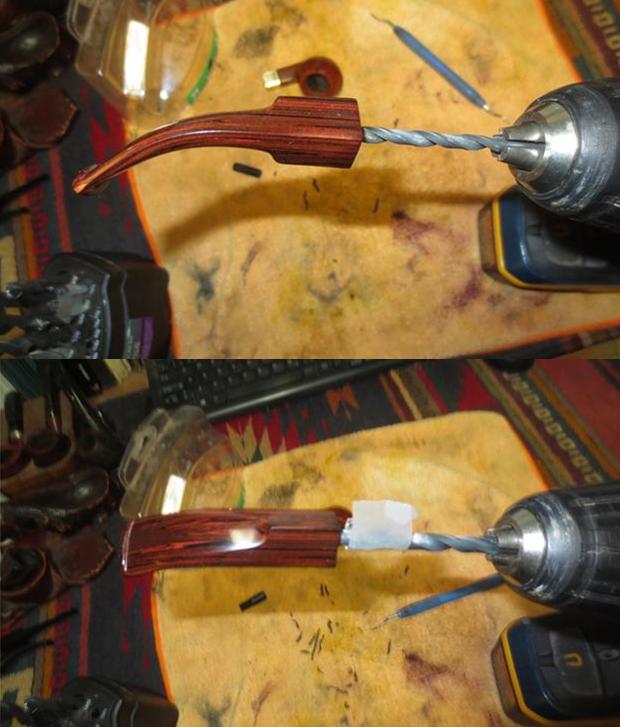
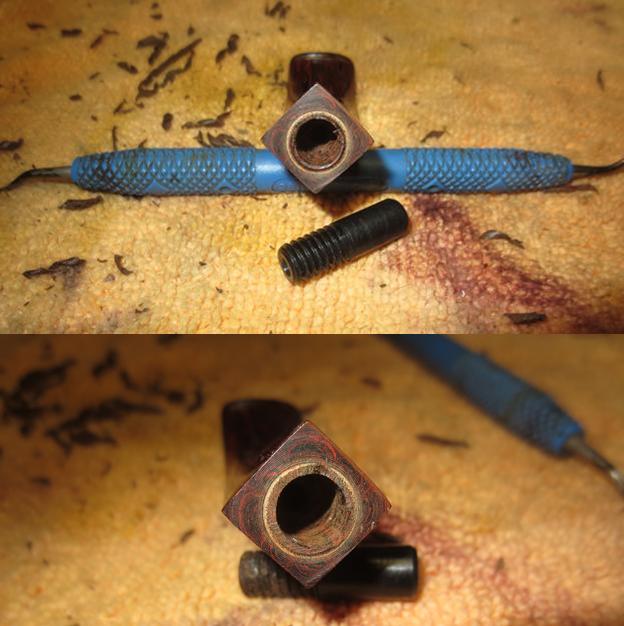
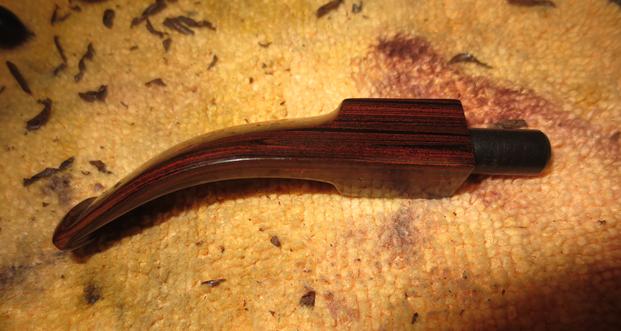
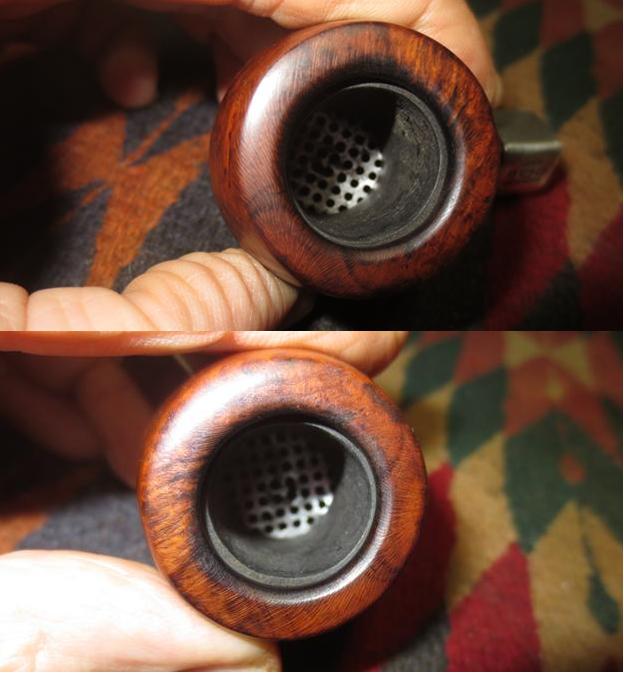
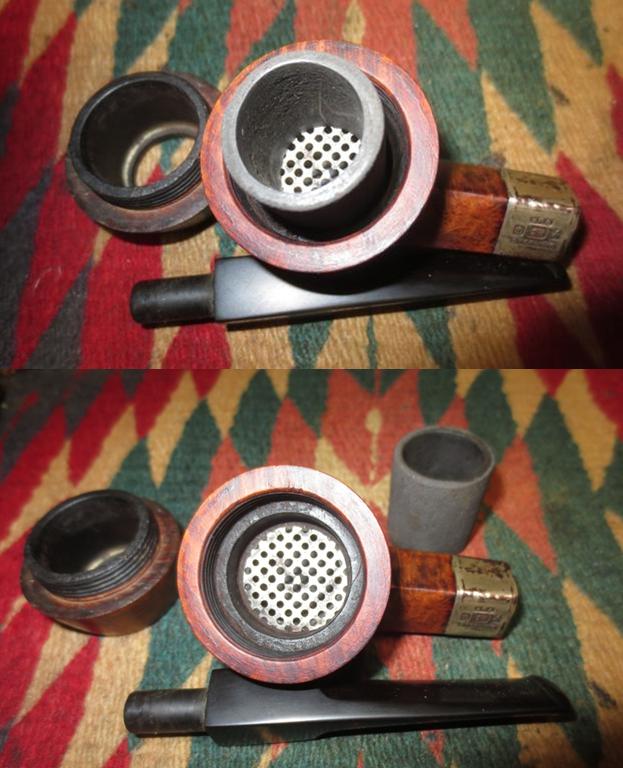
The next series of photos show all of the pieces of the pipe from different angles. Can you figure out from the photos what was going through my mind about that bowl liner? 
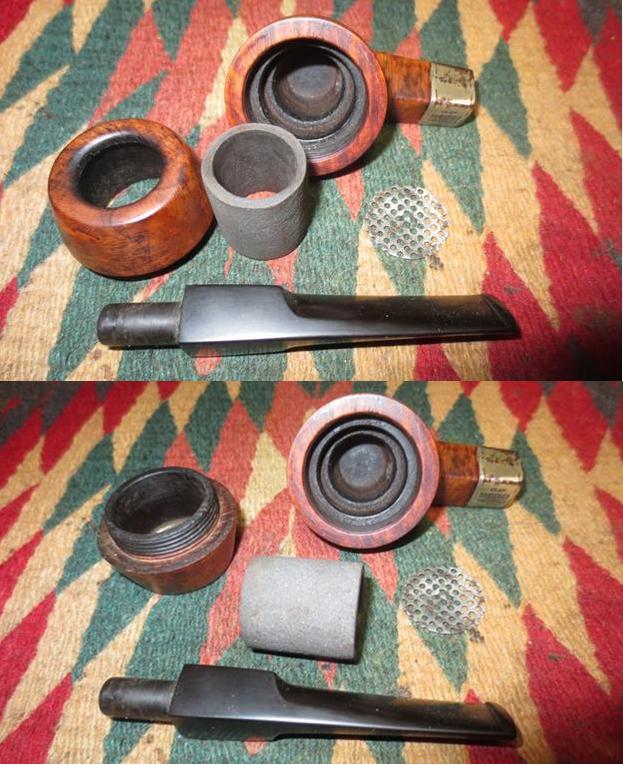
Did you figure out what was going through my mind yet? Well, before I went any further with the refurbishing of this pipe I wanted to know what material composed the bowl liner. I did not want to work on the base or the cap or any other part of the bowl until I was pretty sure what the liner was. My first thoughts were asbestos! If it was asbestos I did not want to work on it at all. I would probably just put it in the pipe cupboard and leave it alone as a piece of tobacco history. I put it back together and set it aside on the work table. I wanted to think about it and do a bit of research to see what I could find before proceeding.

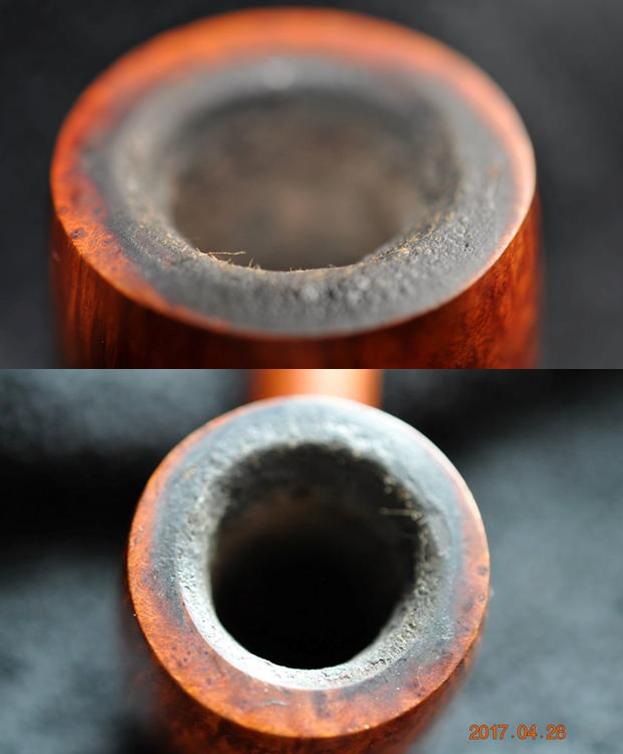
Well, the pipe sat for quite a while just looking at me. I would pick it up now and then and turn it over in my hands and set it back down. I needed some uninterrupted time to deal with. Today I had that time. I get a long weekend do to the Victoria Day holiday here in Vancouver. It was quiet as the ladies in my life had gone out for the afternoon. I took the pipe apart and examined the bowl liner with a magnifying glass and bright light. I was glad to see that there were no fibers in the material. It looked the colour of pencil lead through the lens under the bright light. I was pretty certain that I was not dealing with asbestos. But what the material was still remained a mystery to me.

I wrote my brother Jeff a private message and included some photos of the bowl liner. He is a chemist and I wanted to get his opinion regarding the material. The photos showed a sparkling grey black material that was compressed together. He replied that he thought it might be graphite. He said that it looked like the graphite electrodes and cuvettes that he used to work with at the lab. Since was used in the bowl lining he thought that it seemed like a good application for graphite due to its characteristics in terms of heat resistance. Sounded reasonable to me, as I know next to nothing about graphite, the only thing I know is that I use it to lubricate hinges around the house and on the vehicle.

I asked him whether the age of the pipe matched the introduction of Graphite. He sent me the following link on Wikipedia: https://en.wikipedia.org/wiki/Graphite. The article said that graphite was archaically referred to as plumbago and is a crystalline allotrope of carbon, a semimetal and a native element mineral. Graphite is the most stable form of carbon under standard conditions. Therefore, it is used in thermochemistry as the standard state for defining the heat of formation of carbon compounds.

I went on to read more of the article and particularly with regard to the invention of a process to produce synthetic graphite. I quote that portion of the article in full.

In 1893 Charles Street of Le Carbone discovered a process for making artificial graphite. Another process to make synthetic graphite was invented accidentally by Edward Goodrich Acheson (1856–1931). In the mid-1890s, Acheson discovered that overheating carborundum produced almost pure graphite. While studying the effects of high temperature on carborundum, he had found that silicon vaporizes at about 4,150 °C (7,500 °F), leaving the carbon behind in graphitic carbon. This graphite was another major discovery for him, and it became extremely valuable and helpful as a lubricant.

In 1896 Acheson received a patent for his method of synthesizing graphite, and in 1897 started commercial production. The Acheson Graphite Co. was formed in 1899.

From that information I learned that graphite was discovered and worked with at about the same time as the date I proposed for the making of this pipe. It also was a material that worked well in terms of heat insulation. I was getting closer to my determination regarding the material of the lining.

I looked further on the web and found an interesting page on pyrolytic graphite pipes called The Pipe. Here is the link to that site: http://www.thepipe.info/history/index.html. There was a great section on the history of the material and its use in tobacco pipes. While it primarily refers to the manufacture of the smoking pipe called The Pipe there is much information that is applicable. The article is quite long and I quote from the relevant parts of it below. I have marked the sections in bold font and underlined that are particularly applicable to the material of the bowl lining.

…In 1896, Thomas Edison, an American inventor, discovered a process for hardening carbon which caused the molecules to align in such a way that heat was dissipated along the vertical axis of the material while the horizontal axis remained relatively cool. He called the material pyrolytic graphite. When shaped into a bowl or cup, pyrolytic graphite also creates a venturi effect. It has wide applications today in space rocket nose cones and nozzles, nuclear power plant plumbing, brake linings for such behemoths as the Concorde Supersonic Transport, and numerous other situations where intense heat must be quickly and uniformly dissipated in a controlled manner

In the 1950’s, defense contractors began experimenting with pyrolytic graphite for use as heat-shield coatings for space rockets which were planned for reentry into the earth’s atmosphere. In the late 1950’s, Super-Temp Corporation was founded to manufacture pyrolytic graphite and other specialty metals. In 1962, Ducommun purchased Super-Temp and promptly built a new manufacturing facility for it. Dr. William H. Smith, a widely regarded expert in the production of specialty metals, was then hired away from General Electric Company to become the President of Super-Temp.

In 1963, George Long, a venture capitalist who had made a fortune with Ampex Corporation (the creator of the technology that allowed instant replays of televised sporting events), was looking for another business opportunity. Robert Dailey had recently retired from an advertising agency and had heard of a new product called Tar Gard Cigarette Filters. Long and Dailey bought all 55 Tar Gard Patents and began selling the product from their offices at 2 Pine Street, San Francisco, California. They did not manufacture the filters or any of their other products; manufacture was always contracted from outside suppliers…

In 1963, one of the workers at Super-Temp was machining pyrolytic graphite sleeves and cups for nuclear power plant plumbing. An avid pipe smoker, he noticed that the cups he was working on were about the same size as his pipe bowl. On a whim, he drilled a hole near the bottom of one of the cups and stuck it in his pipe. It smoked quite well and he shared his discovery with management. Dr. Smith was taken with the notion of a pipe lined with pyrolytic graphite and encouraged further experimentation. They discovered that the pipe bowl liners’ venturi effect significantly reduced the tars and nicotine passing through the pipe to the smoker. An application for patent of a “Smoking Element” was submitted by Edgar C. Buckingham, Super-Temp’s Marketing Manager, in August, 1963. The patent was granted in 1965.

When he learned of his subsidiary’s new pipe bowl liner, Charles Ducommun introduced Dr. Smith to a social acquaintance, George Long. When Smith presented the new pipe concept to Tar Gard, Dailey, also an avid pipe smoker, and Long enthusiastically adopted it as an extension of their product line. Tar Gard applied at once for a trademark for the pipe. The first several applications were rejected but, when the initial “p” of “pipe” was made a small logo of a pipe, the trademark was granted.

The above article extends long after the manufacture of the pipe I had in my hand but it certainly added information regarding the concept of a graphite bowl liner. It was used in quite a few pipesmoking applications from 1963 on but I don’t think it is unreasonable to think that it was used before in similar applications. The one I have in hand was not an obvious success as it bears no copyright information or stamping to identify the manufacturer but the concept is very similar to the pipe described as The Pipe above.

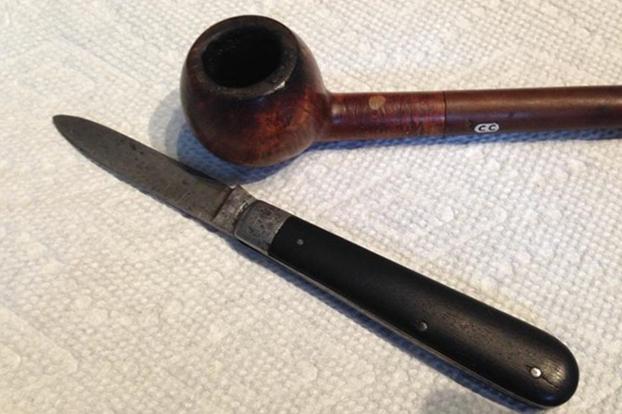
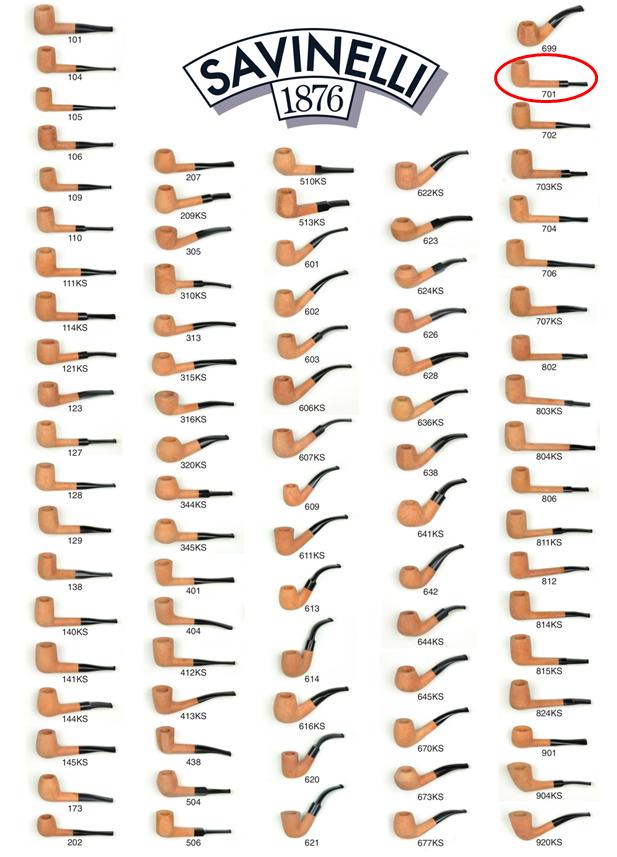
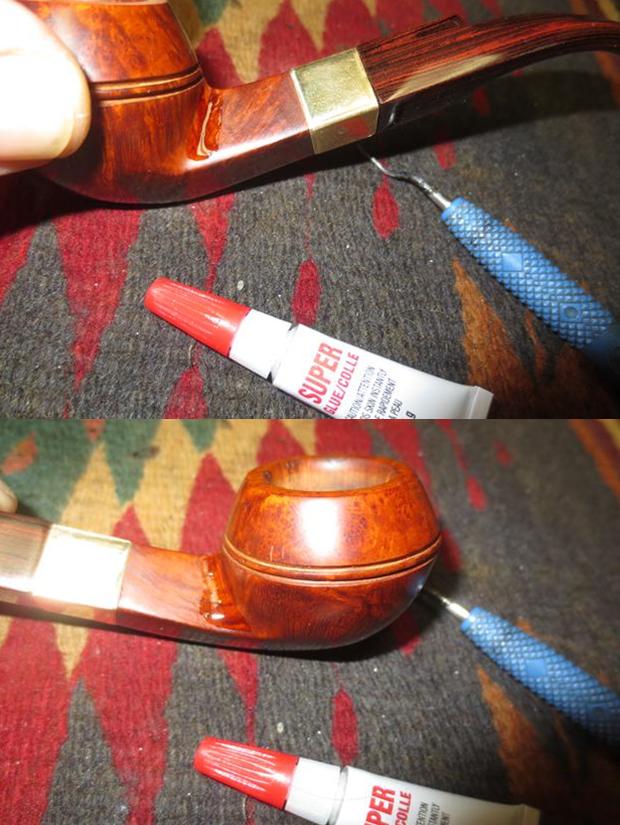
Pretty convinced that I was dealing with a Graphite bowl lining I took the pipe apart to clean it. I was careful in the work so that I did not inhale the dust that was generated from the work. I started by reaming the various briar parts of the bowl with the Savinelli Fitsall Pipe Reaming Knife. It worked really well on the various platforms on the side of the bowl. 
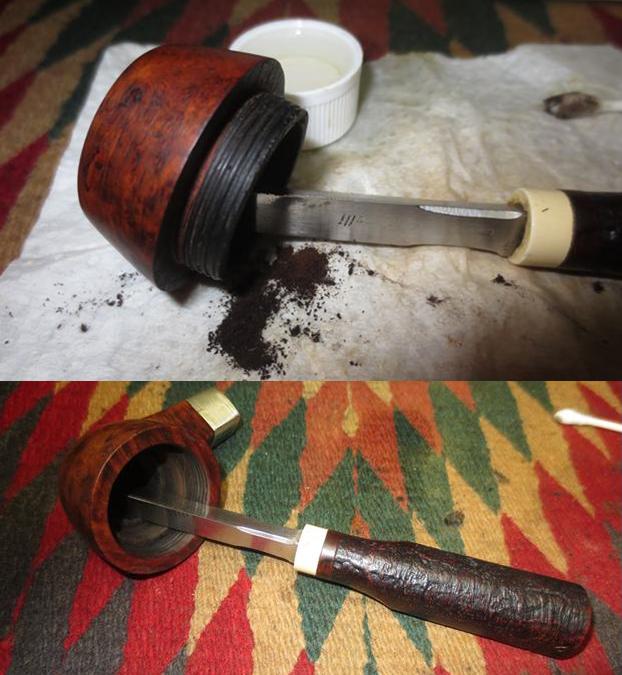
I scrubbed out the interior after the reaming using alcohol and cotton swabs to remove the tars and oils on the walls of the various briar parts of the pipe.
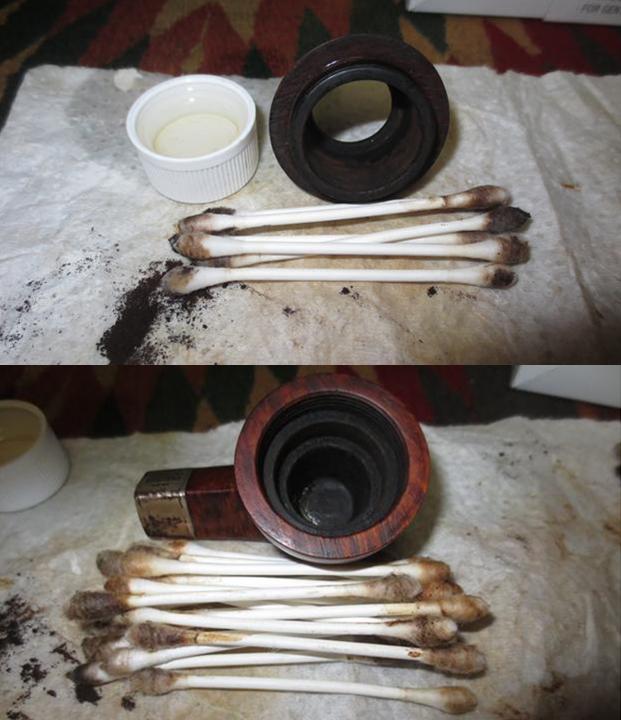
I scrubbed out the mortise at the same time with alcohol, pipe cleaners and cotton swabs until the interior of the pipe was absolutely clean.I scrubbed the metal perforated screen that sat on the shelf in the bottom of the base. The graphite bowl liner sat on top of this. I scrubbed it with alcohol and cotton swabs and pads and then sanded it with sandpaper, micromesh sanding pads and wiped it clean.
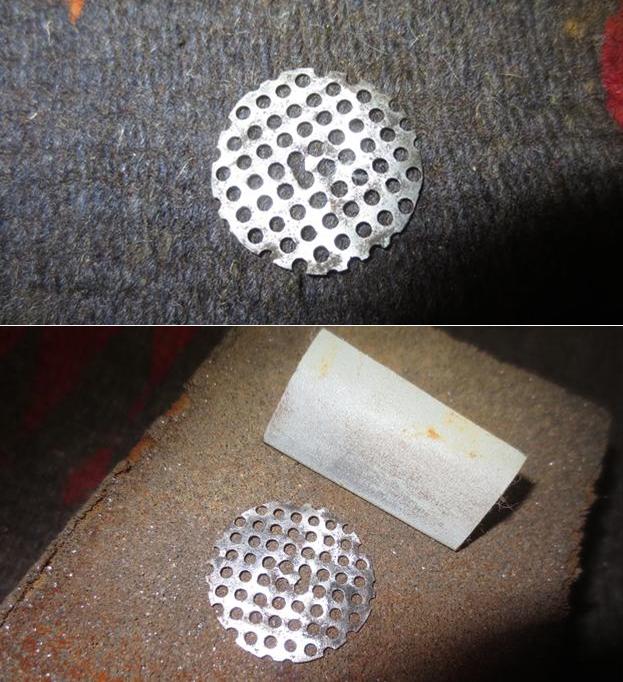
I ran a pipe cleaner and alcohol through the airway in the stem to clean out any remaining debris that may have been hidden there. The pipe cleaner came out very clean with no tars of oils. When I held it up to the light the airway was spotless.
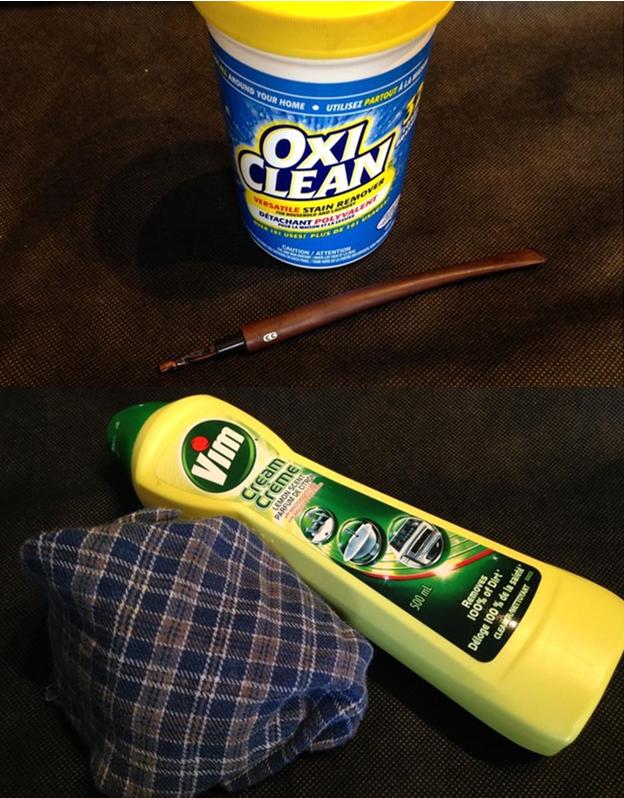
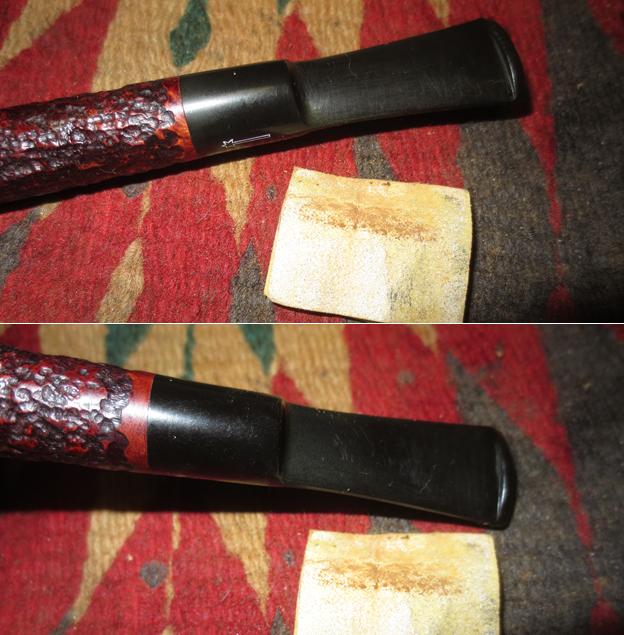
I cleaned out the grooves in the stamping on the silver with cotton swabs and alcohol. I polished the band with a jeweler’s cloth to remove all of the oxidation. I buffed the bowl with Blue Diamond on the buffing wheel to give it a shine. I gave the bowl and silver band several coats of carnauba wax and buffed it with a clean buffing pad to raise the shine. I would give it more wax once I finished with the stem. 
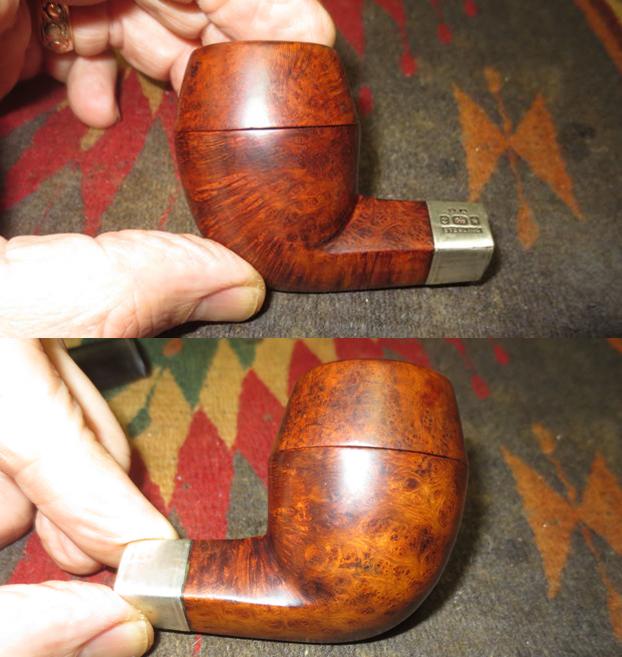
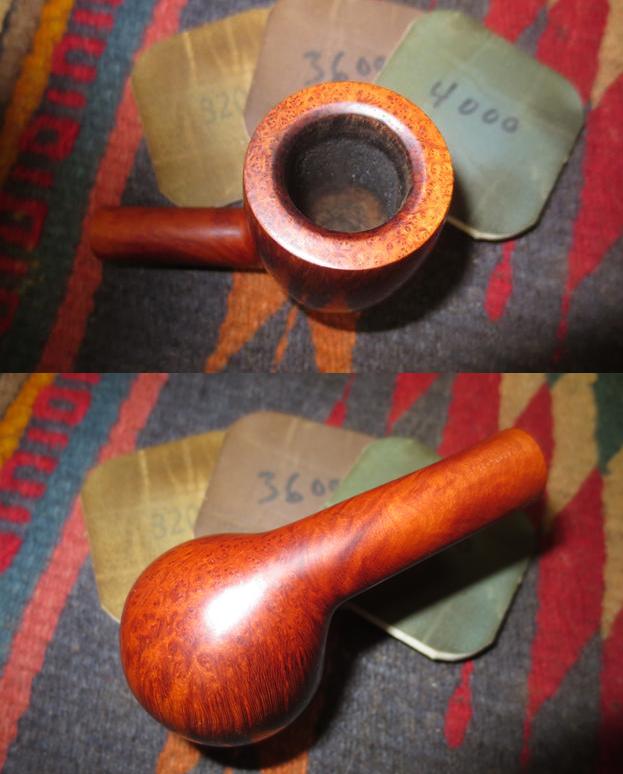
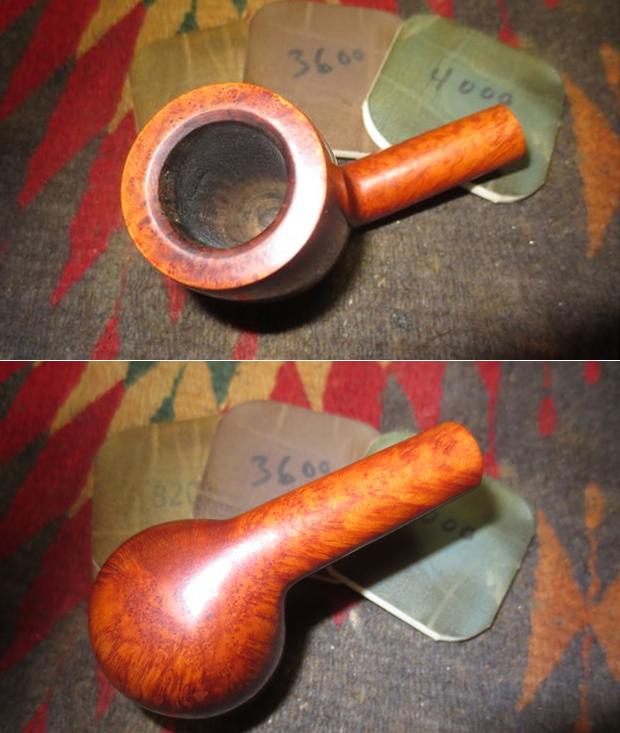
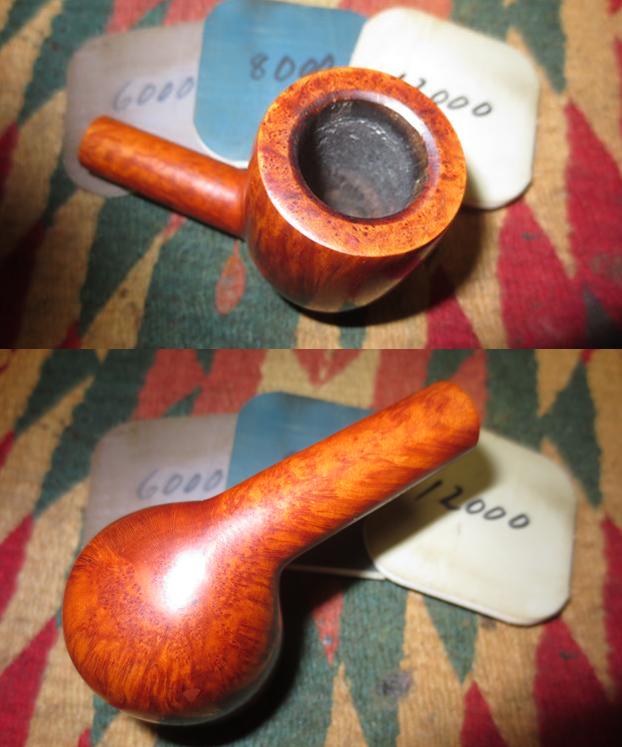
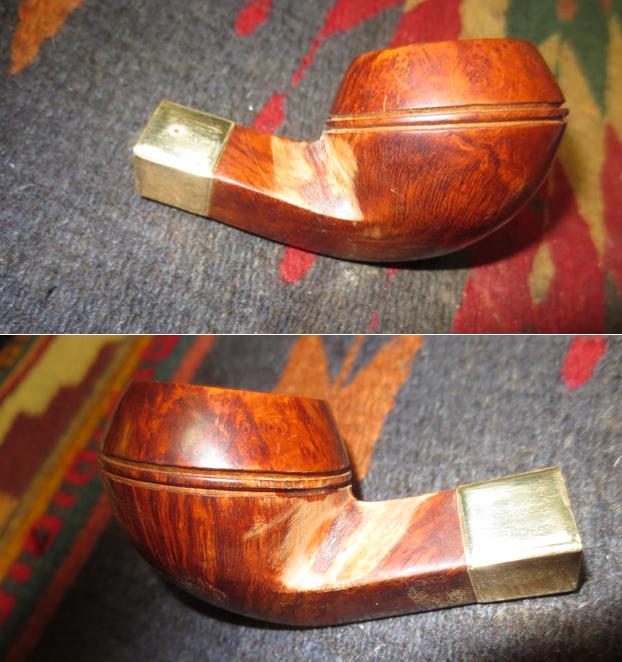
I took the pipe apart again and took pictures of the polished briar parts. The bulldog cap and the base of the bowl both are clean the briar has a patina.
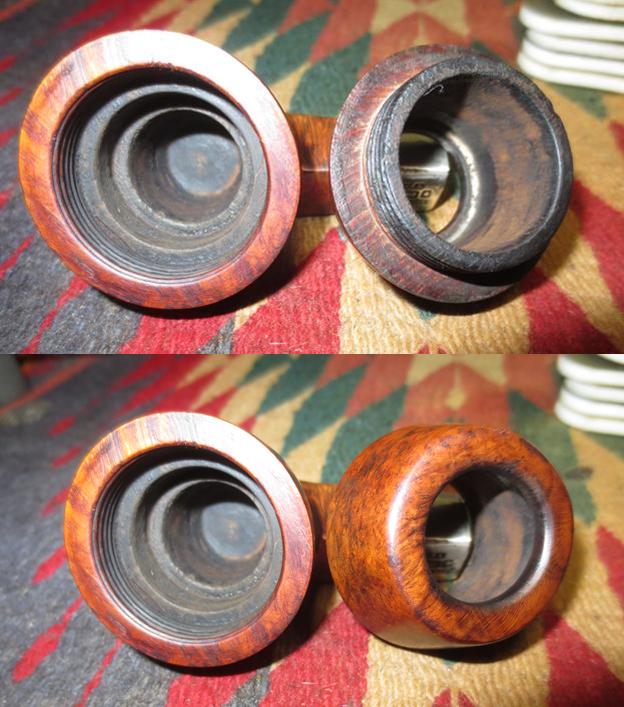
I put the perforated metal disc/screen in the base of the pipe. It sat on the lower shelf in the base. I would be held in place on the liner was put in the bowl. I scraped the bowl liner with the Savinelli Fitsall Pipe Knife to remove the light cake on the walls. I put the liner on the second shelf in the base and screwed the cap in place on the base. The next photos tell the story of putting the pipe back together. 
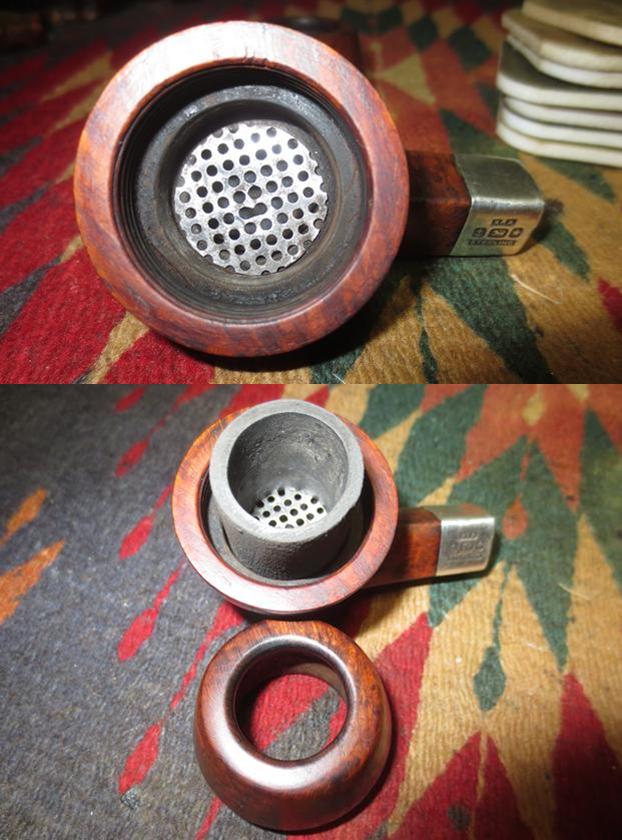
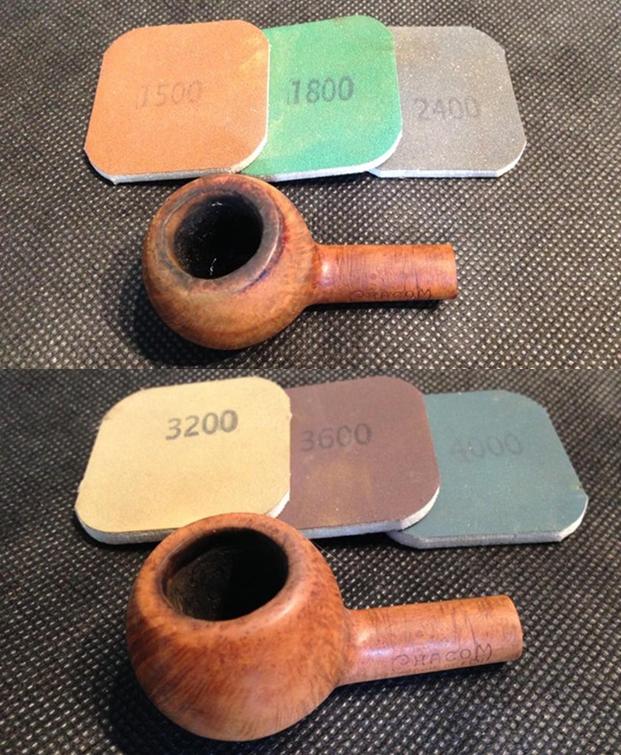
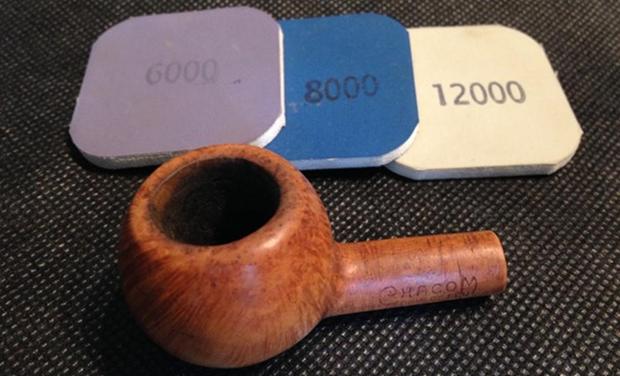
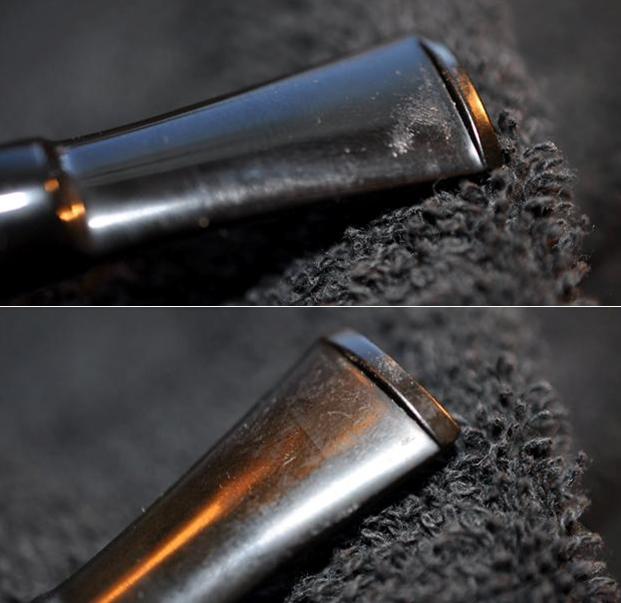
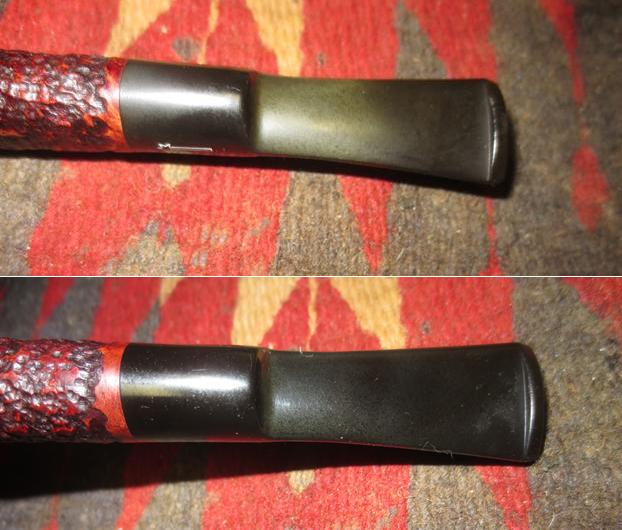
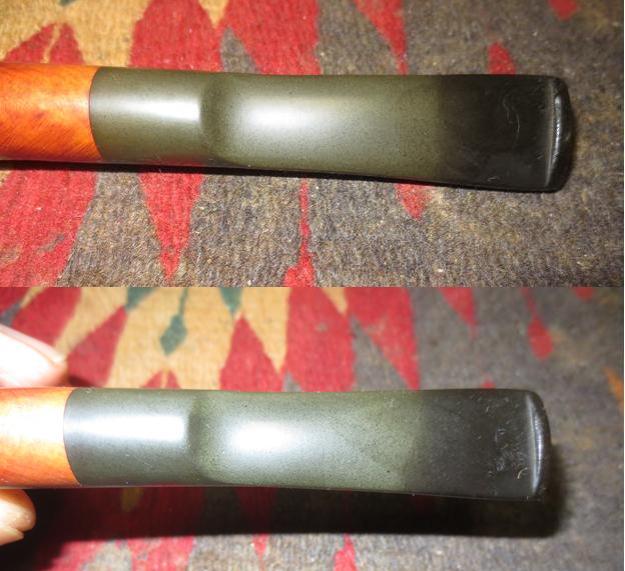
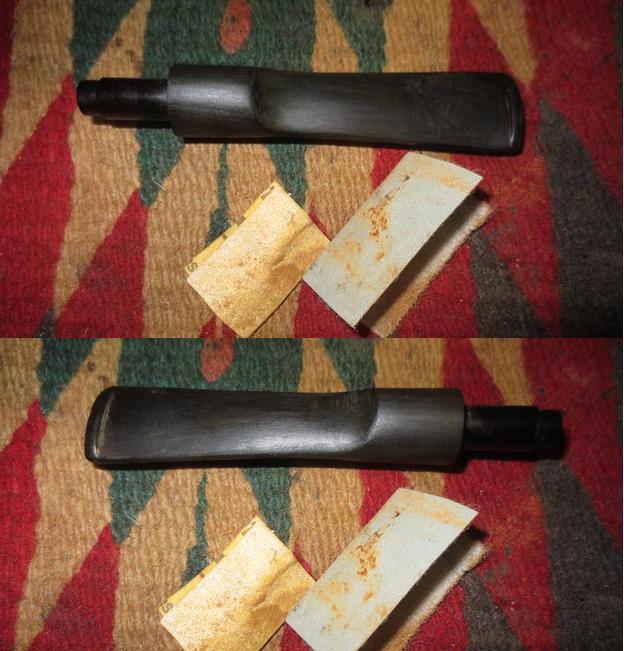
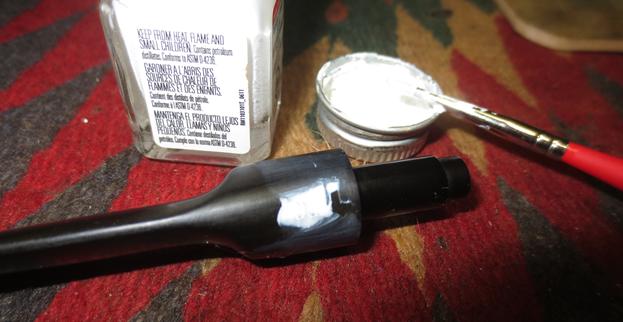
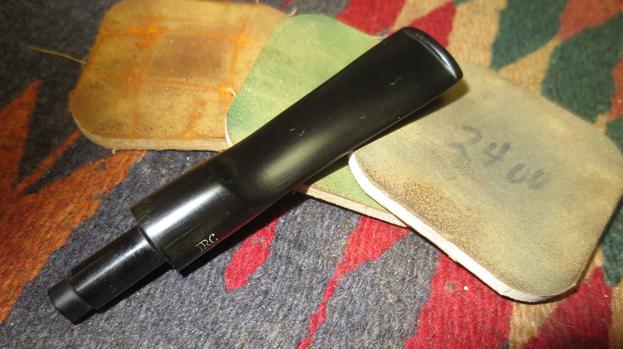
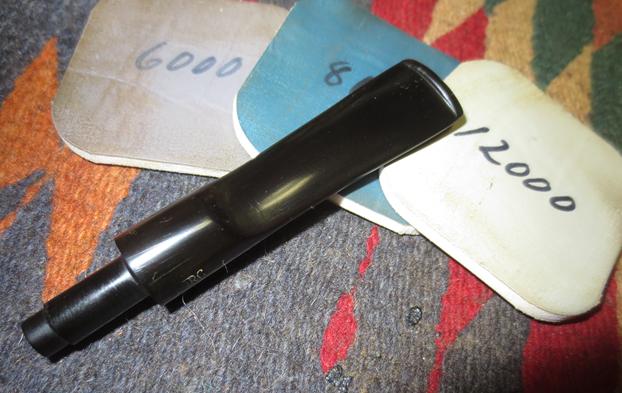
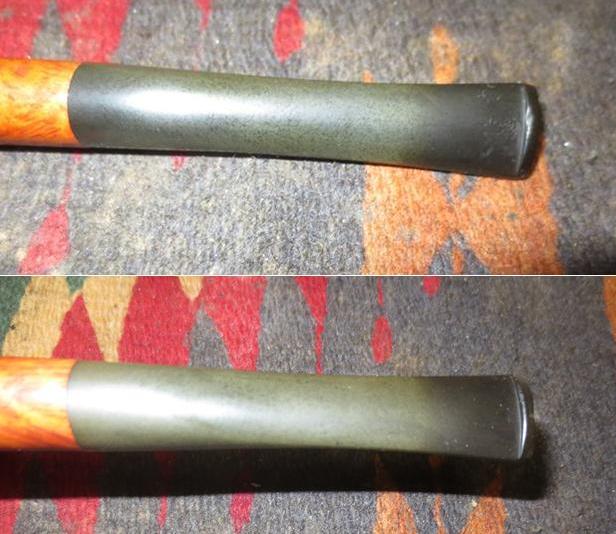
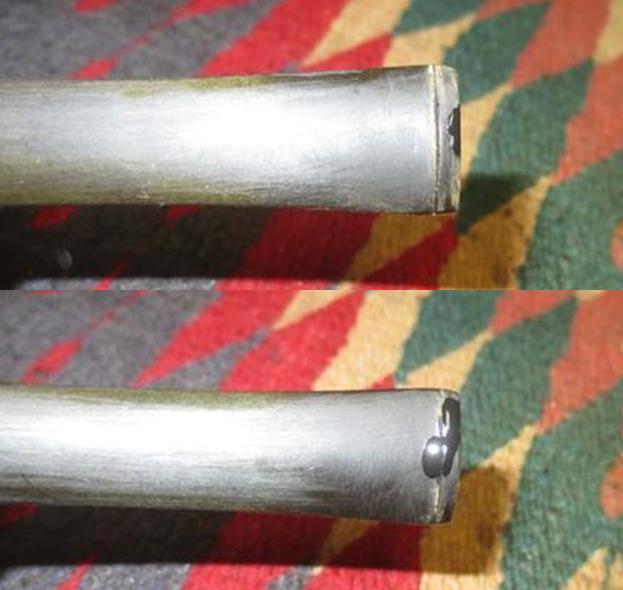
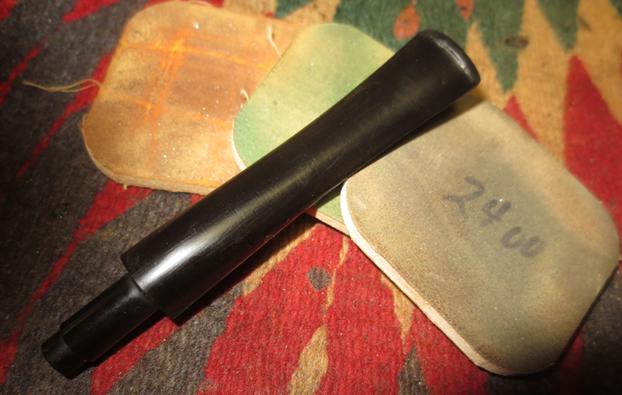
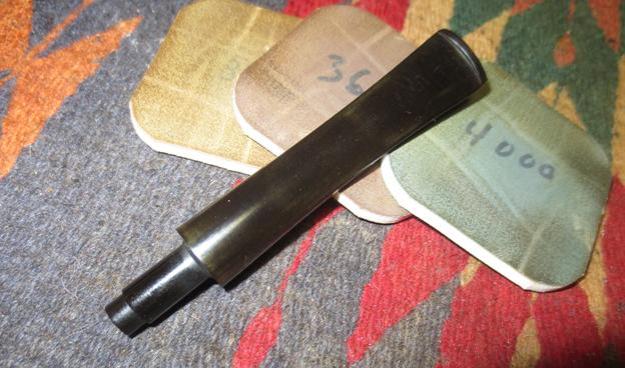
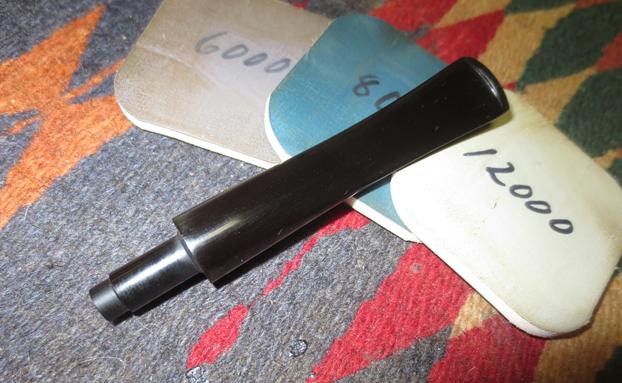
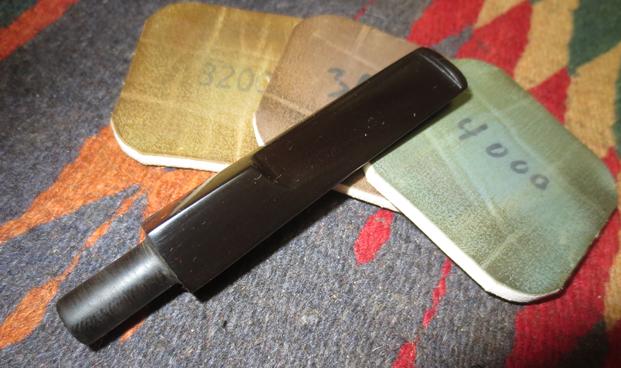
I polished the stem with micromesh sanding pads – wet sanding it with 1500-2400 grit pads and dry sanding it with 3200-4000 grit pads. I rubbed it down with Obsidian Oil after each pad. I buffed the stem with red Tripoli to remove the last remnants of oxidation. I buffed it with Blue Diamond to polish out the minute scratches and sanded it with the last three micromesh sanding pads, 6000-12000 grit pads.  I gave it a final coat of oil after the 12000 grit pad and set it aside to dry. 
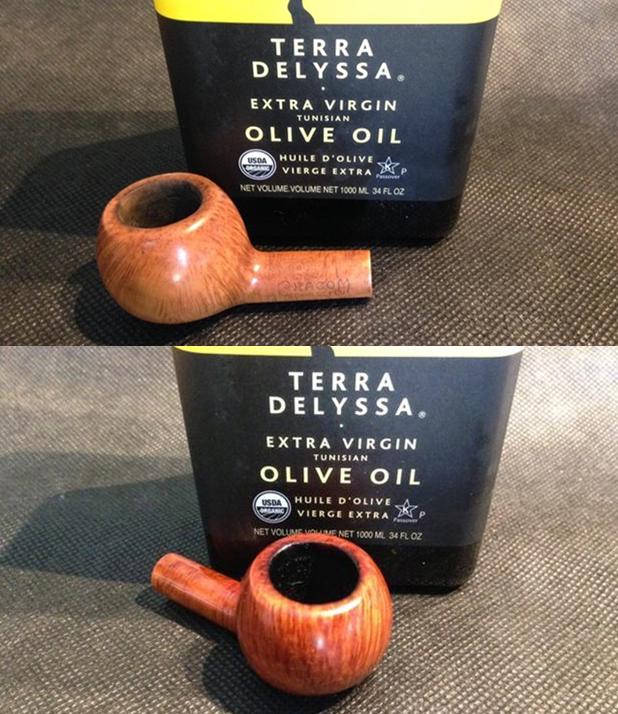
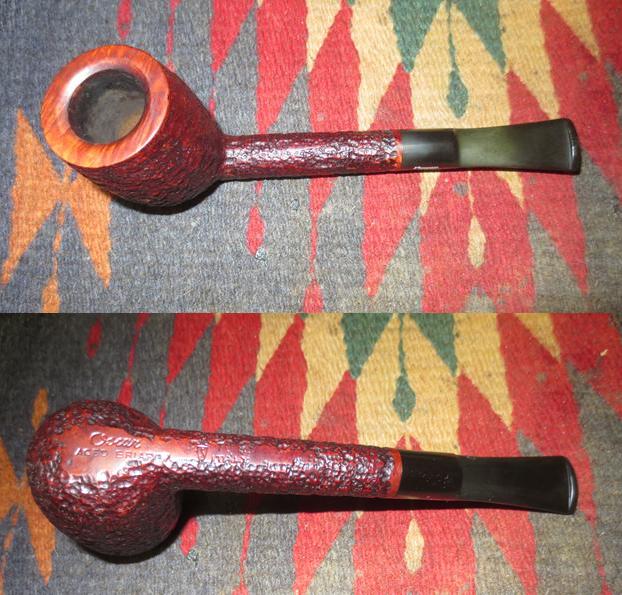
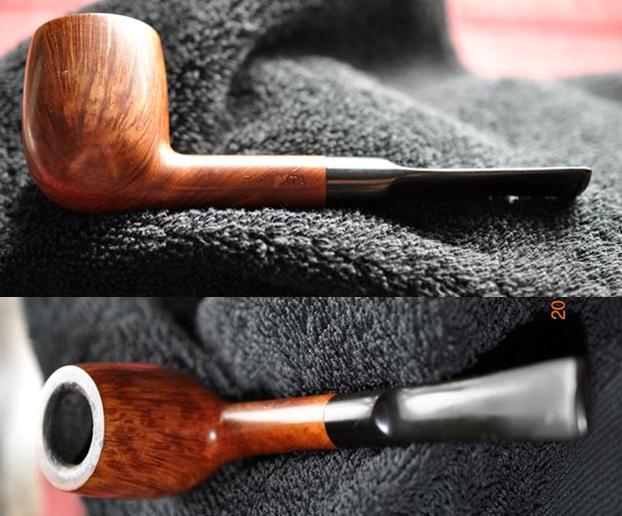
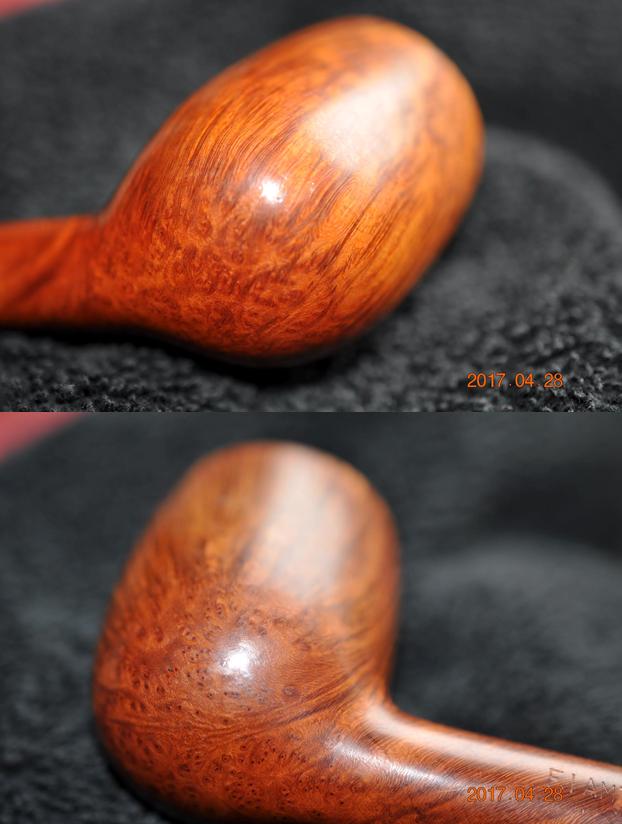
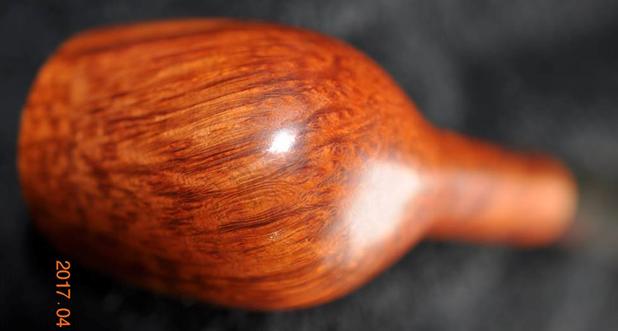
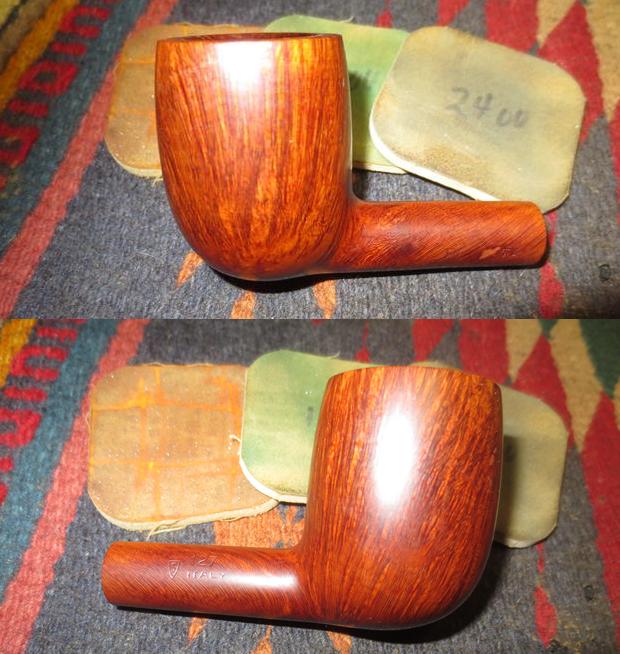
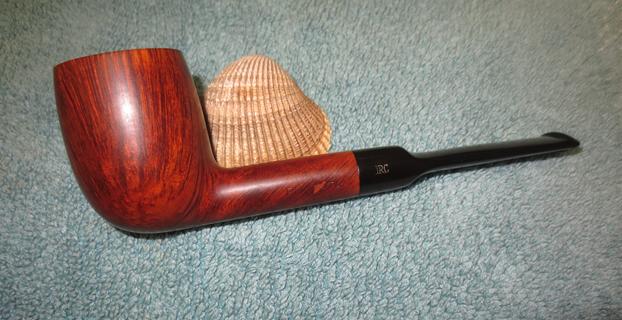
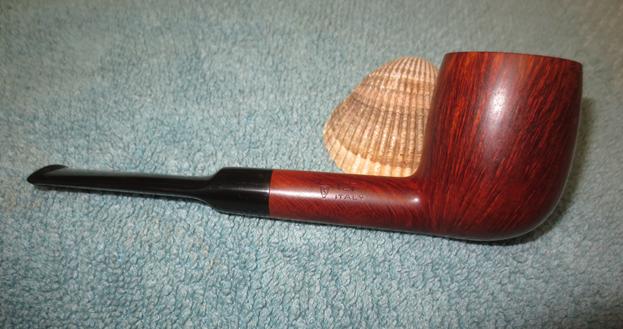
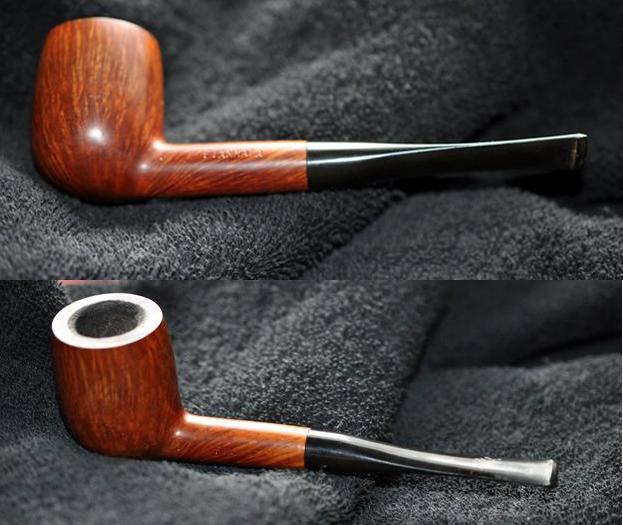
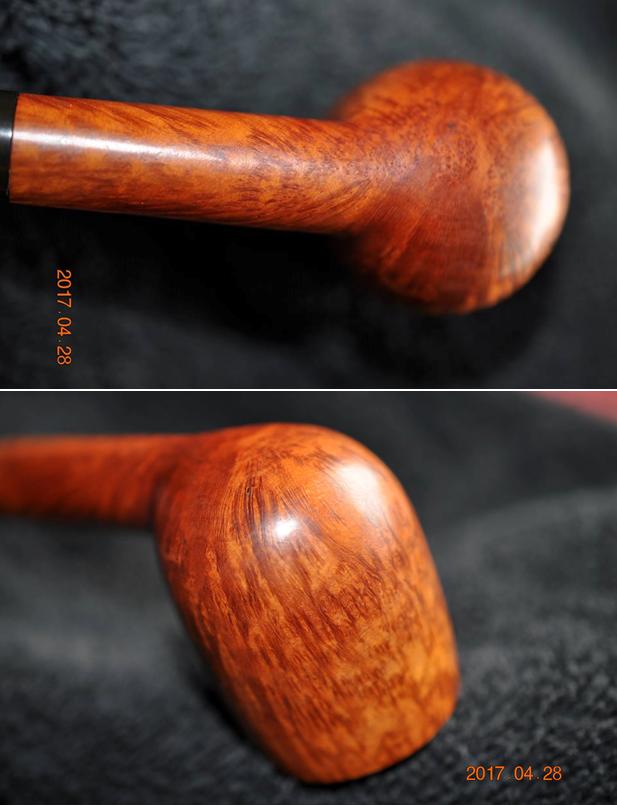
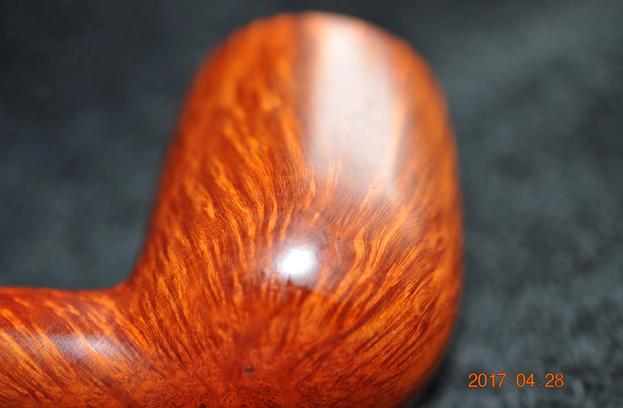
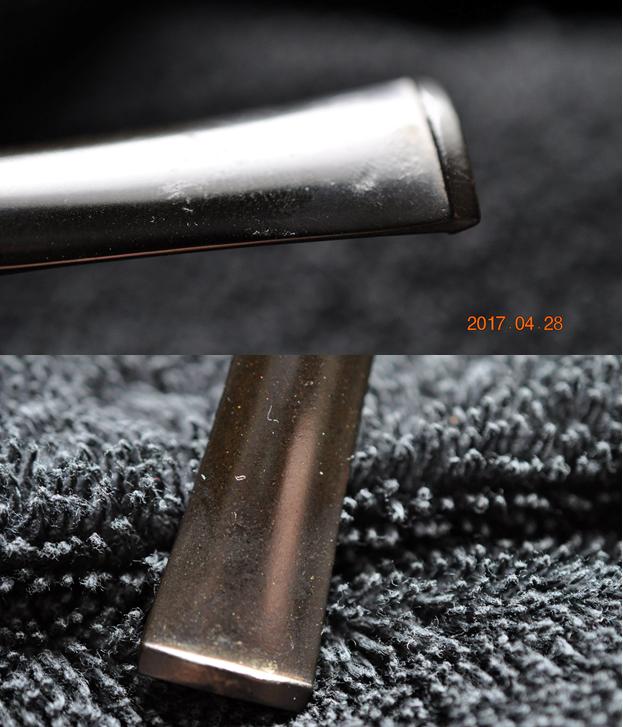
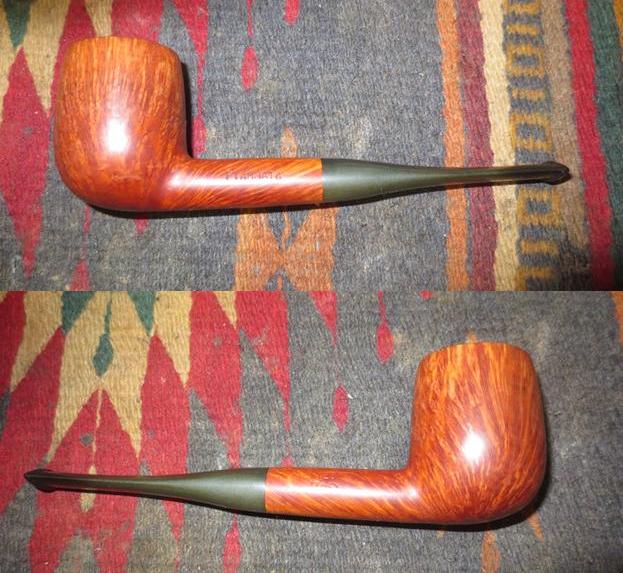
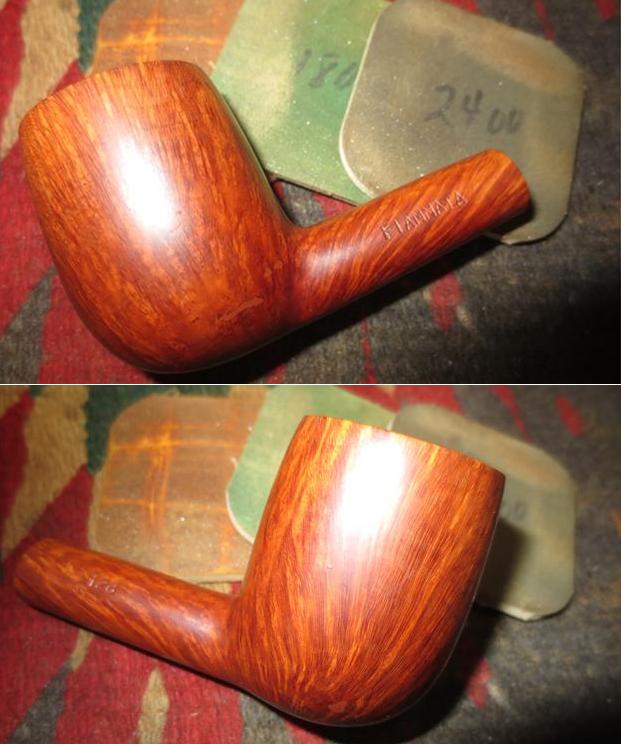
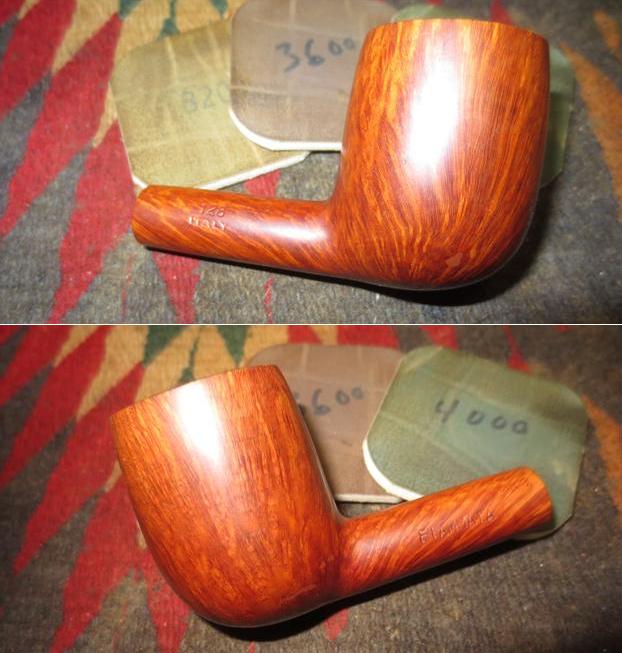
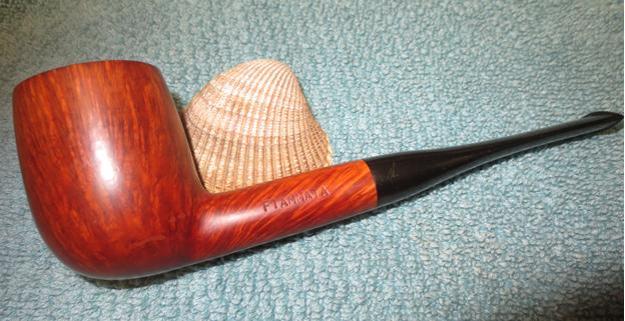
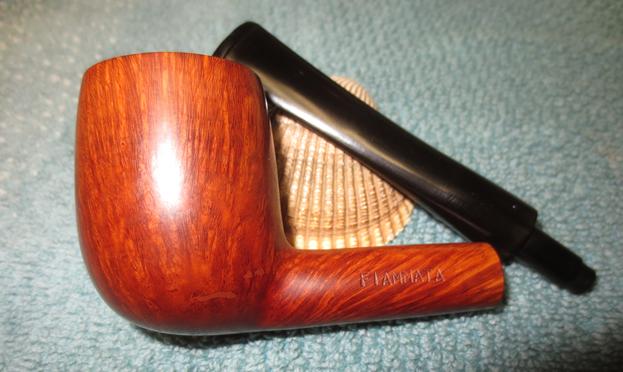
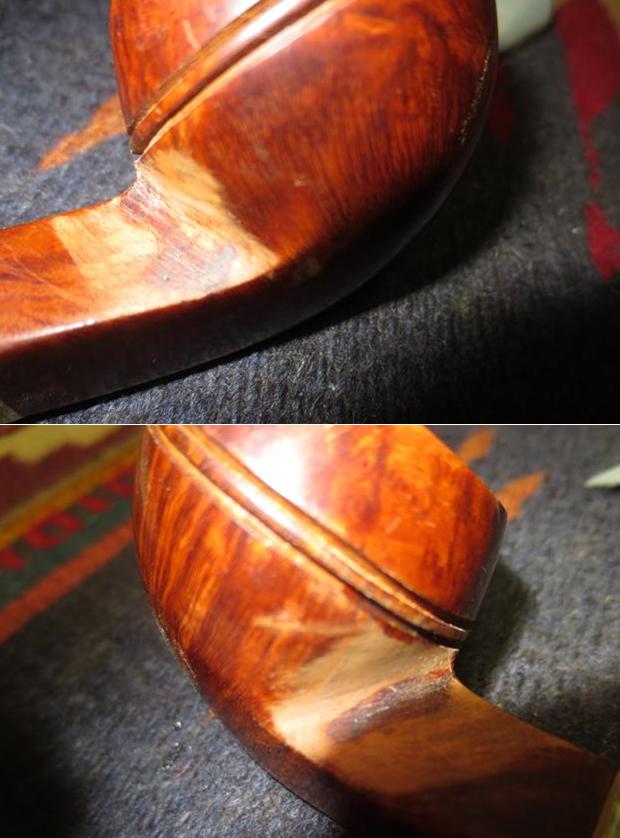
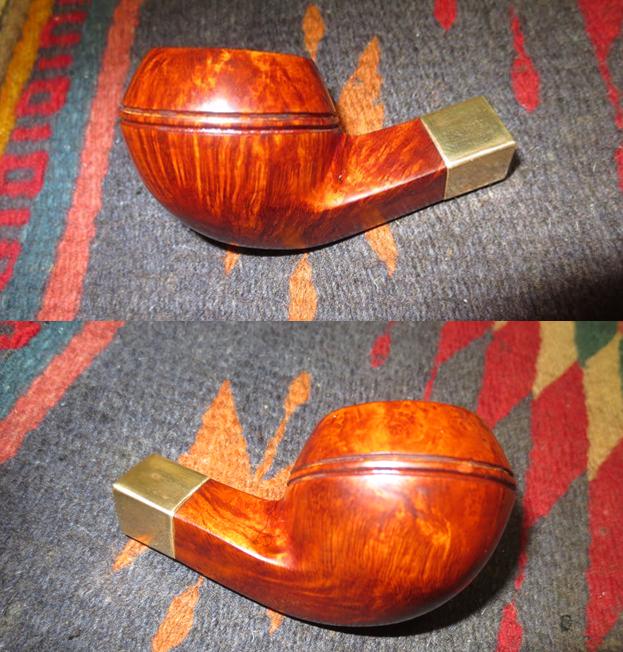
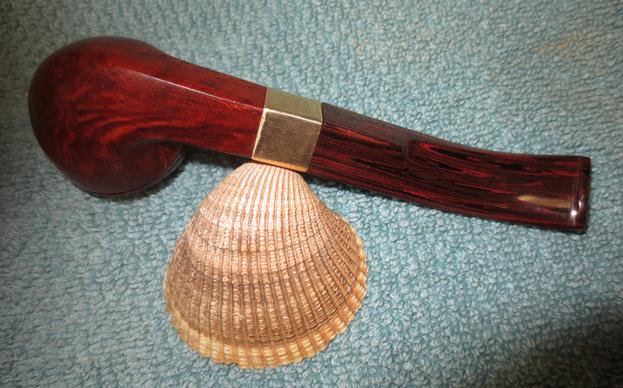
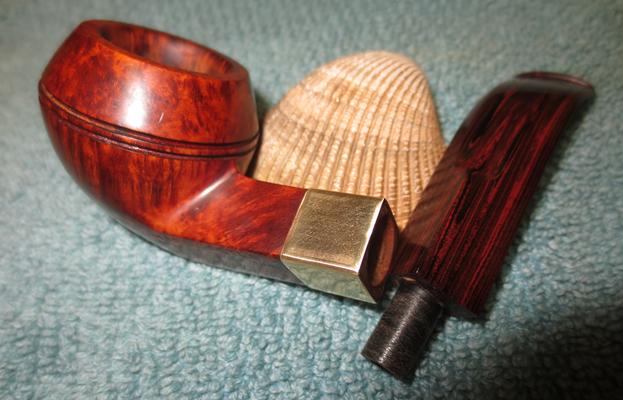
I put the stem in the shank and buffed the pipe a final time with Blue Diamond on the wheel. I gave the bowl and stem multiple coats of carnauba wax to protect it and give it a shine. I buffed it with a clean buffing wheel to raise that shine. I hand buffed it with a microfibre cloth to deepen the shine. The finished pipe is shown in the photos below. It is a beautiful piece of briar that has an unusual pattern of grain around the bowl and cap. The bowl and cap seem to have been made from one piece of briar as the grain matches on both parts. The vulcanite stem is high quality and as such it was hardly oxidized. The internals of the pipe are also clean now. The pipe looks and smells very clean. It is one that will remain in my pipe collection for a long time. It is one more attempt to find the perpetual desire of all pipemen – that perfect smoke. Thanks for looking.

Donegel Rocky 999


By Al Jones

I have a hard time passing up any Peterson 999 shape. This one is a Donegal Rocky with a Sterling silver band. The nomenclature showed it was a Republic era pipe, but it appeared to be from an earlier era. The sellers pictures didn’t reveal the hallmark detail, but the rugged and random rustification style is significantly different than the machine-created marks of a modern era pipe. My hunch was right. On receipt of the pipe, I cleaned the band, which revealed a stylized “E” for 1972.

?

The pipe as it was received. The stem was only mildly oxidized and there was minimal cake in the bowl.

I cleaned the bowl with some warm, soapy water and the polished it by hand with Halycon wax. The cake was reamed and the bowl soaked with sea salt and alcohol.

When the bowl was finished soaking, the stem was mounted and the oxidation removed with 800, 1500 and 2000 grit wet paper. This was followed by 8,000 and 12,000 grade micromesh sheets. The stem was then buffed with White Diamond and Meguiars Plastic Polish. The Sterling band was polished with silver polish.

Below is the finished pipe.

?

Restoring a Second Fiammata – A 127 Saddle Stem Billiard


Blog by Steve Laug

The next pipe on the work table came from the recent estate sale my brother attended. The pipeman whose pipes were being sold had good taste as can be seen from the pipes I have posted recently from my workbench. This one is no exception. It is a match to the other FIAMMATA that I posted (https://rebornpipes.com/2017/05/20/why-is-it-a-second-a-fiammata-128-billiard/) It has stunning straight grain around the bowl and a few small well-hidden fills on the bowl. There is a large fill on the left side of the shank underneath the stamping. The pipe is stamped on the left side of the shank with the name FIAMMATA and on the right side it is stamped 127 over Italy and to the left of those stamps is the familiar Savinelli S in a shield. On the underside of the shank it is stamped Savinelli Product. The stem is lightly oxidized and has the now familiar tooth marks as the other pipes in this estate.The shape number, the Italy stamp and the overall look of the pipe told me that it was a Savinelli pipe. The stamp on the underside as well as the S in a shield confirmed that it was indeed a Savinelli product. When I worked on the previous Fiammata 128 pipe I did a bit of research to find out information about it. Pipedia gave me information that I included in the previous post. I am including it here in case you happened to miss the other one. Here is the link to the section of the Pipedia article on Savinelli Sub-brands: https://pipedia.org/wiki/Savinelli#Savinelli_made_sub-brands.2C_seconds_.26_order_productions

On the Sub-brands list you will see the name Fiammata. Next to the name it says that the sub-brand is a “Rejected “Giubileo D’Oro” – Straight Grain”. That matches the look of this pipe as well as the previous one. As before I have included an advertisement on Giubileo D’Oro pipes to see what I could learn about the destiny of this pipe before the flaws were noted and the pipe was rejected. The grain on this second Fiammata has grain on it that is better than the one in the photo below.I have included a copy of the Savinelli Shape Chart once again so that you can see the shape of the pipe in hand. It is stamped 127 and can be seen on the first column of the chart. It is a saddle stem billiard. I circled the shape in red on the chart below.My brother Jeff took some close up photos of the rim and the bowl to show the cake in the bowl and the tarry buildup on the rim top. It looked to be in very good shape under the grime.He took photos of the bowl from various angles to show the quality of grain that covered the sides and bottom of the bowl. He took photos of the stamping on the sides and bottom of the shank. The stamping is in excellent condition and is very readable. In the first photo you can see the large fill under the second M of FIAMMATA on the left side of the shank.The stem also has an IRC stamped on the left side of the saddle portion. IRC is the store stamp of Iwan Ries & Company pipe shop in Chicago, Illinois, USA. I would assume that the store stamp was added when the pipe arrived in Chicago from the Savinelli factory in Italy.The next two photos show the condition of the stem. The stem has the now familiar tooth marks and chatter on the top and underside near the button.My brother did a great job cleaning the pipe and preparing it for me. He reamed and cleaned the mortise and the airways in the shank and stem. He scrubbed them with alcohol, pipe cleaners and cotton swabs until they were clean. He scrubbed the surface with Murphy’s Oil Soap and rinsed it with water. The pipe was clean once it arrived. The next four photos show what the pipe looked like when it arrived in Vancouver. The grain on this bowl is outstanding but the fills are much more obvious than those on the previous Fiammata. I took a close up photo of the bowl and rim to show the condition. The bowl was clean and the lava on the surface was gone. There were some deep nicks on the rim surface that would need to be addressed but it looked really good.Jeff had soaked the stem in Oxyclean for a several hours and the oxidation rose to the surface of the vulcanite. The worn areas on the button and the tooth chatter and marks showed up clearly as well.I sanded the stem and reshaped the button with 220 and 320 grit sandpaper to remove the damage, tooth chatter and tooth marks. I sanded the rest of the stem to remove the oxidation that was on the surface.To remove the rim top damage I lightly topped the bowl on the topping board using 220 grit sandpaper. I removed the damaged part of the rim top and then polished the bowl and rim with micromesh sanding pads. I wet sanded it with 1500-2400 grit pads and dry sanded it with 3200-12000 grit pads. I wiped the bowl down between pads to remove the sanding dust. I painted the IRC on the left side of the saddle with white acrylic paint and a fine bristle brush. Once the paint dried I would scrape the excess off leaving only the letters filled in.I polished the stem with micromesh sanding pads – wet sanding it with 1500-2400 grit pads and rubbing it down with Obsidian Oil after each pad. I dry sanded it with 3200-4000 grit pads and rubbed it down with the oil. I buffed the stem vigorously with red Tripoli on the buffing wheel followed by Blue Diamond. I finished polishing it with 6000-12000 grit pads and rubbed it down with Obsidian Oil between each of the grits. I gave it a final coat of oil and set it aside to dry. I buffed the bowl and stem with Blue Diamond on the buffing wheel. I worked on the stem to remove any final oxidation that was showing, particularly around the stamping on the left side of the saddle. I buffed the bowl carefully avoiding the stamping on the shank sides and bottom. I gave the pipe multiple coats of carnauba wax and buffed it with a clean buffing pad to raise the shine. I hand buffed it with a microfibre cloth to deepen the shine. The finished pipe is shown in the photos below. The dimensions of the pipe are Length: 5 ¾ inches, Height: 2 inches, Outer diameter of the bowl: 1 3/8 inches, Chamber diameter: ¾ inches. Even with the obvious fills around the bowl and shank this is a beautiful piece of briar. The straight grain is stunning and certainly testimony to the kind of briar that was used on Savinelli Giubileo D’Oro pipes. This is another pipe that will soon be on the rebornpipes store. If you are interested in adding it to your collection you can email me at slaug@uniserve.com or send me a private message on Facebook. Thanks for looking.

Why is it a Second? A Fiammata 128 Billiard


Blog by Steve Laug

The next pipe on the work table came from the recent estate sale my brother attended. The pipeman whose pipes were being sold had good taste as can be seen from the pipes I have posted recently from my workbench. This one is no exception. It has stunning straight grain around the bowl and a few small well-hidden fills. The pipe is stamped on the left side of the shank with the name FIAMMATA and on the right side it is stamped 128 over Italy. There are no other markings on the pipe. The stem is lightly oxidized and has the now familiar tooth marks as the other pipes in this estate.The shape number, the Italy stamp and the overall look of the pipe told me that it was a Savinelli pipe but I was not sure. You know how when you are handling a pipe of unknown make you just have a feeling about its origin? That is what happened as I turned this one over in my hands to examine it. I did some digging on Pipedia and found the information to confirm my suspicions about the pipe being a Savinelli made produce. Here is the link to the section of the Pipedia article on Savinelli Sub-brands: https://pipedia.org/wiki/Savinelli#Savinelli_made_sub-brands.2C_seconds_.26_order_productions

On the Sub-brands list you will see the name Fiammata. Next to the name it says that the sub-brand is a “Rejected “Giubileo D’Oro” – Straight Grain”. That matches the look of this pipe. I have to say though that the quality control people were very good on the day this pipe was made as the tiny sandpits and fills that I can see on the bowl were hard to identify as they followed the grain on the pipe so well. I thought it might be interesting to check out the Giubileo D’Oro pipes to see what I could learn about the destiny of this pipe before the flaws were noted and the pipe was rejected. The next photo of an advertisement for the brand gives information that I found extremely helpful when looking at this pipe in terms of shape, colour and finish. The top pipe in the photo is the 128 which is the same shape I am working on at the moment. The grain on my pipe is far better than the one in the photo.I have included a copy of the Savinelli Shape Chart so that you can see the shape of the pipe in hand. It is stamped 128 and can be seen on the first column of the chart. It is a tapered stem billiard. I circled the shape in red on the chart below.Jeff took some close up photos of the rim top to show the condition of the cake in the bowl and the overflow of lava on the top of the rim. From the photos it is hard to know if the inner rim edge is damaged because of the buildup of lava.Jeff took the next series of photos to show the grain on the bottom and both sides of the bowl. It is really quite beautiful grain. Look closely and see if you can see the small fills. The next two photos show the stamping on the shank of the pipe. The first photo is the right side of the shank and the second is the left side.The final two photos that Jeff sent to me show the familiar tooth marks on the top and the underside of the stem at the button.My brother did his usual amazing clean up of the pipe. He reamed the bowl and scrubbed the lava off the rim. He scrubbed the finish with Murphy’s Oil Soap and rinsed it with water. He cleaned out the mortise and the airway in the shank with alcohol, cotton swabs and pipe cleaners. The next four photos show the condition of the pipe when it arrived in Vancouver. Jeff was able to get the lava off the rim and leave the rim looking almost new. The inner beveled edge of the rim is flawless as well. It looks undamaged and there are no burn marks on the bevel or on the rim top. There is slight darkening on the back of the top but it is minimal.He soaked the stem in Oxyclean for a few hours and scrubbed it clean. The oxidation came to the surface and looked speckled in the next two photos. The photos also show the tooth marks and chatter clearly.I sanded the stem with 320 grit sandpaper to remove the surface oxidation and smooth out the tooth chatter and tooth marks.I cleaned the top and bottom edge of the button with alcohol and used black super glue to fill in the deeper spots on both sides of the button. I filled them in and set the stem aside to dry.I sanded the bowl rim and sides with micromesh sanding pads – wet sanding with 1500-2400 grit sanding pads. I wiped the bowl down with a damp cotton pad to remove the dust. I dry sanded it with 3200-12000 grit pads and repeated wiping down the bowl with the damp cotton pad. The photos below tell the story of the polishing. Look closely and see if you can see some of the small fills. I sanded the repaired area on the stem with 320 grit sandpaper to remove the excess hardened super glue and blend it into the surface of the button. I ran a pipe cleaner through the shank and the airway in the stem to remove any of the sanding debris from the airways. They came out very clean.I polished the stem with micromesh sanding pads – wet sanding with 1500-2400 grit sanding pads. I wiped down the stem with Obsidian Oil and dry sanded it with 3200-12000 grit pads. I repeated wiping down the stem with the oil. After sanding it with the 12000 grit pad I wiped it down a final time with Obsidian Oil and set it aside to dry. I put the stem on the shank and buffed it with red Tripoli to work out the rest of the oxidation that still remained on the stem near the shank end. It took some careful buffing to work it out but it finally came out. I buffed the stem with Blue Diamond to polish the stem even more. I buffed the entire pipe with the Blue Diamond on the wheel to polish out the minute scratches in the rubber and the briar. I gave the bowl and stem multiple coats of carnauba wax with the wax buffing pad. I polished it with a clean buffing pad to raise the shine. I hand buffed it with a microfibre cloth to deepen the shine. The shape and condition of the pipe is very nice and the grain stands out much like it would have if the pipe had made the grade for a Giubileo D’Oro pipe. There is a faint stamp of triangles on the side of the stem. The dimensions of the pipe are as follows Length: 6 inches, Height: 1 7/8 inches, Outer bowl diameter: 1 3/8 inches, Chamber diameter: ¾ inches. The finished pipe is shown in the photos below. The pipe is a made in such a way that it follows the stunningly grained piece of briar perfectly. The shape of the stem works with the flow of the pipe. The black of the stem and natural finish of the briar work well together. This pipe will soon be available on the rebornpipes store. If you want to add it to your collection email me at slaug@uniserve.com or send me a private message on Facebook. Thanks for looking.


A Bench Pin – For Those Times You Need an Extra Hand


Blog by Henry Ramirez

Henry and I have been corresponding via email for some time now sharing ideas and questions. Henry is a dentist who uses his mad dental skills in restoring and refurbishing pipes. He has the tools of his trade that he has taken to the pipe repair bench and he has done some great work. I wanted him to introduce us to this tool – the like of which I have not seen before but which I want to order – yesterday! Thanks for doing this Henry. I appreciate it.  — Steve Laug

I noticed when on pipe maker’s website blogs that everyone seemed to have a funny appendage attached to their work table which was usually covered with what appeared to be either cloth or leather. With Google’s help, God bless them, I found out it was called a Bench Pin and was a jeweler’s right hand when sawing, filing and buffing.Ebay has quite a few different ones available at all price ranges and it could probably be easily made from some scrap lumber if you’re inclined. Since I have never been able to saw a straight line I elected to purchase a pre-made one which would allow me to attach it to my office desk without marring the surface. Thus I would be able to spend more time, sort of, with my wife who reads in the adjoining room. Sometimes I get so caught up in pipes out in the garage that time flies and the entire afternoon and evening are gone. I have purchased a second unit which I will permanently screw to my garage work table surface. I find that filing the stem’s button contour and buffing the bowls with a shoe brush are greatly improved with the help of the Bench Pin. 

Just a few minor details – a Broken Tenon and a Cracked Shank on a Hardcastle Special Selection 7 Bulldog


Blog by Steve Laug

Not too long ago I received an email from a reader of rebornpipes regarding a pipe he was restoring. It was a beautiful little Hardcastle Bulldog that is stamped on the left underside Hardcastle over Special Selection over the number 7. He had finished cleaning and restoring it and it was looking good. He had done a thorough job, as I would see later in this post. He went on to tell me about how he had repeated my misadventure when buffing the pipe. Not long ago I posted about having finished a pipe and having the buffer snatch it from my hands and fling it against the floor. I snapped the tenon off a pipe I had finished while doing the final buffing. He wrote that he had done the same thing exactly. He wanted to know if I would be willing to put a new tenon on the stem. He noted a hairline crack at the shank/bowl junction and wondered if I would be willing to deal with that at the same time. We wrote back and forth and he sent me the following photos. The first one shows the cleaned up pipe ready for buffing.The next photo he sent shows the crack at the top of the shank on both topsides of the diamond. It stopped on both sides before it got to the edge of the diamond.The third photo shows the stem with the snapped tenon. He did a far better job snapping it off than I had done on mine. My broken tenon was jagged and needed to be sanded smooth before I could replace the tenon.He sent the pipe to me Vancouver for me to work on. It is funny in that it took a longer time to arrive from Idaho than pipes I have received from the east coast. But when it arrived I took photos of it. I have a container of threaded tenons here that I use for replacement tenons on pipes. I like the way they grip in the drilled out stem. Once they are anchored in place with glue on the threads, there is little chance that they will come out. I went through my tenons and found one that would fit the mortise with a little adjustment – the fit was tight and it was a little long for the shank.I set up my cordless drill and chose a bit that was close to the size of the airway in the stem. I have learned to work my way gradually through bits until I get to the size of the threaded portion of the new tenon. Doing it this way keeps the stem material from chipping or breaking away with the pressure of the drill bit. I turn the stem onto the stationary drill by hand so that I can control the depth of the bit. I mark the bit with scotch tape ahead of time to measure the depth of the drilled out airway that I need to have when I am finished.Once I had the airway opened enough to take the threaded end I used a tap to cut threads on inside of the newly opened airway. I turned the tenon in place on the stem to check the fit against the face of the stem.I checked the fit against the end of the mortise and found that the tenon was too long. I used a Dremel and sanding drum to bring it down to the correct length and cleaned up the end of the tenon with the topping board.I glued the new tenon in place in the stem with medium viscosity black superglue. It allows me time to adjust and align it so that it fits the mortise well and leaves no gaps.I set the stem aside overnight to allow the glue to cure. In the morning, I fine-tuned the fit so that it sat well in the shank. I chamfered/beveled the airway in the end of the new tenon to maximize the airflow into the stem.I put the stem in place in the shank and took photos of the newly repaired stem. This little Hardcastle Bulldog is a really beauty and extremely lightweight. The Cumberland stem looks good with the briar and gives the pipe an elegant appearance. I polished the stem and the tenon with micromesh sanding pads to remove any remaining scratches. I set the stem aside and turned my attention to the crack on the shank/bowl junction. I examined the crack with a bright light and a lens to make sure I could see the ends of the crack on both sides of the shank. It was a tight hairline crack so I just needed to stop it from spreading further. I drilled the end of the crack on both sides of the top of the shank using my Dremel and a microdrill bit. I slow the Dremel down to a speed of 10 so that I can carefully put the holes at the crack ends without it either going too deep in the shank or bouncing across the surface of the shank. It did not take too long to drill the holes.I took it back to the work table and took photos showing the two drill holes. The plan now was to use a dental pick to see if I could open the crack at all. I wanted to be able to put superglue into the crack to seal the two sides. It did not budge so I scratched it with the pick to provide a rough surface for the glue to adhere.I ran a bead of clear super glue the length of the crack from drill hole to drill hole. I put a drop of glue into each drill hole to fill them in. Since they are so tiny, I don’t bother with briar dust. I used the end of the dental pick to push the glue deep into the drill hole and refilled it to a bubble.Once the glue hardened I sanded it smooth to match the surface of the shank using 220 and 320 grit sandpaper folded to fit the angle of the junction. I sanded the area until the repair was smooth with the surface of the shank. I wanted the transition to be seamless. I took a close up photo of the repair on both sides of the shank to show what I had to deal with in terms of blending it into the finish of the bowl and shank.I sanded the repair with micromesh sanding pads to remove the scratches left behind by the sand paper. I worked through 1500-4000 grit pads to polish the shank. I polished the gold band with the higher grades of micromesh as well to give them a richer gleam. The repairs were slightly lighter in colour than the rest of the shank and the bowl so they would need to be restained. I restained the repaired area with a medium brown stain pen to blend it into the colour of the bowl and shank. I buffed the stained areas by hand with a microfibre cloth.I wrote to the pipeman who owned it and told him I had finished the repair to the shank and the stem and was touching up the stain. He wrote back to say that I had carte blanche to finish the pipe in any stain I saw fit. That was the go ahead I needed. I wanted to highlight the red hues in the briar that stood out in the bright light. I also knew that a red stain would allow me to blend in the repaired areas on the shank/bowl junction better. So I chose to stain the pipe with Danish Oil with Cherry stain. I am really happy with how the red of the stain works to highlight the grain. It also goes really well with the Cumberland stem and its red striations.I warmed the briar and applied the stain with a cotton pad. The nature of Danish Oil stain is that it highlights grain and breathes life into the wood. I let it sit for 10 minutes and hand buffed it off the bowl and shank. I took the next four photos of the finished bowl once I had hand buffed it. I buffed the bowl and stem with Blue Diamond polish on the buffing wheel to polish out any remaining scratches in the finish of the briar or the Cumberland. I gave them multiple coats of carnauba wax to protect the finish and buffed it with a clean buffing pad to raise a shine. I hand buffed it with a microfibre cloth to deepen the shine. I hand buffed the gold band on the shank with a jeweler’ cloth to polish and shine it. The finished pipe is shown in the photos below. I really like the finished look of the pipe. It is a beautiful and well executed Bulldog and it should serve its owner well. I plan on letting him know that if it does not fit his collection it will always have a home here. Thanks for looking.