Monthly Archives: December 2017

The Minklings of Budapest


Blog by Laci Németh

Greetings pipe smokers of the world! 🙂 This post is coming to you from Europe. Budapest, Hungary. I am one of the many silent readers of this blog. I am a pipe smoker myself for arround 15 years now. This post has mentioned me. In October I gathered a group of pipe smokers to form a regular pipe smoking fellowship, and Steve asked me to share about it. So here we go.

Why a smoking fellowship?

Yes I know, pipe smoking is an “indivudual sport”, but it does bring an interesting experience when “simple” people share time, thoughts, hearts together. My first encounter with this experience was on a mountain overlooking the city of Sarajevo in Bosnia and Herzegovina. I was visiting a friend who was on a mission there and choose pipe smoking as a way to go deeper with those who are opened to him.

Two Americans, few Bosnians, me as a Hungarian, a bottle of whisky, our pipes, and an open fire.  It started with them chanting this quote almost as a prayer:

“I have some friends, some honest friends, and honest friends are few; My pipe of briar, my open fire, a book that’s not too new.” — Robert W. Service

Wood was burning. Pipes smoked. Books opened to read poems. One Bosnian fellow shared his own poem that he has wrote since the last time he attended. And I was just sitting there…breathing in every second, every emotion, every heartbeat. A wonderful, life changing memory from 2006.img_1015

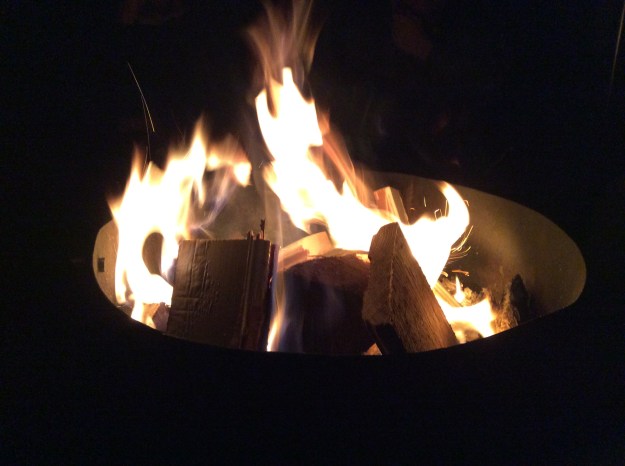
I asked them where did the idea came from?

They said: Inklings. (few of them were big C.S. Lewis and Tolkien fans)

Later I found out that one of them was influenced by the Wheaton version of this group: Whinklings.

11 years later. In Budapest I got to gather several pipe smokers arround an open fire. We have called ourselves: Minklings (M stands for Hungarian in our language, and the first four words also mean “us”. So its a play with the words.) 🙂img_1016

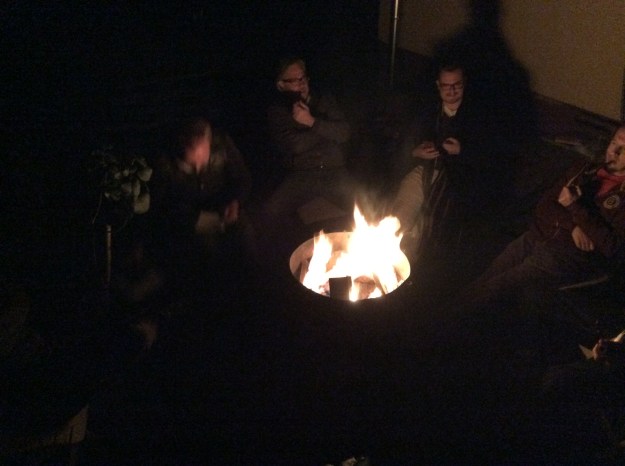
Yes, I am aware that we are nothing to compare ourselves to these giants of world literature. We are counselors, buisiness people, church pastors, programmers, etc. But we have many things in common. Among which the pipe smoking might be the least important.

I was very much surprised that almost each person had a poem (or poems) written before. They shared it. It was unique time. One of us has brought his own home
brewed beer. Some played a song.

We got to know each other through what we brought to the table.

in my point of view, we are all unique, worthy and special. we all have talents, gifts, capabilities that can be treasures to others. But we have many things in common. Among which the pipe smoking might be the least important.

I was very much surprised that almost each person had a poem (or poems) written before. They shared it. It was unique time. One of us has brought his own home brewed beer. Some played a song.  We got to know each other through what we brought to the table.  Every human being is a treasure.

If you want to discover it, all you need to do is organize a meeting for people you know that are pipe smokers. Announce a subject, for example: Bring a poem, a song, or something that describes you, that introduces you. Have an open fire. And let the magic happened. You will not regret it.

We are now meeting (only) every three months in organized way. But several of us have posted times when “we ran” into each other for a smoke wherever we met in the country.

PIPE SMOKERS UNITE! 🙂

Renewing a large Calaman Brunette Unique Bent Billiard


Blog by Steve Laug

This large Italian made Calaman pipe was one that Jeff was drawn too but I was not sure about. He picked it up anyway and it turns out to be a very well made pipe. The bowl has a rustication pattern that I have only seen on Lorenzo pipes, so this may well be one of theirs. It is stamped on the underside of the shank Calaman over Brunette and at the end of the shank near the stem junction it reads Italy and underneath Italy it is stamped with the shape number 840. It is stained in a medium brown stain with black in the pits and rustication on the bowl and shank. The stem is good quality vulcanite. The bowl had a thin cake in it that was soft and smelled of aromatic tobacco. The finish was in good condition other than being dirty and dusty. The bowl had indents carved into it at the back side that are perfect for the thumb regardless of whether you hold it with your right or your left hand. The stem was lightly oxidized and the CM stamp on the left side of the saddle was undamaged. There were light tooth marks on both sides of the stem at the button. The marks on the underside were deeper than the ones on the topside. Jeff took a few photos to show the condition of the pipe before he worked on it.The next photos show the bowl from various angles revealing the condition. The first one shows the rim and bowl with the cake lining the bowl. If you try you can almost smell the aromatic, soft cake. The rim is in good condition – a little dirty on the back side of the rim top. The second photo shows the stem indents on the back side of the bowl. It makes the pipe a comfortable one to hold in the hand. The third and fourth photos show the underside of the bowl and shank. The stamping is readable. The CM stamp on the left side of the saddle stem is also in great condition. The oxidized stem shows lots of tooth chatter and some tooth marks on both sides near the button.Jeff did a thorough cleanup on the bowl and stem. He reamed the bowl back to bare briar with a PipNet pipe reamer and cleaned up the remnants with a Savinelli Fitsall reamer. He cleaned the internals with alcohol, pipe cleaners and cotton swabs – scrubbing out the mortise as it was dirty. He scrubbed the exterior of the pipe with Murphy’s Oil soap and a tooth brush and was able to remove all of the oils and dust in the rusticated finish on the briar. He was able to remove all of the grime from the rim top and left it looking very clean. The rim top and outer edge were very clean and the inner and outer edges were in good shape. He soaked the stem in an Oxyclean bath to raise the oxidation to the surface of the vulcanite. When it arrived I took some photos of it to show how it looked before I did the restoration.  The rim top and bowl looked really good. The finish was in great shape and the bowl was ready to load and smoke again. It was really clean.The Oxyclean soak had really raised the oxidation to the surface of this stem. The stem was internally very clean but the surface was heavily oxidized when it arrived.Because the stem was so oxidized after the soak in Oxyclean, I put it in a bath of Before & After Pipe Stem Deoxidizer to soak overnight and let the enzymes in the mixture work on the oxidation. In the morning I removed the stem from the deoxidizer and wiped off the excess deoxidizer from the surface of the stem with a paper towel. I cleaned out the airway in the stem with pipe cleaners and alcohol to remove any remnants of the bath from that part of the stem. I forgot to take any photos of the stem at this point but it was in much better condition. There was still some oxidation in the angles but otherwise it was cleaner. The tooth marks chatter on the top and underside of the stem were very visible. I sanded the stem with 220 grit sandpaper to remove the tooth chatter and minimize the tooth marks on both sides of the stem. I reshaped the button with the sandpaper and a needle file. I sanded the rest of the stem to break up the remaining oxidation.I polished out the sanding scratches and marks in the vulcanite with micromesh sanding pads – wet sanding it with 1500-2400 grit pads and dry sanding it with 3200-4000 grit pads. I wiped the stem down with Obsidian Oil after each sanding pad. The photo I took of the stem after working it over with the 1500-2400 grit pads showed some oxidation in the light of the flash. I buffed the stem with red Tripoli on the buffing wheel being careful around the CM logo stamp so I would not damage it. I dry sanded it with 3200-4000 grit pads and wiped it down with Obsidian Oil after each one. It looked better than before but I still was not satisfied so I buffed it again this time using red Tripoli and Blue Diamond. I brought it back to the table and sanded it with the final three 6000-12000 grit pads. I wiped it down with oil after each pad. When I finished with the 12000 grit pad I gave it a final coat of oil and set it aside to dry. I set the stem aside and rubbed the bowl down with Before & After Restoration Balm to deep clean the smooth finish, enliven and protect the briar. I hand rubbed it with my fingers and used a horse hair shoe brush to work it into the rustication on the bowl and shank. I wiped it off with a soft cloth. The briar really began to have a deep shine. I took some photos of the bowl at this point to mark the progress in the restoration. I put the stem back on the bowl and took the pipe to the buffing wheel to work it over. I carefully buffed it with Blue Diamond using a light touch to keep the polish out of the rustication. I like polishing with Blue Diamond as it raises a good shine without a lot of work. I buffed the stem at the same time to raise the gloss on the vulcanite. I gave the bowl several coats of Conservator’s Wax and the stem multiple coats of carnauba wax. I buffed the entire pipe with a clean buffing pad to raise the shine. I hand buffed it with a microfiber cloth to deepen the shine. The finished pipe is shown in the photos below. The black stain in the nooks and crannies of the rustication and the medium brown stain on the smooth portions of the bent billiard shaped bowl worked well with the rich black of the polished vulcanite stem. This Calaman Brunette pipe has a unique shape with the thumb dents on the back of the bowl. The finish feels good in the hand and I would think it would heat up nicely when smoked. The dimensions of the pipe are: Length: 6 inches, Height: 2 inches, Diameter of the bowl: 1 1/2 inches, Diameter of the chamber: 7/8 inches. I will be adding this one to the rebornpipes store shortly if you are interested in adding it to your collection. This is a larger pipe and it’s a nice addition to the rack. If you are interested email me at slaug@uniserve.com or send me a message on Facebook. Thanks for looking.

Merry Christmas too all the rebornpipes family


I want send out this short Christmas wish to each of you and your families for a Merry Christmas and a Blessed New Year. It has been a great year in many ways for me at rebornpipes and thank each of you who are part of the family for your support. It is each you who make this place what I had dreamed it would be.

DBFF0D0D-A291-4616-9C5B-1A4DAD3450FF

Refreshing & Restemming a Missouri Meerschaum Great Dane Spool


Blog by Steve Laug

My brother was going to pitch this old cob but when I saw it I told him to throw it in one of the boxes he sent my way. I figured I could do something with it. I think he told me that the stem had collapsed but I don’t remember. It didn’t matter anyway because the stems are not expensive to replace. It arrived several months ago and I chucked it in the pipes to be refurbished box and forgot about it. Yesterday (first day of my Christmas holiday time off work) I was going through the boxes and consolidating a bit. I came across this one and brought it to the work table. The bowl and shank were in pretty good condition – just a little cake in the bowl, lava on the rim and tars and oils in the shank. The stem looked ok other than some tooth marks and chatter on both sides of the stem. You might wonder why I would even bother cleaning up a cob, but remember that every pipe that comes across the worktable provides an opportunity to practice skills and potentially learn new ones. I took some photos of the pipe before I started to clean it up. I took a picture of the rim and bowl to show the condition of the light cake and the lava overflow and scorching on the back side of the rim top. Otherwise the bowl looked decent.I took some photos of the stem to have a look at it and see what I was going to do. You can see the dent in the stem on the first photo. I have circled it in red to make sure you can identify it. It looks like a dent but it actually was a collapse in the airway that was blocking it off part way. The cheap plastic stems on the cobs do not do well with heat in my experience. I have ruined a few of them trying to raise dents and even just from the heat of buffing them.I topped the bowl with 220 grit sandpaper on the topping board to remove the lava build up and scorched area on the back of the rim top. It cleaned up really well leaving behind a pretty pristine looking rim. The inner and outer edges were in good shape.I reamed the bowl with Savinelli Fitsall Pipe Knife to take back the cake that had formed around the middle of the bowl and smooth out the inside walls. I ran a folded piece of sandpaper around the inner edge of the bowl to clean it up a bit.I cleaned out the mortise and the airway in the shank and the stem with pipe cleaners, cotton swabs and alcohol. At this point I was not sure what I would do with the stem so I figured I might as well clean it up.I sanded the top of the stem to see what I could do with the dent. I put a pipe cleaner in the airway and painted the surface with the flame of a lighter. The area did not lift but collapsed further. The stem was a going to be a loss. It was time to look for another one that would work on this pipe.Jeff had sent me a couple of bags of stems that he had picked up on Ebay. In one of them there were quite a few Missouri Meerschaum stems that might work. I found a nice looking reddish amber plastic one that was bent the same angle. It was new and unused and it would look really good with the spool cob. I put the two stems side by side and took a couple of photos. You will notice that the new stem is slightly shorter than the original but the shape and the bend were more classic and elegant.I polished the rim top with micromesh sanding pads – 1500-12000 grit pads. Each pad brought more of a shine to the cob and it matched the rest of the bowl well. I gave it a coat of Conservator’s Wax and buffed it with a soft cloth. I put the new stem on the bowl and gave the pipe a hand buff with a microfiber cloth to give it a bit of a shine. The finished pipe is shown in the photos below. The cob is in great shape and the shank is made to look like a cob. The transparent red plastic stem looks really good with the golden yellow of the cob. This old cob has lots of life in it and it would be a great addition to anyone’s rack. Have you been wanting to give a cob a try? This is your chance to pick one up at a great price. The dimensions of the pipe are: Length: 6 inches, Height: 2 inches, Outer diameter of the bowl: 1 ½ inches, Chamber diameter: 5/8 inches. I will be adding this one to the rebornpipes store shortly if you are interested. If you are interested email me at slaug@uniserve.com or send me a message on Facebook. Thanks for looking.


Breathing Life into an early 1900s Eagle Claw Billiard


Blog by Steve Laug

My brother Jeff picked up this interesting Eagle Claw pipe in Montana on one of his pipe hunts. It is well carved and is a well grained piece of briar. The finish was very dirty and worn but under the dirt and dust of years sat some beautiful briar. The bowl had a thin cake – almost like it had been cleaned. Sometime in the life of the pipe the inner edge of the bowl had been chipped on the left side of the bowl. I would almost bet that it happened the last time the pipe was cleaned as there was no buildup of tars or cake in the chip itself. There were remnants of lava on the top of the rim around the rim top but not too thick or too much. There was a very tarnished brass band on the shank that was loose. The stem was Bakelite and was overturned. It also was worn and the top surface at first appeared to be crazed but the more I looked at it the more I could see that it was actually deeply pitted. There were bite marks on the top of the stem and the top edge of the button was worn down. There was a large bite through on the underside of the stem and the button was worn. There was some chipping around the junction of the stem and the band on the shank. Jeff took the photos of the pipe that follow before he started his cleanup work. It is always good to have a baseline of what the pipe looked like when we began the work. The next two photos show the condition of the briar. The first shows the rim top and bowl. There is minor tar buildup on the left side rim top. The chip in the rim is also visible in that photo. The second photo shows the carving patterns on the side and bottom edge of the bowl and shank. Though they are dirty they are well executed and interesting.The band is worn and oxidized but appears to be brass underneath. The top side of the stem is worn and there appears to be casting marks on both edges.The next photos show the bite through in the underside of the stem and the shape and condition of the airway in the button end.The last two photos show the stem. The first is the top side showing the tooth marks near the button and the pitting and checking of the material. This photo shows why originally I thought that the stem had crazed. The second photo gives a close up look at the bite through in the underside of the stem. It was quite large and went from one side of the airway to the other.Jeff did his usual thorough cleanup on the bowl and stem. He used his two favourite reamers to clean up the bowl and rim edges – a PipNet pipe reamer a Savinelli Fitsall reamer. He cleaned the internals with alcohol, pipe cleaners and cotton swabs – scrubbing out the mortise and shank as it was very dirty. He scrubbed the exterior of the pipe with Murphy’s Oil soap and a tooth brush and was able to remove all of the tars and oils built up on the briar. He was able to remove all of the tars and lava on the rim top and left it looking very clean. The chip damage on the rim top and inner edge was clean and visible. He cleaned the stem with warm soapy water and pipe cleaners. He rinsed it with clean water to remove the soap in the airway. When it arrived I took photos of the pipe before I started to work on the restoration. I took a close up photo of the rim top to show how well it had cleaned up. The chip is on shown on the bottom of the photo (left side of the bowl). It would need to be repaired and topped to clean up the damage.The stem cleaned up nicely. The next two photos show the stem after Jeff’s clean up. You can see the pitting, chipping at the shank connection and the tooth marks on the top side. The bite through is clear on the underside and I have pushed a pipe cleaner through to show the size of the hole.Since the stem was quite clean, I wiped it down with a damp cotton pad and dried it off. I greased the pipe cleaner with Vaseline and inserted it into the airway. I filled in the bite marks on the top side and repaired the bite through with Amber super glue. I overfilled the two repairs to make sure that it would not shrink and require more as it dried. I sprayed it with an accelerator and set it aside to dry for an hour.Once the repair had cured for an hour I used a small file to smooth out the patch and reshape the edge of the button. At this point I was interesting in smoothing out the repair and the surface of the stem to match. I also wanted to have the edges of the button look as close as possible to their original shape.I sanded the repaired areas and the rest of the stem with 220 grit sandpaper to deal with the pitting and to blend the repair into the rest of the surface of the stem. The stem is starting to look pretty good and the button and shape are correct.I polished out the sanding scratches, pitting and marks in the Bakelite with micromesh sanding pads – wet sanding it with 1500-2400 grit pads and dry sanding it with 3200-4000 grit pads. I wiped the stem down with Obsidian Oil after each sanding pad. I carefully buffed the stem with Blue Diamond on the buffing wheel so as not to let it get too hot and damage the material. I brought it back to the table and sanded it with the final three 6000-12000 grit pads. After the final pad I gave it a final coat of oil and set it aside to dry. The band/ferrule on the end of the shank was loose so I removed it to clean up the pipe. The photos below show the beautiful grain in this pipe. I really like the looks of the grain and the carving. It is well laid out on the briar. In order to repair the damaged edge of the rim I wanted to top the bowl back to get rid of the other damage to the rim top and prepare it for the patch. I topped it on a topping board using 220 grit sandpaper. I removed enough of the rim top to take care of the other damage on the rim and the burned areas around the inner edge. I pushed some of the briar dust from sanding into the chipped area and put several drops of clear super glue on top of the dust. I repeated the process until the edge and the rim top were even. I sanded the inner edge with a folded piece of 220 grit sandpaper to smooth it out and finished by lightly topping the bowl. The repair looks really good.I polished the rim top using the micromesh sanding pads – wet sanding with 1500-2400 grit pads and dry sanding with 3200-12000 grit pads. I wiped the rim down after each pad with a damp cotton pad. When I finished the polishing I wiped it down a final time. I rubbed the briar down with Before & After Restoration Balm to deep clean the smooth finish, enliven and protect the briar. I hand rubbed it with my fingers and a cotton swab to get into the deep grooves of the carving. I wiped it off with a soft cloth and lightly buffed the bowl with soft cloth. I lightly buffed it with Blue Diamond on the wheel to polish it. It really began to have a deep shine in the briar. The rich reds and browns of the stain, which I have often found in briar of this age, made the grain really stand out. I took some photos of the bowl to mark the progress in the restoration. At this point I decided to not restain the rim top but let is remain natural. The balm that rubbed into the briar made it almost blend with the rest of the bowl. I used a cotton swab to paint some white glue around the shank end to hold the band firmly in place. Once it was evenly spread I pressed the band in place on the shank and let it dry. Once the band had cured I polished it with micromesh sanding pads and a jeweler’s cloth. The brass band really took on a rich glow that went well with the stain on the pipe. I put the stem back on the bowl and gently worked the pipe over on the buffing wheel using Blue Diamond to polish the bowl and shank. I lightly buffed the bowl so as not to get a lot of polishing compound in the grooves and feathers. I carefully buffed the stem to raise the gloss on the Bakelite without damaging it from the heat. I gave the bowl and stem multiple coats of Conservator’s Wax. I gently buffed the entire pipe with a clean buffing pad to raise the shine. I hand buffed it with a microfiber cloth to deepen the shine. The finished pipe is shown in the photos below. The rich reddish brown stain on the carved eagle claw and egg bowl works well with the yellow amber gloss of the Bakelite stem. This old carved pipe really has a nice mix of grain and now that it is restored it has lots of life in it. This is another pipe that I wish could speak and tell its story. As I hold it I wonder about its travels and how it came to rest in Montana before coming to Idaho and then up to Vancouver. It would be fascinating to be able to sit and have a chat with it while I fired up a bowl. I guess though I will have to be satisfied to add my own chapter to the ongoing saga of this old pipe. Thanks for looking.


Resurrecting an old GFB Bent Bulldog


Blog by Steve Laug

I have worked on three older GFB pipes over the past 4 years. One was an unsmoked briar calabash, one a military mount bent billiard and the final one a horn stemmed bulldog. All had the same stamping as the pipe I am working on now. All were made of a nice piece of briar and all had the same classic shape to them. When I saw this old pipe on eBay I wanted to add it to the collection. It was similar in shape to the little GFB horn stemmed bulldog though the stem was shorter. The first photo below shows the horn stemmed GFB and the second one was photo that the seller included in the eBay advertisement. The stem on the second one is a Bakelite amberoid stem. The finish on both pipes appeared to be similar. The shape is identical. The stamping on the top pipe was GFB in an oval with three stars over the oval. The second pipe has the same GFB oval but it did not have the stars on it. I am including the link to the previous blog. https://rebornpipes.com/2013/11/21/restoring-an-older-gfb-three-star-horn-stem-bent-bulldog/I am including the rest of the photos that seller attached to the item. They give a pretty good picture of what I saw when I was hooked by the pipe. The finish was very worn. The stem was the same size as the shank and lined up straight on all angles. The stem appears to have a paper washer between the shank and the stem to help keep things straight. It appears that there is a small gap between the shank and the stem but I would not know for sure until I saw it. It is a small pipe – just 4 inches long and 1 ¾ inches tall.The rim top looked to be darkened and possibly burnt in the next two photos but it is hard to tell by the dark quality of the photos. The stem shows some damage on the edge at the joint with the shank. The photos show that the pipe is clearly stamped with the GFB in an oval logo. In the article I noted above on the other GFB bulldog I found some interesting information that I have included here for ease of reference.

The first thing I found was information that the GFB brand was an older French Trademark and that it came from Saint Claude, France. A more focused search for GFB French Briar Pipes led to information that the stamping GFB stood for Great French Briar – something about that did not seem right to me so I continued to look and finally came across the following advertisement from a Sears Catalogue. It shows a full page of GFB pipes and the header says GENUINE FRENCH BRIAR. That made much more sense to me, and all three of my GFB pipes match the pipes in the catalogue. It was good to be reminded of the old brand. I am pretty sure that all three of my GFB pipes come from either the late 1890’s or the early 1900’s. Here are links to the other two GFB pipes that I restored and restemmed if you are interested in some further reading on the brand.

https://rebornpipes.com/2013/06/07/restemming-and-reclaiming-an-older-unsmoked-gfb-briar-calabash/

https://rebornpipes.com/2013/04/01/restoring-a-gfb-bent-billiard-another-reclamation-project/

When the pipe arrived in Idaho, Jeff took photos of it. His photos gave a more accurate look at the condition of the pipe before he cleaned it up. The bowl had a lot of black spots all around the sides of the bowl and the shank. The paper washer can be seen between the stem and the shank. It almost looks like a spacer. The Bowl had a thick cake that had overflowed onto the rim top and hardened like lava. The finish on the bowl was worn and tired but the original reddish brown stain still looked good underneath the grime. The rim top was so covered it was hard to know if the inner or outer edge had damage. The stem had tooth marks on both the top and the underside near the button itself was worn as was the slot in the end. The stem material was amberlike but was not amber. There was some crazing in the stem material on both sides of the stem. Jeff took a close up photo of the stem to show the condition of the bowl and the rim top. You can see the thick cake in the bowl and it appears that there may be a little damage on the front right side of the inner edge of the bowl. He also included a picture of the left side of the bowl with the black spots on the finish – it almost looked like tar. The next two photos show the stamping on the left side of the shank. It shows the GFB in an oval logo. It is slightly worn but still showed signs of the gold leaf that is stamped inside the logo.Jeff unscrewed the stem from the shank. In the next photos you can see the buildup of tars and oils on the bone tenon and the wear on it as well. The paper washer was torn and when he removed it off the tenon it fell apart.The next photos show the crazing in the stem and a few cut marks on the top side. The stem was worn, dirty and the sharp edge of the button had smoothed out and was worn into the surface.Jeff did a thorough cleanup on the bowl and stem. He reamed the bowl back to bare briar with a PipNet pipe reamer and cleaned up the remnants with a Savinelli Fitsall reamer. He cleaned the internals with alcohol, pipe cleaners and cotton swabs – scrubbing out the mortise as it was very dirty. He scrubbed the exterior of the pipe with Murphy’s Oil soap and a tooth brush and was able to remove all of the tars and oils built up on the briar. He was able to remove all of the tars and lava on the rim top and left it looking very clean. The damage on the rim top and outer edge was clean and visible. He cleaned the stem with warm soapy water and rinsed it with clean water to remove the soap in the airway. When it arrived I forgot to take photos of the pipe. I started to work on it before I took the photos. I remembered after I had topped the bowl and also started to sand the stem and fit it to the shank. I painted the worn tenon with clear fingernail polish to build it up. Then fit it to the shank and took some photos of it to show how it looked before I continued on the restoration. I took photos of the stem to show the crazing in the Bakelite and some of the damaged areas on the top and underside.I took some photos of the topping process on the bowl. I did not have to remove too much of the rim surface to get rid of the damage to that area. I used 220 grit sandpaper on the topping board and carefully worked on the rim top until it was smooth and the damaged removed.I set the bowl aside and turned my attention to the stem. I filled in the deep gouges on the top of the stem with amber super glue. I sprayed it with accelerator and when it dried I sanded out the repairs with 220 grit sandpaper to blend them into the surface. I polished out the sanding scratches and marks in the Bakelite with micromesh sanding pads – wet sanding it with 1500-2400 grit pads and dry sanding it with 3200-4000 grit pads. I wiped the stem down with Obsidian Oil after each sanding pad. I carefully buffed the stem with Blue Diamond on the buffing wheel so as not to let it get too hot and damage the material. I brought it back to the table and sanded it with the final three 6000-12000 grit pads. After the final pad I gave it a final coat of oil and set it aside to dry. I was able to polish out much of the damage to the stem. Most of crazing was on the surface so most of it is gone as well. The amber Bakelite polished up really well and almost glowed. That part of the restoration went well and the stem looked new and would look good on the finished pipe bowl.

I set the stem aside and rubbed the briar down with Before & After Restoration Balm to deep clean the smooth finish, enliven and protect the briar. I hand rubbed it with my fingers and wiped it off with a soft cloth. I buffed the bowl with Blue Diamond on the wheel to polish it. It really began to have a deep shine in the briar. The rich reds in the briar and the brown stain really looked good at this point in the process. I took some photos of the bowl to mark the progress in the restoration. I decided to leave the small nicks in the bowl surface as marks of character rather than damage the original finish by sanding them all out. I polished the bowl and rim top using the micromesh sanding pads – wet sanding with 1500-2400 grit pads and dry sanding with 3200-12000 grit pads. I wiped the rim down after each pad with a damp cotton pad. When I finished the polishing I wiped it down a final time. I used some Rub’n Buff European Gold to touch up the GFB stamp on the left side of the shank. I applied it to the stamp with a cotton swab and worked it into the stamp. I repeated the process until the coverage was good. I wiped it off and buffed the shank with a cotton pad.I put the stem back on the bowl and worked the pipe over on the buffing wheel using Blue Diamond to polish the bowl and shank. I lightly buffed the stem to raise the gloss on the Bakelite. I gave the bowl multiple coats of carnauba wax and the stem multiple coats of Conservator’s Wax. I buffed the entire pipe with a clean buffing pad to raise the shine. I hand buffed it with a microfiber cloth to deepen the shine. The finished pipe is shown in the photos below. The rich reddish brown stain on the bulldog shaped bowl works well with the amber gloss of the Baklite stem. This old GFB pipe has a nice mix of grain and now that it is restored it has lots of life in it. It is pipes like this that I wish could speak and tell their story. I would love to know the length and breadth of its journey around the world from France to the US and now to Canada. I guess though I will have to be happy adding my own story to the ongoing saga of this old pipe. Thanks for looking.


Breathing Life into a Dr. Grabow Omega Bent Billiard


Blog by Steve Laug

I have always liked the look of the Dr. Grabow Omega pipes. I have worked on quite a few over the years and have found them well made. The briar is a mixed grain pattern usually but the look of the classic shape and the feel in the hand is quite nice. The style of the stem mimics the Peterson P-Lip but up close it is very different. The airway exits not on the top of the button as in a P-Lip but out the end as in a standard fish tail stem. This old timer was no exception so when Jeff sent it I was interested in what it would look like after his cleanup. The bowl was structurally sound but the finish was worn and tired looking with a lot of scratches all around the sides and bottom of the bowl. The bowl had a thick cake that had flowed over the top. The rim was coated in lava and it was beat up. It had a lot of small holes in it like it had been knocked out on concrete and the outer front edge of the bowl was roughened and rounded over. The inner edge of the bowl looked like it was undamaged. The nickel ferrule was oxidized and scratched. The stem had some tooth marks on the top and underside near the button and was oxidized. Jeff took photos of the pipe to show its condition before he started his cleanup work. The next photo shows the cake in the bowl and the condition of the lava overflow on the rim top. You can see that it is quite thick. You can also see the rough condition of the outer edge of the bowl.Jeff took several photos of the bowl from various angles to show the general condition of the finish. There were scratches and nicks but none of them look too deep in the briar. The finish also appears to be very dirty and the varnish coat that is usually present seems worn and tired looking on the sides and bottom of the bowl. The next two photos not only show the stamping on the shank but also the buildup of tars and grime around the edges of the ferrule. It is almost as if the shank was weeping under the ferrule. The stamping is worn but readable. It is stamped OMEGA over Dr. Grabow on the left side of the shank and on the right Imported Briar.When Jeff took the pipe apart it appeared that the seller had put a newer Grabow Paper Filter in the shank of the pipe to make the pipe appear to have been cleaned. The next three photos show the condition of the tenon end of the stem and the filter. The oxidation on the stem is also visible in the photos below. The stem was scratched and worn but the Grabow Spade logo was in good condition on the left side of the shank. The top and underside of the stem had some deep tooth marks around the button and the sharp edge of the top of the button was quite worn and damaged.I did some searching to find out a bit of history about the Omega. I found that it was first released around 1975 and was a copy of a well pipe imported from Italy. It has continued to be offered for sale in their catalogues.

Jeff did a thorough cleanup on the bowl and stem. He reamed the bowl back to bare briar with a PipNet pipe reamer and cleaned up the remnants with a Savinelli Fitsall reamer. He cleaned the internals with alcohol, pipe cleaners and cotton swabs – scrubbing out the mortise as it was very dirty. He scrubbed the exterior of the pipe with Murphy’s Oil soap and a tooth brush and was able to remove all of the tars and oils built up on the briar. He was able to remove all of the tars and lava on the rim top and left it looking very clean. The damage on the rim top and outer edge was clean and visible. He soaked the stem in an Oxyclean bath to raise the oxidation to the surface of the vulcanite. When it arrived I took some photos of it to show how it looked before I did the restoration.  Jeff was able to remove the thick lava coat from the rim and revealed what I thought would be underneath the thick coat. The rim top was speckled with tiny dents and marks and the outer edge was damaged all the way around the bowl. There was a little damage on the inner edge on the right side of the bowl.The Oxyclean soak had really raised the oxidation to the surface. The stem was clean but heavily oxidized when it arrived.Because the was so oxidized after the soak in Oxyclean, I put it in a bath of Before & After Pipe Stem Deoxidizer to soak overnight and work on the vulcanite oxidation. In the morning I removed the stem from the deoxidizer and wiped off the excess deoxidizer from the surface of the stem with a paper towel. I cleaned out the airway in the stem with pipe cleaners and alcohol to remove any remnants of the bath from that part of the stem. The photos below show the stem after the soak and rub down. The oxidation looked much more manageable and what remained would be easily dealt with. The tooth chatter on the top and underside of the stem is hard to see in the photos, but it is present.I sanded the stem with 220 grit sandpaper to remove the tooth chatter and minimize the tooth marks on both sides of the stem. I reshaped the button with the sandpaper and a needle file. I sanded the rest of the stem to break up the remaining oxidation.I polished out the sanding scratches and marks in the vulcanite with micromesh sanding pads – wet sanding it with 1500-2400 grit pads and dry sanding it with 3200-4000 grit pads. I wiped the stem down with Obsidian Oil after each sanding pad. I buffed the stem with Blue Diamond on the buffing wheel being careful around the spade logo insert as they can easily be damaged. I brought it back to the table and sanded it with the final three 6000-12000 grit pads. After the final pad I gave it a final coat of oil and set it aside to dry. The outer edge of the rim was damaged all around the bowl but the worst damage was on the front edge. You can see the roughness of the rim edge in the next photo. With the small pin prick holes on the rim top and the damage on the inner edge of the right side of the bowl I decided to top the bowl. I top a pipe on a topping board with 220 grit sandpaper and work the bowl over the sandpaper holding the rim flat against the topping board and working the bowl to evenly sand the bowl top smooth and remove the damage. Once the rim edges were almost smooth I used a folded piece of sandpaper to smooth out the outer edge of the bowl all the way around the bowl. I polished the rim top with micromesh sanding pads – wet sanding with 1500-2400 grit pads and dry sanding with 3200-12000 grit pads. I wiped the rim down after each pad with a damp cotton pad. When I finished the polishing I wiped it down a final time. I blended some light and medium brown stain from a stain pen to restain the rim top and edges to match the colour of the rest of the bowl. The blend works well in trying to get this particular shade of brown. I hand buffed the stain to polish it and blend the colours together.I rubbed the bowl down with Before & After Restoration Balm to deep clean the smooth finish, enliven and protect the briar. I hand rubbed it with my fingers and wiped it off with a soft cloth. I buffed the bowl with Blue Diamond on the wheel to polish it. It really began to have a deep shine in the briar. I took some photos of the bowl at this point to mark the progress in the restoration. I decided to leave the small nicks in the bowl surface as marks of character rather than damage the original finish by sanding them all out. I cleaned and polished the nickel ferrule with micromesh sanding pads. I was careful in sanding the nickel in that the dust from the metal can discolour the briar and make more work. I was happy with the finished end cap. I buffed the briar on the wheel with Blue Diamond to polish it more. I was careful around the already light stamping. I hand buffed the bowl and ferrule with a microfiber cloth and took photos of the bowl at this point. I put the stem back on the bowl and worked the pipe over on the buffing wheel using Blue Diamond to polish the bowl and shank. I buffed the stem to raise the gloss on the vulcanite. I gave the bowl and stem multiple coats of carnauba wax. I buffed the entire pipe with a clean buffing pad to raise the shine. I hand buffed it with a microfiber cloth to deepen the shine. The finished pipe is shown in the photos below. The dark to medium brown stain on the billiard shaped bowl works well with the polished nickel ferrule and the rich black of the vulcanite stem. This old Omega pipe has some interesting grain and has lots of life in it to add your own story to the ongoing saga of the briar. The dimensions of the pipe are: Length: 6 inches, Height: 1 3/4 inches, Diameter of the bowl: 1 1/4 inches, Diameter of the chamber: 5/8 inches. I will be adding this one to the rebornpipes store shortly if you are interested in adding it to your collection. It will make a fine addition to the rack. If you are interested email me at slaug@uniserve.com or send me a message on Facebook. Thanks for looking.


Comoy’s Golden Grain Apple Restoration


By Al Jones

Comoy’s with the drilled, 3-piece “C” stem logo always catch my eye. This one is a Shape 483 in the Golden Grain finish.  The stem was oxidized with a few bite marks. There was some build-upon the bowl top. The stem wasn’t inserted all the way into the shank, but that is typically due to build-up in the shank. Here is the pipe as it was received.

The shape 483 is listed as a Large Apple on the Comoy’s shape chart.

I reamed the cake and found the bowl to be on very good condition. I used a worn piece of scotchbrite to clean up the bowl top. The pipe was soaked with alcohol and sea salt. While the bowl was soaking, I put a dab of grease on the C logo and soaked it in a mild Oxy-Clean solution. After the soak, I used a bristle brush and then a scrunched up paper towel to clean the inside of the shank. Once that was done, the stem fit properly.

I raised a few tooth dents on the stem with flame from a lighter. One dent remained underneath, and I decided to let well enough alone as it was structurally sound. I used 800, 1,500 and 2,000 grade sandpaper to remove the oxidation. That was followed with 8,000 and 12,000 grade micromesh followed by White Diamond and Meguiars Plastic polish on the buffer.

The briar was lightly buffed with White Diamond and several coats of Canuba wax.

Below is the finished pipe, now being enjoyed by a member of the SmokersForums.uk forum.

Restoring & Repairing a Damaged Stem on a Big Ben Nautic 252


Blog by Steve Laug

Not long ago I received a phone call from an interesting woman who had been given my phone number by a local pipe and cigar shop. She had a couple of pipes that needed some stem repair. In our conversation it turned out that they belonged to her husband and he had a total of two pipes. Both of them needed work and she was determined to get them repaired for him. In our talking we spoke of the options – either repairing the stem or making a new stem. She spoke with him and they decided to repair them. A few days later her husband stopped by the house to show me the two pipes. We talked and he decided to work on one pipe at a time so that he would have one to smoke while I repaired the other one. The first of these was a Big Ben Nautic shape 252. It is a bent apple kind of quasi brandy shaped pipe with some really nice grain on the sides of the bowl. I took some photos of the pipe to show the condition it was in before I started my clean up.From the side view photos above the pipe looked pretty good. The finish was dirty but the pipe appeared to be in decent condition. The next photos show what the bowl and stem looked like from the top and underside views. The bowl had never been reamed and there was a thick cake that was composed of aromatic tobacco. It was soft and sticky. The lava overflow on the rim top was also sticky to touch. The smell of the pipe was a sickly sweet and sour smell of a pipe that had never seen a pipe cleaner and never had been cleaned. The stem had suffered gnawing that had broken the top edge and a bit of the stem in front of the button. It was a mess. The underside had deep bite marks and was also damaged. The poor pipe was a mess but it was obviously his favourite pipe to smoke.I took a close up photo of the bowl and rim to show the thickness and composition of the cake and the thick overflow of lava on the rim top. The good news was that since it had never been reamed or scraped the edges of the rim looked to be in very good condition.I also took some photos of the stem damage so that you could see what I was up against. The sad thing to me was that his second pipe had exactly the same damage to the stem and the bowl looked identical as well.When I removed the stem I was not surprised to find that the mortise and the airways in the shank and stem had also never been cleaned. But even more surprising was the fact that the stem and shank were made for a 9mm filter and the pipe had been smoked sans filter to the point that the airway in both were almost closed off with the gunk (technical term for the black, oily, tarry stuff that filled the stem and shank). The next series of three photos show the clogged condition of the airways and mortise. I am amazed that the pipe man was able to load any tobacco in the bowl and draw any smoke through the pipe. I decided to rid the pipe of the smell that permeated my work space when I had the pipe on the worktable. I used pipe cleaners, cotton swabs and alcohol to clean out the interior of both. I used a dental spatula to scrape the walls of the shank and the filter tenon. It took a lot of pipe cleaners to remove all of the buildup but once it was clean the pipe smell better and would be easier to work on. I reamed the bowl back to bare briar with a PipNet pipe reamer. I started reaming it with the smallest cutting head and worked my way up to the cutting head that fit the diameter of the bowl. I touched up the reaming with a Savinelli Fitsall Pipe knife.I scraped off the thick lava coat on the rim top using a pen knife. I was able to remove all of it. There was still some rim darkening but I figured that it would also come of the rim. I scrubbed the rim top with saliva and cotton pads.I polished the rim of the bowl with micromesh sanding pads. I started by wet sanding it with 1500-2400 grit pads until all of the darkening and remnants of lava on the rim. I dry sanded it with 3200-12000 grit pads until the rim was shining. I wiped it down with a damp cotton pad after each micromesh sanding pad to remove the grime that came free. The rim began to look almost new again. I rubbed the bowl and shank down with Before & After Restoration Balm to deep clean the smooth finish, enliven and protect the briar. I hand rubbed it with my fingers and wiped it off with a soft cloth. I buffed the bowl with a soft cotton cloth to polish it. It really began to have a deep shine in the briar. I took some photos of the bowl at this point to mark the progress in the restoration. I sanded the top and underside of the stem with 220 grit sandpaper to clean up the edges of the damaged area on the top side of the stem and button and on the underside where there was a deep tooth mark and lots of tooth damage. I roughened the surface of the stem to give the glue and charcoal powder something to bite into and hold.I filled in the deep tooth mark on the underside of the stem with black super glue. The damaged area was not too large so the black super glue alone would work on this part of the stem. Once the repair had dried I used a needle file to sharpen the edge of the button and sanded out the repair to blend it into the surface of the underside of the stem.I greased a pipe fluffy pipe cleaner with Vaseline and flattened it to insert into the slot in the stem. I wanted to keep the airway open when I applied the repair material. I mixed some activated charcoal powder with black super glue to make a thick paste and applied it to the top of the stem with a dental spatula. I flattened it with the spatula and built it up heavier on the top of the button than on the flat portion of the stem. The repair dries fairly quickly to touch but I like to let it sit and cure for several days to make sure that the very centre of the patch is hardened.After the repair had cured I used a small flat bladed needle fill to recut the button and smooth out the repaired area on the stem. Once I had flattened out the repair there were some air bubbles in the patch that needed to be touched up. I filled in the air bubbles with clear super glue.When the repair had dried I used a knife blade and a round needle file to open and reshape the slot in the button.I sanded the repaired area with 200 grit sandpaper to smooth out the repair and blend it into the rest of the stem. I reshaped the button with the sandpaper at the same time so that it was the same all the way across the stem and on the top and underside of it.I polished out the sanding scratches and marks in the repaired area in front of the button on both sides of the stem and the button surface itself with micromesh sanding pads – wet sanding it with 1500-2400 grit pads and dry sanding it with 3200-12000 grit pads. I wiped the stem down with Obsidian Oil after each sanding pad. After the final pad I gave it a final coat of oil and set it aside to dry. I buffed the bowl with a soft cloth to polish away the remaining Restoration Balm. I worked the pipe bowl over on the buffing wheel using Blue Diamond to polish the bowl and shank. I hand buffed the stem to raise the gloss on the stem and polished the metal stem adornment with a silver polishing cloth. I gave the bowl multiple coats of carnauba wax and buffed it with a clean buffing pad to raise the shine. I gave the stem multiple coats of Conservator’s Wax. I buffed the entire pipe with a clean microfiber cloth to deepen the shine. The finished pipe is shown in the photos below. The medium brown stains on the apple/brandy shaped bowl works well with the rich black of the Lucite stem. The polish and the reworking of the stem material left this a beautiful and well-made pipe. Thanks for looking. I am recommending that the pipe man smoke this pipe with a softee bit in place to protect the repair. Once he has seen the repair I will install the softee bit on the stem. It should give some protection from his incessant chomping on the stem. If not the stem will face repeated repairs.

Stem Work on an Oversized Blatter Bros Make Selected Rustic Author


I am a sucker for the author shaped pipe and also Blatter and Blatter pipes. This is the perfect combination. Great work Charles.

This is another of the pipes sent to me from Iqaluit for refurbishment. I don’t how the owner sources such consistently interesting Blatter estate pipes, but source them he does!

This particular Blatter is a BIG rustic Author pipe, a real fistful of briar with a large chamber and thick walls. The shank looks positively stubby in comparison to the width of the bowl, but actually retains the classic Author 1:1 shank length to bowl height dimensions. The stem is a short bent saddle, into which Blatter has carved convenient dimples to assist removal and reinsertion of the stem.

The pipe arrived in good estate condition. It would need a good general cleaning to prepare it for its new piper, but apart from a layer of lava on the inward-sloping bowl rim, the briar looked to be in great shape.

The stem was a slightly different matter. While it was…

View original post 759 more words