Monthly Archives: September 2023

Peterson’s System Standard XL307 Made in the Republic of Ireland Rusticated Bent


Blog by Steve Laug

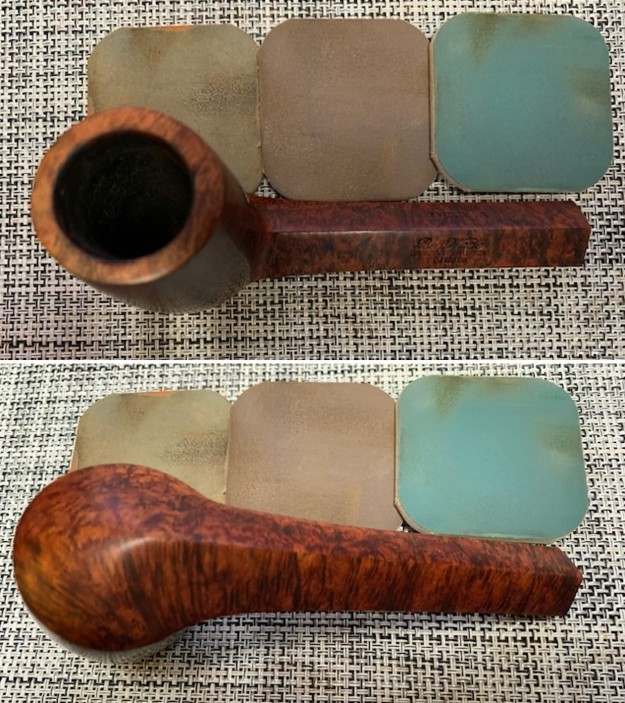
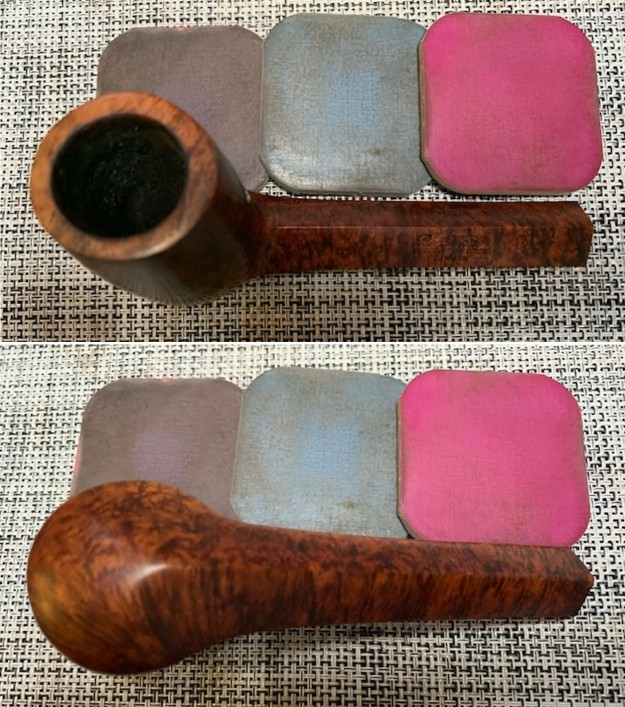
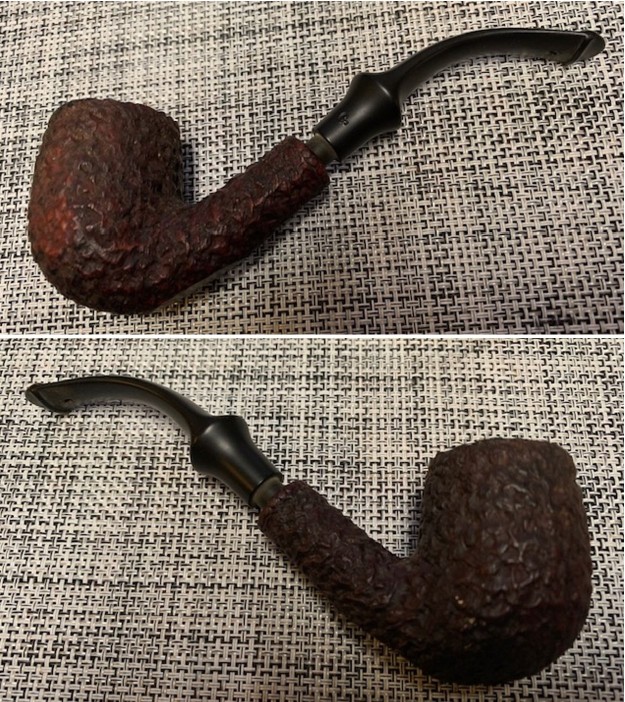
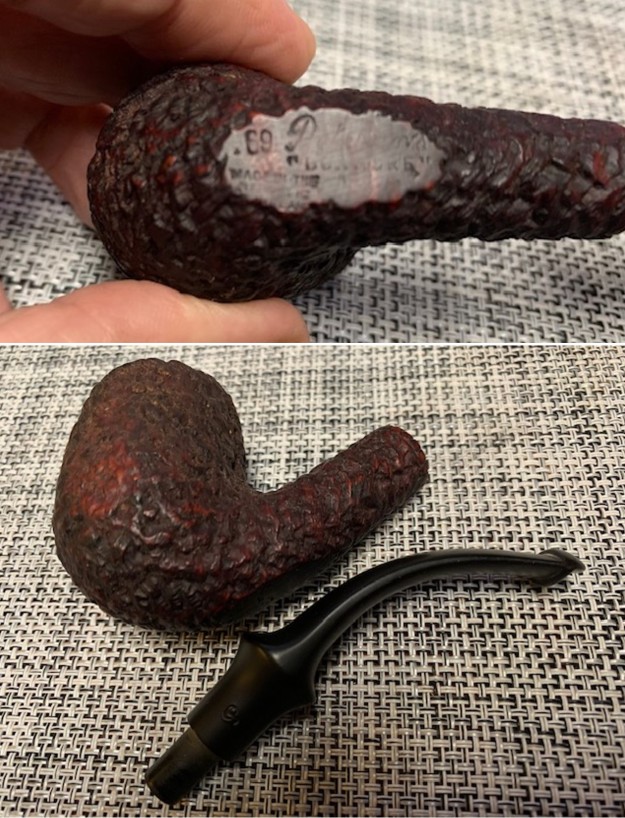
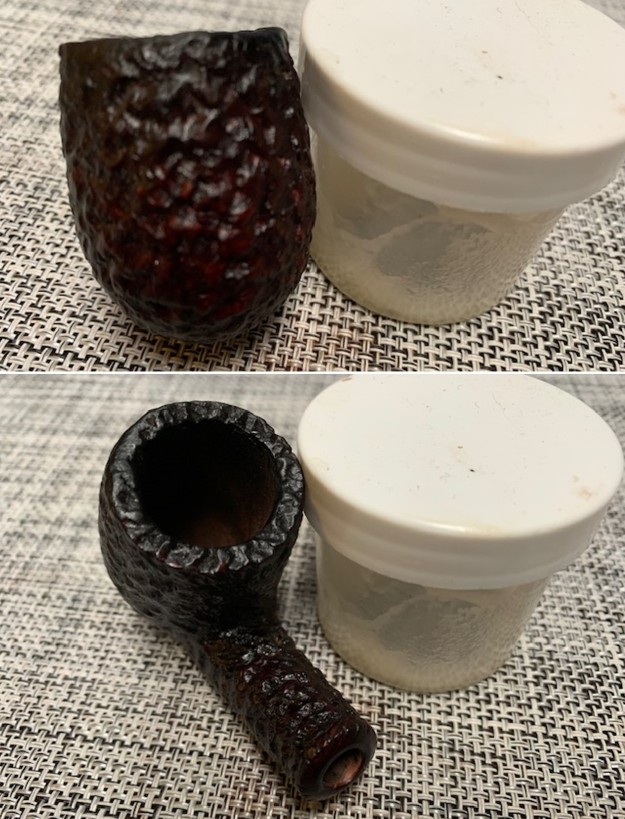
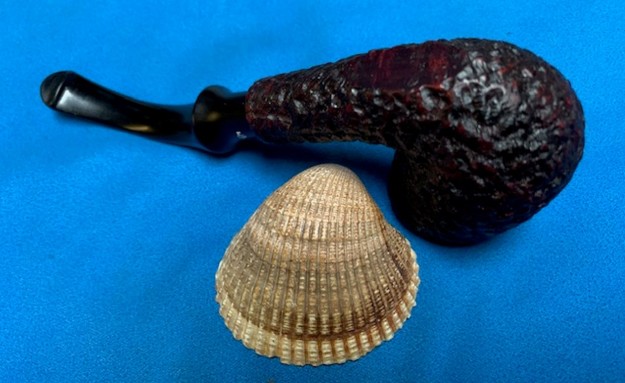
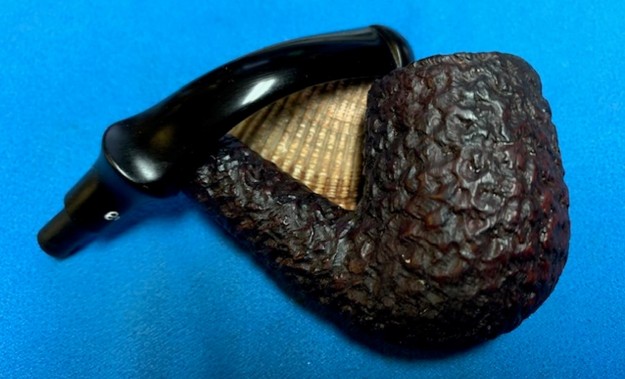
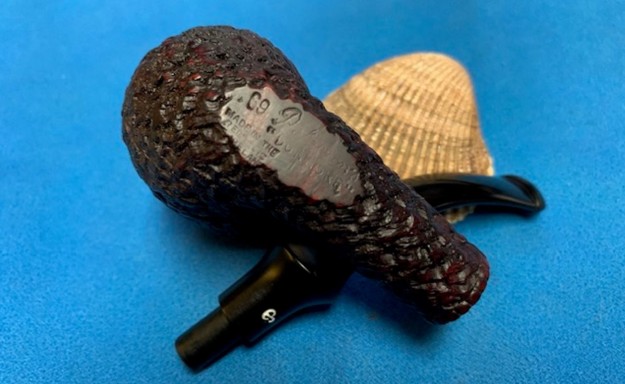
The next pipe on the work table is Rusticated Peterson’s System pipe that we purchased from and estate in Plano, Texas, USA on 03/30/2022. It was stamped Peterson’s System Standard on the underside side of the shank in a smooth panel. It was stamped Peterson’s [over] System [over] Standard. That is followed by the shape number XL307 [over] Made in the Republic of Ireland (in three lines). It has a rugged, tactile rustication around the bowl and shank that is fill with a lot of oils, debris and grime. There was a thick cake in the bowl with remnants of tobacco stuck on the walls. There was a lava overflow on the rim top that was heavier toward the back side. The top and edges of the rim were well hidden under the tars and lava. There was a very beautiful pipe underneath all of the buildup of years of use. The nickel ferrule on the shank end was oxidized and is stamped on the top and left side K&P [over] three faux hallmarks. That is followed by Petersons. It is not dented or damaged. The stem was the wrong stem for the pipe. It was not a Peterson’s style P-Lip but rather a Wellington style with the airway exiting on the end of the stem. It was oxidized and calcified toward the end with some tooth chatter. There were also some tooth marks on both sides of the stem ahead of the button. I would need to restem it with a proper stem once I received it in Vancouver. Jeff took photos of the pipe before he started his cleanup work on it. Jeff took photos of the bowl and rim top to show the thick, hard cake in the bowl with remnants of tobacco stuck on the walls of the bowl. There was a lava build up on the top of the rim and the edges of the bowl. The rim top looked pretty good but it was hard to know for sure if there was damage under the thick lava. Only clean up would tell the full story. Jeff took photos of the top and underside of the stem showing the tooth chatter, scratching and oxidation on the stem surface and wear on the edges of the button. You can also see the exit of the airway on the stem end rather than the to of the P-lip. Jeff took photos of the sides and heel of the bowl to show the condition of the finish. You can see the grime in the rustication around the sides of the bowl and shank. Even under the dirt and debris of the years it looked very good. Jeff took photos of the stamping on the underside of the bowl and shank. The stamping was faint but readable as you can see from the photos. It read as noted above. The nickel ferrule on the shank end is stamped on the top and left side K&P Peterson’s over three Peterson marks used on nickel ferrules. I have included the information on the shape number on this pipe that I picked up on researching the previous pipes. This is the second of two Peterson’s System Standard pipes in Bob’s collection marked with the 307 shape number. I have included a page from a Petersons Catalogue that I have on rebornpipes (https://rebornpipes.com/tag/peterson-hallmark-chart/). I have put a red box around the 307 shown in the catalogue page shown below. That should give a clear picture of the size and shape of the pipe. I am also including the information from Pipedia’s article on Peterson pipes. It is a great read in terms of the history of the brand (https://pipedia.org/wiki/Peterson). I have included a bit of the pertinent history here.

1950 – 1989 The Republic Era  – From 1950 to the present time, the stamp for this era is “Made in the Republic of Ireland” in a block format generally in three lines but two lines have been used with or without Republic being abbreviated.

During the 1950’s and 60’s the Kapp & Peterson company was still in the ownership of the Kapp family. However 1964 saw the retiral of the company Managing Director Frederick Henry(Harry) Kapp.

Pipedia also included a section of information on the System pipes including a diagram of the systems look (https://pipedia.org/wiki/Peterson#Republic_Era_Pipes). I quote a section of the article in part and include a link to another article on Pipedia on the System pipe.

The Peterson System pipes are the standard bearers of the Peterson pipe family, famous for the excellent smoking pleasure they provide. Often imitated but never equaled, the Peterson System smokes dry, cool and sweet, thanks to the scientific effectiveness of the original design. The heart of the System is the unique graduated bore in the mouthpiece. This makes the suction applied by the smoker 15 times weaker by the time it reaches the tobacco chamber. The result is that all the moisture flows into the reservoir and, thus cannot reach the smoker’s mouth. The Peterson Lip further enhances the effectiveness of the graduated bore by directing the flow of smoke upwards and away from the tongue. This achieves a uniquely even distribution of smoke and virtually eliminates any chance of tonguebite or bitterness. Furthermore, the shape is contoured so that the tongue rests comfortably in the depression under the opening. Each “PLip” mouthpiece is made from Vulcanite. For the Peterson System pipes to work properly, the stem/tenon has to have an extension, the tip of which will pass by the draft hole from the bowl and into the sump. Upon the smoker drawing in smoke, this extension then directs the smoke down and around the sump to dispense a lot of the moisture before the smoke enters the extension and stem. On the System Standards and other less expensive systems, this extension with be made of Vulcanite turned integrally with the stem. On the more expensive System pipes this extension will be made of metal which screws into the Vulcanite stem. This extension on the earlier pipes will be of brass and the newer pipes will be of aluminium. Most smokers not knowing this function of the metal extension, assumes that it is a condenser/stinger and will remove it as they do with the metal condensers of Kaywoodie, etc. Should you have a System pipe with this metal extension, do not remove it for it will make the System function properly and give you a dryer smoke (https://pipedia.org/wiki/A_closer_look_at_the_famous_Peterson_Standard_System_Pipe).

With that information in hand I knew what I was dealing with in terms of the stamping and the age of this pipe. I knew from the information that the pipe was made during the Republic Era between 1950 and 1989. My guess is that the pipes is a 1960s era System pipe. Now it was time to work on the pipe.

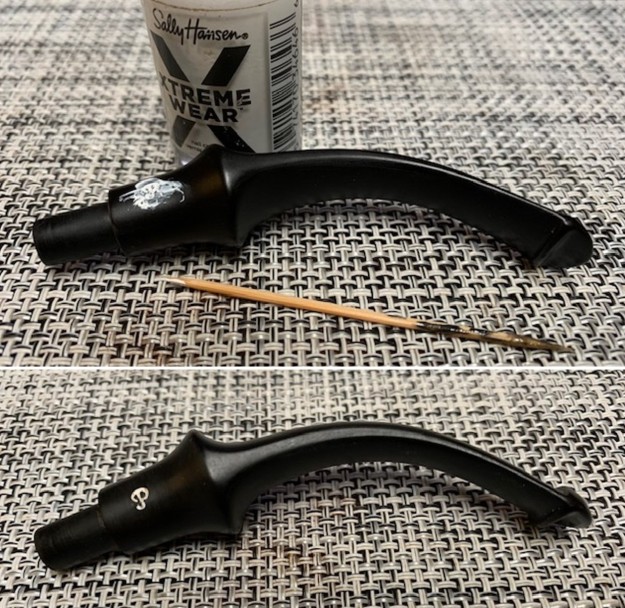
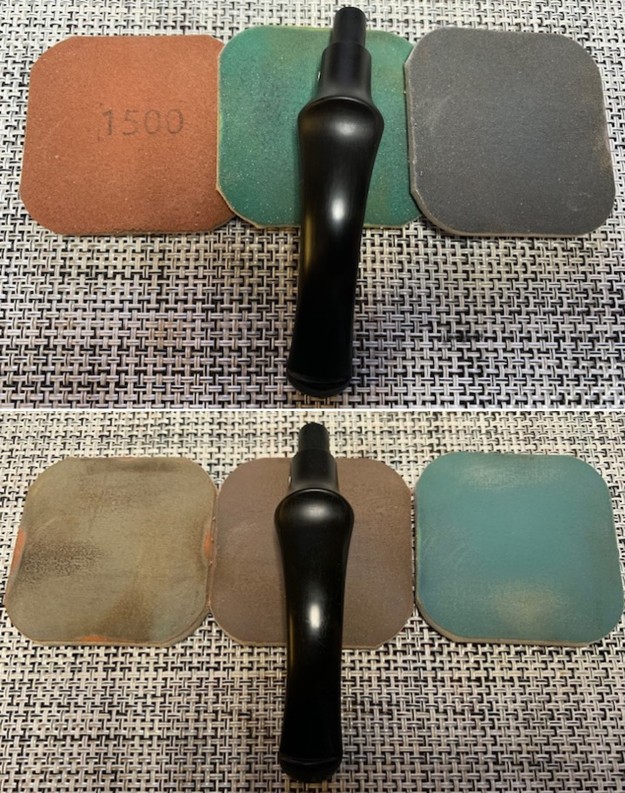
Jeff cleaned this filthy pipe with his usual clean up process. This one was a real mess and I did not know what to expect when I unwrapped it from his box. He reamed it with a PipNet pipe reamer and cleaned up the reaming with a Savinelli Fitsall Pipe Knife. He scrubbed out the internals with alcohol, pipe cleaners and cotton swabs until the pipe was clean. He scrubbed the exterior of the bowl with Murphy’s Oil Soap and a tooth brush to remove the grime and grit on the briar and the lava on the rim top. The finish looks very good with great looking grain around the bowl and shank. Jeff soaked the stem in Briarville’s Pipe Stem Deoxidizer to remove the oxidation on the vulcanite. When the pipe arrived here in Vancouver for the second stop of its restoration tour I was amazed it looked so good. I removed the incorrect stem and replaced it with a correct P-Lip stem for a 307 that I had here in my box of stems. The bonus was that the tenon had a brass chimney in the end that was correct for this pipe.I put the stem in the pipe and took photos of it with the correct stem. I liked the look of the pipe at this point in the process. I took some close up photos of the rim top and also of the stem surface. I wanted to show what an amazing job Jeff did in the cleanup of the rim top. The rim top was and inner edge were in excellent condition. I also took close up photos of the replacement stem I put in the shank to show the condition of the vulcanite. It was quite clean other than some slight oxidation at the edges of the button. There were no tooth marks or chatter on the stem surface.One of the things I appreciate about Jeff’s cleanup is that he works to protect and preserve the nomenclature on the shank of the pipes that he works on. The stamping on this one was very faint to start with so I was worried that it would disappear altogether with the cleanup. He was not only able to preserve and maintain its condition in the process. I took some photos to show the clarity of the stamping. I have noticed that many restorers are not careful to protect the stamping in their cleaning process and often by the end of the restoration the nomenclature is almost destroyed. I would like to encourage all of us to be careful in our work to preserve this as it is a critical piece of pipe restoration! I took the stem off the shank and took a photo of the pipe. I decided to start my work on the pipe by cleaning up some of the polishing compound left in the rustication ahead shank rustication ahead of the ferrule. I worked the end over with a brass bristle wire brush to remove the crud in the finish. The photos show the progress.  I rubbed the bowl and rim down with Before & After Restoration Balm. I worked it into the rusticated surface of the briar with my fingertips and a horse hair shoe brush to clean, enliven and protect it. I let the balm sit for 10 minutes and then buffed with a cotton cloth to raise the shine. I really like watching the Balm do its magic and bring the briar alive. With briar polished with the Restoration Balm I moved onto the metal. I polished the nickel ferrule with a jewellers cloth to raise the shine and to protect the ferrule from further oxidation. I sanded the stem with 220 grit sandpaper to remove the oxidation that remained in the vulcanite and also the light tooth marks on the top and underside near the button. I started polishing it with 400 grit wet dry sandpaper.I touched up the “P” logo on the left side of the saddle stem with white acrylic fingernail polish. I let it dry then I polished off the excess with a worn 1500 grit micromesh sanding pad. Once the excess was removed the stamp looked much better even though there was some faintness on the curve of the P.I polished the stem with micromesh sanding pads – wet sanding with 1500-12000 grit pads. I wiped the stem down after each sanding pad with Obsidian Oil. I polished it with Before & After Pipe Stem Polish – both Fine and Extra Fine. I gave it a coat of Obsidian Pipe Stem Oil. It works to protect the stem from oxidizing. I set it aside to dry.  Once again at this point in the restoration process I am excited to be on the homestretch. I look forward to the final look when the Rusticated Peterson System XL307 is put back together, polished and waxed. I put the bowl and stem back together. I lightly polished the bowl and stem with Blue Diamond to polish out the scratches in the briar and the vulcanite. I gave the bowl multiple coats of Conservator’s Wax and the stem multiple coats of carnauba wax. I buffed the pipe with a clean buffing pad to raise the shine. I hand buffed it with a microfiber cloth to deepen the shine. The pipe polished up pretty nicely. The depths of the rustication really pop with the wax and polish. The shiny black vulcanite stem is a beautiful contrast to the browns of the bowl and thick shank and nickel ferrule. This Peterson’s System Standard XL307 Bent Billiard was another fun pipe to work on. It really is a quite stunning piece of briar whose shape follows the flow of the briar. The pipe is tactile in the hand and should feel great as it is warmed up when smoking. The finished pipe is shown in the photos below. The dimensions of the pipe are Length: 6 ½ inches, Height: 2 inches, Outside diameter of the bowl: 1 ¼ inches, Chamber diameter: ¾ of an inch. The weight of the pipe is 2.26 ounces/64 grams. I will be putting it on the rebornpipes store in the Irish Pipemakers Section if you would like to add it to your rack and carry on the previous pipeman’s legacy. This is an interesting estate to bring back to life.

As always, I encourage your questions and comments as you read the blog. Thanks to each of you who are reading this blog. Remember we are not pipe owners; we are pipe men and women who hold our pipes in trust until they pass on into the trust of those who follow us.

On My Diversionary Pipe Hunt I Found this French Made Lotus Bent Billiard


Blog by Steve Laug

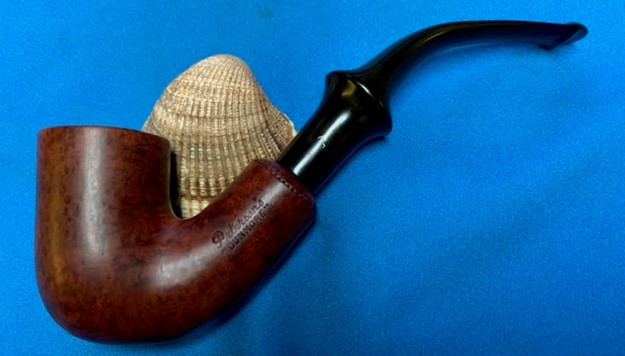
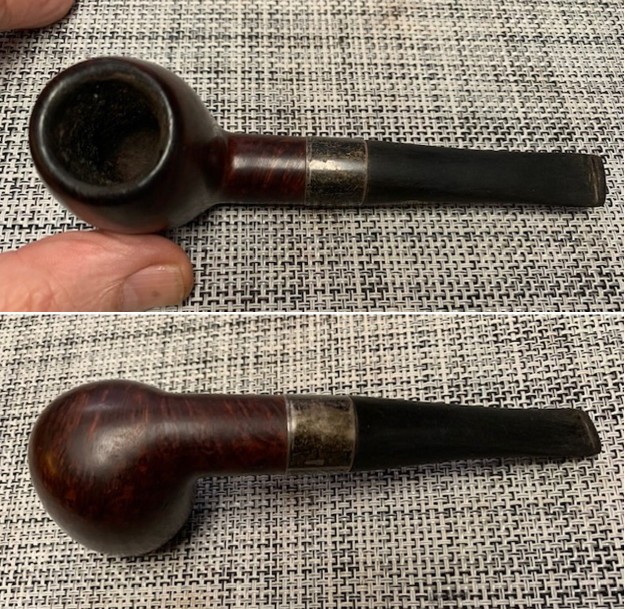
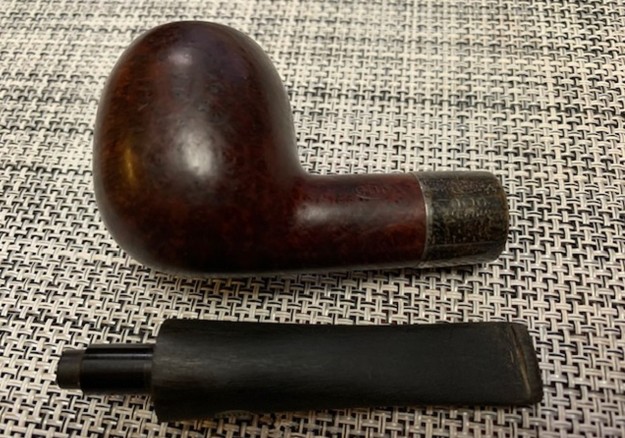
The next pipe on the table was second pipe I found on a recent trip to Alberta. I had a couple of hours to kill so I stopped at an antique mall along the way. The first was an Italian made cross grained Molina Bent Billiard that I already restored (https://rebornpipes.com/2023/09/27/took-a-diversionary-pipe-hunt-and-found-this-molina-81007-bent-billiard/). The second pipe I found was a French Made Bent Billiard. It was time to work on the second one now. On the left side of the shank it is stamped Lotus in script, underlined [over] Made in France. The pipe was in dirty condition. The finish on the bowl and shank were coated with a thick coat of grime and oils ground into the surface. There were many fills in the bowl sides, heel and the shank. The bowl had a thick cake that overflowed with a thick coat of lava on the rim top that obscured the inner and outer edges of the bowl. There appeared to be some damage on the front outer edge of the bowl. The black, hard rubber stem had an orific button and there was the beginning of a slot being shaped points to an older pipe. It was dirty and had tooth marks and chatter on both sides ahead of the button. There were small white paint spots on the shank and the stem. I took photos of the pipe before I started my clean up work on it to give a clear photo of the condition of the pipe before I started my work. I took a photo of the bowl and the rim top. The bowl had a thick cake that covered the bowl walls and bottom. The rim top and the bevelled inner edge of the bowl had a thick lava overflow. There appeared to be some damage on the front outer edge of the bowl. It was hard to know for sure what was underneath until it was cleaned. The hard rubber stem shows light tooth marks and chatter on both sides ahead of the button as mentioned above. There were paint spots on the stem top and sides. It had promise but it was dirty!I took a photo of the left shank side to try to capture the stamping on the briar. It is clear and readable as noted above. I removed the stem from the shank and took a photo of the parts to give a sense of the pipe’s proportions.I dropped a message to Kenneth Lieblich about the pipe because of his love of French Made Pipes and his work on gathering information on them. He wrote me back with the following helpful hint.

I think Lotus was a line of Delacour Brothers. Delacour closed around 1960, so if it’s one of their pipes, it must be older than that.

He wrote back with some more information as well:

Very little, but there’s a possible tidbit. There is a lighter company called Lotus, but I don’t think that’s related. However, my tidbit is a tobacco shop in Paris called “Le Lotus”. It’s been there for a while, but I haven’t yet figured out how long. That seems like a possibility, however tenuous. It’s also possible that it’s a second from one of the big French companies, but I don’t have a listing for it.

Also, there was a Lotus brand made by Delacour Bros. — that might be the most likely. The St Claude branch of Delacour, not the London branch.

I started by looking up the tobacco shop in Paris that Kenneth referred to “Le Lotus”. I found the shop in Paris and it looks to be an amazing shop with a huge selection of cigars. It is an old style tobacco shop and I suppose it could have some pipe tobacco but there were no photos showing any available. It is still a shop that I would love to visit one day that is for certain.

I agreed with Kenneth’s suggestion that the pipe is probably made by the St. Claude brandch of Delacour. I decided to do some digging to see if I could find information that definitively linked the Lotus pipe to Delacour.

I turned first to Pipephil to see what I could learn (http://www.pipephil.eu/logos/en/logo-d4.html). It gave a brief history of the brand and link to both the French and British activities of the company. I have included a screen capture of the pertinent section and the comments from the side bar below. Delacour pipes were crafted in the St Claude (14 bis rue Carnot) factory. The brand was founded in the late 19th century by Alix Delacour and owned a subsidiary company in London. Their activities stopped in the late 1950s.

From there I turned to look up the brand on Pipedia (https://pipedia.org/wiki/Delacour). There was very little included in the article. In fact, it gave a very brief history and a link to the company website. I quote the article in its entirety below.

The Delacour factory was built around 1892 and expanded in 1893) in Saint-Claude, Jura, France, Rue Carnot 14 bis.

The owner was Alix Delacour. Already in 1909 the factory was further expanded. Delacour had their own briar drying facilities. In 1960, the pipe factory closed. (Brand name was probably taken over by Jeantet). The Delacour building harbored afterwards: an eye-wear company, dance school, restaurant, etc. There was not any direct mention of the Lotus brand in the material but the shape and the look of the pipe is much like the Delacour pipes. I am about 99% clear that the pipe is a Delacour pipe. Given that information it was time to work on the pipe itself.

I started my work by reaming the bowl with a PipNet pipe reamer to remove the thick cake on the walls so I could see what they looked like. I used a Savinelli Fitsall Pipe Knife to scrape off the remaining cake on the bowl walls. I followed that by sanding the walls of the bowl until they were smooth with 220 grit sandpaper wrapped around a piece of dowel. The bowl walls showed no checking or cracking which is remarkable. I cleaned off the rim top and bevelled inner edge carefully, wet sanding the rim top with a folded piece of 220 grit sandpaper. It cleaned up quite well. I also gently topped the bowl with 220 grit sandpaper on a topping board to minimize the damage on the top and outer edge of the bowl. I scrubbed the bowl down with a tooth brush and some undiluted Murphy’s Oil Soap to remove the grime and oils around the bowl and shank. I rinsed it down with warm water to remove the debris. I coloured in the fills with a Walnut stain pen then filled them in with a clear CA glue. There were nine fills around the bowl and also the rebuild of the damage on the front of the outer edge of the rim. I sanded the glue repairs to the fills with a folded piece of 220 grit sandpaper. I smooth them out so that the surface of the repairs was smooth and blended together. I touched up the repaired spots and the bevelled inner edge of the rim with a Walnut stain pen to prepare the bowl for restaining. I stained the bowl with Fiebing’s Cordovan aniline stain. I flamed it and repeated the process until I was happy with the coverage on the bowl.I wiped the bowl down with isopropyl alcohol on cotton pads to make the stain more transparent and still leave the repaired fills hidden. I worked on the finish around the rim top and bowl with micromesh sanding pads – 1500-12000 grit sanding pads to dry sand the briar. I wiped it down after each sanding pad with a damp cloth after each sanding pads. I rubbed the bowl and shank down with Before & After Restoration Balm. I worked it into the surface of the bowl sides and shank with my fingertips and a horsehair shoe brush. The product works to clean, enliven and protect the briar. I let the balm sit for ten minutes and then buffed with a cotton cloth to raise the shine. It was at that moment I remembered I had not cleaned the shank and stem. I turned to work on that now. I cleaned out the airway and mortise in the shank and the airway in the stem. I used 99% isopropyl alcohol, pipe cleaners and cotton swabs to remove the tars and oils. It was extremely dirty and once cleaned smelled and looked better.I set the bowl aside and turned my attention to the stem. It was in decent condition with very light tooth marks. I polished the stem surface with micromesh sanding pads – 1500-12000 grit pads and was able to remove the marks. I wiped it down Obsidian Oil on a cotton cloth. I finished my polishing with Before & After Pipe Stem Polish – both Fine and Extra-Fine polishes. I wiped it down with a final coat of Obsidian Oil and set aside.I am excited to finish restoration of this Lotus Made in France Bent Billiard. I put the pipe back together and buffed it with Blue Diamond on the buffing wheel. I gave the bowl and the stem multiple coats of carnauba wax. I hand buffed the pipe with a clean buffing pad to raise the shine. It is fun to see what the polished bowl looks like with beautiful mixed grain all around it. I love the look of the polished grain on the pipe with the polished black hard rubber stem. It is a very beautiful looking pipe. This smooth Lotus Bent Billiard is great looking and the pipe feels great in my hand. It is light and well balanced. Have a look at it with the photos below. The dimensions are Length: 4 ½ inches, Height: 1 ½ inches, Outside diameter of the bowl: 1 ¼ inch, Chamber diameter: ¾ of an inch. The weight of the pipe is 33 grams/1.16 ounces. It turned out to be a beautiful pipe. I will be putting it on the rebornpipes store in the French Pipemakers Section soon. If you are interested in adding it to your collection let me know. Thanks for reading this blog and my reflections on the pipe while I worked on it.

As always, I encourage your questions and comments as you read the blog. Thanks to each of you who are reading this blog. Remember we are not pipe owners; we are pipe men and women who hold our pipes in trust until they pass on into the trust of those who follow us.

I like old WDC Pipes for the many unique shapes and styles – have a look at this Wellington


Blog by Steve Laug

The next pipe on the table was one Jeff and I picked up somewhere. We picked up this interesting WDC Wellington Bent Billiard with a Nickel-Plated ferrule on the shank and Nickel Plated Windcap. We purchased it on 04/04/2018 from a seller in St. Leonard, Maryland, USA. I picked it up when I visited Jeff in July. It is one we did not clean or prepare at all. On the left side of the shank it is stamped WDC logo in an upside down triangle and underneath it in script it reads Wellington. On the underside of the ferrule it is stamped Nickel-Plated in a rectangle. The pipe was in dirty condition. The finish on the bowl and shank were coated with a thick coat of shiny varnish. There was grime and oils ground into the surface all around the bowl and shank. The rim cap and shank ferrule were oxidized and dull looking. They appeared to be in okay condition but polishing would tell the story. The stem was an amber coloured Bakelite that was stained on the ferrule end. The stem was dirty with tars and oils colouring the airway from the shank end to the button. It had deep tooth marks and chatter on both sides ahead of the button. I took photos of the pipe before I started my clean up work on it to give a clear photo of the condition of the pipe before I started my work. I took a photo of the bowl and the rim top. The bowl had a thin cake on the bowl walls and bottom. The wind cap covered rim cap and the inner edge of the bowl were clean but oxidized. They should polish up very well. The amber/orange Bakelite stem shows deep tooth marks and chatter on both sides ahead of the button as mentioned above. It had promise but it was dirty! I took a photo of the left side of the shank to try to capture the stamping on the briar. It is clear and readable as noted above. I removed the stem from the shank and took a photo of the parts to give a sense of the pipe’s proportions.I turned to Pipephil’s site (http://pipephil.eu/logos/en/logo-w1.html). I did a screen capture of the section on the site on the Wellington. I clicked on a link on the site and was directed to an advertisement on the bran from a 1915 Literary Digest Magazine. The copy makes some interesting reading on the brand.I reread a blog I wrote on a Wellington Jumbo back in 2020 to refresh myself on the brand and follow up (https://rebornpipes.com/2020/12/03/breathing-new-life-into-a-wdc-wellington-jumbo-french-briar/). It directed me to an article on Pipedia.

Pipedia’s article on WDC (William Demuth) pipes is a great read in terms of the history of the brand (https://pipedia.org/wiki/William_Demuth_Company). I have included a pair of the advertising flyers on the Wellington pipe below. The second flyer below has a photo of the Jumbo Wellington and its original sales price. Look at the price of this pipe when it was sold. Now it was time to work on the pipe. I wiped the bowl down with acetone to remove the shiny varnish coat on the briar. The finish removed reveals a beautiful piece of briar with an interesting combination of grain. Have a look. I reamed the bowl with a Savinelli Fitsall Pipe Knife to scrape off the light cake on the bowl walls. I followed that by sanding the walls of the bowl until they were smooth with 220 grit sandpaper wrapped around a piece of dowel. The bowl walls showed no checking or cracking which is remarkable. I cleaned out the airway and mortise in the shank and the airway in the stem. I used 99% isopropyl alcohol, pipe cleaners and cotton swabs to remove the tars and oils. What came out was a combination of stain and tars. It was extremely dirty and once cleaned smelled and looked better.   I worked on the nickel rim cap and ferrule and around the bowl and shank with micromesh sanding pads – 1500-12000 grit sanding pads to dry sand the briar. I wiped it down after each sanding pad with a damp cloth after each sanding pads. I rubbed the bowl and shank down with Before & After Restoration Balm. I worked it into the surface of the bowl sides and shank with my fingertips and a horsehair shoe brush. The product works to clean, enliven and protect the briar. I let the balm sit for ten minutes and then buffed with a cotton cloth to raise the shine. I set the bowl aside and turned my attention to the stem. There were deep tooth marks on both sides next to the button edge. I filled in the deep marks on the top and underside with clear CA glue. Once it cured I used a file to flatten the repairs and blend them into the surface. I also sharpened the edge of the button on both sides. I sanded the repairs smooth with a folded piece of 220 grit sandpaper to blend it into the surface. I started polishing the stem with 600 grit wet dry sandpaper. I polished the stem surface with micromesh sanding pads – 1500-12000 grit pads. I wiped it down Obsidian Oil on a cotton cloth. Many say that the Obsidian Oil does nothing on the acrylic but I have found that the product does give some bite to the sanding pads. I finished my polishing with Before & After Pipe Stem Polish – both Fine and Extra-Fine polishes. I wiped it down with a final coat of Obsidian Oil and set aside. I put the amber coloured Bakelite stem back on the WDC Wellington Bent Billiard with a Nickel Windcap and Ferrule and buffed the pipe with Blue Diamond on the buffing wheel. I polished the briar and the amber Bakelite of the stem until there was a rich shine. The grain follows the shape around the classic Bent Billiard shape. It has some amazing grain on a proportionally well carved pipe. I polished the nickel windcap and the ferrule with a jeweler’s cloth to protect it. This nice pipe sits right in the mouth and is definitely a pipe to smoke while sitting and enjoying a book or a glass of your favourite beverage. Have a look at it with the photos below. The dimensions are Length: 5 ½ inches, Height: 2 inches, Outside diameter of the bowl: 1 ¼ inch, Chamber diameter: ¾ of an inch. The weight of the pipe is 1.73 ounces/49 grams. This beauty will be going on the rebornpipes online store in the American Pipemakers Section. If you are interested in breaking this old timer in with a tobacco of your choice let me know. Thanks for walking through the restoration with me as it was a pleasure to work on.

As always, I encourage your questions and comments as you read the blog. Thanks to each of you who are reading this blog. Remember we are not pipe owners; we are pipe men and women who hold our pipes in trust until they pass on into the trust of those who follow us.

Crafting a New Orific Stem for a 1902 Loewe & Co Army Mount Meerschaum


Nicely done Charles.this may be one from a fellow I referred to you.

As one might imagine, the majority of the pipes sent in to me for repair or restoration are fairly new, at least in pipe terms, dating from the Post-…

Crafting a New Orific Stem for a 1902 Loewe & Co Army Mount Meerschaum

A Beauty Lies Under the Grime on this Republic Era Peterson’s “Dunmore” 73


Blog by Steve Laug

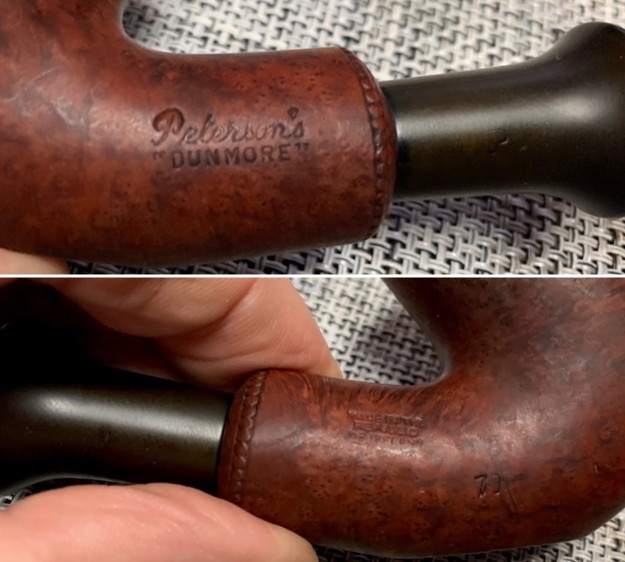
The next pipe on the table was purchased on 03/30/2022 from an estate in Plano, Texas, USA. I have always liked the look of a Dunmore pipe – shape, the carved shank end, the fit of the stem against the shank all add to the beauty. This one is smooth like many I have worked on in the line. The pipe is stamped on the left side of the shank and reads Peterson’s [over] “Dunmore”. On the right side it is stamped Made in the Republic of Ireland (3 lines) with the shape number 73 underneath. It was another pipe that was someone’s favourite. The bowl had a thick cake and lava build up in the rim top and inner edge. The finish looked good underneath all of the grime and oils that were ground into the bowl sides and heel. The beaded decoration on the shank end is in excellent condition. Like other Dunmores I have worked on, it had a flattened shank just next to the heel and the pipe functioned as a sitter. The stem fit well in the shank and seemed to be snug. The stem had light tooth marks and chatter on both sides ahead of the P-lip and on the underside edge of the button. The “P” stamp on the left side of the stem was very faint. Jeff took photos of the pipe before he started his clean up work on it. It is a pretty pipe! The next photos show the bowl and rim top as well as the stem condition. The bowl had a thick cake that is very visible. The rim top and edges have a heavy coat of tar. It is hard to know what the rim edge looked like underneath the lava. The rim top also had some darkening. The stem looked good with some tooth chatter and marks on both sides and the button. Jeff took photos of the sides and the heel of the bowl and shank to show the grain in the briar. It is quite beautiful. You can also see the grime and oil ground into the bowl sides. I can’t wait to see it once it is cleaned and polished. The stamping on the shank sides was clear and very readable. It read as noted above. Notice also the carved detail on the shank end in the photos as it is a feature of Dunmore pipes.I turned first to Pipephil’s site to remind myself of the background of the Dunmore line. Unfortunately, there was no information to be found there. I then turned to Pipedia’s article on Peterson pipes to see what I could garner from that information. It is a great read in terms of the history of the brand (https://pipedia.org/wiki/Peterson) but nothing specific to the Dunmore line of pipes.

I then turned to the book I should have consulted first, The Peterson Pipe, by Mark Irwin and Gary Malmberg. On page 298 there is an entry for Dunmore pipes. It reads as follows:

Dunmore (1971-c.1984 2006-10). Appeared first as Iwan Ries & Co. exclusive line “Dunmoor,” a Premier-grade in light-brown smooth or rustic red in all System shapes, with beading at the shank. Documented in the Associated Imports Catalog from 1973. Classic Range Dunmore shapes from ’78. A third Dunmore line (’06-10) featured standard and some B shapes, with beading around bowl instead of at shank-face, produced for European market.

On page 165 there were also photos of pages from a catalogue with the description: The unmounted Dunmore Premier debuted in both System and Classic Range shapes circa 1973 with a final appearance in the 1981 catalogue.

The information blurb on each page read: “Dunmore Briars.” Beautifully grained best quality briar in light-brown, matt or rustic finish. Often described as “Petersons Unmounted System” has all the advantages of the system range. Ten models each fitted with the Peterson Lip mouthpiece.

With that information in hand I knew what I was dealing with in terms of the stamping on the pipe. It is a Late Republic era pipe. It showed up in Peterson Catalogue in 1973. Now it was time to work on the pipe.

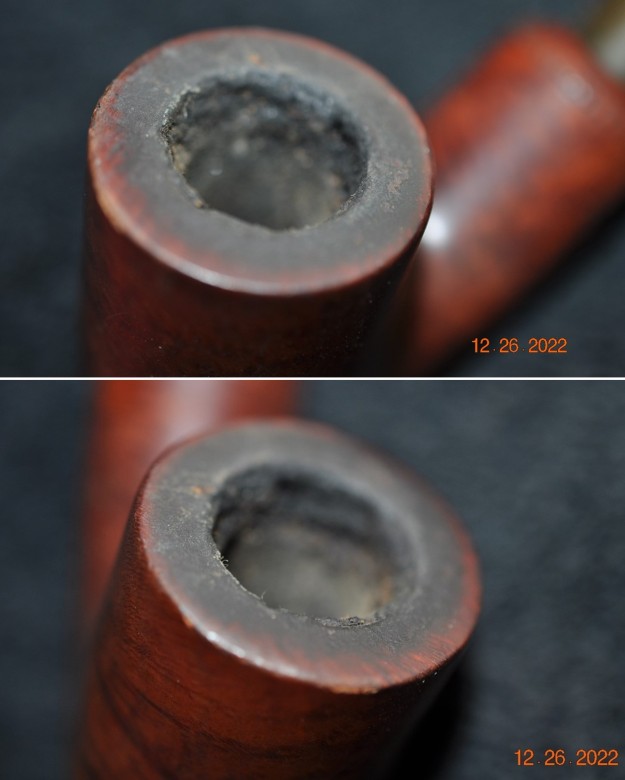
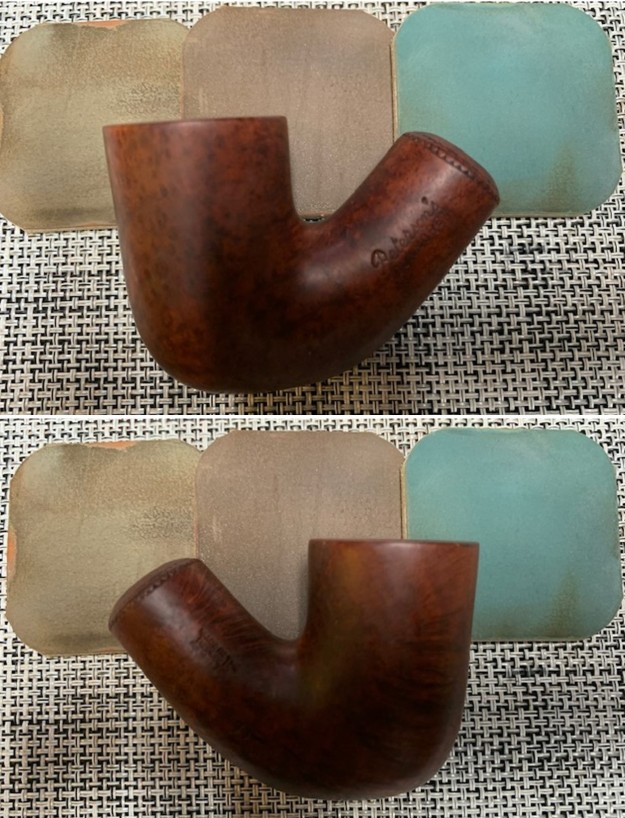
With that information at hand I turned to work on the pipe itself. Jeff had thoroughly cleaned up the pipe. He reamed the pipe with a PipNet Pipe Reamer and cleaned up the remnants with a Savinelli Fitsall Pipe Knife.  He scrubbed the bowl with undiluted Murphy’s Oil Soap with a tooth brush. He rinsed it under running warm water to remove the soap and grime. There were portions of the bowl sides where it had lightened in the clean up process. He cleaned out the inside of the shank and the airway in the stem with alcohol, cotton swabs and pipe cleaners. He scrubbed the exterior of the stem with Soft Scrub to remove as much of the oxidation and calcification as possible. He soaked the stem in Before & After Deoxidizer and rinsed it off with warm water. I took photos of the pipe once I started to work on it. I took some close up photos of the rim top and also of the stem surface. I wanted to show what an amazing job Jeff did in the cleanup of the rim top. I also wanted to show condition of the rim top and the look that flowed around the bowl from there. The outer edge of the bowl looks very good and I think the dark stain really hid any damage. I also took close up photos of the stem to show the tooth marks and chatter on the stem surface. One of the things I appreciate about Jeff’s cleanup is that he works to protect and preserve the nomenclature on the shank of the pipes that he works on. The stamping on this one looked good. I took some photos to show the clarity of the stamping. You can also see the faint P on the stem side. I have noticed that many restorers are not careful to protect the stamping in their cleaning process and often the nomenclature is almost destroyed. I would like to encourage all of us to be careful in our work to preserve this as it is a critical piece of pipe restoration! I took a photo of the pipe with the stem removed to give a sense of that parts and look. I started my work on the pipe by addressing the damage to the rim edges and top. I used a folded piece of 220 grit sandpaper to smooth out the edges and top. It looked much better once finished.I polished the briar with micromesh sanding pads – wet sanding with 1500-12000 grit pads. I wiped the bowl and shank down after each sanding pad with a damp cloth to remove the dust and debris. I rubbed the bowl and shank down with Before & After Restoration Balm. I worked it into the surface of the bowl sides and shank with my fingertips. The product works to clean, enliven and protect the briar. I let the balm sit for ten minutes and then buffed with a cotton cloth to raise the shine. I set the bowl aside and turned my attention to the stem. I “painted” the stem surface with the flame of a Bic lighter. I was able to lift them some but some deeper cut like dents were still present. I filled those that remained in with black CA glue and set it aside to cure. Once it had cured I used files to flatten the repair and start blending it into the surface and reshaping the button edge. I sanded it with 220 grit sandpaper. I started polishing the stem with 600 grit wet dry sandpaper. I touched up the “P” stamp on the left side of the saddle with white acrylic nail polish. I applied it and worked it into the stamp with a tooth pick. Once it cured I scraped off the excess. It is definitely better though the stamp is faint in some spots.I polished the repaired vulcanite stem surface with micromesh sanding pads – wet sanding with 1500-12000 grit pads. I wiped it down with a damp cloth after each sanding pad. I finished my polishing with Before & After Pipe Stem Polish – both Fine and Extra-Fine polishes. I wiped it down with a final coat of Obsidian Oil and set aside.This classic shaped Peterson’s Dunmore 73 Bent Billiard with a Peterson’s P-lip vulcanite stem looks much better now that it has been restored. The rim top and edges cleaned up very well. The rich brown stains on the bowl came alive with the polishing and waxing. I put the stem back on the bowl and buffed the pipe with Blue Diamond on the buffing wheel using a light touch on the briar. I gave the bowl and the stem multiple coats of carnauba wax on the buffing wheel and followed that by buffing the entire pipe with a clean buffing pad. I hand buffed the pipe with a microfiber cloth to deepen the shine. The finished Peterson’s Dunmore 73 is a beauty that fits nicely in the hand and looks very good. Give the finished pipe a look in the photos below. The dimensions of the pipe are Length: 6 inches, Height: 2 inches, Outside diameter of the bowl: 1 ¼ inches, Chamber diameter: ¾ of an inch. The weight of the pipe 1.87 ounces/53 grams. I will be putting it on the rebornpipes store in the Irish Pipe Makers Section soon. If you are interested in adding this pipe to your collection send me a message or an email. Thanks for reading this blog and my reflections on the pipe while I worked on it. There are many more to come!

As always, I encourage your questions and comments as you read the blog. Thanks to each of you who are reading this blog. Remember we are not pipe owners; we are pipe men and women who hold our pipes in trust until they pass on into the trust of those who follow us.

Took a Diversionary Pipe Hunt and Found this Molina 81007 Bent Billiard


Blog by Steve Laug

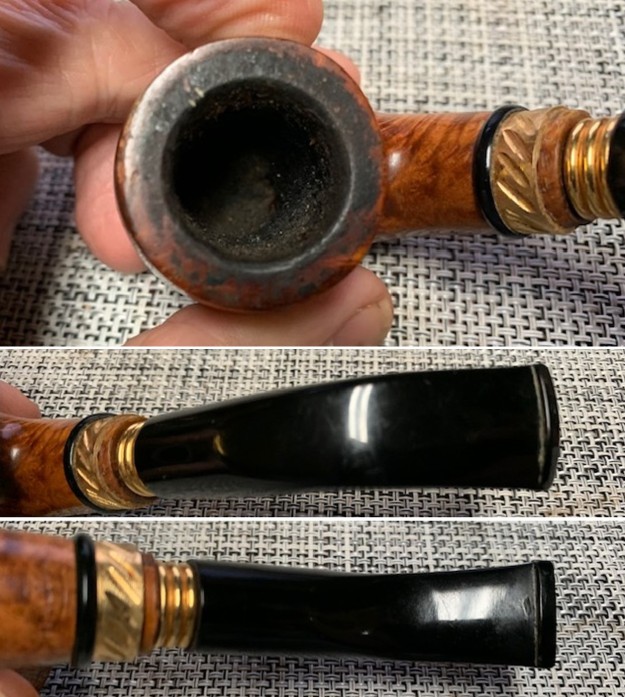
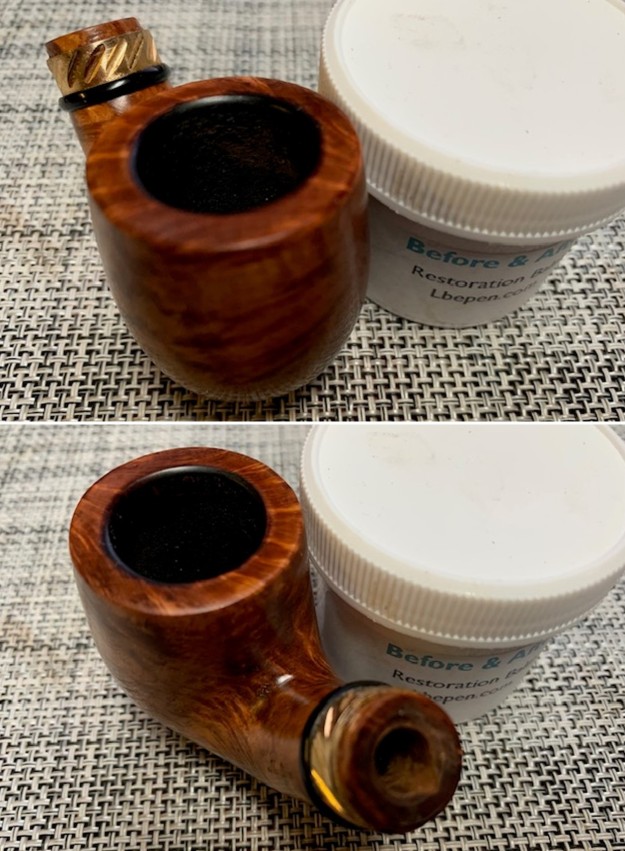
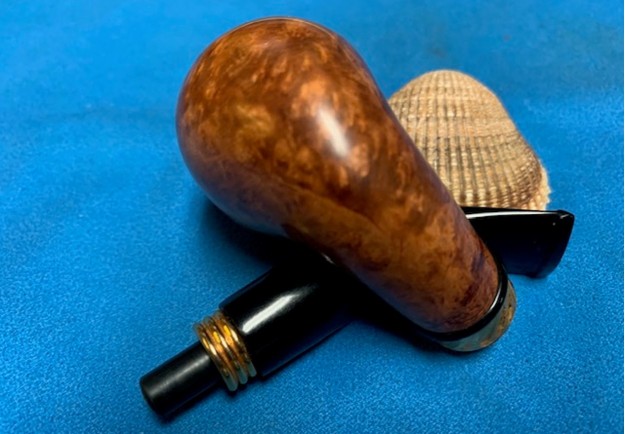
The next pipe on the table was one I found on a recent trip to Alberta. I had a couple of hours to kill so I stopped at an antique mall along the way. I found this interesting Italian made cross grained Bent Billiard and a French Made Bent Billiard. I decided to start on the Italian made pipe first. On the left side of the shank it is stamped Molina in script and on the right side it was stamped with the number 81007. On the underside next to the stem/shank junction it read Italy. The pipe was in dirty condition. The finish on the bowl and shank were coated with a thick coat of shiny varnish. There was grime and oils ground into the surface all around the bowl and shank. The rim top had a thick coat of lava that obscured the inner and outer edges of the bowl. They appeared to be in ok condition but cleaning would tell the story. The stacked bands on the shank were quite nice – there was a black acrylic ring followed by a fancy golden band with grooves cut at angles. The end of the stem also had a matching triple brass ring fitting that sat against the shank end. There was a gap between the shank band and end showing a ring of briar. The black, acrylic stem was dirty and had tooth marks and chatter on both sides ahead of the button. I took photos of the pipe before I started my clean up work on it to give a clear photo of the condition of the pipe before I started my work. I took a photo of the bowl and the rim top. The bowl had a moderate cake on the bowl walls and bottom. The rim top and the inner edge of the bowl had a thick lava overflow. It was hard to know for sure what was underneath until it was cleaned. The acrylic stem shows light tooth marks and chatter on both sides ahead of the button as mentioned above. It had promise but it was dirty!I took photos of the shank sides to try to capture the stamping on the briar. It is clear and readable as noted above. I removed the stem from the shank and took a photo of the parts to give a sense of the pipe’s proportions. I turned to Pipephil to renew my memory of the brand (http://www.pipephil.eu/logos/en/logo-m6.html). It gave a brief history of the brand and the changes of owners. I have included a screen capture of the pertinent section and the comments below.

Artisan: Giovanni Carollo, a former employee of the Rossi factory. Machine crafted mass production. Pipes mainly aimed for German and US market. I looked up the brand on Pipedia (https://pipedia.org/wiki/Molina_Pipe). There was very little included in the article. In fact it gave a very brief history and a link to the company website. I quote the article in its entirety below.

Molina pipes has it’s origins in Barasso in Lombardy. It was born from what was left of the old Rossi pipes factory, that started in the early 1900s. Molina’s inheritance from Rossi pipes does not only consist of the factory but also the machinery and methods of production. The name Molina refers to a district where you could find mills powered by water.

I followed the link to the company website (https://www.molinapipe.it/). I have cpied a section on the site about the brand and the Molina pipe. I has some helpful information on the way the company saw the creation of the pipe.

We create pipe from 19th century

Molina pipes has it’s origins in Barasso in Lombardy.it was born from what was left of the once glorious Rossi pipes, an old trade name of an ancient and unquestionable famous international pipe company in the early 1900s. Molina still lies in part on the antique Rossi factory, a peculiar but not a casual circumstance. it represents an excellent example of industrial archeology. its working environment is enriched with the modernised charm of the past.

Molina pipe

Molina still lies in part on the antique Rossi factory, a percular but not a casual circumstance. it represents an excellent example of industrial archeology. its working environment is enriched with the modernised charm of the past.

Molina’s inheritance from Rossi pipes does not only consist of the factory but also of ancient machinery and methods of production, antique ”secretes”, antique receipts and production procedures used over 100 years ago.

The name Molina has even a longer history, it is up to today used to refer to a district where you could find mills powered by a rush of water.

I turned to Google and did a search for a Molina 81007 Bent Billiard. Two of them came up on smokingpipes.com. This the link for the second of the pipes which I am including to show what the pipe looked like when it left the factory (https://www.smokingpipes.com/pipes/estate/italy/moreinfo.cfm?product_id=206723).

Both were very similar to the one that I was working on. The one I have is missing an acrylic band on the shank above the brass middle band. It is good to know that there was one missing as I wondered what would have originally been in place on the shank end. The missing band would have added a great touch to the overall look of the pipe but I do not have one to replace it with so it will go out minus that little black band. I think it actually does not look too bad without it but it always interesting to know what it would have looked like originally.

Given that information it was time to work on the pipe itself.

I started my work by reaming the bowl with a PipNet pipe reamer to remove the thick cake on the walls so I could see what they looked like. I used a Savinelli Fitsall Pipe Knife to scrape off the remaining cake on the bowl walls. I followed that by sanding the walls of the bowl until they were smooth with 220 grit sandpaper wrapped around a piece of dowel. The bowl walls showed no checking or cracking which is remarkable. I cleaned off the rim top carefully, scraping it with a pipe knife. I wet sanded the rim top with a 1500 grit micromesh sanding pad and was able to remove the build up. To break down the shiny coat I wiped the bowl down with acetone on a cotton pad. I was able to remove some of the shininess and dull the coat a bit. Further polishing with micromesh should finish the task. I cleaned out the airway and mortise in the shank and the airway in the stem. I used 99% isopropyl alcohol, pipe cleaners and cotton swabs to remove the tars and oils. It was extremely dirty and once cleaned smelled and looked better.I scrubbed the exterior of the briar with a tooth brush and undiluted Murphy’s Oil Soap to remove the build up on the surface of the briar and clean off the lava on the rim top. I scrubbed it and then carefully rinsed the bowl with warm water. I dried it with a soft cotton cloth. It certainly looked significantly better and the patina remained in the wood. I worked on the finish around the rim top and bowl with micromesh sanding pads – 1500-12000 grit sanding pads to dry sand the briar. I wiped it down after each sanding pad with a damp cloth after each sanding pads. I rubbed the bowl and shank down with Before & After Restoration Balm. I worked it into the surface of the bowl sides and shank with my fingertips and a horsehair shoe brush. The product works to clean, enliven and protect the briar. I let the balm sit for ten minutes and then buffed with a cotton cloth to raise the shine.  I set the bowl aside and turned my attention to the stem. There were only deep tooth marks on the underside of the stem next to the button edge. The ones on the topside were light. I filled in the deep mark on the underside with clear CA glue. Once it cured I sanded it smooth with a folded piece of 220 grit sandpaper to blend it into the surface. I also sanded the stem surface with 220 to remove the marks on the top of the stem as well. It looked much better. I started polishing the stem with 600 grit wet dry sandpaper. I polished the stem surface with micromesh sanding pads – 1500-12000 grit pads. I wiped it down Obsidian Oil on a cotton cloth. Many say that the Obsidian Oil does nothing on the acrylic but I have found that the product does give some bite to the sanding pads. I finished my polishing with Before & After Pipe Stem Polish – both Fine and Extra-Fine polishes. I wiped it down with a final coat of Obsidian Oil and set aside. I am excited to finish restoration of this Molina 81007 Italian Made Bent Billiard. I put the pipe back together and buffed it with Blue Diamond on the buffing wheel. I gave the bowl and the stem multiple coats of carnauba wax. I hand buffed the pipe with a clean buffing pad to raise the shine. It is fun to see what the polished bowl looks like with beautiful mixed grain all around it. I love the look of the polished grain on the pipe with the polished black vulcanite stem. Even with the missing acrylic ring it is a very beautiful looking pipe. This smooth Cross-Grained Molina 81007 Bent Billiard is great looking and the pipe feels great in my hand. It is light and well balanced. Have a look at it with the photos below. The dimensions are Length: 5 ½ inches, Height: 2 inches, Outside diameter of the bowl: 1 ¼ inch, Chamber diameter: 7/8 of an inch. The weight of the pipe is 62 grams/2.19 ounces. It turned out to be a beautiful pipe. I will be putting it on the rebornpipes store in the Italian Pipemakers Section soon. If you are interested in adding it to your collection let me know. Thanks for reading this blog and my reflections on the pipe while I worked on it.

As always, I encourage your questions and comments as you read the blog. Thanks to each of you who are reading this blog. Remember we are not pipe owners; we are pipe men and women who hold our pipes in trust until they pass on into the trust of those who follow us.

Breathing New Life into a True Beauty – An Ivarsson Product 389 Apple


Blog by Steve Laug

The next pipe on the table is the third of three pipes that came to me for restoration from a friend in the US. I finished the restoration of two of them – a 1913 GBD 347 Straight Apple (https://rebornpipes.com/2023/09/23/breathing-life-into-a-1913-mrco-gbd-london-england-347-apple/) and the Preben Holm made Ben Wade Connoisseur Collection First Edition Danish Style Canadian (https://rebornpipes.com/2023/09/24/breathing-new-life-into-a-stunning-ben-wade-danish-canadian/). All the pipes are gorgeous examples of pipe craft and all were incredibly dirty and showed various issues with their finishes. I am turning to the final one he sent, an interesting Ivarsson 389 Product Apple. In the email that he sent to me about the pipes he included this interesting tidbit of information. I thought it was interesting enough to include it here.

The Ivarsson was quite a surprise. I almost sold this one in a lot with 36 other pipes on Ebay before I got suspicious of all the emails wanting pics and a Buy it Now price. I did some research and pulled the auction when I realized my mistake. The retail price of these pipes is crazy. I believe it may been made by Sixten himself as Nanna and Lars both carve their initials next to the nomenclature (per Pipedia: Lars’ and Nanna’s pipes carries the same stamp, but can always be identified by their initial letters or names on the pipes as well (L.I. and N.I.). Not 100% on this, but a classic pipe nevertheless. You may notice that the bottom of the bowl is a little rougher than the sides. When I initially saw the pipe, the bottom was lighter than the top, indicative of moisture (I am assuming since I work with walnut, teak, rosewood furniture). I put a coat of mineral oil on the entire stummel, but that part may need to be lightly buffed to give it a smoother finish like the sides. But, of course, take care of the nomenclature (I’m sure you know that but just worth mentioning 🙂).    

I turned the pipe over in my hands and examined it carefully to get a sense of the condition of the pipe. I turned first to the stamping noted above. It reads as follows. On the underside of the shank it read An Ivarsson Product in a circle with a dot between each word. In the centre of the circle is the shape number 389. Under that number is another stamp that looks like an I with a bar next to it. The pipe was in dirty condition. The finish on the bowl and shank were worn and dirty with grime and darkening ground into the surface all around the bowl and shank. The underside of the bowl (heel) were worn and the finish gone. As noted above it appeared to be water damage. The cake in the bowl was very thick but broken and soft. The lava flowed over the rim top and inner and outer edges of the bowl. It seemed to be in fair condition under the lava but cleaning would tell the story. The grain under the filth was beautiful. The acrylic saddle stem had no logos or marks. It was dirty and had deep tooth marks and chatter on both sides ahead of the button. I took photos of the pipe before I started my clean up work on it to give a clear picture of the condition of the pipe before I started my work. I took a photo of the bowl and the rim top. The bowl had a very thick cake on the walls and bottom. There was tobacco debris in the bowl as well on the sides. I wondered what the inside of the bowl walls would look like once the cake was gone but I was a bit nervous because of the softness of the cake. The lava coat on the rim top and the inner edge of the bowl made it hard to know what it looked like underneath. The acrylic stem shows some deep tooth marks and chatter on both sides ahead of the button as mentioned above. The fit against the shank is also not smooth or clean. The pipe showed some real promise but it was dirty!I took photos of the shank sides to try to capture the stamping on the briar. I took photos of the stamping on the right top side, underside and right top side of the diamond shank. It was clear and readable. I removed the stem from the shank and took a photo to get a sense of the length of the shank and overall look of the pipe. It is a beauty!I turned to Pipedia and read through the various articles on the Ivarsson’s pipes – Sixten, Lars and Nana (https://pipedia.org/wiki/Ivarsson,_Sixten). It is a great read and well worth the time to work through the three articles. The stamping on each involves the “An Ivarsson Product” circle but all are slightly different. The stamping on this one is clearly like the one the is shown in the article on Sixten’s pipes. I copied the section on the Nomenclature of his pipes and included it below.

Sixten’s Nomenclature:

After Sixten became independent, Sixten’s pipes were always stamped with “an Ivarsson product”, written in a ring. Lars’ and Nanna’s pipes carries the same stamp, but can always be identified by their initial letters or names on the pipes as well (L.I. and N.I.). According to Lars, until about 1965, Sixten also stamped his pipes with at least 2 figures inside the ring. The first (one or two) figure(s) was referring to the price. When he started, the cheapest pipe cost 35 Danish kroner (about 5 $). This was marked with a 1-figure. From 35 dkr. the price was added by 5 kroner for each step (40-45-50-55….) and the figure was added 1 for each step. The last figure was referring to the year of production starting from 1950. So a pipe stamped 55 cost (35 + (5X5)) = 60 kroner and was made in 1955. Pipes sold to the USA were often stamped with a figure outside the ring referring to the bill on which the pipe was included. I guess Sixten could not imagine the sky high prices for his pipes later on, when he created his system of stamping. From the middle of the 60’ies, he just stamped the year, e.g. 1982.

Given that background information it was time to work on the pipe.

I started my work on the pipe by reaming the bowl with a PipNet pipe reamer to remove the thick cake on the walls so I could see what they looked like. Once again, I touched the cake with the tip of the cutting head and the cake crumbled out onto the paper. It was very soft and crumbly and the entire cake come out of the bowl with the first touch of the reamer. I followed that with a Savinelli Fitsall Pipe Knife to scrape off the bits of remaining cake on the bowl walls. There was some burn damage toward the bottom of the bowl sides. There were fissures though they were not too deep in the briar. I sanded the walls of the bowl until they were smooth with 220 grit sandpaper wrapped around a piece of dowel. The bowl walls looked much better at this point though I would need to do more sanding to remove more of the damage. I took a photo of the large mountain of carbon that came out of the bowl with the reaming. It seemed like there was a lot of carbon. I rolled a piece of 180 grit sandpaper and inserted it in the bowl and sanded the walls smooth to further remove the checking on the bowl sides. I tried to capture the bowl walls to show the damage to the inside toward the bottom right side of the bowl. I cleaned out the airway and mortise in the shank and the airway in the stem. I used 99% isopropyl alcohol, pipe cleaners and cotton swabs to remove the tars and oils. It was extremely dirty and once cleaned smelled and looked better.I scrubbed the exterior of the briar with a tooth brush and undiluted Murphy’s Oil Soap to remove the build up on the surface of the briar and clean off the lava on the rim top. I scrubbed it and then carefully rinsed the bowl with warm water. I dried it with a soft cotton cloth. It certainly looked significantly better and the patina remained in the wood. I decided to deal with the remaining buildup and darkening to the rim top and inner edge of the bowl next. I used a 1500 grit micromesh sanding pad to work over the rim top and the inner edge. I wetted the briar and then worked the pad over the surface. I was able to remove the lava on the top and inner edge. There were still some burn marks on the inner edge that I needed to deal with but it looked better.I steamed out the dents in the heel of the bowl and on each side with a steam iron and a wet cloth. I put the wet cloth on the briar and put the hot iron on the top of the cloth to steam out the dents in the briar. I was able to raise the dents in the briar significantly. There was one small one that remained on the lower left side of the bowl. The ones on the right side of the bowl all steamed out. The dents on the heel looked much better. There were two small cut marks in the briar that would not raise with steam. I used a tooth pick and a drop of clear CA glue to fill in the cuts in the briar on the heel of the bowl. Once the glue cured I used a small piece of 220 grit sandpaper (worn) to smooth out the repairs and reduce them to the size of the cut. It is shown in the second photo below. I touched up the stain on the heel of the bowl with a Cherry stain pen to match the rest of the bowl. Once the stain cured I polished it with a 1500 grit micromesh sanding pad. It looked significantly better. I worked on the finish around the rim top and bowl with micromesh sanding pads – 1500-12000 grit sanding pads to dry sand the briar. I wiped it down after each sanding pad with a damp cloth after each sanding pads. I rubbed the bowl and shank down with Before & After Restoration Balm. I have been using it for quite a few years and really appreciate the product. I worked it into the surface of the bowl sides and shank with my fingertips. The product works to clean, enliven and protect the briar. I let the balm sit for ten minutes and then buffed with a cotton cloth to raise the shine.  I set the bowl aside and turned my attention to the stem. I painted the stem surface with the flame of a Bic lighter to lift the tooth marks. I was able to lift them some but not enough for blending them in. I repaired what remained with some light spots of CA. I would have left them but the marks were large and needed to be addressed. I sanded out the repairs and blended them into the surface with 220 grit sandpaper. I started polishing the stem with 600 grit wet dry sandpaper. I polished the stem surface with micromesh sanding pads – 1500-12000 grit pads. I wiped it down Obsidian Oil on a cotton cloth. I know that it is said not to work with acrylic but I find that it adds some additional bite for the sanding pads and helps a deeper shine to develop. I finished my polishing with Before & After Pipe Stem Polish – both Fine and Extra-Fine polishes. I wiped it down with a final coat of Obsidian Oil and set aside. I set the stem aside and moved on to address to checking and damage on the bowl walls. I mixed up a batch of bowl coating – a mixture of sour cream and charcoal powder. I stirred the mix with a dental spatula to blend to two together. I inserted a pipe cleaner in the airway to keept the mix out of the shank. I folded a pipe cleaner and painted the walls of the bowl with the mixture to fill in the fissures in the bowl walls. I spread it evenly on the walls and repeated the process. I set it aside to let the coating cure. In the morning I buffed the pipe. I am excited to finish the restoration of my first Ivarsson restoration – An Ivarsson Product 389 Apple. I put the pipe back together and buffed it with Blue Diamond on the buffing wheel. I gave the bowl and the stem multiple coats of carnauba wax. I hand buffed the pipe with a clean buffing pad to raise the shine. It is fun to see what the polished bowl looks like with beautiful mixed grain all around it. I love the look of the polished grain on the pipe with the polished black acrylic stem. This smooth, beautiful Ivarsson Product 389 Apple is great looking and the pipe feels great in my hand. It is quite light for its size and well balanced. Have a look at it with the photos below. The dimensions are Length: 5 ½ inches, Height: 1 ¾ inches, Outside diameter of the bowl: 1 ½ inch, Chamber diameter: 7/8 of an inch. The weight of the pipe is 50 grams/1.76 ounces. It turned out to be a stunningly, beautiful pipe. I will be sending it back to the pipeman who sent it to me now that I have finished this last pipe. Thanks for reading this blog and my reflections on the pipe while I worked on it.

As always, I encourage your questions and comments as you read the blog. Thanks to each of you who are reading this blog. Remember we are not pipe owners; we are pipe men and women who hold our pipes in trust until they pass on into the trust of those who follow us.

Breathing New Life into a Stunning Ben Wade Danish Canadian


Blog by Steve Laug

The next pipe on the table is another that came to me for restoration from a friend in the US. He sent three pipes for me to restore for him. I finished the restoration of the first of these – a 1913 GBD 347 Straight Apple (https://rebornpipes.com/2023/09/23/breathing-life-into-a-1913-mrco-gbd-london-england-347-apple/). I am turning to the second one he sent, a beautiful Ben Wade Connoisseurs Collection First Edition Long Diamond Shank Brandy with a saddle stem. That leaves the final one that I need to work on an interesting Ivarsson 389 Product Apple. All the pipes are gorgeous examples of pipe craft and all were incredibly dirty and showed various issues with their finishes. The stamping on the pipe was as follows. On the top left side of the long diamond shank it read Ben Wade in script [over] Connoisseur Collection [over] First Edition. On the left underside it is stamped Hand Made [over] In [over] Denmark. On the right side it was stamped Reg. No. 80343. My guess is that this is a Ben Wade made by Preben Holm during the time Dunhill had him making Freehands for them. The pipe was in dirty condition. The finish on the bowl and shank were worn and dirty with grime and darkening ground into the surface all around the bowl and shank. The cake in the bowl was very thick – so much so that I could not put my little finger into the bowl. The lave flowed over the rim top and inner and outer edges of the bowl. It seemed to be in fair condition under the lava but cleaning would tell the story. The vulcanite diamond saddle stem had a crown logo on the top of the diamond. The stem was dirty and had file marks/sanding marks and tooth marks and chatter on both sides ahead of the button. I took photos of the pipe before I started my clean up work on it to give a clear picture of the condition of the pipe before I started my work. I took a photo of the bowl and the rim top. The bowl had a very thick cake on the walls and bottom. I was not able to even put my little finger in the bowl. The rim top and the inner edge of the bowl showed some nicks and a thick lava overflow. There also seemed to be some burn marks on the inner edge. It was hard to know for sure what was underneath but I would be there would be some darkening. The vulcanite stem shows some deep tooth marks and chatter on both sides ahead of the button as mentioned above. There were also some file or coarse sandpaper marks. It had promise but it was dirty!I took photos of the shank sides to try to capture the stamping on the briar. I took photos of the stamping on the right top side, underside and right top side of the diamond shank. It was clear and readable. I removed the stem from the shank and took a photo to get a sense of the length of the shank and overall look of the pipe. It is a beauty!I did a Google search on the Ben Wade Connoisseur Collection [over] First Edition and found two listings on Worthpoint (an auction site). The first included the pipe, the hand made case and the certificate of authenticity (https://www.worthpoint.com/worthopedia/ben-wade-pipe-preben-holm-connoisseur-521474453). Make sure to read the certificate as it clearly states that Preben Holm made the pipe under the auspices of Ben Wade. The First Edition was limited to 504 pipes. Theoretically a second edition etc. would follow. We know that Holm died in 1989 so it appears that there was only one edition of the pipe. That makes this a rather unique and very collectible piece.

I copied the advertisement on Worthpoint in full and included it below. The description of the pipe is quite amazing as is details on the shape, size, finish etc. I quote:

You are bidding on a special BEN WADE, ” CONNOISSEUR COLLECTION ” first limited edition series that was hand crafted by legendary pipemaker PREBEN HOM, in Denmark, in 1980. This pipe shows a darker reddish stain that nicely accentuates the well-defined birdseye and cross grain that cover the entire bowl and shank. Top of bowl is very clean and in excellent condition (please see pictures). The shank itself and the mouthpiece show a distinct diamond shape. Unique, ” Canted Danish Billiard ” shaped bowl with a 1/4 bent, diamond shaped shank. Part of a ” LIMITED EDITION ” series called ” Connoisseur Collection ” of distinctively shaped and numbered pipes. This is number 388 of a first series of only 504. There has never been a second edition of Ben Wade pipes. This is roughly the size (and capacity) of a Dunhill ODA sized pipe. Lovely grain textures, unique shape, great condition and overall quality artisanship! A very lovely piece and a very original play on an old classic! This pipe has been formerly lightly smoked and is in very good condition. A pipe cleaner passed through with ease. This pipe comes in its original presentation box, and with the original certificate. The pipe was cleaned, polished and taken care of by one of the oldest pipemakers in Montreal, now celebrating 107 years of pipe making (est. 1907)! Markings: The mouthpiece is the original (acrylic), shows the original Ben Wade “crown” and is in excellent condition (no marks …). Ben Wade CONNOISSEUR COLLECTION FIRST EDITION HAND MADE INDENMARK REG NO. 8021 ……(21st PIPE OF THE FIRST EDITION, 1980). Dimensions:  Overall height of pipe: 2″ Length: 6 3/4″ Inner Diam. = 7/8″ Outer Diam. (top of bowl) = 1 3/8″ If there are any questions about this item or any other items presently available, please feel free to ask.

The second listing on Worthpoint (https://www.worthpoint.com/worthopedia/ben-wade-connoisseur-collection-first-486770771) was a second pipe with the same stamping other than the Reg. No. I have copied it below for the further information. In this article it says that Holm died in 1975 but he died in 1989. The other error it seems to my research that Ben Wade made the pipe in honour of Preben Holm. However, it seems that pipes were actually made or designed by Holm himself. I quote:

Bari Preben Holm died 1975 this pipe was made in his Ben Wade (Dunhill) era Wade Connoisseur Collection First Edition Reg.No.80353 Hand Made in Denmark that’s it!! This pipe is amazing good old times this pipe was made for collectors and lovers for a very good Danish pipe by Ben Wade to honour Preben Holm Hand Made unique birdseye smoked made without any number- means this pipe is unique. This pipe shows a smooth finish-no scratches no tooth marks very good condition for the age!!! Nearly 45years old!!High: 4,5 cm = 1,77 inch length: 17 cm = 6,68 inch smoked pipe comes cleaned with 96% alk x-mas is coming shipping with tracking number and insurance Austria : 6 €eu : 14€ = 18 $us and worldwide : 19 € = 25$i am a private seller: no returns no exchanges.Given those facts I can be certain that the pipe was made by Preben Holm in Denmark prior to his death in 1989. From the information above using the Reg. No. 80343 stamp we are given a method of dating the pipe. The pipe is thus the 34th pipe of the first edition made in 1980. It is a limited collector series of pipes that combines a touch of freehand with a classic Danish Canadian. It was a way in which Dunhill could carve a niche for themselves in the burgeoning freehand market in the US. Now it was tie to work on the pipe.

I started my work on the pipe by reaming the bowl with a PipNet pipe reamer to remove the thick cake on the walls so I could see what they looked like. Strangely, I touched the cake with the tip of the cutting head and the cake crumbled out onto the paper. It was very soft and crumbly and I have never had an entire cake come out of the bowl with the first touch of the reamer. I used a KleenReem pipe reamer to clean up the bottom of the bowl and remove remnants of cake there. I followed that with a Savinelli Fitsall Pipe Knife to scrape off the bits of remaining cake on the bowl walls. I followed that by sanding the walls of the bowl until they were smooth with 220 grit sandpaper wrapped around a piece of dowel. The bowl walls showed no checking or cracking which is remarkable. I took a photo of the mountain of carbon that came out of the bowl with the reaming.I cleaned out the airway and mortise in the shank and the airway in the stem. I used 99% isopropyl alcohol, pipe cleaners and cotton swabs to remove the tars and oils. It was extremely dirty and once cleaned smelled and looked better.I decided to deal with the damage and darkening to the rim top and inner edge of the bowl next. I used a folded piece of 220 grit sandpaper to smooth out the nicks and damage on the edge. Once finished it looked much better. I cleaned up the damage to the rim top and thick lava coat with a piece of 220 grit sandpaper and a topping board. I lightly topped the bowl to remove the damage. I did not remove much briar at all, actually I removed the thick lava coat and smooth out the nicks and marks. That was my goal and I think it worked well. I touched up the stain on the rim top with a Walnut stain pen. It would even out as I polished and buffed it. I worked on the finish around the rim top and bowl with micromesh sanding pads – 1500-12000 grit sanding pads to dry sand the briar. I wiped it down after each sanding pad with a damp cloth after each sanding pads. I rubbed the bowl and shank down with Before & After Restoration Balm. I worked it into the surface of the bowl sides and shank with my fingertips and a horsehair shoe brush. The product works to clean, enliven and protect the briar. I let the balm sit for ten minutes and then buffed with a cotton cloth to raise the shine.    I set the bowl aside and turned my attention to the stem. I painted the stem surface with the flame of a Bic lighter to lift the tooth marks. I was able to lift them quite a bit. I repaired what remained with some light spots of CA. I would have left them but the marks were large and needed to be addressed. I sanded out the repairs and blended them into the surface with 220 grit sandpaper. I stared polishing the stem with 600 grit wet dry sandpaper. I polished the stem surface with micromesh sanding pads – 1500-12000 grit pads. I wiped it down Obsidian Oil on a cotton cloth. I finished my polishing with Before & After Pipe Stem Polish – both Fine and Extra-Fine polishes. I wiped it down with a final coat of Obsidian Oil and set aside. I am excited to finish the restoration of this 1980s Preben Holm carved Era Ben Wade Connoisseur Collection First Edition Danish Canadian. I put the pipe back together and buffed it with Blue Diamond on the buffing wheel. I gave the bowl and the stem multiple coats of carnauba wax. I hand buffed the pipe with a clean buffing pad to raise the shine. It is fun to see what the polished bowl looks like with beautiful mixed grain all around it. I love the look of the polished grain on the pipe with the polished black vulcanite stem. This smooth Ben Wade Connoisseur Collection Canadian is great looking and the pipe feels great in my hand. It is quite light for its size and well balanced. Have a look at it with the photos below. The dimensions are Length: 7 inches, Height: 2 ¼ inches, Outside diameter of the bowl: 1 ¼ inch, Chamber diameter: 7/8 of an inch. The weight of the pipe is 46 grams/1.62 ounces. It turned out to be a beautiful pipe. I will be sending it back to the pipeman who sent it to me once I finish the final remaining pipe. Thanks for reading this blog and my reflections on the pipe while I worked on it.

As always, I encourage your questions and comments as you read the blog. Thanks to each of you who are reading this blog. Remember we are not pipe owners; we are pipe men and women who hold our pipes in trust until they pass on into the trust of those who follow us.

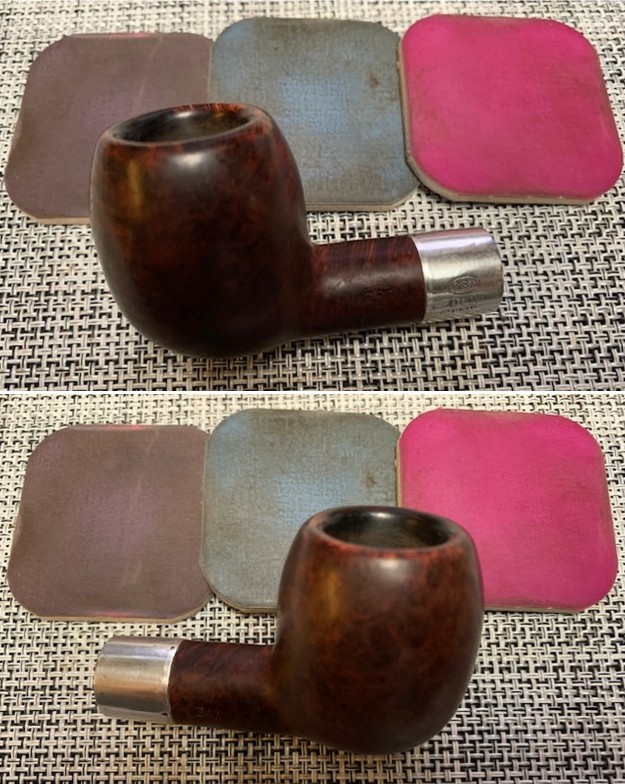
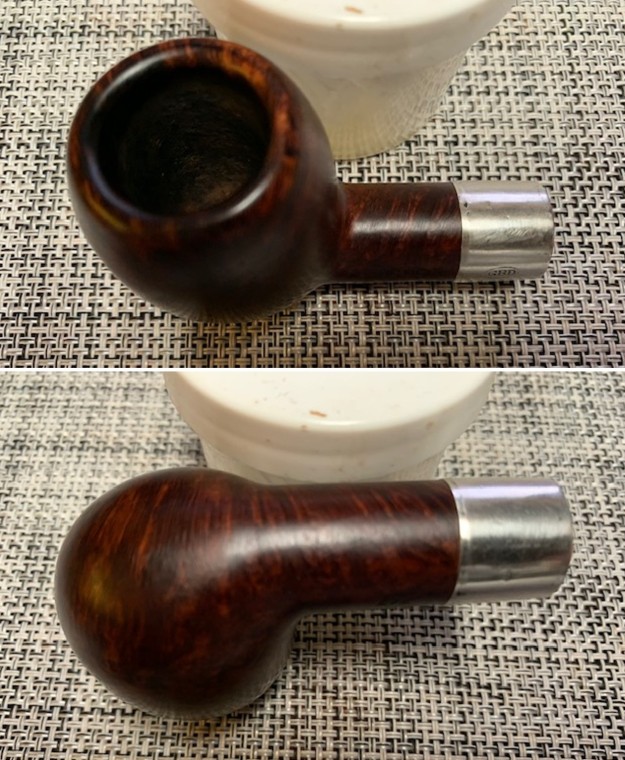
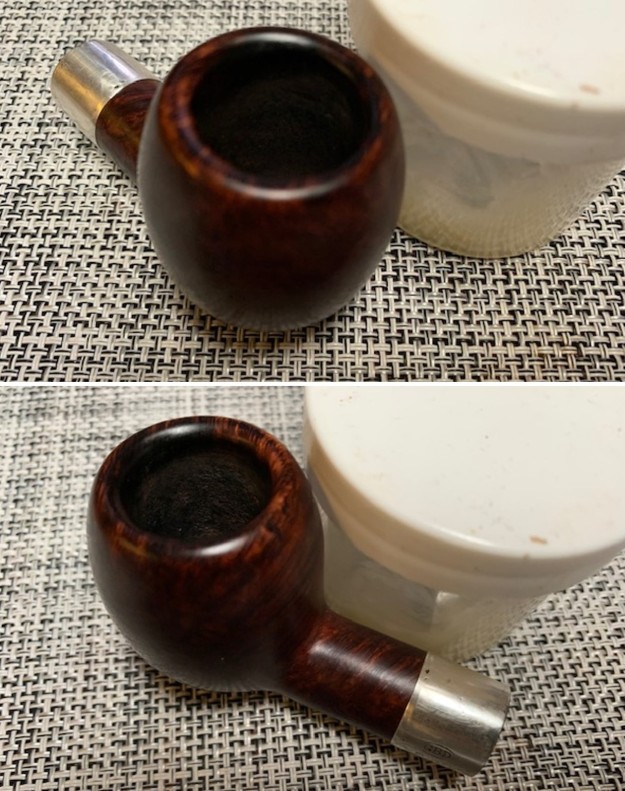
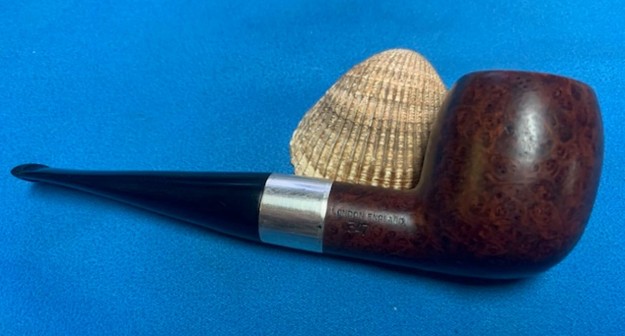
Breathing Life into a 1913 MR&Co GBD London England 347 Apple


Blog by Steve Laug

The next pipe on the table came to me for restoration from a friend in the US. He sent three pipes for me to restore for him. These included this GBD London England 347 Apple, a Ben Wade Connoisseurs Collection First Edition Long Diamond Shank Brandy with a saddle stem and an interesting Ivarsson 389 Product Apple. All are gorgeous examples of pipe craft and all were incredibly dirty and showed various issues with their finishes. I chose to work on the GBD first. The stamping on the pipe was as follows. On the left side it had a GBD in an oval stamped mid shank and on the right side it was stamped London England [over] the shape number 347. The Sterling Silver Band also had the GBD oval stamp [over] three hallmarks – the date stamp letter “S”, a Rampant Lion and a Leopard’s Head all in square cartouches with rounded corners. Underneath that it was stamped MR&Co in a rectangle with a pointed end on each side. The pipe was in dirty condition. The finish on the bowl and shank were worn and dirty with grime and darkening ground into the surface all around the bowl and shank. Under the tars the rim top and inner and outer edges of the bowl appeared to be in ok condition but cleaning would tell the story. The Sterling Silver band was tarnished and the stamping faint though readable. The vulcanite stem was dirty and had file marks and tooth marks and chatter on both sides ahead of the button. I took photos of the pipe before I started my clean up work on it to give a clear photo of the condition of the pipe before I started my work. I took a photo of the bowl and the rim top. The bowl had a moderate cake on the bowl walls and bottom. The crowned rim top and the inner edge of the bowl showed some nicks and some lava overflow. It was hard to know for sure what was underneath but I would be there would be some darkening. The vulcanite stem shows light tooth marks and chatter on both sides ahead of the button as mentioned above. There were also some file or coarse sandpaper marks. It had promise but it was dirty!I took photos of the shank sides to try to capture the stamping on the briar. It is neat to see the GBD ovals line up on the left side of the shank, band and stem. Because I expected this I can faintly see it. The stamping on the right side is not readable at all. I turned to Pipephil to renew my memory of the brand (http://www.pipephil.eu/logos/en/logo-gbd.html). It gave a brief history of the brand and the changes of owners. I was looking for the MR&Co stamp and found mention of Marechal & Ruchon Cie. The name of the French owners of the GBD lines after the original founders in 1850 sold it. I have included comments below.

Brand created in 1850 in Paris by Ganneval, Bondier and Donninger.

Marechal & Ruchon Cie first, then C.J. Verguet Frères (closed in 1970) owned GBD from 1903 to 1970 and manufactured these pipes in the St Claude (Fr) plant.

Sometime in the 1970s Cadogan company (Oppenheimer group) took over GBD. Prior to this time, the pipes were stamped “London England” in a straight line, even if they were sometimes crafted in France.

I also reread the history of the brand on Pipedia (https://pipedia.org/wiki/GBD). It gave more detail than Pipedia but nothing stunningly helpful.

I went back to Pipephil and did a quick look at some of the additional links that are present on hallmarks (http://www.pipephil.eu/logos/en/infos/hallmark-london.html). I found a great reference tool for London Hallmarks that applied to the pipe in hand. I have included a screen capture of that below.You can see from the information above that the Leopard’s head in a square was the mark for the City of London. That gave me information that the band (the pipe?) was made in London. Secondly the Rampant Lion shown in the second photo above is the same as the mark on this band which certifies the quality of the Sterling Silver in the band. That gave me the information on the two marks on the band. It was thus the London town Mark and the .925 Sterling silver mark. Now I need to look at the date stamp “S” that was on the band.

The page contained a dating chart as well as the above information. It stated that the “Twenty letters of the alphabet of different shape identify the year in which the piece was verified by the assay office.” It included a chart for the years 1896 – 2001. I did a screen capture of that below. To me the “S” stamp matches the one under 1913 in the chart below. I have drawn a red box around it for ease of reference for you.

Given those facts the Hallmarks can be interpreted. The pipe is a GBD London England Made pipe (GBD Logo and stamp on the briar and band). It has a London town mark (Leopard head without the crown), a .925 Sterling Silver certification (the Rampant Lion) and a 1913 date stamp (“S”). The MR&Co stamp identifies it as being made during the time Marechal & Ruchon Cie (1903-1970). That fit well with the 1913 date stamp. Now it was time to work on this old timer.

I started my work by reaming the bowl with a PipNet pipe reamer to remove the thick cake on the walls so I could see what they looked like. I used a Savinelli Fitsall Pipe Knife to scrape off the remaining cake on the bowl walls. I followed that by sanding the walls of the bowl until they were smooth with 220 grit sandpaper wrapped around a piece of dowel. The bowl walls showed no checking or cracking which is remarkable. I cleaned out the airway and mortise in the shank and the airway in the stem. I used 99% isopropyl alcohol, pipe cleaners and cotton swabs to remove the tars and oils. It was extremely dirty and once cleaned smelled and looked better.I scrubbed the exterior of the briar with a tooth brush and undiluted Murphy’s Oil Soap to remove the build up on the surface of the briar and clean off the lava on the rim top. I scrubbed it and then carefully rinsed the bowl with warm water. I dried it with a soft cotton cloth. It certainly looked significantly better and the patina remained in the wood. I cleaned the oxidation on the silver band with Hagerty’s Tarnish Preventive Silver Polish. I was able to remove all of it without damaging the stamping on the band. I polished it further with a jeweler’s cloth to further protect it from tarnish. I worked on the finish around the rim top and bowl with micromesh sanding pads – 1500-12000 grit sanding pads to dry sand the briar. I wiped it down after each sanding pad with a damp cloth after each sanding pads. I rubbed the bowl and shank down with Before & After Restoration Balm. I worked it into the surface of the bowl sides and shank with my fingertips and a horsehair shoe brush. The product works to clean, enliven and protect the briar. I let the balm sit for ten minutes and then buffed with a cotton cloth to raise the shine. I set the bowl aside and turned my attention to the stem. I painted the stem surface with the flame of a Bic lighter to lift the tooth marks. I was able to lift them all with little issue left. I sanded out what remained with a folded piece of 220 grit sandpaper. I started polishing the stem with 600 grit wet dry sandpaper. With a pipe of this age I was careful to not sand much as the stem is thin around the button. I did not repair the bite marks with CA as I wanted to leave it as pristine as possible. There are light marks on both sides on the side edge ahead of the button on both sides. I polished the stem surface with micromesh sanding pads – 1500-12000 grit pads. I wiped it down Obsidian Oil on a cotton cloth. I finished my polishing with Before & After Pipe Stem Polish – both Fine and Extra-Fine polishes. I wiped it down with a final coat of Obsidian Oil and set aside. I am excited to finish restoration of this 1913 GBD London England 347 Apple. I put the pipe back together and buffed it with Blue Diamond on the buffing wheel. I gave the bowl and the stem multiple coats of carnauba wax. I hand buffed the pipe with a clean buffing pad to raise the shine. It is fun to see what the polished bowl looks like with beautiful mixed grain all around it. I love the look of the polished grain on the pipe with the polished black vulcanite stem. This smooth 1913 GBD 347 Straight Apple is great looking and the pipe feels great in my hand. It is light and well balanced. Have a look at it with the photos below. The dimensions are Length: 5 ¼ inches, Height: 1 ¾ inches, Outside diameter of the bowl: 1 ¼ inch, Chamber diameter: ¾ of an inch. The weight of the pipe is 45 grams/1.59 ounces. It turned out to be a beautiful pipe. I will be sending it back to the pipeman who sent it to me once I finish the remaining two pipes. Thanks for reading this blog and my reflections on the pipe while I worked on it.

As always, I encourage your questions and comments as you read the blog. Thanks to each of you who are reading this blog. Remember we are not pipe owners; we are pipe men and women who hold our pipes in trust until they pass on into the trust of those who follow us.

A Brother to Kenneth’s “Kildare” Beauty – a Republic Era Rusticated Peterson’s Dunmore 69 Bent Billiard


Blog by Steve Laug

The next pipe on the table was purchased on 04/11/2023 our contact in Copenhagen, Denmark. I have always liked the look of a Dunmore pipe – shape the carved shank end, the fit of the stem against the shank all add to the beauty. This one is rusticated which I have not see before – at least in my old memory it seems new! The pipe is stamped on the underside of the shank and reads 69 (shape number) [over] Made in the Republic of Ireland. Next to that it is stamped Peterson’s [over] “Dunmore”. It was another pipe that was someone’s favourite. The bowl had a thick cake and lava build up in the rustication on the rim top. The finish looked good underneath all of the grime and oils that were ground into the bowl sides and heel. The beaded decoration on the shank end is in excellent condition. Like other Dunmores I have worked on, it had a flattened shank just next to the heel and the pipe functioned as a sitter. The stem did not seat correctly in the shank leaving a gap between the shank end and saddle. The stem had light tooth marks and chatter on both sides ahead of the P-lip and on the underside edge of the button. There was a bite through on the underside that was a bit of a pin hole. The “P” stamp on the left side of the stem was clear and just needed to be touched up otherwise it looked good. Jeff took photos of the pipe before he started his clean up work on it. It is a pretty pipe! The next photos show the bowl and rim top as well as the stem condition. The bowl had a thick cake that is very visible. The rim top and edges have a heavy coat of tar. It is hard to know what the rim edge looked like underneath the lava. The rim top also had some darkening. Notice also the carved detail on the shank end in the photos as it is a feature of Dunmore pipes. The stem looked good with some tooth chatter and marks on both sides and the button. You can also see the bite through on the underside of the stem. Jeff took photos of the sides and the heel of the bowl and shank to show rustication patterns in the briar. It is unique and quite beautiful. You can also see the grime and flecks of paint in the rustication on the bowl sides. I can’t wait to see it once it is cleaned and polished. The stamping on the shank sides was clear and very readable. It read as noted above. I turned first to Pipephil’s site to remind myself of the background of the Dunmore line. Unfortunately, there was no information to be found there. I then turned to Pipedia’s article on Peterson pipes to see what I could garner from that information. It is a great read in terms of the history of the brand (https://pipedia.org/wiki/Peterson) but nothing specific to the Dunmore line of pipes.

I then turned to the book I should have consulted first, The Peterson Pipe, by Mark Irwin and Gary Malmberg. On page 298 there is an entry for Dunmore pipes. It reads as follows:

Dunmore (1971-c.1984 2006-10). Appeared first as Iwan Ries & Co. exclusive line “Dunmoor,” a Premier-grade in light-brown smooth or rustic red in all System shapes, with beading at the shank. Documented in the Associated Imports Catalog from 1973. Classic Range Dunmore shapes from ’78. A third Dunmore line (’06-10) featured standard and some B shapes, with beading around bowl instead of at shank-face, produced for European market.

On page 165 there were also photos of pages from a catalogue with the description: The unmounted Dunmore Premier debuted in both System and Classic Range shapes circa 1973 with a final appearance in the 1981 catalogue.

The information blurb on each page read: “Dunmore Briars.” Beautifully grained best quality briar in light-brown, matt or rustic finish. Often described as “Petersons Unmounted System” has all the advantages of the system range. Ten models each fitted with the Peterson Lip mouthpiece.

With that information in hand I knew what I was dealing with in terms of the stamping on the pipe. It is a Late Republic era pipe. It showed up in Peterson Catalogue in 1973. Now it was time to work on the pipe.

With that information at hand I turned to work on the pipe itself. Jeff had thoroughly cleaned up the pipe. He reamed the pipe with a PipNet Pipe Reamer and cleaned up the remnants with a Savinelli Fitsall Pipe Knife.  He scrubbed the bowl with undiluted Murphy’s Oil Soap with a tooth brush. He rinsed it under running warm water to remove the soap and grime. There were portions of the bowl sides where it had lightened in the clean up process. He cleaned out the inside of the shank and the airway in the stem with alcohol, cotton swabs and pipe cleaners. He scrubbed the exterior of the stem with Soft Scrub to remove as much of the oxidation and calcification as possible. He soaked the stem in Before & After Deoxidizer and rinsed it off with warm water. I took photos of the pipe once I started to work on it. I took some close up photos of the rim top and also of the stem surface. I wanted to show what an amazing job Jeff did in the cleanup of the rim top. I also wanted to show condition of the rustication on the rim top and the rugged look that flowed around the bowl from there. The outer edge of the bowl looks very good and I think the dark stain really hid any damage. I also took close up photos of the stem to show the lack of tooth marks on the stem surface. You can also see the bite through on the underside of the stem. The stem still not fit properly in the shank.One of the things I appreciate about Jeff’s cleanup is that he works to protect and preserve the nomenclature on the shank of the pipes that he works on. The stamping on this one was faint to start with so I was worried that it would disappear altogether with the cleanup. He was not only able to preserve it but it is clearer than shown in the earlier photos. I took some photos to show the clarity of the stamping. I have noticed that many restorers are not careful to protect the stamping in their cleaning process and often by the end of the restoration the nomenclature is almost destroyed. I would like to encourage all of us to be careful in our work to preserve this as it is a critical piece of pipe restoration! I took a photo of the pipe with the stem removed to give a sense of that parts and look.I started my work on the pipe by addressing the fit of the tenon in the shank. I sanded down the tenon and also used a rolled piece of 220 grit sandpaper to smooth out the mortise walls. I was able to take it down enough to get a proper fit in the shank. I took photos of the new fit of the stem and it looks much better. I touched up the stain around the bowl and shank with a Walnut stain pen to match the colour around the rest of the bowl. It looked much better when finished.I rubbed the bowl and shank down with Before & After Restoration Balm. I worked it into the surface of the bowl sides and shank with my fingertips and a horsehair shoe brush. The product works to clean, enliven and protect the briar. I let the balm sit for ten minutes and then buffed with a cotton cloth to raise the shine. I set the bowl aside and turned my attention to the stem. I decided to address the bite through in the underside of the stem. I greased a pipe cleaner with Vaseline and inserted it in the stem below the tooth mark. I filled it in with black CA glue and sprayed it with some accelerator to harden it. I used files to flatten the repair and start blending it into the surface. I sanded it with 220 grit sandpaper. I started polishing the stem with 600 grit wet dry sandpaper. I touched up the stamp on the left side of the saddle with white acrylic nail polish. I applied it and worked it into the stamp with a tooth pick. Once it cured I scraped off the excess. It is definitely better though the stamp is faint in some spots. I polished the tooth marks and chatter out of the vulcanite stem surface with micromesh sanding pads – 1500-12000 grit pads. I wiped it down with a damp cloth after each sanding pad. I finished my polishing with Before & After Pipe Stem Polish – both Fine and Extra-Fine polishes. I wiped it down with a final coat of Obsidian Oil and set aside.This classic shaped, rusticated Peterson’s Dunmore 69 Bent Billiard with a Peterson’s P-lip vulcanite stem looks much better now that it has been restored. The rim top and edges cleaned up very well. The rich brown stains on the bowl came alive with the polishing and waxing. I put the stem back on the bowl and buffed the pipe with Blue Diamond on the buffing wheel using a light touch on the briar. I gave the bowl multiple coats of Conservator’s Wax and the stem multiple coats of carnauba wax on the buffing wheel and followed that by buffing the entire pipe with a clean buffing pad. I hand buffed the pipe with a microfiber cloth to deepen the shine. The finished Peterson’s Dunmore 69 is a tactile beauty that fits nicely in the hand and looks very good. Give the finished pipe a look in the photos below. The dimensions of the pipe are Length: 5 ½ inches, Height: 1 ¾ inches, Outside diameter of the bowl: 1 ½ inches, Chamber diameter: 7/8 of an inch. The weight of the pipe 1.55 ounces/44 grams. I will be putting it on the rebornpipes store in the Irish Pipe Makers Section soon. If you are interested in adding this pipe to your collection send me a message or an email. Thanks for reading this blog and my reflections on the pipe while I worked on it. There are many more to come!

As always, I encourage your questions and comments as you read the blog. Thanks to each of you who are reading this blog. Remember we are not pipe owners; we are pipe men and women who hold our pipes in trust until they pass on into the trust of those who follow us.