Blog by Robert M. Boughton
Copyright © Reborn Pipes and the Author except as cited
For
Ed Anderson (August 10, 1945-March 28, 2017)
and
Ed James (July 11, 1950-June 4, 2017)
Chasers of the grain whatever pipes they smoked
6 For I am now ready to be offered, and the time of my departure is at hand. 7I have fought a good fight, I have finished my course, I have kept the faith.
— The Bible, KJV, 2 Timothy 4:6-7
Old artists never die. They just find a new genre.
– RMB
CHASING THE GRAIN
The term chasing the grain has been used to describe activities including farming, micro-brewing, woodworking in general such as furniture and, of course, the noble pursuit of transforming blocks of wood into vibrant, striking tobacco pipes. After extensive searching, I have found varied references to that phrase as well as “the chase” and still others, and each seems to reflect the same basic idea – with twists as various as the personalities of those who create, study, sell and savor tobacco pipes of all kinds, not just freehands.
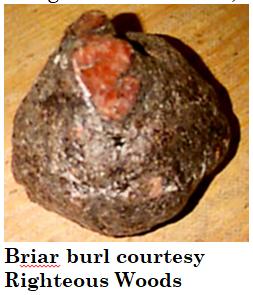 In its most basic sense, for a pipe maker to chase grain is to choose the block and carve it, following wherever the wood leads to achieve the desired result. The concept, therefore, commences with the skill of the carver to find the best available wood block and not to dismiss out-of-hand any natural and useful quality that may be uncovered later. The turn of the chase in the direction, closeness and evenness of the grain in the burl, or the tuberous growth harvested from beneath the soil and between the shrub and the roots, is paramount. To interpret the flow of the burl’s grain could be called secondary only to the highest management of whatever other advantages lie within the block and its ultimate embodiment. Other than those factors, as if they were not enough, the individual and competitive chases are “won,” or better yet advanced as an artform, by a combination of imagination and intuition: having the right stuff to take even the “heart” of a burl, with no grain at all, and make something of beauty from it.
Most shocking of all to old-schoolers, when the practice gained speed in the 1960s into the following decade and began its steady march from the capitol of Denmark across the globe, were the rough, hardened bark left intact, and the “crazy designs” to achieve the result that is incongruous in the most glorious, exalted sense of the word. Maybe as a Codger I would have reacted with the same trepidation, but I was a toddler at the time and have grown to adulthood with far stranger spectacles – Flower Children and their VW Peace Vans, Hasbro’s Twister, the Slinky (which in fact was introduced in 1945), and certain soiled clothing saved by a female White House intern, for example.
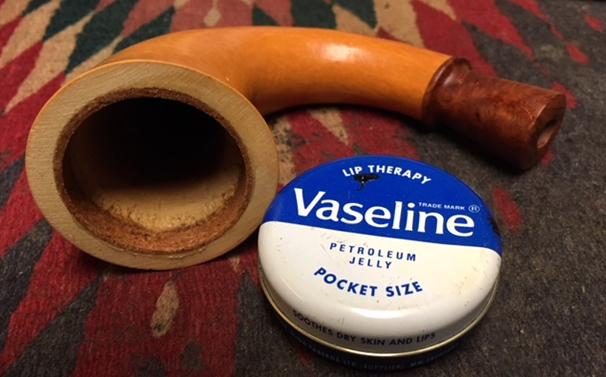
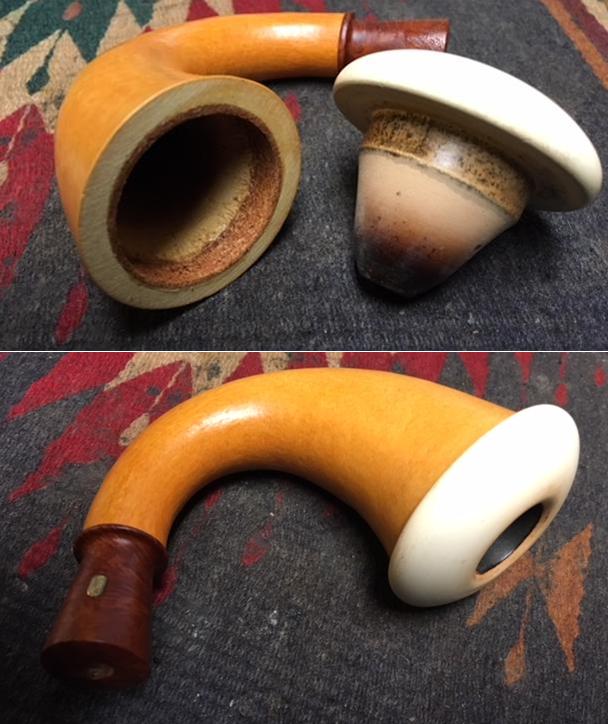
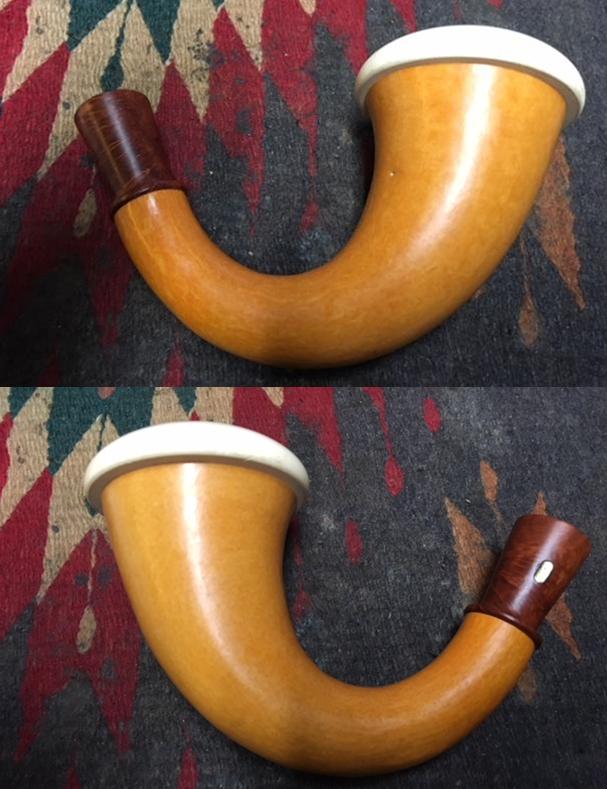
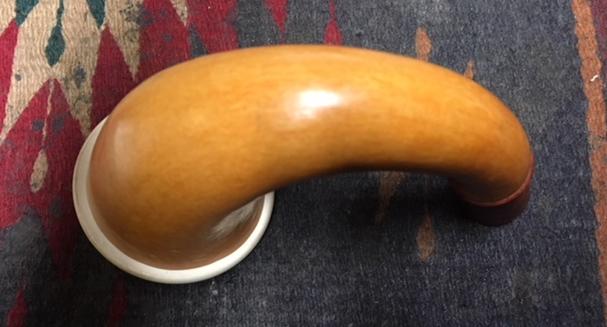
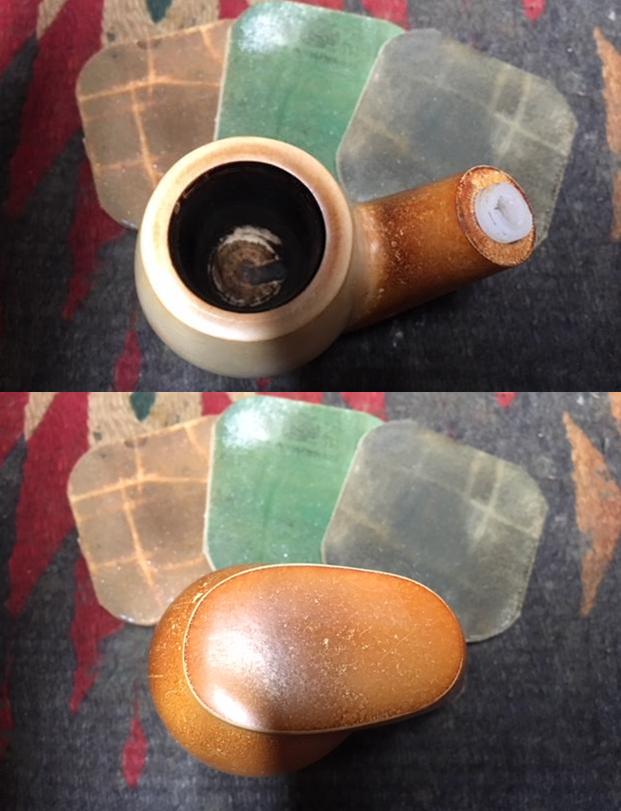
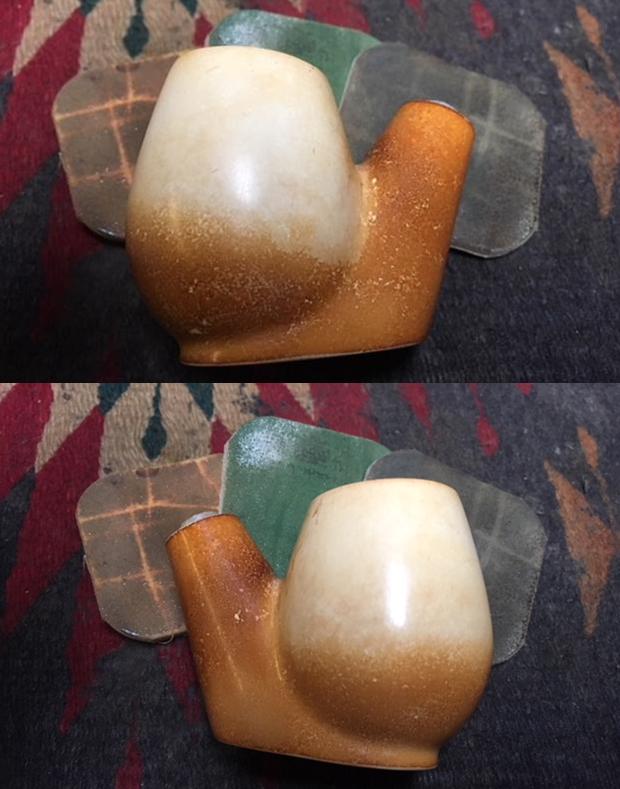
Alternative woods such as the golden walnut used for the pipe the restoration of which will be shown in the second part of this tribute come from trees. The idea that briar is from the same source, or even bushes, is incorrect and ought to be banished.
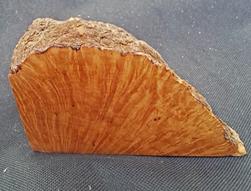
 Plateaux and ebauchon blocks courtesy The Wood Database
Plateaux (fine grain, and with the bark left on the burl) and ebauchon blocks (often birds-eye or no grain, and without the bark) are harvested from the briar shrub, a small, woody plant with one to several branches sticking out of the ground and notable on sight for the little white and blue flowers. Most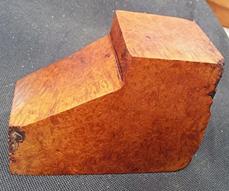 carvers prefer the plateaux blocks to the ebauchon due to the bark that is almost a trademark of the Danish freehand, the striking straight grain and increased density. But a real chaser of the grain, again, can take almost any block and produce a masterpiece from it by following its trail: with or without bark and having straight, flame, cross, bird’s-eye, mixed and/or no grain.
Many words are used to describe this amazing plant. I reached the designation shrub – based on the obvious properties of treeless branches, a burl that, by definition, is buried, and roots – from the minority of sources, available pictures and my own ability to think. The botanical name for the briar shrub is Erica arborea, of the Heath family, which grows to a general maximum height (again debated but taking the middle ground) between eight and 12 feet. The plant must be at least 40 years old before it is viable to sell because of its size corresponding to age. An older, bigger burl being necessary to make a larger pipe, but also able to be cut in halves or still smaller fractions for multiple lesser sizes, sets the standard. Burls as old as a century, uncommon within my lifetime of 55 years, are now all but impossible to find; within the lives of my parents and grandparents, briar burls dating back two and a half centuries were still around, though already scarce.
Now, a few words regarding the standard for age and size of briar burl harvesting. The only block I have bought with the intent to try fashioning a pipe was the most gorgeous hunk of rich, brown walnut with the tightest, straightest grain I’ve ever seen in that type of wood. And by hunk, I mean it was an easy 12″ x 12″ x 4″. To give an idea of what that means, the perfect specimen of walnut I bought at a local exotic wood shop for around $8 was about four times larger than a briar block for a bent pipe that the great American carver Mark Tinsky offers. That’s the block for more experienced pipe makers, by the way, not the beginner’s pipe making kit. After an unfortunate series of misadventures, I no longer have the walnut block or the photo of it I snapped as a sort of proof of life, but there are witnesses including two pipe maker friends who dissuaded me from making a first attempt with the beautiful piece, the hardness of which they agreed would create difficulties better avoided. One of them did offer to buy it from me, but I was still determined to go for it. In that respect, the loss of the walnut block was good luck, as it made the decision for me.
Some notes about briar as opposed to other woods used in pipe making, including golden walnut. Many reasons briar is the ideal wood for pipes include but are not limited to the following.
- Perfect density. On the Janka Rating System, the industry standard, briar’s density is 2,090 lbs./ft. – although very dense, not too hard and not too soft, but just right. The more detailed descriptions I found to describe how the scale works – one being that it “measures the force required to drive a .444-inch steel ball into the wood until half the diameter of the ball is embedded in the wood,” from 0-4000 lbs./ft. – may be second tongue to engineers and construction contractors and the like. But for most of us, these brief technical explanations are complex and, worse, incomplete, as if the little details such as how the force is delivered and determined go without saying. It’s like trying to follow the lecture of a college algebra professor who speaks impeccable Pidgin English with an unintelligible accent. And so, I searched Google for the latest Janka Scale for Idiots, a level in this esoteric field of knowledge to which I have no timidity owning. I found a site (below in Sources) that in its turn oversimplifies the process as dropping a small metal ball onto a piece of wood until the wood dents. But for me, counting as givens the weight and velocity of the ball, which is more accurately shot with something akin to a nail gun rather than dropped by a klutz, works.
- High threshold for igniting. Remember, briar is wood, even though it doesn’t come from a tree, and wood has two primary attributes, being good for making things and burning. So-called common sense would, therefore, make the mere idea of crafting any kind of wood into an implement with a hollow bowl at one end to fill with deliberately combustible leaves, and then a connecting piece to place in the mouth and light, laughable. Of course, this is not as preposterous a proposition as, say, doing the same with “the elongated woody core in which the grains of an ear of corn are embedded” (see corncob, dictionary.com). On the latter subject, have you ever seen a homemade corncob, or a cheap Chinese pipe made of some mystery, balsa-light, maybe ersatz and toxic wood burst into flames while someone is smoking it? I have. It’s not a pretty sight. But returning to the point and keeping in mind that paper is perhaps the best comparison for the temperature at which it ignites, at 233° Celsius, or Fahrenheit 451, another reason briar is preferred for pipes is its amazing heat resistance (withstanding more than 700° C, or 1,292° F, in tests after the full processing of burls into blocks).
- Relative porousness. Despite its high density and threshold for bursting into flame, briar has a certain contradictory porousness, giving this unique wood an ability to breathe and expand that makes it more viable for tobacco pipes than any alternative wood.
- Lack of toxicity. Last, but not least, while every wood has dreadful toxic consequences if the dust is inhaled, briar by itself is without doubt safe when a pipe made from it is placed in the mouth and heated. Walnut is also safe in this regard. That is as far as I dare go at this point on that subject, for well-founded fear of kindling a debate that might just turn into a conflagration.
ON PIPES AND PERSONIFICATION
“Okay, this is a good time to talk about limits,” Janeane Garafolo as Dr. Abby Barnes tells her radio audience in the 1996 romantic comedy The Truth About Cats & Dogs. “You can love your pets. Just don’t love your pets.” While the implication is a little more disturbing in the movie, so close are we humans to our pipes that we sometimes personify them. While coming to love our pipes and even think of them as dear friends, perhaps naming and referring to them as he or she is a touch – well, touched. Then again, if it works, don’t fix it.
In Pipes & Tobacco Magazine [Fall 2002], the authority R.D. Field goes so far, in an essay titled “Curing: Another in a series of infrequent articles on the briar pipe,” as to write how “the shrub needs to sort of undergo torture, to struggle.” In a jovial, downhome tone, he describes the process in horrific detail, starting with the shrub’s early life as if profiling an un-sub. Really, it’s like TV’s “Criminal Minds,” or The Police song about a serial killer, “Murder by Numbers,” with a line I’ll never forget, “First you make a stone of your heart.” To become what it is, the plant needs a horrible living environment, bad soil and a hot, very arid climate, to stunt its growth so that it doesn’t mature fast and becomes hardened inside. Then the burl must be tracked down and captured uninjured, intact, in its violent removal from the soil using pick-axes and shovels and whatnot, with the final parting of its roots made with a chainsaw, so that it can be taken alive straight to the sawmill. From there on, it is kept wet (read water-boarded) on a constant basis until the “processing,” or rehabilitation, begins. Here is a direct extended quote from Field’s detailed description of the entire lurid process in his style that is a cross between Hemingway and King, from a man who clearly knows his subject.
“Now at this point the wood is still alive, and the sawmill folks have to kill it, but nicely, so it can be made into pipe bowls. So they put the burls into trenches, cover ’em with empty gunny sacks, and let ’em sit until they die – about three months’ time. Man, you ought to smell the aroma of that wood in the trenches; there’s a real tang in the air, a good clean tang that makes you feel good to be alive and to be in the countryside. Anyway, the wood takes a time to die. And if you take away some sacking to look at the burls you’ll see bright green shoots growing out of the wood. That wood is a fighter; it doesn’t give up but tries to find new earth to bury itself in. After the wood is dead is the time for cutting.”
Ya think? I, for one, thank God for that last tidbit in the passage! Wow. But wait! There’s more! After the 90-day holding period is up, the burls, dead but still wet and, of course, were they in fact persons, grateful for the release from their earthly bonds, are taken to the cutters. Everyone should read Field’s full, concise account of the old salts described so well in his article, if only for its Victorian/Goth side. These singular, peculiar and frankly scary men begin their work with back country surgical first cuts into each burl, calculated by on-the-job knowledge, to split the plant and reveal an inner cavity which is, in an à propos way, referred to in certain circles as its heart. There is even a reddish fluid present. This key area, however, is by proper convention referred to as the center, perhaps representative of the suppressed sensibilities of those concerned, where the wood is redder and without grain at all. From there, the burl is cut into various numbers of blocks and sizes that are segregated into plateaux and ebauchon, again by size. Not to beat a dead burl, but the plateaux blocks, with their much better grain, tend to be preferred, whether for “traditional” or Danish freehand pipes.
The blocks are then boiled, even if in water rather than oil, as in the bygone days of the Inquisition, to remove most of the sap and all other impurities such as bacteria, and to hydrate the wood. This is the step that heightens briar’s heat resistance. Then they are re-graded based on the inspections of experts who pass judgment according to outward appearances that lead them to render their professional guesses, in effect, of what is inside. The experts search for tell-tale signs – perhaps blips in the grain like spikes or dips on an electrocardiogram monitor? – of small inner pockets with stones and dirt and other illicit substances that later create pits. Before shipping to re-sellers, the blocks are dried by air for as long as a year or by faster means, such as a kiln, depending on demand. This is the best laid plan men have today, but it can still go askew. [My thanks and apologies to Robert Burns.]
There is so much more but so little space, and nothing in my stomach after so much exposure to the facts of the matter. The unusual number of Sources at the end provides at least fuller details. But it seems to me that the two friends in my local pipe club, whom I mentioned earlier regarding the one walnut block I bought, agree upon the simplest way to spot a good block of any suitable wood, although they both push briar as the best and easiest for beginners. The friends and well-known pipe makers, Victor Rimkus and Don Gilmore (who makes his pipes under the name Don Warren, or DW), advise wiping the dust and dirt from a block with a wet cloth or paper towel to see the quality of grain, which would seem to require some experience to obtain the skill to spot signs of inner pits. Free advice doesn’t get much easier than that, and coming from successful artisans, it ought to be a suggestion worth heeding – and one the original chasers of the grain must have used, carried on today by their followers in different countries, of particular note Denmark, Italy, Russia and its former satellites, and the U.S., to name too few.
P-P-P-P.A.D. TO THE BONE
Thus might George Thorogood have sung one of his greatest songs had he been into tobacco pipes, I imagine. I pined for a freehand since the first time I walked into my local tobacconist, still new enough not to have seen one, and scoped out the glass display cases. Selling is the bottom line in capitalism, but the wonderful owner, Jennifer, is one of those rare souls who never lets her considerable business drive prevent customer service from coming first. She’s the kind of entrepreneur who is always happy, in the most genuine way, to unlock a case and place any pipe someone might want to examine on an ornate felt-cushioned stand, to be picked up by the potential buyer without the inherent possibility of fumbling in a hand-off.
And Jennifer, although she doesn’t smoke pipes, is an expert on the signs of P.A.D., thereby knowing that once the seed is planted, in time it may grow into a mature briar burl. That is how it started for me, and although I ogled a few Nordings and Karl Eriks and others that day, all were beyond my means. Not long later, at the height of my disorder, when the roots had encircled me, I was the little shop’s best pipe customer, spending hundreds of dollars there each month not counting the acquisitions I made at antique stores, garage sales and online.
Then one fine day, from the last person I would have imagined, came my chance to own a real Danish freehand – for free! You see, we had not exactly gotten on well before then. You could say he is the definition of a codger. But in the years since, our friendship has bloomed like an old briar shrub.
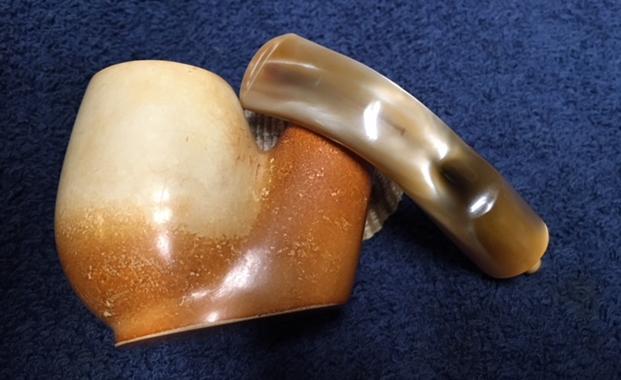
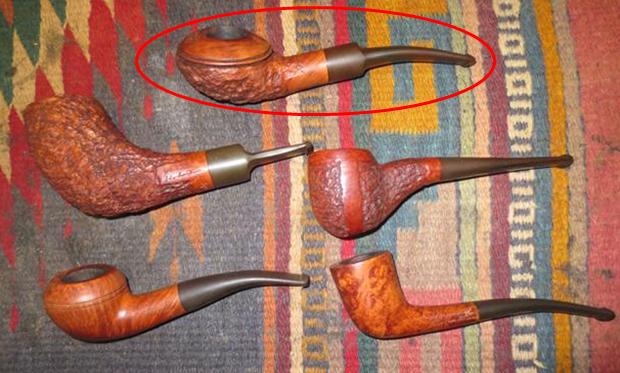
 In the years since, I’ve acquired eight more, although one, however dear to me, is of dubious origin. Here they are, and I expect the one will be obvious.

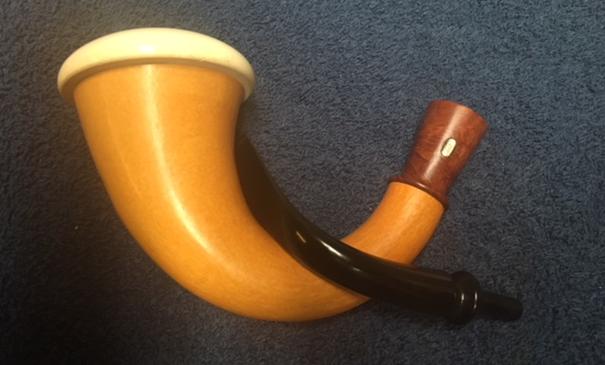
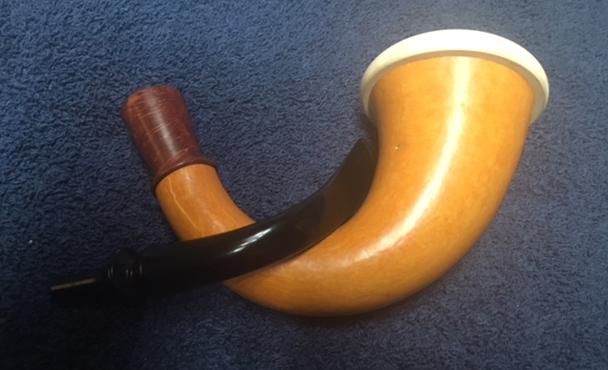
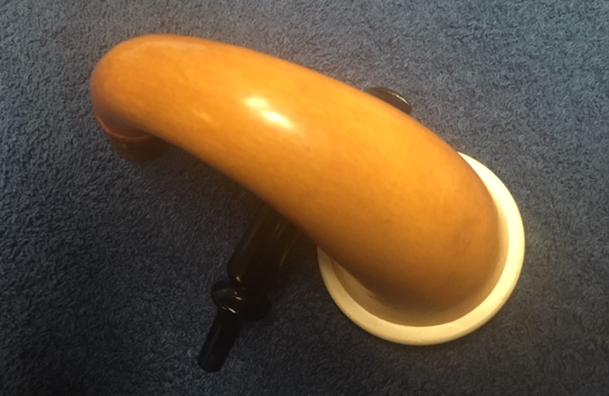
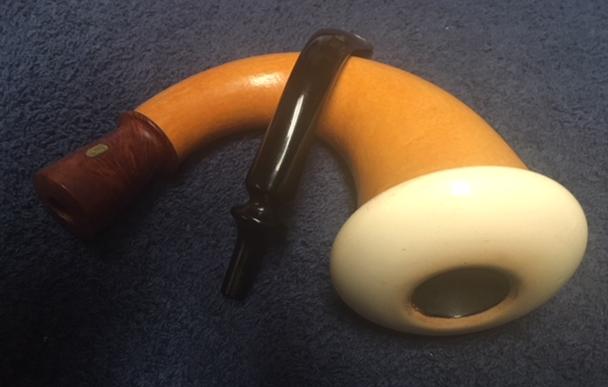
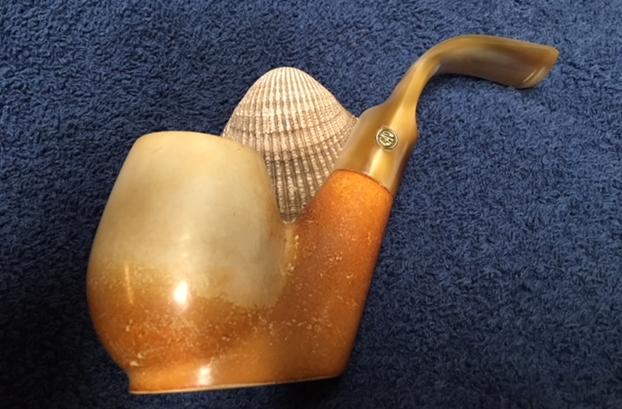
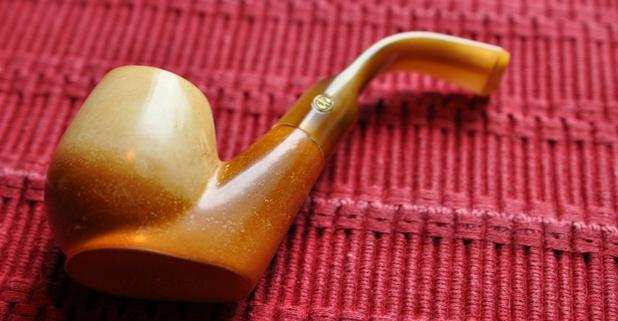
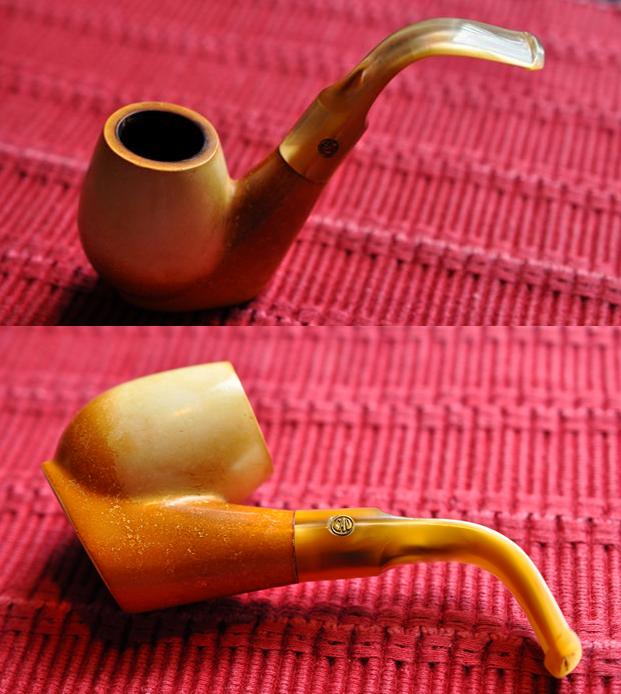
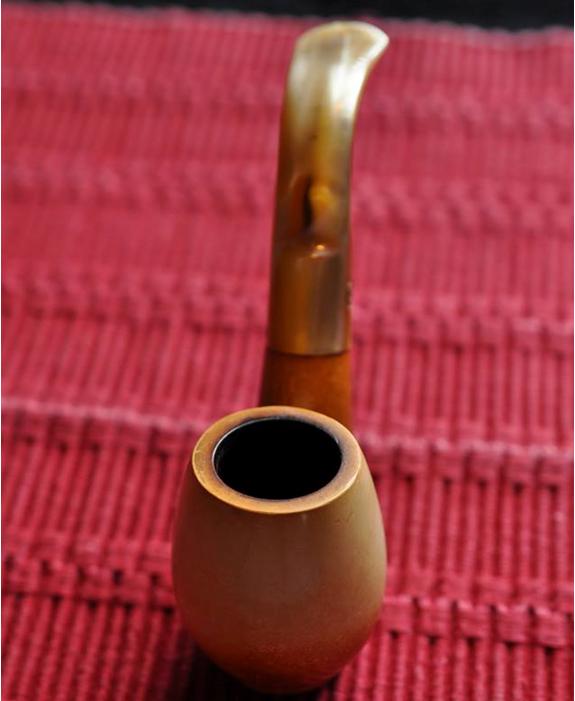
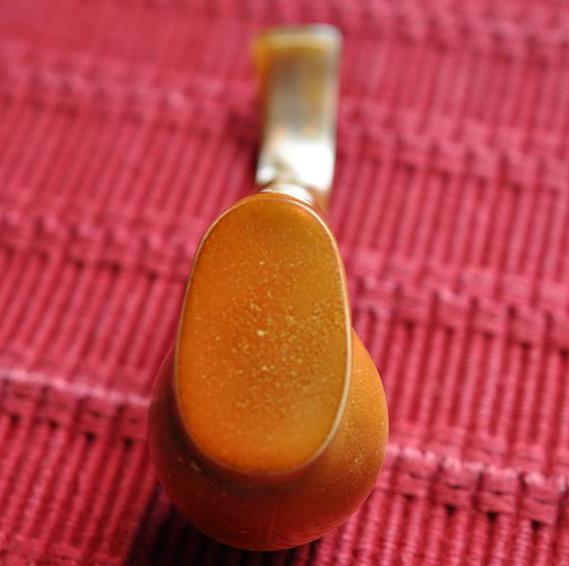
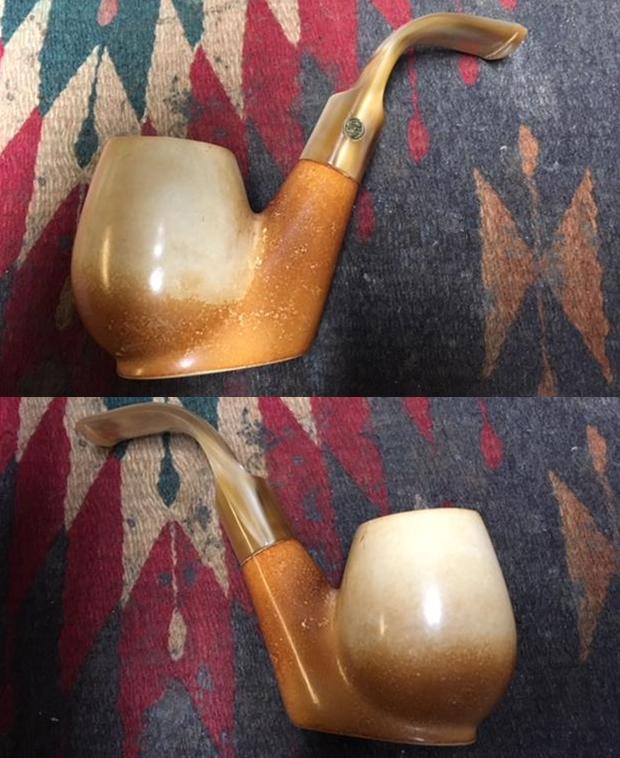
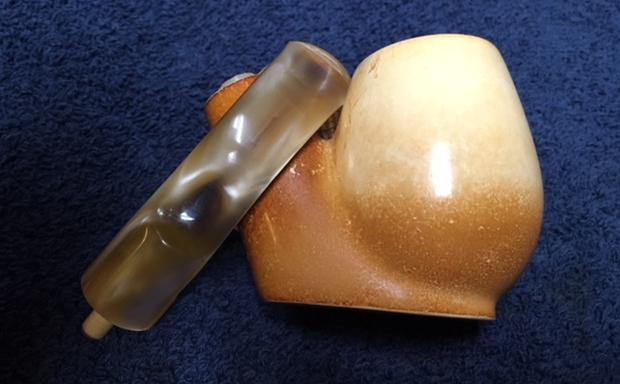
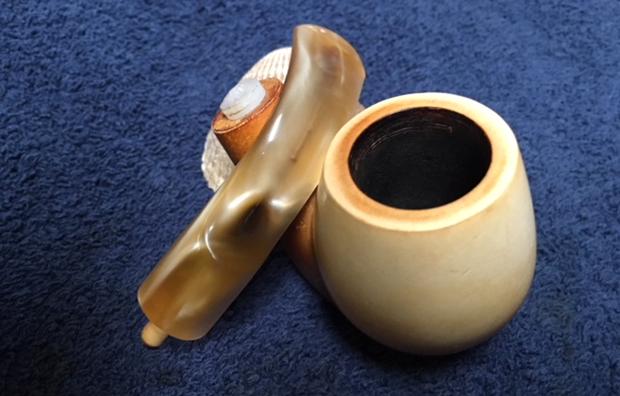
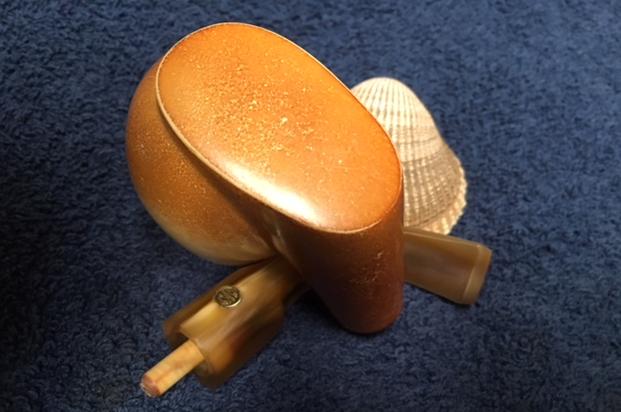
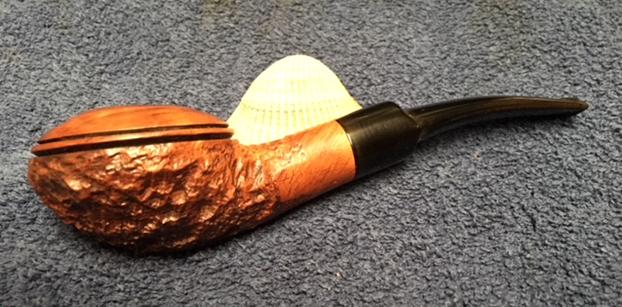
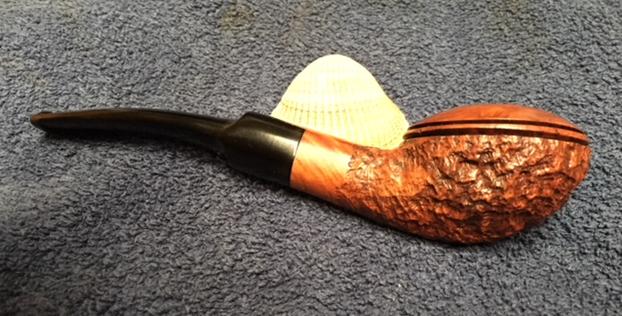
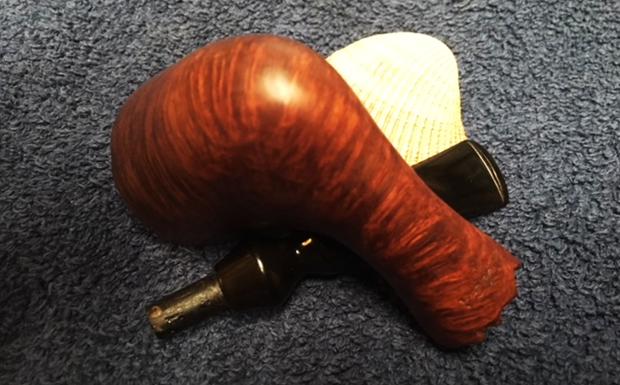
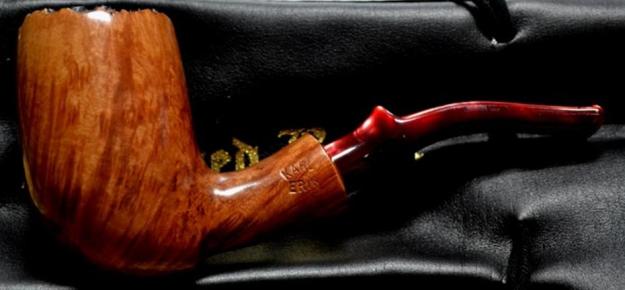
My first BW by Preben Holm, a stunner

Another Golden Walnut BW by Preben Holm

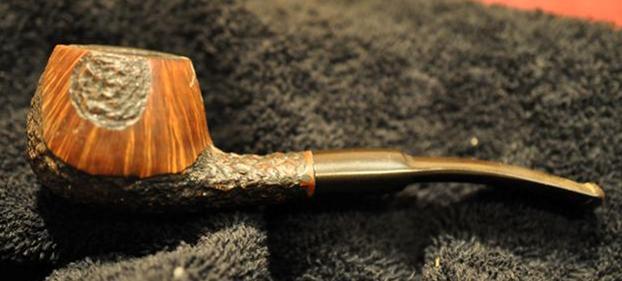
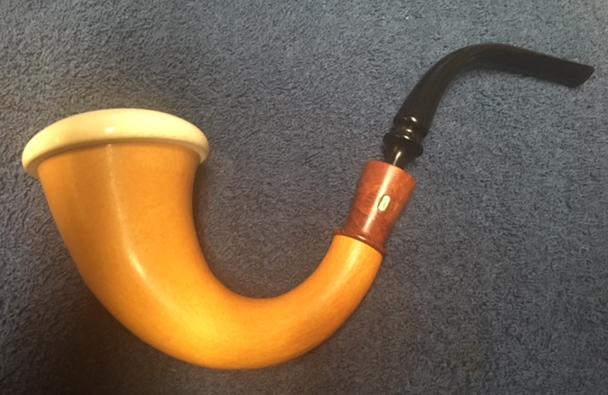
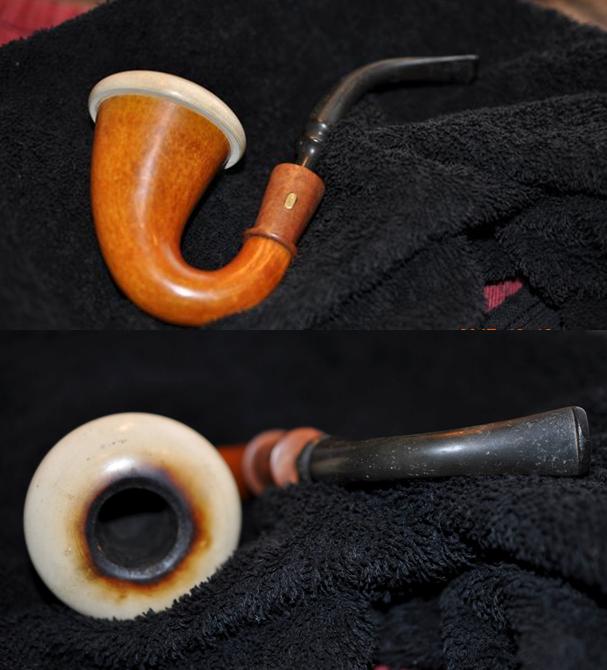
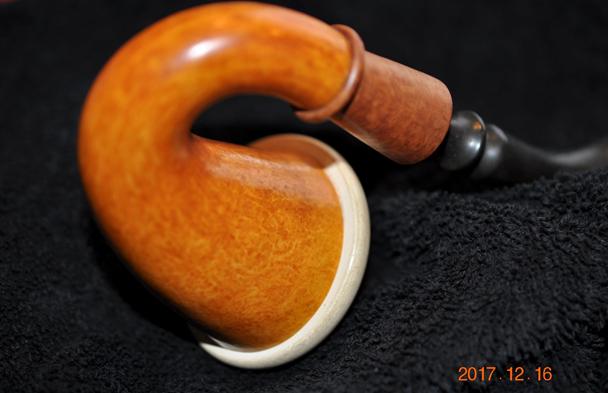
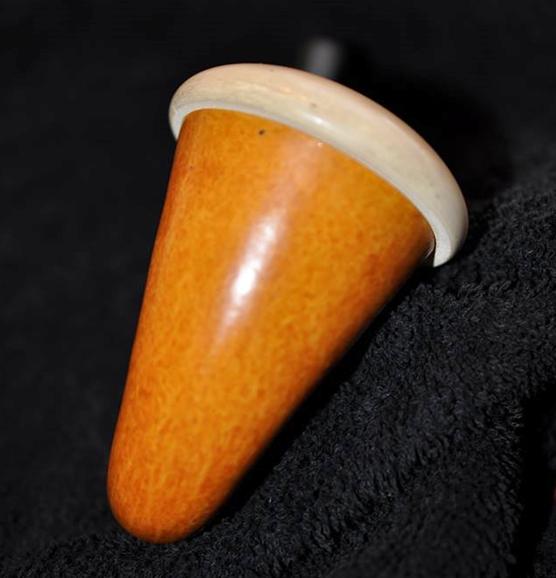
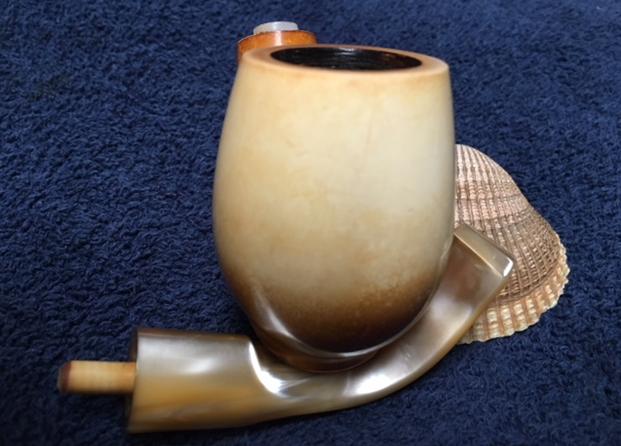
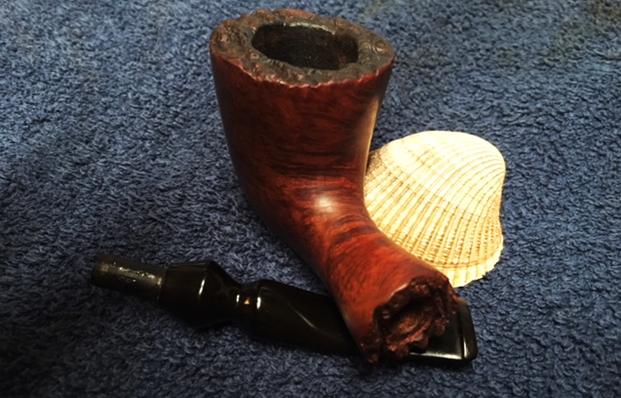
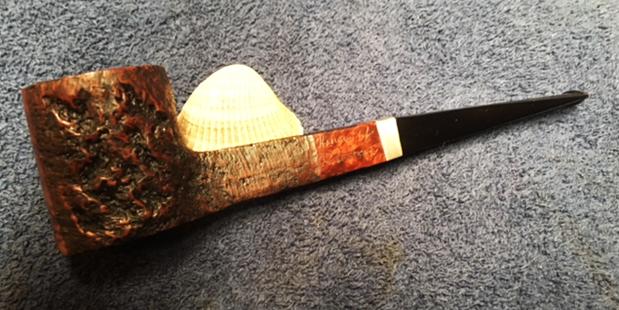
I dubbed this Italian no-name “The Beak” after I completed its forming, as it clearly was unfinished.
Karl Erik Chimney
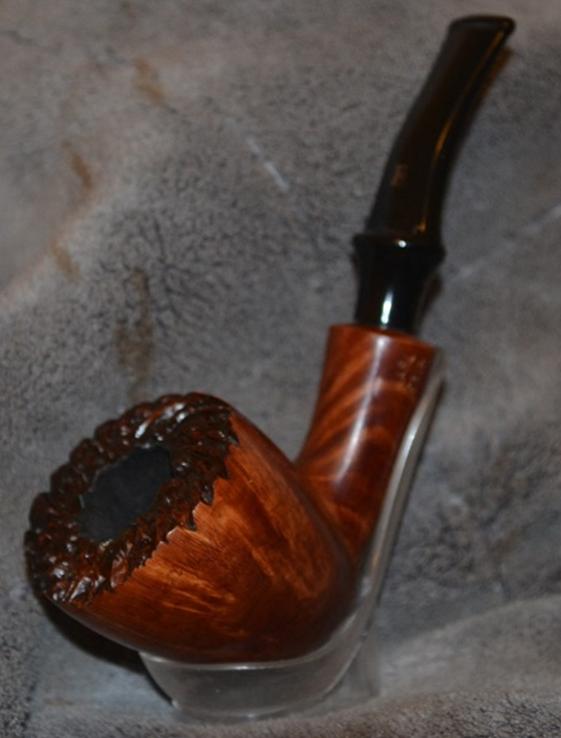
Karl Erik beauty

Søren Refbjerg Rasmussen 4-Panel Rustic

Mastersen Israeli

Bjarne
CONCLUSION
The potential end of each chase is limitless, turning only upon a few integral factors: the grain of the wood; the shape and/or design of the pipe (classic, striking in originality or a merger of the two), and sometimes mind-blowing manipulations of the multiple possible grains imposed by the characteristics of a block. Imagination is the one asset needed to attempt the pursuit at all. [See Field again, in his straight-forward description of the grains with some fascinating challenges to accepted wisdom, as well as being devoid of gruesomeness, in the Sources.] The results of the practice can be dazzling, or less so, hence the attraction and excitement of the chase.
SOURCES
https://pipedia.org/docs/CharacteristicsOfBriar.pdf
http://www.naspc.org/archives/odyssey_3.html
http://www.amsmoke.com/briar_folder/BriarStory.html
http://www.wood-database.com/briar/
http://tinytimbers.com/janka.htm
http://www.ralphshardwood.com/blog/when-does-the-hardness-matter
http://www.rdfield.com/Articles/curing.htm
http://www.azlyrics.com/lyrics/police/murderbynumbers.html
http://rimkuspipes.com/index.html
http://www.dwpipes.com/
http://www.rdfield.com/Articles/Grain.htm
http://archives.nypl.org/rbk/22970

 I will be restoring them in the days ahead. He picked them up for us to restore. They all have the name House of Robertson roughly hand-etched on the side or underside of the shank with an engraving tool. I am including the information that I found when I received my first of the House of Robertson Pipes. I found a link on Pipedia that gave me the only information I could find on the brand. I include that in total as it is interesting to read.
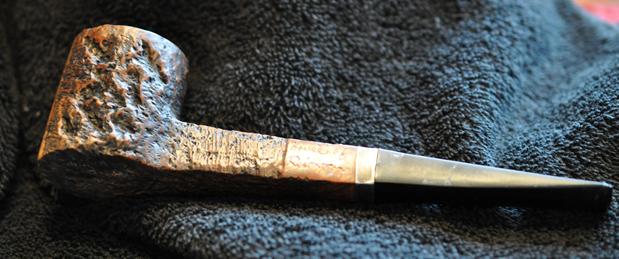
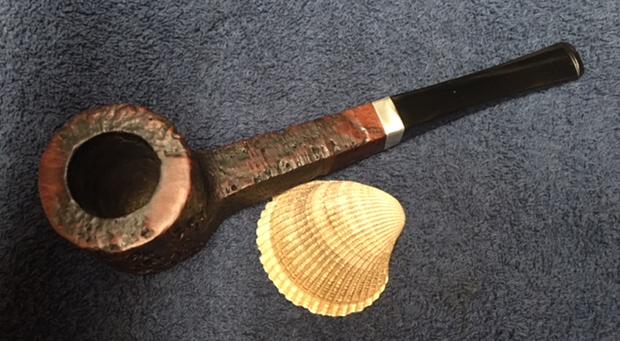
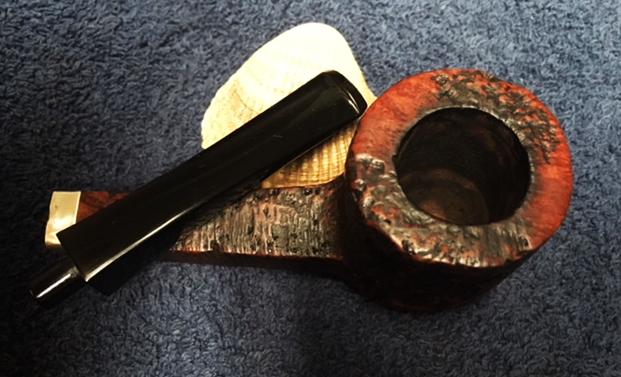
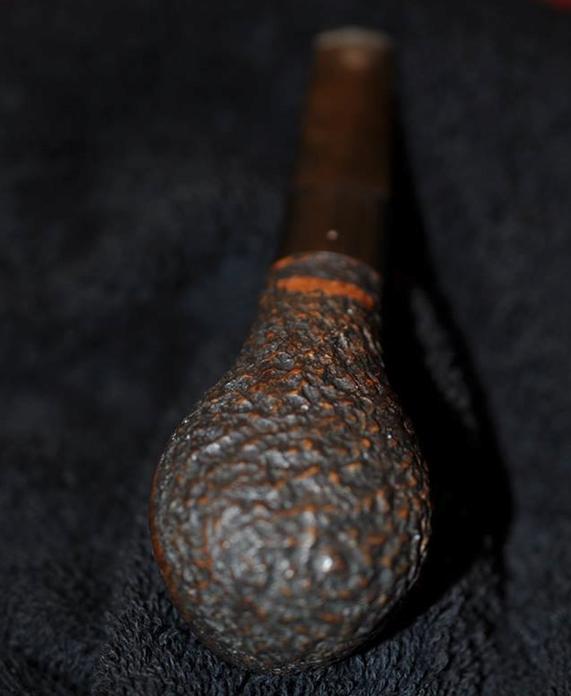
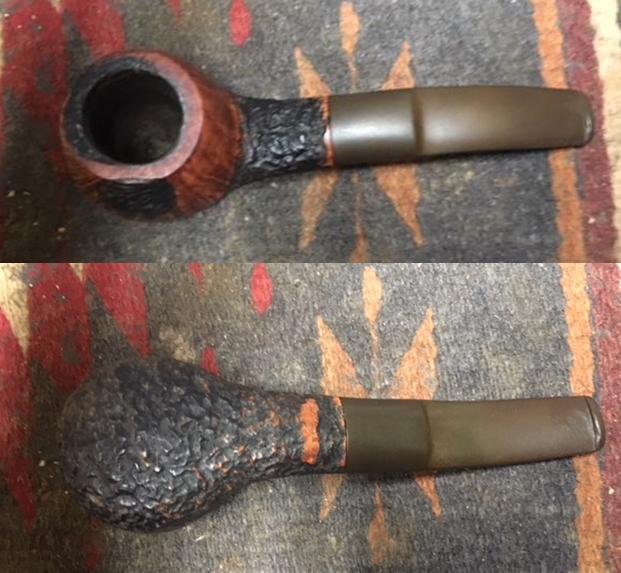
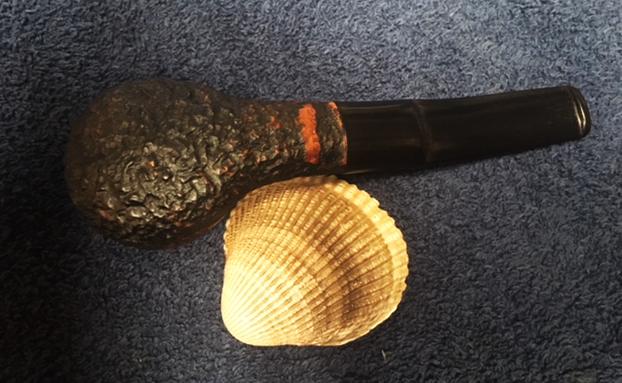
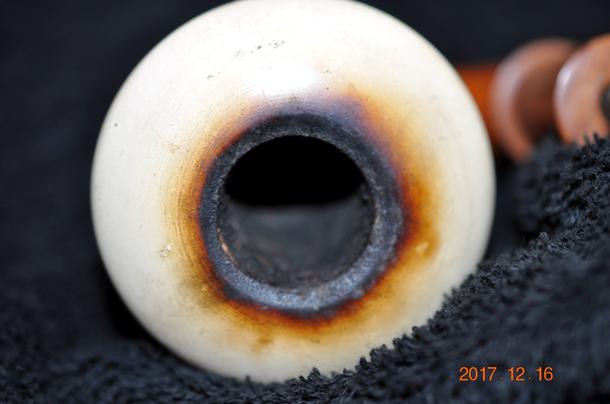
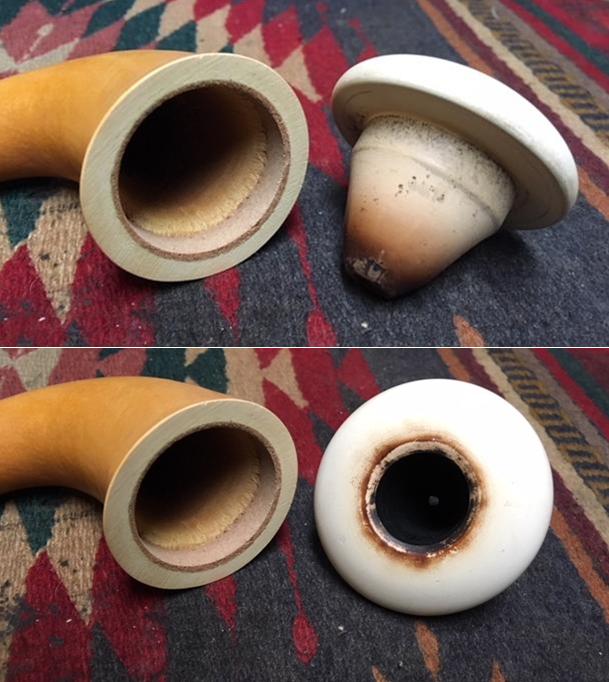
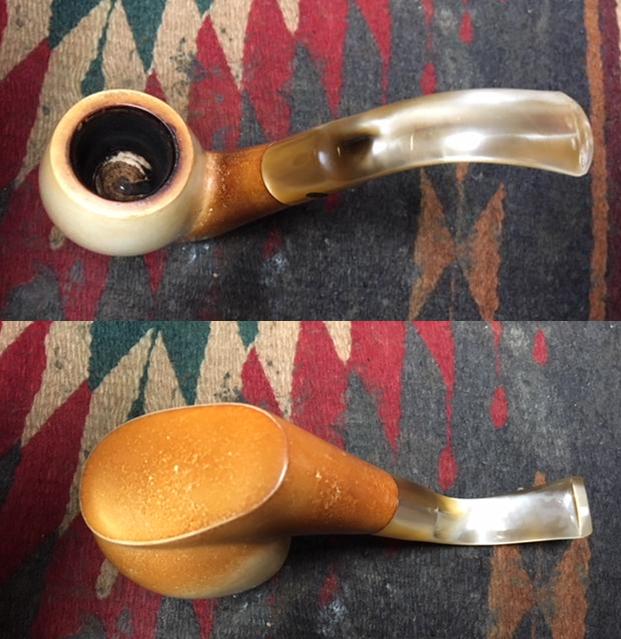
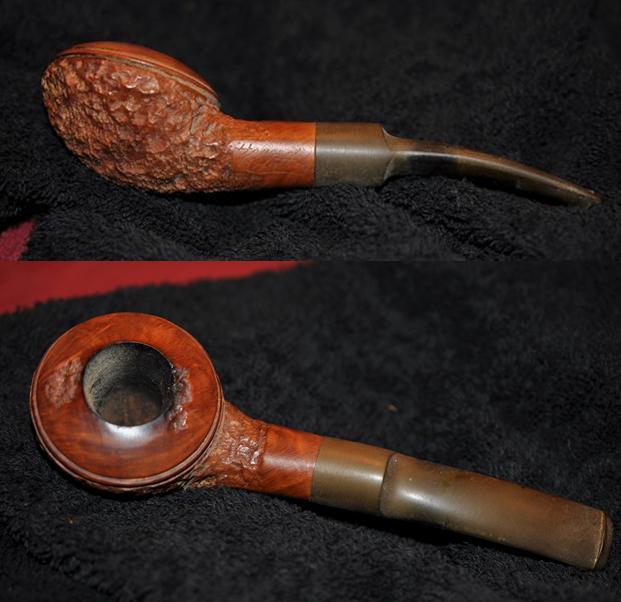
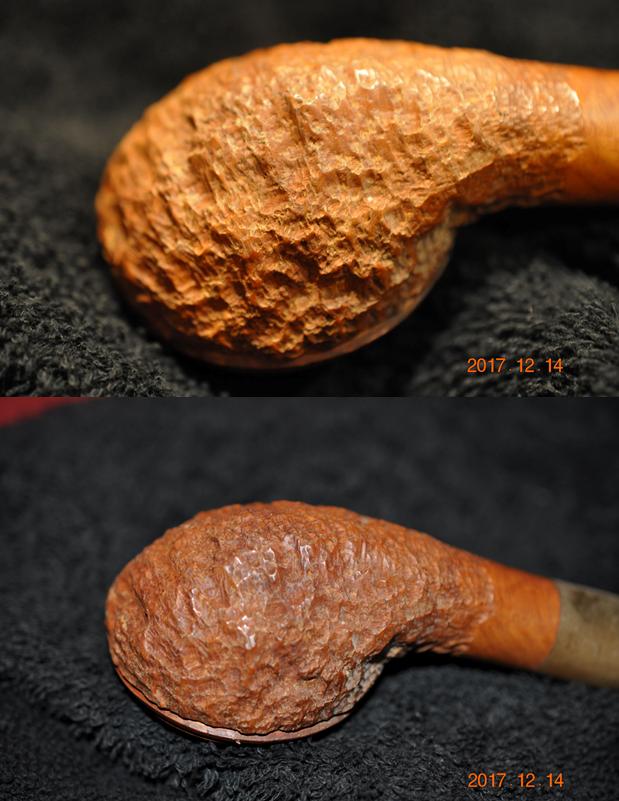
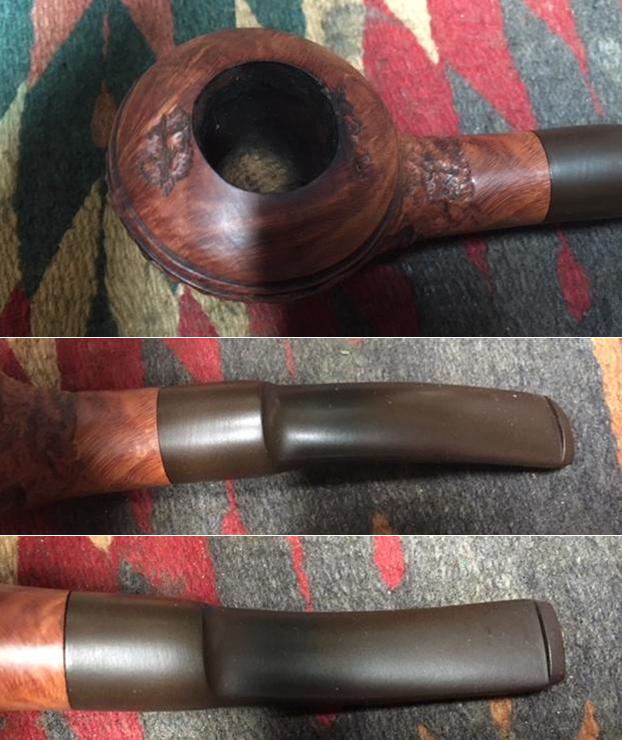
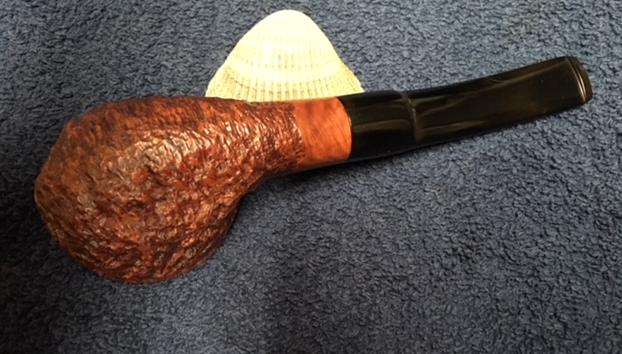
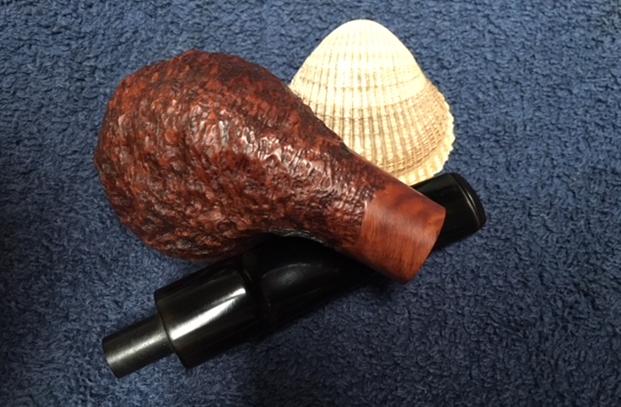
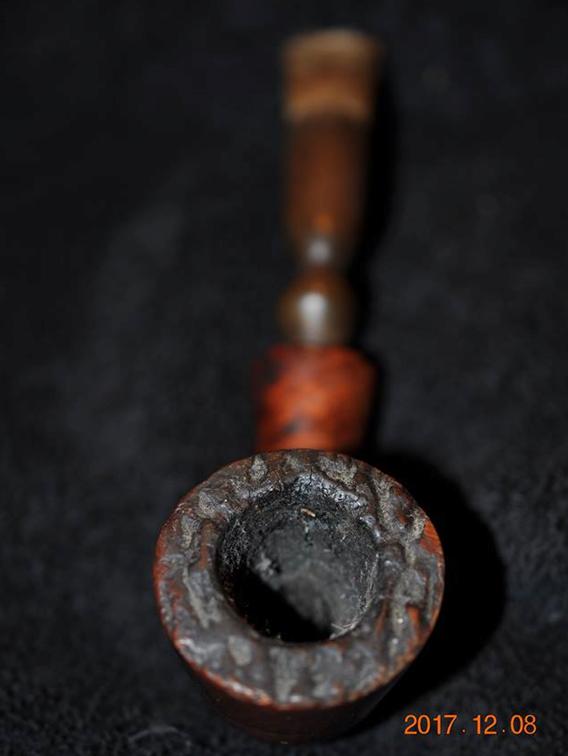
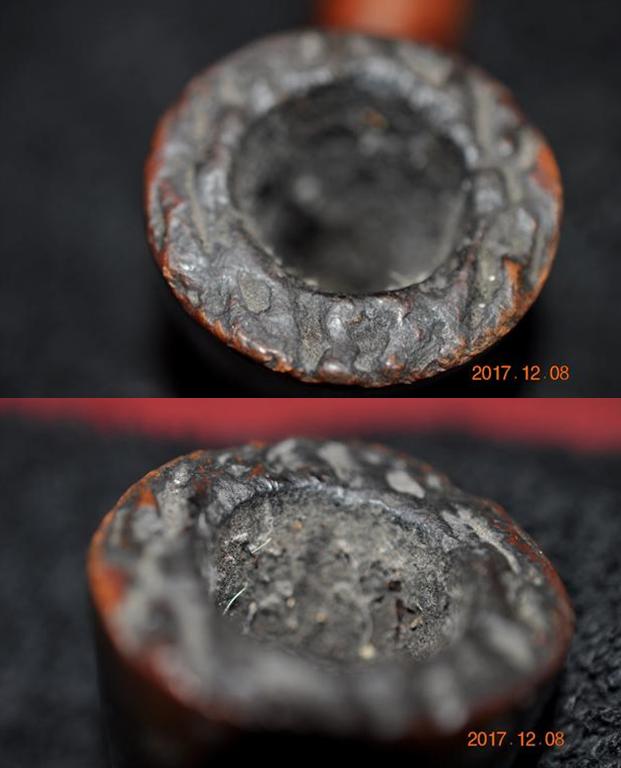
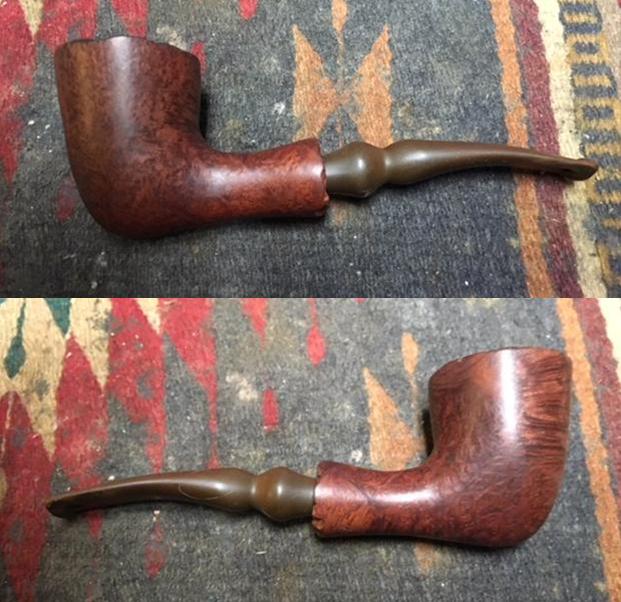
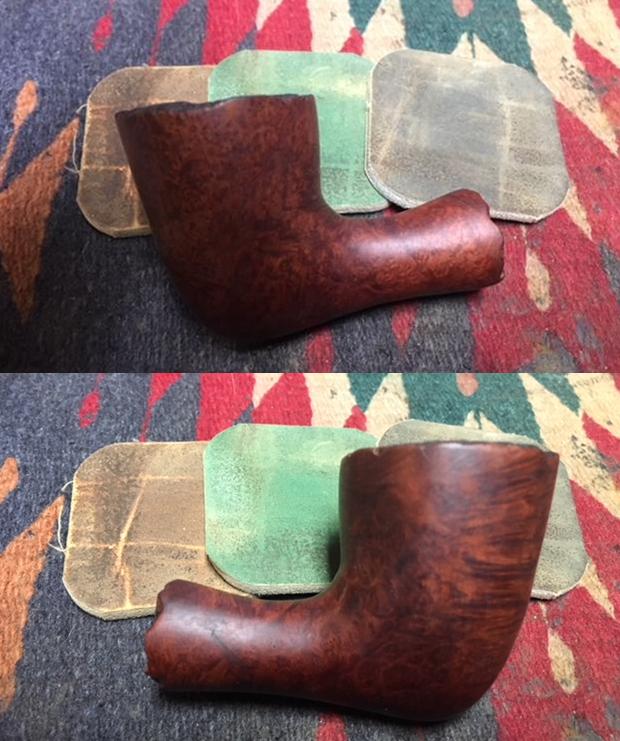
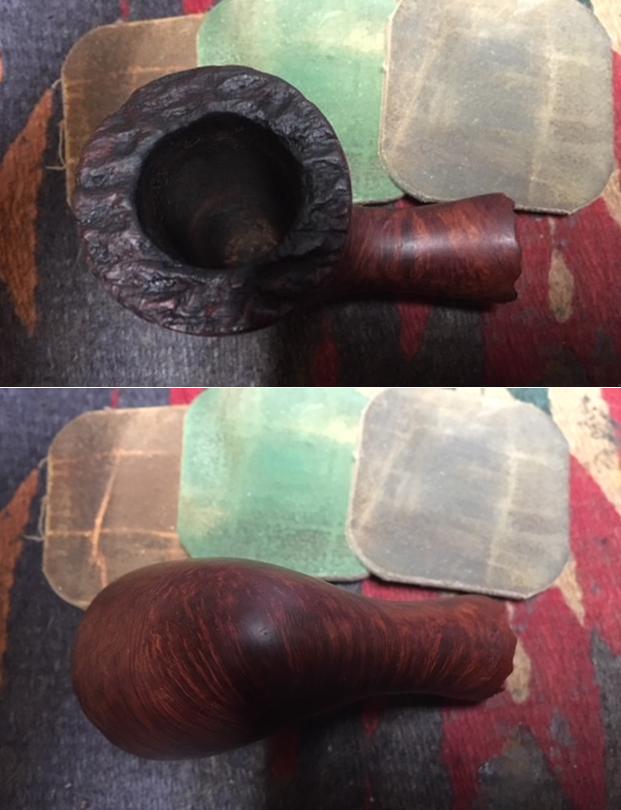
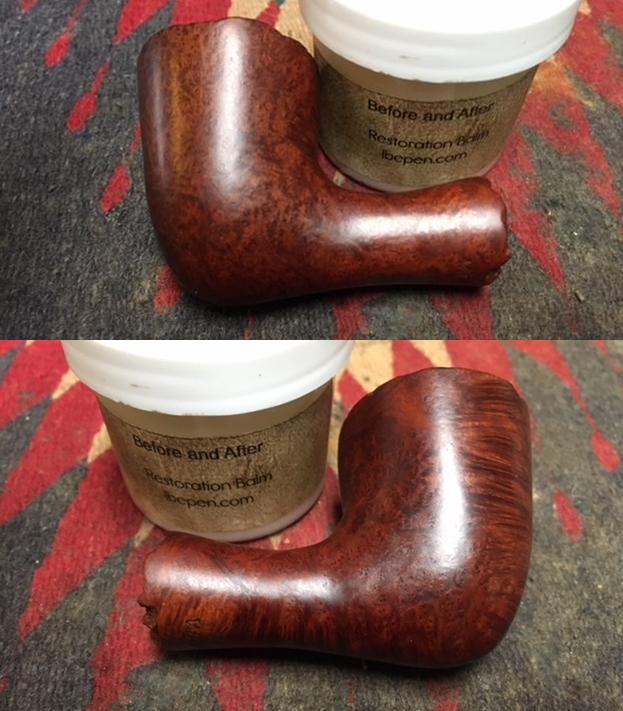
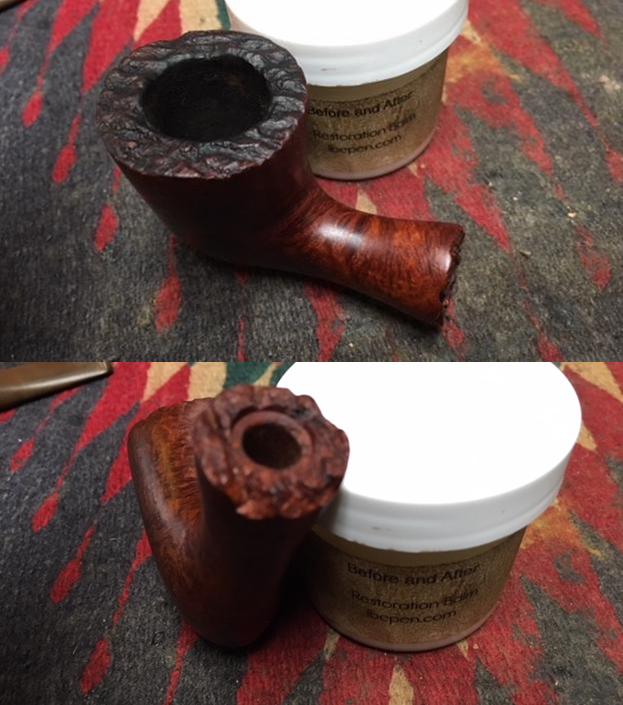
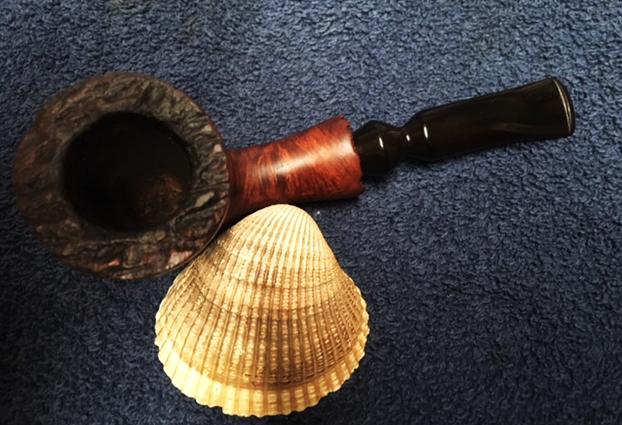
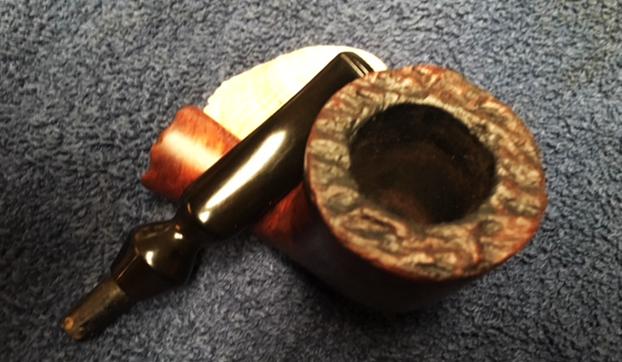
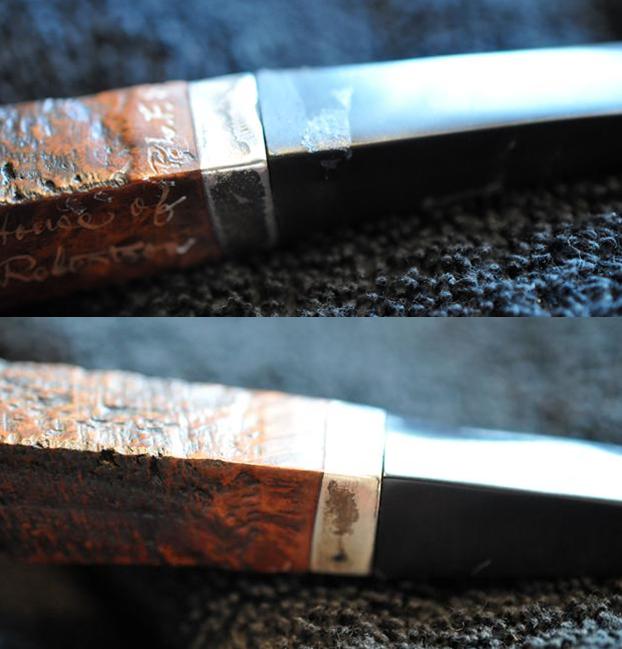
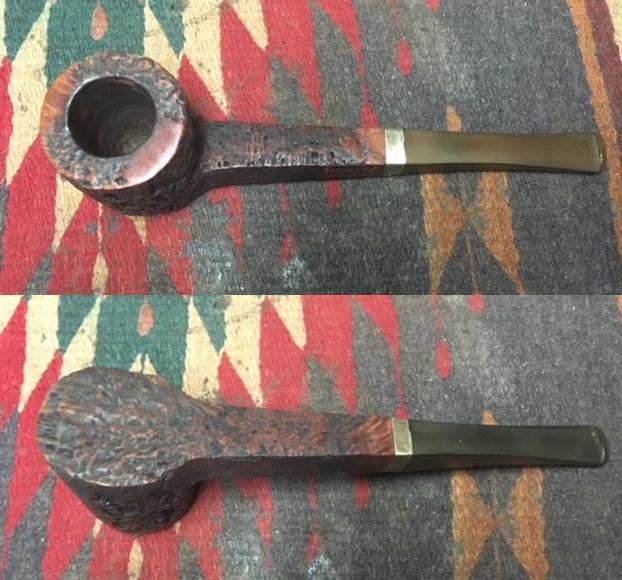
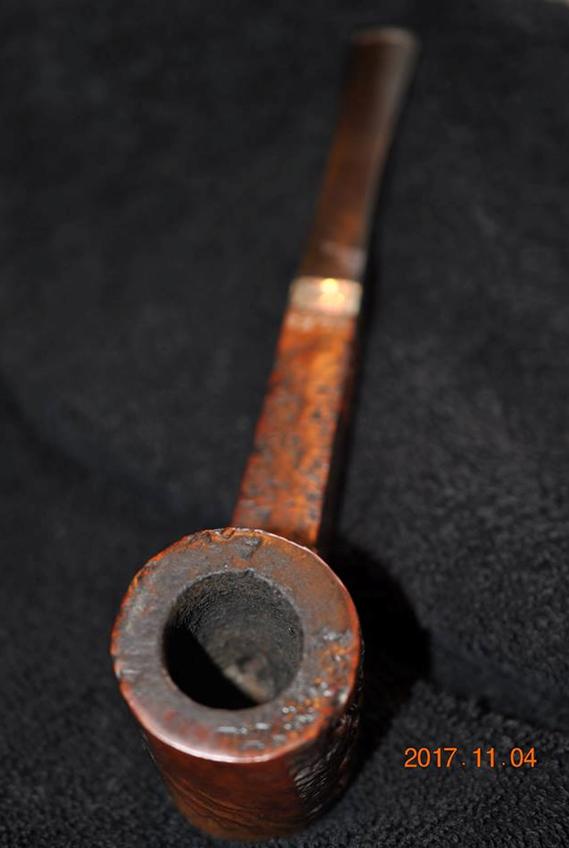 The next close-up photos show the finish on the top and the underside of the bowl. The first photo shows cake in the bowl and the lava overflowing onto the rim top. The grain on the top of the bowl and the inner and outer edge of the rim looks really good. The finish on the rim top was appeared to be in great condition under the lava coat. The next two photos show the front, side and underside of the pipe. It has a very interesting finish.
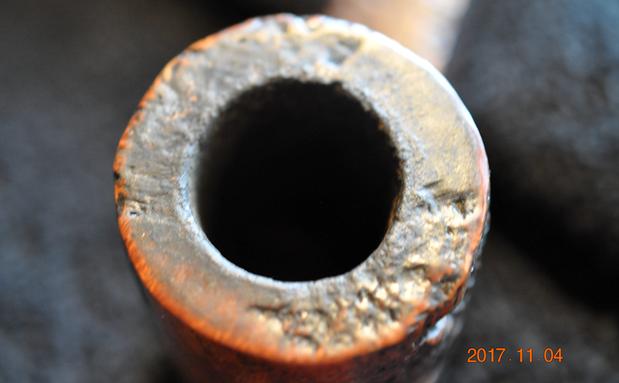
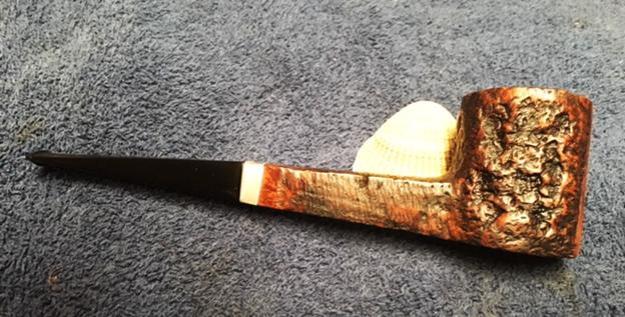
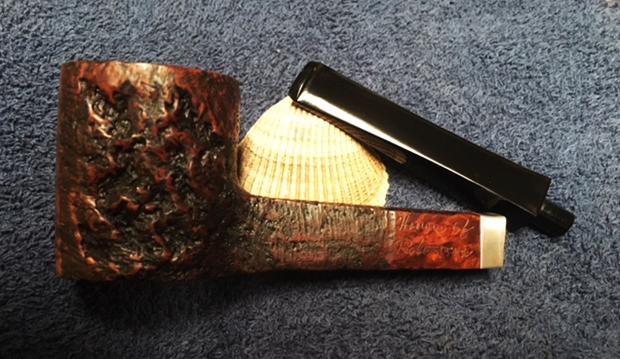
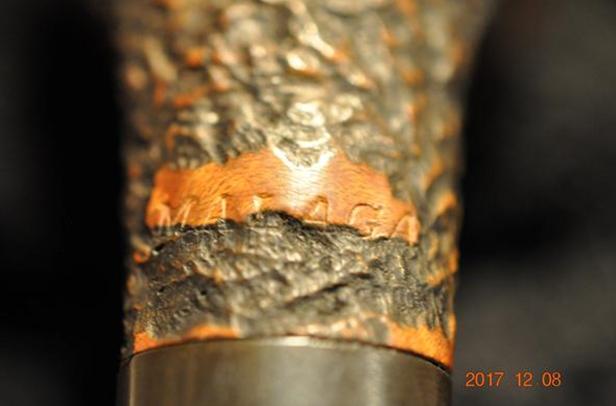
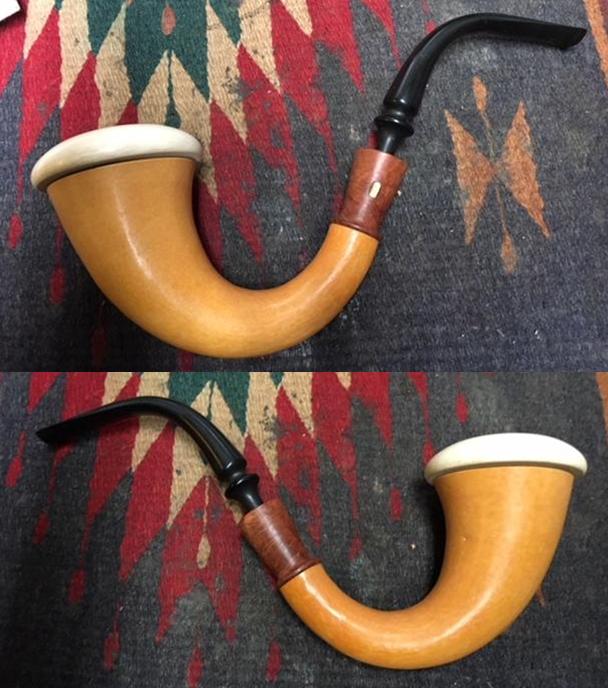
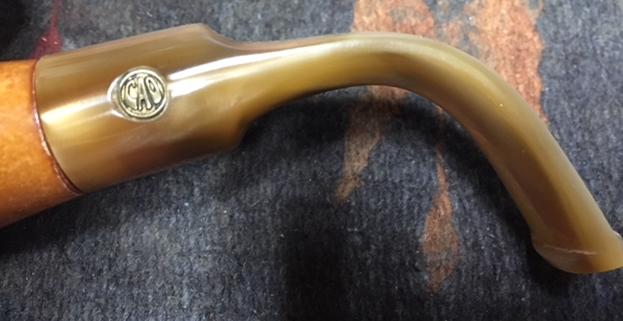
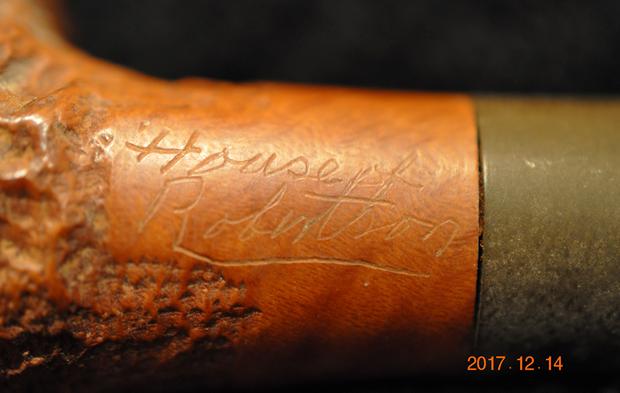
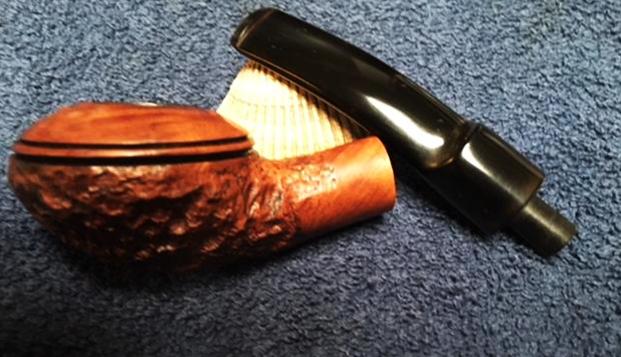
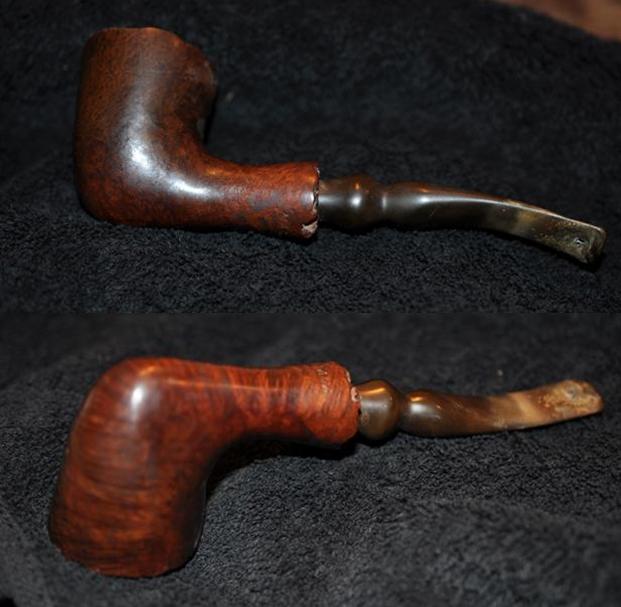
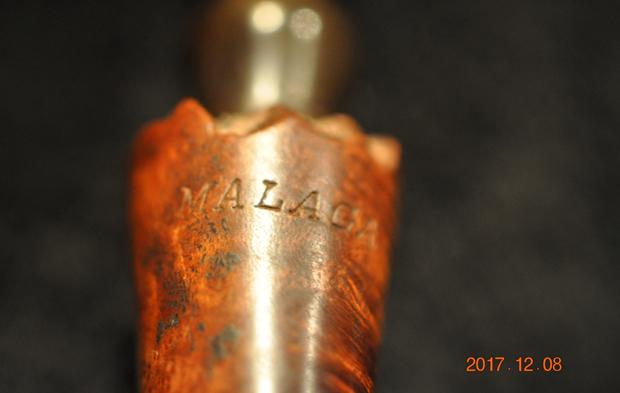
 The next photo shows the etched name on the left side of shank on a smooth panel of briar. It reads House of Robertson. On the top of the shank on a narrow smooth panel it reads P.L.F.S. The final two photos show square shank and band. You can also see the general condition of the grime in the rustication of the briar.
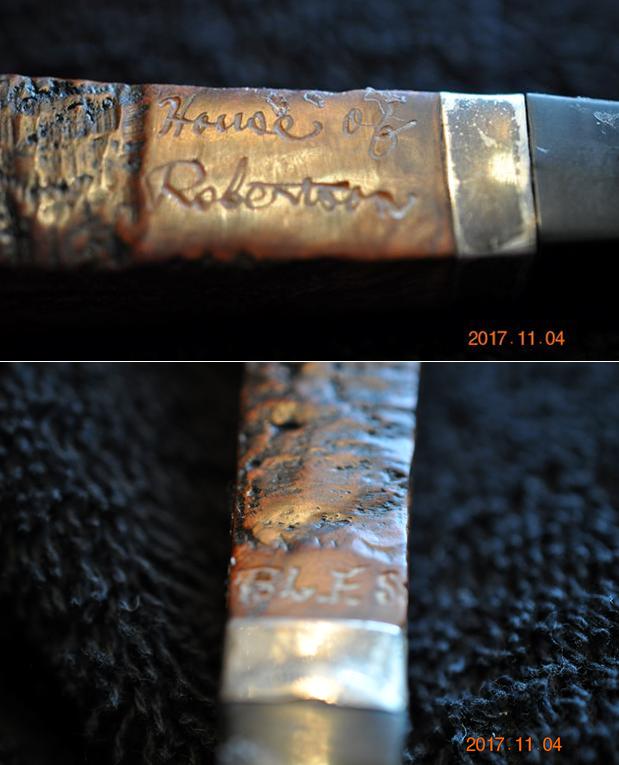
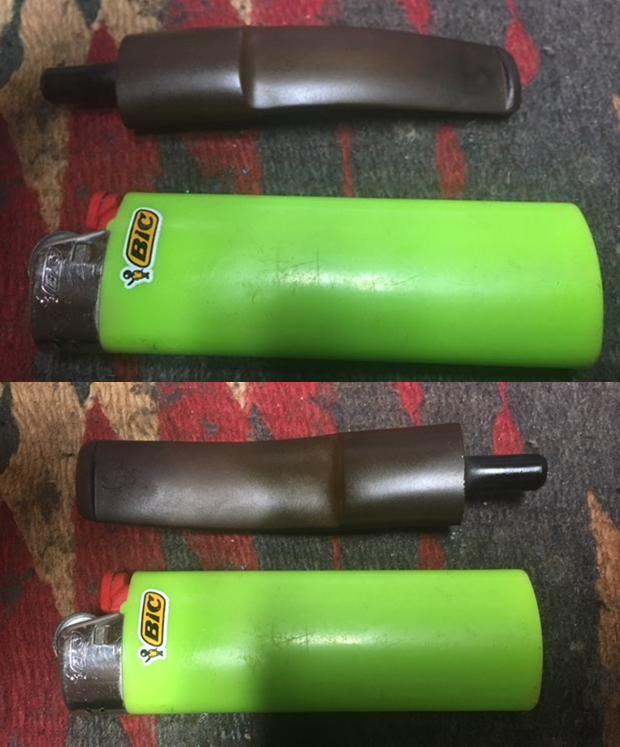
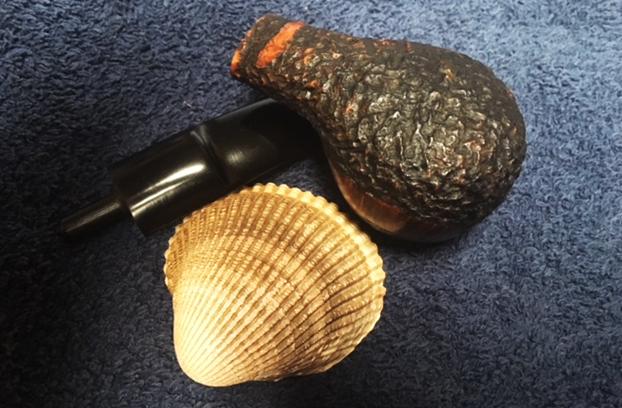
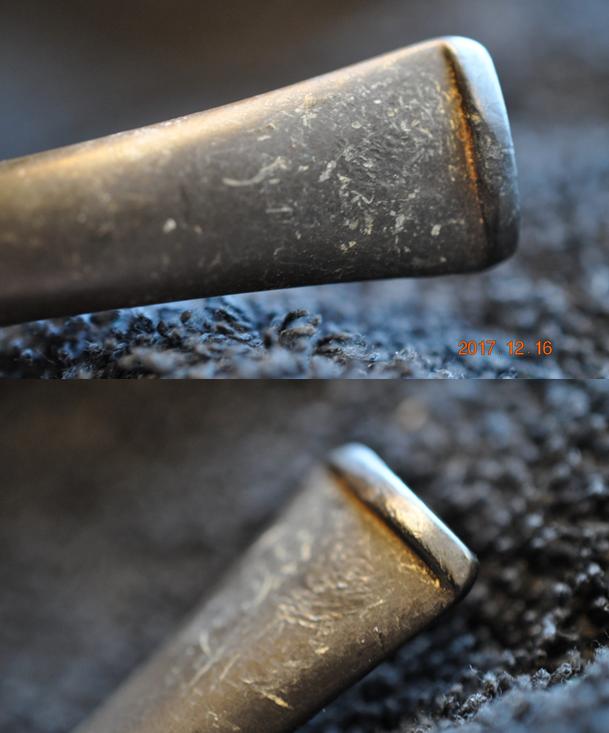
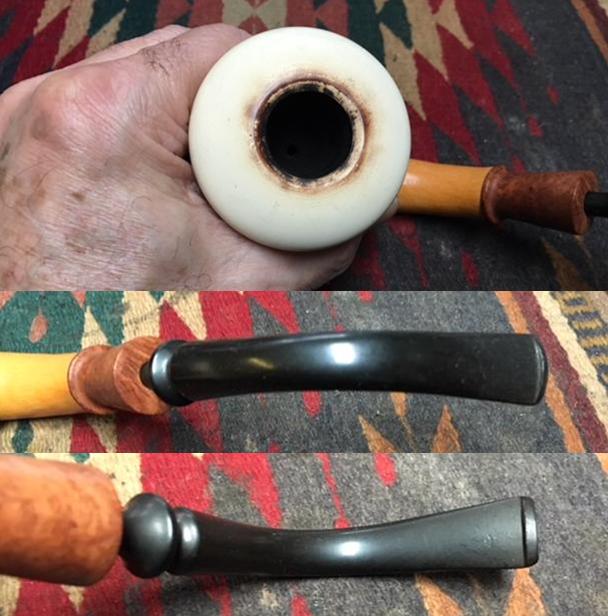
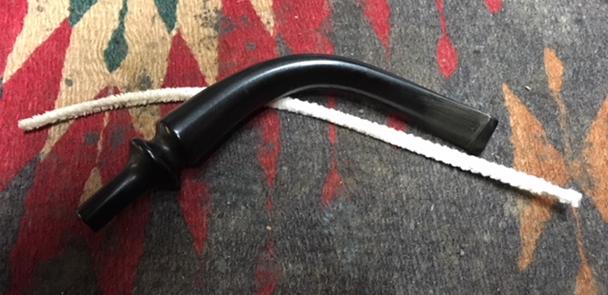
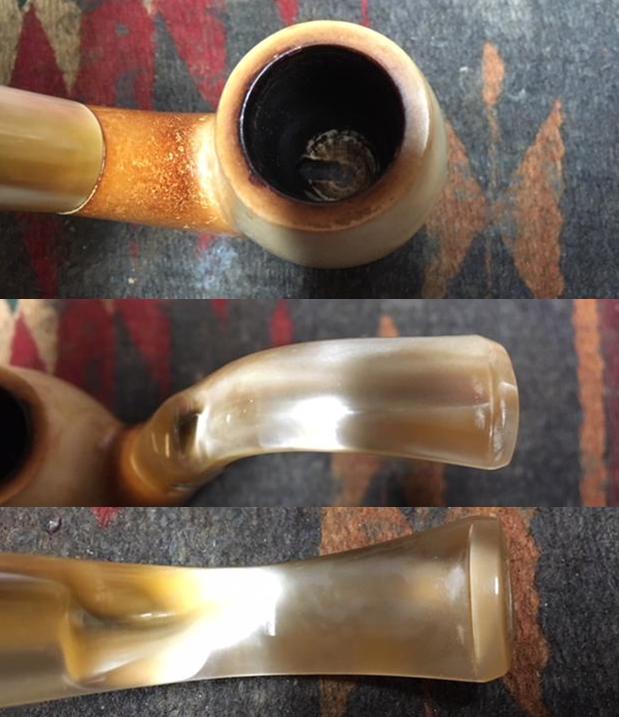
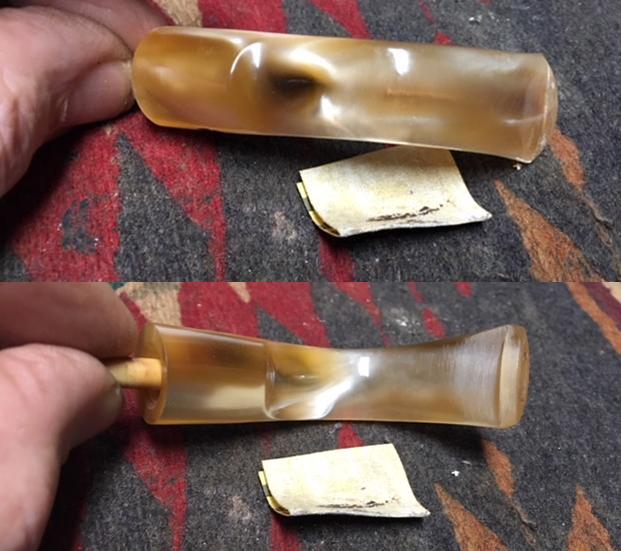
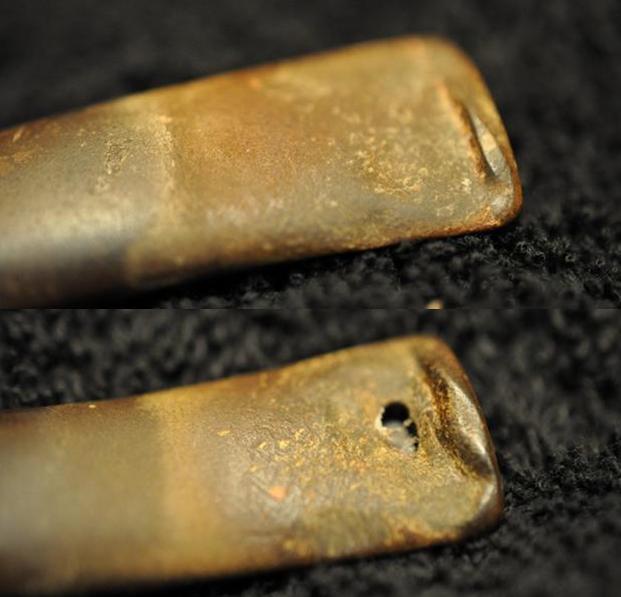
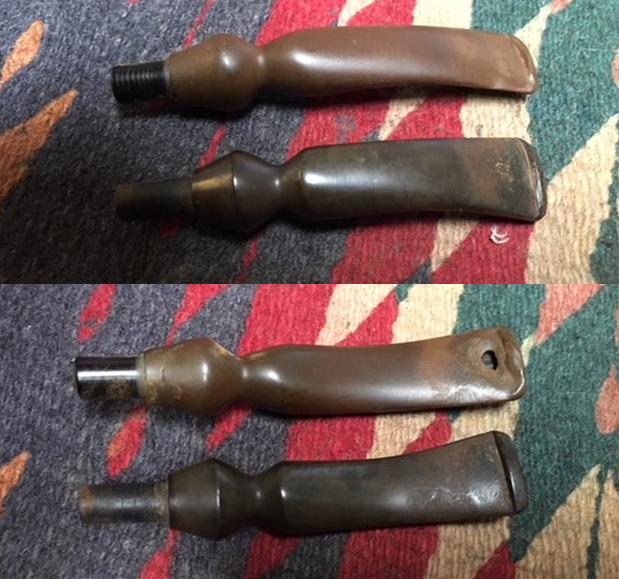
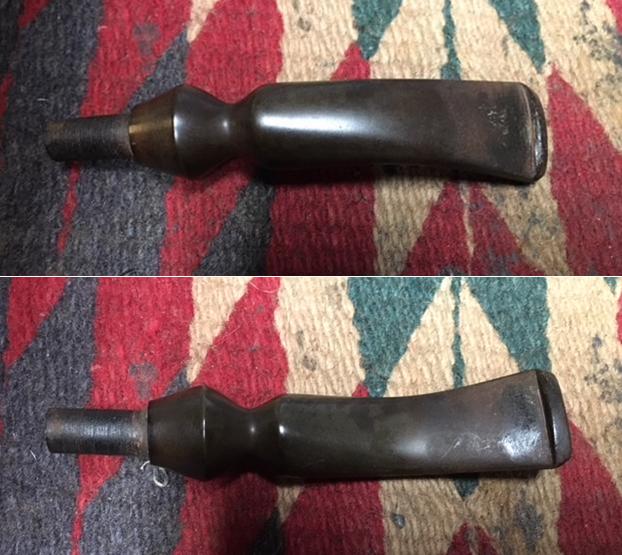
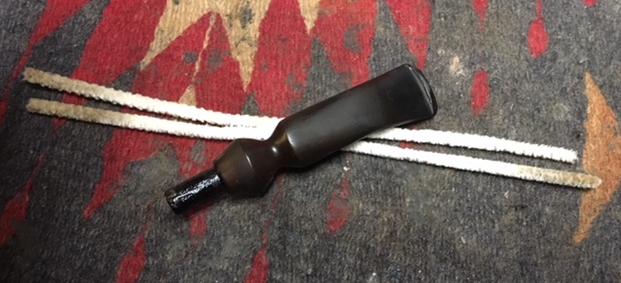
 The tapered stem was oxidized and had tooth chatter and marks on both sides of the stem near the button. The edge of the button had some dents in it as well.
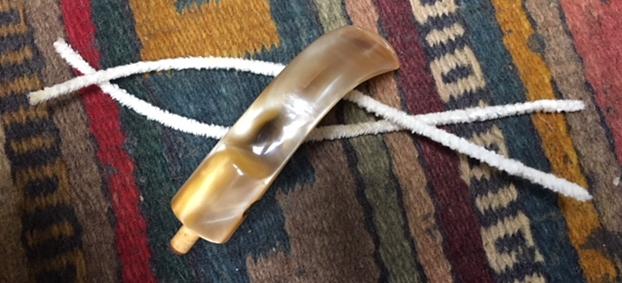
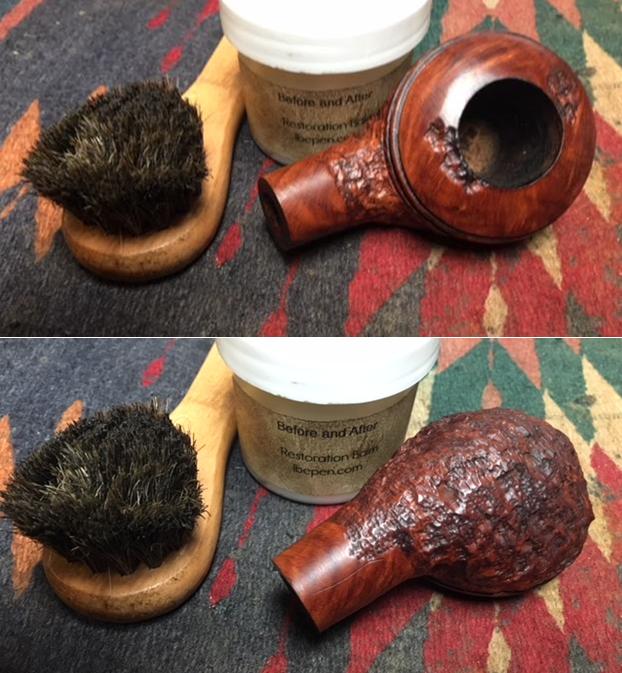
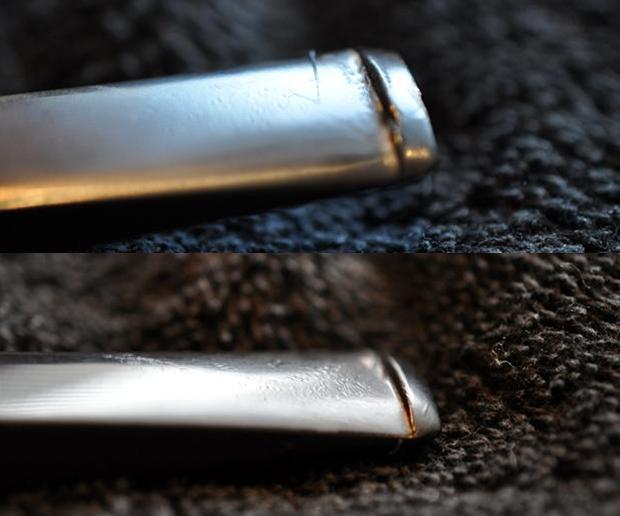 This unique pipe was really dirty with a thick cake, overflow of lava on top the rim and dust and debris in the heavy rustication on the sides of the bowl. He reamed the bowl with a PipNet pipe reamer and cleaned up the remnants with the Savinelli Fitsall Pipe Knife. He scrubbed out the mortise and the airway in the shank and the stem with alcohol, cotton swabs and pipe cleaners. He scrubbed the exterior of the bowl, rim and shank with a tooth brush and Murphy’s Oil Soap to remove the dust in the rustication on the bowl and shank as well as the smooth portions. He rinsed it under running water. He dried it off with a soft cloth. Once the dust and debris were removed the finish was dull but appeared to be in excellent condition. I took photos of the pipe to show its condition before I started my work on it.
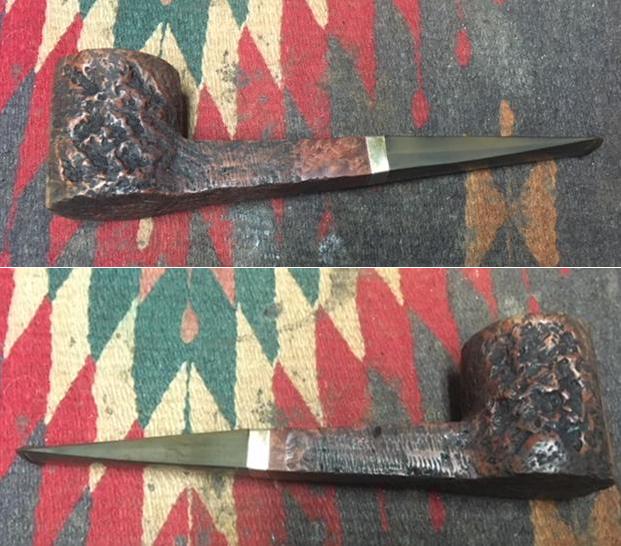
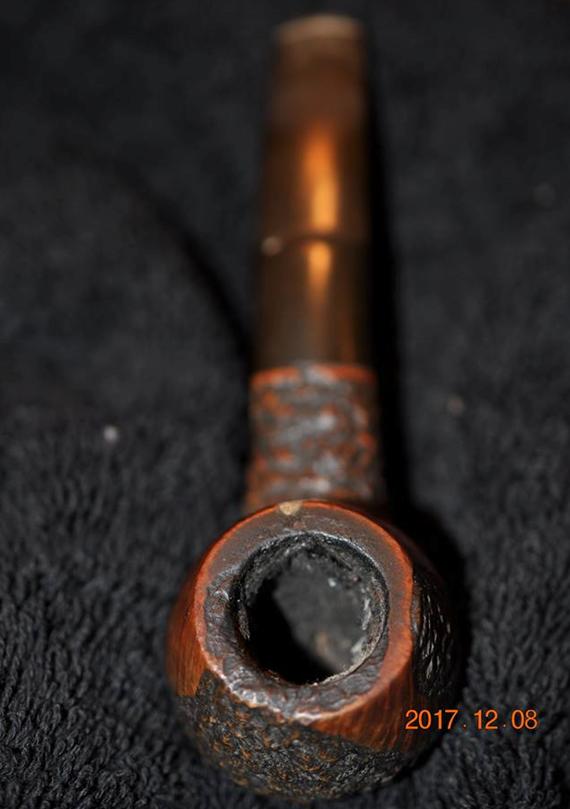
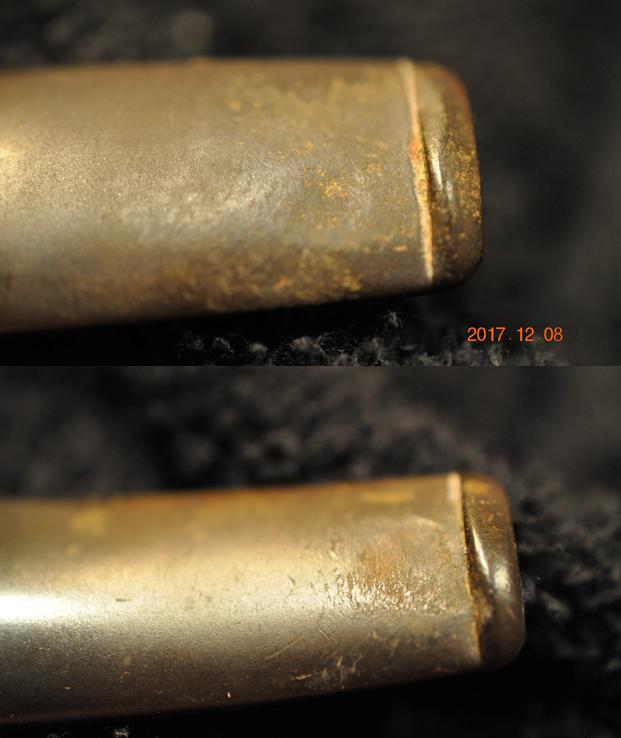
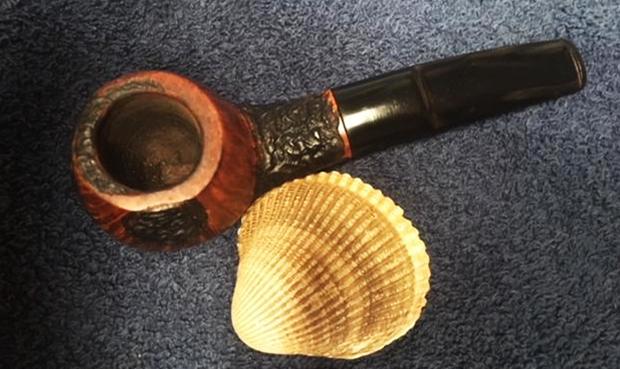
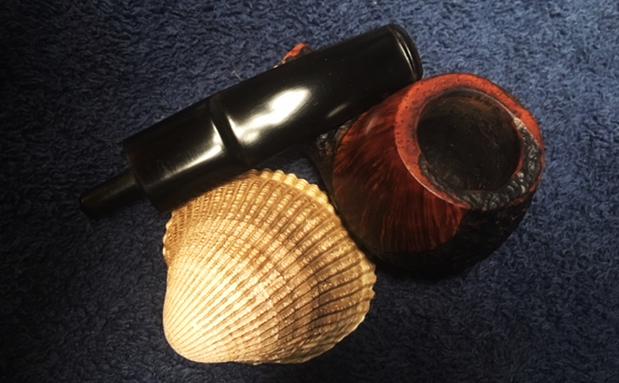
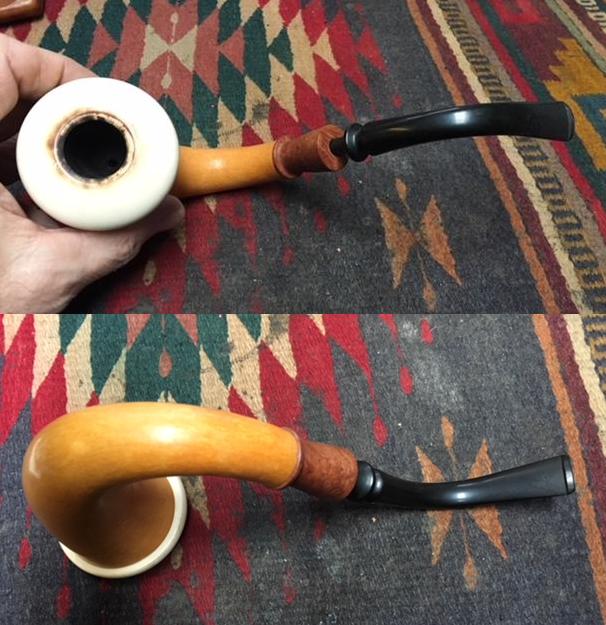
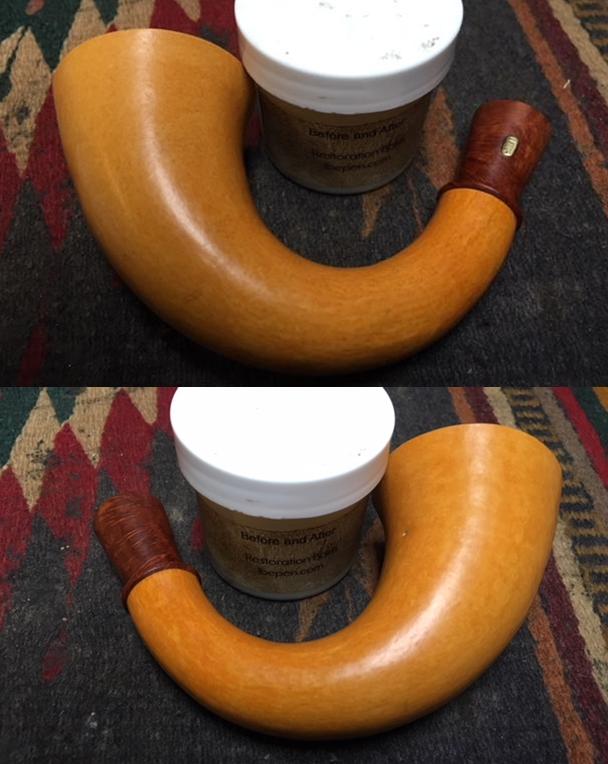
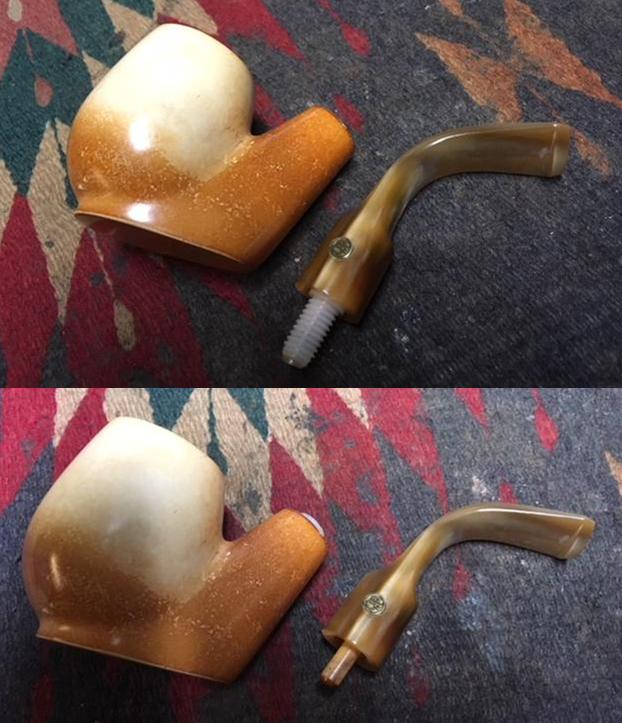
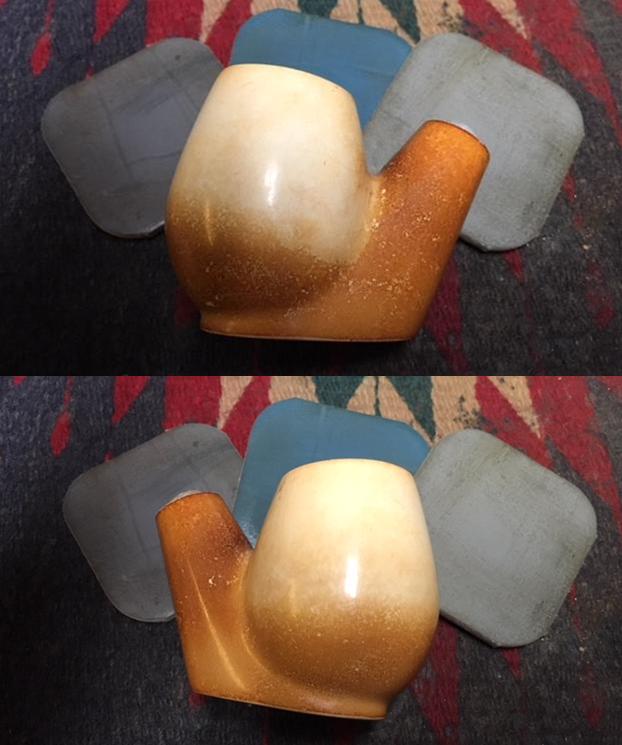
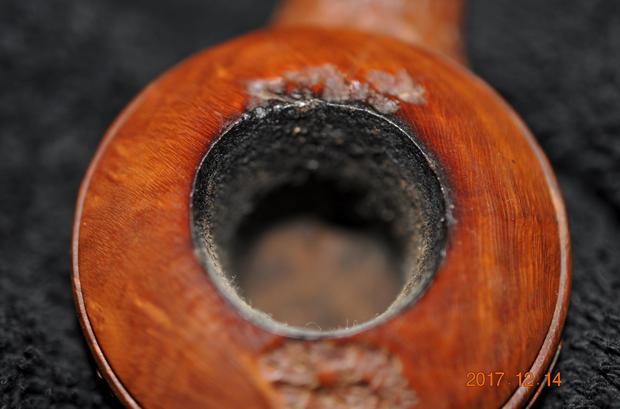
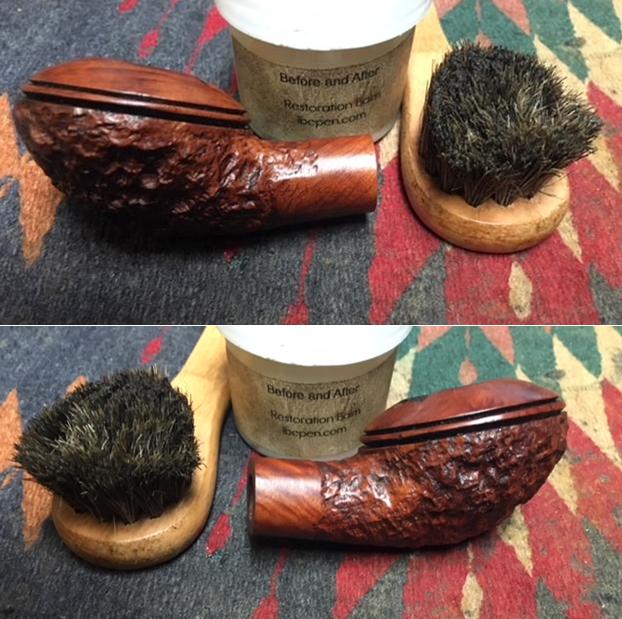
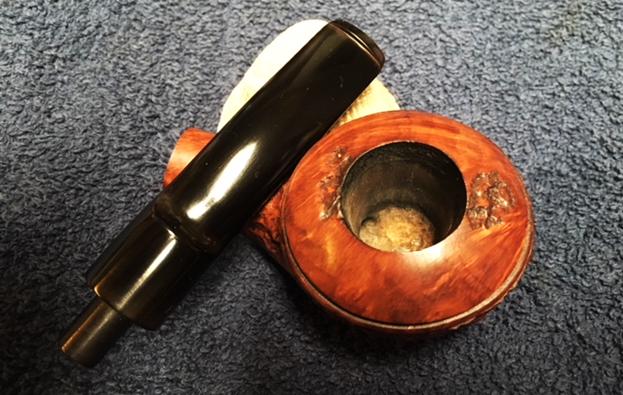
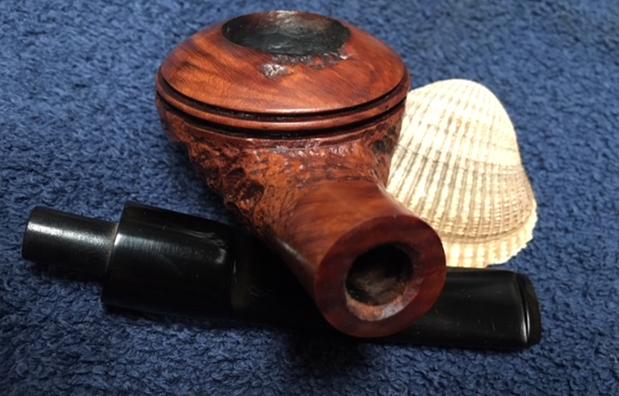
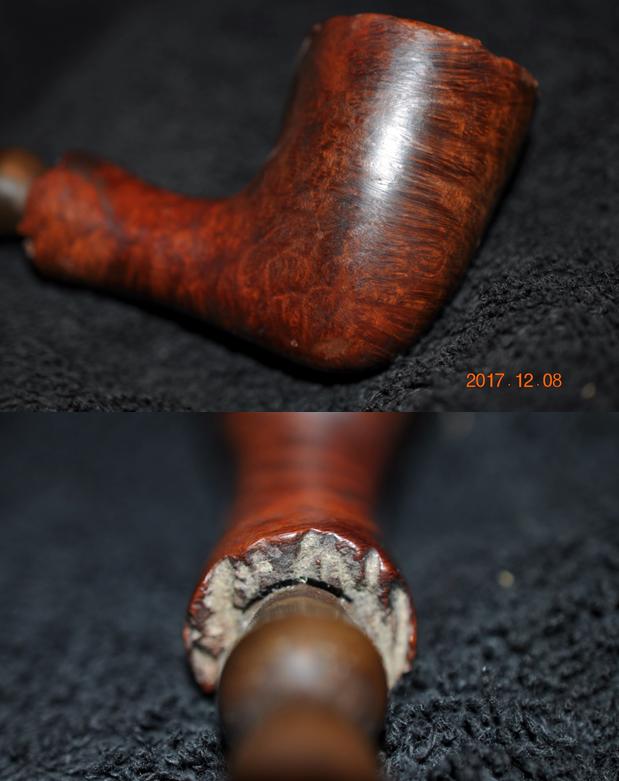
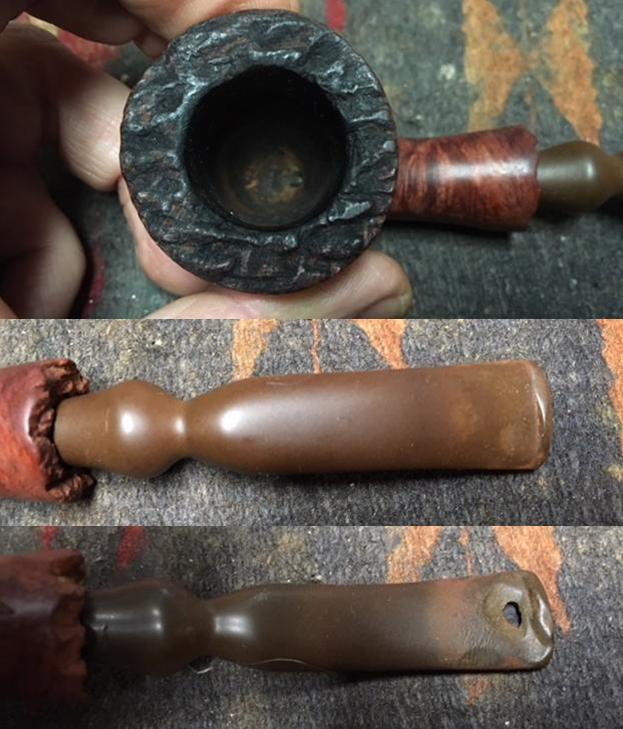
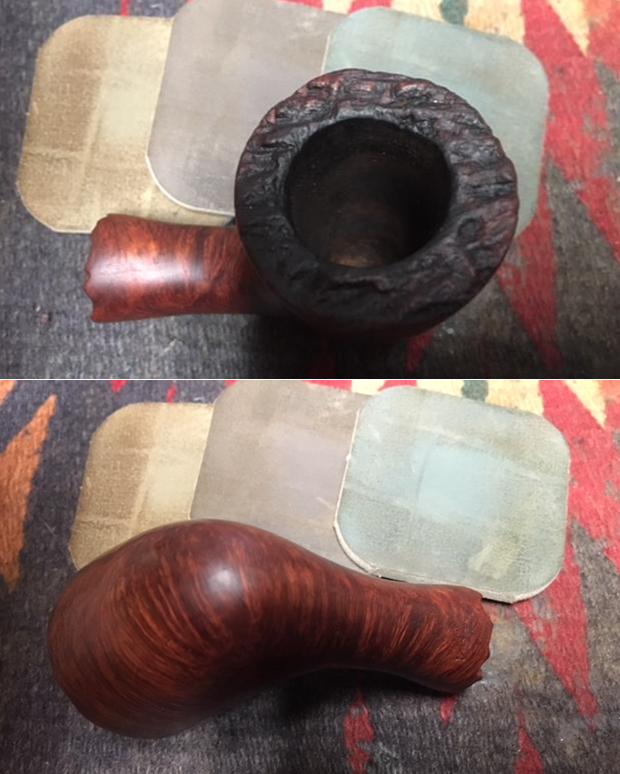
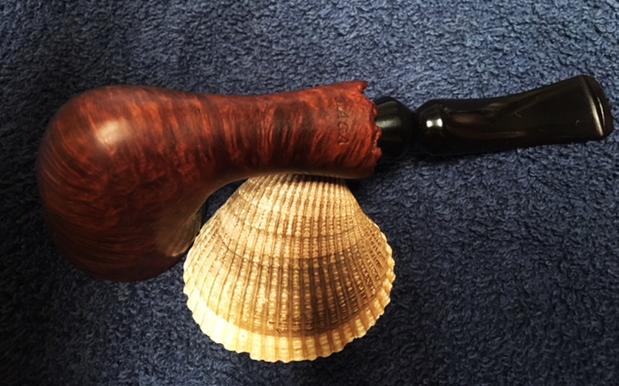
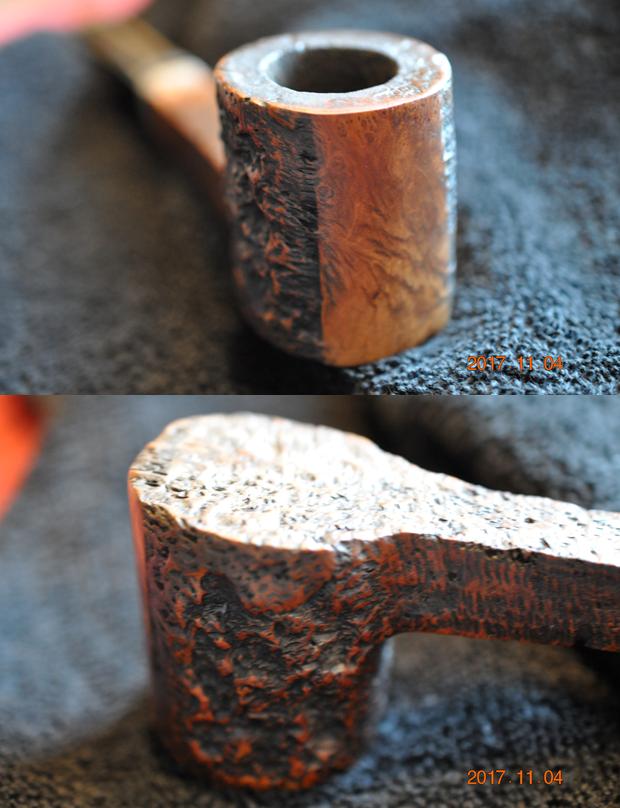
 I took a photo of the bowl and rim top to show the condition it was in once it was cleaned off. It has an interesting combination of rusticated and smooth finishes on the top of the bowl. The unique square stem was oxidized and had tooth marks and chatter on both sides. You can also see the nicks in the edge on the top and underside of the Sterling Silver band.
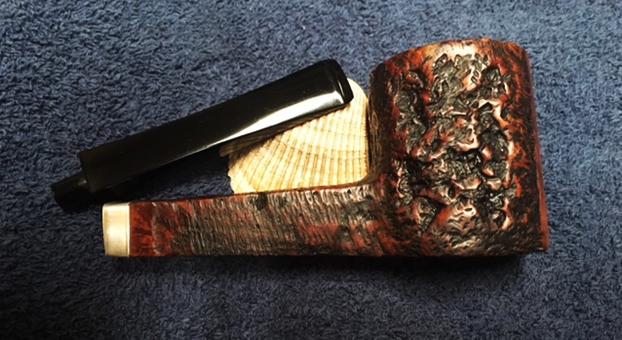
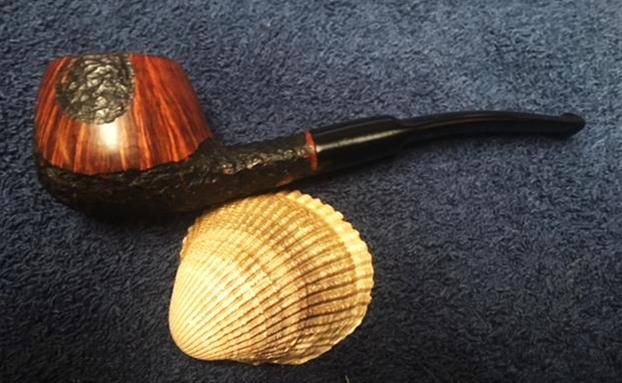
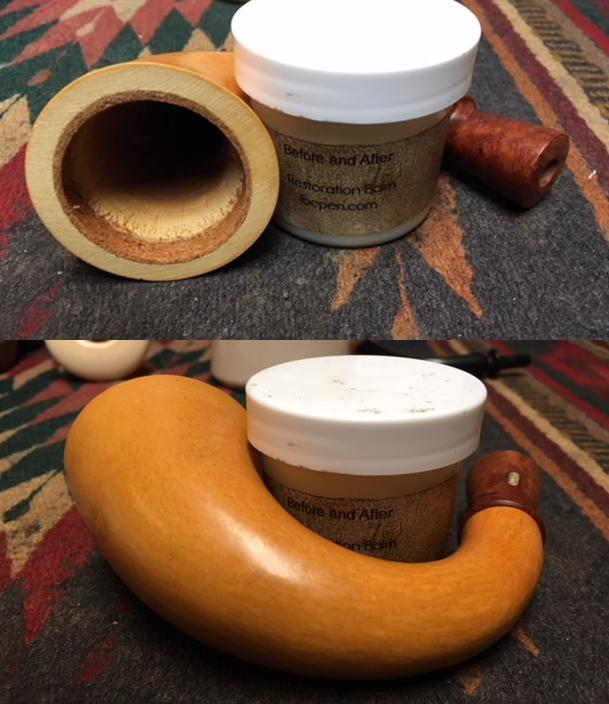
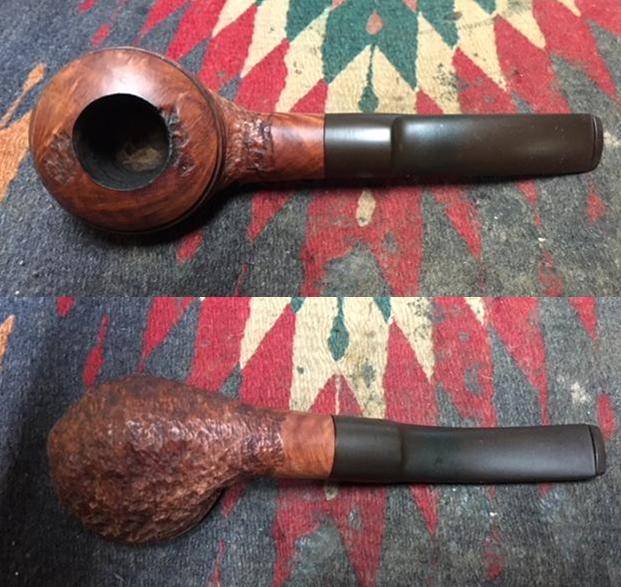
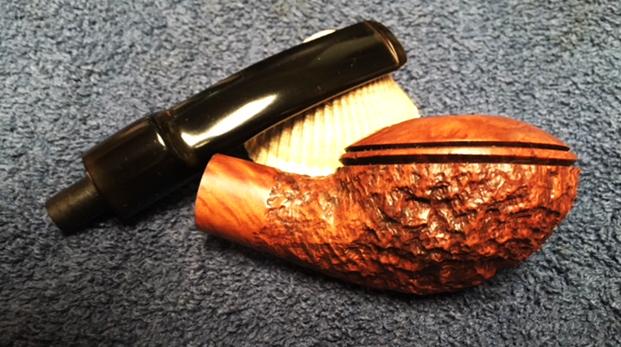
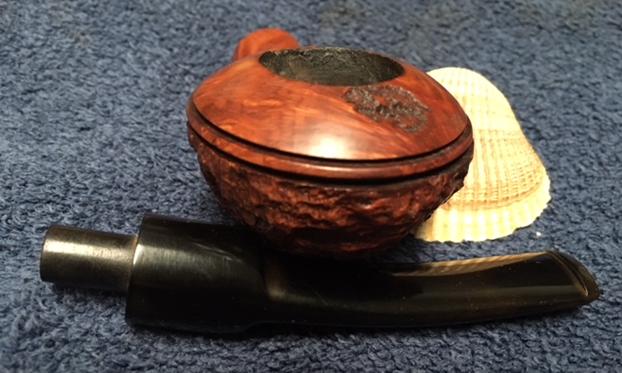
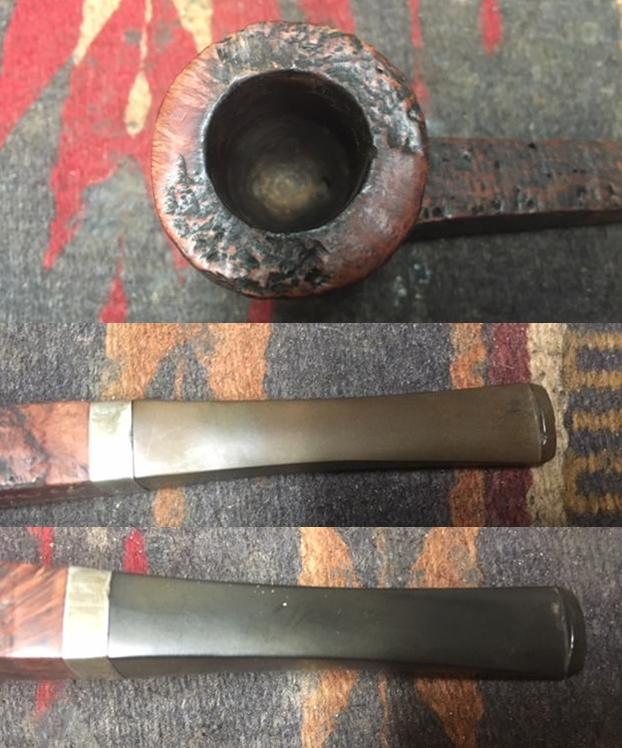 I worked Before & After Restoration Balm deep into the nooks and crannies of the rusticated finish to clean, enliven and protect the briar. I hand rubbed it with my fingers and worked it into the finish with a horsehair shoe brush. I wiped it off with a soft cloth. I buffed the bowl with a cotton cloth to polish it. It really began to have a deep shine in the briar. I took some photos of the bowl at this point to mark the progress in the restoration. The grain on the smooth portions stands out, while the deep grooves of the rustication look almost undulating. It is a unique and strangely beautiful pipe.
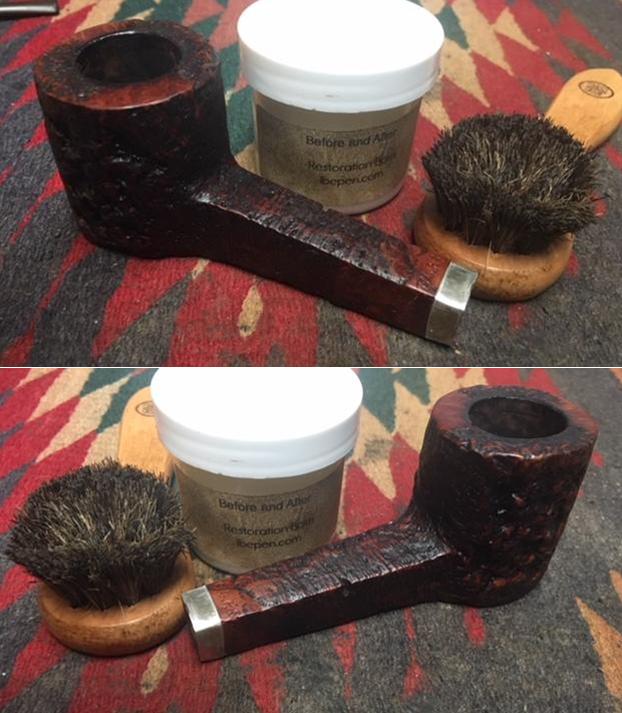
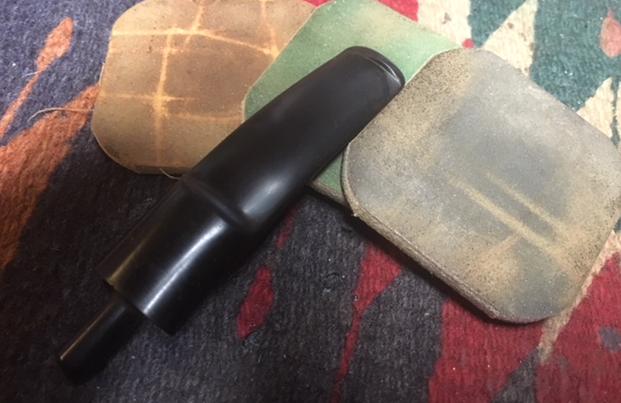
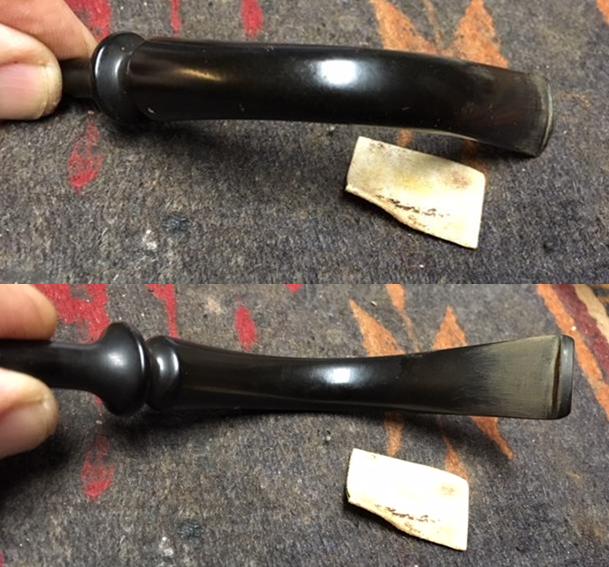
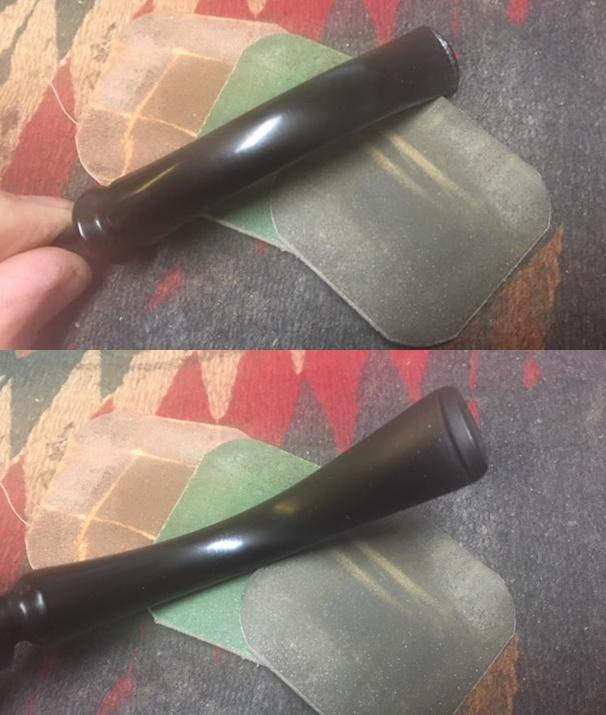
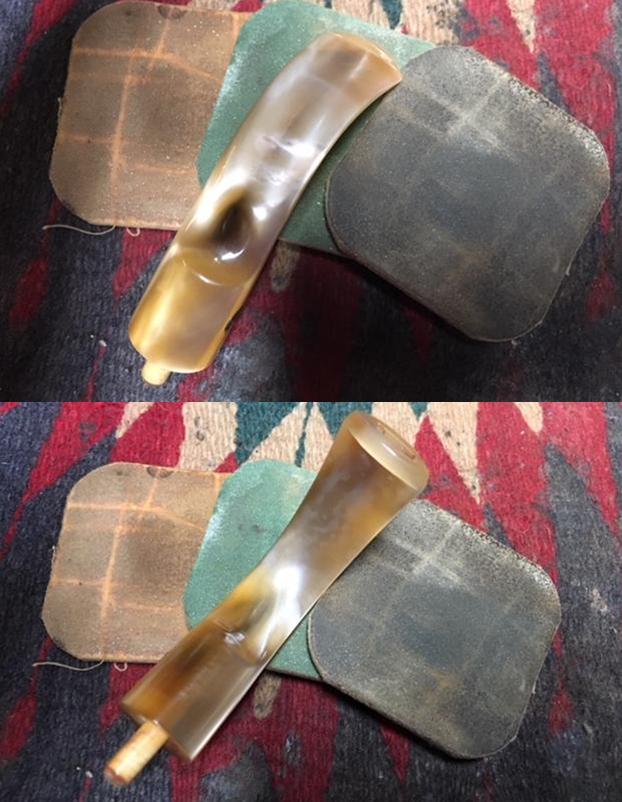
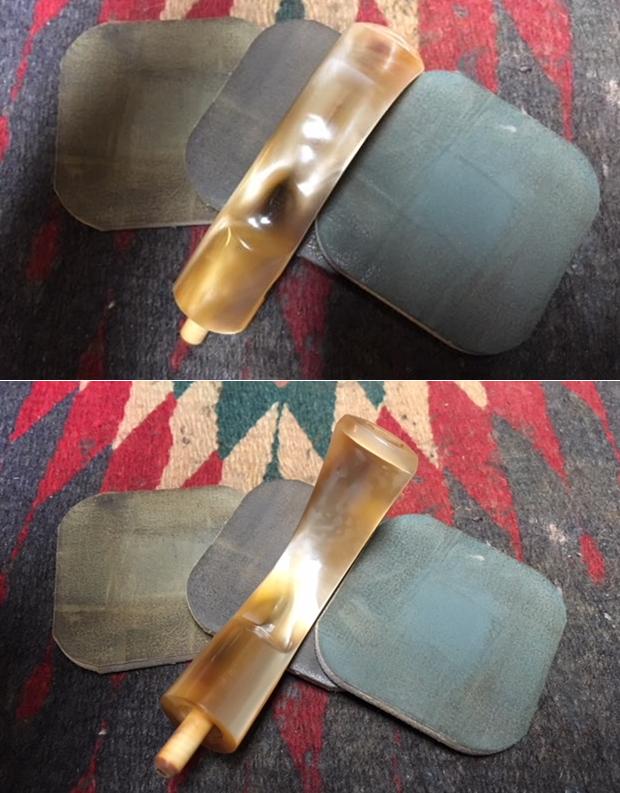
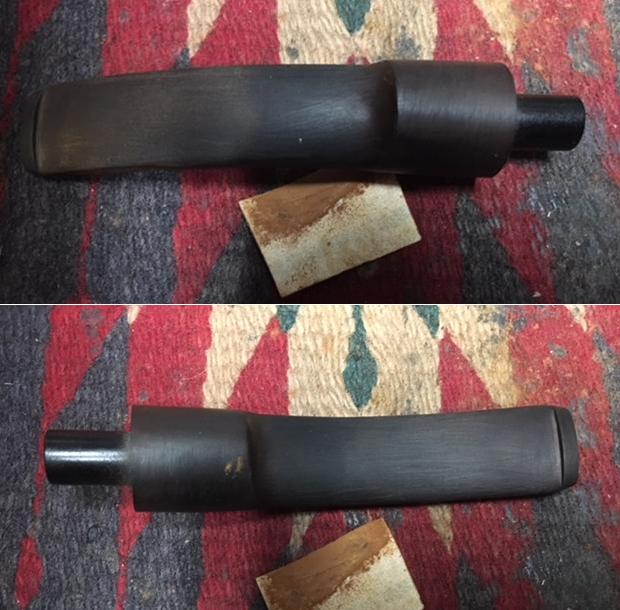
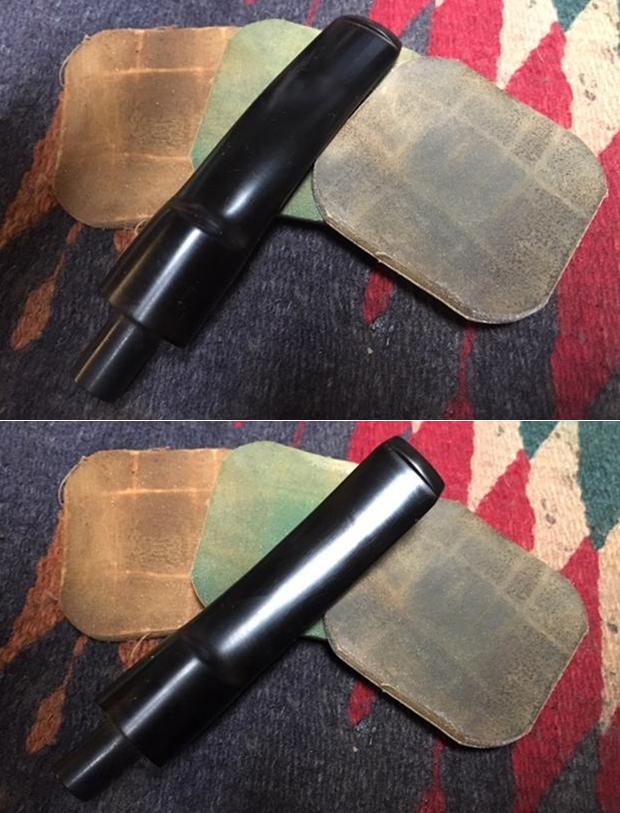
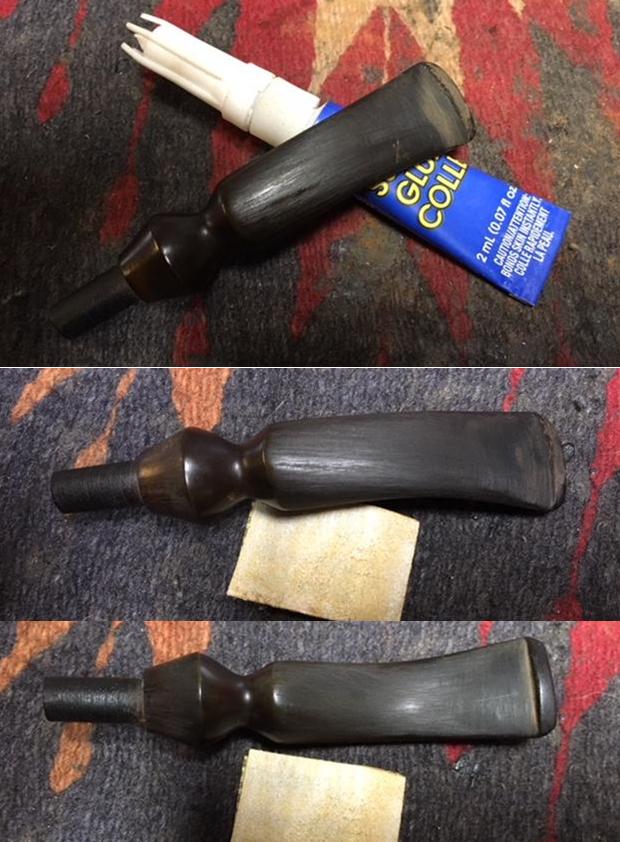
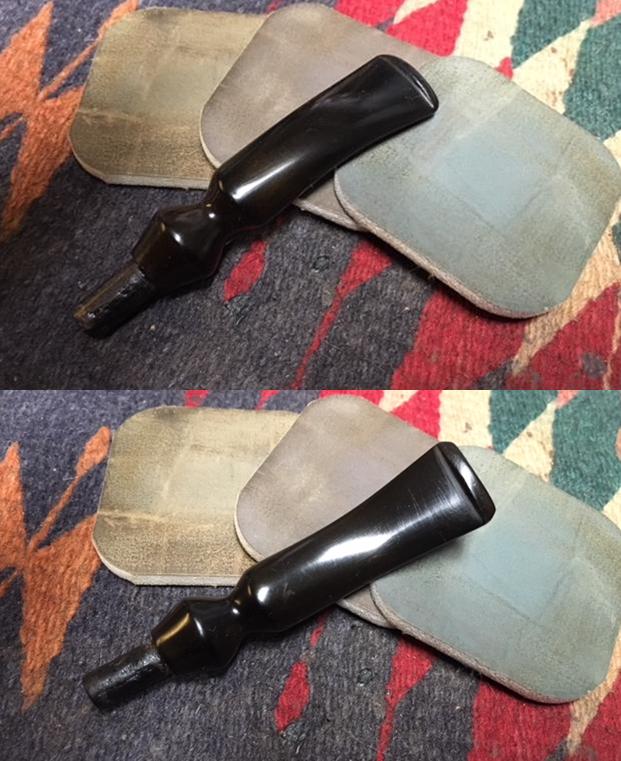
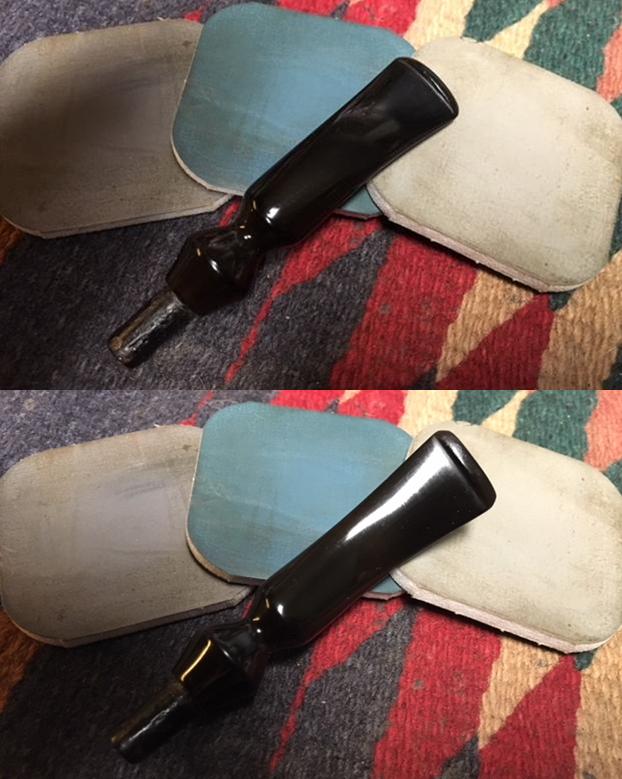
 I sanded the stem with 220 grit sandpaper to remove the oxidation on both sides of the tapered stem and remove the tooth marks and chatter on the top and bottom sides at the button.
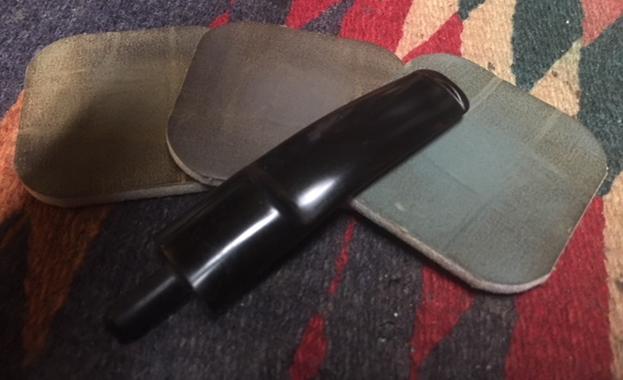
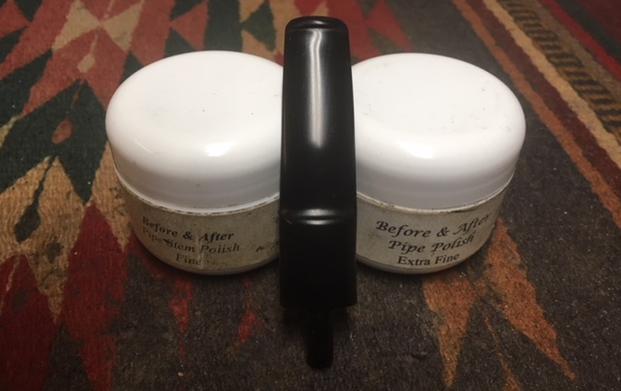
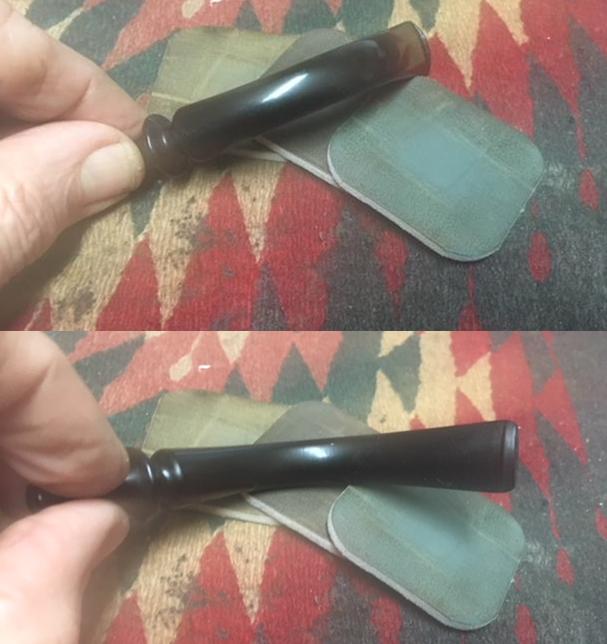
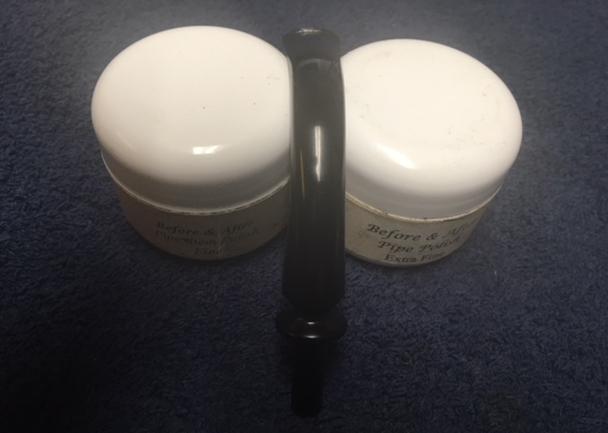
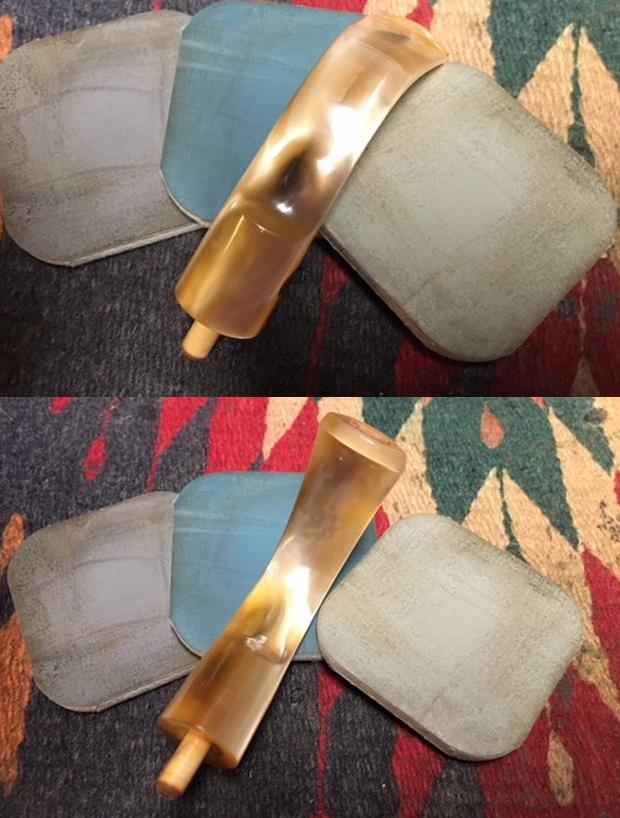
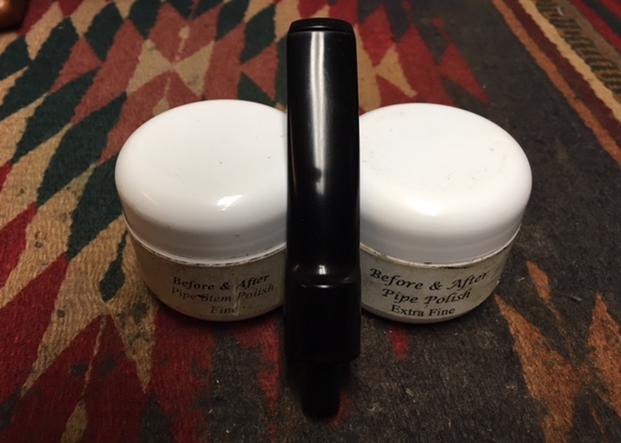
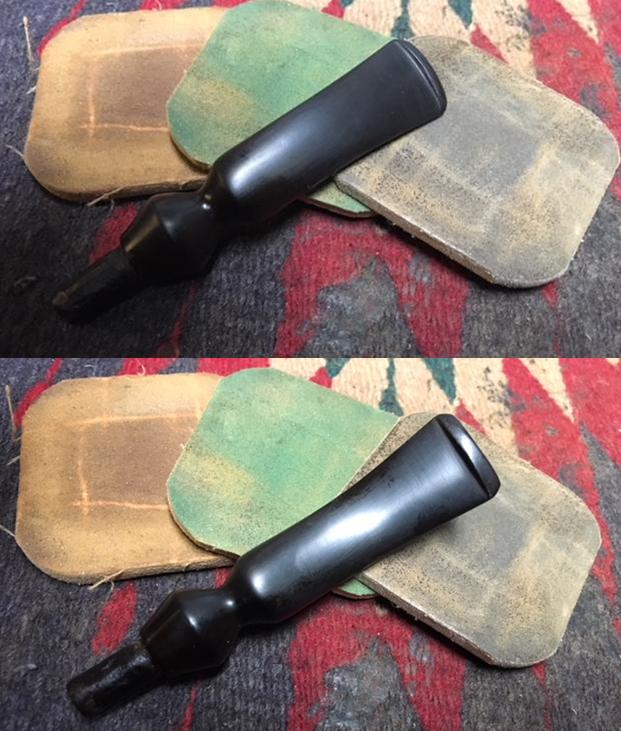
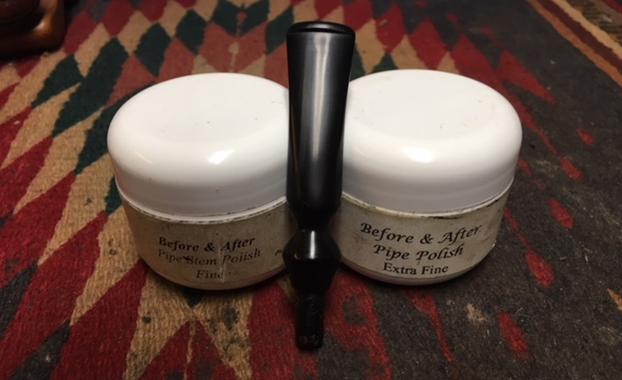
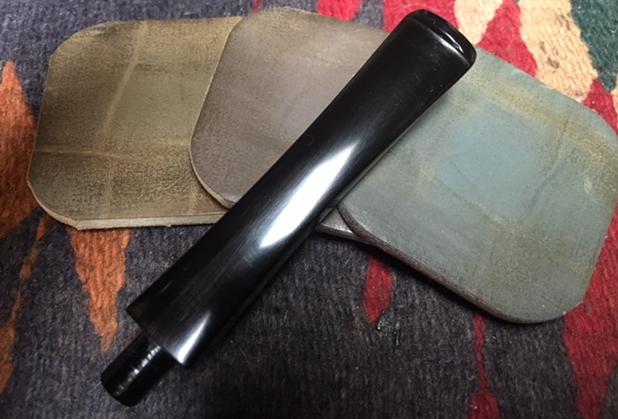
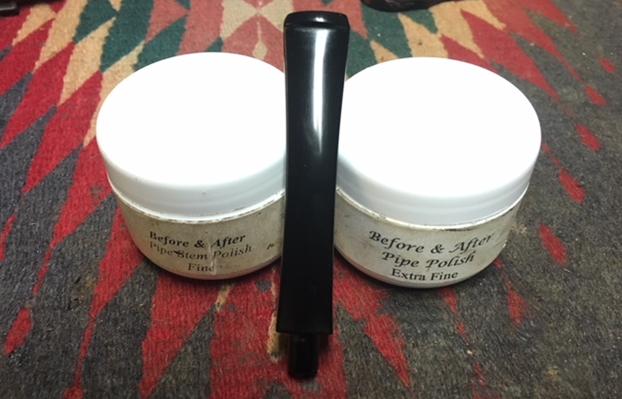
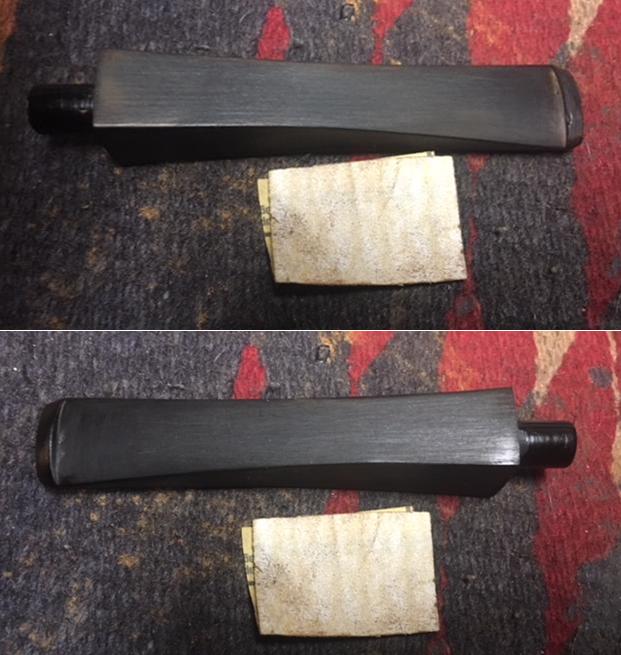 I polished out the sanding scratches and marks in the vulcanite with micromesh sanding pads – wet sanding it with 1500-2400 grit pads and dry sanding it with 3200-4000 grit pads. I wiped the stem down with Obsidian Oil after each sanding pad. I buffed the stem with Blue Diamond on the buffing wheel. I brought it back to the table and sanded it with the final three 6000-12000 grit pads. I polished it further with Before & After Pipe Polish –using both the Fine and Extra Fine Polishes. I gave it a rubdown with Obsidian Oil one last time and set it aside to dry.
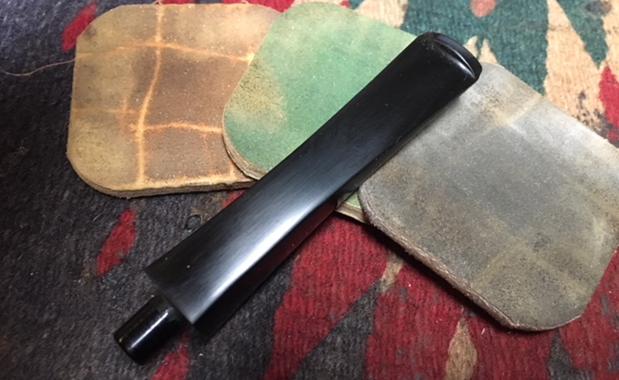
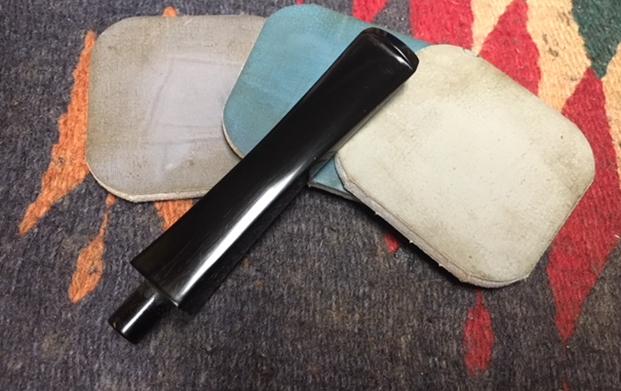
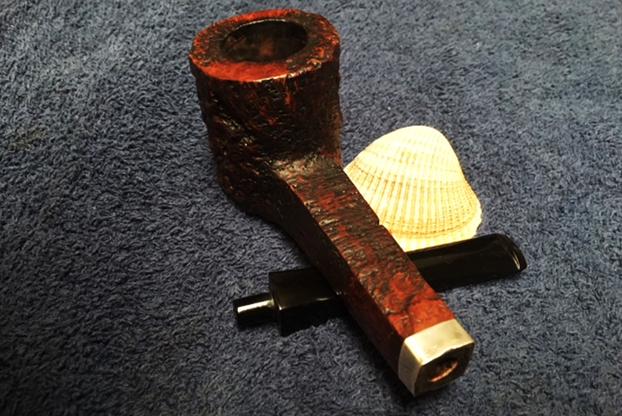
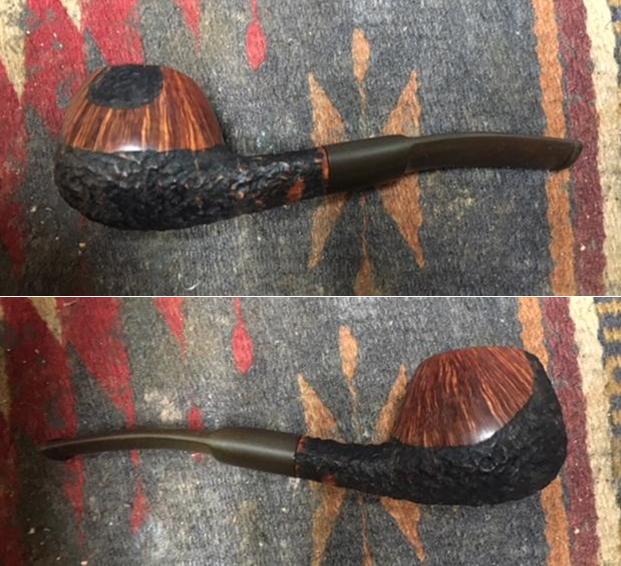
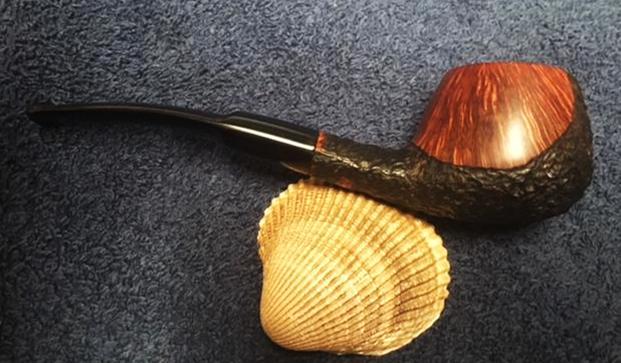
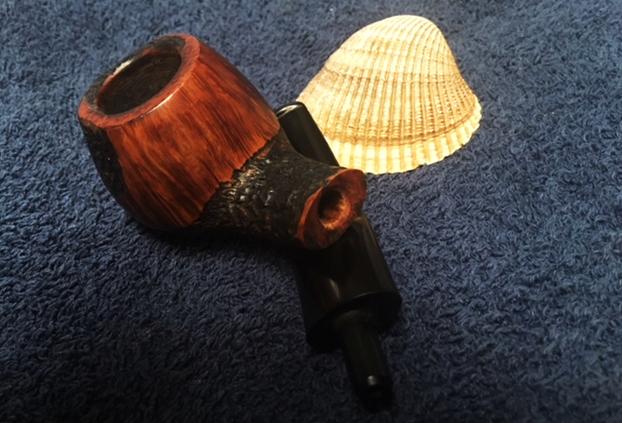
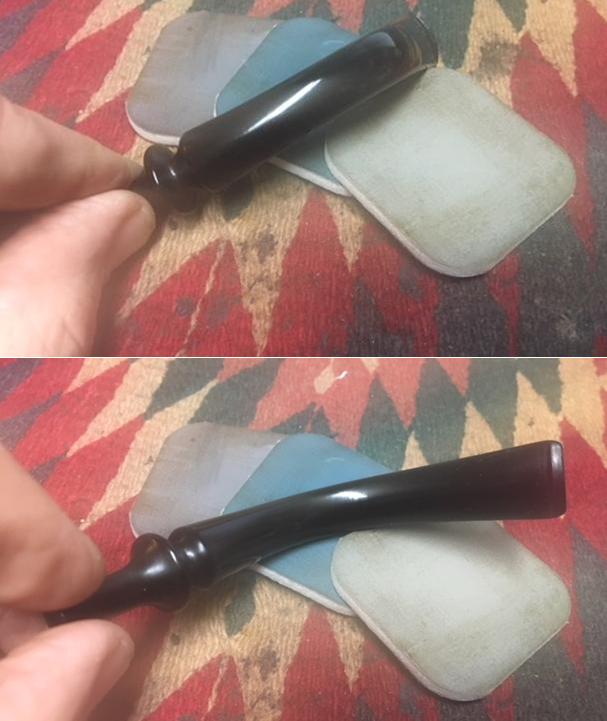
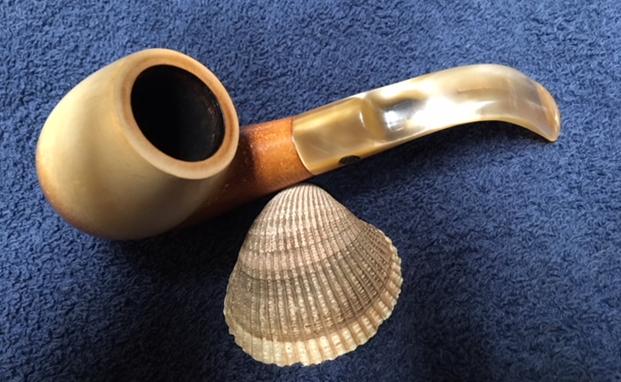
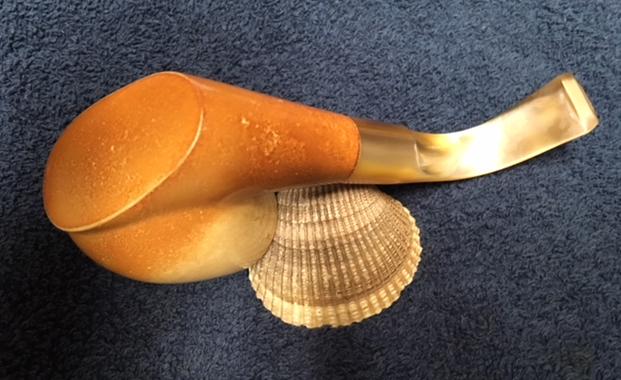
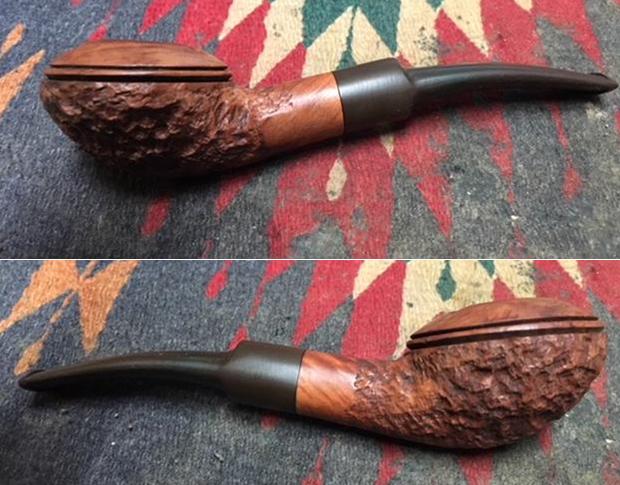
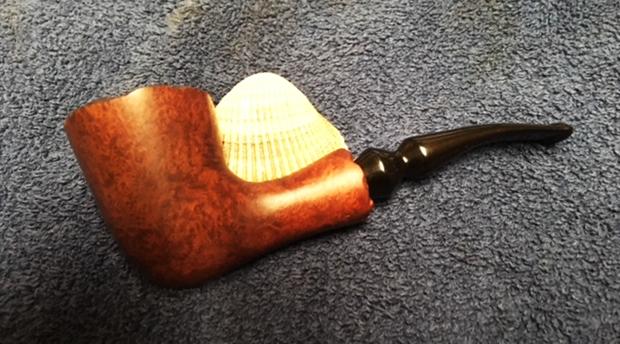
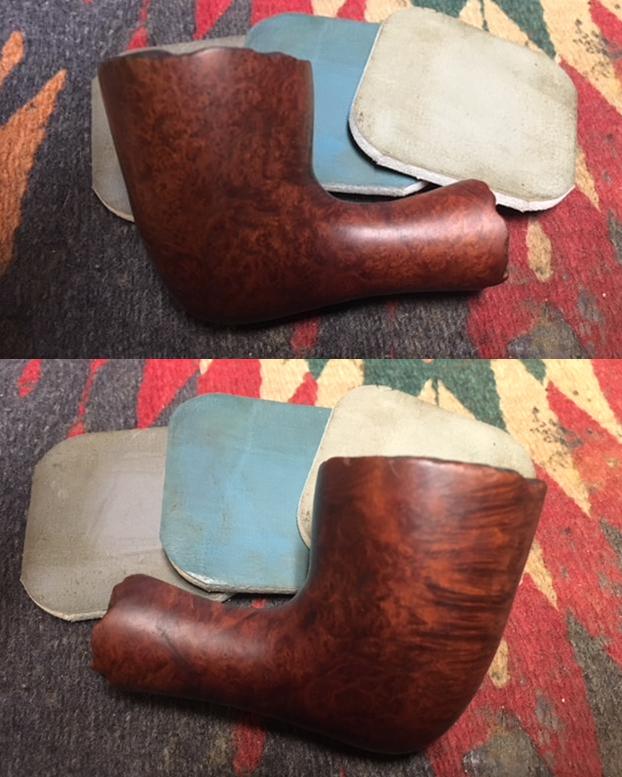
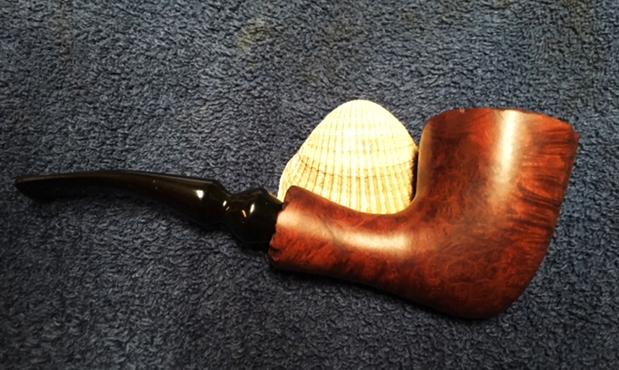
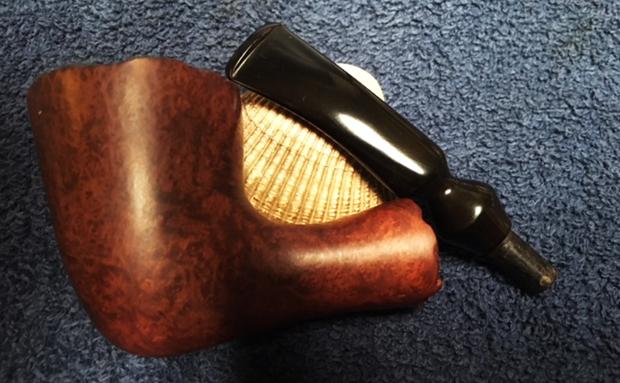
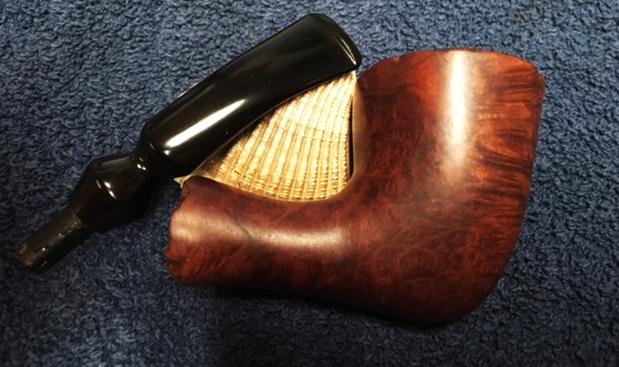
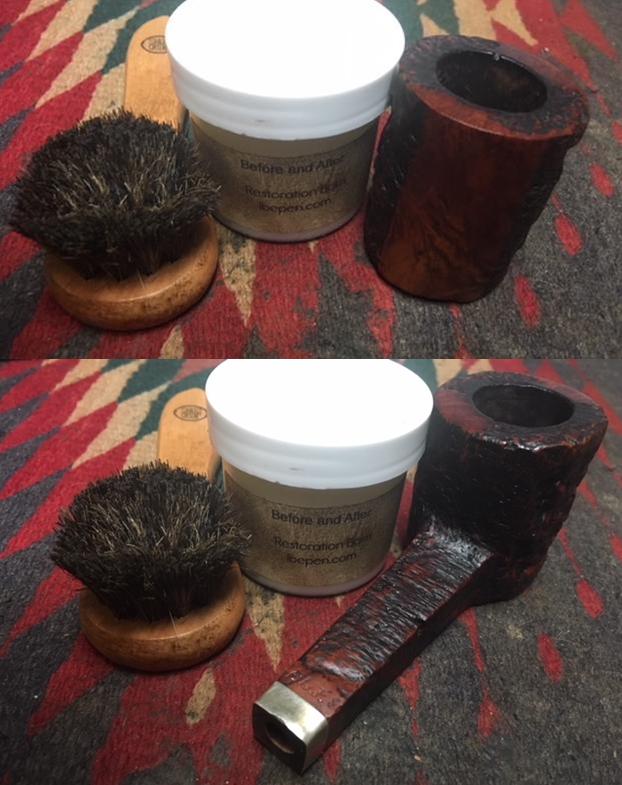
 I put the stem back on the bowl and worked the pipe over on the buffing wheel using Blue Diamond to lightly polish the stem. I buffed the bowl with a light touch so as not to get any of the buffing compounds in the grooves of the rustication. I buffed the stem to raise the gloss on the vulcanite. I gave the bowl multiple coats of Conservator’s Wax and gave the stem multiple coats of carnauba wax. I buffed the entire pipe with a clean buffing pad to raise the shine. I hand buffed it with a microfiber cloth to deepen the shine. The finished pipe is shown in the photos below. The medium brown stains on the rusticated square shanked poker shaped bowl with a smooth bands and rim works well with the rich black of the vulcanite stem. The polishing and the reworking of the stem material left this a beautiful and interesting looking pipe. The dimensions of the pipe are: Length: 7 3/8 inches, Height: 2 inches, Outside Diameter: 1 5/8 inches, Diameter of the chamber: 7/8 inches. This one will be heading back to Idaho. A House of Robertson collector who used to frequent the Boise shop is adding it to his collection. Thanks for looking.