Monthly Archives: October 2017

Scorched Briar and Unique Stamping Reveal a Part of Brigham Pipe History


Nice work Charles on a great piece of Brigham history.

A DadsPipes reader contacted me a little while ago to ask about a Brigham pipe he’d picked up at a local antique shop. Initially he had planned to clean up the pipe himself, but after running into possible burnout problems, he decided to send the pipe my way for an opinion.

I was sent these pictures as an introduction to the pipe. As you can see, there were several large scorch marks on the outside of the bowl, and a damaged area inside the chamber that I’d have to sort out. While potentially serious issues, the scorch marks didn’t peak my interests as much as the stampings. Can you spot what made me sit up and take notice in these pics?

brigha524fullburn1
scorch2brigstamp1
brigA524

The pipe is stamped on the left shank “Brigham” over “MADE IN CANADA”, and on the right shank “A524”. The stem is inset with the 7-Dot “starburst” pinning pattern.

View original post 1,651 more words

A Nice Relaxing Refurb – A Churchill’s Black Friar 407 Poker


Blog by Steve Laug

I have cleaned up a few Churchill’s pipes over the years and found them to be well made pipes. Several of the ones I have worked on were English-made pipes but the one on the table now is a French made pipe. I have a few hours to kill before I head to the airport and needing something a bit relaxing to work on. This pipe fit the bill for me. It is stamped on the left side of the shank with the word Churchill’s in old English script and underneath that it is stamped Black Friar over the shape number 407. The number makes me think it is a French made Comoy’s pipe. It is stamped on the underside of the shank at the stem/shank junction FRANCE. The pipe is a rusticated bowl with a contrast finish of dark and medium browns. The stamping on the shank is in excellent condition as is the stamping of the C on the Lucite stem. The finish is in good condition with little wear or tear and only showing the dust of sitting around in disuse. Jeff took the next series of photos before he cleaned the pipe and stem.From previous blogs I have written I remembered that the brand was named for a pipe shop in Norwich, England that was called Churchills of Norwich. They evidently had shop pipes made for them by various makers. I found the following information Pipephil’s Pipes,Logos and Stampings website http://pipephil.eu/logos/en/logo-c4.html. I quote: “Churchill’s Tobacco shop is situated in St Andrew’s Street at the corner of Bridewell Alley in Norwich, England. The shop was next to a church and at the bottom of two hills, and that’s how it became “Churchill’s”. Former manager: John Elvin (retired on May, 31 2008). Current owner (2008): Keith Garrard.”

I then turned again to Churchill’s own website to see if I could find any more information. The site gave me some background information that adds colour to the history of a brand and makes it more personal for me. According to their website the shop is the last remaining specialist tobacconist in Norwich, originally standing at 32 St Andrews Street for over 23 years. http://www.churchillsofnorwich.com/index.php?_a=viewDoc&docId=1. The site also notifies the shop’s clients that Keith Garrard, who had a wealth of knowledge and was an avid pipe and cigar smoker himself, passed away on 23rd March 2012. His wife Coral continues to maintain the business in his honor.The bowl had a thick cake and an overflow of lava onto the top of the rim. The lava had filled in much of the rustication on the rim top. It looked as if the inner edge of the rim was undamaged but I would not know for sure until it was cleaned. The back of the rim had a much thicker coat of lava than the front side. The rustication patter on the bowl – top, bottom and sides is unique and the stain chosen makes it really stand out in contrast. The contrasting browns work really well with the golden swirls of the Lucite stem.The next two photos show the stamping on the left side of shank curling over on to the top of the shank. The third photo shows the stamped C on the left side of the stem.The golden swirled Lucite stem was clean other than having tooth chatter on both the top and underside near the button.Jeff out did himself on the clean up of this pipe. He reamed the bowl with a PipNet reamer and smoothed the walls of the bowl with a Savinelli Fitsall pipe knife. He scrubbed out the mortise and the airway in the shank and the stem with alcohol, cotton swabs and pipe cleaners. When he had finished, the bowl looks almost new on the inside (I actually don’t think it has ever been smoked to the bottom of the bowl as it is raw briar in the bottom third).  He scrubbed the exterior of the bowl, rim and shank with a tooth brush and Murphy’s Oil Soap to  remove the oils and tars on the bowl, rim and shank. He rinsed it under running water. He dried it off with a soft cloth. The lava mess on the rim and deep in the rustication was thoroughly removed without harming the finish underneath it. Once the grime was removed the finish actually looked to be in excellent condition I took photos of the pipe to show its condition before I started my work on it. I took a photo of the rim top to show the great condition it was in after the clean up.The stem looked really good other than the tooth chatter on both sides at the button. The chatter is hard to see in the photos but I was thankful that none of it was too deep.I once again used the Mark Hoover’s Before & After Restoration Balm on the briar. I rubbed it into the rustication on the rim, bowl and shank with my fingers. I wanted it to go deep in the rustication pattern to continue my test of the effectiveness of the product. As I have mentioned before Mark had said that the product can be used on briar or stems – whether vulcanite, acrylic or horn. He said it was designed to pull the dirt off of the briar as well as polish it. I figured this was a totally different type of finish that would once again put those claims to a test. He said that he had added some anti-oxidants to keep the briar from getting damaged from both UV rays and water. Once I had all the grooves and surfaces of the bowl covered I wiped it down with a clean cotton pad and then buffed it with a shoe brush. It seemed to work very well and I took the following photos to show the results. I set the bowl aside and turned my attention to the tooth chatter on the stem. I sanded out the chatter with 220 grit sandpaper until it was gone.It was time to polish out the scratches on the stem left behind by the 220 grit sandpaper with micromesh sanding pads. I wet sanded it with 1500-2400 grit pads and wiped it down after each pad with a damp cloth to wipe off the dust. I dry sanded it with 3200-12000 grit pads and again wiped it down with the damp cloth after each pad. The polishing of the stem removed all of the scratches and the tooth chatter. Each photo shows it progressively getting a shine. I put the stem back on the bowl and buffed it with Blue Diamond on the buffing wheel to polish the stem and lightly polish the briar. I gave the stem multiple coats of carnauba wax buffed it with a clean buffing pad to raise a shine. I gave the bowl multiple coats of Conservator’s Wax and rubbed it into the rusticated finish. I buffed it with a shoe brush and then with a clean buffing pad to raise the shine. I hand buffed the pipe with a microfiber cloth to deepen the shine. The variegated brown stained finish on the bowl and gold swirled Lucite stem combine to present a beautiful pipe. The dimensions of this pipe are Length: 5 1/2 inches, Height: 1 3/4 inches, Bowl diameter: 1 1/4 inches, Chamber diameter: 3/4 inches. The finished pipe is shown in the photos below. I will soon be putting it on the rebornpipes store if you are interested in adding to your collection. It is a beauty and will serve someone very well. Email me at slaug@uniserve.com or send me a message on Facebook. Thanks for looking.

This Old Italian Canadian showed Promise


Blog by Steve Laug

Jeff picked this heavily rusticated pipe up on one of his recent forays into the antique shops and malls of Montana. It is sea rock like rustication on the bowl and shank with a wire rustication on top of that. The finish was very dirty with a lot of dirt and grime in the deeper grooves of the rustication. There was a random stem stuck in the shank when he picked it up – I think it was just to make it more sellable. The stem is a round saddle stem while the shank is oval. The finish was dirty and there were some nicks in it around the shank end. The bowl had a heavy cake in it with some lava overflow filling in the rustication pattern on the rim top. There appeared to be some burn damage on the back left side of the rim top. The pipe had a smooth portion on the underside of the shank for stamping but the only stamping was at the shank/stem junction where it read ITALY. Jeff took photos of the pipe before he started his clean up. The rim top can be seen in the next photo. You can see the thick cake and the lava overflow on the top of the rim. It is hard to know if there is damage to the inner edge of the rim but the outer edge was clean and undamaged. It appeared that there was some burn damage on the back left side of the inner rim edge but we would not know until Jeff cleaned the pipe.Jeff took pictures of both sides of the bowl to show the rocky, craggy appearance of the finish on the bowl. It is unusual and interesting at the same time.The next photos show the shank and Italy stamping on the shank end. The stem is obviously the wrong one. You can see the variation of the round saddle portion of the stem and the oval shank. I am not too worried about the stem as it is going in the bin anyway as I will need to fit a new stem on the shank. Jeff worked his magic in cleaning up this pipe as it was a real mess on the rim and deep grit and grime in the grooves of the finish. He reamed it with a PipNet reamer and smoothed the walls of the bowl with a Savinelli Fitsall pipe knife. He scrubbed out the mortise and the airway in the shank and the stem with alcohol, cotton swabs and pipe cleaners. He scrubbed the exterior of the bowl, rim and shank with a tooth brush and Murphy’s Oil Soap to the oils and tars on the bowl, rim and shank. He rinsed it under running water. He dried it off with a soft cloth. Once the grime was removed the finish actually looked quite good condition. I took photos of the pipe to show its condition before I started my work on it. I did not bother with the old stem as it would be replaced. I went through my can of stems and found one that had the same diameter all the way around as the shank. The fit against the shank end was almost perfect. I would need to make the edges taper a bit more at the shank. The stem was new and still had castings on the sides and the end of the button. The tenon was a perfect fit in the mortise. I put the stem in the shank and took photos of the restemmed pipe. The pipe looks good with the new stem. There is promise in the appearance at this point. I repaired the chip on the left side of the shank end with clear super glue. I needed to rebuild that edge to remove the damaged area and allow the stem to fit snug against the shank. I used a sharp knife to bevel the edges of the mortise to accommodate the hip at the tenon/stem junction.I used a brass bristle wire brush on the rustication to clean off any remnants of the finish and then wiped the bowl down with acetone on cotton pads to remove the dust. I stained the bowl with a dark brown aniline stain and flamed it to set it in the briar. I repeated the process several times until I was happy with the coverage on the bowl. I set the bowl aside to dry overnight before proceeding with polishing the briar.In the morning I buffed the bowl with a shoe brush to raise a shine on the briar. I took the following photos to show what the pipe looked like at this point in the process. The bowl is looking good with a lot of colour variation due to the roughness of the rustication. I laid aside the finished bowl and turned my attention to the stem. I sanded out the casting marks and scratches on the stem with 220 grit sandpaper. I opened up the slot in the button with needle files to make it easier to push a pipe cleaner through. After I had removed the casting marks and the scratches on the stem surface it was time to work on it with micromesh sanding pads. I wet sanded it with 1500-2400 grit pads and wiped it down after each pad with Obsidian Oil to give the next pad more bite when I sanded. I dry sanded it with 3200-12000 grit pads and again wiped it down with the oil after each pad. After the final pad I wiped it down with a final coat of oil and set it aside to dry. Each photo shows it progressively getting a shine. I set aside the stem and picked up the bowl once again. I used the Mark Hoover’s Before & After Restoration Balm on the briar. I rubbed it into the grooves on the bowl sides with my fingers. I wanted it to go deep in the grooves to further test the effectiveness of the product. This would be a good test as it one of the roughest rustications that I have worked on with the product. As I have mentioned in previous blogs Mark had said that the product can be used on briar or stems – whether vulcanite, acrylic or horn. He said it was designed to pull the dirt off of the briar as well as polish it. I figured this deep rustication would certainly put those claims to a test. He said that he had added some anti-oxidants to keep the briar from getting damaged from both UV rays and water. Once I had all the grooves and surfaces of the bowl covered I wiped it down with a clean cotton pad and then buffed it with a shoe brush. It seemed to work very well and I took the following photos to show the results. I put the stem back on the bowl and buffed it with Blue Diamond on the buffing wheel to polish the stem and lightly polish the briar. I gave the stem multiple coats of carnauba wax buffed it with a clean buffing pad to raise a shine. I gave the bowl multiple coats of Conservator’s Wax and rubbed it into the rusticated finish. I buffed it with a shoe brush and then with a clean buffing pad to raise the shine. I hand buffed the pipe with a microfiber cloth to deepen the shine. The variegated finish on the bowl and stem combine to present a beautiful pipe. The pipe really does look good with the new stem. The dimensions of this pipe are Length: 5 1/2 inches, Height: 2 1/8 inches, Bowl diameter: 1 1/2 inches, Chamber diameter: 7/8 inches. The finished pipe is shown in the photos below. I will soon be adding it to the rebornpipes store if you are interested in adding to your collection. It is a beauty and will serve someone very well. Email me at slaug@uniserve.com or send me a message on Facebook. Thanks for looking.


Cleaning up a Pair of Goedewaagen Delft Ceramic Pipes


Blog by Steve Laug

This pair of double walled ceramic pipes was originally white with a blue Delft style scene painted and cured into the ceramic on the front of both bowls. They both have a painting of a scene that is a famous picture from Troost Tobacco where one man is in the stocks and another, rather portly man is helping him smoke a pipe. There is no other stamping on either pipe. Both pipes have begun to develop a nice patina as the bowls darken from smoking them. The stem on the smaller of the two (photos 1-4) was a typical freehand stem like many I have seen and used in the past. The one on the larger calabash (photos 5-8) shaped one is like the stems on WDC Wellington’s – kind of a faux p-lip with the airway coming out the end of the button rather on the top like a Peterson. The smaller pipe had a rubber stopper in the end of the shank to hold the stem in place and the larger one had a crumbling cork stopper. Both pipes were very dirty with cake in the bowls and oxidation on the stem surfaces. The pipes were made by an old Dutch pipe making house called Goedewaagen. Here is the link to their website. Have a look at the history page on the site. It gives a detailed background on the Company that made the pipes. Even though the link is in Dutch it is worth translating with Google Translate. http://www.goedewaagen.nl/goedewaagen/. I have included the cutaway diagram of the double walled ceramic pipe to help give and idea of the concept and construction of the pipe.Both pipes came to me from the estate of a Vancouver pipe smoker whose widow left them with RJ Clarke’s Pipe Shop after he died. I was asked to clean them up and sell them for the shop as it has since closed. I decided to work on them together as they will need the same kind of cleanup and restoration. The photos below show both pipes as they were when I brought them to my work table. I took photos of each of the bowls to show the cake lining the walls and the condition of the bowl and rim top. Both had a thick cake and the airway at the bottom of both bowls was half plugged making the airflow quite restricted.The paintings on both bowls were identical – a painting of a scene that is a famous picture from Troost Tobacco where one man is in the stocks and another, rather portly man is helping him smoke a pipe. As mentioned above both shanks used a stopper in the mortise to hold the stem in place. The smaller pipe used a rubber stopper and the calabash style pipe had a cork stopper. The rubber one was in good condition while the cork one was crumbling and pushed into the mortise. The photos below show the two stoppers.The stems were quite different in terms of condition. It appeared to me that the one on the smaller pipe was better quality vulcanite than the other one and it was barely oxidized. There was light tooth chatter on the stem. The stem on the calabash pipe was heavily oxidized and the tooth chatter and marks were heavier. I put both stems in the Before & After Pipe Stem Deoxidizer bath to soak overnight. I knew that it would work well on the stem from the smaller pipe as it was less oxidized. The heavier oxidation on the calabash stem would be harder because the bath was getting less effective after soaking and cleaning 80-90 stems in it.I scraped out the cake in both bowls using the Savinelli Fitsall Pipe Knife. I removed all of the cake and sanded the inside of the bowls with 220 grit sandpaper to remove the remnants. I used a dental pick to clean out the clogged airway at the bottom of each bowl.The rubber stopper on the smaller pipe was in good condition and still usable. The cork stopper was crumbling and I could hear pieces rattling in between the double walls of the ceramic pipe. I used a pen knife to clean out the pieces of cork. I cleaned both bowls under warm running water. I filled the space between the two walls of both pipe with hot water and shook it to loosen any residual tars or oils that had collected in those spots. I shook the water out and repeated the cleaning until the shanks and insides of both pipes were clean. I scrubbed the outside of the bowl and the inside of the bowl with hot water and a light detergent to remove the dirt on the glazed ceramic finish. While I was cleaning the bowls I remembered that I had inherited a bag of corks that were drilled or Le Peltier ceramic pipes. I took one out and was glad that it was the proper diameter for the calabash.  I dried out the shank and the bowl with paper towels and wetted the cork to cause it to swell. The fit in the mortise was perfect. I used a dental pick to carefully lift it out of the mortise and coated it with all-purpose glue. I pressed it in to the mortise until the surface of the end of the cork was the same distance from the outer edges as the rubber stopper on the other pipe. I set the bowl aside to let the glue dry before trying the stem on the pipe. I took photos of both bowls to show how clean they were at this point in the process. By this time the stems  had been soaking since the night before. I took them out of the bath and held them over the container to let the thick solution drip clean of the stems. When the majority had dripped clean I dried them off with a rough cotton cloth the wipe off as much of the oxidation on the rubber as possible in the drying process. I cleaned the airway on both stems with alcohol and pipe cleaners until the deoxidizer and the tars and oils in the stems was removed and they were clean. In retrospect I should have cleaned them before soaking them but hindsight is always better anyway. The stem with the lighter oxidation came out almost perfect. The other one was certainly better than before the soak.The stems looked good but more work would need to be done before the final black gleam was back. I buffed both stems with red Tripoli to remove the remaining oxidation. I sanded both stems with 220 grit sandpaper to remove the tooth chatter from both sides near the button. I did more work on the stem from the calabash to remove the heavier oxidation of the vulcanite and to reshape the button. Once I was finished with the sanding I buffed both stems again with the red Tripoli. After buffing them I polished them with micromesh sanding pads – wet sanding them with 1500-2400 grit pads and wiping them down after each pad with Obsidian Oil to give the next pad more bite when I sanded. I dry sanded them with 3200-12000 grit pads and again wiped them down with the oil after each pad. After the final pad I wiped them down a final time with the oil and set them aside to dry. I put the stem back on the bowl and buffed the entire pipe with Blue Diamond on the buffing wheel to polish the stem and the bowl. I used a soft touch on the bowl as I did not want to damage the paintings on the bowl fronts of the ceramic polish in any way. I buffed stem hard to work over the remaining small scratches and minute oxidation that was still on the rubber of both stems. It took some work but they cleaned up nicely. I gave the bowls and the stems multiple coats of carnauba wax buffed them with a clean buffing pad to raise a shine. I hand buffed the pipes with a microfiber cloth to deepen the shine. The two double walled bowls with the Delft style painting on the front and the developing brown patina combined with the black vulcanite stems present a beautiful pair of pipes. I find these interesting double walled Goudewaagen ceramic pipes a pleasant change to the briar pipes that I normally work on. The finished pipes are shown in the photos below. The dimensions of the smaller brandy shaped pipe are Length: 6 inches, Height: 1 ¾ inches, Bowl diameter: 1 ½ inches, Chamber diameter: 7/8 inches. The dimensions of the larger calabash pipe are Length: 7 inches, Height: 2 ½ inches, Bowl diameter: 2 inches, Chamber diameter: 7/8 inches.I will be adding both of these pipes to the rebornpipes store shortly. I already have several of these pipes so I will be passing these on to others to try. Thanks for looking.

Restoring an Edwards 730 – 4 Panel Rhodesian with a Square Shank


Blog by Steve Laug

When my brother sent me this Edwards Panel Rhodesian (at least that is what I would call it), I immediately thought of William and wondered if he would be interested in it. He had earlier purchased an Edwards paneled pipe from me so it was not a far stretch to wonder if he might be interested in this one as well. I set it aside and pretty much forgot about my initial thought. However, not long afterward, William wrote about a pipe he wanted to send me to clean up for him. He sent the package to me and when it arrived, I opened it to find an Edwards Octagon shaped paneled Dublin that he wanted reworked. When I saw that, I remembered the other pipe I had that might interested him. I wrote and sent him photos of this pipe to see if he had any interest in adding it to his collection. He wrote back and said he was definitely interested in it. I figured I would restore it the same time I worked on his other pipe and could save postage by mailing them both back to him in the same package. With that in mind, I worked on the pair at the same time. I have already written about the restemming and the restoration of his Octagon shaped pipe (https://rebornpipes.com/2017/10/17/restoring-an-edwards-hexagon-dublin-sitter-97/).

The pipe is stamped Edwards on the left side of the shank and on the right it reads Algerian Briar over the shape number 730. The underside of the shank bears as a large number 7. The Edwards stamp while readable was faint in the middle. The pipe was in pretty decent shape for an estate. There was a light cake in the bowl and some darkening on the rim top but nothing thick or horrible. Even the inner beveled edge of the bowl was in good shape. The finish has some nicks and scratches on the sides and front of the bowl. There were a few small fills in the briar on the rim cap but the pipe was in very god condition. The next series of photos show the condition of the finish on the bowl. The old oiled finish that Edwards put on their pipes was worn but the grain still showed through. There was a mix of grains on the sides and bottom of the bowl and shank – cross grain, birdseye and mixed. The next photos show the stamping on the shank of the pipe. All of it is readable. The last picture shows the France stamp on the underside of the saddle stem. The stem was oxidized and had tooth chatter and tooth marks on both sides near the button. There was some damage to the top edge of the button as well from being chomped.Jeff did his usual impeccable job cleaning off the debris and grime on this old bowl. He reamed the light cake from the bowl with a PipNet reamer and smoothed the walls of the bowl with a Savinelli Fitsall pipe knife. He scrubbed out the mortise and the airway in the shank and the stem with alcohol, cotton swabs and pipe cleaners. He scrubbed the exterior of the bowl, rim and shank with a tooth brush and Murphy’s Oil Soap to the oils and tars on the bowl, rim and shank. He rinsed it under running water. He dried it off with a soft cloth. Once the grime was removed the finish underneath was in decent condition. The rich patina on the grain of the older briar really stood out after the pipe was cleaned. I took photos of the bowl to show its condition before I started my work on it. The condition of the bowl and rim was good. There was a little damage on front right of the inner edge that I had not seen before that would need to be address but otherwise it was clean.The stem had some oxidation around the saddle portion of the stem and the tooth chatter and marks would need to be addressed.I decided to start working on the stem first. I lightly sanded the tooth chatter and marks out of the surface of the stem on both sides at the button. I heated the stem with a lighter to try to raise the marks. While many of them responded well to the heat some of them remained. I have found that if the marks are dents they respond well to heat and typically return to a flat condition. If however, they have any sharp edges on then the heat only works minimally well. I filled in the larger tooth mark and the damage to the top edge of the button with black super glue. I also filled in the lighter, smaller mark on the underside at the same time.While the stem repair was drying I worked on the bowl itself. I wiped down the surface with acetone on cotton pads to remove any remnants of debris and grime that had escaped my brother’s attention or had been picked up in the shipping wrappers. I lightly sanded the inner edge of the bowl to take care of the light damage on the front right edge. By this time the repair on the stem was dry. I recut and reshaped the button with a needle file and smoothed out the surface repairs. I sanded the stem with 220 grit sandpaper to blend the repairs into the rest of the stem. I sanded the stem to remove the oxidation that is visible in the next photos. I put the stem on the bowl and rubbed the bowl down with Before & After Restoration Balm. As part of my ongoing experiment I thought it would be good to use it on an oil finished bowl and this one was a prime candidate. I rubbed it in (using the stem for a handle) and wiped it off with a cotton pad. I removed the stem and dropped it in a bath of Before & After Pipe Stem Deoxidizer to attack the oxidation. My bath is getting older and it is not as effective as it was when I first started using it but it would help minimize the work on the stem for me. (I am waiting for a new jar of the deoxidizer to replace this one. I have cleaned between 80-90 stems with the product so it is tired.) I put the lid on the bath and left it to soak until morning.Before calling it a night I worked on the finish on the bowl some more. I lightly buffed the bowl with red Tripoli to remove as many of the surface scratches and nicks as I could. Doing that got rid of a lot of them and polishing it with micromesh would minimize what remained. I hand polished the briar with micromesh sanding pads – wet sanding with 1500-2400 grit pads and dry sanding with 3200-12000 grit pads. I worked on the beveled inner edge of the bowl to clean it up the damage and the darkening a bit more. I wiped the bowl down with a damp cloth after each pad. I hand buffed it with a microfibre cloth after the 12000 grit pad. The pictures below show the progress of the polishing on the briar. In the morning I took the stem out of the bath and let the excess product drain off into the bath before wiping it down with a cotton pad to remove the oxidation that was attached to the product. I ran a pipe cleaner through the airway with alcohol to remove the remnants of the bath. The stem looked good but more work would need to be done before the final black gleam was back. I buffed the stem with red Tripoli to remove the remaining oxidation. I polished the stem with micromesh sanding pads – wet sanding it with 1500-2400 grit pads and wiping it down after each pad with Obsidian Oil to give the next pad more bite when I sanded. I dry sanded it with 3200-12000 grit pads and again wiped it down with the oil after each pad. After the final pad I wiped it a final time with the oil and set it aside to dry. I put the stem back on the bowl and buffed the entire pipe with Blue Diamond on the buffing wheel to polish the stem and the bowl. I used a soft touch around the stamped areas as I did not want to flatten them or polish them away. I buffed stem hard to work over the remaining scratches in the rubber. It took some work but they are smoothed out. I gave the bowl and the stem multiple coats of carnauba wax buffed it with a clean buffing pad to raise a shine. I hand buffed the pipe with a microfiber cloth to deepen the shine. The four panel Rhodesian shaped bowl, and the square shank and saddle stem combine to present a beautiful pipe. I find these interesting shaped Edwards four sided, six sided and eight sided Dublin shaped pipe a real pleasant variation on the normal classic shapes. The combination of grains and the natural oil finish give the pipe a rich patina that is highlighted by the black of the polished vulcanite stem. The finished pipe is shown in the photos below. I think William is going to really like this new pair of Edwards pipes. They are both ready to pack up and head back to him in the mail. Thanks for looking.

Reviving a Handsome Dr. Grabow Golden Duke Adjustomatic Chubby Author


This is one of my favourite old Grabow shapes. This one is a classic shape and a beautiful piece of briar. Well done Charles.

I’ve been working on quite a few old Brigham pipes recently, so this Grabow Golden Duke Author was a welcome respite when I pulled it from my box of pipes waiting refurbishment. It has that classic chubby shape that, at least for me, holds a timeless appeal and the promise of a cool smoke thanks to its thick bowl walls and stout shank.

The pipe was in decent estate condition when it arrived on my worktable. It was dirty, of course; the briar felt oily in the hand, the pipe’s rim was hidden under a crust of lava, and the shank had random dark splotches of some kind of grease or perhaps adhesive residue. The stem was oxidized a very unappealing yellow/brown colour, and the bit showed a small constellation of tooth dents on both top and bottom surfaces.

20170729_17273820170729_172746
20170729_17275220170729_172758
20170729_17280520170729_172811
20170729_17281620170729_172908

The pipe is stamped “GOLDEN DUKE” over “DR. GRABOW” on the…

View original post 732 more words

GBD 9242 Restoration


By Al Jones

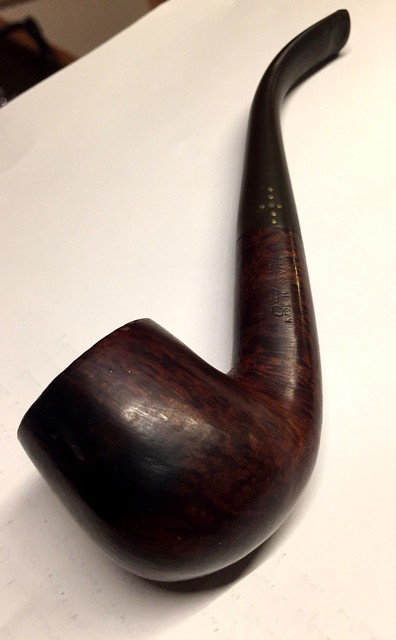
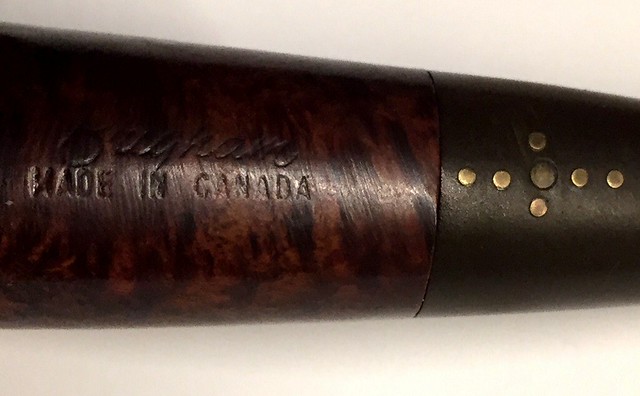
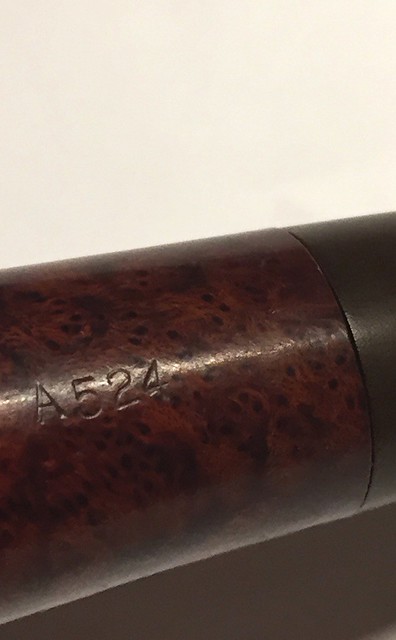
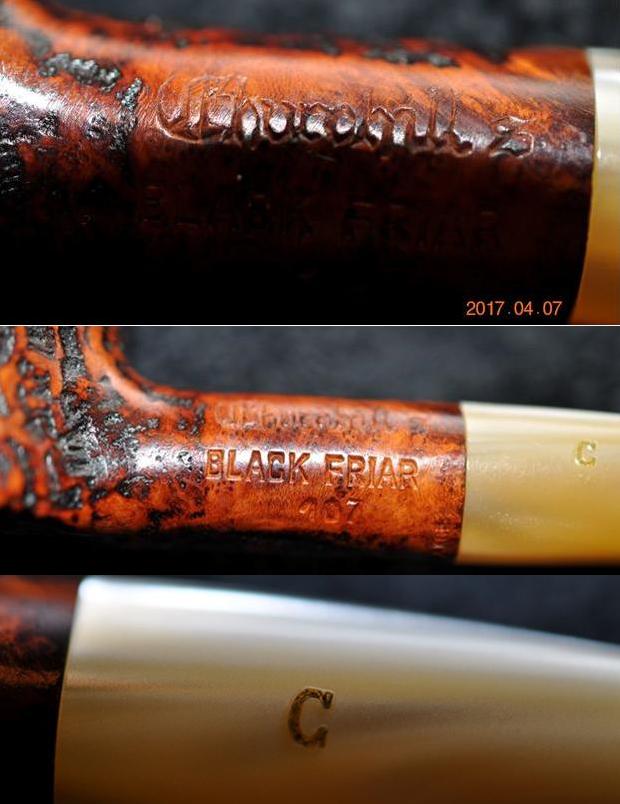
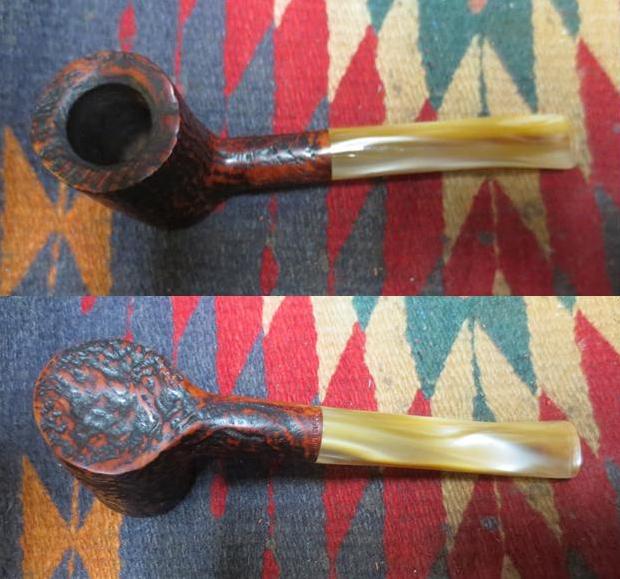
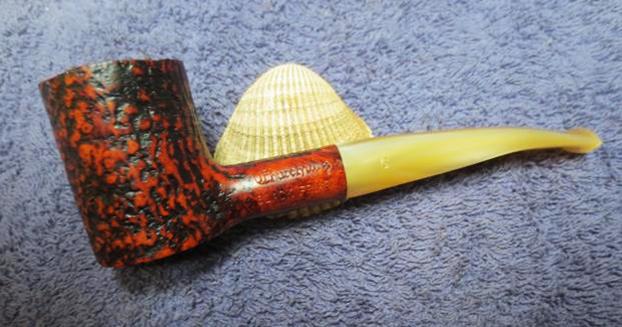
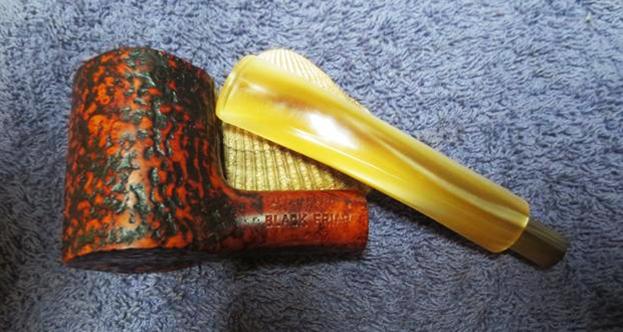
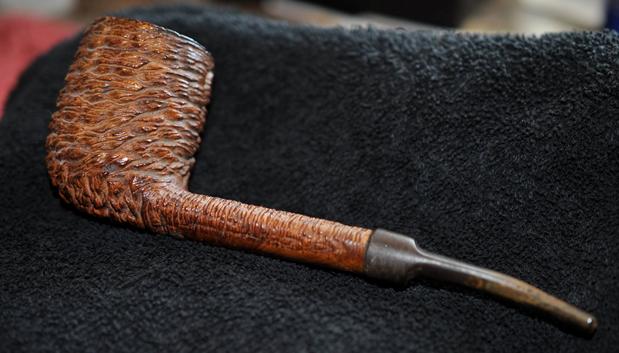
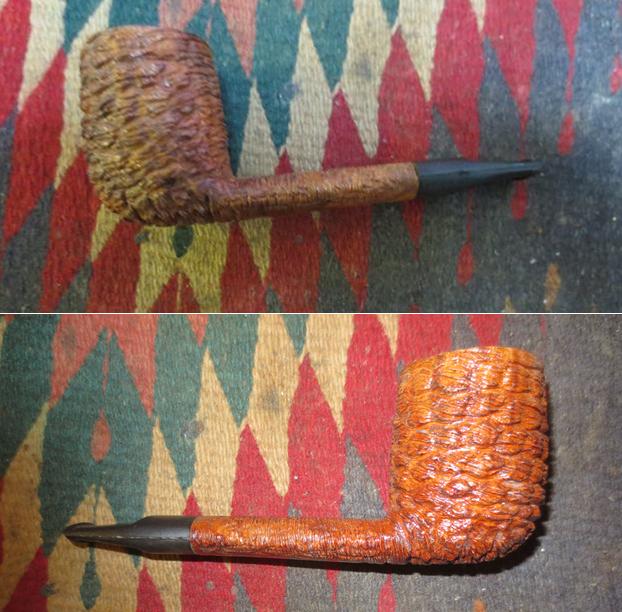
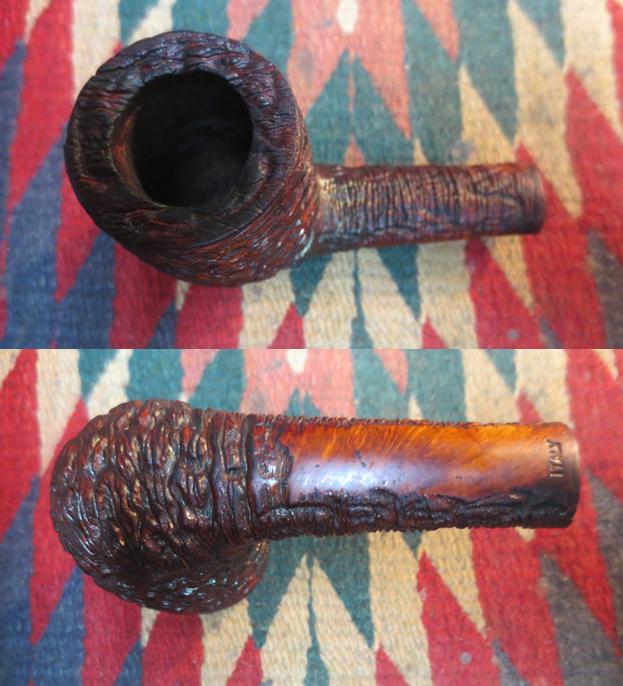
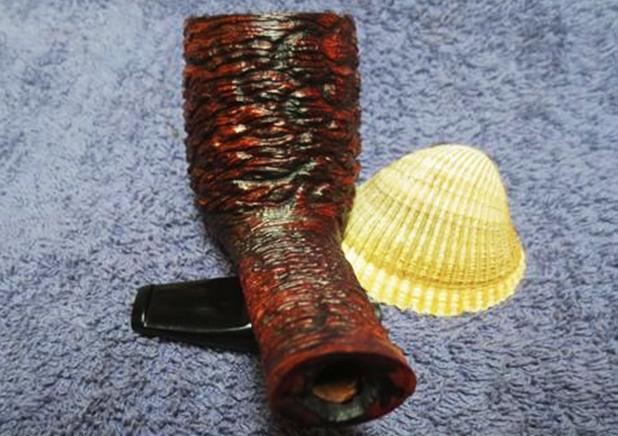
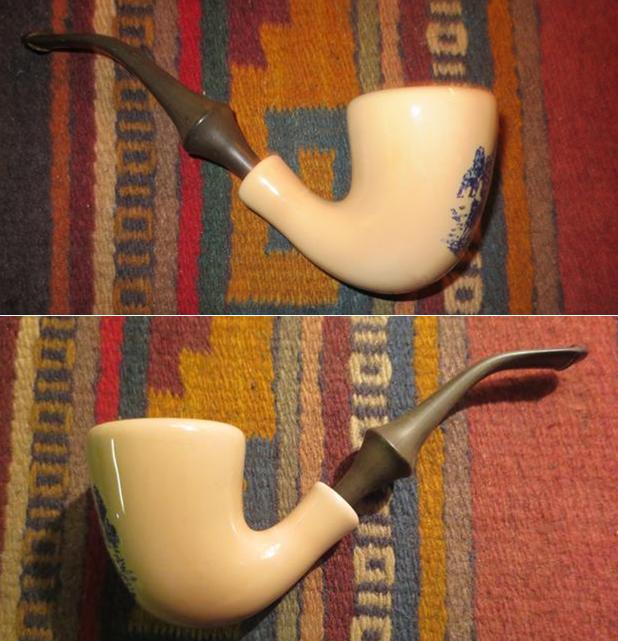
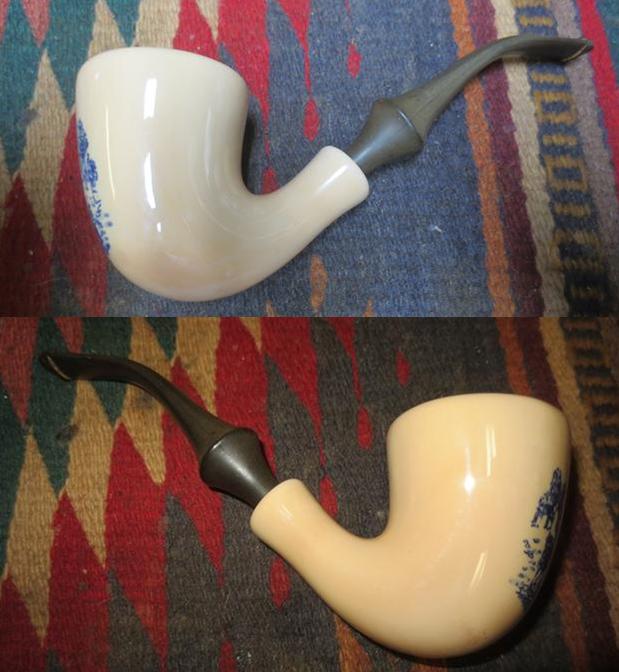
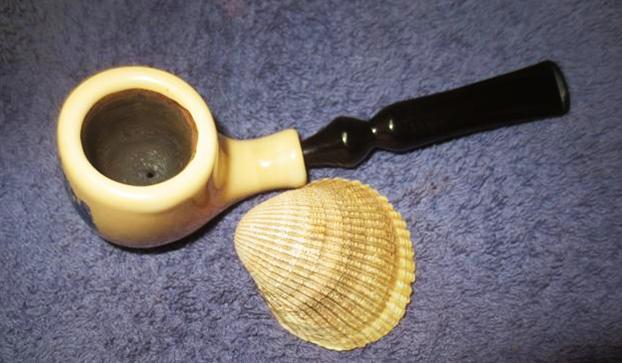
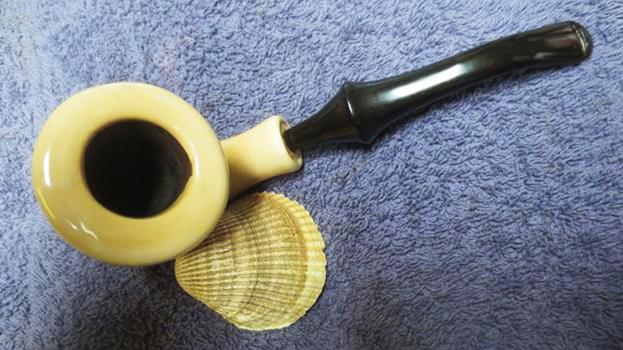
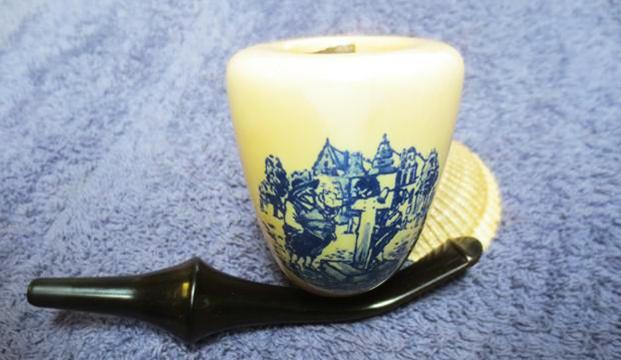
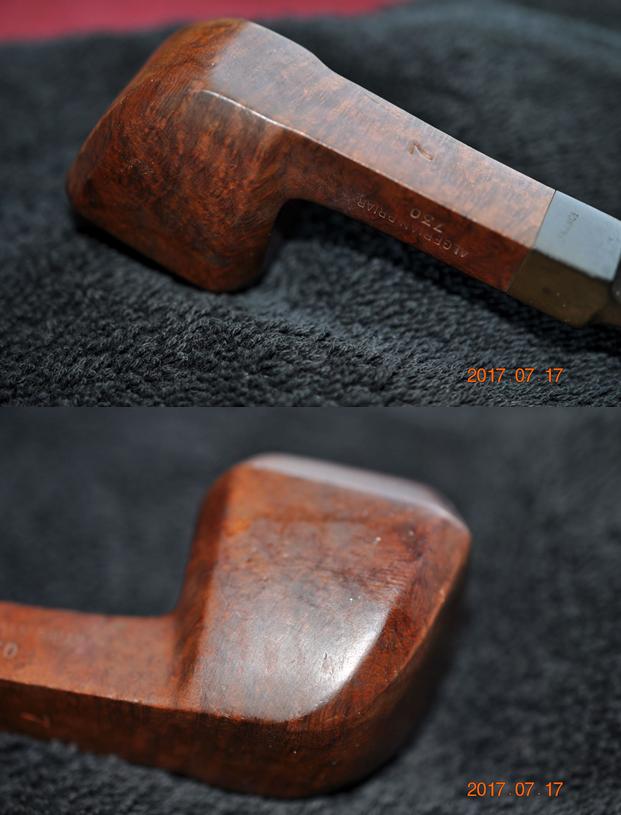
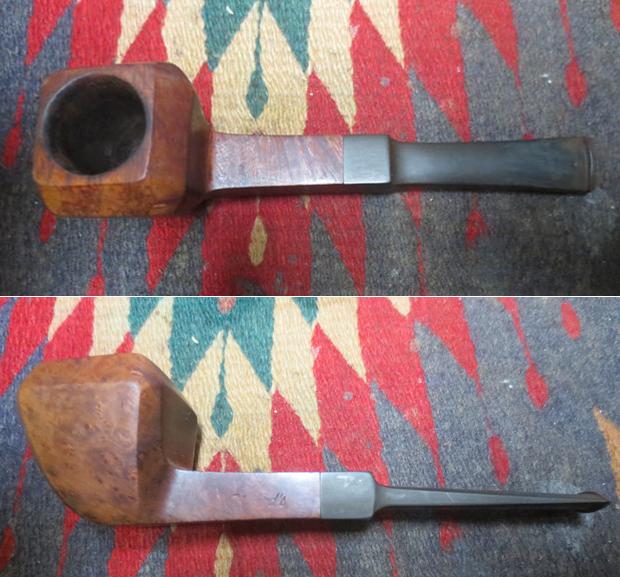
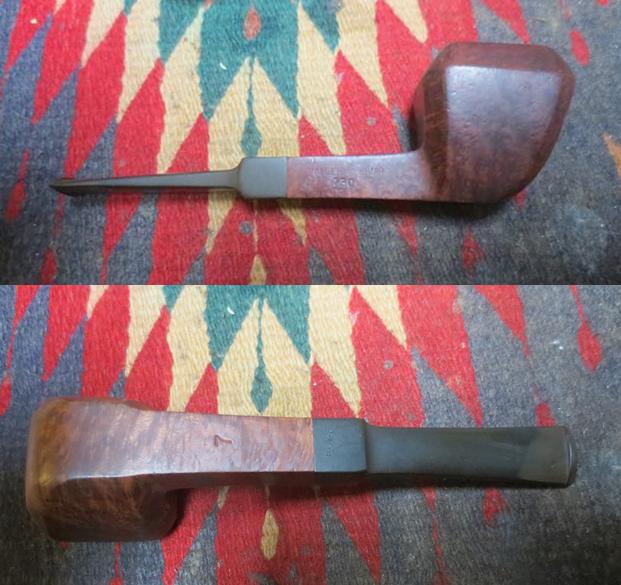
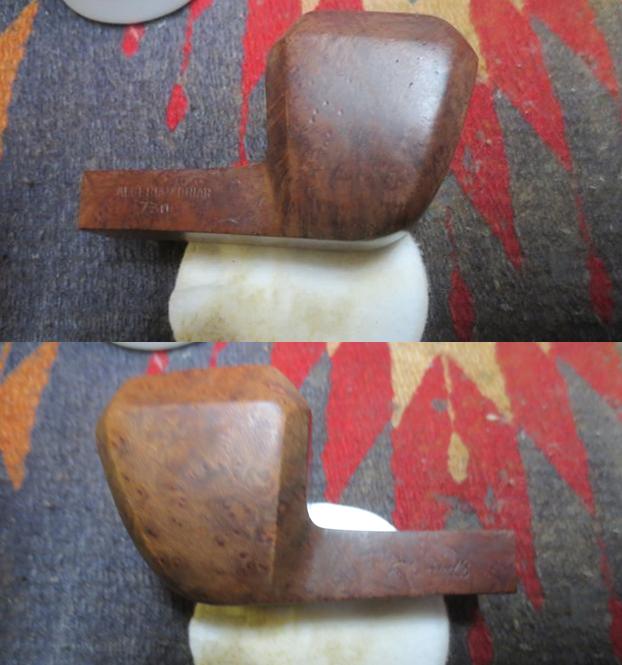
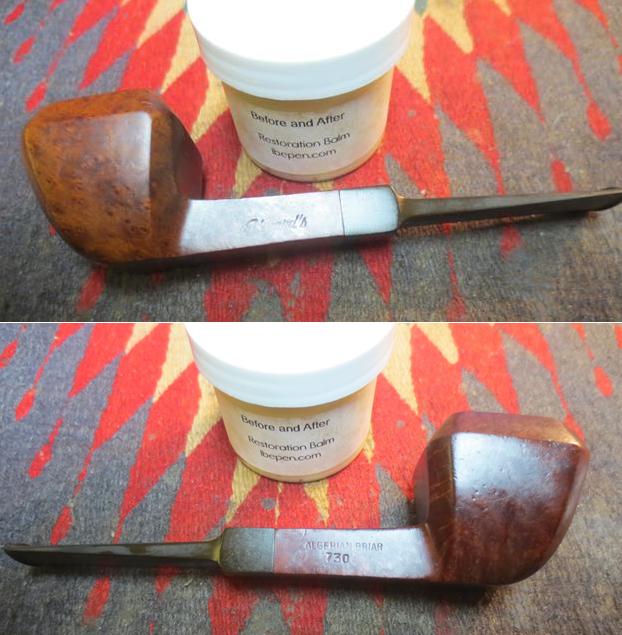
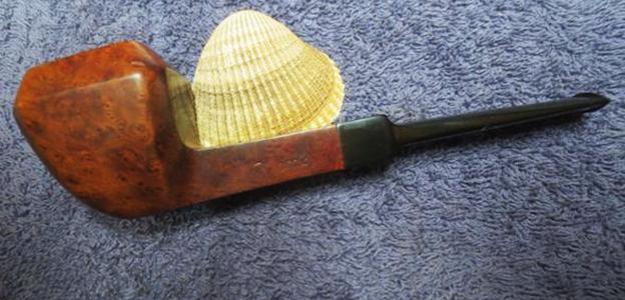
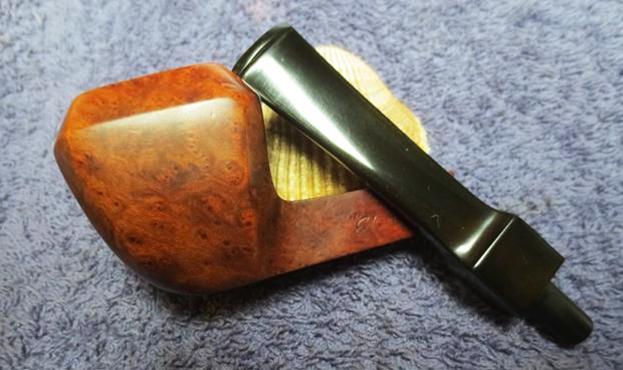
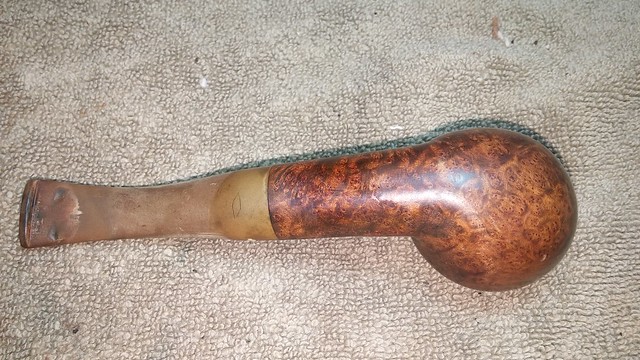
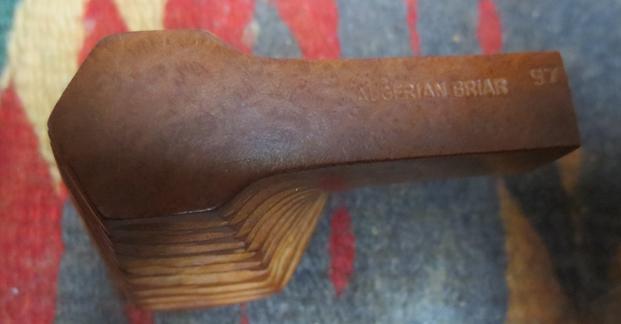
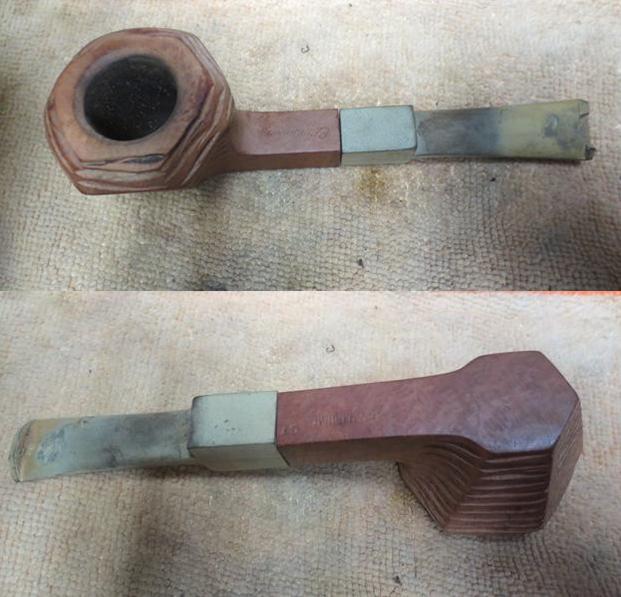
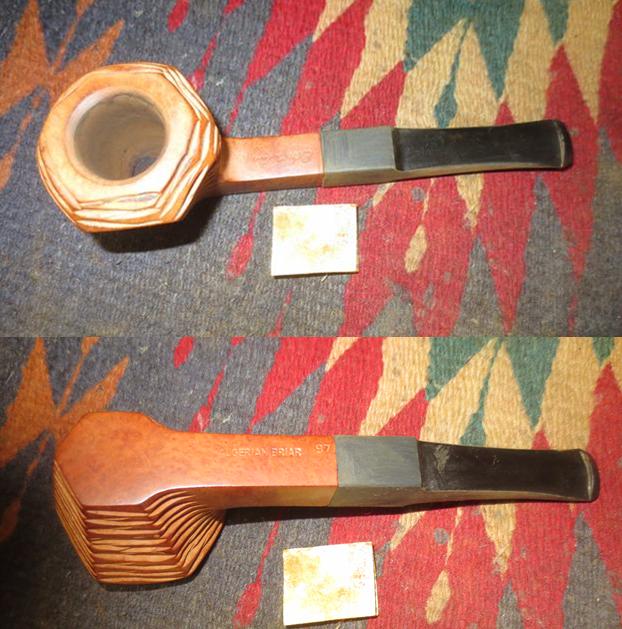
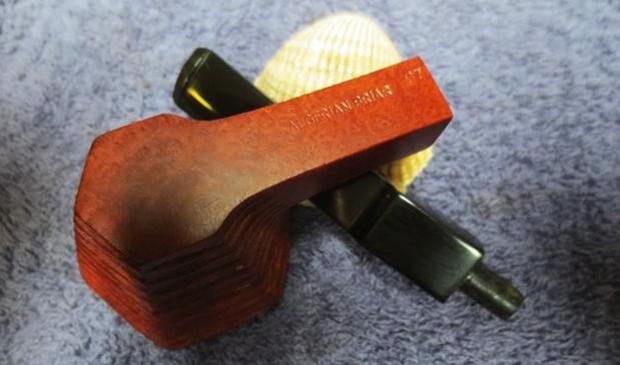
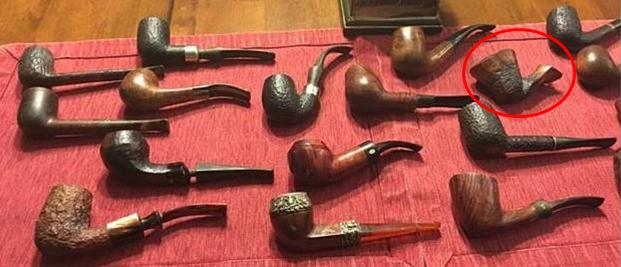
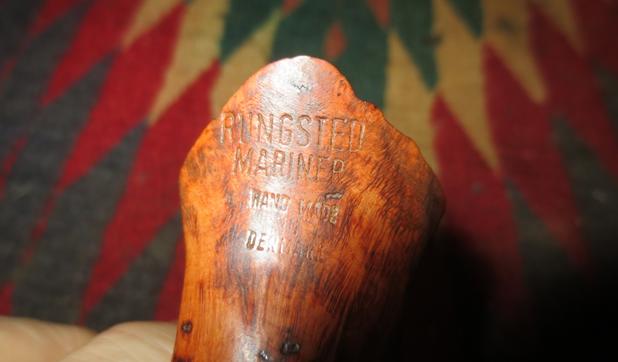
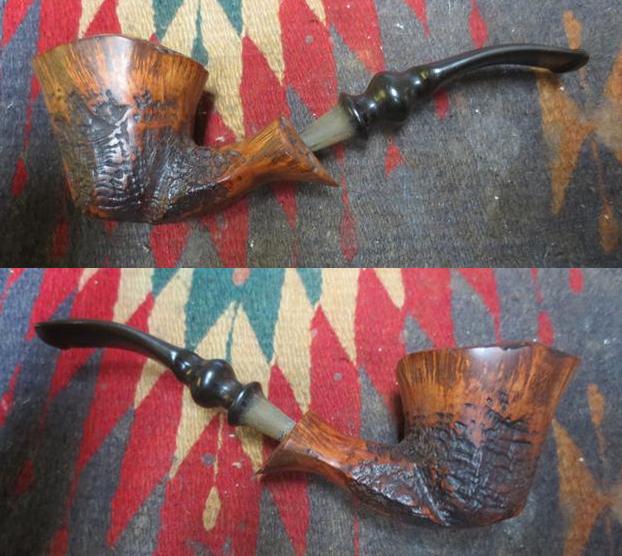
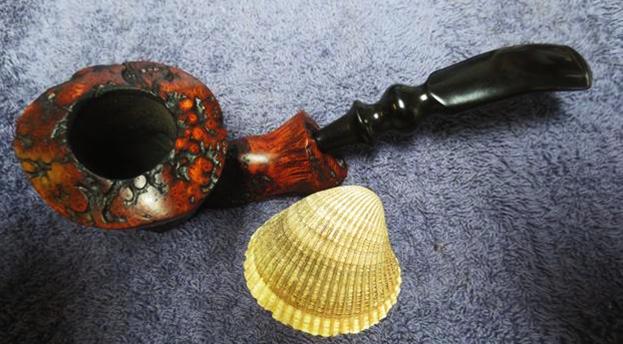
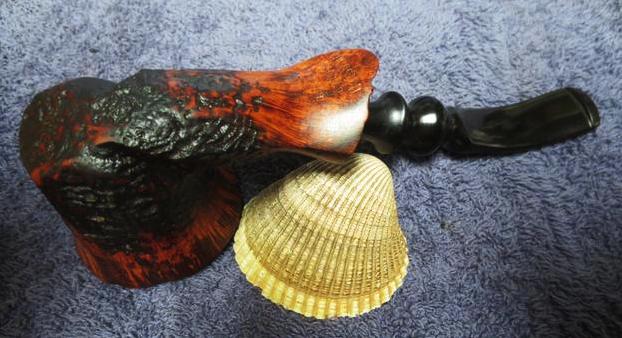
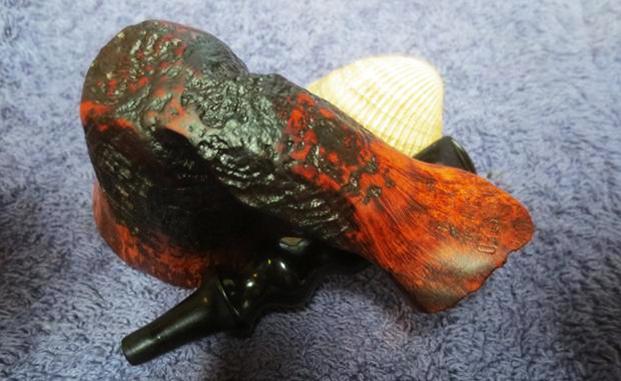
For many fans of the GBD marque, the shape 9242, a chubby Rhodesian is at the top of their wish list. As such, I can never resist them on the rare occasion where they pop up on Ebay. I estimate that 150 or so of the shape 9438 (saddle stem Rhodesian) is sold for every one shape 9242. This one was going to take some attention, but seemed solid from the sellers pictures. The pipe had the brass rondell and straight line, “London, England” stamp making if from the pre-Cadogan era (prior to 1982).

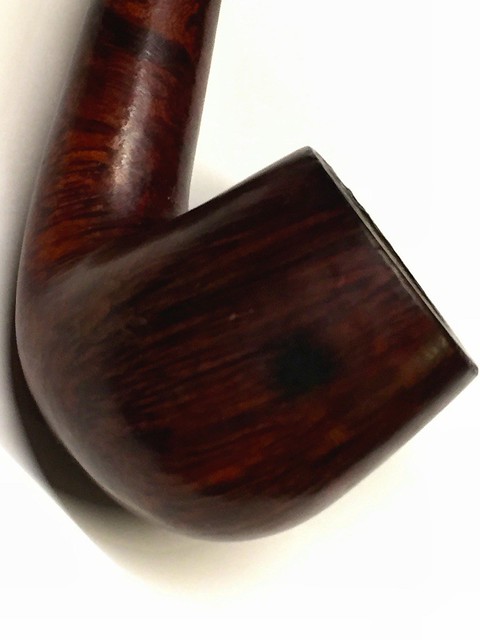
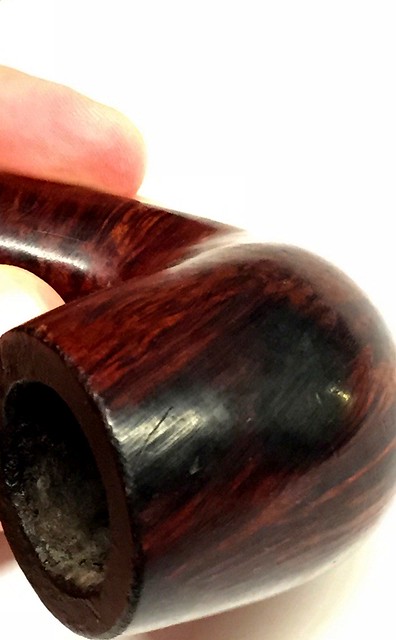
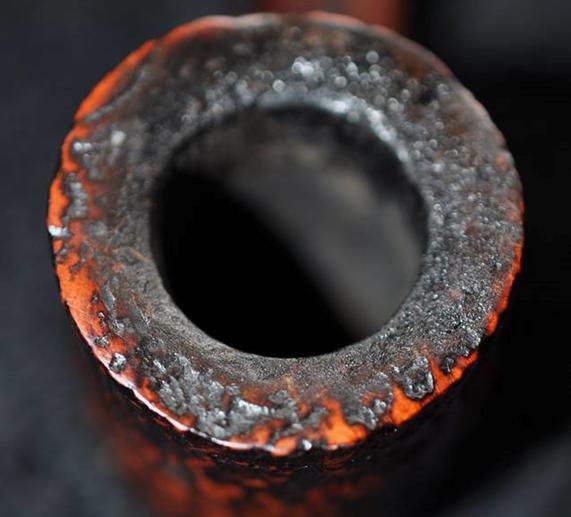
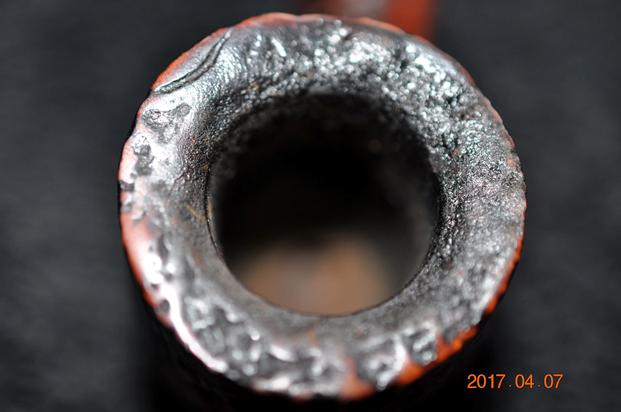
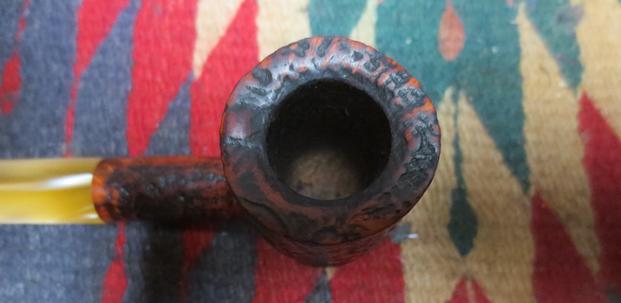
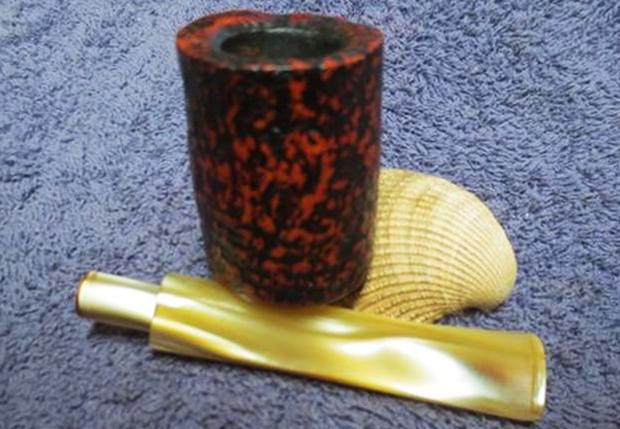
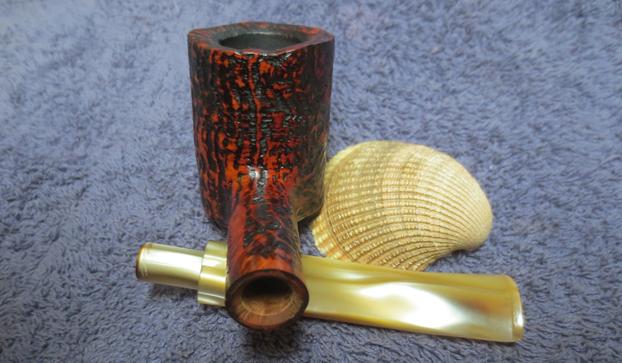
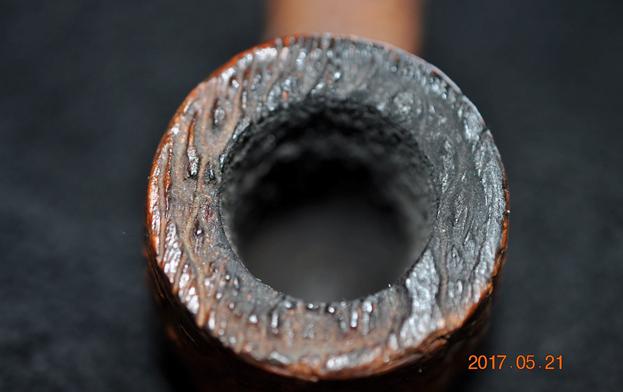
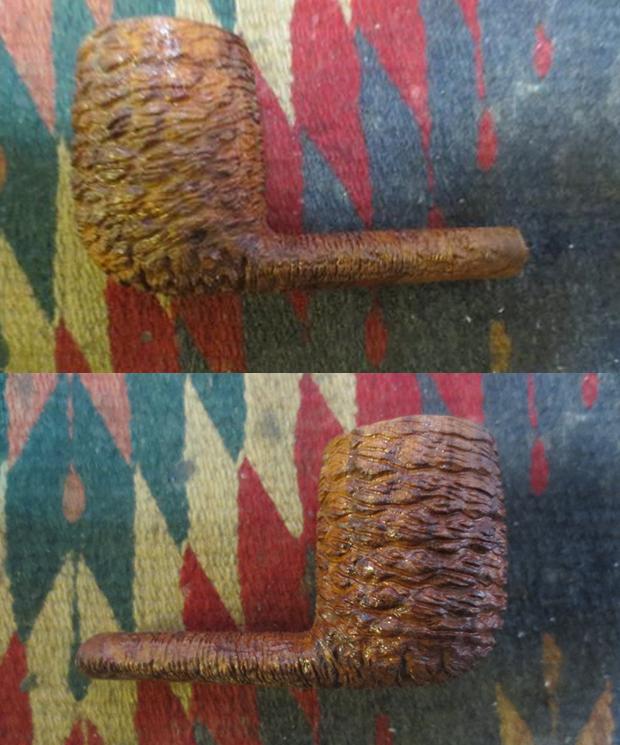
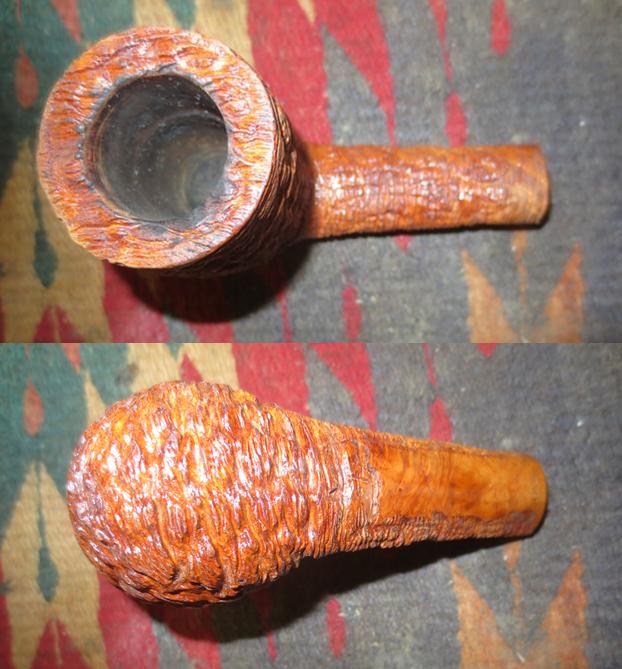
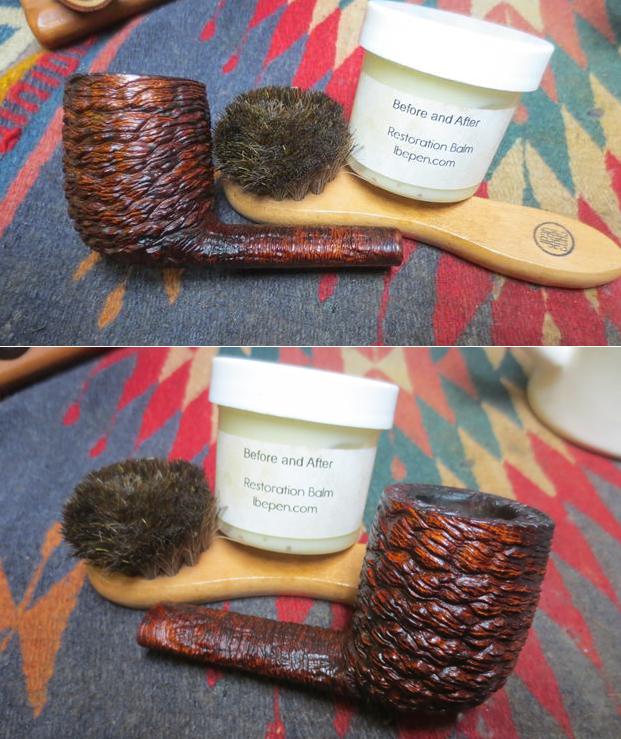
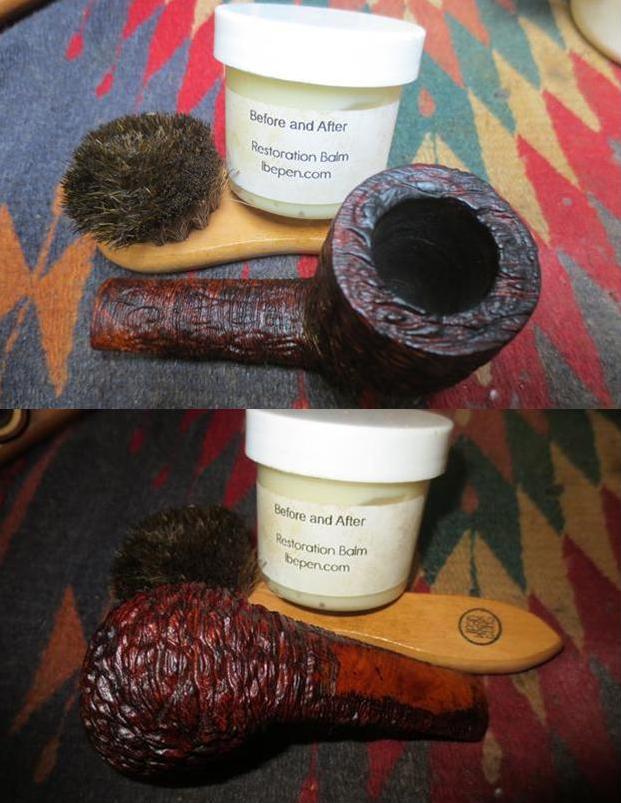
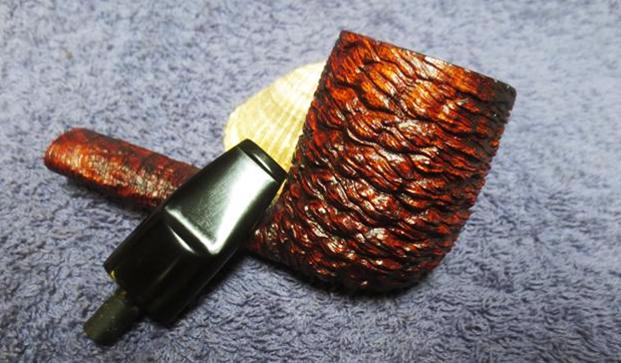
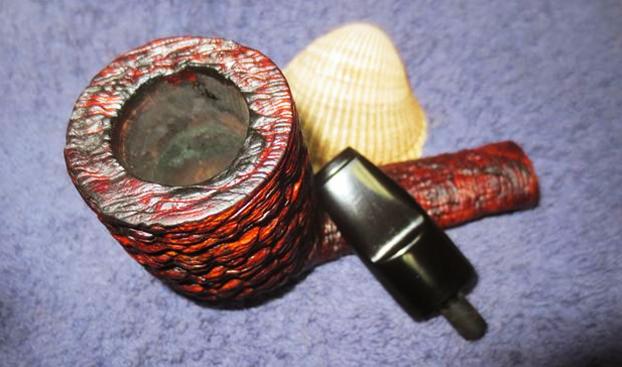
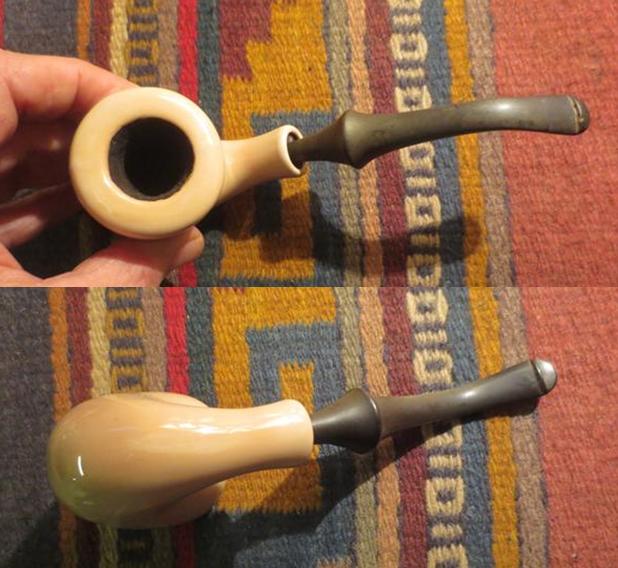
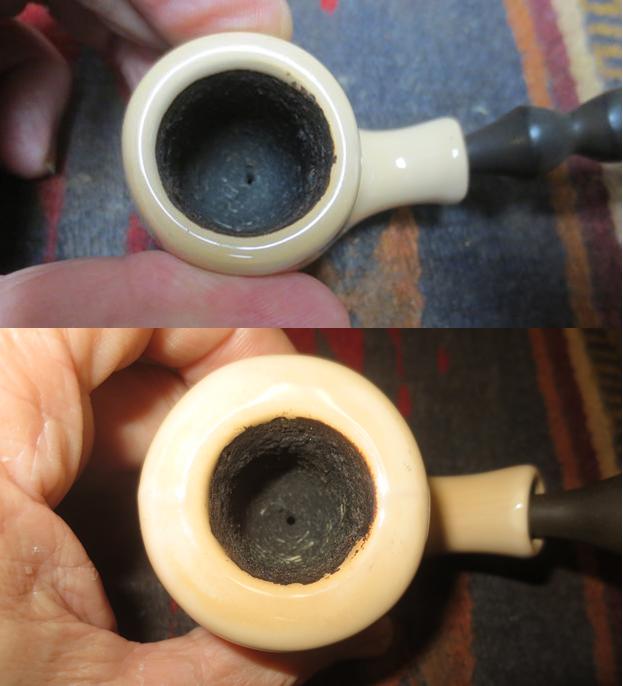
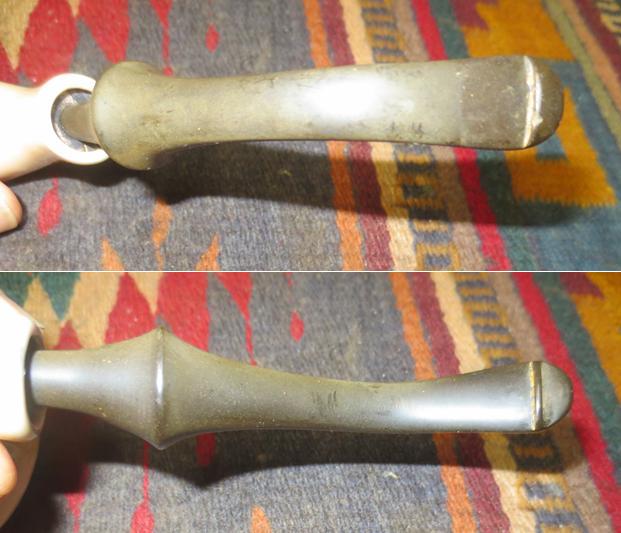
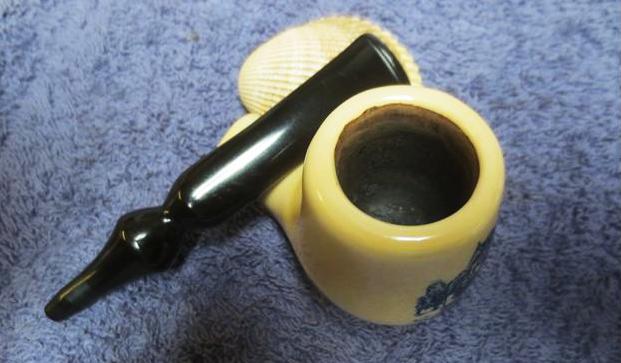
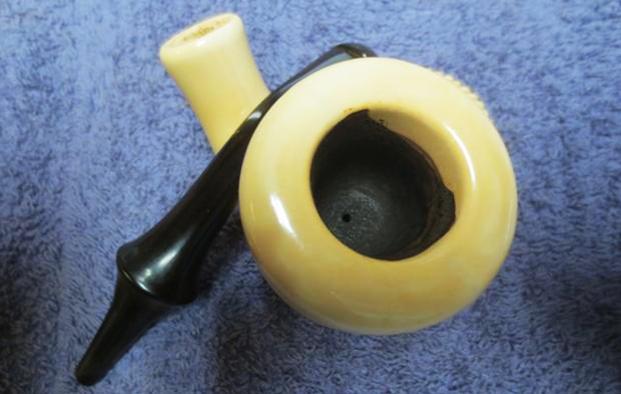
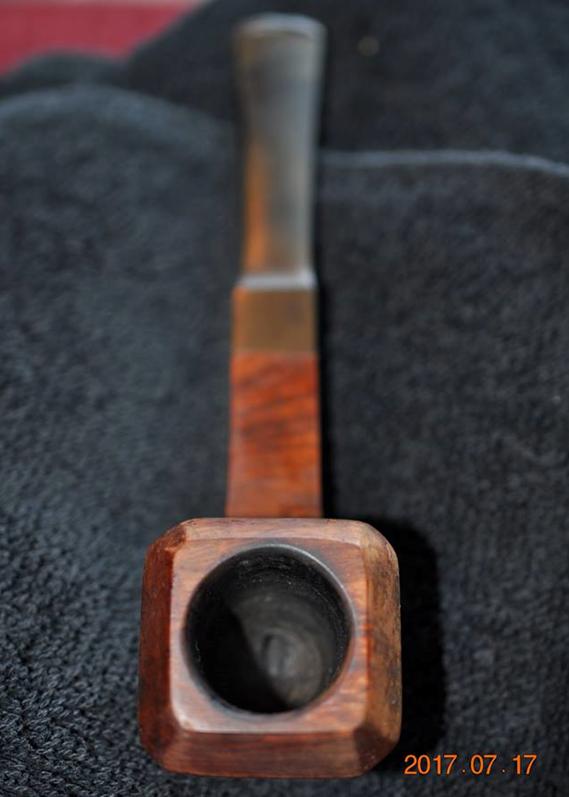
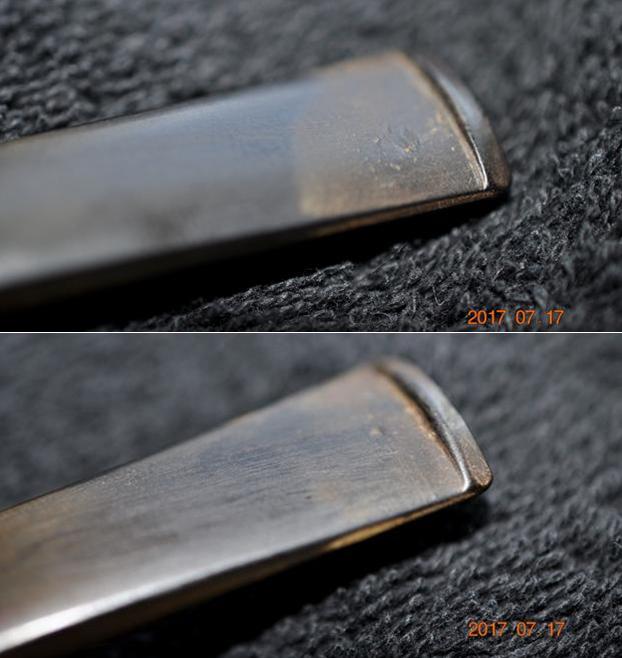
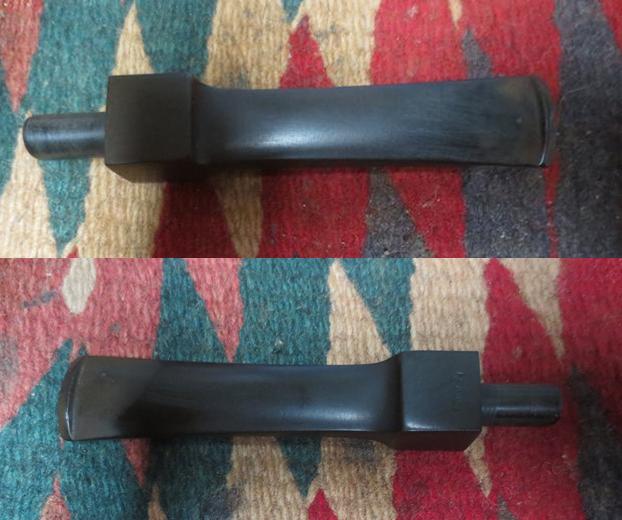
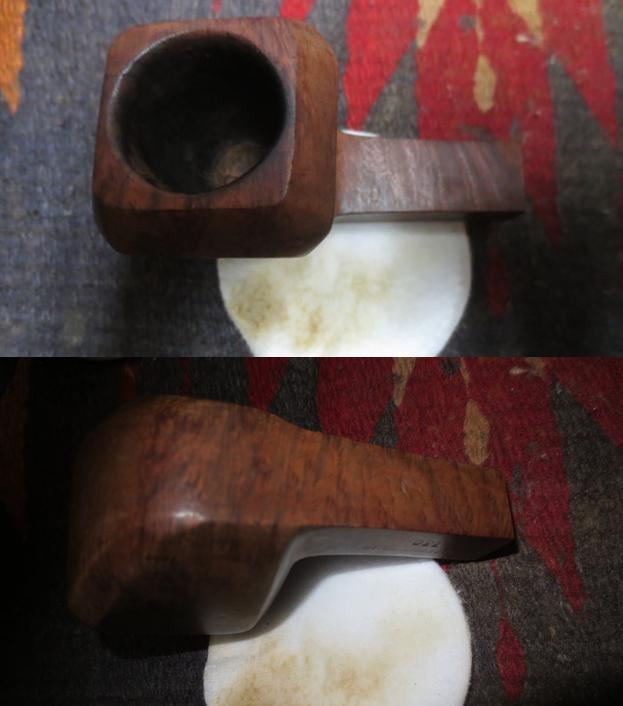
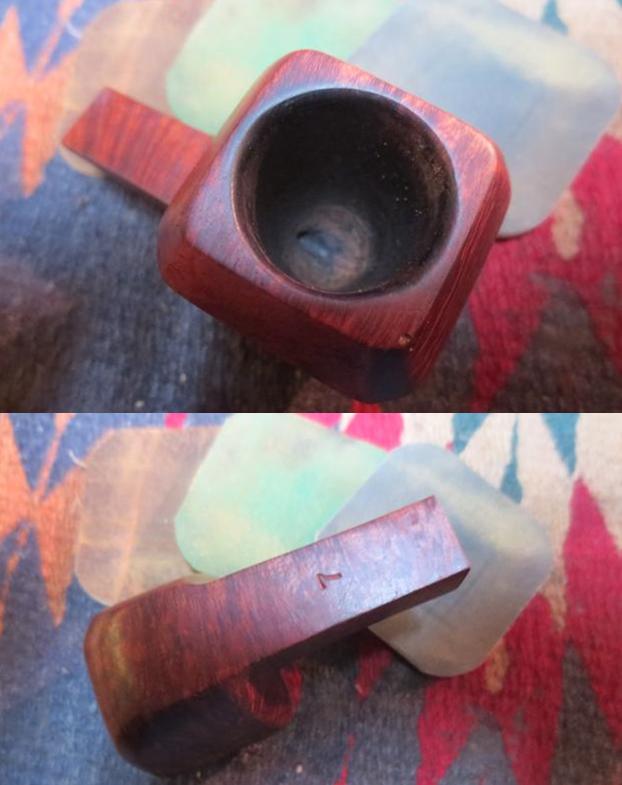
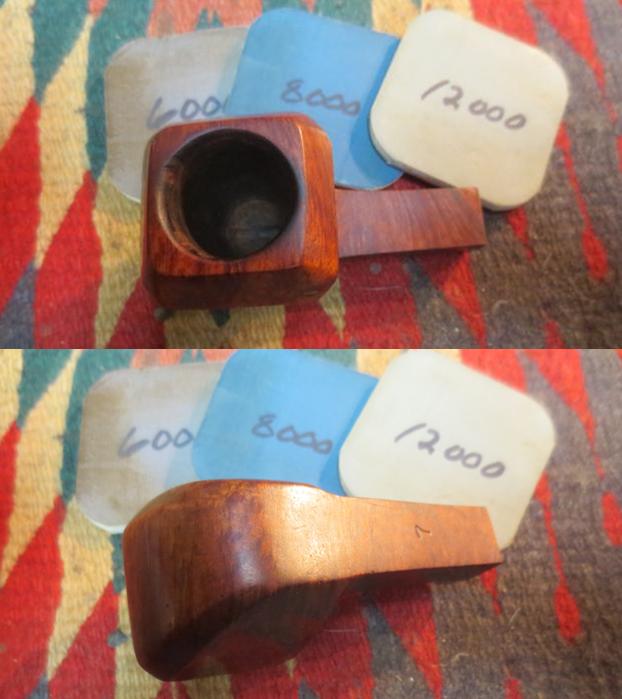
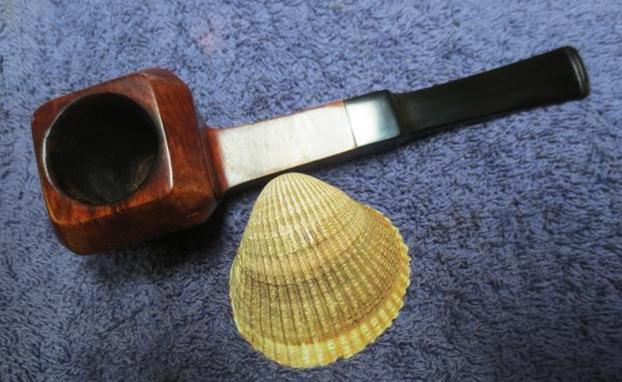
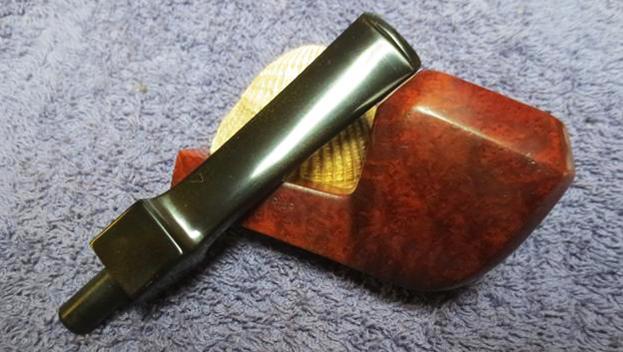
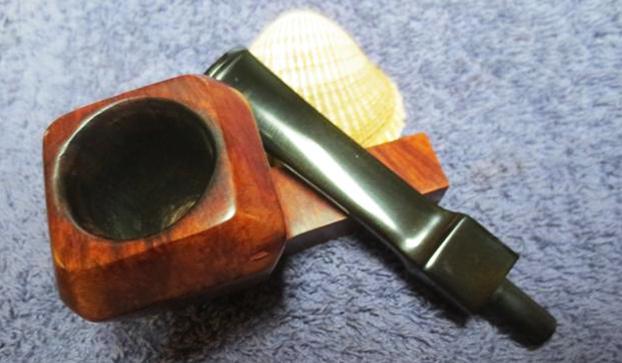
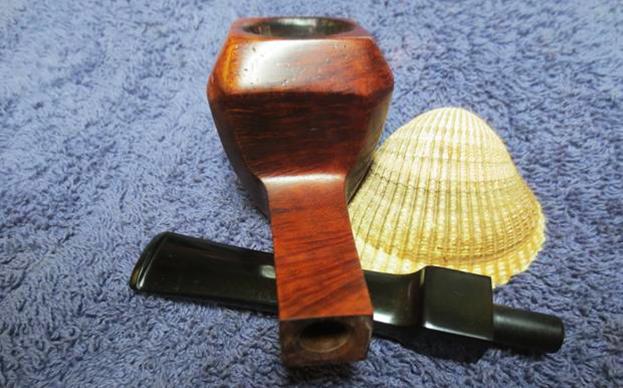
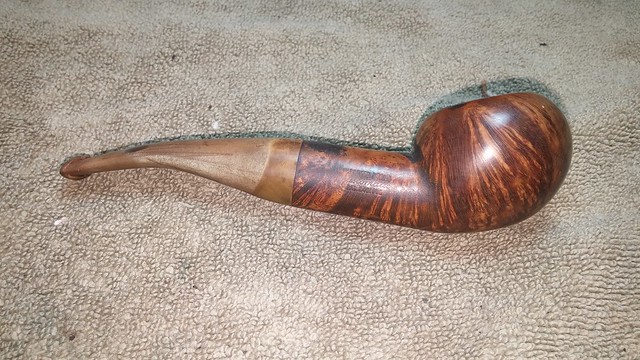
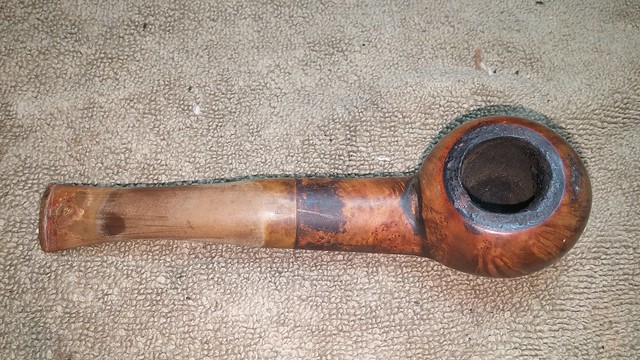
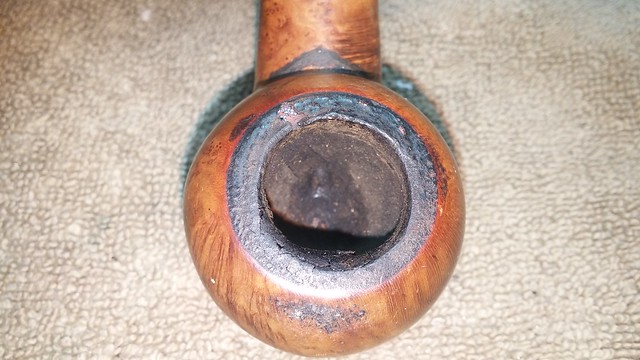
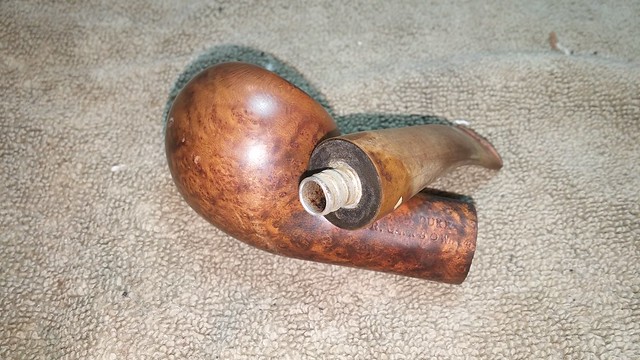
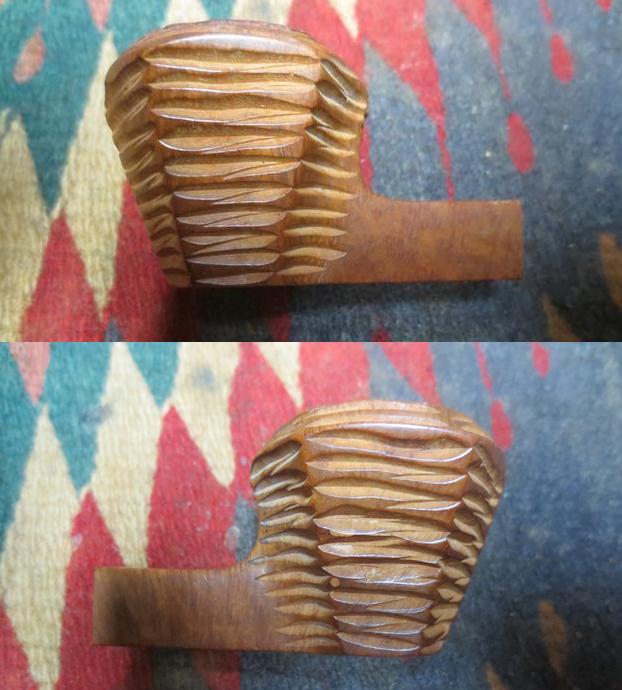
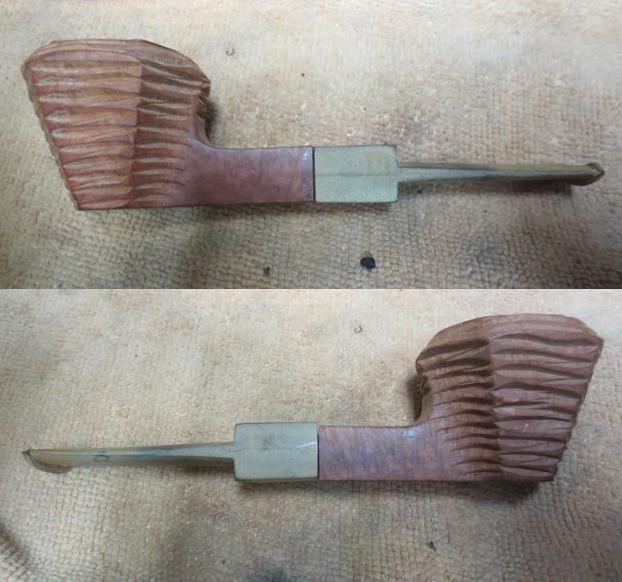
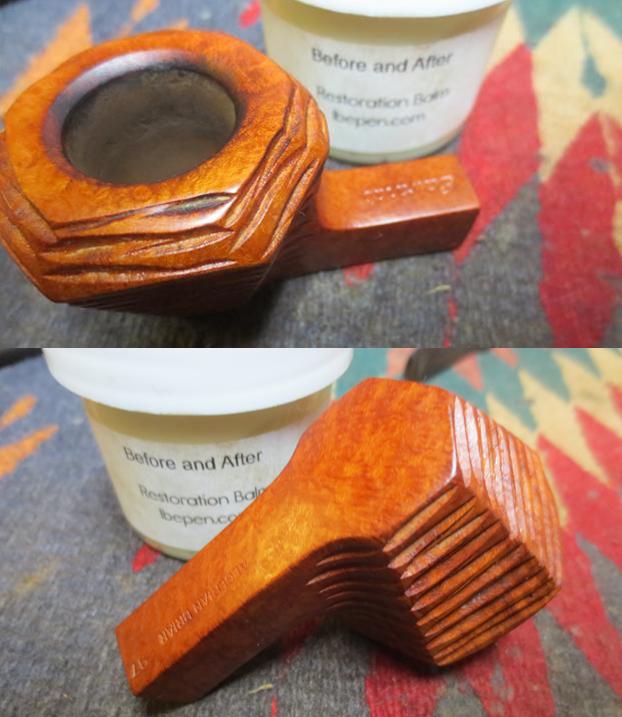
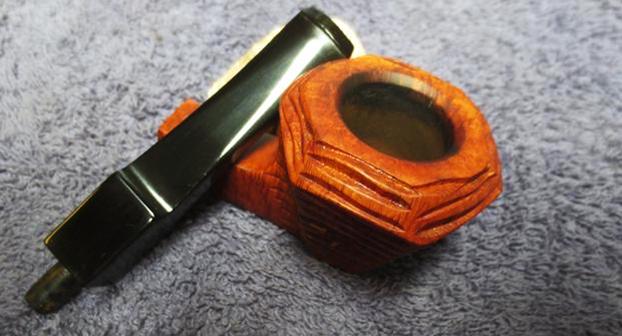
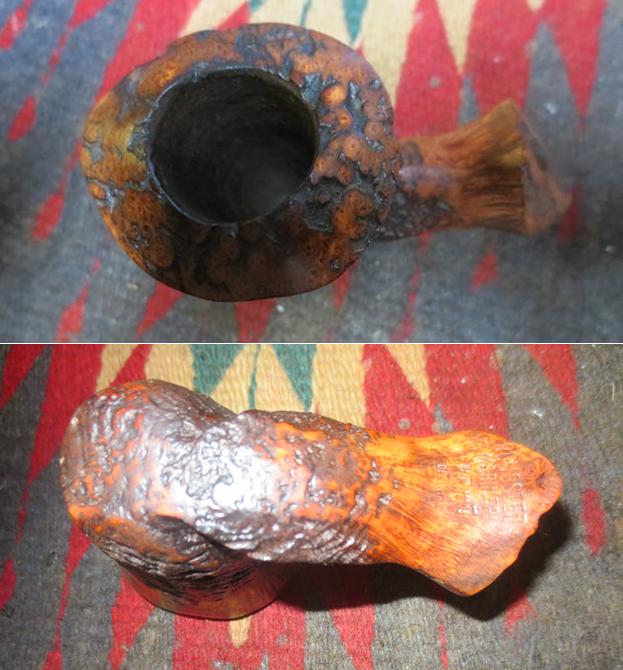
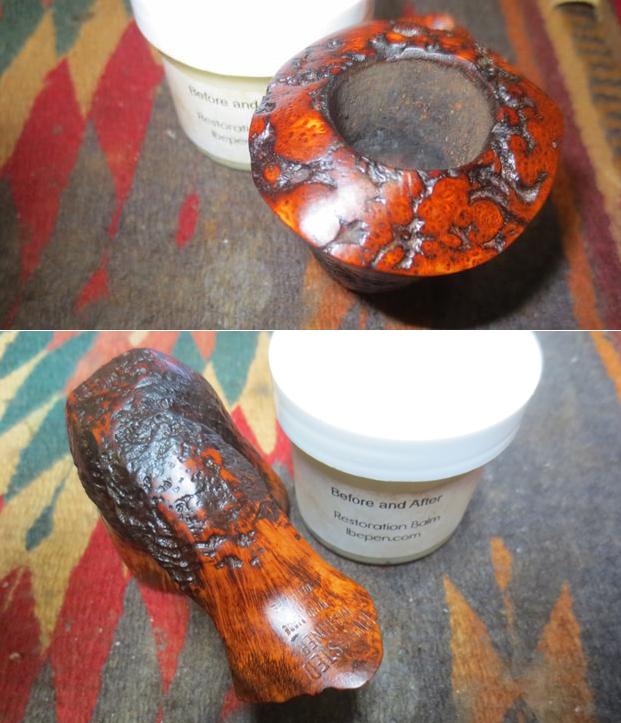
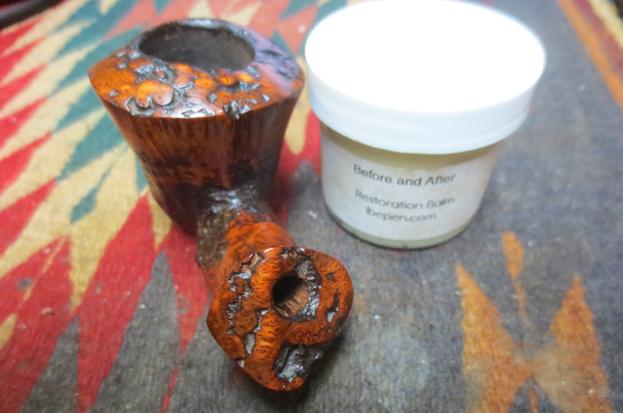
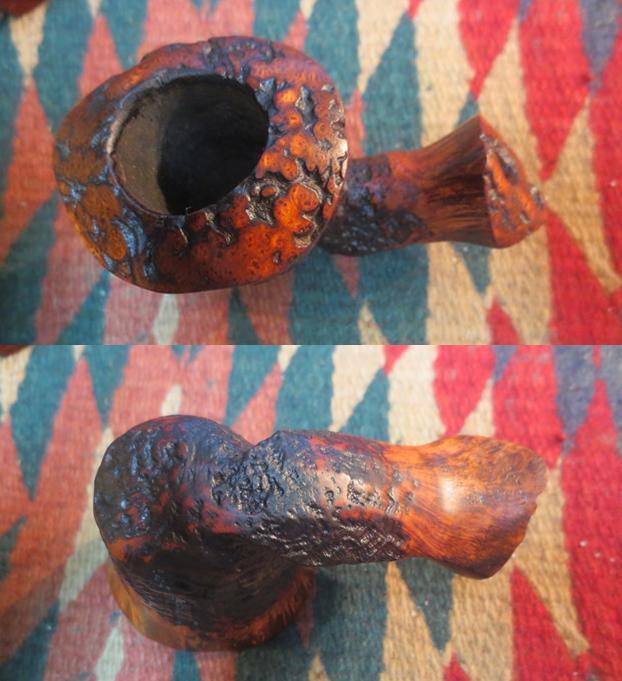
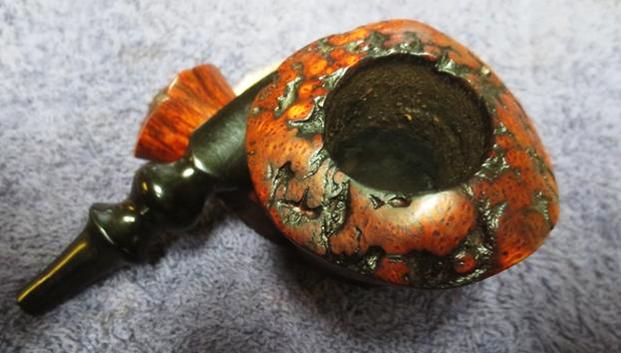
There were some darkening marks on the rim top but the bowl was solid. The stem was oxidized, with one tooth nick on the button but also otherwise, in good shape.

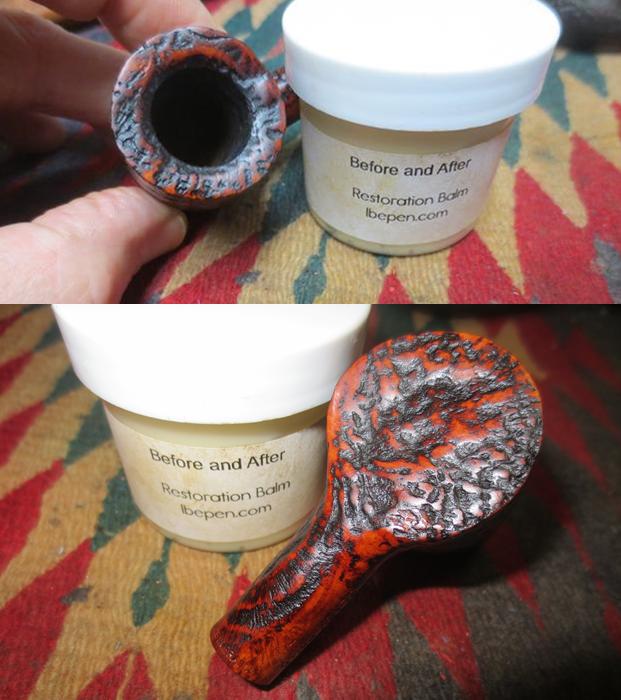
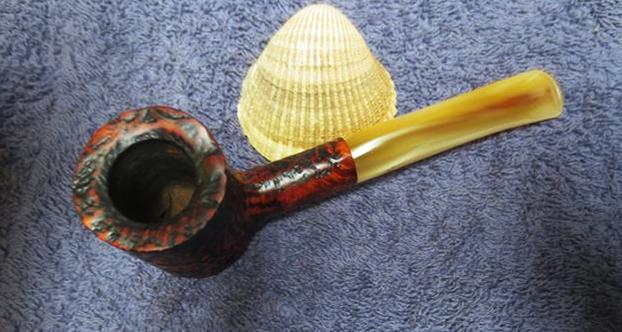
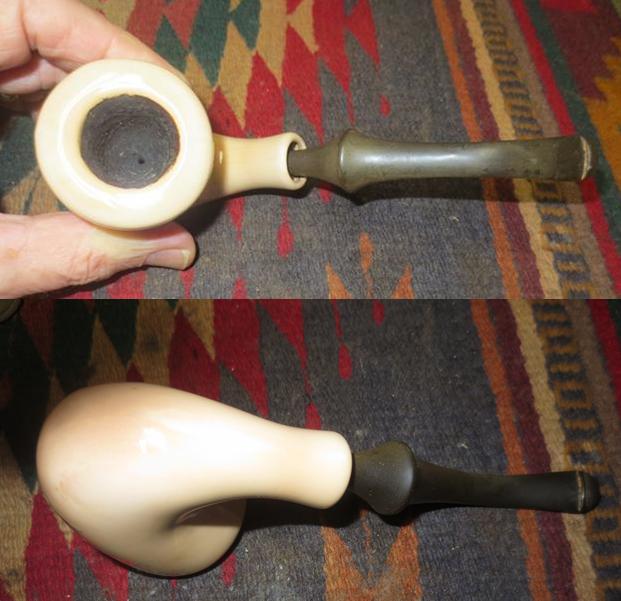
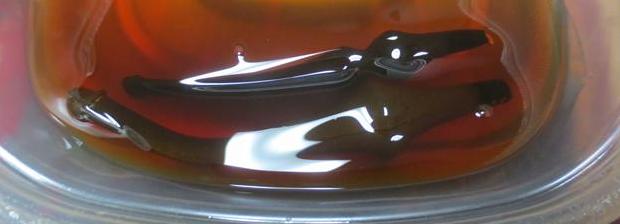
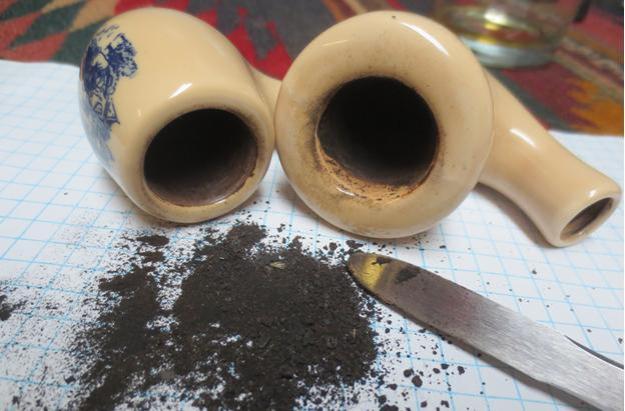
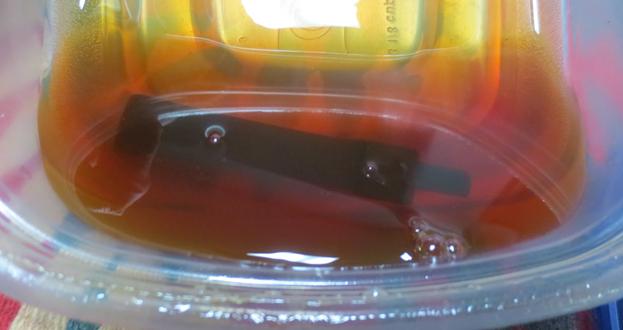
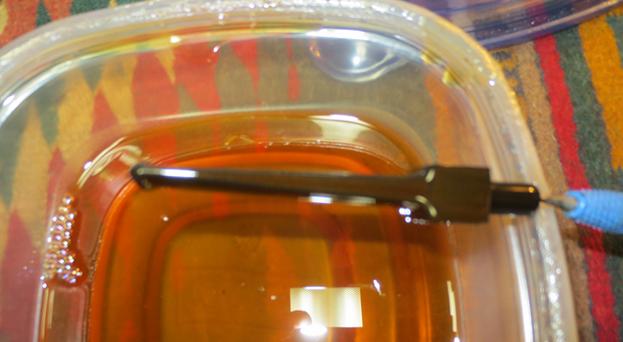
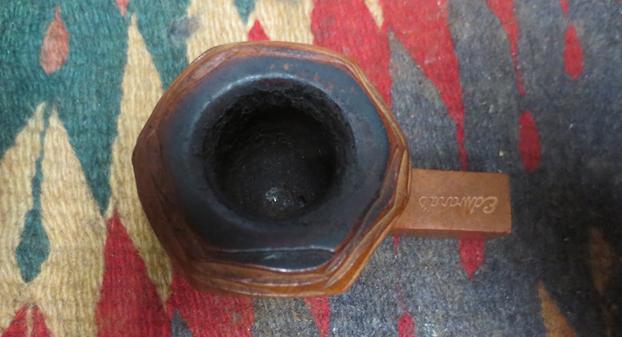
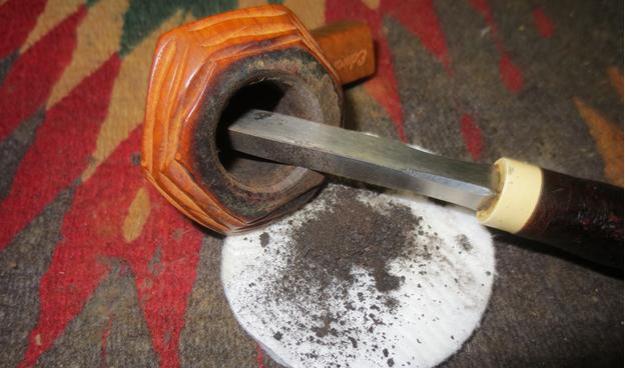
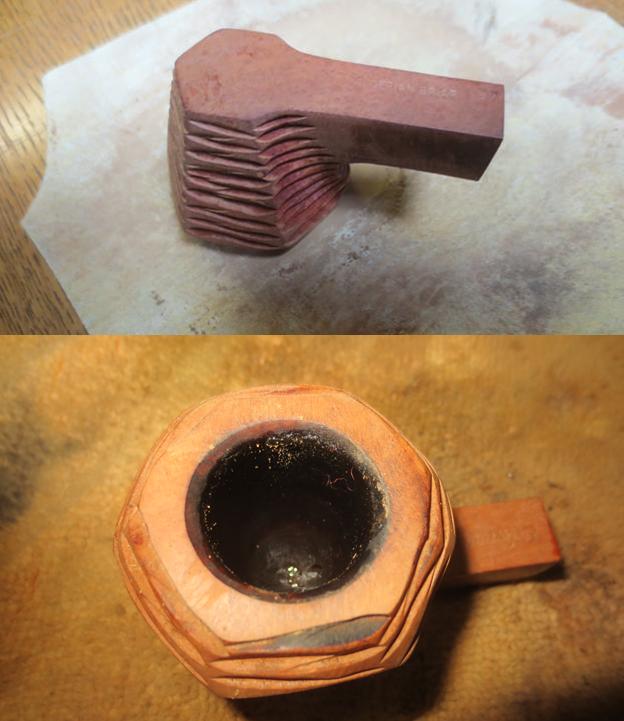
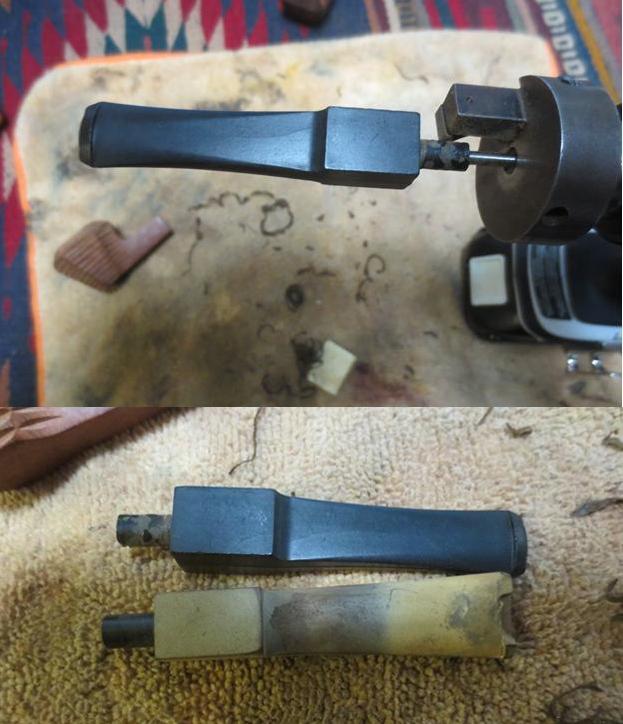
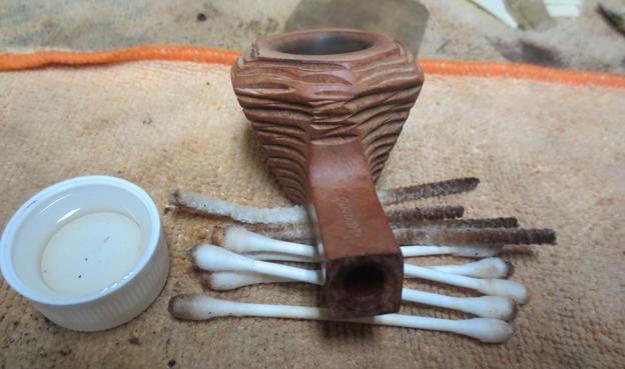
I reamed the cake from the bowl and soaked it with sea-salt and alcohol. The stem was soaked in a mild Oxy-clean solution with a dab of grease on the brass rondell.

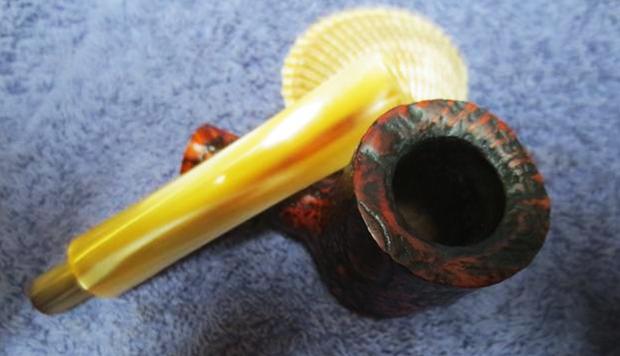
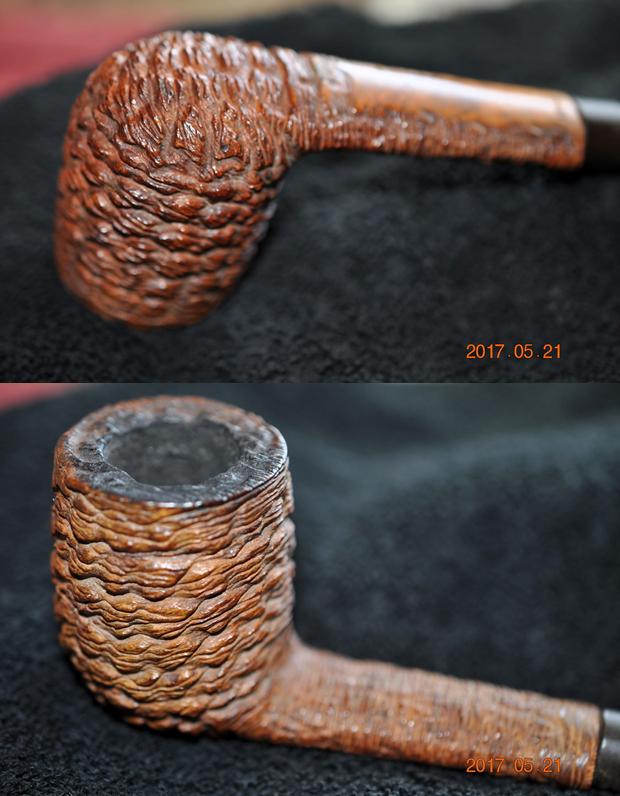
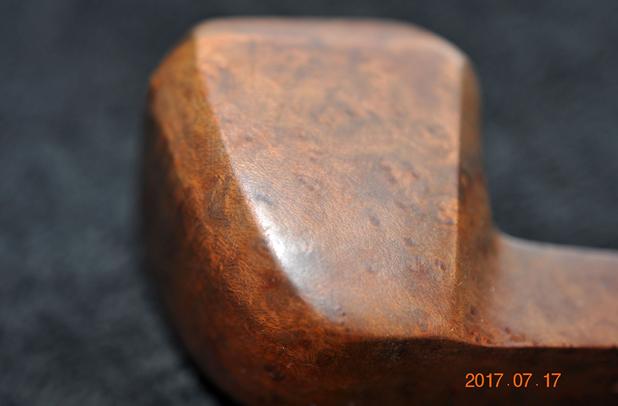
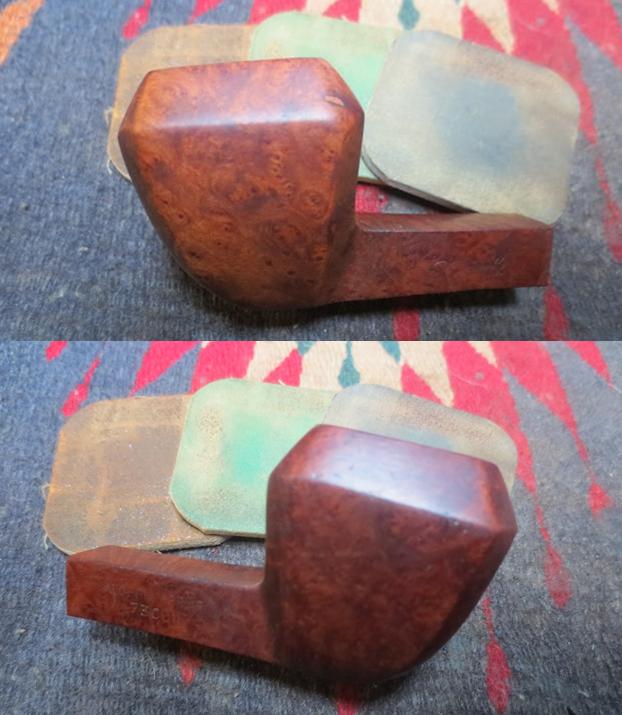
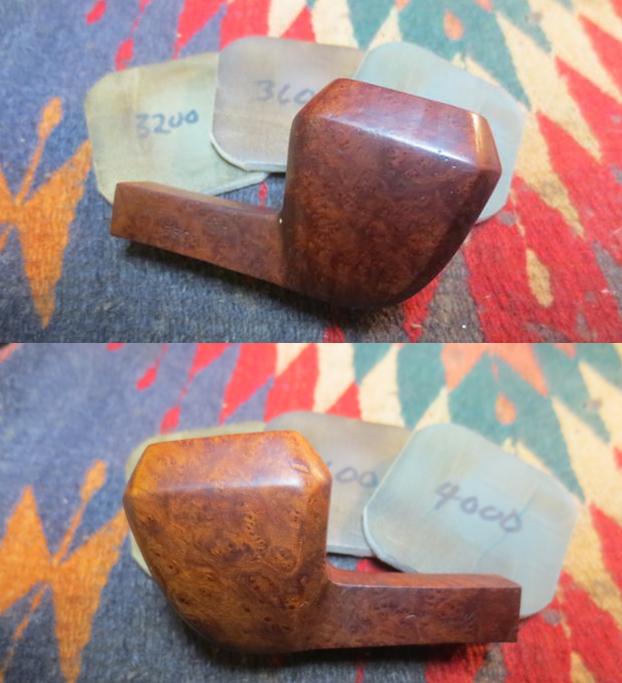
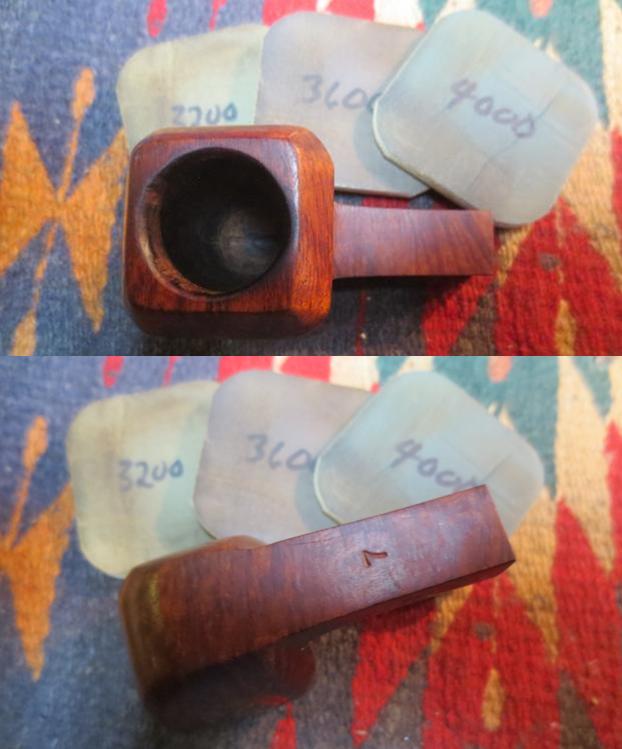
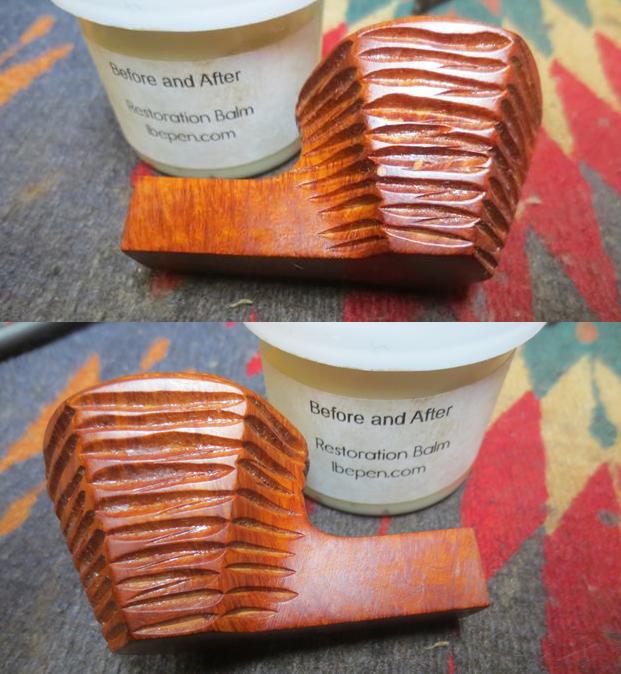
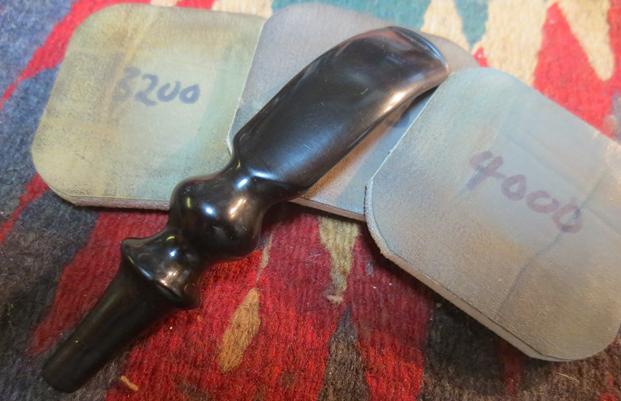
I used worn pieces of 6,000 and 8,000 grit sheets of micromesh to remove the bowl top build-up and reduce the darkening. There were several small handling dings around the bowl, which were lifted with an electric iron and a wet cloth. The bowl was buffed with White diamond and several coats of Carnuba wax.

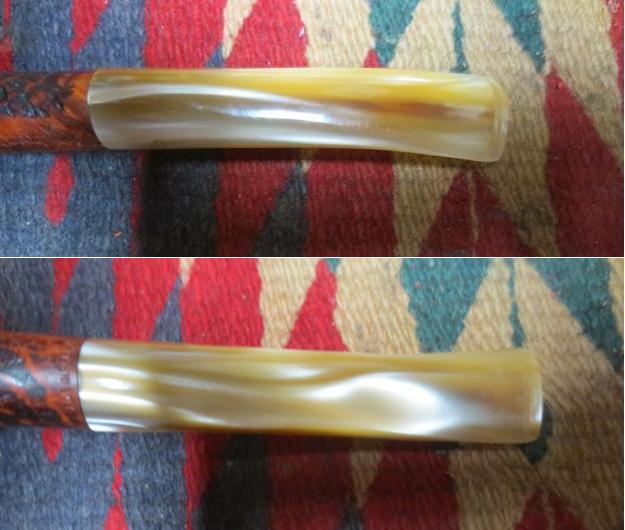
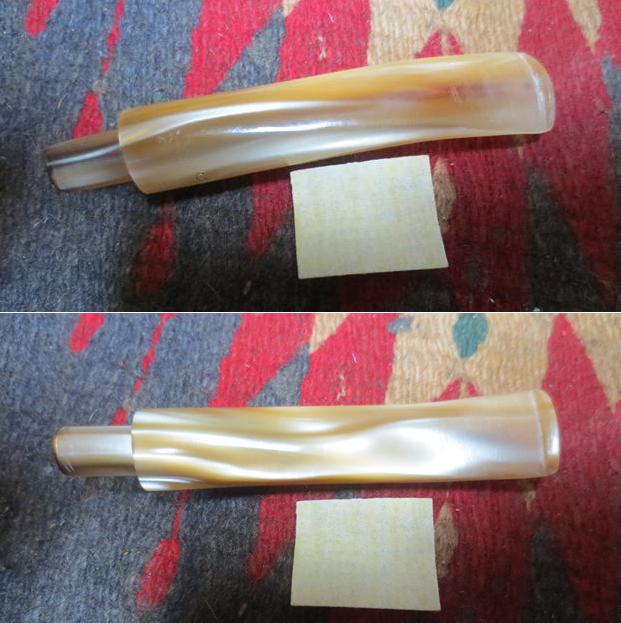
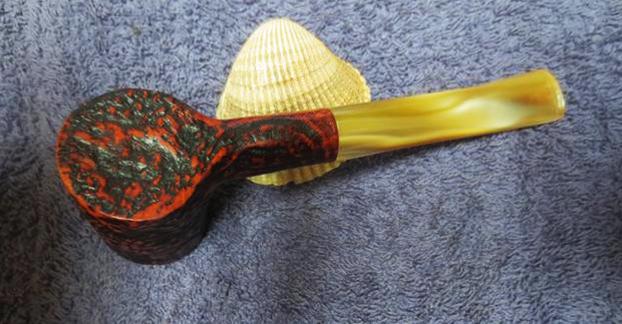
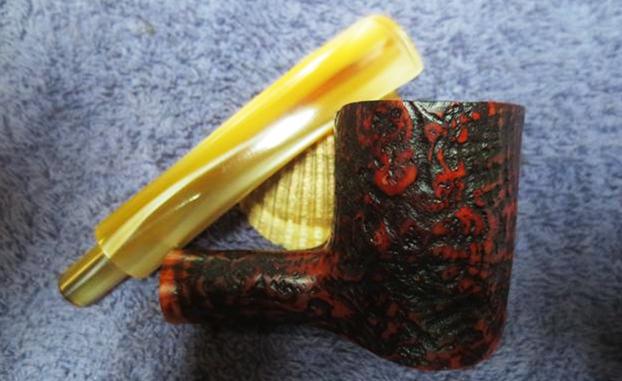
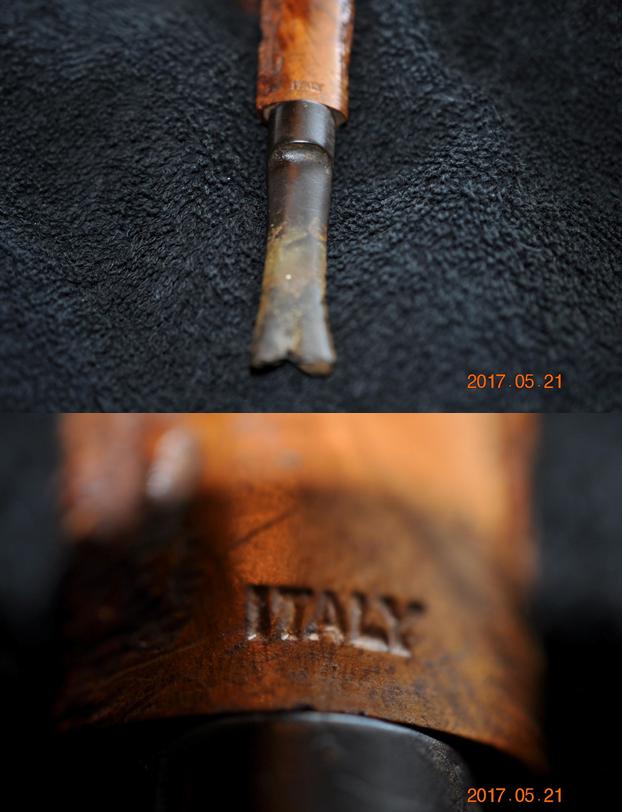
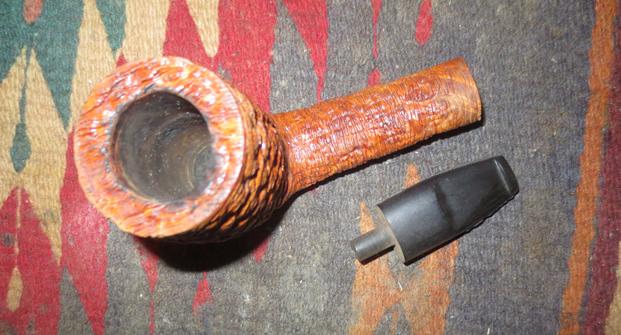
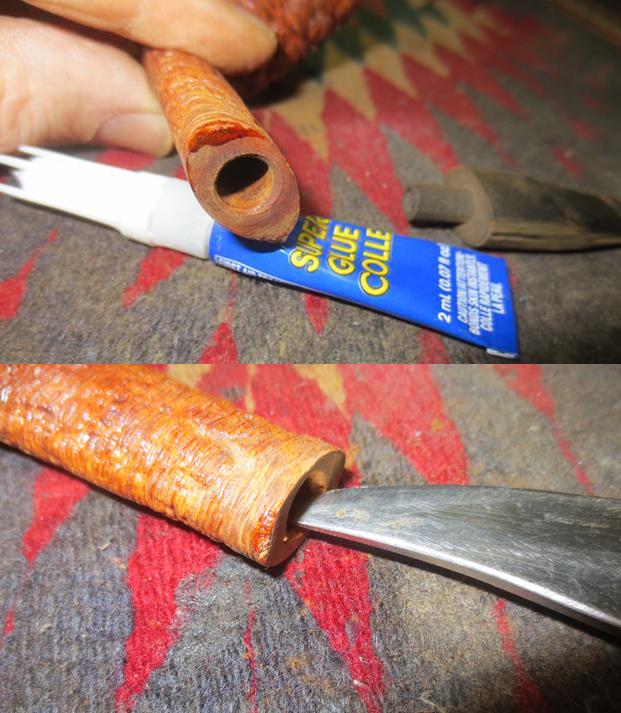
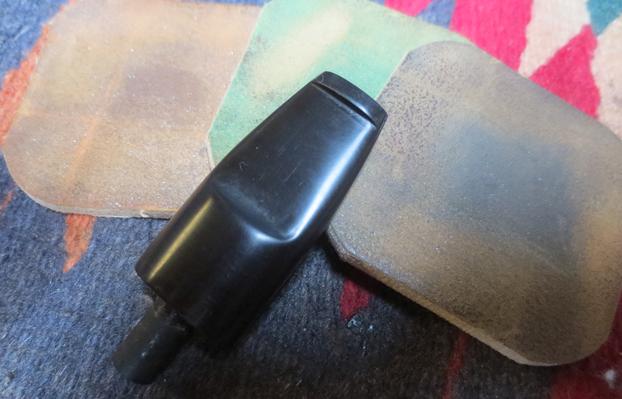
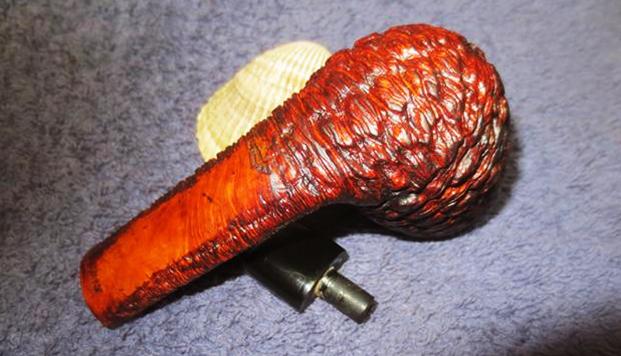
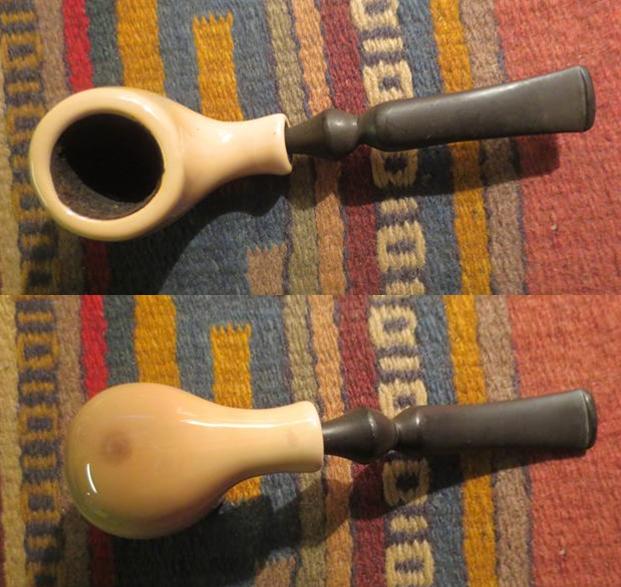
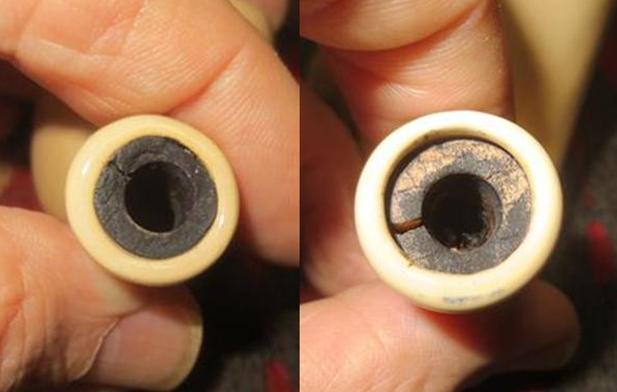
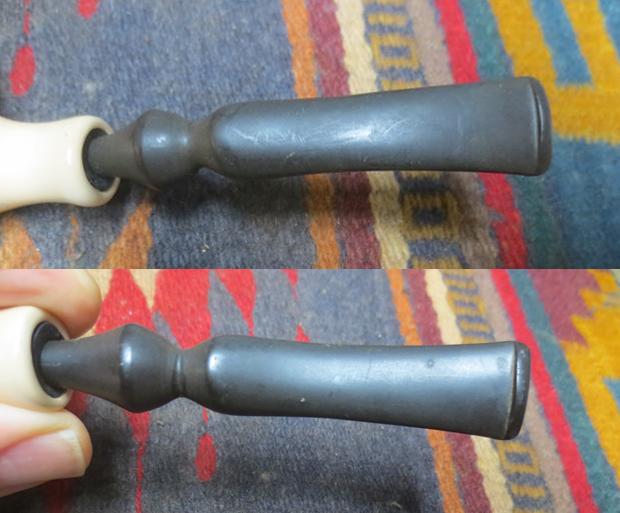
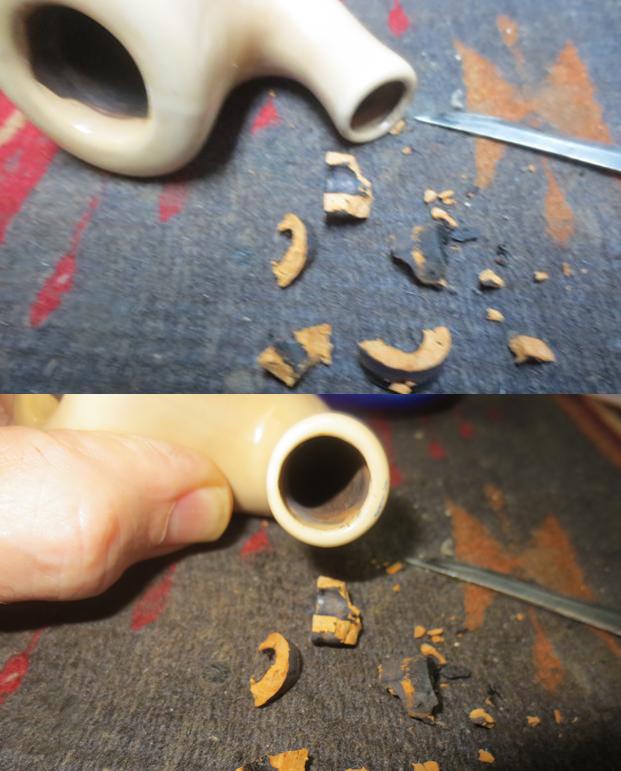
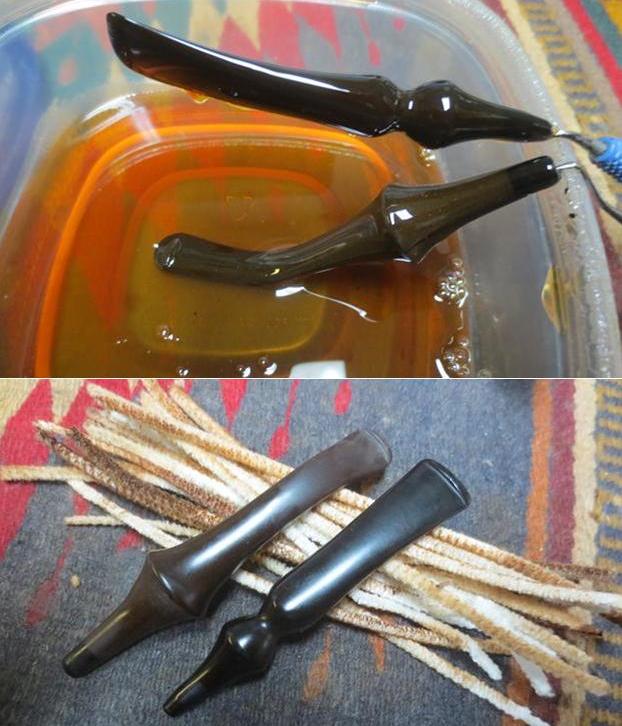
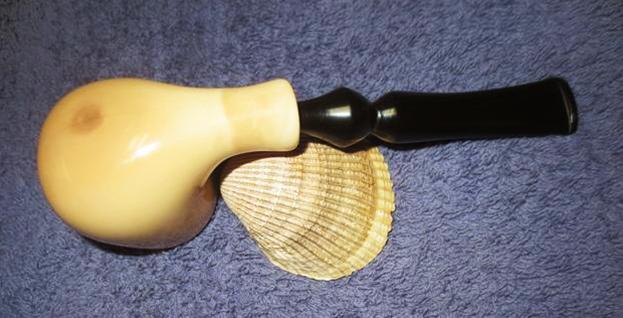
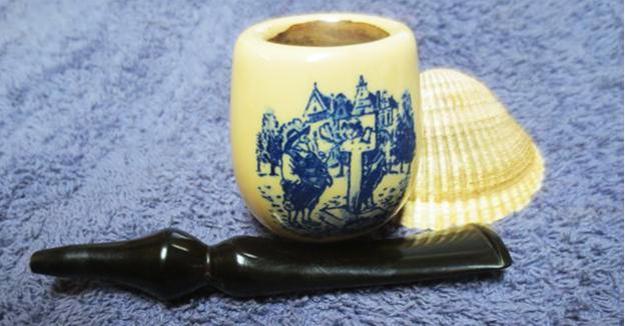
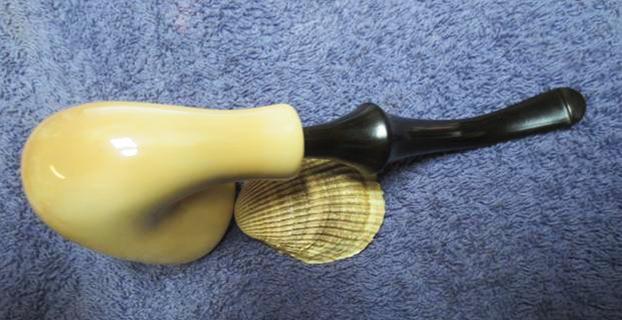
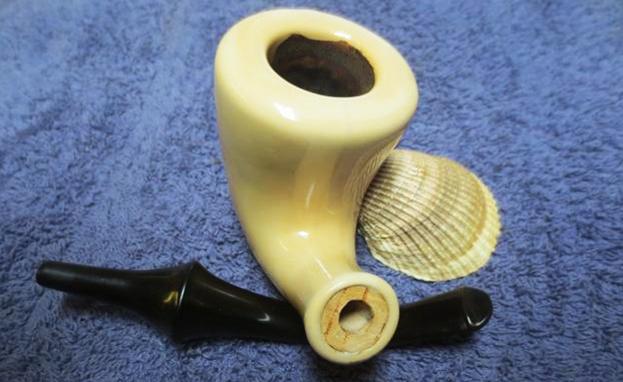
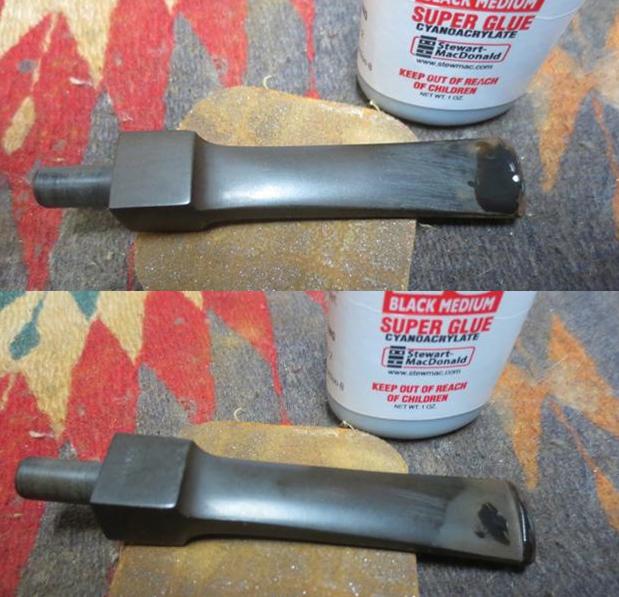
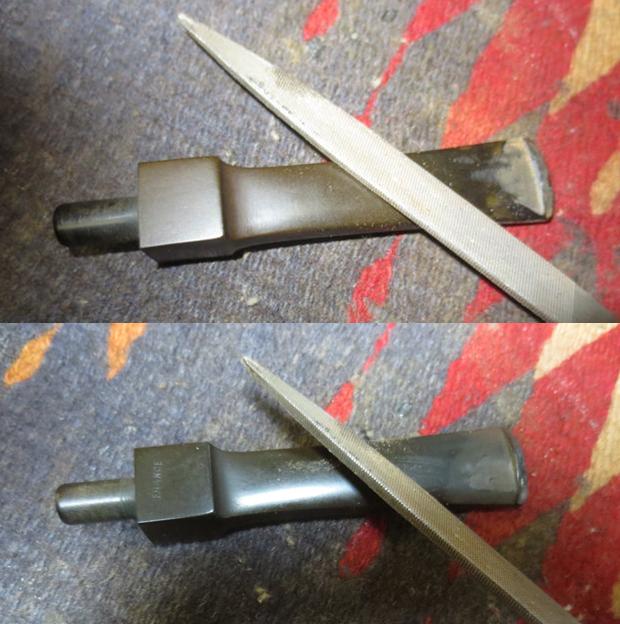
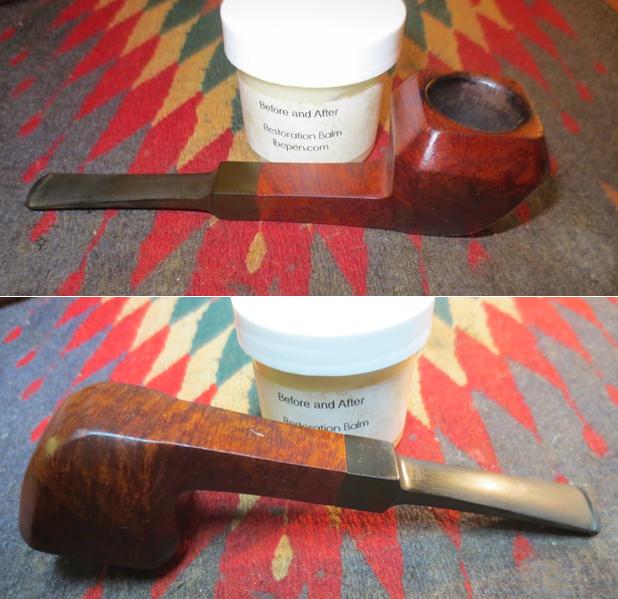
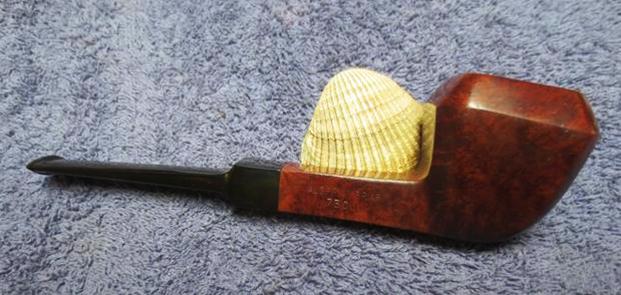
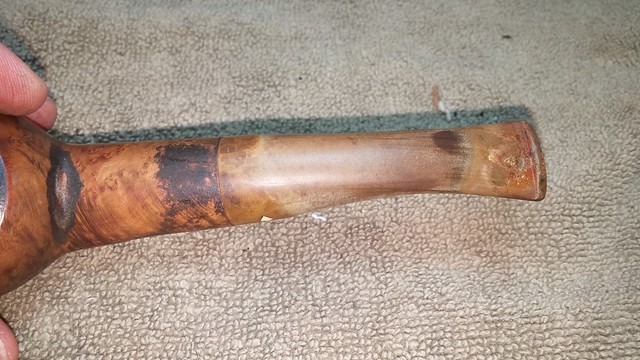
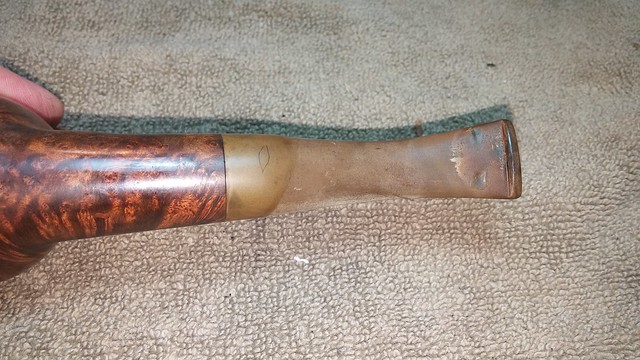
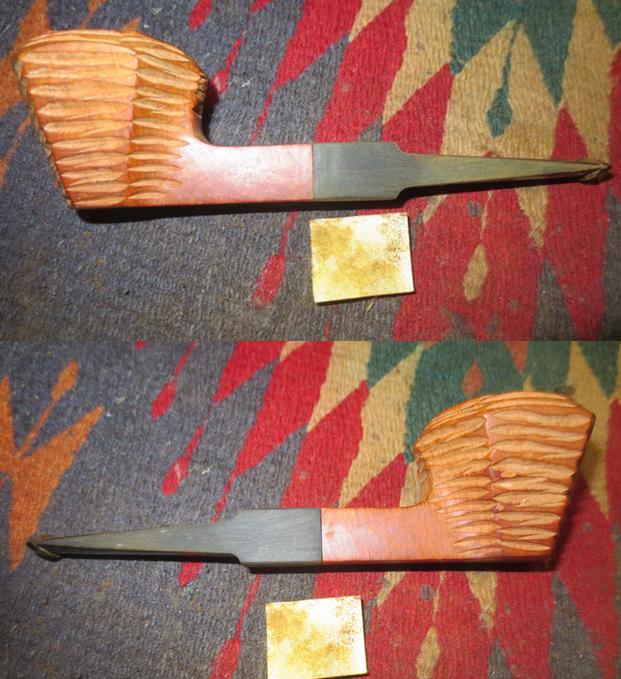
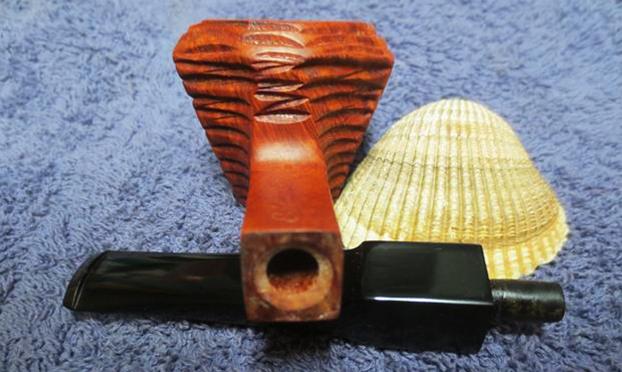
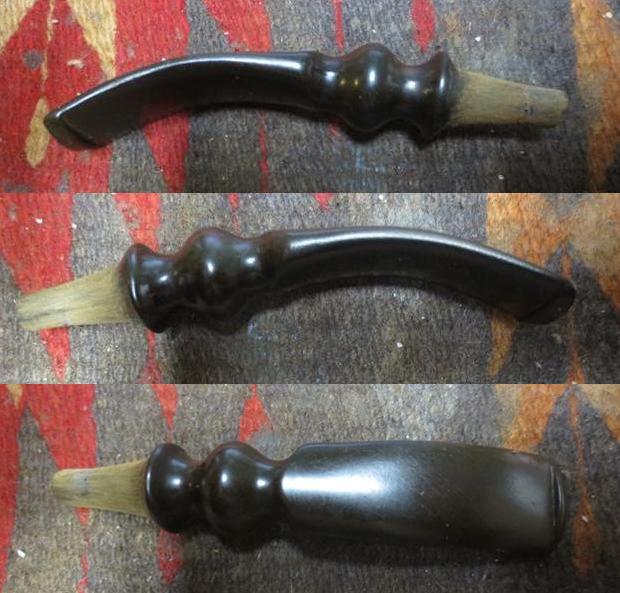
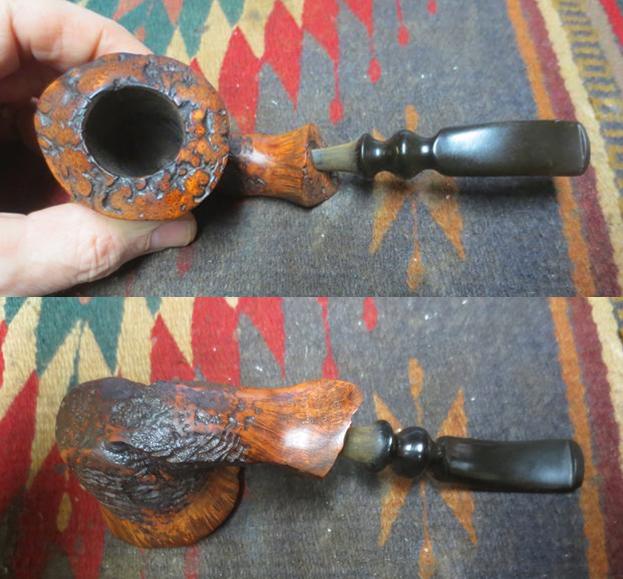
The stem had some light tooth dents, which lifted nicely with some heat from a lighter flame. One nick on the button remains. The tenon was slightly tweaked, as you can see from the initial photos, leaving a gap. I warmed the tenon carefully with a heat gun and quickly inserted it into the shank. This allowed it to go back to the flush position. Once cooled, the stem can be removed and the set takes.

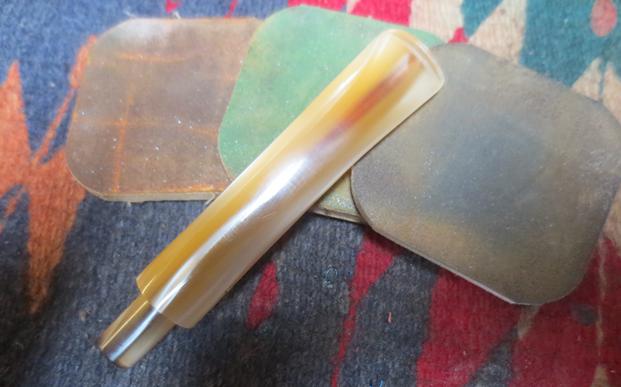
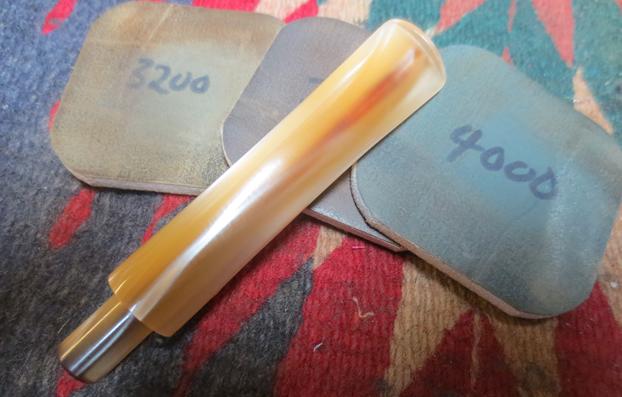
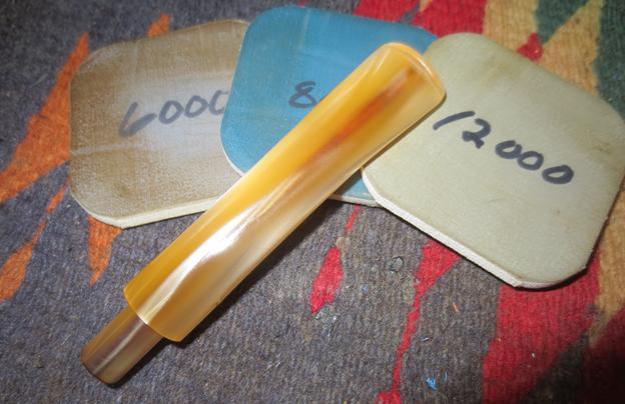
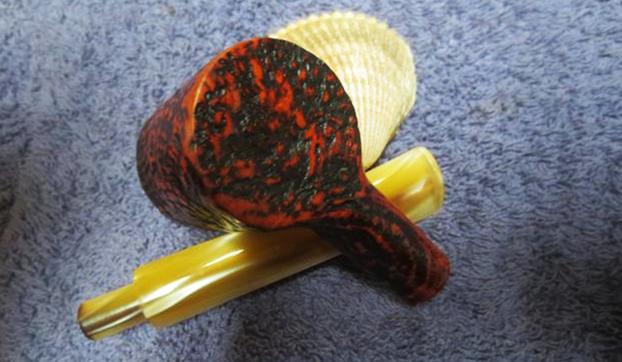
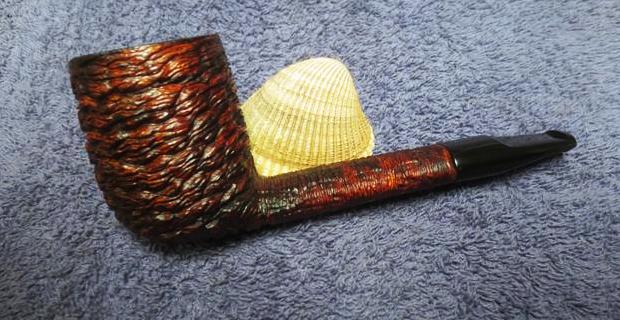
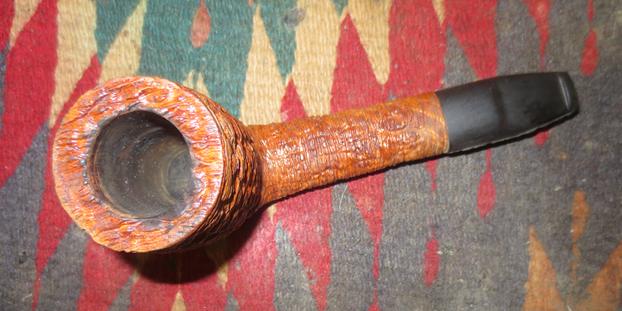
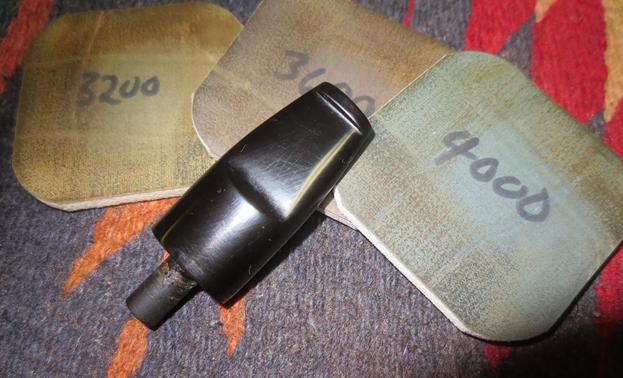
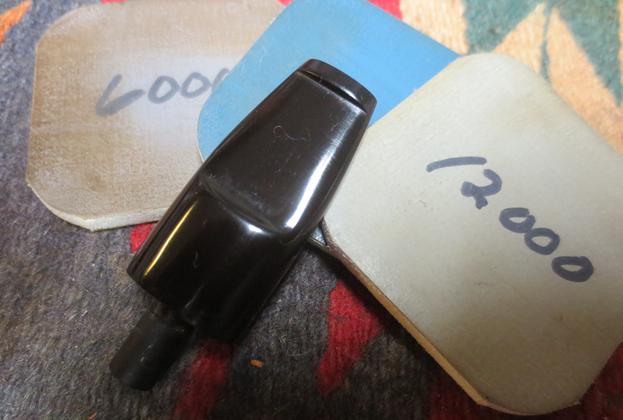
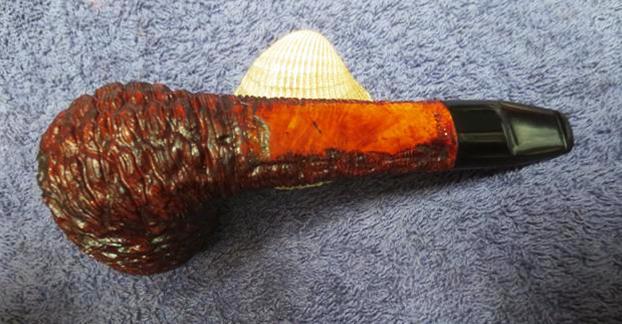
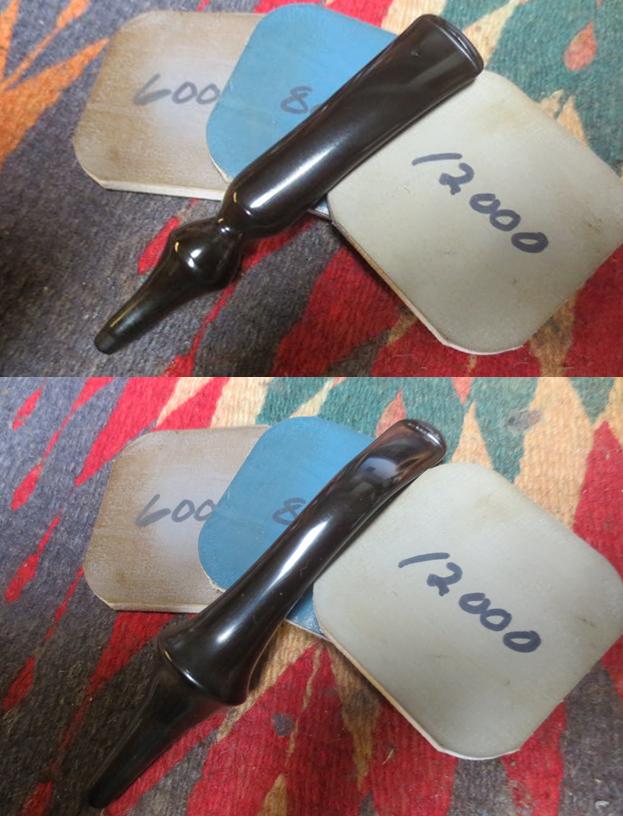
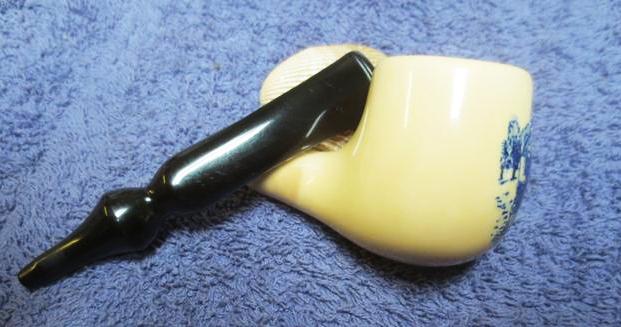
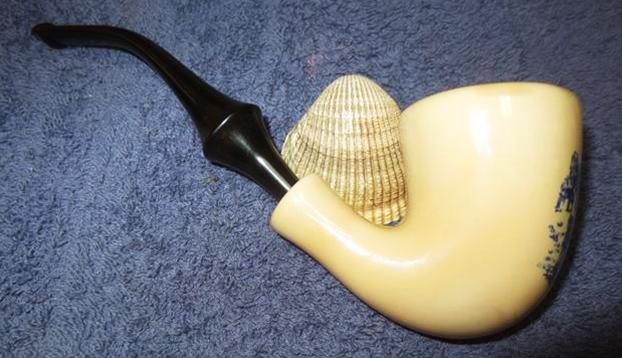
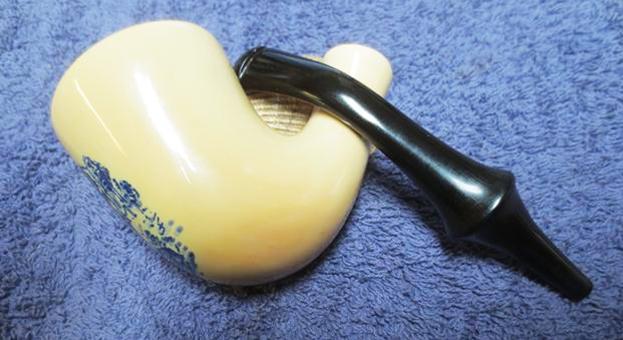
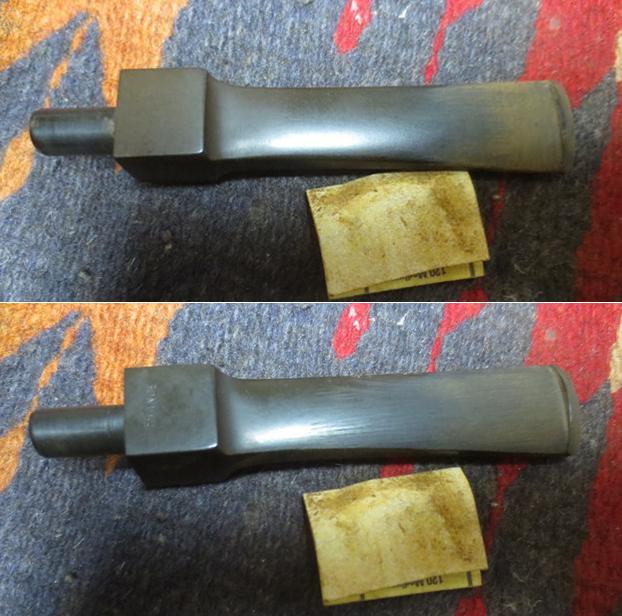
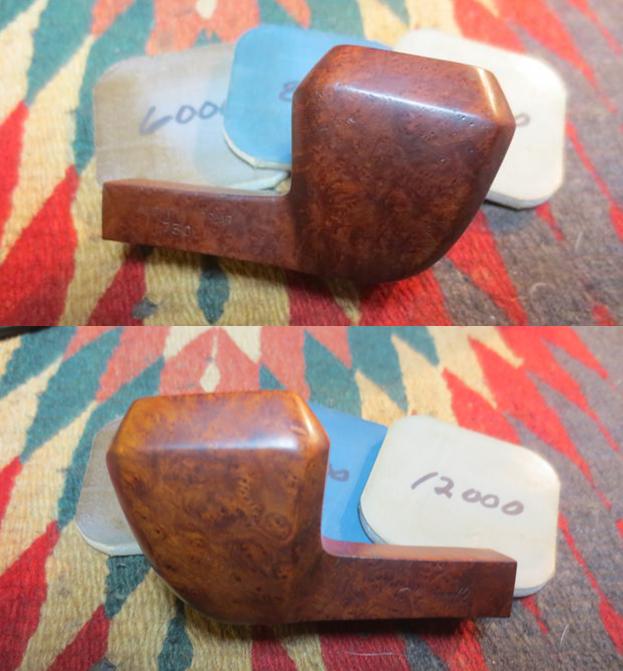
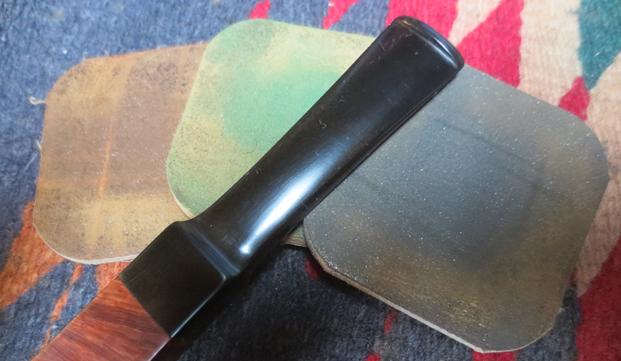
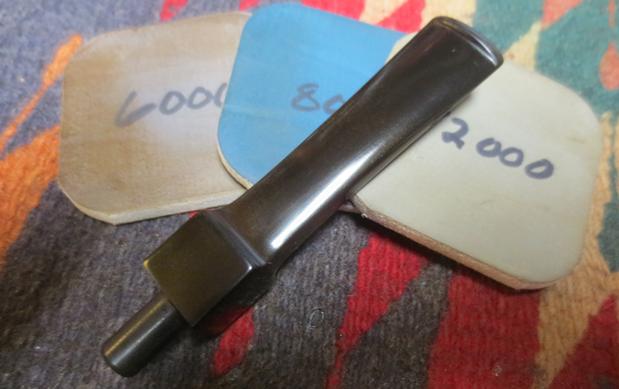
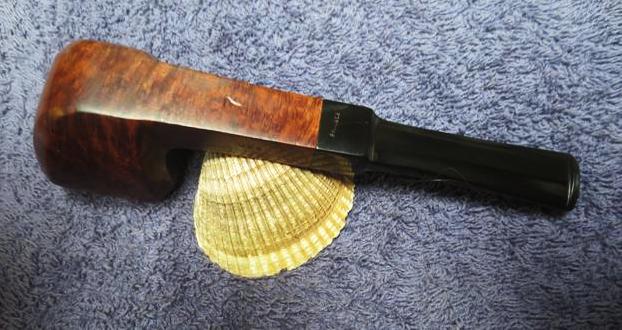
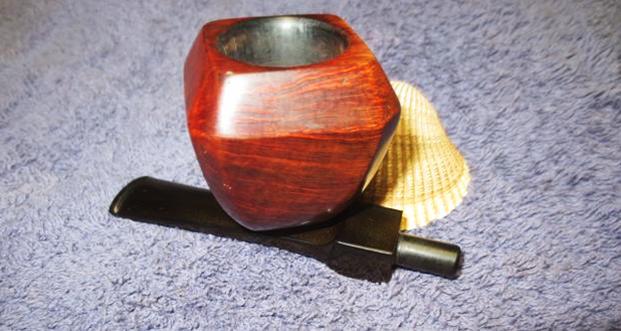
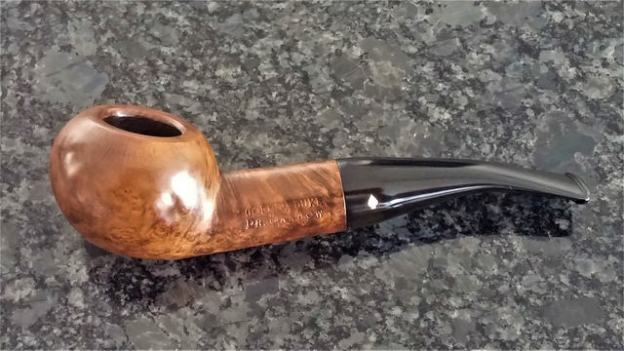
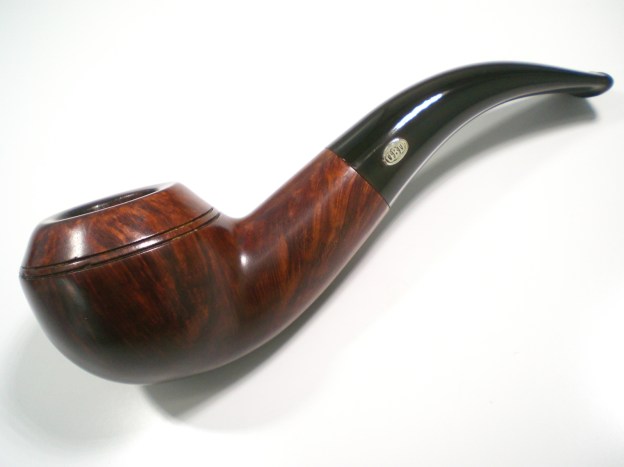
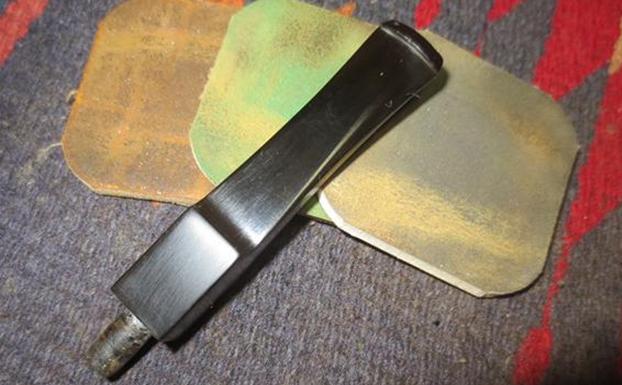
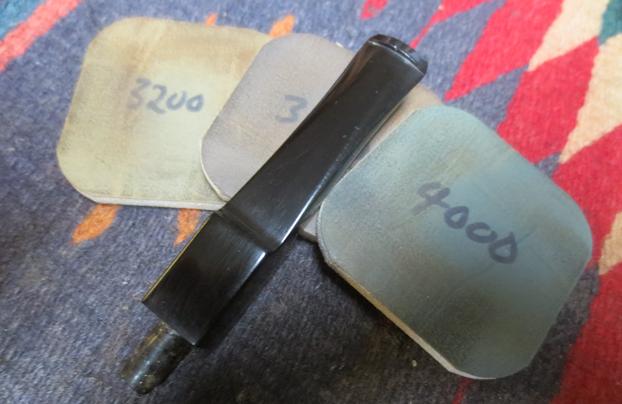
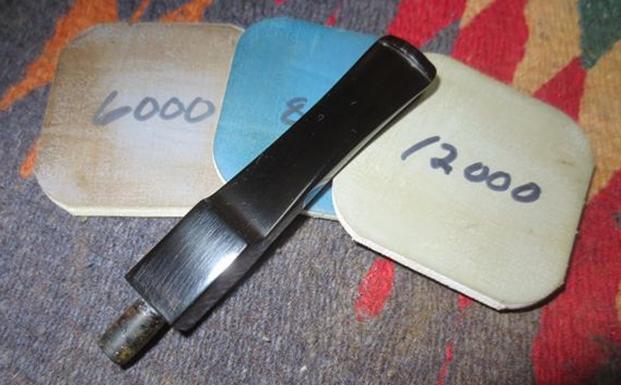
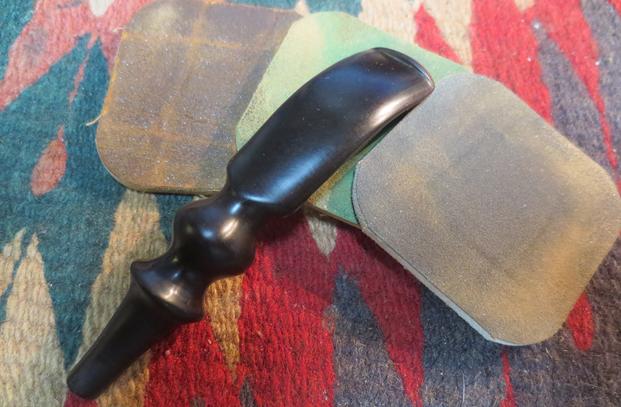
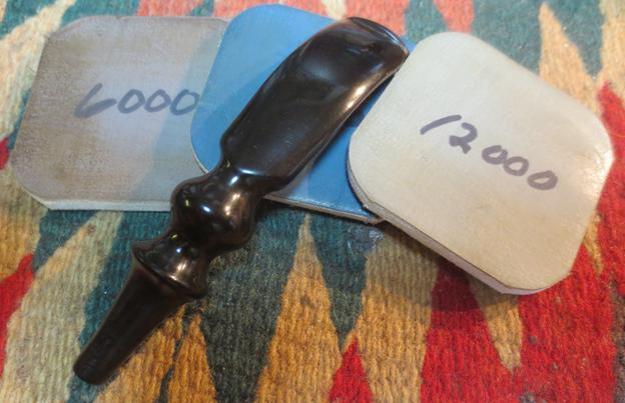
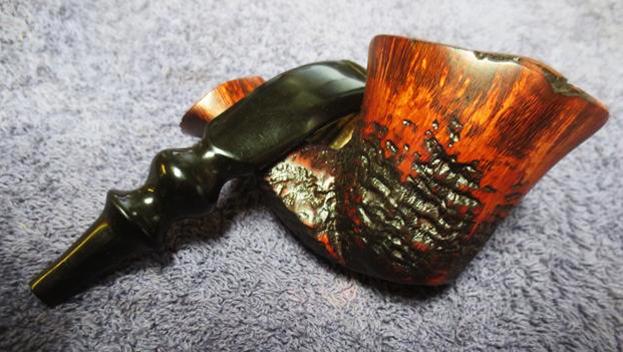
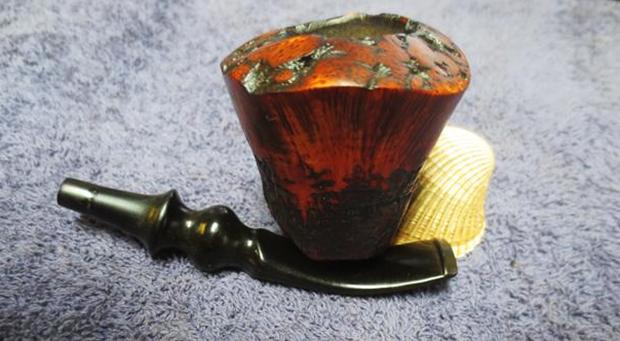
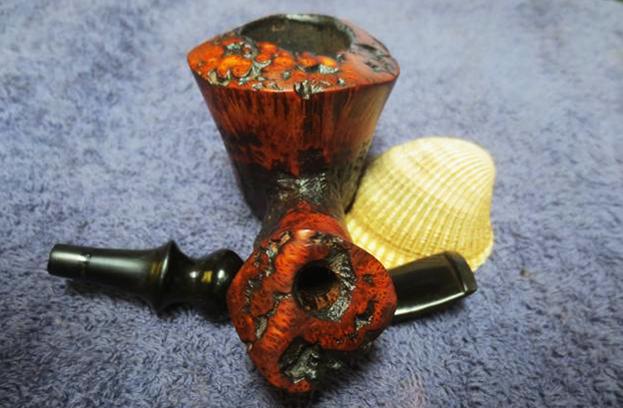
The stem was re-mounted and I used 800 grit paper to remove the layer of oxidation. The stem was then polished with 1,500 and 2,000 grit wet paper, followed by 8,000 and 12,000 micromesh sheets. The stem was buffed with White Diamond and Meguiars Plastic polish. Last night, when I showed the pipe to my local Pipe Club members (Frederick MD Pipe Club), one asked me how I shine the brass rondell. My answer: “I don’t”. I stay away from the rondell when using any abrasive products and work as close to it as I can by hand. I don’t think the Megiuars Plastic Polish is abrasive enough to do any damage, so I let that get worked in close. The stem looks brilliant and I’m very pleased with this result.

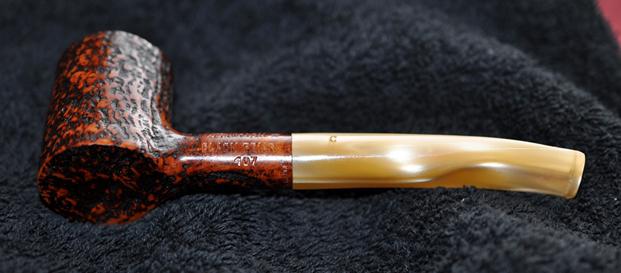
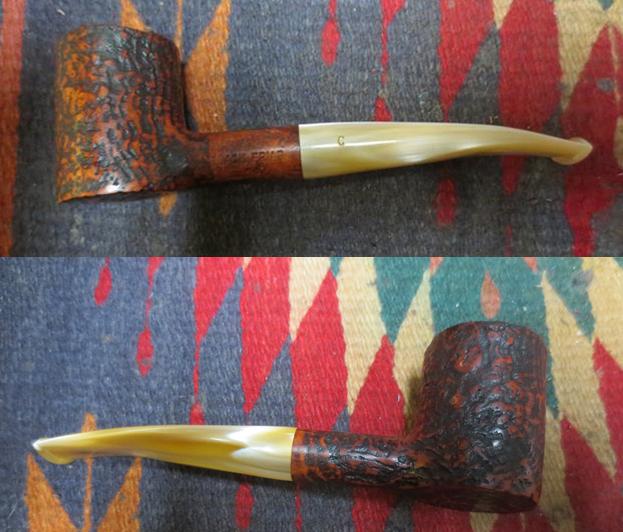
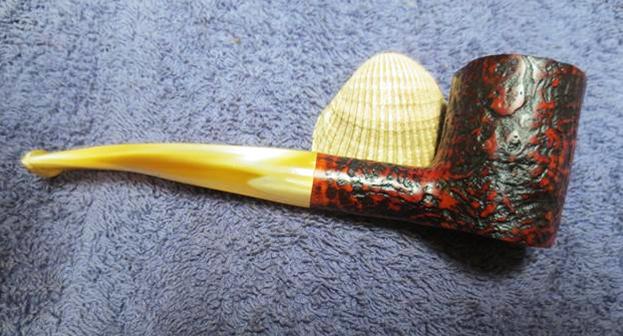
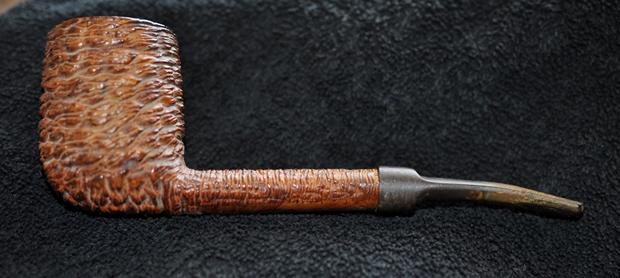
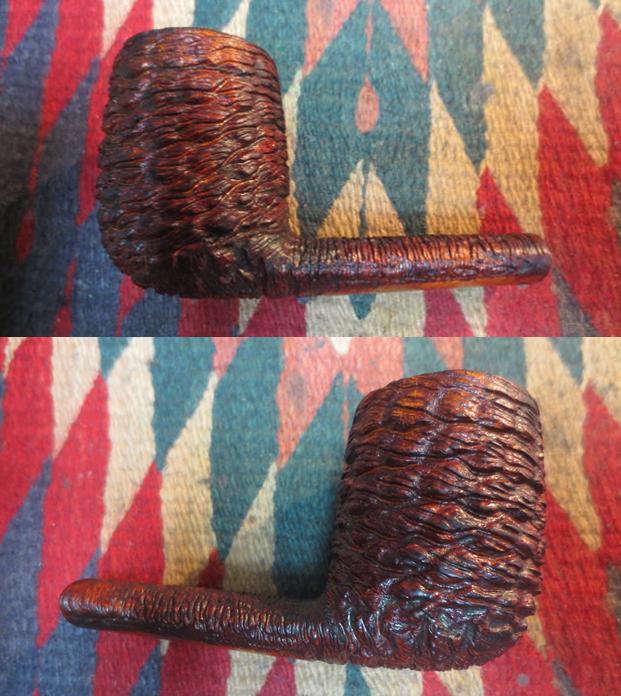
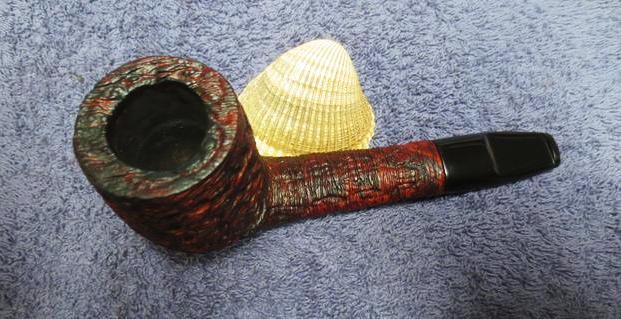
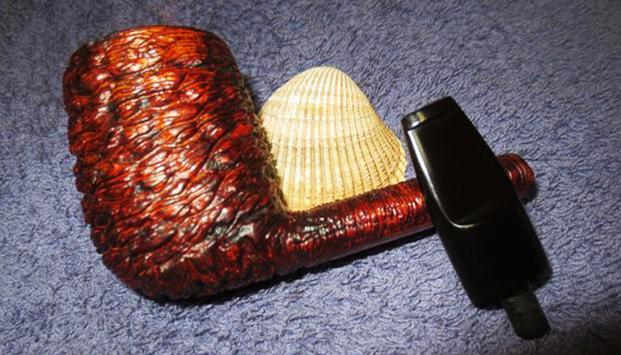
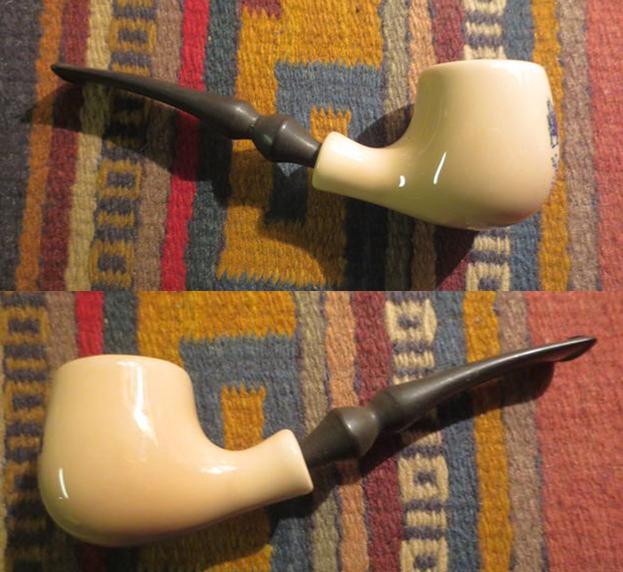
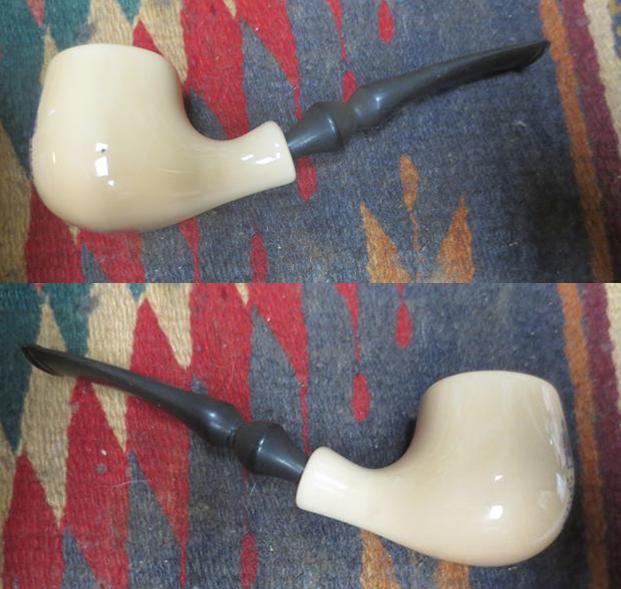
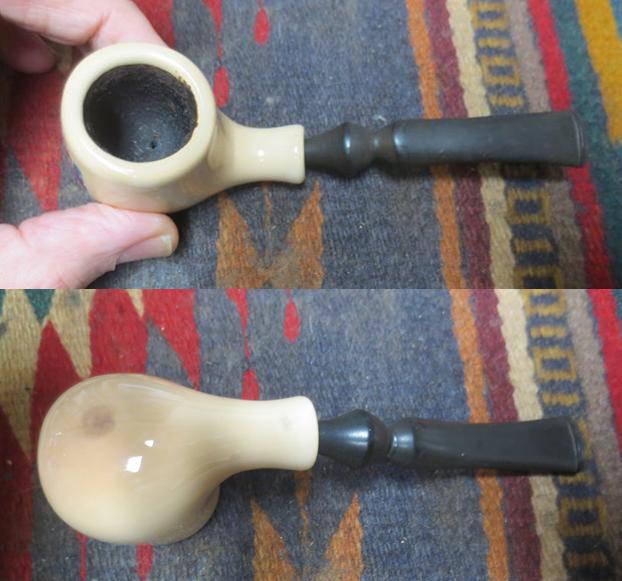
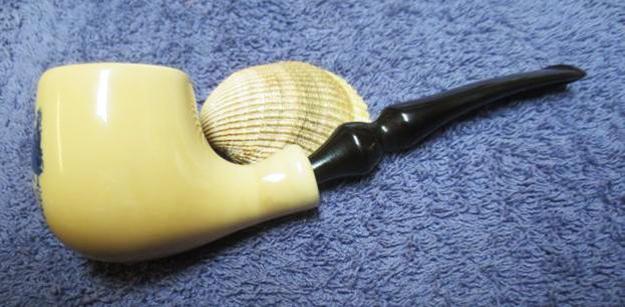
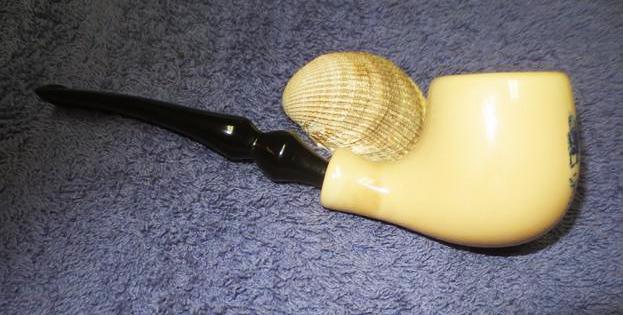
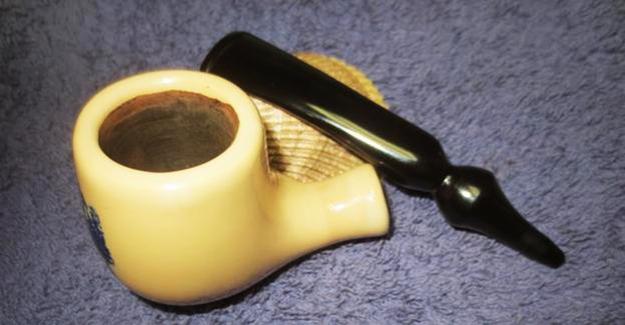
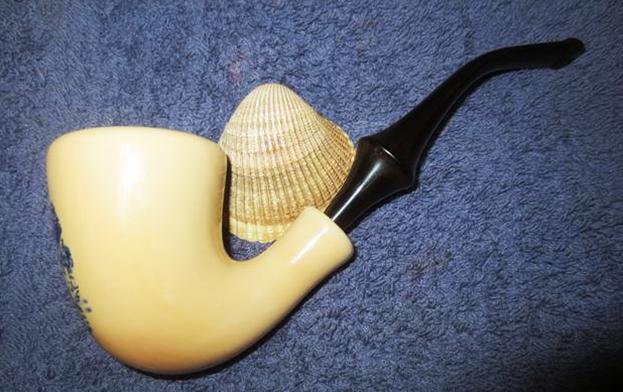
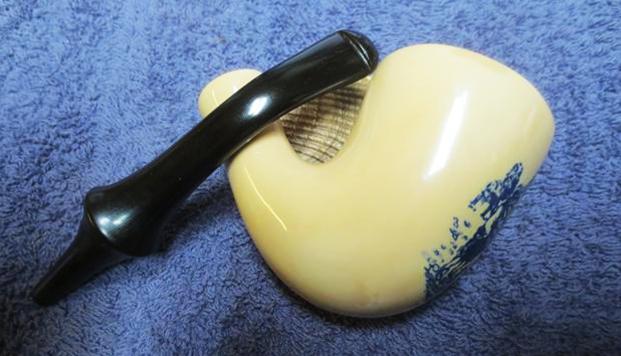
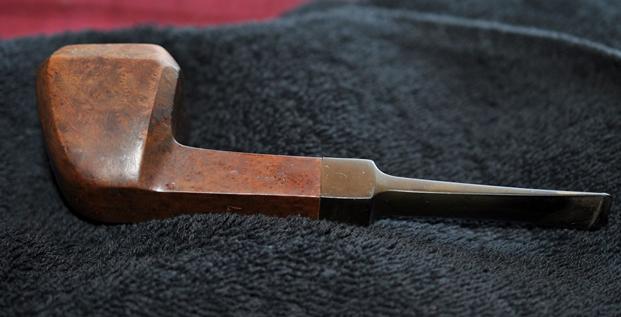
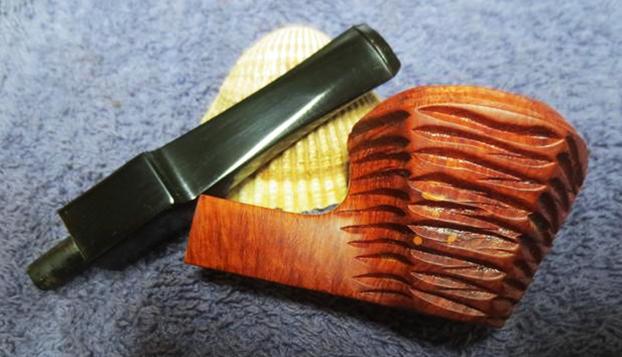
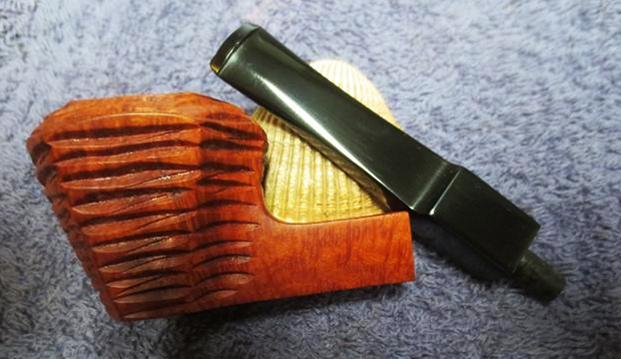
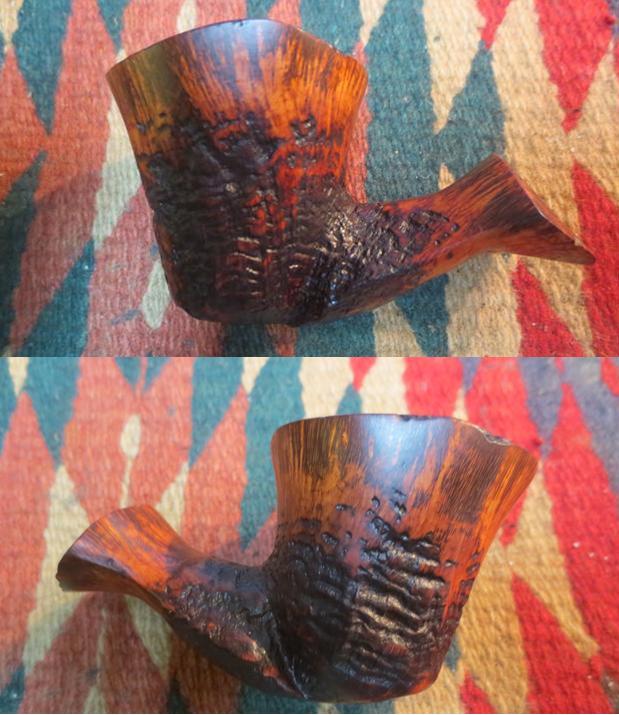
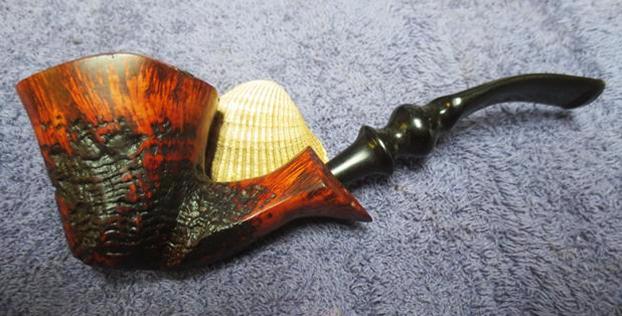
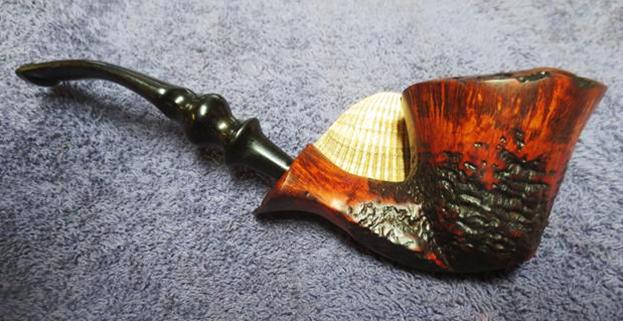
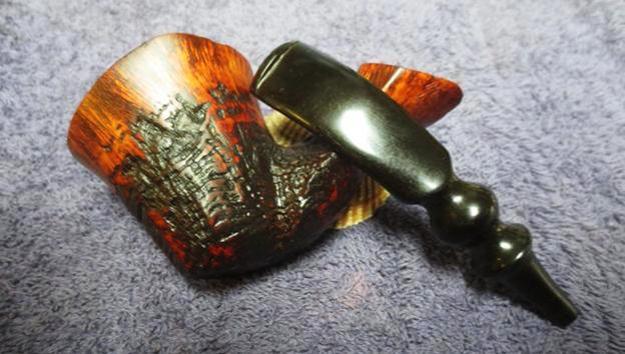
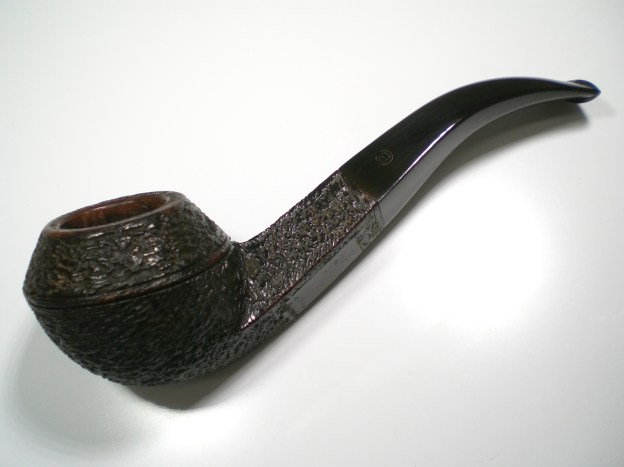
Below is the finished pipe. I have another 9242 New Standard, so this one will most likely be re-sold at a later date.

Restoring an Edwards Hexagon Dublin Sitter 97


Blog by Steve Laug

I got an email a while back from a friend who wanted me to work over an old Edwards that he had picked up. He had bought one from me in the past and had now found another one. It was a Hexagonal Dublin that had carved grooves on the sides of the bowl from the rim down to the base. The shank is square sided and is smooth. It is stamped Edwards on the top side of the shank. On the underside of the shank it is stamped Algerian Briar followed by the shape number 97. He had found it in a local antique shop I think. It had a thick cake in the bowl and the lava flowed over the top of the rim and down to the second layer of the carving on the rim. The shank was dirty and also filled with tars. The stem was a heavily oxidized replacement stem with the entire underside of the button broken off. Because it was a replacement I decided to put another replacement stem on the shank. I pulled the stem off the shank and took photos of the bowl. The grooves in the carving were dirty and the natural finish was dirty and damaged. I forgot to put the stem back on the shank and take photos. I was intent on cleaning up the bowl. I scraped out the carbon cake in the bowl and off the rim top with a Savinelli Fitsall Pipe Knife. I carefully removed the lava from the rim of the bowl.I lightly topped the bowl on the topping board with 220 grit sandpaper to remove the thick lava coat on the rim. I did not want to take off too much of the briar as it looks like an interesting stack of briar sheets from the top down.I scrubbed the bowl and rim with Murphy’s Oil Soap and a tooth brush to get all of the grit and dust out of all of the grooves and edges of the briar stack. I rinsed the pipe with running water to rinse off the dust and the soap and scrubbed it under the running water to leave behind a clean bowl. I dried it off with a clean cloth. Then I remembered I had not taken photos of the pipe with the old stem in place so I slid the stem into the shank and took the next series of photos. Not only was the replacement stem badly oxidized it also had a large chip out of the button across the top side of the stem. It was poorly fit to the shank as well. You can see from the photos that it is larger in diameter than the shank itself. It was definitely going to be replaced. I put aside the damaged replacement stem and took a new square stem blank out of my box of stems. I turned the tenon on the PIMO tenon turning tool on my cordless drill to take down the tenon to fit the shank of the Edwards pipe. Once I had the tenon turned I wiped it down with a damp cloth and took a picture of the new stem next to the one I was replacing.I put the new stem on the shank to see how it fit against the shank end. I needed to do quite a bit of sanding on the sides of the stem to get the flow along the sides, top and bottom smooth and even.I cleaned out the internals of the pipe – the mortise and the airway in the shank using alcohol, cotton swabs and pipe cleaners to remove all of the oils and tars that collect there. I cleaned out the airway in the new stem to remove the dust from turning tenon.I sanded the stem to reduce the size on all sides with 220 grit sandpaper. When I got close I put it on the shank and carefully sanded it until the transition between the shank and the stem was smooth. I sanded out the casting marks and scratches on the stem with 220 grit sandpaper. There were quite a few scratches left behind by the work I did to fit it to the shank. Once I had the majority of deep scratches sanded out, it was time to work on it with micromesh sanding pads. I used the micromesh sanding pads to polish the stem. I wet sanded it with 1500-2400 grit pads and wiped it down after each pad with Obsidian Oil to give the next pad more bite when I sanded. I dry sanded it with 3200-12000 grit pads and again wiped it down with the oil after each pad. After the final pad I wiped it down with a final coat of oil and set it aside to dry. In the last photo of the three below you can still see some light scratches in the vulcanite on the saddle part of the stem. These would need to be buffed out on the wheel. (I polished the tenon as well as can be seen in the photos below. Each photo shows it progressively getting a shine.) With the stem almost finished I took it off the shank and used the Mark Hoover’s Before & After Restoration Balm on the briar. I rubbed it into the grooves on the bowl sides with my finger and a cotton swab. I wanted it to go deep in the grooves to further test the effectiveness of the product. This would be a good test as it is a totally different finish than any of the other pipes I have worked on with the product.  Mark had said that the product can be used on briar or stems – whether vulcanite, acrylic or horn. He said it was designed to pull the dirt off of the briar as well as polish it. He added some anti-oxidants to keep the briar from getting damaged from both UV rays and water. Once I had all the grooves and surfaces of the bowl covered I worked it into the finish with a cotton pad to see if it pulled out the dirt. It seemed to work very well and I took the following photos to show the results. So far the product seems to be delivering as promised. I will continue using it for a while and see how it works in a variety of settings before I give an opinion of the product. I put the stem back on the bowl and buffed the entire pipe with Blue Diamond on the buffing wheel to polish the stem and the bowl. I used a soft touch around the stamped areas as I did not want to flatten them or polish them away. I buffed stem hard to work over the remaining scratches in the rubber. It took some work but they are smoothed out. I gave the stem multiple coats of carnauba wax buffed it with a clean buffing pad to raise a shine. I gave the bowl multiple coats of Conservator’s Wax and rubbed it into the sandblast and the plateau areas. I buffed it with a shoe brush and then with a clean buffing pad to raise the shine. I hand buffed the pipe with a microfiber cloth to deepen the shine. The interesting carved finish on the bowl with its natural oil finish and the new stem combine to present a beautiful pipe. The pipe has been given a total makeover and the new stem fits the shape very well. The finished pipe is shown in the photos below. I think William is going to really like the new look and feel of this pipe. I have one more of his to finish up and then the pair will go back to him in the mail. Thanks for looking.

Restemming and Reconditioning a Rungsted Mariner by Preben Holm


Blog by Steve Laug

I don’t know when I learned that the Rungsted line of pipes was another line that Preben Holm carved. But I learned that he made several lines outside the Ben Wade contract pipes he was producing for Snug Harbor/Lane. This was confirmed when I looked online and found a thread on PipesMagazine.com. The discussion covered a brand called Britta Bech and one of the members there happened to mention and confirm what I already knew about the Rungsted line. From my memory and the speaker’s the pipes were mostly carved in the mid to late 70’s or early 80’s during the height of the Danish Freehand pipe craze in the US. The speaker there said that though some refer to these as seconds he did not think that was accurate and that really it was a totally separate line from Preben Holm. I would agree with his assessment on this. I am pretty certain looking at the various Rungsted pipes that I have worked on that there are no flaws. They all combine both smooth and sandblast finishes and present a really interesting finished pipe. (mlaug on pipesmagazine.com http://pipesmagazine.com/forums/topic/preben-holm-info-needed).

This particular pipe came in a lot that Jeff and I purchased from a fellow in Idaho. Jeff had purchased the pipes shown in the photo below from him. The Rungsted is circled in red at the top right side of the photo. The photo came because I asked Jeff to send me a picture of the pipes he picked up. I have written about the find on a previous blog that you can read if you are interested at the link that follows: https://rebornpipes.com/2016/10/07/a-good-day-hunting-orchestrated-between-british-columbia-and-idaho/ 

Jeff did a great job cleaning off the debris and grime on this old bowl. It did not have a stem when it came to us, one would have to be made to fit it. He reamed it with a PipNet reamer and smoothed the walls of the bowl with a Savinelli Fitsall pipe knife. He scrubbed out the mortise and the airway in the shank and the stem with alcohol, cotton swabs and pipe cleaners. He scrubbed the exterior of the bowl, rim and shank with a tooth brush and Murphy’s Oil Soap to the oils and tars on the bowl, rim and shank. He rinsed it under running water. He dried it off with a soft cloth. Once the grime was removed the finish underneath was in stellar condition. The rich patina of the older briar was a variegated finish of smooth and sandblast looked great. I took photos of the bowl to show its condition before I started my work on it. The shank of the pipe was stamped on the smooth underside. It read RUNGSTED over MARINER over Hand Made in Denmark. The stamping was quite legible, though the lower portion was lighter than the upper.I had a stem in my can of stems that I had started shaping for another pipe some time ago and abandoned. It needed to have a little more of the tenon end taken down to fit in the mortise but it had the correct look for the pipe. I took pictures of the stem before I did the work to make it fit.I sanded the tenon end down with 220 grit sandpaper until it fit snugly in the shank. I put it in place on the pipe and took the next set of photos. Lots of sanding to do, but it gives an idea of what the pipe will look like when it is finished. In my ongoing experiment with Mark Hoover’s Before & After Restoration Balm I am using it on this mixed finish pipe. It should be a good test of how it works in the transitions between the smooth and sandblast portions as well as on the plateau on the rim and the shank end. I have used it individually on each of those finishes but not on a pipe that had all three features. Mark describes the product being designed for use on briar or stems – whether vulcanite, acrylic or horn. It was formulated to pull the dirt off of the briar as well as polish it at the same time. It includes anti-oxidants to keep the briar from getting damaged from UV rays and water as well as something that enlivens the briar. I worked it into the sandblast portions with my fingers and rubbed it on the smooth portions. I wiped it down with a cotton pad to see if it pulled out the dirt. It worked very well on all the different parts of this bowl. I took the following photos to show the results. As always, I will continue using it for a while and see how it works in a variety of settings before I give an opinion of the product. I buffed the bowl with a clean buffing pad to polish the briar and see what the finished bowl would look like and if areas that needed a bit more attention. The buffed bowl can be seen in the photos that follow. It has a rich patina that really has a deep glow to it. The two finishes really flow into each other and give the pipe a warm look. I sanded out the casting marks and scratches on the stem with 220 grit sandpaper. I opened the slot in the end of the button with needles files and sandpaper to make it easier to push a pipe cleaner into the stem and shank. I polished it with micromesh sanding pads – wet sanding it with 1500-2400 grit pads and wiping it down after each pad with Obsidian Oil to give the next pad more bite when I sanded. I dry sanded it with 3200-12000 grit pads and again wiped it down with the oil after each pad. After the final pad I wiped it down with a final coat of oil and set it aside to dry. I put the stem back on the bowl and buffed it with Blue Diamond on the buffing wheel to polish the stem and the smooth portions of the briar. I used a soft touch around the stamped areas as I did not want to flatten them polish them away even more that they already were. I gave the stem multiple coats of carnauba wax buffed it with a clean buffing pad to raise a shine. I gave the bowl multiple coats of Conservator’s Wax and rubbed it into the sandblast and the plateau areas. I buffed it with a shoe brush and then with a clean buffing pad to raise the shine. I hand buffed the pipe with a microfiber cloth to deepen the shine. The variegated finish on the bowl and stem combine to present a beautiful pipe. The pipe really does look fresh and new to me and I like the finished look with the new stem. The dimensions of this pipe are Length: 6 1/2 inches, Height: 2 inches, Bowl diameter: 2 inches, Chamber diameter: 7/8 inches. The finished pipe is shown in the photos below. I will soon be adding it to the rebornpipes store if you are interested in adding to your collection. It is a beauty and will serve someone very well. Email me at slaug@uniserve.com or send me a message on Facebook. Thanks for looking.

Berkley Club Bulldog Restoration (Sasieni 2nd)


By Al Jones

A member of the PipesMagazine.com forum contacted me after spotting this bulldog on Ebay. He wondered if it was a Sasieni 2nd. There is a long list of Sasieni second line pipes, but I could tell from the football shaped COM (Country of Manufacture) stamp that it was made by Sasieni. The pipe is stamped with the shape number 779R, as are most Sasieni second line pipes (Sashar, etc.). I wonder what the R signified? A thread on the PipesMagazine.com forum indeed showed that the Berkley Club was indeed a Sasieni second.  This shape would have been the “Danzey” shape, 79, if it were a Sasieni.    There is a small flaw near the shank/bowl junction that was filled.  I suspect this rendered the pipe to be a second line offering.

Sasieni Seconds Thread – PipesMagazine.com

From the Ebay listing, the pipe appeared to be in good condition. I love restoring these kind of British oddities, so I volunteered to restore the pipe. When it arrived at my home, I could see that he made a good decision in buying the pipe, it was great shape. The briar stain was faded and the stem oxidized with some teeth indentions.

Curiously, the bowl has a very uniform well drilled into the bottom and the stem included an aluminum straw/stinger. I’ve not yet encountered a pipe bowl with this feature.

The stem bore a faint “B” stamp and I wasn’t sure that could be salvaged.

There was very little cake in the bowl, so I used a piece of 320 grit sandpaper to remove the minimal residue. The shank was completely clogged with debris, which I removed with the drill bit from my Senor reamer. The bowl was soaked with alcohol and sea salt. I soaked the stem in a mild solution of Oxy-Clean.

I wiped on a coat of Fieblings Medium Brown stain to freshen the briar, then hand waxed it with Halycon Wax.

Following the bowl soak, the shank was cleaned with a soft bristle brush. I used a lighter to bring up some of the tooth indentions. The initial layer of oxidation was removed with 800 grit paper, followed by 1,500 and 2,000 grades. Next up was 8,000 and 12,000 grade micromesh sheets. The stem was buffed with White Diamond and then Meguiars Plastic polish. Most of the teeth indentions were removed. I was able to save the fragile appearing “B” stem logo

Below is the finished pipe.