Steve Laug recently underwent major surgery. I am happy to report that the surgery was successful and he is on the road to recovery. However, he is going to be away from Reborn Pipes for a while. To ease the burden on Steve, I would ask that if you have questions, comments, requests, etc., please email me instead of Steve at kenneth@knightsofthepipe.com. Similarly, if you emailed Steve recently and did not receive a response, please email me. I will do my best to help you. Thank you very much and please keep Steve in your prayers.
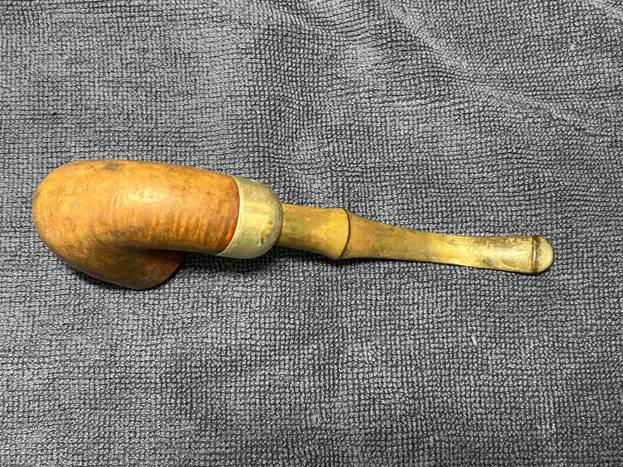
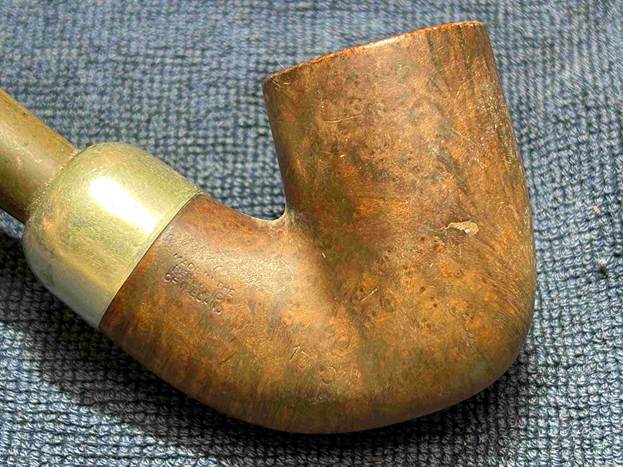
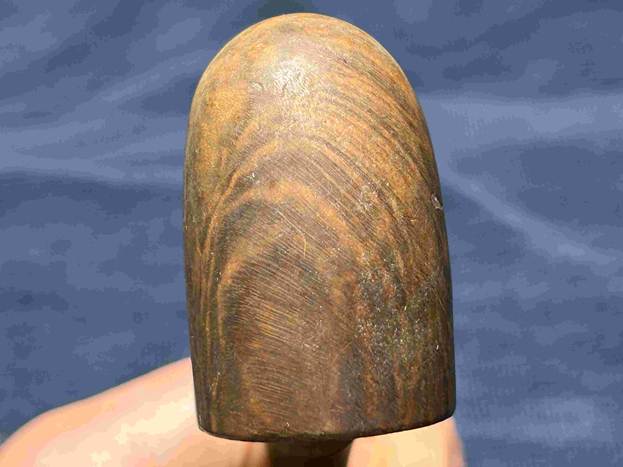
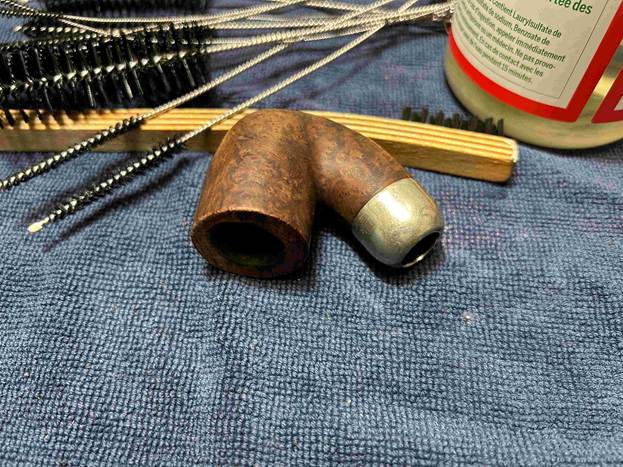
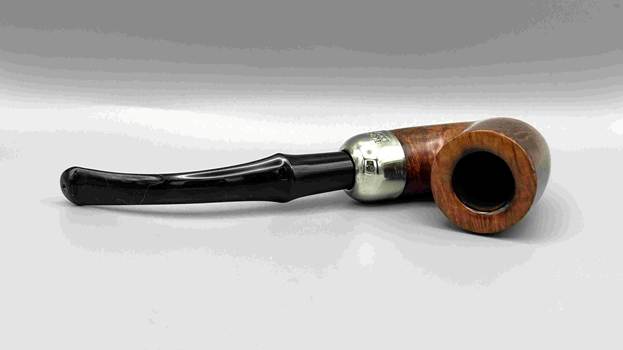
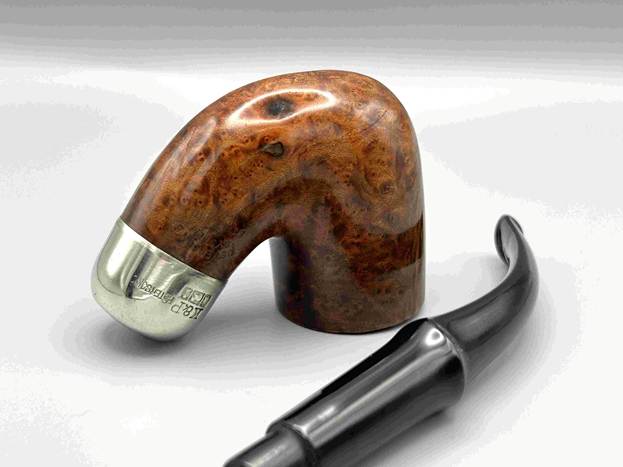
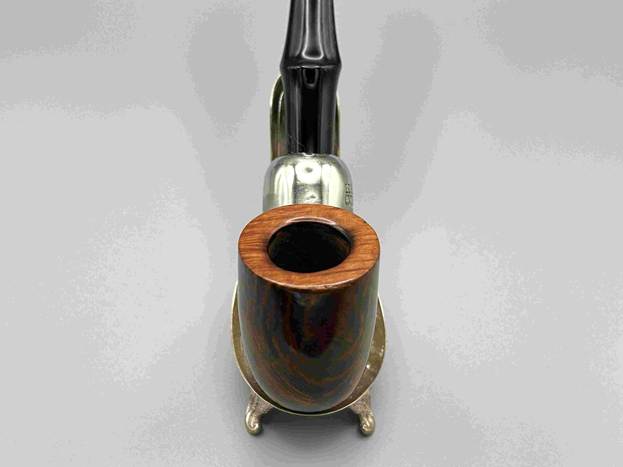
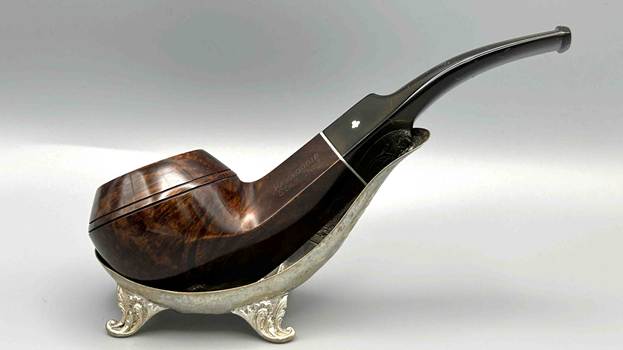
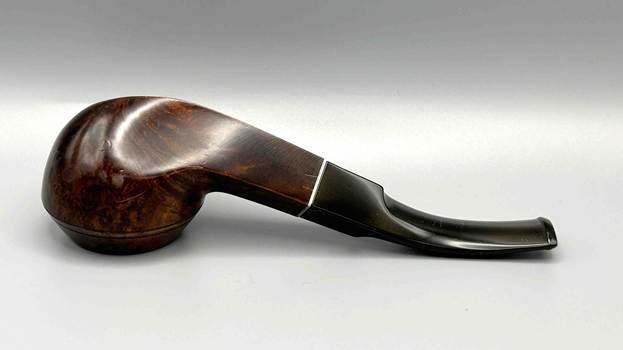
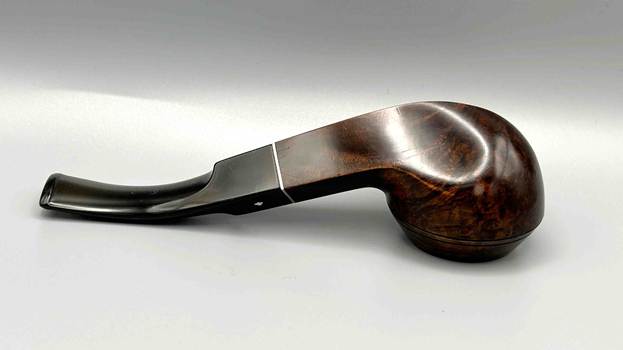
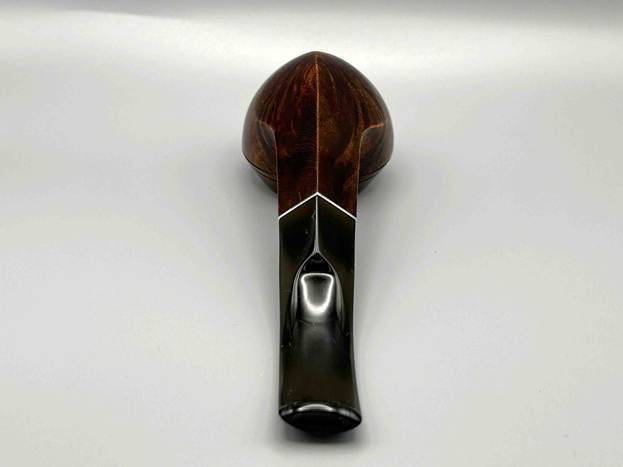
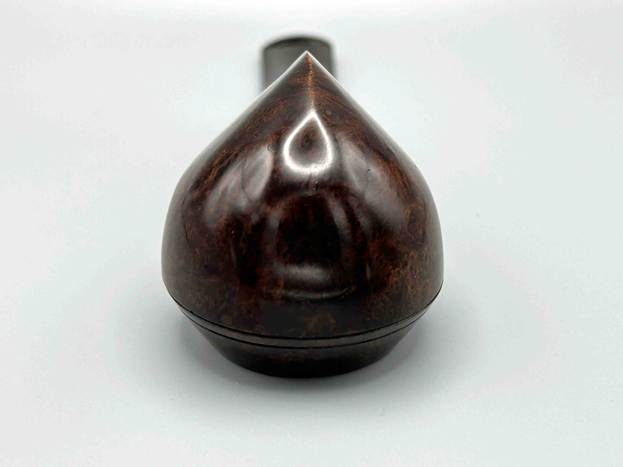
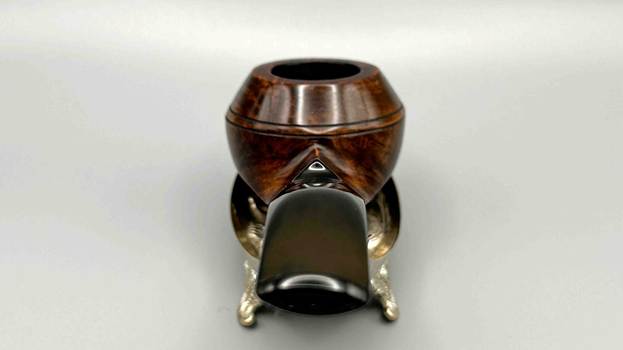
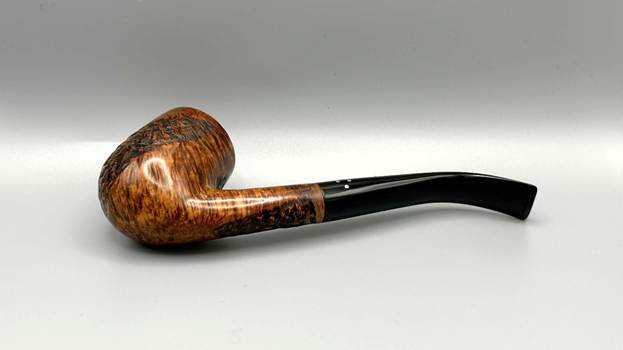
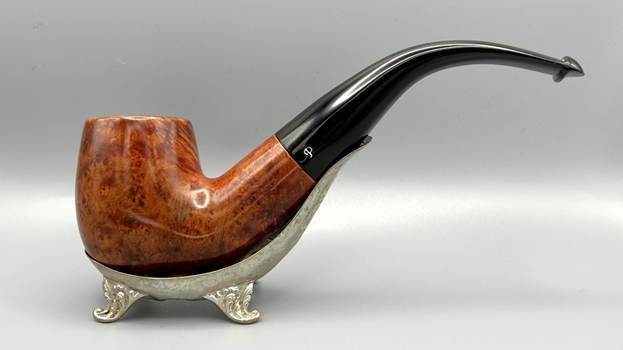
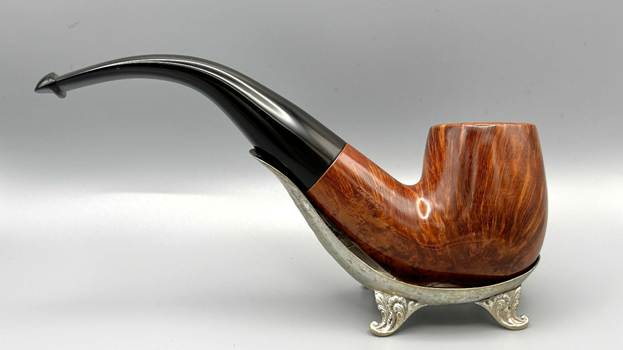
Next up is a pipe that I acquired from a local gentleman – and it is the classic Pete. This is a republic-era Peterson System Standard 1309 bent billiard. The smooth finish on it is really attractive and satisfying. Naturally, the stem has the time-honoured Peterson P-lip. The 1309 is exactly the same pipe as the 309 – the initial ‘1’ simply indicates that it was made for the Canadian market. Otherwise, they are identical.
This Pete has had a rough-and-tumble life. It has seemingly been through a few wars. This will be an interesting restoration, as it involves many different techniques. It’s definitely worth reading through this pipe’s journey – it was a hard row to hoe.
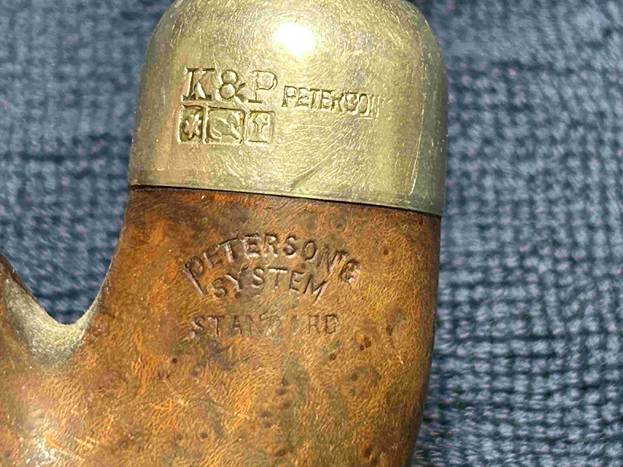
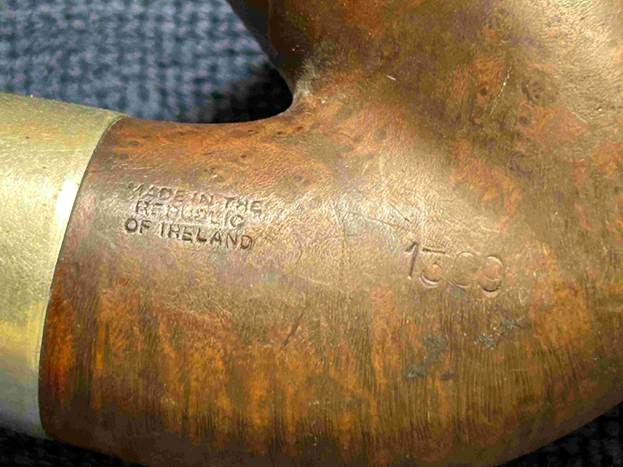
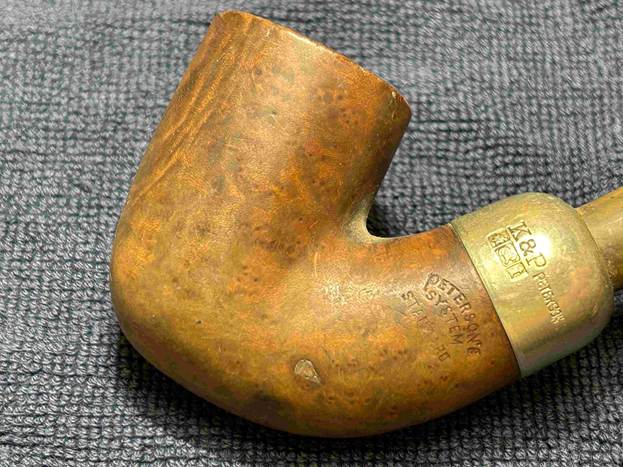
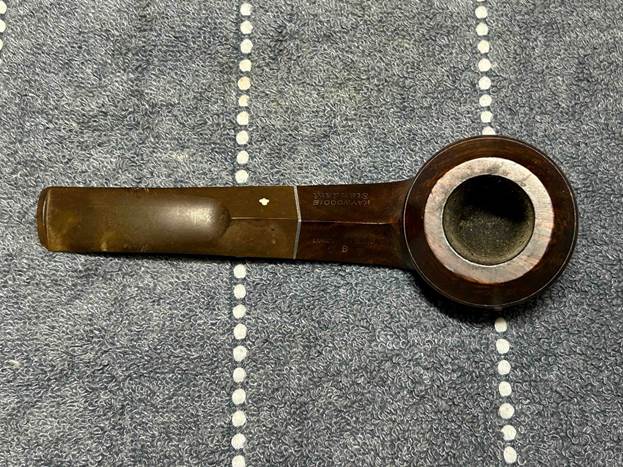
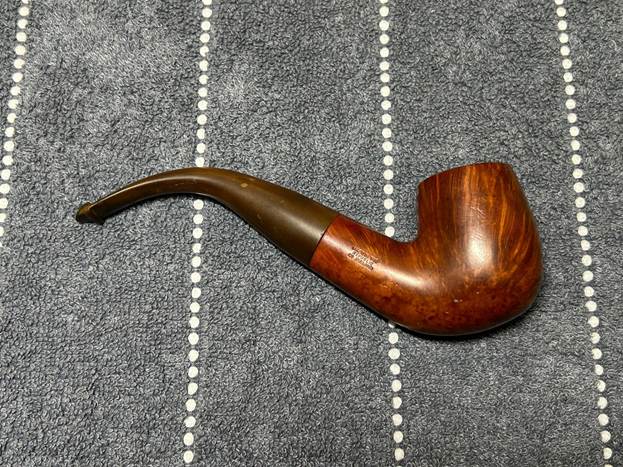
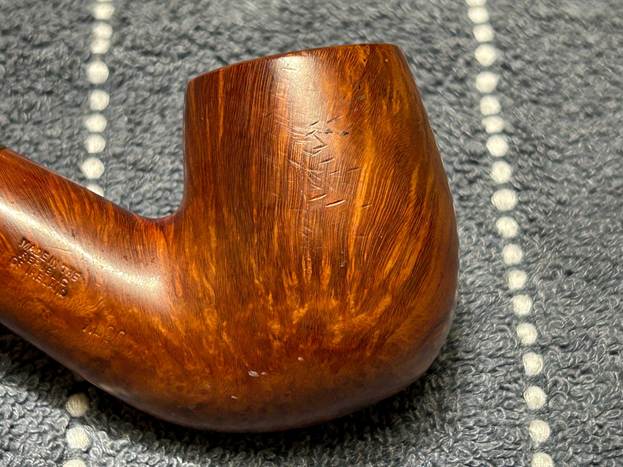
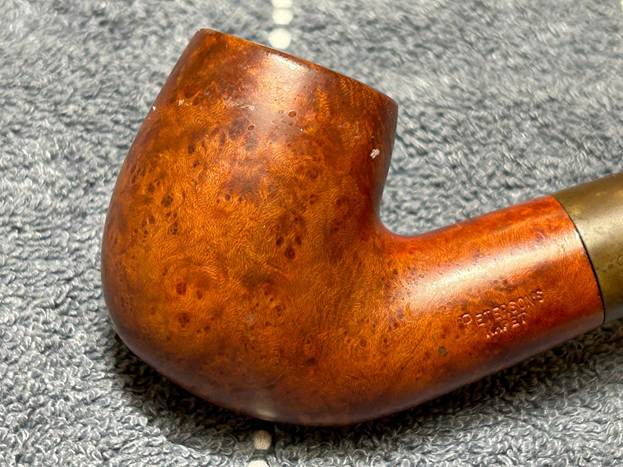
Looking on the left side of the stummel, we can see the marks. First, we have Peterson’s [over] System [over] Standard. On the right of the stummel we see Made in the [over] Republic [over] of Ireland. Then the shape number 1309. On the nickel ferrule, there are more marks. K&P [over] the symbols (not hallmarks) of a shamrock, a lion and a standing figure. Next to that is the name Peterson’s.
The Peterson website provides some great information, specifically about the 309 shape, and I quote it here:
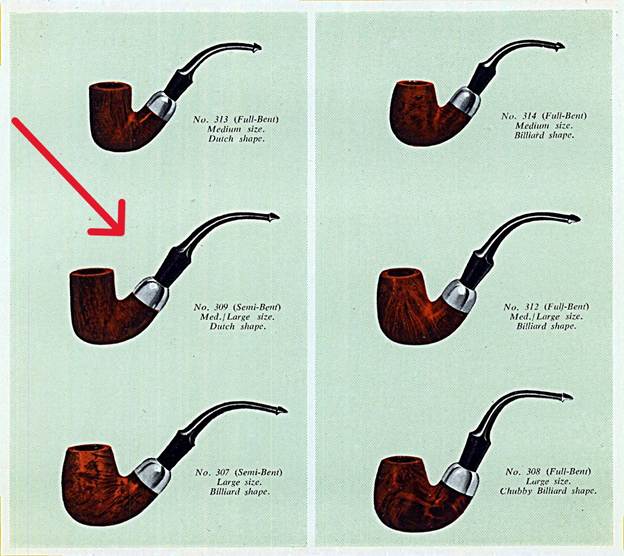
Introduced in 1896, this large straight-sided Billiard (also known as the large Dutch Billiard) was among our first System pipes and remains among our most recognizable shapes. It’s the pipe smoked by Basil Rathbone in 12 of his Sherlock Holmes films and beautifully represents Peterson history from the first days of the patents. It is iconically, quintessentially Peterson.
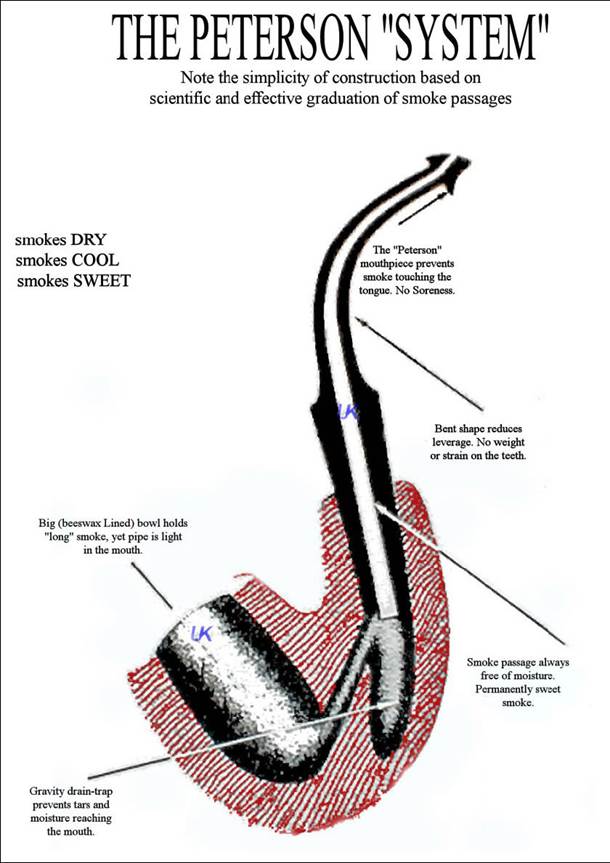
They also included a good paragraph on the Peterson system itself:
In 1890, after 15 years of handling and repairing pipes while working for the Kapps, Charles Peterson secured a patent in his own name, titled “A certain new and useful improvement in Tobacco-Pipes,” which introduced a unique system comprised of a higher draft hole and a moisture reservoir bored into the shank and transition of a briar pipe. Over the next eight years, Charles continued to refine his System, applying for and securing patents for a graduated bore mouthpiece (1891), and a unique button design known today as the P-Lip (1894-1898). Designed to wick moisture away from the smoke, reduce tongue bite, and increase the longevity of the pipe, Peterson’s complete System patent sparked a tradition of innovation, one we continue to uphold to this day. The System Pipe is the invisible source behind our unique House Style: our pipes’ muscular shanks and transitions, tubular profile, and generous bends. Our overall shaping style has a distinctly antique form because it has remained largely unchanged for over 120 years.
Steve and I have written about the Peterson System many times in many blogs. The Peterson System pipes are well storied among Peterson collectors/admirers. I took the opportunity to read the article on Pipedia, specifically about the System pipes, by Jim Lilley. There is a lot of good information and I encourage you to read it here.
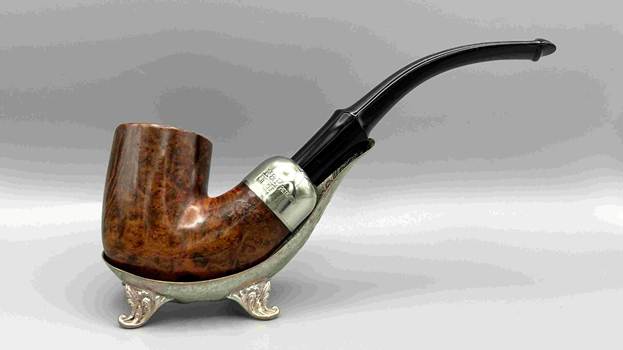
As usual, I owe a debt of gratitude to Mark Irwin of Peterson Pipe Notes. He has a very interesting article on the various System shapes and I highly recommend having a look here. In fact, regarding the 309, he says this: ‘As I’ve said many times, for me this is the Peterson shape.’ Here is a photo from his page:
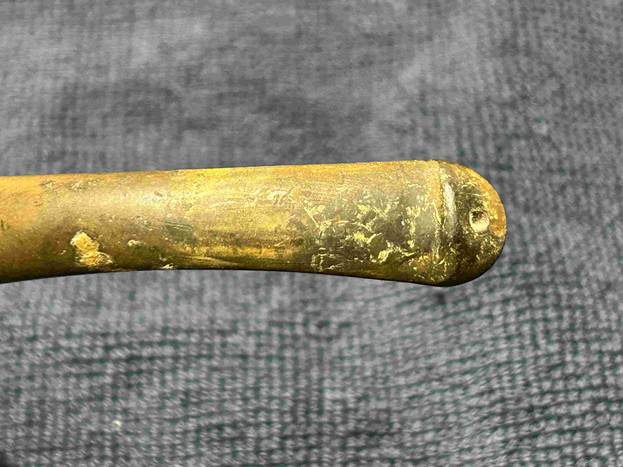
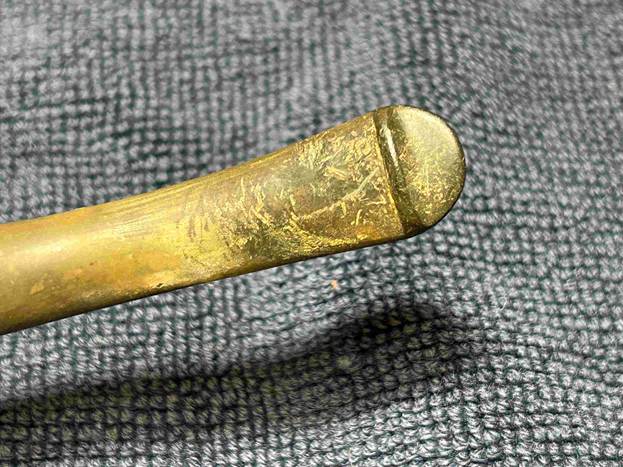
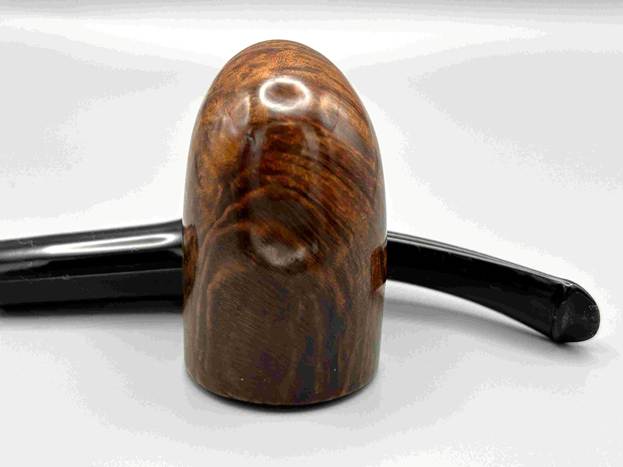
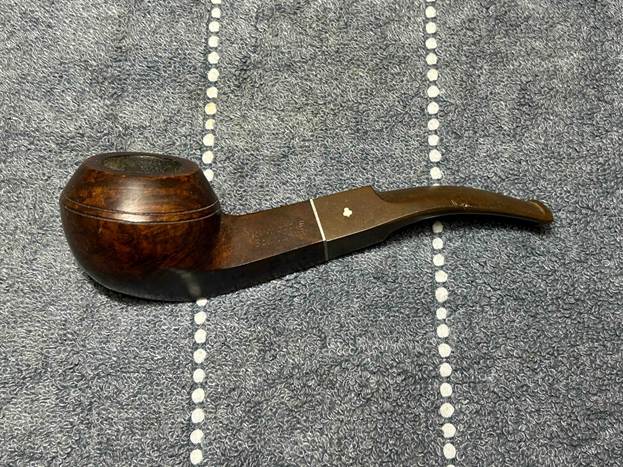
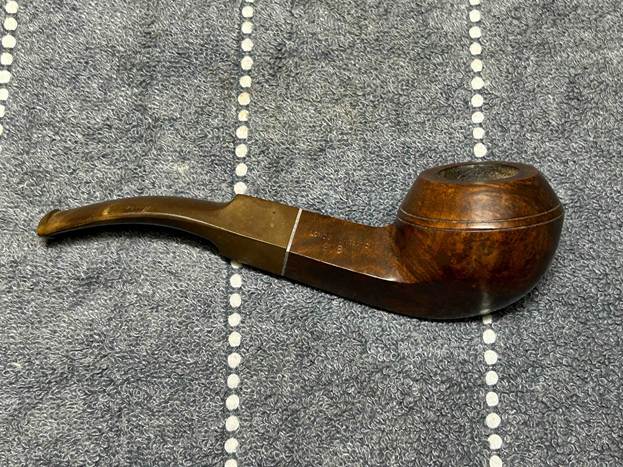
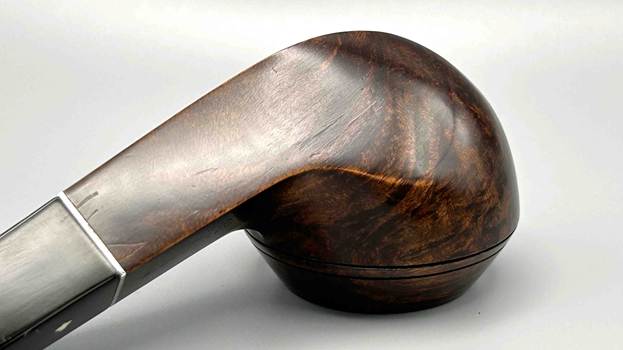
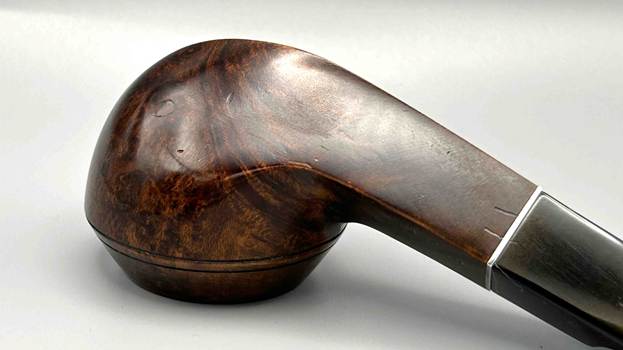
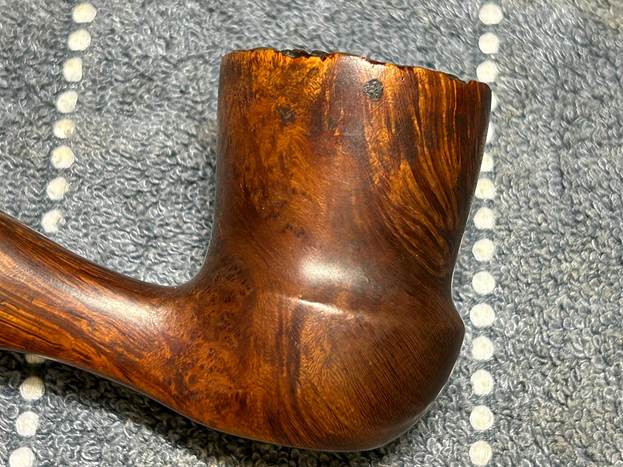
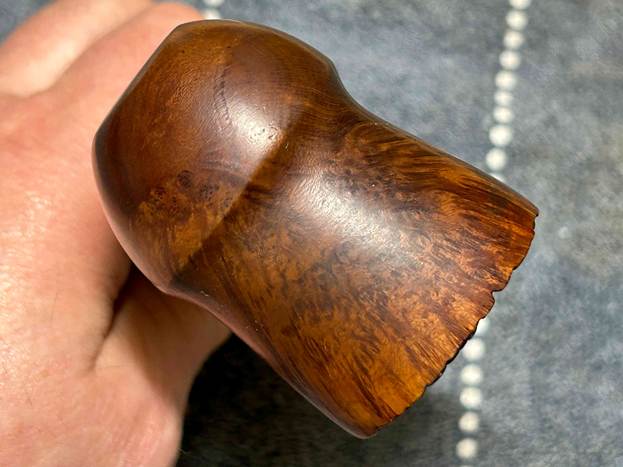
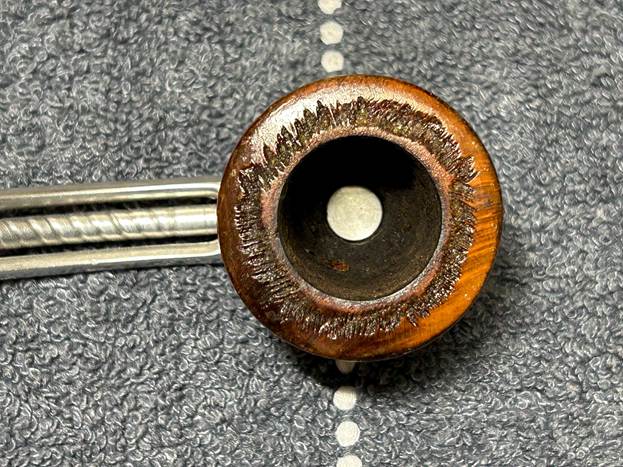
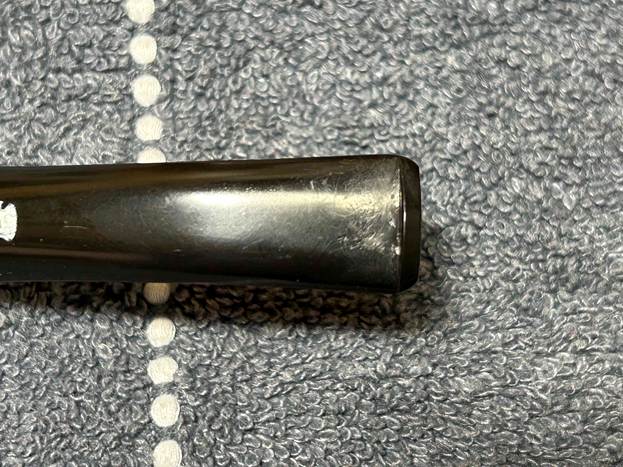
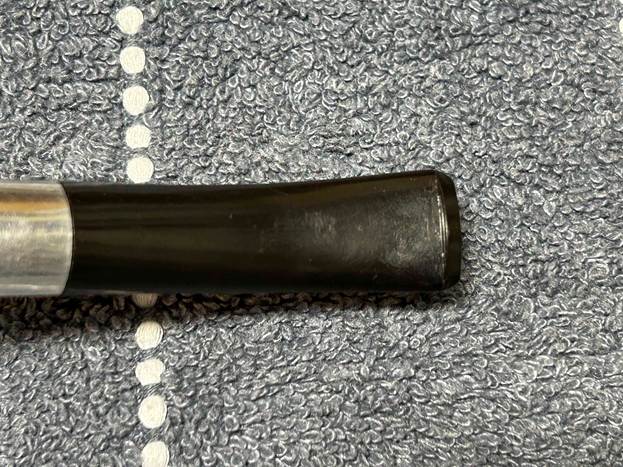
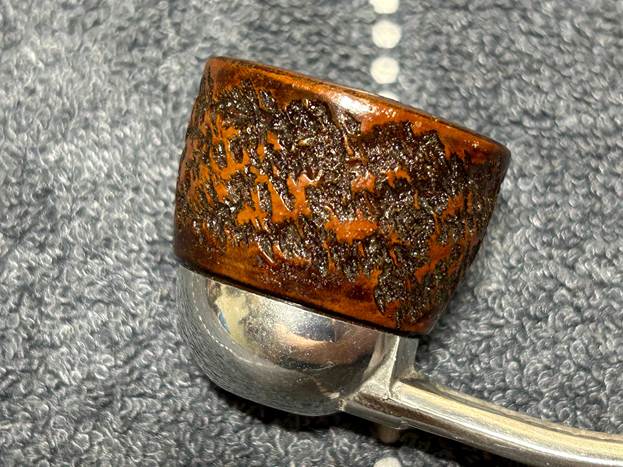
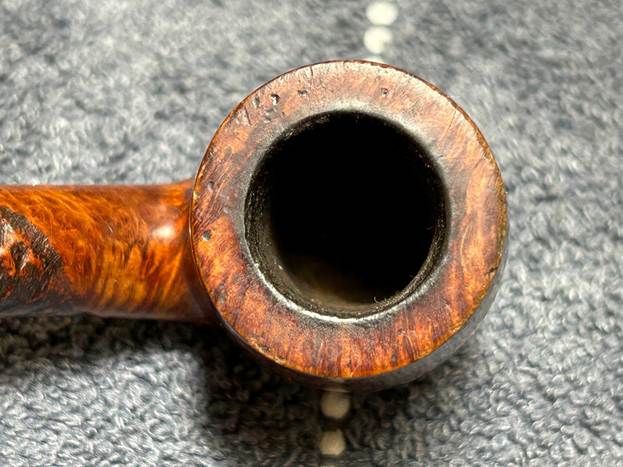
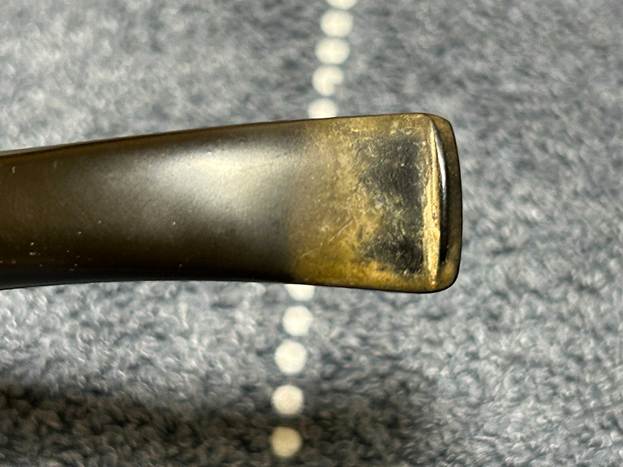
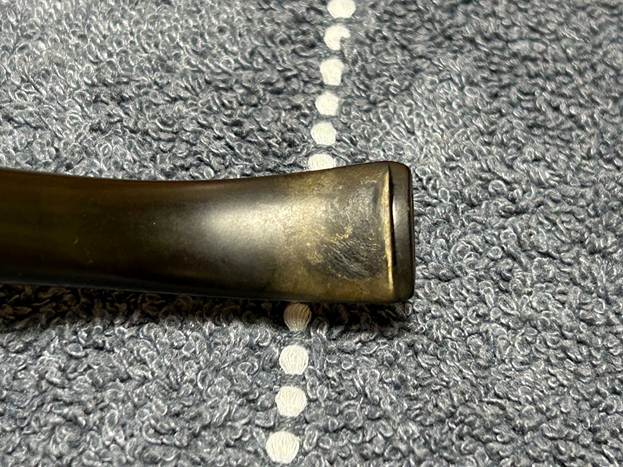
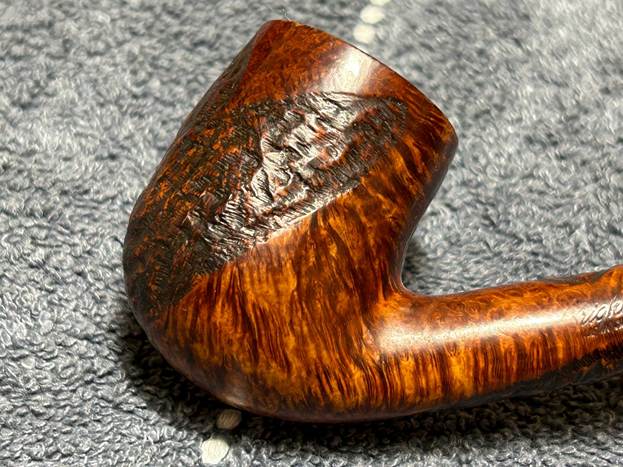
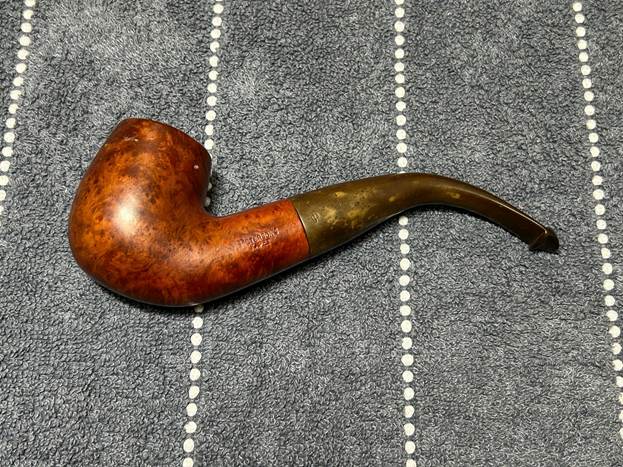
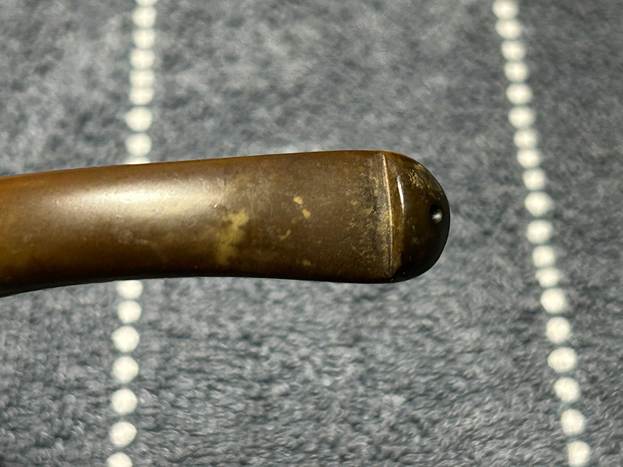
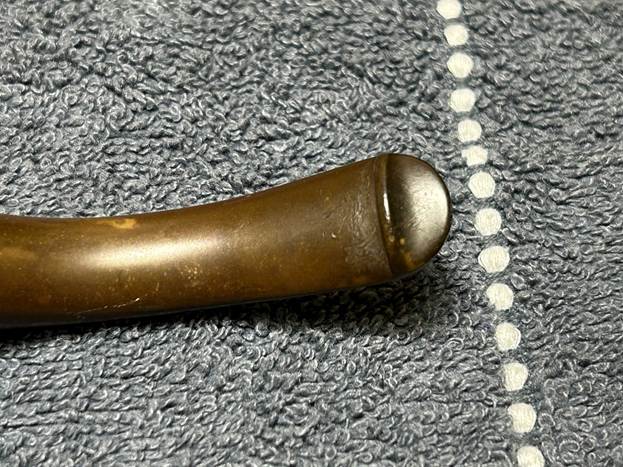
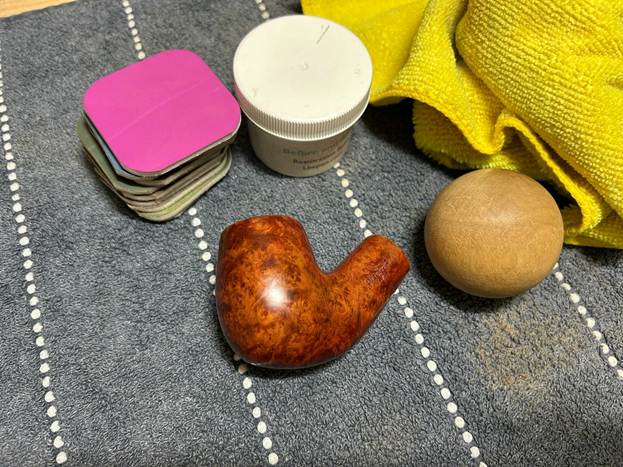
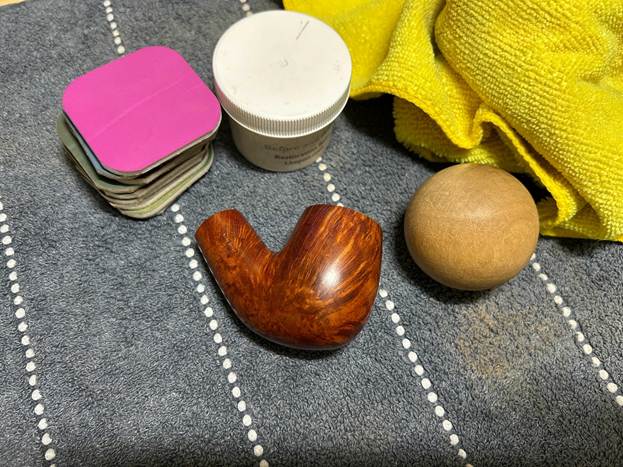
On to the pipe itself. It appears to be in rough shape and pretty darn dirty. The stem has tooth marks and dents, and tons of oxidation and calcification. There’s a lot of cake inside the bowl, and some charring to the rim. The outside shows two significant fills and one small burn spot. I’ve got my work cut out for me.
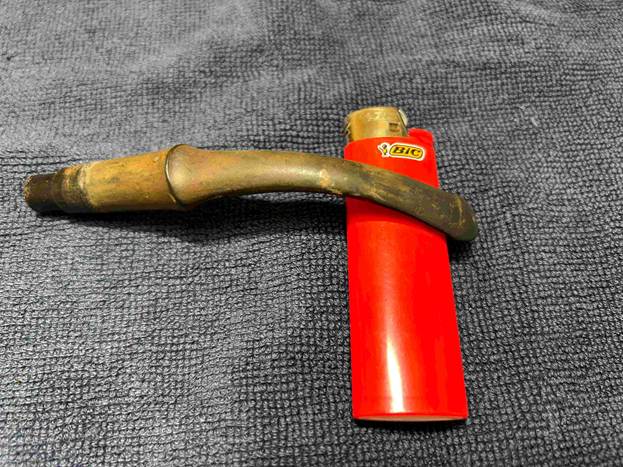
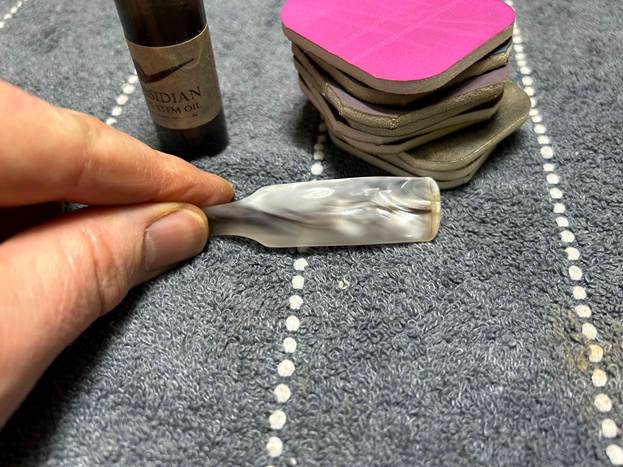
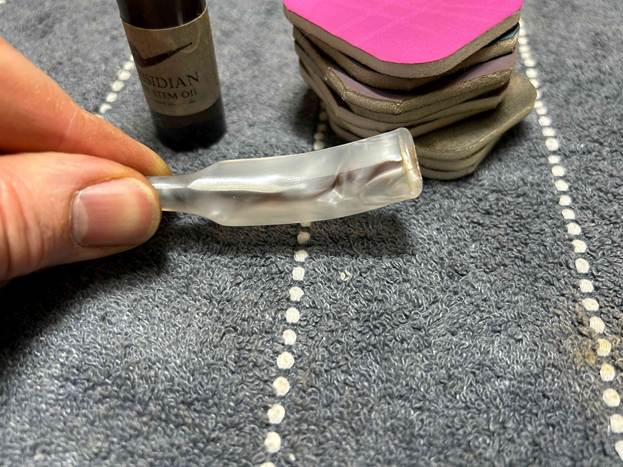
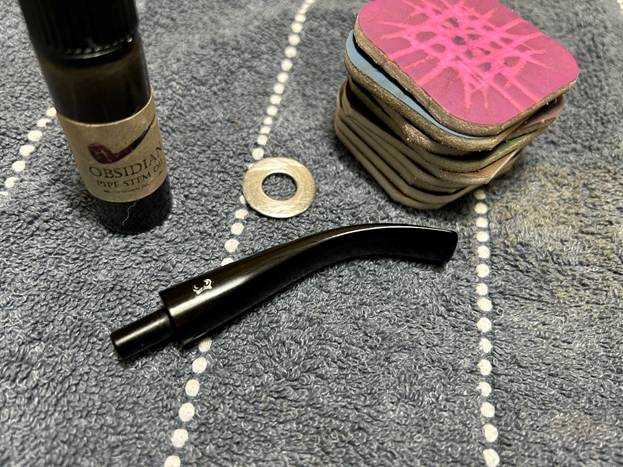
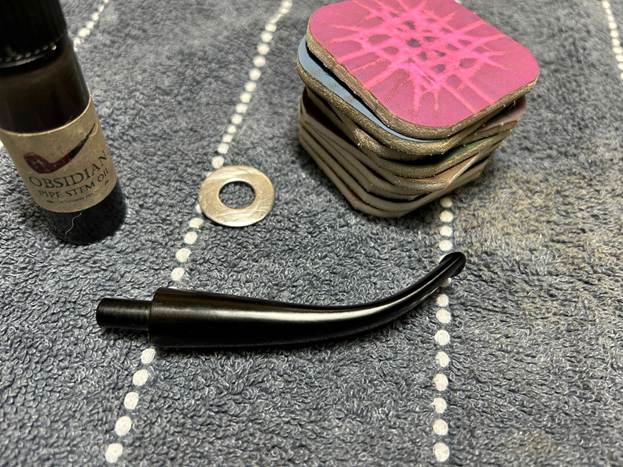
I used a disposable lighter and ‘painted’ the stem with its flame. The gentle heat of the flame can cause the dents in the vulcanite of the stem to expand back into shape. In this case, I got some movement – and that was satisfying.
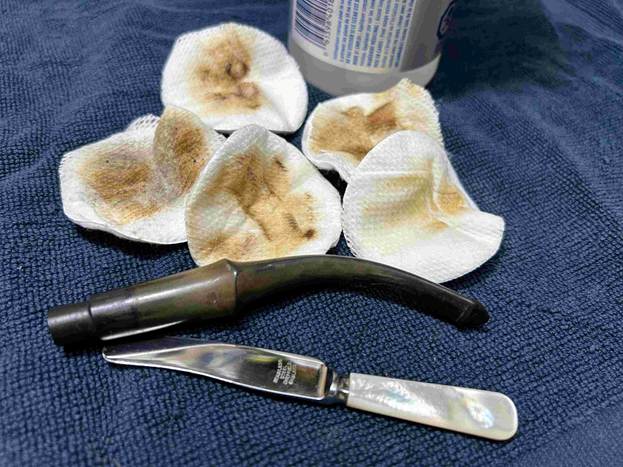
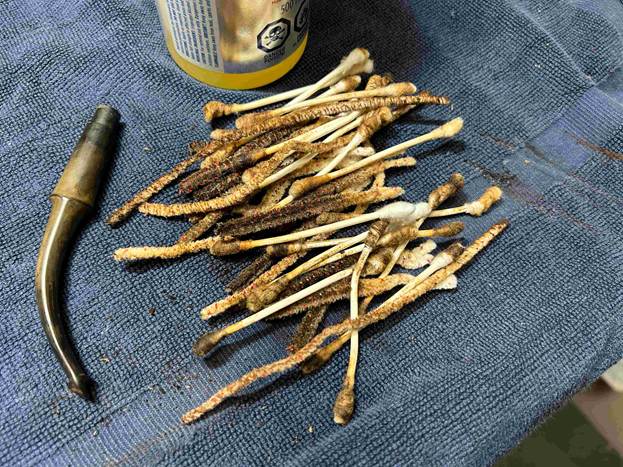
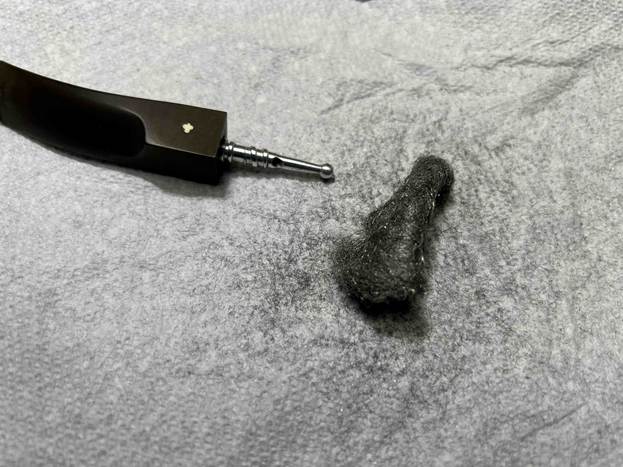
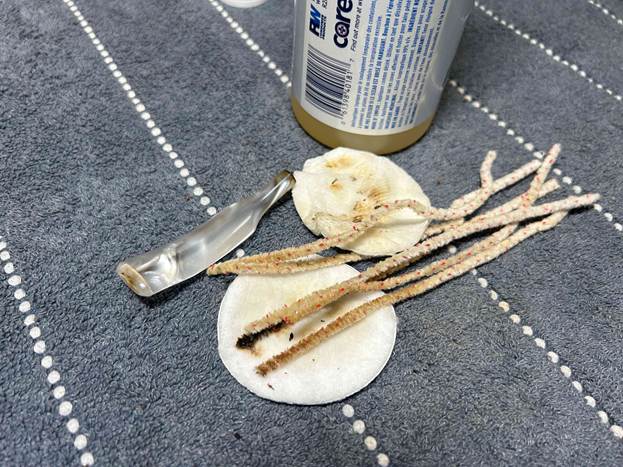
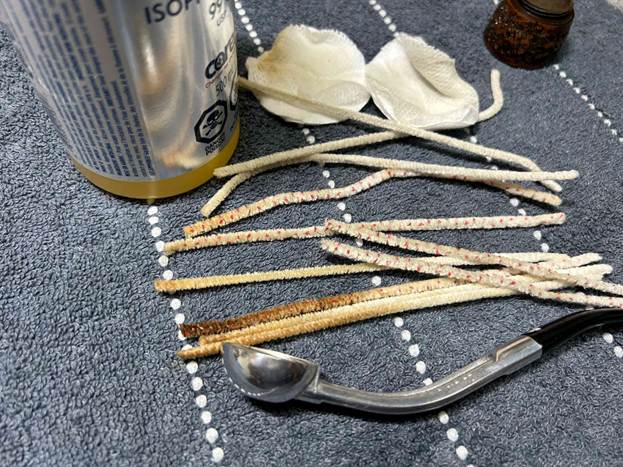
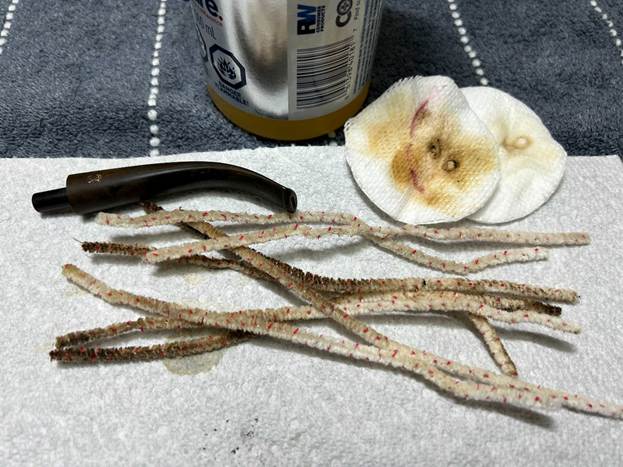
The stem’s calcification was quite substantial. I used an old butter knife and gently scraped some of the thicker accretion off. Doing this now helps later in removing the oxidation. I used isopropyl alcohol on a few cotton rounds and wiped down the stem to provide an initial cleaning of filth before moving on to the next steps.
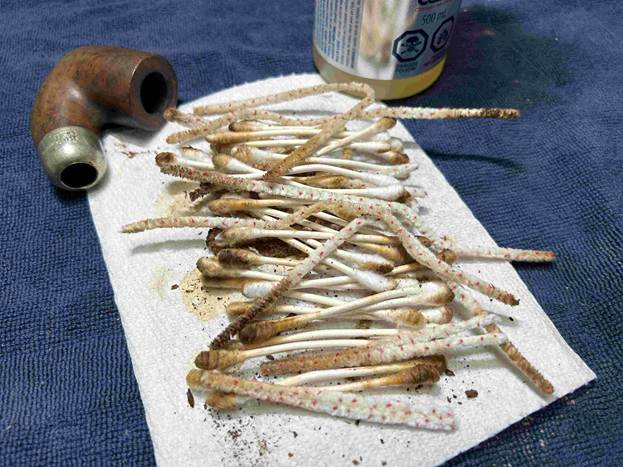
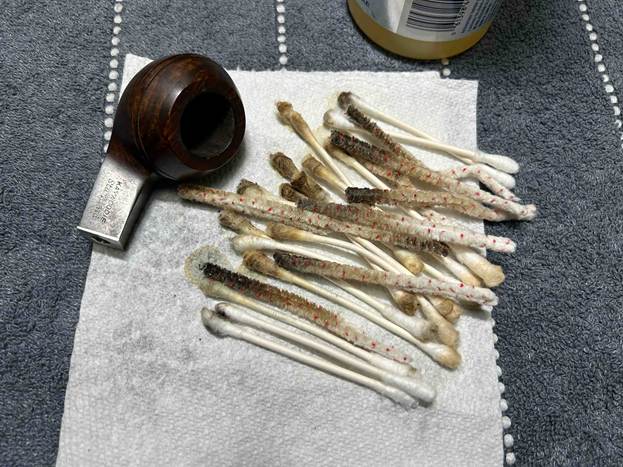
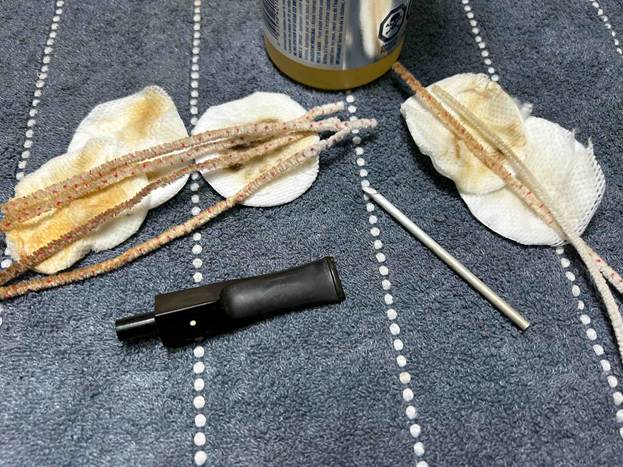
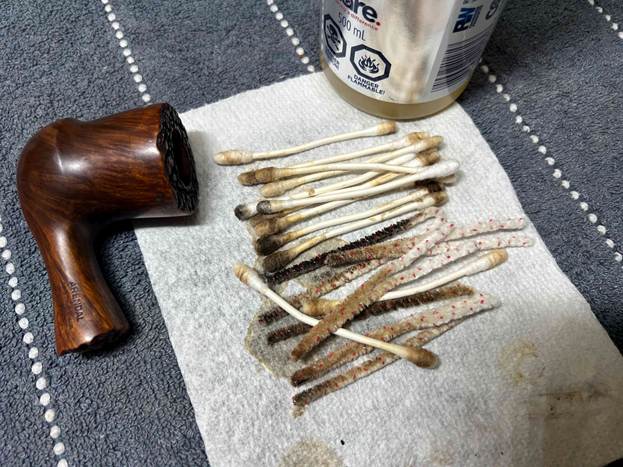
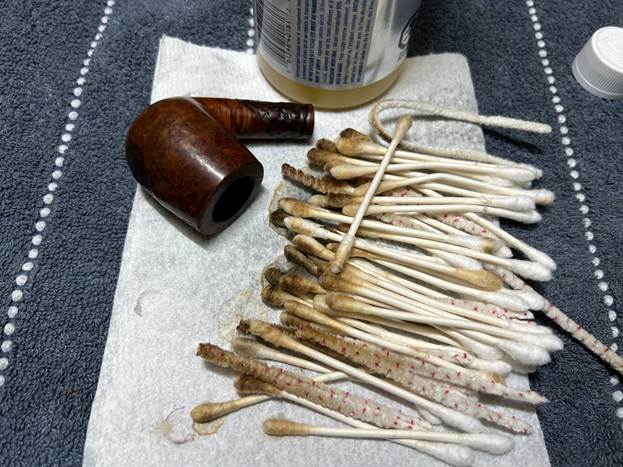
The primary cleaning came next. I disinfected the inside of the stem with both pipe cleaners and cotton swabs dipped in lemon-infused 99% isopropyl alcohol. I scrubbed thoroughly to make sure the interior was very clean. I used zillions of pipe cleaners and cotton swabs. The photos just don’t do it justice
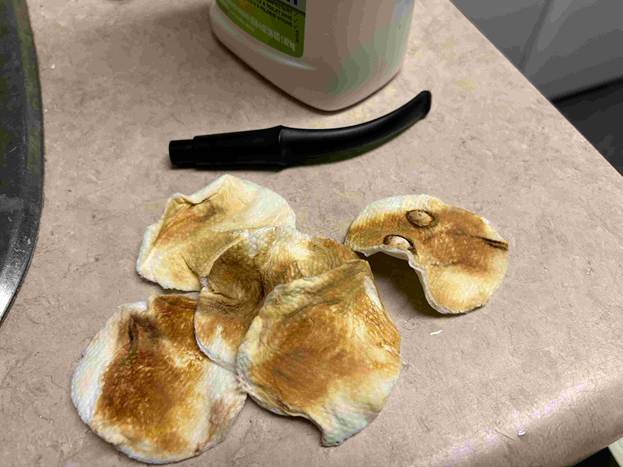
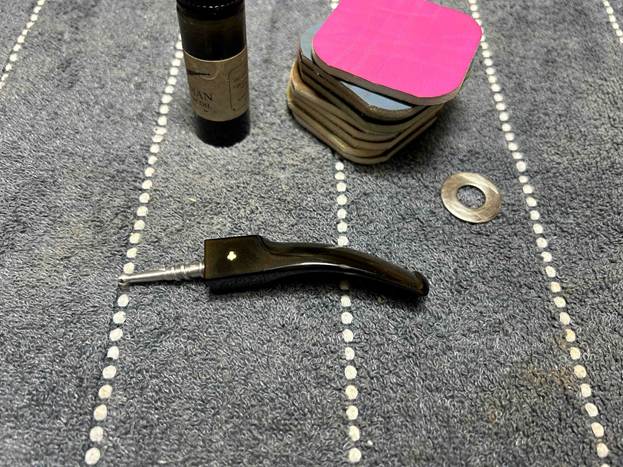
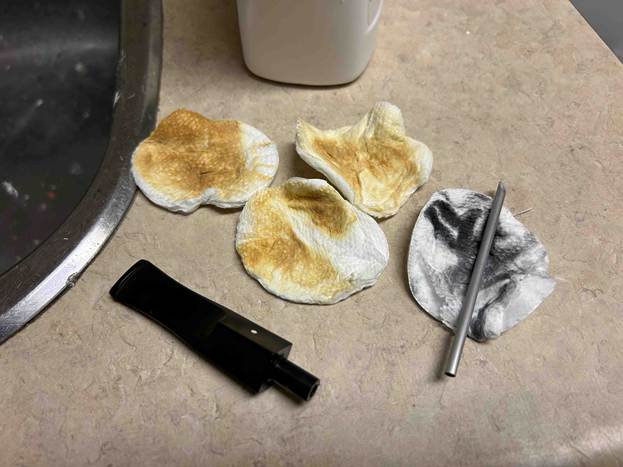
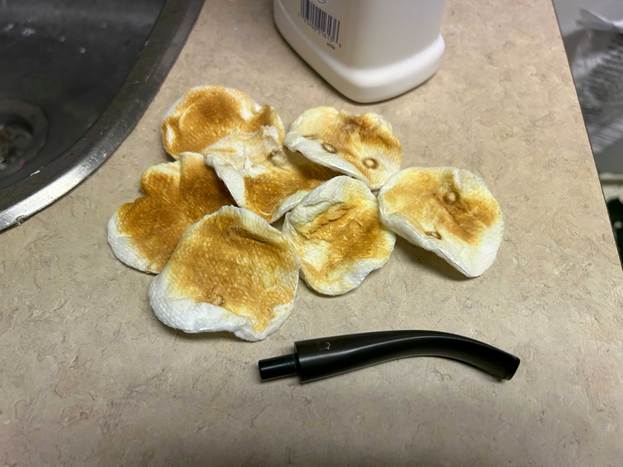
The goal of the next step is the removal (or minimization) of oxidation. Going to my sink, I used cream cleanser, cotton rounds, and a toothbrush, and scoured the stem to remove as much surface oxidation as possible. As the photos show, the result was a hideous, ochre-coloured mess – but better off the stem than on it.
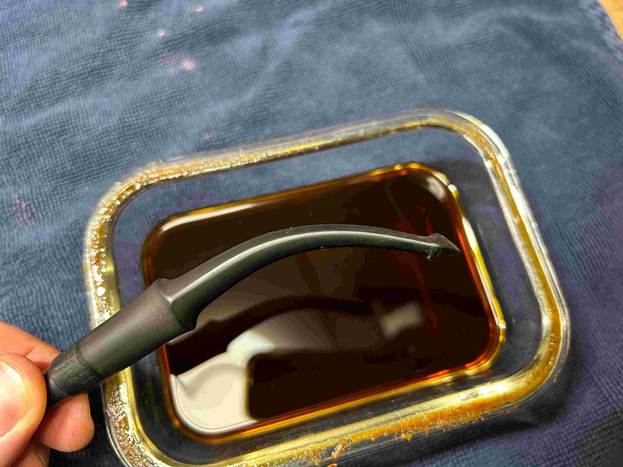
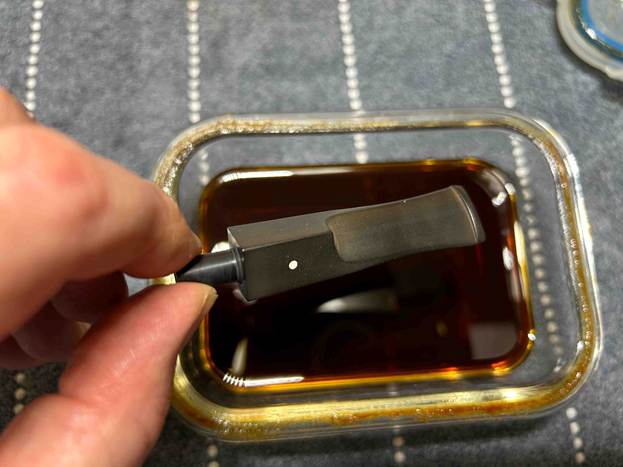
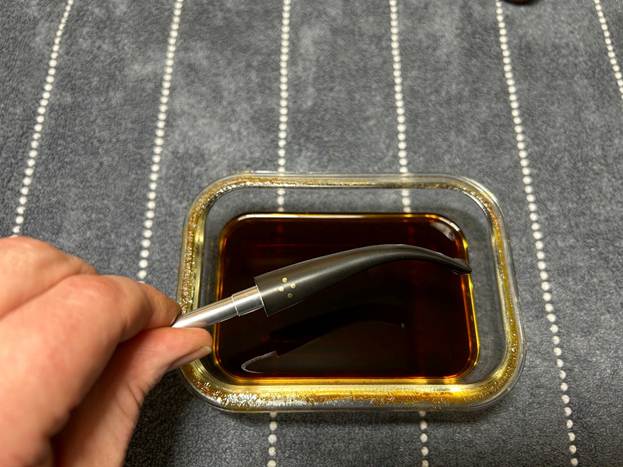
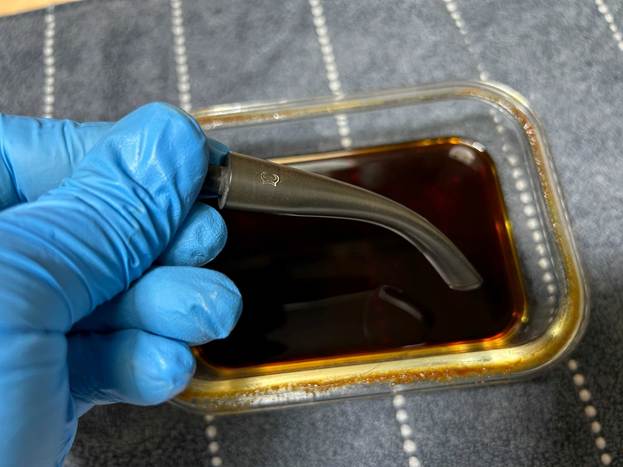
Once the stem was reasonably clean, I soaked it overnight in some Briarville Stem Oxidation Remover. This solution works to draw oxidation in the stem to the surface of the vulcanite. This is a major aid and an important step in ensuring a clean stem. The following day, I drew out the stem from its bath and scrubbed the lingering fluid with a toothbrush. Due to the severity of the oxidation, I then repeated the scrubbing with the cream cleanser for maximum effect.
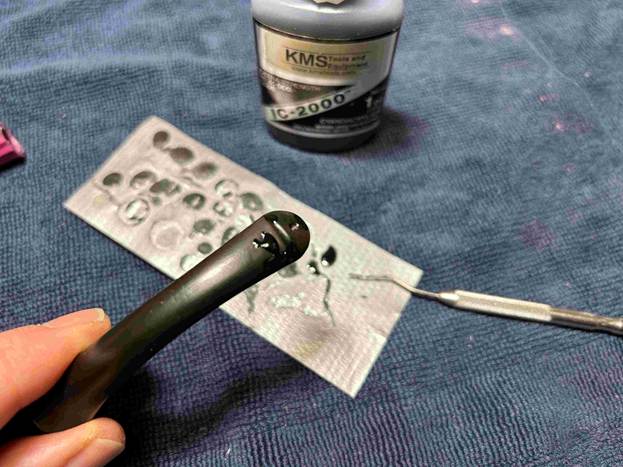
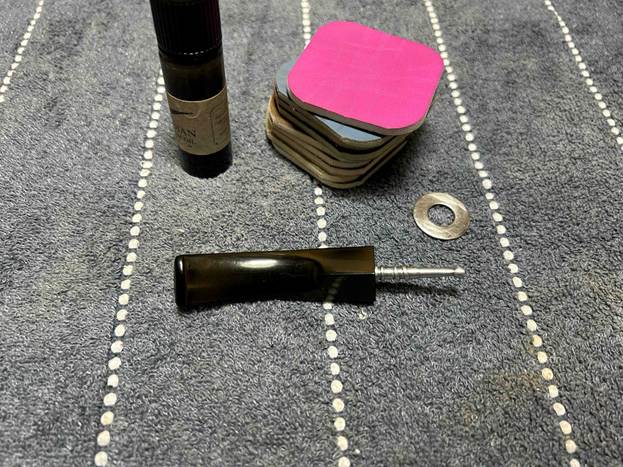
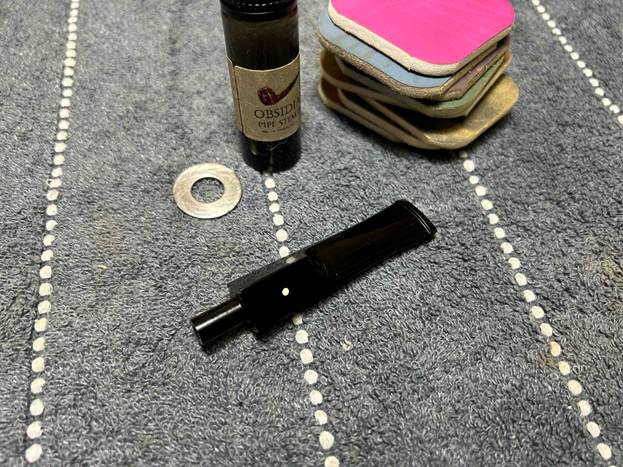
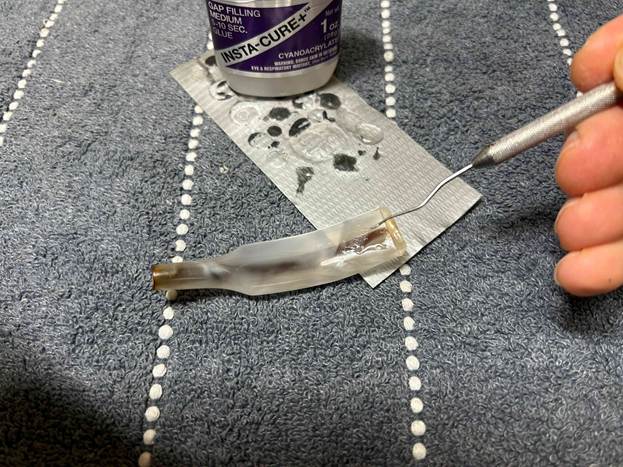
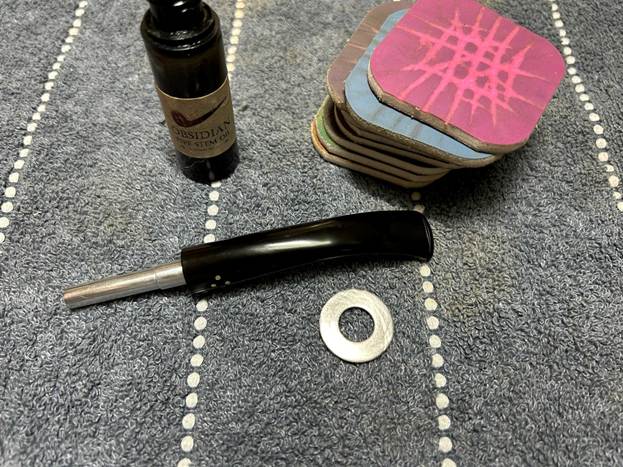
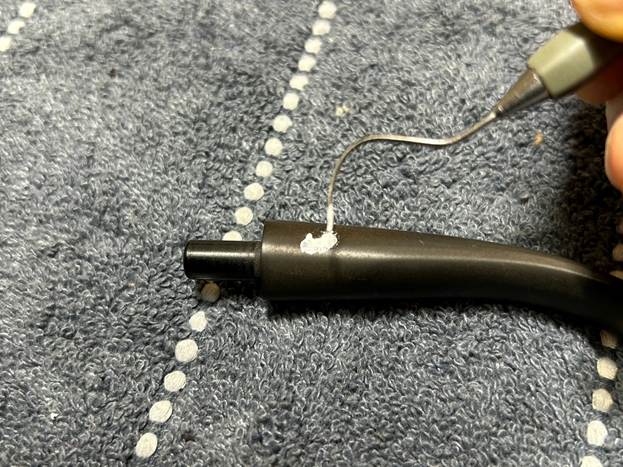
As the stem was now clean and dry, I set about fixing the marks and dents in the vulcanite. This was done by filling those divots with black cyanoacrylate adhesive, impregnated with carbon and rubber. I left this to cure and moved on.
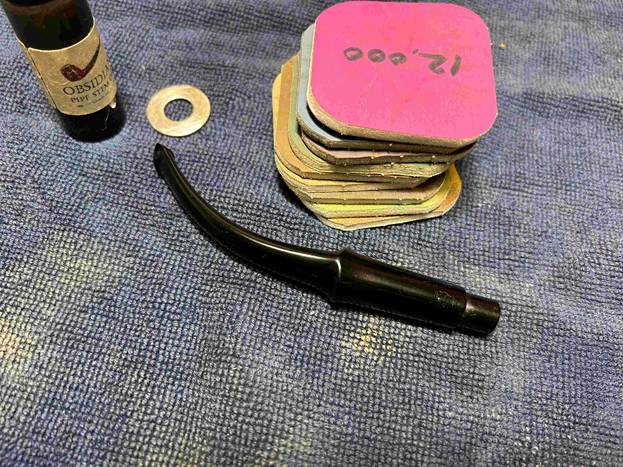
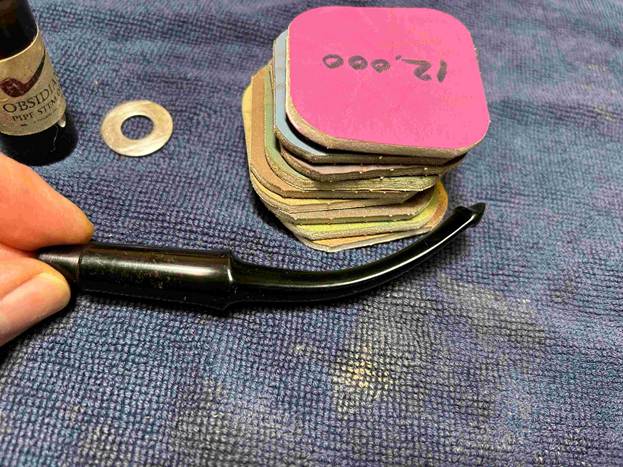
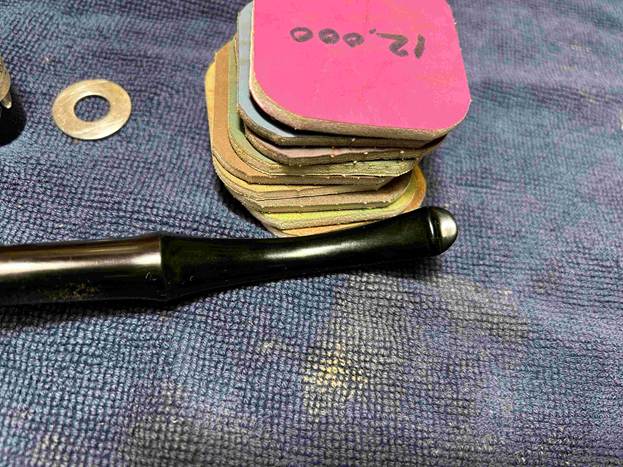
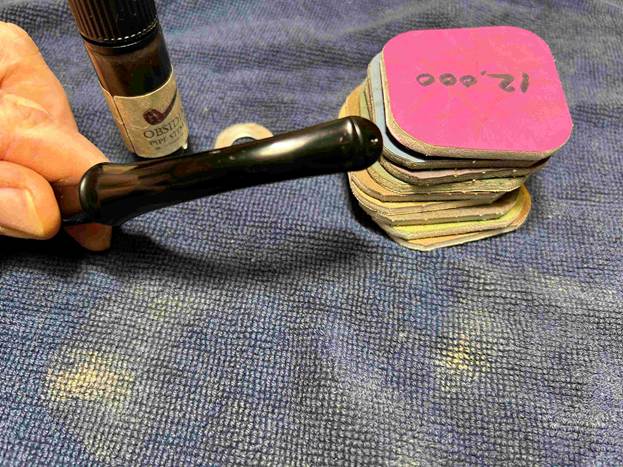
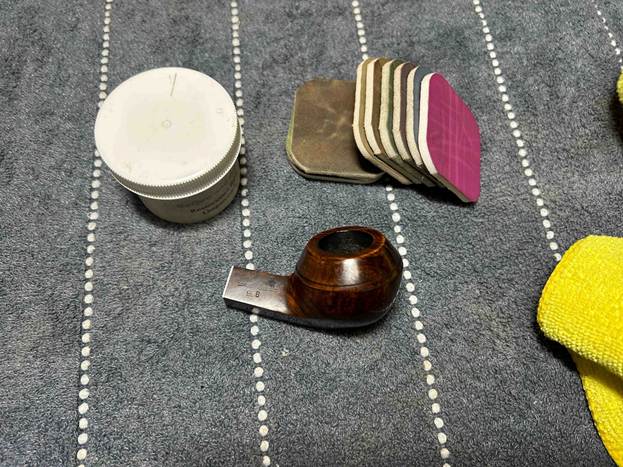
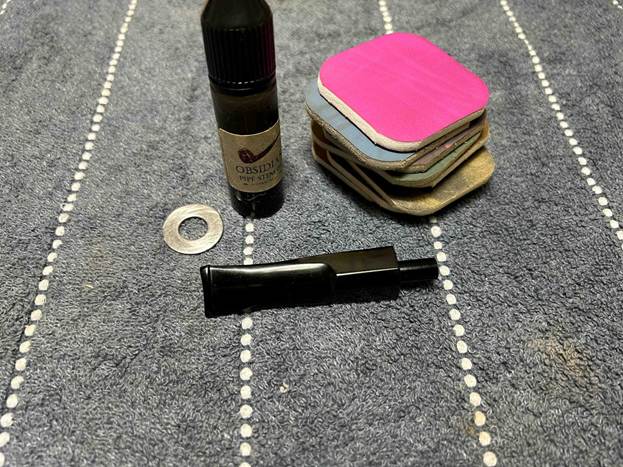
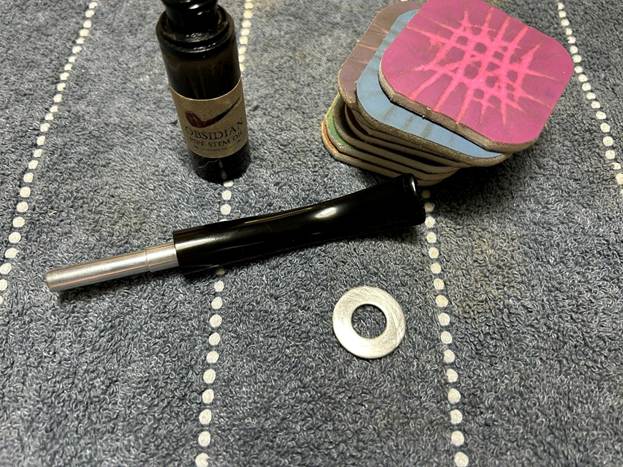
The penultimate step for the stem is sanding. First, with my set of needle files, I reduced the bulk of the cyanoacrylate repairs. I removed the excess adhesive as near to the surface as possible, without cutting into the vulcanite. Following that, I used all nine of the micromesh sanding pads (1,500 through 12,000 grit) to sand out flaws, even out the vulcanite, and provide gentle polishing of the finished surface. I also applied pipe-stem oil while using the last five micromesh pads. There was a wonderful, deep black shine to the stem when I was done.
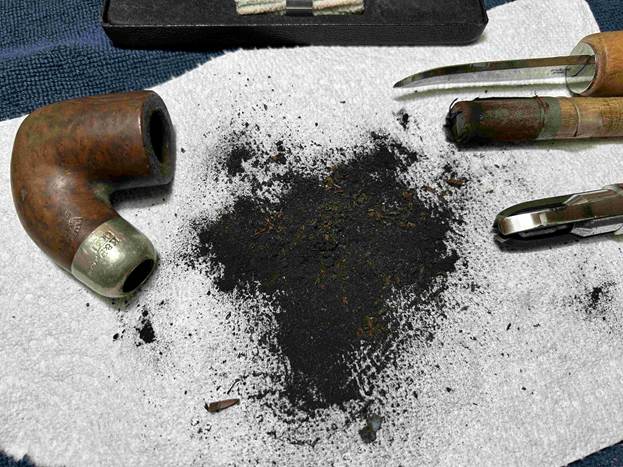
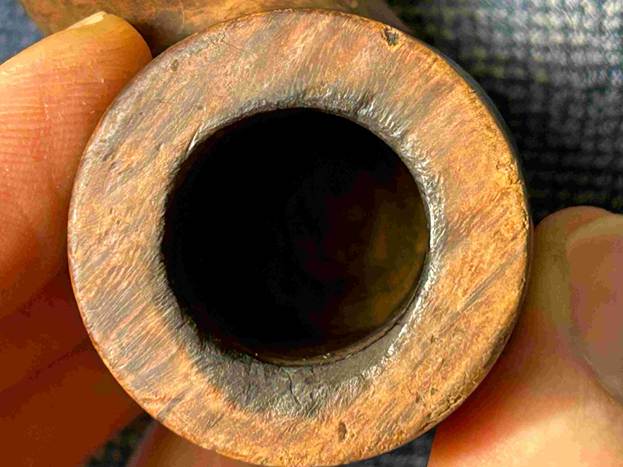
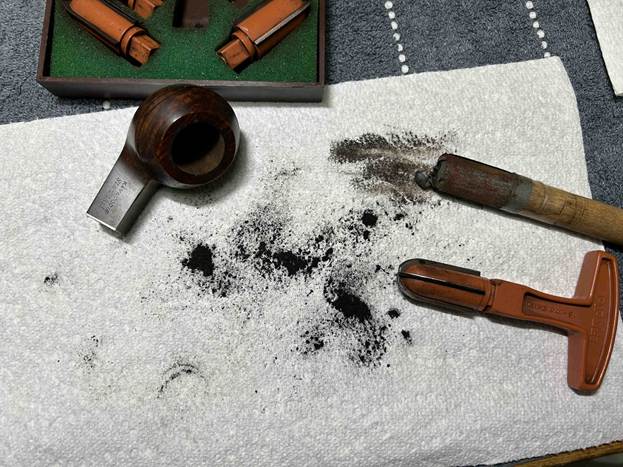
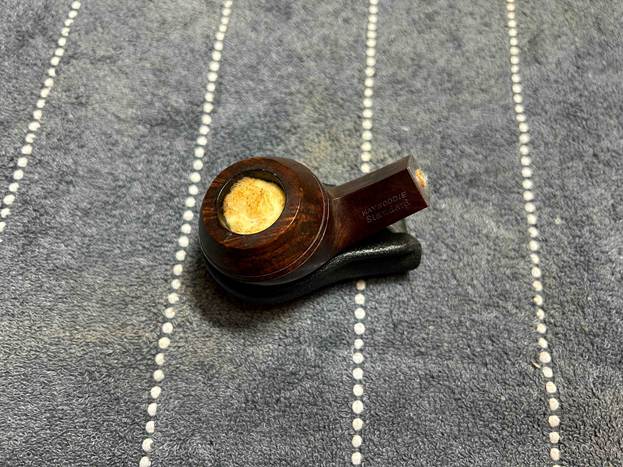
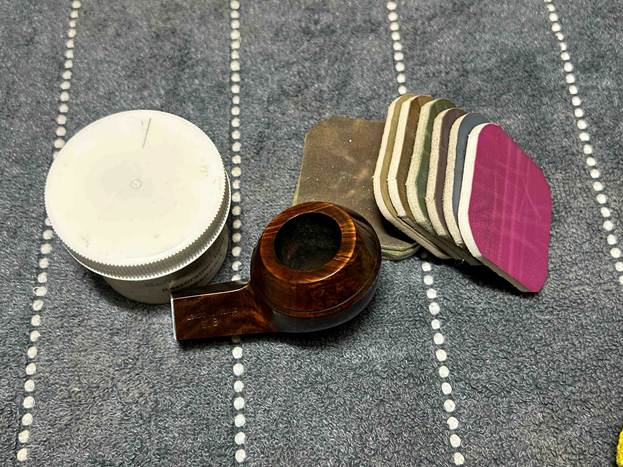
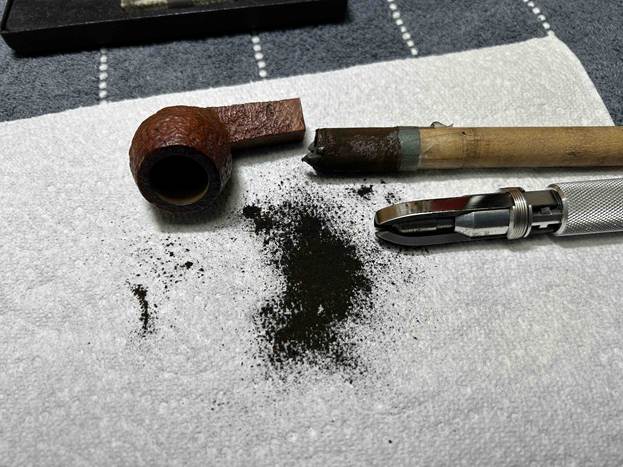
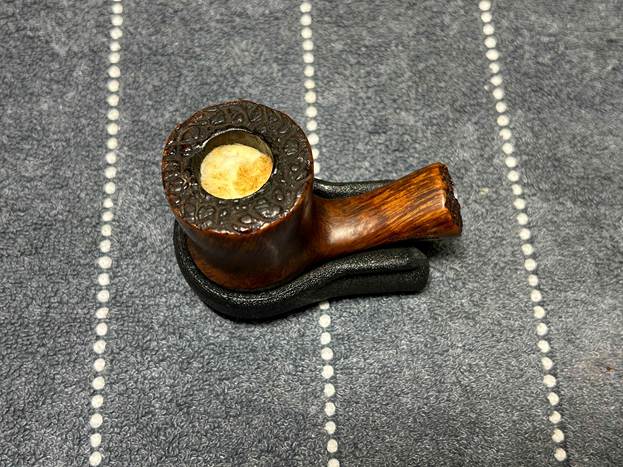
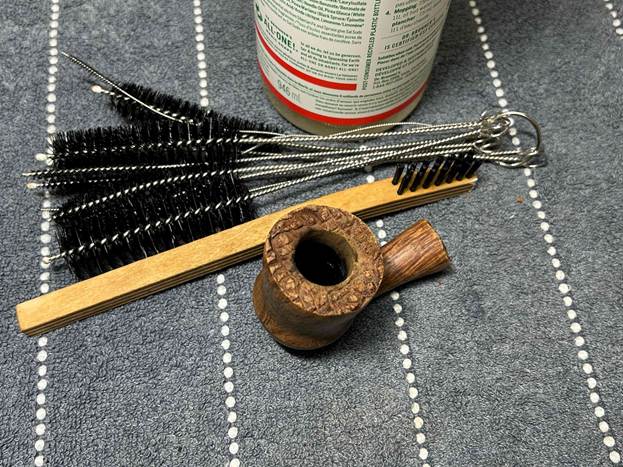
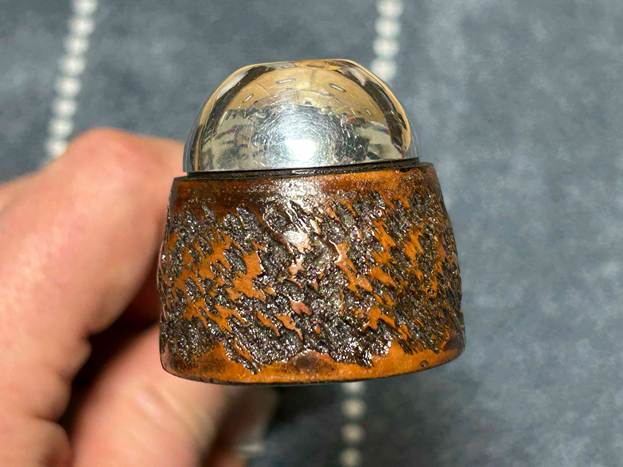
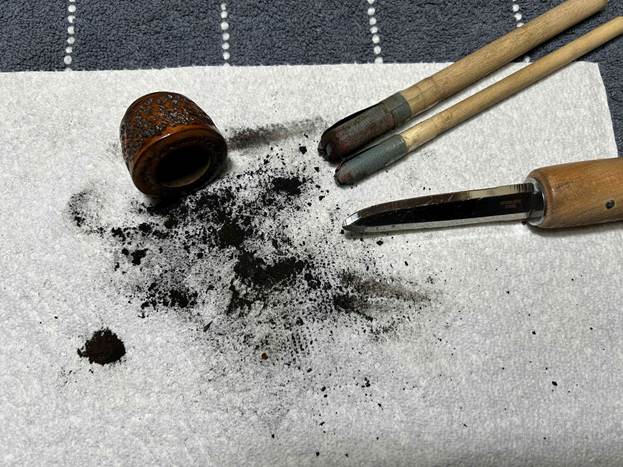
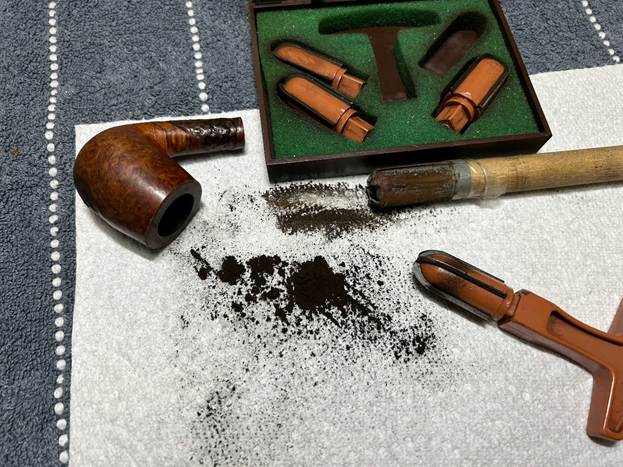
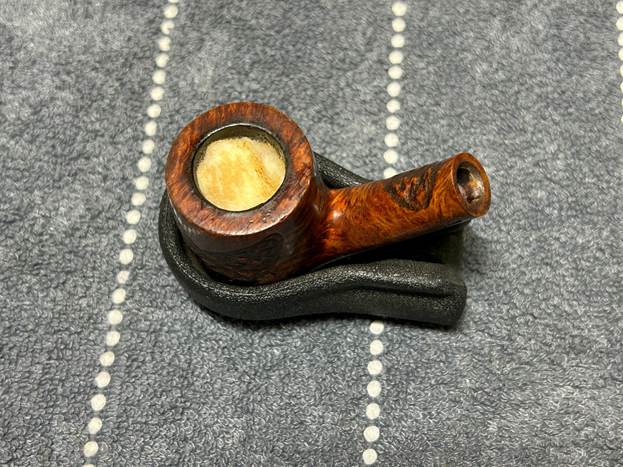
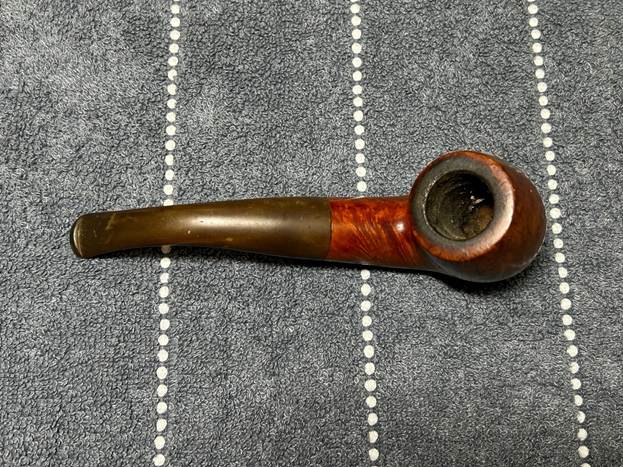
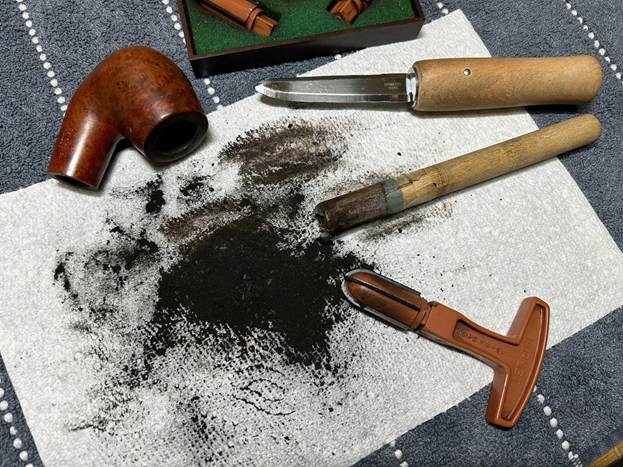
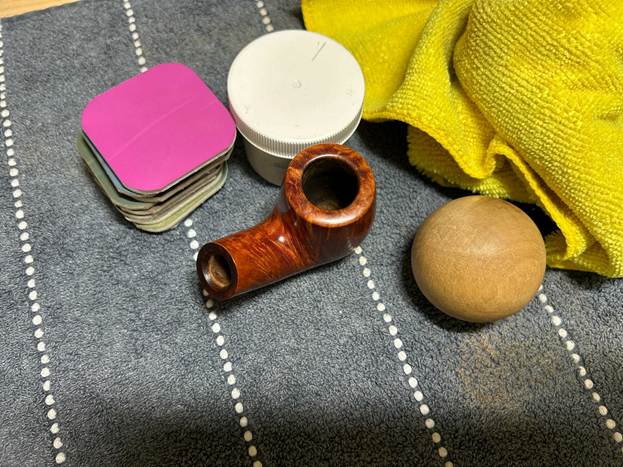
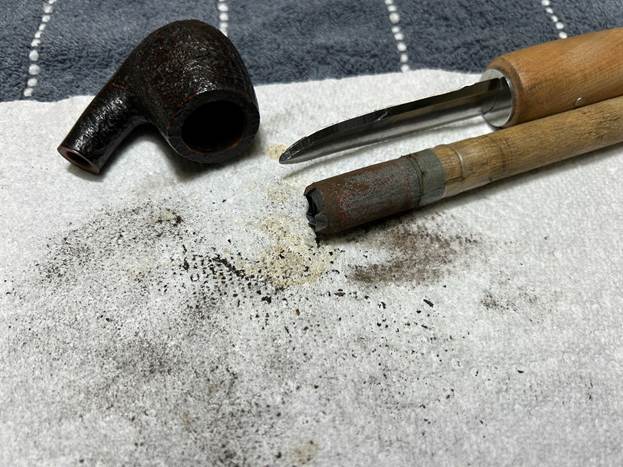
As the stem was (nearly) complete, I moved on to the stummel. The first step was to ream out the bowl – that is to say, remove all the cake inside the bowl. This accomplished a couple of things. First (and most obviously), it cleaned the bowl and provided a refurbished chamber for future smoking. Second, when the old cake was removed, I could inspect the interior walls of the bowl and determine if there was damage or not. I used a reamer, a pipe knife, and a piece of sandpaper taped to a wooden dowel. Collectively, these ensured that all the debris was removed – and there was so much.
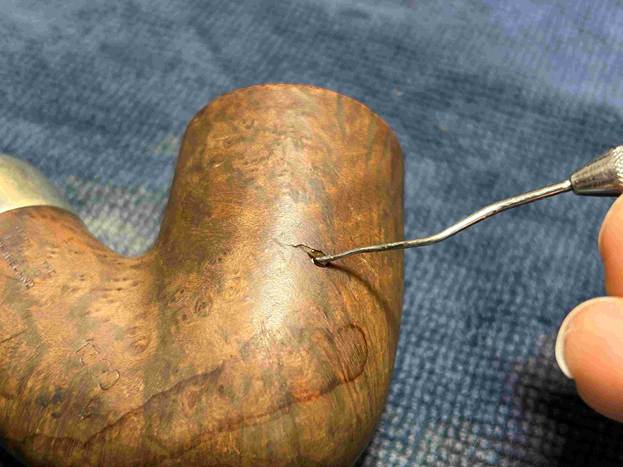
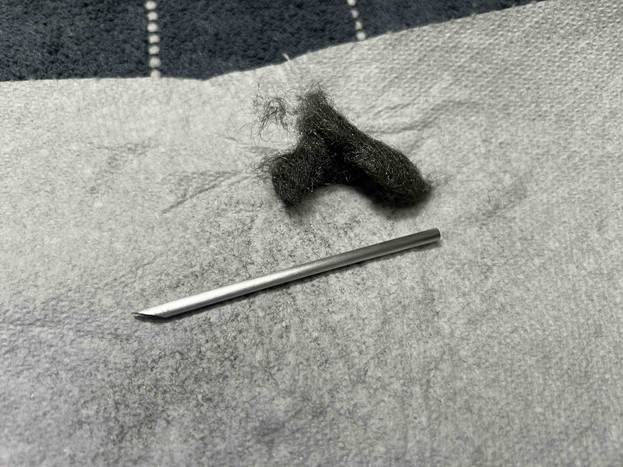
My next step was to remove the lava on the rim. For this, I took a piece of machine steel and gently scraped the lava away. The metal’s edge is sharp enough to remove what I need, but not so sharp that it damages the rim. That wasn’t really an issue since there was a lot of damage there already.
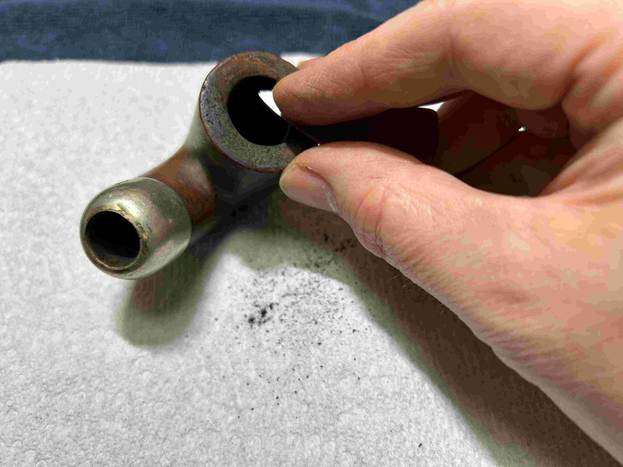
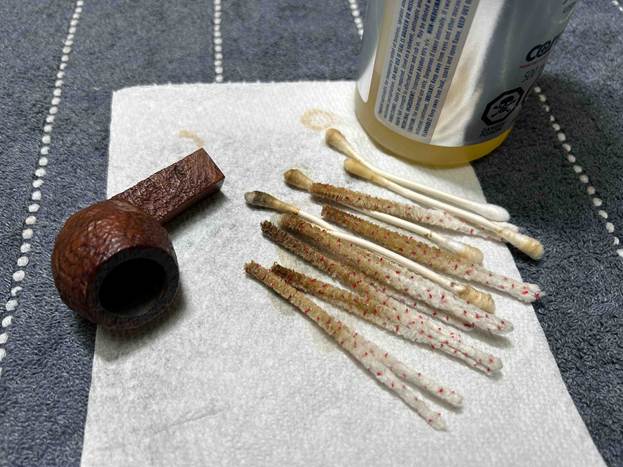
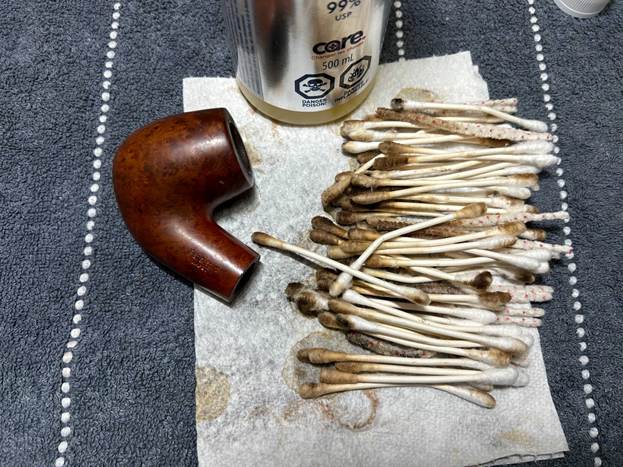
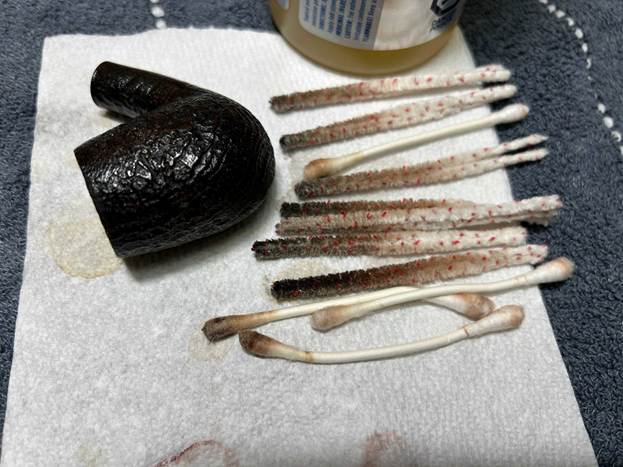
Similar to the stem, I then cleaned the stummel with both pipe cleaners and cotton swabs dipped in lemon-infused 99% isopropyl alcohol. With a pipe this dirty, it took quite a while and much cotton to clean. I can’t quite communicate to you just how dirty this pipe was.
I then decided to ‘de-ghost’ the pipe – that is to say, exorcize the remaining filth from the briar. I filled the bowl and the shank with cotton balls, then saturated them with 99% isopropyl alcohol. I let the stummel sit overnight. This caused the remaining oils, tars and smells to leach out into the cotton.
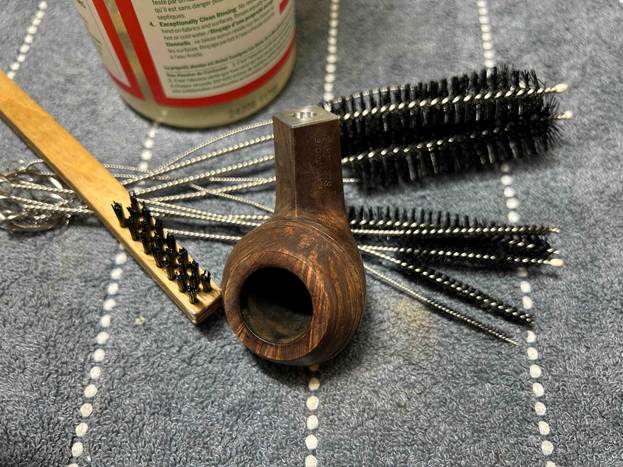
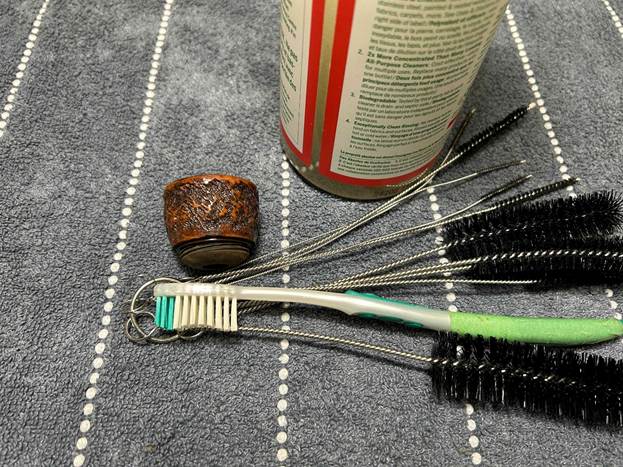
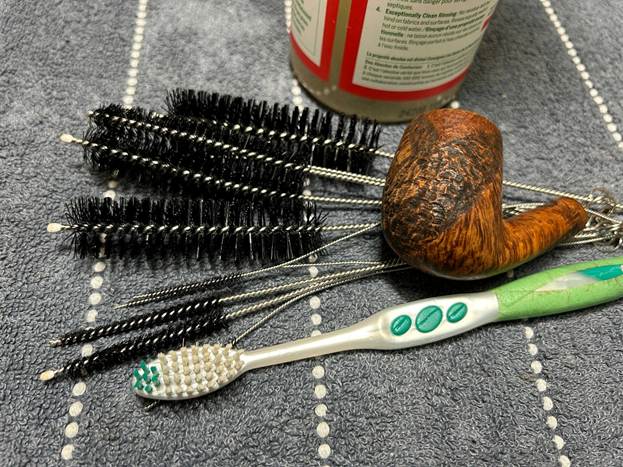
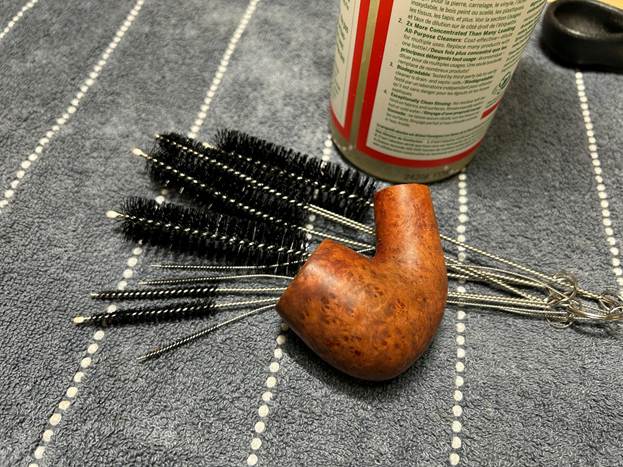
To tidy up the briar, I wiped down the outside, using a solution of a pH-neutral detergent and some distilled water, with cotton rounds. This did a good job of cleaning any latent dirt on the surface of the briar. The last step of the cleaning process was to scour the inside of the stummel with the same mild detergent and tube brushes. This was the culmination of a lot of hard work in getting the pipe clean.
I then buffed the nickel ferrule with a couple of very gentle micromesh pads, then then buffed it with a jewellery cloth.
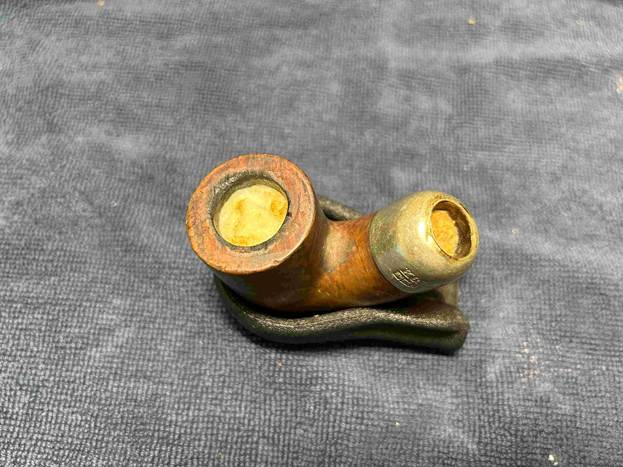
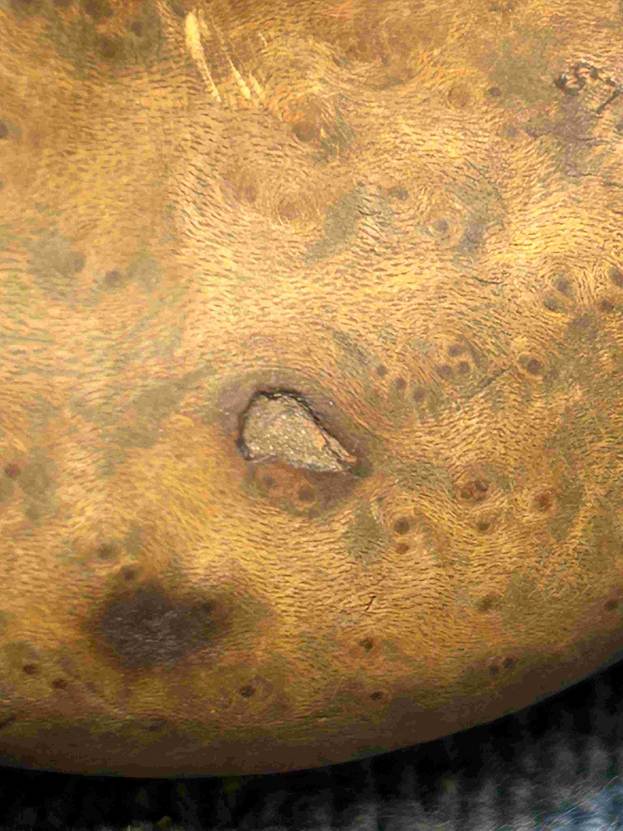
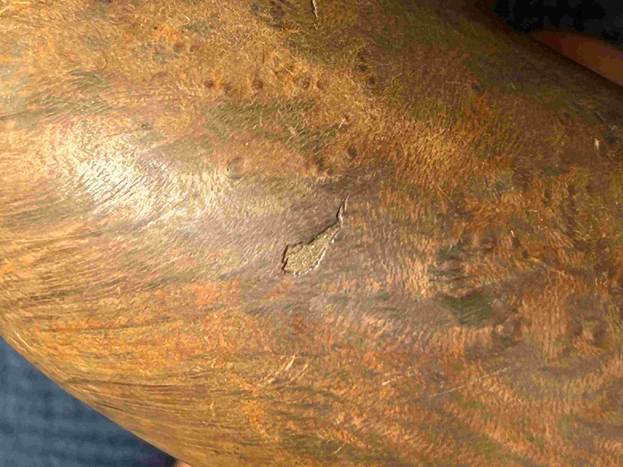
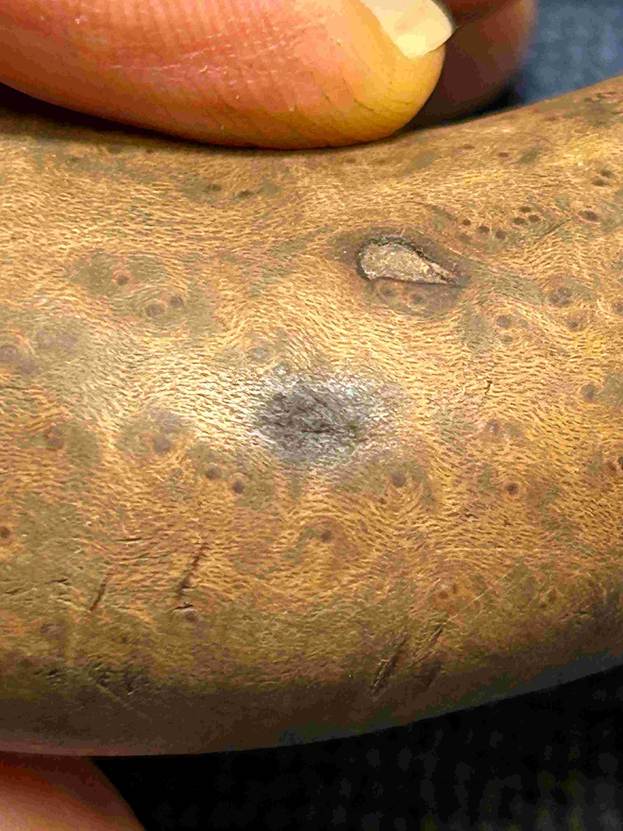
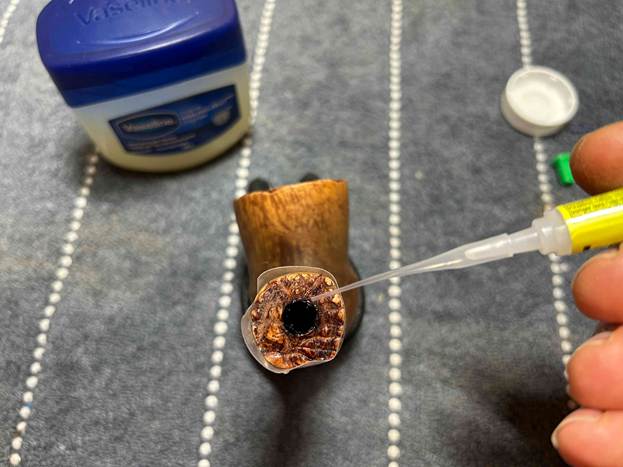
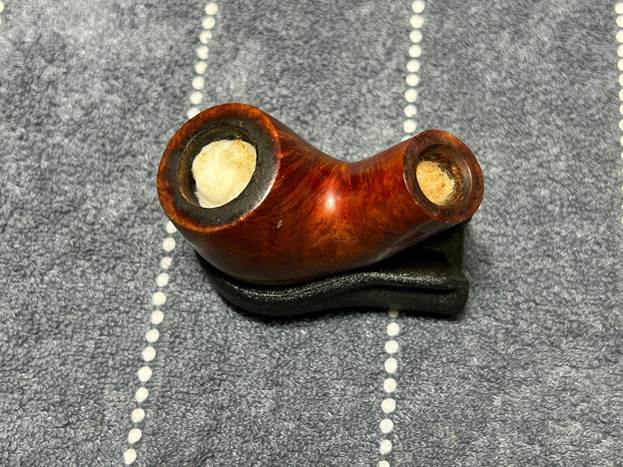
Time to deal with some other issues. As I previously mentioned, there were two fills and a burn to be addressed. I closely examined the fills. They were sound, but slightly depressed, relative to the wood. I delicately applied some clear cyanoacrylate to the fills to strengthen them and raise them to the level of the wood.
Now the burn. This also had a slight depression. I took some crystalized oxalic acid and dissolved it in warm water. I took some cotton swaps, dipped in the solution, and rubbed the burned spot vigorously. The weak acid works very nicely to alleviate superficial burns (where the integrity of the wood is still sound). This only worked so well and the burn spot remains – but it is part of the history and story of this old pipe.
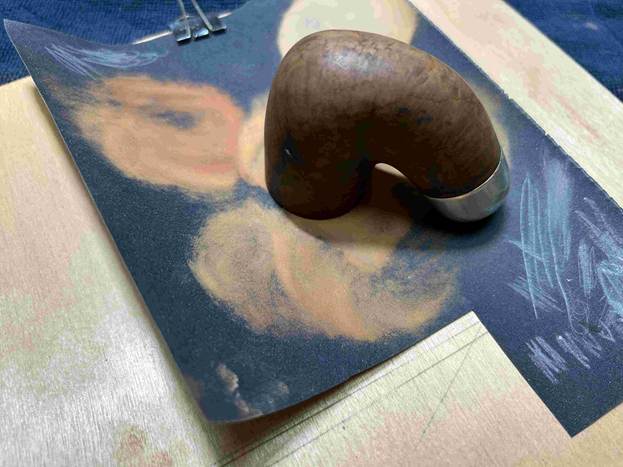
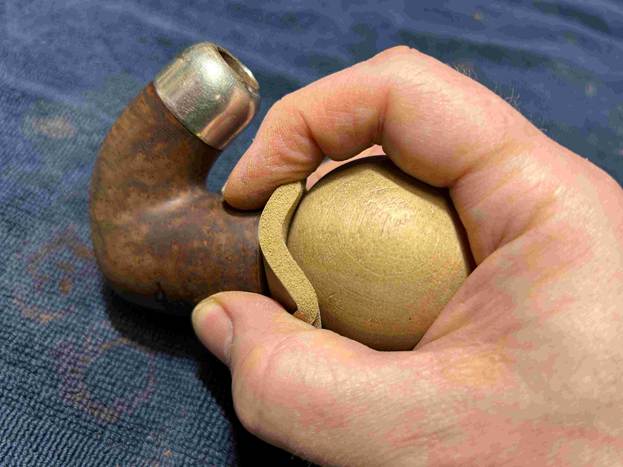
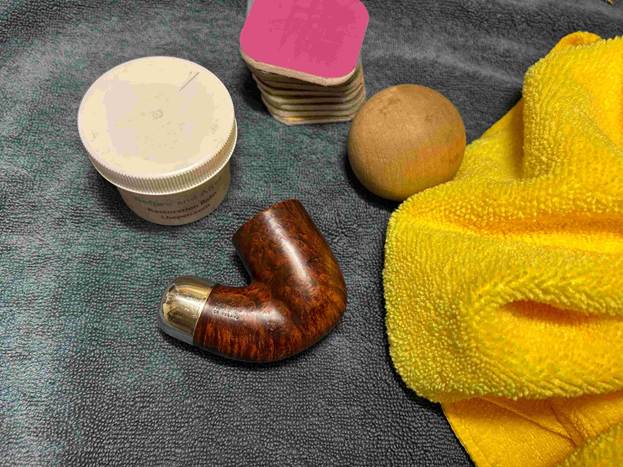
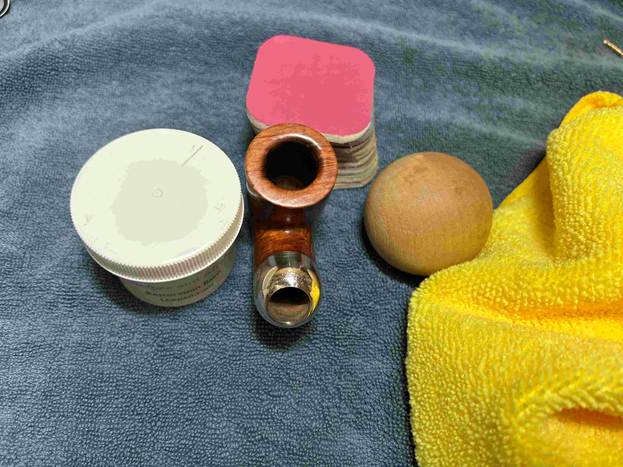
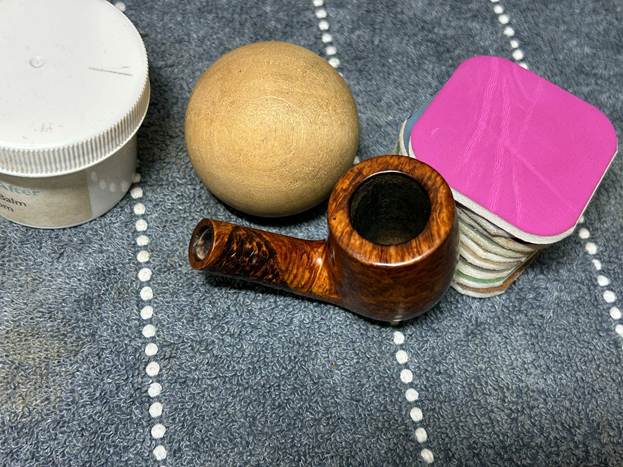
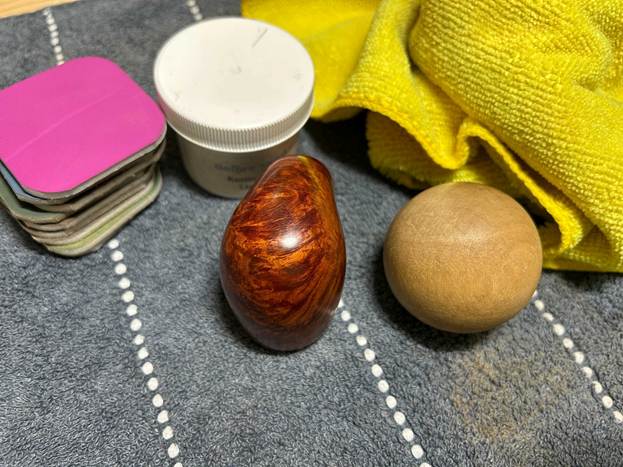
The damage to the rim was significant. In order to lessen the burns and nicks on the rim, I ‘topped’ the pipe – that is to say, I gently and evenly sanded the rim on a piece of 400-grit sandpaper. This effectively minimized the damage, without altering the look of the pipe. Then I took a solid wooden sphere, wrapped the micromesh pads around it, and lightly sanded the inner edge of the rim. This achieved two things: first, it removed some of the burn marks; and second (and more importantly), the circular shape and motion of the sphere gradually returned the edge to a perfect circle.
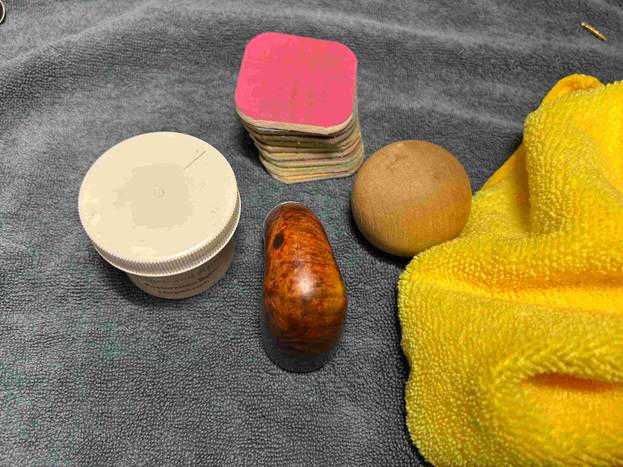
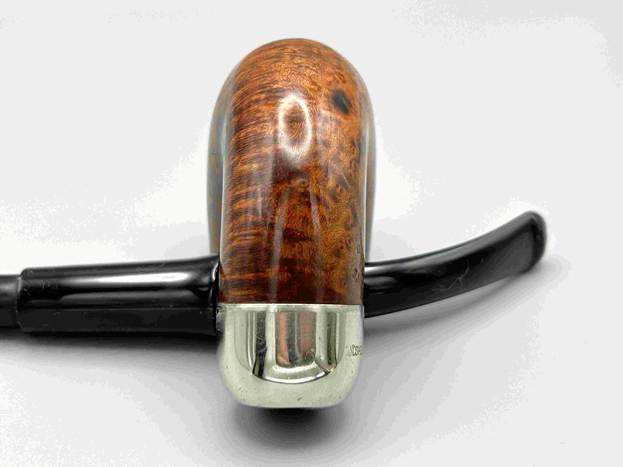
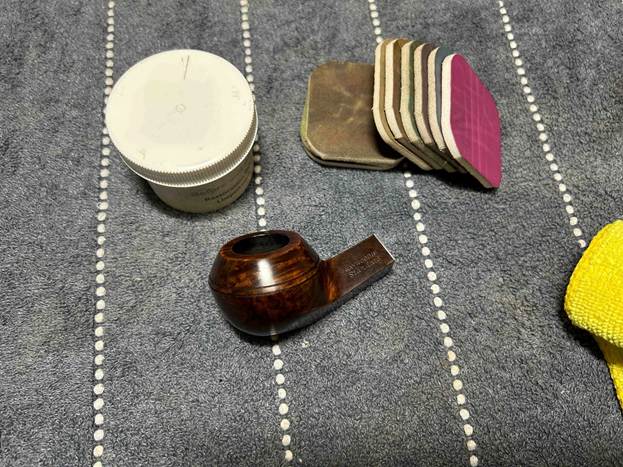
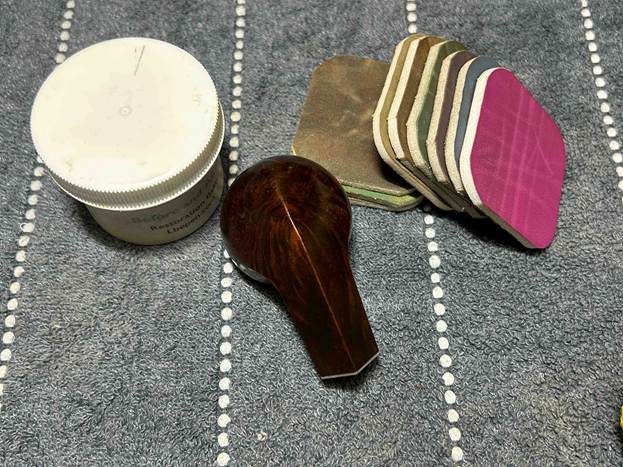
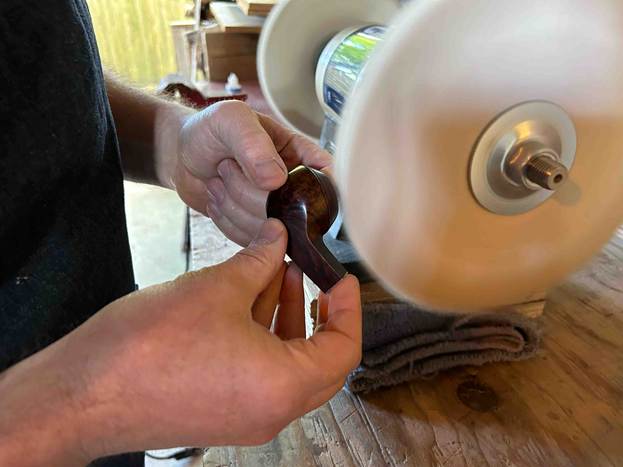
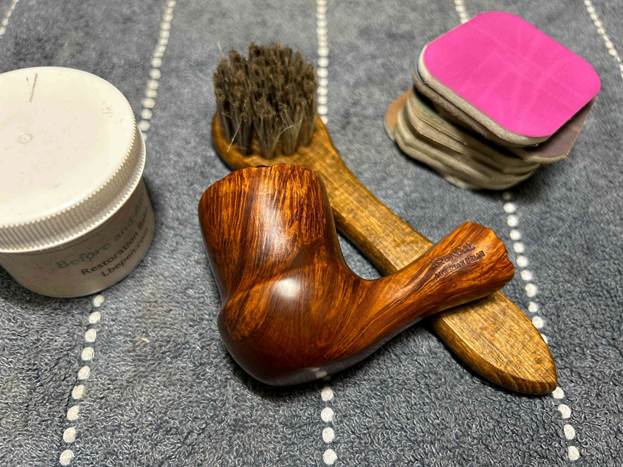
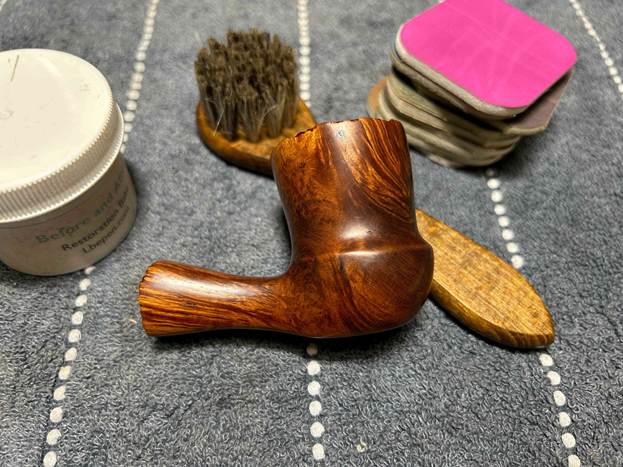
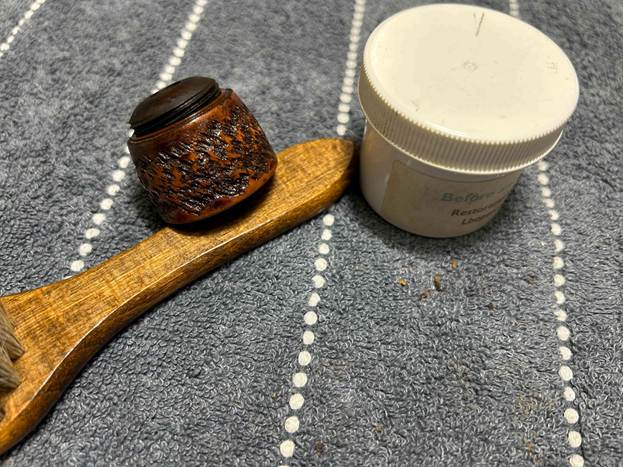
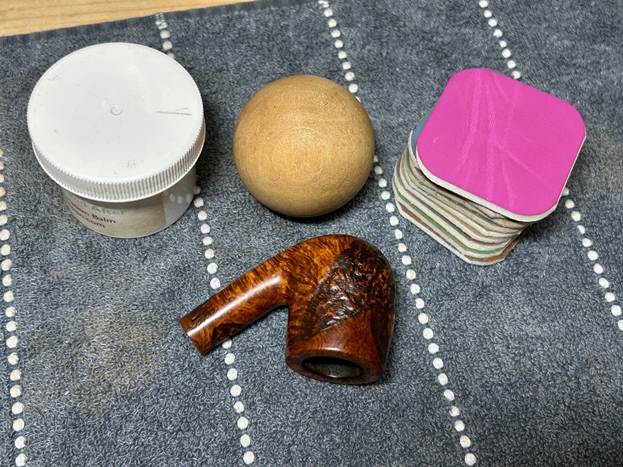
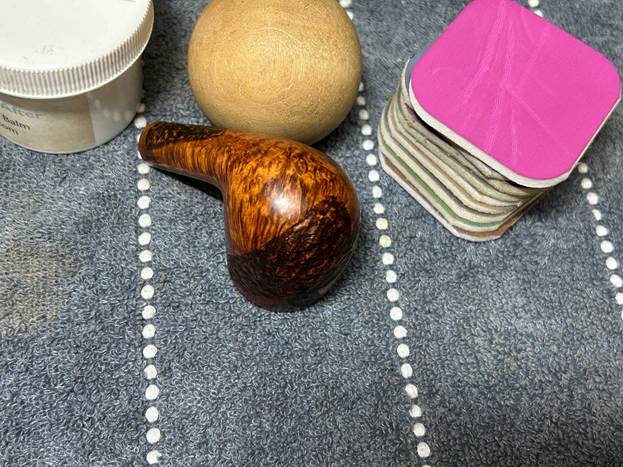
I rubbed some LBE Before & After Restoration Balm into the briar and let it sit for 30 minutes or so. The balm moisturizes the wood and gives a beautiful depth to the briar. I then buffed the stummel with a microfibre cloth. For the final step, I took the pipe to my bench polisher and carefully buffed it – first with a blue diamond compound, then with three coats of carnauba wax. This procedure makes the pipe look its best – the stummel sings and the stem glows.
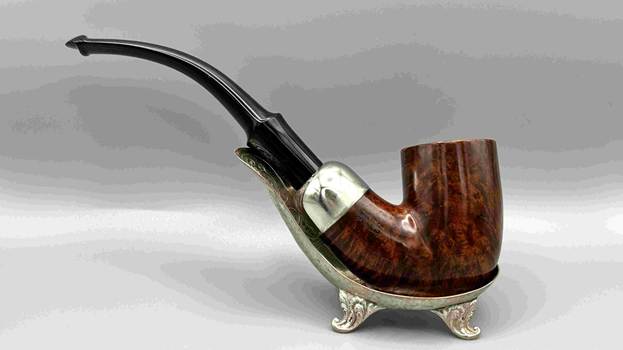
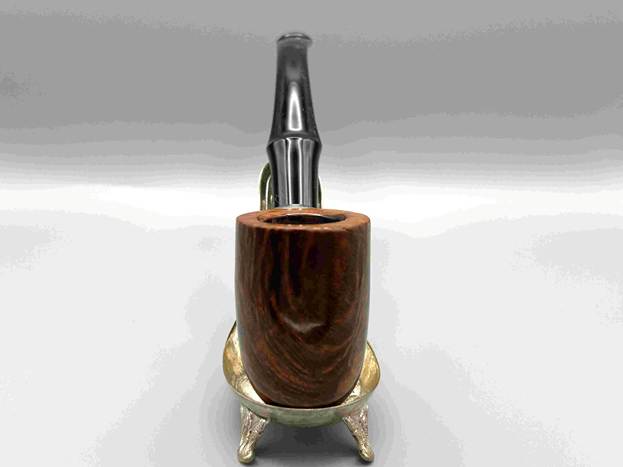
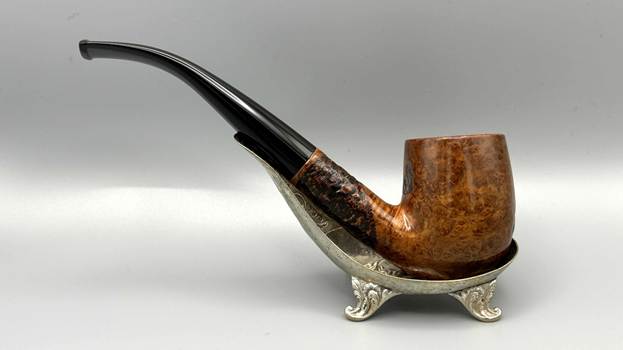
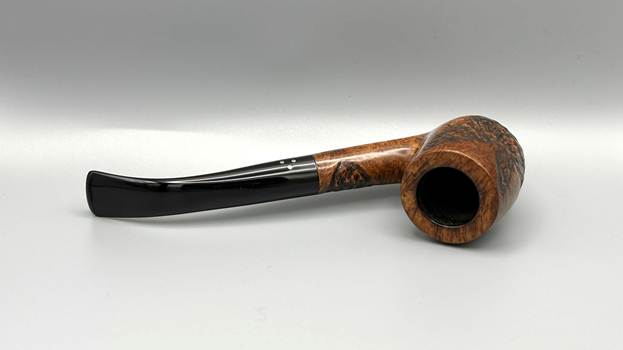
All done! This Peterson System Standard 1309 bent billiard looks fantastic again and is ready to be enjoyed by its next owner. I am pleased to announce that this pipe is for sale! If you are interested in acquiring it for your collection, please have a look in the ‘Irish’ section of the store here on Steve’s website. You can also email me directly at kenneth@knightsofthepipe.com. The approximate dimensions of the pipe are as follows: length 5¾ in. (147 mm); height 3⅛ in. (79 mm); bowl diameter 1⅓ in. (33 mm); chamber diameter ¾ in. (19 mm). The weight of the pipe is 1¾ oz. (52 g). I hope you enjoyed reading the story of this pipe’s restoration as much as I enjoyed restoring it. If you are interested in more of my work, please follow me here on Steve’s website or send me an email. Thank you very much for reading and, as always, I welcome and encourage your comments.
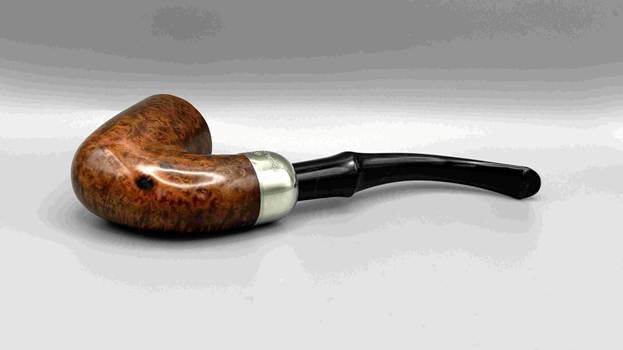
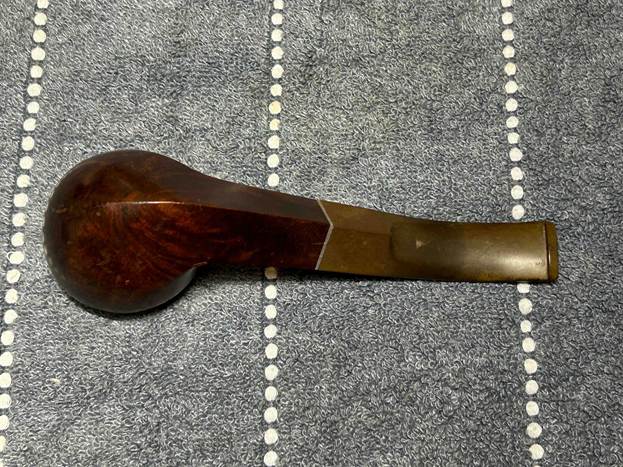
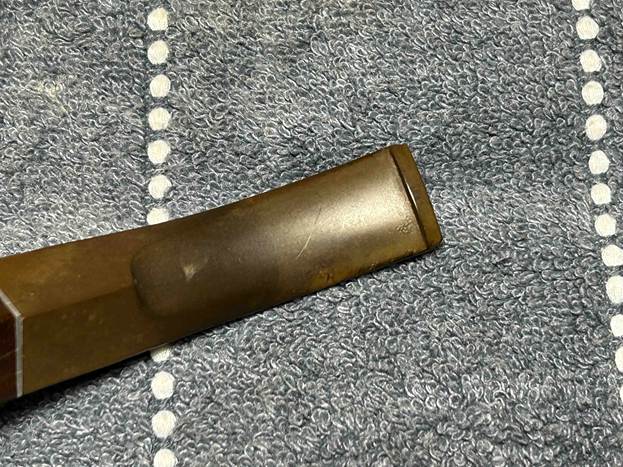
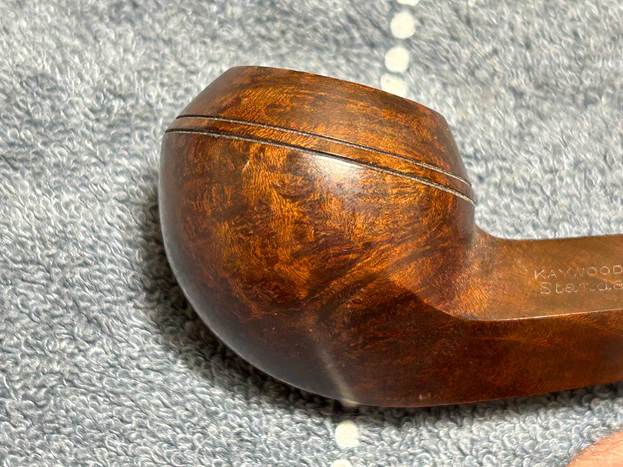
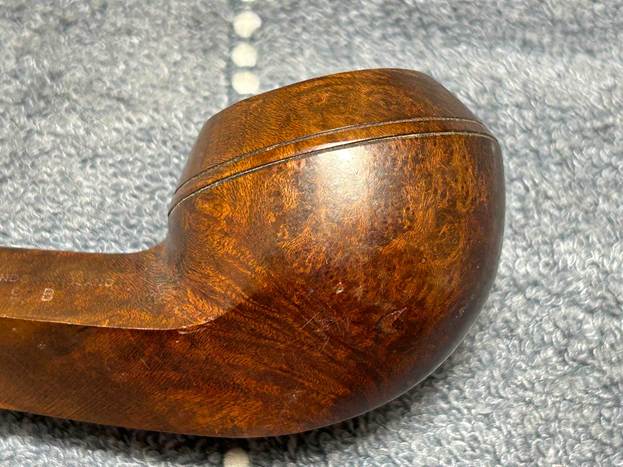
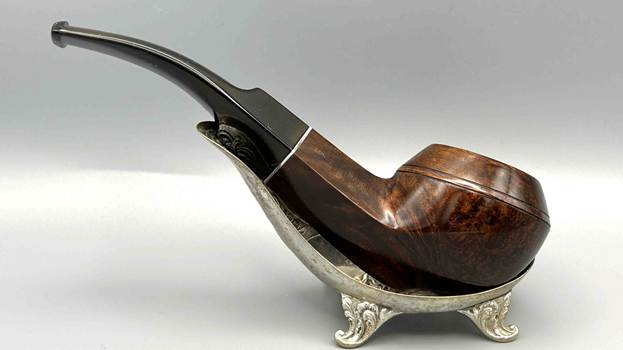
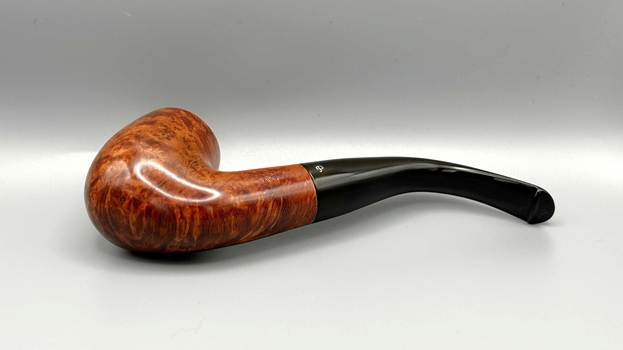
This recently acquired pipe caught my eye because of its markings and I thought I should clean it up and offer it to you all. It is a Kaywoodie Standard 99B bulldog, with a square shank, a screw-in tenon, and a bent saddle stem. In fact, Kaywoodie refers to this pipe as ‘Squat Bulldog, Half Bent, Saddle Bit’. The difference is that this one comes from London, England. Most unusual! It’s a handsome pipe, a lovely piece of briar, and reminds me of another time and another place.
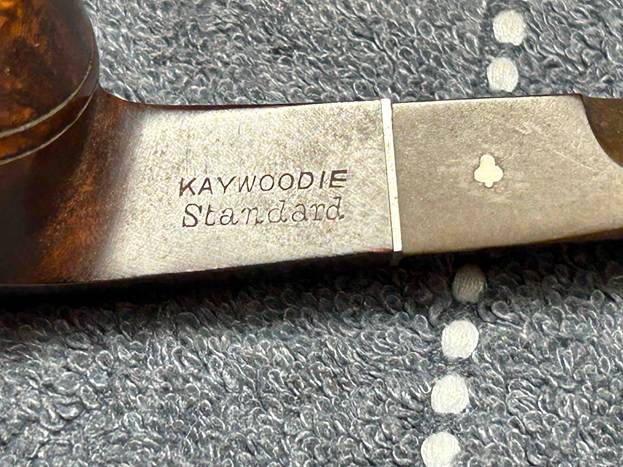
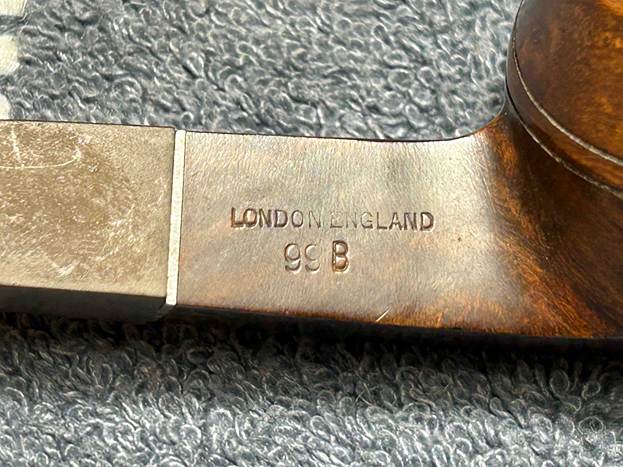
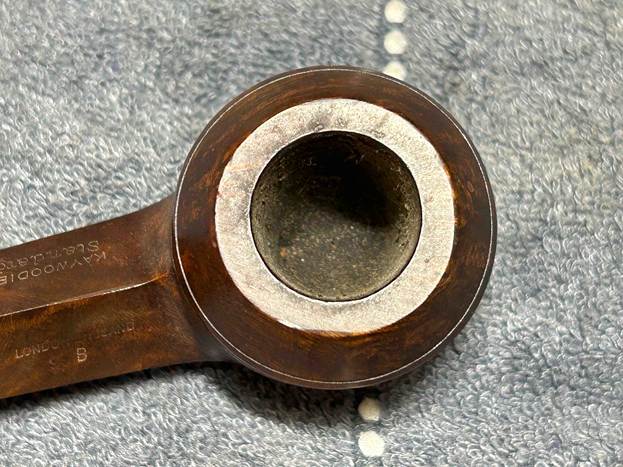
A quick look at the markings tells us what we need to know. On the left side of the shank, we read Kaywoodie [over] Standard. On the right side of the shank, we read London England [over] 99B. Finally, the stem has the famous cloverleaf logo on the left side.
Dating this Kaywoodie is a bit of a head-scratcher. I think I’ve figured it out, but the historical details of many a pipe have been lost in the mists of time. Perhaps the cloverleaf logo on the stem can help. Pipephil says:
The cloverleaf logo: the round logo (black cloverleaf in white circle or white cloverleaf in black circle) was first used in 1937. Up until the late 40’s this logo was used on all of the upper-grade pipes. The concomitant use of the plain white cloverleaf and the disk inlaid logo continued until the early 80’s. Up until the late 1940’s/early 50’s, the logo was on top of the stem. After that the logo was moved to the side of the stem (exceptions exist).
Some elementary investigation online (from Pipedia and Pipephil) informed me that the ‘Standard’ line did not appear until 1950, so we can combine that tidbit with the detail above (regarding the cloverleaf) and certainly say that the pipe dates from after 1950. Furthermore, the fact that the pipe was made in England doesn’t help insofar as date is concerned. Kaywoodies were made there from about 1938 to about 1972.
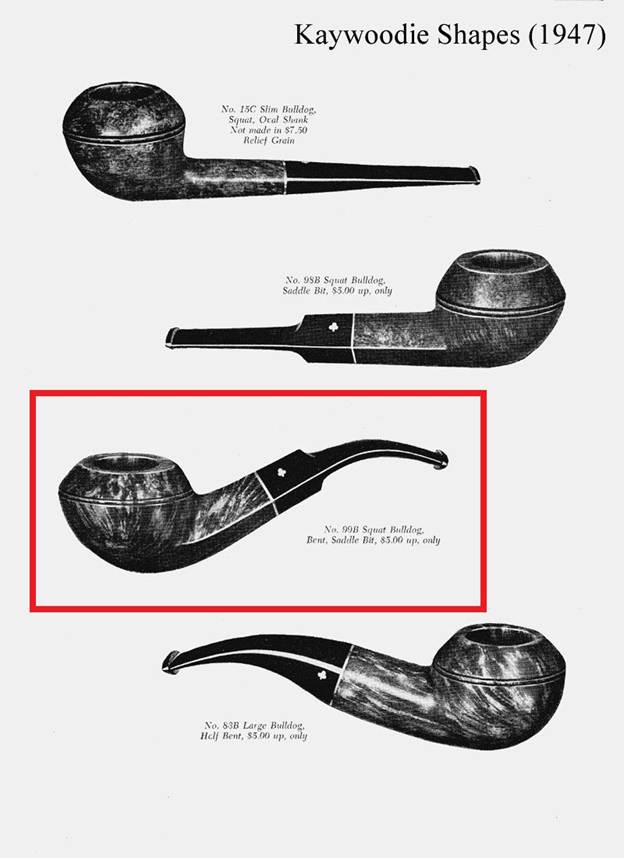
After doing some digging on Pipedia, I finally figured out a reasonable date range for this old pipe. Please follow me! The following image shows a page from the 1947 Kaywoodie catalogue and it shows this pipe, as it should be:
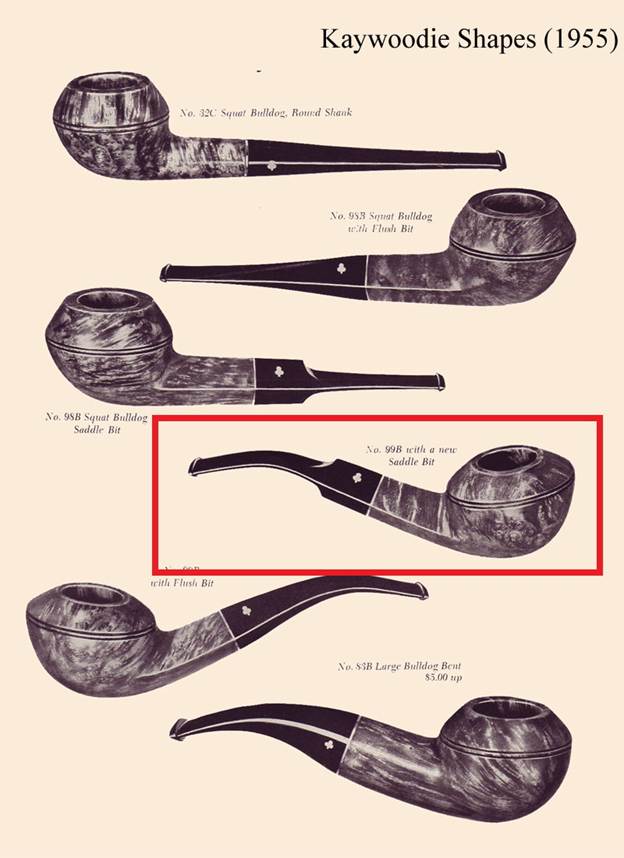
So far, so good. The next image shows a page from the 1955 Kaywoodie catalogue and it also shows this pipe, as it should be:
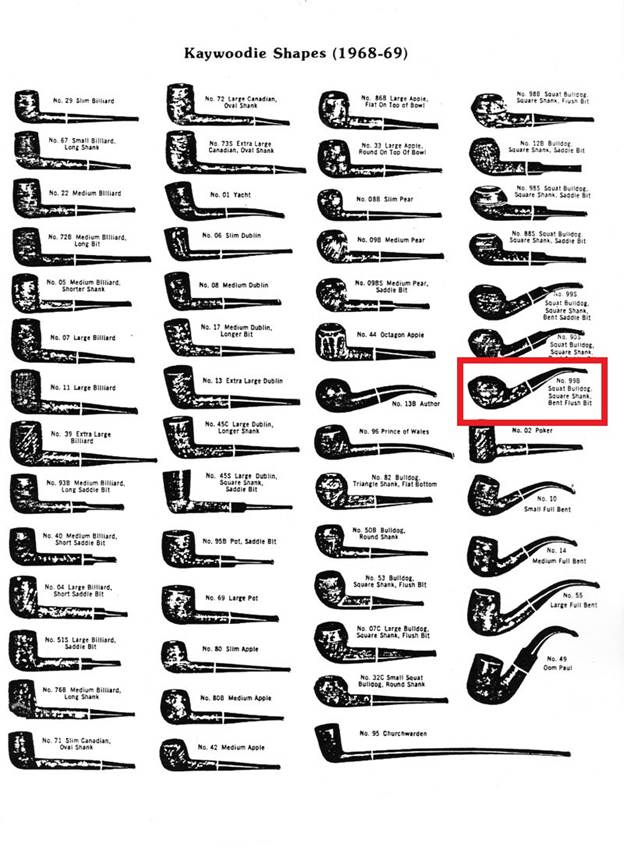
That’s also good. Finally, the next image shows a page from the 1968–69 Kaywoodie catalogue and it shows something a little different:
Do you see the difference? It shows the same pipe (99B) – but with a flush stem, not a saddle stem. Instead, the 99S is the one with the saddle stem. I will conclude that this particular pipe was made no earlier than 1950 and no later than 1968. My experience and my gut tell me that it’s probably from the earlier part of this time range, but it’s difficult to know for sure. There you go.
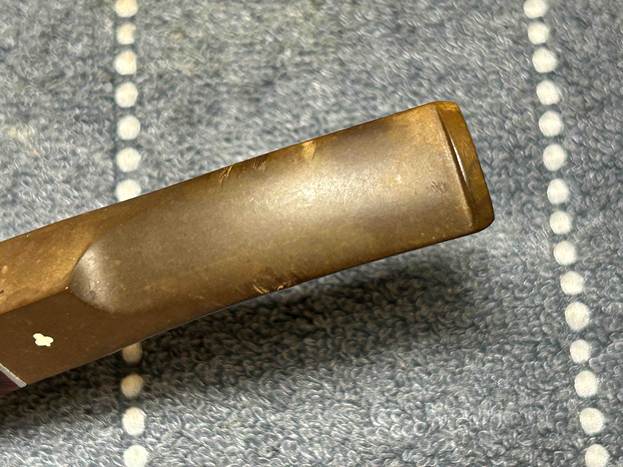
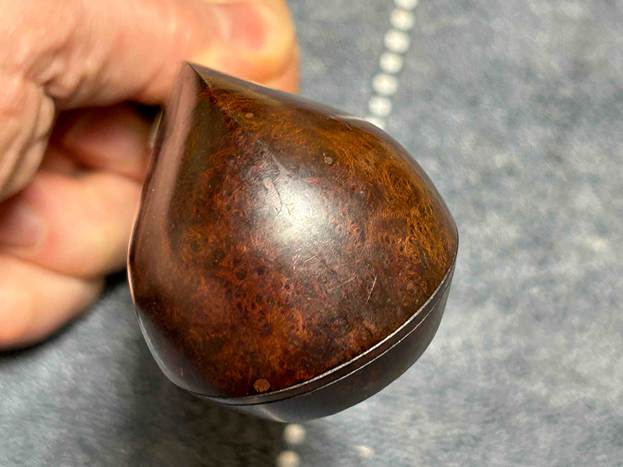
Let’s get on with cleaning this beauty. The bowl is in lovely condition – dirty, but quite sound. No significant damage to be seen – a couple of small nicks near the shank, but no big deal. The stem was thoroughly oxidized and the three-hole stinger was dirty too. Of course, these Kaywoodie stingers don’t come off, so it will have to be cleaned in situ.
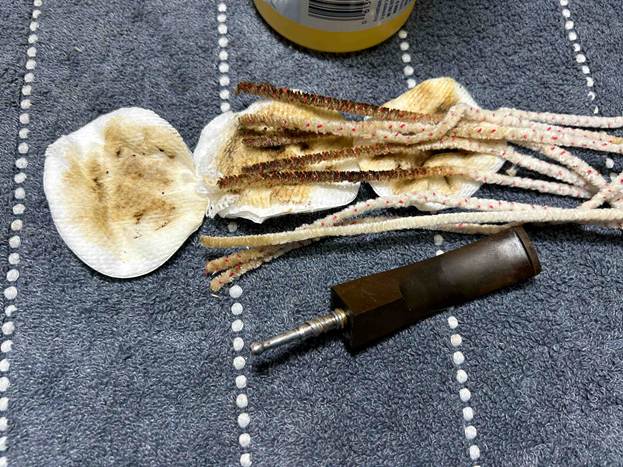
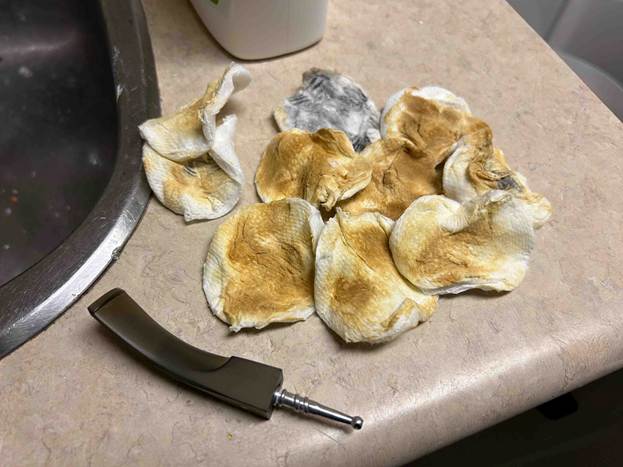
I used isopropyl alcohol on a few cotton rounds and wiped down the stem (including the stinger) to provide an initial cleaning of filth before moving on to the next steps. The primary cleaning came next. I disinfected the inside of the stem with both pipe cleaners and cotton swabs dipped in lemon-infused 99% isopropyl alcohol. I scrubbed thoroughly to make sure the interior was very clean. I used quite a few pipe cleaners and cotton swabs.
The goal of the next step is the removal (or minimization) of oxidation. Going to my sink, I used cream cleanser, cotton rounds, and a toothbrush, and scoured the stem and stinger to remove as much surface oxidation as possible. As the photos show, the result was a hideous, ochre-coloured mess – but better off the stem than on it.
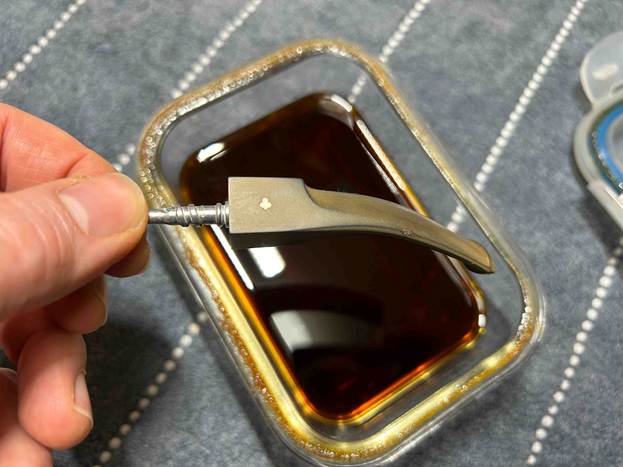
Once the stem was reasonably clean, I soaked it overnight in some Briarville Stem Oxidation Remover. This solution works to draw oxidation in the stem to the surface of the vulcanite. This is a major aid and an important step in ensuring a clean stem. The following day, I drew out the stem from its bath and scrubbed the lingering fluid with a toothbrush. Due to the severity of the oxidation, I then repeated the scrubbing with the cream cleanser for maximum effect.
Before moving on, I then finished the stinger with some 0000-grit steel wool to give it a nice shine.
The penultimate step for the stem is sanding. First, with my set of needle files, I reduced the bulk of the cyanoacrylate repairs. I removed the excess adhesive as near to the surface as possible, without cutting into the vulcanite. Following that, I used all nine of the micromesh sanding pads (1,500 through 12,000 grit) to sand out flaws, even out the vulcanite, and provide gentle polishing of the finished surface. I also applied pipe-stem oil while using the last five micromesh pads. There was a wonderful, deep black shine to the stem when I was done. There was still a hint of the old oxidation, but it will always be with this pipe.
As the stem was (nearly) complete, I moved on to the stummel. The first step was to ream out the bowl – that is to say, remove all the cake inside the bowl. This accomplished a couple of things. First (and most obviously), it cleaned the bowl and provided a refurbished chamber for future smoking. Second, when the old cake was removed, I could inspect the interior walls of the bowl and determine if there was damage or not. I used a reamer and a piece of sandpaper taped to a wooden dowel. Collectively, these ensured that all the debris was removed – fortunately, there wasn’t much.
Similar to the stem, I then cleaned the stummel with both pipe cleaners and cotton swabs dipped in lemon-infused 99% isopropyl alcohol. With a pipe this dirty, it took quite a while and much cotton to clean.
I then decided to ‘de-ghost’ the pipe – that is to say, exorcize the remaining filth from the briar. I filled the bowl and the shank with cotton balls, then saturated them with 99% isopropyl alcohol. I let the stummel sit overnight. This caused the remaining oils, tars and smells to leach out into the cotton.
To tidy up the briar, I wiped down the outside, using a solution of a pH-neutral detergent and some distilled water, with cotton rounds. This did a good job of cleaning any latent dirt on the surface of the briar. The last step of the cleaning process was to scour the inside of the stummel with the same mild detergent and tube brushes. This was the culmination of a lot of hard work in getting the pipe clean.
I used all nine micromesh pads (1,500 through 12,000 grit) to sand the outside of the stummel and finish it off. This sanding minimizes flaws in the briar and provides a beautiful smoothness to the wood. I rubbed some LBE Before & After Restoration Balm into the briar and let it sit for 30 minutes or so. The balm moisturizes the wood and gives a beautiful depth to the briar. I then buffed the stummel with a microfibre cloth.
For the final step, I took the pipe to my bench polisher and carefully buffed it – first with a blue diamond compound, then with three coats of carnauba wax. This procedure makes the pipe look its best – the stummel sings and the stem glows.
All done! This English-Made Kaywoodie Standard 99B bulldog looks fantastic again and is ready to be enjoyed by its next owner. I am pleased to announce that this pipe is for sale! If you are interested in acquiring it for your collection, please have a look in the ‘American’ section of the store here on Steve’s website (even though it was made in England). You can also email me directly at kenneth@knightsofthepipe.com. The approximate dimensions of the pipe are as follows: length 5½ in. (141 mm); height 1⅔ in. (41 mm); bowl diameter 1¾ in. (44 mm); chamber diameter ⅞ in. (21 mm). The weight of the pipe is 1⅜ oz. (41 g). I hope you enjoyed reading the story of this pipe’s restoration as much as I enjoyed restoring it. If you are interested in more of my work, please follow me here on Steve’s website or send me an email. Thank you very much for reading and, as always, I welcome and encourage your comments.
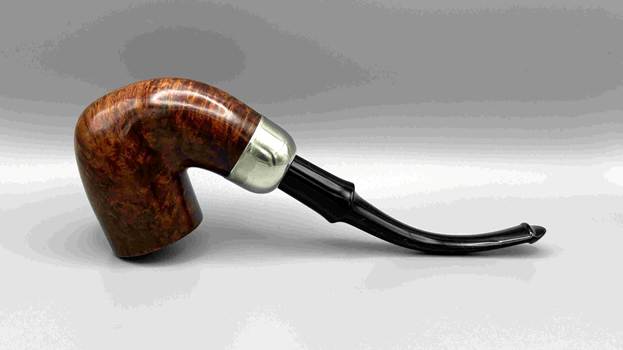
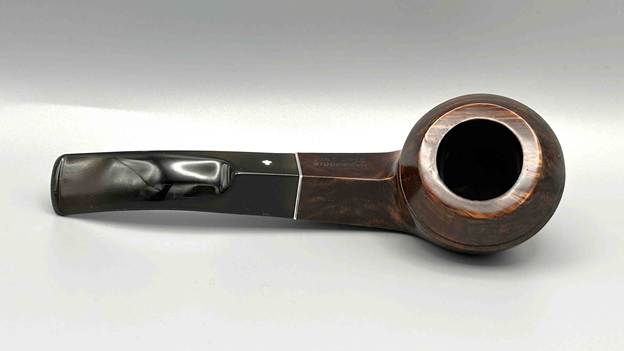
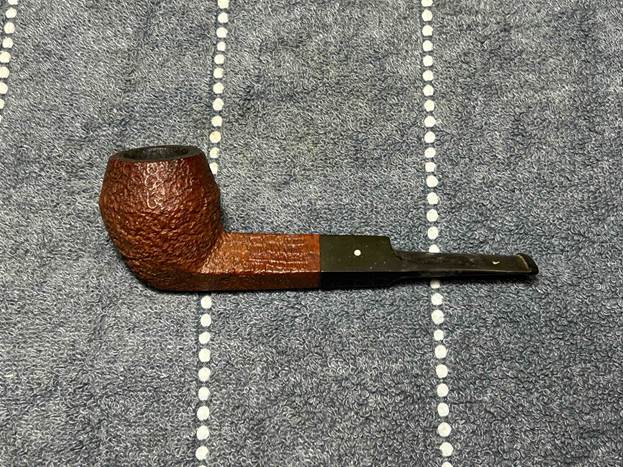
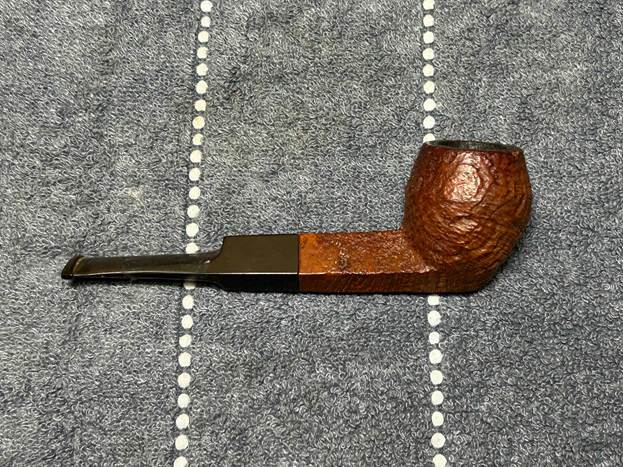
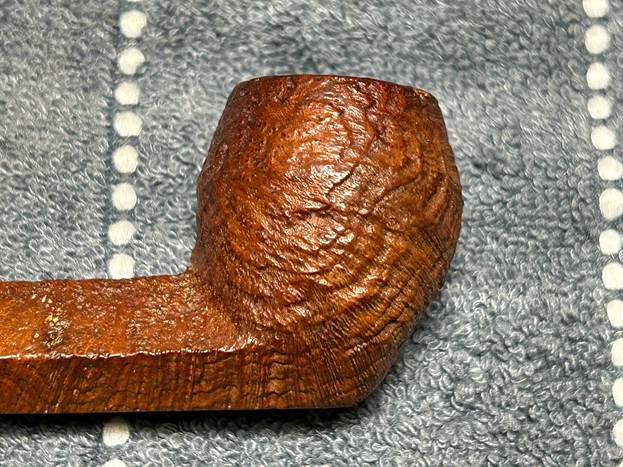
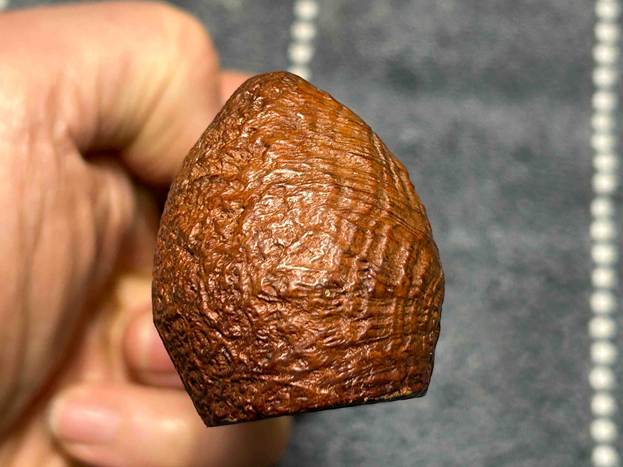
Dunhill is a name that inspires awe and warms the cockles of the hearts of many pipe smokers worldwide. Today, I am pleased to show the restoration of a wonderful tanshell briar. I acquired it in an auction some time ago. Other than that, I don’t know much of its provenance. Its colour and cragginess are very handsome, and I have no doubt that it was a much-loved pipe. I instinctively have a certain respect for Dunhill pipes, and I am especially keen to restore this one so that the next pipe smoker can enjoy it.
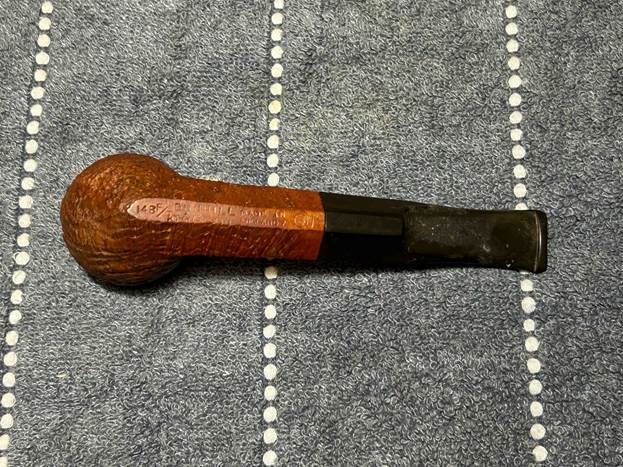
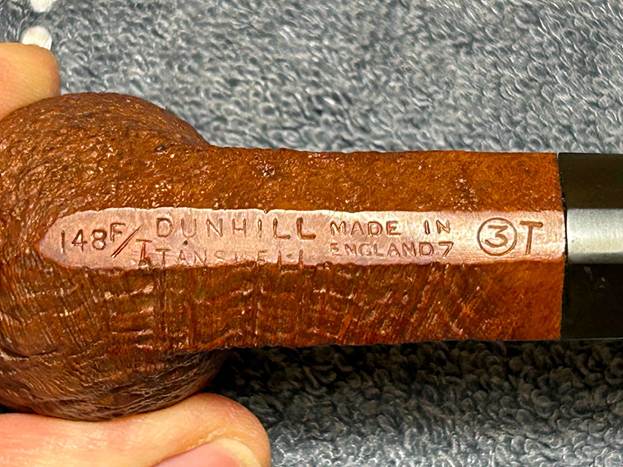
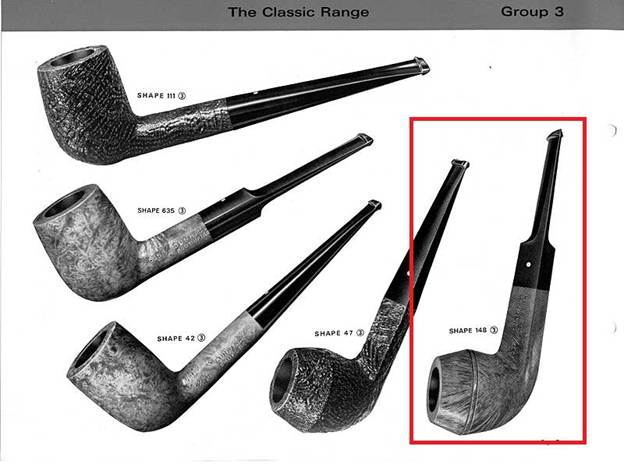
As I mentioned, this is a Dunhill Tanshell and the markings confirm this. It is a beautiful, classic bulldog shape. Pleasingly, those markings are very clear and well-cut on the bottom of the shank. On the left-hand side is the model number, 148 F/T. Immediately to the right of this is Dunhill [over] Tanshell. Then, to the right of that, is Made in [over] England7. To the right of that is an encircled 3, followed by a T. Finally, the stem, of course, has the iconic white spot of Alfred Dunhill’s company. Here is a photo of Alfred, followed by the markings.
Let’s have a closer look at what all of these markings mean. The model number 148 is a classic Dunhill bulldog shape – that number first appeared back in 1950. The page on Pipedia about Dunhill shapes says this:
The original skus/model numbers from the 1920’s until the early 1970’s stood for very specific shapes and bowls. For example, the codes 31, 34, 59, 111, 113, 117, 196, LB, LBS… were all different types of Billiard shaped pipes and there were about 50(!), such codes for the Billiard shape alone.
The F/T stands for ‘fishtail’, which is the style of stem bit.
The markings Dunhill [over] Tanshell refer (obviously and respectively) to the company that produced the pipe and the finish. The history of Alfred Dunhill, his company, and his family is fascinating. If you are interested in learning more, have a read of this article from Pipedia. The tanshell finish is best described by the company itself – this is taken from Dunhill’s website. Following that is a photo of Alfred’s son (also Alfred) seeking out briar in Sardinia.
Introduced in 1952. The Tanshell is a light tan sandblast. Sardinian briar was used for this sandblast. There is a distinct contrast in the sandblasts using Sardinian as opposed to Algerian briar. The Sardinian is much denser and much harder. The resulting pattern, when blasted, is far more even and regular both in terms of the surface texture and the finish.
Furthermore, John Loring’s fine book, The Dunhill Briar Pipe: The Patent Years and After, says this about the tanshell:
The TanShell was Dunhill’s fourth finish and its first major post-war line addition. Introduced in 1951/1952 the TanShell was a naturally stained sandblasted pipe made exclusively from Sardinian briar through the 1960s. The TanShell apparently was not simply a light stained Shell but rather was also the product of “certain processes [unrevealed] not previously employed.” Initially, it appears that the pipe was to be named the Root Shell and a stamp to that effect was ordered and received by Dunhill in May 1951. Ultimately, however, the name TanShell was settled upon but the stamp for the TanShell name was not received by Dunhill until the beginning of December. Thus while the Tanshell was in production in 1951 it appears that most if not all TanShells made in that year did not enter into retail distribution until 1952 and were given a 1952 date code.
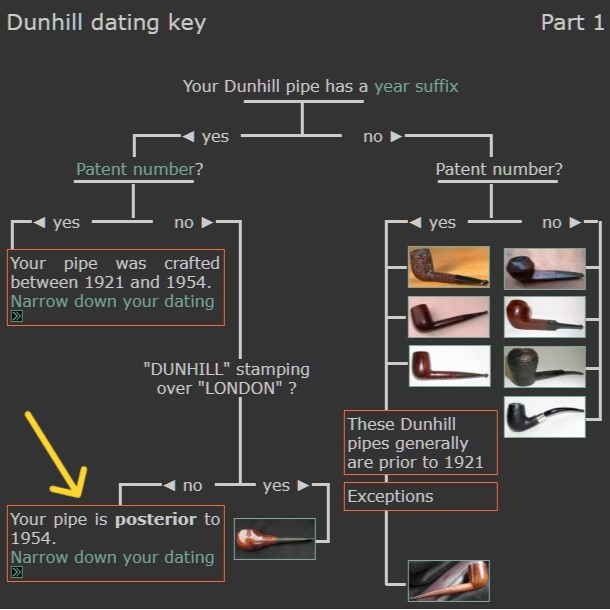
The markings Made in [over] England7 give us an indication of when this pipe was manufactured. The number is the date suffix and provides us the information we need to figure out the date. I already knew the answer, but allow me to walk you through the process. I went to Pipephil’s Dunhill Dating Key (which you can find here) and I have reproduced (below) the two charts they use to date Dunhills. In the first image below, we are asked if our pipe has a date suffix. It does, so we follow the arrow and the chart asks if our pipe has a patent number. It does not, so we proceed. Then we are asked if our pipe reads Dunhill [over] London – again, it does not. As a result, we know that our pipe dates from after 1954.
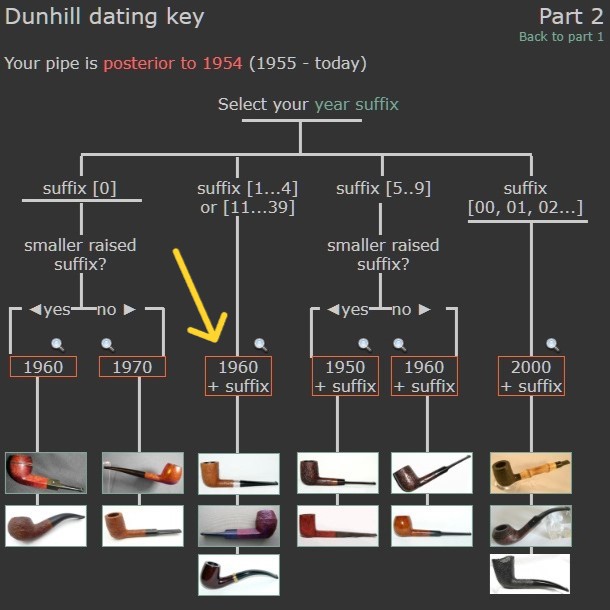
On to the second chart – and it is much more straightforward. The chart asks for the digit(s) in our date suffix. In our case, it is 7, so we know that the date of our pipe is the result of simple addition: 1960 + 7 = 1967. Now we know that the year of manufacture is 1967! Is this your birth year? If so, have I got a pipe for you!
Next, the encircled 3 and the capital T. This tells us about the size and finish of the pipe. Pipedia says:
The encircled group number indicates the size of the bowl (1, for example, is the smaller bowl). It is usually followed by a letter corresponding to the pipe finish. This number/letter code has been introduced about 1950 and was discontinued about 1976 replaced by a 4 or 5 digits code. They were reintroduced in March 2012, but only for commemorative versions.
In this case, the 3 indicates a medium-sized bowl and the T naturally refers to tanshell.
Finally, the white spot. Have you ever wondered about it? Well, very briefly, here is the origin of the famous white spot (from Pipedia):
In 1912, the famous white spot was introduced for very practical concerns. With straight pipes, customers had trouble knowing which way to insert the handmade vulcanite mouthpieces. So Alfred Dunhill ordered white spots to be placed on the upper side of the stem. This very practical solution would become a definitive trademark of Dunhill pipes. The “white spot” soon became known as a symbol of quality.
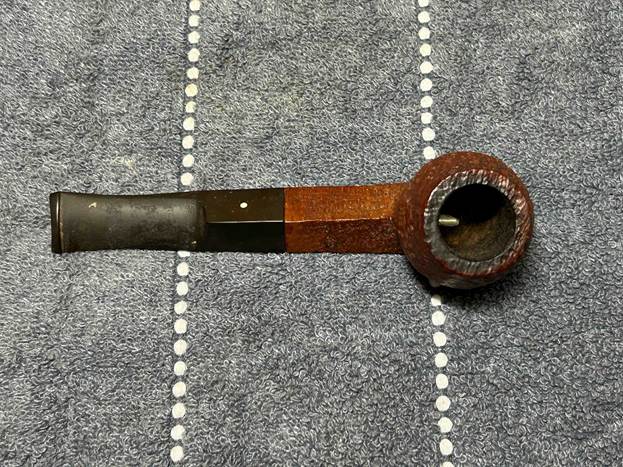
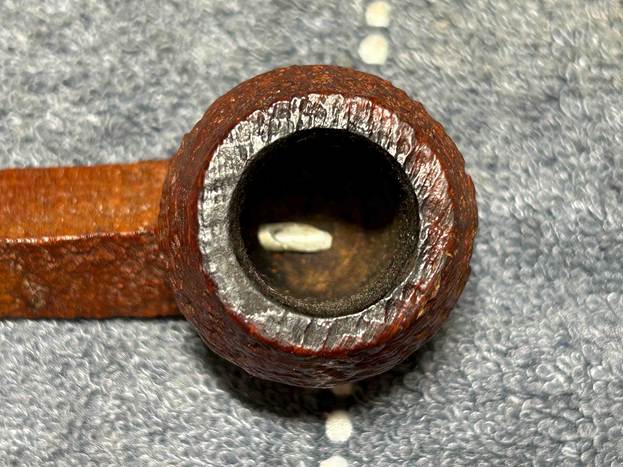
Now let’s get on with restoring this beautiful pipe! It was in generally good condition – nothing outstanding and no significant damage. As you can see, the stem had the usual wear-and-tear. There was some oxidation, but not much calcification. Meanwhile, the stummel was in lovely condition, but a bit dirty. The rim had some darkening and the bowl had only a little cake inside it. The sandblast looked rich and beautiful.
I wiped the stem and the stinger with some cotton pads. There was some filth there and I needed to remove it. Meanwhile, the stem was a bit dirty inside. I cleaned out the inside with various pipe cleaners and 99% isopropyl alcohol.
I then wiped down the stem and the stinger with some cream cleanser to remove some surface oxidation. Once this process was done, the stem went for an overnight soak in the oxidation remover. As the name suggests, this liquid removes oxidation, but, more than anything, it helps draw oxidation to the surface of the vulcanite. This allows me to clean the oxidation off in a couple of ways: both by applying a mild abrasive cleanser to the surface, then by sanding the stem. The following day, I cleaned all of the de-oxidizing mess off with alcohol, pipe cleaners, et cetera. The oxidation had migrated to the surface and would be fairly straightforward to remove. I scrubbed with the cleanser again on some cotton pads to remove the leftover oxidation.
In order to give some shine to the metal stinger, I burnished it with some 0000-grit steel wood. Looked much better afterwards.
Then I used a set of nine Micromesh pads (1,500 through 12,000 grit) which gradually erased the ravages of time and brought out the stem’s lovely black lustre. For the last five pads, I also lightly coated the stem with pipe stem oil in between each scrubbing. At last, I set the finished stem aside.
Off to work on the stummel! The outside looked very well cared-for. No significant damage and the blast maintained its great appeal. Alas, the rim had some darkening, but first things first. The bowl needed a thorough reaming, so I used the KleenReem to scrape off the built-up cake and I followed that with 220-grit sandpaper taped to a dowel to eliminate as much as possible. Generally, I prefer to sand the chamber down to bare briar. When restoring, it is important to ensure that there is no damage to the briar in the bowl, under the cake. I was pleased to see that the walls were sound.
Next up, I needed to clean the shank and bowl thoroughly. I proceeded to use Q-tips, pipe cleaners, and 99% isopropyl alcohol. I made sure that everything was very clean.
Then, to further clean the inside of the pipe, I opted to ‘de-ghost’ the pipe. I put some cotton balls in the bowl and in the shank, and then saturated them with 99% isopropyl alcohol. I let that sit overnight to exorcize any evil spirits (i.e. bad smells and oils) from the old pipe.
Time to deal with that rim. I gently scraped away as much debris as I could. However, given the craggy blast, that only worked so well. I moved on to cotton rounds and some pH-neutral detergent to clean the outside of the stummel and a toothbrush for the rim of the pipe. This worked reasonably well. I followed that up by cleaning the insides with the same detergent and tube brushes.
At this point, I rubbed some of Mark Hoover’s Before & After Restoration Balm into the briar and left it to sit for 15 minutes or so. I brushed it with a horsehair brush and buffed it with a microfibre cloth. The balm does wonderful things to the wood, and I really like the sheen on the sandblast.
Then it was off for a trip to the bench polisher. A few coats of conservator’s wax were just what this pipe needed. Boy – that wax really makes this pipe pop! The lovely shine made the wood look absolutely beautiful. The sandblast looks fantastic and is ready to be enjoyed again by the next owner.
I thoroughly enjoyed bringing this Dunhill Tanshell 148 bulldog back to life and I am pleased to announce that this pipe is for sale! If you are interested in acquiring it for your collection, please have a look in the ‘British’ section of the store here on Steve’s website. You can also email me directly at kenneth@knightsofthepipe.com. The approximate dimensions of the pipe are as follows: length 5⅛ in. (131 mm); height 1⅔ in. (43 mm); bowl diameter 1⅜ in. (35 mm); chamber diameter ¾ in. (19 mm). The weight of the pipe is ⅞ oz. (19 g). I hope you enjoyed reading the story of this pipe’s restoration as much as I enjoyed restoring it. If you are interested in more of my work, please follow me here on Steve’s website or send me an email. Thank you very much for reading and, as always, I welcome and encourage your comments.
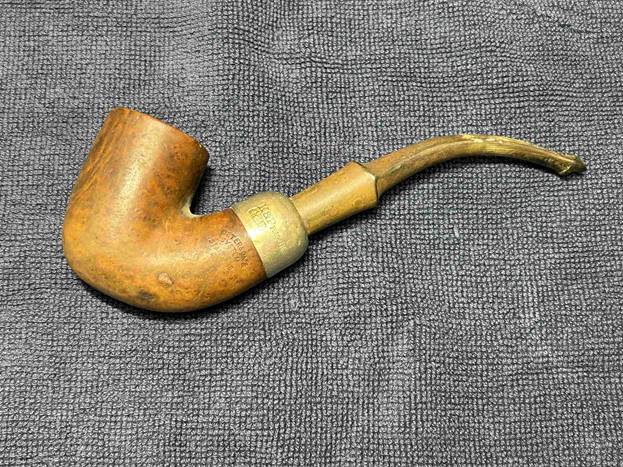
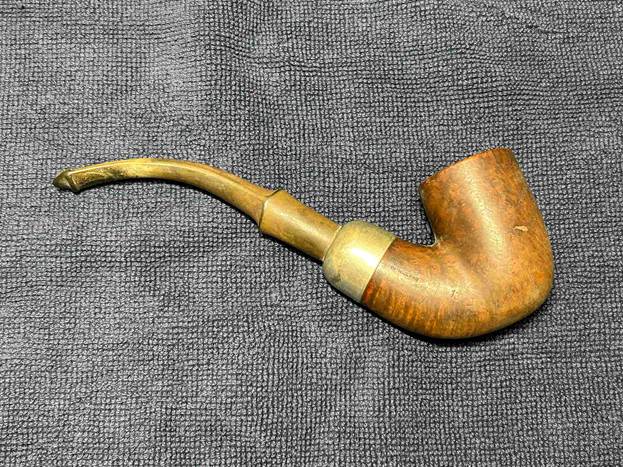
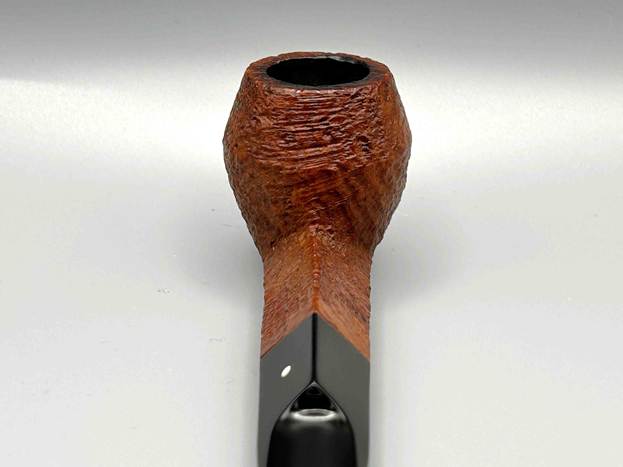
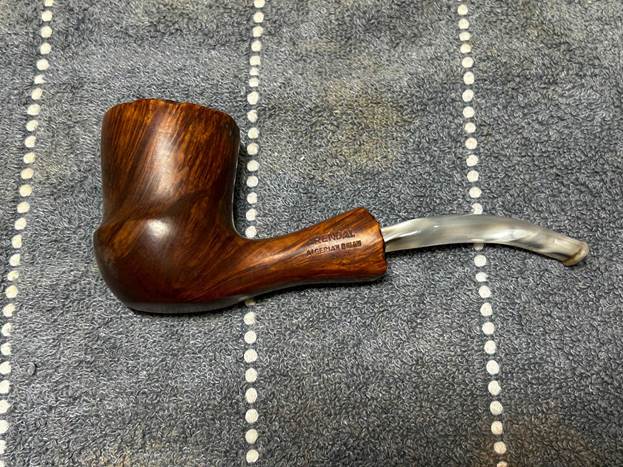
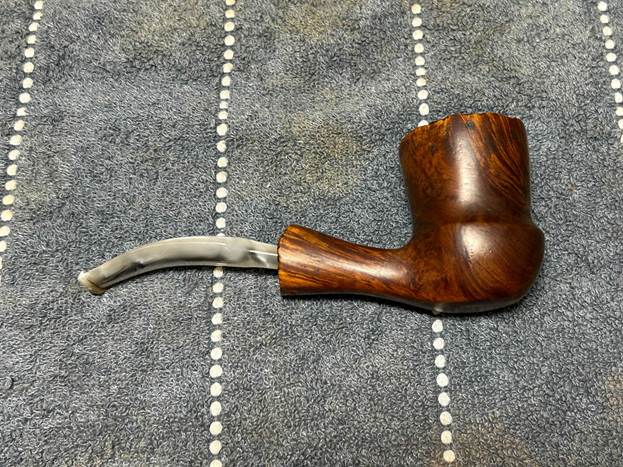
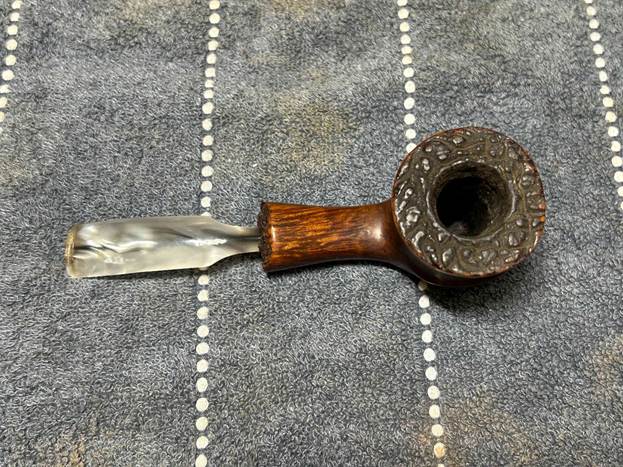
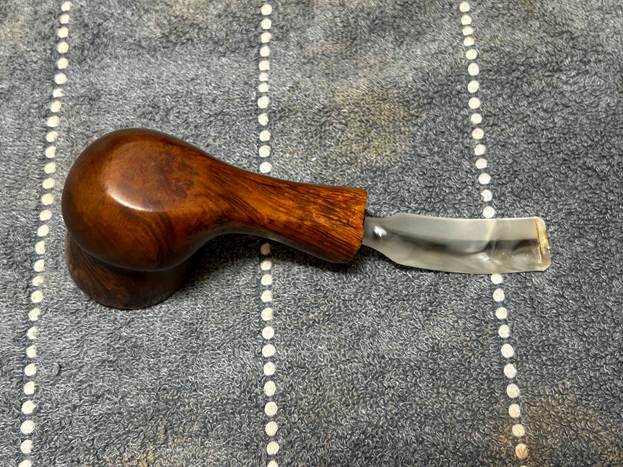
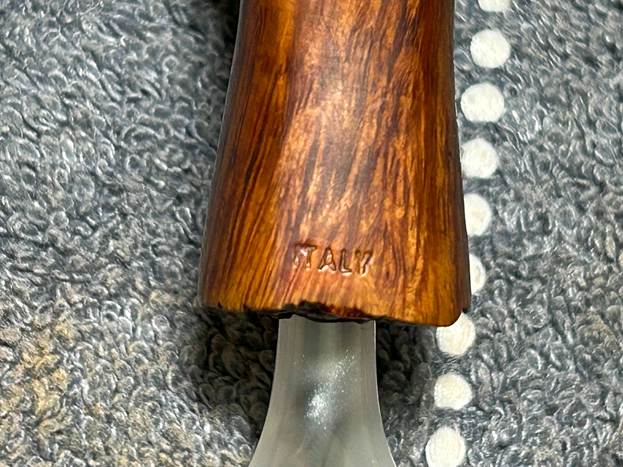
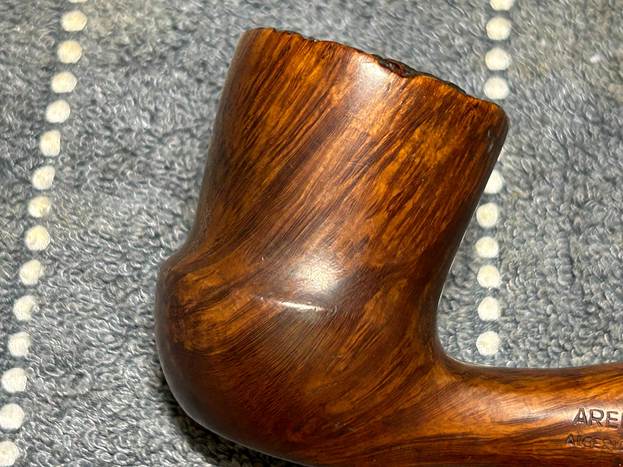
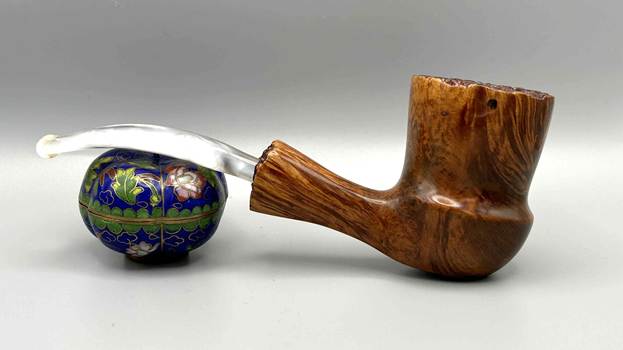
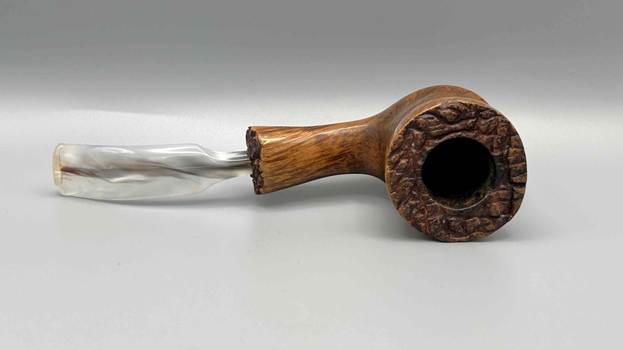
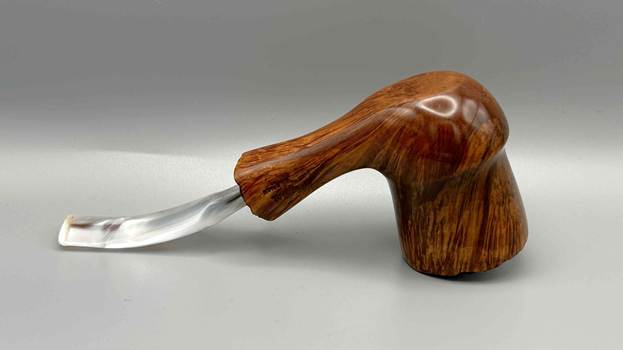
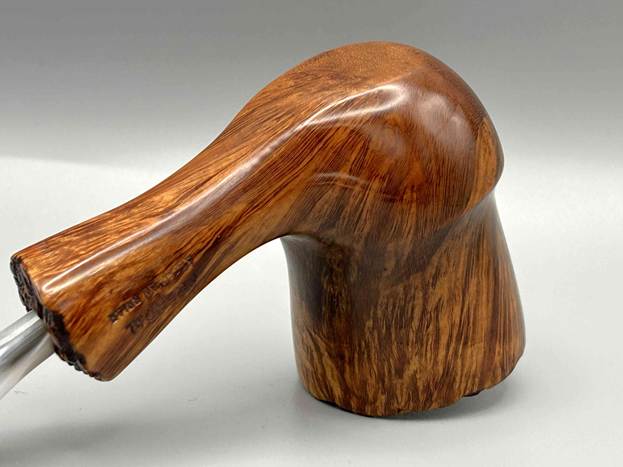
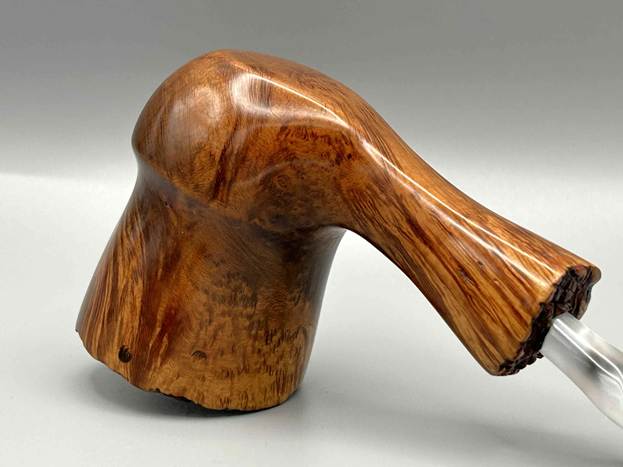
An elegant young lady approached me recently with a pipe belonging to her fiancé. She wanted some tidying up done to it – a bit of spit & polish, so-to-speak. Only too happy to oblige, I took the pipe with me and immediately noticed a certain malodorous quality to it. This pipe was dirty – very dirty – but it was a beautiful piece of wood and I wanted to return something nifty to her. This pipe is an Arendal Algerian Briar freehand, made in Italy. It has a large, gorgeously grained briar bowl, with a plateau rim top and shank end. In addition, the stem was a variegated acrylic, military-mount style. Despite its dirtiness, it held a handsome charm and looked like a good smoker.
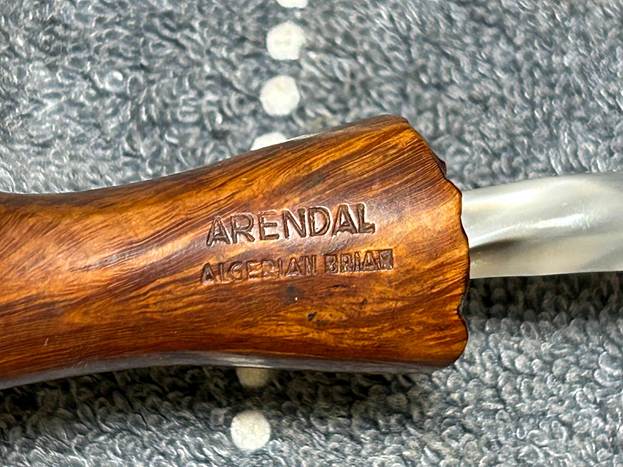
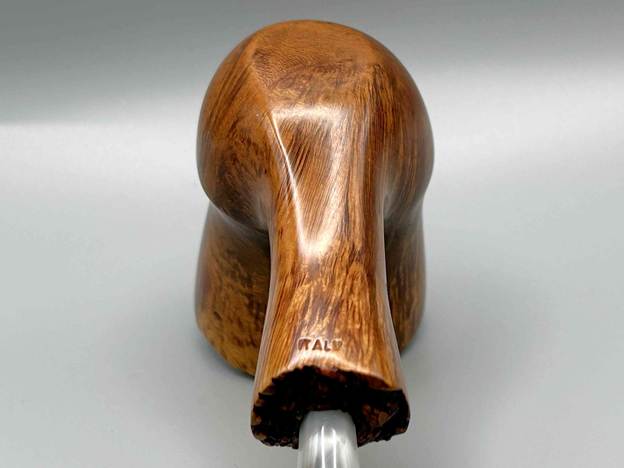
A quick look at the markings was in order. On the left side of the shank were the words Arendal [over] Algerian Briar. On the underside of the shank was the word Italy. Well, that tells us something, but not much. There were no other markings.
I was not familiar with the Arendal brand, and I couldn’t find any indication that Steve had worked on one before. I looked at Pipedia and Pipephil and the PipesMagazine forums – and found nothing about Arendal. So, I checked my copy of Wilczak and Colwell’s book, Who Made That Pipe?, and got a hit! It associated Arendal with the Hudson Universal Pipe Co. of the United States – despite the pipe having been made in Italy. I went back to Pipedia and searched Hudson Universal Pipe Co. It referred me to José Manuel Lopes’ book, Pipes: Artisans and Trademarks. Fortunately, I have a copy of that book and it told me that Hudson Universal Pipe Co. was a retailer of pipes, selling such brands as Eagle, Excelsior, Harrington Park, and Hilex. No mention of Arendal. I have emboldened those two names because they will come back into this story.
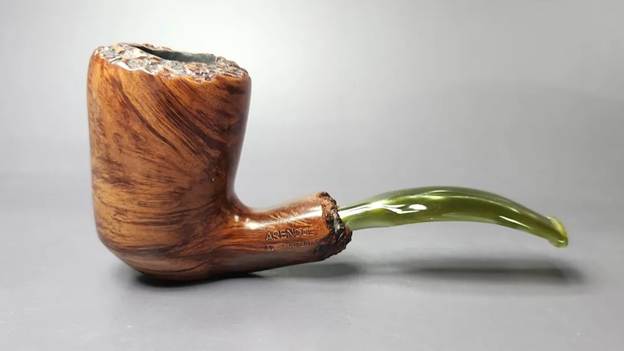
A quick search online uncovered that MBSD Pipes once had another Arendal for sale at some point in the recent past. They provided no more information than I have here, but it was interesting to see that the pipe looked somewhat similar to this one. Here is the MBSD pipe, and you can see the similarity:
My online search also turned up another clue. It turns out that Arendal is the name of a city in Norway. Here is an interesting point which may be a coincidence or may be a small connection. The Wikipedia article for the Norwegian city of Arendal says that
The Old Norse form of the name was probably Arnardalr. The first element is the genitive case of ǫrn which means “eagle” and the last element is dalr which means “valley” or “dale”, thus meaning the “eagle valley”.
Could there be a connection between this and the fact that Hudson Universal Pipe Co. sold a pipe brand named Eagle? The connection is most certainly tenuous, but I post it here for your consideration.
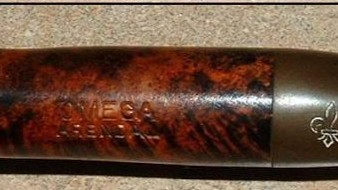
Here is my final detail. My online searching accidentally turned up the name ‘Omega Arendal’ – and there was a link to it on Pipephil. The entry for Omega pipes on Pipephil includes the following words (emphasis mine):
Pipes with this brand are obviously from the same origin as Bayard, Chadhall, Thomas and Duke of Kent pipes. Others fleur-de-lis logos: Ajustomatic, Cellini, Fleur de lis, Harrington Park, Vincenzo Lombardi.
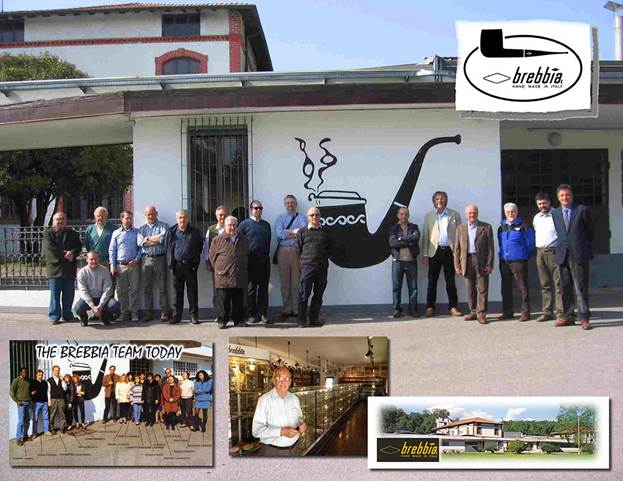
Harrington Park again! Now, almost all of those brands were made in France (I checked). However, Cellini and Vincenzo Lombardi were both Brebbia seconds. Of course, Brebbia pipes are made in Italy – so I wonder if we can conclude that our Arendal pipe was made by the Brebbia factory. That would make sense and I may have solved this little mystery.
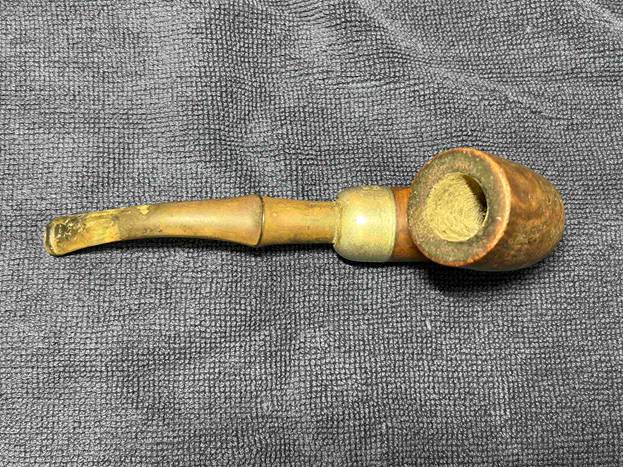
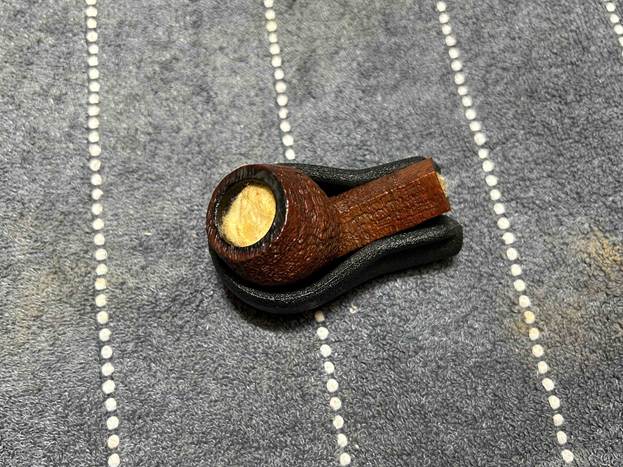
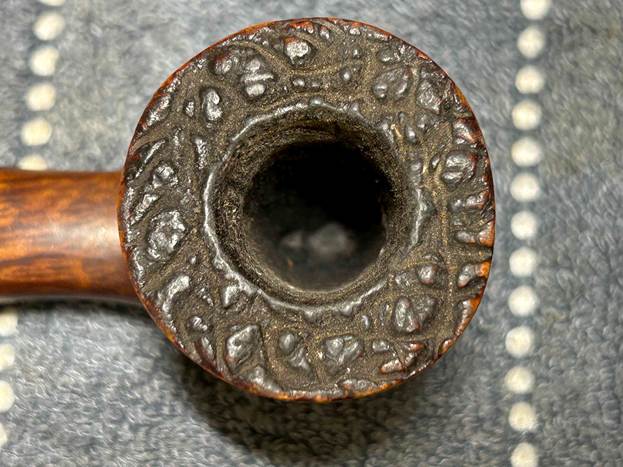
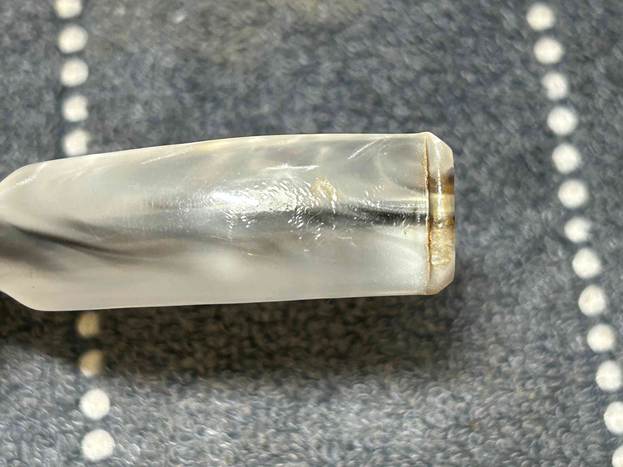
Anyway, enough about that – let’s get on with the pipe! It was pretty darn grungy. There was filth ground into the plateau rim top. The wood was soiled and ever-so-slightly slimy. The bowl had plenty of cake and the mortise in the shank was quite yucky too. The stem was less problematic: it certainly had tooth marks and scratches, but the acrylic meant that there was no oxidation to deal with. On the other hand, no matter how much one scrubs an acrylic stem’s draught, it never loses the tobacco colour inside. Ah well, it is what it is. What was clear, however, was that this was a remarkably attractive piece of briar. I looked forward to seeing what it would look like in the end.
I used isopropyl alcohol on a few cotton rounds and wiped down the stem to provide an initial cleaning of filth before moving on to the next steps. The primary cleaning came next. I disinfected the inside of the stem with both pipe cleaners and cotton swabs dipped in lemon-infused 99% isopropyl alcohol. I scrubbed thoroughly to make sure the interior was very clean. There was a lot more cleaning involved that the photo below would suggest.
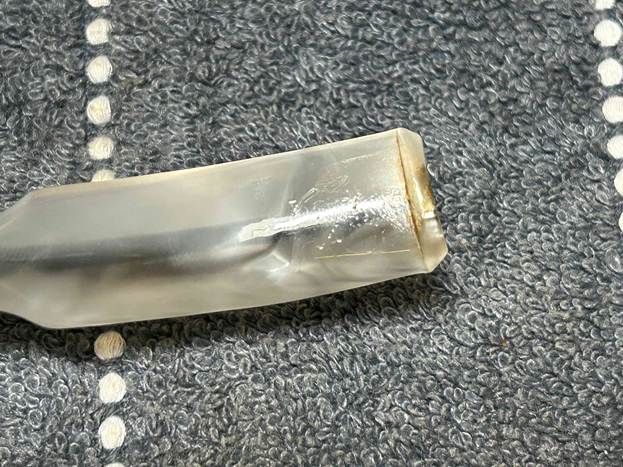
I then set about fixing the marks and dents in the acrylic. This was done by filling those divots with clear cyanoacrylate adhesive. I left this to cure and moved on.
The penultimate step for the stem is sanding. First, with my set of needle files, I reduced the bulk of the cyanoacrylate repairs. I removed the excess adhesive as near to the surface as possible, without cutting into the acrylic. Following that, I used all nine of the micromesh sanding pads (1,500 through 12,000 grit) to sand out flaws, even out the acrylic, and provide gentle polishing of the finished surface. I also applied pipe-stem oil while using the last five micromesh pads. There was a wonderful shine to the stem when I was done.
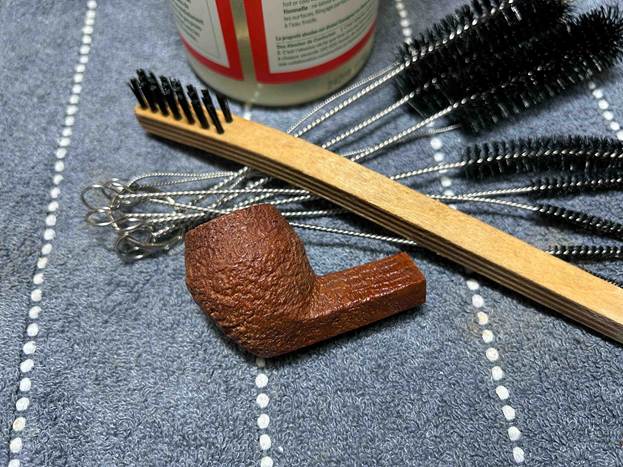
As the stem was (nearly) complete, I moved on to the stummel. The first step was to ream out the bowl – that is to say, remove all the cake inside the bowl. This accomplished a couple of things. First (and most obviously), it cleaned the bowl and provided a refurbished chamber for future smoking. Second, when the old cake was removed, I could inspect the interior walls of the bowl and determine if there was damage or not. I used a reamer, a pipe knife, and a piece of sandpaper taped to a wooden dowel. Collectively, these ensured that all the debris was removed. There was some charring to the walls of the bowl, but I left it as is. It wasn’t significant enough to mess with.
The inside of the stummel needed to be cleaned thoroughly. However, this pipe was so clogged, that I first needed to open the horribly occluded airway. So, I took a long drill bit, held in a drill chuck, and hand-cranked it to dislodge the dreadful detritus inside. Hand cranking is essential because it provides a precision and caution that a power drill cannot provide. Similar to the stem, I then cleaned the stummel with both pipe cleaners and cotton swabs dipped in lemon-infused 99% isopropyl alcohol. With a pipe this dirty, it took quite a while and much cotton to clean.
I then decided to ‘de-ghost’ the pipe – that is to say, exorcize the remaining filth from the briar. I filled the bowl and the shank with cotton balls, then saturated them with 99% isopropyl alcohol. I let the stummel sit overnight. This caused the remaining oils, tars and smells to leach out into the cotton.
To tidy up the briar, I wiped down the outside, using a solution of a pH-neutral detergent and some distilled water, with cotton rounds. I also used a toothbrush in the crevices – especially on the plateau rim and shank end. This did a good job of cleaning any latent dirt on the surface of the briar. The last step of the cleaning process was to scour the inside of the stummel with the same mild detergent and tube brushes. This was the culmination of a lot of hard work in getting the pipe clean.
The thorough cleaning I provided revealed some hidden damage to the shank end. As the photo below shows, there were some notable cracks in the briar. This would suggest that the pipe had been disassembled while still warm. This is a no-no! The reason is plain to see.
Anyway, I elected to fill these cracks with clear cyanoacrylate adhesive. This was tricky, as I had to select an adhesive that was thin enough to penetrate the cracks, but not so thin that it went everywhere. Before that, I applied some petroleum jelly to the mortise. The petroleum jelly prohibits the adhesive from leaking out over everything. Applying cyanoacrylate adhesive to a plateau like this is fraught with potential problems because it is difficult to hide the repair effectively. However, I feel that, in the end, I did a good job.
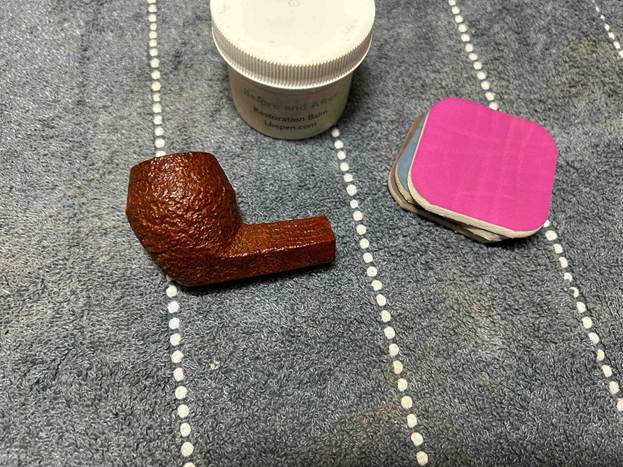
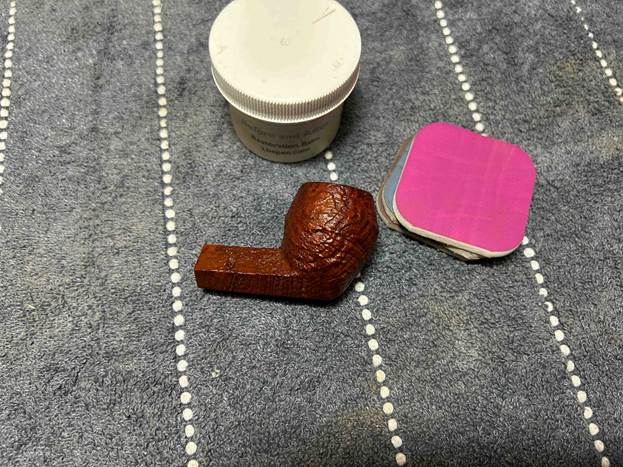
I used all nine micromesh pads (1,500 through 12,000 grit) to sand the outside of the stummel and finish it off. This sanding minimizes flaws in the briar and provides a beautiful smoothness to the wood. I rubbed some LBE Before & After Restoration Balm into the briar and let it sit for 30 minutes or so. The balm moisturizes the wood and gives a beautiful depth to the briar. I then buffed the stummel with a microfibre cloth.
For the final step, I took the pipe to my bench polisher and carefully buffed it – first with a blue diamond compound, then with three coats of conservator’s wax. This procedure makes the pipe look its best – the stummel sings and the stem glows.
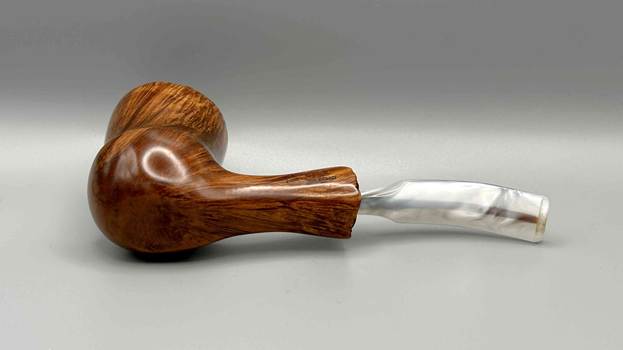
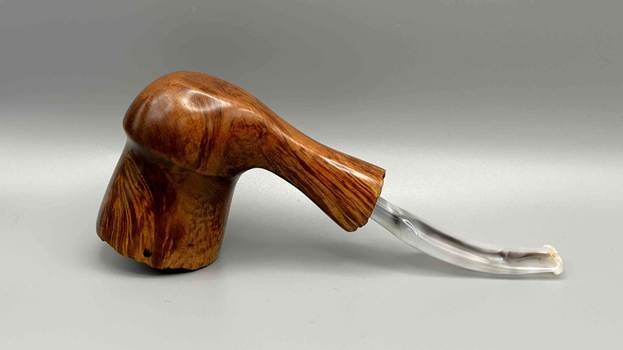
All done! This Arendal Algerian briar freehand looks fantastic again and I am delighted with the results. I’m sure the young lady’s fiancé will be too. The approximate dimensions of the pipe are as follows: length 5¾ in. (145 mm); height 2⅛ in. (55 mm); bowl diameter 1⅔ in. (41 mm); chamber diameter ¾ in. (20 mm). The weight of the pipe is 1⅞ oz. (55 g). I hope you enjoyed reading the story of this pipe’s restoration as much as I enjoyed restoring it. If you are interested in more of my work, please follow me here on Steve’s website or send me an email at kenneth@knightsofthepipe.com. Thank you very much for reading and, as always, I welcome and encourage your comments.
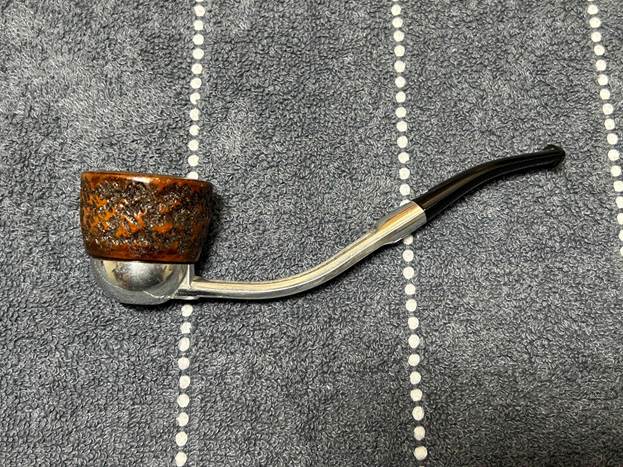
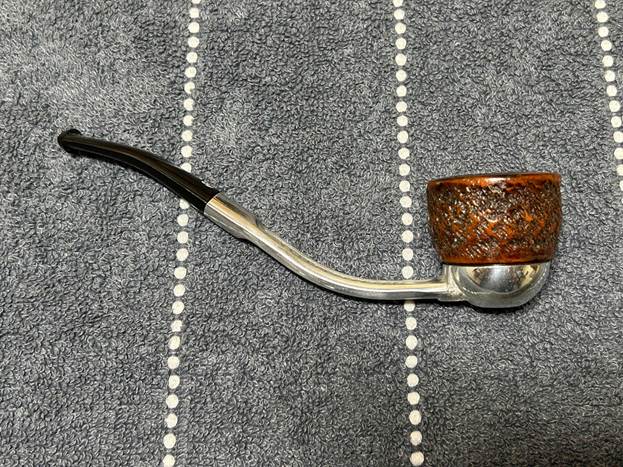
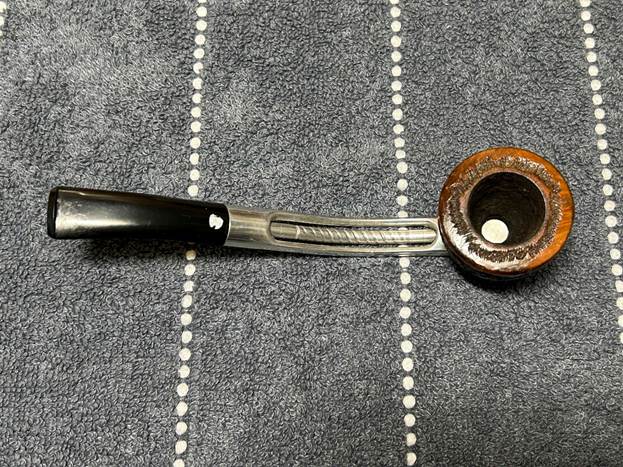
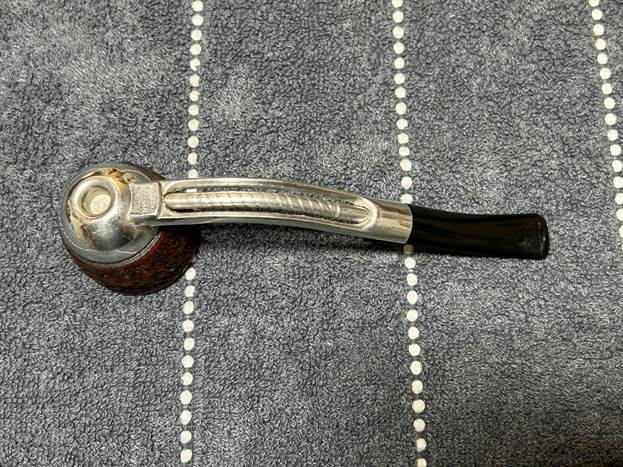
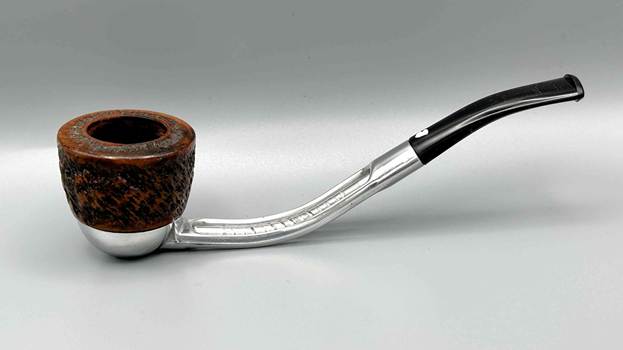
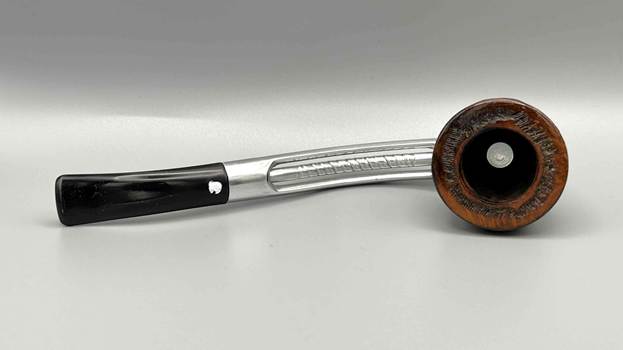
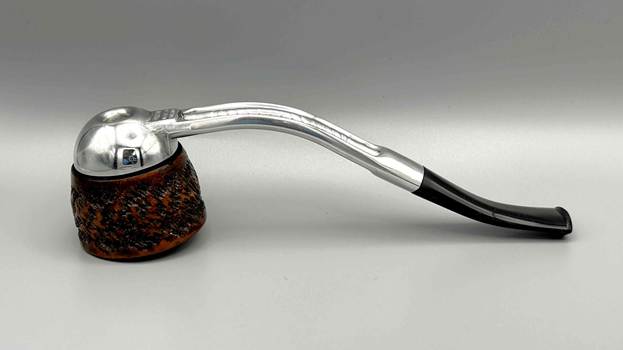
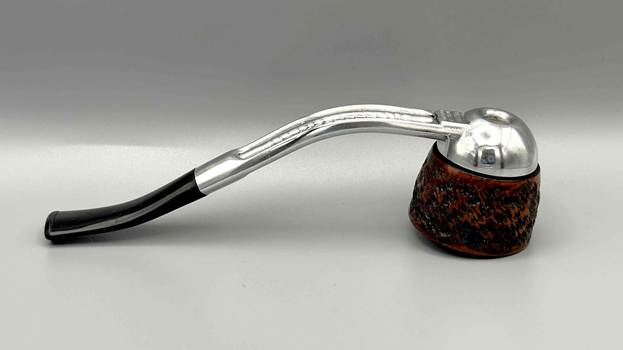
If I remember correctly, this Falcon AN 7 bent Dublin came in an auction lot last year. I don’t really remember the details of its acquisition, but no matter. Falcons are always fun, good-looking pipes. This one was already in good shape, it just looked tired and worn. This particular Falcon has a beautifully bent shank and a rusticated, Dublin-style bowl. The stem has a nice fishtail bit.
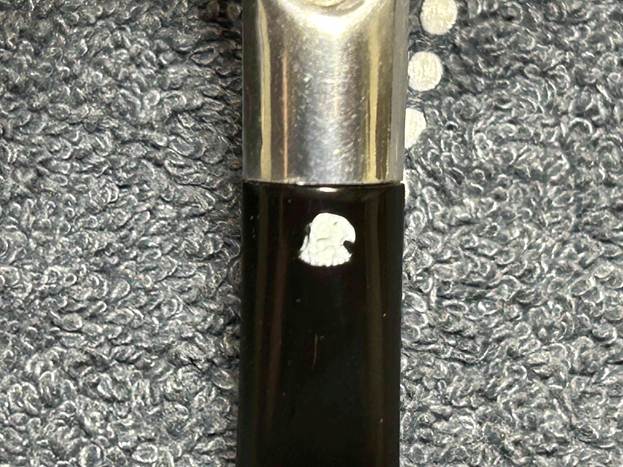
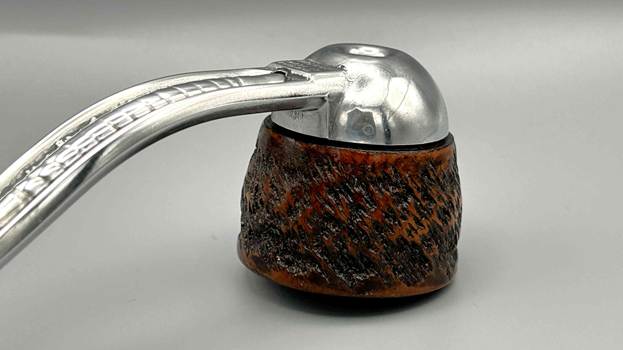
Let’s have a look at the marks. On the underside of the bowl, engraved in the metal, is the word Falcon [over] Made in [over] England. Also engraved, inside the centre circle, is the shape number AN [over] 7. At the opposite end, on top of the stem, is engraved the head of a falcon. The number 7 is the mould number from the factory and the AN indicates that this pipe was made with an anodic casting.
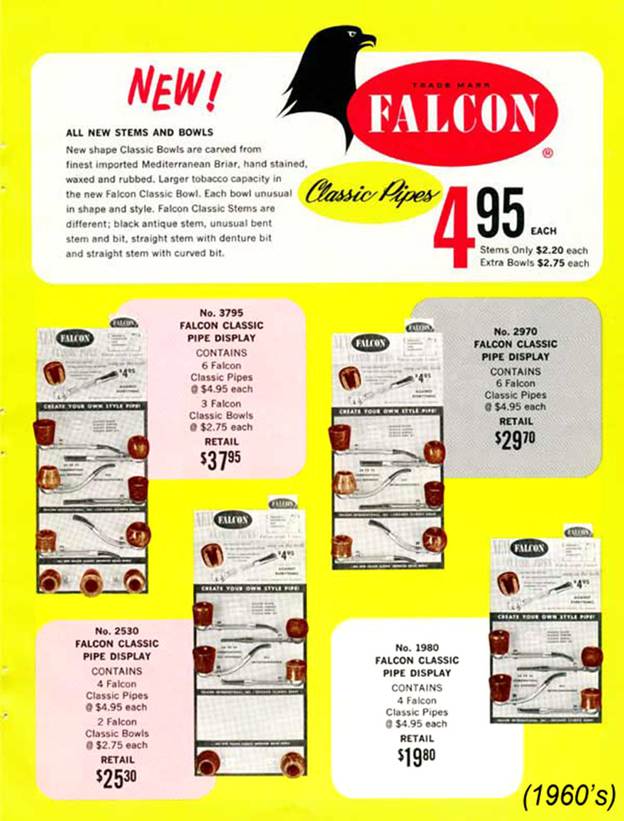
Looking into the background of Falcon Pipes, my first stop was SmokingMetal.co.uk – a very fine resource for all things related to metal pipes. Here are a few snippets:
There are an incredible number of combinations of Falcon pipes. many variants of the stems and of the bowls. All I can hope to do here is to show some of them. Some of course are no longer available but very many are. Contrary to most descriptions you will see, the smoke tube is not a twisted alloy tube, but a tube that has been scrolled to increase the surface area for cooling.
There are at least three distinct eras of Falcon production, those stamped under the stem with just the single word ‘Falcon’ indicating a USA made pipe, those with ‘Falcon Ireland'( indicating, or it ought to, that the casting originated in Ireland but actually only some bowls originated in Ireland) and those with ‘Falcon Made in England’ which does tell us where that model actually originated from. The bowls come in an incredible range of shapes and finishes, but can always be pinned down as Falcon as they have a 4 start thread, enabling a quarter turn to lock them on the stem. Very, very few other makes have this feature. The numbers and letters under the humidome are mould numbers.
Pipedia has some good information too (which you can find here). Here is a brief summary of Falcon history:
The Falcon pipe was created in 1936 by the American engineer Kenly Bugg. However during WWII the production of the Falcon was limited. In 1949 George Hunt took over production and marketing and by 1954 6 million Falcon pipes had been sold in the U.S.A. By 1961 production started in England. In 1964 the Alco was launched. In 1967 the Brentford was launched but in 1979 it was withdrawn from the market. In 1968 production of the Falcon in Chicago, U.S.A. stopped. The Falcon International was introduced in 1977, which featured a removable mouth piece and filter.
This provided some detail, but another point was mentioned in posts from the PipesMagazine and PipeSmokersDens forums. These stated that the falcon-head emblem was used on pipes between 1975 and 1981. Based on all that I read – and if I am not misinterpreting something – I can conclude that this pipe was made sometime after 1975 and prior to 1981.
Let’s take a closer look at the condition of the pipe. As I indicated before, nothing too serious – just some minor wear-and-tear to address. The bowl is lightly smoked and just needs a good cleaning. The metal body has no notable damage and I will simply clean and polish it. Finally, the acrylic stem also has only minor wear – should be quite straightforward.
I started on the bowl. The first step was to ream it out – that is to say, remove all the cake inside the bowl. This accomplished a couple of things. First (and most obviously), it cleaned the bowl and provided a refurbished chamber for future smoking. Second, when the old cake was removed, I could inspect the interior walls of the bowl and determine if there was damage or not. Fortunately, there was none. As the cake was light, I used a pipe knife, and a piece of sandpaper taped to several sizes of wooden dowel. Collectively, these ensured that all the debris was removed. I then took a dental tool and cleaned any gunk from the grooves in the threads of the bowl.
To tidy up the briar, I wiped down the outside, using a solution of a pH-neutral detergent and some distilled water, with cotton rounds. I also used a toothbrush in the crevices. This did a good job of cleaning any latent dirt on the surface of the briar. The last step of the cleaning process was to scour the inside of the stummel with the same mild detergent and tube brushes.
I used a couple of the finest-grit micromesh pads to polish the outside of the stummel and finish it off. This minimizes flaws in the briar and provides a beautiful smoothness to the wood. I rubbed some LBE Before & After Restoration Balm into the briar and let it sit for 30 minutes or so. The balm moisturizes the wood and gives a beautiful depth to the briar. I then buffed the stummel with a microfibre cloth.
I then moved on to the metal body of the pipe (including the acrylic stem, which is attached). It didn’t initially look dirty, but took a surprising amount of elbow grease to clean! I disinfected the inside and outside of the pipe with both pipe cleaners and cotton swabs dipped in lemon-infused 99% isopropyl alcohol. I scrubbed thoroughly. I also used a wire brush to scrub some of the more stubborn areas.
In addition, I began my polishing procedure with some 0000-grit steel wool. This worked incredibly well – I was so pleased with the results. I then used some micromesh pads that I have saved solely for metal work and buffed it up to an incredible shine. Following that, I used all nine of the micromesh sanding pads (1,500 through 12,000 grit) to sand out flaws in the stem, even out the acrylic, and provide gentle polishing of the finished surface. I also applied pipe-stem oil while using the last five micromesh pads. There was a wonderful, deep black shine to the stem when I was done. Sorry for the dearth of photos here.
For the final step, I took the pipe to my bench polisher and carefully buffed it – first with a blue diamond compound, then with three coats of conservator’s wax. This procedure makes the pipe look its best.
All done! This Falcon AN7 Dublin looks fantastic again and is ready to be enjoyed by its next owner. I am pleased to announce that this pipe is for sale! If you are interested in acquiring it for your collection, please have a look in the ‘British’ pipe section of the store here on Steve’s website. You can also email me directly at kenneth@knightsofthepipe.com. The approximate dimensions of the pipe are as follows: length 5⅞ in. (151 mm); height 1½ in. (38 mm); bowl diameter 1½ in. (38 mm); chamber diameter ⅞ in. (21 mm). The weight of the pipe is 1⅛ oz. (34 g). I hope you enjoyed reading the story of this pipe’s restoration as much as I enjoyed restoring it. If you are interested in more of my work, please follow me here on Steve’s website or send me an email. Thank you very much for reading and, as always, I welcome and encourage your comments.
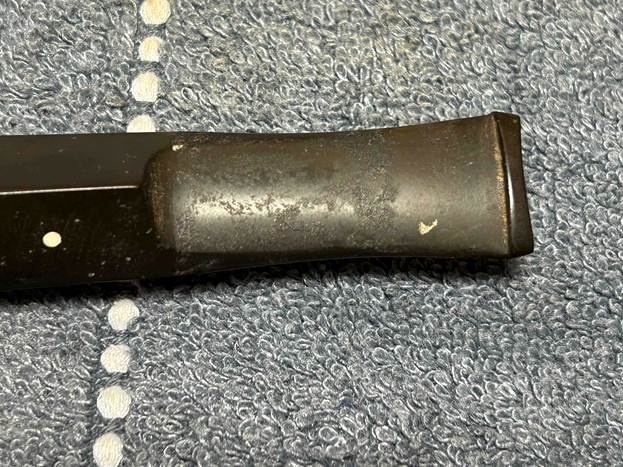
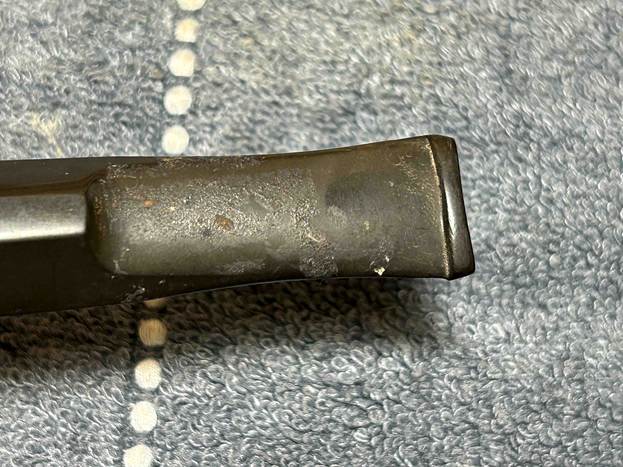
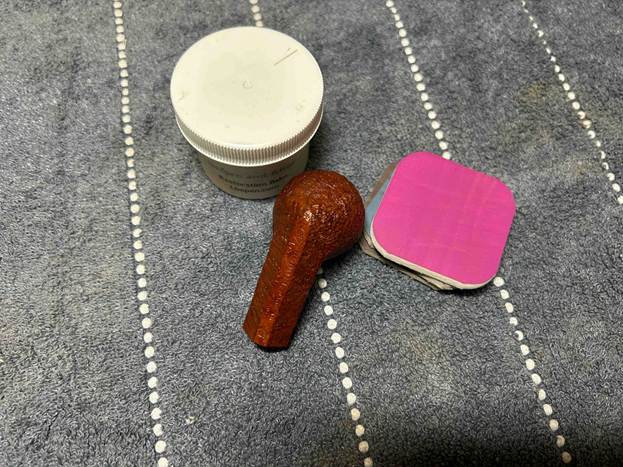
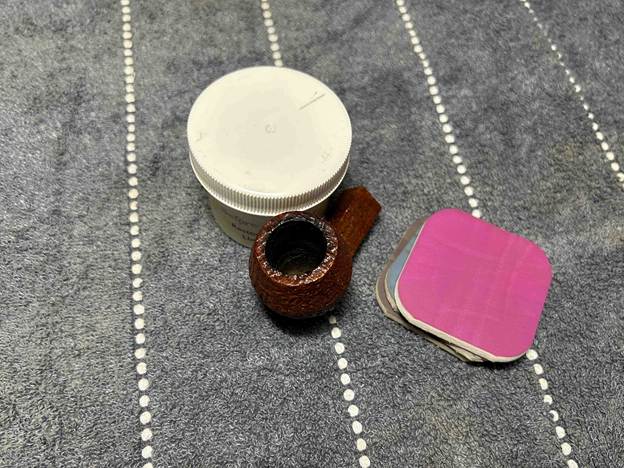
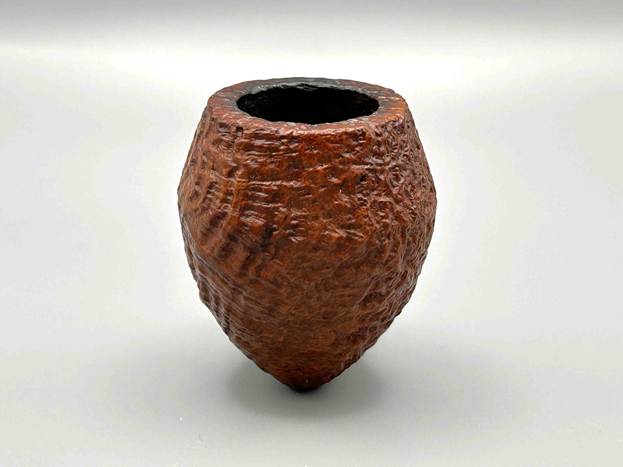
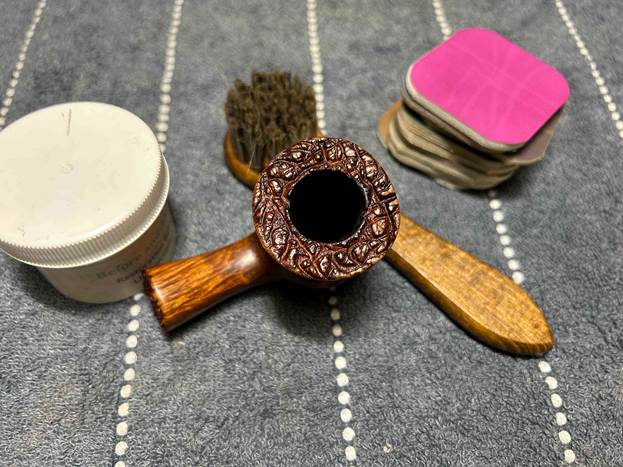
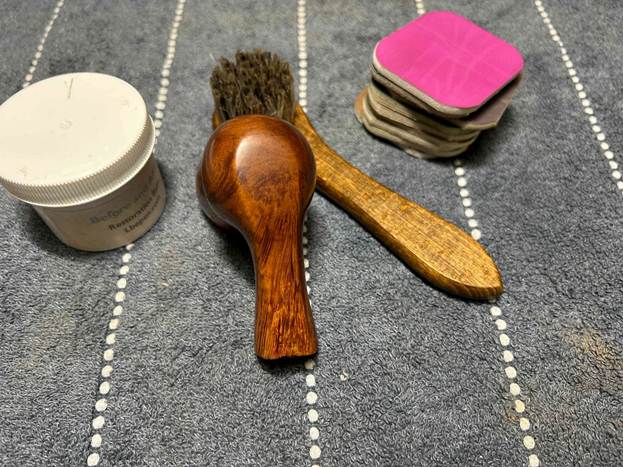
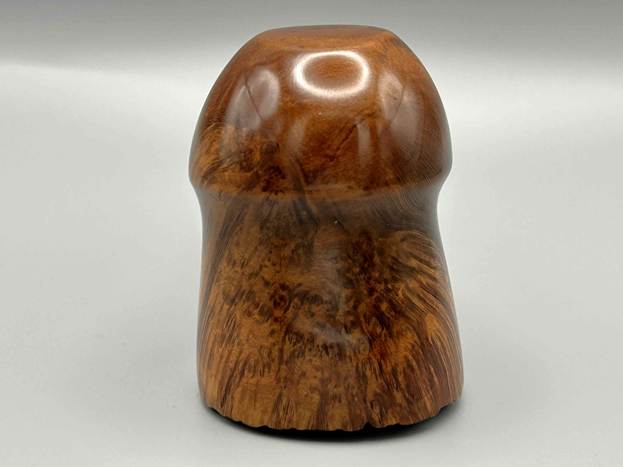
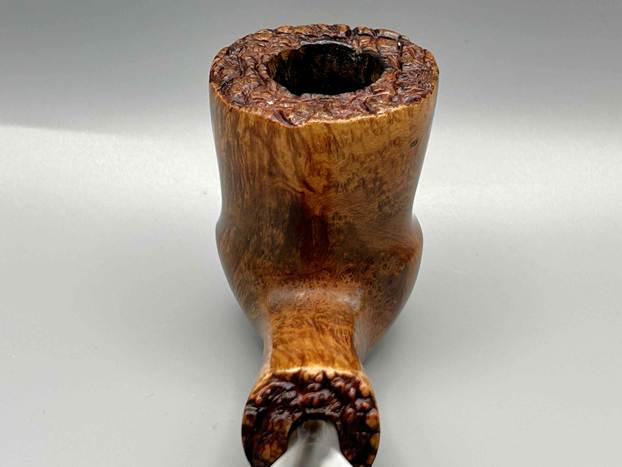
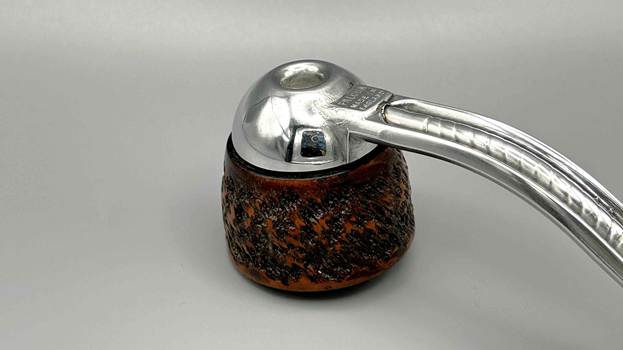
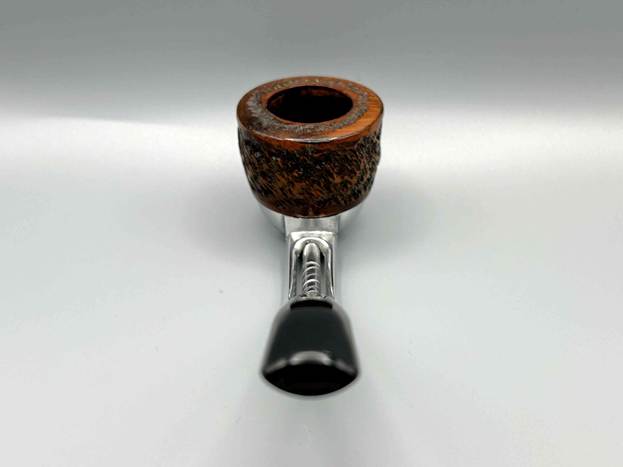
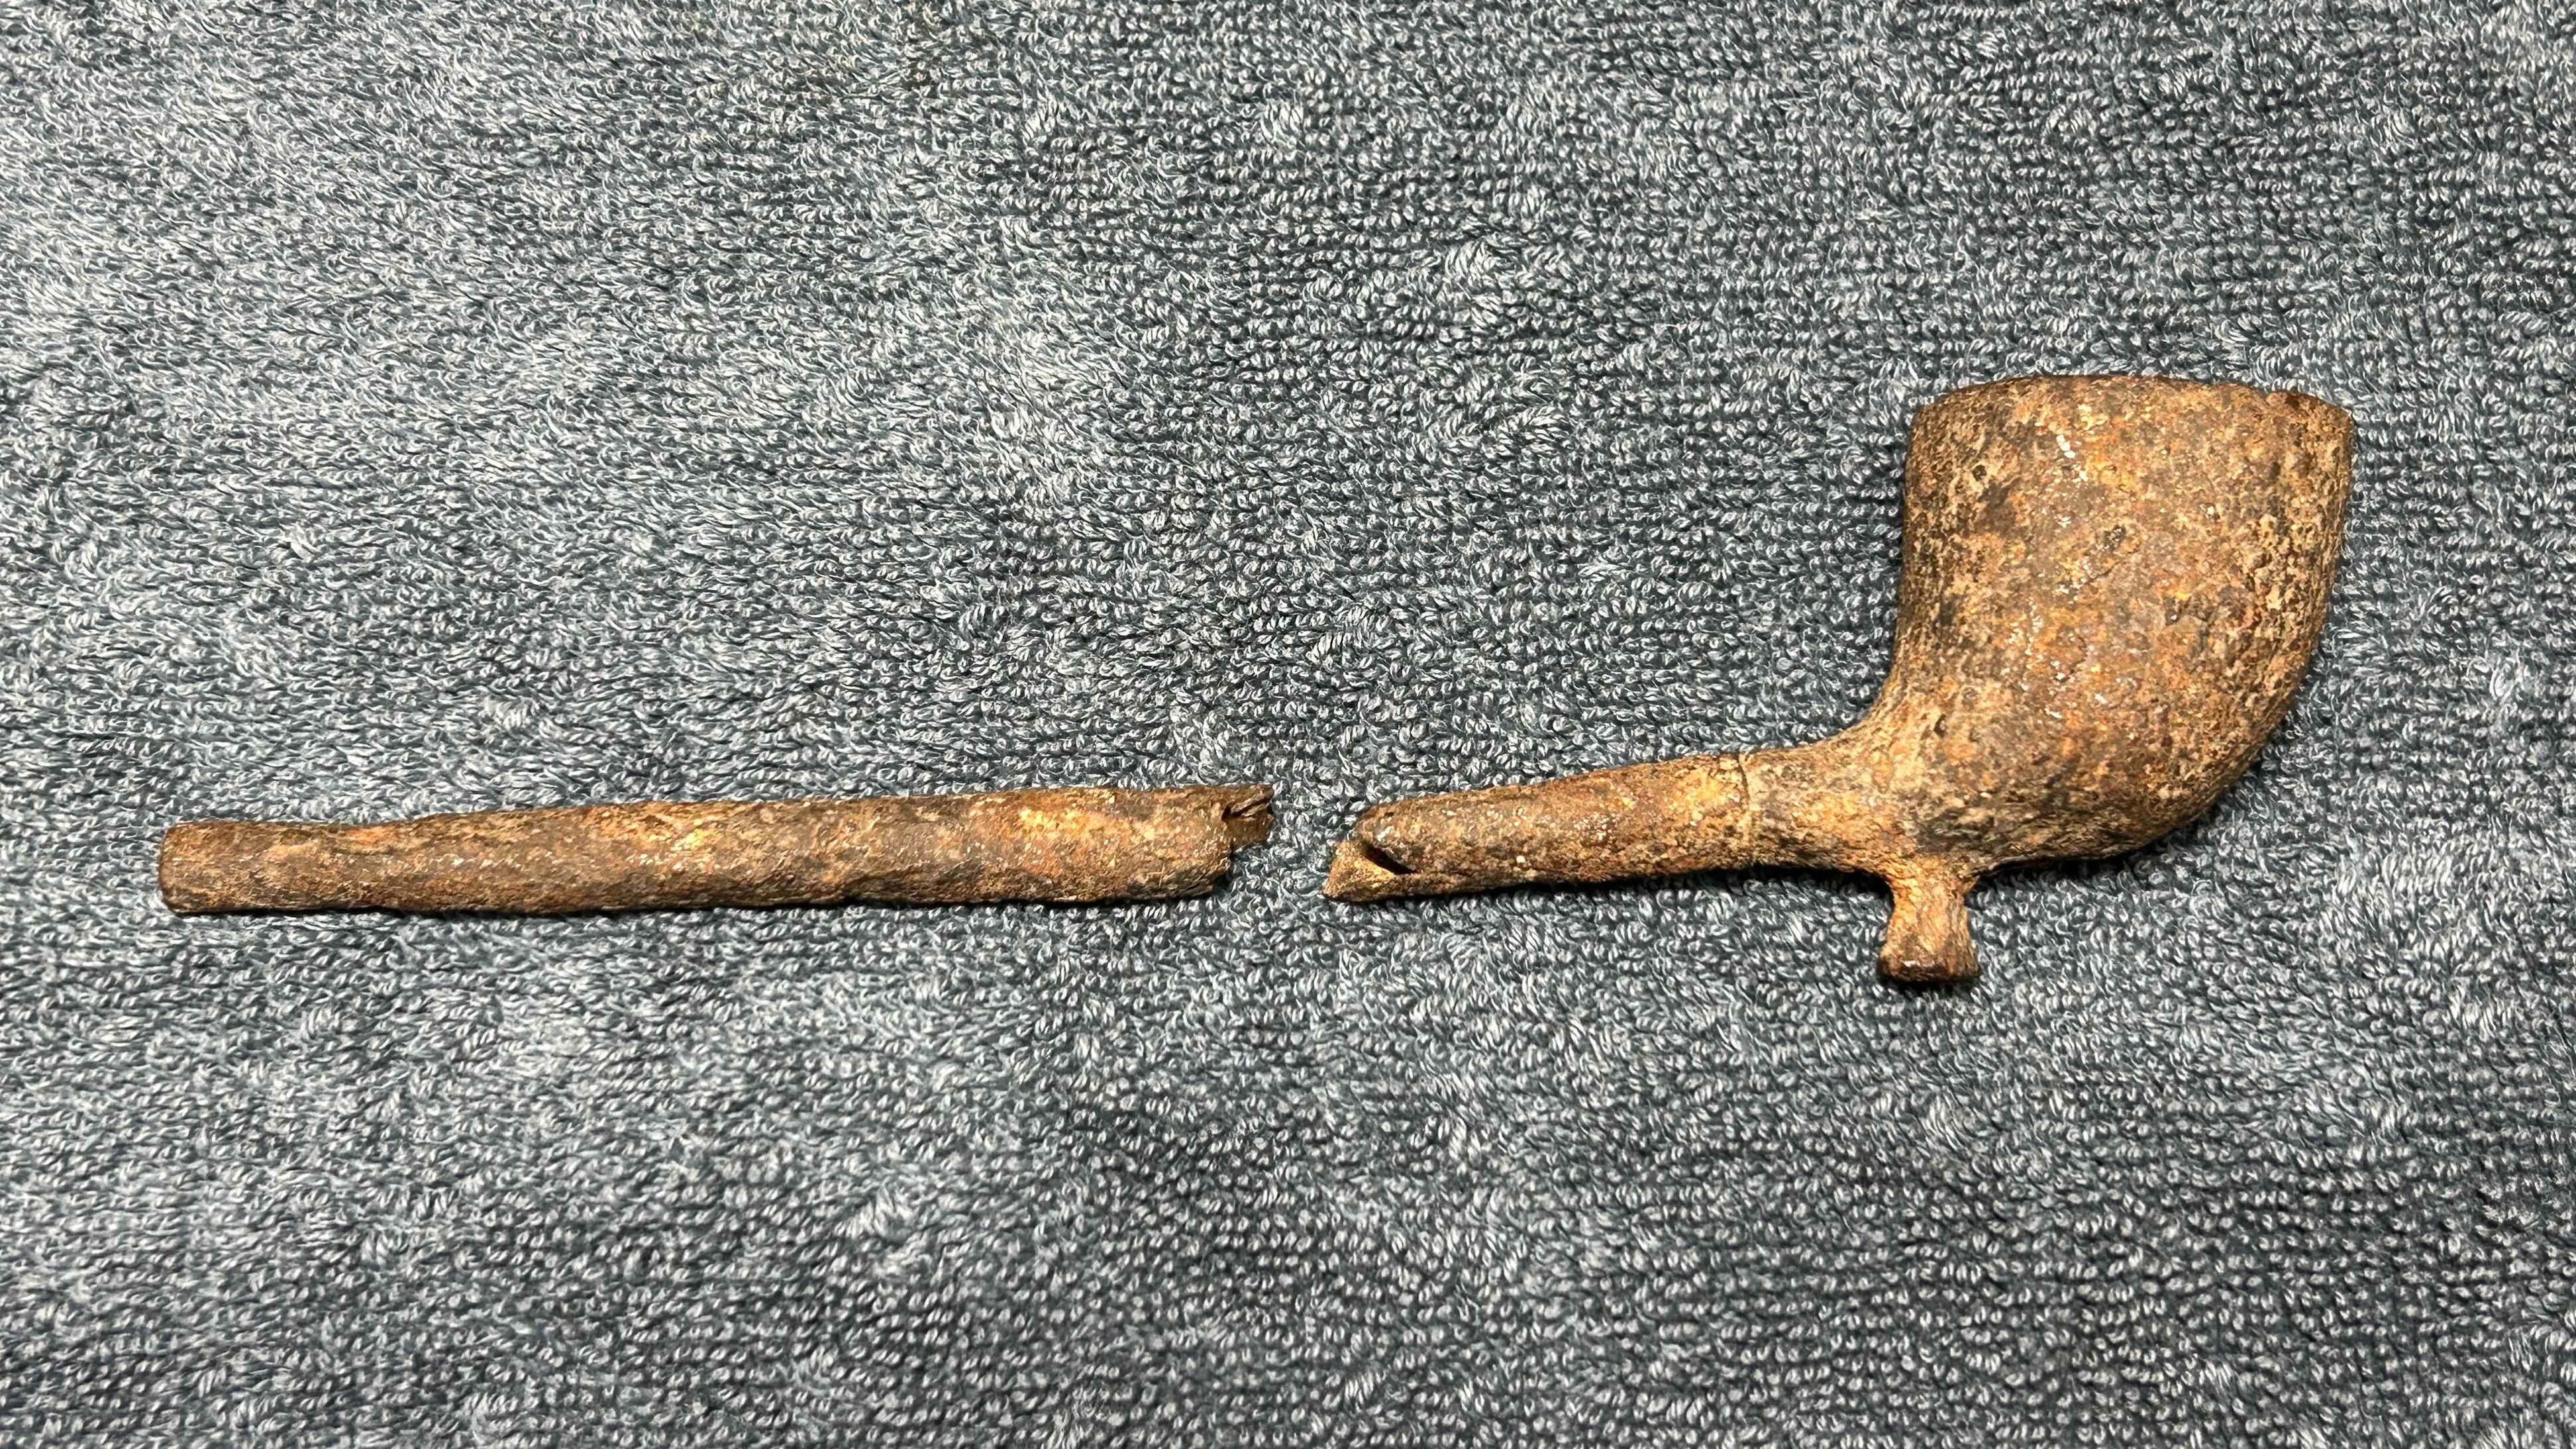
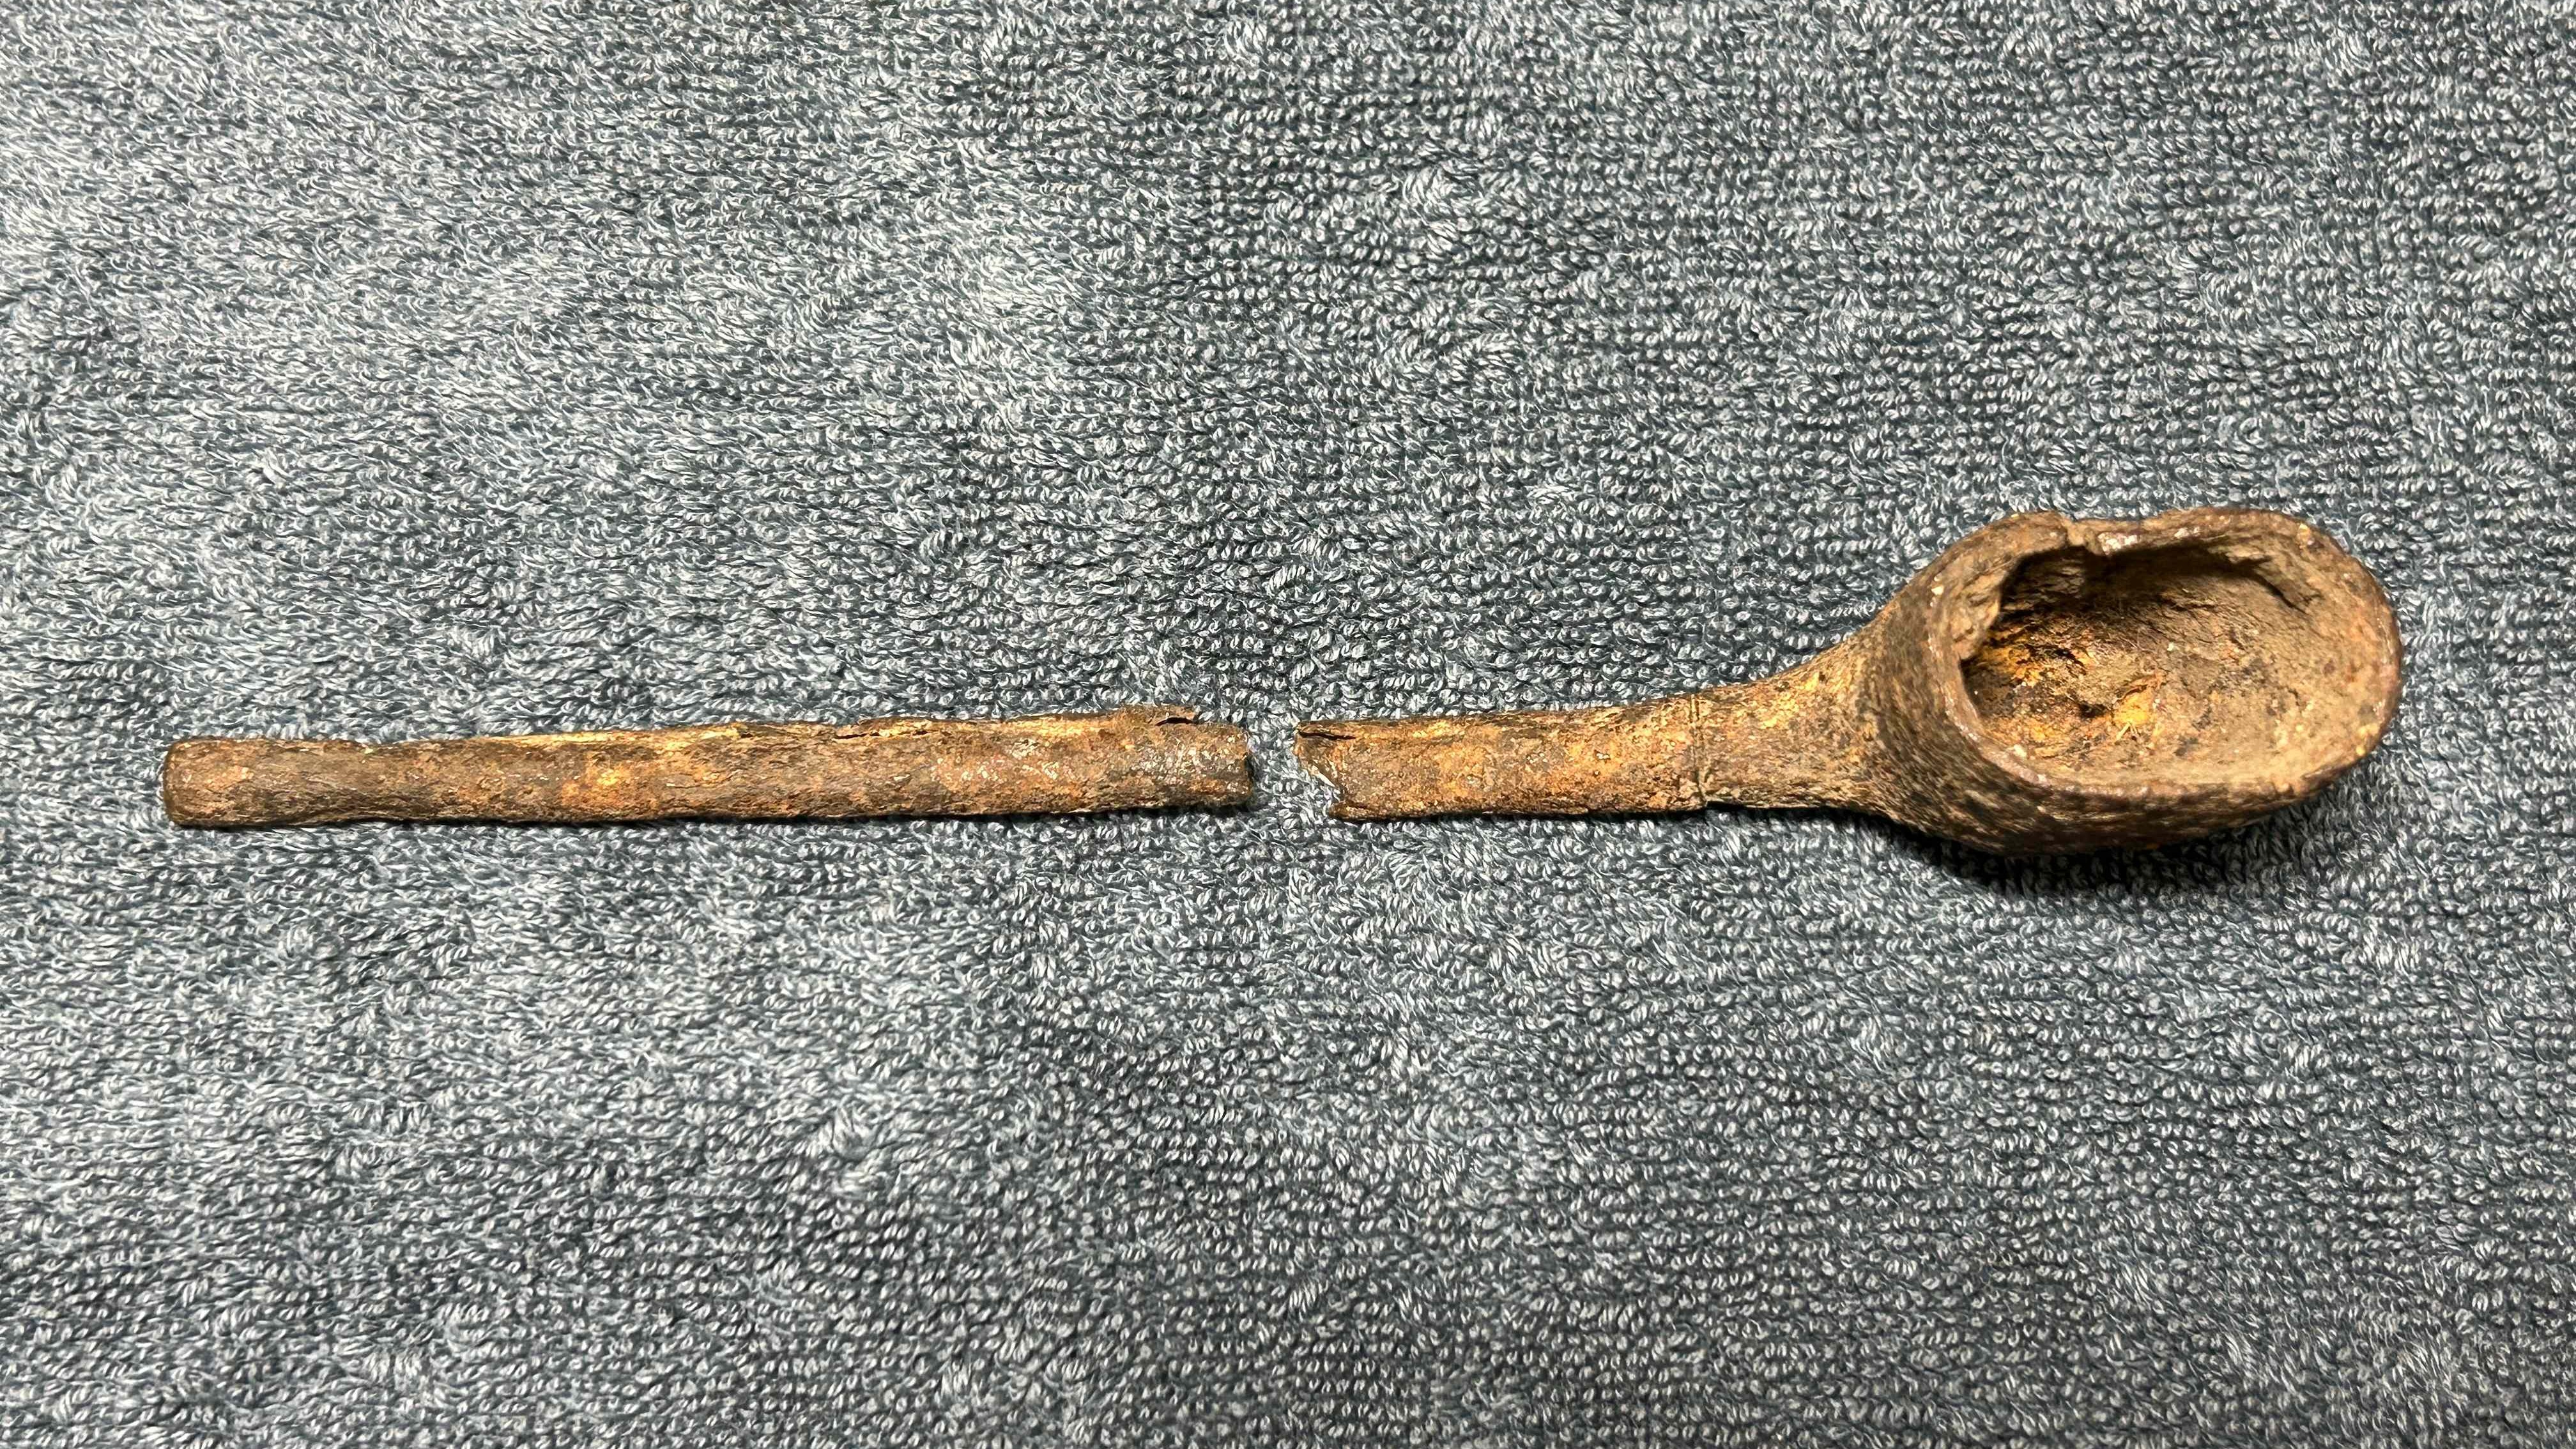
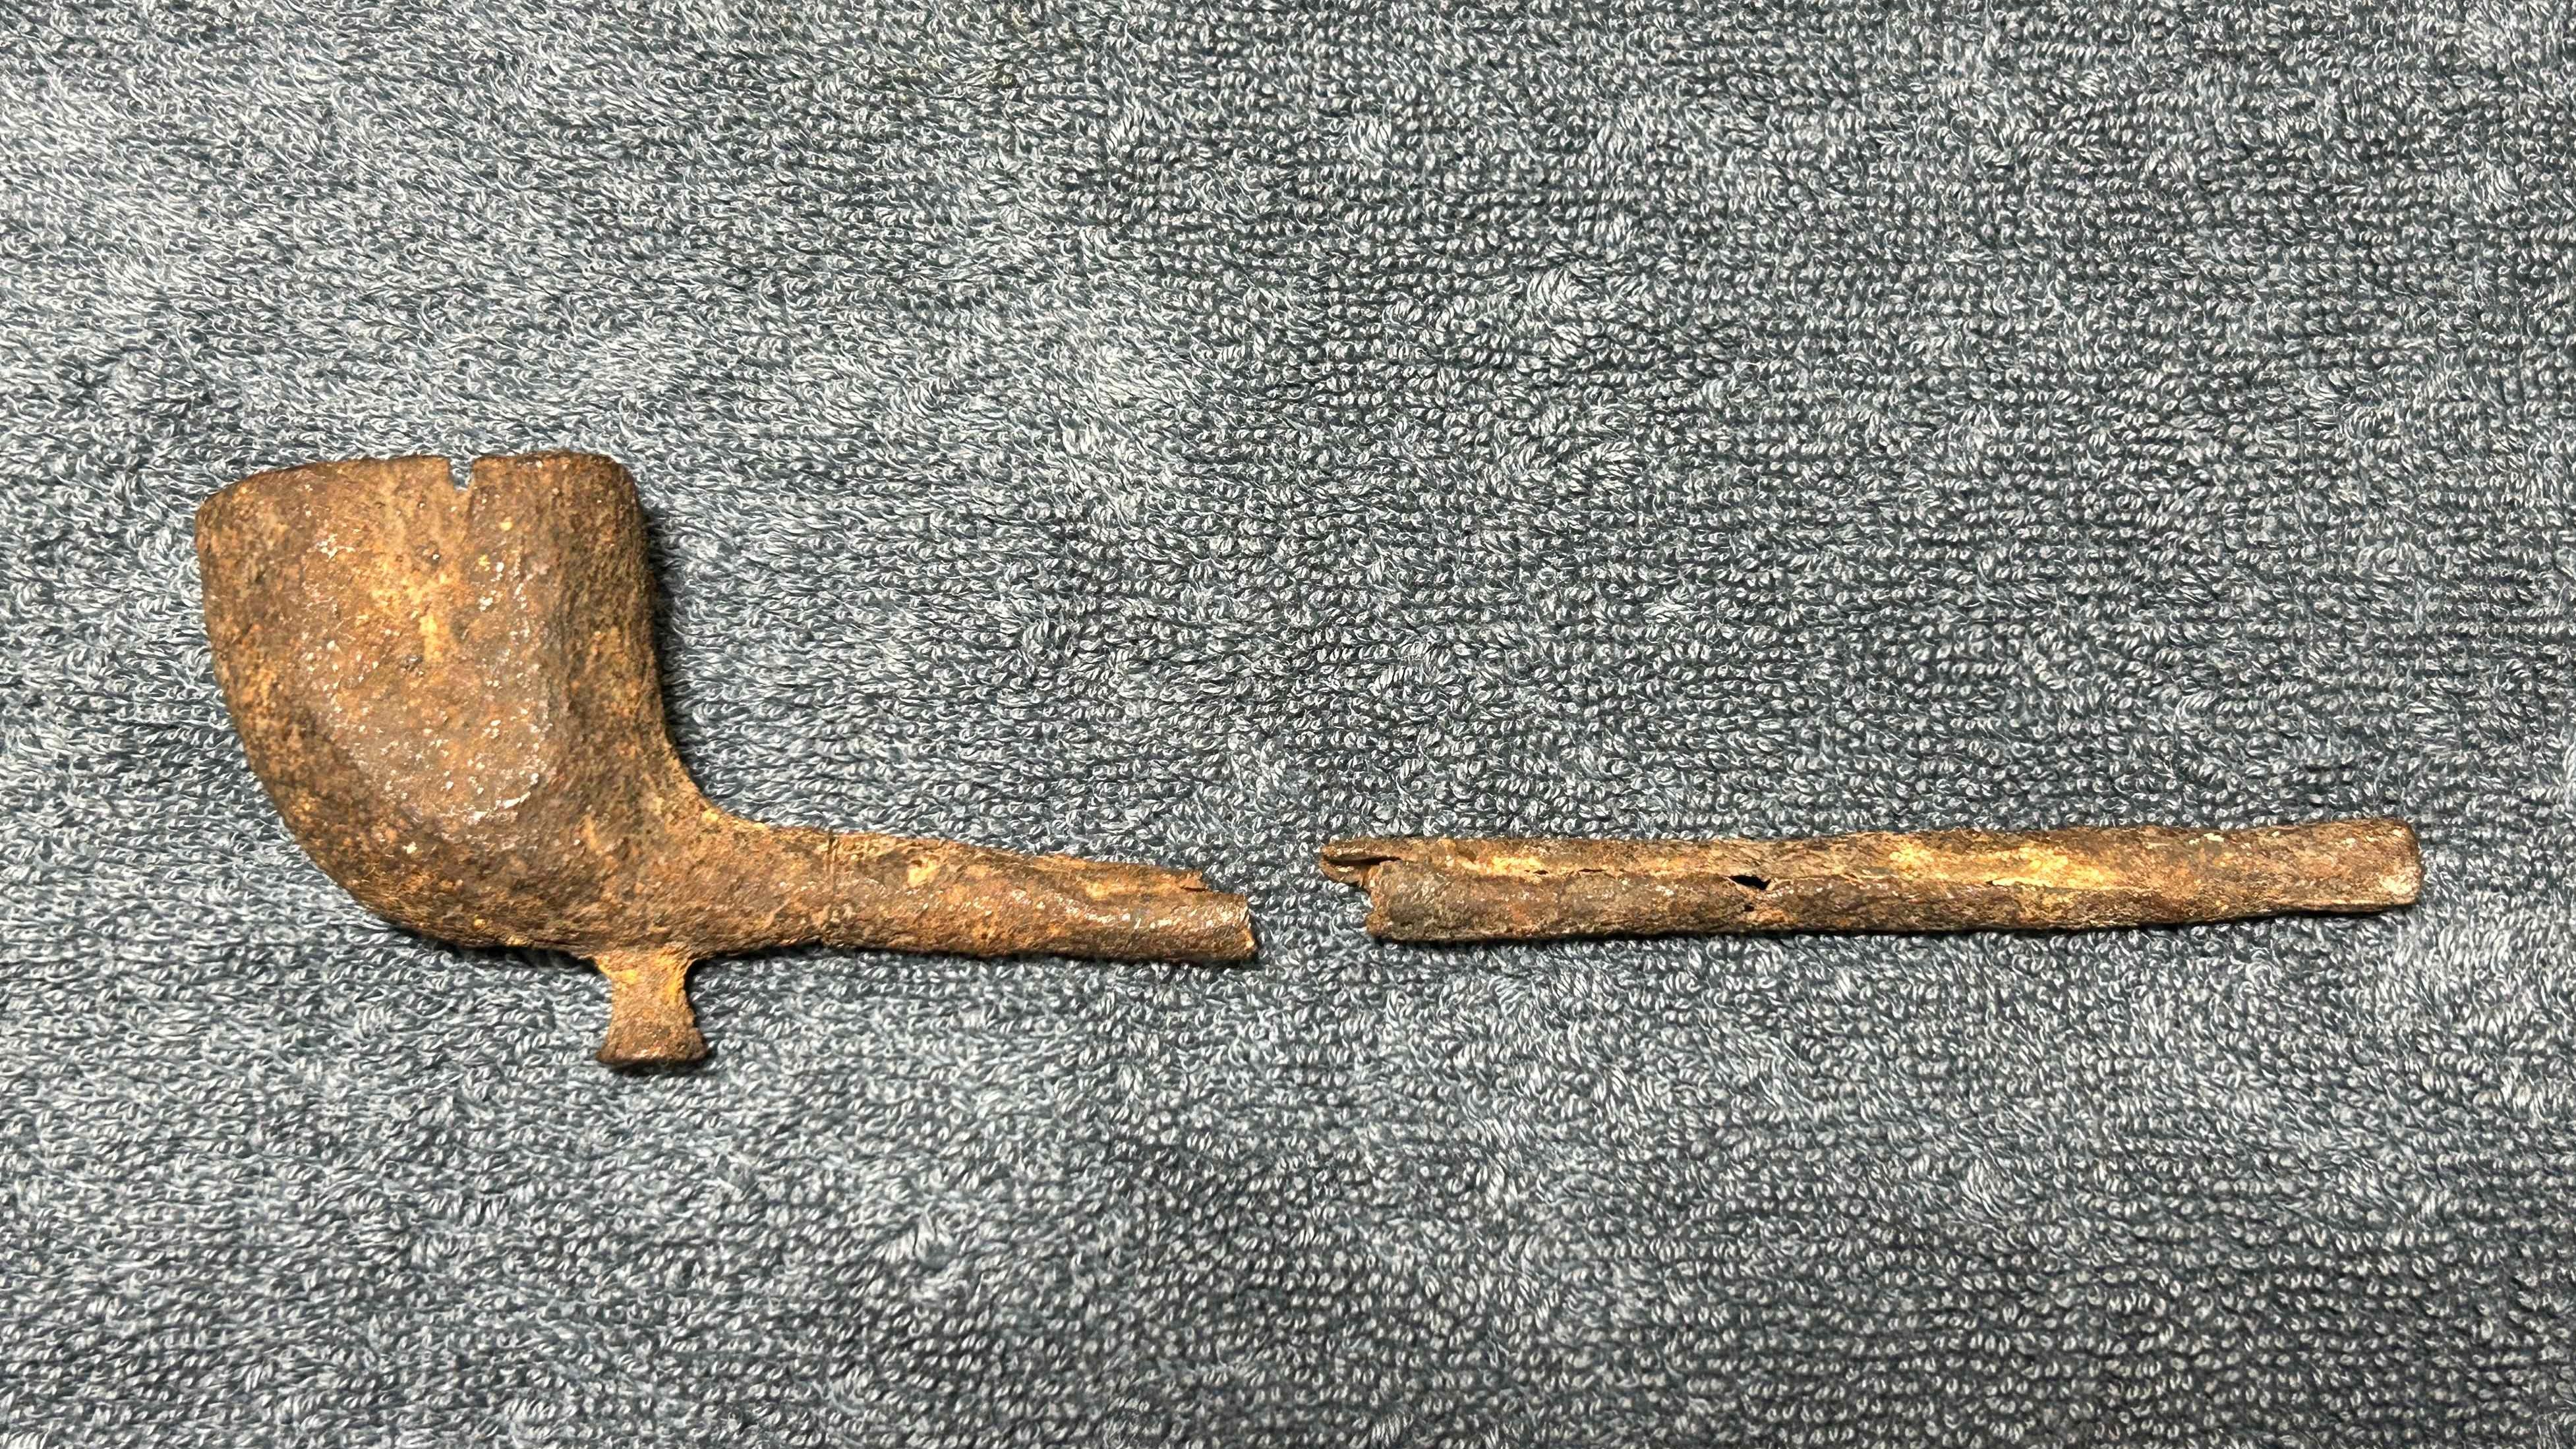
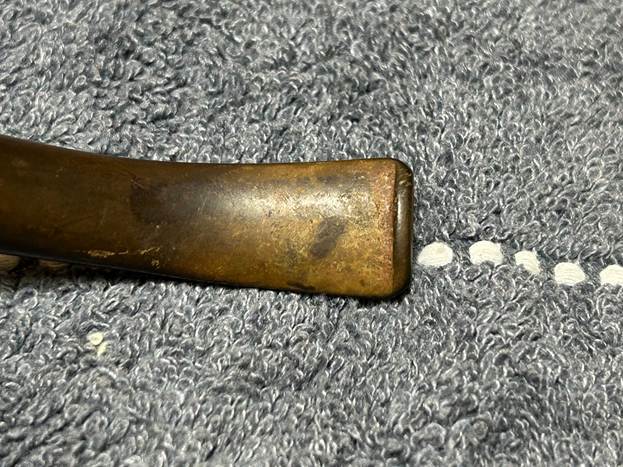
I need your help! I’m reaching out to the collective, worldwide pipe community to seek information on an old and mysterious pipe. This pipe came into my possession in a lot of other pipes – and this one wasn’t even the focus of the lot. I found it at the bottom of the bag of pipes, looking quite sorry and forlorn. As the photos show, it is old, worn, rusted, and broken in two.
So, let me tell you what little I know about it. This pipe is a cutty shape, as you can see. As described in Pipedia, the cutty has a ‘canted tulip shaped bowl’. It also has an ‘ornamental spur, a small bit of material extending from beneath the bowl’. The pipe is definitely made of iron – probably cast iron or wrought iron, though I am certainly not a ferrous expert. I can tell that it is iron because it is very heavy, strongly magnetic, and obviously rusted. In fact, there is a considerable accretion of rust. I’m not at all sure what other accoutrements this pipe might have had. Did it have some sort of mouthpiece? Did it have a bowl insert? Someone asked me if this might have been some sort of mould for making clay pipes or something similar, but I don’t see that as being likely. Perhaps you know better.
The approximate dimensions of the pipe are as follows: length 6 in. (153 mm); height 1⅔ in. (43 mm); bowl length 1¼ in. (31 mm); bowl width ⅞ in. (21 mm); shank diameter ¼ in. (7 mm). The weight of the pipe is 2¾ oz. (78 g). That’s a remarkable weight for such a slender pipe.
I have done a lot of searching, in books and online, and I can’t find anything substantial about this sort of pipe. I have found mention of old metal tobacco pipes – including ones from hundreds of years ago – but only minor references to iron tobacco pipes and very little that would correlate with this pipe specifically. The one pipe I found that was vaguely similar to mine is in the photo below. It came from a 2019 auction of American furniture and decorative arts in Massachusetts and the description read,
Wrought Iron Tobacco Pipe, 18th century, with straight tapering stem and curved bowl, lg. 10 in. The property of Bill McKeever. Estimate $300-500.
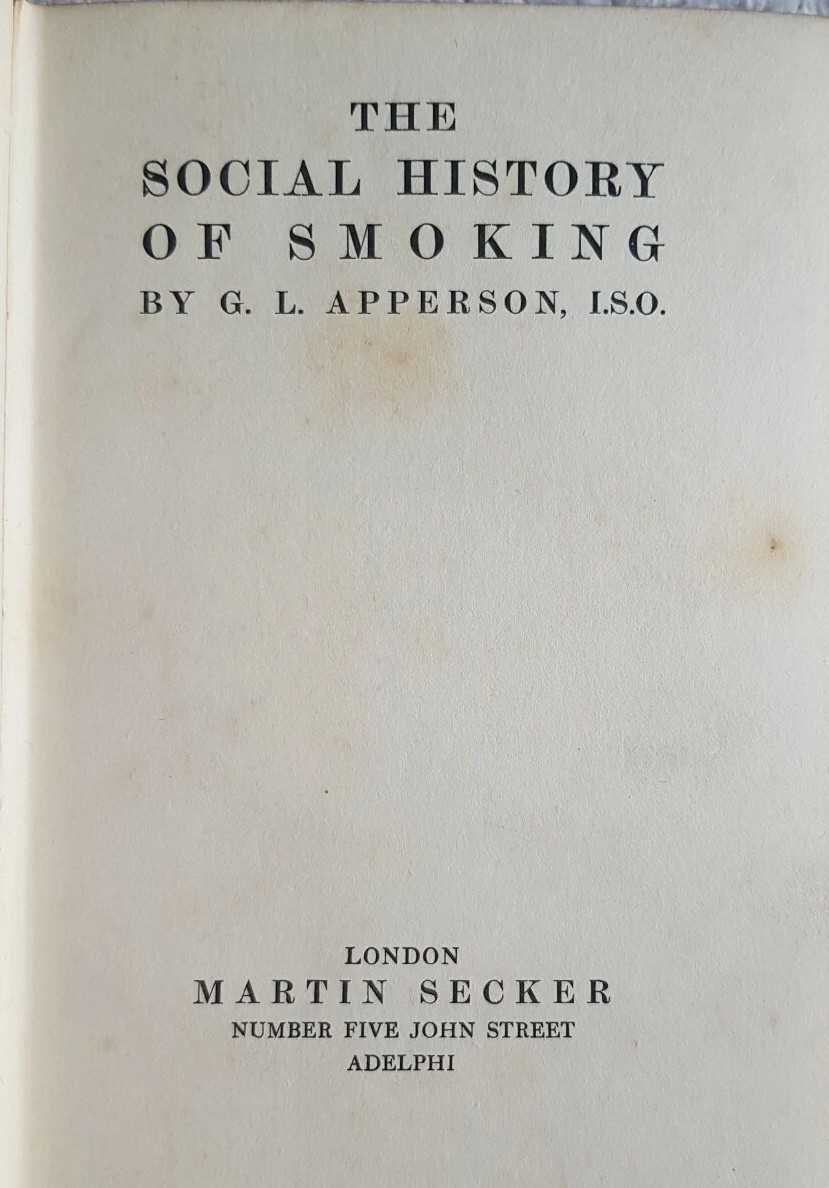
Another clue comes from a 1914 book entitled, The Social History of Smoking, by Scottish scholar, George Apperson. In it, Apperson recalls a scene from Sir Walter Scott’s novel, The Heart of Midlothian, in which Duncan of Knockdunder was smoking his ‘short tobacco-pipe made of iron’. Apperson relates,
Knockdunder’s pipe, according to Scott, was made of iron. This was an infrequent material for tobacco-pipes, but there are a few examples in museums. In the Belfast Museum there is a cast iron tobacco-pipe about eighteen inches long. With it are shown another, very short, also of cast iron, the bowl of a brass pipe, and a pipe, about six inches in length, made of sheet iron.
Sadly, the book came with no photos of said pipe. Furthermore, I could find no examples online of iron pipes in any museum of British-occupied Ireland. Finally, I found another reference to a cast iron pipe at a museum in the Bailiwick of Jersey, one of the Channel Islands. Of course – just my luck – there was a brief description, but no photo! Here is that description:
I asked both Steve and Ben Rapaport if they knew anything about my pipe. They didn’t, but Ben recommended that I contact the Amsterdam Pipe Museum. I did – and I have received precisely zero response. Crickets and tumbleweeds. I mention this only in the remote hope that someone draws the museum’s attention to this and that they respond to my query.
So, with all of that in mind, do you know anything about this pipe? Or about iron smoking pipes in general? Have you seen something like this before? Is this a maritime artefact? Are you aware of any resources that could provide more information? Please send me an email or drop a comment below.
I hope you enjoyed learning what scant information I have on this iron cutty and I hope you can help me learn more. If you are interested in more of my work, please follow me here on Steve’s website or send me an email at kenneth@knightsofthepipe.com. Thank you very much for reading and, as always, I welcome and encourage your comments.
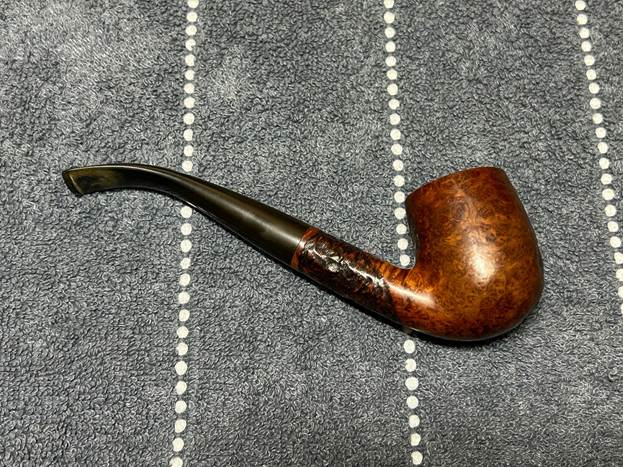
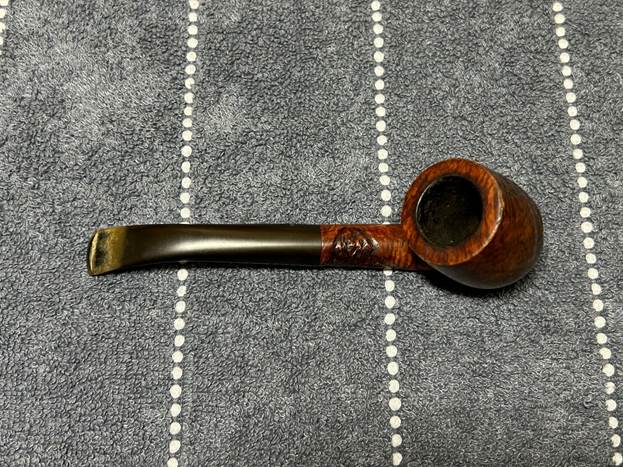
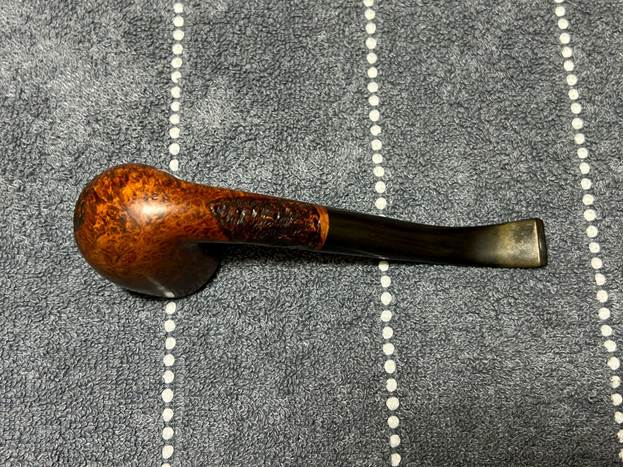
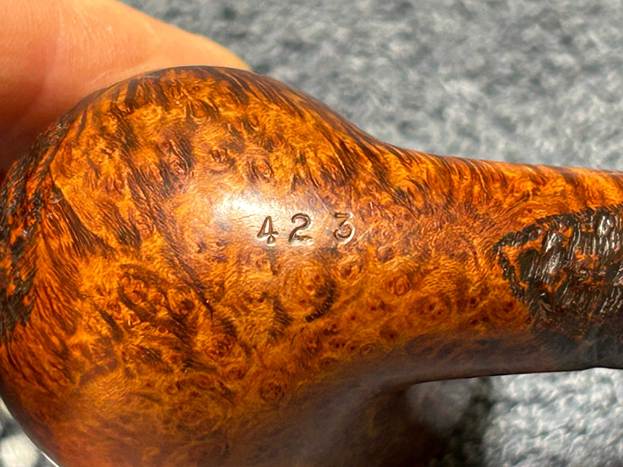
Take a good look at this great pipe. It is a Brigham 423 4-dot bent billiard, with partial rustication and a lovely vulcanite taper stem. I got it in a lot of pipes from a local gentleman. They were well smoked and he took good care of his pipes. Brigham, of course, is the well-known pipe manufacturer of Canada. This is a very elegant pipe and it will be a great addition to any pipe collection. It’s an attractive piece of briar.
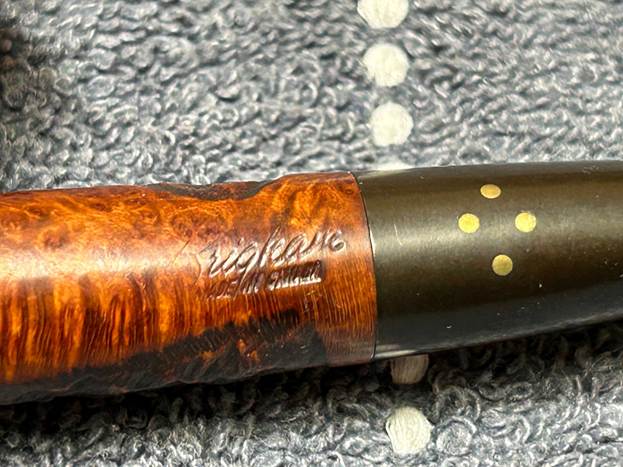
A quick look at the markings on the pipe tell us all we need to know about it. On the left side of the shank, it reads Brigham [over] Made in Canada. On the underside of the bowl, it reads 423 – the shape number. Finally, on the stem, we see four brass pins in a diamond shape.
A quick look at the markings told me a lot of information. The four brass pins are typical of Brigham’s marking system. As Charles Lemon wrote in his book, Brigham Pipes: A Century of Canadian Briar:
A single brass pin inserted in the left flank of the stem near the shank was originally used as a physical anchor to hold the press-fit aluminum tenon/filter holder securely in the stem. Brigham built on this manufacturing necessity by setting additional pins or Dots as they came to be known to denote the quality level of his pipes.
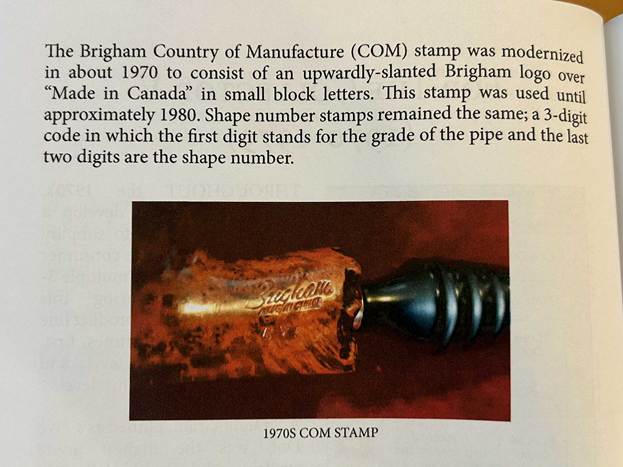
I was pretty sure I knew how old this pipe was, but felt it was best to check in Lemon’s book. I photographed a couple of pages and highlighted the relevant parts. We can conclude definitively that this pipe dates from the 1970s. However, whether it is from the earlier period or the later period (as indicated in the photo below), I do not know.
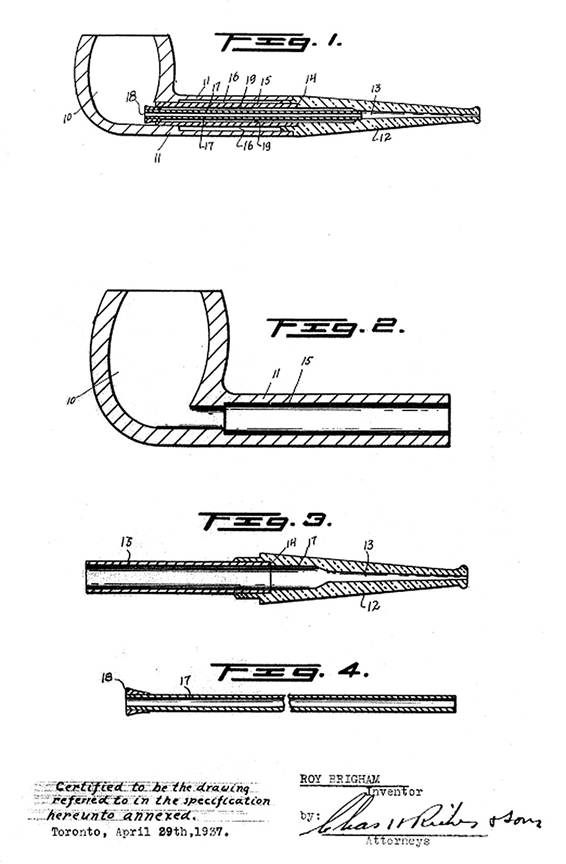
We can see that the shape number 423 translates as follows: the ‘4’ corresponds to the four brass pins on the stem, indicating the ‘Four Dot’ level of pipe. The ‘23’ corresponds to the shape of the pipe, which is listed in Lemon’s book as ‘Medium Bent Billiard, Round Taper Stem’. For a more thorough view of Brigham’s history, please visit Pipedia’s article here. Meanwhile, here is a view of Brigham’s patented filter system:
Anyway, both the stem and stummel were in very good condition. There were some minor tooth marks on the stem and some oxidation. The rim of the stummel had some wear on it, but it turned out to be nothing of note.
The stem’s calcification was notable. I used an old butter knife and gently scraped some of the thicker accretion off. Doing this now helps later in removing the oxidation. I used isopropyl alcohol on a few cotton rounds and wiped down the stem to provide an initial cleaning of filth before moving on to the next steps. The primary cleaning came next. I disinfected the inside of the stem with both pipe cleaners and cotton swabs dipped in lemon-infused 99% isopropyl alcohol. I scrubbed thoroughly to make sure the interior was very clean.
The goal of the next step is the removal (or minimization) of oxidation. Going to my sink, I used cream cleanser, cotton rounds, and a toothbrush, and scoured the stem to remove as much surface oxidation as possible. As the photos show, the result was a hideous, ochre-coloured mess – but better off the stem than on it.
Once the stem was reasonably clean, I soaked it overnight in some Briarville Stem Oxidation Remover. This solution works to draw oxidation in the stem to the surface of the vulcanite. This is a major aid and an important step in ensuring a clean stem. The following day, I drew out the stem from its bath and scrubbed the lingering fluid with a toothbrush.
The penultimate step for the stem is sanding. First, with my set of needle files, I reduced the bulk of the cyanoacrylate repairs. I removed the excess adhesive as near to the surface as possible, without cutting into the vulcanite. Following that, I used all nine of the micromesh sanding pads (1,500 through 12,000 grit) to sand out flaws, even out the vulcanite, and provide gentle polishing of the finished surface. I also applied pipe-stem oil while using the last five micromesh pads. There was a wonderful, deep black shine to the stem when I was done.
As the stem was (nearly) complete, I moved on to the stummel. The first step was to ream out the bowl – that is to say, remove all the cake inside the bowl. This accomplished a couple of things. First (and most obviously), it cleaned the bowl and provided a refurbished chamber for future smoking. Second, when the old cake was removed, I could inspect the interior walls of the bowl and determine if there was damage or not. I used a reamer and a piece of sandpaper taped to a wooden dowel. Collectively, these ensured that all the debris was removed.
My next step was to remove the lava on the rim. For this, I took a piece of machine steel and gently scraped the lava away. The metal’s edge is sharp enough to remove what I need, but not so sharp that it damages the rim.
Similar to the stem, I then cleaned the stummel with both pipe cleaners and cotton swabs dipped in lemon-infused 99% isopropyl alcohol. With a pipe this dirty, it took quite a while and much cotton to clean. Boy-oh-boy, this pipe was dirty.
I then decided to ‘de-ghost’ the pipe – that is to say, exorcize the remaining filth from the briar. I filled the bowl and the shank with cotton balls, then saturated them with 99% isopropyl alcohol. I let the stummel sit overnight. This caused the remaining oils, tars and smells to leach out into the cotton.
To tidy up the briar, I wiped down the outside, using a solution of a pH-neutral detergent and some distilled water, with cotton rounds. I also used a toothbrush in the crevices. This did a good job of cleaning any latent dirt on the surface of the briar. The last step of the cleaning process was to scour the inside of the stummel with the same mild detergent and tube brushes. This was the culmination of a lot of hard work in getting the pipe clean.
I used all nine micromesh pads (1,500 through 12,000 grit) to sand the outside of the stummel and finish it off. This sanding minimizes flaws in the briar and provides a beautiful smoothness to the wood. I rubbed some LBE Before & After Restoration Balm into the briar and let it sit for 30 minutes or so. The balm moisturizes the wood and gives a beautiful depth to the briar. I then buffed the stummel with a microfibre cloth.
For the final step, I took the pipe to my bench polisher and carefully buffed it – first with a blue diamond compound, then with three coats of carnauba wax. This procedure makes the pipe look its best – the stummel sings and the stem glows.
All done! This 4-Dot Brigham 423 bent billiard looks fantastic again and is ready to be enjoyed by its next owner. I am pleased to announce that this pipe is for sale! If you are interested in acquiring it for your collection, please have a look in the ‘Canadian’ section of the store here on Steve’s website. You can also email me directly at kenneth@knightsofthepipe.com. The approximate dimensions of the pipe are as follows: length 5⅛ in. (132 mm); height 1⅞ in. (47 mm); bowl diameter 1⅜ in. (36 mm); chamber diameter ¾ in. (20 mm). The weight of the pipe is 1½ oz. (44 g). I hope you enjoyed reading the story of this pipe’s restoration as much as I enjoyed restoring it. If you are interested in more of my work, please follow me here on Steve’s website or send me an email. Thank you very much for reading and, as always, I welcome and encourage your comments.
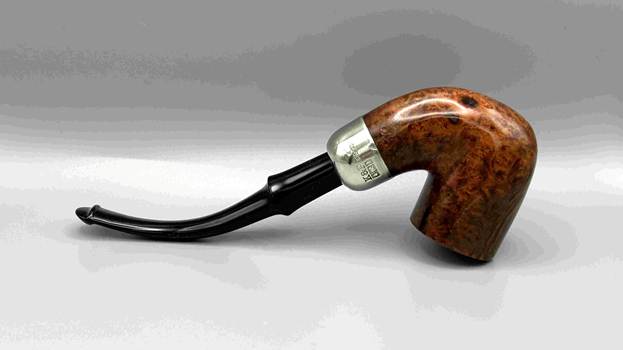
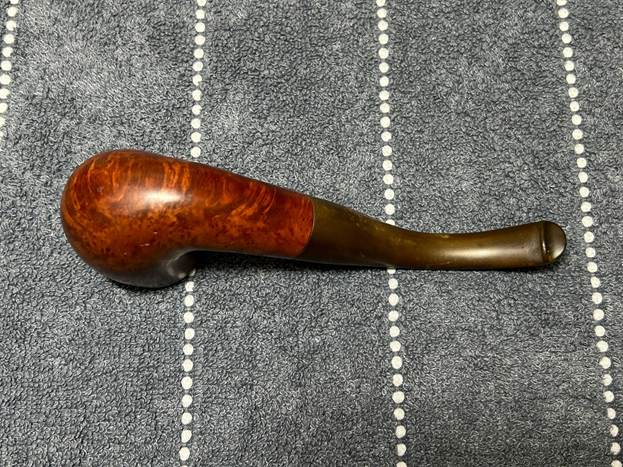
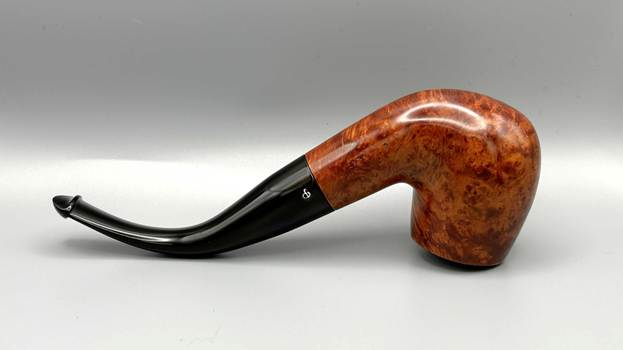
Attention all Peterson admirers! Have a look at this very nice Peterson Kapet XL90. It is a robust bent billiard pipe with a good-looking taper stem which includes Peterson’s classic P-lip. It’s thick and chunky, and feels wonderful in hand. It has great wood grain and is in good condition. I’ve had this one in my boxes for a while and it’s time to clean it up. This might just be the pipe for you.
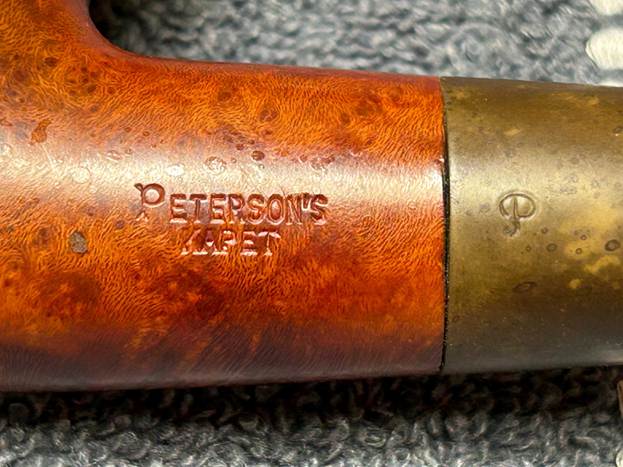
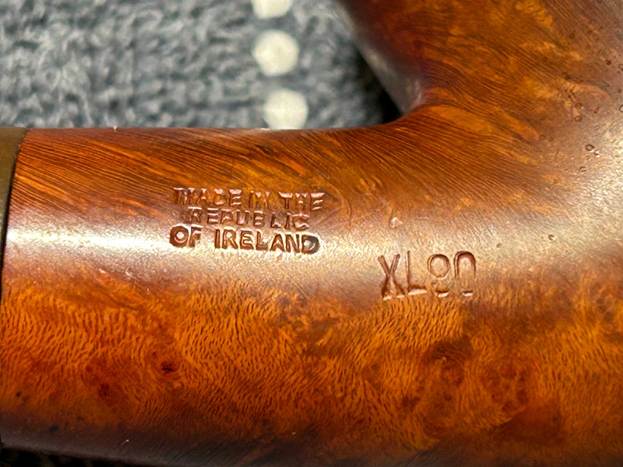
Let’s look at the markings. On the right side of the shank, we’ve got Peterson’s [over] Kapet. Then, on the left side, we have Made in the [over] Republic [over] of Ireland. Finally, there is the shape number, XL90. Of course, there is also the stylized P on the stem, indicating the famous Peterson company of Ireland.
I encourage you to read the Pipedia article on Peterson pipes here. It has a lot of good history and information on the venerable Irish company – including the following:
1950 – 1989 The Republic Era – From 1950 to the present time, the stamp for this era is “Made in the Republic of Ireland” in a block format generally in three lines but two lines have been used with or without Republic being abbreviated. During the 1950’s and 60’s the Kapp & Peterson Company was still in the ownership of the Kapp family. However 1964 saw the retiral of the company Managing Director Frederick Henry(Harry) Kapp.
To learn more about the Kapet line, I looked in The Peterson Pipe book by Mark Irwin and Gary Malmberg. It contained the following information:
Kapet (1925-87) Line first described in 1925 brochure and featured in occasional catalogs through 1987. Early specimens will be stamped IRISH over FREE STATE. Described in 1937 catalog as available in dark plum or natural finish. Featured an aluminum “inner tube” or stinger until 1945. Mid-century specimens may be stamped Made In over Ireland. Specimens from 1970 on may have mounts with hallmarks.
As usual, I owe a debt of gratitude to Mark Irwin of Peterson Pipe Notes. He has a very interesting article on the XL90 (and related shapes) and I highly recommend having a look here. The long and short of it is that the XL90 is the same as the 307, and is one of the old classic shapes from Peterson. Given that my pipe is a republic-era pipe, we can safely say that this pipe dates from between 1948 and 1987.
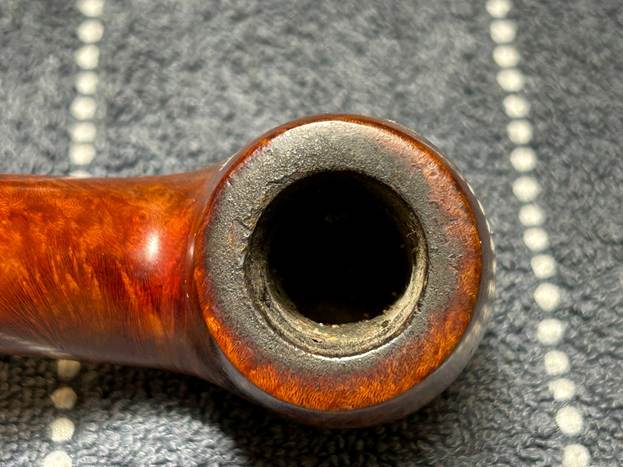
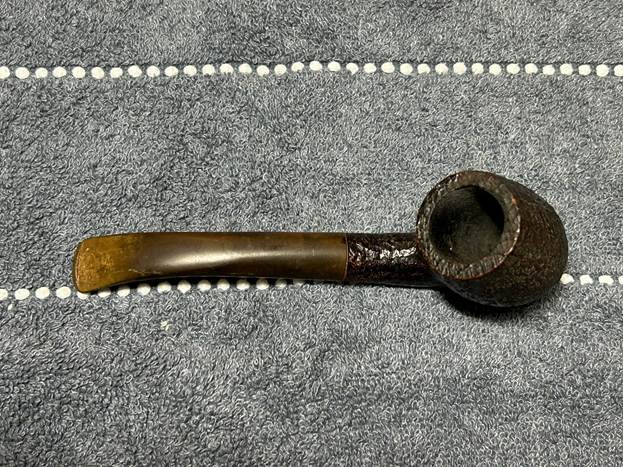
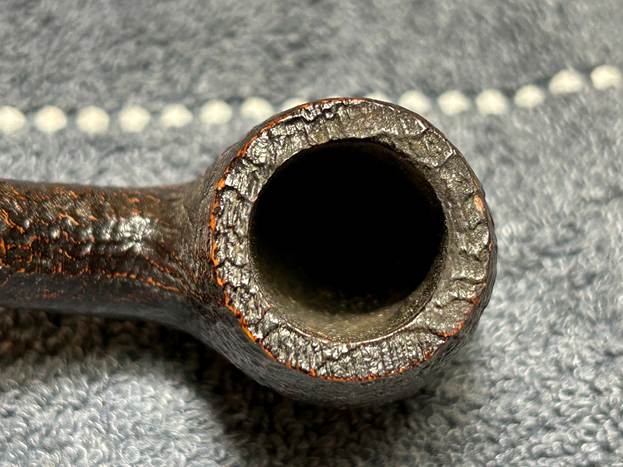
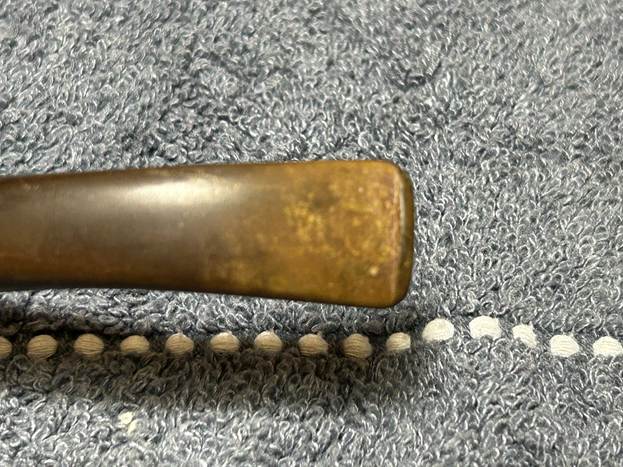
Let’s get on with it. This pipe is in nice shape and should clean up very well. The rim has some lava on it, but nothing serious. There is cake in the bowl, but nothing outlandish. The wood is dirty and just needs some TLC – including a few odd scratches on one side of the bowl. The stem is heavily oxidized and has some calcification. There are some small tooth marks, but easily addressed.
I used isopropyl alcohol on a few cotton rounds and wiped down the stem to provide an initial cleaning of filth before moving on to the next steps. The primary cleaning came next. I disinfected the inside of the stem with both pipe cleaners and cotton swabs dipped in lemon-infused 99% isopropyl alcohol. I scrubbed thoroughly to make sure the interior was very clean.
The goal of the next step is the removal (or minimization) of oxidation. Going to my sink, I used cream cleanser, cotton rounds, and a toothbrush, and scoured the stem to remove as much surface oxidation as possible. As the photos show, the result was a hideous, ochre-coloured mess – but better off the stem than on it.
Once the stem was reasonably clean, I soaked it overnight in some Briarville Stem Oxidation Remover. This solution works to draw oxidation in the stem to the surface of the vulcanite. This is a major aid and an important step in ensuring a clean stem. The following day, I drew out the stem from its bath and scrubbed the lingering fluid with a toothbrush. Due to the severity of the oxidation, I then repeated the scrubbing with the cream cleanser for maximum effect.
As the stem was now clean and dry, I set about fixing the marks and dents in the vulcanite. This was done by filling those divots with black cyanoacrylate adhesive, impregnated with carbon and rubber. I left this to cure and moved on. After this, I painted the logo on the stem with some enamel nail polish. I restored the logo carefully and let it fully set before proceeding.
The penultimate step for the stem is sanding. First, with my set of needle files, I reduced the bulk of the cyanoacrylate repairs. I removed the excess adhesive as near to the surface as possible, without cutting into the vulcanite. Following that, I used all nine of the micromesh sanding pads (1,500 through 12,000 grit) to sand out flaws, even out the vulcanite, and provide gentle polishing of the finished surface. I also applied pipe-stem oil while using the last five micromesh pads. There was a wonderful, deep black shine to the stem when I was done.
As the stem was (nearly) complete, I moved on to the stummel. The first step was to ream out the bowl – that is to say, remove all the cake inside the bowl. This accomplished a couple of things. First (and most obviously), it cleaned the bowl and provided a refurbished chamber for future smoking. Second, when the old cake was removed, I could inspect the interior walls of the bowl and determine if there was damage or not. I used a reamer, a pipe knife, and a piece of sandpaper taped to a wooden dowel. Collectively, these ensured that all the debris was removed.
My next step was to remove the lava on the rim. For this, I took a piece of machine steel and gently scraped the lava away. The metal’s edge is sharp enough to remove what I need, but not so sharp that it damages the rim.
Similar to the stem, I then cleaned the stummel with both pipe cleaners and cotton swabs dipped in lemon-infused 99% isopropyl alcohol. With a pipe this dirty, it took quite a while and a huge amount of cotton to clean.
I then decided to ‘de-ghost’ the pipe – that is to say, exorcize the remaining filth from the briar. I filled the bowl and the shank with cotton balls, then saturated them with 99% isopropyl alcohol. I let the stummel sit overnight. This caused the remaining oils, tars and smells to leach out into the cotton.
To tidy up the briar, I wiped down the outside, using a solution of a pH-neutral detergent and some distilled water, with cotton rounds. I also used a toothbrush in the crevices. This did a good job of cleaning any latent dirt on the surface of the briar. The last step of the cleaning process was to scour the inside of the stummel with the same mild detergent and tube brushes. This was the culmination of a lot of hard work in getting the pipe clean.
Having completed that, I was able to address those nicks on the side of the bowl. I dug out my iron and a damp cotton flannel cloth. By laying the cloth over the affected areas and applying the iron to it, the hot and moist steam can cause the wood to swell slightly and return to shape. There was some good improvement. A small number of scratches remained, but it was much better. I apologize for having neglected to photograph this.
I used all nine micromesh pads (1,500 through 12,000 grit) to sand the outside of the stummel and finish it off. This sanding minimizes flaws in the briar and provides a beautiful smoothness to the wood. I rubbed some LBE Before & After Restoration Balm into the briar and let it sit for 30 minutes or so. The balm moisturizes the wood and gives a beautiful depth to the briar. I then buffed the stummel with a microfibre cloth.
For the final step, I took the pipe to my bench polisher and carefully buffed it – first with a blue diamond compound, then with three coats of carnauba wax. This procedure makes the pipe look its best – the stummel sings and the stem glows.
All done! This Peterson’s Kapet XL90 chubby bent billiard looks fantastic again and is ready to be enjoyed by its next owner. I am pleased to announce that this pipe is for sale! If you are interested in acquiring it for your collection, please have a look in the ‘Irish’ section of the store here on Steve’s website. You can also email me directly at kenneth@knightsofthepipe.com. The approximate dimensions of the pipe are as follows: length 6⅛ in. (154 mm); height 2⅛ in. (53 mm); bowl diameter 1⅝ in. (40 mm); chamber diameter ¾ in. (20 mm). The weight of the pipe is 2⅔ oz. (69 g). I hope you enjoyed reading the story of this pipe’s restoration as much as I enjoyed restoring it. If you are interested in more of my work, please follow me here on Steve’s website or send me an email. Thank you very much for reading and, as always, I welcome and encourage your comments.
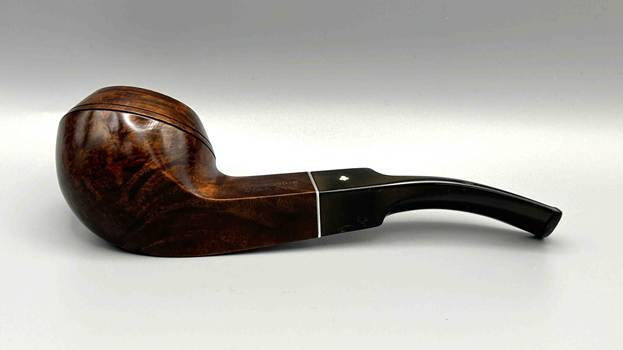
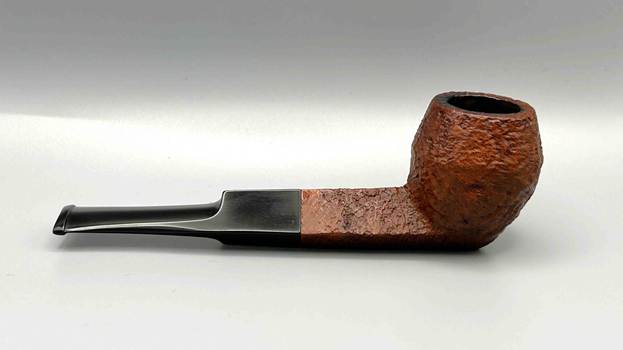
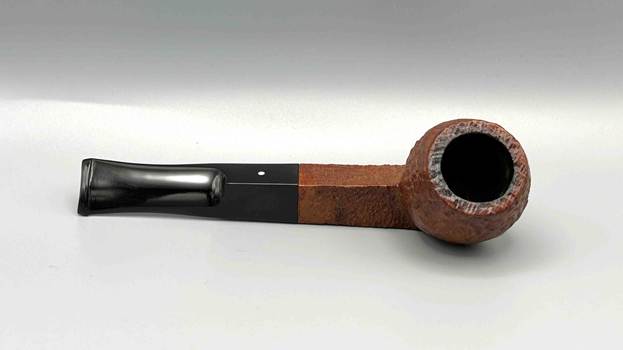
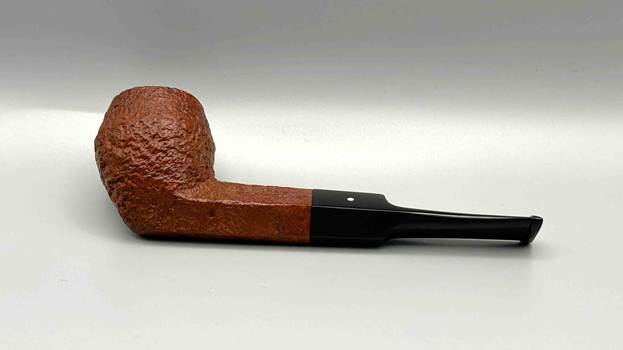
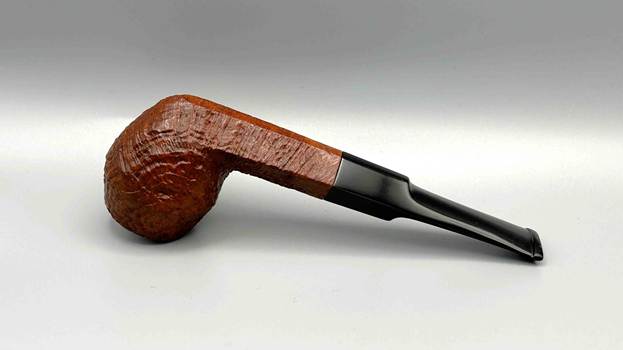
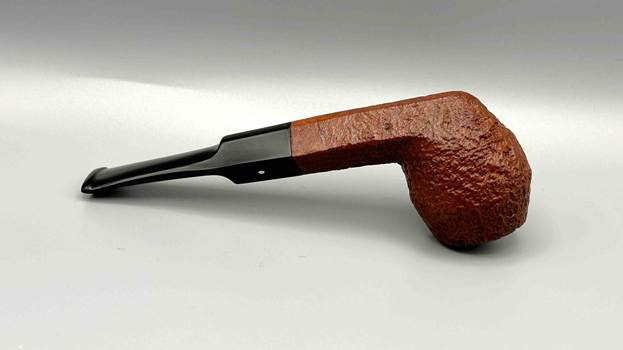
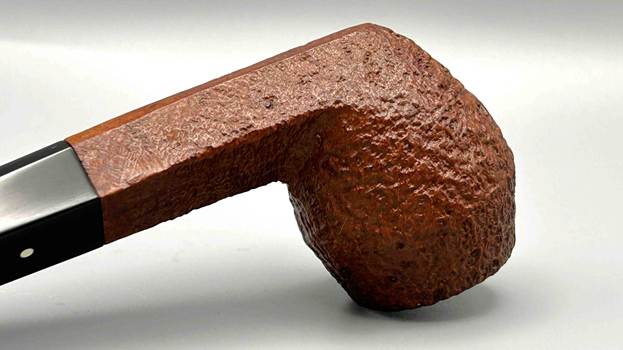
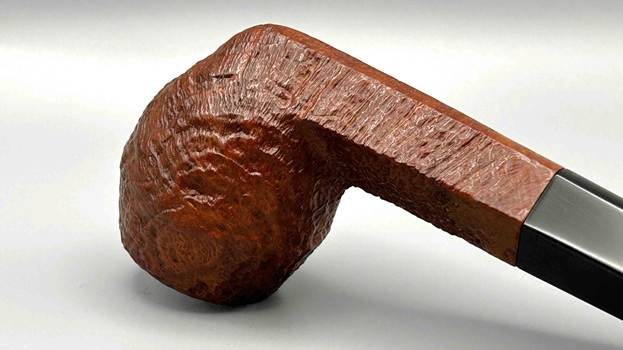
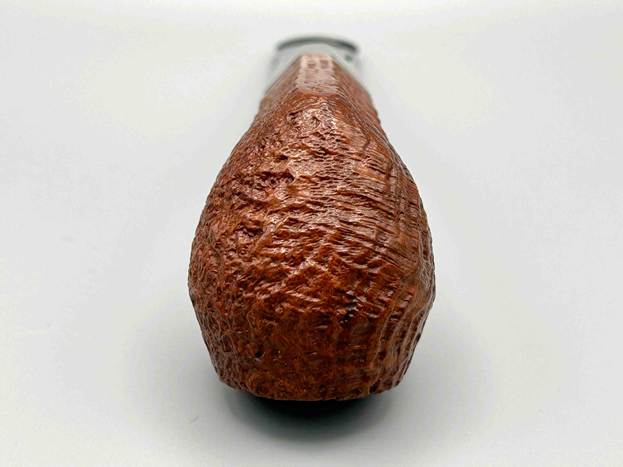
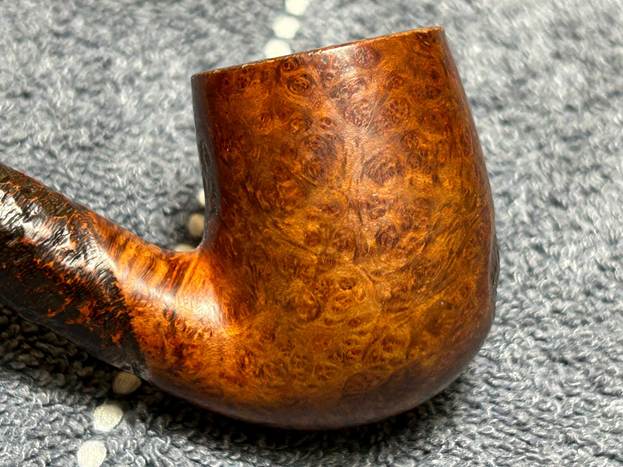
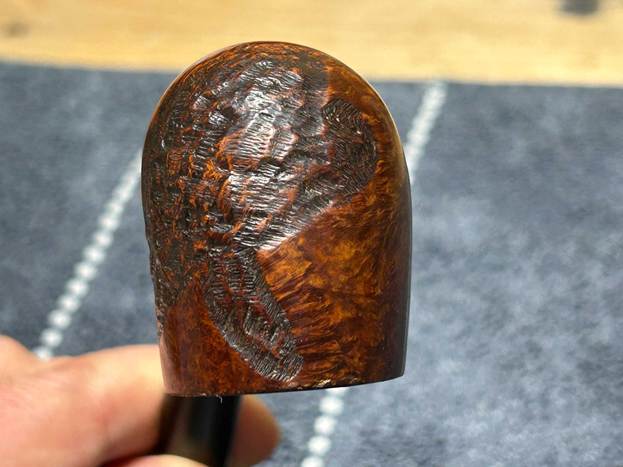
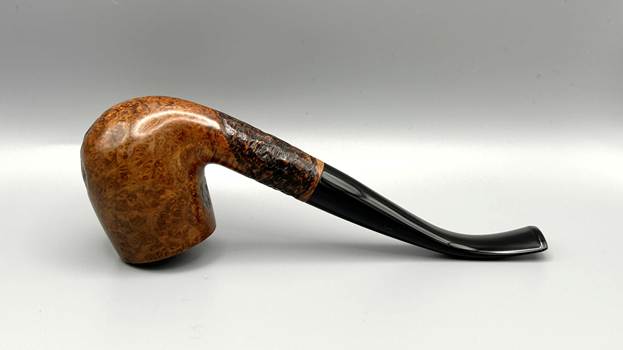
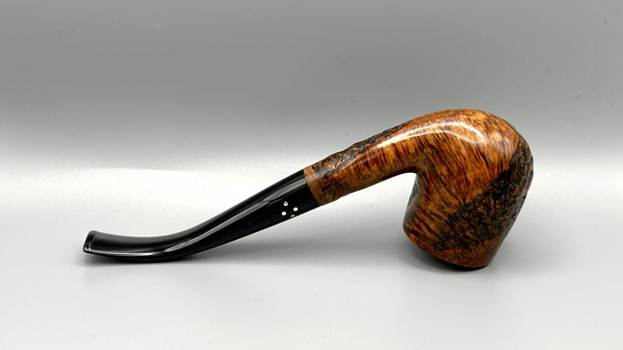
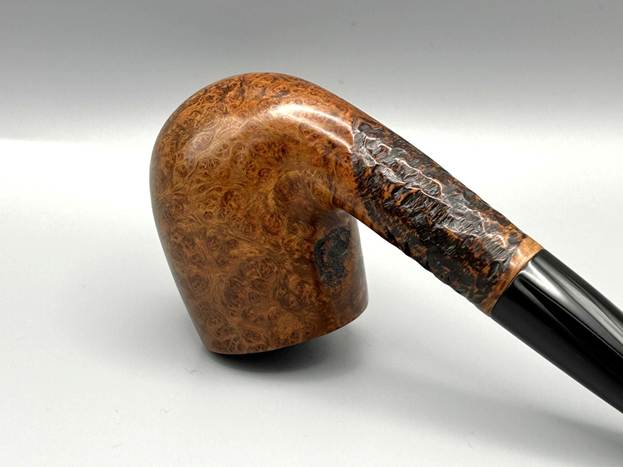
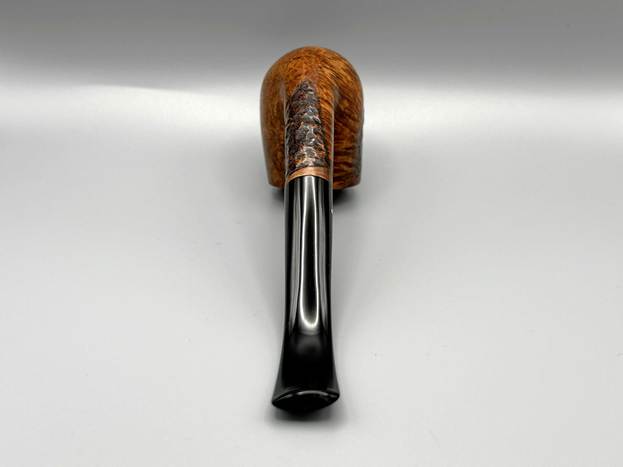
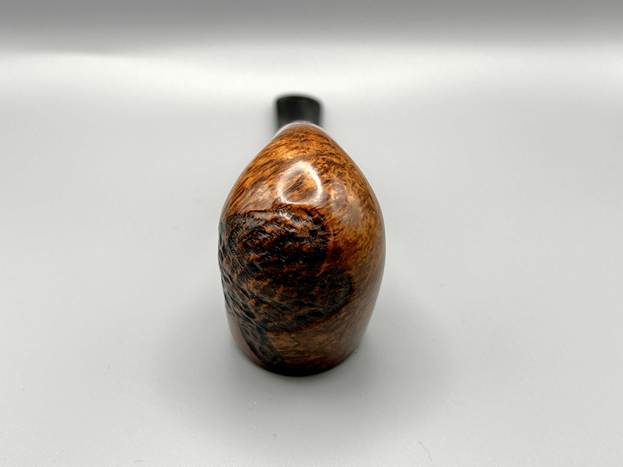
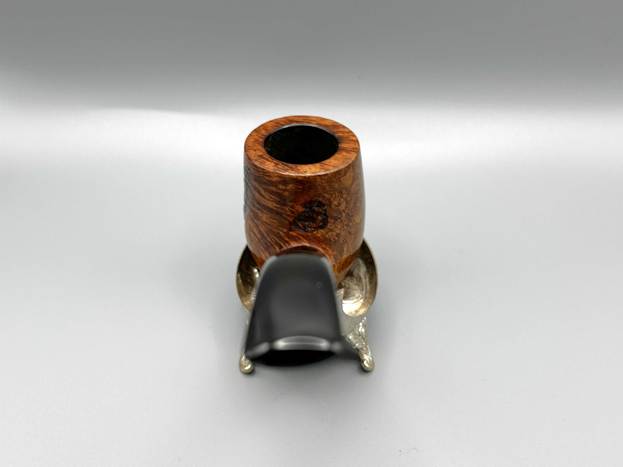
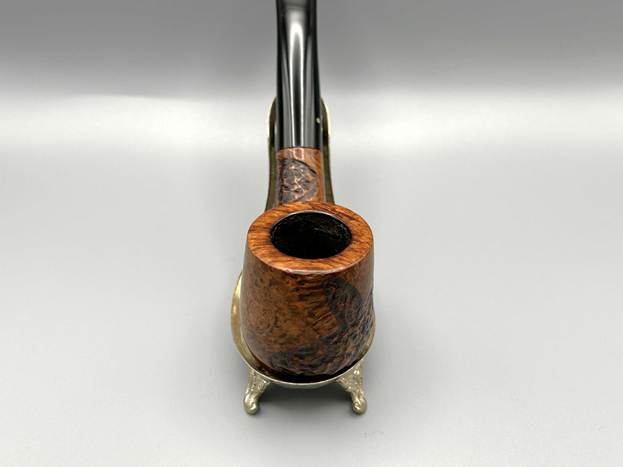
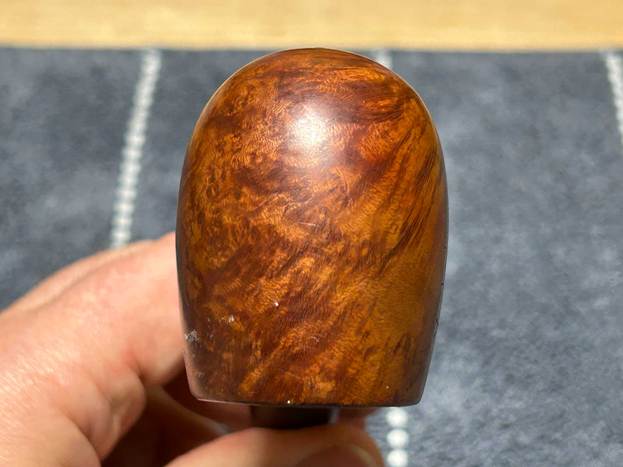
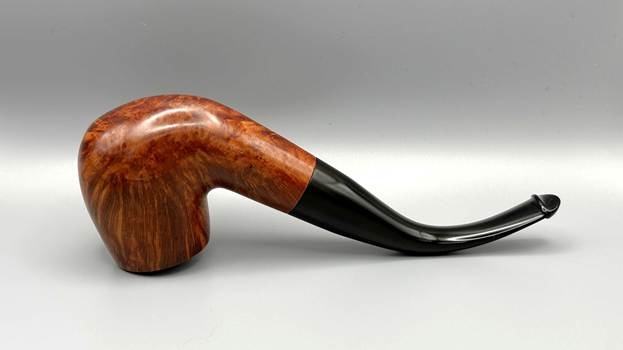
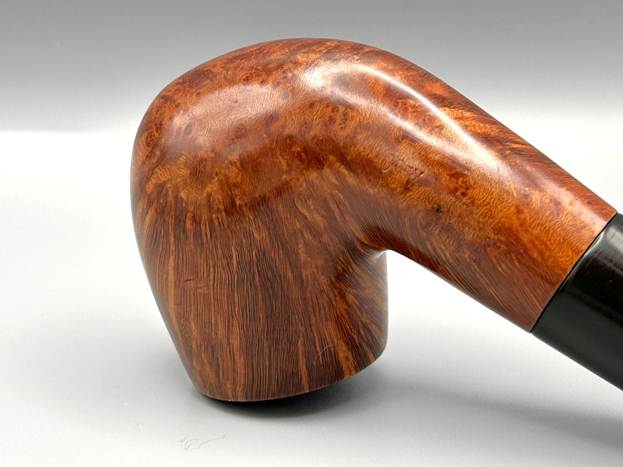
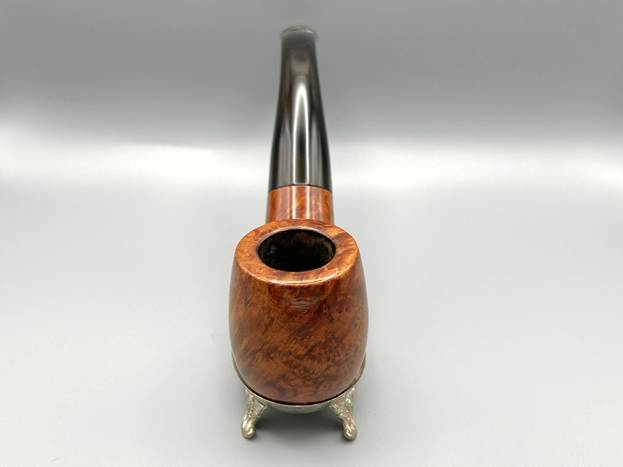
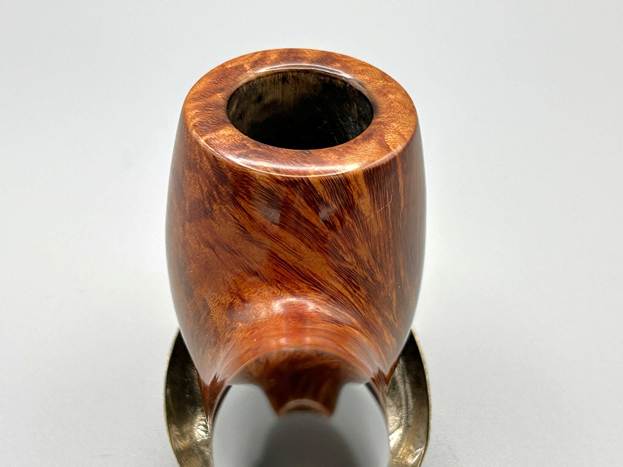
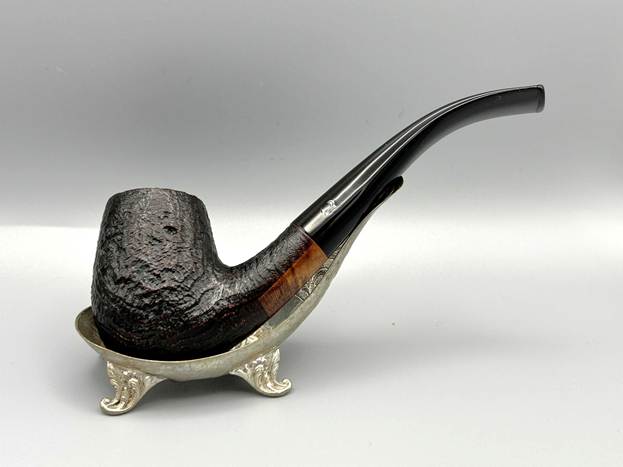
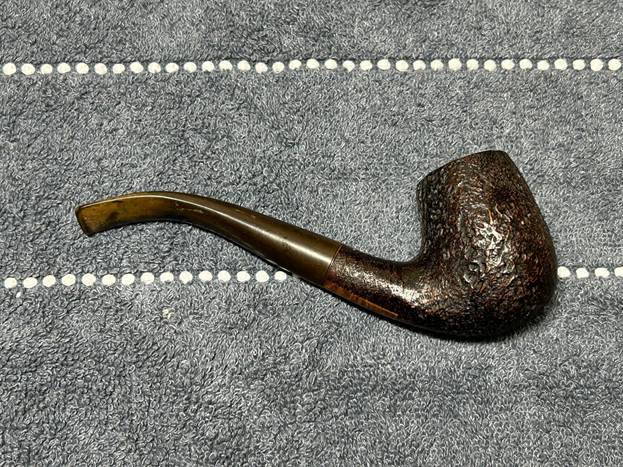
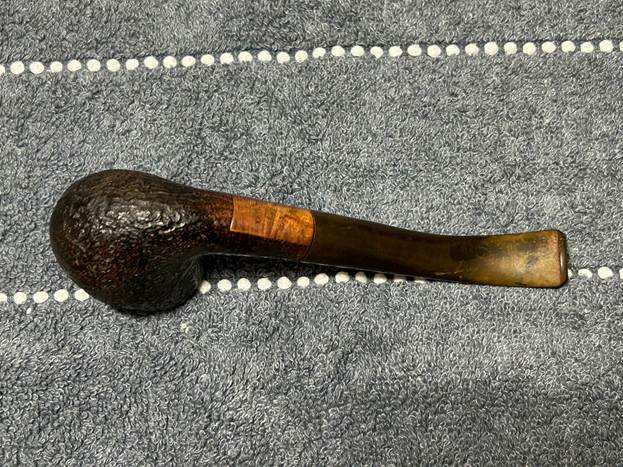
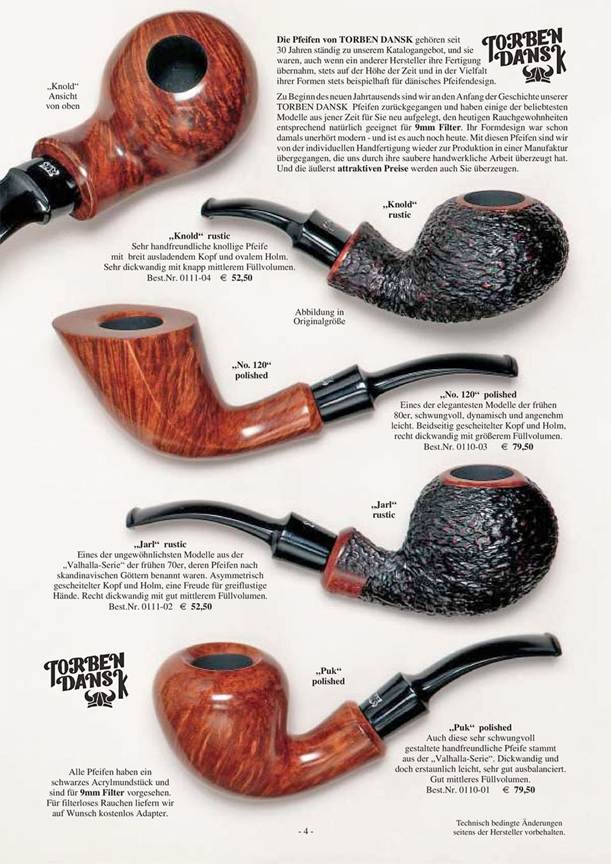
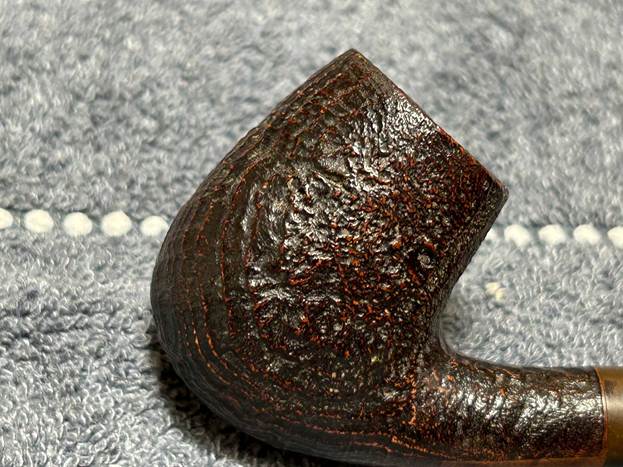
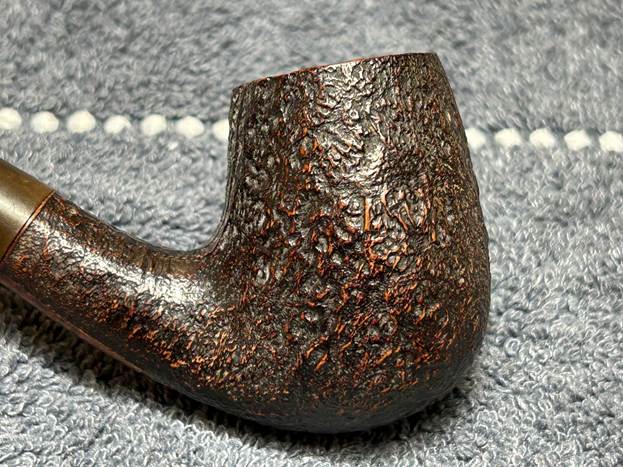
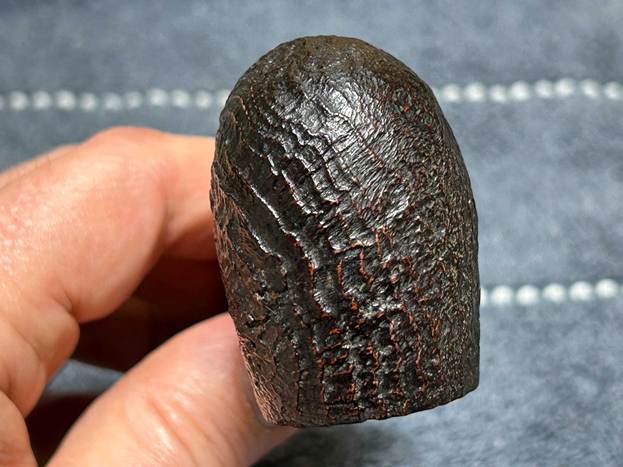
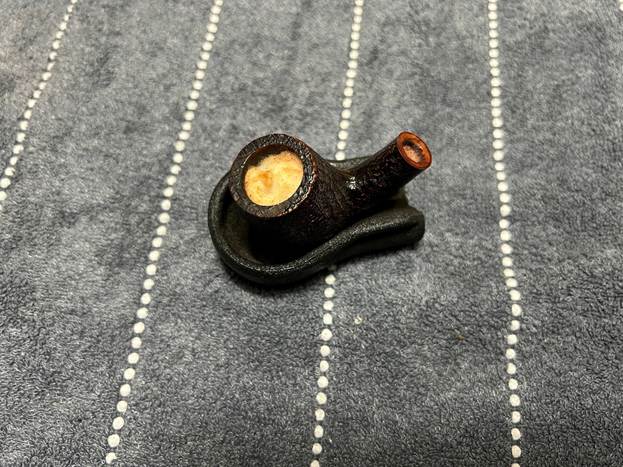
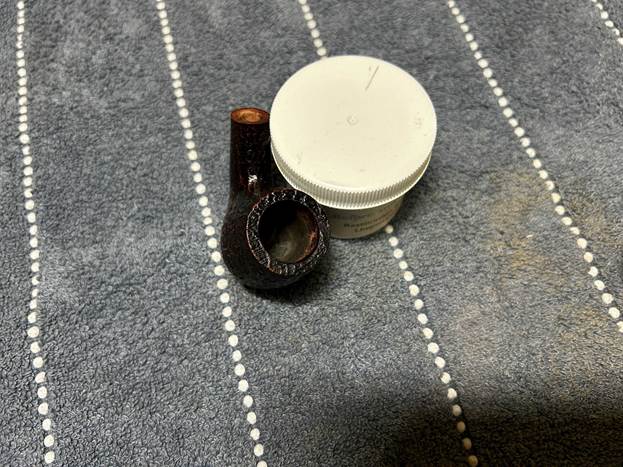
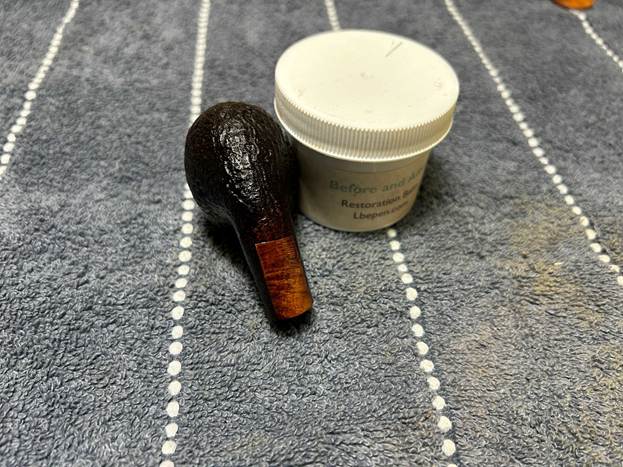
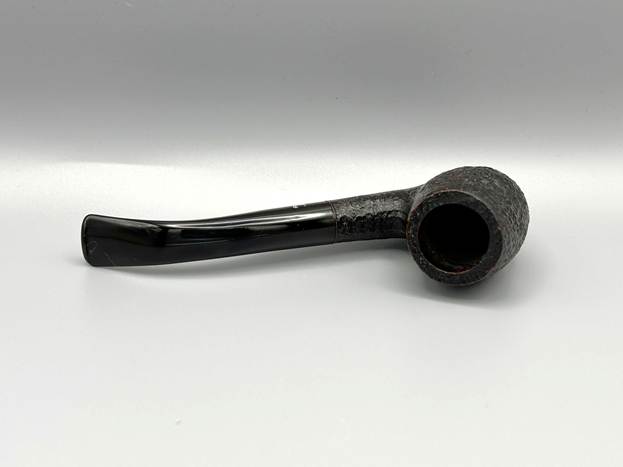
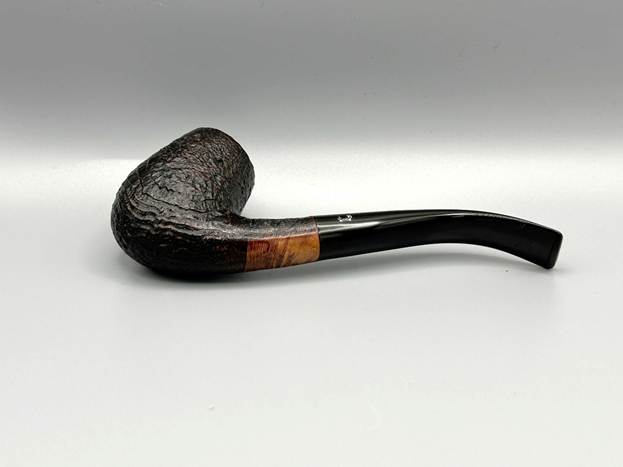
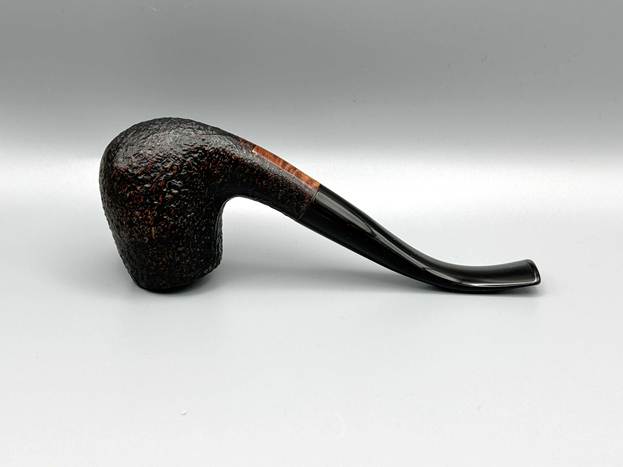
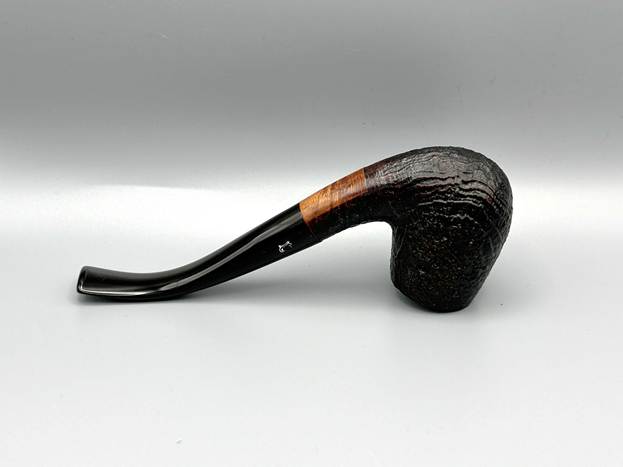
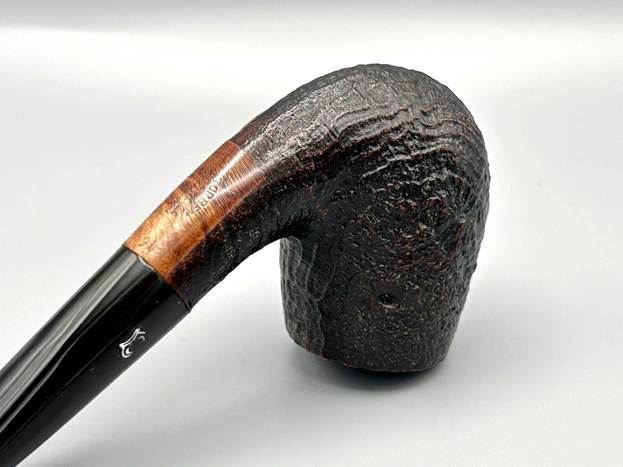
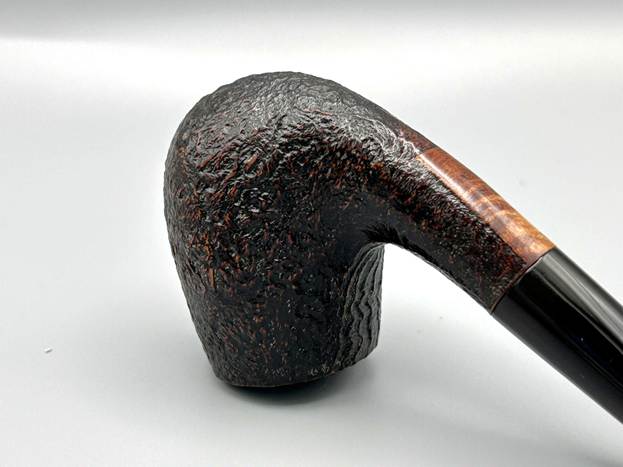
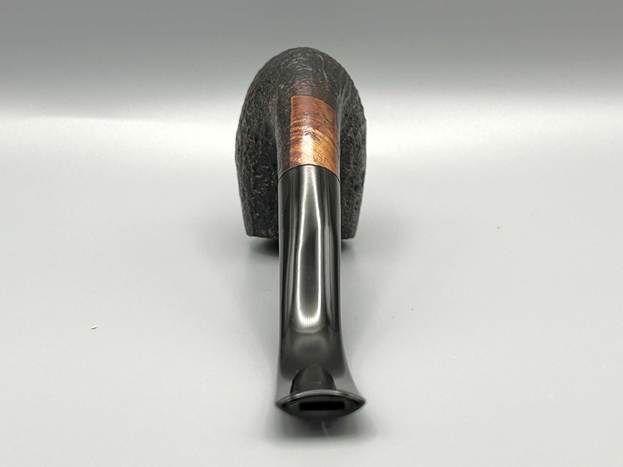
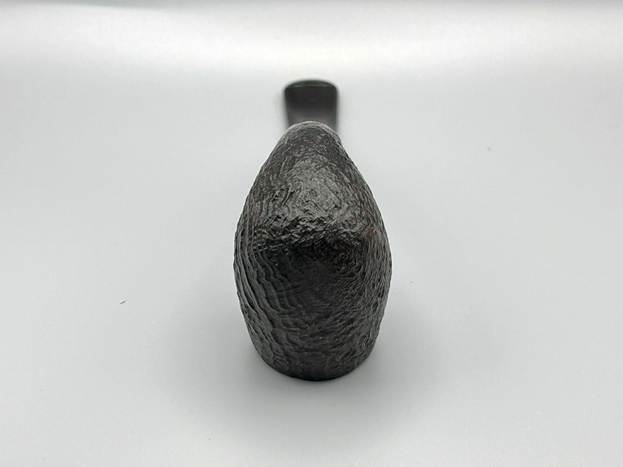
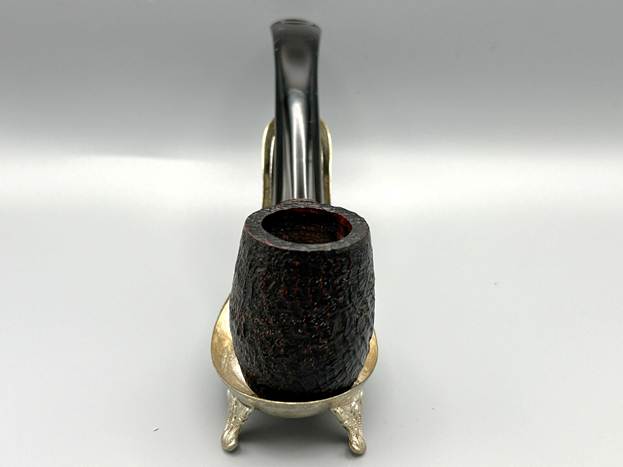
Now, this is a perfect example of the sort of pipe that we should all have in our collections: a really good smoker – and, by all accounts, that’s exactly what this is. This pipe is a dapper, sandblasted bent billiard from Torben Dansk of Denmark. The blast is gnarly and wonderful. The pipe looks well made and feels very nice to hold.
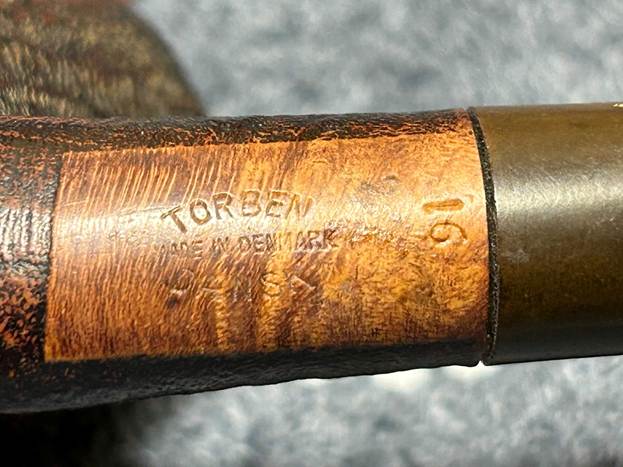
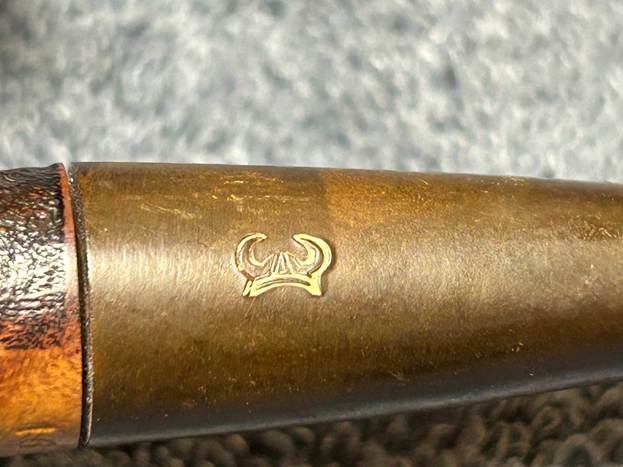
The markings are found on a smooth patch of briar on the underside of the shank. They read Torben [over] Made in Denmark [over] Dansk. Off to the right of this, and at a right angle, is the shape number, 16. Finally, on the stem, we see a Viking helmet as logo.
So, what do we know about Torben Dansk? There is a brief write-up at Pipedia about the label. It reads as follows:
Torben Dansk pipes were originally made by Torben Hetler. Next to other manufacture brands (Danmore, Tabago e.a.) they appeared in the first cataloge of Dan Pipe (originally named “Danske Pibe”), a pipe and tobacco mailing enterprise established by Heiko Behrens in 1972. Following the pipes became well-known and quite popular in Germany. Later they were made by Lars Christensen’s manufacture. According to the cataloge 1992/93 they were made by Poul Winslow.
I checked in at Pipephil, but they didn’t have any significant information to offer. However, there were three interesting comments from different fellows in the forums over at PipesMagazine:
The old briar buffed up like new and now it’s one of the best lookers and best smokers in my collection.
I had two Torben Dansk pipes in my collection several years ago. I remember they were both great smokers and I am sorry I traded them away.
Well, I wish I could say I had one in my collection. I was eyeing one on the bay and was outbid at the last second.
There was also mention of Torben Dansk at DutchPipeSmoker, in an article about the Dan Pipe company:
The history of Dan Pipe began in 1972 when, after a holiday in Denmark, teacher and enthusiastic pipe smoker Heiko Behrens decided to sell the creations of then unknown Danish pipe makers. In a small catalogue handmade pipes by Former, Emil Chonowitsch and Poul Hansen were presented together with factory pipes from Tabago, Torben Dansk, Danmore and other Danish producers. Soon also pipe tobacco was added to the catalogue, including Dan Pipe‘s first own-brand Torben Dansk. The quality of the pipes and tobaccos from the Dan Pipe catalogue provided good word-of-mouth advertising amongst the German pipe-smokers so gradually the customer base grew.
Sounds like a quality pipe. Let’s get working.
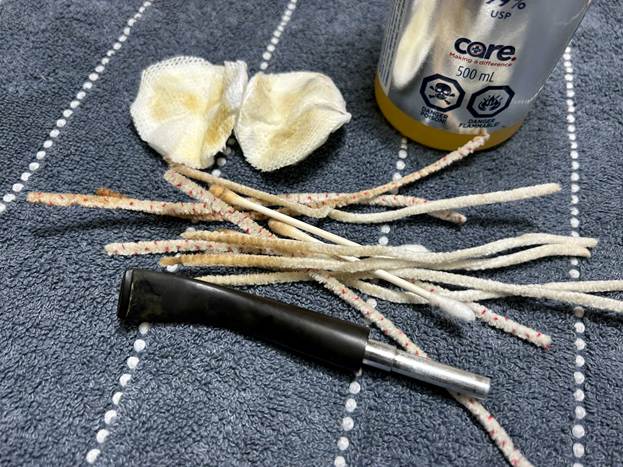
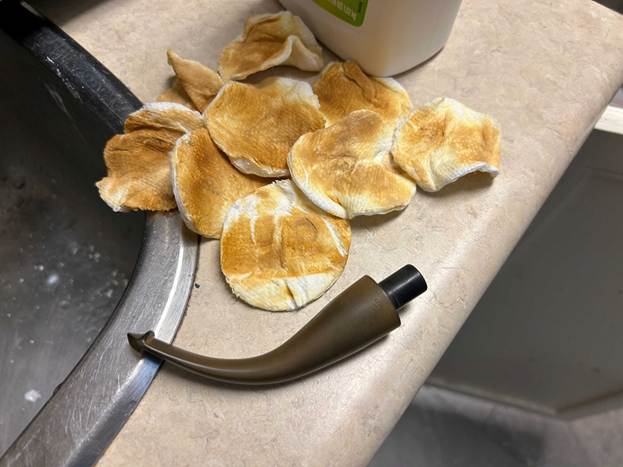
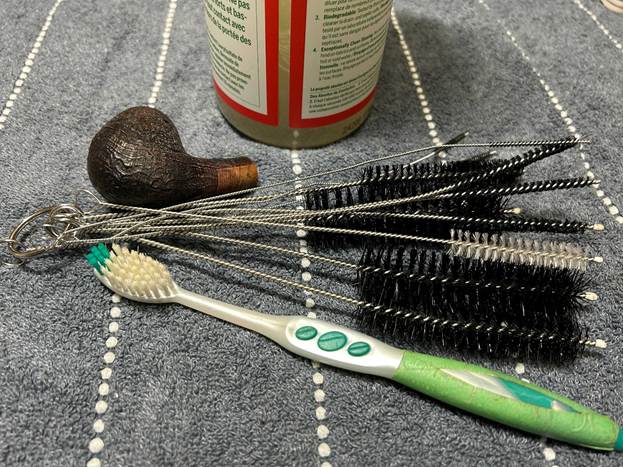
The stem’s calcification was quite substantial. I used an old butter knife and gently scraped some of the thicker accretion off. Doing this now helps later in removing the oxidation. I used isopropyl alcohol on a few cotton rounds and wiped down the stem to provide an initial cleaning of filth before moving on to the next steps. The primary cleaning came next. I disinfected the inside of the stem with both pipe cleaners and cotton swabs dipped in lemon-infused 99% isopropyl alcohol. I scrubbed thoroughly to make sure the interior was very clean.
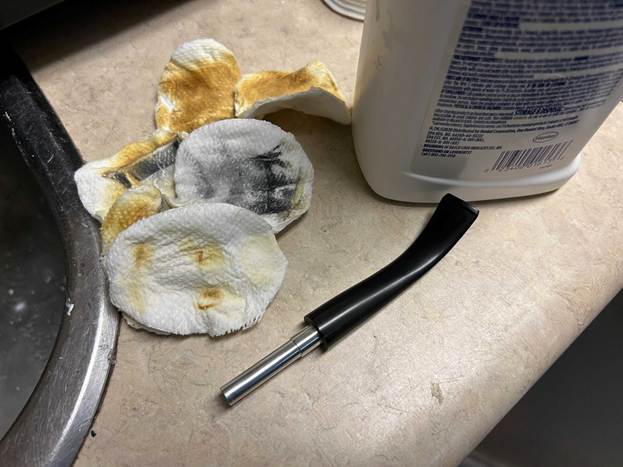
The goal of the next step is the removal (or minimization) of oxidation. Going to my sink, I used cream cleanser, cotton rounds, and a toothbrush, and scoured the stem to remove as much surface oxidation as possible. As the photos show, the result was a hideous, ochre-coloured mess – but better off the stem than on it.
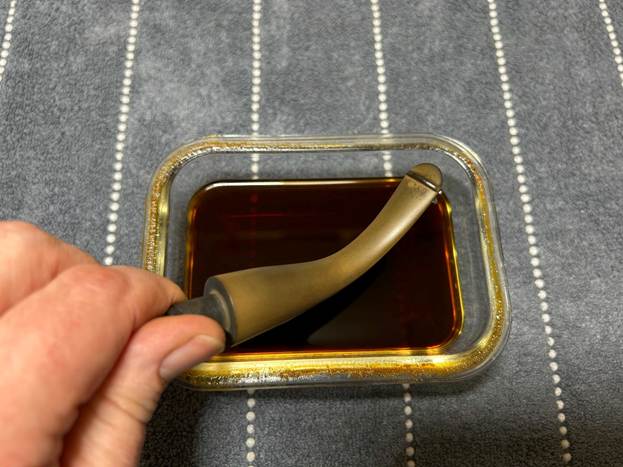
Once the stem was reasonably clean, I soaked it overnight in some Briarville Stem Oxidation Remover. This solution works to draw oxidation in the stem to the surface of the vulcanite. This is a major aid and an important step in ensuring a clean stem. The following day, I drew out the stem from its bath and scrubbed the lingering fluid with a toothbrush.
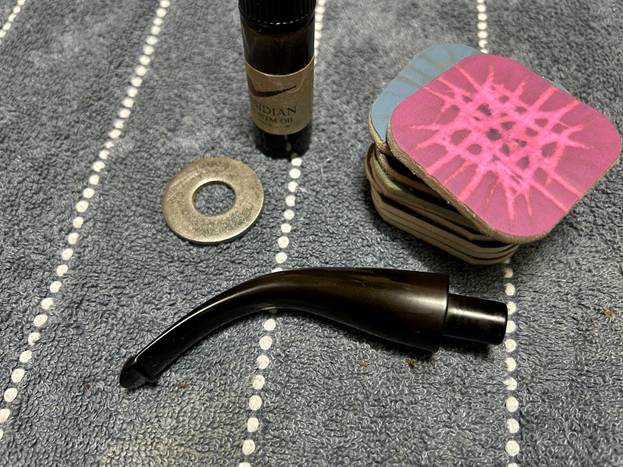
As the stem was now clean and dry, I set about fixing the marks and dents in the vulcanite. This was done by filling those divots with black cyanoacrylate adhesive, impregnated with carbon and rubber. I left this to cure and moved on. After this, I painted the logo on the stem with some enamel nail polish. I restored the logo carefully and let it fully set before proceeding.
The penultimate step for the stem is sanding. First, with my set of needle files, I reduced the bulk of the cyanoacrylate repairs. I removed the excess adhesive as near to the surface as possible, without cutting into the vulcanite. Following that, I used all nine of the micromesh sanding pads (1,500 through 12,000 grit) to sand out flaws, even out the vulcanite, and provide gentle polishing of the finished surface. I also applied pipe-stem oil while using the last five micromesh pads. There was a wonderful, deep black shine to the stem when I was done.
As the stem was (nearly) complete, I moved on to the stummel. The first step was to ream out the bowl – that is to say, remove all the cake inside the bowl. This accomplished a couple of things. First (and most obviously), it cleaned the bowl and provided a refurbished chamber for future smoking. Second, when the old cake was removed, I could inspect the interior walls of the bowl and determine if there was damage or not. I only used a pipe knife and a piece of sandpaper taped to a wooden dowel – fortunately, there was very little debris in the bowl.
Similar to the stem, I then cleaned the stummel with both pipe cleaners and cotton swabs dipped in lemon-infused 99% isopropyl alcohol. With a pipe this dirty, it took quite a while and much cotton to clean.
I then decided to ‘de-ghost’ the pipe – that is to say, exorcize the remaining filth from the briar. I filled the bowl and the shank with cotton balls, then saturated them with 99% isopropyl alcohol. I let the stummel sit overnight. This caused the remaining oils, tars and smells to leach out into the cotton.
To tidy up the briar, I wiped down the outside, using a solution of a pH-neutral detergent and some distilled water, with cotton rounds. I also used a toothbrush in the crevices. This did a good job of cleaning any latent dirt on the surface of the briar. The last step of the cleaning process was to scour the inside of the stummel with the same mild detergent and tube brushes. This was the culmination of a lot of hard work in getting the pipe clean.
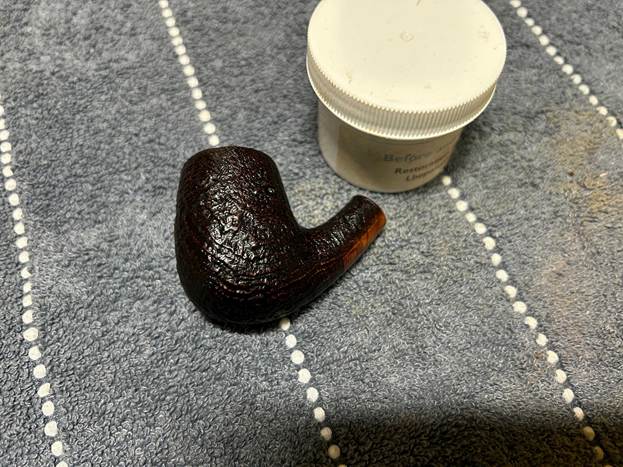
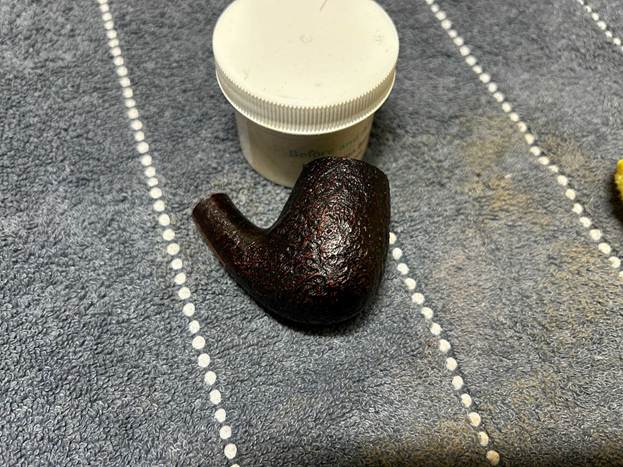
I gave a quick pass of the micromesh pads on the smooth bit of briar on the shank. I rubbed some LBE Before & After Restoration Balm into the briar and let it sit for 30 minutes or so. The balm moisturizes the wood and gives a beautiful depth to the briar. I then buffed the stummel with a microfibre cloth.
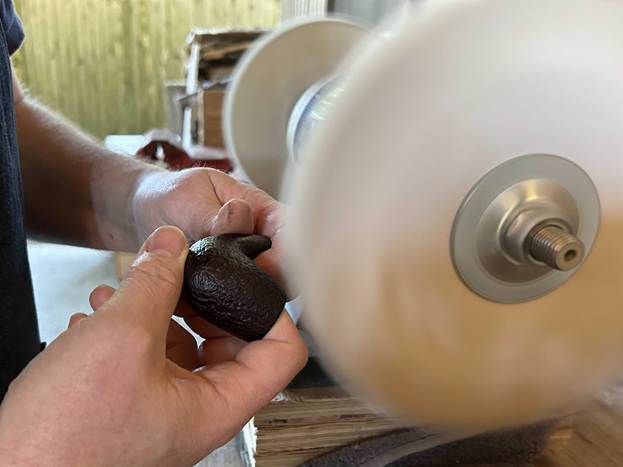
For the final step, I took the pipe to my bench polisher and carefully buffed it – first with a blue diamond compound, then with three coats of conservator’s wax. This procedure makes the pipe look its best – the stummel sings and the stem glows.
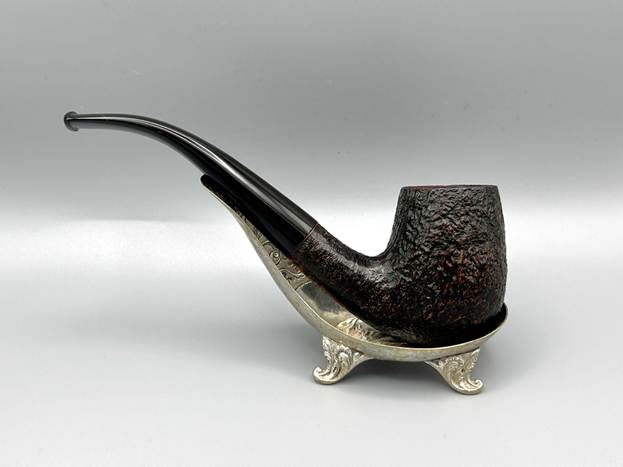
All done! This Torben Dansk 16 sandblasted bent billiard looks fantastic again and is ready to be enjoyed by its next owner. I am pleased to announce that this pipe is for sale! If you are interested in acquiring it for your collection, please have a look in the ‘Danish’ section of the store here on Steve’s website. You can also email me directly at kenneth@knightsofthepipe.com. The approximate dimensions of the pipe are as follows: length 5⅜ in. (138 mm); height 1⅞ in. (48 mm); bowl diameter 1⅓ in. (34 mm); chamber diameter ¾ in. (20 mm). The weight of the pipe is 1¼ oz. (36 g). I hope you enjoyed reading the story of this pipe’s restoration as much as I enjoyed restoring it. If you are interested in more of my work, please follow me here on Steve’s website or send me an email. Thank you very much for reading and, as always, I welcome and encourage your comments.