Blog by Paresh Deshpande
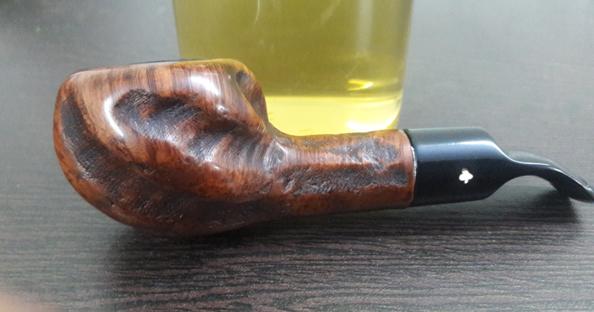
Yes!! That is what exactly my thought was, when I looked closely at the small pipe in my hand that I had selected as my next project for restoration. Those who have read my previous write ups on pipe restoration would know that I have inherited a large number of pipes from my grandfather dating between the periods from 1940s to 1970s. I had not come across a single Kaywoodie pipe in the two boxes I had opened, one box still remaining unopened!!!
I have restored two Custom-Bilt pipes from this collection to date, one from 1938-41 era (https://rebornpipes.com/2018/06/02/restoring-my-grandfathers-custom-bilt-pipe/) and second from the Wally Frank era(https://rebornpipes.com/2018/07/20/restoring-a-wally-frank-era-custombilt-sitter-633/), the third Custom-Bilt billiard from 1938-41 era was sent to Mr. Steve of rebornpipes fame to sort out tenon issues and have fallen in love with Custom-Bilt pipes since thereafter!!!! I had picked this pipe assuming it to be a Custom-Bilt and it was only on close scrutiny was it reveled that this was a Kaywoodie!!!!! I deliberately rummaged through the pile again and sure enough, there was another Kaywoodie Bent Billiard with 4 holed stinger in relatively unsmoked condition. It seems my grandfather never took a liking for these Kaywoodie pipes!!!!!
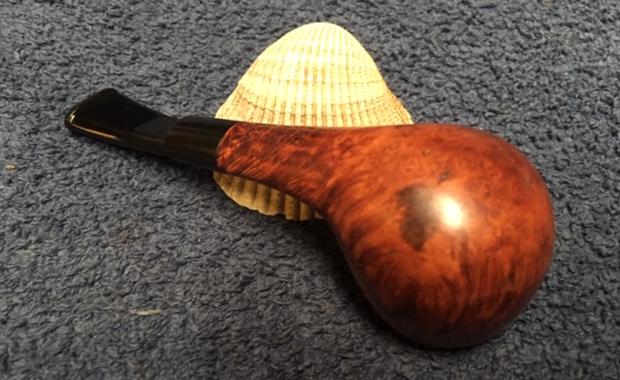
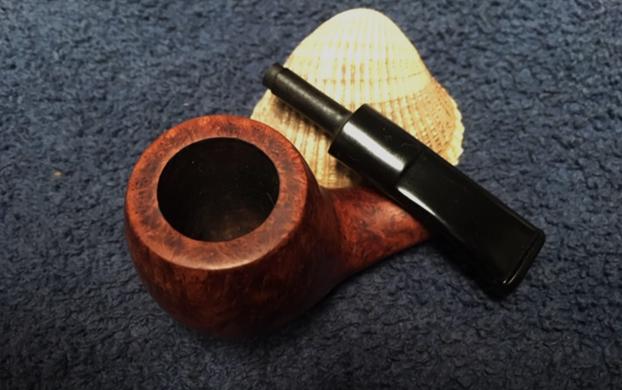
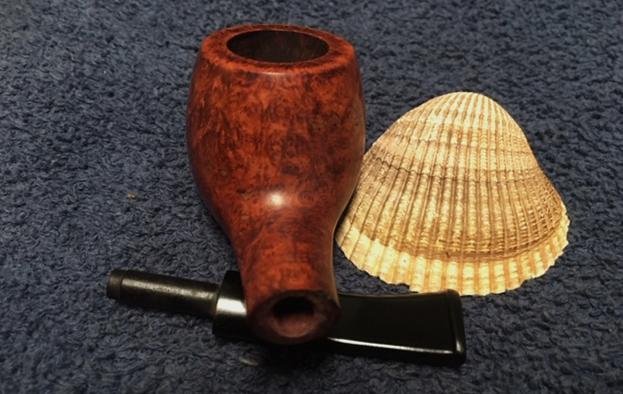
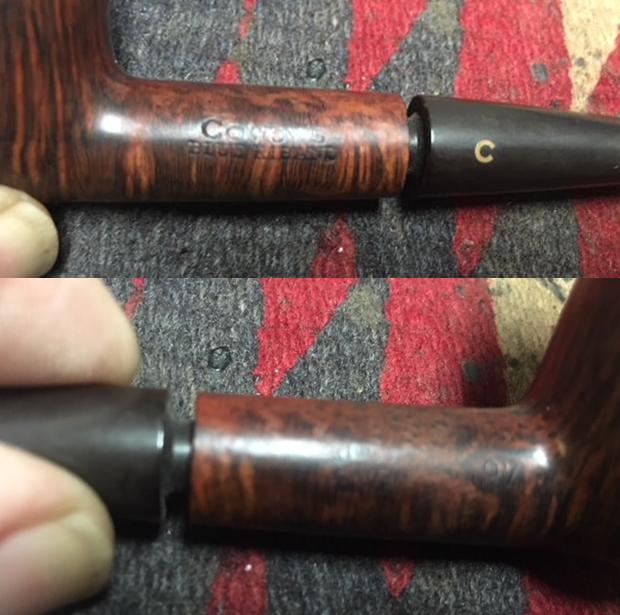
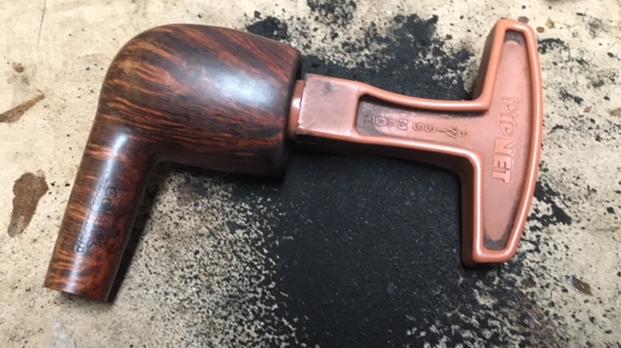
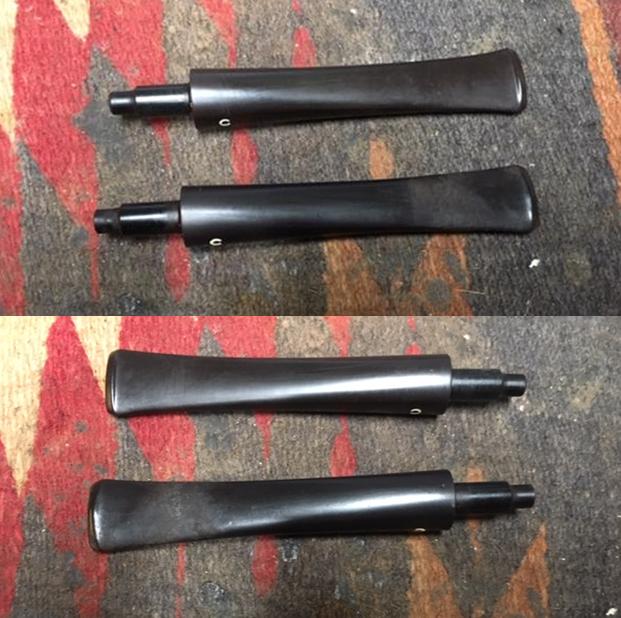
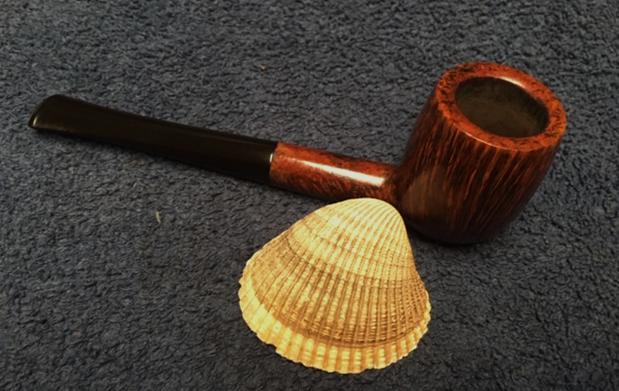
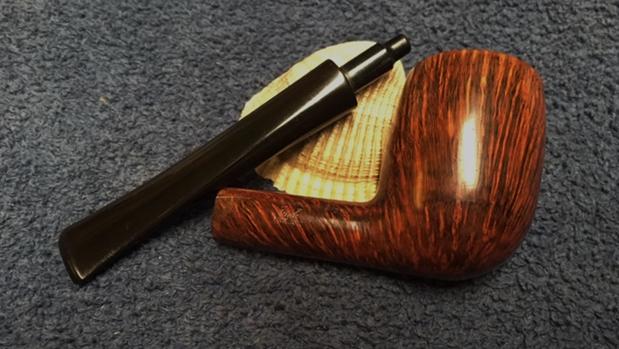
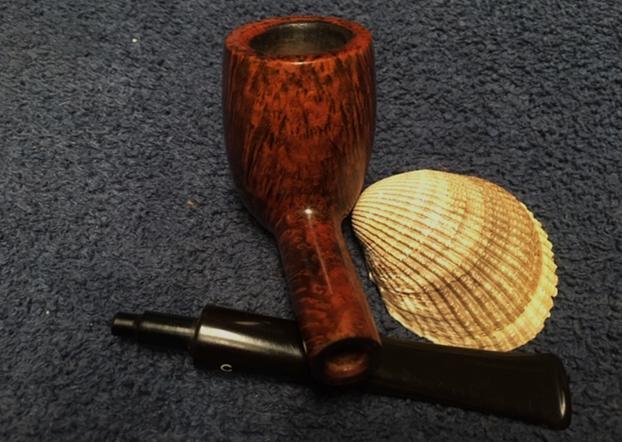
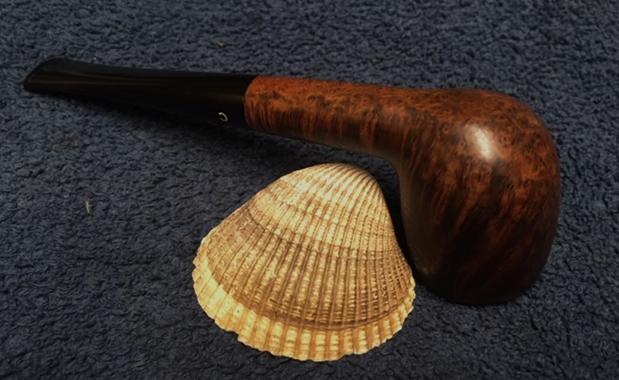
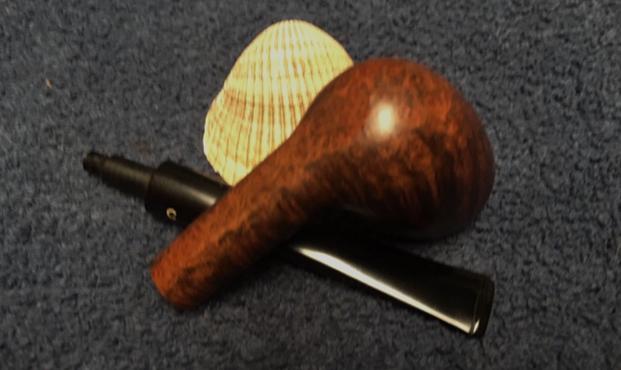
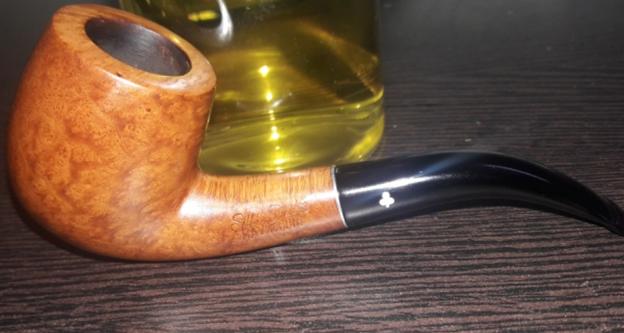
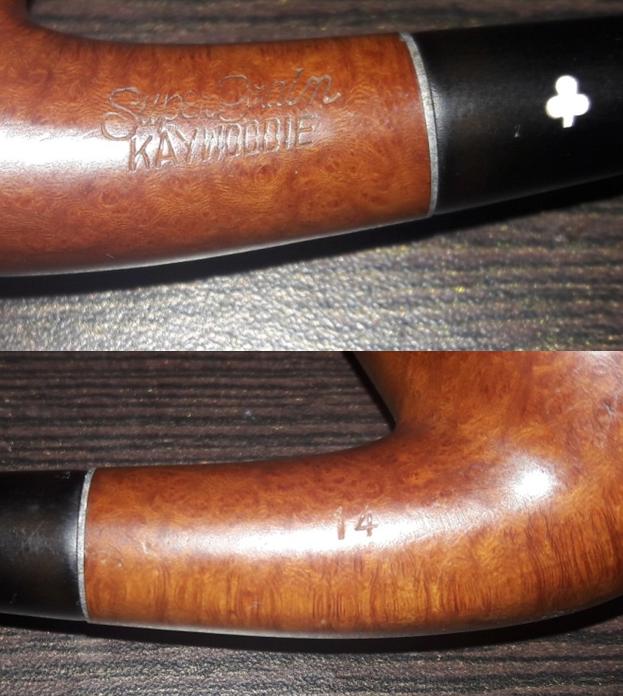
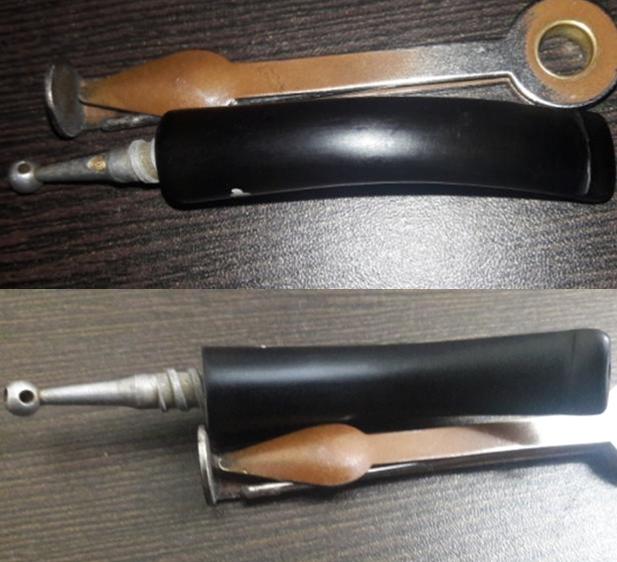
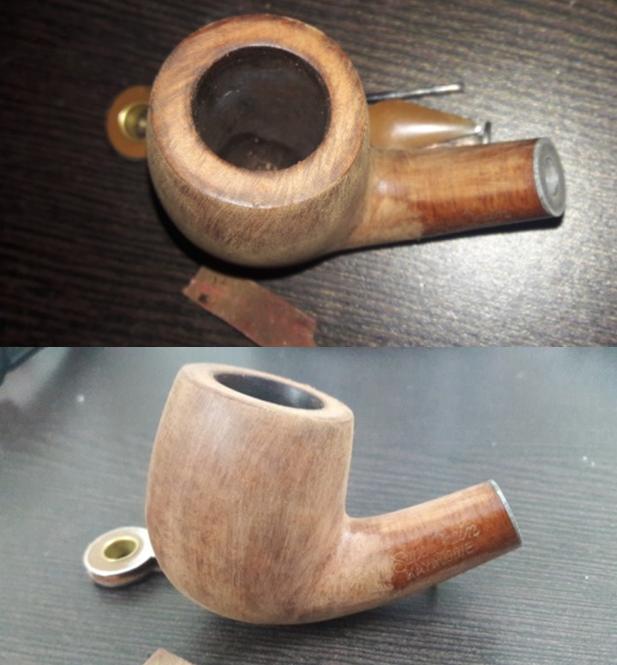
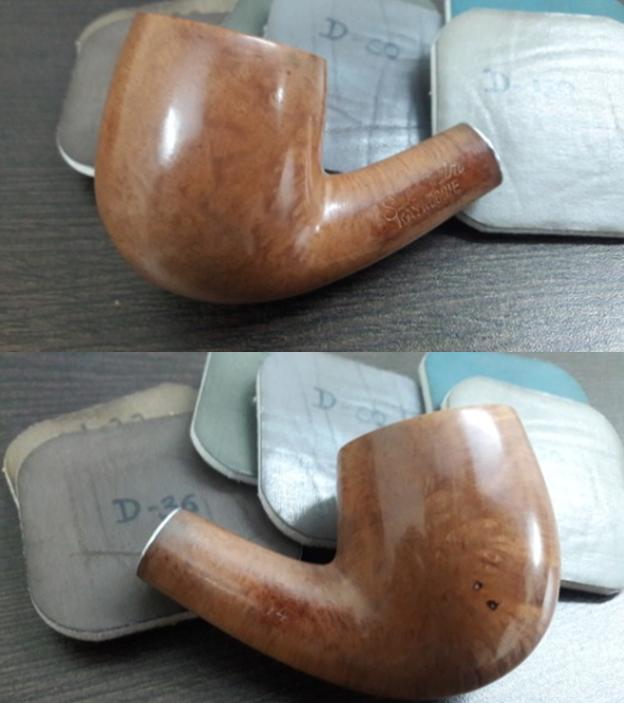
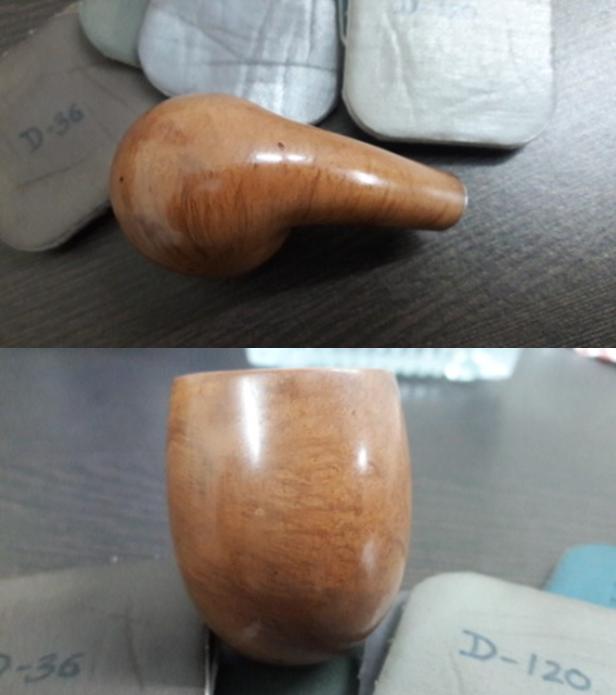
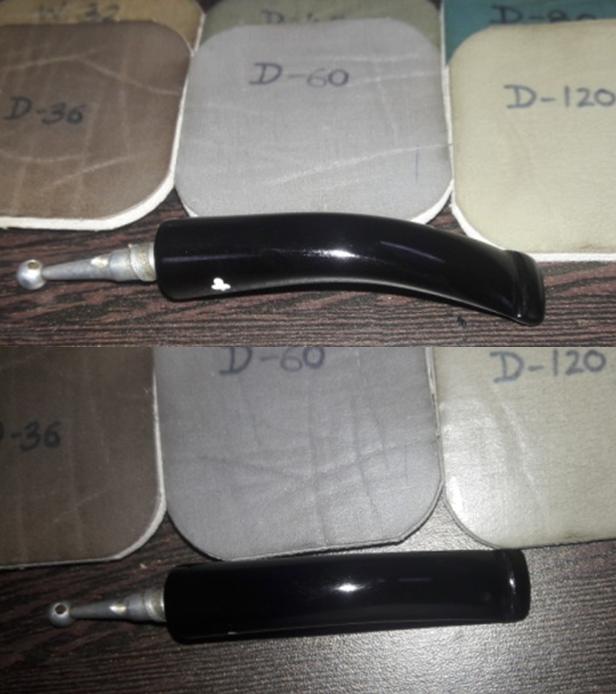
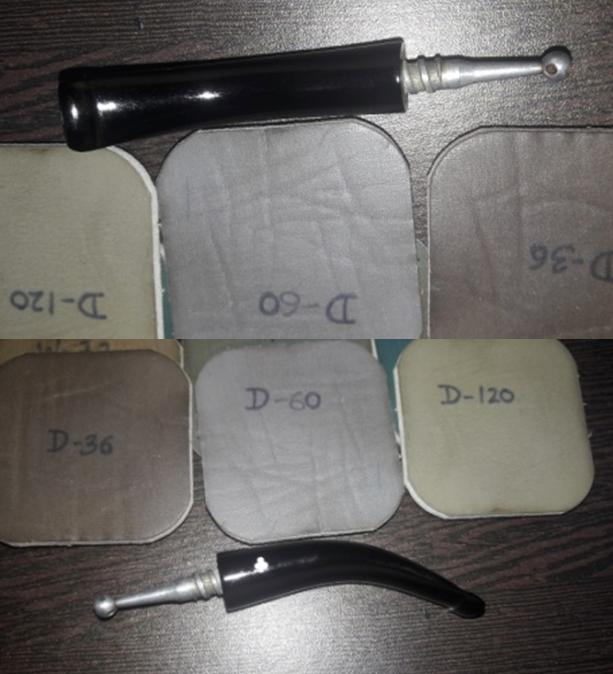
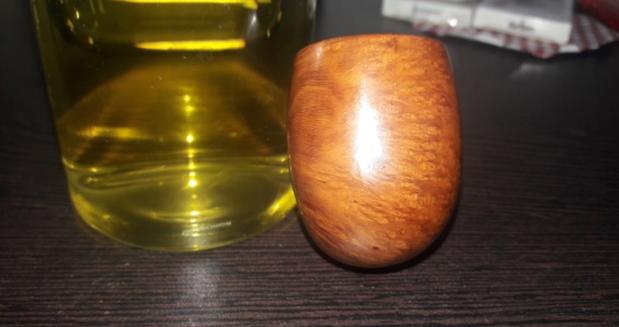
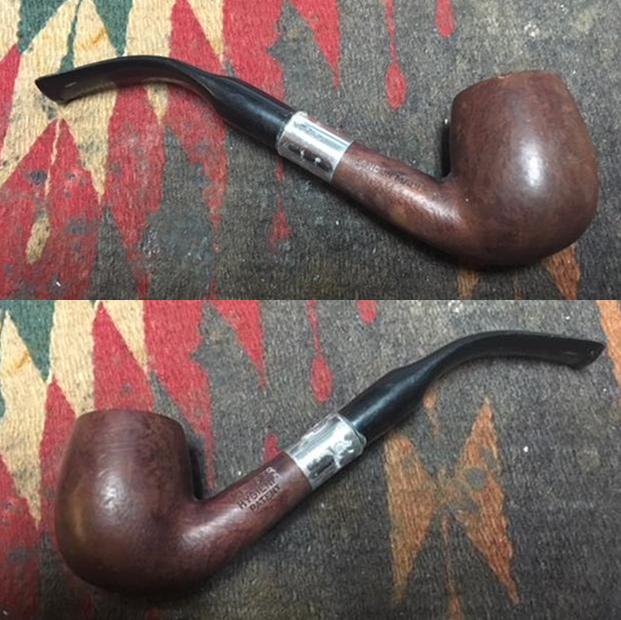
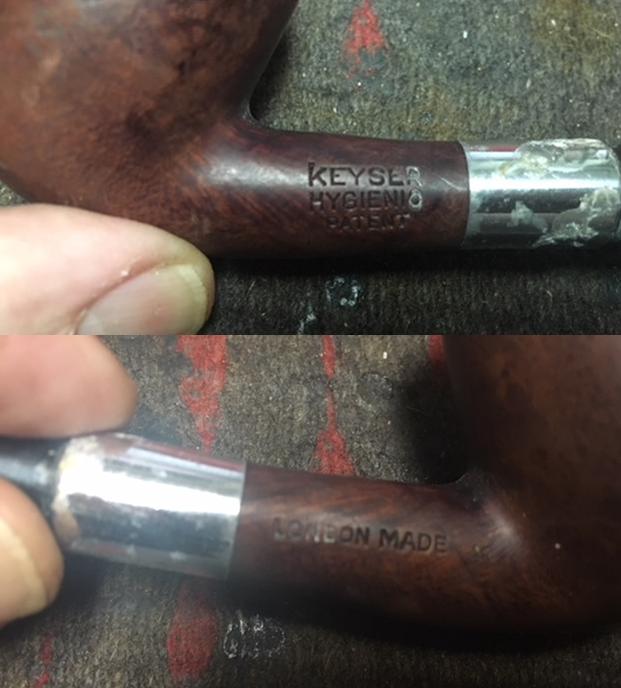
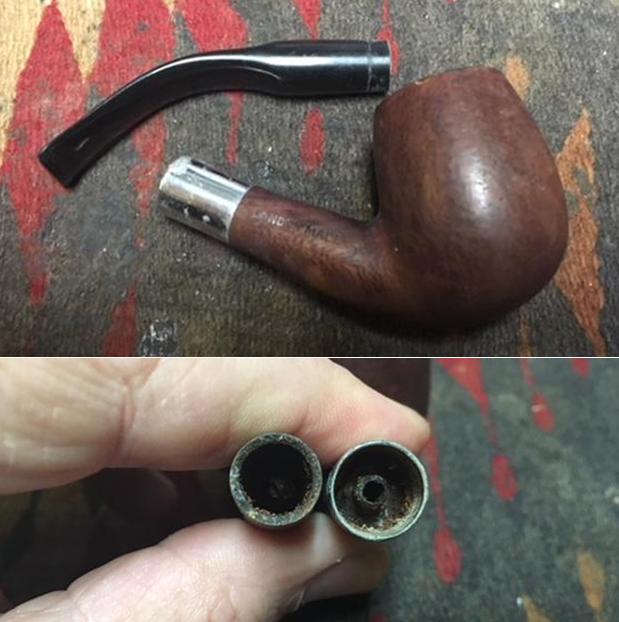
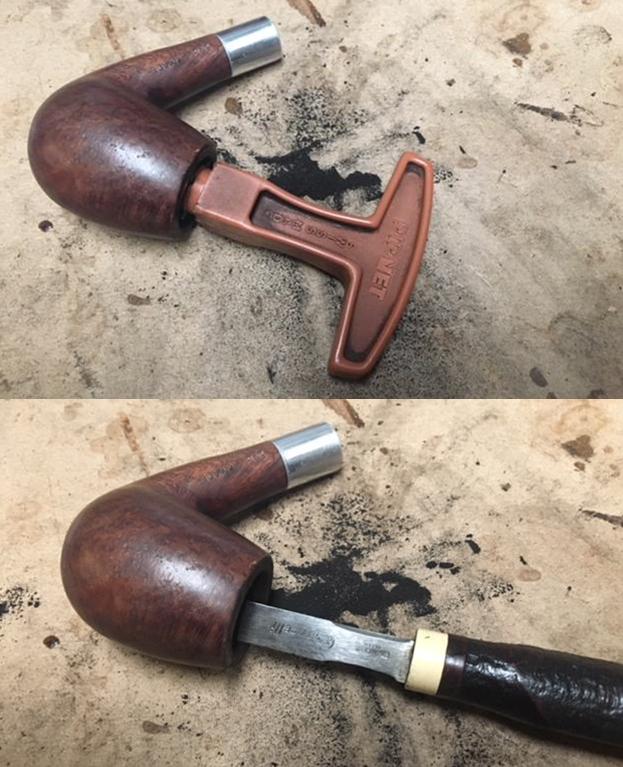
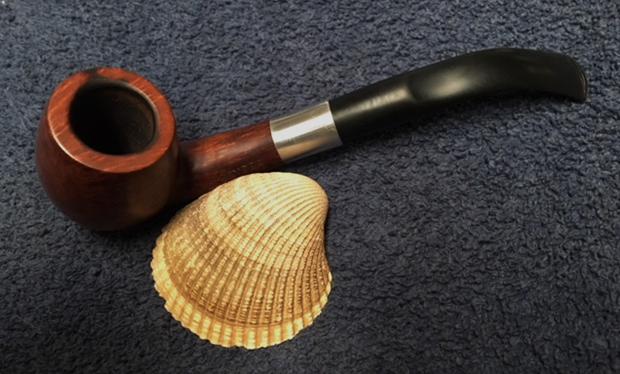
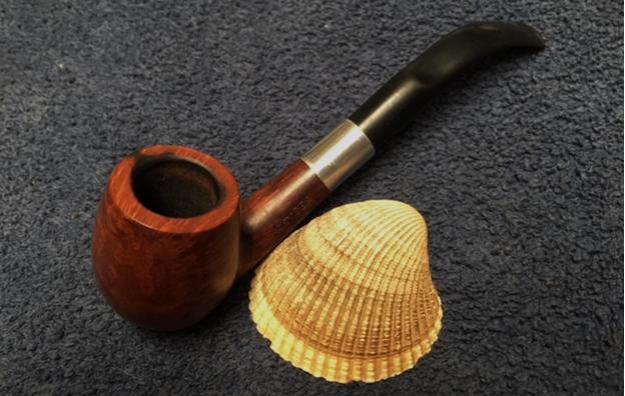
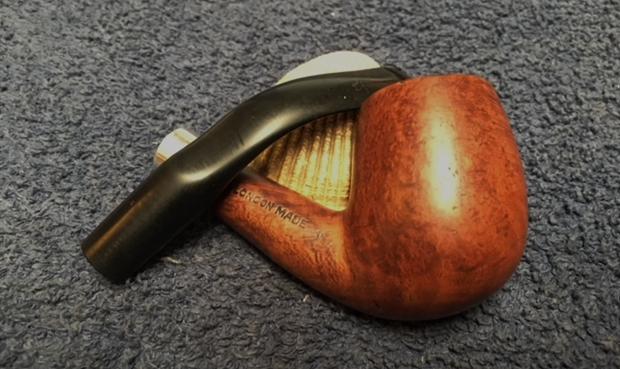
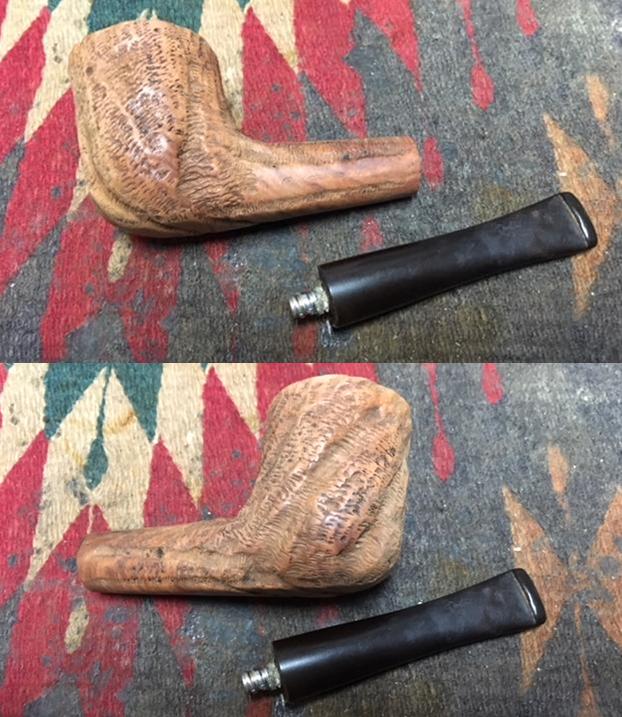
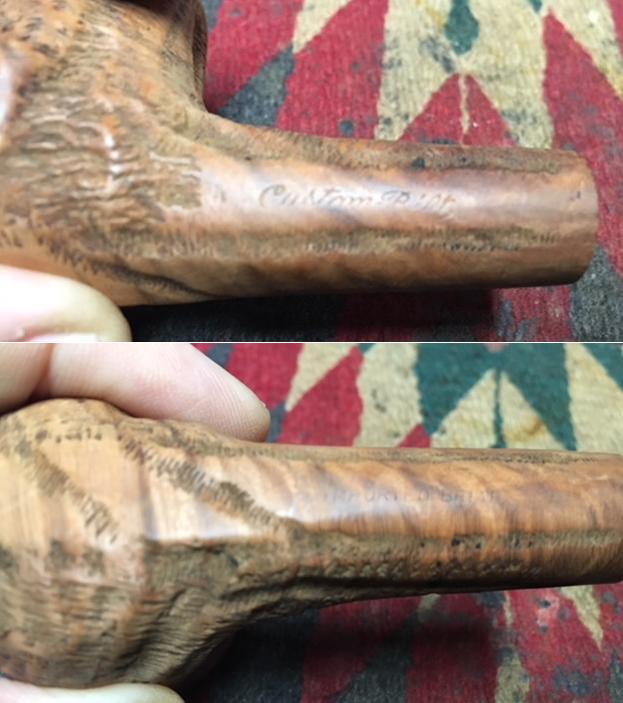
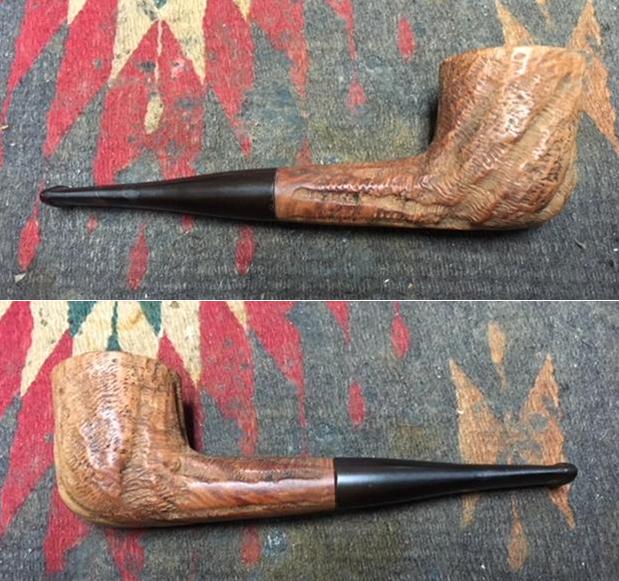
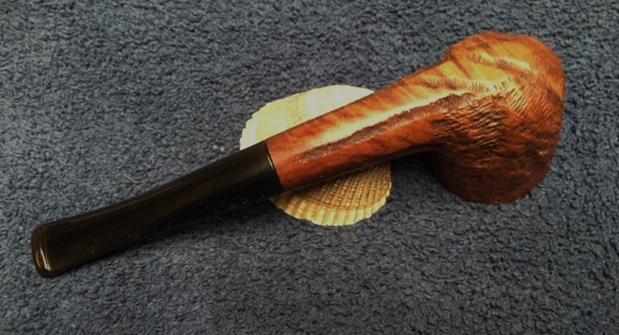
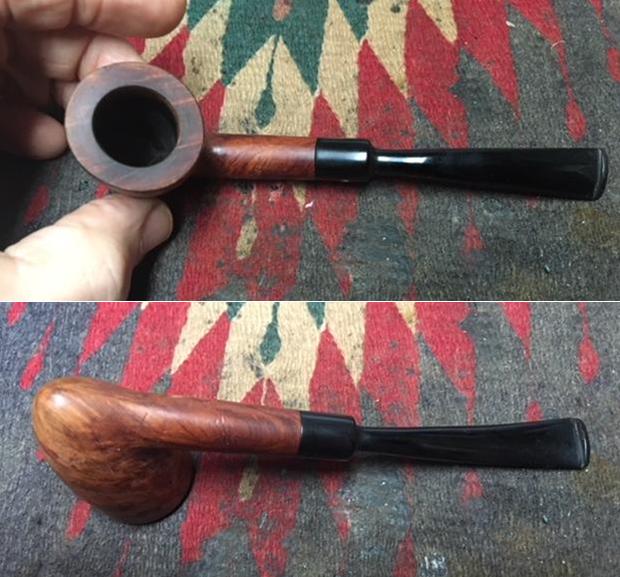
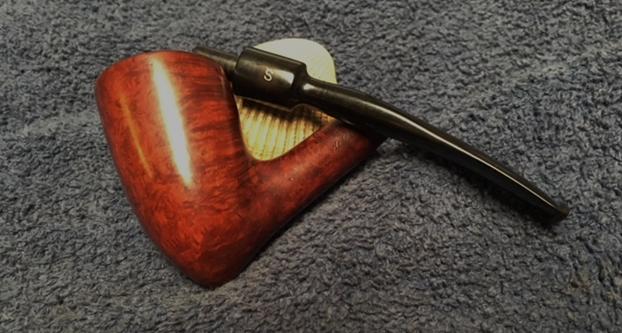
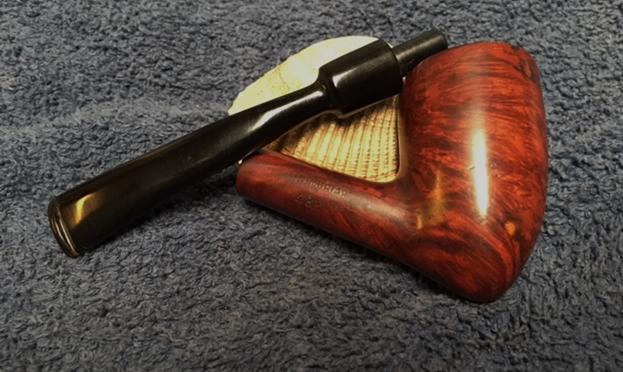
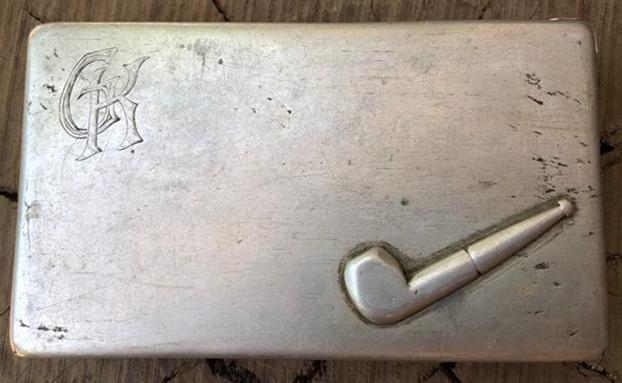
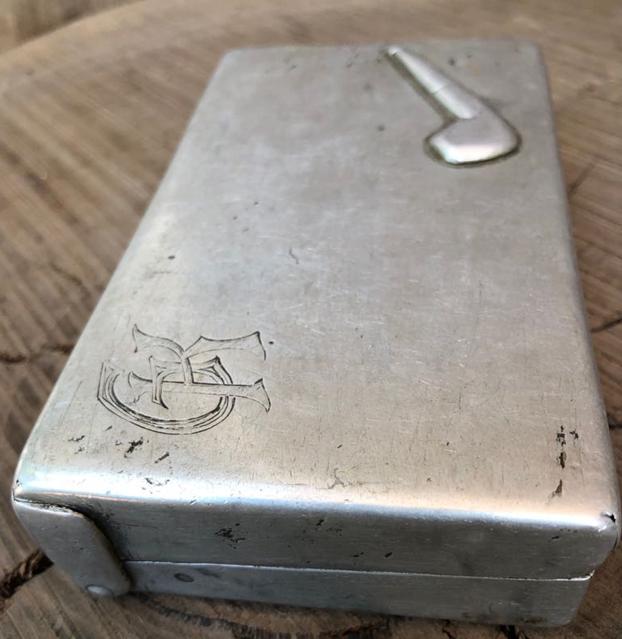
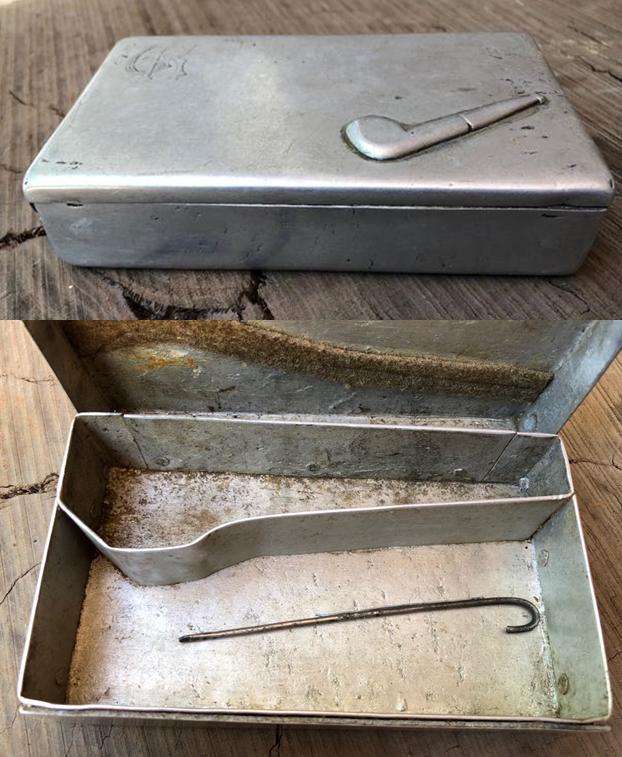
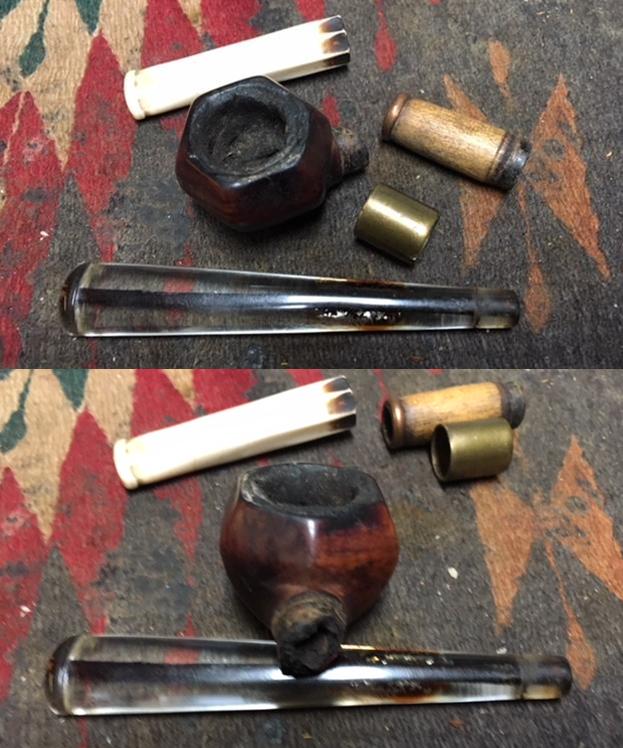
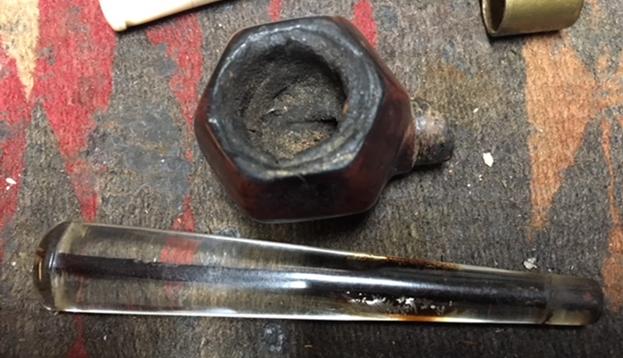
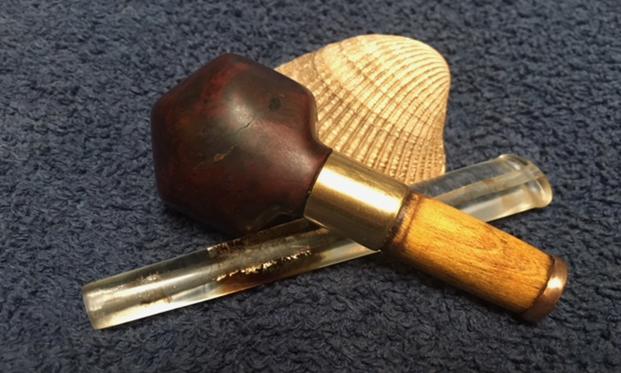
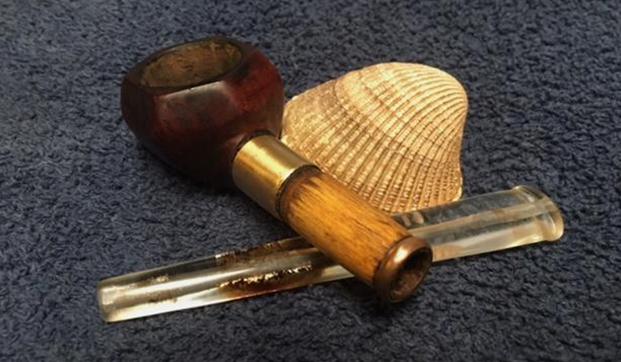
This Kaywoodie Pocket Pipe, now on my work table, has similar large finger like vertical rustications with very thin horizontal lines ensconced within these large vertical rustications. These thick vertical rustications extend upwards and end short of the rim top, giving the rim top a flat smooth surface. These rustications can be seen extending all around the shank on top and bottom, save for smooth surfaces on either sides of the shank. The smooth surface on the left side of the shank bears the stamping “Handmade” over “Super Grain” in cursive hand, over “KAYWOODIE” in block capital letters. The right side of the shank bears the stamp “IMPORTED BRIAR”. All these stampings are thin, worn out but readable under bright light with a magnifying glass. The ¾ bent saddle stem bears the trade mark “Clover leaf” symbol. This pipe comes with a four-holed threaded stinger which screws into the shank. This stinger is stamped with “DRINKLESS”. There is an aluminum spacer ring separating the shank end from the stem end when threaded in. On closer observation, it can be seen that a portion of this spacer, closer to the mortise opening, extends into the mortise and is threaded which matches with the stinger threads.
 I took all these observation and searched pipedia.com for history of this brand, models and attempt at dating this pipe. This site has detailed information on Kaywoodie pipes, including the history of origin, about the owners of the brand and also various important links to “Collector’s Guide to Kaywoodie Pipes” and “Kaywoodie’s Logos and Markings: Clover variations since 1919”. Here is what was revealed as extracted from pipedia.com:-
Kaywoodie was the name a pipe offered by Kaufman Brothers & Bondy Company (KBB), first appearing in February of 1919. The Dinwoodie pipe, also by KBB, appeared in November of 1919. Sometime before 1924, the Dinwoodie had been discontinued and the Kaywoodie name was beginning to be used on an extensive line of pipes that ultimately would be the name of the company. The origin of the name Kaywoodie is a combination of the K from Kaufman and wood, as in briar. Not much is known of the original KBB company other than it was started in 1851 by the German born Kaufman brothers when they opened a small pipe shop in the Bowery section of New York City. In the back room of this shop, they made their first pipes. From this meager beginning, the Kaywoodie name and organization was to emerge.
When one of the men from the New York office got “gold fever”, he carried a large supply of pipes with him to California that he sold along the way. This early “national distribution” did much to build the reputation of KBB. By the late 1800’s, branches of KBB were opened in Chicago, Atlanta, San Francisco and St. Louis with family and friends acting as agents. The trademarks, for the inlaid cloverleaf and the cloverleaf with the KBB initials inside, were issued in 1881. KBB’s pipes became more popular and were in constant demand by the end of the century. Orders were streaming back east and KBB needed to move to larger manufacturing facilities. By 1915 the move was made to larger facilities in the old Union Hill section of Union City, New Jersey. The salesroom offices were located at 33 East 17th. Street, New York. When the Kaywoodie pipe was first introduced by KBB it came with a hand cut rubber mouthpiece fitted with an aluminum Inbore Tube. This device was to “assure a clean, cool smoke.” Other KBB pipes such as Ambassador, Heatherby and Melrose also had the Inbore tube. The early Drinkless Kaywoodies from 1924 through 1931 had push bit stems. In 1931, after three years of research, the new Drinkless Kaywoodies with the synchro-stem, (threaded drinkless screw-in mouthpiece) were introduced. The drinkless attachment was advertised as cooling the smoke from 850 degrees in the bowl to 82 degrees when it entered the mouth. By the mid 1930’s, all Kaywoodie’s came with the screw mounted Drinkless attachment. (Export Kaywoodies, available briefly from 1950-1955, had push bit stems and were available in all the same shapes and finishes as the drinkless versions.)
Throughout much of the 1940’s, 50’s and 60’s, the Kaywoodie family of pipes consisted of 11 basic grades of briar pipes; though new grades were frequently added to the line and some older grades were discontinued or downgraded. These 11 basic grades of pipes, listed in ascending order of quality, were:
- Drinkless
- Hand-made Super Grain
- Super Grain
- Relief Grain
- Flame Grain
- Silhouette
- Oversize Kaywoodies
- Meerschaum Inlaid Kaywoodies
- Connoisseur
- Ninety-fiver
- Centennial
Thus from the above, I can safely infer that this pipe was a higher grade Kaywoodie from the 1940s to 1960s.
INITIAL VISUAL INSPECTION
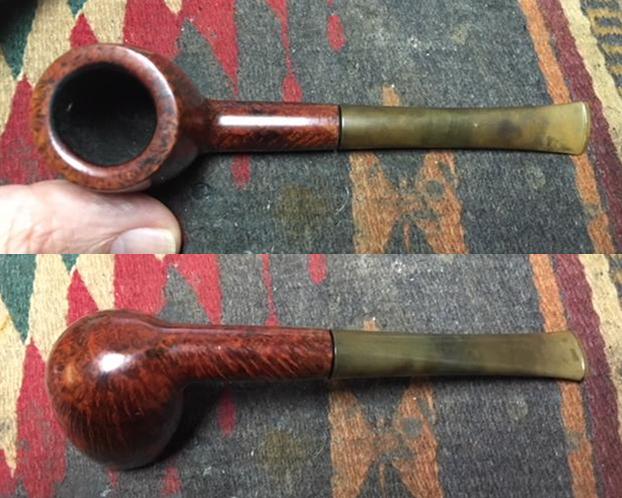
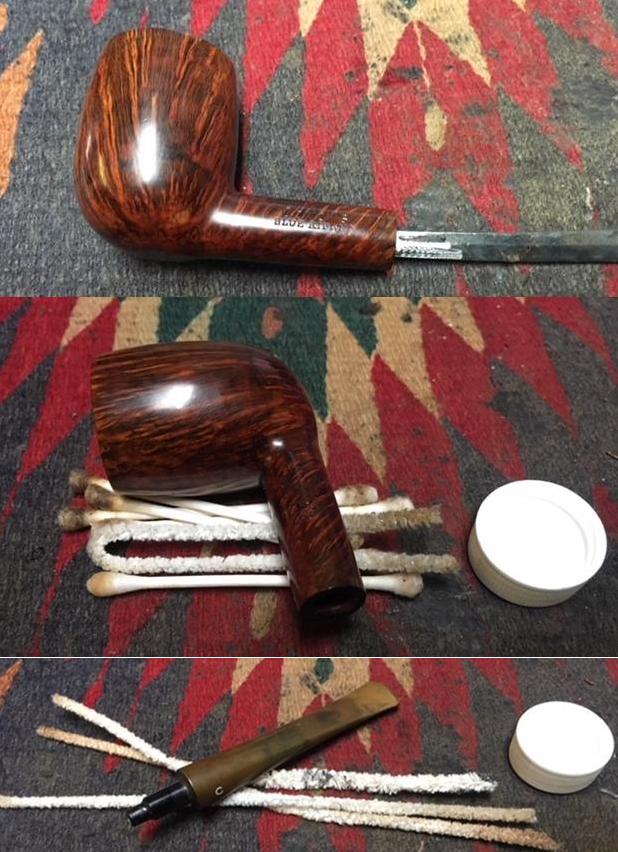
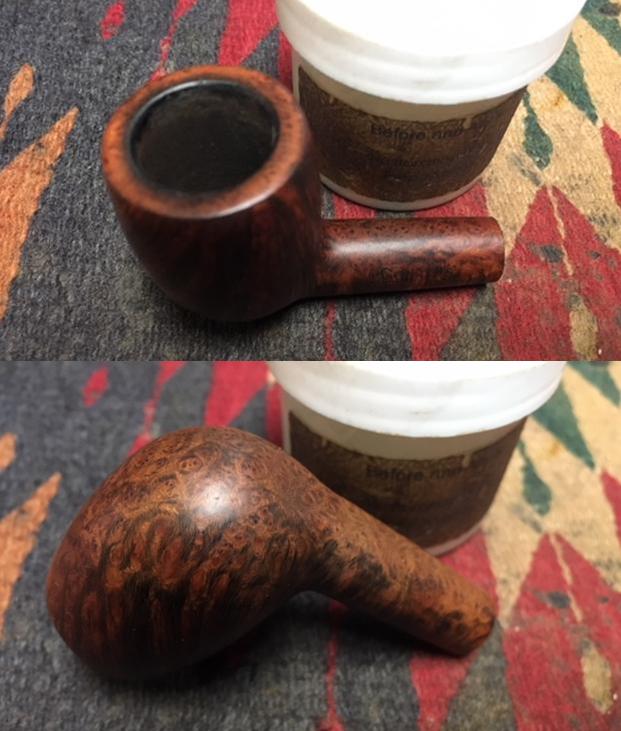
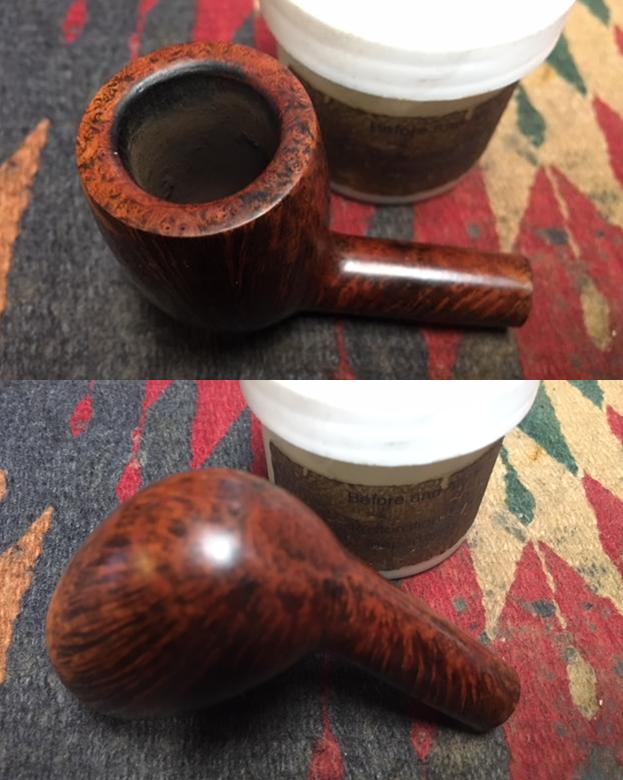
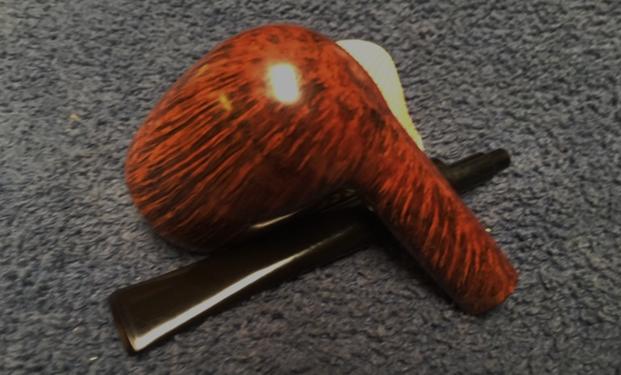
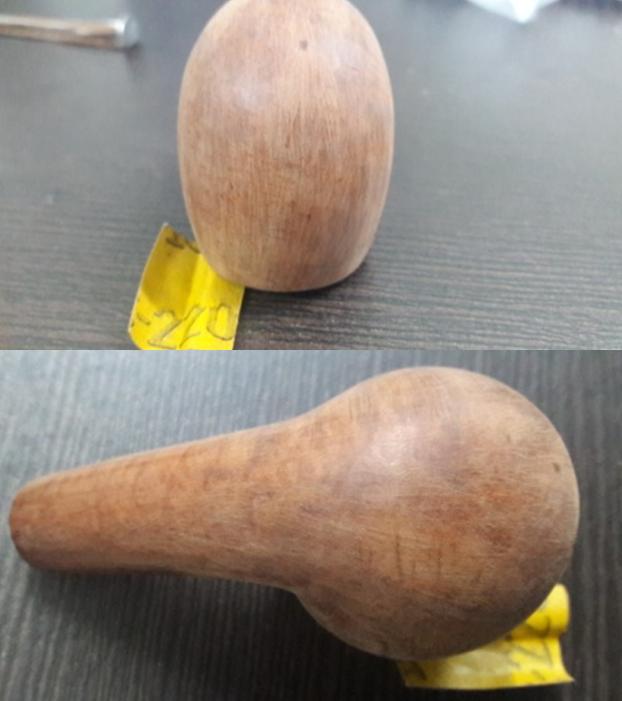
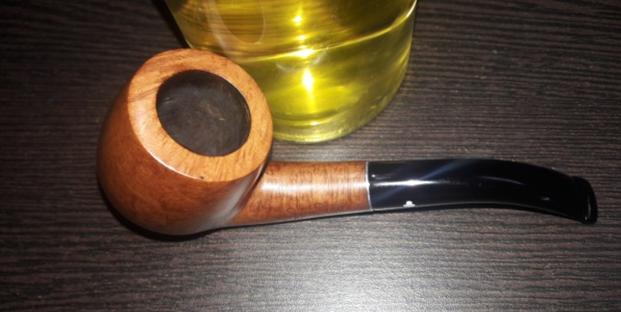
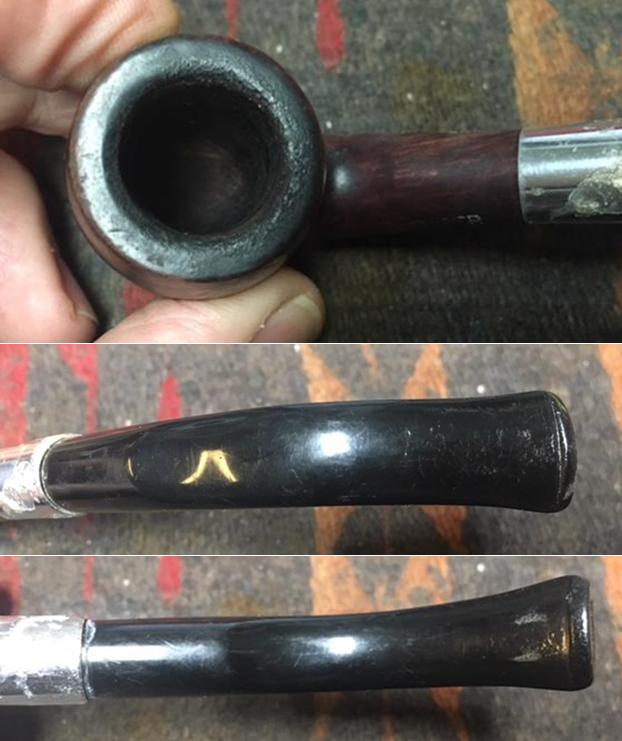
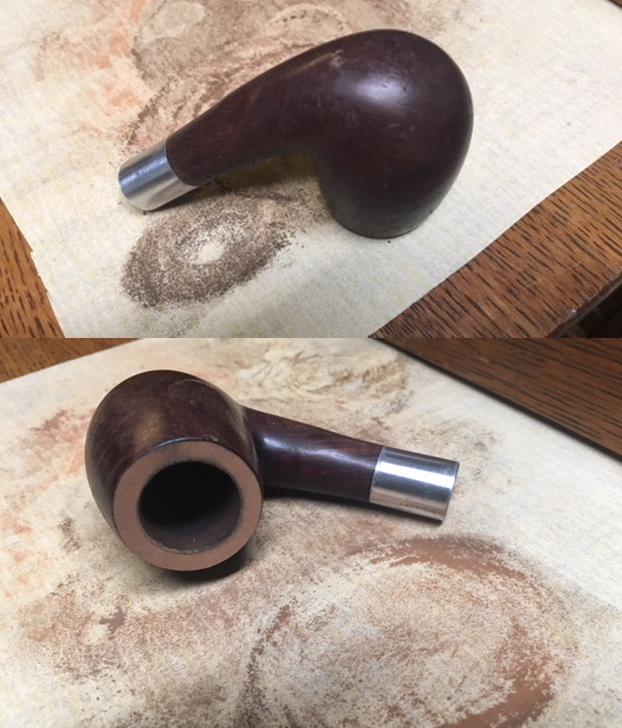
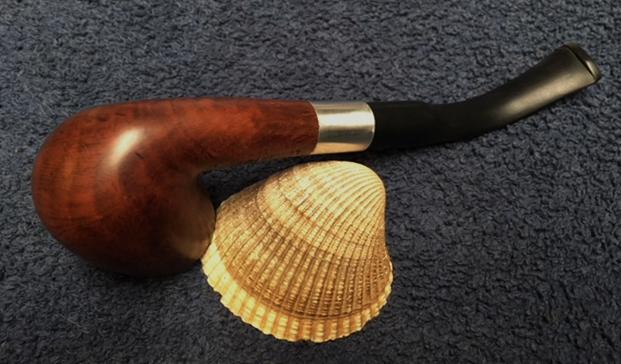
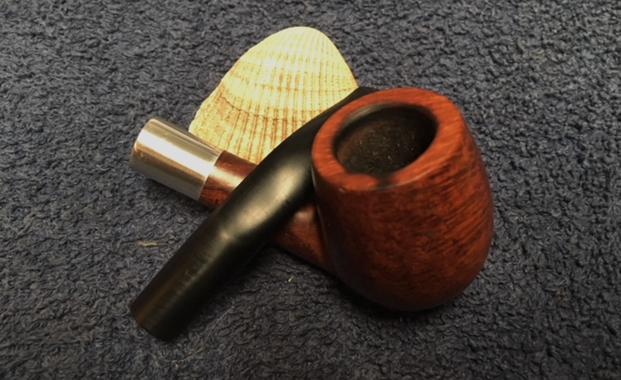
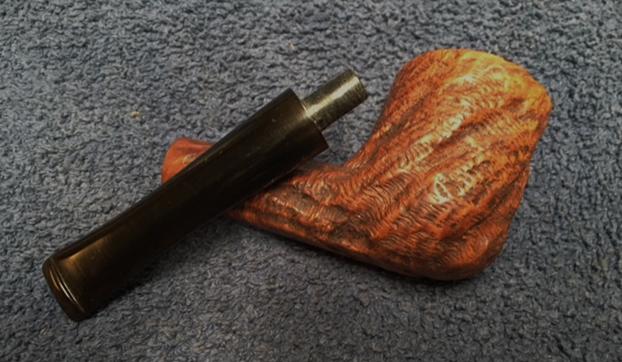
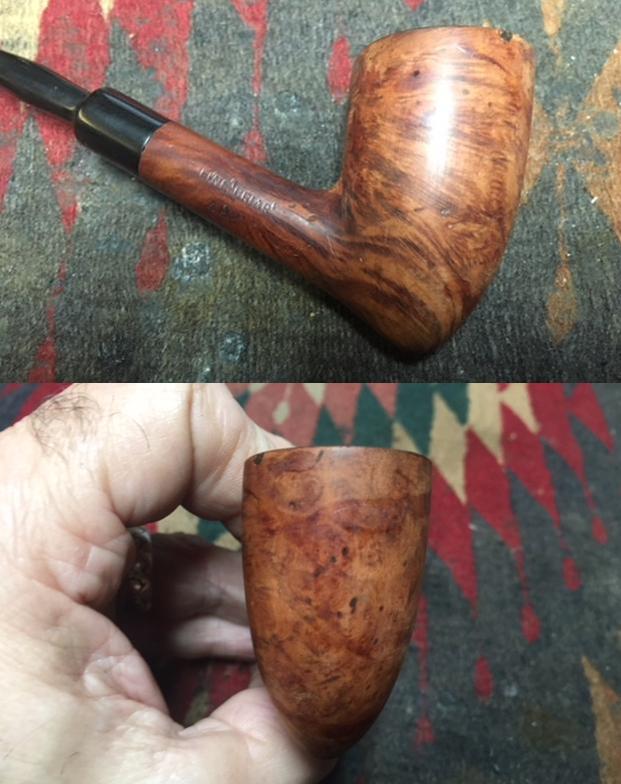
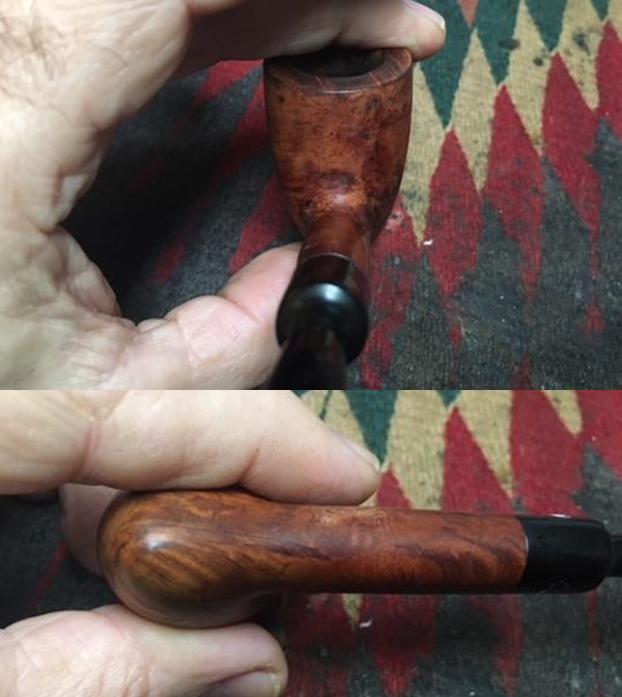
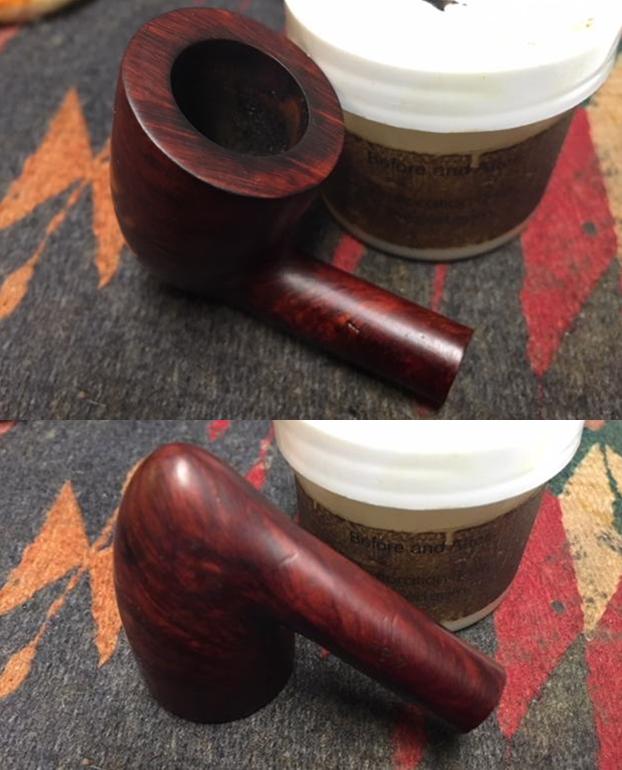
The finish looked a lot like the classic Kaywoodie take on Tracy Mincer’s Custom-Bilt pipes. The carved worm trails seen on the stummel and shank is filled with dust, dirt and grime of years of smoking and thereafter years of uncared for storage. The grime and dirt is so strongly entrenched in to these carved worm trails that it appears black and solidly smooth to the touch. I could see 3-4 small dings and dents on one of the fingers of the raised portion of the stummel. This will need to be addressed. 

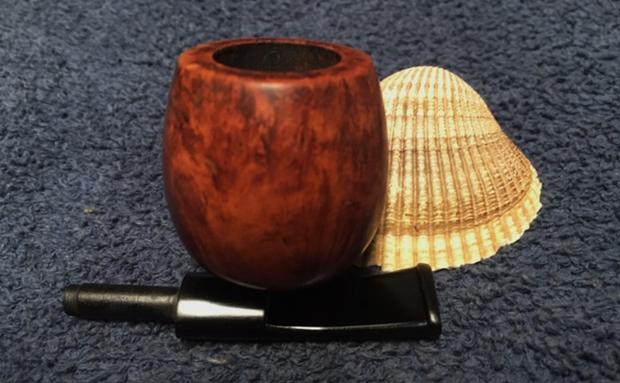
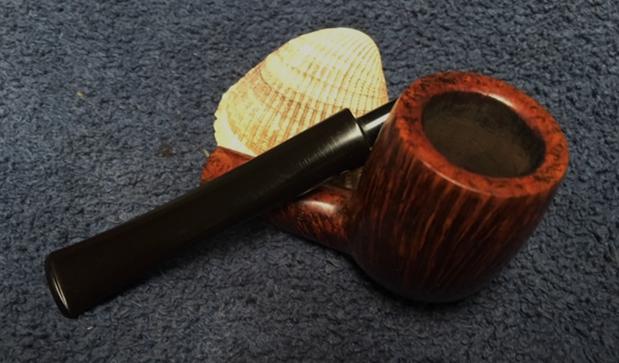
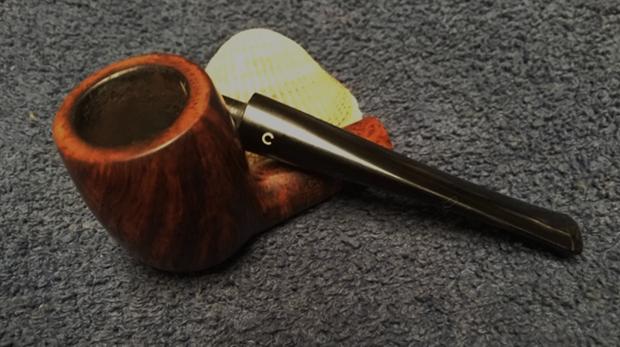
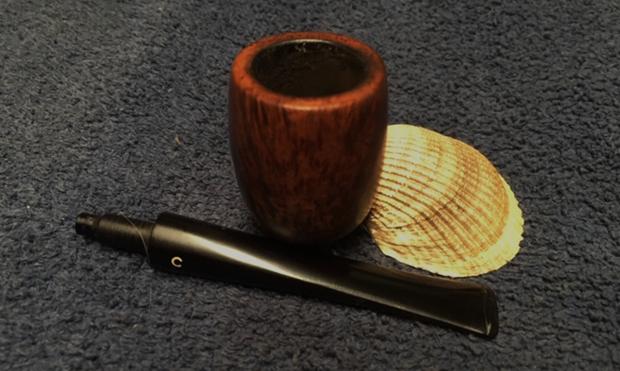
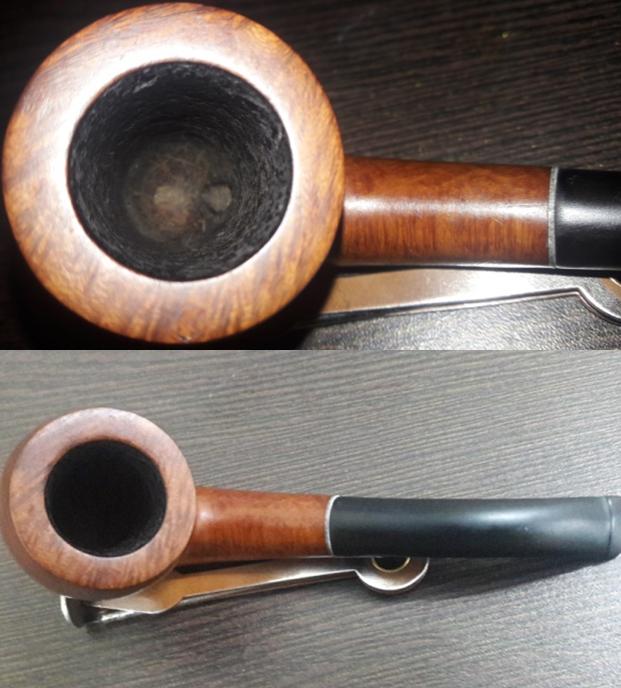
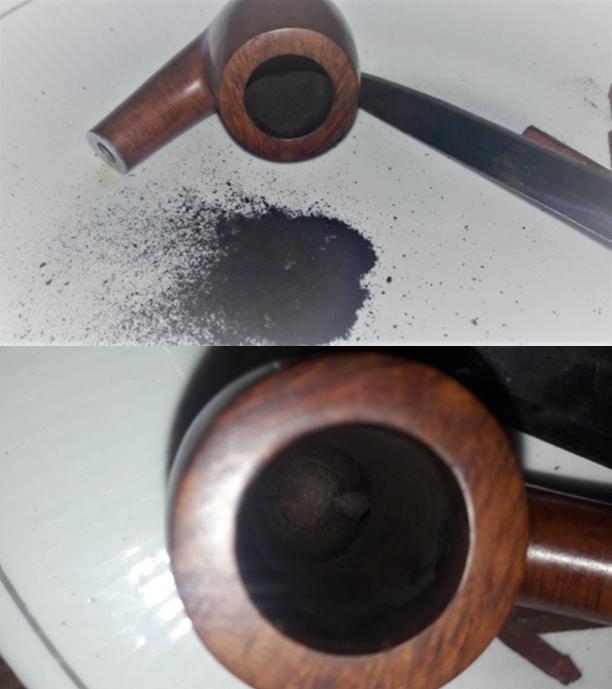
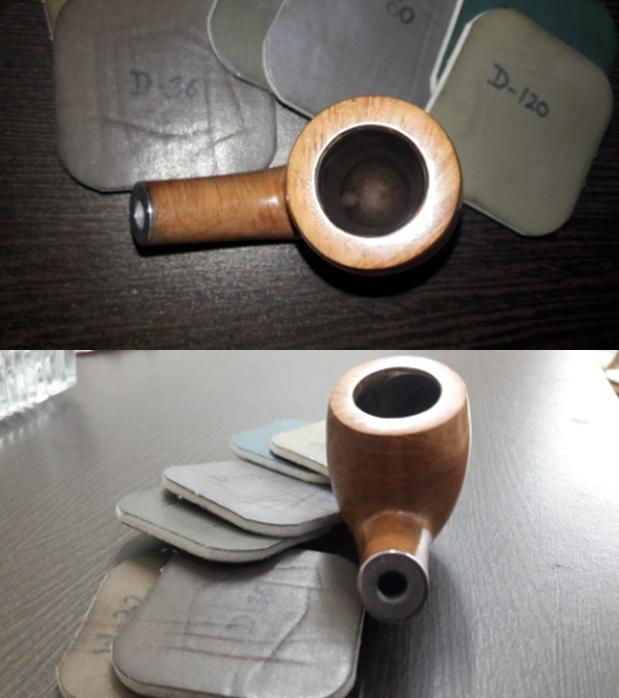
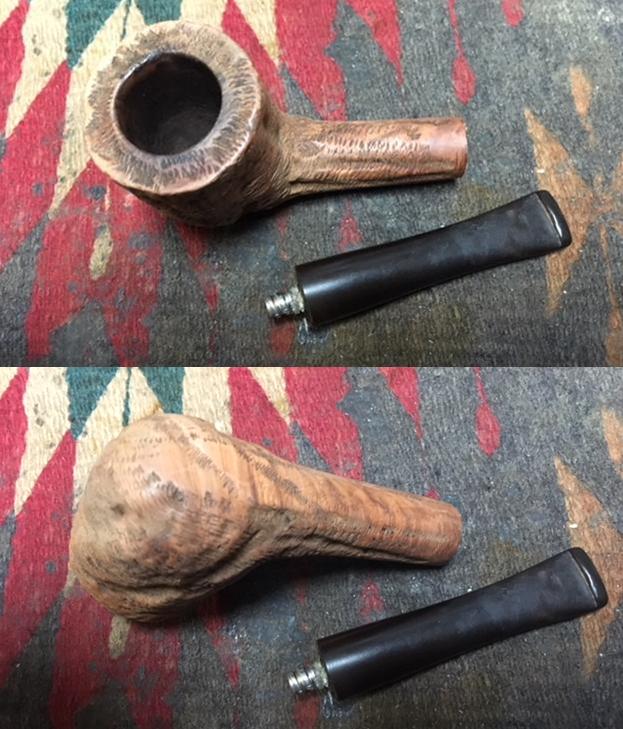
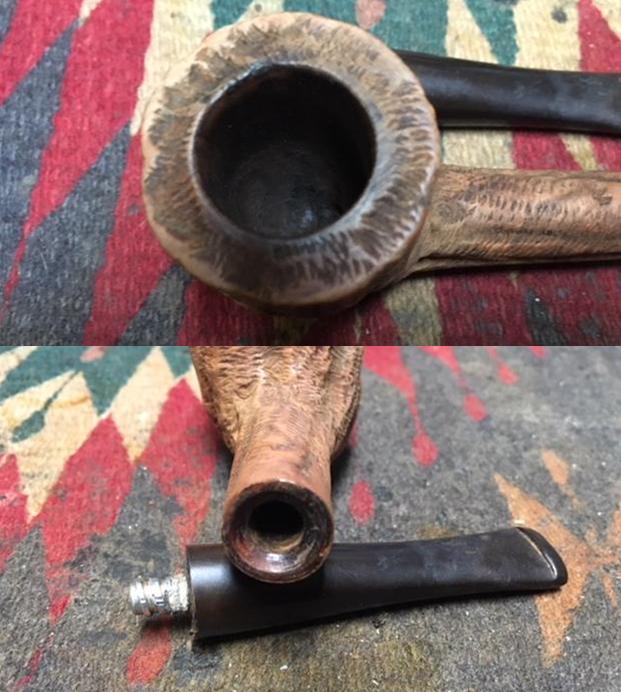
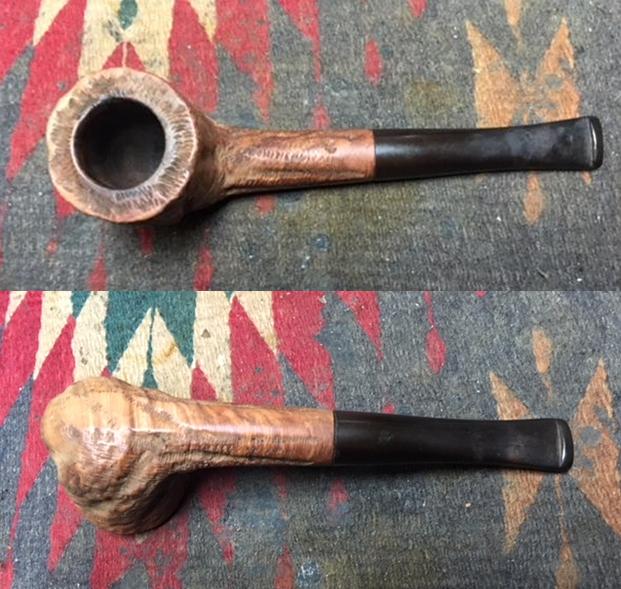
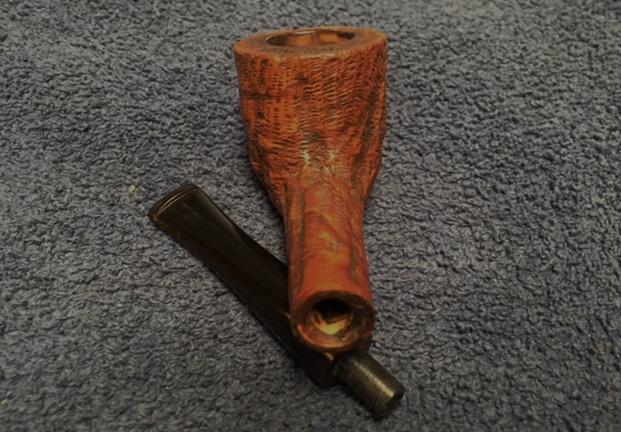
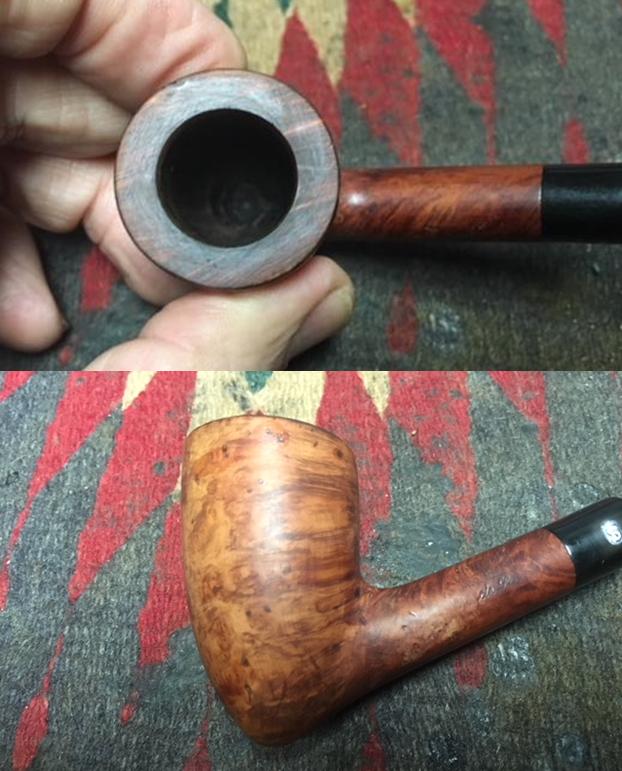
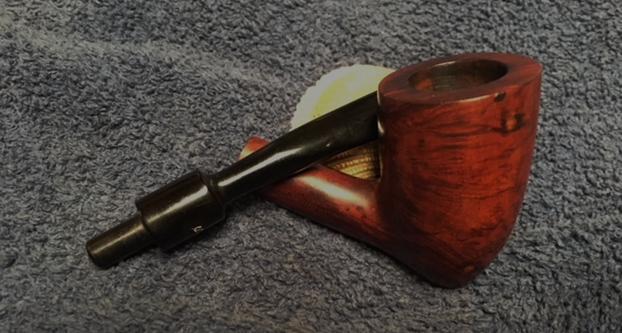
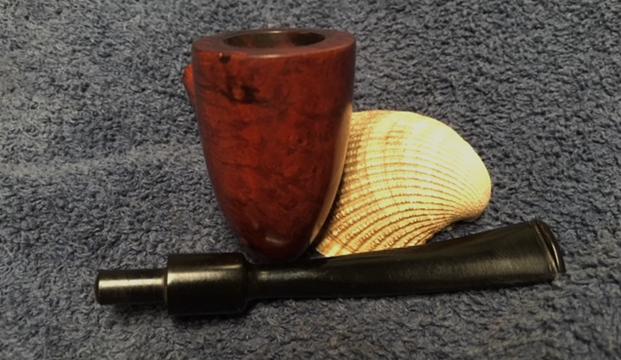
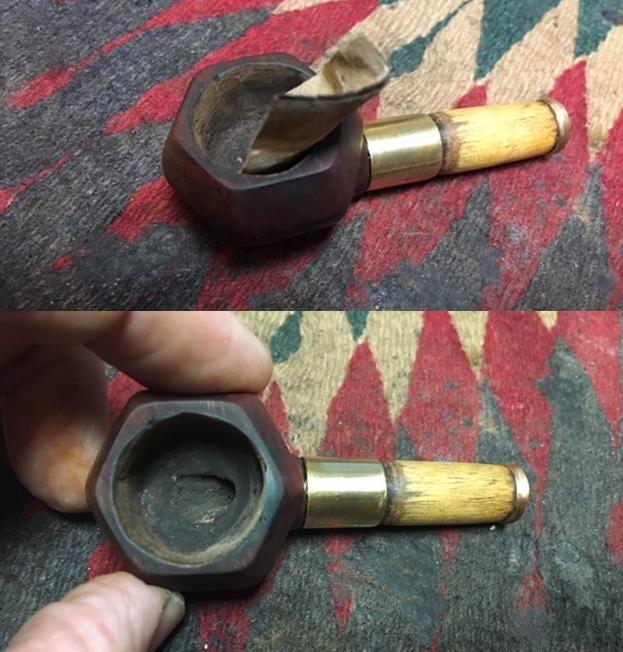
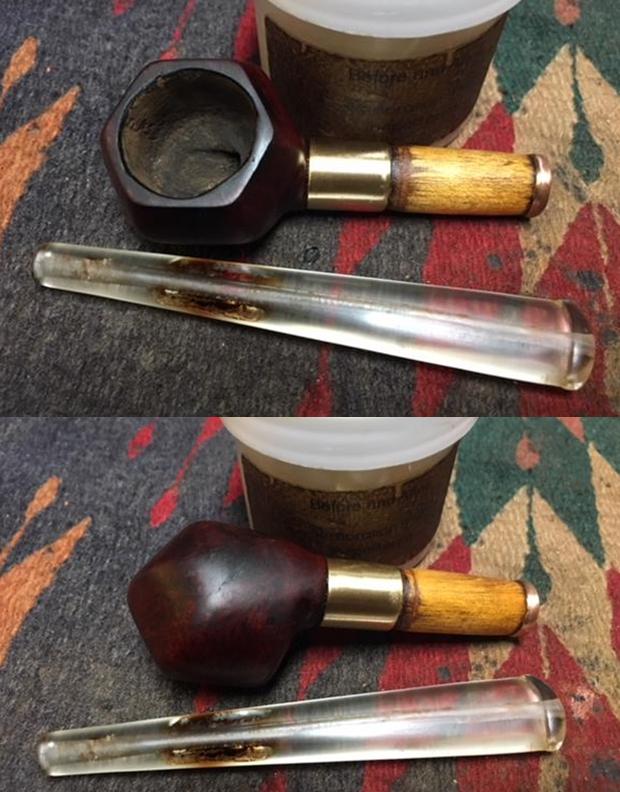
 There is a decent layer of cake inside the bowl which is dry and hard to the touch. The smooth rim top is clean and devoid of any apparent damage. The condition of the inner walls of the chamber can be ascertained after the cake has been reamed out. The inner edge of the rim shows minor uneven surface, however, the outer edge of the rim is clean and without dents or dings.
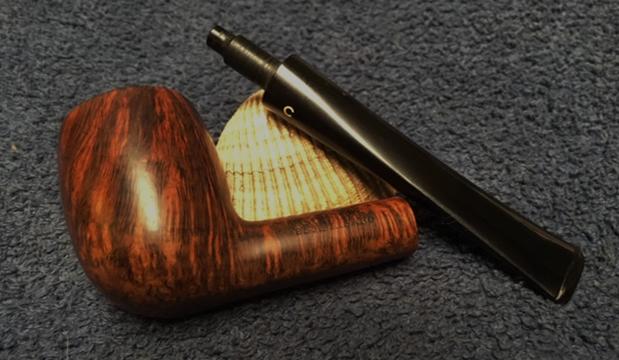
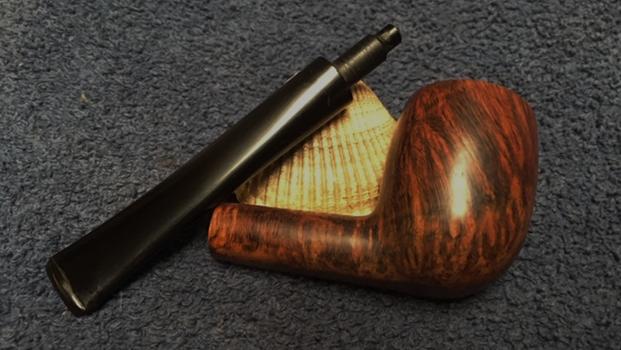
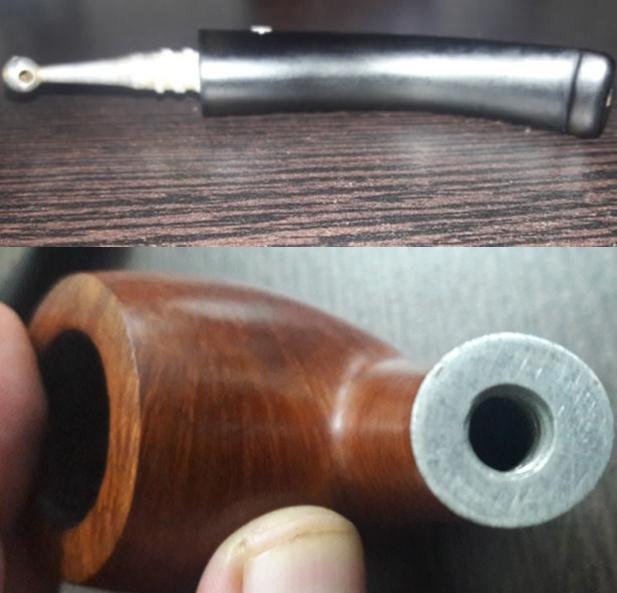
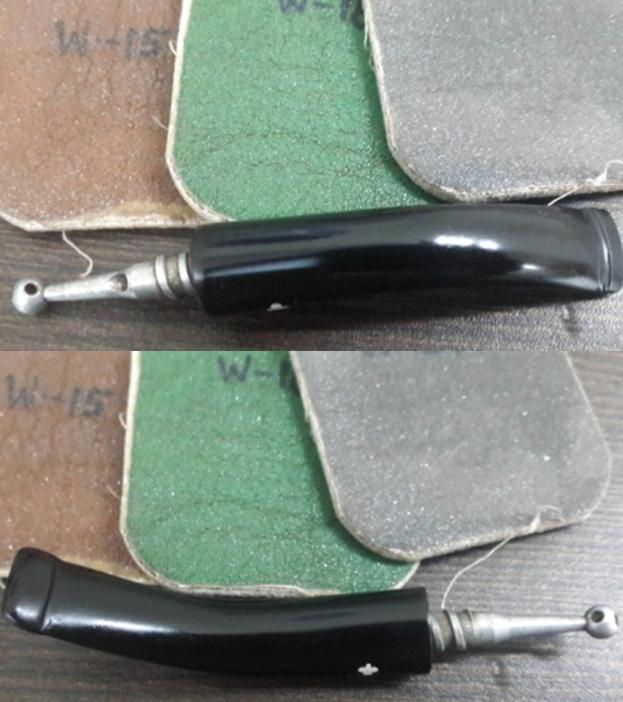
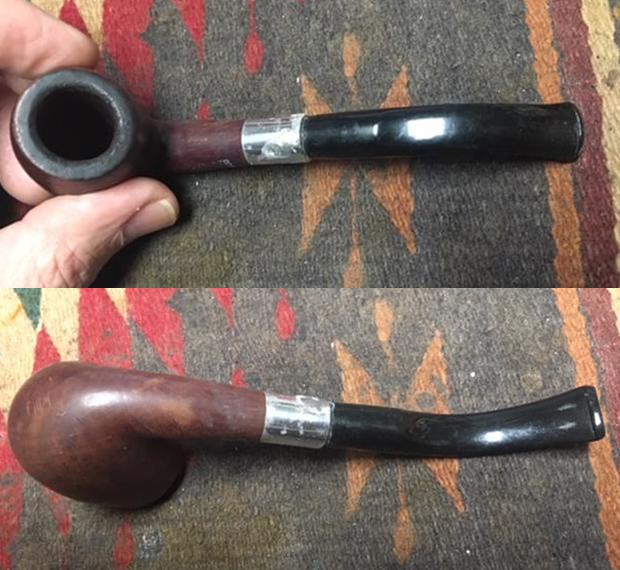
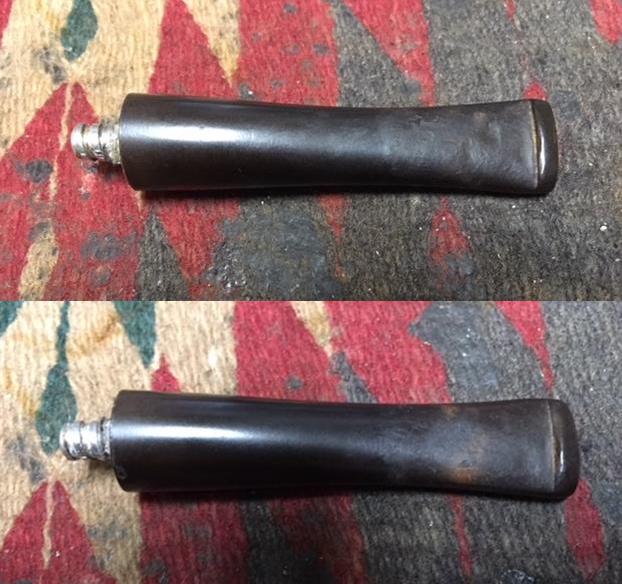
  The short ¾ bent saddle stem has smooth upper and lower surfaces without any tooth chatter or bite marks. This is unlike any other pipe stem I have seen that had belonged to my grand old man. The four holed stinger is clean, however, the holes appear to be clogged. This was confirmed as air did not flow when I tried to blow through the stem. May be that has been the reason that this pipe was not as extensively used by him. The inlaid white clover leaf is clean and prominent with a tiny portion of the top of the leaf missing!! But it is so tiny chip that it is not immediately visible. The lips are worn out and may need to be reconstructed; again I am not sure about this as there is no damage as such.
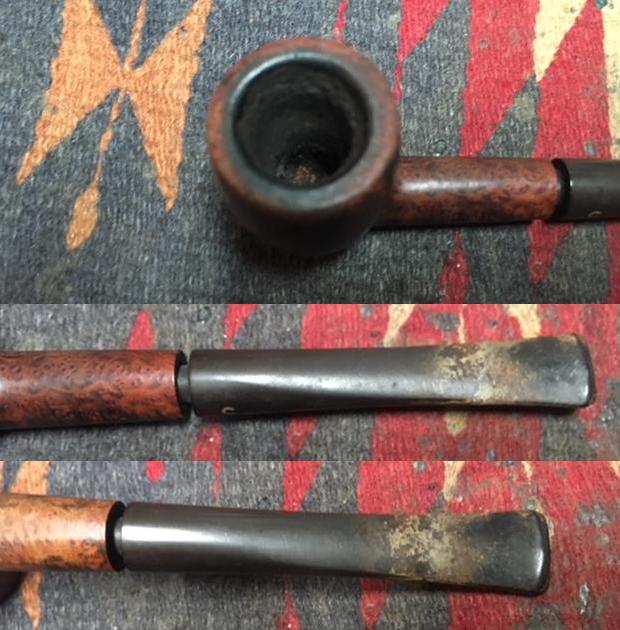
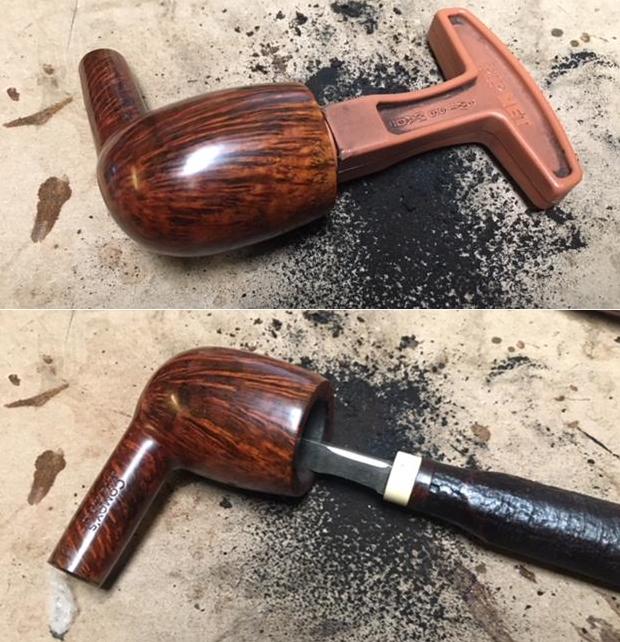
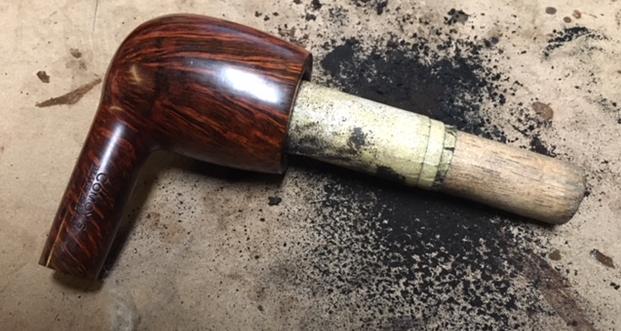
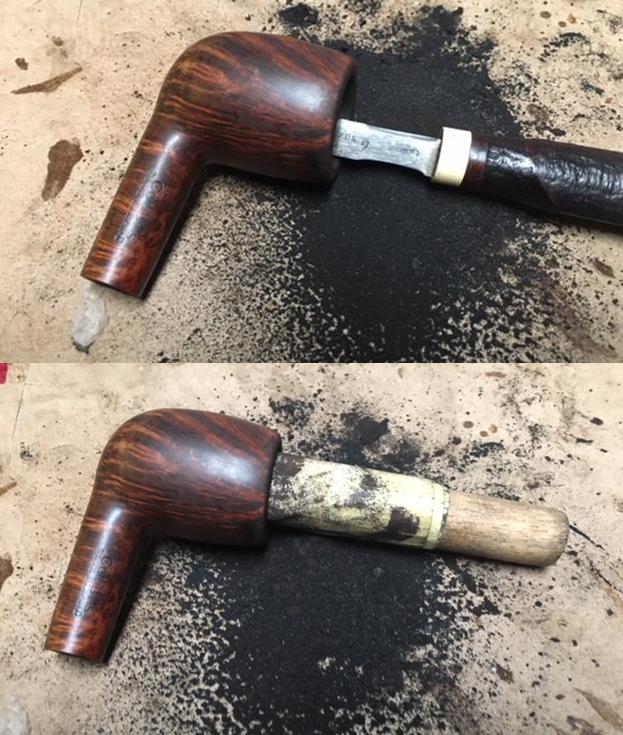
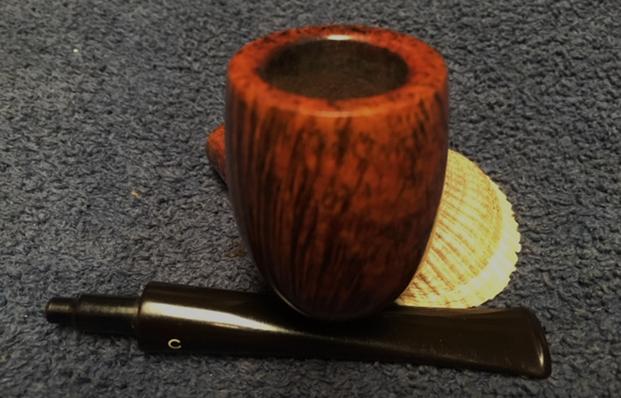
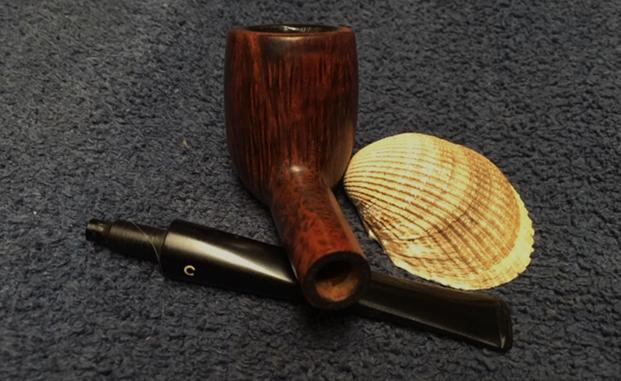
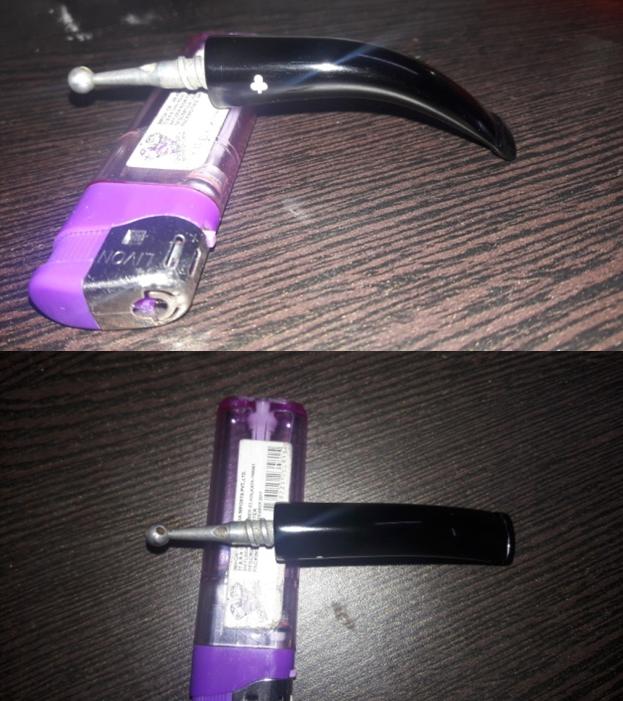
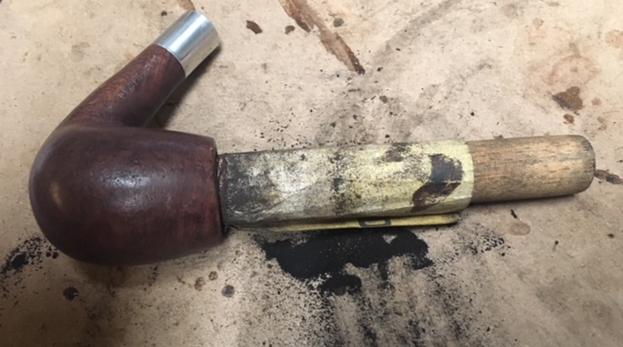
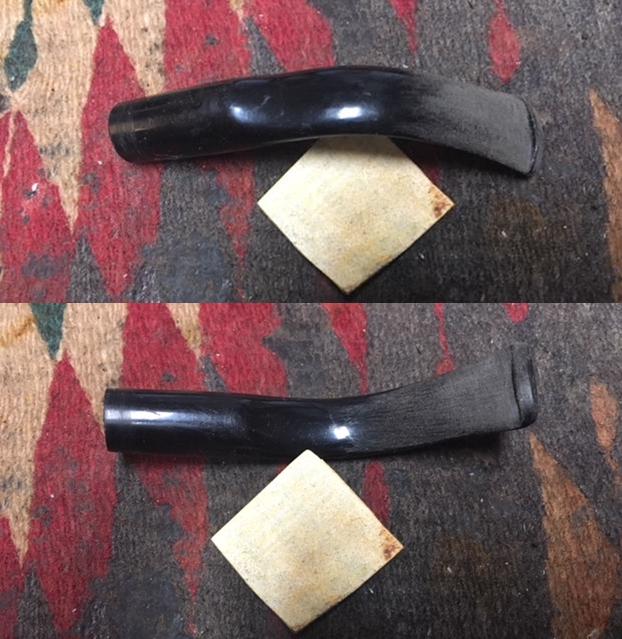
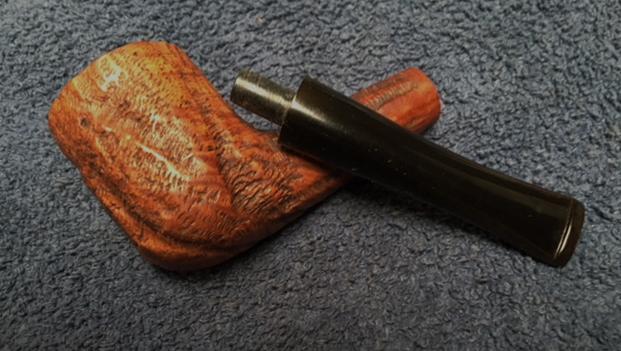
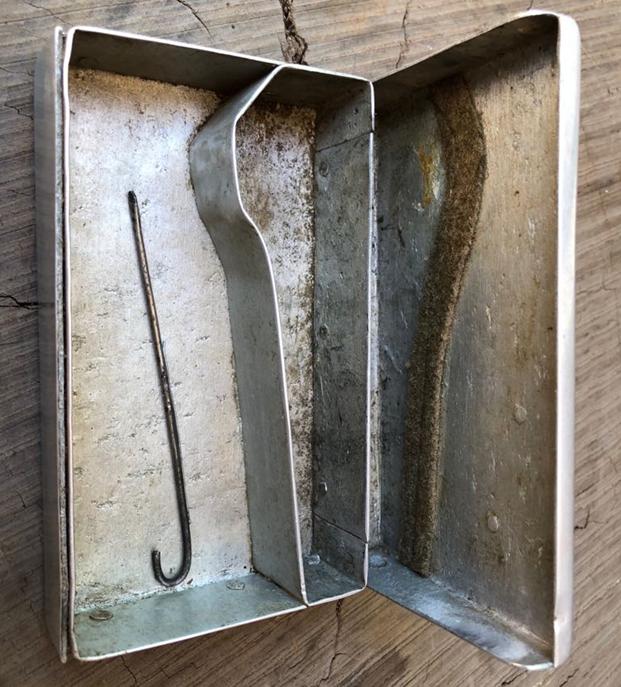
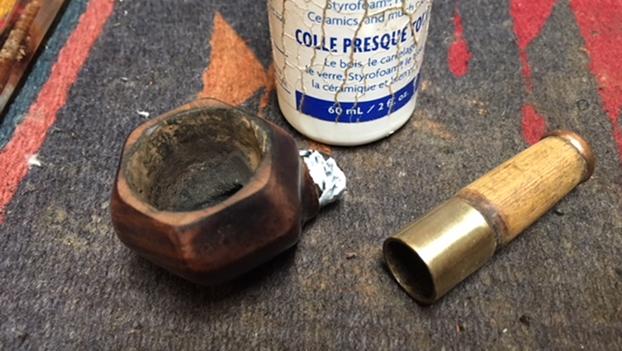
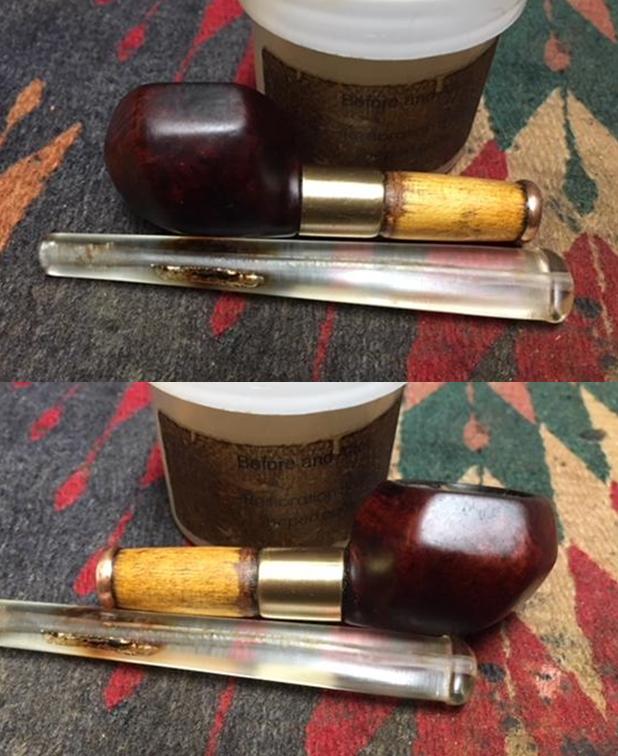
 There is an aluminum spacer between the stem and the shank which breaks the monotony of the pipe. However, it is broken on the right side leaving an ugly gap between the shank and stem. The remaining portion of the aluminum spacer was crumbling and breaks merely to the touch. This needs to be addressed. There is a circular band of white tape or some such material at the end of the stinger where it meets the stem. This is something which is not correct and the reason for it having been placed needs to be checked.

 THE PROCESS
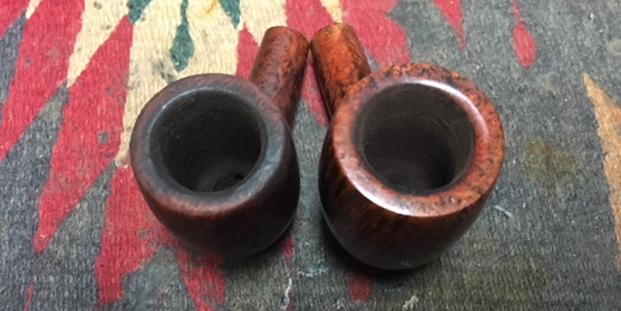
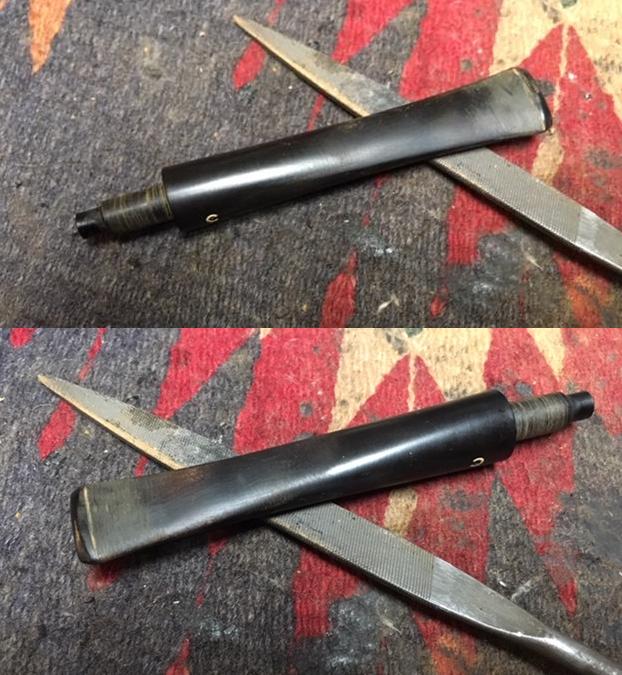
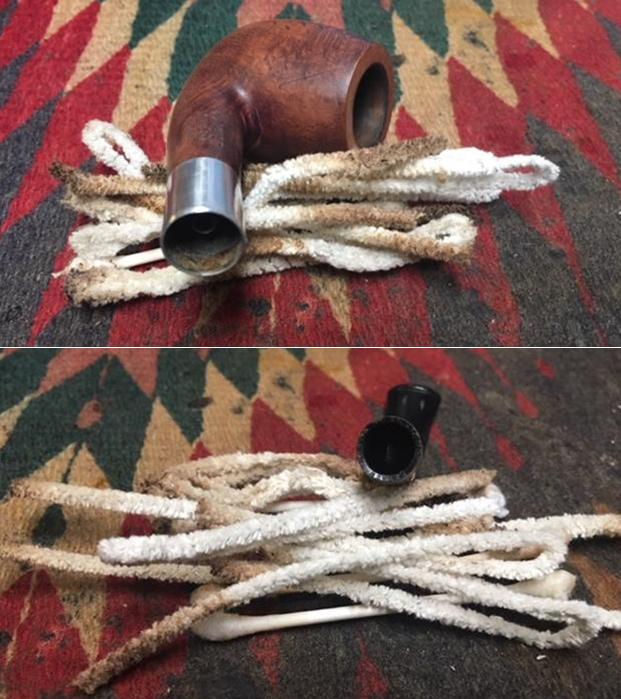
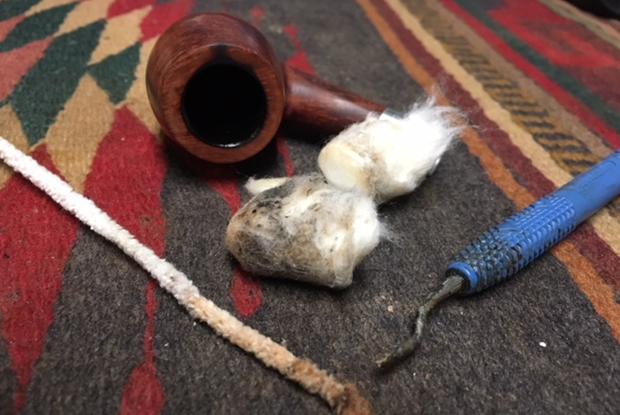
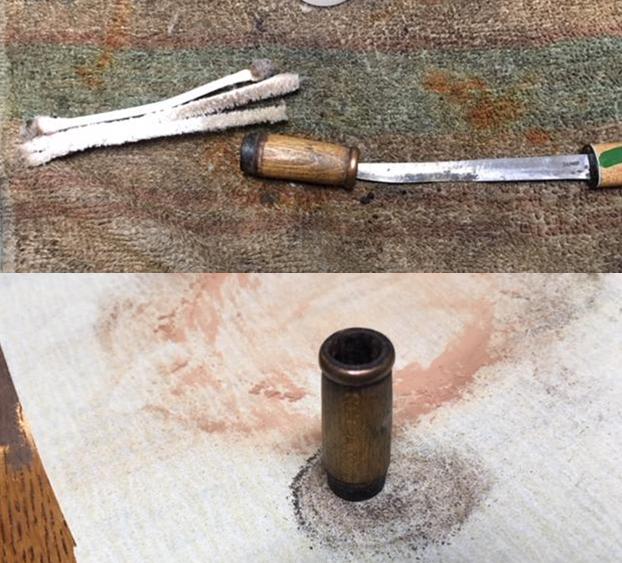
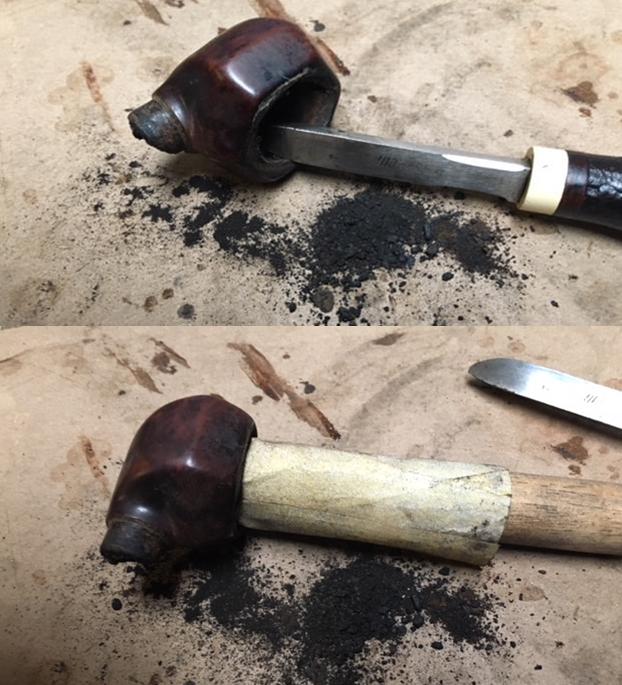
First and foremost in any restoration of pipe, I start with reaming the chamber with a Kleen Reem pipe reamer. However, in this instance, the cake was dry, tightly packed and very hard. I feared breaking the reamer and resorted to the use of my fabricated knife. After a struggle, I was able to take the cake down to the bare briar. I sanded the inner walls of the chamber with 150, 220 and 600 grit sand paper to completely remove the remaining cake and smooth out the walls. Alas, I observed some superficial gouges on the wall surface due to the use of knife. I would need to address this by coating the chamber walls with pipe mud at a later stage. I cleaned the mortise and internals of the shank with cue tips, pipe cleaners and alcohol.
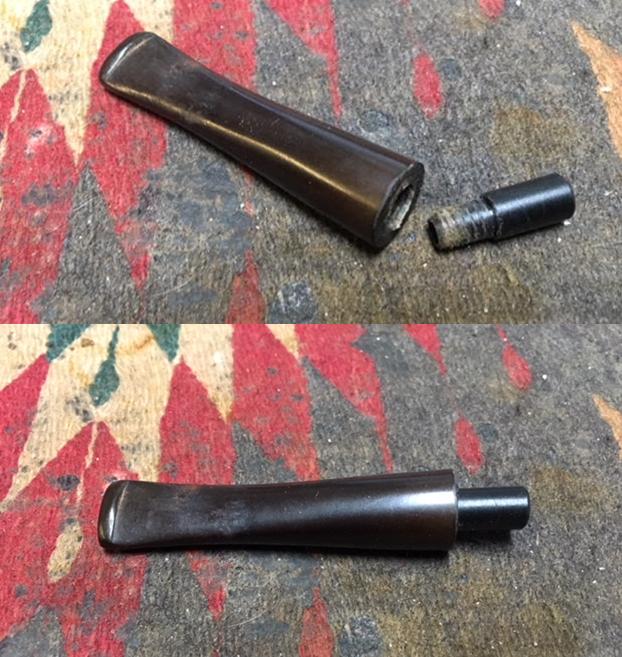
 Since the major challenge appreciated in this restoration project was the construction of a new aluminum spacer, I decided that is where I would start!!!! To address this issue, I identified three options, as under, which were available to me:
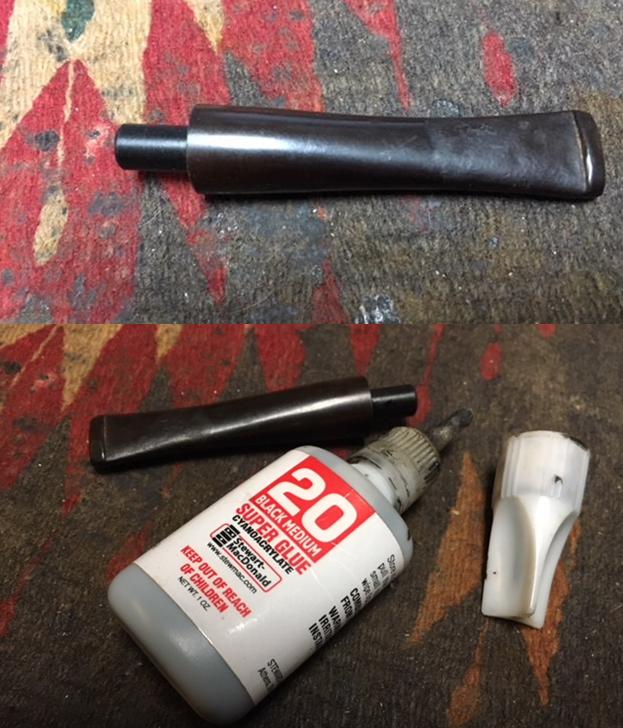
(a) Coat the entire spacer, including the broken portion, with superglue, building it up in layers and then sanding it to flatten it on a topping board. This coat of superglue will also stabilize the remaining original spacer.
(b) Fabricate an aluminum spacer out of a regular aluminum washer and replace only the broken portion of the spacer.
(c) Replace the entire spacer with the new fabricated aluminum spacer.
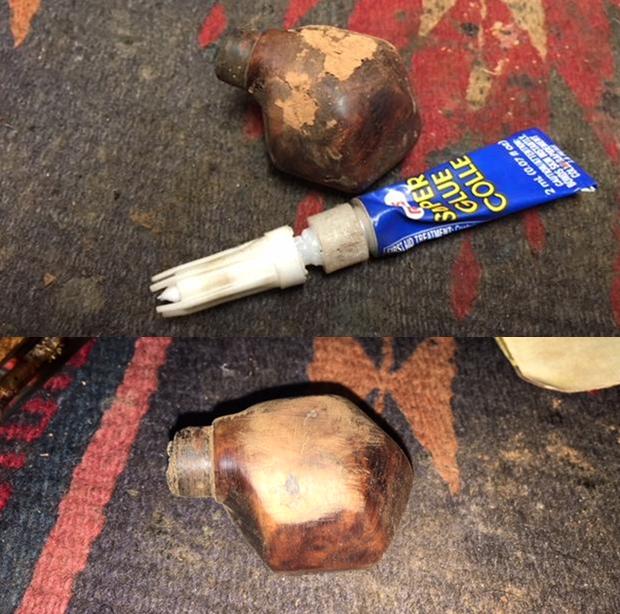
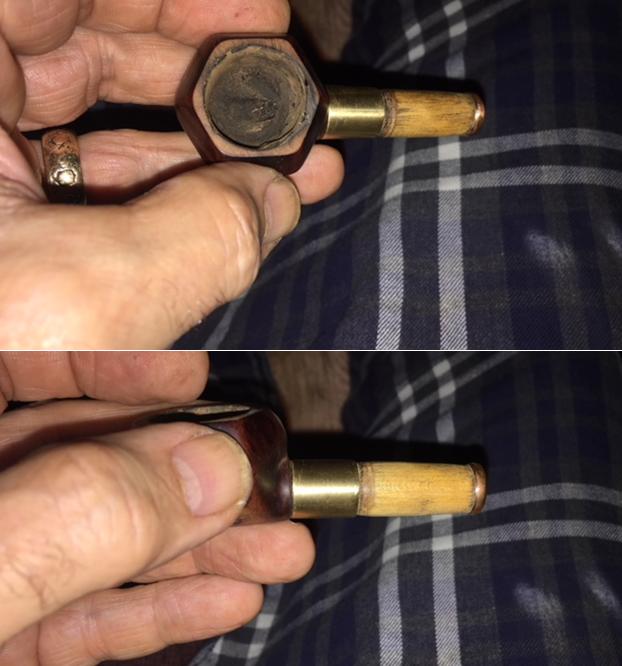
I discussed these options with my mentor, Mr. Steve Laug. As is his trademark style of tutoring, his suggestion was, “I would go with the first option”!!!!! He further clarified that the spacer also enters the mortise and has threads for the “synchro-stem” (threaded drinkless screw-in mouthpiece). Thus, I concluded that exercising the third option was best avoided if I wished to avoid ruining the pipe!!! That left me with following either first option or the second option. Any other sane student would have followed the advice of his mentor (which I had been doing up to this point!!!). However, I, for some reason, was convinced that the end result of exercising the second option would result in a better finish and thus embarked on the arduous journey of replacing only the broken portion of the original spacer with the fabricated aluminum washer.
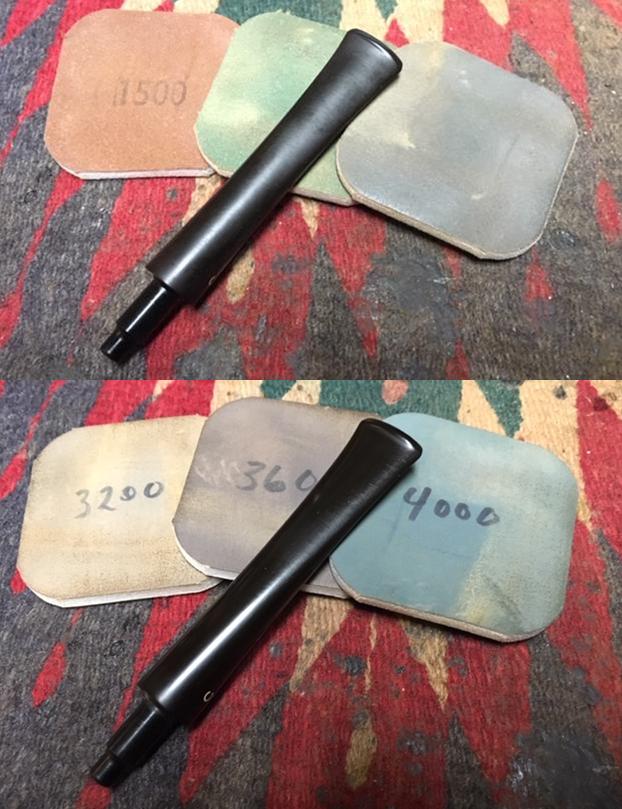
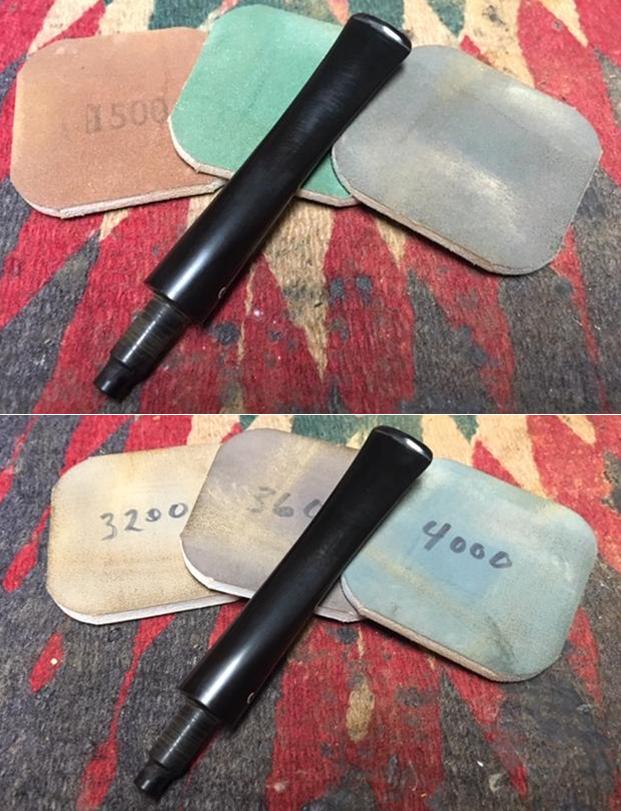
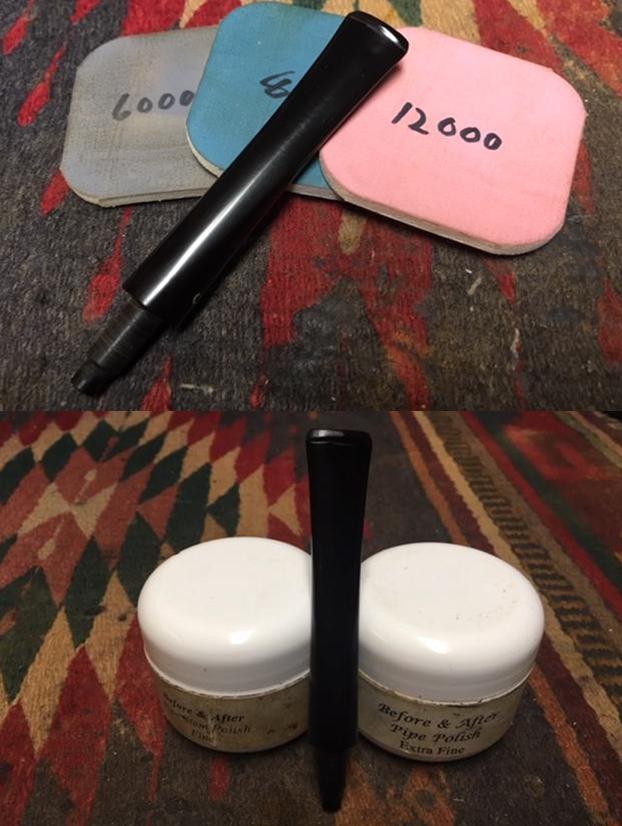
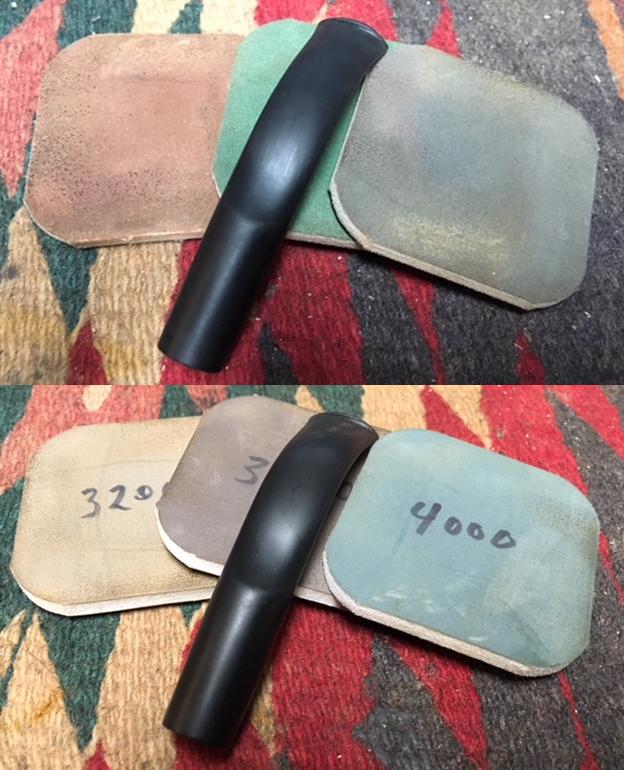
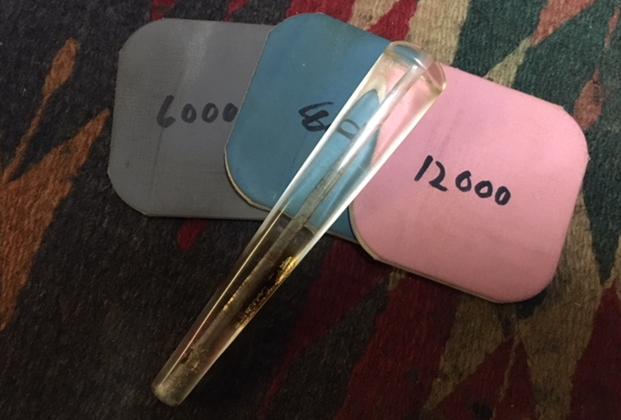
I began the process by shaping the new aluminum washer to match the size, shape and thickness of the original spacer. I was not very meticulous about the size and thickness as the same would, in any case, have to be perfectly matched by sanding it down with needle files. The following pictures will tell the story of the entire process of constructing this spacer. However, what these pictures do not tell you is the long back breaking hours involved, the strain to which eyes were subjected, precise and controlled movements of the needle files and agony experienced whenever the needle file inadvertently scraped the crumbling original spacer, causing it to chip. When I was satisfied with the fit and finish of the new spacer, I applied an even coat of superglue over the entire surface and very painstakingly re-aligned all the broken pieces of the original spacer and also the new fabricated spacer over the coat of the superglue and set it aside to cure overnight. Next day I evenly applied another coat of superglue over the entire spacer and again set it aside to cure so as to stabilize the spacer repairs and even out the surface. Once the glue had sufficiently cured, I topped the surface on a topping board to even out the glue. To further smooth out the surface and ensure a transparent, even and smooth surface, I polished the surface with micromesh pads, wet sanding with 1500 to 2400 grit pads and dry sanding with 3200 to 12000 grit pads. I frequently wiped the surface with a moist cloth to remove the glue dust. I was able to maintain just sufficient thickness of the coat so as not to disturb the alignment of the stem with the shank while stabilizing and protecting the spacer. I was very satisfied with the results.


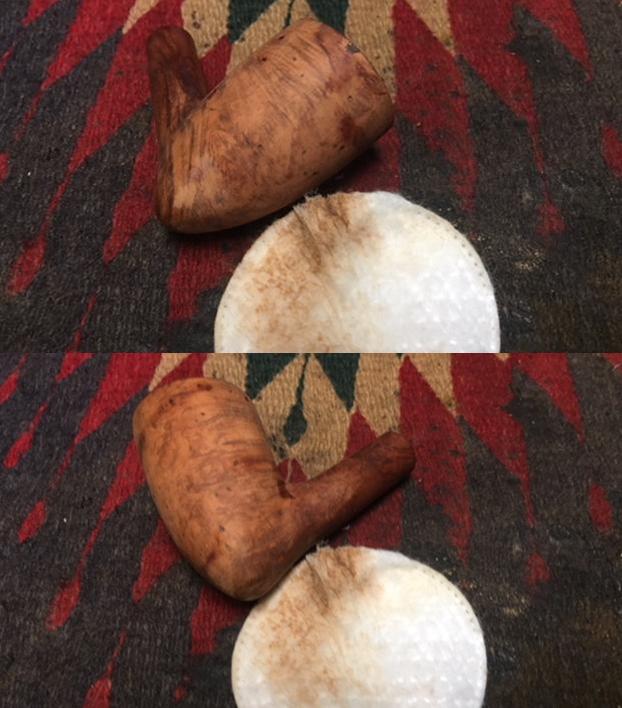
 Now with the spacer taken care of, I start working on the stummel. I thoroughly clean the stummel with undiluted Murphy’s oil soap and a hard bristled tooth brush scrubbing the rustications clean of all the lodged dirt, dust and grime.

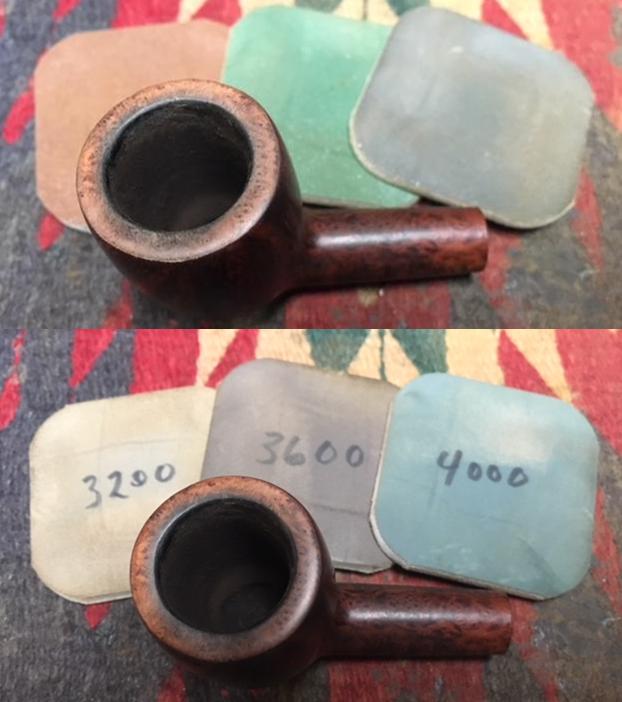
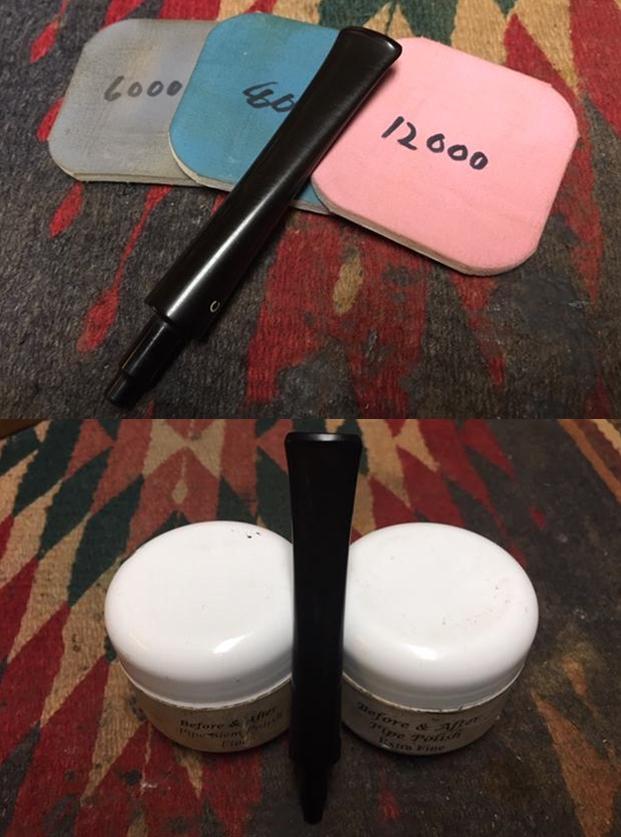
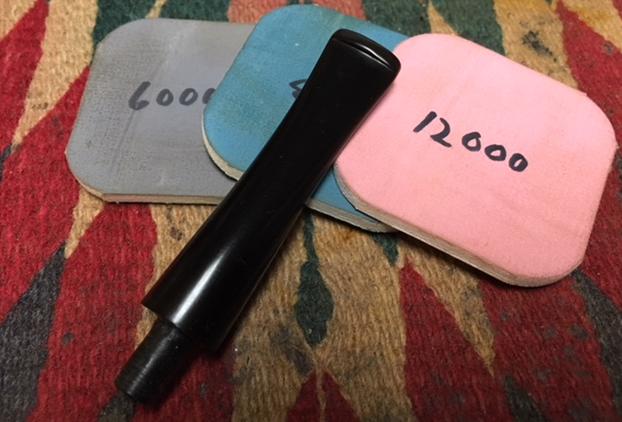
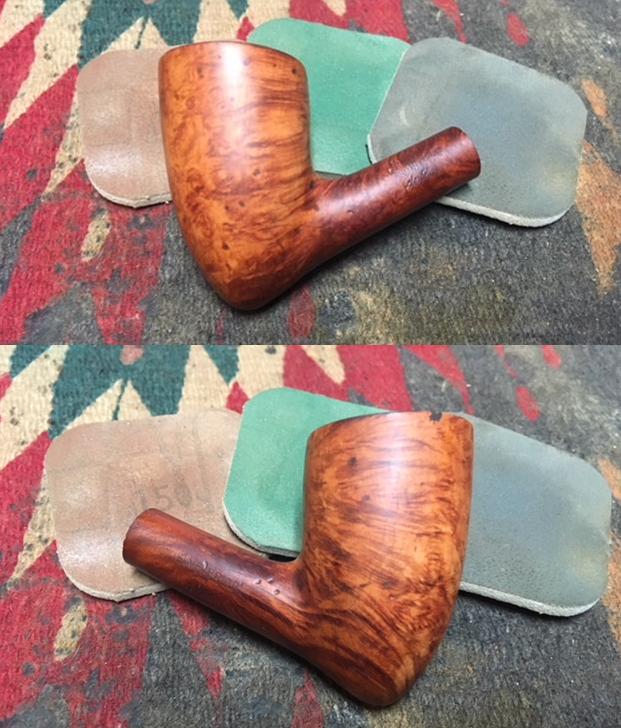
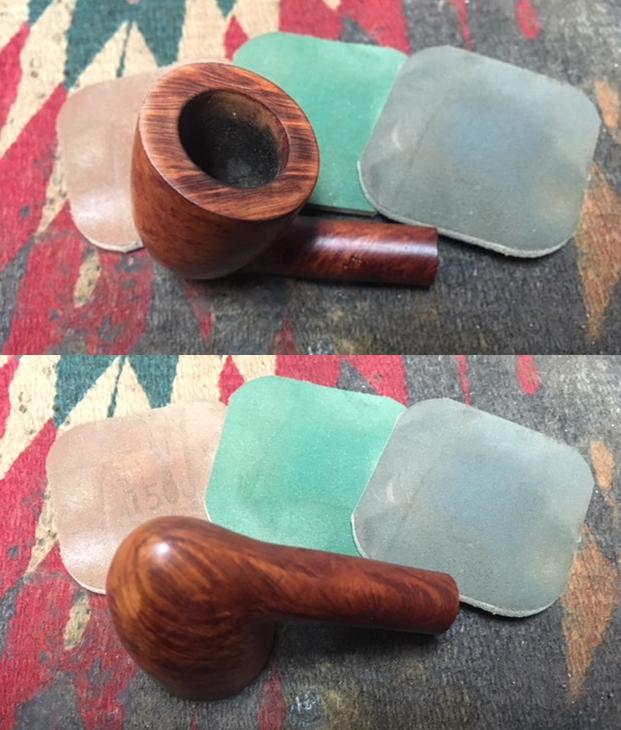
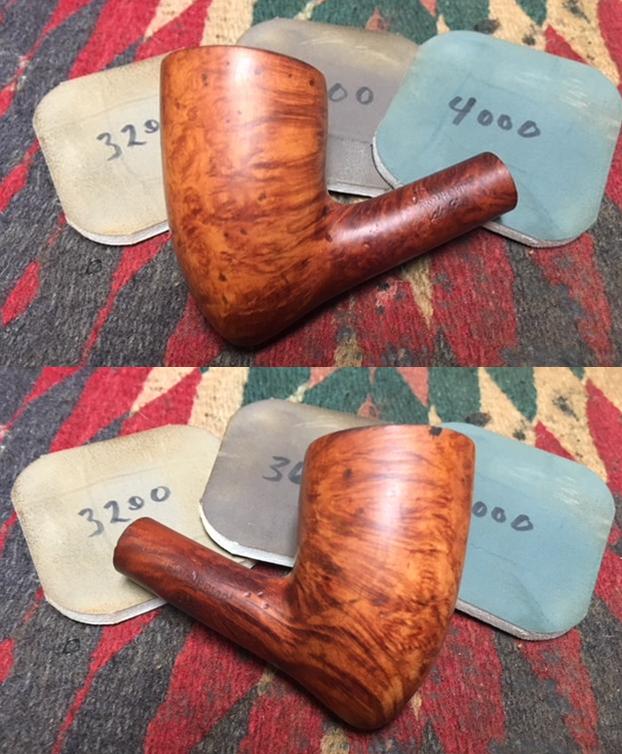
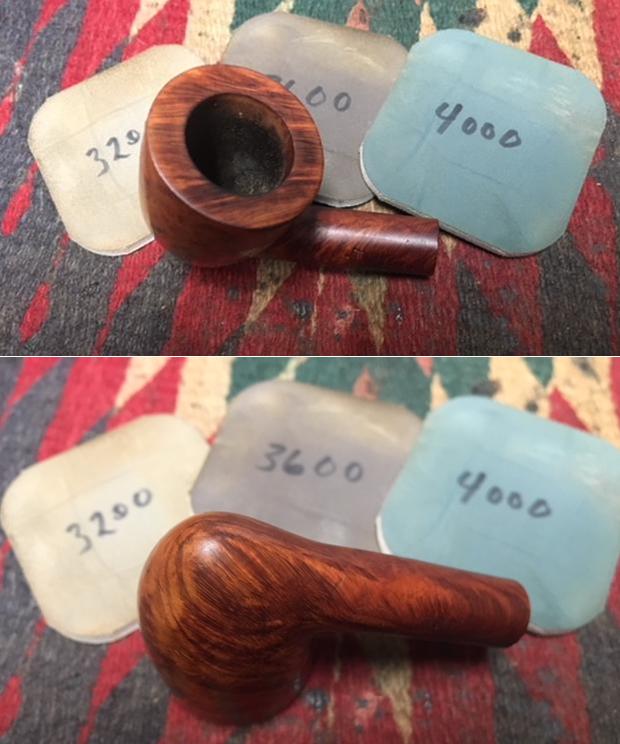
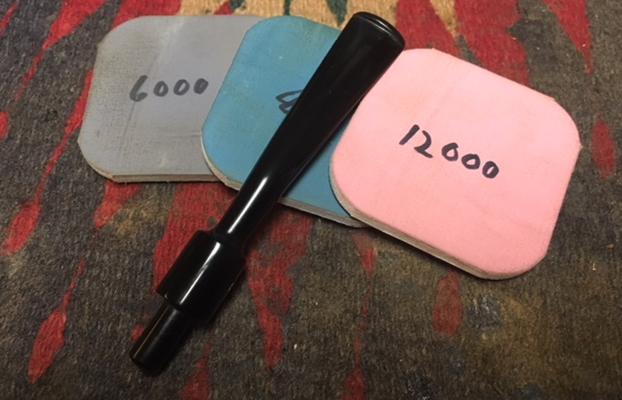
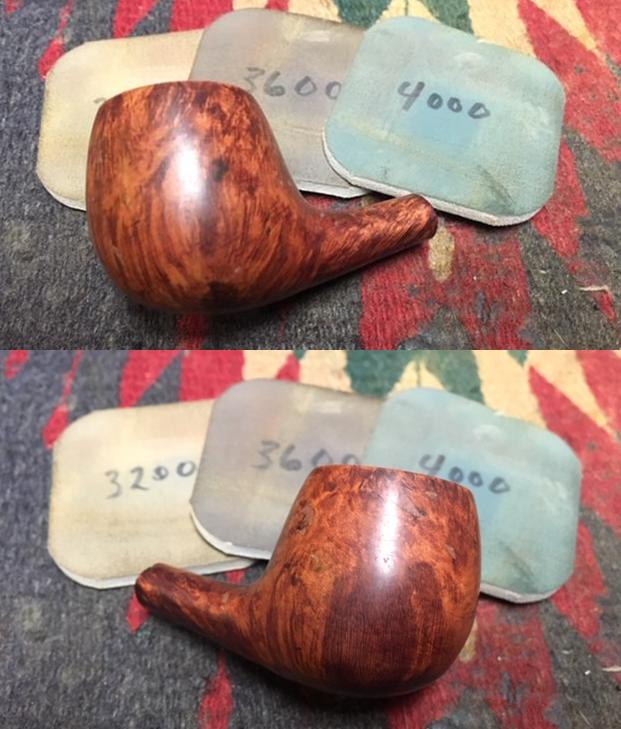
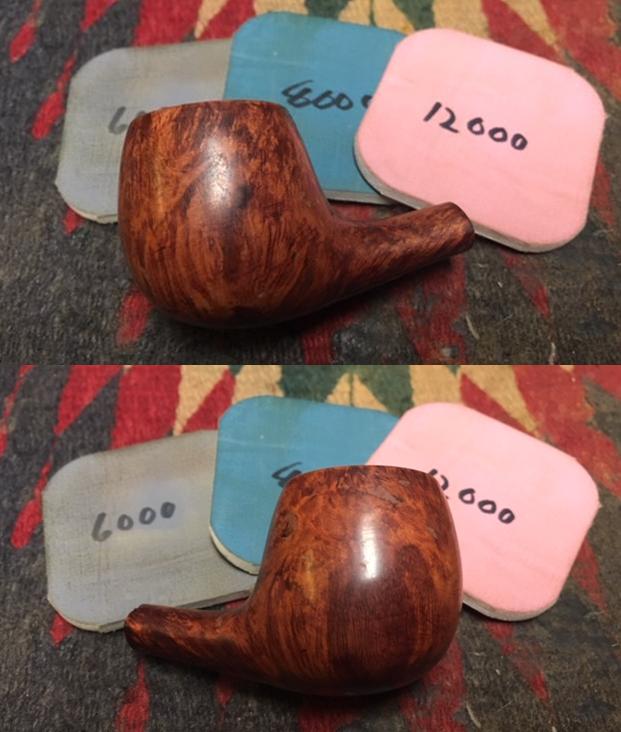
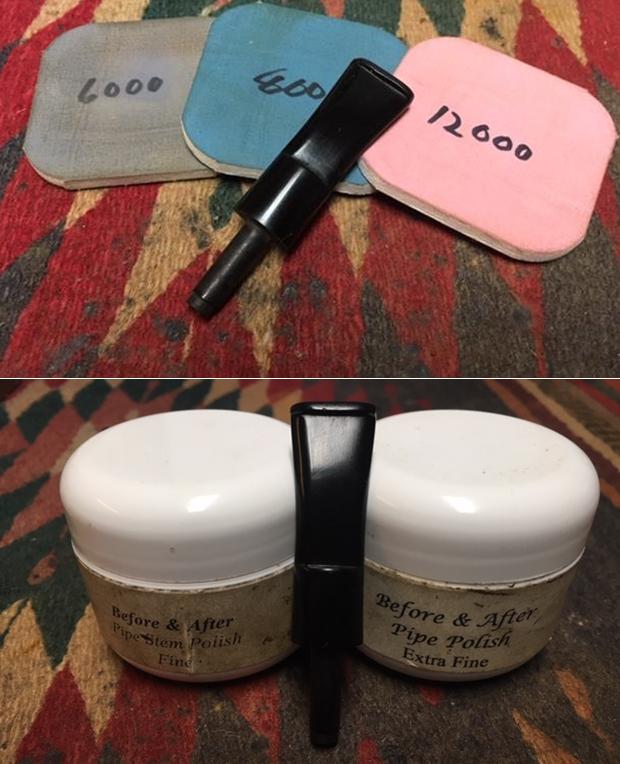
 I had seen a few dents and dings on one of the fingers of the stummel rustication and wanted to address it. I began by sanding the stummel and raised portion of the rustications with a 600 grit sand paper followed by 800 grit sand paper. I had used very light hand so as not to lose too much briar (though at the end I realized that I should have used a bit more force since at the end of the process, these dents and dings were still very much visible!!!!!!). This sanding was followed by polishing with micromesh pads, wet sanding with 1500 to 2400 grit pads and dry sanding with 3200 to 12000 grit pads. I wiped the bowl down with a moist cloth after each pad to remove all the sanding dust.


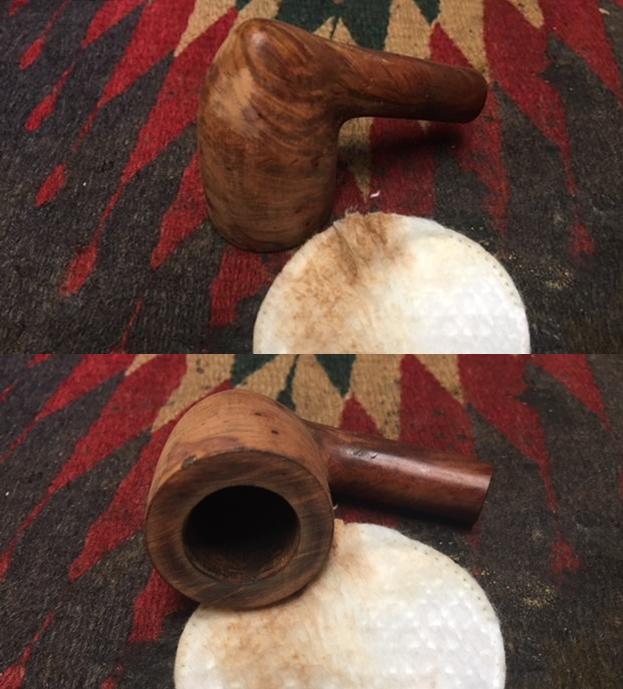
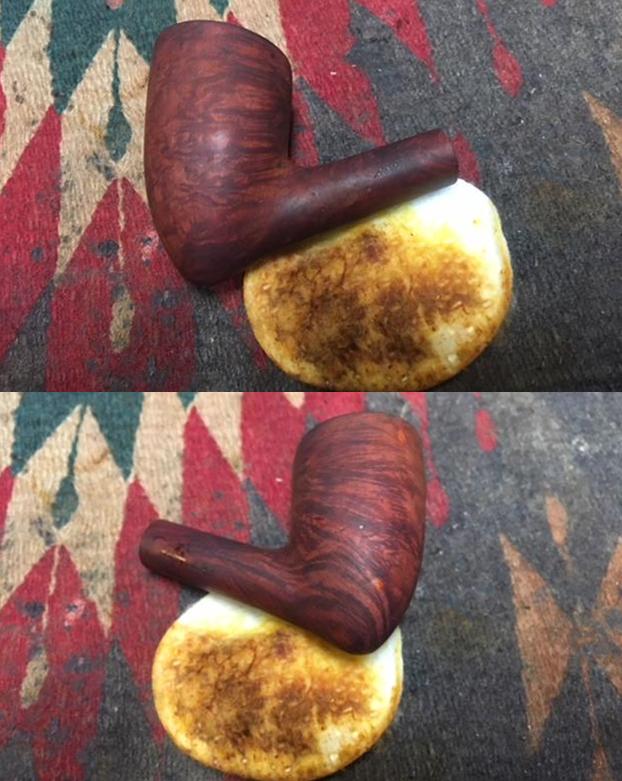
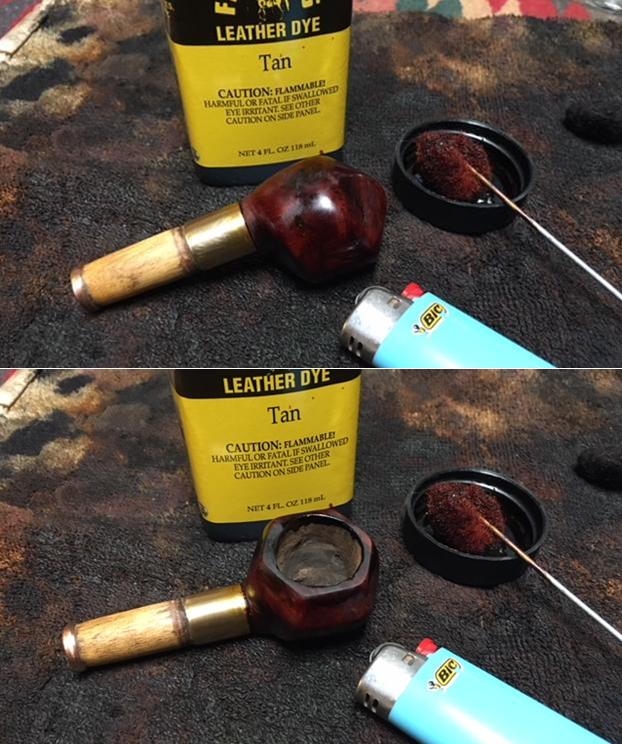
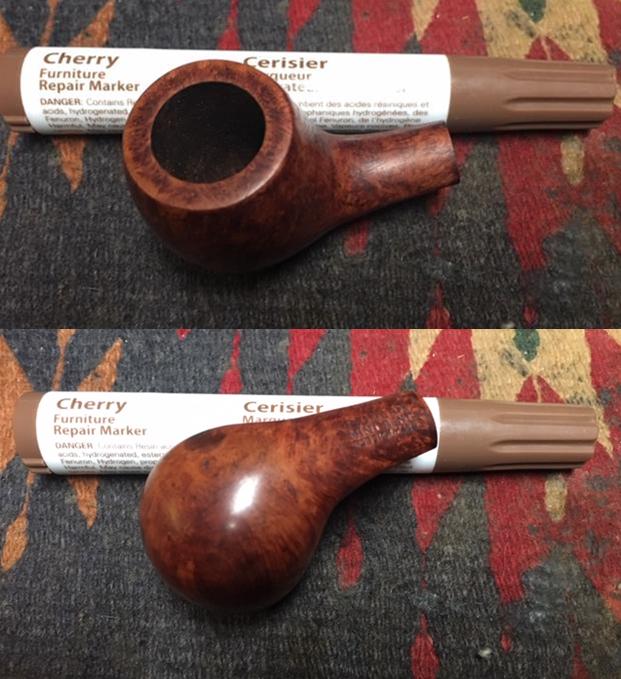
 As I was going through the micromesh pads, I was thinking of adding some twist to the finish and remembered that Mr. Dal Stanton, a gentleman I often turn to for some interesting pipe related conversations and advice, had refurbished a Tom Howard rusticated tomato pipe for me. He had darkened the crevices of the rustications with a dark stain pen and the contrast was eye catching, to say the least. I wanted to have a pair of pipes with this finish and decided to give this Kaywoodie the same treatment. I discussed with Mr. Dal Stanton who wholeheartedly explained the technique of achieving this finish and also gave me some very fine and pragmatic advice which I shall cherish on this journey. I stained the crevices in the rustications with a dark brown stain pen and set it aside for the stain to set in to the crevices.
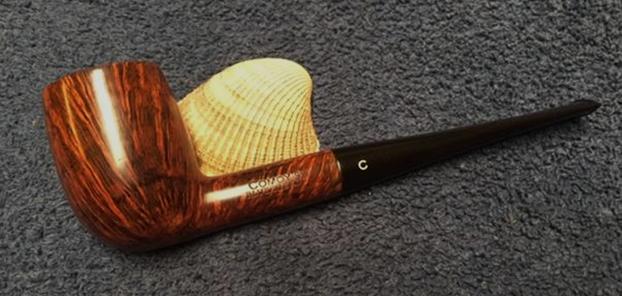
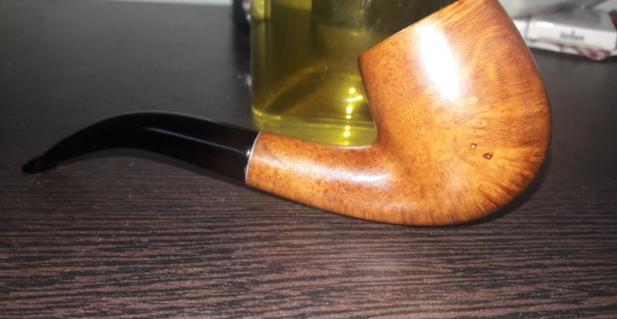
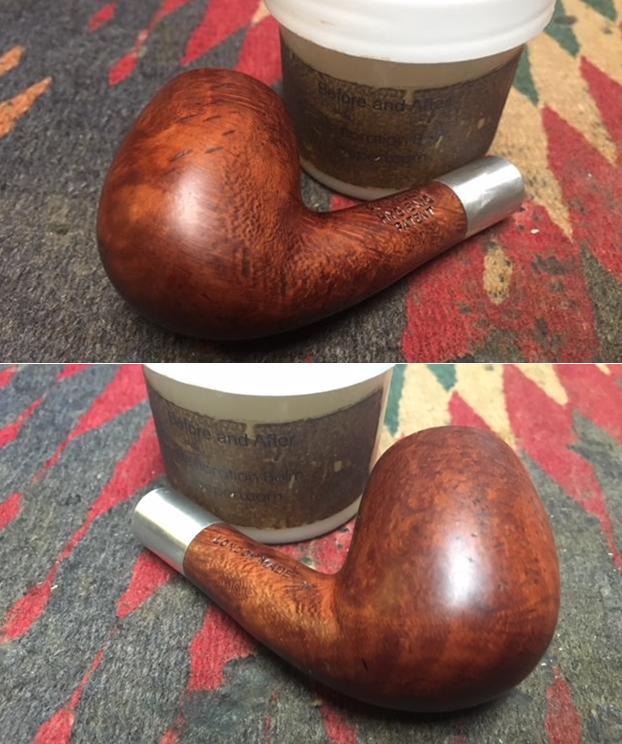
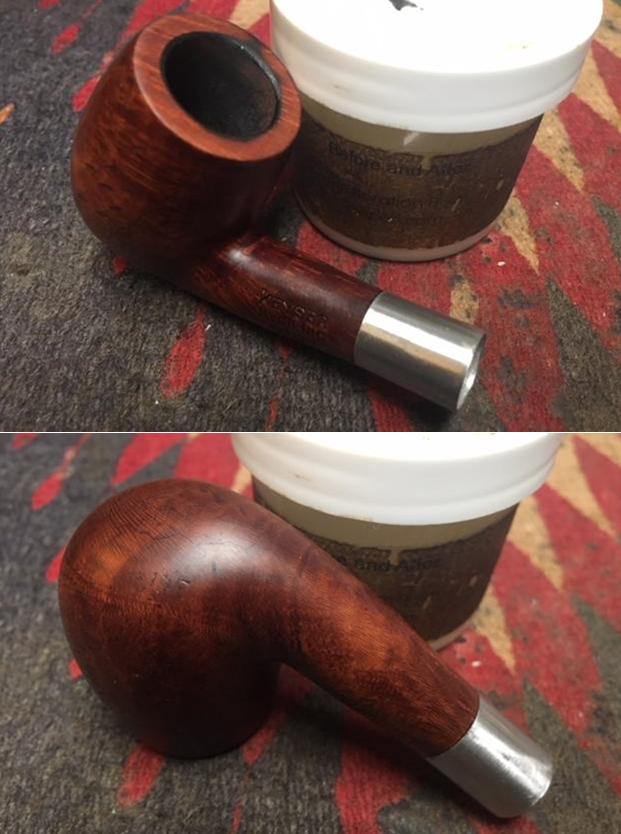
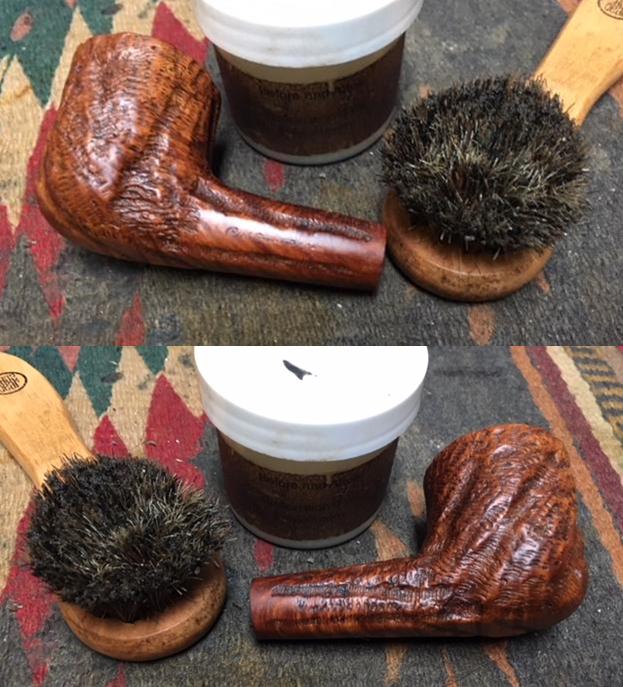
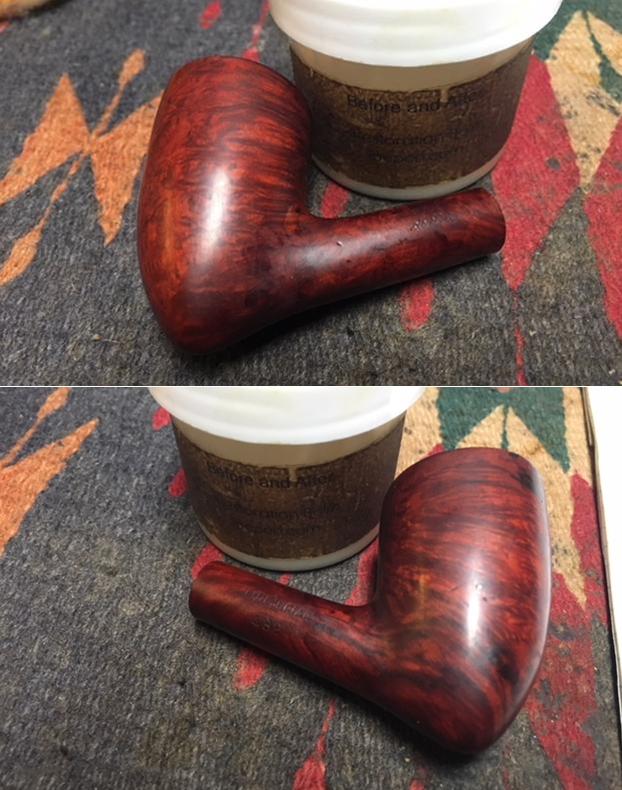
 After the stain had set, I rubbed a small quantity of “Before and After” restoration balm in to stummel and set it aside for a few minutes to let the balm work its magic on the briar wood. The balm works to bring back the shine and pours life in to the briar. I buff the stummel with a horse hair shoe brush followed by a nice hand polish with a soft cotton cloth. I liked the way the stummel has finished.
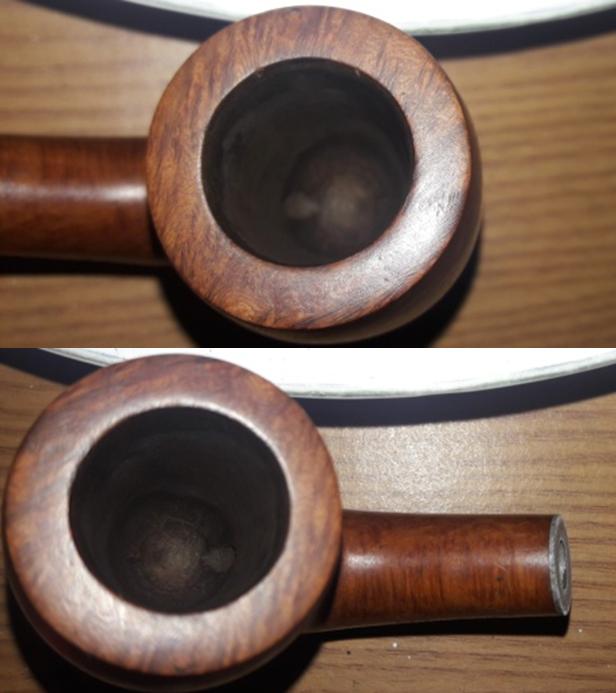
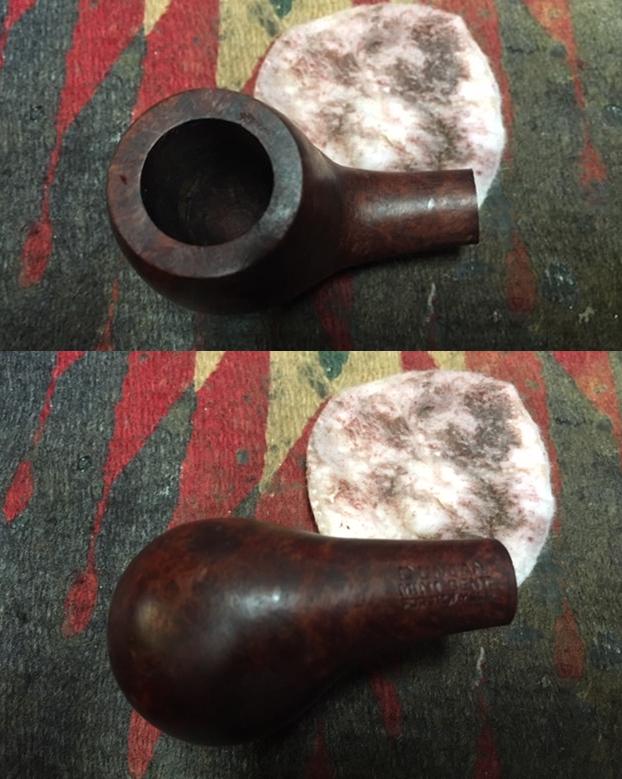
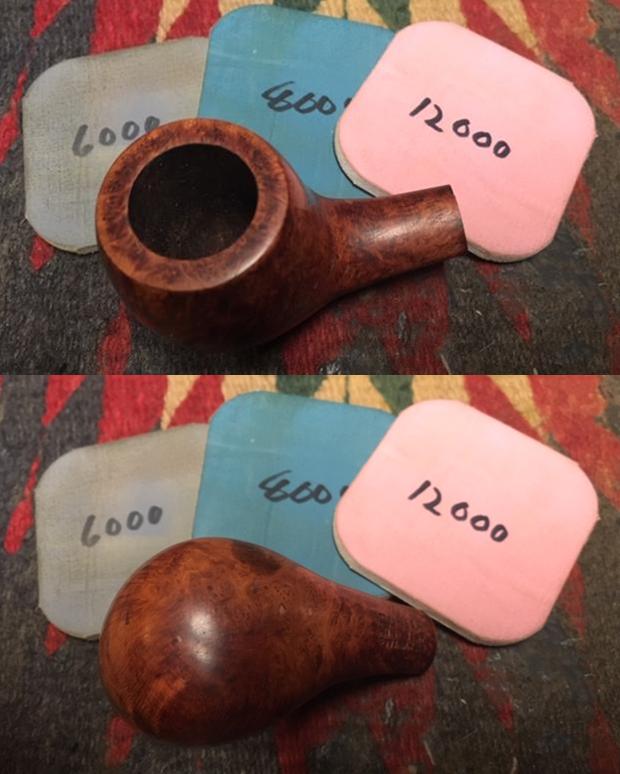
 To address the superficial gouges in the chamber created by use of knife during reaming, I prepared a mixture of pipe ash and yogurt of putty consistency and applied a coat to the inner walls of the chamber. Once the coating had cured, I gently sand the walls with a 220 grit sand paper to a smooth and even surface. With this, the stummel is all completed.
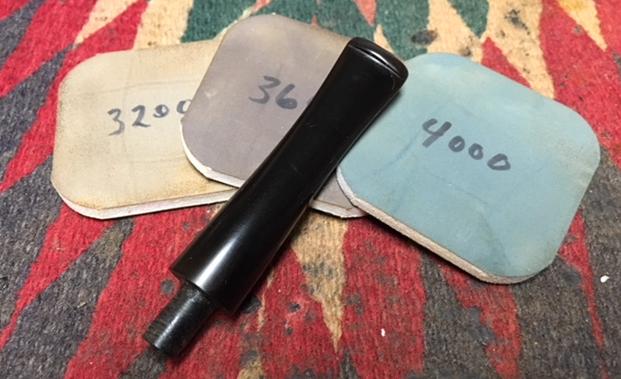
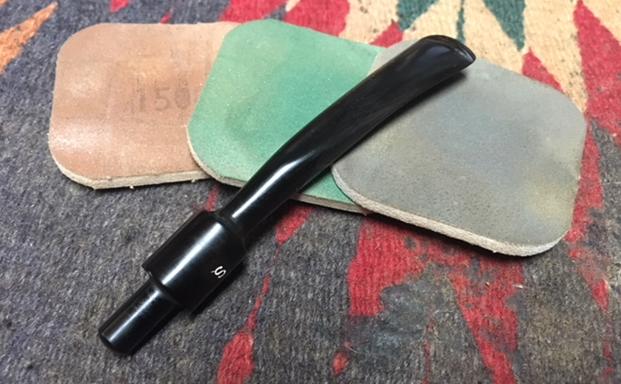
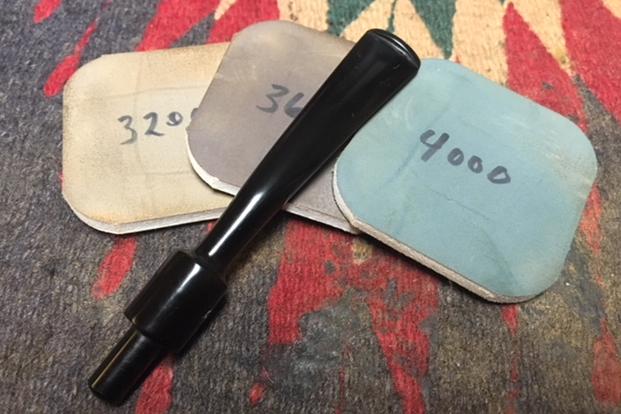
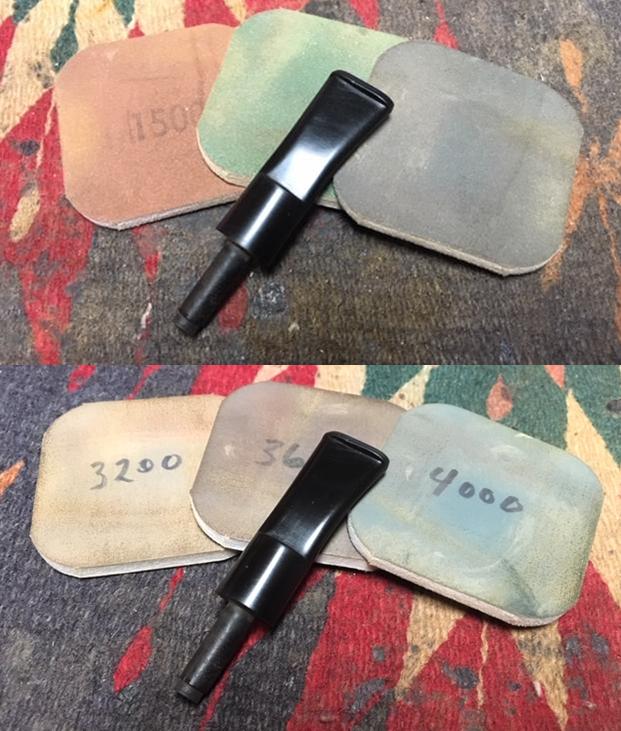
 Once the stummel had been finished and set aside, I turned my attention to the stem. There was not much work on this stem since it was sparingly used with only light signs of oxidation and no bite marks or tooth chatter. I start by sanding with micromesh pads, wet sanding with 1500 to 2400 grit pads and dry sanding with 3200 to 12000 grit pads. I wiped the stem with a cotton swab dipped in alcohol to remove the sand dust and rub a small quantity of Extra Virgin olive oil and allow it to be absorbed in to the stem. The stem is now nice and shiny.

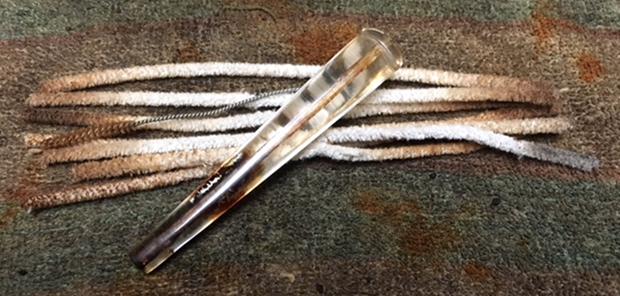
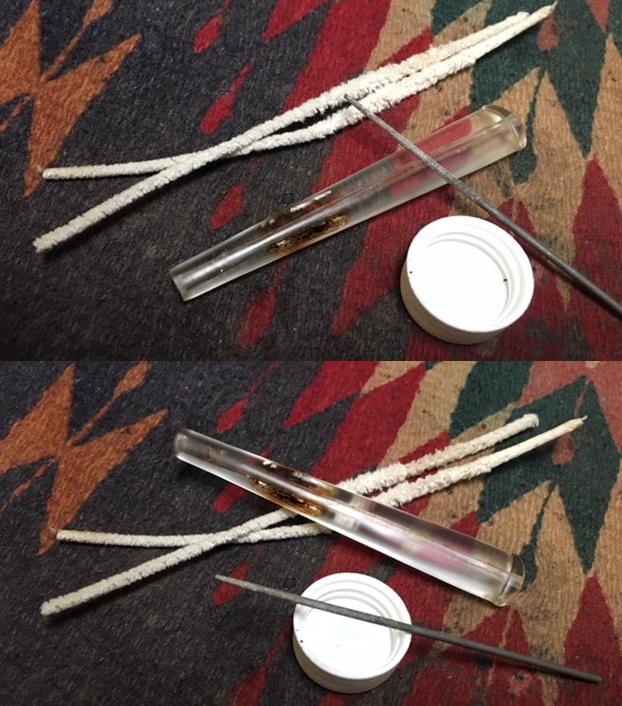
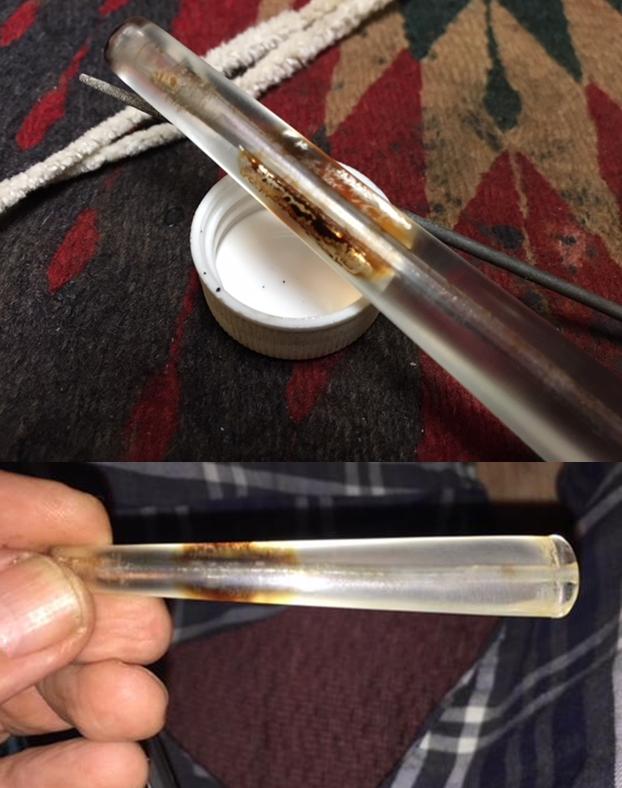
 The next thing to address was the blocked stem. I tried cleaning the airway in the stem with pipe cleaners dipped in alcohol, but the pipe cleaner would not go in the complete distance. There was gunk and tars which had accumulated inside the airway and in the holes too!!!! Using a straightened paper clip, I probed and cleaned all the holes on the stinger. I tried to blow through the stem, but I realized that it was still blocked. I tried pushing the paper clip through the airway and then there was this small sound of a crack!!!!!! Aargh……..the upper lip now has a chip!!!!! Undaunted by this temporary setback, I continue with the clearing of the blocked stem. Finally, I am able to dislodge the block and now the air flows freely through the stem.
 To address this chip, I firstly insert a regular pipe cleaner coated with Vaseline in to the air way. This prevents the charcoal and glue mix from dribbling in to the air way blocking it. I mix a small quantity of activated charcoal and CA superglue and spot apply it over the chipped surface. Once I have ensured that the complete surface is coated with the mix, I set it aside to cure overnight. The next evening, I file the filling with a needle file and match it to the surface of the stem. To further match the filling with the rest of the stem surface, I sand the fill with a 220 grit sand paper followed by micromesh polish pads. The stem is now nice and shiny again with a free flow of air through the airway.

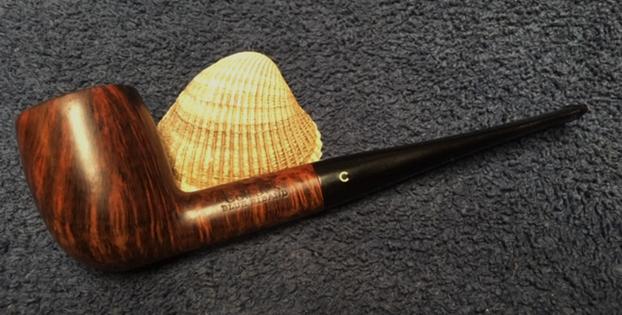
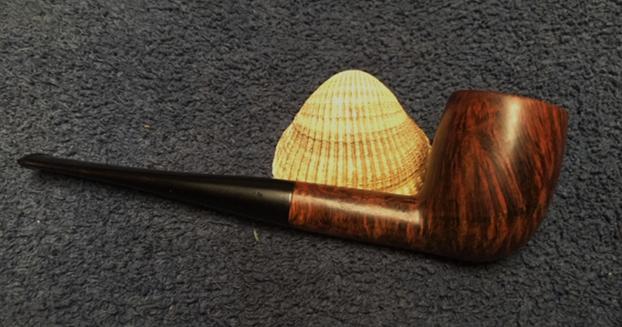
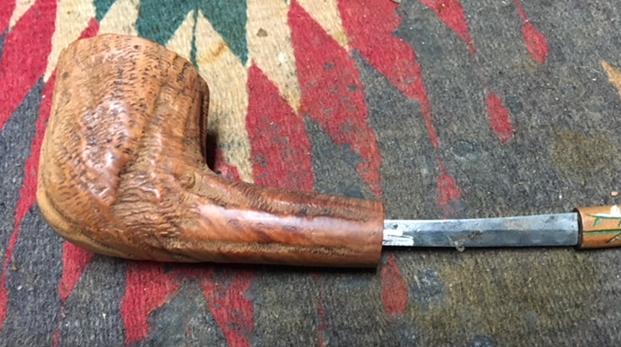
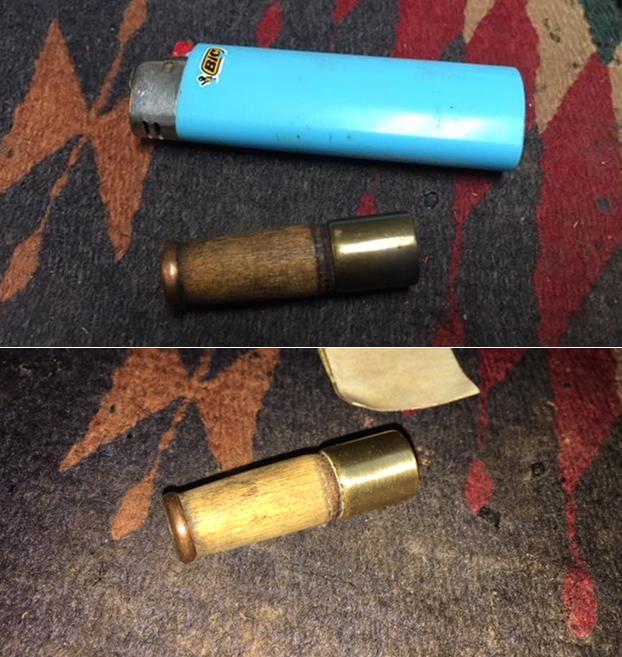
 I finished this restoration by applying a small quantity of Halcyon II wax and rubbed it deeply in to the stummel with my fingers. A few minutes later, I polished it with a soft cotton cloth using muscle power. The stummel now has a nice deep shine to it and the grains on the rim top and raise portion of the rustication can be seen in its full glory. I re-attach the stem and then relies that the stem is off center to the shank!!!! My God, this one was giving me a hard time. I removed the white sticky tape that was stuck around the stinger at the stem end and tried the fit. The fit had improved but it was still off centre. Again, to address this issue, I was presented with two options of either sanding the coating of superglue over the spacer till the off center was corrected or heat the stinger till the glue fixing the stinger in the stem was loosened and turn the stinger in to the mortise till the issue was addressed. I decided to go with the second option as I feared losing the coating of superglue over the spacer and thus exposing the brittle original to further chipping. I heated the stinger with the flame of a Bic lighter so that the glue holding the stinger would loosen a bit and fitted the stem in to the mortise, tightening it till the stem and shank were perfectly aligned. I let the stinger sit in this position till it had cooled down and the glue had hardened again. Now the fit of the stem and the shank is perfectly aligned.
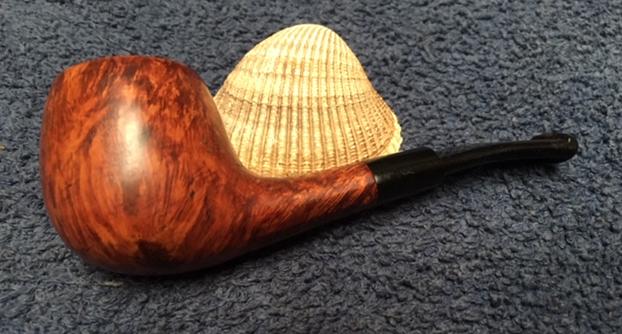
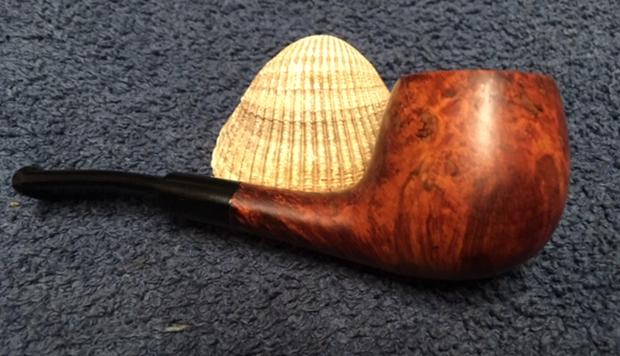
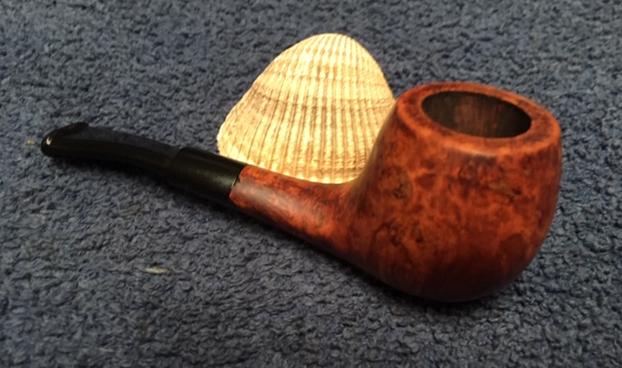
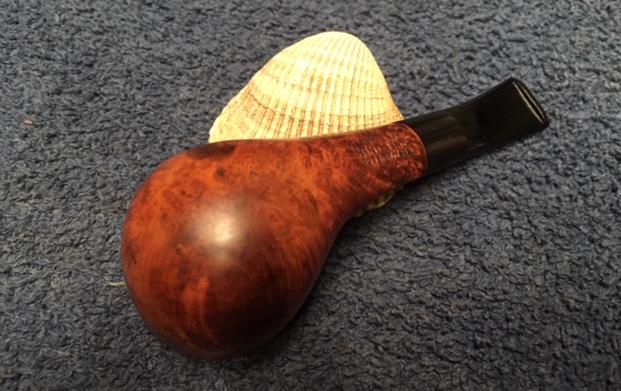
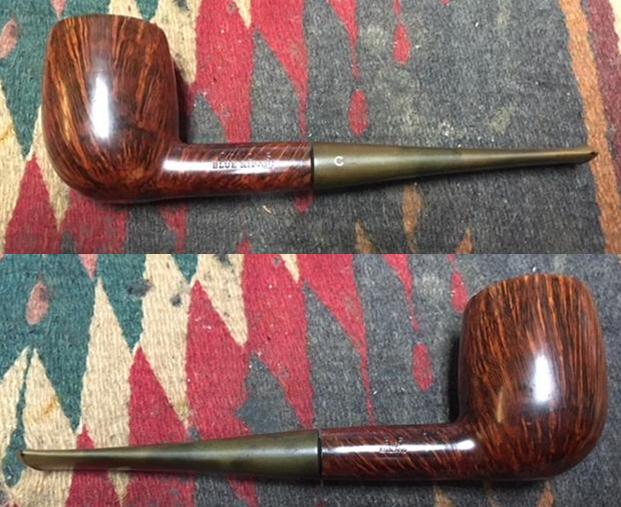
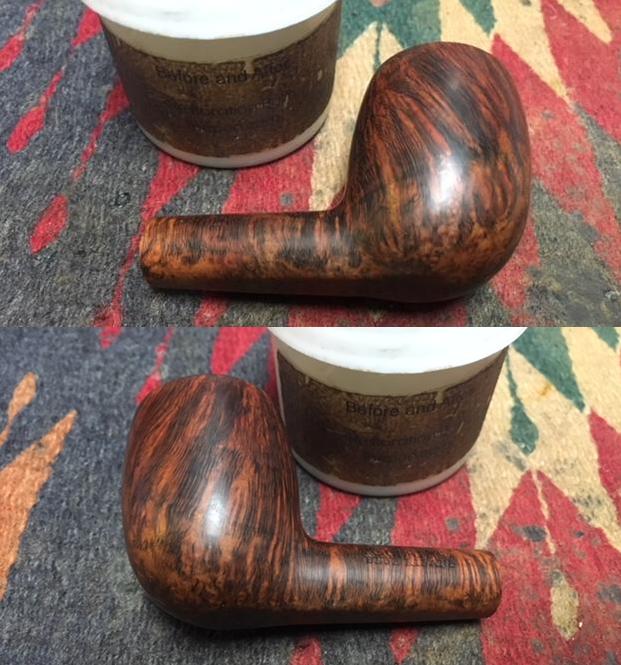
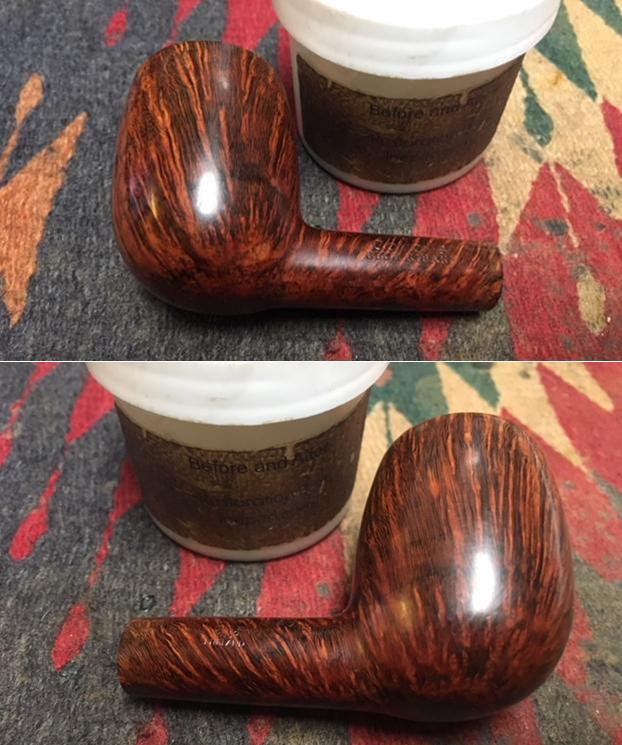
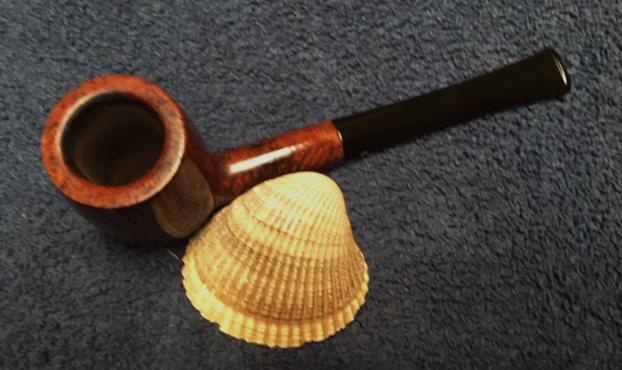
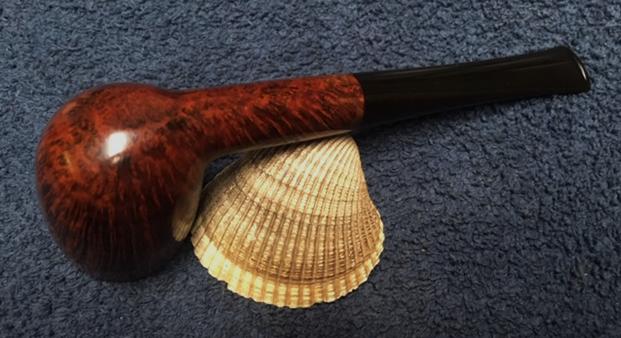
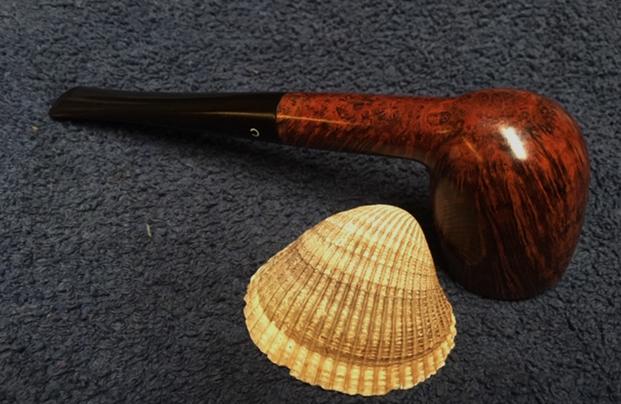
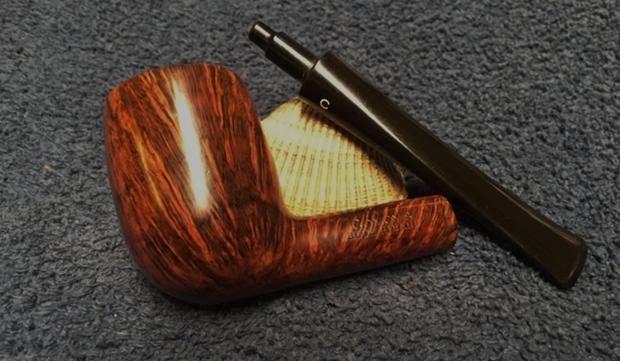
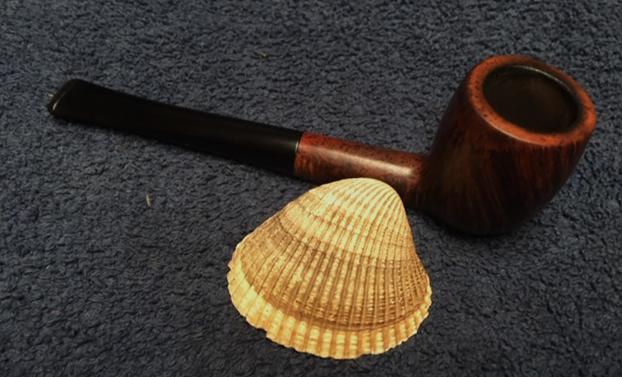
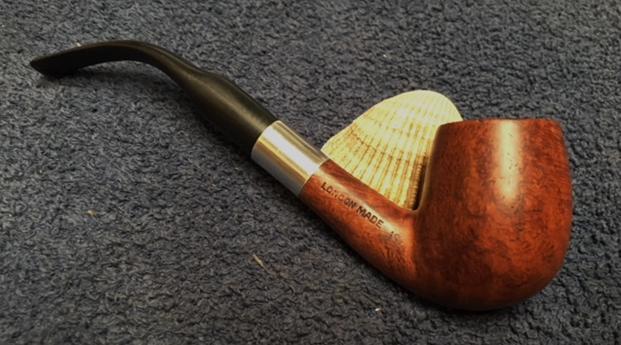
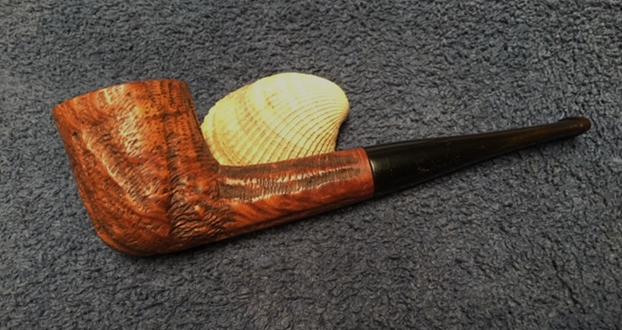
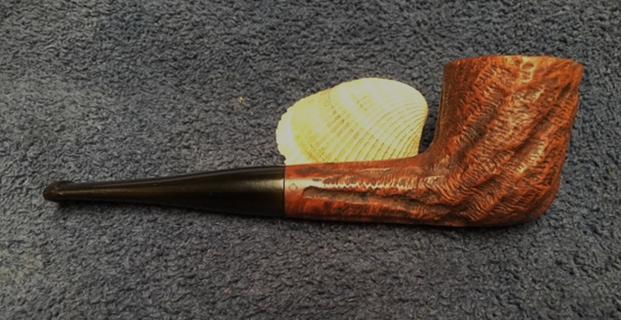
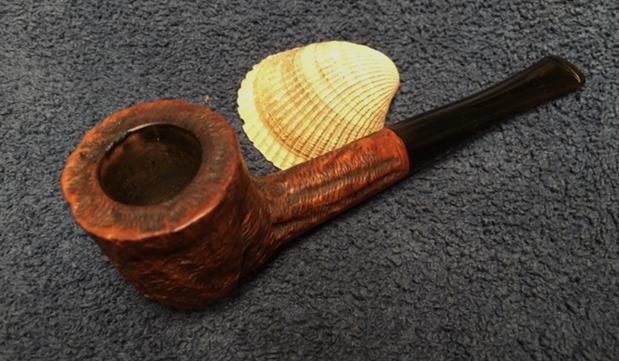
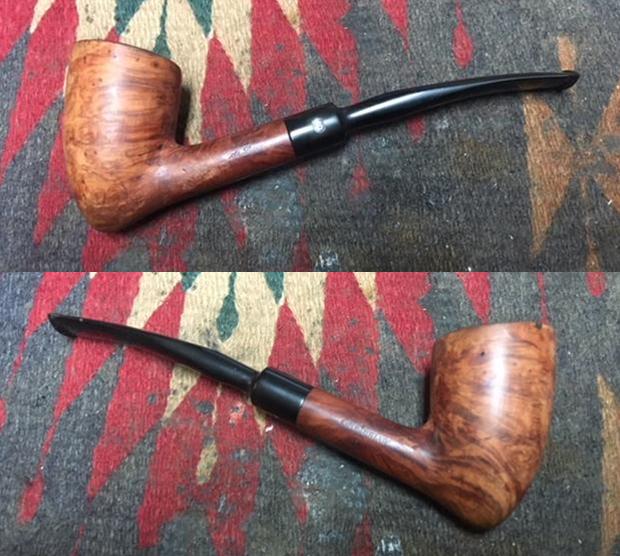
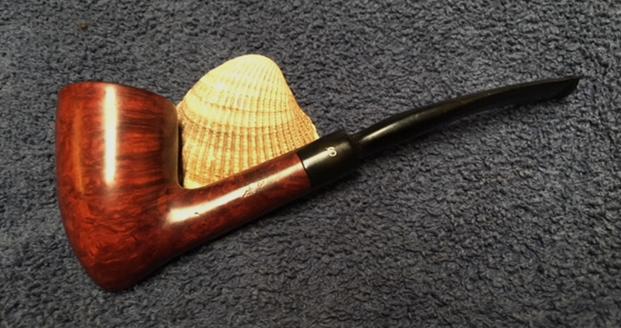
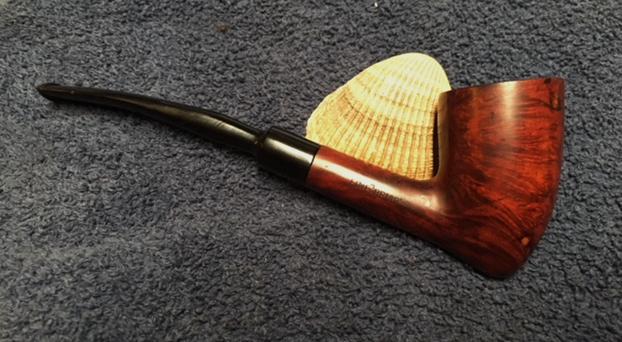
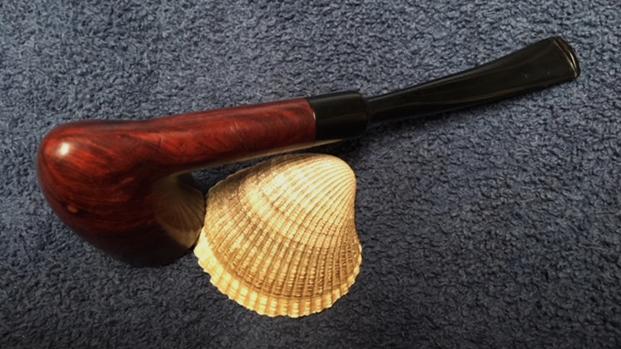
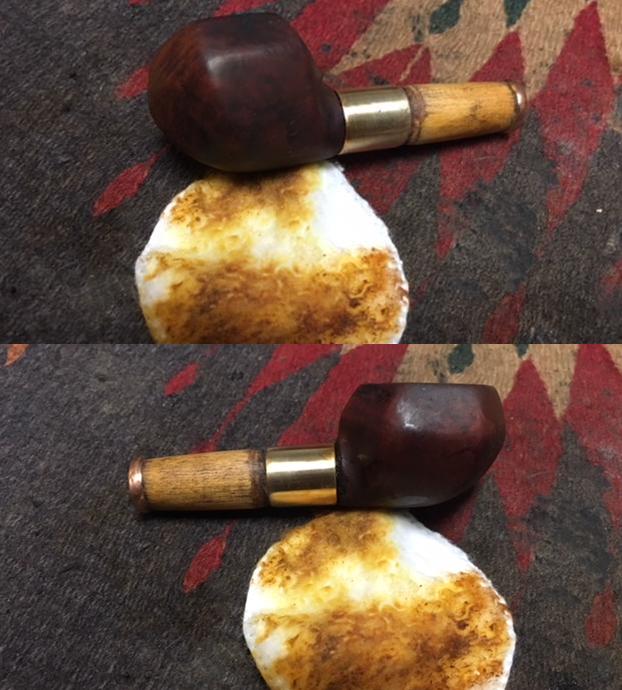
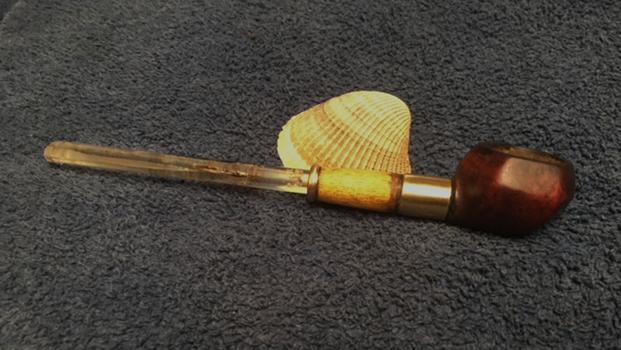
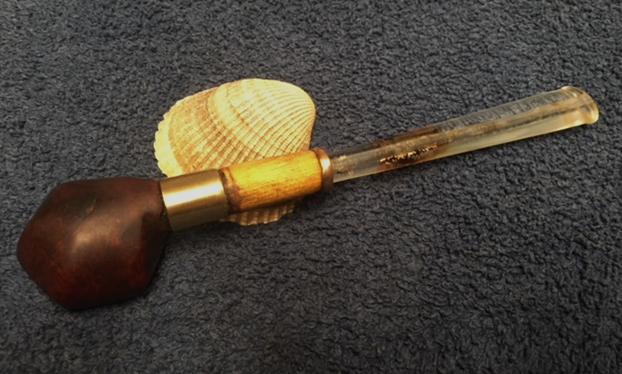
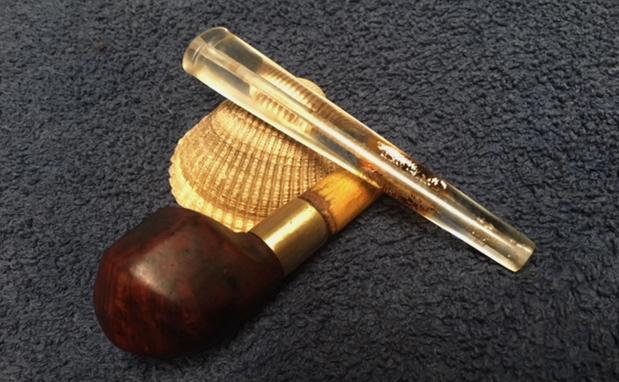
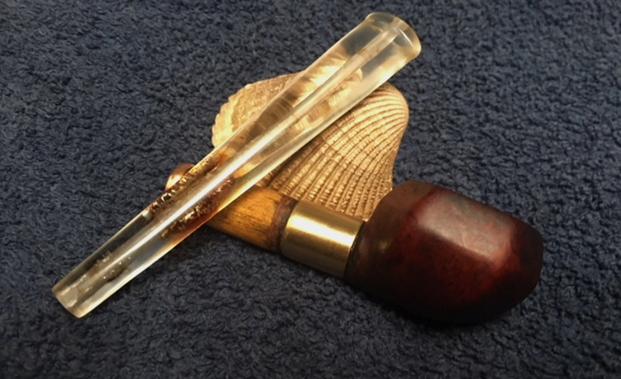
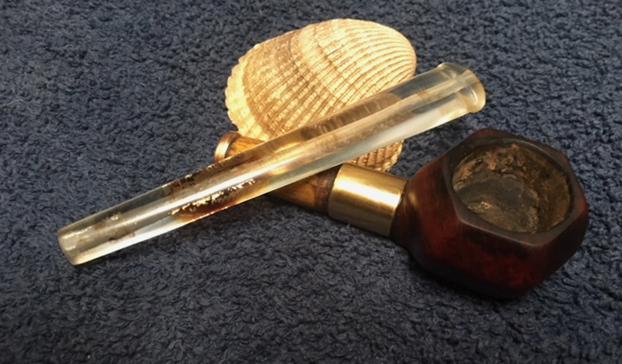
 Here are the pictures of the finished pipe and hope that this long write up has been an enjoyable read. Thank you for walking with me through this restoration as I attempt to preserve the legacy of my beloved grand old man!!!!!


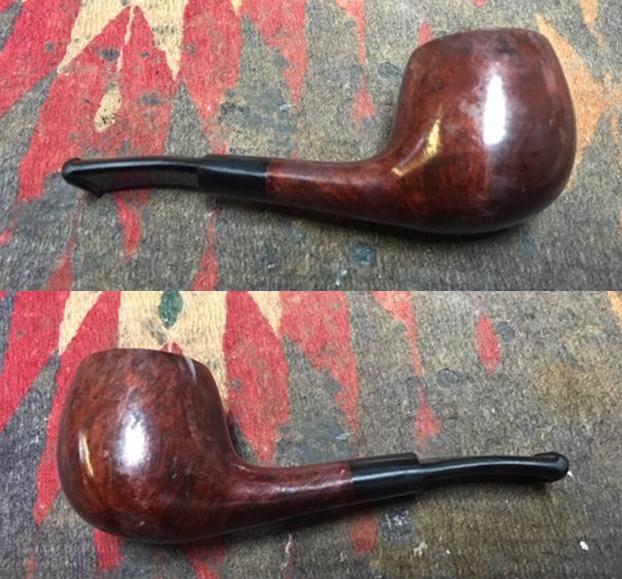
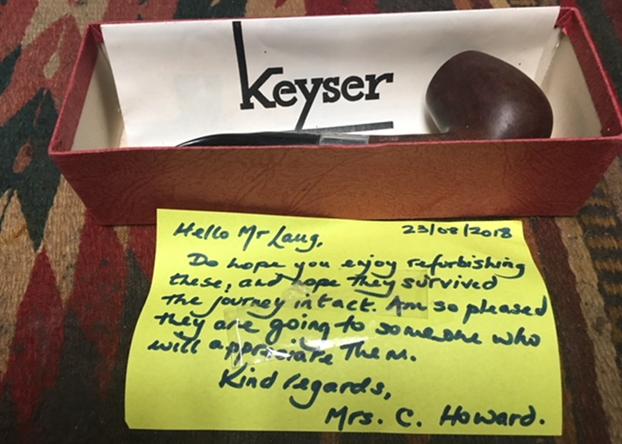
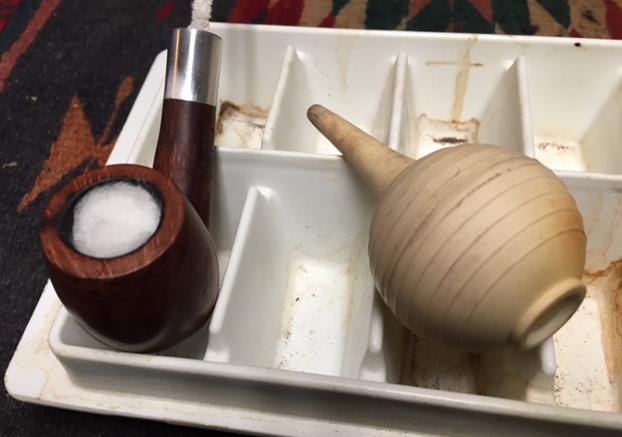
 The pipe had the same garden shed aroma as the Keyser that came with it. It was kind of musty smelling. It had definitely been smoked but not much. There were some dings on the rim top but other than the varnish coat wrinkling it looked good. The bowl did not have a cake and was raw briar half way down the bowl. The stem had a lot of tooth chatter and some light tooth marks on both sides near the button. The button itself also had a few tooth marks. You can see the varnish run on the saddle portion of the stem in the first photo of the stem below. I took some close up photos of the rim and stem to show the condition.
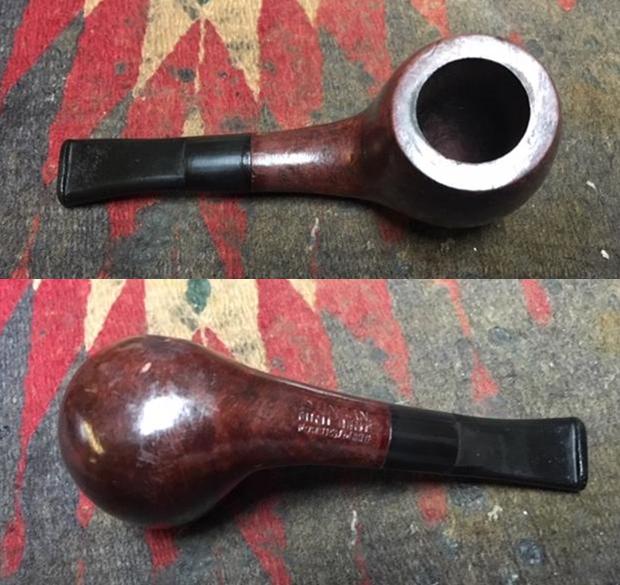
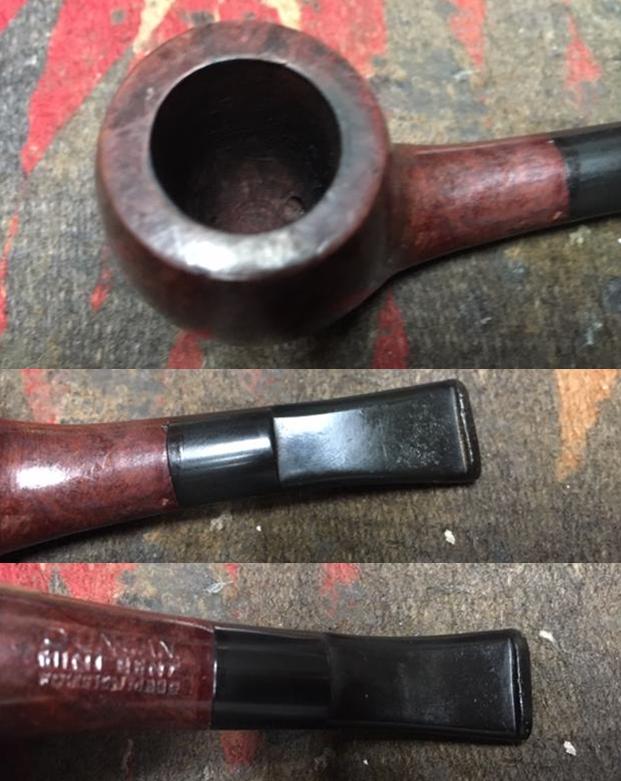 The next photo shows the stamping. It appears blurry but sadly the stamping itself is blurred from repeated stamping. It reads Duncan over Mini Bent on the first two lines. The last line is the most blurry but it appears to read Foreign Made as best as I can make out. I removed the stem and was surprised at the length of the stepped down tenon – ¾ of an inch. There was a spiraled stinger in the airway that was dirty and pushed deep in the airway.
 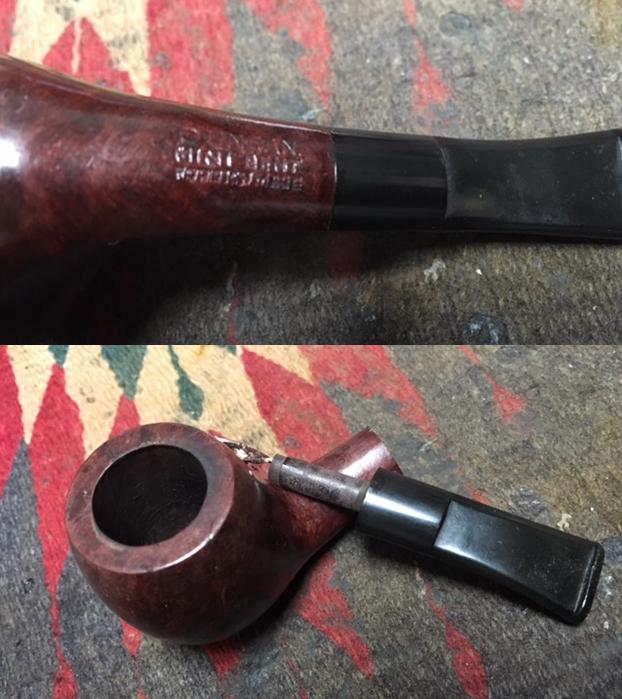 I decided to address the heavy coat of varnish on the bowl first. I wiped it down with acetone on cotton pads and was able to remove all of it from the surface of the briar.
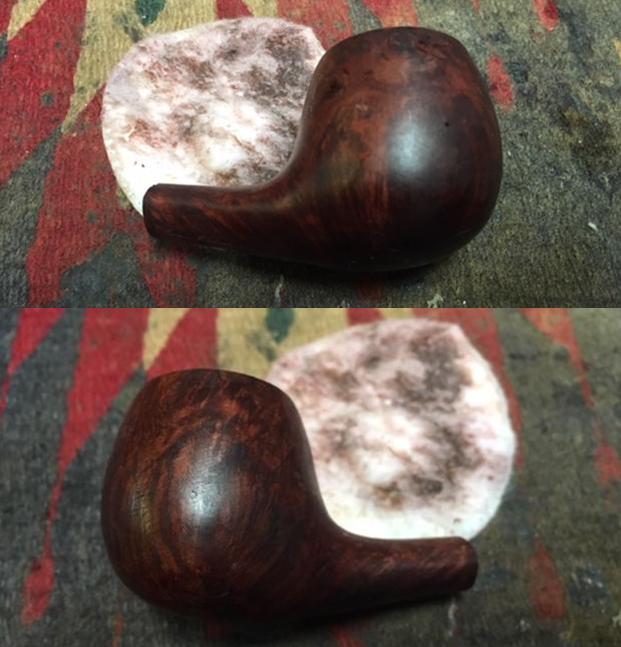
 I removed the stinger from the tenon. It was merely stuck in the airway so it was an easy removal. I think that half of the insert end is missing so it was not tight. The airway in the tenon was drilled off-centre toward the right side leaving the wall thin.
 I cleaned out the mortise and the airways in the shank and the stem with pipe cleaners, cotton swabs and alcohol. While a bit of tars and oil came out most of the colour on the swabs came from the same stain I had removed from the exterior with the acetone. It is a reddish coloured stain that revealed that the entire bowl had been dipped in stain.
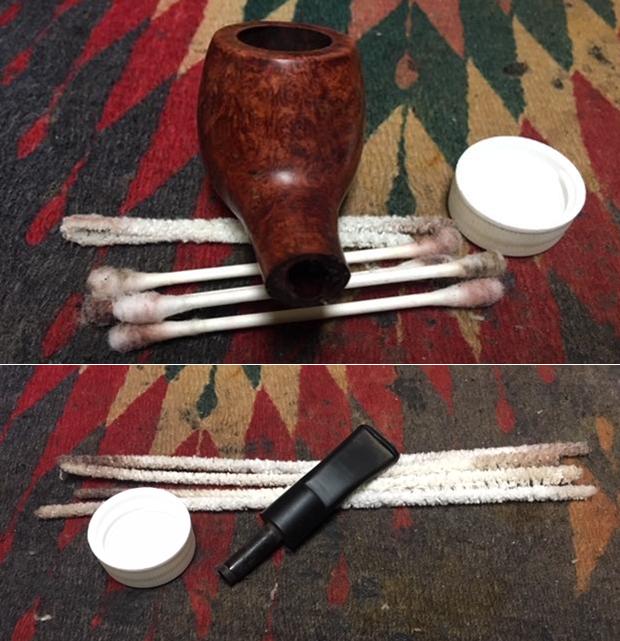 I sanded the bowl with micromesh sanding pads to remove the rest of the finish. I wet sanded it with 1500-2400 grit sanding pads and dry sanded it with 3200-12000 grit pads. I wiped the bowl down with a damp cotton pad after micromesh grit. There are a few dark spots on the briar – right side mid bowl and on the underside on the right as well. I am not sure what they are but they are not removed by sanding. As I polished it the fills in the bowl became very visible.
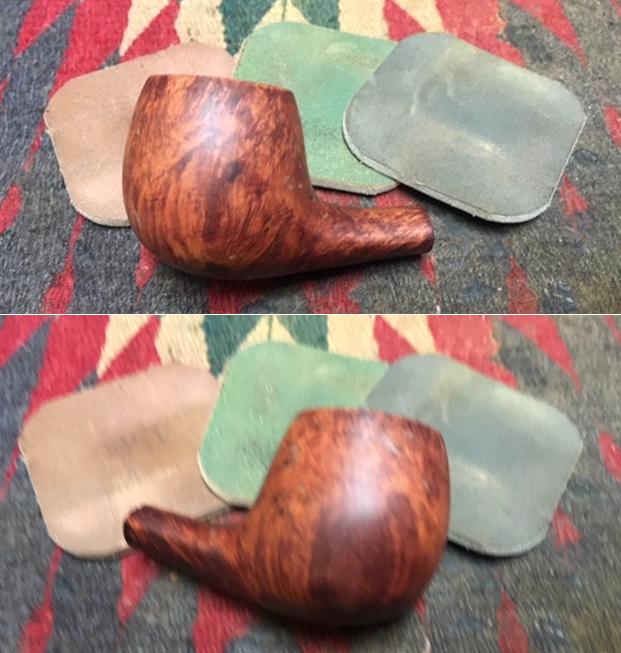


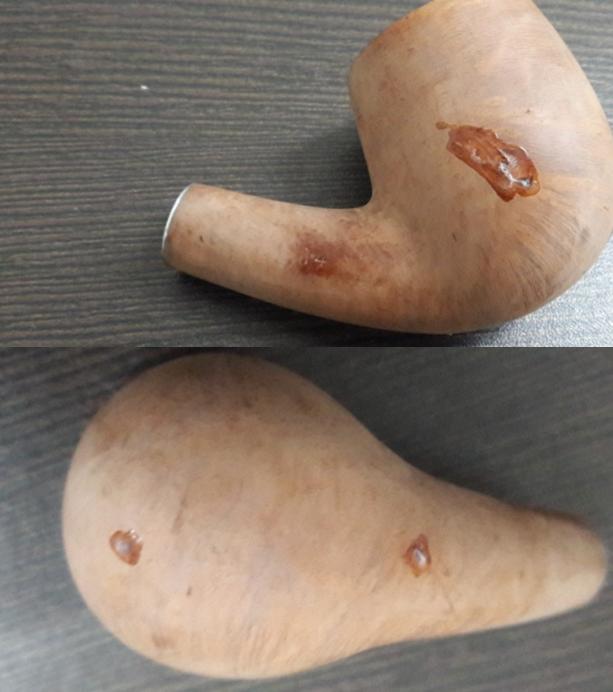
 The briar had taken on a shine. The fills were very visible so I used a Cherry stain pen to touch up the fills around the bowl sides, bottom and shank. A light stroke across the fill with the pen hid the fill and I set the bowl aside to let the stain cure. The fills blended in but the dark spots remained on the left and underside.
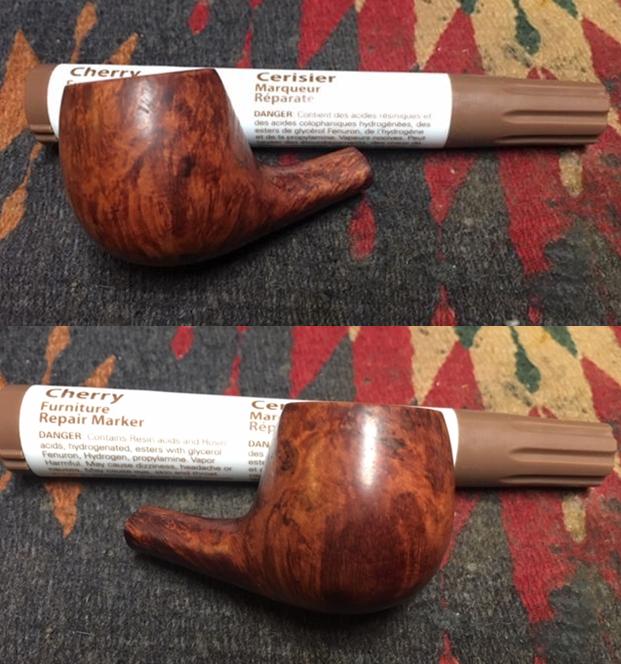
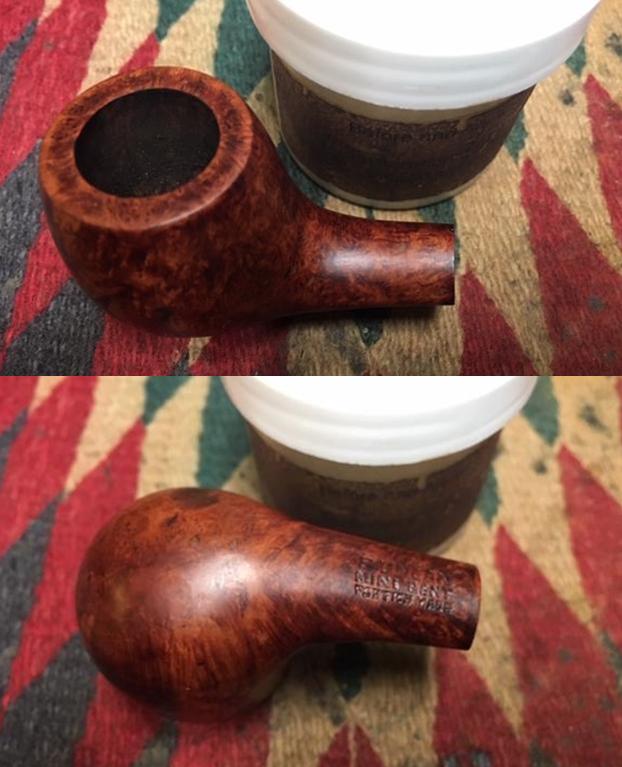
 I worked some Before & After Restoration Balm into the briar of the bowl with my fingertips to clean, enliven and protect the wood. I let the balm sit for about 20 minutes and buffed it off with a soft cotton cloth. I took photos of the bowl at this point in the process. The photos show the condition of the bowl at this point in the process. The bowl was looking quite good at this point with some beautiful grain showing through.
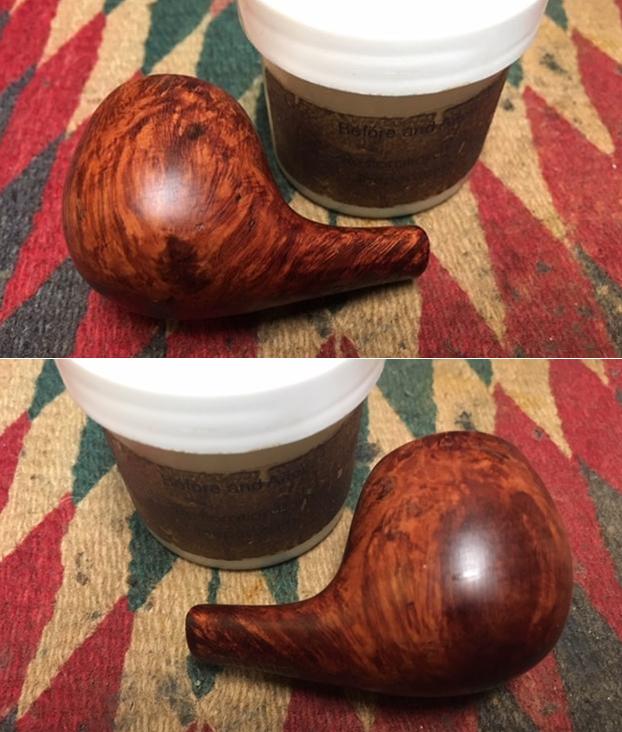
 I set the bowl aside and turned my attention to the stem. I sanded out the tooth chatter and marks with 220 grit sandpaper. I polished the stem with micromesh sanding pads – wet sanding it with 1500-2400 grit pads and dry sanding with 3200-12000 grit pads. I wiped the stem down with Obsidian Oil after each pad. I polished the bowl with Before & After Pipe Polish – Fine and Extra Fine. I gave it a final coat of Obsidian Oil and set it aside to dry.
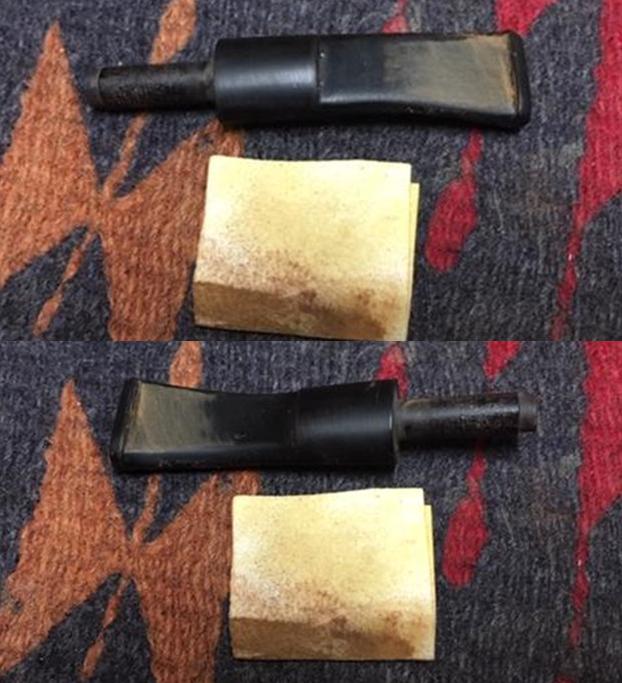
 I polished stem and the bowl with Blue Diamond polish on the buffing wheel. I gave the bowl and the stem multiple coats of carnauba wax. I buffed the pipe with a clean buffing pad to raise the shine. I hand buffed it with a microfiber cloth to deepen the shine. The pipe polished up pretty nicely. The grain really came alive with the buffing and works well with the polished black vulcanite stem. Together the pipe looks much better than when I began and has a rich look. The finished pipe is shown in the photos below. The shape, finish and flow of the pipe and stem are very well done. The dimensions are Length: 4 inches, Height: 1 1/2 inches, Outside diameter of the bowl: 1 1/4 inches, Chamber diameter: 3/4 of an inch. I will be putting this little pocket pipe/nosewarmer on the rebornpipes store shortly if you are interested in adding it to your collection. Thanks for walking through the restoration with me as I worked over this unique little pipe.