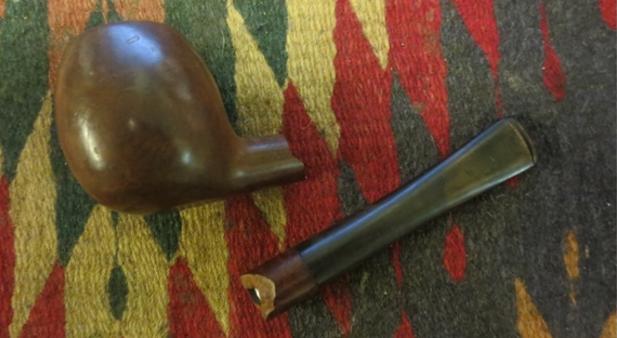
Category Archives: Answers to Questions Blogs

ANSWERS TO QUESTIONS: What differentiates cleaning a pipe and restoring it?


Blog by Steve Laug

After cleaning, refurbishing and restoring pipes for more years than I care to remember I continue to receive emails with questions that readers have about the restoration process and other more philosophical questions.

The next two questions came from a reader prompted this blog. I received an email through the blog from Nathan with these questions. I thought that both the questions and my responses make for a good ANSWERS TO QUESTIONS BLOG. Enjoy the read.

Nathan wrote as follows: Hello! I have been refinishing old pipes for about 2 years now. I have sold a few on eBay, but I mostly do it because I enjoy the hobby, history, and giving them as gifts or selling them to friends. However, I really do want to be able to start selling pipes on eBay at a more regular pace. My big questions are:

  1. When do you feel like a pipe is not only “cleaned and ready to smoke”, but “restored”? I know my skill, and I’m confident in my ability to clean, sanitize, and polish a bowl as well as deoxidize, sand, and polish stems. I can fix minor breaks in stems to a point that it’s *almost* unnoticeable. What are your defining points that cross the barrier of “cleaned and ready to smoke” and “restored”?
  2. At what point do you consider the changes you’ve made to a pipe too drastic to consider “restored”? Maybe an example will help clarify the question: I very recently came upon a lot of pipes and half of them are perfectly within my skill set to fix, but the other half have damaged or broken stems past the point that I know how to restore personally. But these stems are broken in half, with one half of the stem missing. If I bought an entirely new stem and sold it, would you still consider it “restored”, or has the original integrity been altered too much? If so, how would I label such a pipe if I were to sell it?

I wrote the following in response to Nathan’s questions:

My opening comments were simply for my own information.

Where did you learn the art of restoration? Why are you doing it?

Then I responded to each question in turn.

  1. When do you feel like a pipe is not only “cleaned and ready to smoke”, but “restored”?

I want the pipe to be clean and ready to smoke and by and large for me this means free of ghosts of the previous smokers. I want it to smell clean and want the internals clean enough that once they are heated that they don’t bleed old tobacco juices. I want to be able to put a pipe cleaner in the shank and have it come out clean. I want the bowl to be free of previous debris and for me to be reamed clean so that I can check out the walls for heat fissures.  For me the two – clean and restored are the same line! Hope that helps.

  1. At what point do you consider the changes you’ve made to a pipe too drastic to consider “restored”?

This is a tough one and for some the definition is no definitive change has been made to the pipe – no topping, no restaining, no restemming and no repairs to tooth damage. Too me that is too stringent. I will gently top a bowl and aim to get it as close to the day it came out of the factory as i can without changing to the stain or the profile. I will restain but always aim to match the original stains as much as possible. I replace stems and just not when I sell them that the stem is a replacement. Of course if I can find a matching original stem that is always preferred. I haunt sales, flea markets etc to scavenge as many stems as I can. I only do minimal repairs to a stem. To me if half is missing it will never be as good as the original as the repairs are always less resilient that the original rubber. If the stamping has been damaged in my work I note that as well. If I rusticate the bowl then I do not consider it restored… it is now my piece that I have altered. I have a hard time justifying leaving the stamping when I change a pipe to this degree. I always note my changes to a pipe when I sell it. I note flaws and I note repairs.

Nathan responded with two more questions:

  1. So to be clear, unless you’re affecting the briar in a drastic way, you consider it to be restored to its original integrity?

For me if I make any changes to the original design of the pipe – the shape, size, style, finish etc. that deviate from the original makers design the pipe has lost it original integrity.

  1. Also, and this is more practical, how do you remove the smells? I have tried soaking in in 99% isopropyl alcohol and cotton balls, but I can never seem to fully remove that old tobacco smell.

There are different ways of removing the smells depending on what they are. I have written a blog in my Q&A series on that. Here is the link: (https://rebornpipes.com/2017/12/19/answers-to-questions-how-do-i-de-ghost-a-pipe/).


ANSWERS TO QUESTIONS: What is the process for cleaning my pipe?


Blog by Steve Laug

After cleaning, refurbishing and restoring pipes for more years than I care to remember a question from a friend prompted this blog. It makes sense to put this blog together as a good pipe cleaning regimen will prevent a lot of problems that neglect bring to a pipe. Those issues range from a sour and stinky pipe to a cracked bowl or shank. In fact the majority of issues that I deal with on an almost daily basis come from poor maintenance of a pipe. The first cardinal rule of pipe cleaning is very simple and if you remember nothing else from this blog remember this: DO NOT TAKE THE PIPE APART WHILE IT IS WARM/HOT. I have seen too many loose tenons, broken tenons, and cracked shanks because this simple rule was ignored. It is not a suggestion! It is a warning. In terms of the question in the title of the blog, I thought I would break the steps down into the two broad categories that characterizes my own cleaning and then spell out the specifics under the two broad headings.

After each smoke – These steps are my own post smoke regimen that I try to religiously follow after each smoke. I find that for me it generally keeps my pipe smoking sweet and cool and minimizes the problems that I have seen in my refurbishing work.

  • Immediately upon finishing a bowl tap out the ash on the heel of your hand or use the pick end of the tamper to empty the bowl.
  • Scrape the edge of the tamper around the inside of the bowl to remove most of the debris left behind.
  • Run one or more pipe cleaners through the airway in the stem and shank to remove the moisture and oils from those areas. If the pipe cleaner does not go through to the bowl wiggle and turn it to see if it will slide in. If not just clean the stem for now. Once the pipe cools you can remove the stem and do the shank.
  • Work the pipe cleaner into the edges of the slot in the button to remove any buildup in those spots. You can wet the pipe cleaner with a bit of saliva if you would like to help with debris removal.
  • Fold the used pipe cleaner in half and work it around the inside of the bowl to remove remaining debris from the walls and bottom of the bowl. Tap out the bowl on the heel of your hand to remove any loose tobacco bits and then blow through the airway to displace any debris in the airway and bowl.
  • Stand the pipe in a rack or pipe rest – bowl down to let the pipe air dry. I have found that often an overnight rest for the pipe is enough. Others swear that you should let it set for several days and even up to a week to let it rest. I have not found that to be an issue. Sometimes I will leave a pipe cleaner in the stem and shank to let it absorb any residual moisture.

That is the short and long of a post smoke cleanup. You can see that it is not a long process or one that needs to be avoided. It is simple and easily becomes a part of the smoking process for your pipe once you build it into your routine.

Weekly – Once a week or at least every other week I take the pipes I have smoked during that week to my work table and do a more thorough cleaning. The more thorough cleaning keeps the pipe operating at its full potential and helps to deliver a clean tobacco taste with each smoke.

  • Spread out a cloth or a newspaper to keep the table top or work table clean as it will minimize the distress of your other half.
  • Carefully remove the stem so that I can clean out the mortise and shank. If it is tight and does not come out with a little pressure, put it in the freezer for about 10 minutes and that should loosen the stem and make it easy to remove.
  • Scrub down the mortise area with cotton swabs and 99% isopropyl alcohol to remove the tars and oils that collect there. I always use the highest % of alcohol I can find as it evaporates quickly leaving the interior of the pipe dry.
  • Clean out the airway to the bowl with pipe cleaners and alcohol to remove tars and oils that eventually accumulate and constrict the airway. Over time these build up and harden and reduce the draw of a pipe.
  • Lay the bowl aside to let the shank thoroughly dry before you reassemble the pipe. Usually a half hour is enough time to make sure all is dry. Moisture can swell the briar so letting the pipe dry keeps the fit of the tenon snug in the mortise.
  • Run pipe cleaners and isopropyl alcohol through the airway in the stem and work over the end of the tenon to remove any tar or oil that has built up there. Clean out the edges of the slot. You may need to use a tooth pick or dental pick to clean out these areas.
  • PLEASE NOTE – Neglecting the internals of your pipe can eventually lead to a sour tasting and bitter smoking pipe.
  • Check the cake in the bowl. I personally keep the cake in my bowls thin and I want them to be hard and clean. To allow the cake to form in that way you do not want to ream your pipe every week. The easiest method is to simply twist a paper towel into the bowl to knock off loose debris in the surface of the cake and smooth out the bowl sides. It also absorbs any liquid in the bowl.
  • Clean off the rim top with a little saliva on a cotton pad or paper towel to remove the natural oils that build up on the surface.
  • Once the bowl is finished, check to see if the shank is dry enough for an easy fit of the stem. It should be snug but not have to be forced.
  • Wipe down the exterior the cleaned bowl and stem with a paper towel lightly wetted with olive oil. I find that this preserves and protects the briar and the stem material. Do not use it in excess as many have said that it goes rancid – personally I have never had a problem with that so I continue to use it.
  • I buff it dry with a soft cloth to remove the excess oil and to give the pipe a shine.
  • Set the pipe upright in a rack and let it thoroughly dry out. Put a pipe cleaner in the stem to absorb any residual moisture. Repeat the process with the next pipe in your collection.

That summarizes the procedure that I use to clean my pipe and keep it smoking well. Hopefully the process gives you a sense of how to build your own. The key is to keep the pipe clean daily and the other cleanups will be less onerous. As always I am sure there as many views on this process as there are people who will read it. This is my own process and it works for me. How you do it is up to you. Until next time enjoy your pipe!


ANSWERS TO QUESTIONS: Topping or not topping a bowl – that is the question


Blog by Steve Laug

Often I am asked how I decide whether or not to top a bowl. Like the other questions in this series of Answers to Questions this has a multifaceted answer. I wish sometimes that the answers were black and white – very straightforward. Wouldn’t it be nice to be able to have a template that says when a rim top looks like “this” – top the bowl? Sadly there is no such template. For me the decision is really a process of elimination. I look at the condition of the rim and consider the various options putting them aside one by one until I come to a conclusion. I may use a combination of steaming and topping to bring back the rim top. There are times when I have had to rebuild portions of the rim top to get it level and smooth. Whatever, method I use I spend a fair bit of time examining the pipe before moving forward. Here is my process for deciding to top the bowl or not to top it.

Examine the rim top. The first thing I do when I bring a pipe to the work table is assess the damage to the bowl and shank. Focusing on the rim top, I look for damage to the outer and inner edges of the rim and damage to the rim top itself. At the worst these damages include one or more of the following – deep gouges, marks, burned and charred areas. At the best they may include dings, nicks and dents. Sometimes you can guess at the condition of the rim at this point – you get so you can tell quite quickly over time. Other times the examination has to be done after the initial cleaning of the exterior of the bowl. Generally I can draw my conclusions quite quickly just by looking, the extent of the damage (this is one of the perks of having worked on pipes for over 20+ years).

Dents, nicks and dings. This is the best case scenario in terms of rim damage. If this is what I find then I seek to remove or minimize these issues. Dents and dings can be lifted with steam. I use a wet cloth and hot knife to create steam and lift the dents and dings. I repeat the process until I am happy with the results. Others use an iron and cloth. Choose what you are comfortable with because both work well. For nicks along the edges – inner or outer – I try to steam them to raise them but have found that this is often pretty useless in addressing issues where a nick has a sharp or cut edge. In that case I use a small folded piece of sandpaper to smooth them out. I follow that by polishing the sanded areas with micromesh sanding pads. I rarely top a bowl with this kind of damage to the rim top. I have found that these issues generally can be remedied with steam and little bit of sanding magic.

Nicks, cuts, gouges, road rash. There are definite issues that call for the use of a topping board. For me topping tends to be the last resort after I have tried other means of dealing with the damage on the bowl. But if the following scenarios are true then I top the pipe. If the pipe has been used like a hammer to knock out the dottle and the outer edges of the bowl a broken down or rounded over. If the surface of the edge is very rough with broken fibres of briar. If the inner edge is damaged to a point where a light topping will remove the damage. If the top surface of the rim is gouged, cut or rough to the touch. All of these are signs to me that the bowl should be topped.

Once you have made the decision that the rim needs to be topped then the next question comes into play. How much of the top needs to be removed from the surface of the rim? To me this is as important a decision as that of topping. Once again I am a bit of a minimalist in my approach. I only remove as much as is necessary to reduce the footprint of the damage. In some cases it is very light and I work over the edges of the bowl independently to minimize the damage in those areas and blend the sides into the topped rim. In other cases it requires a bit more work to remove the damage and I have to remove more material. I always keep the idea of minimal in mind as I do the work.

In terms of the actual process, I use a cutting board with a piece of 220 grit sandpaper attached to it. I work the bowl on the sandpaper in a circular motion as I find it makes the scratches in the briar less noticeable that when I work from side to side or front to back. The circular motion sandpaper marks are also more easily removed. I sand and check, sand and recheck, and repeat until I am satisfied with surface of the rim and the edges. Sometimes all of the damage is removed and other times it requires some hand work to fine tune the edges of the bowl. The key to the process is the repeated checking to make sure that you have removed enough of the briar to deal with the damage but not too much to ensure that the profile of the pipe remains the same. . I cannot emphasize enough how important it is to keep the rim top flat against the topping board as it is very easy to give the top an unwanted slant in the process. A good topping job should be unnoticeable. You work to blend the rim top into the flow of the bowl and then match the stain.

My rule of thumb is always to aim for removing the least amount of material from the rim top as possible. I want to minimize the damage and bring the rim back to a “near new” condition. I want the rim to match the normal wear on a pipe of its age. There is nothing worse in my opinion than having crisp edges on a rim top when everything else about the pipe has been softened with time and use. Once the rim is topped and the damage is removed if any dents remain I will steam them out. If you top a sandblast or rusticated rim top then your work just begins with the topping. You will need to decide if you want to leave it smooth as a contrast with the finish around the bowl and shank or work over the rim top with a Dremel and burrs to match the original finish on the rest of the bowl. That of course is a matter of your own comfort with process and your own aesthetic as well.

I think that summarizes my thoughts on the original question. As with most things in our hobby there seems to be questions behind the questions. There are always multiple levels of answers but at the same time it really boils down to what you individually are comfortable with in terms of the topping. Hopefully you have found this blog helpful as you make your own choices. Thanks once more for humouring this old pipeman in his ramblings. Cheers.

ANSWERS TO QUESTIONS – What are the refurbishing tools that you can’t live without?


Blog by Steve Laug

I can’t remember how many times I have been asked for a simple list of refurbishing tools. The list for me keeps growing to I always narrow it down to the tools I use the most and “can’t live without.” This seems easier for you and for me. You will find that as you work with restoring/refurbishing pipes that you will come up with your own tools and tricks. You can add these things to your kit as the need arises. I have organized the various tools under the categories where I see them fitting in my kit. I am well aware that more can be added by each of you who work on pipes but it seems to me that this is the bare minimum of supplies. I added a few items to the end of the list that go beyond the minimum but make life a lot easier. I have organized my list in terms of the order of use of the tools both in the category headings and the supplies under each.

REAMERS

I start my list of tools with my favourite pipe reamers because I use them on almost every pipe that I refurbish. Generally I use at least two of them each day. Remember I clean up a lot of estate pipes (between my brother and I) and these are the ones that we repeatedly come back to. I have listed them in my order of preference. I have at least two (maybe three) PipNet reamer sets in my drawer. I don’t ever want to be without this set. The versatility of the interchangeable cutting heads for various bowl sizes is hard to beat. I always start with the smallest cutting head and work up to the one that takes the cake back to the bare briar or the thinness that I am looking for. It is my first go to reamer.

For me the Savinelli Fitsall Pipe Reamer is a close second. I use it to clean up any remnants in the heel of the bowl or along the walls that have been left behind by the PipNet set. I also use it exclusively on Meerschaum pipes because I can actually feel the work on the bowl walls. I use it to also scrape of the lava coat on the top of the rim. It has a triangular shaped blade that works very well and the pointed end allows me to effectively scrape the bottom of the bowl. I have found that these are hard to come by, but Smokingpipes.com recently tweeted that they have one that looks very similar. The following link will take you to their site: smokingpip.es/2GcoWxK. It is called the Low Country Reamer and they sell for $14.95USD.

The third reamer that I turn to when the other two will not work on a particularly narrow or conical bowl is the KleenReem Pipe Reamer. This is different from the Senior Reamer that I feel is far more flimsy and not designed as well to get to the bottom of the bowl. I keep several of these on hand at all times. Its adjustable diameter allows me to fit it to the bowl and the point at the end of the tool allows me to work on the bottom as well. It also comes with a drill bit in the end of the handle that can be used to ream out the airway between the mortise and the bowl. It can be used as is or can be wrapped with a bit of pipe cleaner to remove the tars and oils that harden in those areas. I often use the drill bit even if I do not use the reamer because there really is nothing like it.

Those are my three indispensable reamers for use in cleaning up the bowl and shank. I have many other reamers that I have collected over the years but none of them live up to the workability and flexibility of these three tools. I have tried using others and just laid them aside to go back to these. If you plan on working pipes as a hobby you need to have all three of these in your tool box.

SCRUBBING – EXTERIOR

The next indispensable tools in my kit are some brushes that I use for scrubbing the exterior of the bowl, shank and stem. The first of these that I keep handy is a toothbrush. I have several different toothbrushes with different weights of bristle from soft to stiff. I use them on different finishes. The soft bristle brush is what I use on smooth finished pipes as it is stiff enough to remove the grime on the surface of the bowl. With sandblast and rusticated pipes I use either a medium bristle or stiff bristle brush to clean out the nooks, crannies and grooves in the finish.

For plateau rim tops and shank ends as well as heavily rusticated pipes I use a brass bristle tire brush. These are available at most hardware and tool shops as they are used for cleaning parts. The brass is soft and I find that on these particular pipes it does not damage the briar and does a great job of removing the lava and built up grime. It is really a helpful tool. The key with it is not to press too hard on the brush but work it over the surface repeatedly until it is clean.

I use Murphy’s Oil Soap with each of the brushes. I used it undiluted and scrub the briar with the soap and brushes and rinse it off afterward with warm, running water. Many wonder about using water with briar. Remember I am letting it sit and soak in the water I am merely rinsing it off and immediately drying it off with a cloth. The water does not have the time to be absorbed by the briar.

For cleaning vulcanite and acrylic stems I have two different tools in my arsenal. The first is Mr. Clean Magic Eraser and the second is Oxyclean. If the stem is not too badly oxidized often a Magic Eraser wetted with water will make short work of removing the oxidation. I scrub the surface of the stem with the Magic Eraser sponge and then repeatedly rinse the sponge to remove the oxidation that colours it brown. Repeated scrubbing will remove most of the oxidation on hard rubber stems that are not too oxidized. On Lucite or acrylic stems it is more a matter of cleaning off scum or buildup. It works well for that too. For more heavily oxidized stems a soak in a bath of Oxiclean mixed with warm water will bring the oxidation to the surface of the stem where it can be wiped off with a paper towel. I repeat the process until the oxidation is gone. It works quite well to bring a badly oxidized stem back to life. I personally do not use bleach in any form on stems as I find that it deteriorates the rubber, leaves the surface pitted and reduces the life expectancy of the rubber itself.

SCRUBBING – INTERIOR

Moving to the inside of the pipe I have four tools that I use on every pipe. I clean out the inside of the mortise and the airway in the shank and stem with 99% isopropyl alcohol. I know that others do not like using this kind of alcohol but the higher the percentage the less water is in the mix and the more quickly it evaporates leaving nothing in the airways and shanks. I have been using it for years and generally have several bottles in my supply. I purchase it from a local pharmacy where it is kept behind the counter. I do not use the common isopropyl that is sold in most shops as it is 79% to 90%. The lower the percentage, remember the more water is in the mix. I do not use Everclear because it is not available here and I do not use any distilled spirits as I don’t waste that on cleaning a pipe.

The second indispensable tool that I always keep in supply is pipe cleaners. I use primarily regular pipe cleaners that are the same the entire length of the cleaner. I do not like tapered ones because I find that the large end rarely fits and the thin end is too thin for anything other than metal pipes. I also have a few bristle pipe cleaners on hand should I want to use them. I find that often a good scrubbing with regular pipe cleaners works very well. I dip them in a small cap of alcohol and run them through the various airways.

I also have pipe brushes that are specifically made to reduce the number of pipe cleaners needed to clean the shank and airways. They are generally made of twisted wire and a nylon bristle brush head. They are flexible enough to fit curved and straight shank pipes and do a decent job of cleaning. I personally do not use them very often as I find that they get very dirty very quickly and are a pain to clean. I have some and use them on rare occasions when a pipe cleaner just does not do the job. I would say don’t bother but just the time I think that I reach for one.

The last items that I go through by the boxload are cotton swabs or q-tips. I know that there are many low cost, inexpensive cotton swabs and I think I have tried most of the generic ones. I find that they fall apart when wet with alcohol and can easily clog the shank and mortise. I don’t skimp on these and get name brand Q-tip or equivalent swabs with the paper stick. I check to make sure the cotton ends are well connected and will not come off inside the shank. I dip them in isopropyl alcohol and scour the inside of the mortise, the end of the tenon and the slot in the button. I work with them until those areas are clean and the swabs remain white.

I cannot think of much other than this combination that is needed to clean out the inside of the pipe. Remember to ream the bowl before you do the cleaning or you will need to repeat it as the carbon dust goes everywhere when you are reaming and you will find that it is in the airway in the bowl, shank and even the stem if you happen to leave it on while reaming. I learned that the hard way and would hope that you could learn from my errors.

SANDING AND POLISHING

In terms of sanding and polishing I have done both the bowl and the stem over the year so I will include them both as I walk through the tools with you. I know some use low grit papers for stripping finishes, shaping briar and stem material. Personally I use 220 grit sandpaper as I find that the scratches left behind by the paper are easier to deal with than the lower grits. It will pretty much do everything that I want it to do on both. I use it to shape the stem and work over repairs on the bowl. I use it to bevel the rim and to clean up damaged rims. I always keep a stock of that grit paper here. I also keep several other higher grit papers for polishing (400 and 600 grit) but since I started using micromesh sanding pads I rarely use the higher grit papers.

I also have three different sets of needle files in different lengths, shapes and thicknesses that I use in working on airways in the bowl, the rings on bulldog pipes, the button and slot on stems. In almost all the sets there are four different files that are my go to shapes – round, flat oval, oval and knife blade shaped. I find that these are all I need to do most of the work I do. I also have some flat larger files that make short work of smoothing out stem repairs or super glue and charcoal powder. I replace these files about every five years – I have a tool liquidator near the house that allows me to just purchase the style of file that I need.

I have started using sanding sticks in shaping the button, slot and funnel in the end of the tenon. I have also found that they are helpful when I am joining together two parts of a broken shank. They are quite long so I can sand inside the shank smoothing out the joint of the two parts. They are not expensive so I go through them quite quickly.

Finally I have several trays of micromesh sanding pads. I buy these in sets from 1500-12000 grit from Stewart MacDonald online( http://www.stewmac.com). I personally like the 2 inch x 2 inch pads as they are a good size for what I do with them. The following link shows the options (http://www.stewmac.com/Materials_and_Supplies/Sanding_and_Polishing/Buffing_and_Polishing/Micro-Mesh_Soft_Touch_Pads.html). They are easy to manipulate around the curves of pipes, the sharp edges of the rim and button and can be rolled or bent to work I the angles. Others use the micromesh sheets and cut them to size. I generally use the pads for wet sanding the briar and the stem material so I wash them with soap and water and reuse them for a long time. I rarely throw them away as even the pads that are worn smooth work to polish at times when nothing else works.

POLISHES AND WAXES

If the finish on the pipe is undamaged once the grime is removed I will often rub it down with a product called Before & After Restoration Balm. I find that it cleans, enlivens and protects the briar. I rub it into the finish with my finger tips and let it sit before buffing it with a soft cloth. Sometimes I will use this product before buffing with and polishes or adding waxes. It really does work.

For both the bowl and the stem to remove scratches in the surface left behind by sanding I used Red Tripoli on a buffing wheel and follow that by Blue Diamond. The Red Tripoli is quite coarse so if I have already polished the stem with micromesh sanding pads I skip the Tripoli. If a stem has some nasty spots of oxidation I buff them with Red Tripoli to work at them. But if the stem is polished pretty well I turn to Blue Diamond. Blue Diamond is a plastic polish and is pretty fine. It really makes a finish pop on the bowls and gives the surface of both the vulcanite and acrylic stems a rich shine.

Once the stem has the nice shine that I have come to expect with these buffing compounds I give the stem and bowl several coats of carnauba wax. (I use a soft wax called Conservator’s Wax or even Renaissance Wax for rusticated and sandblasted finishes as the carnauba can fill in the grooves and make the finishes a real mess – learned that from experience.) When I have finished waxing the bowl and the stem I buffed it with a clean buffing pad to polish the wax. Lots of folks leave out this step but it really does add a finished touch to the polished pipe.

APPLICATORS

For applying the polishes and wax there are several methods depending on what you are using. With soft polishes like Dunhill Stem polish or Savinelli Pipe Stem polish you can apply it with your fingers and buff it with a soft cloth. But for polishing compounds and carnauba wax you need some kind of wheel to apply the product. Many people use a 4 inch wheel on an arbor on their hand drill or lathe and it works very well. I have used a four inch wheel on a cordless drill with good success. You chuck it in your drill and either move the pipe around the buffing wheel or the buffing wheel around the pipe. I anchored my drill with a bench vise to keep it stationary and worked the pipe around the wheel. I find that gave me more flexibility. I run the drill at a fairly slow speed until I get used to the feel and then speed it up.

Others have used a Dremel and buffing wheels with great success. The key is to run it at a lower speed and don’t leave it in one place as it will definitely cause ripples and waves in the material. You need to change the pads for each product so there is no crossover. Use one pad for Tripoli, one for Blue Diamond or White Diamond and one pad for your waxes. Also use a clean pad to polish the final product.

For me however, the best method is my buffing wheel. I picked up two bench grinders from a local tool liquidator and removed the grinding wheels and covers and use 6 inch buffing wheels on both. This way I do not need to change wheels on it. I used to use a homemade buffer made from a furnace motor, an on/off switch and a three prong plug that I wired to the switch. It had an arbor and quick change system that I purchased called the Beall Buffing System. That worked really well.

SPECIALTY TOOLS

I am adding two other tools that I have added that I really think have lightened my load and made my work simpler. The first of those is the PIMO Tenon Turning Tool which is available now from Vermont Freehand. It is adjustable and you can easily turn down tenons for most pipes. The limitations really are with regard to the tiny pipes and pencil shank pipes. Those I get as close as possible and finish with files and sandpaper. Before I purchased this tool I used to do the tenons by hand with files and sandpaper – it was labour intensive but it worked. Needless to say, that I rarely restemmed pipes with that method. I still have a box of bowls that need to be restemmed from that era. Perhaps one day I will get to them.

The second tool that I don’t know how I lived without is a heat gun. I used to use boiling water in the microwave or a cookie sheet in the oven to bend stems. With the water method I had to contend with oxidation afterwards. With the oven method the beauty was that I could do multiple stems at once. The only problem is that often I only need one stem and this seemed like over kill. Now with the heat gun I can bend stems on demand. I have also found that it works well to heat up metal tenons for removal and readjustment and for loosening stems that are stuck in the shank.

CONCLUSION

That is the content of the basic tool kit that you can start with to work on pipes. It is a basic list of tools that I use almost daily as I work on pipes. Remember I do this for a hobby so there are probably other tools that a shop or repair business uses that I have not listed. I don’t use them because I do not have the room. I do all of my repairs on my desk top one or two pipes at a time. The tools work for me. Hopefully that helps some of you as you think about our joint hobby. If it does so, great. If not, just ignore this post. As always these are just my own opinions and I am expressing what has worked for me. If you don’t agree that is ok with me. Until the next Answers to Questions blog keep your pipes clean and enjoy smoking your work! Cheers.


ANSWERS TO QUESTIONS – What do I look for when buying estate pipes?


Blog by Steve Laug

I remember when my brother got bit by the pipe hunting bug and just about picked up every pipe he saw because they looked good, or were unique, or just because… I remember doing the same thing when I first started going through antique malls or rummage shops. I just purchased what I found because they were there. Jeff and I sat down and talk through what I looked for and how to sort through all the brands of pipes that are in the sales. We spoke of brands and my process for sorting through the options. I don’t remember how long we took but he wrote down the brand names that I look for and asked questions about the details of knowing what was workable and what was not. This for me was the part of the process that was not logical it was merely a matter of preference. I have a lot of pipes to work on so I have become very selective over the years as the bins and boxes have filled up.

Since we had talked about this it dawned on me that it might be helpful to walk those of you who are interested through my process. It is here for you to use if you want to. If you don’t want to, just skip this blog and carry on. You will eventually develop your own hunting regimen and methodology. This one is mine and it has worked for me for many years now.

When I look at estate pipes, whether online, on eBay or in person at an estate sale, auction or in my visits to antique shops and malls, I have an internal checklist that I work through. I used to have to think about it and methodically work my way through the process but no longer. It is now a part of the warp and weave of my thinking when I am in the pipe hunting mode. I had to step back and think through it again as I write this blog because I just automatically do it now. Here is my list.

  1. Who made that pipe – my first question is one of the ways I eliminate pipes from my purchase. I have become more selective, as I mentioned above, so I quickly move through the pipes in a display. After a while you learn to recognize shapes, markings, finishings etc. so it is pretty quick. If the pipe is a drugstore pipe (think Medico, corn cob), then I skip over it. If is an older one – Kaywoodie, KBB or KB&B, Yell-bole I will often put it aside or add it to my mental list. Personally I pass up many Medicos, Carey Magic Inch pipes, Grabows and Willards. I skip most is not all of the Imported Briar no name pipes and all no name Italian pipes that have flooded the inexpensive baskets by pipe store cash registers.
  2. What is the general condition of the pipe – Again this review is almost automatic. Last weekend my brother was in an antique mall in Montana and we Facetimed for a bit and he showed me pipes. It seems I can see cracks, nicks, holes, breaks, wrong stem and misfit stems with broken tenons without taking a lot of time. I look at the rim top and check for lava, damage to the inner and outer rim, burn marks and charred areas. I quickly eye-ball the finish and see if there is a heavy varnish coat of varathane coat. I typically do not take a pipe apart at this point. I am merely eliminating the ones that I am not interested in working on. The ones I want are now added to my growing pile to be examined more thoroughly.
  3. Let’s take it apart (if I am able) – This is the time for a closer inspection of the pipes in hand. I scrutinize them at all levels in this step. I look at the stamping to see if it is readable and/or damaged. I look at the stem to check if it is original and the markings match the shank stamp. I remove the stem if I am able without breaking the pipe and check out the internals. He I am examining the inside of the mortise, holding it up to the light to see if the shank is clogged. I look for broken inner tubes or stinger apparatuses in the shank or the stem. I check the shank end to see if there are any signs of cracks that don’t show up on the exterior of the shank. I look for burn marks internally in the mortise as I have seen burn through areas even there. I check out the inside of the bowl as much as I can and the outside looking for burn marks or checking or charring. I am not too worried about fissures in the bowl I am more concerned with the condition of the wood around them. Those that make this final cut are the ones I purchase the rest are left behind. I do not hesitate to walk away from these pipes. Even the chosen few can be left behind if the price cannot be agreed upon between the seller and me.

Often folks will assume that I will not buy damaged pipes – broken shanks, cracked shanks, stems that are chewed up, etc. That is not necessarily so. I assess what work will need to be done and if it will reduce the value of the pipe or if I am not in the mood to work on that kind of issue (yes there are times that I just don’t want to look at another cracked shank). If the pipe is repairable and will look good when fixed then it remains in my purchase pile. Oh, there is also another exception I tend to also scavenge pipes for parts – stems, bands even briar for other repairs so some of the pipes I purchase may be for my bone pile. I gather my purchases, pay my bill and add them to my restoration bins.

I thought it might also be helpful to some of you to have an idea of the brands I look for on my hunts. I know that this highly subjective (at least to some degree) but I think it illustrates a point in terms of how my head works when I am hunting. The brands that make up this list are not exhaustive as there are many that may have escaped my memory as I write this but you will catch the pattern. I have organized them by region in the list below.

  1. Danish or Scandinavian – these include Stanwell, Kriswill, Jarl, Nordings (I have found many of each of these brands on my hunts).
  2. English and Irish – Dunhill, BBB, GBD, GW Sims, Barlings, Comoy’s, Charatan, Lowes, Petersons and all of the sub brands and seconds of each of these (check out the Pipephil.eu site to figure out these).
  3. French and Belgian – Hilsons, GBD early pipes, Comoy’s, Butz Choquin, Chacom and some of the earlier St. Claude made pipes (again check the Pipephil.eu site).
  4. Italian – I have found that other than Savinellis the estate market on these is limited. I have picked up some nice Castellos, Brebbias, Acortis, Radicis, and even an occasional le Nuvole pipe. I leave behind some of the other brands such as Lorenzo or Lorenzetti as well as the no name basket pipes that bear the Italy stamp.
  5. North American – Tracy Mincer, Custombilt, Custom-Bilt, CPF, National, Manhattan, Linkmanns, older Yello-Boles, KB&B pipes, KBB pipes, Kaywoodies, SM Frank, some Wally Frank pipes, Canadian made Brighams, Trypsis, Calich, and even the occasional artisan pipe from both countries – such as Tinskys, von Ercks, Wests, Buraks and the list can go on.
  6. Meerschaums – Generally I am not a big fan of facial meerschaums. I like classic shapes, lattice meers and sometimes well executed faces. I probably pass over more meerschaum pipes than I purchase. If I take one I want the carving to be really well done. I really dislike poorly carved faces with poorly executed features.

I am sure that each of you who are reading this could add more to the list but this is a bare bones list that I work with. It is meant to be a starting point. Add your own brands to the list as I am sure I will as more come to mind. I think that summarizes my thoughts on the original question. As with most things in our hobby there are questions behind the questions. There are multiple levels of answers but at the same time it really boils down to what you individually want to do. It comes down to your aesthetic and your willingness to take the time to work on an estate pipe. What I find ugly and worthless may well turn your crank and be on your wish list. No problem with that because that is what makes this hobby the amazing thing it is. Hopefully you have found this blog helpful as you make your own choices. Thanks for humouring this old pipeman in his ramblings. Cheers.


ANSWERS TO QUESTIONS – How do you decide whether to replace fills or rusticate a bowl?


Blog by Steve Laug

Another of the questions that I am frequently asked is “How do you decide whether to replace fills I the briar or to rusticate the bowl and shank?” As always seems to be the case there is another question behind that one that needs to be answered before even considering that decision. That question is fundamental to all the work we do as refurbishers/restorers. Simply stated it is: “How far do I go in the process of working on a pipe before it ceases to be its original maker/manufacturers pipe and becomes a product of my work?” If your changes essentially alter the original it has become yours. The choice boils down to a question of preservation or abandonment. I thought it was worth devoting an Answers to Questions Blog to addressing this question and all of the considerations that it raises. As always the ideas are my own and I am not expecting everyone to agree with my conclusions but I ask that at least you wrestle with the issues.

Once you have wrestled with the question of how far you go in your work and make a decision about how much is too much then you are ready to go the direction that decision presets for you. If you decide to preserve the pipe as much as possible to the original then rustication is off the table. It becomes simply a matter of repairing or replacing the fills in the briar. That decision is not difficult because the end result is that you want the fills to blend into the finish as much as possible. The last thing you want is spots all over the bowl where the fills stick out.

Hopefully, that will help you make the initial choice regarding the pipe in your hands. To fine tune the decision make process further, set some parameters for what you will or will not rusticate. For example for me the fine tuning has led me to make decisions on what I will and will not rusticate. I will rusticate any Imported Briar no name pipe without thinking twice. These generally have a lot of fills that stick out and I want to get rid of them. With these there is never any concern about preservation. I am really more concerned about beautifying what to me is an eye sore. I wipe it down with alcohol to clean it up and jump right into the rustication.

I have also decided that I will not personally rusticate or change any name brand pipes – Stanwell, Kriswill, BBB, KBB, Charatn, GBD, Kaywoodie to just name a few. With the Kaywoodie brand I specify even more focused on the early pipes they made. I never mess with higher end pipes like Dunhill or even new artisan pipes. With all of those I have chosen to take a minimalistic approach in terms of refurbishing and restoration. Even in my repairs I tend to be a minimalist with these brands as much as possible. I do not want the pipe to be anything less than what it was when it left the factory or the maker. I want it to shine in all of its beauty. Of course you will need to make your decisions regarding parameters and once you do you also have the power to make exceptions to them.

If I am going to preserve the pipe and leave the fills in place that decision also have some qualifiers. If the fills are large and ugly pink putty has been used to fill them in I almost always use a dental pick and remove them. I refill them with a mixture of briar dust and super glue. If they are chipped but otherwise solid I often repair them instead of replacing them. If they are soft they need to be replaced. If they are small and well hidden in the finish I tend to leave them. If they are out of my sight line when I smoke it then I also tend to leave them. If they stand out then to me they have to go. I replace them and blend them into the finish as much as possible. All of these qualifiers are arbitrary and personal at some level I guess but you can decide that yourselves. If you can live with the fills as they are then leave them. Most if not all of them are aesthetic and in no way affect the smoking function of the pipe. I have had the most filled and ugly pipes that are my best smokers and I have had almost flawless pipes that were awful smokers.

I think that summarizes my thoughts on the original question. As with most things in our hobby there are questions behind the questions. There are multiple levels of answers but at the same time it really boils down to what you individually want to do. It comes down to your aesthetic. Whether you choose to preserve a brand or to make it your own truly is your choice. I think for many of us once we have made it our own we should remove the original makers marks as it is no longer a pipe from their hands (at least externally as notice we have said nothing about changing the mechanics). Hopefully you have found this blog helpful as you make your own choices. Thanks for humouring this old pipeman in his ramblings. Cheers.

ANSWERS TO QUESTIONS – Is this pipe repairable?


Blog by Steve Laug

In this next installment of the Answers to Questions blogs, I want to address a question that comes to me via email, the contact button on the blog or through Facebook. I receive photos and descriptions of pipes in a variety of conditions asking if I think the pipe is repairable. I have learned over time that the question has a variety of possible answers. I think that questioner thinks it will be a yes or no question. Really, I suppose that is what they want to hear. Yes I think it can be repaired or No, it cannot be repaired. Often when I answer yes, they want me to do the work, and sometimes when I answer, no they want to send it me to “dispose” of properly. But really the question is not a yes or no question. Every pipe gives multiple options for how to proceed.

I think the right question to ask is, “How badly do you want to keep this pipe?” or “How much work are you willing to put into this pipe?” These questions determine what a person will do and what lengths they will go to in order to keep or return the pipe to smokable condition. If the question is merely a simple yes or no then many pipes will end up in the tinderbox destined for the fire. However, if the question is as I have spelled it out above then the answer will lead to the next steps of restoration. Let’s talk about some of the pipes that have come across my desk or my email address that can illustrate this variation on the question.

A Beautiful older Peterson 999 with a huge burned out hole in the lower left side of the bowl. Many would have simply said good-bye to this old friend because you could put your index finger through the side of the bowl. It appeared to be a goner. When I looked at it I remembered an old Blatter and Blatter pipe that I had picked up on eBay that had a burn out on the back side of the bowl. I had talked to the shop in Montreal and they had me send it back to them. They drilled out the burned out area until they had solid briar. Then they cut a chunk of new briar and fit it into the drilled out hole. They glued it in place and once it had set, they rusticated the patch to match the rest of the bowl. They gave the inside of the bowl a bowl coating to protect it until a cake had formed and sent it back to me. I have had that pipe for over 20 years now and it is still going strong. You would be hard pressed to find the repaired area.

With that living memory I said yes to the burned out Peterson. In days past, I would have walked away and left it for firewood but I had learned. I drilled out the burned out area with a drill bit until the surrounding briar was solid. I cut a plug from a piece of briar and adjusted it to fit into the hole. I glued it in place and rusticated the area around the plug and lower part of the bowl until it blended in well. I stained the lower half of the bowl with a dark brown stain and the upper half with a medium brown stain. The finished exterior looked very good. I coated the inside of the bowl with bowl coating to protect it. The fellow still smokes the pipe I believe and the repair has held up well. Here is the link to the blog: https://rebornpipes.com/2014/02/06/plugging-a-burnout-on-a-petersons-irish-whiskey-999/

You can see from that example that a simple yes or no question would have probably sacrificed what turned out to be a repairable bowl. The question was whether I wanted to take the time and invest the work to make it smokable again. In this case the invested work was worth the results in my opinion.

An Ardor Urano Fancy with a ½ inch deep chunk broken out of the right side edge of the rim. This is one that caught my eye on Ebay. Many would have simply passed it up and said it was not worth repairing. The large broken out chunk of briar from the back right side of the bowl near the top and the general wear and tear on the bowl would have easily made it a pass. But to me something about the rugged rustication and the blue of the shank end and stem just caught my eye and made me want to give it a try. So I put in the only bid on the pipe – no surprise there and picked it up for a decent price. This was a pipe that would go in my collection and not be sold and it was a pipe that would provide more schooling for me in the art of pipe repair.

I had it shipped to Idaho and my brother cleaned it up for me. When it finally came to Canada I was excited to see what could be done with it. I cleaned out the damaged area with alcohol and cotton swabs until the surface was clear. I smoothed out the edges of the break to make fitting a new piece of briar a little easier. I cut a piece of briar from the side of one of my sacrificial briar bowls that I keep just for this purpose. I shaped the piece of briar with my Dremel and a sanding drum until I had it close to fitting. I used the Dremel to give the inner edge a bit of a curve that would match the wall of the pipe around it. Once I was close I used a file and 80 grit sandpaper to bring to the size that I could press it into the damaged area. I coated the edges with epoxy and pressed the chunk in place. I filled in around the patch with clear super glue to ensure that the seal was tight. I set it aside to cure.

The next day I used the Dremel with various burrs to rusticate the repaired area to match the surround bowl sides. There was an uneven smooth area around the rim top so I left that smooth on the repair as well. Once the rustication was complete and I was satisfied with the match I washed the area down with a cotton pad and alcohol. I mixed a batch of JB Weld and coated the wall of the repaired area. Once it dried I used the Dremel and sanding drum to carefully smooth out the inside of the bowl. I gave it a thick coat of pipe mud and let it dry. I stained it with a dark brown aniline stain and washed it lightly with alcohol to blend it in. I gave the bowl multiple coats of Conservator’s Wax and buffed it with a clean buffing pad to raise a shine. I have had the pipe now for almost a year and it smokes really well and looks pretty good for a repair. Here is a link to the full blog: (https://rebornpipes.com/2016/02/26/with-just-a-little-work-i-now-have-a-dr-ardor-urano-fantasy-apple/) The next three examples show very different repairs and issues with old pipes that I have dealt with. I decided to use two of them as examples in this blog. https://rebornpipes.com/2016/09/03/what-to-do-with-a-cracked-bowl-options-for-their-repair/. The first was cut off and the job was done very poorly. It had originally been a GBD 9438 in a previous life and someone had cut off the entire top half of the bowl. They had restained the bowl but had not sanded it so there were saw marks and file marks and a very rough look to the pipe. This is another pipe that could easily have been relegated to the dust bin. My brother Jeff picked it up in a bunch of pipe from a fellow on Ebay who called himself a refurbisher. This pipe came as one that had been restored. It had a lot of problems. Not only had he cut the bowl off he had also used a Dremel and took it straight down the bowl leaving a mess in the bottom of the bowl. I figured that maybe there was something redeemable in the pipe. I used a Dremel and sanding drum to reshape the top and round it over giving some form to the damaged bowl. I decided to round it over leaving a rounded top edge to the rim. It took a lot of sanding and shaping but I think in the end I had a smokable pipe with a bit of charm that previously had been severely lacking. You be the judge. Was it worth the effort to do the work on the bowl?

The second pipe in the lot was an Alpha freehand rusticated shape that someone had done the same hack job to the bowl was very short and held a mere thimble full of tobacco. It had thick walls on the portion of the bowl that was left so I decided to experiment. If the experiment did not work there would be no loss. I had a bowl with the shank missing and damage to the bottom side that could easily be salvaged and the two parts connected to make a new pipe. I cut off the damaged (cracked) bottom of the sacrificial bowl in preparation for the new union. I drill small holes in the top of the bowl and the base that matched each other and cut some stainless pins that would join the two parts. I glued the pins in the base and coated the surface of each part with epoxy and pressed them together until the surfaces joined. I filled in the gaps and crevices joining the two bowls with briar dust and super glue. Once everything had set I reshaped the bowl so that the joint was less visible and then rusticated the new top half to match the base. I coated the inside of the bowl sealing the area where they joined with JB Weld and when dry sanded it out with my Dremel leaving the JB Weld only in the joint. I coated the bowl with a bowl coating of sour cream and charcoal powder. I restained the bowl with a dark brown stain. Once the pipe was finished I had an interesting chimney pipe that would give many more years of service. Was this worth it? To me it was worth the education for me. GBD Made Square Shank Poor Richards Pipe Shop with a lot of cracks around the bowl. This one was a challenge that Charles Lemon of Dad’s Pipes Blog and I took on together. We were experimenting with the question, “When was a pipe no longer redeemable.” https://rebornpipes.com/2016/03/06/a-humpty-dumpty-cross-canada-project-could-this-poor-richards-select-square-shank-billiard-9489-ever-be-whole-again/. The pipe was one my brother had picked up that was stemless. The bowl was a mess with cracks on all sides of the bowl. Charles and I had been chatting on Skype about repairing pipes and I told him about it and we decided to make it a joint effort. Charles was experimenting with using rods to stitch a cracked bowl back together again and this was just the one to do that on. He drilled angled holes on each side of the crack and pushed a rod through. The angles of each set of holes was drilled in opposition to the previous one so that it acted to pull the crack together. The next series of photos show the process of stitching the bowl together, filling in the holes and refinishing the bowl. Putting the shank back on a broken LHS Park Lane DeLuxe — Lovat 12. The next one was a fun pipe to work on. It was one that I would have thrown in the bin for parts in the past. The shank was completely broken off leaving a short section on the bowl. I liked the look of the Cumberland stem and the Lovat is one of my favourite shapes so I figured it was worth a try. You can read the details on the blog here: https://rebornpipes.com/2015/09/29/repairing-a-broken-shank-on-an-lhs-park-lane-de-luxe-lovat-12/ I cleaned up the broken ends of the shank and bowl and used a brass tube to insert, glue and bind the two parts together. I filled in the gaps in the crack with clear super glue and briar dust to make things smooth. The crack virtually disappeared into the grain once I stained the pipe with a dark brown stain. The finished pipe is shown in the last two photos. The repair has held up for several years now without any sign of the joint failing. Crafting a Frankenpipe from a cut off Brebbia Lido Bowl and a piece of bamboo. The next example is a Brebbia Lido that my brother picked up on one of his trips. Someone had glued a stem in the shank and the shank itself had been cut off crooked so the entire pipe curved toward the right. The short shank also did not work well with the stem that had been put on the bowl. We removed the stem during the cleanup process and cleaned off the glue and crud in the shank. It looked like another broken pipe but I thought that the shank had enough length that a piece of shank could be added. I checked out the look with a piece of briar, acrylic and bamboo. The bamboo worked for me the best. I used a topping board to square up the shank end on the Lido and both ends of the piece of bamboo. When I put the two together the junction was smooth and tight. I joined the bamboo to the shank of the pipe using a piece of Delrin tenon that I glued into the shank first and then into the bamboo. I filled in the small gaps around the joint with super glue to seal it tight. Once it had cured, I glued a drilled out acrylic button on the end of the bamboo to keep it from fraying or splitting when the stem was in put in and taken out repeatedly. The longer stem worked well with the rustication and the bamboo the contrast of finishes and colours made the pipe a beautiful addition to my rack. What had been a throwaway was rescued and given a new look. It is now a pipe that I enjoy smoking. If you wish to read more about the process, I have included the link to the blog on the restoration of the pipe. https://rebornpipes.com/2017/10/09/another-frankenpipe-salvaging-a-lido-root-briar-dublin-bowl/

Crafting another Frankenpipe from a broken shanked apple, a piece of briar and a metal tube. The final example is another broken shanked apple. It was a no name pipe with a nice shape on the bowl and a jagged broken shank. I decided to take a totally different tack on this one. I had an old metal flashlight tube that had a cross hatch pattern on the metal. It was an open tube. I had a sacrificial pipe that had a long shank that I cut off and used to make this more of a Lovat style apple. I wanted a pretty indestructible pipe to use while I was working in the yard or the garden. I cut off the broken shank on the apple and topped it to square it up. I turned the other shank that I was using so that it would fit into the metal tube and allow me to use the mortise for a new shorter stem. I joined the bowl and the shank with a piece of stainless tubing. I scored the tubing and epoxied it in the bowl end first then added the shank end to it. Once it cured I used a file to step down the end of the shank on the bowl end so that the tube would fit closer to the bowl staggering the new joint and giving it more stability. I pressed the metal tube on the shank piece until the end was flush with the briar of the bowl. I filled in the gaps with clear super glue to make the transition seamless. I wanted the transition between the metal and the stem to be seamless so I stepped down the end of the stem just past the tenon to sit inside the metal tube. I restained the bowl and polished the vulcanite and the pipe was ready to smoke and it was pretty indestructible. This is yet another example of the lengths that I will go to salvage a pipe that I like or that I see promise in. Here is the link to the blog if you would like to read about the process in detail. https://rebornpipes.com/2015/02/07/pipe-resurrection-from-a-broken-shank-to-another-frankenpipe/

Looking at the various examples above of pipes that have crossed my worktable you can see how I chose to answer the question, “How badly do you want to keep this pipe?” or “How much work are you willing to put into this pipe?” In each case, my decision was that the pipe was worth saving and investing time in whether it was for the sake of repairing a beautiful old pipe or for learning new skills that I could use on other pipes that came to my desk. The decision was not quick or foolish it was made with full awareness of the extent to which I would have to go to bring the pipe back to useable condition. With that I bring this Answers to Questions blog to a close. I hope that this installment has been helpful to you. Have fun crafting what you can out of the broken pieces of the pipes that come your way. Think hard before you throw the pipe in the fire and look beyond the pieces and see if you can imagine a way to make it work. Thanks for reading.

ANSWERS TO QUESTIONS: How do I repair a bite through on an amber coloured stem?


Blog by Steve Laug

I have been asked a few times about how to patch amber coloured stems. It is a little different from repairing black stems (whether vulcanite or acrylic). Repairing the black stems is relatively simple and includes the use of charcoal powder or vulcanite dust and black super glue. A mixture is made and after insuring that the airway does not close off with the repair the mix is put in place over the hole. Using needle files, sandpaper and micromesh sanding pads the repair is blended into the stem surface, the button is reshaped and the stem is good to use after the repair cures. Repairing an amber or yellow coloured stem is a bit trickier. I have yet to find any yellow charcoal powder or even sanding dust that can be mixed with the super glue like I do with the black glue. What I have found is some amber super glue that is sold by Stewart MacDonald. They sell several colours of super glue including black, white and amber along with the regular super glue that is clear. Here is the link:  (http://www.stewmac.com/Materials_and_Supplies/Glues_and_Adhesives/StewMac_Tinted_Super_Glue.html)

I thought it might be helpful to use a recent stem repair I did and wrote about on a previous blog (https://rebornpipes.com/2017/12/24/breathing-life-into-an-early-1900s-eagle-claw-billiard/).  I will go into more detail of the process to demonstrate how the repair works. I started with an amber coloured Bakelite stem from an old pipe. It was a mess. There was a bite through on the underside of the stem that was quite large and dirty. There were tooth marks that were quite deep on the top side of the stem – almost going through to join the other side. It would be an interesting repair that would take some finesse to get right. While the amber glue would not perfectly match the stem material it would be a close enough match to make the pipe smokable once again. I cleaned the surface of the stem with Oxyclean to remove all of the buildup and oils on the surface of the stem. I worked over the deep tooth marks on the top side of the stem and the hole on the underside using a cotton swab and the Oxyclean solution to remove the grime that was in them. I dried the stem off with a clean cotton pad in preparation for the repair. I inserted a fluffy pipe cleaner to make sure that it was wide enough to fill the airway and give me protection from getting the glue in the airway. Once I saw that it would work, I greased the pipe cleaner with Vaseline to make sure that the glue did not stick to the pipe cleaner and anchor it in the airway making more work for myself.I filled in the hole with amber super glue (no other material) and sprayed it with an accelerator that I also purchased from Stewart MacDonald. I did the same on the tooth marks on the other side of the stem. I repeated the fill of glue until the repairs were a little higher than the surface of the rest of the stem. I sprayed both sides with the accelerator and removed the pipe cleaner from the stem. The next three photos show the repairs to both sides. While they are visible and looking thick they will blend in better once they have been sanded smooth. I set the stem aside overnight to let the repair cure. I wanted it to be very hard before I started sanding and shaping it.In the morning the glue had cured to a hard surface. It was time to begin the shaping process. I have a small rasp that I used to bring the repaired area down close to the surface of the stem and to start the reshaping of the button area. Once I get the repaired area close I wipe the stem down with a damp cloth to remove the debris left behind by the file.The rest of the shaping and blending is done with 220 grit sandpaper. I sand the surface of the stem until all the transitions between the repair and the surface of the stem are smooth. It takes quite a bit of sanding to get to this point. I often sand the entire stem to make sure that all the surfaces are smooth and that there are no lips or edges to the repaired area.Once I am happy with the feel of the stem it is time to begin polishing it. I used micromesh sanding pads to bring a shine to the repair and the stem. I wet sand it with 1500-2400 grit pads and wipe it down to remove the sanding dust. I am always checking to make sure that the edges of the repair are still very smooth and the transitions around the edges are virtually invisible to touch.I continue to polish the stem, dry sanding it with 3200-4000 grit micromesh sanding pads. I wipe the stem down after each pad and run my fingers over the repaired areas to check on smoothness. I don’t hesitate to refill areas that are not quite smooth and start sanding all over again. In this case that was not necessary. The repairs were solid and the one in the deep tooth marks looked really good (first photo below shows the topside of the stem). The underside of the stem where the bite through had been had a lot of checking or small minute crazing in the material. Because of the clarity of the amber super glue in contrast to this it showed up more on the underside (second photo below).I finished polishing the stem, dry sanding it with 6000-12000 grit micromesh pads. The photos below show both sides (first photo is the topside of the stem and the second one is the underside). The repair is solid and smooth at this point. I wiped the stem down with a damp cloth to remove any polishing dust that may have remained. I gave it several coats of Conservator’s Wax and hand buffed it with a microfiber cloth to polish the wax and give it the protection it would need.  I carefully buffed the stem using a very light touch to raise the gloss on the Bakelite without damaging it from the heat. I took it back to the work table and gave it several coats of Conservator’s Wax. I hand buffed it with a microfiber cloth to polish the wax and deepen the shine. The finished stem is shown in the photos below. While the repair is visible I accomplished what I set out to do – repair the stem and return it usefulness. That is the process and methods that I use to repair bite throughs or holes in a yellow, amber or even reddish Bakelite stem. The process is done after the stem has had a thorough cleaning. This gives a fresh surface for the patch to bind to when it applied and cured. I have found that doing this is the most effective way to ensure that the repair holds in the long run. I would encourage you to give it a try to see how it works for you. With that I bring this Answers to Questions blog to a close. I hope that it has given you some insight the methodology for repairing holes in the stem. Thank you for taking time to read this blog. Cheers.


ANSWERS TO QUESTIONS – How do I “De-ghost” a pipe?


Blog by Steve Laug

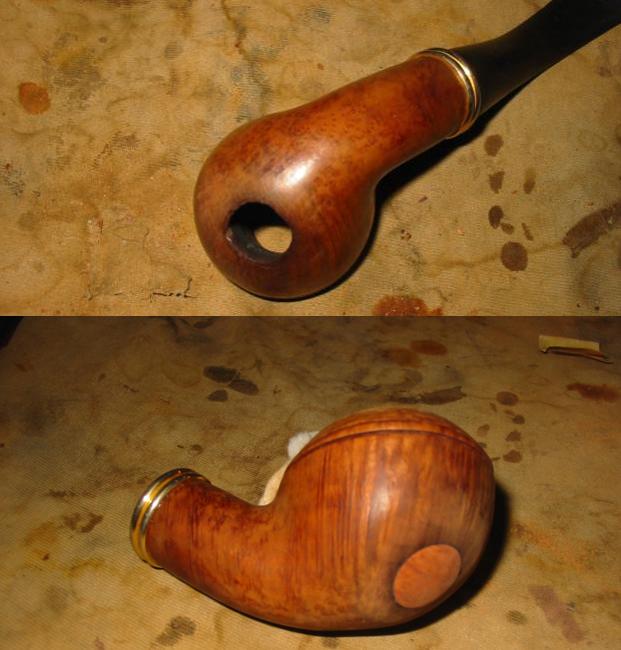
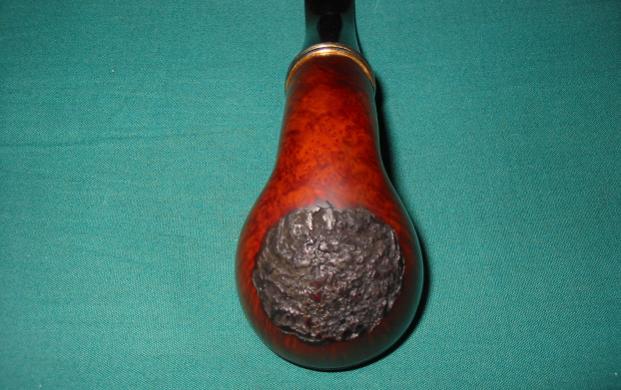
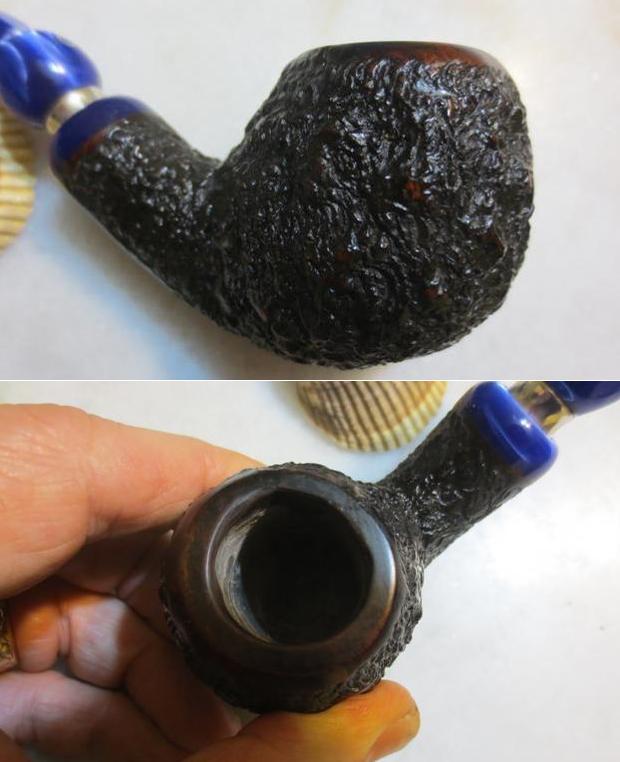
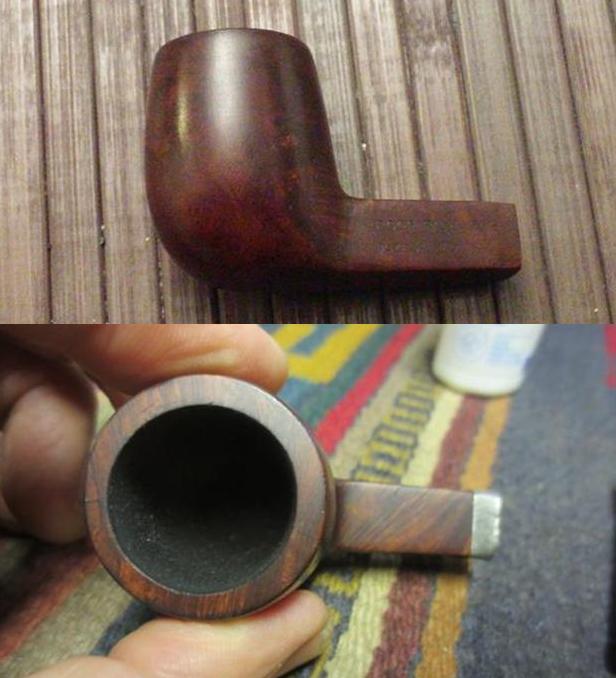
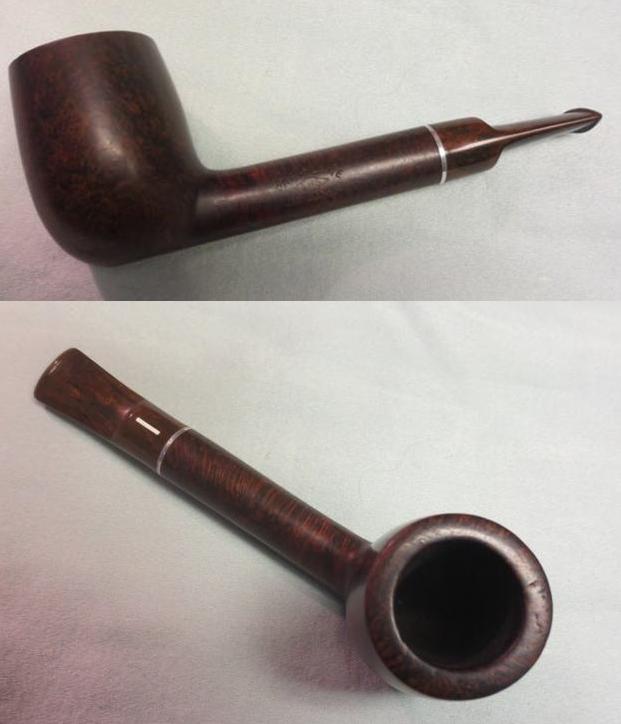
Another of the questions that I am frequently asked is about how to remove a tobacco ghost from a pipe. For some folks it is a matter of removing the ghost of Latakia from an estate pipe so they can smoke a favourite Virginia or aromatic without the smoky overtones coming through from the past. For others it is the opposite – how to remove the sweet, candy-like ghost from a past pipe man. However, one I hear about most often involves the left over smells and tastes left behind in a pipe from Lakeland tobaccos. Folks want to remove that ghost of “grandma’s perfume”, the floral scent that stubbornly clings to a pipe even after a thorough cleaning. I thought it was worth devoting an Answers to Questions Blog to addressing some of the different methods that can be used to address the ghost in the pipe.

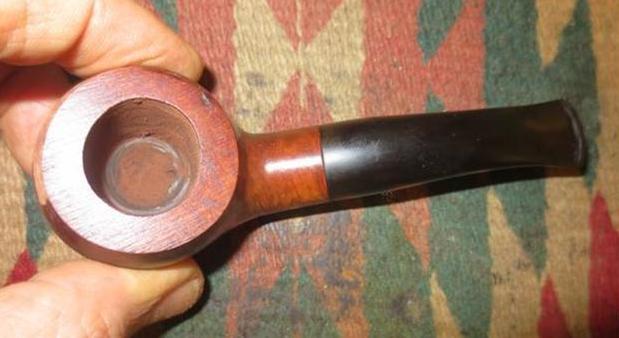
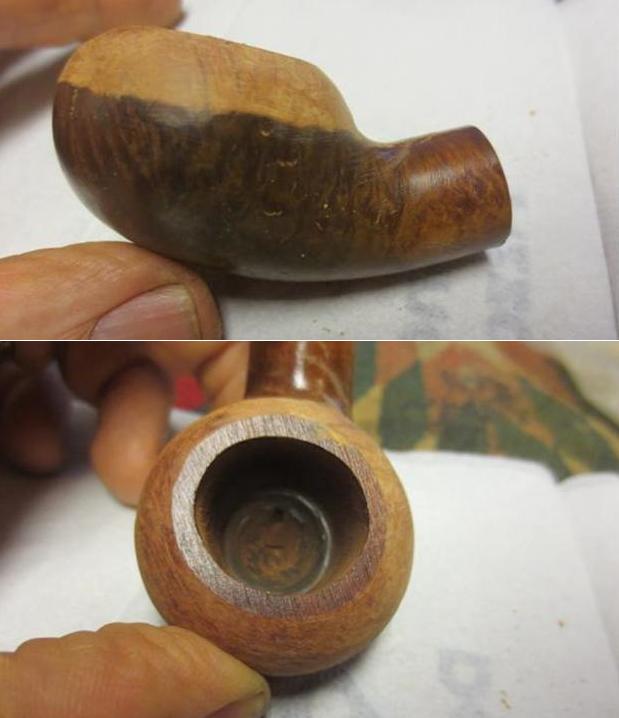
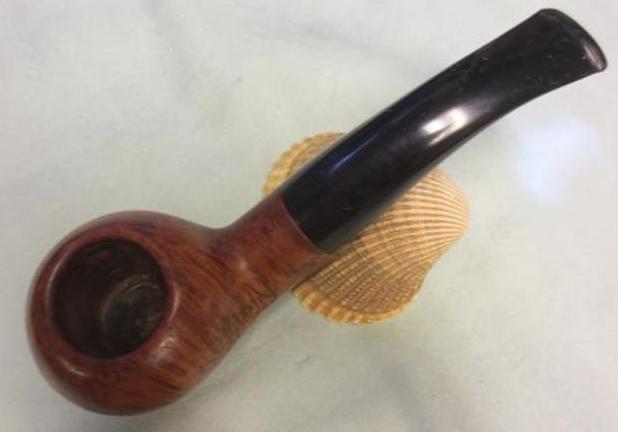
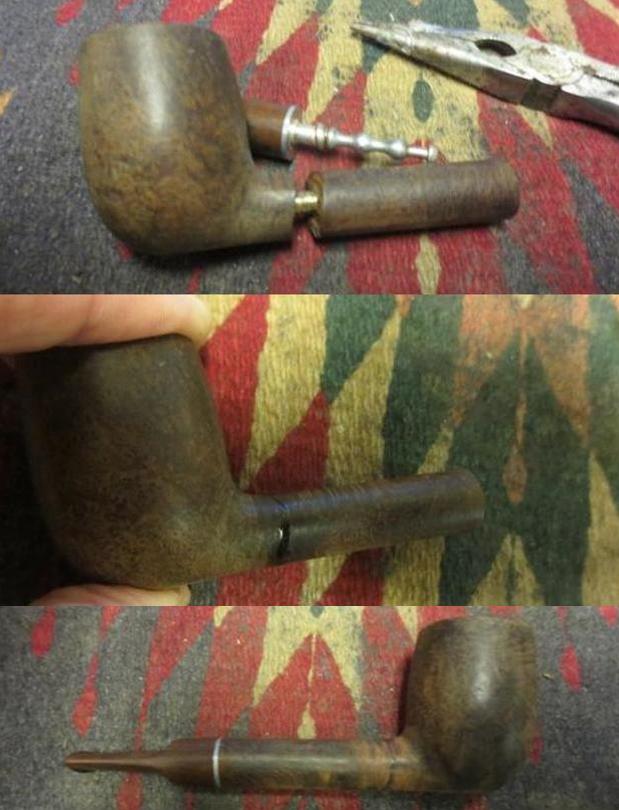
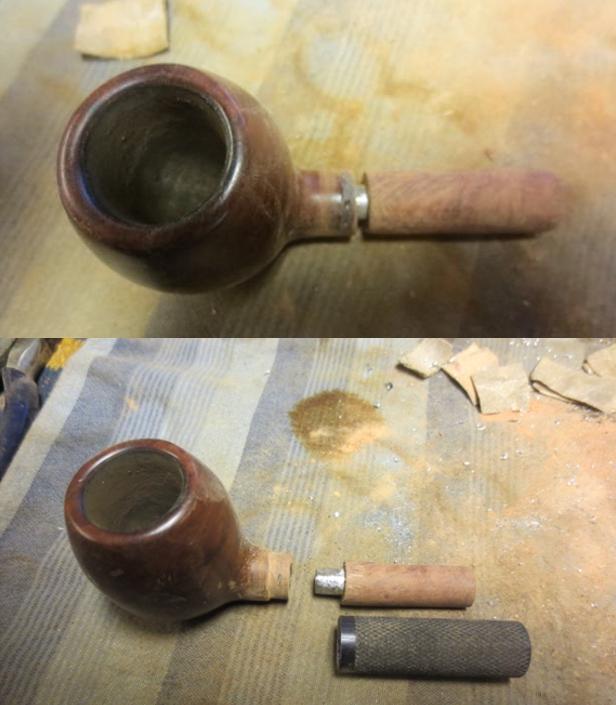
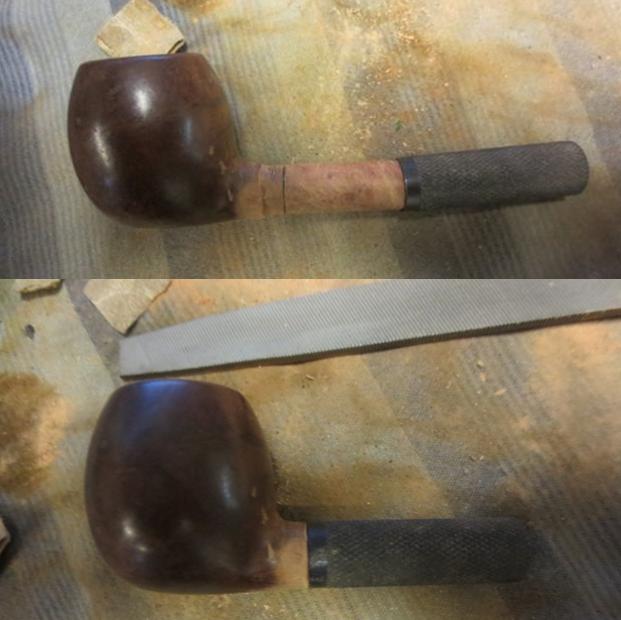
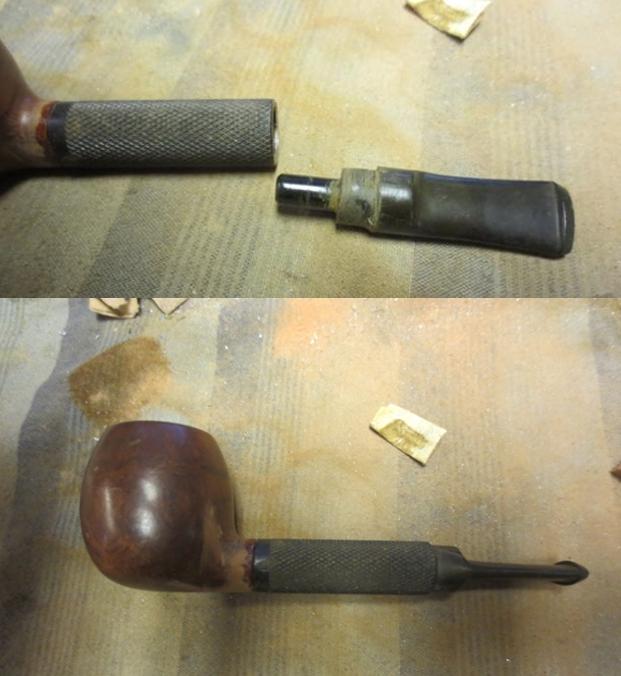
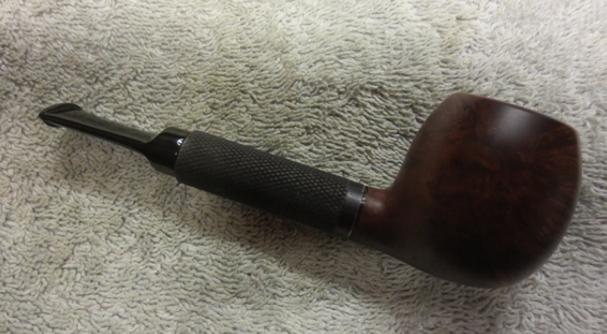
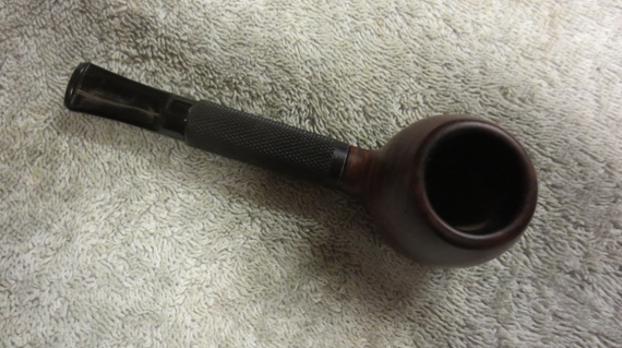
All of the methods that I will write about assume that the pipe has been thoroughly cleaned before using them. It is easier to work on a pipe that is not filthy with tars, oils and debris than otherwise. I am sure that others may think that this pre-clean is not necessary but I have found that it is not only necessary but also essential to getting the best deep clean possible. I will summarize the way I do this cleanup in the form of a checklist.

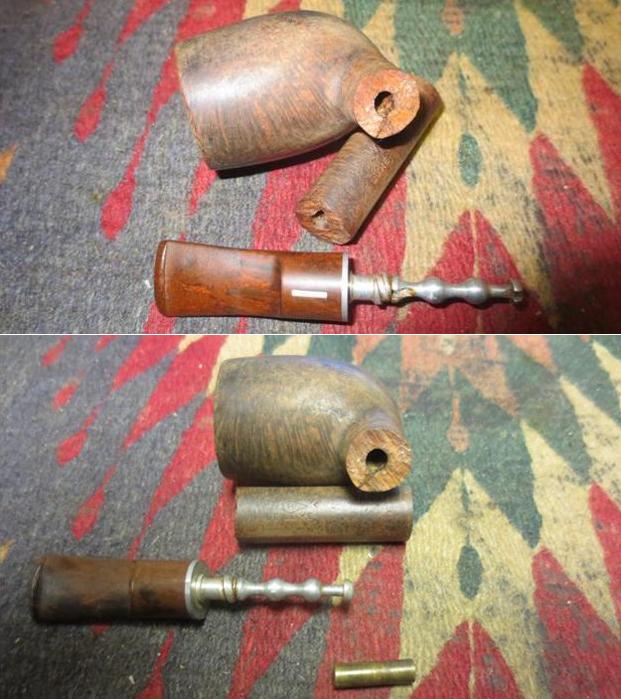
___ Remove the stem and clean out the airway in the stem with alcohol and pipe cleaners. Repeat the process until the pipe cleaners come out clean.

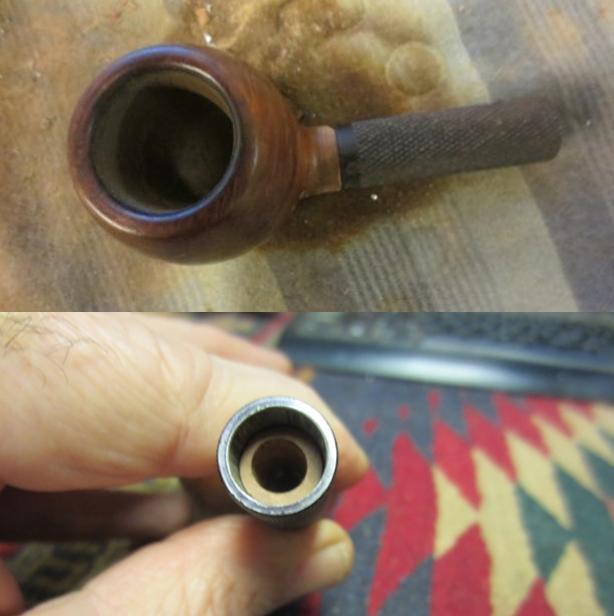
___ Clean out the mortise area in the shank with cotton swabs and alcohol to remove the obvious buildup in that area.  Check the walls of the mortise to see if there is any hardened buildup on the walls. If so, scrape it out with a thin blade – I use a penknife or a dental spatula to scrape the walls. Be careful to not cut into the briar in the walls.

___ Clean out the airway between the end of the mortise and the bowl. You can use pipe cleaners and alcohol to begin this process however; I have found that the airway is often quite constricted with tars and oils. I use the drill bit that comes with the KleenReem pipe tool and twist it into the airway in the mortise carefully until the tip comes out in the bowl.

___ Clean off the drill bit and wrap a pipe cleaner up the grooves of the bit. Dip the bit in alcohol and twist it into the airway once again. It will remove the grime and open the airway. I repeat that until the pipe cleaners come out clean.

___ Finish the process by running pipe cleaners and alcohol into the shank – mortise and airway to remove any remaining debris.

When that process of “pre-cleaning” is complete the pipe is ready for the deep cleaning of “ghost busting” methods I will describe next. I have used the all of the methods for over 20 years now and I have found that they all work far better after a thorough pre-clean as I have described above. I will cover the three methods that I use in the order that I use them. In most cases, one method can bust the ghost from a pipe. However, as usual in this hobby there are exceptions. I have found that there are some very stubborn ghosts that do not leave the pipe until I have used all of the methods.

Pipe Retort System

I have written several blogs on the use of a pipe retort covering how it is used and an instructional sheet included with the retort I purchased on eBay. I am including those links here if you want to read in more detail about the use of a retort system. https://rebornpipes.com/2012/10/17/what-is-a-pipe-retort-and-how-it-is-used/
https://rebornpipes.com/2015/03/02/an-instruction-sheet-for-using-a-pipe-retort/  A short explanation of the system is that it involves boiling alcohol through the pipe and then removing the heat and letting the dirty alcohol exit the pipe back into the attached test tube. I will use a checklist once again to spell out the process.

___ Materials needed are cotton balls, isopropyl alcohol, surgical tubing, a pipet or metal tube, a rubber stopper that will hold the tube, a Pyrex heat resistant test tube and a heat source. The surgical tubing is attached to the pipet/tube and then the tube is put through the stopper. The open end of the surgical tube is fit over the end of the stem.

___ Pour alcohol into the test tube until it is half-full. Put the stopper in the test tube to keep the alcohol in place.

___ Fit the open end of the surgical tube over the button end of the mouthpiece (leave the mouth piece attached to the shank).

___ Gently stuff one or two cotton balls in the bowl of the pipe to keep the alcohol inside when it is heated.

___ Hold the end of the test tube over the heat source and the heat will bring the alcohol to a rolling boil. The stem will warm up as the alcohol moves through it. Hold the tube by the rubber stopper at about a 33-degree angle – enough to encourage the heating alcohol to move through the pipe.

___ The alcohol boil through the pipe for 5 minutes or more then remove the tube from the heat source. As the alcohol cools, it flows back into the test tube bringing the tars, oils and debris with it.

___ Remove the stopper from the test tube and dispose of the dirty alcohol. Refill and repeat the process until the boiled alcohol comes back clean.

___ Remove the retort from the pipe and run clean pipe cleaners through the airways and cotton swabs through the mortise to remove any remaining debris.

Once the pipe has dried out, smell it and see if the ghost remains. Take a couple of draws on the stem to see if there is any remaining flavor from the ghost. If the ghost has been “exorcised” you can do a simple wipe down, buff the bowl and stem with either a buffer or by hand to raise a shine and remove any signs of the retort. I give my pipe a day to dry out then load a bowl and enjoy the first smoke in this refreshed bowl. However, if it still reeks of the ghost’s presence there are several more options that we can use.

Salt and Alcohol/Cotton Ball and Alcohol Treatment

I have written several blogs regarding the use of the salt and alcohol treatment already and have compared it with using cotton balls in place of the kosher salt. Both work equally well in pulling the tars and oils out of the briar bowl and shank. I have moved away from using the kosher salt with the alcohol to cotton balls because it is less of a mess and for me removes some of the threat that others have mentioned regarding the salt splitting the briar. The cotton balls and alcohol are just as effective in removing the tars and oils from the briar as the salt. The concept is simple in that the surface of the cotton or salt provides somewhere for the tars to rest once the alcohol draws them out of the briar. Here are the links to two of the blogs I have written on this treatment previously on rebornpipes. Give them a read if you want more details of either treatment or a comparison of the two.
https://rebornpipes.com/2013/02/08/to-use-or-not-to-use-the-salt-and-alcohol-treatment/
https://rebornpipes.com/2013/02/10/sweetening-a-pipe-an-alternative-to-the-salt-and-alcohol-treatment/  I will use a checklist once again to spell out the process.

___ Whether you use cotton balls or Kosher salt (coarse grind) the beginning step is the same. Remove the stem from the pipe. Fill the bowl of the pipe with either one leaving some room at the top of the bowl. The idea is to leave enough room that once the bowl is filled with alcohol it does not splash onto the rim top or down the sides and damage the bowl.

___ Insert a twisted piece of paper towel or a pipe cleaner into the shank of the pipe to keep the mixture in the bowl from flowing out the mortise.

___ Use an ice cube tray or a bowl of uncooked rice to hold the pipe upright with the shank elevated enough that the mixture does not wick out of the bowl.

___ Use an ear syringe or some other simple tool to fill the packed bowl with alcohol. I use isopropyl alcohol (99%) because of the low water content of the alcohol and I find that by the time I empty the bowl most if not all of the alcohol has evaporated.

___ Leave the bowl sitting overnight to maximize the draw of the mixture on the oils and tars in the bowl. I find that typically in the morning, after the mix has sat all night, the cotton balls or salt are very dark brown and smell awful.

___ Remove the cotton balls or salt and dispose of them. Dry out the inside of the bowl with paper towels of cotton swabs, run several pipe cleaners through the shank to dry out the briar and remove any debris.

___Let the pipe dry thoroughly before putting the stem on the shank. I usually let it sit for 2-3 days to ensure that it is dry.

Once it has dried out smell the bowl to check if you have eradicated the ghost using this procedure. You may have to repeat the process several times to remove all of the oils and tars from the briar. (Because of the repetition, I find that the cotton balls work better and do not leave any salty residue in the briar of the bowl or shank.) After the pipe has been sitting and it has dried out then load a bowl and enjoy the first smoke in this refreshed bowl. However, if it still reeks of the ghost’s presence there one more trick that we can use.

Activated Charcoal Treatment

(I have yet to have this final method fail.) You might think that you can short cut to this method first and avoid all of the other methods. I do not do that as I find that the majority of ghosts are “exorcised” with the first two methods spelled out above. I leave this final method as my last resort. It is simple but many folks find it a bit intimidating. It was first spelled out in an article by Greg Pease that he originally wrote in for the now out of print Pipe Friendly Magazine (it appeared in Vol. 5 No. 4). He has since added it to his Briar & Leaf Chronicles (GLP Blog). It is a well-written piece that gives the results of his experimenting with the method and the results he achieved. What he has written should allay your fears about trying out his method. Here is the link to the blog: http://www.glpease.com/Articles/Spot.html. I will use a checklist to summarize the process of his method.

___ Heat the oven (electric is what Greg used though I use a gas stove) setting the thermostat to 180°F. (Greg’s experimental tests had shown him that the temperature in an empty oven would vary between about 180°F and a bit over 200°F, which well below the temperature at which the briar would scorch.

___ Remove the stem, place the empty bowl on a towel in the oven, on the upper rack, far away from the source of radiant heat, and let it sit for three hours.

___ Remove the now hot pipe and fill the bowl with the activated charcoal.

___ Place the bowl back in the oven for an additional three hours.

___ After three more hours remove the pipe and empty the charcoal.

___ Smell the bowl and see if there is any trace of ghost.

Allow the pipe to cool overnight before putting the stem on it. I run pipe cleaners through the bowl to remove any of the carbon bits that might be in the shank then load a bowl and enjoy the refreshed bowl. Give Greg’s article a read if you want more detail on this method along with a couple of disclaimers he gives. The method works well.

Those are the three methods I use to de-ghost a pipe. Each of them is used after a thorough cleaning of the pipe to make the method more effective. I would encourage you to give them a try if you want to remove a ghost of past tobaccos from your pipe or even just sweeten a pipe that has grown sour. With that I bring this Answers to Questions blog to a close. I hope that it has given you some insight the methodology for the process of de-ghosting. Thank you for taking time to read this blog. Cheers.

ANSWERS TO QUESTIONS: How do I strip a finish from a pipe?


Blog by Steve Laug

I have been asked how to strip a finish from a pipe more times than I can tell you. So this Answers to Questions blog is written to talk about how I remove the finish from a pipe. On first glance this seems like a very easy thing to do. You just need to sand the bowl until the finish is removed correct? That answer is certainly describes one method that has been used with success. But there are other ways to do the job that are less intrusive and less damaging to the bowl and shank. When sanding the pipe it is easy to damage the stamping and modify the shape. Both of these are undesirable in restored pipe. So how do I go about doing the job? I want to take time to present the options for removing finishes. I will differentiate between smooth, rusticated and sandblast bowls in the process of explaining each method. (I know that opinion varies on each of these coats and I only speak from my personal tastes and experience.)

Removing stain from the briar/wood bowl.
1. Removing stain from a smooth finish is actually quite straight forward. You need to understand that once you remove the stain you may well reveal more issues – fills, flaws and less than perfect briar. You have to be okay with taking that chance because you never know what you will find under the stain. To carefully observe what is underneath the stain coat I wipe the bowl down with isopropyl alcohol. I find that the alcohol makes the stain more transparent and blends the colours together in a way that is much more conducive to seeing the grain. Wiping off the stain may well reveal fills underneath the stain. They will need to be dealt with but that does not bother me too much. I really like a more transparent stain so it is worth the extra effort.

If I want to strip the stain from the bowl I wipe it down with acetone. Some have used fingernail polish remover which contains acetone and this works very well. However, I like to use a product that contains 100% acetone that I buy in the nail polish removal area of my local pharmacy. Acetone strips the finish back to almost bare briar. Repeating the process will bring more and more of the stain to the surface of the briar. Once the pipe is clean it can be restained and polished with micromesh sanding pads and/or a buffing wheel.

2. Removing stain from a rusticated or sandblast finish is different from removing it from a smooth finish. Alcohol works very well but needs to be almost washed over the bowl. I have used an alcohol bath to remove the finish. I fill an airtight container with isopropyl alcohol and drop the bowl into the bath overnight or at least for 3-4 hours. I find that it removes the finish very well from both sandblast and rusticated bowls. If you are reticent to soak the bowl, remember the isopropyl alcohol I use is 99% alcohol and evaporates very quickly. It does not stay in the briar. Besides that, you will be thoroughly cleaning the pipe afterwards.

You can also wipe the outside of the bowl down with very wet cotton pads that are almost dripping alcohol. It has the same effect. Remember you want the alcohol to reach down into the grooves, nooks and crannies of the finish. An interesting effect can be obtained by merely wiping down the high spots on the finish and leave the depths untouched. You can then restain it with a contrasting colour and get some beautiful finishes.

Removing shellac from the briar bowl.
1. Shellac is a shiny top coat that is often applied by a pipe maker or manufacturer to give a pipe a permanent shine. It is much easier to remove than the other topcoats that follow. On a smooth finish, it is very simple. Wipe the bowl down with isopropyl alcohol on a cotton pad. I repeat until the shine is dull once the bowl dries. I touch up the shiny spots with more alcohol. If you want to restain the pipe afterwards then you can wipe it down with acetone instead of alcohol. Both do the job but acetone also strips more of stain coat than alcohol. I finish the pipe with several coats of carnauba wax buffed to a shine with a clean buffing pad.

2. Removing shellac from a rusticated or sandblast finish is done in exactly the same way as removing stain from this finish spelled out above. I use either an alcohol bath or a very wet cloth of alcohol and wipe the finish down. Both work very well as they work deep in the grooves and nooks and crannies of the finish. The idea for me is to remove the shiny coat because to be honest I really don’t like it. I have had it come off on my hands when the pipe heats up. Therefore, the shellac coat has to go.

Removing varnish from the briar bowl.
1. Varnish is more resistant to alcohol than the other top coats I have talked about so far. For smooth finished pipes, I tend to use acetone on cotton pads to remove the varnish finish off. It takes some scrubbing to remove it but it will come off. I scrub the bowl until there is no more shine once it dries. Check carefully in the junction of the bowl and shank and in the stamping on the shank as the varnish in those spots can be very stubborn. Wipe down the end of the shank as it is often varnished. I don’t worry about using acetone on the exterior of a pipe as it also evaporates very quickly into the air leaving the bowl dry. Once the finish is flat, it can be waxed and buffed.

2. Removing varnish from a rusticated or sandblast finish is harder. I use a brass bristle wire brush (it has soft bristles and is available in auto parts stores or Walmart type stores). I work over the entire bowl, carefully working around the stamping and any smooth portions. I find that the soft brass bristles loosen the varnish in the grooves and crevices of the finish. I wipe it down afterwards with acetone on a cotton pad making sure to get the acetone deep into the grooves. Sometimes I have to repeat the process to remove all of the ‘offending’ varnish. Once it is gone I wax the bowl with Conservator’s Wax and polish it with a horsehair shoe brush. I find the method works well for me.

Removing lacquer from the briar bowl.
1. Removing lacquer from a smooth finished bowl is quite straightforward. I have removed it quite easily with both lacquer thinner and with acetone. It comes off quite easily and without a lot of fuss. I have found that lacquer has to be scrubbed slightly harder than the varnish coat because of its resilience but it does come off. I use cotton pads to apply the thinner or acetone to the finish and scrub it until it is gone. I find that the makeup removal pads available at most drug stores or pharmacy work really well. They are white so the finish shows up well on the pad as it is removed.

2. Removing it from a rusticated or sandblast finish is harder. It is like the process I use to remove varnish coats. I begin by using a brass bristle wire brush (it has soft bristles and is available in auto parts stores or Walmart type stores) to work over the finish and try to loosen things. I work carefully around the stamping and any smooth portions. The soft brass bristles loosen the lacquer in the grooves and crevices of the finish as I methodically work them over with the brush. I wipe it down afterwards with acetone on a cotton pad making sure to get the acetone deep into the grooves. Often I repeat the process to remove all of the lacquer from the bowl. Afterwards I wax the bowl with Conservator’s Wax and polish it with a horsehair shoe brush. This method has worked over time as I have fine tuned it.

Removing urethane products from the briar bowl.
I have to say that I find this finish the hardest to remove from pipes. I do not even pick up rusticated or sandblast pipes that have been coated with urethane products. I am hesitant even to take on smooth finished pipes. I really don’t like the product on pipes. It is recognizable in that it is a shiny and plastic looking coating that comes in varying thicknesses. It goes by a variety of names – Varathane, Urethane, Polyurethane but all have the same resistance to both alcohol and acetone. The finish seems to be impervious to all attempts to break through with these products. I know others have used a paint stripping product to remove this finish but I really don’t like using this stripper product. The chemicals in the stripper require a lot of ventilation and are really hard on my hands so I try to avoid them.

In place of using the stripper I have resorted to my own method with some degree of success. Sometimes I question the worth or value of doing this when there are so many really good pipes out there that I can work on without having to deal with urethane. But when I do have to, I break through the shine with either a brass bristle wire brush or with a piece of 220 grit sandpaper. Once I have broken through the top of the finish I can wipe it down with acetone and have limited success. It really is a matter of sanding or wire brushing and wiping it down – repeatedly until the finish is gone. I have seen folks sand off the coat but I find that if I can strip it there are less scratches to deal with in the refinishing process. Best case scenario when I find a urethane coated pipe is I clean it up the best I can and give it away.

Removing paint from the briar bowl.
Next to a urethane finish painted finishes is next on my list of dislikes for finishes on pipes. I do not like painted finishes. I actually avoid purchasing them because I have learned the hard way that they are impossible to bring back to the kind of finish I like on a pipe. If there are dents and chips in the finish they are impossible to repair or touch up. I have tried almost every kind of paint out there and not been able to get a match or if I get close, the minute pipe is lit and heated the repairs bubble.

Others have taken a different tactic and sand the paint off the rims and stain the rim to give the painted pipe a bit of contrast look. But to be honest I really don’t like the look. To deal with my own irritation I have resorted to stripping the bowl of all of its paint. I have used a variety of methods to remove paint. I have sanded the bowl down to remove the finish. I have used a paint stripper but I have spoken about my dislike of that above. I think that at times sanding the bowl down is the best choice. It is up to you whether you sacrifice the stamping in the sanding process or whether you strip that area. I have had limited success breaking the shine and wiping the paint down with acetone. It seems that once the seal is broken the acetone does the job but it is really labour intensive.

To top it off once the painted finish is removed I have found that the paint hid a multitude of flaws in the briar that have been filled and masked by the paint coat. It is generally a disappointment to me after all the work on the briar to get to that point. Instead, if I am left with a damaged painted pipe I generally rusticate it and thus remove the issue. I know that the solution may not be acceptable to all of you but it is what I do with this problem.

Conclusion: You can tell from the processes that I have developed to remove top coats from briar pipes that I really do not like them. I like the briar to breathe as I found that without the various top finishes the pipe smokes cooler. I like to finish my pipes with carnauba wax for smooth finishes and with Conservator’s Wax on rusticated or sandblast finishes. When I buy a new pipe this is one of the first things I look for. It is not a deal breaker but the shape has to be one I really like and want before I buy it. Then when I get home the first thing I do before smoking it is to remove the top coat and wax the bowl.

On estate pipe purchases I note which sellers on eBay give the bowls a coat of varnish or worse yet urethane and refuse to purchase pipe from them. Too often, I have bought pipes that have had the varnish coat slopped over the grime on the bowl and even into the bowl itself. It is easier just having to deal with that added issue. When it is a part of the original finish, that is another story and I address it as it comes. When I buy from antique malls and dealers, I specifically talk to them about not putting any shiny coats on the pipes they sell. It may make them look better to sell but it really is an old used pipe so why wreck it with these ministrations.

I think that is it for now. I hope that this series of Answers to Questions blogs is providing information that you find useful. If you have other methods for the various things that I am posting please feel free to comment or contact me. I am well aware that in each case these are my own opinions and that they are not shared by all. I raise a pipe to each of you who enjoy this hobby of ours. Cheers.