Monthly Archives: April 2017

A VIRTUAL PIPE HUNT – A new way to experience the joy of a pipe hunt


Blog by Steve Laug

To me there is nothing quite like the thrill of a pipe hunt to get my blood running. The anticipation of finding something that I had not found or seen before is always a prologue to the actual hunt itself. When I walk through the door of the “hunting ground” there is a new anticipation – what lies in store for me in the aisles and booths of the shop. I have found that some shops/malls are organized and have all of the tobacciana in one spot in the shop but the majority are not that systematized. Something about walking through a large or small shop with a focused objective makes the pleasure even more intense. When I find pipes – be it just a few or a box full – I get a solid rush as I work my way through the box and see if anything special is hidden in the lot. I have found Dunhill’s hidden in cans of junk pipes so I always work through the lot individually. I have to tell you that there are very few times that I come home from a hunt empty handed.

On Friday evening my brother Jeff called me from Montana. He and his wife had driven there to visit her parents. Along the way they had of course stopped at several antique shops and looked for pipes. In one of the shops he struck “gold”, the shop had a motherlode of pipes. He had talked with the owner and she told him she bought a box of pipes. He bought a few of them from her and then went back to the hotel and gave me a call. He showed me the pipes he had picked up and they were old ones. He had some nice pipes. He then told me the story and an idea he had.

His idea was brilliant really and quite simple. We both have iPads and use FaceTime to chat back and forth about pipes that he is looking at. He thought, why not bring the iPad to the antique shop and take me on the pipe hunt with him. That way we could look through the many pipes that were available in the shop and it would be like I was present experiencing the discovery of each one. We made a plan and set the time for the hunt. I was looking forward to checking out the place.

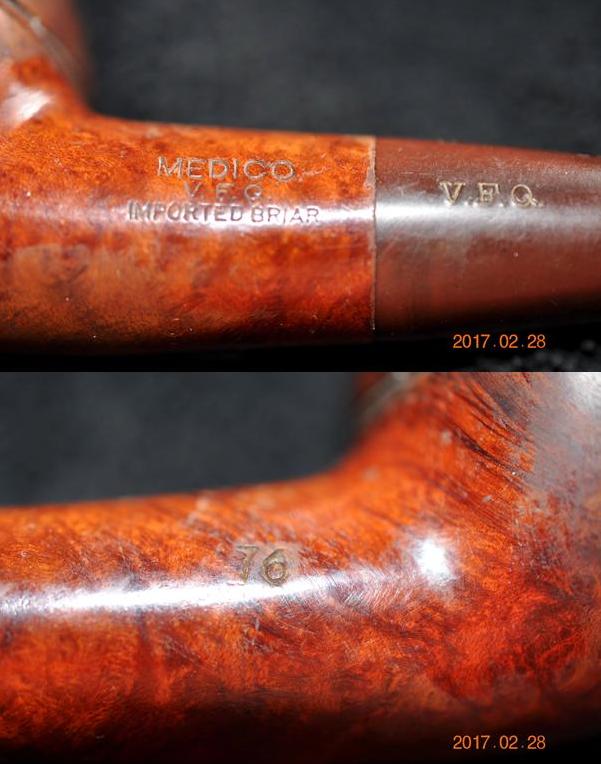
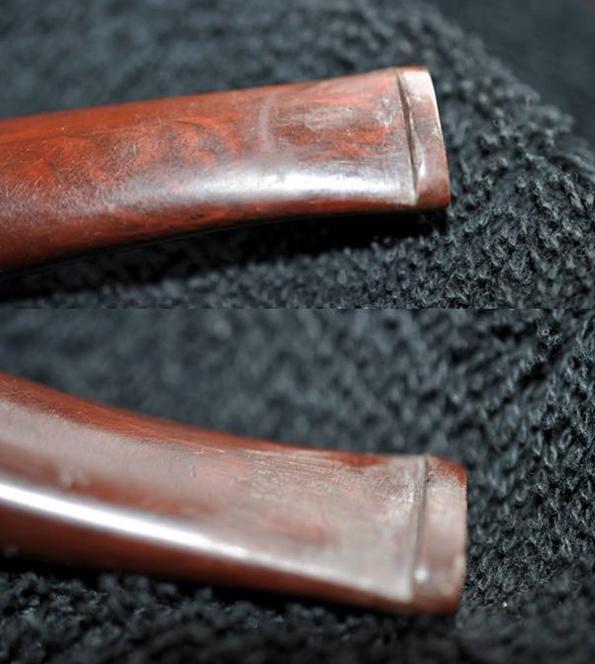
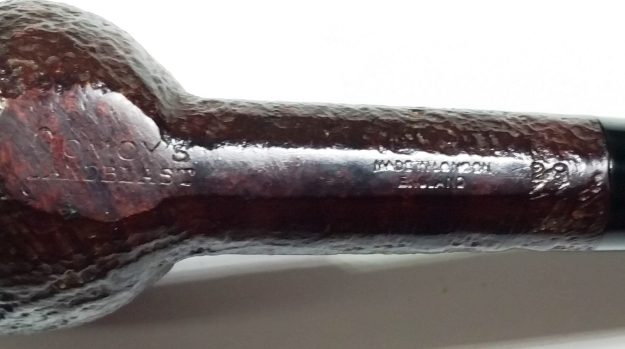
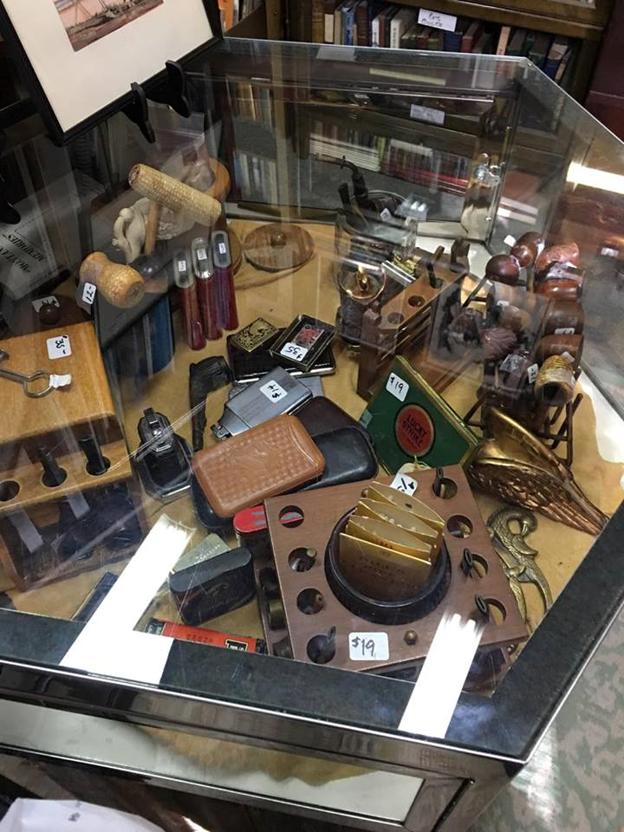
The next day after lunch my iPad showed that Jeff was calling on Facetime. I answered and in a moment I was inside the antique shop with him. We walked over to the corner of the shop where the display case was. The owner opened the case and Jeff brought out a rack of pipes at a time. He brought them to the counter where the iPad was sitting. He took each pipe out of the rack and we looked at the stamping on the shank and the condition of the mouthpiece and bowl. We looked at the stem material and determined what it was made of. We guessed the age as best as we could, given the brand and the style of the bowl and stem. We went through over forty pipes that way and spent the better part of an hour and a half.

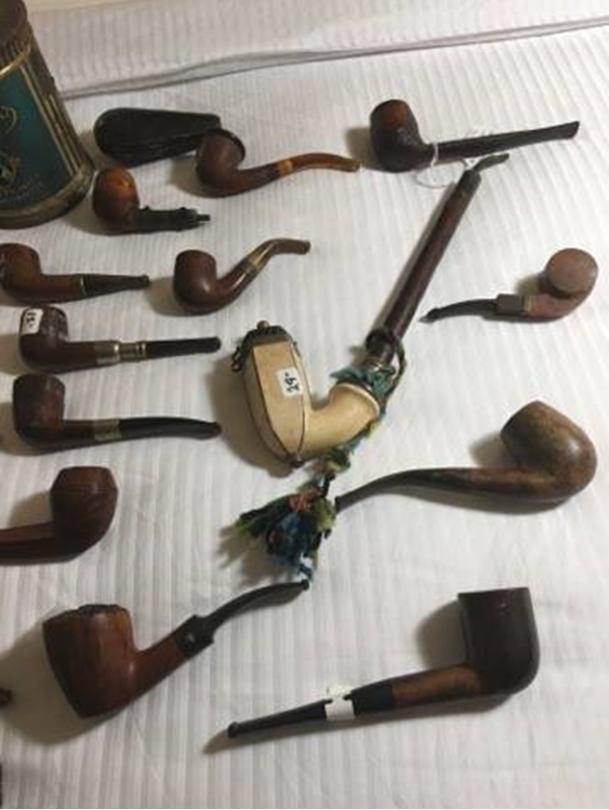
He captured two photos of the iniside of the shop that showed what we saw when we were on FaceTime. They show a display case and the area where the pipes were in the store from two different angles. 
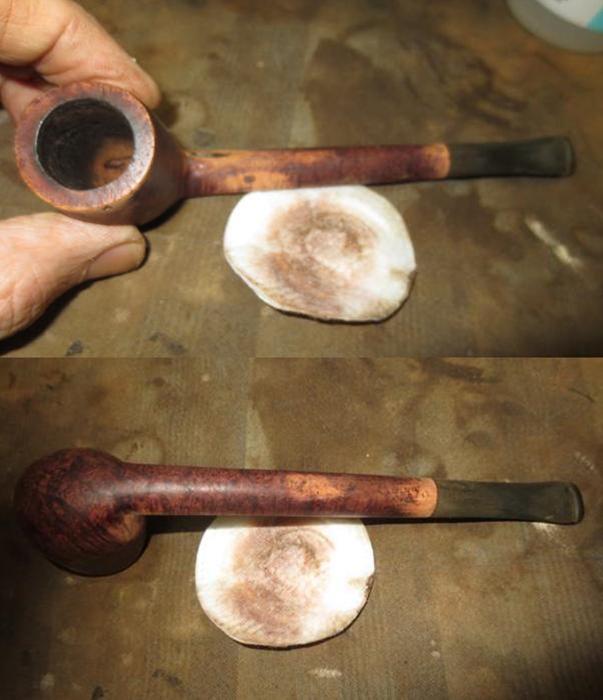
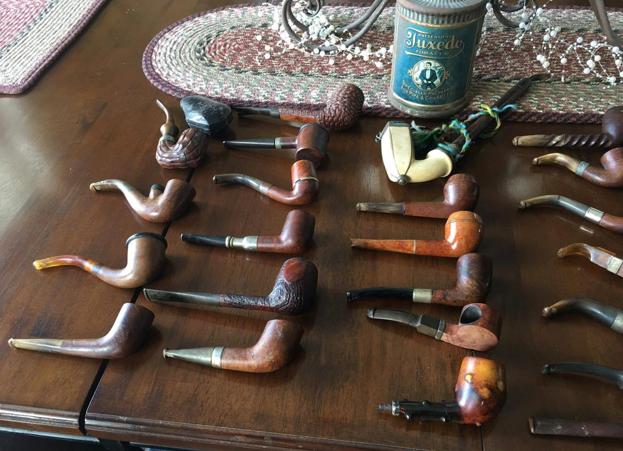
He gathered the pipes together and took them to his hotel room. He spread out the pipes on the bed and took some photos of the lot. There really are some unique pipes in the lot. I can’t wait to get them in Vancouver and work them over. There were many CPF pipes in the bunch that are different from others I have worked. The first is a photo that gives a big picture of the pipes we picked out from the shop.He also took some close up photos of sections of the lot. Here are those photos. They give you an idea of some of the unique pieces we found at the shop.
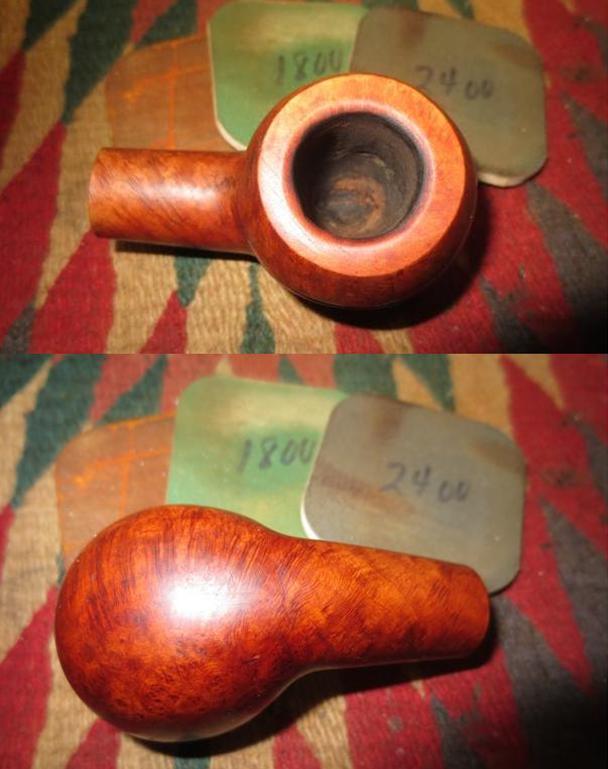
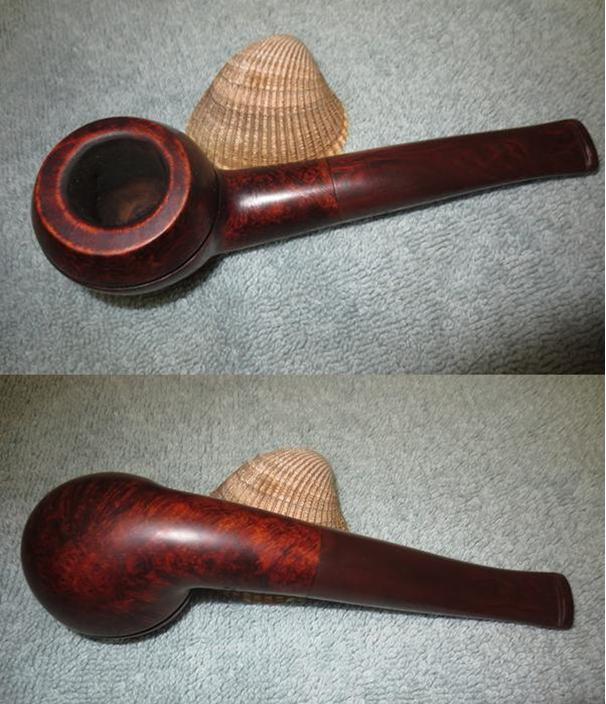
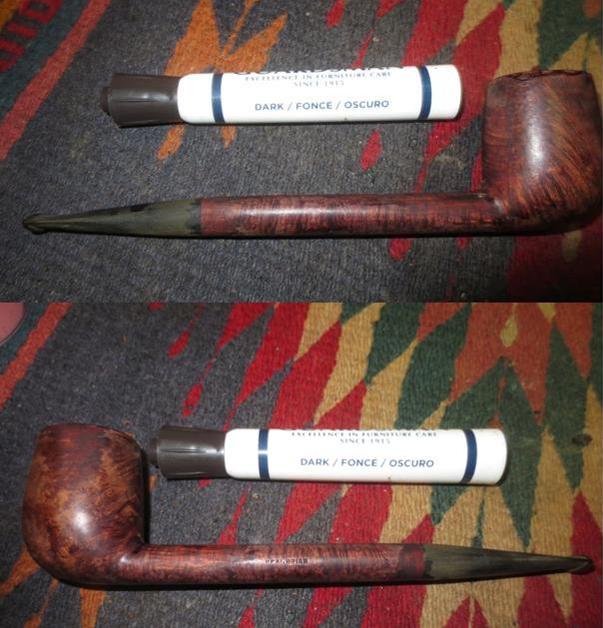
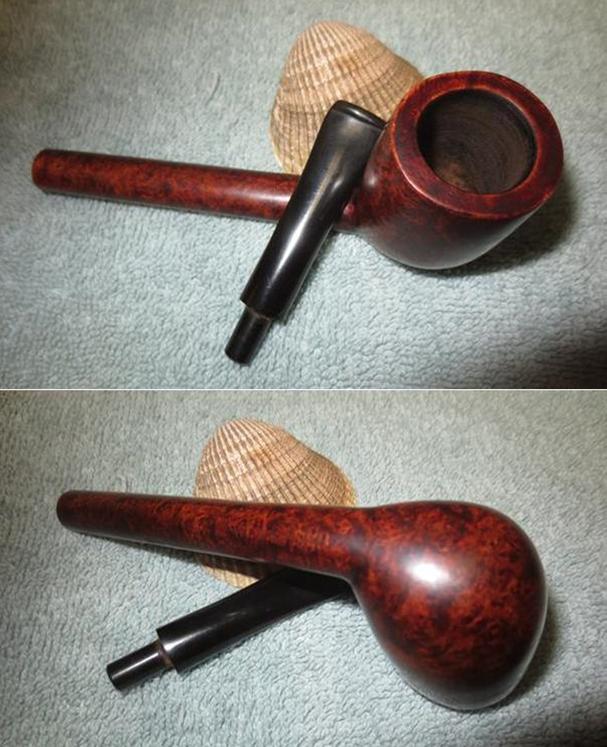
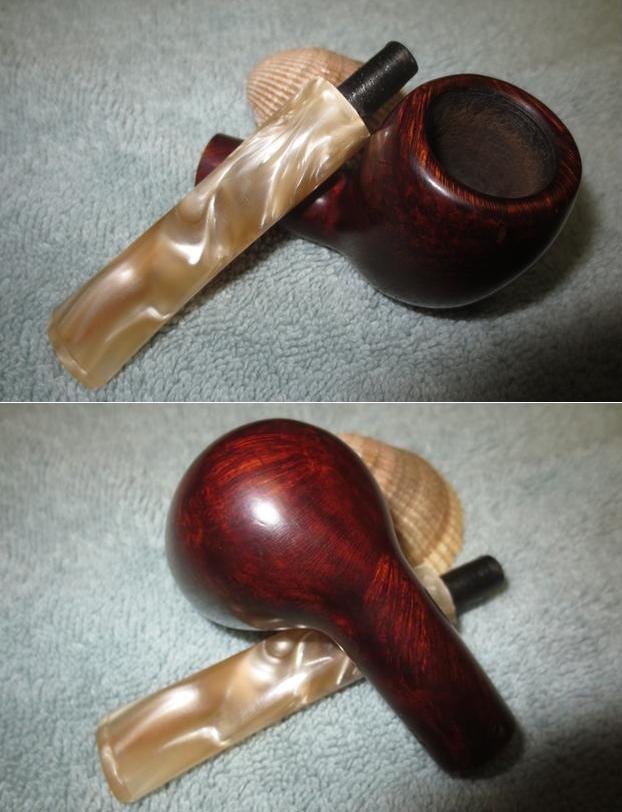
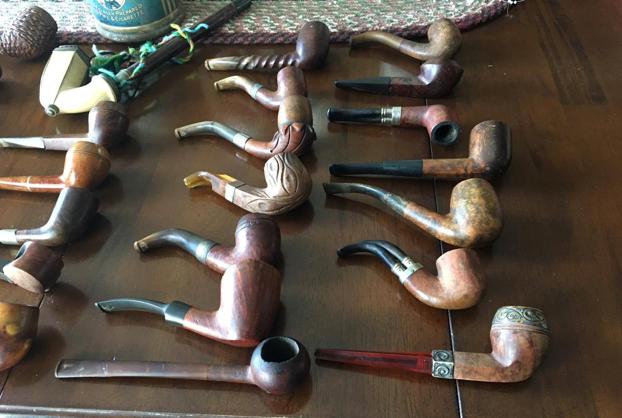
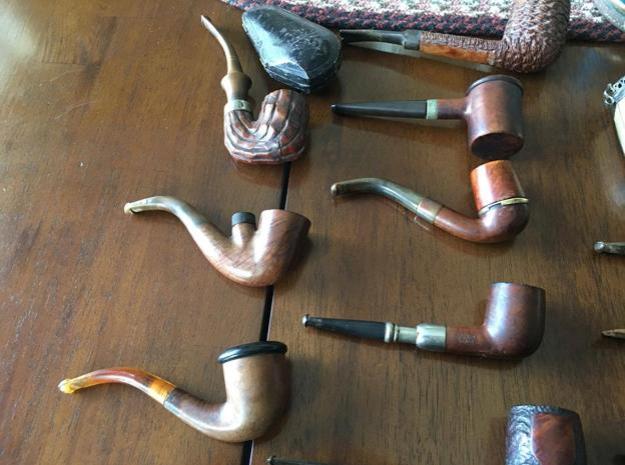
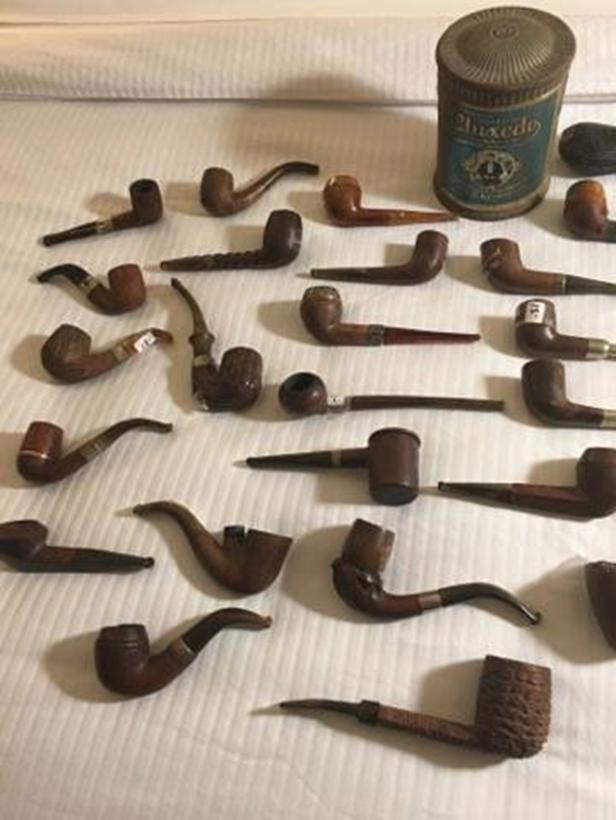
The next two photos is a close up of the pipes on the left toward the top of the first photo.
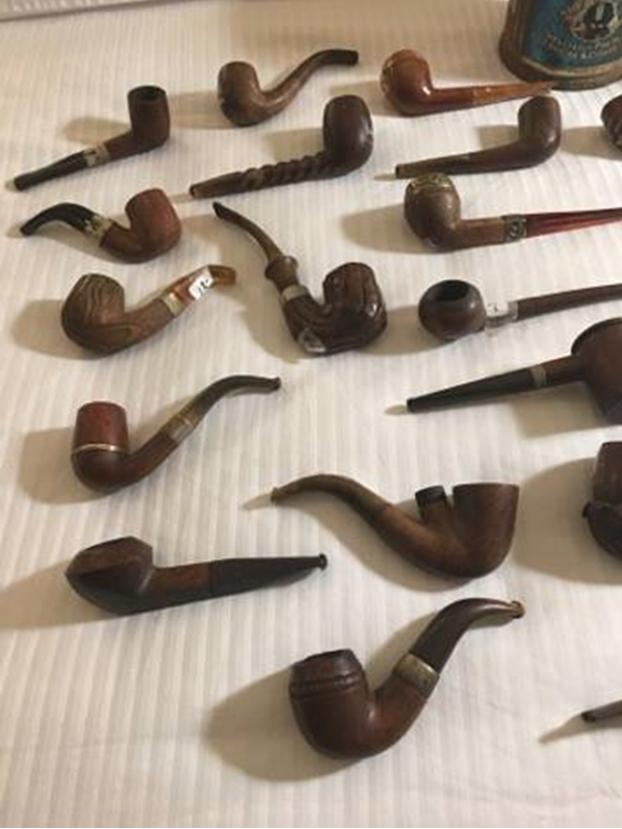
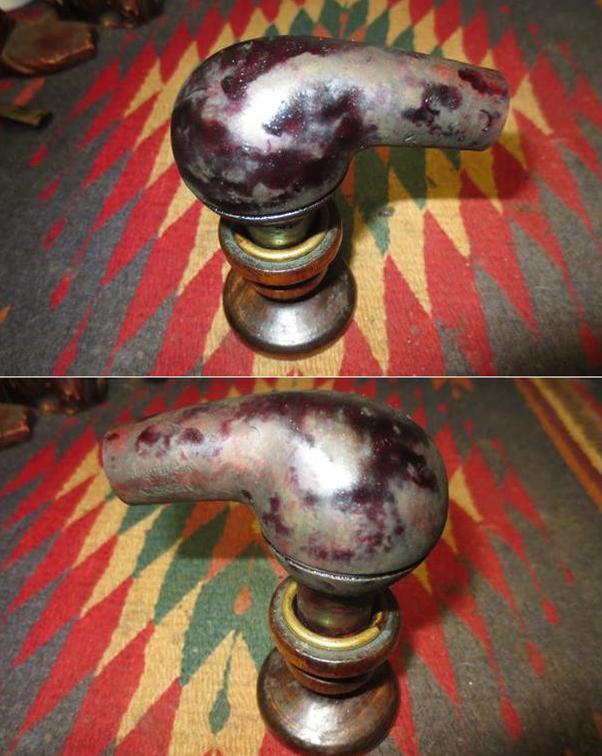
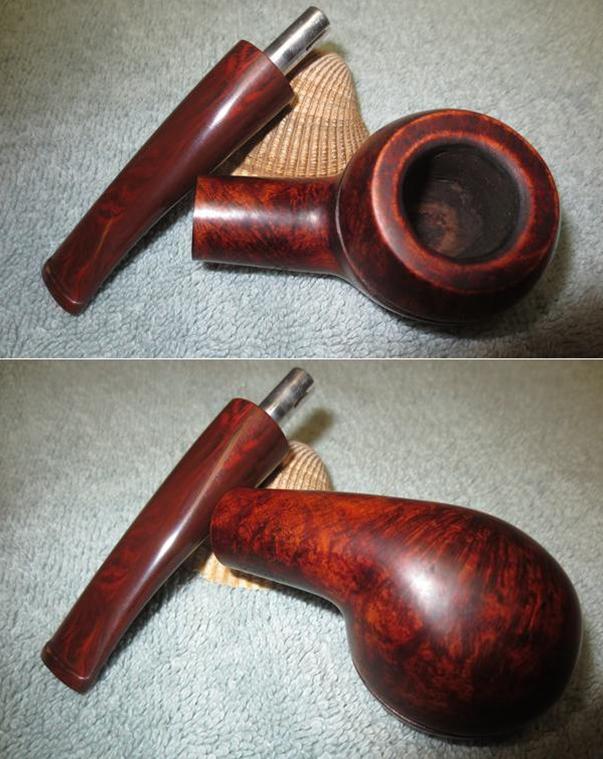
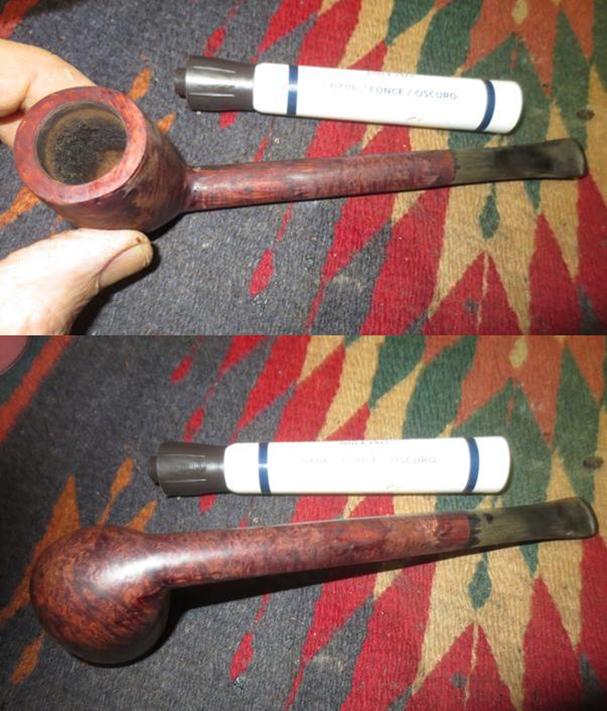
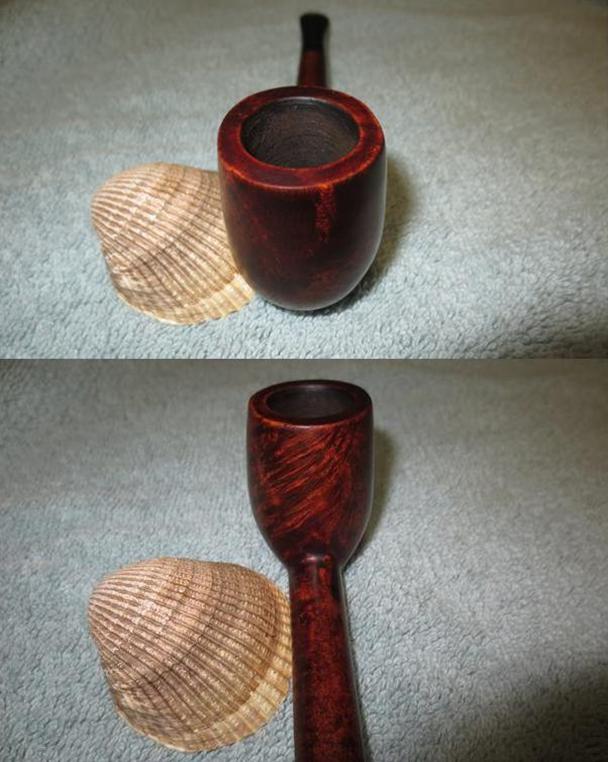
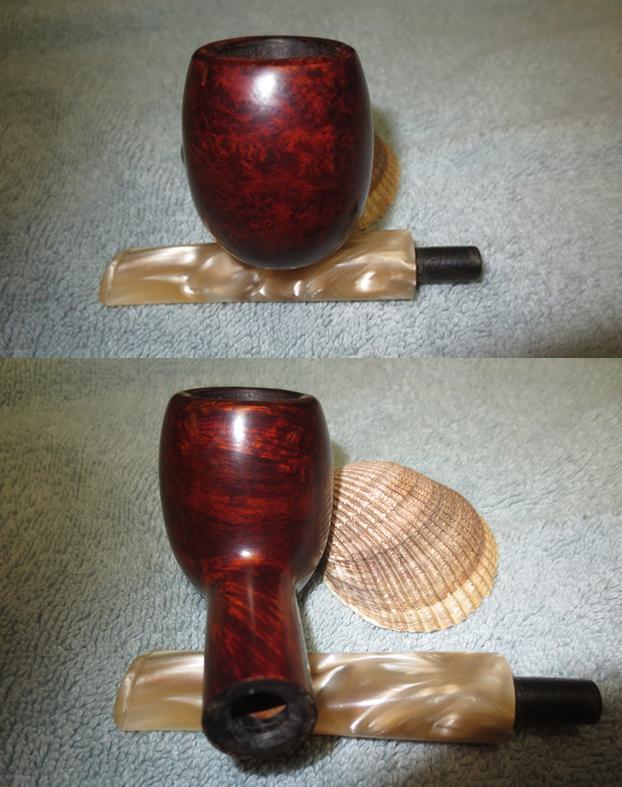
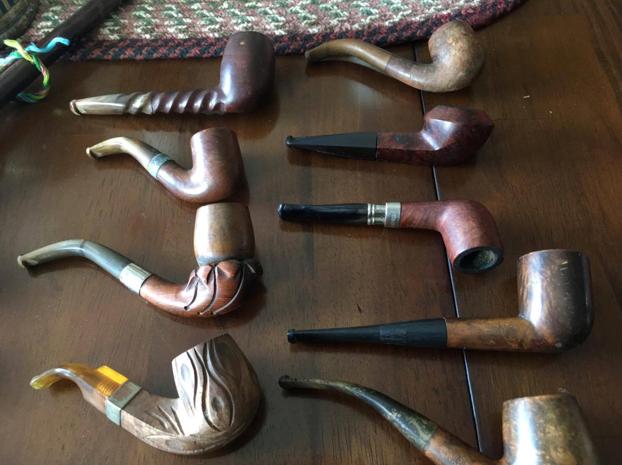
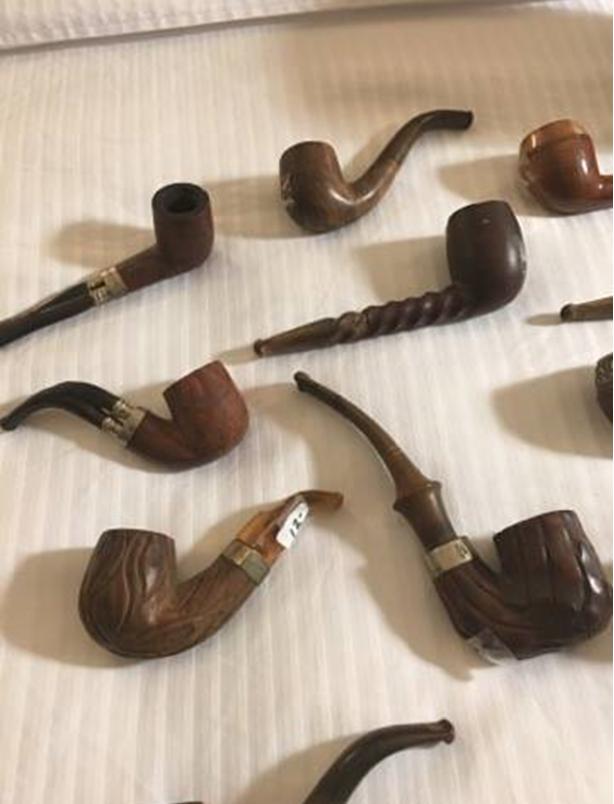
The next two photos show closer looks at the pipes in the middle and on the right side of the first photo. 
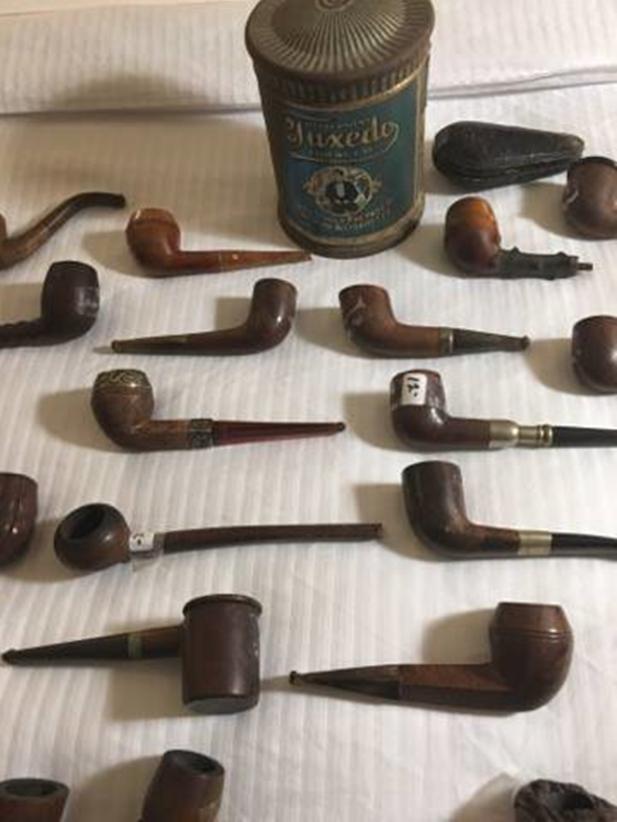
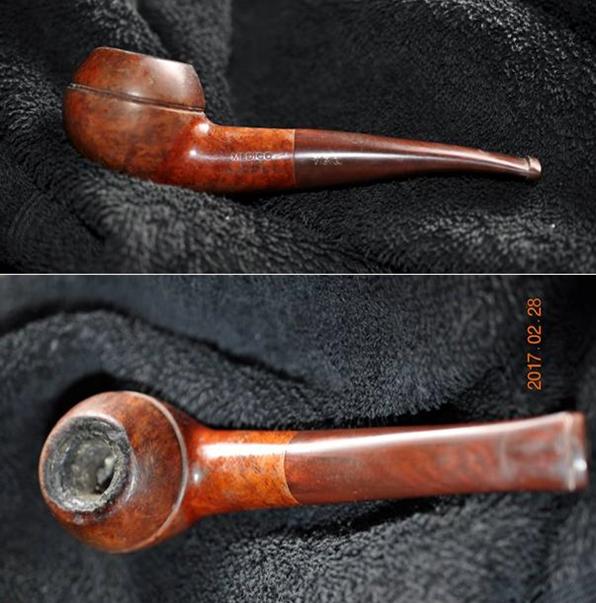
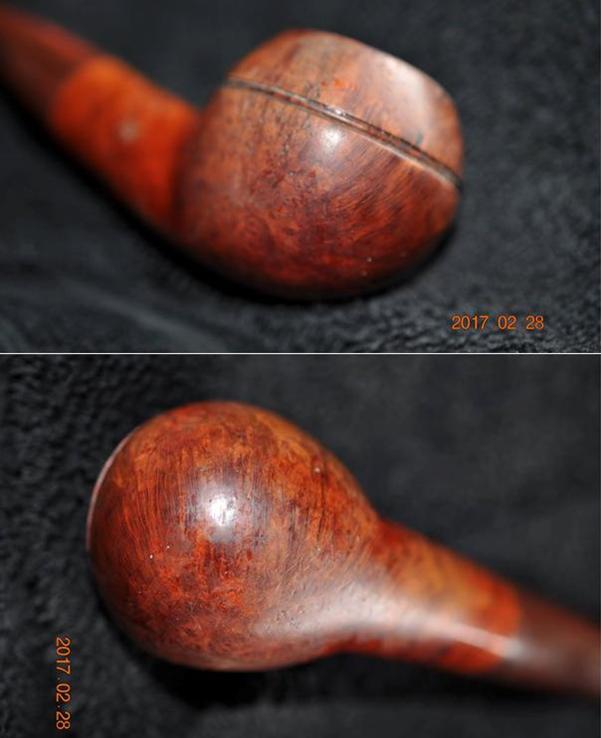
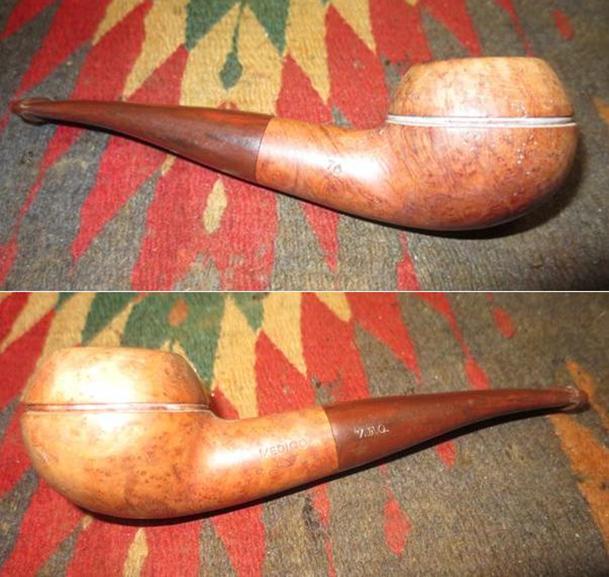
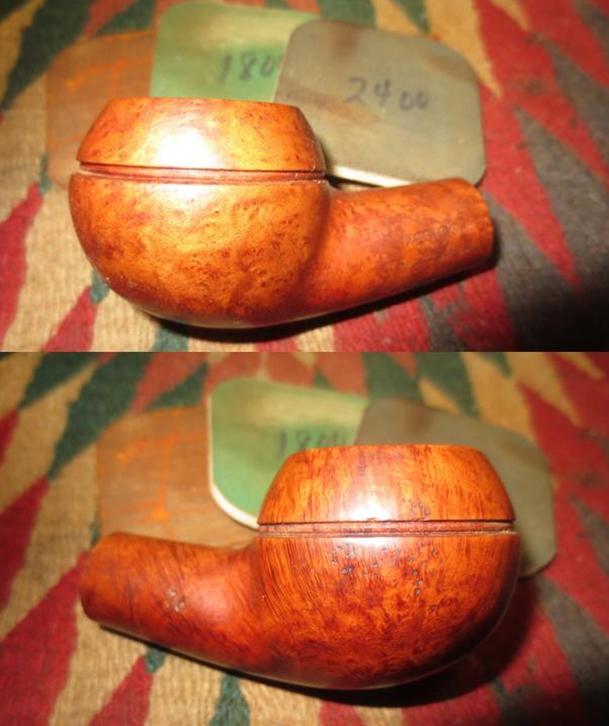
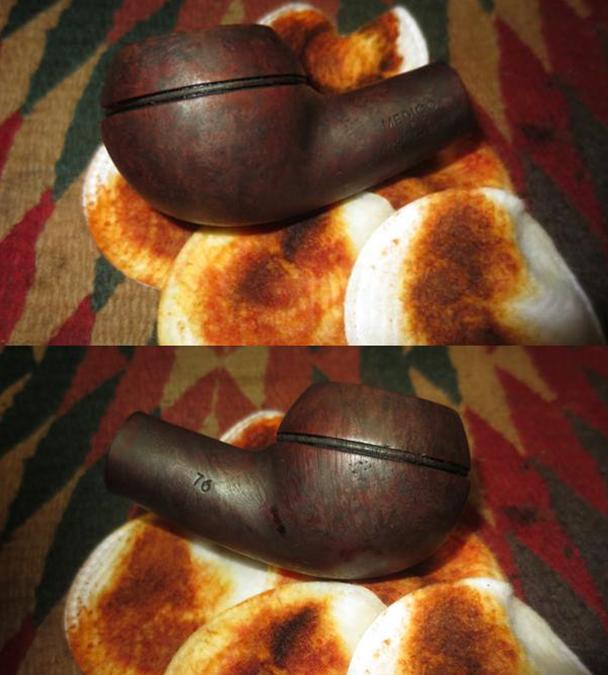
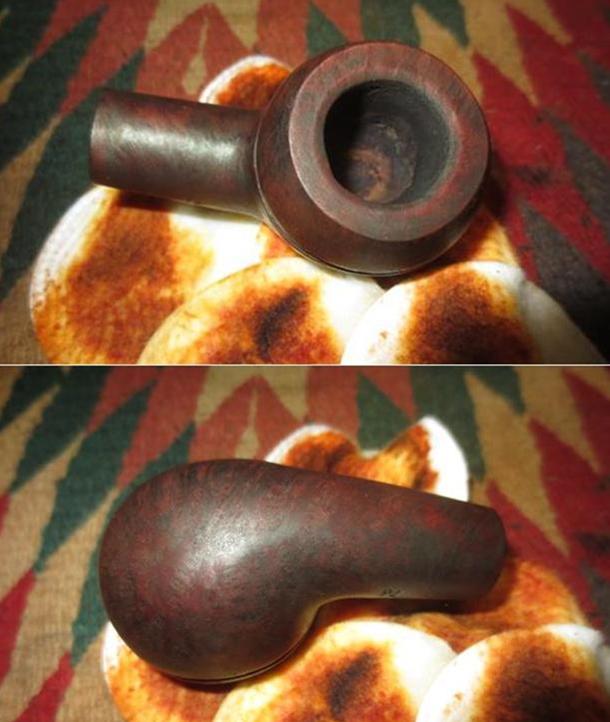
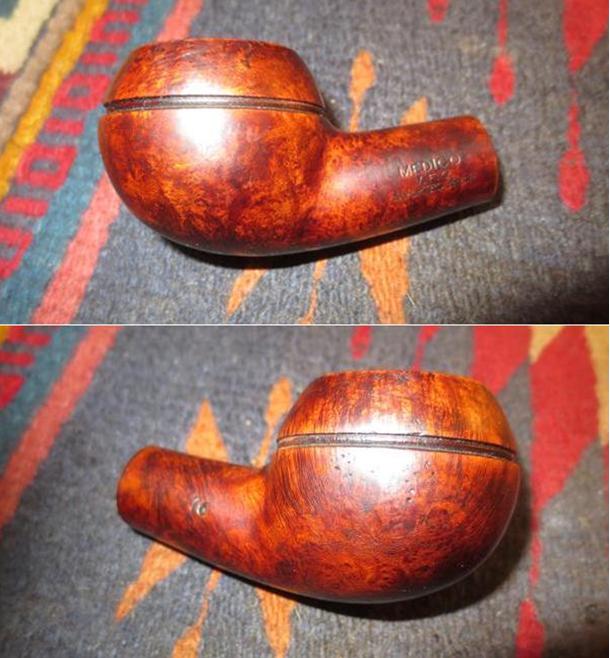
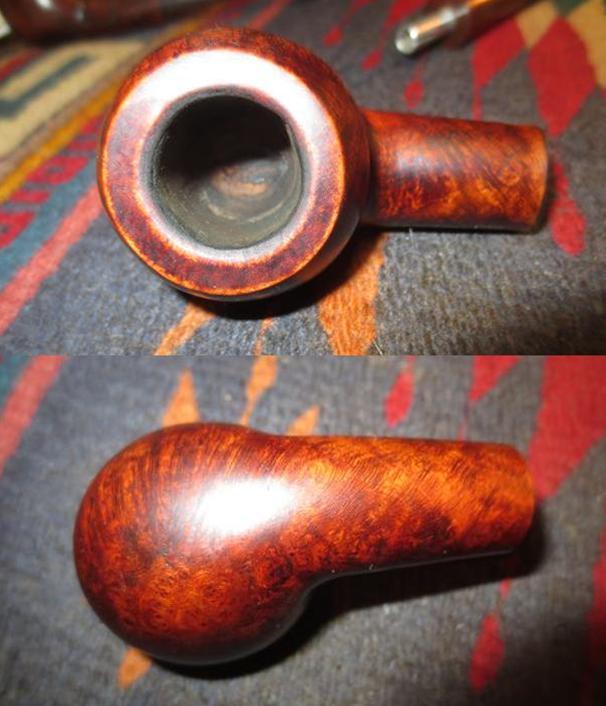
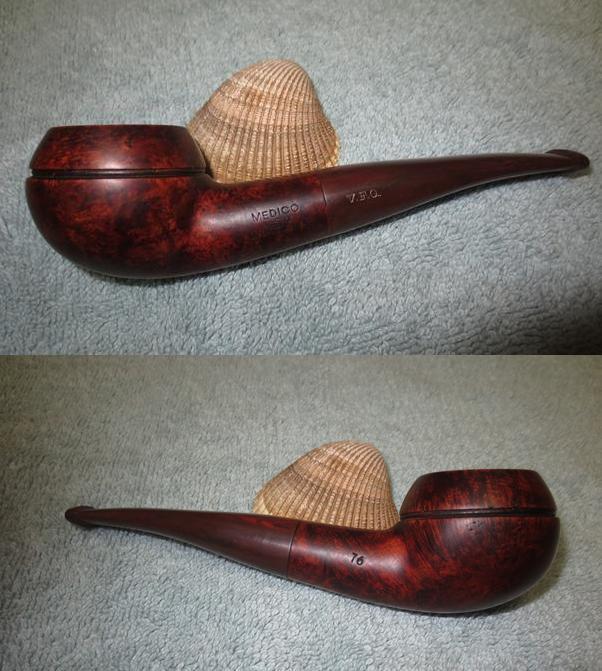
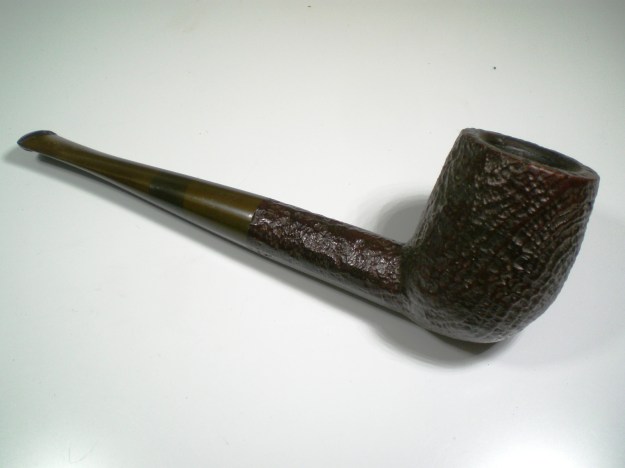
You can see from the photos that there are some interesting pieces that we found. I could not believe that we picked up 30 pipes and one case. There were 11 unique CPF brand pipes, 1 Manhattan, 1 Twisted shank horn stem, 1 Borlum, 1 Superior, 1 Hilson, 2 WDC, 1 Kaywoodie All Briar, 1 Imperial, 2 Italian Briar, 1 Hooker, 1 Stanwell Majestic,  1 London Thorn Drucquer pipe, 2 Meerschaums, 1 carved bulldog, 1 Seville, 1 Frank Bakelite and a RBC empty pipe case. He sent me a list of the brands on the pipes. I have grouped together to give a sense of what was present in the lot.

  1. CPF military mount Oom Paul
  2. CPF The Remington, French Briar, (Miliatary mount)
  3. CPF French Briar with Hallmarked band and horn stem. Filigree carving around bowl
  4. CPF Pullman with Horn Stem
  5. CPF Siamese with twin horizontal stems
  6. CPF Cromwell with twin vertical stems
  7. CPF Briar Bowl Sitting on Petals- Horn Stem
  8. CPF French Briar Bulldog with Horn Stem
  9. CPF French Briar with tarnished metal band and a Horn Stem (looks like mini-Wellington)
  10. CPF French Briar Horn Shaped Pipe with metal band and Horn Stem
  11. CPF Colon French Briar with Black Meer Bowl and Amber stem
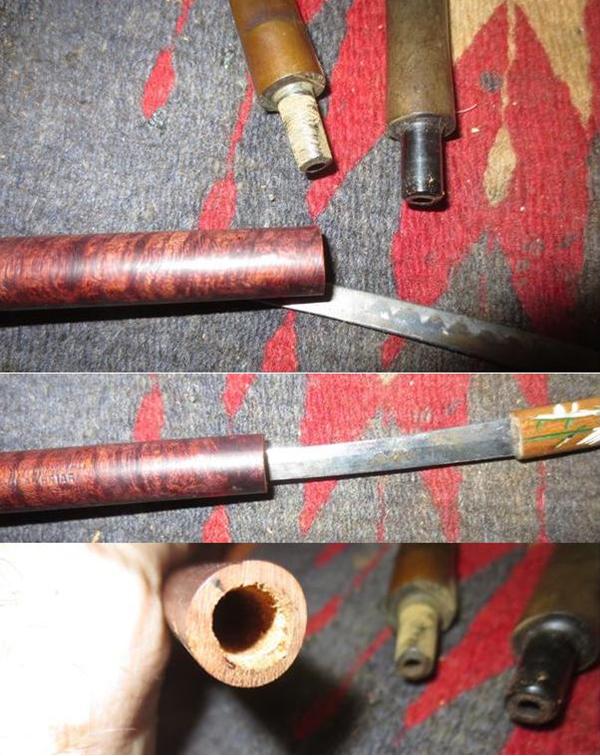
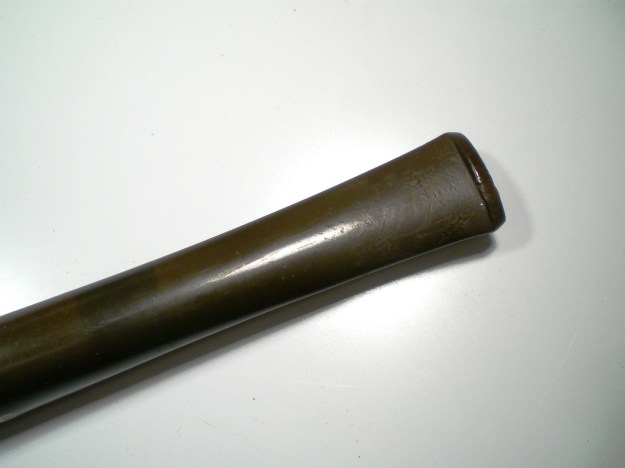
  12. Briar pipe with twisted shank going into a twisted horn stem
  13. Borlum Italian Briar (Unbreakable Bit)
  14. Hilson Bolero, Made in Belgium, #8
  15. Superior with filigree metal band around shank and bowl- red bakelite stem
  16. Manhattan with Horn Stem
  17. WDC Monitor
  18. WDC Campaign with Briar unscrewable bowl
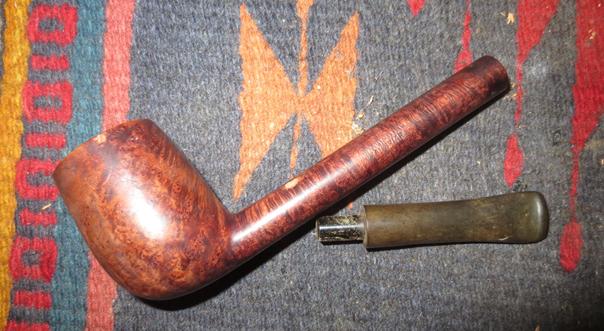
  19. Kaywoodie AllBriar 50B (All-imported Briar)- chewed off wood stem
  20. Imperial De Luxe, Made in London England (Mini-churchwarden)
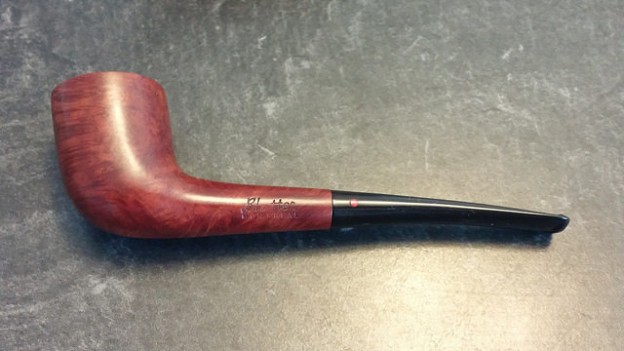
  21. Italian Briar bulldog with red dot on stem
  22. The Hooker- with screw cap next to bowl on top of shank- Patented May 17,1910- Horn Stem
  23. Stanwell Majestic 64, Made in Denmark
  24. London Thorn, Drucquer & Sons, Berkeley
  25. Carved bulldog with yellow Bakelite stem
  26. Seville Filter, Imported Briar Italy
  27. Heavily Rusticated Italian Briar with wrong stem
  28. No-name Meerschaum Bowl and shank without stem- with spikes on bowl and shank, brown to black
  29. Large Meerschaum Capped Pipe with horn stem and cherry wood shank
  30. Frank Bakelite (EP Silver)
  31. RBC Genuine French Briar , Red-lined small Black Case

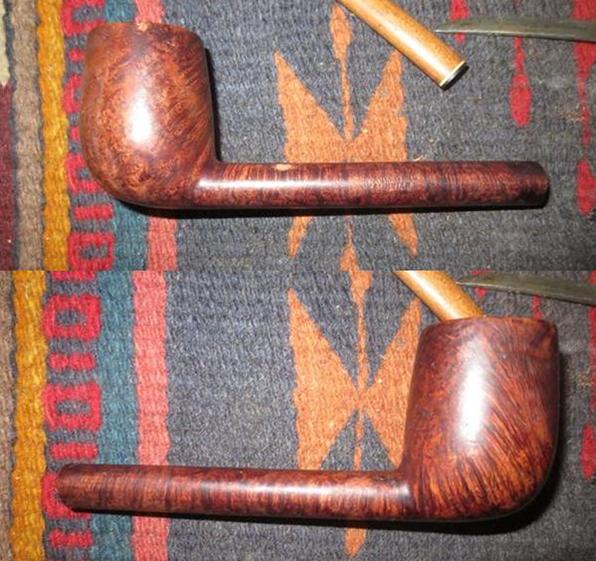
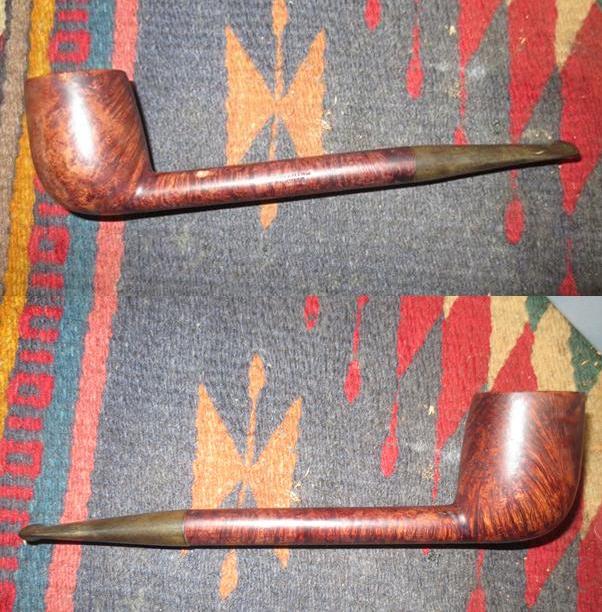
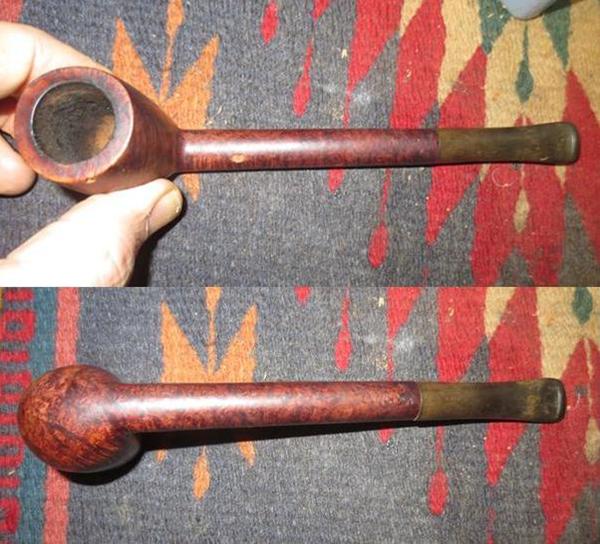
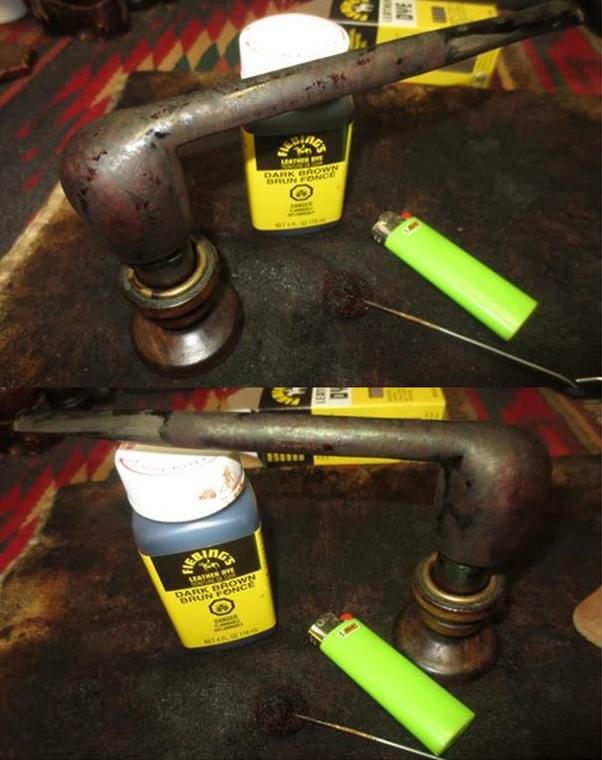
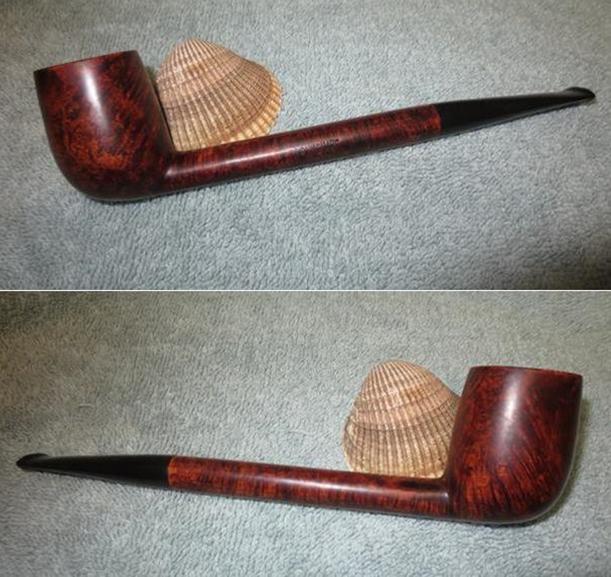
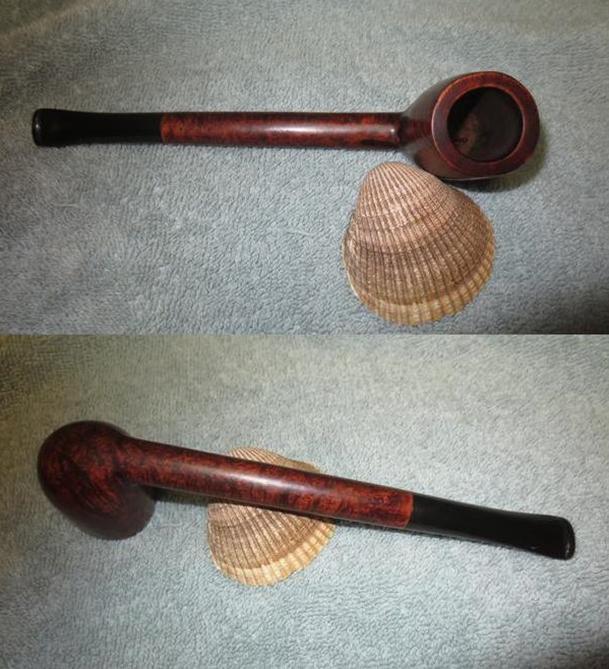
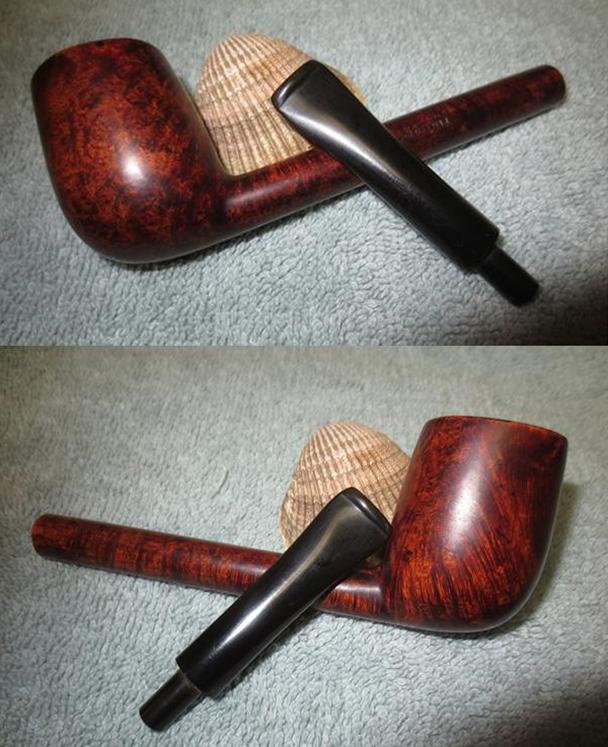
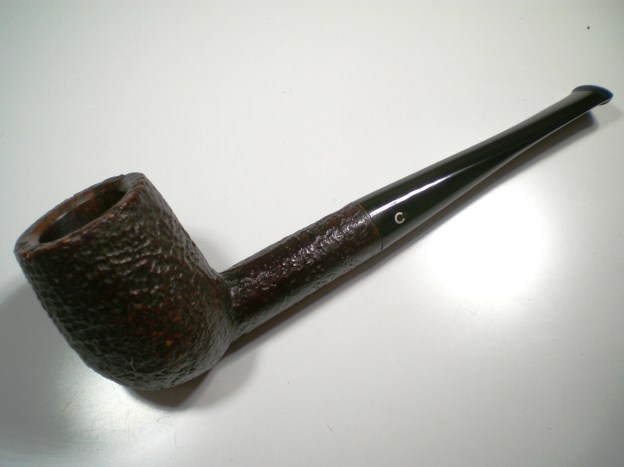
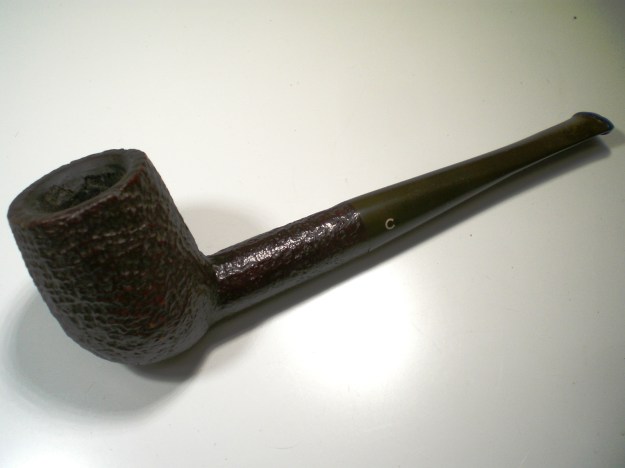
When Jeff returned home, he removed the stickers and tags from the pipe and laid them out on his kitchen table. The photos below give another look at the pipes – sans price stickers and tags. 
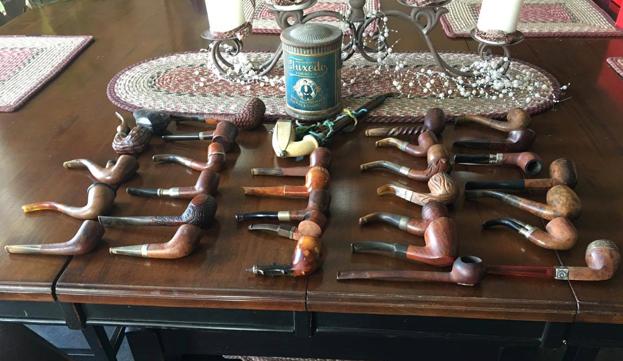
I would say we had a good day pipe hunting. I have never seen that many CPF pipes in one spot and the number of pipes of that age is unique as well. I think we will have to do some more of these virtual pipe hunts because it transcends borders and space and gives the experience in real time. The only thing missing to me was the actual handling of the pipes in person. The experience was really good and I was able to feel like I was in the shop itself as we looked at each pipe and discussed the pros and cons before buying them. You might consider this kind of pipe hunt if you have a good friend who enjoys the hunt as much as you do and has an iPhone or iPad. If you happen to try it out or have already done so in the past post a comment below. Thanks for looking.


A Medico VFQ Rhodesian with a Cumberland Stem


Blog by Steve Laug

My brother Jeff and I visited an antique mall that was in an old grainery along a railroad track not too long ago. We went through the display cases and booths on two floors and found a few pipes. This was one of them – an old Medico VFQ Rhodesian. I have been told that VFQ means Very Fine Quality and underneath the grime it appeared that this one may have lived up to the stamping. The stem is a Cumberland like material with swirls and striations in a mahogany coloured stem. In classic Medico style the pipe was made for their paper filter and had a hollow, adjustable tenon. The tenon has a split on both sides that can be expanded should the stem become loose in the shank.The pipe was in rough shape. The bowl was thickly caked and had remnants of tobacco in it. The rim top was covered with overflow from the bowl and there were some large chips on the top and inner edge of the bowl on the right side. The finish was shot with the top varnish coat peeling all over the bowl. The ring around the bowl was dirty but was undamaged.The pipe was stamped Medico over V.F.Q. over Imported Briar on the left side of the shank. It also was stamped with the shape number 76 on the right side. The stem bore the V.F.Q. stamp on the left side as well.The stem was oxidized, dirty and had tooth chatter on both sides at the button. There was an old paper filter still in the tenon and the inside of the shank and stem were filthy.When we got back to my brother’s place we reamed the pipe and scrubbed it down with acetone on a cotton pad to remove the damage finish. We scrubbed the mortise, airway into the bowl and the stem with pipe cleaners, cotton swabs and alcohol. I took photos of the cleaned pipe when I finally brought it to my work table in Vancouver. (Notice the angle of the rim top on the bowl. It was not flat and the damage had left the front higher than the back.) The next two photos show the condition of the tenon and bowl when taken apart and the damaged rim once all the cake had been removed. The rim had damage all the way around but the biggest damage was on the rear right side where there was a large chip missing.The stem shows some wear in the next photos and the striations of colour are almost not visible due to oxidation.I decided to even out the height of the rim cap by carefully topping the bowl. Since the back side was higher than the front I was pretty sure I could remove most if not all of the chipped area on the rear right. I topped it on a board with 220 grit sandpaper and carefully leveled the bowl by applying more pressure to the rear of the bowl than the front and lifting the front edge off the paper as I remove the damaged and excess on the read of the bowl. It took some work to level the bowl properly and end up with an even top both from a vertical and horizontal view.I used a folded piece of 220 grit sandpaper to bevel out the inner edge of the rim to remove the remaining rim damage and clean up the appearance of the rim.I sanded the rim with a medium and fine grit sanding sponge and with 1500-4000 grit micromesh sanding pads to remove the scratches. I wiped the bowl down with acetone on a cotton pad to remove the remaining finish and stain on the bowl in preparation for matching the newly topped rim with the colour of the rest of the bowl. I did a more thorough cleanup of the mortise and airway into the bowl to remove all of the sanding dust and remaining debris that was there. I scrubbed it out with cotton swabs, pipe cleaners and alcohol. I also ran pipe cleaners through the airway in the stem and cleaned the mortise with cotton swabs.The bowl had many nicks and scratches. I sanded it with micromesh pads to remove the majority of them but decided to leave some of the deeper ones as beauty marks of the old pipe. In the photos the bowl looks pretty richly coloured but in reality it was faded and apart from the flash the grain did not stand out. I stained the bowl with a dark brown aniline stain, flamed it and repeated the process until I was happy with the coverage on the bowl. The look of the bowl in the next two photos is really odd. I think that it is a phenomenon of the flash because it did not look like this in person.I wiped the bowl down with alcohol on cotton pads to remove some of the opacity of the stain and make it more transparent. In the photos below you can see that it is lighter but still to heavy to show the grain to my liking. I buffed the bowl with red Tripoli, sanded it with a medium and a fine grit sanding sponge, then polished it with 1500-2400 grit micromesh pads to remove some more of the dark stain and leave behind some nice contrasts in the grain of the bowl. The next photos show it after I had buffed it with Blue Diamond to polish it. I set the bowl aside for now and turned my attention to the stem. I have found that these Medico stems are not fully vulcanite and are a bit of a bear to polish. I have often been left to do the polishing by hand as the buffer can generate too much heat if I am not careful. The heat damages the material of the stem and forces you to start over. I sanded out the tooth chatter and marks on both sides of the stem and reshaped the button edges with 220 grit sandpaper.  The flow of the top of the shank to the top of the stem was interrupted in that the height of the stem at that point was higher than that of the shank so I sanded the top half of the stem to make that transition smoother.I polished the stem with micromesh sanding pads – wet sanding it with 1500-2400 until I removed the scratches left behind by the sandpaper. I dry sanded with 3200-12000 grit pads. I rubbed the stem down with Obsidian Oil between each sanding pad to give the pads more bite and allow them to really polish the stem. Between the 4000 and 6000 grit pads I buffed the stem very carefully (you have to have a light touch against the wheel). I gave it a final rub down of oil after the 12000 grit pad. I put the stem back on the bowl and buffed bowl and stem with Blue Diamond a final time. It really polishes the briar and with a careful/light touch can polish these older Medico stems. I gave the bowl and stem multiple coats of carnauba wax and buffed it with a clean buffing pad to raise the shine. I hand buffed it with a microfibre cloth to deepen the shine.The finished pipe is shown in the photos below. To me the stain goes really well with the polished Cumberland like stem. They play off each other very well. The contrast on the bowl raises the highlights in the stem and vice versa. This pipe will soon be on the rebornpipes store if you wold like to add it to your rack. It is very lightweight and comfortable in the hand. I think, judging from the condition of the pipe when I got it, that it will be a great smoking pipe, with or without the Medico filter.

Rebirth: a Liverpool Stummel with Beautiful Grain and Miserable Drilling


Blog by Steve Laug

I found this long shank Liverpool pipe sans stem at an antique mall in Idaho when I was visiting my brother. I did not look at it too closely but noticed it was lightly smoked and had some really nice looking grain. I bought it as I figured it would not be too big a deal to make a stem for it. Besides the price was only $4. Looking at the next four photos you can see why the grain got my attention. It is a mix of birdseye, flame and cross grain. The stain that was used really highlights the grain. In the first photo you can see the chip out of the top of the bowl on the left side as well as the chip out of the shank top between the bowl junction and the stamping on the shank side. When I got back to my brother’s place he looked it over and just shook his head. He pointed out the issues with the bowl. The airway entered the bowl at the far right side. The bowl was hardly smoked and this may well have been a reason. Externally the bowl was not round it was entirely lopsided. It was wrong both inside and out in more ways than I had noticed in my quick decision to purchase it. This one was going to be a challenge in more ways than one to restem and make usable once more. I was looking forward to seeing what I could do. The next two photos show the misdrilling and the misshapen out of round external bowl.There were some deep gouges on the left side of the pipe – one had the top of the bowl and one on the shank just ahead of the stamping. There were also some pits and gouges on the underside of the shank and on the end on both top and bottom. I have circled the large one in the first photo below. It is a bright spot circled in red. Then I looked closer at the overall bowl and shank. What a mess. It had been drilled at quite an angle. It appeared that the drill had gone through the right side of the shank just before the bowl. It had been repaired with a fill that was pitted. It is circled in red in the second photo below. The third photo shows the shank from the mortise end. It is obvious that the shank was not round and the mortise was off to the right. This was going to be an interesting pipe to restem. As I looked at the left side of the shank with a magnifying lens I could see that first line of stamping (faint on the top and better at the bottom side of the words read CONTINENTAL. The second line of stamping was clearer and read REAL BRIAR. In examining the rest of the shank, I could see that it was all that was stamped on the pipe. I did some searching for the brand name and found one on Pipedia. The Continental Briar Pipe Co. Inc. manufactured briar pipes in Brooklyn, New York. The address on York and Adams Streets was taken from a letter sent to a Henry T. Rice dated July 28, 1941.

I went through my stem can and found two prospects for stems. Because the shank was misdrilled and out of round and the mortise was also off to the side I needed to have a stem slightly larger in diameter than the shank.  One of the stems was a saddle stem and the other a taper stem. The saddle stem was not quite large enough so I opted for the taper. I used a pen knife to open the mortise and make it more round. I worked to remove briar from the left side of the mortise and make the shank end round. In the third photo below you can see the finished mortise.When I finished the work on the mortise I sanded it with a rolled piece of sandpaper to smooth things out.I pushed the taper stem into the mortise and the fit against the shank was a good fit. The right side where the shank was out of round needed to have some vulcanite removed to make the flow of the stem and shank correct but it would work. The taper stem makes the pipe a Liverpool. If I had used the saddle stem it would have been a lumberman. I like the promising look of the new pipe. There were many on the top and the bottom of the shank and along the right side of the top of the bowl. There was also a place on the right side of the shank at the bowl shank junction that had been filled to repair a drill through. It had been patched with putty but was pitted and rough. I wiped the shank and bowl edge down with alcohol. I filled all of the pits and the repaired area with briar dust and then put drops of super glue on top of the dust fills. The photos below show the patched and repaired areas.When the repairs dried I sanded the repairs smooth to match the briar around them. The photos below show the freshly sanded areas on the pipe. The repairs are dark spots in the middle of the sanded areas. They will be blended in once I stain the bowl and shank. I used a needle file to reshape the button edges on both sides of the stem. They were worn down and the sharp edge was indistinct. I redefined the edges and smoothed out the surface in front of the button.I wiped the bowl and shank down with alcohol to remove the remaining finish on the bowl and to clean off the dust in preparation for restaining the pipe. I sanded the surface of the stem with 220 grit sandpaper to remove the oxidation and smooth out the file marks and tooth marks that remained. I lightly topped the bowl on the topping board to remove the damaged areas on the rim and created a smooth well defined edge on both the inner and outer parts of the bowl. I used a folded piece of 220 grit sandpaper to clean the inner edge and remove the darkening there.I wiped it down another time to clean off the rim and the edges of dust. I used a dark brown stain touch up pen to stain the sanded areas on the rim, bowl side, shank top and bottom and shank end. I was not too worried about coverage at this point rather providing a base coat before I stained the bowl in its entirety. My thinking was that the base coat would blend in with the existing stain and then the top coat would tie it all together. I stained the pipe with a dark brown aniline stain and flamed it with a lighter. I repeated the process of staining and flaming until the coverage was even around the bowl. I set the pipe aside to dry for a few hours and worked on the stem.I wiped the bowl down with alcohol on cotton pads to remove the dark crusty finish. I wanted the stain to be more transparent to let the grain show through. I sanded it with micromesh sanding pads to polish the bowl and shank. The grain really shown through now and the flame grain, birdseye and cross grain were beautiful. The fills have blended in on most of the bowl while the repair on the right side of the shank at the bowl is dark but smooth. I scraped out the remnants of cake that remained inside of the bowl with the Savinelli Fitsall Pipe Knife and sanded the walls with 180 grit sandpaper to smooth them out.I polished the stem with micromesh sanding pads – wet sanding with 1500-2400 grit pads and dry sanding with 3200-12000 grit pads. I rubbed the stem down with Obsidian Oil between each set of three pads. I took it and buffed it with Tripoli after the 2400 grit pad and followed that with Blue Diamond. Then I went on to continue polishing it with the higher grits of micromesh pads. I buffed the pipe and stem with Blue Diamond on the buffing wheel and carefully buffed around the stamping. I did not want to damage it any further than before. I gave the pipe and stem multiple coats of carnauba wax and buffed the pipe with a clean buffing pad. I hand buffed it with a microfibre cloth to deepen the shine on the briar and the vulcanite. The finished pipe is shown in the photos below. It is a long pipe that is just under 7 inches long and the bowl is 1 ¾ inches tall. The bowl exterior is 1 1/8 inches in diameter and the bowl chamber is ¾ inch in diameter. What started out as a major mess came out looking like a fine pipe. Even though the airway enters the bowl on the far right the draw is still very good. I think it should smoke fairly well and provide a decent looking long pipe for someone who wants to add it to his collection. Thanks for walking through the challenge with me.

Comoy’s Billiard Sandblast Restoration


By Al Jones

This Sandblast Comoy’s, a shape 28, from the pre-Cadogan era was in too good condition to pass up. The stem was only mildly oxidized and the rim bowl top showed some of the factory beveled edge was still visible. On delivery, all of this was confirmed. There was heavy cake, but the owner had never overfilled the pipe.

I reamed the cake with my Castleford set and finished with a piece of 320 grit paper around a slightly smaller bit. The interior of the bowl was in excellent condition. The bowl was soaked several hours with alcohol and sea salt. I used a wet rag to remove some of the bowl top buildup and a worn piece of scotchbrite on the polished beveled edge, followed by a piece of 8,000 grit micromesh. The bowl was then polished with Halycon wax, worked into the sandblast with an old toothbrush.

The stem was soaked for a few hours in a mild Oxy-Clean solution. Mounted to the briar, I used 800, 1000 and 2000 grade wet sandpaper to remove the oxidation and teeth abrasions. Fortunately, the marks were only minor. The stem was then buffed with white diamond rouge and then Meguiars plastic polish.

Below is the finished pipe, which has been sold to a member of the PipesMagazine.com forum. I’ve sold a number of these straight billiards over the years, many of where were Comoy’s. If I ever discover that I enjoy smoking a straight billiard shape, I’ll have many regrets, including this fine specimen.

?

Restoring a piece of WDC Pipe History – A Meerschaum Bulldog


Blog by Steve Laug

When I was visiting my brother in Idaho, we called an eBay seller he had bought from before. We were looking for the Koolsmoke base and in the process of asking and buying that from her she also talked to us about other pipes that she had for sale. I love older WDC pipes so when she said she had a WDC Bulldog that was in a case that she would sell to me I was hooked. Then she said it was Meerschaum and that the case was in excellent condition. She said it was red leather-covered and stamped Genuine Meerschaum over Real Amber on the front of the case and Made in Austria on the back side of the case.  We asked her to send us some photos in an email and when she did I bought it. It was a beauty. I loved the shape, the condition the amber stem, actually just about everything about the pipe. Here are pics of the case when it arrived. I opened the case and took a photo of the WDC Triangle logo on the inside cover. The case was in excellent condition both inside and outside.I took a photo of the pipe before I removed it from the case. It looked really good sitting in the opened case. The shape is one of my favourites and the amber stem appeared to be in good shape at this point.I took the pipe out of the case and took a few photos of it to show the general condition of the pipe when I received it. I was amazed that it was in as good condition as it was.  I am guessing that was made in the late 1890’s through the early 1900’s. The bowl had begun to show some colour. There were some nicks and scratches on the sides and also on the stem itself. The rim top was tarred with overflow from the cake in the bowl. The stem was in good shape and showed tooth marks and chatter on the end of the stem on both sides near the button. It had a single hole orific style button. The stem aligned perfectly to the shank. That surprised me as most of the pipes of this era I have worked on had threaded bone tenons and either the internal threads on the shank or those on the bone tenon itself were worn and the stems were over turned. When I took it off the shank there was a small paper washer that had been carefully fitted to the shape of the stem and shank. That is why it aligned. I removed the washer and put the stem back on to find that it was indeed overturned.I scraped out the cake in the bowl with a Savinelli Fitsall Pipe Knife. I wanted to remove all of the cake so I carefully took it back to the meerschaum.I worked on the tarry build up on the rim with 1500-2400 grit micromesh sanding pads. I wiped rim top with a damp cotton pad repeatedly during the process of sanding it. I was able to remove all of the cake on the rim. There was some darkening around the outer edge of the rim and on the left side there was a small nick in the edge.With the rim cleaned I polished the entire bowl with micromesh sanding pads. I dry sanded it with 1500-12000 grit pads to polish the meerschaum and remove some of the finer scratches in the surface of the meerschaum. I left the larger ones and merely smooth out around them. To me these scratches give character and are an integral part of the story of the pipe. The photos below tell the story of the process. With the externals cleaned and polished I turned to the internals. I scrubbed out the shank and mortise with cotton swabs and alcohol. I cleaned the airway in the shank and the stem with pipe cleaners and alcohol. I scrubbed until the internals were clean.I moved on to work on the tooth marks and chatter on the stem. I sanded the stem with 220 grit sandpaper to minimize the scratches and nicks on the sides and angles of the stem.  I sanded out the tooth marks and chatter with little trouble as none of them were deep. That is one beauty of amber as a stem material. It is hard to dent!With the marks removed I decided to address the overturned stem before I polished the stem with micromesh. I have learned a good trick to correct the overturn on these bone tenons and threaded shanks. I have never read about it anywhere but it works really well. I used a clear nail polish, which dries hard and is neutral, to coat the threads on the tenon and the inside of the shank. I carefully apply the polish to the threads and set it aside to dry. It generally takes two or more coats to build up the threads enough to correct the overturn. I painted it the first time, let it dry and turned it on to the shank. It was better but needed a second coat. I gave it a second coat, let it dry and turned it on to the shank. It was a perfect fit. The alignment was spot on.I polished the stem with micromesh sanding pads – wet sanding with 1500-2400 grit pads and dry sanding with 3200-12000 grit pads. I wiped the amber down with a damp cotton pad between each different pad to remove the dust and check on the polishing. It did not take too long before the stem began to glow again. I love the look of a polished amber stem. This particular stem had some really nice patterns in the amber. The underside near the tenon was almost a birdseye pattern. I put the stem back in place in the shank. Things lined up perfectly. I gave it another quick polish with the 12000 grit micromesh pad. I hand waxed it with Conservator’s Wax because it is a microcrystalline polish and it really works well on meerschaum and amber. I rubbed the wax into the finish and buffed the pipe by hand with a microfibre cloth. The finished pipe is shown in the photos below. The meerschaum bowl has a rich glow to it and the amber stem looks really good. The combination is really nice with the amber and the meerschaum reflecting off of each other. I really like the looks of this old timer. It will more than likely remain in the collection with some of my other old timers. Thanks for looking.

Making Work for myself – Restoring a GDB Rainbow 347


Blog by Steve Laug

I have worked on and collected many GBD pipes over the past 20 years. I have some great resources that I use to identify the nomenclature, shape and date of the various lines that GBD issued. However, all of my sources and resources regarding GBD are from the time prior to the merger (Cadogan) or shortly thereafter. The Rainbow Line is not mentioned in any of them. I also looked on the pipephil Logos and Stampings site and Pipedia and again there is no mention of the line. In my online research, I found several people who think that it is probable that the pipe was made during the 70’s through 90’s. Several things point to this – the chunky Lucite stem, the name of the line itself and the brightly coloured stems used. One fellow on Pipes Magazine’s online forum had a great quote that caught my attention. He said, “If you’re old enough you might remember that Rainbow was a popular theme in the late 70’s to early 90’s due to Sesame Street, “The Rainbow Connection,” The Rainbow Reading Room, etc.” http://pipesmagazine.com/forums/topic/help-with-info-on-a-gbd-pipe I think this is as close as I am going to get to a time period when the pipe was made.

The pipe I picked up on a recent trip to Idaho is a nicely shape apple that was in pretty decent shape. I figured it would be an easy clean up. But things happened along the way and I made more work for myself. It is stamped GBD in an oval over Rainbow on the left side of the shank. On the right side stamped London, England in a straight line over 347 (shape number). On the underside of the shank near the stem/shank junction it is stamped D. The faint painted GBD in an Oval on the left side of the stem also suggests a later GBD. The nomenclature is consistent with usual smooth GBD markings (GBD over Grade (left side) and London England over style number on the right side.) The photos below came from the person I purchased the pipe from and show the general condition.He provided some close up photos of the bowl and rim. He said that the pipe had been reamed and clean. However, it was not reamed and clean to my liking. The bowl had a thick cake that I will need to remove, some rim darkening and some dents in the rim. My guess was that like the bowl, the shank and mortise would need some attention. The stamping on the shank was very clear. The first photo below shows that. Next to the shank/stem junction in the first photo, there is also the remnant of the GBD oval logo that had been originally painted on the stem. The stem had a lot of tooth chatter and some shallow tooth marks in the Lucite.While I was staying with my brother, I cleaned and reamed the pipe. I used the PipeNet reamer and took it back to the walls. I would need to clean it up more once I got home but it was better than when I started. Last evening I took the pipe out of the box to finish the clean up and restoration. I took some photos of it before I started to have a benchmark. I took a close up of the bowl and rim. It was better than when I started but still needed to be cleaned up some more. The rim had some darkening that I could reduce some more as well.I used the Savinelli Fitsall Reamer to scrape the remaining thin cake from the walls of the bowl. I personally like to remove all of the cake when cleaning up a bowl. I will sand a bowl interior a bit later to smooth things out. Little did I know at this point that the decision to sand the bowl would send me on a repair detour.I scrubbed out the mortise, airway in the bowl and in the stem with alcohol, cotton swabs and pipe cleaners. I used the dental spatula to scrape the walls of the shank and remove the hard tars that had built up there. The airway in the stem was also dirty and had some darkening at the button and in the first few inches of the stem. I cleaned it with bristle pipe cleaners and picked the debris out of the button and from around the stem down tenon with a dental pick.The stem not only had tooth chatter but also some stickiness from a price tag on the top surface. The edge of the button also had some chatter. I sanded the tooth marks out with 220 grit sandpaper and reshaped the button at the same time. The stem was smooth when I finished. It was dull and needed a good polishing.I polished it with micromesh sanding pads – wet sanding with 1500-2400 grit pads and dry sanded with 3200-12000 grit pads. I wiped the stem down with a damp cotton pad to remove the dust after each pad. I was finished with the stem at this point so I set it aside to work on the bowl. I had decided to use a dark brown aniline stain thinned by 50% with alcohol to darken the grain on the pipe and hide a couple of small fills. I applied the stain, flamed it and repeated the process until the  bowl was covered evenly. I wiped the bowl down with cotton pads and alcohol to make it more transparent. I hand buffed it and took the following photos. It was still too dark to my liking. I sanded the bowl with micromesh sanding pads to make it more transparent and to see if I could make the grain pop. I sanded it with 1500-2400 and took these photos. It was getting there. I continued to sand it with 3200-12000 grit pads to polish it and give it a shine. The next photos tell the story. The bowl was looking better and better. It is at this point that I made a decision that would inevitably cost me. That results of that decision turned out to be a mistake that made a lot more work for me! I put the stem on and decided to work on sanding out the inside of the bowl to remove the polishing compound and remnants of cake. Stupidly, I put the stem on the pipe to enjoy the look of the combination while I worked. Wrong thing to do! Understand, I was sitting at my work table, the top of which is a meter above the floor. I was carefully sanding the bowl interior so as not to damage the nice stain on the rim. Somehow, the pipe wiggled free from my hands and fell to the floor. If you could have watched it and my face at the same time you would have seen the look of horror on my face as it dropped to the floor. That horror changed to a moment of dread as I watched it bounce and heard a snap and watched as the bowl and stem went in opposite directions. I quietly picked up the bowl and stem. The tenon had snapped off in the mortise. It was a clean break. I don’t know about you but I find Lucite is much less forgiving than vulcanite. I have had pipes with vulcanite stem hit the floor with not breakage but not so with Lucite. It seems that the tenon inevitably snaps. Well this one certainly did.I sat and looked at it for a long time just sick at the thought that a pipe I was basically finished with was in pieces on my table. I know how to replace a tenon; that is not a problem. I just did not want to have to do that on this pipe. However, my own stupidity and carelessness had successfully sent me back to work on this pipe. Ahh well… just as well call it a night. Perhaps a good night’s sleep would give me better perspective on this new problem!

I woke up early this morning and dragged my feet about going back to work on the pipe. I think I was hoping at some level that it had not actually happened. I sipped my coffee as long as possible postponing the inevitable. I talked with my eldest daughter who is in Kathmandu for work. I took the dog for a walk around the yard… but finally I made to the basement and the work table. It was not a dream the tenonless stem and the bowl was sitting waiting for me.

I used the Dremel to remove the remnants of the old tenon that were on the face of the stem. I flattened it against the topping board. I went through my assortment of threaded Delrin tenons until I found one that was slightly larger than the broken one. I needed to reduce the diameter slightly to make it work but it would do!I set up my cordless drill and put in a bit slightly larger than the airway and turned the stem onto it by hand. The first photo below shows the bits I used as I repeated the process until the hole was large enough for me to use a tap to thread it to match the tenon. The second photo below shows the last drill bit I used the piece of tape on the bit is to show me how deep I needed to go with the bit to accommodate the new tenon threads.I roughened the tenon surface so I could grip it enough to turn it into the newly drilled stem end. It was a good fit. I painted the end with some epoxy and turned it back in place and set it aside to cure and harden.Once the tenon was set firmly in place I used the Dremel and sanding drum to reduce the diameter to a close fit. I finished the fitting with 180 and 220 grit sandpaper. I polished the new tenon with micromesh sanding pads. Now came the telling moment. Would the stem match up with the shank? Would the fit be tight against the shank end? Even though I have done this many times I always have the same questions. I placed the new tenon in the mortise and carefully pushed the stem against the shank end. It was a very close fit and all I would need to do was sand the left side and top a little bit to make the fit even better. I was relieved and happy. I sanded the stem with 220 grit sandpaper and cleaned up the fit. I was almost back to where I was last night before the pipe dropped and the tenon broke. I have to polish the stem once again but the stem fits well. I took photos of the pipe at this point to check it out. The newly fit stem and the stain on the pipe worked well together. Now to polish it all and get it finished. I polished the bowl and stem with micromesh sanding pads – dry sanding with 1500-12000 grit pads to raise the shine.I buffed the pipe and stem with Blue Diamond on the buffing wheel. I gave it multiple coats of carnauba wax and buffed it with a clean buffing pad to raise the shine. I hand buffed it with a microfibre cloth to deepen that shine. The finished pipe is shown in the photos below. I am pretty happy with the way it turned out – even with the detour. The stain accomplished what I hope it would in making the grain pop. The grain stands out like it never did in the pipe when I received it. Now it is visible. It is a nice looking pipe that feels good in the hand. Thanks for looking.


Pipe Smokers’ Laws – Borrowed with Appreciation


Blog by Robert M. Boughton

Member, International Society of Codgers
Member, North American Society of Pipe Collectors
Member, Facebook Gentlemen’s Pipe Smoking Society
Website Roadrunner Restored Pipes
Blog RRP
Falderal About Me
Photos © the Author except as noted

For once I have a contribution to make, which I am so grateful to have chanced upon while surfing the Web for something I no longer even remember (and said forgotten search therefore being of no consequence), that needs no opening quote or official introduction.  I have no idea what category this offering falls under but doubt the change to my typical format will be met with anything less than approval and pleasure by the majority of this forum’s readers and contributors.  My  only request – call it a suggestion, if you prefer – is that the following list, courtesy of the Ozark Pipe Smokers of Rogers, AR, USA, be given a thorough reading with all due sobriety and gravity.  And I hereby move for its formal adoption by all pipe clubs, everywhere.  Anyone wishing to second the motion may do so by commenting below.

Smoke Master Sandblast Large Billiard


I love these old pieces of American Tobacciana as they give us a glimpse of another era. Thanks Troy for posting this and the documentation that goes along with the pipe. Cheers. Well done brother.

Baccy Pipes

On my earlier blog about Wimbledon coupon pipes i touched upon the Smoke Master  pipes. I recently acquired a Smoke Master sandblast so i figured i would feature it on Baccy Pipes as well.

Smoke Master was originally a pipe offered by Briarcraft but by 1950 they had closed their doors. In the 1960’s Dr. Grabow purchased the rights to make the Smoke Master and made them up until the mid 1990’s. They were offered from coupons , mail order and catalogs.

Here is a coupon from a box of Union Leader from my collection.100_1978 (640x613).jpg100_1979 (640x399).jpg100_1980 (640x429).jpg

It has a early bar code so i would say it is most likely from around mid-late 1970’s.100_1981 (640x309).jpg

Here is a order form that was sent to you with the initial pipe purchase in case you wanted another pipe you could pick out the shape as well.Smokemaster+Bard+RJM+ad.jpg

Smoke Master used a unique system where you…

View original post 349 more words

Freshening a Blatter One Dot Zulu


Great information here Charles. There is also a one dot green that is on early pipes made by the grandfather… I have one of those old timers and have been in correspondence with them regarding it. Well done on this pipe – it is a beauty!

I was recently sent a box of six pipes for refurbishment from a gentleman in Iqaluit, Nunavut. All six pipes were made by Blatter & Blatter, Inc of Montreal, known at one point in the firm’s 100 year history as Blatter Bros.

Established in Montreal in 1907, Blatter & Blatter has remained, by choice, a small, family-owned pipe producer, currently putting out about 300 pipes annually. The company website is very short on details – I believe that the Quebec advertising laws restrict the firm from posting pictures and pricing – but as far as grading of Blatter pipes goes, Pipephil.eu can help.

Blatter pipes are marked with one or two dots on the side of the stem. One red dot indicates a machine-made pipe in a classic shape; two red dots mark a completely hand made pipe, usually in the freehand style. A few pipes are marked with one…

View original post 781 more words

Sandblast Reveals Stunning Grain on a GBD Concorde 9438


Blog by Steve Laug

The next pipe I brought to the table had two major attributes that piqued my interest. The first was that it has an amazing sandblast (or is it a combination blast and rustication?). The second thing was that it was a pipe in my favourite GBD shape that I think nobody does as well as they do – the 9438 Rhodesian.  The pipe is stamped on the smooth underside of the shank GBD in an oval and next to that Concorde. Running along the shank stem junction it reads 9438 and Made in France. The logo is stamped into the left side of the saddle portion of the stem. The next photos show what the pipe looked like when it arrived in Idaho before my brother started cleaning it for me.Jeff took some close up photos of the bowl, rim and stamping to show the condition and the brand of the pipe. Those of you who love the 9438 did not need to see the stamping to confirm the shape but here it is. The finish was dirty with lots of debris in the grooves and crevices on the bowl and shank. The rim had a tarry build up on the back half where the cake was overflowing the bowl. The mortise was so dirty that the stem no longer seated against the shank. The GBD oval was stamped on the side of the stem and did not have a brass roundel as some of the earlier ones did.The stem was oxidized and there was tooth chatter on both the top and bottom sides near the button.The finish was a new one to me. I have not worked on a Concorde before so I wanted to learn a bit about it. I was not sure if it was a sandblast or a rustication or both. I did some searching online and found some things about it however. The GBD Concorde was made in France and was a lower priced GBD. It sported what GBD called a “take-off” brown/black stained sandblast. The top three pipes (ABC) in the photo below are from a 1976 Tinderbox Catalog I located on Chris’ Pipepages. The weblink for the pages is shown in the link that follows: http://pipepages.com/2tinderbox3.htm

The pipe I was working on was “B” in the photo below. The finish on mine was very similar but mine did not have the brass roundel on the stem as the one in the photo does. On the second page of the catalogue there is a description of the pipe. It is a little hard to read but here is the text: “GBD Breaks with Tradition and Forges Bold New Designs. A.B.C. Concorde – This latest innovation from GBD’s French factory, the Concorde, offers exceptional value in the popular price range and features a most novel “take-off” process.” The catalogue lists the retail price in 1976 at $12.50. I have a sense of what they mean by the take of process in looking at the finish. It appears that the pipe has a dark brown stain applied to the bowl. It is buffed off the high spots on the pipe giving it a contrasting appearance. At least that is what I think is meant by the take-off process. When I received the pipe it was clean inside and out. My brother had done a great job cleaning out the grime and debris. The stem fit in the mortise perfectly and all looked good. The finish was clean and faded and the oxidation on the stem had come to the surface so it was ready for me to move ahead with the restoration. I took a few photos of the pipe so you could see what it looked like when it arrived in Vancouver. The rim looked much better but still had a bit of debris on the back side. It was nothing that a little sanding with micromesh could not cure. There is some stunning grain on the rounded rim top and on the smooth parts of the bowl. There is also some peeking through the sandblast. This is a beautiful pipe and one I may well hold onto.The oxidation on the stem had been brought to the surface by the cleanup. It definitely appears worse than it did in the earlier pictures but the difference is that the oxidation is on top now and easier to deal with. The tooth marks and chatter on the stem are visible in both photos.I polished the rim and the high surfaces of the bowl with a fine grit sanding block and with 1500-4000 grit micromesh pads to raise a shine. I gave it a coat of Conservator’s Wax and  hand buffed it with a shoe brush and cloth. The photos below show the bowl after that simple treatment. I sanded the stem with 220 grit sandpaper, carefully avoiding the area around the GBD Oval stamping. I did not want to damage that. I polished the stem with 1500-2400 grit micromesh to begin bringing the shine to the stem.I rubbed the stem down with Obsidian Oil and did something I probably should have waited to do. I cleaned around the area of the stamp with a damp cotton pad. I applied some Rub’n Buff European Gold to the stamping and rubbed it off the surface with a cotton pad. The second photo below shows the stamp when I had finished the first application. I can justify this step by saying it is actually easier to see the stamp with a little gold in place so that I can carefully polish around it. I repeated sanding the stem with 1800-2400 grit micromesh sanding pads.I polished it with 3200-12000 grit pads and gave it a coat of Obsidian Oil after each set of three pads. The shine was beginning to come through. I gave it a final coat of oil after the 12000 grit pad and set it aside to dry. I buffed the pipe with Blue Diamond to polish the stem and remove the scratches that still remained on the stem. I lightly buffed the bowl to raise a shine. I gave the stem several coats of carnauba wax and the bowl several coats of Conservator’s Wax and buffed the pipe with a clean buffing pad. The pipe began to truly shine. I hand buffed it with a microfibre cloth to deepen that shine. The finished pipe is shown in the photos below. It is really a beauty and one I am thinking seriously of adding to my own collection… ahh well… we shall see. Thanks for looking.