Blog by Steve Laug
I have worked on and collected many GBD pipes over the past 20 years. I have some great resources that I use to identify the nomenclature, shape and date of the various lines that GBD issued. However, all of my sources and resources regarding GBD are from the time prior to the merger (Cadogan) or shortly thereafter. The Rainbow Line is not mentioned in any of them. I also looked on the pipephil Logos and Stampings site and Pipedia and again there is no mention of the line. In my online research, I found several people who think that it is probable that the pipe was made during the 70’s through 90’s. Several things point to this – the chunky Lucite stem, the name of the line itself and the brightly coloured stems used. One fellow on Pipes Magazine’s online forum had a great quote that caught my attention. He said, “If you’re old enough you might remember that Rainbow was a popular theme in the late 70’s to early 90’s due to Sesame Street, “The Rainbow Connection,” The Rainbow Reading Room, etc.” http://pipesmagazine.com/forums/topic/help-with-info-on-a-gbd-pipe I think this is as close as I am going to get to a time period when the pipe was made.
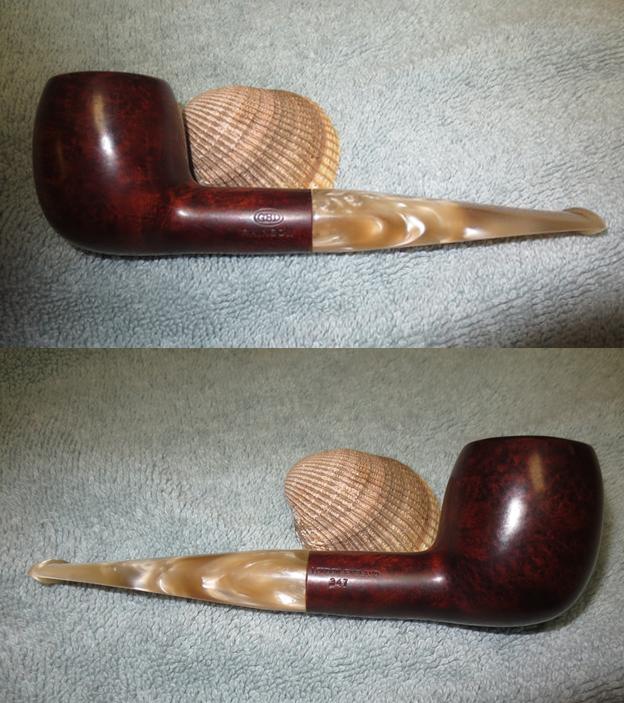
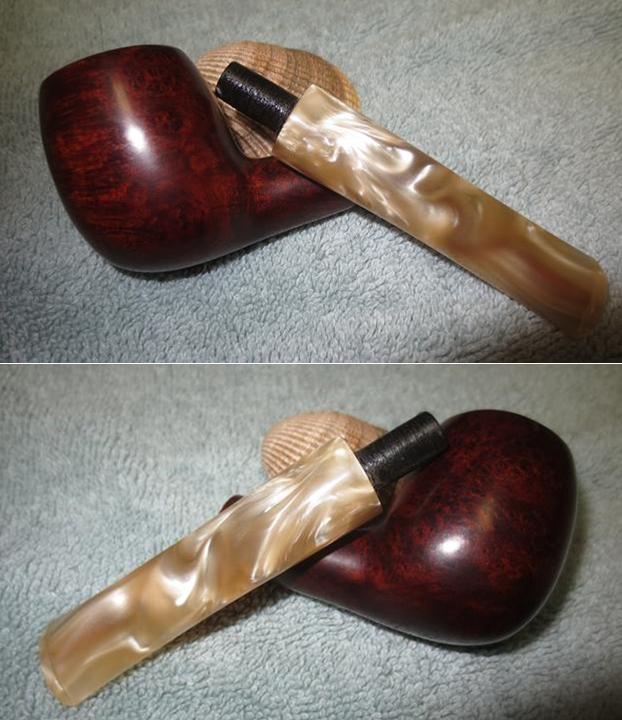
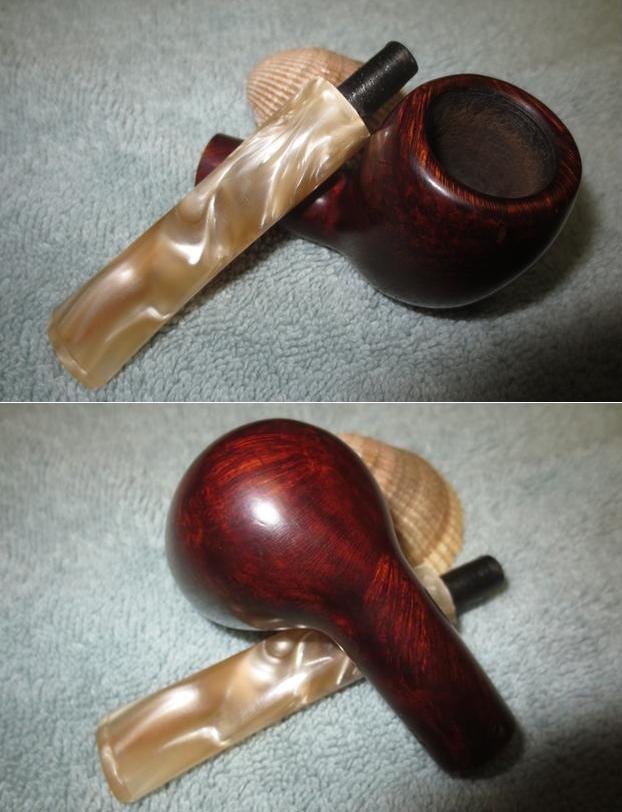
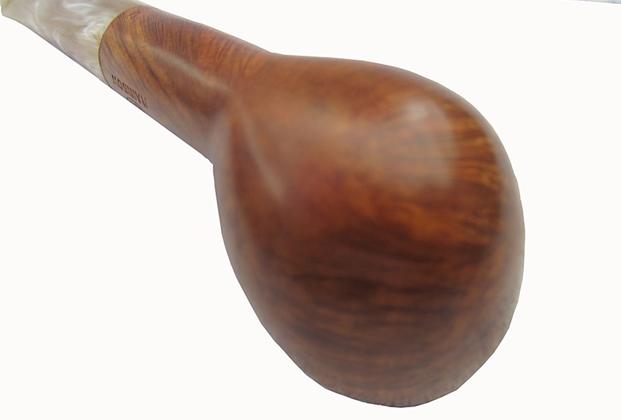
The pipe I picked up on a recent trip to Idaho is a nicely shape apple that was in pretty decent shape. I figured it would be an easy clean up. But things happened along the way and I made more work for myself. It is stamped GBD in an oval over Rainbow on the left side of the shank. On the right side stamped London, England in a straight line over 347 (shape number). On the underside of the shank near the stem/shank junction it is stamped D. The faint painted GBD in an Oval on the left side of the stem also suggests a later GBD. The nomenclature is consistent with usual smooth GBD markings (GBD over Grade (left side) and London England over style number on the right side.) The photos below came from the person I purchased the pipe from and show the general condition. He provided some close up photos of the bowl and rim. He said that the pipe had been reamed and clean. However, it was not reamed and clean to my liking. The bowl had a thick cake that I will need to remove, some rim darkening and some dents in the rim. My guess was that like the bowl, the shank and mortise would need some attention.
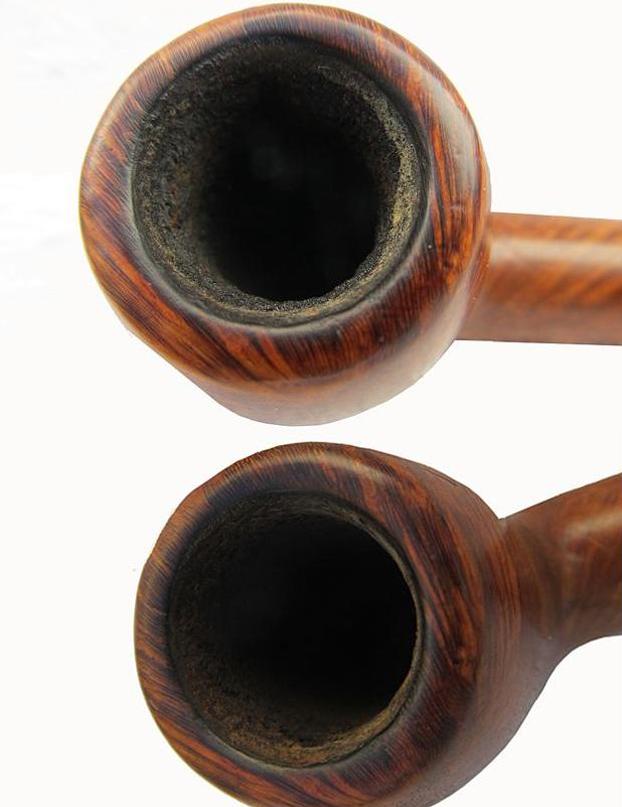
 The stamping on the shank was very clear. The first photo below shows that. Next to the shank/stem junction in the first photo, there is also the remnant of the GBD oval logo that had been originally painted on the stem. The stem had a lot of tooth chatter and some shallow tooth marks in the Lucite.
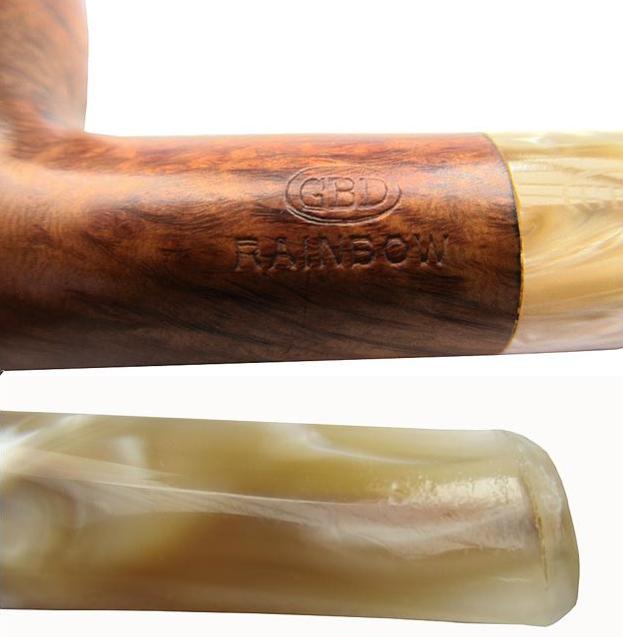 While I was staying with my brother, I cleaned and reamed the pipe. I used the PipeNet reamer and took it back to the walls. I would need to clean it up more once I got home but it was better than when I started. Last evening I took the pipe out of the box to finish the clean up and restoration. I took some photos of it before I started to have a benchmark.
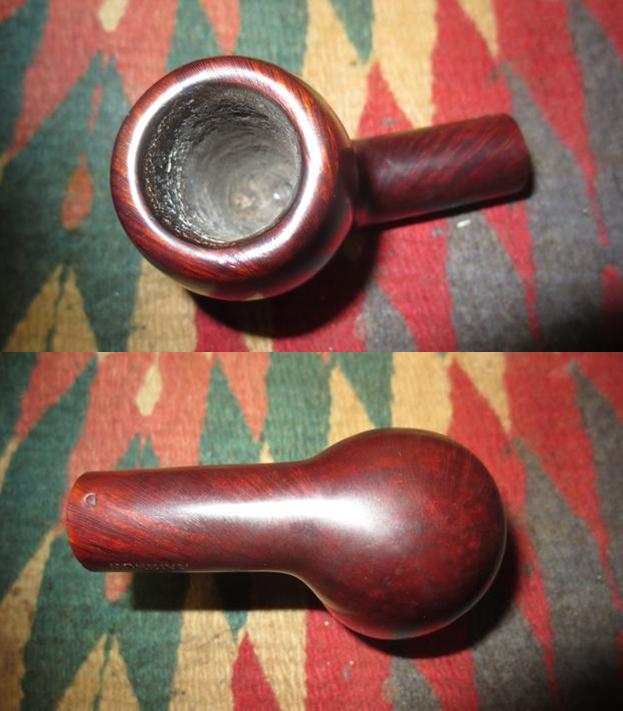
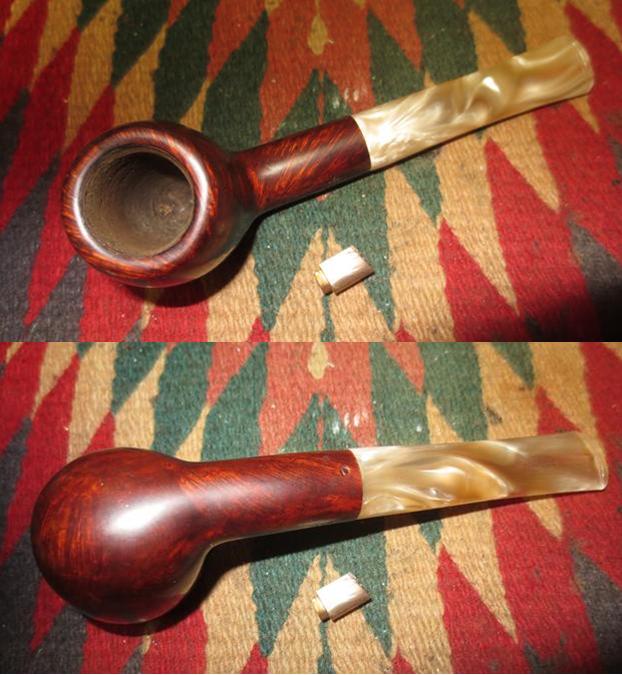
 I took a close up of the bowl and rim. It was better than when I started but still needed to be cleaned up some more. The rim had some darkening that I could reduce some more as well.
 I used the Savinelli Fitsall Reamer to scrape the remaining thin cake from the walls of the bowl. I personally like to remove all of the cake when cleaning up a bowl. I will sand a bowl interior a bit later to smooth things out. Little did I know at this point that the decision to sand the bowl would send me on a repair detour.
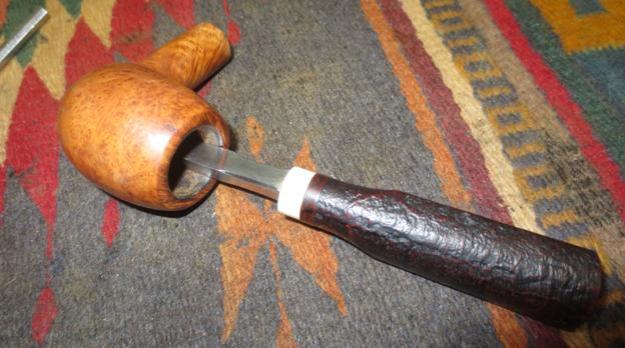 I scrubbed out the mortise, airway in the bowl and in the stem with alcohol, cotton swabs and pipe cleaners. I used the dental spatula to scrape the walls of the shank and remove the hard tars that had built up there. The airway in the stem was also dirty and had some darkening at the button and in the first few inches of the stem. I cleaned it with bristle pipe cleaners and picked the debris out of the button and from around the stem down tenon with a dental pick.
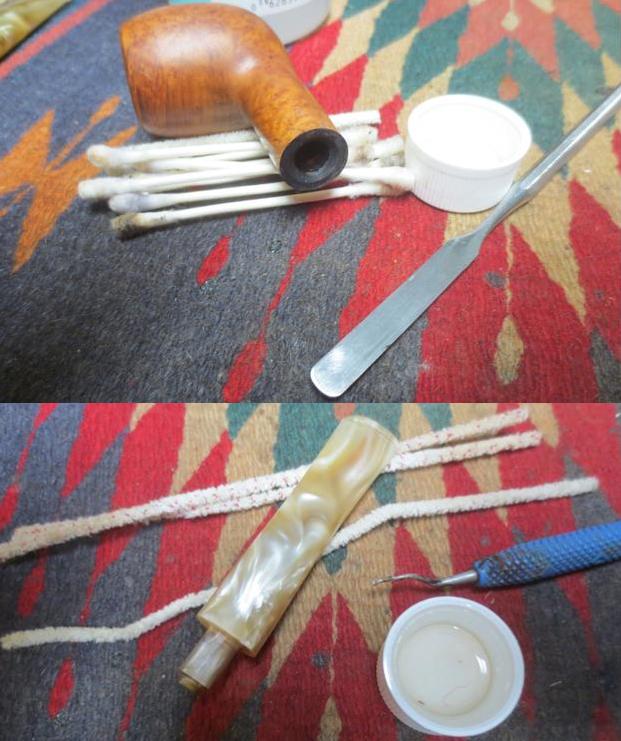 The stem not only had tooth chatter but also some stickiness from a price tag on the top surface. The edge of the button also had some chatter. I sanded the tooth marks out with 220 grit sandpaper and reshaped the button at the same time. The stem was smooth when I finished. It was dull and needed a good polishing.
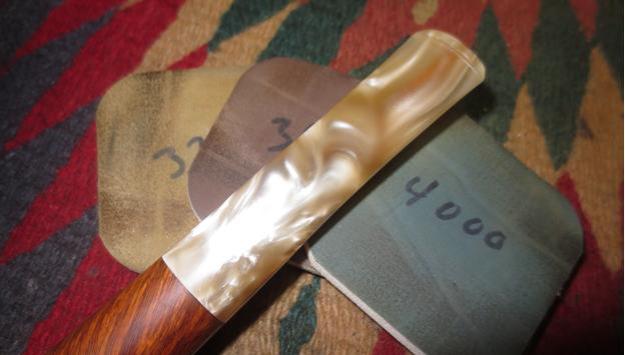
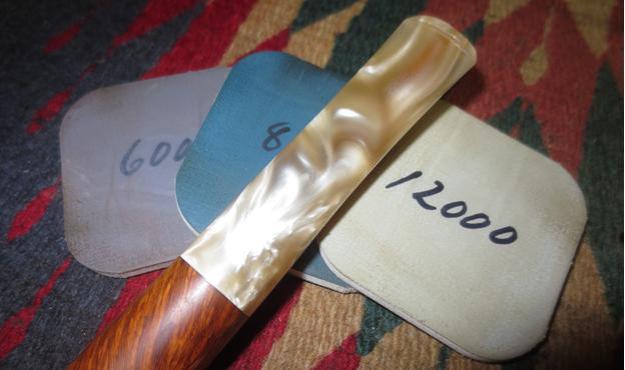
 I polished it with micromesh sanding pads – wet sanding with 1500-2400 grit pads and dry sanded with 3200-12000 grit pads. I wiped the stem down with a damp cotton pad to remove the dust after each pad.
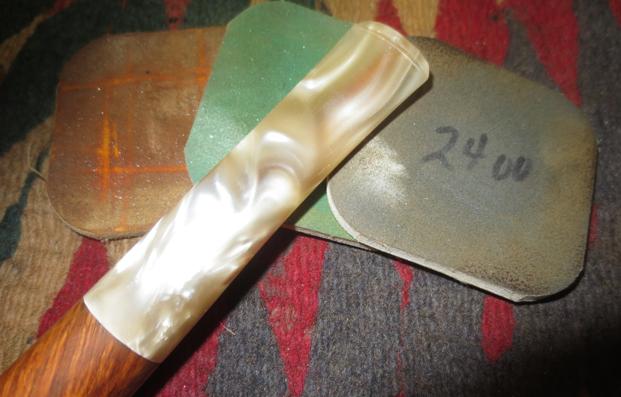
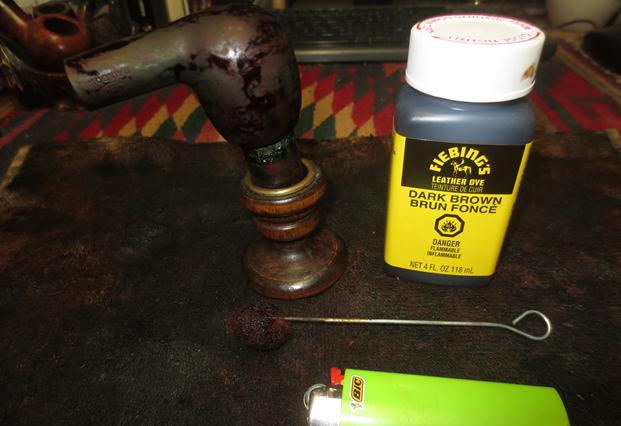
 I was finished with the stem at this point so I set it aside to work on the bowl. I had decided to use a dark brown aniline stain thinned by 50% with alcohol to darken the grain on the pipe and hide a couple of small fills. I applied the stain, flamed it and repeated the process until the bowl was covered evenly.
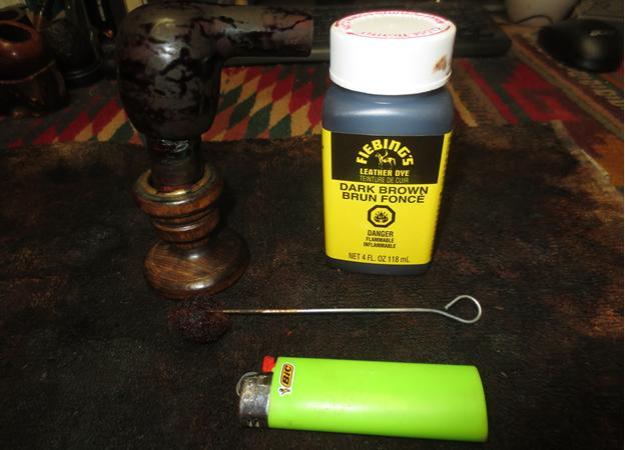
 I wiped the bowl down with cotton pads and alcohol to make it more transparent. I hand buffed it and took the following photos. It was still too dark to my liking.
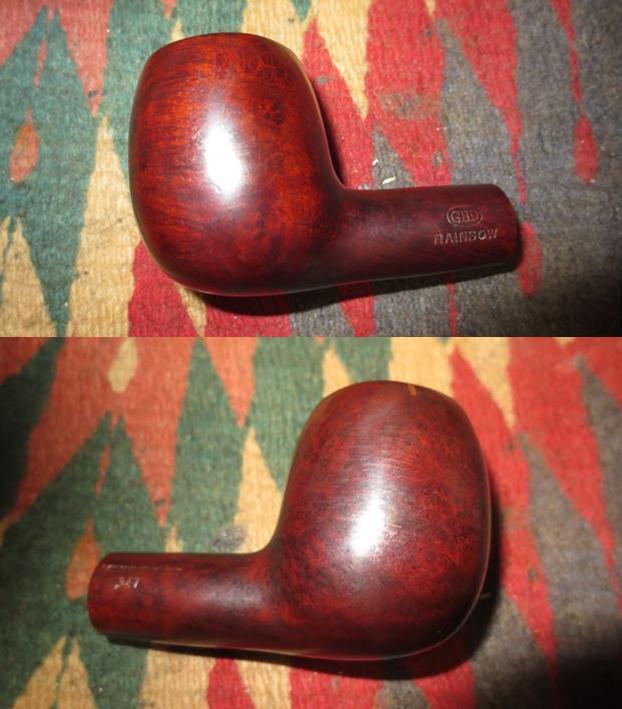
 I sanded the bowl with micromesh sanding pads to make it more transparent and to see if I could make the grain pop. I sanded it with 1500-2400 and took these photos.
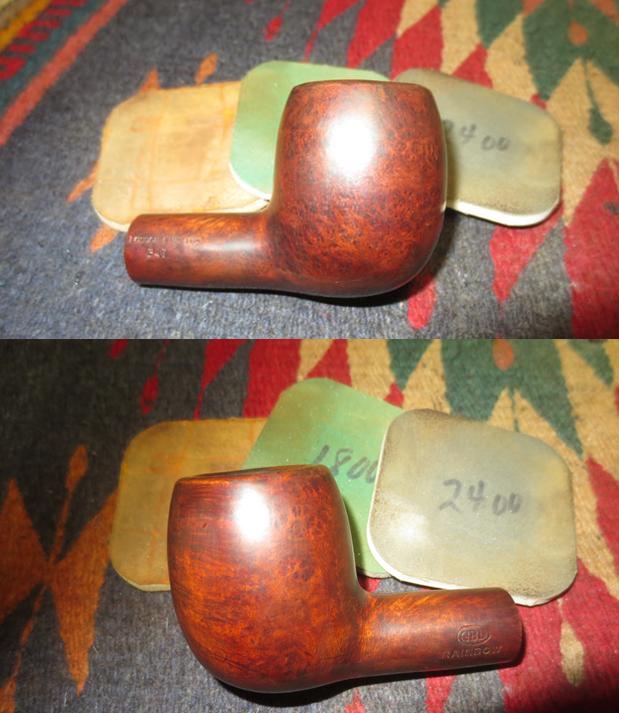
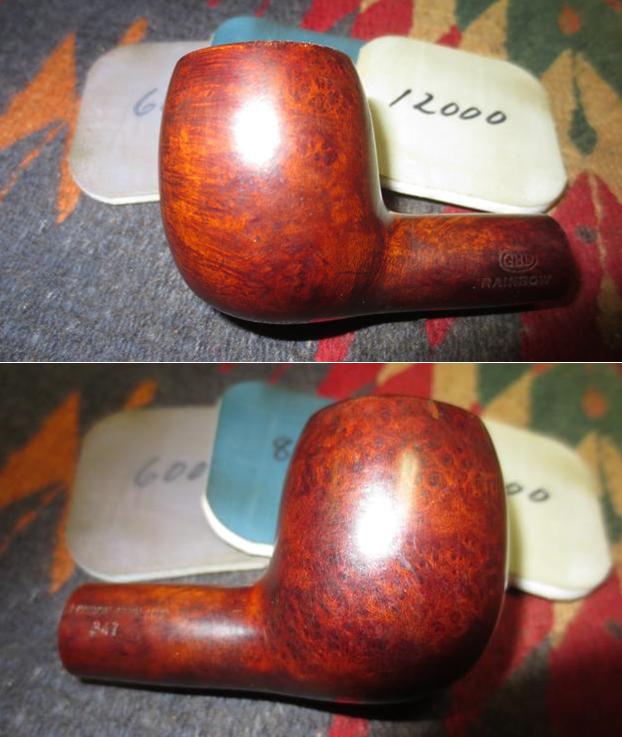
 It was getting there. I continued to sand it with 3200-12000 grit pads to polish it and give it a shine. The next photos tell the story.
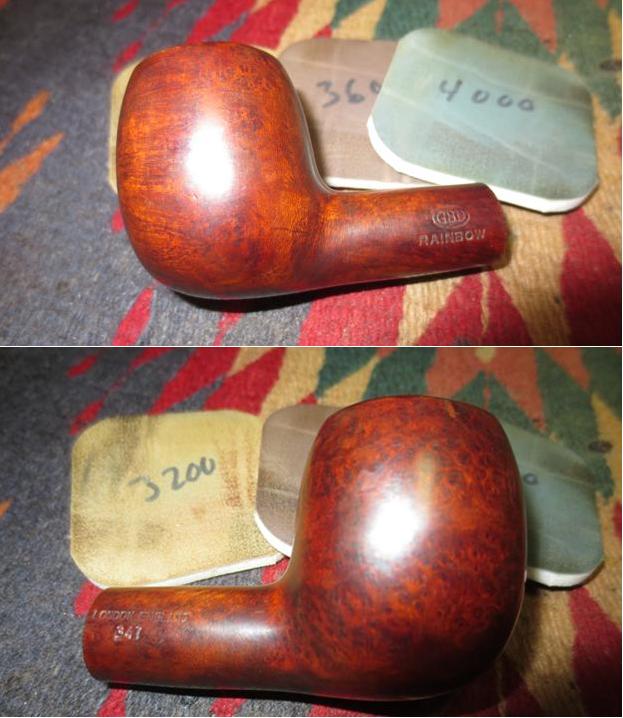

 The bowl was looking better and better. It is at this point that I made a decision that would inevitably cost me. That results of that decision turned out to be a mistake that made a lot more work for me! I put the stem on and decided to work on sanding out the inside of the bowl to remove the polishing compound and remnants of cake. Stupidly, I put the stem on the pipe to enjoy the look of the combination while I worked. Wrong thing to do! Understand, I was sitting at my work table, the top of which is a meter above the floor. I was carefully sanding the bowl interior so as not to damage the nice stain on the rim. Somehow, the pipe wiggled free from my hands and fell to the floor. If you could have watched it and my face at the same time you would have seen the look of horror on my face as it dropped to the floor. That horror changed to a moment of dread as I watched it bounce and heard a snap and watched as the bowl and stem went in opposite directions. I quietly picked up the bowl and stem. The tenon had snapped off in the mortise. It was a clean break. I don’t know about you but I find Lucite is much less forgiving than vulcanite. I have had pipes with vulcanite stem hit the floor with not breakage but not so with Lucite. It seems that the tenon inevitably snaps. Well this one certainly did.
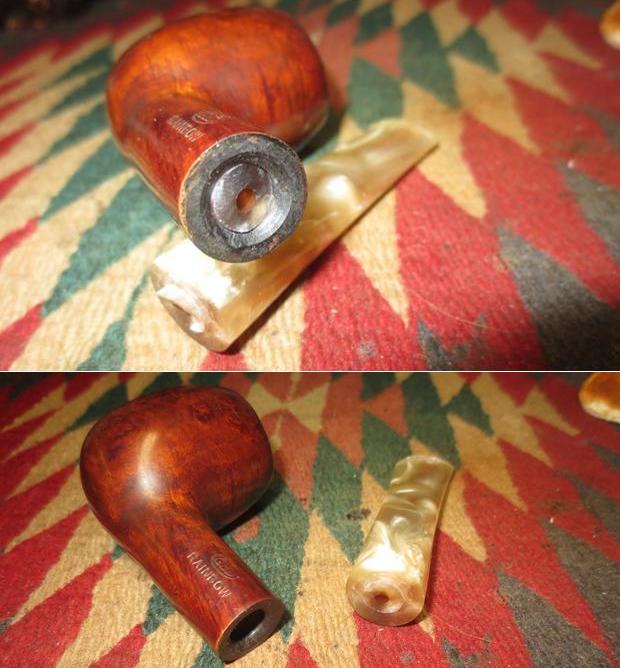 I sat and looked at it for a long time just sick at the thought that a pipe I was basically finished with was in pieces on my table. I know how to replace a tenon; that is not a problem. I just did not want to have to do that on this pipe. However, my own stupidity and carelessness had successfully sent me back to work on this pipe. Ahh well… just as well call it a night. Perhaps a good night’s sleep would give me better perspective on this new problem!
I woke up early this morning and dragged my feet about going back to work on the pipe. I think I was hoping at some level that it had not actually happened. I sipped my coffee as long as possible postponing the inevitable. I talked with my eldest daughter who is in Kathmandu for work. I took the dog for a walk around the yard… but finally I made to the basement and the work table. It was not a dream the tenonless stem and the bowl was sitting waiting for me.
I used the Dremel to remove the remnants of the old tenon that were on the face of the stem. I flattened it against the topping board. I went through my assortment of threaded Delrin tenons until I found one that was slightly larger than the broken one. I needed to reduce the diameter slightly to make it work but it would do!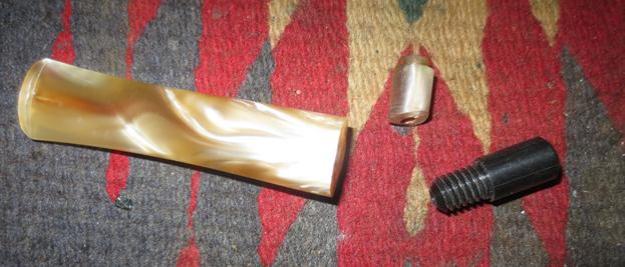 I set up my cordless drill and put in a bit slightly larger than the airway and turned the stem onto it by hand. The first photo below shows the bits I used as I repeated the process until the hole was large enough for me to use a tap to thread it to match the tenon. The second photo below shows the last drill bit I used the piece of tape on the bit is to show me how deep I needed to go with the bit to accommodate the new tenon threads.
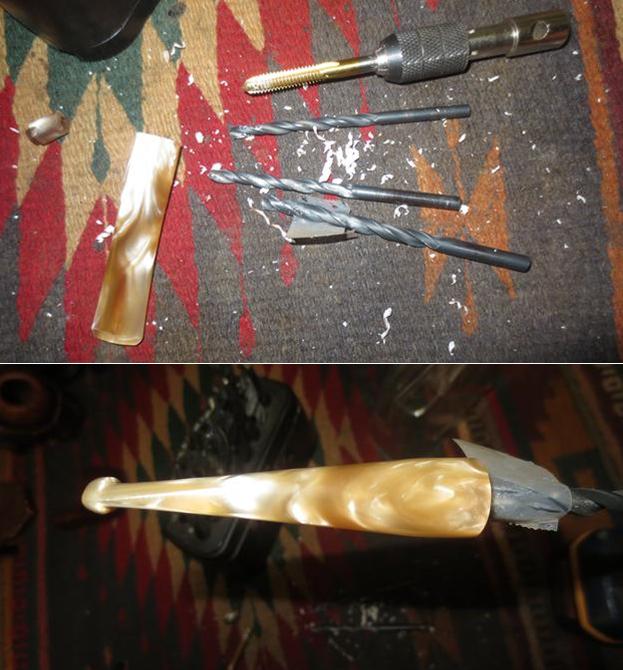 I roughened the tenon surface so I could grip it enough to turn it into the newly drilled stem end. It was a good fit. I painted the end with some epoxy and turned it back in place and set it aside to cure and harden.
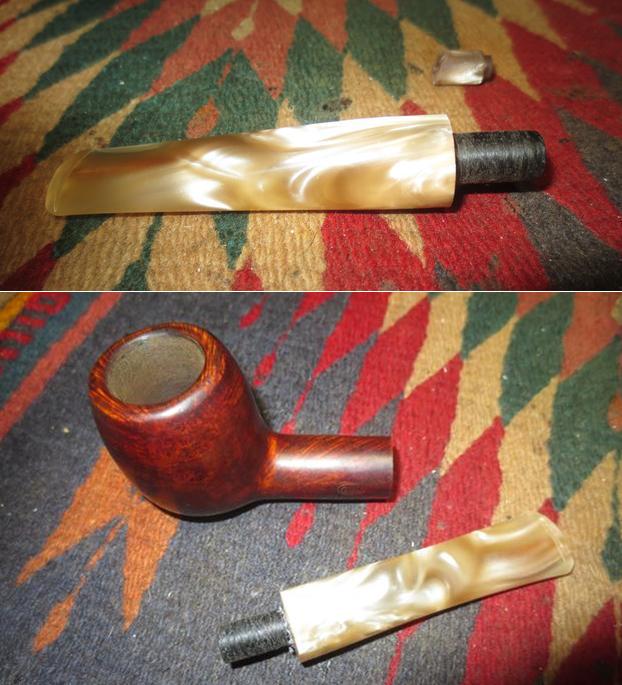 Once the tenon was set firmly in place I used the Dremel and sanding drum to reduce the diameter to a close fit. I finished the fitting with 180 and 220 grit sandpaper. I polished the new tenon with micromesh sanding pads. Now came the telling moment. Would the stem match up with the shank? Would the fit be tight against the shank end? Even though I have done this many times I always have the same questions. I placed the new tenon in the mortise and carefully pushed the stem against the shank end. It was a very close fit and all I would need to do was sand the left side and top a little bit to make the fit even better. I was relieved and happy. I sanded the stem with 220 grit sandpaper and cleaned up the fit. I was almost back to where I was last night before the pipe dropped and the tenon broke. I have to polish the stem once again but the stem fits well. I took photos of the pipe at this point to check it out. The newly fit stem and the stain on the pipe worked well together. Now to polish it all and get it finished.
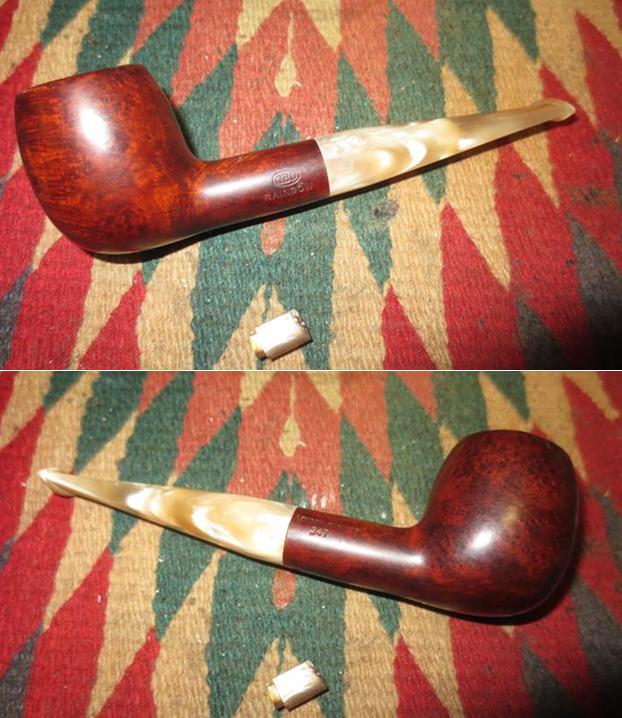
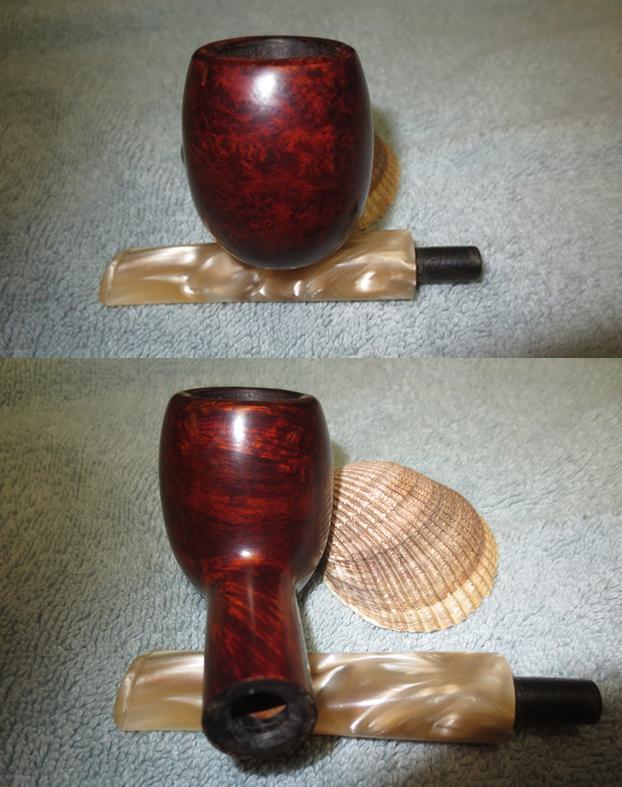
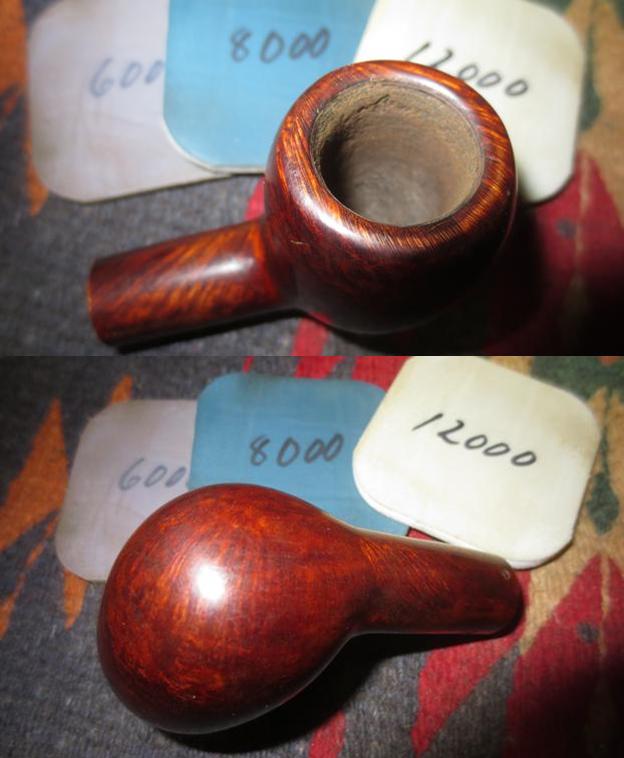
 I polished the bowl and stem with micromesh sanding pads – dry sanding with 1500-12000 grit pads to raise the shine.
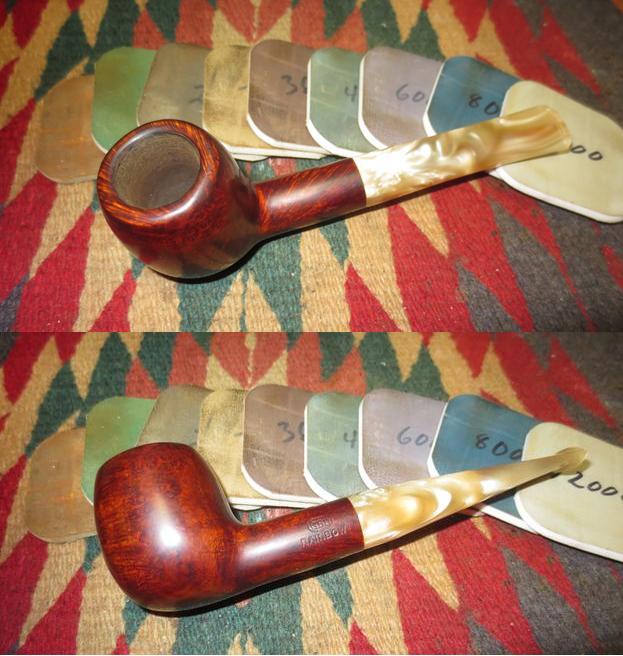 I buffed the pipe and stem with Blue Diamond on the buffing wheel. I gave it multiple coats of carnauba wax and buffed it with a clean buffing pad to raise the shine. I hand buffed it with a microfibre cloth to deepen that shine. The finished pipe is shown in the photos below. I am pretty happy with the way it turned out – even with the detour. The stain accomplished what I hope it would in making the grain pop. The grain stands out like it never did in the pipe when I received it. Now it is visible. It is a nice looking pipe that feels good in the hand. Thanks for looking.