Monthly Archives: August 2016

Revitalizing a Savinelli de luxe Milano 118KS


Blog by Steve Laug

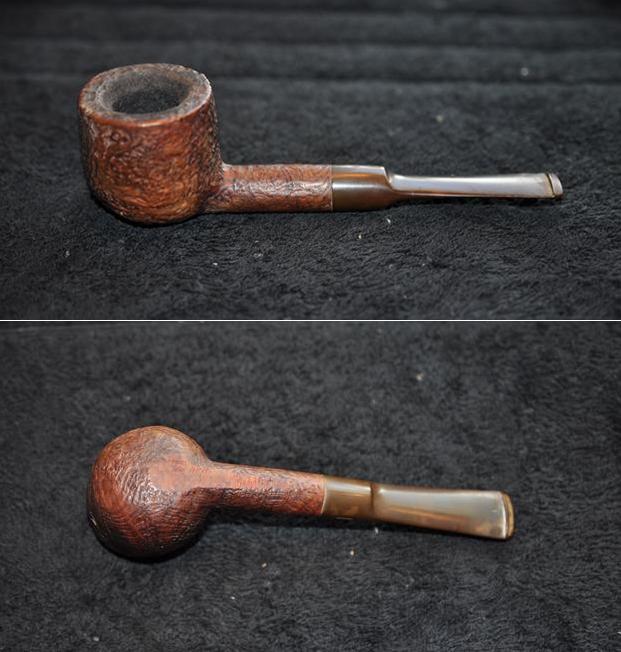
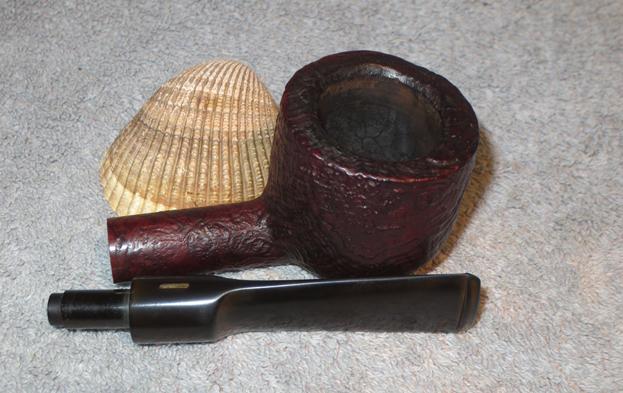
Sav1This pipe came to me from my brother. I am not sure if he found it in one of his antique shop forays between Idaho and Nebraska or on a recent trip to California or even if he found it on eBay. It really doesn’t matter in the long run where it came from. Though sometimes I wish that the pipes I cleaned up could talk and tell their stories. It was obviously a favourite of the pipeman who owned it. It was well smoked but not broken down. The pipe is stamped on the smooth underside of the bowl and the shank with clear and distinct markings. On the bottom of the bowl it reads Savinelli over de luxe over Milano. Next to that it was stamped with the Savinelli Shield logo and the shape number 118KS. Under that is stamped Italy. It is a standard Pot shaped pipe with a large bowl that is one inch in diameter.

The sandblast shown on the pipe in these photos is stunning. Even under the tar, oils and dirt the pipe is quite beautiful. The bowl had a fairly thick cake that had overflowed onto the rim and filled in the grooves. The dust and dirt had filled many of the grooves of the blast on the sides of the bowl and the shank. The stem was oxidized but was high quality vulcanite. In the photos below it is inserted upside down with the brass/gold bar that generally was on the left side of the saddle was turned to the right side. There was some tooth chatter on the top and bottom sides of the stem. On the top side of the stem (which was turned upside down) there was a deep tooth mark.

My brother took these three photos before he cleaned up the pipe. He reamed it with a PipNet reamer to rid the bowl of the cake and scrubbed the exterior with Murphy’s Oil Soap to remove the tars and grime. He cleaned out the airway in the shank, the mortise and the stem airway and removed all of the tar that had collected there.Sav2When the pipe arrived it was spotless. The sandblast really stood out with clarity as can be seen in the next set of four photos. The ring grain, the birdseye and even the flame grain showed but there was also an under grain that shown through that was beautiful as well.Sav3 Sav4I took some close up photos of the pipe. The first shows the stamping on the bottom of the bowl. You can see the clear markings on the pipe and how they stand out on the flat smooth bottom of the bowl and the shank. The second photo shows the rim. There was still light dust and grit in the grooves of the rim.Sav5I also took some close up photos of the stem. I turned it right side up and the tooth mark on the topside near the button is visible in the first photo below. The underside of the stem showed some tooth chatter. Both sides are oxidized.Sav6I used a brass bristle brush to clean out the debris from the grooves in the rim top. It did not take much but once finished the rim was not as dark. I ran a couple of cotton swabs and alcohol through the shank and it was very clean.Sav7I wiped the bowl down with acetone on a cotton pad to remove dust from the bowl surface in preparation for staining the bowl. I applied some dark brown stain thinned by 50% with isopropyl alcohol using a folded pipe cleaner. I flamed the stain and then repeated the process.Sav8I hand buffed the bowl with a microfibre cloth to raise a shine. The next four photos show the bowl after the initial hand buffing. The grain really stands out clearly in these photos.Sav9 Sav10I sanded out the bite marks with 220 grit sandpaper. Thankfully they were not as deep as I thought and were easily removed. I sanded the oxidation as well and gave the stem a general workover.Sav11I polished the stem with micromesh sanding pads – wet sanding it with 1500-2400 grit pads and dry sanding with 3200-12000 grit pads. I rubbed the stem down with Obsidian Oil after each set of three pads. I gave the stem a final rubdown with the oil after sanding with the 12000 grit pad and set it aside to dry.Sav12 Sav13 Sav14

I buffed the bowl and stem with Blue Diamond on the buffing wheel to polish it. I used a light touch on the bowl so as not to get the polish stuck in the grooves of the sandblast. The stem took some work to polish off some of the stubborn oxidation at the shank stem union. I polished the stem with multiple coats of carnauba wax a buffed it with a clean buffing pad. I hand waxed the bowl with Conservator’s Wax and buffed the bowl with a clean buffing pad. I hand buffed the pipe and stem with a microfibre cloth to deepen the shine. The finished pipe is shown in the photos that follow. It is a great looking pipe with an amazing sandblast finish that is worth taking the time to look at. Thanks for looking.Sav15 Sav16 Sav17 Sav18 Sav19 Sav20 Sav21

“The fix was right in front of me” (Restomoding a Falcon)


Mike that is well done. Creative solution on the tubing. Thought I would share it with the readers of rebornpipes. Great work.

MikesPipes

image

A couple months ago I bought a cheap little Falcon pipe. (For anyone who may not know what the falcon pipe is, in the 1930’s a man named Kenly Bugg invented a way to create a cooler, drier smoke using a removable bowl and aluminum.) Twelve dollars is what I pay for any pipe at this antique booth, and I’ve always wanted a falcon ever since I binge read all of RebornPipes and friends. I walked out with a smile and what I didn’t know was going to be a pain in my side.

The pipe was decent, banged up, dulled, minor filiform corrosion, and an odd smell… A smell I recognized from working in fast food, the dreaded “I’ll take one of everything herb” after soaking in alchol for a couple hours, I reamed the bowl and continued with a light topping. The internals were decent, until I snapped…

View original post 268 more words

From Block to Pipe – the birth of a Morta Apple Hand Crafted by Ed James


Blog by Steve Laug

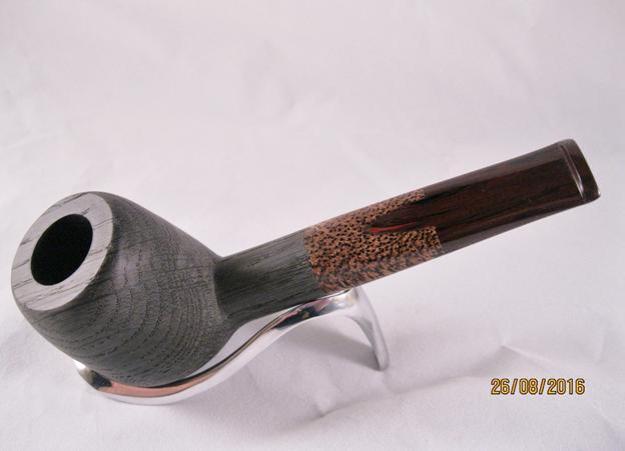
Ed James, Ozark Southpaw posted a Morta pipe that he had made, a beautiful Dublin with a Cumberland stem and an interesting addition of a piece of black palm that was fitted onto the stem. It was an amazing looking pipe and certainly one I would have loved to own. I wrote to Ed and asked about it but it was sold. We went back and forth on email and finally I decided to commission Ed to make a pipe for me. I wanted the same work on the stem – Cumberland and Black Palm. He was getting some Morta from Croatia and he said it was great stuff so we decided to wait until he had it in hand. We discussed the shape of the pipe and I decided to go with an apple – one of my favourite shapes. I have yet to have one of Ed’s pipes and I have never had a Morta before so this was several firsts in one pipe. I was looking forward to seeing what he was going to make. I asked if he would mind sending me some photos along the way as he made the pipe. He said he would gladly do so.

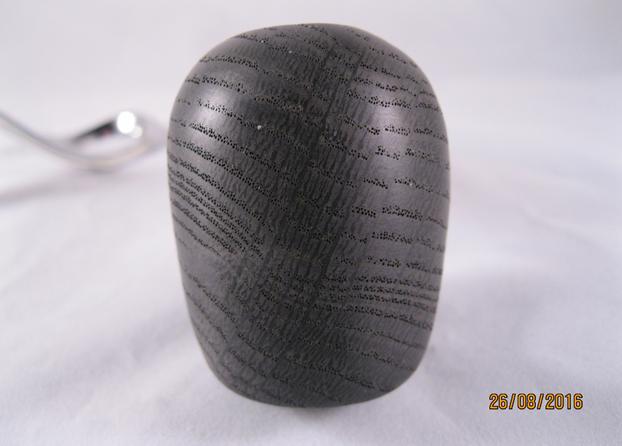
Here is the first set of photos Ed sent me. The first shows his sketch of the pipe or the pattern of how he laid it out on the block of Morta. From the pictures that follow it is clear that it was stuck to the Morta block and when he cut away the pieces noted with the Xs there is paper stuck to them in the third photo below.  Black1The next photo shows the drilled block of Morta, the Delrin tenon and the Cumberland rod stock with the Black Palm overlay on the rod. I like the looks of the parts of the pipe so far. That block of Morta looks really clean and has some interesting grain on it. The speckled Black Palm is one of my favourite exotic woods and I love the look of it with Cumberland.Black2Ed cut away the excess from the block leaving the rough form of the apple in the midst of the slices of Morta. The bowl shape is present and the shank is emerging from the bowl.Black3I believe that Ed began to turn the bowl on the lathe to round out the top half of the pipe and the shank. The grain on the Morta is really showing through.Black4He removed the rest of the excess material on the remainder of the shank and the bottom of the bowl. He also began to shape the stem. The black palm looks great against the Cumberland and the Morta. Ed asked if I wanted to leave it natural or wanted a red stain on the Palm. My choice was to leave it natural. The cut away portion of the palm that flows into the Cumberland is also a nice touch. The arch of Cumberland extending into the Palm will stand out nicely once the stem is finished.Black5Ed sent a close up of the bowl to give me an idea of the shape and the grain. It is looking really good at this point. The speckled Black Palm looks really good with the Morta. Black6He also flattened the bottom of the bowl so the pipe would stand on its own on the desk.Black7He did a lot more sanding and shaping of the bowl and the stem. The next photos show the pipe polished and ready for its final finish. Ed wrote and said he want to do some polishing on the Morta. I can’t wait to see what it looks like once it is done. The pipe shown in the photos below is stunning to me. The Black Palm and the Cumberland work really well together. The shine he achieved on both is amazing. Thanks Ed.Black8 Black9 Black10 Black11 Black12Ed wrote me on the weekend and said that the pipe just needed some polishing. He hand rubbed the pipe with some Halcyon II Wax. He applies it with a finger and rub it in well, lets it dry for 5-10 minutes then buff with a clean wheel — then repeats the process. He has found that the Halcyon Wax doesn’t build up in the pores of the Morta like carnauba does and looks better to his eye. He said, like I have often discovered when buffing a pipe that he had to do a bit more sanding as he found some scratches that he didn’t get out on the bowl. The polished and finished pipe is shown in the photos below. To me it is a beauty and I can’t wait to get it here and see it in person. Thanks Ed for making a beautiful looking pipe. You got my attention with this first Morta that I have purchased.Black13 Black14 Black15 Black16

ADDENDUM:

Ed just sent a photo of a tamper that he made from the pieces of Black Palm and Morta. It is a beauty. Thanks for the tamper Ed.14138235_10208671525778286_2489666687520545610_o

A Reborn KBB Yello-Bole 2329 Billiard


Blog by Steve Laug

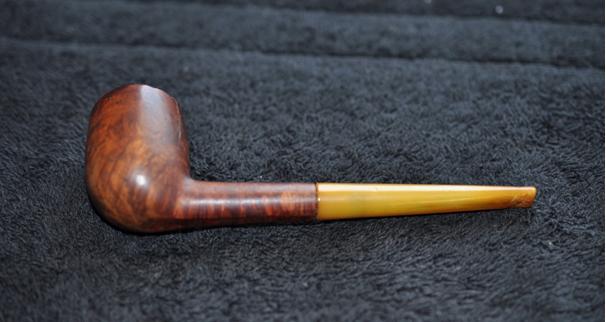
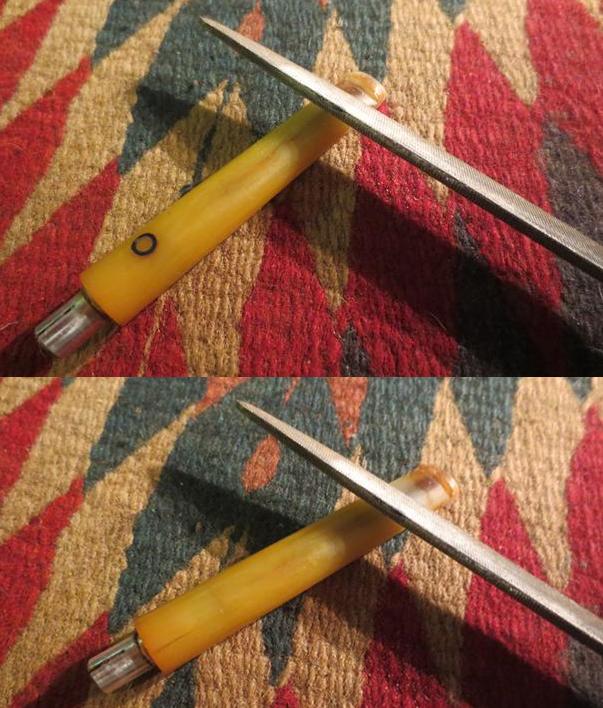
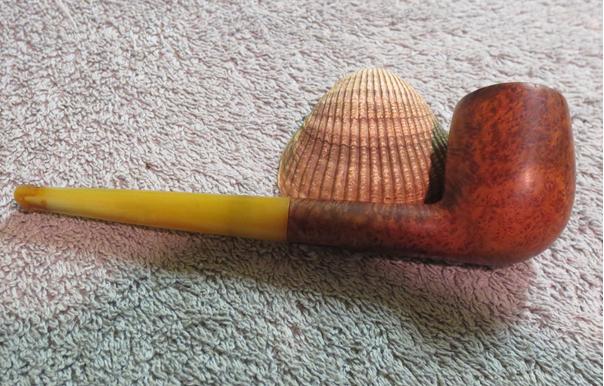
I really like older KBB Yello-Bole pipes. The initial look of this one as it is seen in the first two photos confirms that. There is something about the grain, the briar that is used and the natural patina that comes with years of use that draw me to them. The yellow stem with the inset circle is attractive as well. The Yello-Bole spade stinger that extends into the bowl bottom does not restrict the draw. I had hopes that this one would be in decent shape when my brother sent me the photos below. He had mentioned that the rim was in rough shape and the stem had a lot of bite and tooth marks but the photos did not clearly show that to me.Bowl Bowl1He did his usual stellar job in cleaning up the bowl and stem. The briar and the internals were clean when it arrived. Only then did I see the extent of the rim damage to this one. If you look carefully at the photos you can see how rough the rim top and sides are. You can also see the deep tooth marks on the yellow stem. The stamping on the pipe read KBB in the usual cloverleaf on the left side of the shank with Yello-Bole next to that. The shape number 2329 was on the right side of the shank. All stamping was faint but legible with a lens.Bowl2 Bowl3I took the stem off the bowl and found that the stinger was stuck in the tenon. On these older Yello-Boles the stinger is often threaded rather than pressure fit. I heated the stinger with a lighter and soon I was able to unscrew it from the tenon using some needle nose pliers.Bowl4I took close up photos of the rim and the tooth marks on both sides of the stem. The first photo below shows the extensive damage to the top of the rim. It looked as if the pipe had been used as a hammer. The rough spot on the front of the bowl went down quite far down the outside edge of the bowl. On the back right side of the bowl there was also a deep nick down the side of the bowl. The bowl would need to be topped but the depth of the gouges made it necessary to think of other options along with topping.Bowl5The top and bottom sides of the stem next to the button were imposing. The stem had been deeply gnawed on by the previous pipe smoker. The dents were deep and extensive across both sides of the stem almost obliterating the button from view.Bowl6This was one of those hard ones. The stamping is faint and the amount of work necessary to bring it back to life was questionable. But I decided I liked the look of it enough to go for it. I topped the bowl on the topping board to smooth out the top surface of the rim. This still left a lot of work to do on the gouges down the front and back sides of the bowl. I pressed briar dust into the gouges on the side and top of the bowl and put some clear super glue on top of the briar dust. I put more briar dust on top of the glue to fill in the gouges.Bowl7 Bowl8I filled in the deep tooth marks on both sides of the stem and set it on a small wooden lid to dry. I knew that in sanding the stem after the repairs I would lose some of the rich golden colour but the stem would actually be very usable.Bowl10Once the repair dry I used a needle file to recut the button and flatten the repairs to the surface of the stem.Bowl11I cleaned out the airway in the stem and in the shank with pipe cleaners, cotton swabs and alcohol. You can also see the lightning of the yellow stem at the repair.Bowl12I polished the stem with micromesh sanding pads – wet sanding with 1500-2400 grit pads and dry sanding with 3200-12000 grit pads. I rubbed the stem down with Obsidian Oil after each set of three pads. With the final rub down with oil I set the stem aside to dry.Bowl13 Bowl14 Bowl15I wiped the bowl down with acetone on cotton pads to clean off the remnants of the finish. There was still some finish and varnish on the underside of the shank that needed to be removed. I was careful to not wash off the repairs as the acetone will dissolve the super glue patches.Bowl16Interestingly the bottom of the shank is stamped Algerian Briar. There appears to be a crack or repair on the underside of the shank but it is not it is merely a large scratch that I was able to sand out.Bowl17I polished the briar bowl with micromesh sanding pads – wet sanding it with 1500-2400 and dry sanding it with 3200-12000. Each successive grit of micromesh pads raised the level of shine on the bowl.Bowl18 Bowl19After polishing it with the micromesh pads I took some photos to show the state of the bowl.Bowl20 Bowl21I touched up the stain with a medium brown stain pen on the repaired areas on the rim to blend them into the surface of the briar. I buffed the pipe and stem with Blue Diamond on the buffing wheel and then gave the pipe multiple coats of carnauba wax. I buffed it with a clean buffing pad and then buffed it by hand with a microfibre cloth to deepen the shine. The finished pipe is shown in the photos below. I chose to leave the darkened spot on the bottom of the bowl. I sanded it and found that it was more of stain than a burn mark. The wood is solid in that spot and there is no sign of burn through inside the bowl. Thanks for looking.Bowl22 Bowl23 Bowl24 Bowl25 Bowl26 Bowl27 Bowl28 Bowl29

Refreshing a Karl Erik Grade 2 Freehand Sitter


Charles made this one look really good – the art of restoration at work! Well done.

My apologies on the wait for this post. I had hoped to get it done before our family vacation but there you have it. This one is for all you Danish Freehand pipe fans. The Danes invented Freehand pipes and have proven to be darned good at it. This example is a Karl Erik pipe, stamped “Karl Erik” over “Handmade in Denmark” over “2”.

The pipe arrived in good estate condition. There was a decent cake built up in the chamber and a light crust of lava around the rear of the rim, spreading into the plateau top. Underneath it all, though, was superb grain that shot straight up both the bowl and shank, a testament to the carver’s expert reading of the wood. The stem was a bit grimy, with a few tooth marks and light oxidation, and it is missing the “KE” logo. This omission and a loose…

View original post 1,342 more words

An Old La Meridienne (Deposee) Pocket Pipe


Blog by Steve Laug

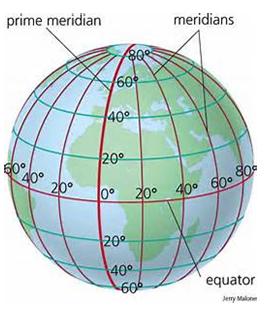
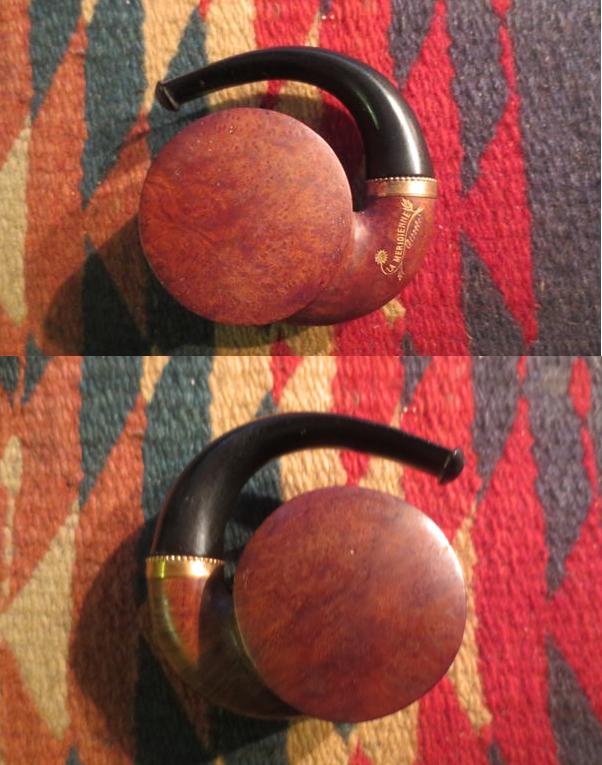
FoldOver the years I have restored many folding pocket pipes where the stem folded over the top of the bowl. These have typically been Italian made and stamped with various names such as Imported Briar or even Rolex. They all looked the same and all were relatively flat, oval bowled pipes and bowls. They were thinned walled and most of the time they were unsmoked. I have given away quite a few of them over time though I think I may have one or two unused ones in my cabinet today. This one is very different. It is oddly shaped – almost perfectly round with an almost ninety degree bent shank. The sides of the bowl are actually thicker than any of the others that I have seen. The bowl oval and it appears to be unsmoked. The briar is quite nice with a combination of birdseye and cross grain around the sides and the shank. There is a brass band with a scalloped edge around the top of the rim. It is more or less a cap on the end of the shank. The shank is stamped La Merdienne (Deposee) on the left side of the shank. It is a French made pipe. The name means The Meridian (Registered). The Meridian is defined as (1): a great circle on the surface of the earth passing through the poles (2): the half of such a circle included between the poles. It is also defined as a representation of such a circle or half circle numbered for longitude on a map or globe. In this case the poles are represented by the bowl running north and south on the circle of the bowl. The next two photos are ones that my brother took when it arrived in Idaho Falls.Fold1The next photo my brother sent me shows the pipe from the top. You can see that it is very clean. The bowl is clean and in person looks unsmoked. With the stem removed it is also clean. There is no staining from smoke or tobacco in the pipe. The stem is clean as well with no tooth marks or tooth chatter.Fold2The grain on the bowl is really quite stunning on the round sides and the edges of the bowl. The curved shank is perfectly set off by the gold band and the scalloped edge that sits against the stem at the shank stem junction. The first set of four photos show what the pipe looked like when it arrived in Vancouver.Fold3 Fold4I folded the stem over the bowl and took some photos of the pipe ready for the pocket.Fold5I took a close up photo of the bowl top and interior to show what the pipe looked like when I got it. The rim and bowl were in excellent shape.Fold6I took a close up photo of the stamping on the shank. It is filled with gold leaf. There is a stock of a flower with the flower and two leaves that weaves between the curves of La Meridienne and separates it from (Deposee).Fold7I sanded the bowl with 1500-12000 grit micromesh sanding pads to polish out some of the scratches and marks on the sides of the bowl.Fold8 Fold9 Fold10 Fold11 Fold12With the bowl polish and smooth I worked on the stem with micromesh sanding pads – wet sanding it with 1500-2400 grit pads and dry sanding it with 3200-12000 grit pads. I rubbed the stem down with Obsidian Oil after each set of three pads. After sanding the 12000 grit pad I set the stem aside to dry.Fold14 Fold15 Fold16I buffed the pipe with Blue Diamond on the buffing wheel and gave it multiple coats of carnauba wax. I buffed it with a clean buffing pad to raise the shine. I buffed it by hand with a microfibre cloth to deepen the shine. The finished pipe is shown in the photos below. It is ready for many more years of service.Fold17 Fold18 Fold19 Fold20 Fold21 Fold22 Fold23 Fold24


I love the shape of this Comoy’s Regent’s Park London Made Canted Volcano


Blog by Steve Laug

This pipe takes advantage of the grain to the maximum. The shape has flame, mixed and stunning birdseye on the sides, top and bottom of both the bowl and the shank. This is another of the pipes that my brother Jeff found. The stamping is faint but readable with a lens. It is stamped on top of the shank with the words Regent’s Park over London Made. On the underside of the shank stamped diagonally from front to back it reads Made in England. From the photos that Jeff set me the pipe was in decent shape. The finish was spotty and dirty. The rim was clean and undamaged with a light and spotty lava coat. Comoy1The stem was lightly oxidized and there was a deep and large tooth mark on the top side near the button. I have learned that there is usually a match to that on the underside of the stem. The canted volcano shape is very nice. In the photo below it appears that there were some small pin prick fills on the back side of the bowl just above the shank.Comoy2From what I can find online the pipe is made by Comoy’s. They made the Hyde Park brand and it appears they also made the Regent’s Park brand – both which are Comoy’s seconds and are named after London Parks. I found this Comoy’s Shape Chart on-line which shows the pipe as a Modern 625. I have circled it in red – it is shown on the bottom of the right column, last pipe.Comoy3As usual now, my brother did a stellar job cleaning up the pipe before he sent it to me. He reamed it and scrubbed the exterior with Murphy’s Oil Soap so the finish was very clean. He cleaned out the internals as well. The pipe was ready for me to work on the finish and stem repairs when I received it. The next four photos show what the pipe looked like when it arrived to my work table.Comoy4 Comoy5I took a close up photo of the rim to show the slight damage – almost cut marks on the top of the rim surface. The inner and outer edge of the rim is fairly undamaged though so it will not take much to clean up this rim. I also took close up photos of the stem to show the large bite/tooth marks on the top and bottom sides near the button.Comoy6 Comoy7I cleaned up the tooth marks with sandpaper, a dental pick and alcohol. I filled in the deep dents with black super glue and let it cure. I forgot to take photos of the repairs before I sanded them out. Once the glue had cured I sanded both sides of the stem with 220 grit sandpaper to smooth out the repair to match the surface of the rest of the stem.Comoy8I also filled the pin holes in the back side of the bowl with clear super glue and briar dust. Again I forgot to take a photo of the glue and dust mixture. Once it dried I sanded the bowl with 220 grit sandpaper and blended the repairs into the surface of the briar. The surface was smooth to touch .Comoy9I sanded the slash marks on the rim with 220 grit sandpaper to minimize them. It did not take too much sanding to remove them. I also sanded the inner beveled edge of the rim to clean it up and remove the darkening.Comoy10I sanded the bowl and rim with a medium and a fine grit sanding block. I worked to remove the scratching left behind by the 220 grit sandpaper. I carefully avoided the areas on the shank that held the already faint stamping.Comoy11 Comoy12I sanded the stem with the sanding block as well.Comoy13I wet sanded the stem with 1500-2400 grit micromesh sanding pads and rubbed it down with Obsidian Oil. I dry sanded it with 3200-4000 grit pads and gave it another coat of oil. I finished sanding it with 6000-12000 grit pads, gave it a final coat of Obsidian Oil and set it aside to dry.Comoy14There were some scratches on the top of the stem. I would need to work on them some more at this point.Comoy14a Comoy14bOnce I buffed the stem with Blue Diamond the scratches would be blended into the stem surface. I gave the bowl a coat of Danish Oil and Cherry Stain to highlight the red of the briar. I set it aside to dry for about twenty minutes.Comoy15I wiped the bowl off with a soft cloth and hand buffed it lightly to get a clear picture of the finish and the grain on the bowl.Comoy16 Comoy17I polished the bowl and stem with Blue Diamond on the buffing wheel. I buffed out the scratches in the stem and the briar. I gave the bowl and stem multiple coats of carnauba wax to protect it. I buffed it with a clean buffing wheel to raise the shine. I hand buffed the pipe with a microfibre cloth to deepen the shine. The finished pipe is shown in the photos below.Comoy19 Comoy20 Comoy21 Comoy22 Comoy23 Comoy24 Comoy25

A Cased Bakelite Manhattan with a Lockrite Stem


Blog by Steve Laug

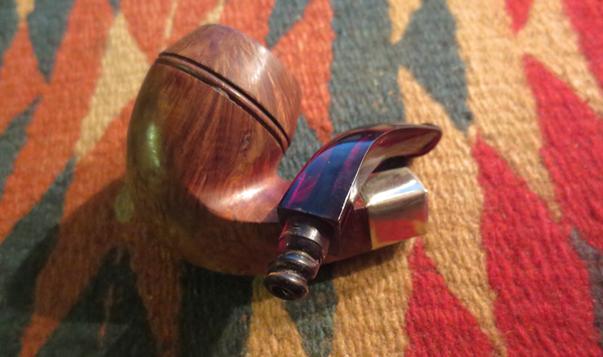
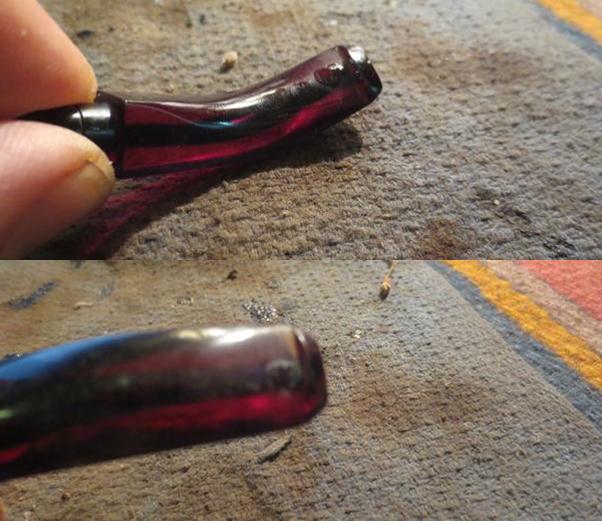
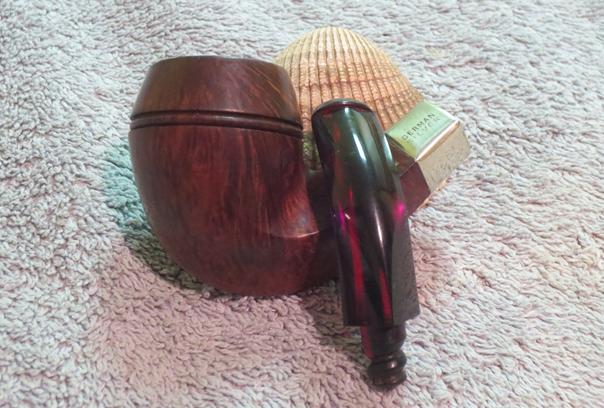
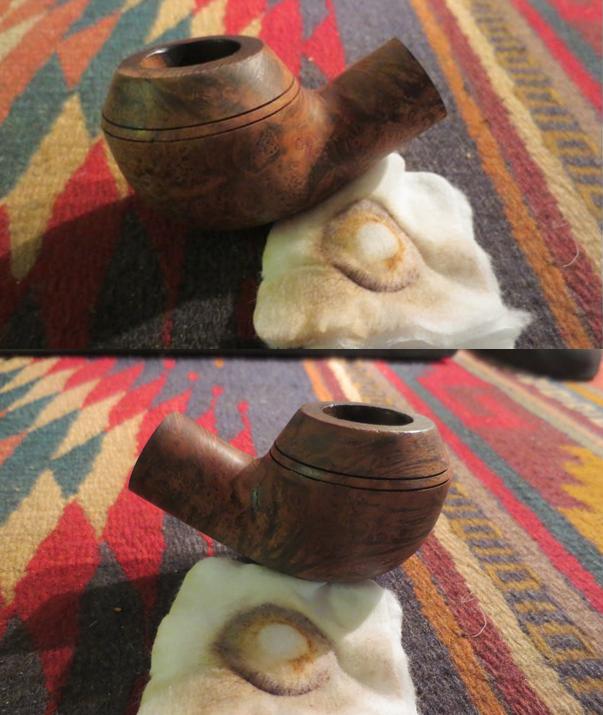
I am always on the lookout for older CPF or WDC cased pipes. I bid on them when I get the chance and I used to win many more of them than I do now. They seem to have not only become more popular than they used to be but are also commanding higher prices. I was showing my brother some of them and asked him to keep an eye for them as well. He came across this little cased pipe. It looks like both the CPF and the WDC pipes and probably comes from the same era. The case has a label that reads Bakelite on it and it sits in the lid of the case over the stem. The pipe itself is stamped BAKELITE over MANHATTAN on the left side of the shank and is filled with a gold foil or paint. The right side of the stem also has a gold foil stamp that reads LOCKRITE. The band on the shank is stamped GERMAN SILVER.Bake1The pipe appeared to be barely used. There was some darkening on the rim and some light cake on the top part of the bowl. The bottom of the bowl was like new. The finish was dirty and the varnish coat had some wear and tear. The gold leaf stamping on the shank was worn on the second line on the left side. The German Silver band was lightly tarnished and had some scratches. The Bakelite stem had deep tooth marks on the top and underside of the stem at the button. The Lockrite stamping on the right side of the shank referred to the newly designed tenon system that took care of the perpetual over clocking that occurred with a bone tenon.Bake2My brother Jeff scrubbed the surface of bowl being careful around the gold stamping on the shank. He cleaned out the bowl and the mortise areas and the airway in the stem. When he sent it to me it was very clean. I took photos of the pipe when it arrived to my work table. The first two photos show the case and the first view of the pipe when I opened it.Bake3I lifted it from the case and took a photo of the pipe looking down at it from the top. The rim looks excellent from this view.Bake4The next four photos show the pipe apart from the case. The finish is clean but the twin rings around the bowl cap are dirty. The silver is lightly tarnished and the gold stamping is light on the left and the right sides. You can see the tooth mark on the stem in the last photo of the underside of the pipe and stem.Bake5 Bake6I took a close up photos of the rim and the stem to show the state of both. The rim looked very good though there was some scratching. The stem had deep tooth marks on both sides though it was hard to capture them with the deep red of the Bakelite stem.Bake7 Bake8I took a photo of the newly designed Lockrite tenon on this pipe. It is extremely well designed and worked well to keep the stem aligned with the shank.Bake9The next two photos show the stamping on the shank. The left side reads BAKELITE over MANHATTAN as mentioned above and the right side reads LOCKRITE.Bake10I wiped down the bowl and shank with acetone and cotton pads to remove the remnants of varnish. I was careful to not damage the gold stamping.Bake11 Bake12I used the dental pick to clean out the tooth marks and wiped the stem down with an alcohol dampened cotton pad. I filled the tooth marks with clear super glue.Bake13Once the glue dried I sanded the surface of the repairs with 220 grit sandpaper to smooth out the repairs to match the surface of the Bakelite stem.Bake14With the tooth marks repaired and smoothed out it was time to polish the stem with micromesh sanding pads. I wet sanded the stem with 1500-2400 grit sanding pads and rubbed it down with Obsidian Oil. I dry sanded with 3200-4000 grit pads and gave it another coat of oil. I finished sanding it with 6000-12000 grit pads and gave it a final coat of Obsidian Oil. I set the stem aside to dry.Bake15 Bake16 Bake17I stained the bowl with a Danish Oil and Cherry stain. I let it dry for about 20 minutes before rubbing the bowl down with a soft cloth.Bake18After rubbing it down with a soft cloth I took the following photos of the bowl. The grain on this one is also very pretty. Some of these older pipes were made of really nice briar.Bake19 Bake20I waxed the bowl twice with Conservator’s Wax and hand buffed it once it had dried. I polished the German Silver band with 6000-12000 grit micromesh sanding pads and also with a jeweler’s silver polishing cloth.Bake21I lightly buffed the bowl and stem with Blue Diamond on the wheel. You have to be careful buffing the Bakelite as the heat of the buffer will melt the stem and make more work for you. I gave the bowl and stem several coats of carnauba wax and lightly buffed it with a clean buffing pad to raise the shine. I hand buffed it with a microfibre cloth to deepen the shine. The finished pipe is shown in the photos below. It is really a beauty. Thanks for looking.Bake22 Bake23 Bake24 Bake25 Bake26 Bake27 Bake28

An Old Timer Horn Stem, Cherrywood Shank and Briar Bowl BBK Bosshardt Luzern


Blog by Steve Laug

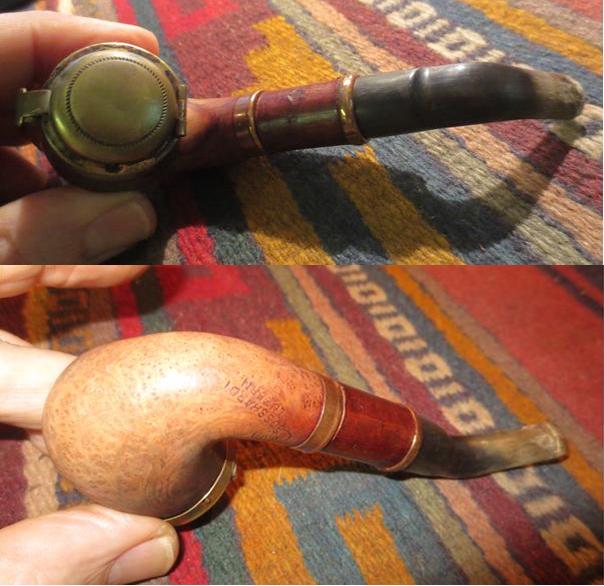
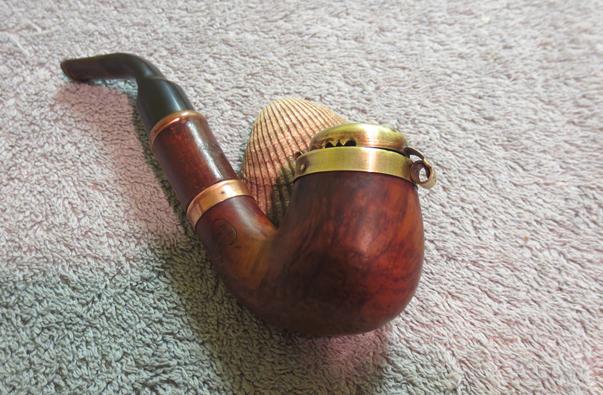
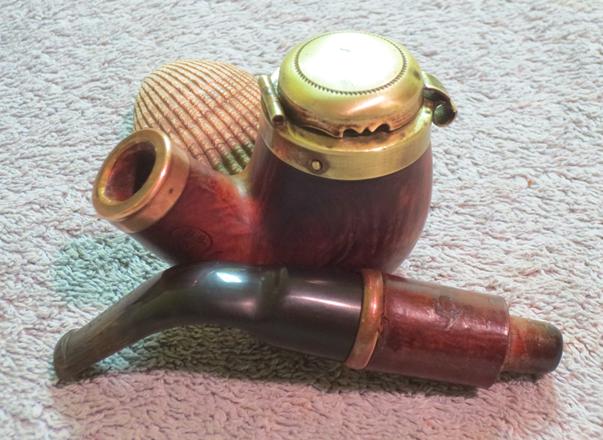
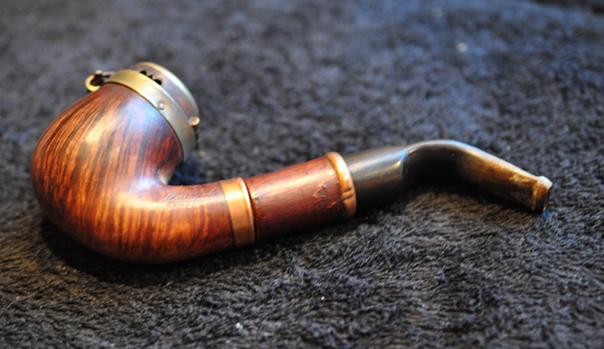
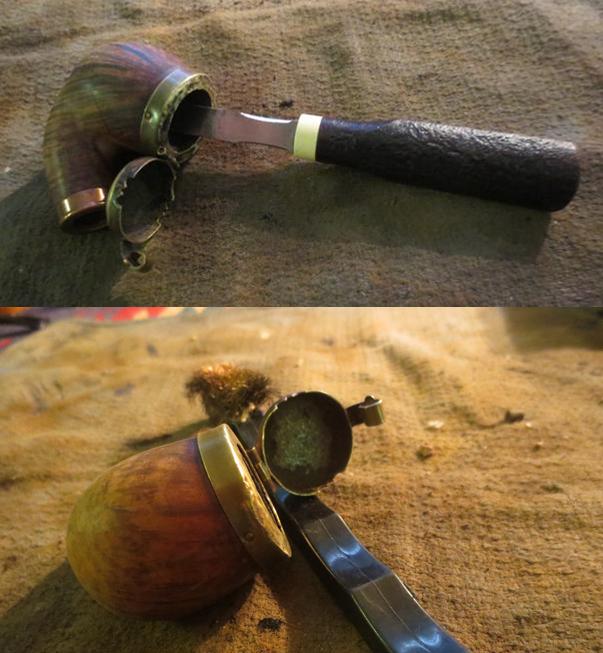
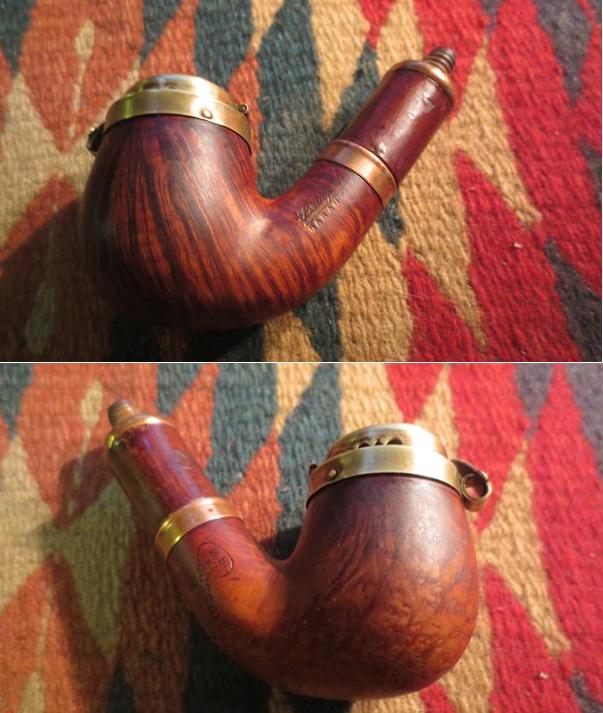
This old pipe came to me from my brother. He picks up some interesting pipes in his hunts and eBay purchases and this is a unique one. The bowl is a really nice piece of briar with some amazing grain – a mix of flame and birdseye on the bowl. The rim cap and bowl cap are brass coloured. The hinge on the back of the rim connects the rim cap and the bowl cap. There is a curved spring piece of brass on the front that fits over a ridge on the front of the rim. The end of the briar shank has a brass shank cap/ferrule. It was tarnished to almost copper coloured brass. The shank extension is cherry wood and is pressure fit into the mortise. The top of the cherry wood extension has a brass ring that is pressure fit on the end of the extension. The stem is horn. The end of the cherry wood has a threaded end that the horn stem screws onto. The stem had some tooth marks and chatter on the top and underside of the stem next to the button. The shank of the pipe is stamped on the left side with the words Bruyere over Garantee. On the right side of the shank it is stamped BBK in an oval over Bosshardt over Luzern.BBK1Through the years I have cleaned up several BBK pipes. The last one was a rusticated hunter pipe with a windcap. Prior to that, I restored a square shanked panel billiard. I have written about both them on rebornpipes at the following links: https://rebornpipes.com/2012/09/21/refurb-on-a-bbk-panel-billiard-swiss-made/, https://rebornpipes.com/2014/08/31/restoring-an-old-bbk-hunter-pipe/.
When I worked on the BBK Hunter I researched the brand. The BBK was a Swiss made brand as the shanks of all the pipes I had cleaned up and restored were stamped that way. Pipedia was my primary reference in that blog. Here is the link: http://pipedia.org/index.php?title=Bru-Bu. I have included the material from the previous blog below.

“Josef Brunner, oldest son of the farmer Konstantin Brunner from the hamlet Nieder-Huggerwald, belonging to the community of Kleinlützel (Canton Solothurn), was sent in 1871 to a pipe turner in Winkel/Alsace for his apprenticeship. As was usual at that time, Brunner wandered as a journeyman after ending the apprenticeship. Eventually, he went to Saint-Claude, France which was then the world’s stronghold of briar pipe manufacturing. There, Brunner was able to increase and deepen his knowledge in the field of industrial pipe making. When he returned home in 1878, he installed a small turner’s workshop in the house of his father. With the energetic support of his two younger brothers, he began to produce tobacco pipes of his own calculation, taking them to the markets in the surrounding area. In 1893, Bernhard Brunner’s wife inherited the mill in Kleinlützel. At this point, the pipe fabrication was transferred to an annex belonging to the mill. Now it was possible to drive the machines by water power – an important relief to the workers and a considerable innovation compared to the previous pedal-driven system.”

“The business developed so well after the turn of the century even when a lack of workers in Kleinlützel occurred. The problem was solved by founding a subsidiary company in the small nearby town Laufen an der Birs in the Canton of Bern. This plant didn’t exist too long. The disastrous economic crisis in the 1920’s and early 1930’s forced the Brunner family to restrict the fabrication of pipes dramatically. In addition the big French pipe factories in Saint-Claude – although suffering from the same circumstances – flooded the Swiss market with pipes at prices that couldn’t be matched by Swiss producers. By 1931 approximately 150 of 180 Brunner employees had been sacked – the rest remained in Kleinlützel, where the cheap electric energy ensured a meager survival.”

“In 1932, Mr. Buhofer joined the Brunner family. The company was named Brunner-Buhofer-Kompagnie, and, shortly thereafter, Bru-Bu. Buhofer had made his fortune in the United States but, homesick, returned to Switzerland to search for a new challenge. Bru-Bu’s fabrication program was expanded with many handcrafted wooden art articles: carved family coats of arms, bread plates, fruit scarves, and – more and more – souvenir articles for the expanding Swiss tourism industry. Pipes remained in the program continuously, but the offerings changed from traditional Swiss pipes to the more standard European shaped pipes. Bru Bu is widely known as BBK.”

The last paragraph of the Pipedia article linked BBK pipes to Former Nielsen. I have two of Former’s pipes so this stood out to me. “At some point in the late 1970’s, Bru-Bu went out of business. Some of the Brunners, as far as known, continued as timber traders. But in 1986 new life filled the old Bru-Bu pipe workshop, when Dr. Horst Wiethüchter and “Former” Nielsen started to produce the high-grade Bentley pipes there.”

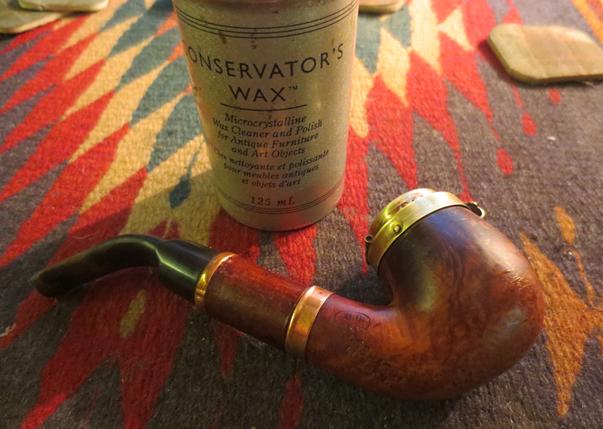
My brother cleaned up the pipe and reamed the bowl. He scrubbed out the wind cap and the brass rim cap. He cleaned out the shank and the airways in the stem, shank extension and the mortise. It turned out that the cherry wood extension was loose fitting in the shank. The wood had worn enough that it was no longer snug. The horn stem was clean but had tooth chatter and a deep tooth mark on the underside of the stem near the button. The brass rim cap was dented and worn but the wind cap still fit tightly against it. The next set of four pictures show the condition of the pipe after he had cleaned it up. BBK2 BBK3I took the pipe apart to show the various components of the pipe. The cherry wood extension in the centre of the photo has a tapered end that fits into the shank and a threaded end that the stem screws onto.BBK4I took a close up photo of the rim cap and the inside of the wind cap. You can see from the photo that the rim is badly dented and quite dirty. The inside of the wind cap is pitted and has some rust. The edge of the rim on the front had lifted slightly from the inner edge of the bowl and was dented on the front. The ridge on the edge was still there and held the front spring on the wind cap in place.BBK5I took some photos of the stem to show the tooth chatter and worn surface of the stem near the button on both the top and the bottom near the button. There was also some deeper tooth marks on the underside of the stem.BBK6I used a small ballpein hammer to flatten the rim cap to the briar rim underneath. I worked on it to minimize some to the dents and dings in the brass rim.BBK7I cleaned out the remaining debris in the bowl with a Savinelli Pipe Knife. My tapping the hammer on the rim knocked some pieces of cake free so the knife cleaned up what remained. I used a brass bristle wire brush to clean out the inside of the wind cap. I was able to remove some of the rust on the inside with the brush.BBK8I scrubbed the shank with alcohol and cotton swabs to remove any of the dust from my quick ream clean up. It was amazingly clean. I also ran pipe cleaners and alcohol through the shank extension and the stem.BBK9I sanded the tooth chatter and the tooth marks on the horn stem with 220 grit sandpaper to remove them and blend them into the material. I also wanted to smooth out the roughness of the stem at those points.BBK10The cherry wood shank extension was dirty so I wiped off the exterior with an alcohol dampened cotton pad. I noticed that the end of the pressure fit tenon had a horn end cap to seal the end of the wooden tenon. I believe that addition preserved the tenon from shrinkage and splintering. The threaded tenon on the other end of the extension fit snug into the end of the horn stem.BBK11I polished the wind cap, rim cap and the shank cap with 1500-4000 grit micromesh sanding pads. I took some photos the pipe after the polishing was completed. It is a beautiful piece of briar.BBK12 BBK14 BBK13I polished the horn stem with micromesh sanding pads – wet sanding with 1500-2400 grit pads and dry sanding with 3200-12000 grit pads. I rubbed the stem down with Obsidian Oil between each set of three pads. I gave it a final rubdown of oil after sanding it with the 12000 grit pad and set it aside to dry.BBK15 BBK16 BBK17I stained the bowl with a Danish Oil and Cherry stain mixture.BBK18 BBK19After it sat for about 20 minutes I rubbed it down with a soft cloth to polish it. After the hand rubbing the grain stood out more clearly. The red stain and the brass caps really looked great together.BBK20 BBK21I gave the wooden friction fit tenon several coats of clear fingernail polish, being careful to keep it off of the horn cap on the end. That did the trick and the extension sat snug in the mortise.BBK23 BBK24I gave the bowl, shank and stem a thick coat of Conservator’s Wax and let it dry. I hand buffed it and gave it a second coat of the wax.BBK25I buffed the pipe by hand with a microfibre cloth and polished the metal with a jeweler’s cloth. The finished pipe is shown in the photos below. I love the way the grain just pops on this old pipe. The cherry wood shank extension adds not only length but also a touch of rustic to the pipe, though this particular piece of cherry wood has bark that is quite smooth. The dark striations of the horn stem also go well with the wood. The brass bands at the stem and the shank as well as the rim cap and wind cap give this old timer a real look of class. The finished pipe is shown in the photos that follow. It is a beautiful pipe to my eyes. Thanks for looking.BBK26 BBK27 BBK28 BBK29 BBK30 BBK31 BBK32 BBK33 BBK34
 

A 9438 Rhodesian Stamped Tobacco Town


Blog by Steve Laug

This is one of my favourite pipe shapes – the classic GBD 9438. There is just something about the way the lines flow and the way the pipe sits in the hand that make this an all-time favourite from me. This one is somewhat unique in that though it bears the London England over 9438 stamp on the right side of the shank on the left side it is stamped Tobacco Town. The stem bears no GBD roundel but it is definitely the original stem. The finish is dark and the briar has some amazing grain. Tobacco Town is a chain of tobacco shops in the Northwestern United States and it also is the name of a few shops across the Southwest and the Midwest. Here is a link to the shops in Portland, Oregon:  http://tobaccotown.com/. I think that because of the wide use of the name that identifying the shop that had this line of pipes made for them by GBD will not be possible. The two photos below show the pipe as it was when my brother received it.GBD1The rim had a heavy tar buildup with the cake overflowing the bowl onto the rim top. The twin rings around the cap on the bowl also were filled with dust and debris. The stem was oxidized and there were some deep tooth marks on the top and underside near the button. The topside of the button was worn thinner than the underside and there were some tooth marks on it as well.GBD2My brother Jeff has developed his own cleaning regimen that really delivers a clean pipe to me. By the time I receive it the bowl has been reamed and the finish scrubbed clean with no dirt or debris in the rings. The stem was clean and the damaged areas very visible. The rim top was free of the lava overflow but still was slightly darkened. The next set of four photos show what the pipe looked like when I started working on it.GBD3 GBD4Before I began my work I took a close up photo of the rim top and the bite marks on the top and bottom of the stem near the button. The rim had the majority of the tars removed but under the bright light I could see some residual stubborn bits. The inner edge of the rim also had some damage from what looked like someone’s reaming the bowl with a knife. I have circled the bite marks in the photos of the stem surfaces with a red circle to clearly identify the issues there.GBD5 GBD6I scrubbed the exterior of the bowl and the rim with acetone on cotton pads to try to remove more of the residue on the rim and to remove some of the darker spots of stain on the bowl. I wanted the grain to really stand out.GBD7 GBD8I worked on minimizing the damage to the inner edge of the rim by sanding it with a folded piece of 220 grit sandpaper.GBD9I decided to lightly top the bowl to remove the stubborn residue that remained and to lighten the smoke darkened rim at the back of the bowl.GBD10I noticed that the inside of the shank had been stained with the same brown stain as the exterior of the bowl so I scrubbed it out with cotton swabs, pipe cleaners and alcohol. I was able to remove the stain. As I scrubbed it I notice that against the end of the mortise there were still some tars that kept coming out with the cotton swabs. I used a dental spatula to scrape the end of the mortise to remove these hardened tars. They are visible on the paper towel in the second photo below. I followed that up by swabbing out the mortise with cotton swabs and alcohol. I also scrubbed the airway in the stem. There was some debris trapped in the slot in the button that I worked out with a dental pick.GBD11 GBD12I wiped the exterior of the stem down with alcohol on a cotton pad and worked on the tooth dents to make sure the surface was clean. I used a dental pick to apply the black super glue to the dents on both sides of the stem and sprayed the glue with accelerator. I followed up with applying a second layer of the glue to fill in the air bubbles on the surface that seem to always follow using the accelerator and set the stem aside to dry.GBD13When the glue had cured I used a flat blade needle file to smooth out the patch to the surface of the stem and to recut and reshape the button. I sanded the repair with 220 grit sandpaper and then refiled it with the needle file.GBD14 GBD16I polished the stem with micromesh sanding pads using my normal routine – wet sanding with 1500-2400 grit pads and dry sanding with 3200-12000 grit pads. I rubbed the stem down between each set of three pads with Obsidian Oil. I gave the stem a final coat of oil and set it aside to dry.GBD17 GBD18 GBD19I rubbed the bowl down with Watco Danish Oil with Cherry stain and let it dry for about 30 minutes. After 30 minutes I rubbed the bowl down with a soft flannel cloth.GBD20I buffed the bowl and the stem with Blue Diamond on the buffing wheel and then gave the pipe multiple coats of carnauba wax. I buffed it with a clean buffing pad to raise the shine. I hand buffed it with a microfibre cloth to deepen the shine. This is one of my favourite shaped both in terms of the shape and the hand feel of the bowl. The red colours that are highlighted by the cherry stain show the grain beautifully. Thanks for looking.GBD22 GBD23 GBD24 GBD25 GBD26 GBD27 GBD28