Blog by Steve Laug
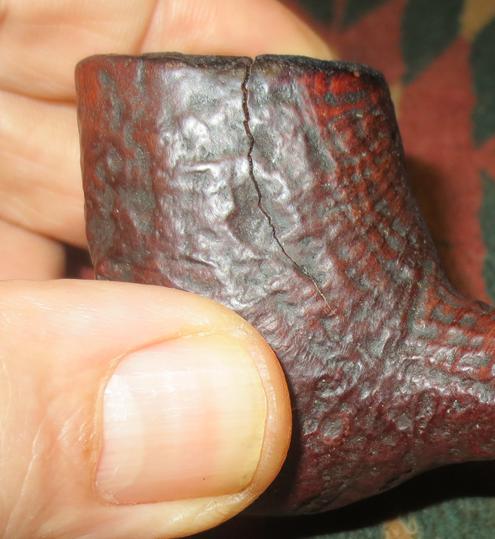
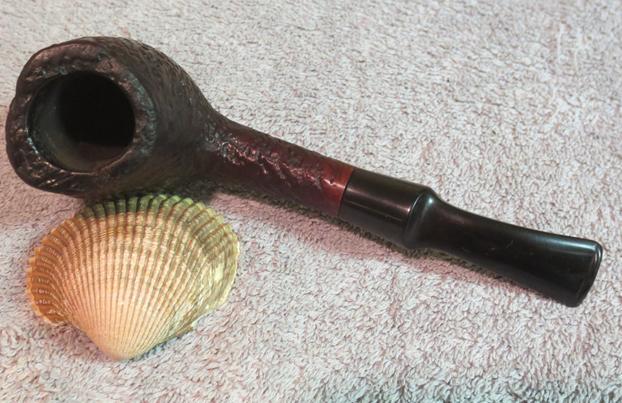
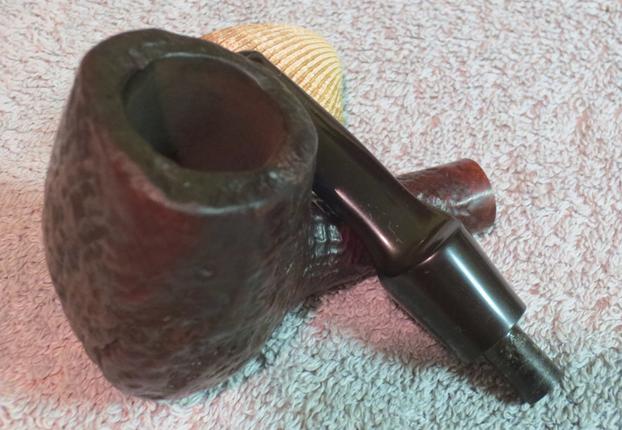
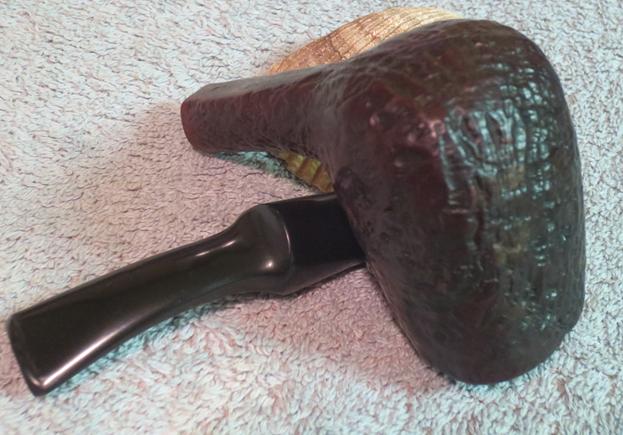
Not long ago I received a second pipe that was sent to me from Dawson Creek, British Columbia for repair. It had belonged to the sender’s father and he wanted it restored so he could use it again. When it arrived it was obvious that I was dealing with a Stanwell product. It was stamped Scandia over Made in Denmark and was followed with the shape number 209. It had a classic Danish look with the flared saddle stem and the almost triangular shaped bowl. The stem was oxidized and worn with the edge between the button and stem worn away. The sandblast was dirty and the finish tired. But the worst issue was that the bowl itself had a large crack running from the rim down the bowl on the left side of the bowl toward the back. It took some photos and emailed them to the sender to let him know the state of the pipe after my assessment. He was surprised that the crack was there as he did not remember seeing it. I begin this blog with those photos below.
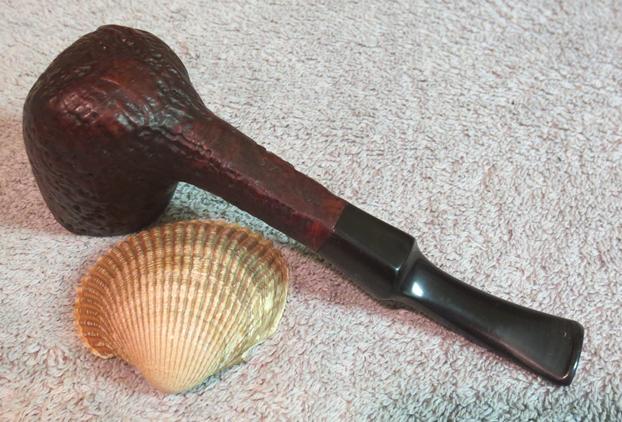
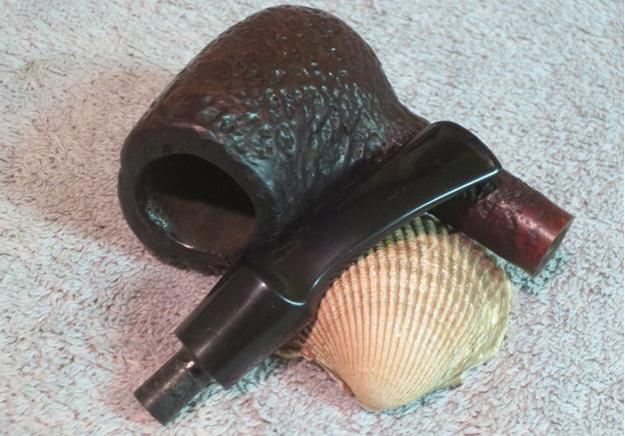
 After photographing the crack in the side of the bowl I took some photos of the entire pipe to give an idea of the look of the pipe and the work that lay ahead of me. You can see the overall condition of the pipe from the photos below. I really like the shape of the bowl and the flow of the stem and shank. The pipe had good lines.
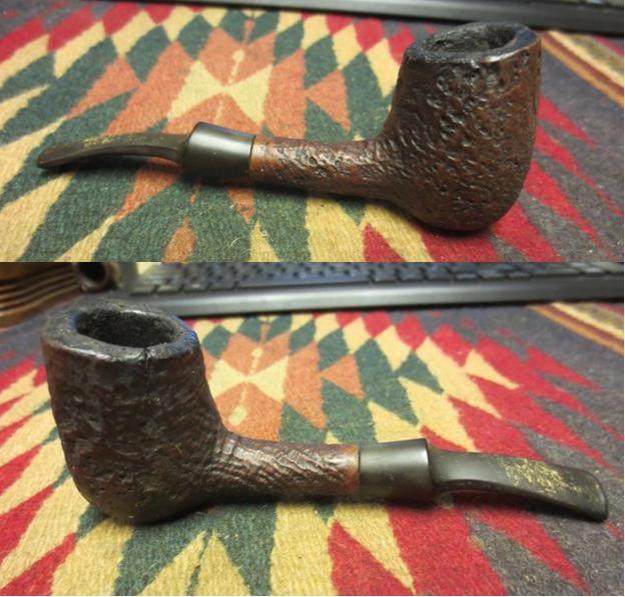
 To begin the process of repairing the bowl I need to carefully ream it back to bare briar. I wanted to see if the crack extended into the bowl and how deeply it went down into it if it did. I also wanted to assess the overall condition of the bowl interior. I started reaming it with a Savinelli Pipe Knife so that I would not put too much stress on the cracked area. I finished carefully reaming the bowl with a PipNet pipe reamer to clean off the cake below the rim.
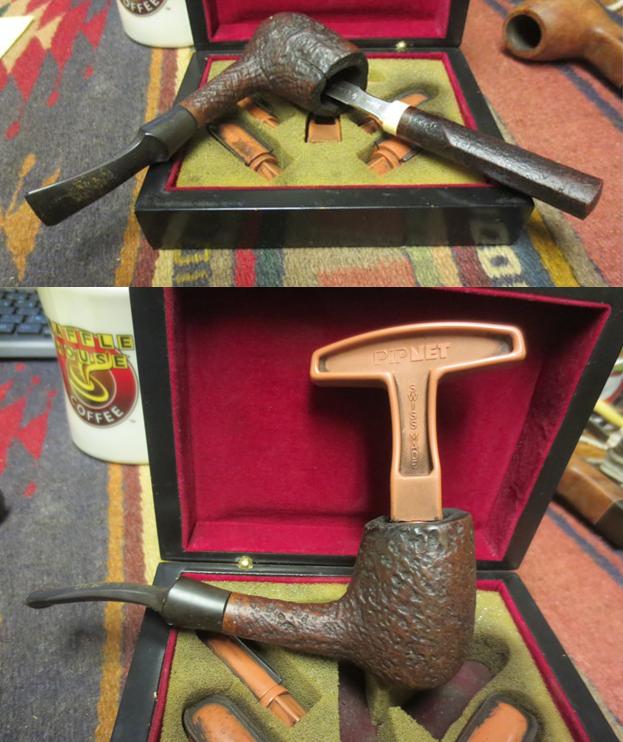 The crack went down about ¼ inch into the bowl from the rim. I used a brass bristle brush to scrub the top of the rim to remove the tars and lava overflow on the rim surface. I used a rolled piece of 220 grit sandpaper to sand out the interior of the bowl and remove the remnants of the carbon build up around the cracked area.
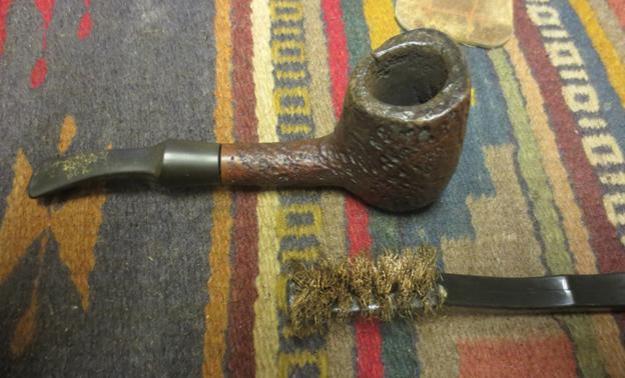 I scrubbed the exterior of the bowl and rim with a tooth brush and Murphy’s Oil Soap to clean off the grime and wax in the grooves of the sandblast. I wanted the surface clean so that I could repair the crack. I rinsed the pipe with running water and dried it off.
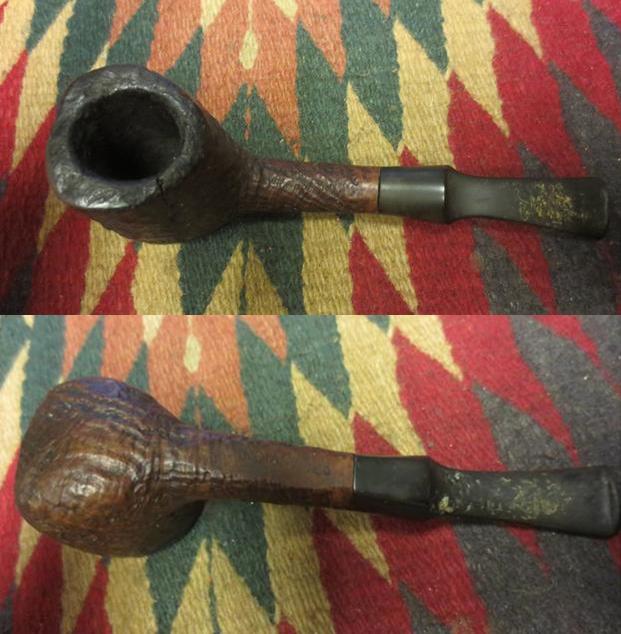
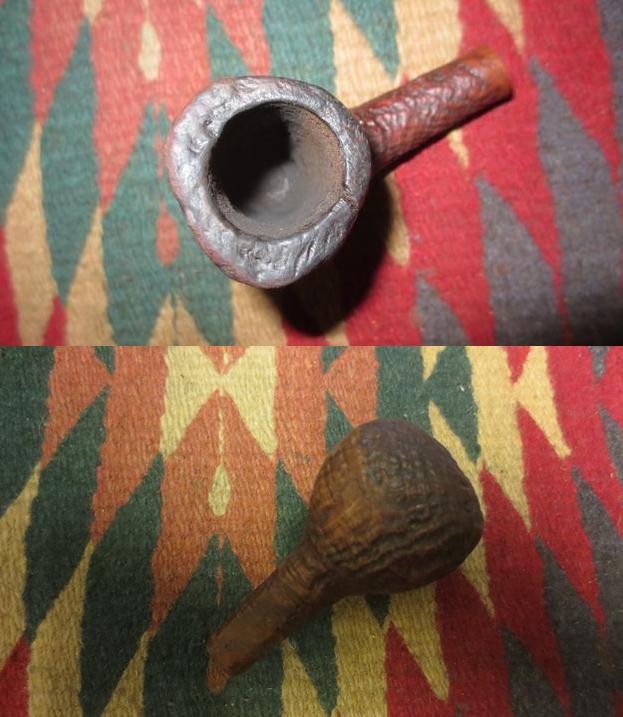
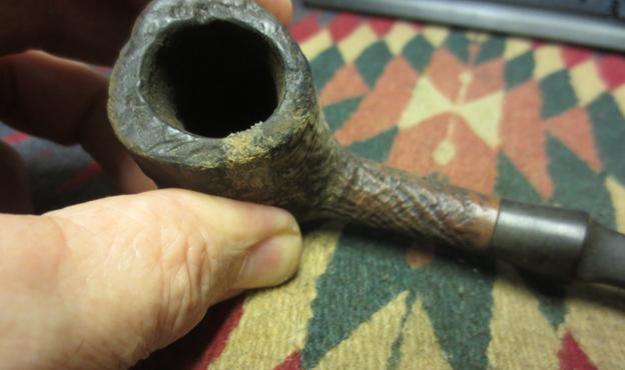
 The next series of photos show the bowl after cleaning. The bowl was ready to repair.
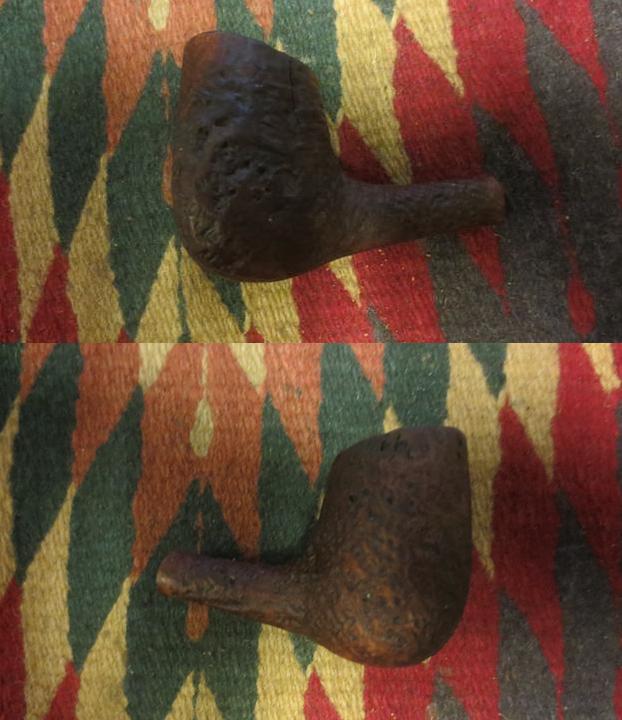
 I used the Dremel and a microdrill bit to put two pin holes at the end of the crack. I used a lens to look for the end and then drilled the first hole. When I took it back to the work table I looked at it under the lens again and notice that I missed the end by just a short distance. I drilled the second hole in the bowl side. I also sanded out the internal edge of the bowl and used the drill to put a hole at the end of the internal crack.
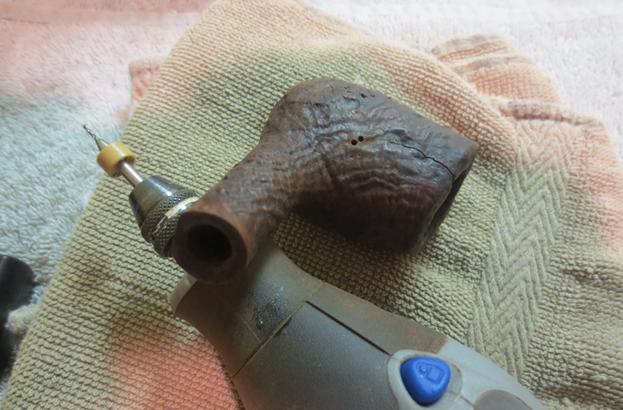 I used the dental pick to clean out the crack on the bowl side and pressed briar dust into the crack with a dental spatula. Once it was full I put drops of clear super glue on top of the crack to seal the area. I put more briar dust on top of the super glue and spread it out with the spatula. I put briar dust on the top edge of the rim and used the glue there and on the internal crack.
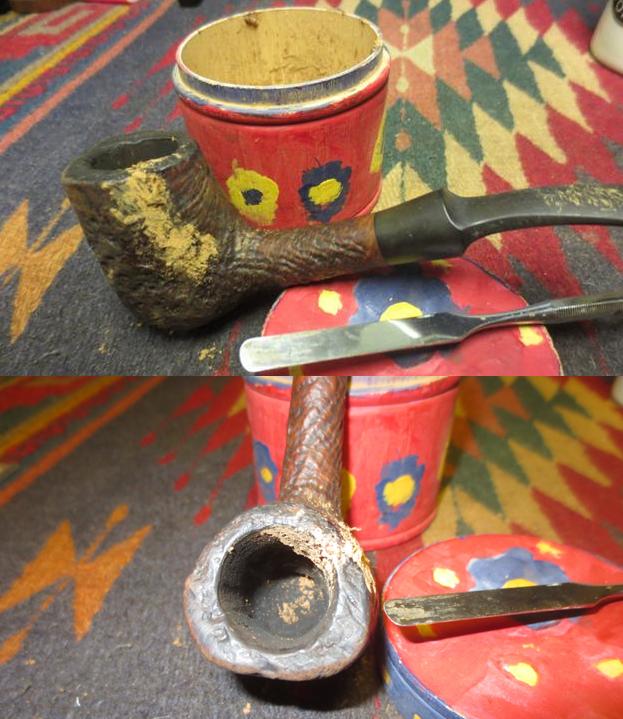 I sanded the filled in area with a folded piece of 220 grit sandpaper to smooth out the repaired areas and used a dental pick to create some grooves to follow the blast pattern.
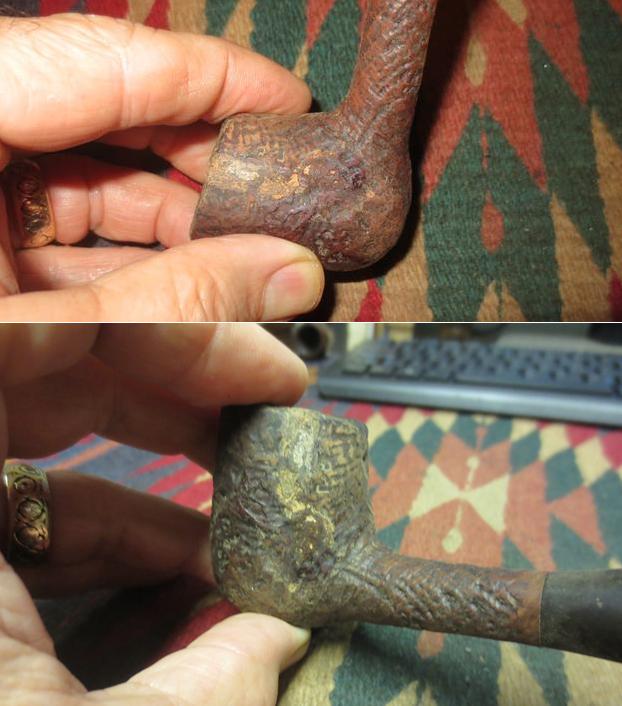
 The texture of the rim repair was rougher than the side of the bowl so I sanded it with a medium grit sanding block to smooth it out. I also sanded the inside of the bowl with a rolled piece of sandpaper to smooth out the repair on the interior wall. I wiped the bowl down with alcohol on a cotton pad to remove the sanding dust and stained the pipe with a dark brown aniline stain. I flamed it and repeated the process until the colour was matched. I used a black Sharpie pen to touch up the grooves in the patch and blended the repair with more stain.
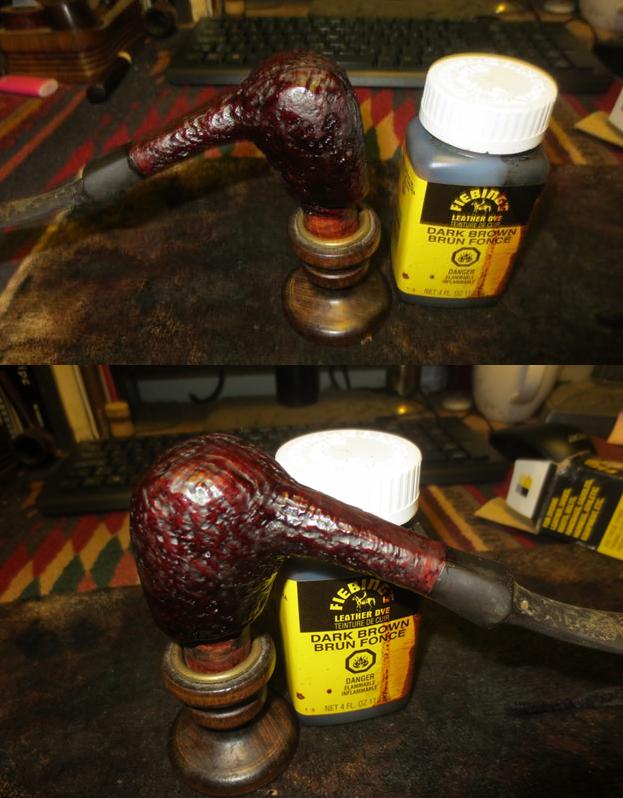 The next photo shows the repaired areas and bowl.
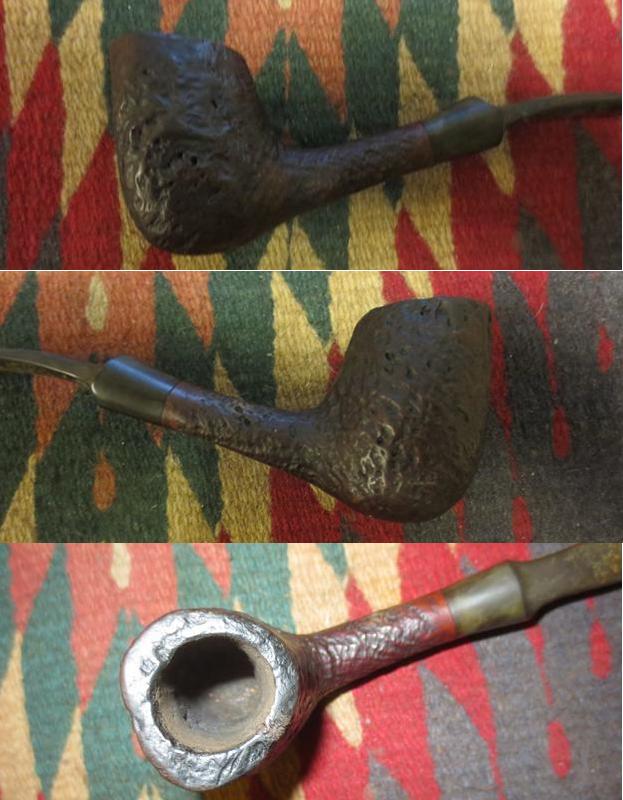 The stain was too opaque for me so I washed it down with alcohol on cotton pads until the stain was more transparent.
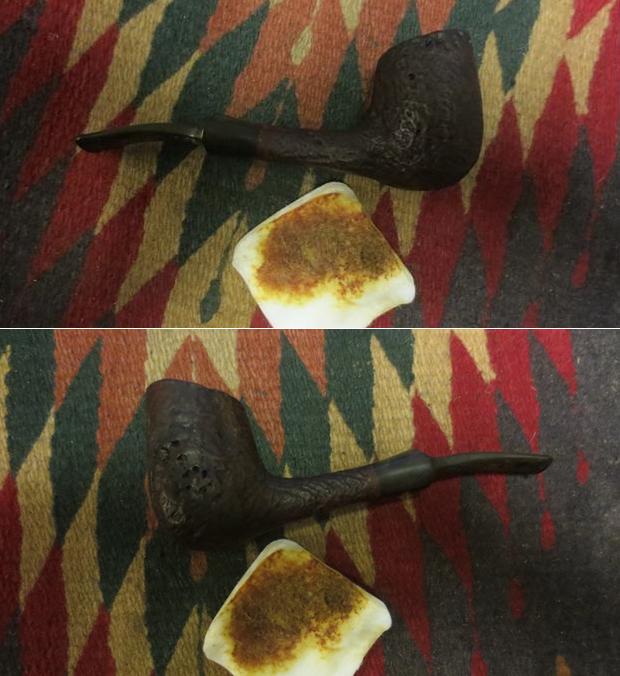 With the bowl repair completed I turned my attention to the oxidized stem. It was not too bad – light oxidation and lots of tooth chatter. Fortunately there were no deep tooth marks. The sharp edge of the button was also very worn down and would need to be redefined.
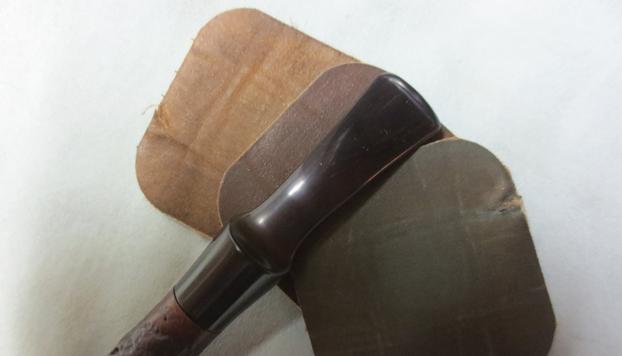
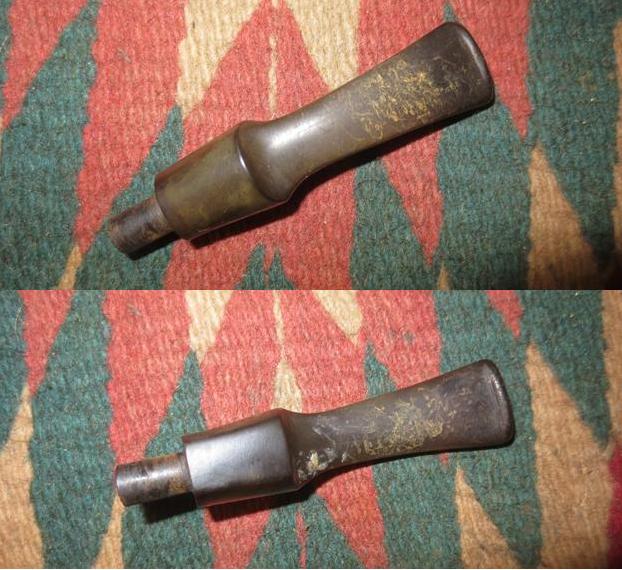 I used a flat blade needle file to reshape the button edge and remove the tooth chatter and marks around the edge of the button. I also reshaped the curved edge of the button with the file.
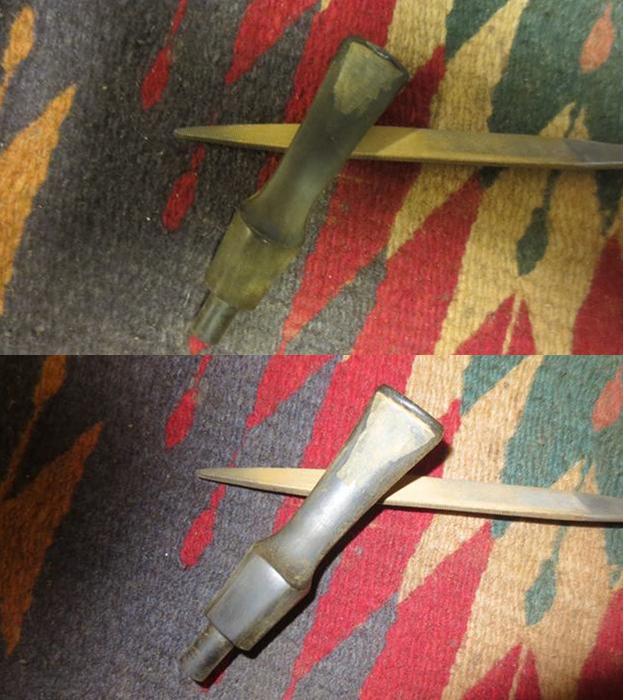 I sanded the file marks out of the stem with a folded piece of 220 grit sandpaper. I worked over the rest of the stem with the sandpaper to remove the light oxidation on the saddle area.
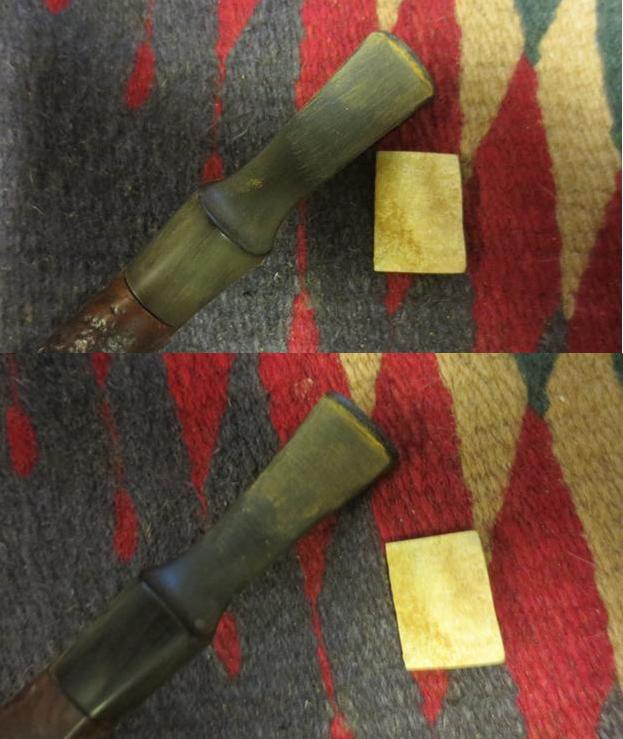 I gave the bowl a light buff with Blue Diamond on the wheel to get a feel for the look of the bowl at this point in the process. You can see the repaired area in the two photos below. It will take some more blending with stain pens and sandpaper before it is finished.
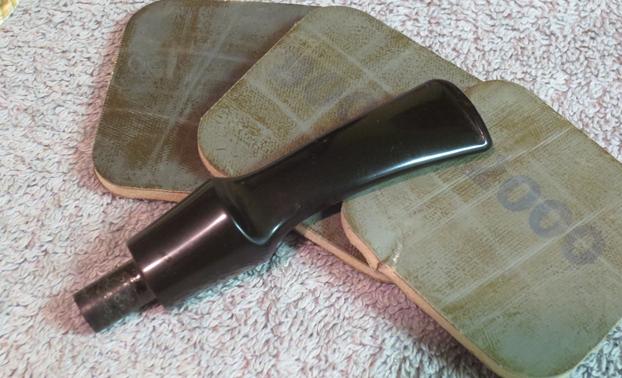
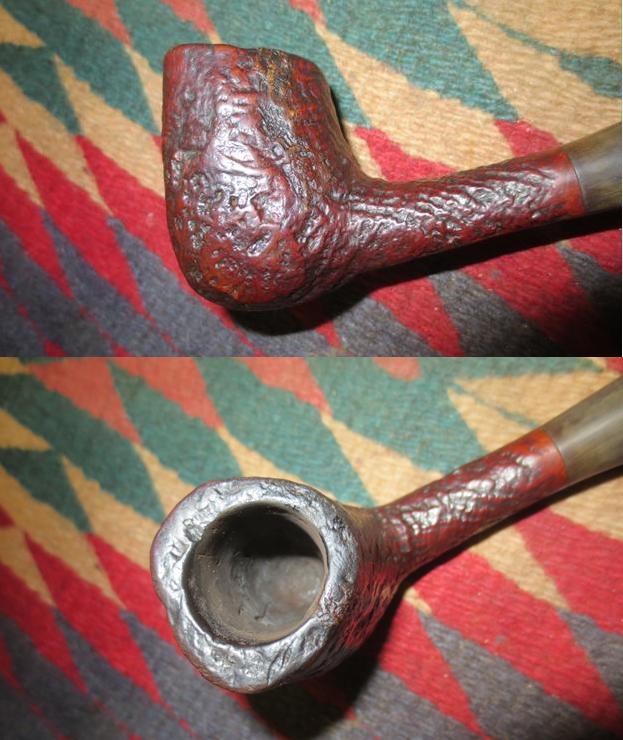 I cleaned out the mortise and the airway in the shank as well as the airway in the stem with pipe cleaners, cotton swabs and alcohol. You can see from the photo of the stem that the polishing of the stem is coming along as well. The oxidation is pretty well gone and the sanding marks are disappearing.
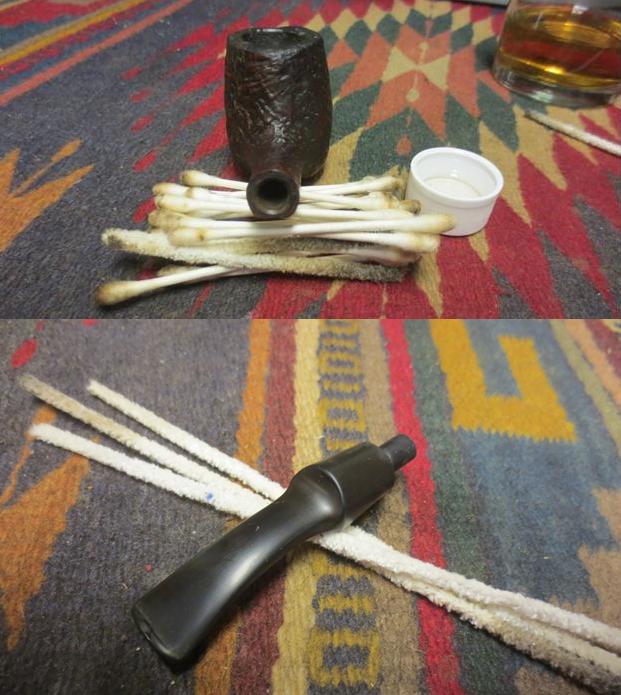 I used my normal polishing process with micromesh pads – wet sanding with 1500-2400 grit pads and dry sanding with 3200-12000 grit pads. Between each set of three pads I rubbed the stem down with Obsidian Oil and when I finished with the 12000 grit pad I gave it a final coat of oil and set it aside to dry.
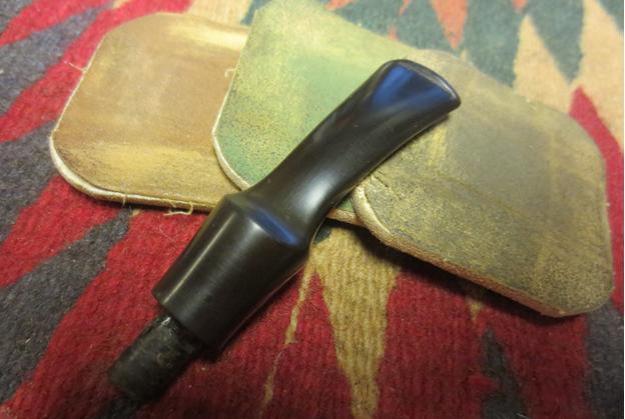
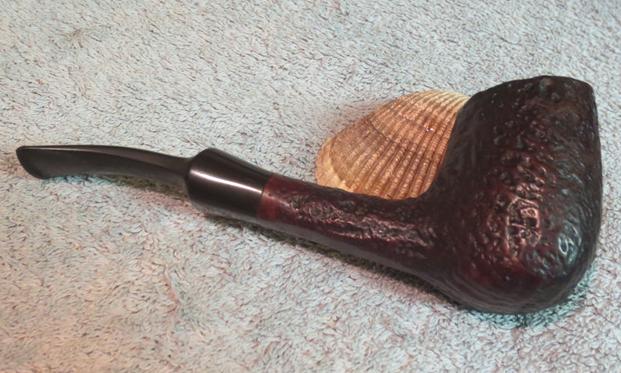
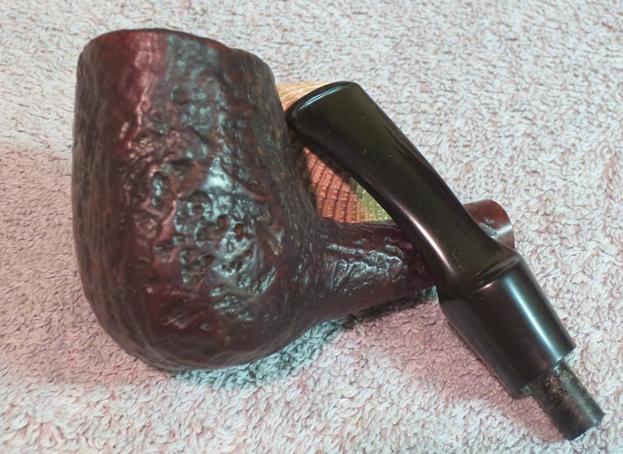
 I lightly buffed the bowl with Blue Diamond to raise a shine and buffed the stem a bit more vigorously. I gave the stem several coats of carnauba wax and buffed it to a shine with a clean buffing pad. I gave the bowl several coats of Conservator’s Wax and buffed it with a clean buffing pad. The finished pipe is shown in the photos below. The repair is finished and the inside and the outside of the bowl look really good. It should last the pipe man who sent it to me for a long time as he enjoys a pipe that his dad smoked. Thanks for looking.
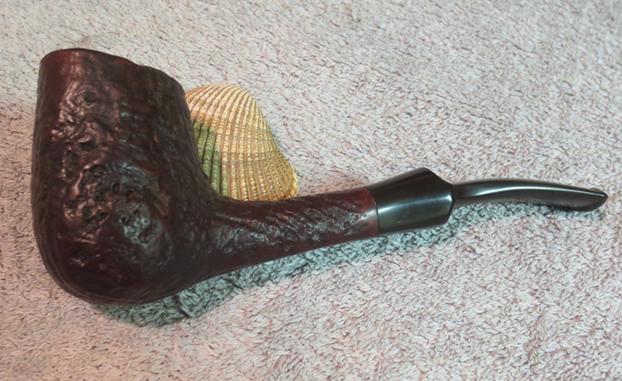
 ADDENDUM
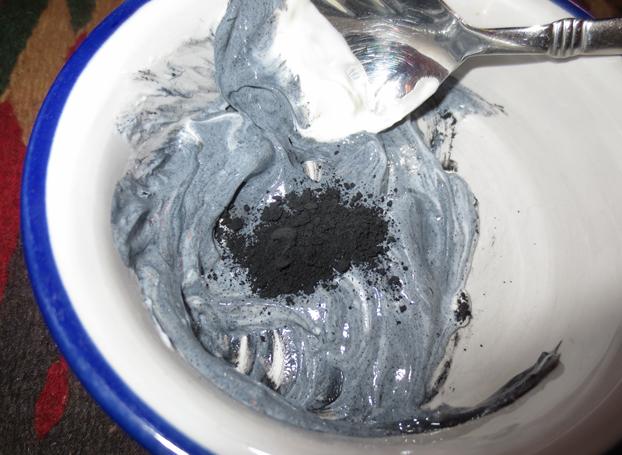
I decided to give the pipe a little more protection by putting a bowl coating on the interior walls of the pipe. I mixed some sour cream and charcoal powder to make a grey paste and apply it to the bowl. I used a dental spatula to put the mixture on the walls of the pipe and then used my finger to smooth it out. The mixture is neutral once it dries and imparts no flavour to the tobacco as the pipe is smoked. It merely serves to protect the repaired walls until a cake is developed in the bowl.

I set the pipe aside to dry overnight. The next two photos show the interior of the bowl this morning after a night of curing. I will leave it to cure throughout the day and it should be good to pack up and send back to Dawson Creek.

