Daily Archives: August 6, 2016

My brother found six NOS unsmoked Yello-Bole, Kaywoodie & Medico Pipes


Blog by Steve Laug

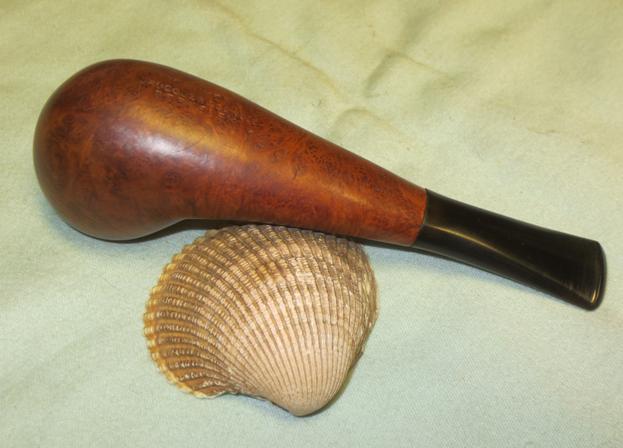
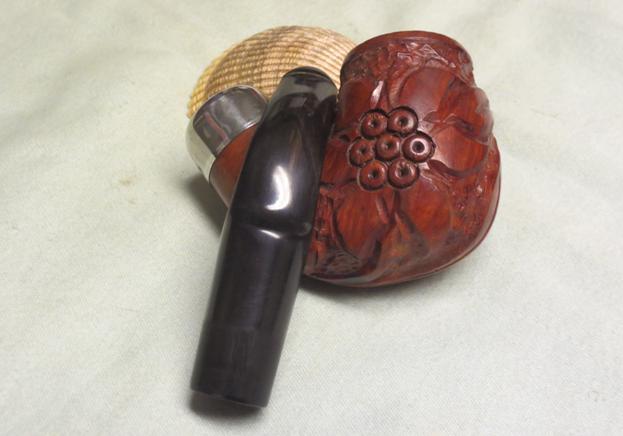
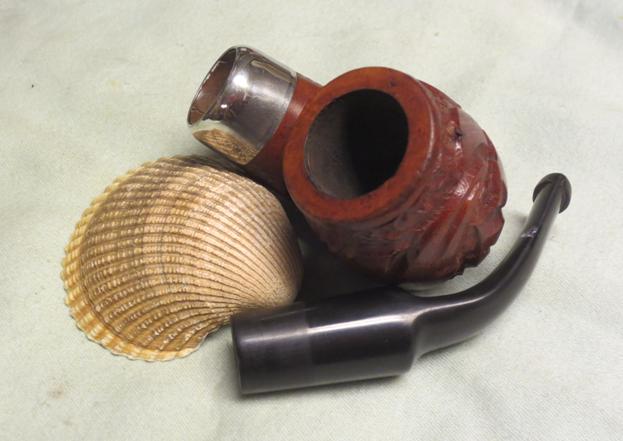
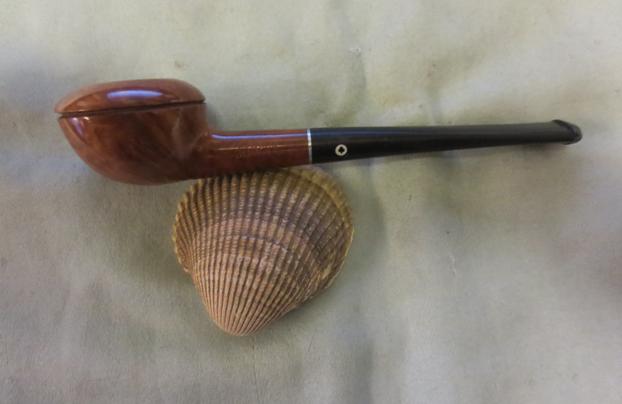
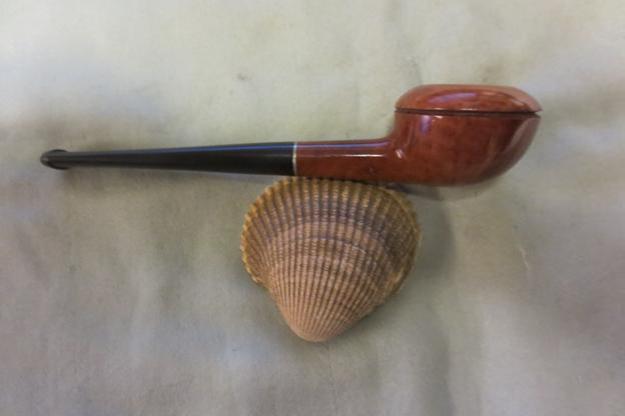
I got a call from my brother when he was driving from Idaho to Nebraska that he had scored a batch of New Old Stock (NOS) unsmoked pipes at an antique shop. These were some beauties he said and the price was right. From left to right in the first photo and from top to bottom in the second and third photo, there was a Yello-Bole Checker Acorn, a Kaywoodie Campus small Rhodesian/Prince, a Kaywoodie Campus Dublin (both of the Campus pipes had a spear shaped stinger), a Kaywoodie Super Grain S-L (with a three hole stinger), a Yello-Bole Collegiate Rhodesian with the bowl insert in place, and a Medico Tuxedo Acorn. These pipes are in excellent unsmoked condition. They will eventually go on the rebornpipes store for sale but I am putting them up as a blog if anyone is interested in purchasing any or all of them let me know. Don’t wait for them to go up on the store.NOS1 NOS3NOS2
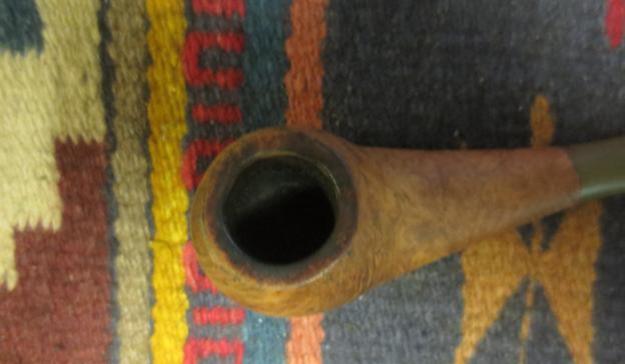
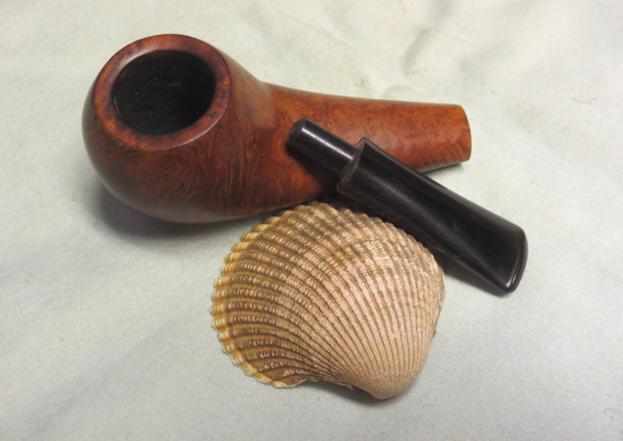
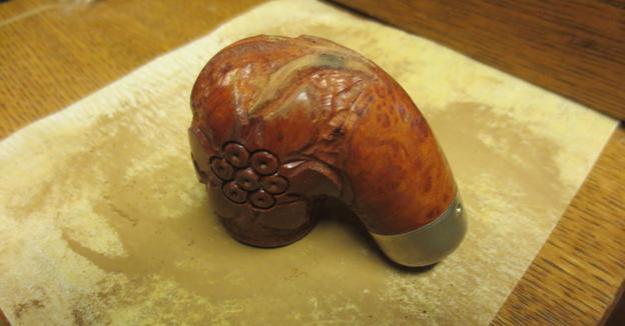
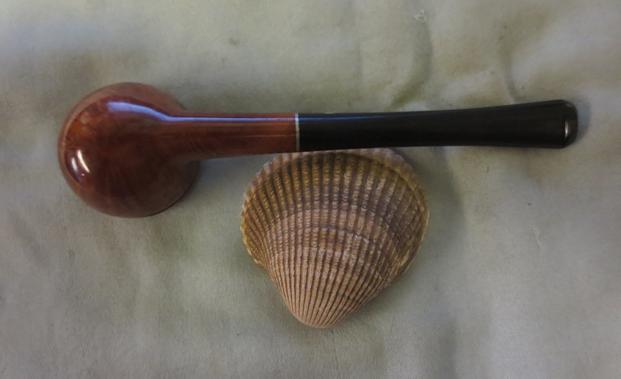
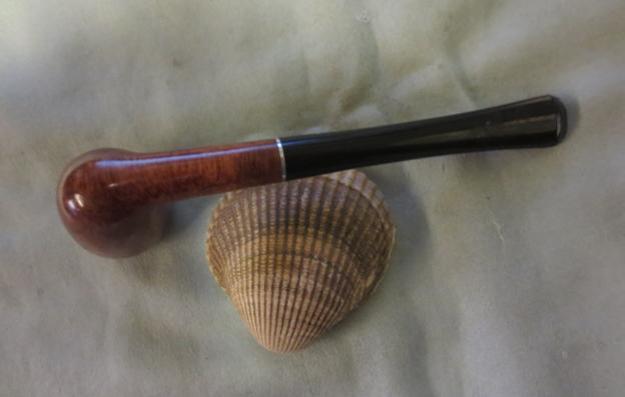
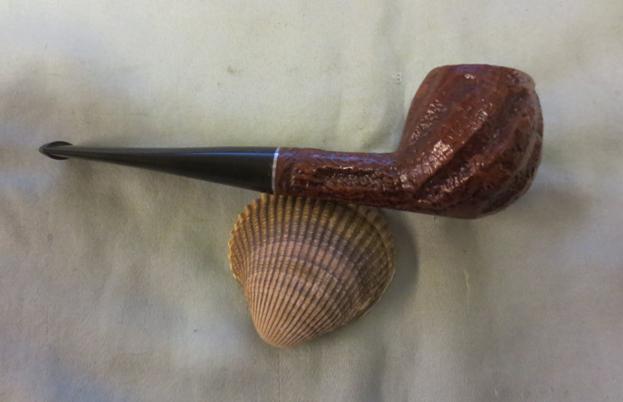
I took individual photos of each of the pipes to give a good picture of the look and the condition of each of them. The first one is the Yello-Bole Checker Acorn. The pipe is 5 ½ inches long, 1 ½ inches tall, the diameter of the bowl is ¾ of an inch, the external diameter of the bowl is 1 1/8 inches. It has the Yello-Bole spade stinger that is removable is you chose to do so.NOS4 NOS5 NOS6 NOS7
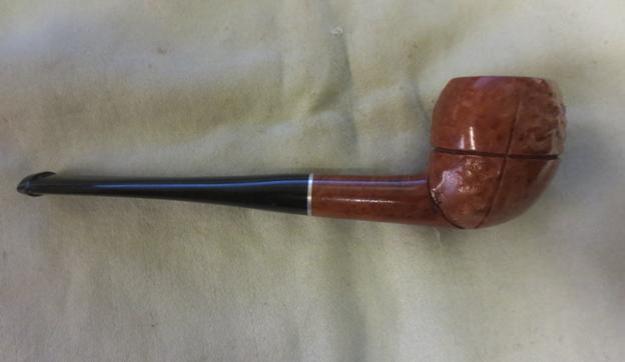
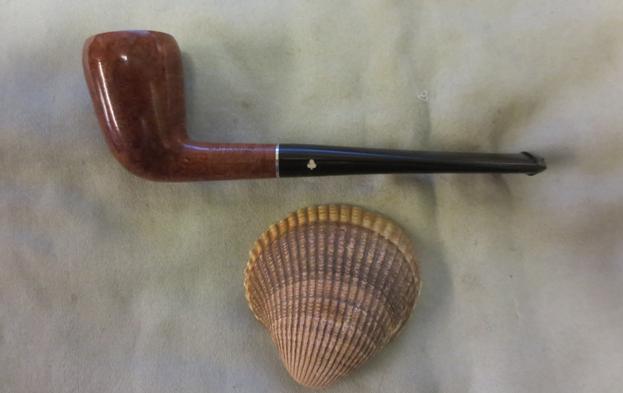
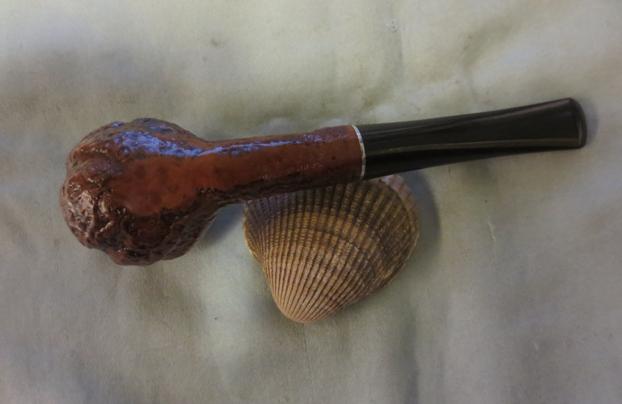
The second pipe is a Kaywoodie Campus small Rhodesian/Prince. The shape is more of a Prince but it has the Rhodesian top cap with a single ring separating the bowl from the cap. The pipe is 5 inches long, 1 inch tall, the diameter of the bowl is ¾ of an inch, the external diameter of the bowl is 1 ½ inches. It has the integrated KW stinger/tenon that is non-removable. It is not the typical ball stinger but rather a spear head shaped stinger.NOS8 NOS9 NOS10 NOS11
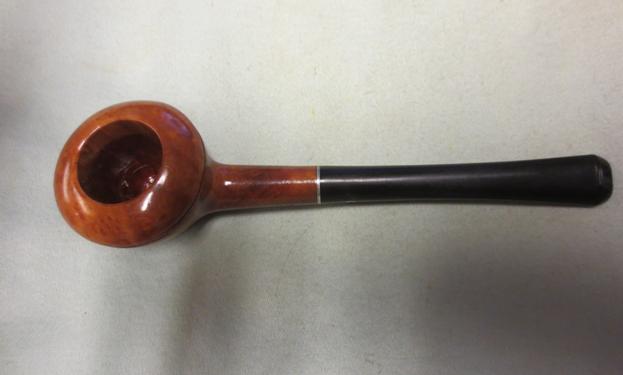
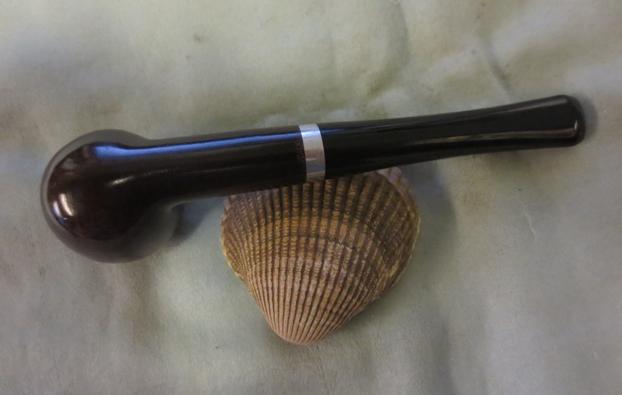
The third pipe is a Kaywoodie Campus small Dublin. It is a dainty, almost pencil shank pipe. The pipe is 5 inches long, 1 ½ inch tall, the diameter of the bowl is ¾ of an inch, the external diameter of the bowl is 1 inch. It has the integrated KW stinger/tenon that is non-removable. It is not the typical ball stinger but rather a spear head shaped stinger.NOS12 NOS13 NOS14 NOS15
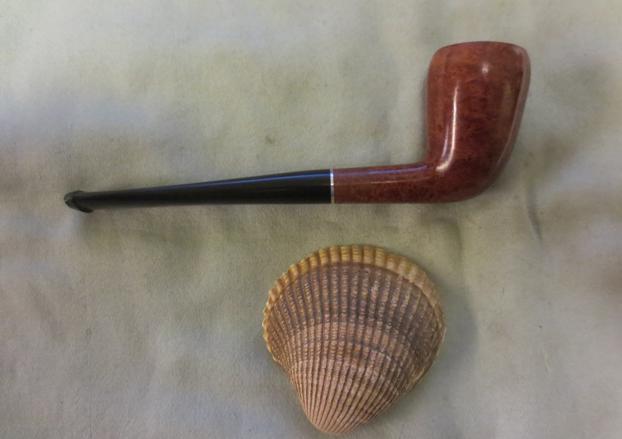
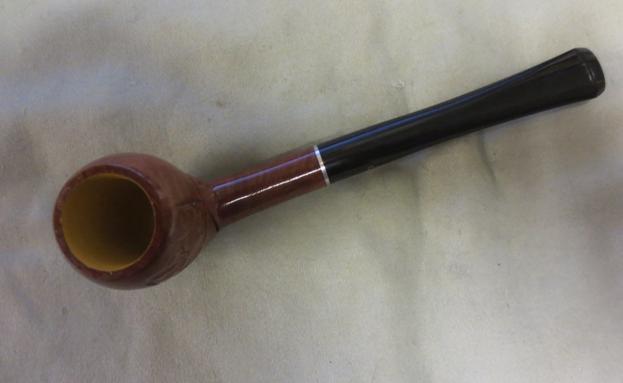
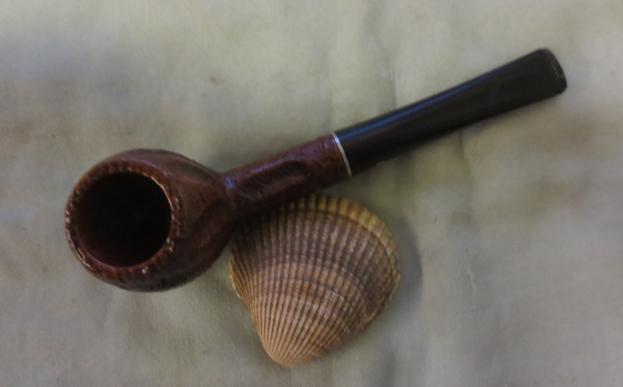
The fourth pipe is a Medico Tuxedo Acorn. The tenon is the typical Medico metal tenon that holds their patented paper filters. The length of the pipe is 5 inches, the height of the bowl is 1 3/8 inches. The diameter is of the chamber is ¾ of an inch and the diameter of the bowl is 1 inch.NOS16 NOS17 NOS18 NOS19
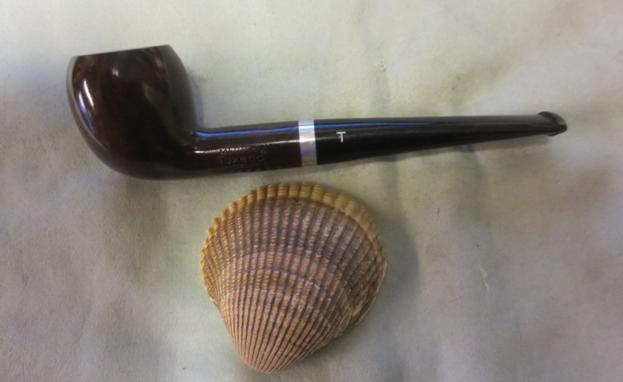
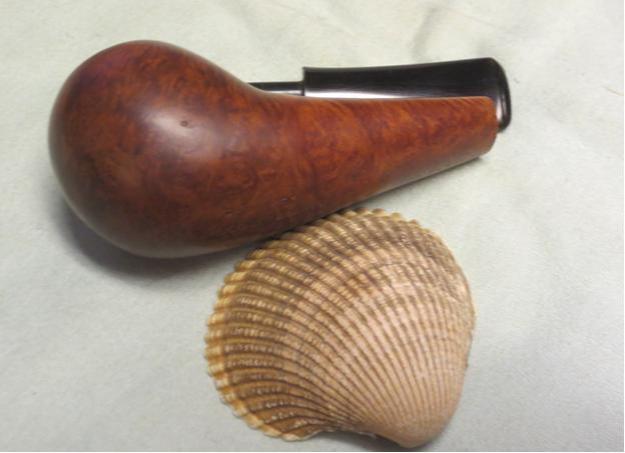
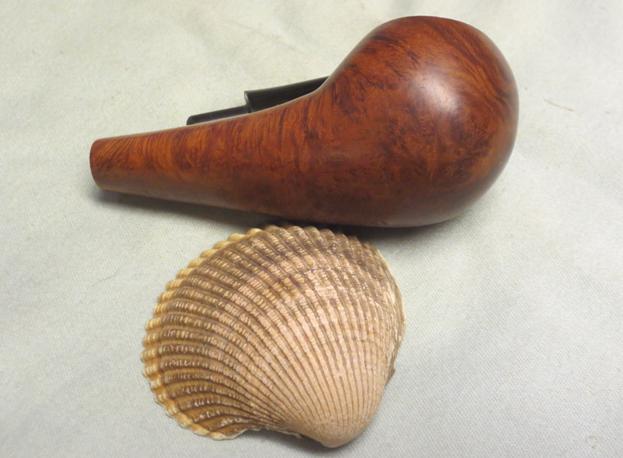
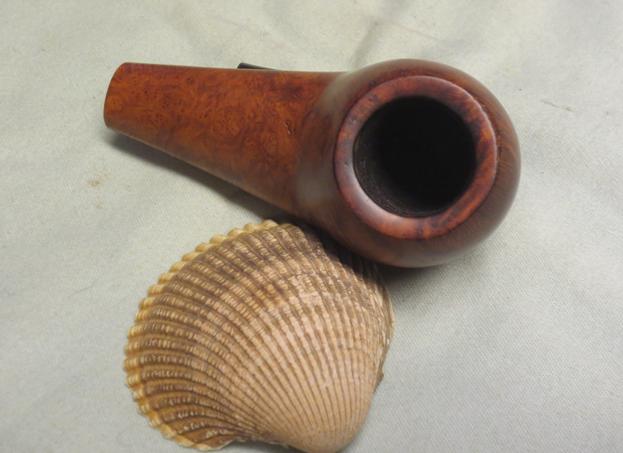
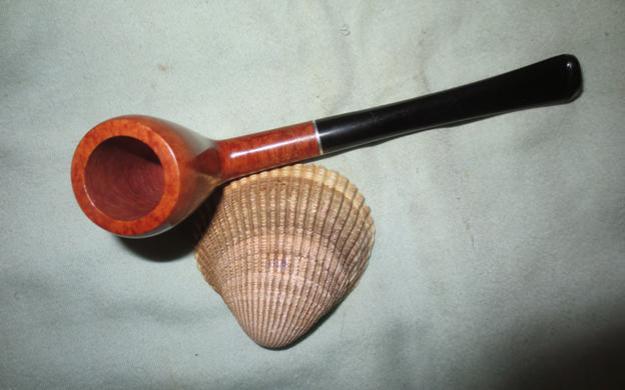
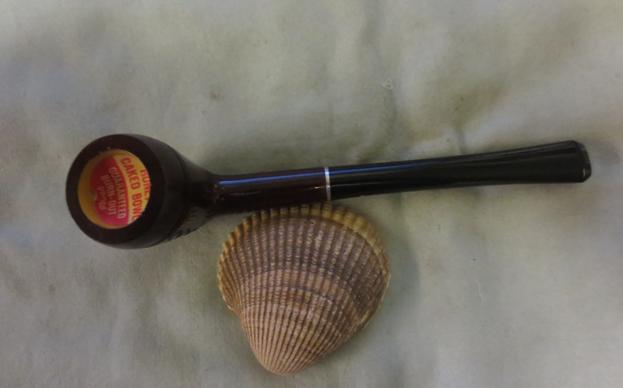
The fifth pipe is a Yello-Bole Collegiate Thin Rhodesian. The pipe is 5 ½ inches long, 1 ½ inches tall, the diameter of the bowl is ¾ of an inch, the external diameter of the bowl is 1 inch. It has the Yello-Bole spade stinger that is removable is you chose to do so. The bowl has the round bowl insert that caps the new Yello-Bole pipes. It sits in the bowl and reads Honey Caked Bowl over Guaranteed Burn-out Proof. It is a great piece of Yello-Bole history.NOS20 NOS21 NOS22 NOS23 NOS24
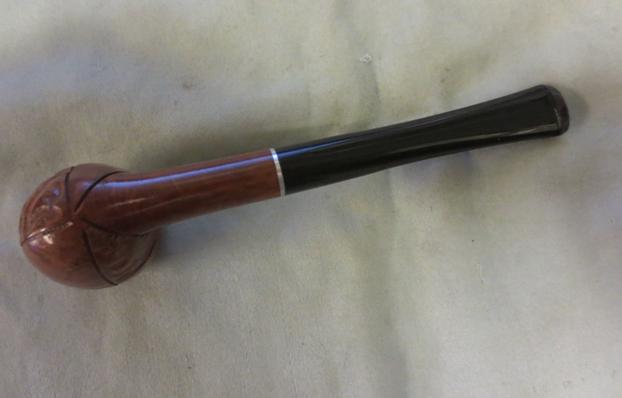
The sixth pipe is a Kaywoodie Super Grain S-L Apple. It is a combination sandblast and rusticated bowl and shank. The pipe is 5 ½ inches long, 1 ½ inches tall, the diameter of the bowl is ¾ of an inch, the external diameter of the bowl is 1 1/4 inches. It has the integrated KW stinger/tenon that is non-removable. It is a three hole typical KW stinger with a ball on the end.NOS25 NOS26 NOS27 NOS28
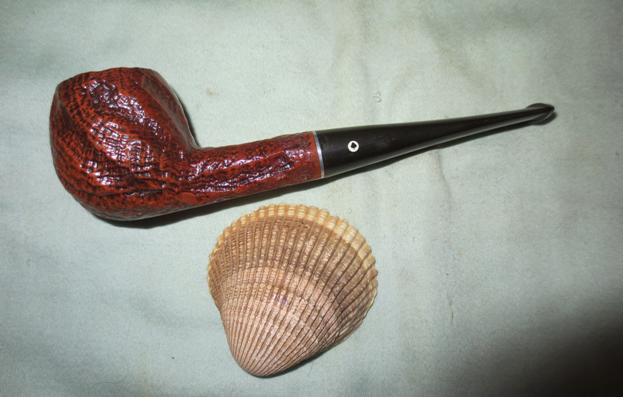
Once again all of these pipes are unsmoked. They are NOS – New Old Stock pipes. All of them are for sale as individual pieces or as a set. Contact me through email at slaug@uniserve.com or leave a response here following the blog. Thanks for looking.

A Nice Looking Drucquer & Sons Berkeley DRUKE 187 Pipe


Blog by Steve Laug

My brother sent me an eBay link that had a few pipes from Drucquer & Sons Ltd, Tobacconists for sale. We bid on several of them and this was one of the ones we won. It is a lot like the Pipo shaped pipes that are still made today. This one is English made and I have no idea what to call the shape. The photos taken on top of the pipe sock came from the seller.Dru1The pipe is stamped on the underside “DRUKE” over Drucquer & Sons Ltd. Underneath that it is stamped Berkeley with a shape number 187 below and toward the stem. Next to the shank/stem junction it is stamped Made in England. I have done some searching but cannot find either the shape or the number on the various English pipe brand charts.Dru2 Dru3When the pipe came to my brother he took some photos to capture the condition of the pipe before he cleaned it up for me. The next photo shows that the overall condition of the pipe is quite good. The finish is not too bad though there are some sand pits or nicks on the back side of the bowl. The rim is dark and oily. The bowl had a thin cake. The stem was oxidized and there was some tooth chatter on the top and bottom sides near the button.Dru4 Dru5He took a close up photo of the top of the bowl that shows the cake and the condition of the rim. It was covered with lava over flow but there appeared to be little rim damage other than a few shallow nicks on the outer edge of the rim.Dru6He reamed the pipe and scrubbed the exterior of the bowl with Murphy’s Oil Soap and a tooth brush. He was able to remove the majority of the rim darkening and all of the cake. The soap took off the grime on the finish so that when he sent me the pipe it was clean. The stem oxidized a bit more after the cleaning but it was not too bad. The pipe has some excellent grain around all sides of the bowl and shank. The next photos show the pipe as it was when it arrived in Vancouver.Dru7 Dru8 I took a close up of how the rim looked after my brother had cleaned it up. It was in decent shape with just some darkening and a few pieces of tar stuck to the surface.Dru9I wiped down the rim with a cotton pad and alcohol to remove the remnants and then sanded it with a folded piece of 220 grit sandpaper. I sanded it until the rim was clean and the bevel was smooth to touch. I sanded it with 1500-3200 grit micromesh sanding pads to remove any scratches left behind by the sandpaper.Dru10I wiped the pipe down with a light coat of olive oil and polished it by hand. The grain began to really stand out and the virgin finish looked good (the pipe had never been stained so the oil approximated what would have been there when the pipe was new).Dru11I sanded the stem with 220 grit sandpaper to remove the tooth marks and chatter on both sides of the stem. I wet sanded it with 1500-2400 grit micromesh sanding pads and gave it a coat of Obsidian Oil. I dry sanded it with 3200-4000 grit pads and gave it another coat of oil. I finished sanding it with 6000-12000 grit pads and gave it a final coat of oil. I set the stem aside to dry.Dru12 Dru13 Dru14I buffed the entire pipe with Blue Diamond on the wheel to polish the stem and the bowl. I gave it multiple coats of carnauba wax to protect and give it shine. I buffed it with a clean buffing pad to shine it and then hand buffed it with a microfibre cloth. The finished pipe is shown in the photos below. Does anyone know what to call this shape? Does anyone have a similar pipe or even the same one from Drucquer’s & Sons Ltd.? Thanks for looking.Dru14a Dru15 Dru16 Dru17 Dru18 Dru19 Dru20 Dru21 Dru22

Restoring an Old Bruyere Extra Floral Carved Bent Billiard


Blog by Steve Laug

This interesting old pipe is unique in many ways. The first and most obvious is the floral pattern carved on the bowl sides and bottom. It is well carved and the petals and the leaves flow around the bowl. They sit against a rusticated finish in the gaps of the leaves and around the top of the bowl. There was one burn spot on the bottom of the shank where it looked as if the pipe had been set down in an ashtray and was burned. The second visible uniqueness is the horn stem with the orific button on the end. It had a little damage on the right edge of the stem but it was fixable. The third unique feature was not visible until I removed the stem. The stem had a large chamber in the saddle portion as did the shank. There were also two tubes at the end of the mortise and a collecting chamber or sump. The pipe was in pretty decent shape for its age. I can only hope that when I reach that age, if I am still around I will look as good.Bru1My brother Jeff had reamed the bowl and done the initial clean up. He had scrubbed the surface of the bowl and the shank. It is great that he is doing that part of the job for me as it speeds up the process that I do in the restoration. The rim had some hard cake built up on the surface. There was a burn spot on the bottom of the shank that is visible in the second photo below.Bru2I took some close up photos of the areas that needed work. The first photo shows the burned spot. Fortunately the burn had not softened the wood too much. It was hard when I probed it with a dental pick. The second photo shows the hard cake on the rim. It is quite thick but the rim appears to be undamaged and the inner and out edges of the rim are in great shape. The third photo shows the damaged portion of the right edge of the stem. I have seen these often on horn stems and have always wondered if it was not damage done by a worm eating the horn.Bru3I took several more close up photos. The first photo shows the two inner tubes that enter the bowl in two spots at the bowl bottom. It is a twin bore airway. The second photo shows the stamping on the left side of the shank – it reads Bruyere Extra. The right side of the shank is stamped with the shape number 6185. The band has three hallmarks and EP in a diamond. The hallmarks are letters, each in a car-touche. My guess is that these signify the maker.B

The letters are JBF and look like the ones I have pictured to the left.

Bru4The inside edge of the briar was thin in several spots. The two that were the most problematic can be seen on the bottom edges of the shank on the right side of the photo below. I have circled the two spots in red. The top one was missing a wedge of briar and the bottom was a half circle of briar. Both were repairable with briar dust and wood glue.Bru5I decided to work on the stem repair first. I cleaned the area on the horn with alcohol and a cotton swab and then filled it in with clear super glue. For some reason this time around the repair turned white. That has never happened for me. Generally the glue dries clear and the underlying colour of the horn shines through. I set the stem aside to let the glue cure.Bru6The tars and oils were almost petrified on the top of the rim. I had soaked the rim with alcohol to try to soften them with no success. I decided that the best option was to lightly top the bowl until the hard tars were gone. I used a topping board and 220 grit sandpaper to remove the buildup. I sanded the burned area on the bottom of the shank at the same time to remove the surface damage to the briar. I sanded it until the briar was darkened but solid.Bru7Once the rim was clean I sanded it with 1500-3200 grit micromesh sanding pads to smooth out the scratches left behind by the topping of the bowl. I scrubbed out the sump and the open mortise with cotton swabs and alcohol until it was clean. I cleaned out the twin bore tubes with pipe cleaners and alcohol. I used an all purpose wood glue and briar dust to build up the two spots on the inside of the shank and sanded them smooth. They are circled in red in the photo below.Bru8I sanded the repair to the horn with 220 grit sandpaper and sanded the tooth marks and chatter on the top and bottom of the stem until it was smooth. I cleaned out the chamber in the stem with pipe cleaners, cotton swabs and alcohol until it was clean. I had to do two full cleanings remove the tars in the chamber. The first photo below shows the stem after the first cleaning. The second photo shows the second cleaning. It took a lot of cotton swabs to clean out the chamber. I don’t like to boil hot alcohol through horn stems with the retort as I do not want to damage the stem.Bru9With the inside of the stem clean I sanded the exterior with micromesh sanding pads. I wet sanded it with 1500-2400 grit pads and rubbed it down with Obsidian Oil. I dry sanded it with 3200-4000 grit pads and gave it another coat of oil. I finished sanding it with 6000-12000 grit pads and gave it a final coat of Obsidian Oil.Bru10 Bru11 Bru12I polished the Electro-Plated silver end cap with silver polish to remove the tarnish and restore the shine. I stained the rim with a light brown stain touch up pen to match the colour of the rest of the bowl.Bru13I gave the bowl several coats of Conservators Wax and hand buffed it with a shoe brush. I buffed the stem with Blue Diamond on the wheel and then gave the bowl and stem several coats of carnauba. I had a light touch on the bowl so it did not clog up the carvings. I buffed the pipe with a clean buffing pad to shine it and then hand buffed it with a microfibre cloth. The finished pipe is shown in the photos below. Have any of you seen a pipe with plumbing like this one? Do you recognize the hallmarks or the brand or shape number? Let me know as I am curious. Thanks for looking.Bru14 Bru15 Bru16 Bru17 Bru18 Bru19 Bru20 Bru21