Monthly Archives: April 2013

Can a Cracked Bowl be Repaired? – Taking a Lesson from Gan Barber’s Work


Blog by Steve Laug

Many of you have read the piece that Gan wrote on “All the King’s Horses and All the King’s Men – A Peterson Adventure” https://rebornpipes.wordpress.com/2012/10/03/all-the-kings-horses-and-all-the-kings-men-a-petersen-adventure-gan-barber/ In it he described the process of reconstructing a Peterson that was in pieces. It arrived with cracks and he put the pieces back together. Since interacting with Gan on that pipe and rereading his article I have wanted to try my hand at repairing a cracked bowl. Finally I picked one up in an EBay lot that I purchased. It was an L. J. Perretti Smooth Bent Billiard. It was in rough shape and needed a stem. I figured I would practice some of the magic Gan used on the Peterson pipe he wrote about on this one.

This Perretti had some deep cracks that ran through the bowl from outside to the inside. Once I had reamed the extremely thick cake out of the bowl I could see that the cracks went all the way through the briar. There were deep gouged areas on the inner walls of the bowl directly behind the cracks. The wood was not charred so it was not a true burnout. I think that a combination of too thick a cake and possible flaws in the briar made these cracks appear. Interestingly the cracks follow the grain all the way through the pipe. I shined a light through the cracks and I could see light on the opposite wall of the pipe bowl. There were two large cracks on the left side and one running with the grain on the front of the bowl. The one on the front was not as open and it did not go all the way through the briar. The ones on the left side were quite open and cavernous.

The first series of seven photos shows the state of the bowl when I began the experiment. I figured I had nothing to lose on this one. If it fell apart or did not work out it was not a great loss at all, but it would fun giving it a try. I wanted to try out some of the methods that Gan used in his reconstruction of the Pete on this one and see what I could do with it.

IMG_0880

IMG_0881

IMG_0957

IMG_0961

IMG_0958

IMG_0959

IMG_0960

After reaming thick cake back to the bare wood I sanded the exterior with 240 grit sandpaper to clean off the finish and get a better look at the nature and depth of the cracks. I wanted to be able to more clearly see how far across the bowl they stretched and if the cracks followed the grain. I had already seen the state of the inside bowl walls. The left side interior showed damage from the crack extending into the bowl. The front side was less damaged. It had some very minor cracks on the inside walls. I blew air through the shank into the bowl and plugged the top of the bowl to see where the air came through the walls. The only one that really allowed airflow was the larger crack on the left side toward the front of the bowl. The next three photos show the sanded bowl. I left sanding dust in the cracks to highlight their depth and the extent of damage.
IMG_0961

IMG_0962

IMG_0963
I decided to put the bowl in the alcohol bath. I wanted to soften the remaining cake in the cracks and crevices inside the bowl and also soften the grime within the cracks. I had no idea what would happen to the bowl as it soaked. I almost expected it to come out of the bath in several pieces. I got busy with work and other demands and ended up leaving it in the bath for over 24 hours. When I finally removed it and let it dry for several days I figured that the drying would probably make the cracks worse.
IMG_0964

IMG_0965
When I removed the bowl from the bath it was not in pieces but the cracks did open a bit wider on the side of the bowl. The finish and grime was gone and I could clearly see what I had to do if I was going to repair this bowl. The end of the shank had also been damage and chipped so I decided to band it to give me a smooth edge for the new stem I was going to turn for it. I used a nickel band, heated it with the heat gun and pressure fit it on the shank of the pipe. The one bonus in the process was that the grain on this pipe was actually quite nice. The next three photos show the dried and banded bowl and shank. There was still a lot of sanding that would need to be done to prepare the bowl for the repairs and even more sanding once those were done.
IMG_1037

IMG_1036

IMG_1038
I selected a stem that had the same diameter as the shank and turned the tenon on the Pimo Tenon Tool. I finished the fit by hand with a little help from the sanding drum on the Dremel. Once I had a good fit I set up the heat gun and heated the stem to bend it to match the bend of the bowl and bring the tip even with the top of the bowl. The next three photos show the heating and bending process as well as the finished look of the pipe with its new stem.
IMG_1039

IMG_1040

IMG_1041
After I restemmed the pipe I did some more sanding on the bowl. I wanted a clean surface to work with when I did the patches on the cracks. I also cleaned out the inside of the bowl with sandpaper and a dental pick. I wanted to clean out the interior cracks in the bowl as well as the exterior ones. Each would use a different kind of patch but each needed a clean surface to work with. The next five photos show the cleaned exterior of the pipe and two photos of the interior. Still more work needed to be done to clean them up before I patched them.
IMG_1042

IMG_1043

IMG_1044

IMG_1045

IMG_1046
For the exterior cracks I decided to use a patch mix of briar dust and superglue. I cleaned the cracks out with my dental pick and some Everclear. Once they were clean I packed them with briar dust, tamping it into the cracks with both the flat head of a tamper and also the tip of the dental pick. Once they were filled the first time I dripped the superglue into the cracks. The glue binds the dust and the surrounding briar and also compacts the briar dust. I then retamped in some more briar dust and repeated the process until it was filled. The next six photos show the process of filling the cracks around the bowl.
IMG_1047

IMG_1048

IMG_1049

IMG_1050

IMG_1051

IMG_1052
Once all the cracks were filled I sanded the bowl with 240 grit sandpaper to remove the excess material on the surface of the bowl. You will note the scratches in the surface of the briar. These would be removed in the successive sanding that still would be done to the bowl. The cracks are filled and the surface hard. The briar dust and superglue form a good bond with the crack and when dry are dark black in colour. They are hard to the touch even with the dental pick. The next four photos show the bowl after sanding. The surface is smooth to the touch.
IMG_1053

IMG_1054

IMG_1055

IMG_1056
The scratches on the bowl have been minimized with the fine grit sanding sponge pictured above. I continued to sand until the marks were gone using 320 grit sandpaper. Once I had the bowl to that point I wiped it down with Everclear on a cotton pad. The three photos below show the bowl after the wash.
IMG_1057

IMG_1058

IMG_1059
I continued to sand the bowl with micromesh sanding pads from 1500-12,000 grit to smooth out the surface of the bowl. The micromesh left the surface ready to be stained. The cracks are still visible in terms of the black lines but the cavernous gaps are filled and repaired.
IMG_1058

IMG_1060

IMG_1061
I decided to stain the bowl with a rich oxblood aniline paste stain. I applied it to the bowl, flamed it and applied it a second time and flamed it. Once it was dry I wiped it off and hand buffed the surface. My purpose was not to hide the flaws but to minimize the glaring nature of the repairs. The next six photos show the staining and rubbed down bowl. I was not happy with the coverage but I buffed it quickly with White Diamond to see what I had to work with. The final photos in the series of six show the buffed and polished look of the bowl.
IMG_1063

IMG_1064

IMG_1065

IMG_1066

IMG_1067

IMG_1068
I decided to give the bowl a second staining of a dark brown aniline colour. This was a mix of dark brown and alcohol 1:1. I applied it and flamed it. I repeated the process to darken the colour of the bowl. The four photos below show the result of the application of the brown stain.
IMG_1069

IMG_1070

IMG_1071

IMG_1072
After the stain had dried it was time to address the inside of the bowl. I sanded it out quickly with a Dremel with a sanding drum attachment. I was careful not to change the shape of the bowl but to merely remove any carbon cake that still remained. I wiped the inside down with Everclear and then flamed it to dry out the surface of any moisture. I then mixed a batch of JB Weld. This would be the first step in doing the interior repairs. I packed it into the cracks on the inside of the bowl using the spoon end of the pipe nail. I continue to pack it into the bowl cracks until they were smooth. The four photos below show the mix and the patch in the bowl. It has a drying time of 6 hours to dry to touch and 24 hours to cure.
IMG_1073

IMG_1074

IMG_1075

IMG_1076
While the bowl was drying I worked on the new stem. I sanded down the castings on the side of the stem and polished it with micromesh sanding pads. I used 1500-12,000 grit micromesh pads on the stem. I pictured three photos below to show the process.
IMG_1077

IMG_1078

IMG_1079
The next series of eight photos show the patch after it had dried. I also reapplied the JB Weld after the initial 12 hours so that it filled in the places where it had shrunk as it dried. The patch dried a fine grey coloured. I sanded it down until it was only in the cracks themselves and not in the clean briar. I wanted to give the briar as much absorption area as possible as the JB Weld does not absorb moisture at all. It dries to a neutral, hard metallic material that has no taste.
IMG_1080

IMG_1081

IMG_1082

IMG_1083

IMG_1084

IMG_1085

IMG_1086

IMG_1087
Once the JB Weld was cleaned up and reduced to only filling the cracks it was time for the second step of the bowl interior renewal. I mixed a batch of bowl coating composed of activated charcoal powder and sour cream. I stirred the batch until it was a consistent blue/black grey colour. I applied it to the entire bowl from top to bottom with a folded pipe cleaner. Once it dries it is a solid black colour and neutral in taste. It gives the bowl an additional layer of protection until the cake builds up. The next three photos show the mix and the application in the bowl.
IMG_1105

IMG_1107

IMG_1108
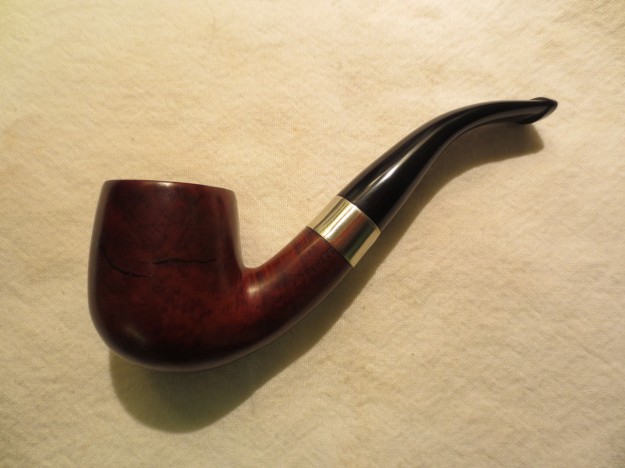
With that done, both the inside and the outside cracks are repaired and the pipe is back in service. I gave the entire pipe a final buff with White Diamond and then applied multiple coats of carnauba wax for protection. The final photos below give you an idea of how the pipe looks today. It is still curing from the bowl coating but I will load it and smoke it once that has cured. The finish of the two stains worked well to blend in the repairs but not hide them. The surface is smooth and the open cracks have been repaired. Now the ongoing test begins. Will the patches hold up or will the new heat from the fired tobacco open them a second time? Time will tell but it is worth the experiment in my opinion.
IMG_1089

IMG_1090

IMG_1091

IMG_1092

IMG_1093

IMG_1094

An OxyClean Experiment


Blog by Greg Wolford

Not long ago I was involved in a discussion about what I do when I start restoring an estate pipe. The subject was on removing oxidation from stems so I stated that the first thing I do is an OxyClean bath, soaking for an hour to overnight. One of the folks involved thought I meant that I put stummel and all in the soak and asked what it did to the briar. I explained that I didn’t put the stummel in, only the stem. But this got me wondering what would happen if I put the whole pipe in … this this experiment.

I picked this little pipe up in a lot and thought at first it was just a “toy” but closer inspection showed it had been used by its former owner – a lot. The cake was surprisingly thick and I figured it must have been his short smoke pipe. This unmarked little guy would be my Guinea pig.

I dropped the separate pieces into the Oxy bath and left it overnight, doing no reaming, acetone wipe, or anything else before so. It sat overnight as the OxyClean did its work.

When I returned to it the next day I retrieved the stem first and saw the soak had done its job on bringing up the oxidation. And I was a bit surprised how much oxidation there actually was. But onto more pressing issues: What did the briar look like?

So I reached in and pulled out the stummel and immediately felt the slick, almost slimy feeling that an OxyClean soak gives stems was on the briar, too. I began wiping it dry and noticed immediately that almost all the finish and a fair amount of the stain was gone. There was one patch that didn’t seem to be too effected by the soak, maybe it was not fully submersed; I don’t know.

The next thing I noticed was the cake, or lack thereof. The OxyClean bath had removed pretty much all of the buildup in the bowl and on the rim, which wasn’t to bad to start with. It would most likely not need any reaming after it was dry from looking at it.

So, what do I think about soaking the whole pipe in OxyClean now? I think that of removing the finish and stain are your goal and it has a fair or greater build up of cake/tars, this probably a pretty viable option. I still need to get the rest of the finish off and sand the stem and stummel; it is nowhere near finished. But I am leaning toward this experiment being called a success. Of course after the pipe has dried well and I finish the work on it I’ll have a better idea of what the pros and unknown at this time cons are so more experimentation is needed to say for sure. But at this stage I think I have new weapon to use (really an old one in a new way) for certain situations. Time will surely tell.

20130418-103448.jpg

20130418-103457.jpg

A Book Review – Tobacco Leaves – Being a Book of Facts for Smokers


The cover of the book

The cover of the book

I picked up a few tobacco and pipe books from Project Gutenberg as EBooks that I am reading on my iPad. The first of these is a fascinating read. It is written in a very modern and readable style that belies the fact that it came out in 1915. It is called Tobacco Leaves – Being a Book of Facts for Smokers – W.A. Brennan 1915. Brennan’s states his purpose in the paragraph’s below copied from the introduction to the book.
“This little book is intended for the man who uses tobacco. While there is a very extensive literature concerning tobacco, yet it is surprising how few books there are written expressly for the smoker. Much has been written concerning culture, production and manufacture; the historical and anecdotal aspects have been catered for; pamphlets and books abusing and denouncing the use of tobacco are plentiful; but the smoker will find it difficult to get a book just giving him the facts concerning tobacco and smoking, which he ought to know, and omitting matters, which, although interesting, are not necessary. This little book is an attempt to fulfill that purpose; and it is felt that no apology is needed for its appearance. (My emphasis) If the average user of tobacco is questioned concerning the matters treated in the following pages, he will be found ignorant of them. This ought not be so. The custom of tobacco smoking is so general and so intimate a part of the daily life of the great majority of men that a better acquaintance with the plant, its qualities, uses and effects should be cultivated and welcomed.

No claim is made for originality. The facts here stated have been gathered from various sources and the only credit claimed is for putting them together in a concise and consecutive form. The object aimed at is to give information. Whether the custom of tobacco smoking is desirable, whether in any individual case it would be beneficial or otherwise to smoke—these and similar questions are left to the reader’s own judgment from the facts and opinions presented, as well as from his own observations. The man who uses tobacco daily should know what he is doing. If statements are made either verbally or in print concerning the custom he should be able to verify them or show that they are incorrect. It is trusted that the information given in these pages will enable him to form a clear judgment whatever the judgment may be.

It may be felt that many aspects of the use of tobacco and matters connected with it have either not been touched on, or only referred to very briefly. The reader who may desire further information will find it in the bibliographical references given throughout the book. These references have generally been consulted by the author and his indebtedness is acknowledged here.” Tobacco Leaves – W.A. Brennan, page 5.

I have divided the book into three parts for ease of reference for me as I write this review and as a way to classify the material found in each part of the book. What I have labeled as Part 1 covers all of the material regarding cultivation, production, processing and sales of the product. Brennan begins the book with a short history of tobacco and its place in the botanical world as he calls it (Chapter 1). From there he covers cultivation, production and curing of tobacco both in the US and in Europe. He talks in a clear and non-confusing way about the chemical composition of tobacco (Chapters 2-6). All of this material serves as a backdrop to the marketing, manufacture and processing of tobacco into the products that smokers imbibe (Chapters 7-9).
Part 2 (Chapters 10-16) looks at the various tobacco products available and talks about their history, manufacture and use. It is this section that covers the products that are manufactured from the processed tobacco. He covers cigars, pipe tobacco, chewing tobacco, cigarettes and snuff. Each chapter gives the details in production and use of the product. I found the material interesting to read and also very informative. I learned things about each product that was new information to me. He begins three chapters on cigars. He is not as concerned with various brands that are available but is looking at the historical and general facts about cigars, their quality and their making (Chapters 10-12). He combines the chapter on Pipe smoking and chewing tobacco into a brief and concise description of preparation of the tobacco and the products themselves. He covers such topics as Qualities required–Description of kinds–Perique tobacco—and Statistics (Chapter 13). He gives a brief description of cigarettes and their manufacture and use as well as domestic and imported brands (Chapter 14). Chapter 15 is a very good description of the use of snuff and it making. He concludes the part of the book I call Part 2 with a brief discourse on Tobacco pipes. I found this chapter interesting even though there was no new information. I enjoyed his way of talking about the subject. He gives a brief history of pipes and how they are made as well as the materials used in making. He speaks of Meerschaum, briar, and the materials used for the stems. He gives a brief discourse on special kinds of pipes and ends the chapter with a few pointers on the care of pipes (Chapter 16).
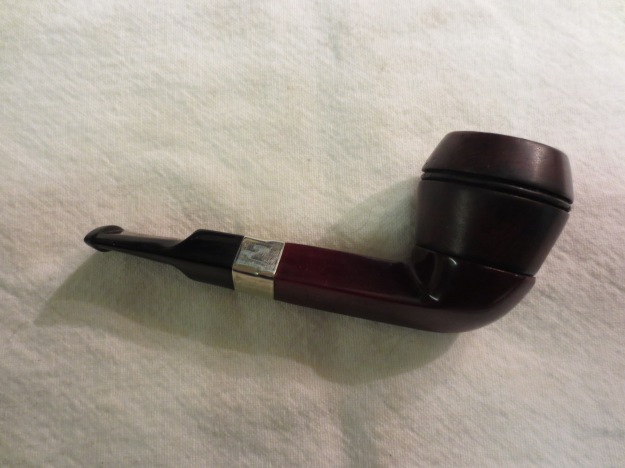
Part 3 (Chapters 17-19) develops several chapters on the effects and benefits of tobacco us. Chapter 17 is a brief chapter on the physical effects of tobacco smoking on the human system and gives medical opinions on tobacco use and discusses the merit of the opinions. Chapter 18 discusses the beneficial effects of tobacco. This section is one that never would have been printed in today’s politically correct climate. He speaks of the disinfecting action of tobacco as protection against infectious disease and ends this chapter with an interesting piece on the psychological effects of smoking. Chapter 19 concludes the book with topics that really do not fit anywhere else within the scope of the book but are interesting nonetheless. These cover such topics as revenue, taxation, etc., in connection with tobacco, the insect pests which attack tobacco and tobacco flavoring fluids, etc.

The book is very readable and the style is fresh and enjoyable. The author has met the objectives that he spelled out in his purpose statement early in the book. I heartily recommend this book to fellow pipemen. I don’t know about you but there is always something to learn or be refreshed on in the arena of our pipes and tobaccos.

I have included a short version of the table of contents for you to have a look at. It will show you the flow and development of the book over the course of the pages.

Chapter 1 – Historical and Botanical
Chapter 2 – The Cultivation of the Tobacco Plant
Chapter 3 – Production of Tobacco
Chapter 4 – Production of Tobacco in the United States
Chapter 5 – The Chemical Composition of Tobacco
Chapter 6 – The Curing of Tobacco Leaf
Chapter 7 – The Marketing and Sale of Tobacco Leaf
Chapter 8 – Rehandling and Fermentation of Tobacco Leaf Prior to Manufacture
Chapter 9 – Manufactured Products of Tobacco in the United States
Chapter 10 – Cigars: Historical and General Facts
Chapter 11 – Cigars and Their Qualities
Chapter 12 – Cigar Making
Chapter 13 – Pipe Smoking and Chewing Tobacco
Chapter 14 – Cigarettes
Chapter 15 – Snuff
Chapter 16 – Tobacco Smoking Pipes
Chapter 17 – Effects of Tobacco Smoking on the Human System
Chapter 18 – The Beneficial Effects of Tobacco
Chapter 19 – Miscellaneous

The book is available as a free e-book from the Gutenberg Project. It can be downloaded in a format the works on iPads or Kindles etc. It is also available in PDF format or can be read online. Here is the link: http://www.gutenberg.org/ebooks/37388

Wood Working Toxic Woods


Blog by Steve Laug

I have used several exotic woods, such as coco bola and ebony when I make shank extensions and have purchased pipes from others that have such woods incorporated in the pipe. I have always wondered about the saw dust and sanding dust that is generated by these woods and what damage if any they can cause. As I did a bit of digging on the web for information came across these charts. I saved them but somehow lost the link. One of the readers Larry G. found the link for me and I include it now http://www.spacecoastwoodturners.com/newsletter/Toxic_Woods.pdf
I found this helpful information to have on hand so I am posting it here for those who are interested. It is entitled Wood Working Toxic Woods. It lists toxic woods and the reaction they cause and the symptoms.

Toxic_Woods-1
Toxic_Woods-2
Toxic_Woods-3
Toxic_Woods-5

A Renewed WDC Bakelite and Briar Pipe Restemmed


I received the Bakelite bowl base in a lot that I picked up on EBay. At first glance I figured I would trash it and not worry about working on it at all. However, I tend to be drawn to working on things that others would throw away so I decided to see what I could do with it. The two bowls pictured below are threaded and both fit the base. The Dublin like bowl, once on the base, was too narrow for the base but the bulldog bowl fit well. It was packed with a cake and there were chips out of the double line band around the bowl. The bowl rim was damaged and the finish was absolutely shot with dark black stains in the briar all around the bowl where the thumb and fingers held the bowl. The Bakelite shank had the WDC in a diamond stamped on it. The ornate band that usually adorned the shank as well as the metal washer like band on the top of the bowl base was missing. The shank had a broken metal tenon stuck deep within it. The surface had scratches in it but none of them were too deep.

Bakelite bowl base and two potential bowls before beginning the process of refurbishing.

Bakelite bowl base and two potential bowls before beginning the process of refurbishing.


The bowl is pictured below. You can see the thickness of the cake and the rough surface of the rim where a previous owner had damaged it when emptying the bowl. The second photo shows the exterior damage and the finish on the pipe. I reamed the bowl to clean out the cake. I decided to take it back to bare wood and start over with the cake. I checked the bowl for cracks and damage but surprisingly there were none to be found. Eventually I would top the bowl.
SIde view of the bowl before refurbishing.

SIde view of the bowl before refurbishing.

Top view of the unreamed pipe bowl showing its condition before cleaning

Top view of the unreamed pipe bowl showing its condition before cleaning


I wiped the bowl down with acetone on a cotton pad, used a dental pick to clean out the grooves and screwed bowl on the base to get an idea how the pipe would look. I also wiped down the bowl base with Everclear to clean off the grime and buildup on that surface. I went through my can of stems in search of a diamond shaped stem that would finish out the look of the pipe. I came up empty-handed so I chose a round stem of the right diameter and length that I could shape to fit the shank. I drilled out the shank to remove the metal tenon and also to open the diameter of the mortise. The original stem had been a screw on one and the metal mortise and the metal tenon were firmly welded together so the drill was the only way to remove it. I opened it as wide as possible while still leaving enough material on the shank to maintain strength. I turned the tenon with the PIMO tenon turning tool and then a Dremel to bring it to the correct size for the new shank. The next two photos show the stem and the fit of the stem to the shank.
WDC base in need of a diamond shaped stem. Necessity is the mother of invention. I used a round Lovat stem.

WDC base in need of a diamond shaped stem. Necessity is the mother of invention. I used a round Lovat stem.


I turned the tenon to fit the mortise and then inserted the stem against the shank.

I turned the tenon to fit the mortise and then inserted the stem against the shank.


Now I needed to shape the stem and remove material to transform the round saddle bit to a diamond saddle bit. I used a Dremel to cut the basic shape in the stem. I proceeded from side to side with the stem on the shank to make sure to match the angles of the shank. I wrote a post on the process for the blog and posted that earlier. You can read about the details of that process on this link https://rebornpipes.wordpress.com/2013/04/15/shaping-a-diamond-shaped-stem-from-a-round-one/ The next eleven photos give a quick look at the shaping work on the stem. It took time and I had to be careful to not damage the shank when I was using the Dremel and sanding drum on the stem.
Figure 3 I used a Dremel to shape the stem to match the diamond angles of the shank. I worked on one side at a time.

Figure 3 I used a Dremel to shape the stem to match the diamond angles of the shank. I worked on one side at a time.

Figure 4 Pipe resting against the Dremel with a sanding drum. Shaping progressed quite quickly. This picture shows one side beginning to take shape.

Figure 4 Pipe resting against the Dremel with a sanding drum. Shaping progressed quite quickly. This picture shows one side beginning to take shape.

5 Top view of the shank. Both sides of the round stem are beginning to take on the shape of the shank.

5 Top view of the shank. Both sides of the round stem are beginning to take on the shape of the shank.

Figure 6 Top view after more shaping with the Dremel.

Figure 6 Top view after more shaping with the Dremel.

Figure 7 Bottom view before the Dremel did its work.

Figure 7 Bottom view before the Dremel did its work.

Figure 8 Left side view after the first side has begun to take shape.

Figure 8 Left side view after the first side has begun to take shape.

Figure 9 Bottom view after both sides have begun to take shape.

Figure 9 Bottom view after both sides have begun to take shape.

Figure 10 Right side view of the stem after it began to take shape.

Figure 10 Right side view of the stem after it began to take shape.

Figure 11 Back to the worktable and the hand sanding.

Figure 11 Back to the worktable and the hand sanding.

Figure 12 Hand sanding continues.

Figure 12 Hand sanding continues.

Figure 13 Hand sanding continues.

Figure 13 Hand sanding continues.


The original shank had sported an ornate band and the stain in the Bakelite showed the marks of the band. I did not have any ornate bands in my collection of bands so I chose instead to band it with a nickel band. I shaped the band to fit, beginning with a round band. This took a bit of fussing to get the shape and fit correct. I have written that process up in detail in a previous blog post as well. You can read about the process at this link https://rebornpipes.wordpress.com/2013/04/15/shaping-a-round-metal-band-to-fit-a-square-or-diamond-shank/ Once the band was shaped correctly I heated it with a heat gun until it was pliable and then pressure fit it on the shank of the pipe. The next series of five photos show the process I used to pressure fit the band on the shank. Once it was in place I carefully used my furniture hammer to flatten the band against the shank.
The square is done

The square is done

Fitting a nickel band on the shank

Fitting a nickel band on the shank

Fitting a nickel band on the shank

Fitting a nickel band on the shank

Nickel band fitted on the shank

Nickel band fitted on the shank

Nickel band fitted on the shank

Nickel band fitted on the shank


The next series of four photos show the newly shaped stem in place on the banded pipe. There was still a lot of work to do on the pipe including cleaning the internals and reworking the bowl and rim but the overall look of the “new” pipe is intriguing.
New band and stem in place.

New band and stem in place.

New band and stem in place

New band and stem in place

Bottom view of the newly banded and stemmed pipe

Bottom view of the newly banded and stemmed pipe

Top view of the new band and stem

Top view of the new band and stem


I have included one photo below to give you an idea of the shape of the new stem. I remove a lot of vulcanite to get it from its original round shape to the diamond shape pictured below. The fit and the angles match the shank perfectly. These older pipes are tricky to fit a diamond stem on because none of the sides of the diamond are the same dimensions. Each one is just slightly different so you have to do the fitting work with the stem in place on the shank.
View from the tenon end of the diamond stem at this point in the process.

View from the tenon end of the diamond stem at this point in the process.


With the stem fitting correctly it was time to tackle the bowl. I set up my board and emery paper so that I could top the bowl. The first photo shows the set up. The second photo shows the state of the bowl rim when I started the process.
Set up for topping the bowl

Set up for topping the bowl

Reamed and ready to top

Reamed and ready to top


Once I had it topped I decided to wipe it down with acetone on a cotton pad to remove the finish and the grime from the topping. The next three photos show the clean bowl and the topped bowl. The finish work would take some time but the bowl was ready to move on to the next stage of rejuvenation.
Wiping down the bowl with acetone

Wiping down the bowl with acetone

Wiping down the newly topped rim with acetone

Wiping down the newly topped rim with acetone

Wiping down the bowl with acetone

Wiping down the bowl with acetone


I sanded the bowl with 240 and 320 grit sandpaper and finished sanding with a fine grit sanding sponge. The next two photos show the cleaned and prepped bowl ready for staining. The dark oil stains on the sides of the bowl would not come out. I wiped the bowl down with repeated washings of acetone and the surface was clean. I also sanded the stem with the sanding sponge while I worked on the bowl.
Bowl sanded, in place and ready to stain.

Bowl sanded, in place and ready to stain.

Bowl in place, sanded and ready to stain.

Bowl in place, sanded and ready to stain.


I decided to restain this old timer with an opaque oxblood aniline based stain. I wanted the opacity so that the dark stains would be minimized beneath the new stain and would eventually be blended in through smoking the pipe. I applied the stain and then flamed it. After flaming I hand buffed it to remove the excess stain. I also used a cotton pad and a dental pick to clean out the grooves on the bowl.
Stained with oxblood stain.

Stained with oxblood stain.

Stained with oxblood stain.

Stained with oxblood stain.


The next series of four photos shows the hand buffed bowl in place on the pipe base. The finish was matte at this point and still needed to be taken to the buffer to raise the shine. The third photo shows the rim. The surface is smooth but there is still damage to the inner edge of the rim. I chose to leave that without reworking it too much. I did not want to change the roundness of the inner bowl and decided that I could live with the nicks in the inner edge.
Left side of the pipe with a hand buff on the newly stained bowl.

Left side of the pipe with a hand buff on the newly stained bowl.

Right side of the newly stained bowl with a hand buffed surface.

Right side of the newly stained bowl with a hand buffed surface.

Top view of the hand buffed newly stained bowl.

Top view of the hand buffed newly stained bowl.

View of the underside of the bowl and Bakelite bowl base.

View of the underside of the bowl and Bakelite bowl base.


The next three photos show the pipe after I had buffed it with White Diamond. The bowl shines and the dark marks around the bowl show faintly beneath the finish but add a flair of character to the old pipe.
Buffed with White Diamond

Buffed with White Diamond

Buffed with White Diamond

Buffed with White Diamond

Buffed with White Diamond

Buffed with White Diamond


The next series of three photos are included to give an idea of the polishing process that went into bringing the stem work to completion. Again I invite you to read the post mentioned above on the transformation of a round saddle stem to a diamond shaped one to understand the full work that the shaping took to bring it to this place.
Stem sanded with 320 grit sandpaper

Stem sanded with 320 grit sandpaper

IMG_1021

Stem sanded with 320 grit sandpaper

IMG_1022

Stem sanded with micromesh sanding pads


Once I had finished polishing the stem with the various grades of micromesh from 1500-12,000 grit I took the pipe to the buffer once again and buffer the entirety with White Diamond and then gave it multiple coats of carnauba wax to protect it and to give it a deep shine. The next series of four photos show the finished pipe. It is ready to load up with a favourite tobacco and be gently sipped in the solitude of an afternoon on the porch.

IMG_1032

IMG_1033

IMG_1034

IMG_1035

Shaping a Diamond Shaped Stem from a Round One


Blog by Steve Laug

This morning I found myself in need of a diamond shaped stem – a short Lovat style stem for a long shanked pipe I was restemming. I did not have any diamond shaped stems in my can of stems so I decided to craft one. I took a round stem that had the same diameter as the high points on the diamond shank and turned the tenon to fit. It was a tiny diameter mortise so I did a lot of work on it with my dremel and with files and sandpaper. Once I had the fit on the mortise I inserted it in place and used the Dremel to reduce the round sides of the stem to match the diamond shank.

Figure 1 WDC base in need of a diamond shaped stem. Necessity is the mother of invention. I used a round Lovat stem.

Figure 1 WDC base in need of a diamond shaped stem. Necessity is the mother of invention. I used a round Lovat stem.

Figure 2 I turned the tenon to fit the mortise and then inserted the stem against the shank.

Figure 2 I turned the tenon to fit the mortise and then inserted the stem against the shank.

I worked on one side at a time with the sanding drum on the Dremel running at medium speed. I worked holding the pipe bowl and shank in hand and holding the Dremel with the sanding drum perpendicular to the stem. I worked it the length of the saddle until each side was set at the same angle as the shank of the pipe. This took care so as not to damage the Bakelite of the shank and base.

Figure 3 I used a Dremel to shape the stem to match the diamond angles of the shank. I worked on one side at a time.

Figure 3 I used a Dremel to shape the stem to match the diamond angles of the shank. I worked on one side at a time.

Figure 4 Pipe resting against the Dremel with a sanding drum. Shaping progressed quite quickly. This picture shows one side beginning to take shape.

Figure 4 Pipe resting against the Dremel with a sanding drum. Shaping progressed quite quickly. This picture shows one side beginning to take shape.

5 Top view of the shank. Both sides of the round stem are beginning to take on the shape of the shank.

5 Top view of the shank. Both sides of the round stem are beginning to take on the shape of the shank.

I finished the top side of the stem with the Dremel before going on to the underside. I worked the Dremel so as to leave a relatively straight line down the centre of the stem. The goal was to align the line with the line of the shank on each side. I eye balled it at this point and would fine tune it when I worked it with sandpaper.

Figure 6 Top view after more shaping with the Dremel.

Figure 6 Top view after more shaping with the Dremel.

Figure 7 Bottom view before the Dremel did its work.

Figure 7 Bottom view before the Dremel did its work.

Figure 8 Left side view after the first side has begun to take shape.

Figure 8 Left side view after the first side has begun to take shape.

Figure 9 Bottom view after both sides have begun to take shape.

Figure 9 Bottom view after both sides have begun to take shape.

Figure 10 Right side view of the stem after it began to take shape.

Figure 10 Right side view of the stem after it began to take shape.

From this point in the process all the work was done by hand with a variety of sandpapers from medium grit emery paper through 220 grit sandpaper. I wanted to smooth out the angles and align the edges with the straight line of the shank.

Figure 11 Back to the worktable and the hand sanding.

Figure 11 Back to the worktable and the hand sanding.

Figure 12 Hand sanding continues.

Figure 12 Hand sanding continues.

Figure 13 Hand sanding continues.

Figure 13 Hand sanding continues.

Figure 14 View from the tenon end of the diamond stem at this point in the process.

Figure 14 View from the tenon end of the diamond stem at this point in the process.

Originally the Bakelite base had a band on it. I used an older complete one I have here for an example so that I could get the feel for it. The original was more of a brass/gold coloured ornamental band. I have none of those bands so I used a nickel band. After fitting the band I needed to reduce the tenon slightly for a snug fit and also work on the angles of the sides and corners of the diamond to match the banded shank.

Figure 15 Top view after more hand sanding with a medium grit sanding sponge.

Figure 15 Top view after more hand sanding with a medium grit sanding sponge.

Figure 16 Bottom view after more hand sanding with a medium grit sanding sponge.

Figure 16 Bottom view after more hand sanding with a medium grit sanding sponge.

At this point in the process I removed the stem from the shank and worked on the sides with a fine grit sanding sponge to remove the scratches and marks from the previous grits of sandpaper. Once I was finished with this portion I cleaned off the stem with a soft cotton pad and Everclear so I could see the scratches that were left before I moved on to sanding with the micromesh sanding pads.

Figure 17 Top view. Shape is finished. Now to sand out the scratches and polish the stem.

Figure 17 Top view. Shape is finished. Now to sand out the scratches and polish the stem.

Figure 18 Side view. Shape matches the shank perfectly. Need to remove scratches and polish.

Figure 18 Side view. Shape matches the shank perfectly. Need to remove scratches and polish.

Figure 19 Bottom view. Need to remove scratches and polish.

Figure 19 Bottom view. Need to remove scratches and polish.

Figure 20 Tenon end view of the diamond shape of the shank. The hardest part of shaping a diamond stem on an old pipe shank like this one is that all sides of the shank were slightly different measurements so that all sides of the stem would have to be as well to match the angles.

Figure 20 Tenon end view of the diamond shape of the shank. The hardest part of shaping a diamond stem on an old pipe shank like this one is that all sides of the shank were slightly different measurements so that all sides of the stem would have to be as well to match the angles.

Once I saw the scratches that remained I worked over the stem with 320 grit sandpaper to remove the scratches and clean up the surface so that when I sanded with the micromesh the deeper scratches would be gone.

Figure 21 Left side after sanding with 320 grit sandpaper.

Figure 21 Left side after sanding with 320 grit sandpaper.

Figure 22 Right side after sanding with 320 grit sandpaper.

Figure 22 Right side after sanding with 320 grit sandpaper.

Figure 23 End view showing the diamond shape after sanding with 320 grit sandpaper.

Figure 23 End view showing the diamond shape after sanding with 320 grit sandpaper.

Finally with the scratches removed it was time to move on to the micromesh sanding pads. Photos 1 & 2 show the stem after sanding with 1500 and 1800 grit micromesh. It should clean up nicely with each successive grit of micromesh. Photo 3 shows the stem after sanding with the 2400 grit micromesh. With all three of these grits I wet sanded the stem.

Figure 24 Left side after sanding with 1500 and 1800 grit micromesh sanding pads

Figure 24 Left side after sanding with 1500 and 1800 grit micromesh sanding pads

Figure 25 Right side after sanding with 1500 and 1800 grit micromesh sanding pads.

Figure 25 Right side after sanding with 1500 and 1800 grit micromesh sanding pads.

Figure 26 Right side after sanding with 2400 grit sanding pads

Figure 26 Right side after sanding with 2400 grit sanding pads

I moved on to the higher grits of micromesh. The next five photos below show the 3600 and 4000 grit micromesh. I dry sanded with these pads. The scratches have pretty much disappeared and the higher grits will give the stem a deep shine.

Figure 27 Sanding with 3600 and 4000 grit micromesh.

Figure 27 Sanding with 3600 and 4000 grit micromesh.

Figure 28 Right side sanded with 3600 and 4000 grit micromesh pads.

Figure 28 Right side sanded with 3600 and 4000 grit micromesh pads.

Figure 29 left side of the stem - sanding with 600 and 4000 grit micromesh.

Figure 29 left side of the stem – sanding with 600 and 4000 grit micromesh.

Figure 30 Top view of the stem after sanding with 3600 and 4000 grit micromesh.

Figure 30 Top view of the stem after sanding with 3600 and 4000 grit micromesh.

Figure 31 Bottom view of the stem after sanding with 3600 and 4000 grit micromesh

Figure 31 Bottom view of the stem after sanding with 3600 and 4000 grit micromesh

The next photo shows the view of the stem from the tenon end. The diamond shape is complete and the remnants of it being a round stem are gone. More polishing will bring this to life.
IMG_1027
From this point on in the process I dry sanded with 6000, 8000 and 12,000 grit micromesh to finish the polishing. Once finished I buffed it with White Diamond and then gave it multiple coats of carnauba wax to preserve the stem. The next four photos show the finished stem.

Figure 33 Right side view of the finished stem.

Figure 33 Right side view of the finished stem.

Figure 34 Left side view of the finished stem.

Figure 34 Left side view of the finished stem.

Figure 35 Top view of the finished stem.

Figure 35 Top view of the finished stem.

Figure 36 View of the stem from the tenon end.

Figure 36 View of the stem from the tenon end.

At this point the stem is finished and ready to be added to the WDC pipe that I was restemming. This process proved a point I have held forever – within in every stem resides another smaller stem or at least one of a different shape. That is why I rarely get rid of a stem. They can be reshaped, the button added on a second time a new tenon added… you get the picture.

Shaping a Round Metal Band to Fit a Square or Diamond Shank


I have been working on refining the process of shaping the nickel bands that I use in repairing cracked shanks. The pressure fitting of round or oval bands is relatively easy. The round bands merely need to be heated and then pressed into place. The oval bands need to be “squashed” to size. This is a bit trickier in that you need to figure out the diameter of the “unsquashed” circle of the shank and match that with the band size that will be used. Doing this has been a bit of an experimental process for me. I am getting to where I can estimate the size and when it is shaped accordingly it fits well. But that took time. I have no special tools to help with the measurements other than a tape measure that enables me to get close to the size I want to begin with.

Tools of the trade

Tools of the trade


The starting point - a round band

The starting point – a round band


But when it comes to shaping a diamond shanked band or a square shanked band that is a different matter altogether. I begin with a band that has the same diameter as the shank of the pipe I am going to work on. I squeeze it to an oval and try to pinch both ends to get a fold. I then squeeze it into an oval the other direction and pinch the ends. This gives me a band that is in essence a square with a bulge on each side.
Squashed to an oval - step 1

Squashed to an oval – step 1

Squashed to an oval the other direction - leaving an odd shaped almost square

Squashed to an oval the other direction – leaving an odd shaped almost square


Once I have the basic shape squared as it appears above, I use a flat blade screwdriver to square up the corners. I place the blade of the screwdriver flat against the inside edge from one side to the other and then push the outside edge with my fingertips working my way around the square on both sides. With this process I have roughly squared up the band and it is ready to be placed on the shank of the pipe.
IMG_0983
I slide it on the shank of the pipe as far as it will go without binding and then use a small furniture hammer (picture above) to square the edges of the band. I then reverse the band and do the same thing a second time. I am very careful with the hammer as I do not want to crack the shank. I merely want to get the band as square as possible before I heat it and pressure fit it on the shank. The next two photos show the squared band after it had been put on the shank and tapped into shape with the hammer. I finished by reinserting the screwdriver and squaring off the corners.
The square is done

The square is done

The band is squared and ready to be pressure fitted.

The band is squared and ready to be pressure fitted.

The new band is in place on the shank.

The new band is in place on the shank.


That is the journey in photos and words from a round to a diamond/square band. As you work with bands and improve upon my method keep us posted. I am always open to learning better and more efficient ways of working. One thought I have had is to get square blocks of various sizes of either hardwood or metal and use these inserted in the band to allow me to flatten the band more thoroughly and sharpen the corners. But until then what you see in this article is what I do and so far it works for me.

Reflections on the Historical Background on CPF Pipes


Blog by Steve Laug

One of the secondary hobbies to pipe refurbishing that I enjoy doing is to research the history of a particular brand or make. In a recent EBay lot I bought there were 3 pipes that were stamped with the CPF logo – CPF in an oval with the word FRENCH stamped in an arch above the oval and the word BRIAR stamped in an arch below the oval. I had heard that the CPF stood for a variety of names from Consolidated Pipe Factory to Colossal Pipe Factory and even Chesterfield Pipe Company. There was a wide range of conflicting information available on the websites and forums that I looked read while looking into the brand. One evening while I was talking with Chuck Richards about the lot (I know that over the years he has seen quite a few old CPF brand pipes) he suggested that I ask Robert Boughton about it. Chuck said that Robert had done some work on the brand when he was given an old Meerschaum to refurbish. I contacted Robert and he sent me a variety of links that he had found. He had looked into the history and background of the CPF brand stamp. He wrote that he had found in his research that “…CPF definitely stands for Colossus Pipe Factory, a late 19th and early 20th century American venture that in its short, happy life created some of the most beautiful briar and Meerschaum pipes ever made”. He sent me a link to the stampings and logos site (1) http://pipephil.eu/logos/en/logo-c1.htmlbelowwhere he had found photos that showed the curved circular printing of French Briar around the CPF oval as well as some with a space between where the customary CPF mark was stamped within an oval enclosure. He had also looked into a variety of EBay offerings of CPF pipes and also on Worthpoint.com. He found some amazingly beautiful pipes for sale.

Throughout this article I have inserted photos of some of the CPF pipes that I have refurbished as examples. All of them showed the marks of having originally had rim caps and shank caps. Some of the older ones that I have seen have had beautiful filigree decorations in these areas.

Figure 1 CPF Bulldog - restored by Steve Laug

Figure 1 CPF Bulldog – restored by Steve Laug


Armed with the information that Robert sent I decided to do some more digging into the brand. I found information on the CPF brand that verified his findings on the meaning of initials. CPF stands for Colossus Pipe Factory. There is not much known about the Colossus Pipe Factory. I learned that by the mid 1890’s CPF was owned by Kaufman Brothers & Bondy (KB&B). They operated the factory at 129 Grand Street, in New York City, New York. I had a faint memory of some connection between CPF and Kaufmann Brothers & Bondy. But was unsure where I had heard or read that. In the process of reading information I came across this post by Bill Feuerbach on the Kaywoodie Forum: “About 10 years ago I picked up two original invoices from KB&B. One is dated February 5, 1884 and the other December 9, 1898. Both have the address as 129-131 Grand Street, which is in Soho, adjacent to the Bowery in New York City. The 1898 invoice has in the upper left hand corner the initials CPF and Trademark. So by 1898 KB&B was making it known to the trade that they owned the CPF trademark. The 1884 invoice does not have CPF on it. Therefore I think we can assume KB&B acquired or started the CPF line sometime between 1884 and 1898.” (2)
Figure 2 CPF Bent Billiard - restored by Steve Laug

Figure 2 CPF Bent Billiard – restored by Steve Laug


Robert Boughton also provided a link to a scan of a page from a trade magazine called “The Jeweler’s Circular”, dated August 23, 1899.(3) http://pipedia.org/index.php?title=C…s_Pipe_Factory In scanning through it I found that at the bottom of the center row of the clip a question sent in by a reader as follows, “Please inform as who manufactures briar pipes with the trademark, CPF?” The answer that was given in the article was, “These letters stand for Colossus Pipe Factory, the business being conducted by Kaufmann Bros. & Bondy, 129 Grand Street, New York.” I did a bit more digging as I wanted to find out the source of the Pipedia clipping. I found that the original source of this information was also Bill Feuerbach. He wrote the following on the Kaywoodie Free forum, “Now as for what CPF means. About 5 or 6 years ago Gary Schrier, pipe book author/publisher and pipe collector from Seattle sent me a copy of page 30 from the Jewelers’ Circular dated August 23, 1899. I assume this was a publication for the jewelry trade. On this particular page they have questions for the editor. One question is “Editor of the Jewelers’ Circular: Please inform us who manufactures briar pipes with the trade-mark rude cut: C.P.F. Thank you in advance for your trouble and kindness”. The answer was “Those letters stand for Colossus Pipe Factory, the business being conducted by Kaufmann Bros. & Bondy, 129 Grand St., New York.”

The address in the scanned document referred to above is the same address as the one on the invoices that Bill referred to in the quoted post in the previous paragraph. This industry/trade magazine, published at the time the CPF brand was being made, reports that the C in the CPF brand means Colossus rather than Consolidated or Chesterfield. To me that answers the question quite definitively.(4)

Figure 3 CPF Billiard - restored by Steve Laug

Figure 3 CPF Billiard – restored by Steve Laug


Even with that clear information from Bill, in both the invoices and the article in the trade jounal there still is some disagreement among pipemen as to the meaning of the letters in the brand. In my research I came across a few divergent opinions on the brand and I thought it important to cite them. The following information comes from Samuel Goldberger of Finepipes Estate pipe website as referenced below. On the page on his site dedicated to CPF pipes Sam wrote, “I have not found any clear history of CPF, but I have developed some ideas about them, based upon my study of early American made pipes. By the turn of the last century, a number of small pipe making factories had collected in and around New York City, including the William Demuth Company (WDC) and Kaufman Brothers and Bondi (KB&B), later to become Kaywoodie. From the design and quality of execution of these pipes, I believe the factories must have been staffed by European immigrants, probably Jewish, who had been trained in the older traditions of pipe making in France, Germany and Austria. The pipes they produced were in a similar style. They were expertly cut from very old, air-cured Algerian briar in classical shapes or from the finest grade of Turkish meerschaum; they sometimes rather small; they often had amber or Bakelite mouthpieces, gold or silver fittings. It’s my suspicion that pipes from these small makers were at one time sold or marketed under the name “Consolidated Pipe Factory.” Alternatively, CPF may have been the name of the distributor.” (5) Personally, not to disparage Sam’s ideas, I find the information provided by Bill Feuerbach in the paragraphs above to be conclusive that CPF stands for the Colossus Pipe Factory.

Further, in my research I found that others commented on the fact that they had seen pipes with both the CPF logo and KB&B logo on them that date to pre-1900. I too have seen, refurbished and sold some that bore both stampings/logos. This has led me to wonder if the dual stamping may have been a way to let pipe smokers of the time know that the companies were affiliated. From my reading and research it seems to me that CPF brand was discontinued sometime in the 1910-1920 range. Again, turning to Bill Feuerbach I found that he notes the following, which pins down the time frame of the discontinuation of the brand more specifically, “I have a CPF Chesterfield in our office display that has a nametag from way before my time that says 1900 CPF Chesterfield. It looks like most other Chesterfields you’ve seen, including the military type push stem, except this stem is horn and not vulcanite. As far as I have gathered the CPF brand was phased out sometime around 1915.” (6) Interestingly, he noted that the Chesterfield name and style was later introduced in the KB&B, Kaywoodie and Yello-Bole lines. He says that the 1924 KB&B catalog shows KB&B Chesterfields.

I also came across the following photo that comes from Bill Feuerbach which shows the dual stamping of the logo on this display placard for CPF pipes. Note the familiar KB&B logo and cloverleaf at the bottom of the placard. (7)

Figure 4 From the collection of Bill Feuerbach

Figure 4 From the collection of Bill Feuerbach


From my research I believe that we can definitively assert that the CPF logo stands for Colossus Pipe Factory. The brand was purchased by KB & B sometime between 1884 and 1898 and that it continued until 1915. That time frame gives help in dating some of the older CPF pipes you or I might find. It can be said that prior to the dual stamping it is fairly certain that the pipe is pre-1884 to 1898. After the dual stamping it can be placed post 1898 until the closure of the brand line in 1915. CPF made beautiful pipes. I believe Sam Goldberger was correct in his assertion of the potential carvers that made the pipes being of European training and the classic shapes and well aged briar. That coincides with all the CPF pipes that I have come across.
_____________________________________________________________
End notes
(1) http://pipephil.eu/logos/en/logo-c1.htmlbelow
(2) http://kaywoodie.myfreeforum.org/archive/cpf__o_t__t_161.html
(3) http://pipedia.org/index.php?title=C…s_Pipe_Factory
(4) http://kaywoodie.myfreeforum.org/archive/cpf__o_t__t_161.html
(5) http://www.finepipes.com/pipes/american/consolidated-pipe-factory-cpf
(6) http://kaywoodie.myfreeforum.org/archive/cpf__o_t__t_161.html
(7) http://kaywoodie.myfreeforum.org/viewtopic.php?t=161&start=0

Banding and Stemming a Figural Pipe – A Carved Bull’s Head


I have never been a big fan of carved animal pipes- whether birds, bulls, horses, etc. There is just something about them that always makes me shy away. Needless to say when I picked up this one in an EBay lot I put it in the bottom of the box of pipes to be refurbished and kept burying it lower in the box. A few weeks ago when I had very few left I decided to give it a go. There were a few challenges about it that made it look interesting. It was without a stem and the shank was damaged – several cracks in it. The angles of the shank made banding it a challenge and the thickness of the neck of the bull at the base of the shank made it formidable. Those attracted me to giving it a try. I also figured I could do some carving on the shank to make it possible to band it and then sand rework an old stem to fit the newly carved shank. The bowl has some kind of impermeable coating on it. Acetone will not cut it; Everclear will not cut it and even a soak in the alcohol bath will not cut it. It is like a coat of Urethane. All my attacks on it resulted in not even damaging the surface. Ah well it will stay as it is then.

I used my Dremel to sand back the shank area so that a band would fit it. I sanded back the neck of the bull to allow for a visible shank. I also had to sand the area at the back of the head to fit the band on the shank. I sanded it with some medium grit emery paper to remove the deep scratches from the Dremel and then worked it over with 240 and 320 grit sandpaper to smooth it out. I finished by wet sanding the shank with micromesh sanding pads from 1500-3200 grit. Once I had it cut back and ready, I heated a band with my heat gun and pressure fit it onto the newly formed shank. The next three photos show the newly banded shank. I left a little excess length on the band so that it would form a seat for the stem (visible in Photo 2). The shank end was so badly damaged that I could not get a smooth end on it. In Photo 3 you can also see the cracks in the shank that I repaired with superglue and pressure.
IMG_0436

IMG_0437

IMG_0438
I had an old stem in my can of stems that was the right shape. It was also in rough shape. It was one of those I had held on to that should have probably been pitched. However, it was right for this shank and would be reparable with a bit of work. This pipe sat on my work table throughout the repairs I was doing on all the other pipes I have worked on in the past month. It was just sitting there and every so often I would pick it up and work on it. The next series of nine photos shows the stem that I was working on for the pipe.

Figure 1 Top view of the stem before I worked on it. There were bite marks, tooth marks and pieces missing.

Figure 1 Top view of the stem before I worked on it. There were bite marks, tooth marks and pieces missing.

Figure 2 I sanded down the stem and filled the deep pits with black superglue. The top side of the stem shows the shiny black glue patches.

Figure 2 I sanded down the stem and filled the deep pits with black superglue. The top side of the stem shows the shiny black glue patches.

Figure 3 The underside of the stem. I used a file to sand down the edges and the flat blade of the stem.

Figure 3 The underside of the stem. I used a file to sand down the edges and the flat blade of the stem.

Figure 4 The stem is beginning to take shape after much filing and sanding on the sides and around the button. This is a photo of the topside of the stem.

Figure 4 The stem is beginning to take shape after much filing and sanding on the sides and around the button. This is a photo of the topside of the stem.

Figure 5 The underside of the stem with the filing and shaping bringing it into shape.

Figure 5 The underside of the stem with the filing and shaping bringing it into shape.

Figure 6 The top side - note the left side dent on the edge of the stem. This would require more sanding, shaping and filling with black superglue.

Figure 6 The top side – note the left side dent on the edge of the stem. This would require more sanding, shaping and filling with black superglue.

Figure 7 Topside of the stem. I sanded it with 320 grit sandpaper and then medium grit sanding sponge. It is beginning to take shape.

Figure 7 Topside of the stem. I sanded it with 320 grit sandpaper and then medium grit sanding sponge. It is beginning to take shape.

Figure 8 Underside of the stem- again sanded and shaped. The dents and edges are starting to be cleaned up.

Figure 8 Underside of the stem- again sanded and shaped. The dents and edges are starting to be cleaned up.

Figure 9 Underside finished with the majority of the shaping. Now a lot of fine tuning needed to be done.

Figure 9 Underside finished with the majority of the shaping. Now a lot of fine tuning needed to be done.

Figure 11 The finished stem fit into the repaired shank. Right side view.

Figure 11 The finished stem fit into the repaired shank. Right side view.

Figure 10 The finished stem shaped and inserted in the repaired shank. Left side view.

Figure 10 The finished stem shaped and inserted in the repaired shank. Left side view.

Once I had the stem cleaned up and repaired it was ready to be heated and bent to fit the flow of the pipe. I set up my heat gun and turned it on low heat. I held the stem over the heat at a distance of 2-3 inches and kept it moving back and forth to prevent the vulcanite from burning. When the vulcanite was pliable I used a wooden rolling pin and bent the stem over the curve of the rolling pin. I find that using this keeps the stem from bending at an angle.

Figure 12 Heat gun set up and ready to use to bend the stem.

Figure 12 Heat gun set up and ready to use to bend the stem.

Figure 13 Heating up the vulcanite stem.

Figure 13 Heating up the vulcanite stem.

Figure 14 Bending the stem over a wooden rolling pin that I scavenged from my wife's thrift shop box.

Figure 14 Bending the stem over a wooden rolling pin that I scavenged from my wife’s thrift shop box.

Figure 15 The finished bend in the pipe. It is now ready to polish the stem and the shank.

Figure 15 The finished bend in the pipe. It is now ready to polish the stem and the shank.

I took it back to the work table and began to sand the stem and the shank with a fine grit sanding sponge. I continued to sand it and then worked on the shank with micromesh sanding pads from 3600-12,000 grit to prepare it for restaining.

Figure 16 Shank preparation for staining.

Figure 16 Shank preparation for staining.

Figure 17 Shank preparation for staining.

Figure 17 Shank preparation for staining.

Once the shank was prepared I stained it with a dark brown aniline stain. I flamed it and repeated the staining and flaming until the brown matched that of the rest of the bowl. I then gave it a coat of Danish Oil medium walnut to seal the shank and give it a shine that would match the head of the bull. I also finished sanding the stem with the remaining grits of micromesh (3600-12,000 grit). When I finished I buffed the stem and shank with White Diamond and gave it all several coats of carnauba wax. The next series of five photos show the finished pipe.
IMG_0951

IMG_0952

IMG_0953

IMG_0954

IMG_0955

Restoring an L.J. Perretti Deluxe Prince


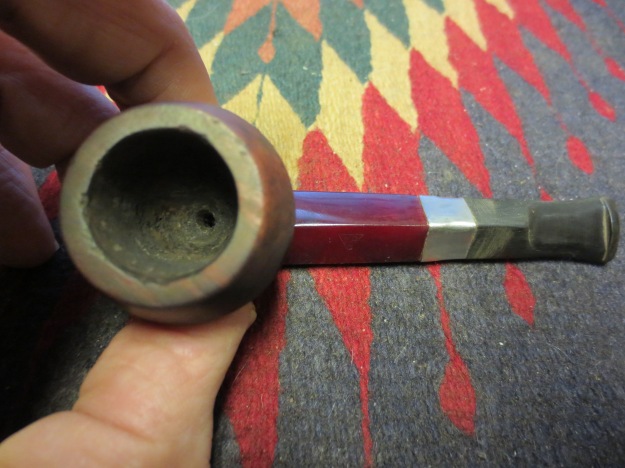
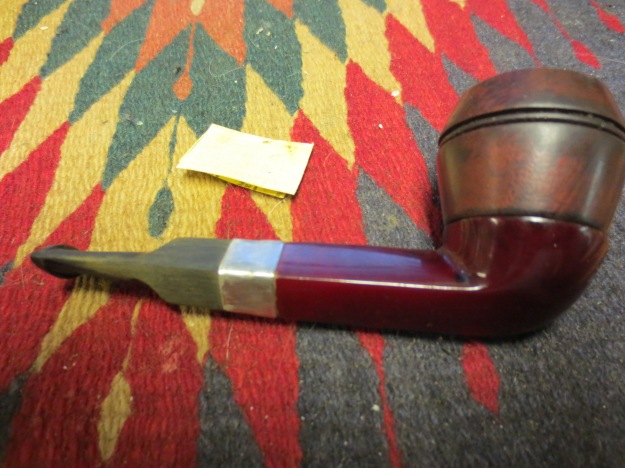
I learned from the last Perretti pipe that I worked on and subsequent replies that the Straight Grain was the top of the line of Perretti pipes. I have no idea where in the hierarchy this one sits but it is stamped L.J. PERRETTI over Imported Briar on the left side and DELUXE on the right side of the shank. It has a factory installed band that is stamped Sterling Silver in an arch. This pipe was a bit of a mess. Like some of the others I have had this one was marked with a swatch of paint – this time red paint. In the first photo below you can see it on the left side of the bowl near the shank bowl junction. The finish was rough but underneath was some great grain. Again there were no fills visible in this piece of briar. The bowl was caked and the lava had erupted over the edges of the rim leaving a thick hard cake on the rim of the bowl. The silver was badly tarnished and the stamping on the silver was not readable. The L.J. Perretti stamping on the left side of the shank ends with the “I” stamped on the silver band. The stem was oxidized and also had a buildup of calcification from the button up the stem about ½ inches. The stem was about a ¼ inch out of the shank and could not be pushed in from the buildup on tars in the shank. The first three photos show the state of the pipe when I brought it to the work table.
IMG_0892

IMG_0893

IMG_0894
I wiped down the bowl with acetone on a cotton cloth. I find that the acetone quickly dispenses with paint spots and splashes on the briar. It seems to go beneath the paint and it easily is scrubbed off. It also removes grime and buildup on the finish and removes the remaining stain on the briar. I wiped down the caked rim to soften the hard surface before I moved on to top the bowl. The next four photos show the pipe after I had scrubbed it with acetone.

IMG_0927

IMG_0928

IMG_0929

IMG_0930
I set up my sanding board and placed the medium grit emery paper on the board. I rotated the bowl on the sandpaper in a circular motion to remove the grime on the rim. I also had seen that there was some burn damage on the rim that needed to be removed. I place the pipe with the rim firmly against the sandpaper and work it until the rim is clean and the damage is minimized. Photos 1 & 2 show the process of sanding on the emery paper. Once I had finished the rough work I moved on to use a medium grit sanding sponge in the same way. I place the sponge flat on the board and work the bowl in a circular motion on the flat surface of the sponge (Photo 3). I then used a fine grit sanding sponge to do the same (Photo 4). Each progressive sanding grit smoothed the scratches and marks left by the previous grit.
IMG_0931

IMG_0932

IMG_0933

IMG_0934
When I had finished topping the bowl I reamed the bowl and cleaned out the shank with cotton swabs, pipe cleaners and Everclear. I also polished the silver band with some tarnish remover applied with a cloth and rubbed into the band. I finished by wiping down the pipe again using Everclear on a cotton pad. This removed the sanding dust and also the overrun of the silver polish on the briar. I reinserted the stem to make sure the fit was correct. The next two photos show the pipe at this point in the process.
IMG_0935

IMG_0936
The next series of six photos show the progressive work on the stem using 1500-12,000 grit micromesh sanding pads. Each degree of grit gave the stem a deeper shine and removed any remaining oxidation. Once I had finished with the micromesh pads I wiped down the stem with Obsidian Oil and then when dry I put the stem on the pipe and buffed it with White Diamond.
IMG_0937

IMG_0938

IMG_0939

IMG_0940

IMG_0941

IMG_0942
I stained the bowl with two different stains – dark brown aniline thinned 2:1 with isopropyl alcohol (Photos 1 – 3 below) and then followed up with an oxblood aniline stain. I flamed the stain, restained, reflamed and then gave the rim a third coat of the brown stain.
IMG_0943

IMG_0944

IMG_0945
The final four photos show the finished pipe. I buffed the entirety a final time with White Diamond and then gave it multiple coats of carnauba wax. I finished by buffing it with a clean flannel buff to bring out the shine.
IMG_0947

IMG_0948

IMG_0949

IMG_0950