Monthly Archives: September 2012

Photo Essay on Opening a pipe for an easier draw – Al Shinogle


Blog by Al Shinogle

I came across this great photo essay on the web on how to open a pipe for an easier draw. It was written by Al Shinogle from the Denver, Col. area so I called him and asked his permission to post the article on the blog. I want to thank him for the informative essay on this topic and for his willingness to have it available on this blog.

A how-to photo essay on a controversial subject

If you want a topic that will cause a lot of controversial discussion, one couldn’t find a better one than opening a pipe’s airways. Battle lines will be drawn quickly. Smokers
who fall into the “ONLY A MORON WOULD CHANGE THE WAY THE PIPEMAKER MADE IT” vs. the “OPEN IS THE ONLY WAY AND YOU’RE AN IDIOT IF YOU DON’T GET IT” groups. Even within the pipemakers themselves there is a lot of debate on this subject.

Are there lots of pipes that smoke very well with small diameter airways? Yup, no doubt
about that.

Will every pipe that is opened turn into a great smoker? Nope, can’t say they will. As we know, there are so many variables in smoking. Bowl size, age/cure of the bowl, the kind, cut and humidity of the tobacco just to name a few. We have all gotten rid of a “poor” smoking pipe only to have the new owner say that it was the best pipe they ever had.

So what does this “opening the airway” do? First off, think of the airway as a soda straw.
You suck (create a vacuum) on one end and fluids will flow up the straw. By increasing
the diameter of the straw, the same amount of “suck” (vacuum) will increase the amount
of fluid. You have probably noticed the difference between using a stirring straw and a
drinking straw. That is what we are looking at, opening the airway to get more smoke
with the same or less effort i.e. an easier draw.

Ok, so we get more smoke per draw, is there anything else it does? Many of the Open
Pipe Followers, believe that the pipe smokes cooler. I believe they are correct, since a
larger amount of air is drawn into the bowl for a shorter amount of time, the burning
doesn’t have to increase much to get the proper smoke. I realize that this is a subjective
thing.

Also many believe that the pipe will stay lit longer. Again a very subjective thing that one
cannot accurately measure. But I have noticed the same thing.

A drier smoke, again many (me included) have noticed that tobaccos tend to smoke dryer
in an open pipe. Perhaps the moisture doesn’t collect as easily.

Now on the negative side. And yes there are always side effects. Opening the airway can
increase the bits of tobacco that get lodged in the airway. So one may have to use a pipe
cleaner more often to dislodge an errant bit of tobacco, especially if one uses a finer cut
tobacco. Different packing techniques can vastly reduce this small problem. Putting a bit
of thicker cut tobacco on the bottom of the bowl will totally eliminate this issue.

So what is this Opening the Airways thing?

First off, this author falls in the middle of the pack on this subject. I have some tighter
draw pipes that smoke outstandingly. I have left them alone. But I have also had some
pipes that have been drastically improved by opening the airways. When one decides to delve into this process…be aware…one can take wood out, but one cannot put it back. So easy is the word.

Starting off….”Most” pipemakers tend to drill the shank airways (the shank is the part of
the pipe between the bowl and the bit, some may call it the stem. A rose is a rose).
Somewhere between 3.5mm to 4mm (for us Yanks  .138 to .157 in.). Then the bit is drilled starting around 3mm (.118) then down to 2mm (.078).

Some makers go larger than this from the start. Alberto Bonfiglioli ‘s pipes are certainly
on the larger size. My favorite pipemaker, Polo Becker tends to be drill his slightly larger.
Those that believe an open pipe is the key, believe in opening the shank from 4.3 mm to
4.7mm (.171 to .187). While this humble pipe smoker has opened up a few pipes that
large, I find that I tend to stop around the .170-ish and find that perfectly adequate. To
each his own, your results and mileage may vary.

OK, since if you have read this far, and not pitched your pipe at the computer screen. I
assume you at least want to give this concept a shot. What are the tools one needs to do
this? Minimal, you probably have most of everything now. But I will assume that you are
starting from scratch.

Drill bits. I have a small set of new sharp bits dedicated for this. Why risk an expensive
pipe by using some cheap-ass bits that you have dulled by drilling metal. Invest a few
bucks in some new sharp bits reserved just for this. I use a series of “Numbered” bits. The sizes are from a #29 (.136) to a #13 (.187). See the chart below.


One does not have to have every size, when increasing the diameter one starts small and works their way up in increments. The ones in yellow are the ones I use the most often. I start with the smallest bit that will go thru the existing hole and then work up from there skipping a size or two at a time.

I ONLY use a T-handle for this…DO NOT DO THIS WITH A POWERED DEVICE.
Fastest way I know to add an unwanted extra airway or create a hole that is out of round
(I know, you could start a whole discussion on why oval holes smoke better than round
holes). With a T-handle, this entire process can be done in 15 to 20 minutes. One will need a T-handle (if you have a shop vise you can clamp the bit in the vise and hand rotate the bowl, either way works well).

To enlarge the bit opening, I use a 2/0 (00) tapered reamer. Those can be ordered from
various places online. My favorite is:
http://www1.mscdirect.com/CGI/NNSRIT?PMPXNO=1702357&PMT4NO=62256300

That pretty much is the tools required, Now for the process.

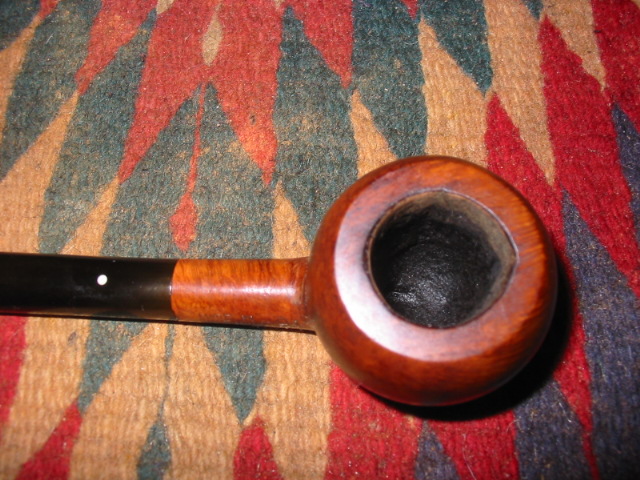
First off, remove the bit and give your pipe a good cleaning, set the bit aside for the
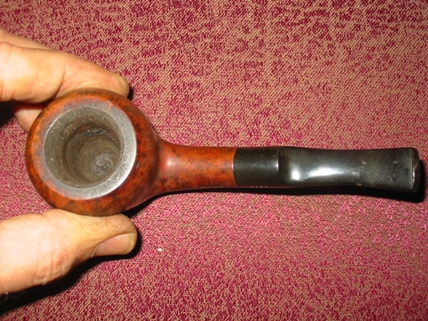
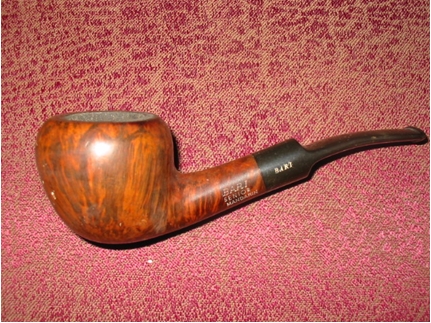
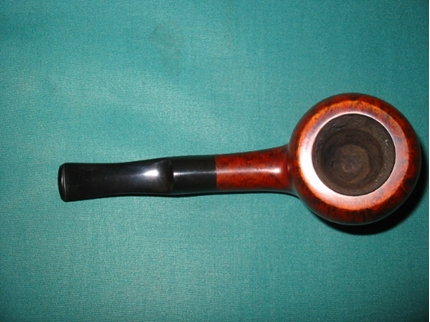
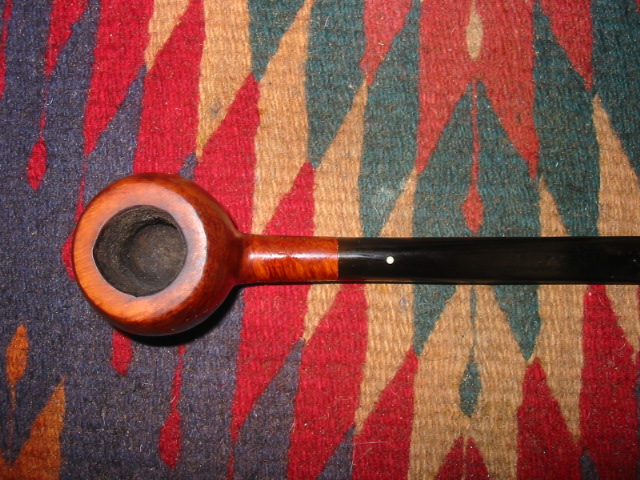
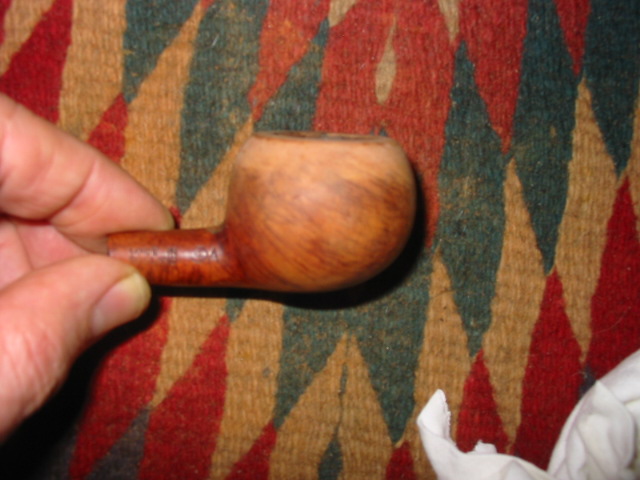
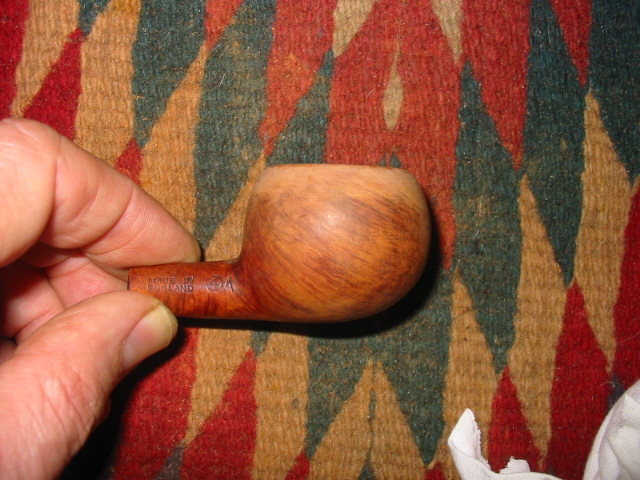
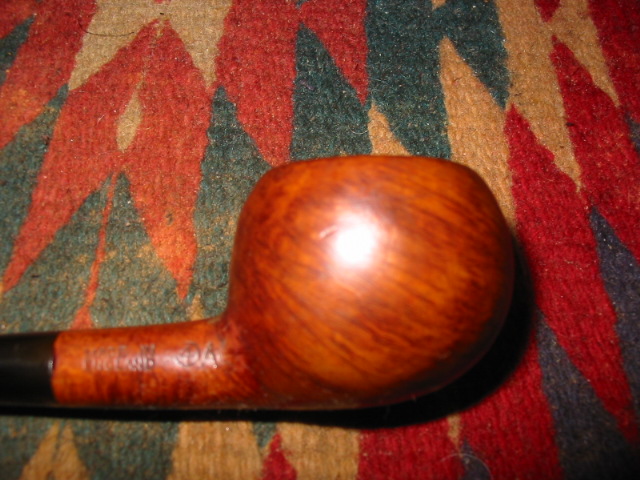
moment. With the bowl in hand, we need to determine how much can we open the airway and be safe. Straight pipes are easy; hopefully the hole is near the center of the shank. But bent pipes are a different animal; it is possible (probable) that the airway does NOT follow the center of the wood. But how do you know?? What I do is insert a 1/8 in. brass rod into the shank all the way to the bowl. Then set a #13 (.187) drill bit on the side of the bowl parallel to the brass rod to see if there is any area that could cause a problem. See pic. 1 and 2 below.


Note in the bent pipe, that the airway gets very close to the surface of the wood at the top
of the shank, in this case I would not go all the way to a #13. But would back off to a
maximum of about a #17 (.173). Could one go larger…sure, but I tend to be more
conservative…. Remember, one can’t put back what one takes out.

Select the smallest bit that will easy push thru the existing airway. If it is a used pipe, you
will be “cutting some crud” that has accumulated in the airway. (Remember I said start
by giving the pipe a good cleaning)…if you missed that step, you will have more crud at
this point.

Now go one size larger than the bit used in the previous step, put it in the T-Handle (or
mount in vise), and gently twist it into the shank. 


“Drill” the shank until you can see the point of the bit in the bowl.


Now you see my warning to NOT USE A POWERED DEVICE. One could easily run
thru the bowl and either gouge the inside of the bowl…or run all the way thru (a real
bummer for resale).

Now, continue up thru the drill bits, a step or two at a time. I tend to skip every other one
until I have reached the largest size that I want to drill. Cleaning out the residue with a
pipe cleaner at every step.

Once I have drilled the largest hole I want and cleaned out the residue. I will wet a big
fluffy pipe cleaner with my favorite alcohol (or pipe sweet) and swab out the newly
drilled hole getting the hole very wet. Then set it aside for a few minutes. Great time to
relax and light a pipe.

Once you have your pipe lit and have enjoyed a few puffs. Now take a dry cleaner and
run thru the shank to soak up any of the alcohol or Sweets still in there. Use the wet
cleaner to clean off any residue from the last drill bit you used, and gently run it back thru
the drilled hole again. Then follow that with a wet cleaner. This will take care of any
remaining residue.

Set the bowl aside, as we are done with it.

Now for improving the bit.

Take the tapered reamer and mount it either in the T-handle or the vise. The 2/0 reamer
measures .110 on the small end to .140 on the large. The reamers can be either a straight
flute like the picture or a spiral flute (sort of looks like a drill bit. I find no advantage or
disadvantage to either…either will work fine).


Now we need to determine how far can we ream out the hole (FROM THE MORTISE
END). I lay the reamer against the bit and measure how far I can safely insert the reamer.
Straight bits are not a problem. 


But bent bits are a different story…. Holes out the side of a bit tend to be frowned upon.
So take the time to measure correctly, you will only get one chance at this…..


Note, I do know of guys who will heat bend a bent bit straight before reaming, then
rebend it back. I have done it….and found it not needed…but it can be done, feel free to
try it.

Back to point, I mark the reamer as to how far I can ream. And gently twist the reamer
into the bit. Removing it often to clean the flutes of residue. This is important, once the
flutes fill, they will no longer cut cleanly. 


Once you have reamed to the desired depth, clean the bit well (residue could be built up
inside the airway).

Once it is well cleaned. Remount the bit to the bowl and be ready for a vastly improved
smoke.

I suggest if you have some flake or “coin” tobacco, place some UNRUBBED, into the
bottom of the bowl and then fill the bowl with your favorite tobacco (using the “Frank”
packing method or Fred Hannah’s “WAD” method is great), light up and sit back and
enjoy.

You will note that your puffs will be shorter, as the volume of smoke has increased.
Smoke well…. and often.

Another on the unique and unusual side – a piece of history


I like the unusual and unique in briar pipes. In fact if it is a bit of an oddball or one that I have not seen before over the past 30 some years I want it. I will often be the only person bidding on these pieces on EBay but I usually get them for a pretty good price. This one has to be one of my favourites – an Italian Folding Pocket Pipe. I have no idea of the age of it but from many signs of stem and button shape I am guessing it is older. I am fairly certain it is a Savinelli but I have really no idea if that is so. It is stamped Made in Italy. The stem is in great shape. The bend is 90 degrees and there are no wrinkles or collapsing of the airway at all. There are no problems. The button is in great shape and is a hole or orific button. There are no bite marks or chewing on the stem.The bowl was clean though used. It had been smoked more than other folding pipes that I have picked up. I have since smoked it and see why. It is a great smoking pipe.

The finish was dirty and once I cleaned it off I needed to restain it. I did so with a medium brown aniline dye. The sandblast or possibly a rusticated finish that looks like a blast is very clean and unworn. The rim on the bowl was intact and without damage. I buffed the pipe and stem with Tripoli and White Diamond and then gave the entirety multiple coats of carnauba wax. The walls are thin but the finish seems to dispense the heat very well when smoking. It is one that I pick up often to carry with me on a walk or hike.

Here are some pictures of the finished pipe.

A Creative Pipe Maker’s Anonymous Attempt at a Cool, Dry Smoke


This is another interesting piece of pipe history. I seem to have trouble passing up odd and creative pipe making attempts. I have no idea who designed or made this one or what the patent information is as there is absolutely no stamping or identification on the pipe itself. I remember seeing one on EBay awhile ago but somehow missed keeping the information. If anyone has any information on it please leave a comment in response to this post.

The pipe itself was in rough shape when I got it. The stem is chewed up badly and I have not taken the time to rework the stem. It is the dreaded nylon stem so it always leaves me cold in wanting to work on it. It is probably the most unforgiving stem material there is in my opinion. You can sand and sand it and it does not seem to change the damage. The heat gun and boiling water do not seem to lift the dents and tooth marks at all. What is there seems to be permanent. The bowl was badly caked – in fact so badly caked that it had a split in the side of the bowl. The finish is strange – best I can say about it almost little worm trails in the briar. The stem was stuck in the shank. I thought at first it was a screw tenon it was so tight. Under the stem was the flat base with what looked like an adjustment screw of some kind. It was also stuck tightly.

I reamed the bowl and found that the draught hole was in the bottom of the bowl – like a calabash. I opened that with a dental pick and cleaned it out. I packed the bowl with cotton bolls and filled it with isopropyl alcohol. I use 99% as it has little water content and seems to work well in drawing out the oils and tars. It took quite a bit of alcohol as it filled the reservoir below the bowl. I put a pipe cleaner in the stem and laid it aside overnight. My hope was that the alcohol would not only draw out the tars and oils but loosen the adjusting screw on the bottom of the shank as well as the stem.

In the morning I removed the cotton bolls. They were almost black with the tars and oils that they drew out. The stem was actually loose – that happens so little that I was surprised when I turned on it and it came out. I was expecting a screw tenon and found that it was not at all. It was an aluminum tenon made to hold a Medico style paper filter. The one in the tenon was almost black with grime and now it was soggy as well. I am still trying to figure out the airflow on this pipe. I also was able to turn the adjusting screw under the stem and it came out as well. I expected that it would adjust the airflow somehow (kind of like a Kirsten). But it was not an adjusting screw at all; instead it was a stinger like apparatus with a long twisted blade on it. Now the airflow was becoming clearer. The smoker pulled the air through the bowl down through the air hole in the bottom of the bowl. Once there it entered the chamber that ran the length of the shank and bowl and contained the twisted stinger. That apparatus would pick up the liquids and oils of the tobacco. The smoke would go up through a hole in the top of the chamber and enter the shank where the paper filter would trap the remaining debris of the smoke (and in my opinion whatever flavour still remained) before delivering it out the slot at the end of the stem.

I cleaned out the chamber and the shank by filling them with isopropyl and plugging the holes and shaking the fluid for several minutes. I would unplug and dump the dirty alcohol down the drain. I repeated this until the fluid came out clear. Then I cleaned the chamber and shank with a shank brush and bristle and ordinary pipe cleaners and more isopropyl alcohol until they came out clean and fresh. The stinger soaked in alcohol and I scrubbed it with 0000 steel wool until it shone. The stem needed a lot of cleaning though it was more dirt and grime that came out rather than tars. I was able to polish the tenon inside and out and clean up the stem. The dents and tooth marks I left alone. One day I will have to work them over and see if I can remove them. But not that day!

I scrubbed the outside of the bowl with a bristle tooth brush and Murphy’s Oil Soap to remove all of the grime from the bowl surface. I cleaned out the crack in the bowl with my dental pick. I then wiped it down with acetone and restained it with a medium brown aniline stain, flamed it and then buffed it with Tripoli and White Diamond. Once it was polished and clean I coated it with several coats of carnauba wax and then buffed it with a clean flannel buff.

I finished up the pipe and put it back together. I added a pipe softee bit to cover the bites and dents on the stem and make it more comfortable in the mouth. I packed a bowl of nice Virginia in it to try it out. I decided to leave out the paper filter and just smoke it as it was. It was an interesting and cool smoke though it pretty much removed the flavour of the Virginias that I chose to smoke. This one will sit in the cupboard as a memorabilia item but will not enter the rotation.


Here are the pictures of the process of repair. I patched it with black super glue and built up the angle of the stem to give a clean flow. I filled the dents and bite throughs on both sides of the stem. I sanded and sanded with 240 grit sandpaper and micromesh 1500 through 12,000 grit. Then gave it a coat of Obsidian Oil and finally several coats of wax. The last four photos show the final product.

Dr. Grabow Colour – Damaged and Reborn


Blog by Steve Laug

I have had this old Dr. Grabow Coloured pipe for a long time. It had damage to the colour coat and to the rim. I kept putting off doing anything with it as I could see no way of repairing the colour coat. It had the nylon stem as well with the Medico filter system. It was a screw mount tenon. The stem was covered with tooth marks and I just did not want to do anything with it… until yesterday.

Yesterday morning I took the pipe out of the box of pipes for repair and wiped it down with some acetone to see if I could clean up the bowl. At this point it was my plan to find some of the same coloured paint and respray the paint on the bowl to fix the spots where it was scratched off. I put the pipe bowl in my pocket and took a trip to Walmart to see if I could match the yellow colour of the paint. I went through about 6 or 7 different yellow colours and none matched. I stuck it back in my pocket and headed home. By this point I had decided to strip the bowl back to the wood and see what was under the paint. I had always heard that the bowls used in these pipes were pretty devoid of grain and had many fills so I figured what did I have to lose on stripping the paint.

I dropped the bowl in the alcohol bath for several hours while I was working on other things around the house. My hope was to loosen the paint coat not dissolve it into the water. Isopropyl should not dissolve the paint but it would certainly soften the paint and penetrate under the paint coat through the scratch marks in the surface. After I removed the bowl from the bath I used a sanding pad with medium grit and rubbed it across the painted surface and the paint began to peel back very easily. The next series of three photos show the effect of the paint coming off with a very light sanding.

I continued to sand the paint coat until it was gone. The next series of four photos show the bowl after the sanding. The paint coat is gone; all that remains is the light coating of yellow haze that will come off with a quick acetone wash. Once the paint was gone I was left with a pretty bland block of briar. There were fills around the front of the bowl and the sides. The shank, right side had a large fill that extended most of the length of the shank. The rim was in great shape with no dents of burns. The inner bevel on the rim was in great shape. I reamed the bowl to clean up the inside and the softened cake. It came out smooth and fresh. I cleaned the shank to remove and of the remaining tars and oils.

Once I had the internals cleaned up I washed the bowl down with a cotton pad and acetone. This removed the remnants of the yellow paint. It is amazing to me to see the amount of yellow colouration that came off with the acetone. The wood had quite a bit of yellow pigment on the surface of the bowl. I washed it down until the pads remained white. I sanded the tooth chatter and marks on the nylon stem (did I ever tell you how much I hate these nylon stems?? No? Well they are truly a pain). I was able to get the majority of the tooth marks out with emery cloth and then 240 grit sandpaper. I attached the stem to the bowl to have a look at what I had to work with  and where I should go with the finish work.

The fills seemed pretty disguised in the light colour of the briar so I decided to do a bit of an experiment. With a pipe of this calibre what do you have to lose? I stained it with a black aniline stain, flamed it and stained it a second time. My hope was that the fills would be hidden well by the stain coat. At first glance they seemed to remain hidden under the stain. I took the pipe to the buffer once it was dry and buffed the bowl with Tripoli to give it a shine and polish. As I did that the fills really stood out. The matte finish of the black hid them but the shine made them stand out. In the second photo below you can see the round fills on the front of the bowl. The one on the shank also stood out a bit.

The next series of photos show the pipe after a buff with Tripoli and White Diamond. The fills on the front now appeared to be a pinkish/red colour under the black coat. The one on the shank also looked pinkish/red. In the second photo below you can see where I restained the fill area on the shank. It was a large fill shaped almost like a moustache. Once it was dry I buffed it again with a light touch. The fills were just too obvious and ugly in my opinion. I even tried giving the pipe a top coat of dark brown stain to see if that would hide them. It did not. So I set the pipe down and went to supper. While I was eating I thought about the possibility of rusticating the bowl and giving the pipe a whole new look.

I took out my modified Philips screwdriver that I use for rustication and went to work on it. The screwdriver has the x pattern and a point. I used my Dremel to cut out the point and create four points with the remaining tip. It has a handle which I pad with a thick cotton cloth so that I can push it into the wood and minimize the discomfort on my palm from pressing. 

In the picture above you can see the work of rustication. The picture below shows the red coloured fills on the front of the bowl that made the decision to rusticate pretty easy for me.

I worked my way around the bowl as is seen in the next series of photos. I worked the front and then the bottom of the bowl and worked my way up each side of the bowl. In this case I decided that I wanted to see what the pipe would look like with a rusticated bowl and a smooth shank so I left the shank untouched with the rustication until I had finished the bowl.

The next three photos show the rusticated bowl and smooth shank look of the pipe. It just did not work for me. I did not like the look. As an aside – one of the great things with the rustication tool I use is the ability to use it in tight spaces and leave the surrounding surface untouched. By the way you will also note the photos that I left the rim smooth as well. 

The next two photos show the putty fills that were used. They seemed to have been white putty that was chalky when I scratched into it during the rustication process. You can see the location and the size of the fills in these photos. I am glad that I decided to rusticate this bowl.

I wrapped the shank and stem junction with a cellophane tape in multiple layers and extended onto the shank a quarter inch. I wanted to make a smooth band that would not be rusticated and match the smooth rim that I was leaving. The tape gave me an edge so that I would feel that as I twisted the tool in rusticating the shank. I also would give an edge to put the teeth of the tool against when I twisted it into the wood of the shank. The next series of photos show the rusticated shank. On the first one you can see the size of the fill on the right side of the shank. It also was the same white putty. As I hit it with the rusticator it left a white chalky residue. You can also see the intent of the band on the shank and the rim of the bowl being left smooth and what that would look like in contrast with the rough finish.

When I had finished the rustication I removed the tape guard and then sanded the band to get it smooth and to bring out the grain with dark undercoat.

Once that was complete I stained the pipe with a black aniline stain. I applied it heavily and then flamed it. The flaming sets the stain deep in the grooves and recesses of the rustication. I gave the rim and the band a coat of black as well. Once it was on I rubbed it off with a soft cloth to get the effect that is visible in the pictures below.

Once the stain was dry I worked on the smooth areas of the bowl – the rim and the band – with micromesh pads from 1500-6000 to polish them and smooth them out. I also worked on the nylon stem. It was a pain. The material scratches no matter what you do to it. And as I learned a long time ago it does not work to buff it as it has a very low melting point. So I sanded it with increasing grits of wet dry sandpaper – 400 to 600 grit and water and then sanded it with wet micromesh pads from 1500-12,000 to remove the scratching. I polished it on the buffer with blue polishing compound and a verrrrry light touch to give it a shine. I had waxed the smooth surfaces and the stem with carnauba and then wiped the pipe down with a cloth impregnated with Briar Wipe. Here is the finished pipe. I think the experiment worked!

Reworked Jobey Shellmoor Apple


This is one I wish that I had remembered to take a picture of before I started working on. But I did not. Sometimes when I am in a hurry I forget to take the photos and this was one of those cases. I was on my way out the door so I took this pipe out of my box of pipes to refurbish, quickly reamed the bowl and threw the stummel in the alcohol bath and the stem in a bath of Oxyclean. You will have to take my word for it – it was a mess. Probably the worst looking mess I had in the box. The bowl was caked with a dark, tarry cake that smelled like roses. The blast was so clogged with grit and grime that you could not feel texture anymore. It was smooth and muddy black looking in colour. The rim was thick with tars and lava build up and the stem was a dark and deep brown from the heavy oxidation. I pretty much figured I would be working on this one for a while to clean it up. After I dropped it in the bath I went off to work and promptly forgot about the pipe altogether. In fact it was two days before I remembered I had left it there.

I went to my work table and took both jars that held the baths. I opened the lid not sure of what I would find when I removed the pipe parts. I took the bowl out first and dried it off with a cotton cloth I have here. Then I took the stem out of the Oxyclean bath. The water had grown cold and dark tea coloured and I wondered what I would find. I dried off the stem with a cotton cloth and put them both on the work table. I was amazed at the work the baths had done to both of them. I reamed the bowl back to bare wood so start over and then wiped the bowl down with acetone on cotton pads. The first four pictures below show the bowl and stem after the bath and the reaming. I then went to work on the inside of the shank and bowl and the inside of the stem. I used both cotton swabs as pictured below and also a series of shank brush, bristle pipe cleaners and regular pipe cleaners all dipped in isopropyl to clean out the shank and stem. I went through quite a pile of both to clean out all the dark tars and oils from inside the shank and stem. The aromatic that had been smoked in this one still survived the two + days in the alcohol and Oxyclean baths and the floral scent remained – not a Lakeland like floral more of a Mixture 79 floral smell. Once the swabs and cleaners were coming out white the smell was gone from the stem and shank.

I scrubbed the exterior of the bowl one last time with a soft bristled brass tire brush to clean out any remaining grit in the sandblast finish. Once it was clean I wiped it down one last time with acetone before I was ready to stain it. I used a dark brown aniline stain to cover the bowl. I flamed it to set the stain and gave it a second coat, flamed it again and then took it to the buffer and buffed it with a Tripoli buff. The stain was still too dark to my liking and also too opaque (though they are dark photos 1-3 below give a pretty accurate picture of the colour of the pipe after staining and buffing). I took it back to my work table and wipe the bowl down with acetone on a cotton pad to lighten the stain. The fourth photo below showing the underside of the bowl gives you an idea of what the stain looked like when I was finished with the wipe down.

I worked on the scratches and tooth marks on the stem with emery cloth (medium grit) first. I worked until they were gone and then used a medium grit sanding pad and a fine grit sanding pad to remove the scratches left behind. I switched to 240 grit sandpaper and took out the rest of the scratches and marks. I buffed the stem with Tripoli and White Diamond and then used micromesh pads on it. I started with the 1500 and 1800 grit sanding pads and then applied a coat of Obsidian Oil. I let it soak in and then rubbed it down with a soft cloth. I then used the rest of my micromesh pads from 2400-12,000 grit to finish sanding the stem. I rubbed in some plastic polish and wiped it off and then buffed the stem with some Blue polishing compound on my buffing wheel. The finished pipe was given multiple coats of Halcyon II wax on the bowl and carnauba on the stem. The colour of the bowl is precisely what I was aiming for and the stem just glows. I am not sure my photos capture the reflective quality of the buff but it is pretty amazing in person.

A Quick and Simple Refurb on a Bari Senior Mandarin


Blog by Steve Laug

This Danish pipe stamped Bari Senior Mandarin was in my pipe box for quite awhile before I got to it. You have to understand that at that point box of pipes awaiting refurb was full of about 300+ pipes. It is down to about 30 now. It was a busy winter and spring as I cleaned up the lot. It rains here in Vancouver for most of the winter, so refurbishing is a nice dry past time.

The Bari Senior Mandarin came out of the box looking like the pictures below. I grabbed my camera and took a couple of shots of the pipe before I worked on it. It is a large bowled pipe with nice grain. It was dirty and just needed reaming and cleaning. The rim had a build up of tars and what some lovingly call pipe lava. The finish looked to be okay under the dirt. There were a few small dents in the sides of the bowl that would need to be looked after. The stem had some oxidation but no tooth marks or dents. ImageImage

The stem was a relatively simple cleaning job. The oxidation was easily removed with a good buff of Tripoli and White Diamond. I scrubbed the inside and outside of the stem to get rid of the tars and tobacco juice in the airway. The bowl was reamed back to a thin coat of cake and the rim was cleaned of the tars and lava buildup with Murphy’s Oil Soap (undiluted) I wiped the bowl down with a soft cloth and some oil soap to clean away the grime and grit on the bowl and shank. I cleaned the inside of the bowl and shank with a shank brush, bristle pipe cleaners and regular pipe cleaners dipped in isopropyl alcohol until they came out clean. I steamed out the dents with a wet cloth and hot butter knife. Once they were repaired I then buffed the bowl and stem with multiple coats of carnauba wax.

ImageImageImage

Reshaping a Dunhill Prince


Blog by Steve Laug

I picked up this old Dunhill Prince from an antique mall here in the Vancouver area. It was an “expensive” pipe in that it set me back $25. The bowl had been topped – badly – by someone. The shape of the bowl was affected by the work on the rim. This is an interesting pipe in that it is impossible to date. The stampings are very clear but the markings do not have date identifiable features. The other unique thing about this pipe is that somewhere in its life it was repaired on the shank. It appears to have been done by the factory in that the stamping is over the shank splice. The stem was dirty when I picked up the pipe but not too badly oxidized. The bowl had been reamed and was out of round as can be seen in the photos below. The rim was very wide and flattened out and there were scratches on it from the sanding.

ImageImage

After smoking it for awhile in this state and looking at other Dunhill princes online and in person I decided to reshape the bowl and correct the wide rim. I stripped the bowl with acetone and then used 240 grit sandpaper (this seems to be my go to grit with sanding as it leaves smaller scratches that need to be sanded later) to begin to reshape the bowl and rim. The first picture below shows the new shape that is emerging from the briar. I was aiming for the look of the standard Dunhill prince. I had pictures that I constantly cross checked as I worked on this one. The second and third pictures show the shape of the bowl in profile. The second picture is after the work with the 240 grit sandpaper. I wanted the slope on the front to be more rounded and the back slope more round as well. I also wanted the rim to be less wide. The third picture shows the pipe when I had finished the sanding and shaping of the bowl. When I laid it on top of the printed photo of the prince shape it was as perfect a match as I was going to get with this one. ImageImageImage

Now I need to restain the pipe to match the previous colour of the stain. I was careful in removing the finish on the bowl to leave the shank colour original. I used a medium brown aniline stain that I thinned with isopropyl alcohol to get the stain to match the shank colour. I restained the bowl and flamed it to set the stain. I took it to the buffer and buffed the bowl with White Diamond, being careful to not buff the nomenclature on the pipe. In the next three pictures you can see the new shape and the staining. I think the match is very good. ImageImageImage

The last two photos show the pipe in a rest and the shape is exactly what I was looking for. The colour in the photos above is a little redder than the colour of the pipe. The two pictures below are correct in terms of colour. It is a nice warm medium brown colour with the grain showing through. I waxed the pipe with several coats of carnauba. It is a great smoking pipe. ImageImage

Refurb on a BBK Panel Billiard – Swiss made


This BBK Panel was an interesting refurb for me. I had not heard of BBK pipes until I came upon this one. I think it came in a box of pipes that was gifted to me but I am no longer certain where it came from or when I received it. It is stamped BBK both on the bottom of the shank and on the logo on the stem. It had a beautiful blast finish. When I took it out of the box it was dirty and the bowl had a thick cake in it. The rim was blackened and tarred. The stem was a brownish green from oxidation. The beauty was that it was not chewed or dented by tooth marks. It would take a thorough cleaning to learn more about this pipe.

I did not know that I was dealing with a meerschaum lined pipe until I wiped it down to begin the cleaning process. I always wipe down the rim with some Murphy’s Oil Soap to get to the rim and clean away the build up and grime. I use it undiluted and scrub it on the pipe with a toothbrush. Once found that I was dealing with a meerlined pipe I carefully reamed the cake that had built up and then sanded it back. I sanded the rim back to get the grime off of it and expose the meer again. In the second photo below you can see what I found once I had wiped the pipe down with oil soap.


The blast is really nice on this panel so I cleaned it and then restained it with a black aniline stain (Feibings Shoe Dye) to match the original colour of the pipe. I flamed the stain to set it in the briar and buffed it lightly with White Diamond to remove the excess and to give it a polish. I finished by giving it several coats of Halcyon Wax to protect the finish. The stem was oxidized so I buffed it with Tripoli to remove the surface coating of oxidation. I soaked it in Oxyclean to soften the remaining oxidation and then sanded it with 240 grit and 400 and 600 grit wet dry sandpaper before using the micromesh sanding pads (1500 to 6000 grit) to finish the work. I rubbed the stem down with Obsidian Oil and then gave the entirety another coat of Halcyon on the bowl and carnauba on the stem.

I used some liquid White Out to try to recolour the logo on the stem but it did not stick… time to try again. Thanks for looking.

4305 Miles From Home – James (jogilli) Gilliam


You have no idea how tempted I am to start this little story off with “It was a dark and stormy night”, but I just can’t bring myself to do it. Especially since it was a lovely sunny July Saturday morning when this little adventure found start. But first a little history lesson little Jedi; I end up travelling a little with my job and often find myself in the Norfolk, Virginia area with absolutely nothing to do on Saturdays, or weekends in particular for that matter. Found the nearest tobacco shop I have, found the furtherest tobacco shop I have, and all those in between. So here’s my plan to stay out of the hotel room for a day knowing that the sanctuary of Emersons near Greenbrier Road will still be there for my evening visit. So, since even I can’t spend an entire day in a tobacco shop, if I had a job there I could, but since I don’t, just imagine the day-after tongue bite that would have caused me all sorts of discomfort had I not made other plans.

So what does a sprite young man do? He takes advantage of the scheduled rendezvous with his co-worker, whose name just happens to be Dani; his name will come up again, hence the gratuitous mention. Anyway, Dani, who happens to be in the exact same predicament, and I meet up in the coffee shop and I, explorerer extraordinaire, suggest a day trip to Colonial Williamsburg. Along the way we can visit some of the antique stores… I mean this is Virginia. Pipes are my thing, but I would really like to find an antique tobacco plug cutter…. And since Virginia grows tobacco, where better to look than in a Virginia antique mall located near a Colonial Village, we’re talking old stuff, very old stuff. At least that was my thought.

So off we head, down what should have been a trip down memory lane of Tobacciana. I mean we walked the isles of two gigantic antique warehouses, and I actually found 3 or 4 plug cutters, not priced within any range of money I was willing to part with, but at least they were there. I got to touch them, mission accomplished.  We ended up almost playing NASCAR with each other as we cruised the aisles, looking at “stuff”. I was at least 3 stalls ahead when Dani informed me of two bags of old pipes behind a corner bookshelf. Since my search for plug cutters wasn’t panning out in my favor, I thought, what the heck and walked over to view the stash. And there they were, resting ever so peacefully in zip lock bags.  Dani saw a bag of broken, ugly, neglected pipes.. I on the other hand, was breathtaken by the unpolished jewels that were there staring me in the face. I think I even heard angels singing. As I stood there rubbing my hands in the same fashion as Smeagol, delicately holding each one in my hands, stroking them ever so gently, and I even think I called one of them My Precious.

I grabbed the bag of five pipes and fell solemnly behind Dani as he made his way through the rest of the warehouse. I think we might have stopped at a stall or two, but I only recall the cashier telling me the price and my pulling out a wad of singles to gladly pay her. Laying each bill on the counter.. One Dollar…. Two Dollars… Three Dollars… and so the count went on until I had paid her in full. I might have even skipped out the front door to the car, only to become a little distraught as the realization hit that it would be at least another two weeks before I would get any workshop time….. What to do? What to say!

Fast forward two weeks and I’m back at home sitting in my basement workshop. Now being a pipe maker and not a pipe restorer I was facing a conundrum, as there are so many blocks of beautiful briar laying around just waiting, begging actually, to have the artistic pipe extracted ever so gently from the rough briar block. Fix, Make, Make, Fix, which should come first? Well since I had promised Steve Laug that I’d write a story of my foray into his realm of the universe, I left my rough cut briar blocks be..for a while.

Five beauties from yesteryear is what I picked up that Saturday in Virginia. A Ladd’s bent bulldog, a Lee bent bulldog, a Kaywoodie bulldog, a Kaywoodie Superior Grain Apple and a Yello-Bole Danish; and of the five laying on the table, my initial inspection deemed that the bent bulldogs would make great shop pipes. The one burning question I had was where do I start? There was really no drilling required, no shaping, no contemplation on how to pull a smoking instrument from raw material, so what am I supposed to do with all the fancy smancy power tools I’ve invested so much time in modifying? In order to explain the process a little more, I thought I’d devote a paragraph to the individual pipes, or at least attempt at doing something like that. But check out the picture, Sasquatches thick headed brother must have owned these. All the buttons are almost chewed off, the cake is so thick that I have no idea how anybody could receive any joy from smoking the instruments, and upon pulling them apart, ohhhh my gosh.. the stench, the smell, the tar, the buildup,… If you’ve ever sanded ebonite, you garner an understanding of the sulfuric bouquet that making a handcut mouthpiece creates.. these “Old Timers” surpassed even my love of sulfur.


Paragraph, schmerigraph, I can’t write an entire paragraph for each pipe. I mean really, what is so hard about restoring a pipe. I’d end up having 5 duplicate paragraphs explaining nearly the exact same thing for each pipe. So I decided against the Novel approach and chose the actually describe the repair aspect of the exercise.

So I reached into the recesses of my shop where the pipes were stored and pulled out the bent bulldogs and seeing that there wasn’t a shape that I was really going to return in its pristine state, decided to sand where I could, and of course remove electrical tape where it had been applied. Once all the digs were sanded down and out, I was astounded by how my meticulous application of pipe making skills could be applied to restoration.. Sanding is good right? Oh, yea I forgot to mention the two hours I spent carefully reaming the living daylights out of these gems, and yes more sanding inside the bowls. I think Tim the Toolman Taylor coined the phrase..or sound, “UHRRRRUHHRRUHRRR”. Back to nature for you guys I say.

Figure 1 Ladd’s Bent Bulldog 

Figure 2. Lee Bent Bulldog

Five clean bowls. Two clean stummels. Mouthpieces, not a single useable device in sight. So I set off making two mouthpieces that would adorn the briar bulldogs of yesteryear. Mortises sorted and standardized for a 7mm tenon. Sure I had to do a little hand drilling..more tools.. it was a good day. Unfortunately, when I twisted in my carefully created mouthpieces all I hear is a sound that is so foul to a man’s ears that I cringed partly in shame, partly in disgust, and partly in astonishment.  Cccrrrrrraaaaaack! I looked around to see if somebody had snuck into my workshop and tripped over the cables adorning my floor. But there I was, alone, with a stummel that had split from the end of the shank halfway toward the bowl. So much for a workshop pipe, but then there is still one more.

Same routine as the last, the pipe is carefully prepared for my artisan mouthpiece and again. Cccrrrrrraaaaaack! I looked at the stummel in a state of pure amazement, as it too had split from end to about midway down the shank. So I’m thinking great, some pipemaker you are. You can’t even repair a simple stummel. This was about the time I really started looking at all those briar blocks just begging for me to help them become a man’s (or woman’s) best friend in moments of quite solitude. Did I drill a block? No, not just yet… but almost. I did the second best thing. I went upstairs and packed one of my old durables with a great tasting tobacco and smoked it while watching some mind numbing show on TV about some subject I couldn’t even remember the next day.

Figure 3. SplitShanks

But the next day would come, did come, and what a day it was indeed. The Kaywoodie Bulldog and the Yello-Bole Dublin from the 50’s were the next two in the lineup. Great instruments from a time gone by. The only thing that was really wrong with them is that they: 1) had no mouthpieces; remember Sasquatches thick headed brother, and 2) had these metal things stuck in them. There was no tenon per se; I mean who makes a pipe without a tenon. Integrated tenon, Delrin tenon… no where in sight, but more aluminum than even I knew what to do with. How in the world  was I supposed to fix a mortise when it has a screw in drool catching device (Kaywoodie) and a aluminum looking tongue thingy sticking out (Yello-Bole) of it where a tenon should be. I can’t make these things, but I can repurpose them.

Heat gun! Yea, I’ll heat these puppies up and just pull or untwist these monstrosities out. And low and behold it worked. Power Tools, they’re your friend I tell you… your friend! These things I can reset into a raw material that needs SHAAPPINNNG. Elation, joy, and pure ecstasy ensued. Easy part here.. figure out the diameter, drill, glue and Viola ready to shape. There really isn’t a great point to pontificate on here. Old mouthpieces were looked at, copied and made, but they were missing one integral part that the originals had. The emblems. I looked down and say my hacksaw just laying there begging to be used after such a long time of non-use.

First I attacked the Kaywoodie and cut out a square portion around the emblem out, repeat for the Yello-Bole. Chucked them in my lathe and with masterful skill got the Kaywoodie emblem to pop out of its abused resting place. At this point I’m feeling pretty good and figured I could do the same for the Yello-Bole. Cut out the square, mount in my chuck, and turn the piece down to the yellow circle. It was to my horror, or as the Dreaded Pirate Roberts would say “To the Pain”, that I watched the yellow dot disintegrate as I tried to free it from its resting place. Man that bites.

Figure 4. Kaywoodie Bulldog

Figure 5. Yello-Bole Danish

So what does a maker do? He longingly looks at his briar block again. Picks up a pencil and starts drawing on the blocks. Two designs anxiously awaiting and two “Old-Timers” saying.. “Hey I’m still here young fella, and you ain’t done yet”. I ended up giving in to peer pressure and carefully figured out what the diameter of the Kaywoodie clover was.. drilled a hole in the mouthpiece where the emblem would set, mixed up my epoxy, and carefully placed the emblem in predetermined location. YES! I think I patted myself on the back about this time and since I was feeling so good decided to attack the Kaywoodie Premium Briar apple.

Figure 6. Mouthpeice Workings

The mouthpiece wasn’t really all that ruined. So I cut off the chewed up part and started reshaping a new button. And that is where the fun really stopped, and the briar blocks started screaming to me. I had to muster all my strength at this point as I was just about ready to throw the pipe across the room. I actually sanded into the airway. Now I have to cut a new stem! No, now I get to cut a stem. Yea, that’s it.. same shape, same emblem extraction exercise and same delicate placement in the proper place… well someday.

Here is where the story comes to an end. The Kaywoodie bulldog and Yello-Bole pipes are done. They have newly created artistically designed shiny new mouthpieces. One looks original, while the other is unfortunately missing the emblem. Good enough for now.

The 1955 Kaywoodie is mine. I didn’t have a bulldog yet, and the opportunity to have something made in the 50’s is just calling to me. The 1950-60’s Yello-Bole will be sold, someday to somebody that will appreciate it. Dublin isn’t really my shape, or at least doesn’t call out to me with the same longing voice as the bulldog does. Please don’t take my comment wrong, as it is a preference thing. Seriously though, I will say that I truly admire the works of Steve and Co. who devote their time to restoring old(er) pipes. It is a labor of love, the same labor of love that most makers enjoy. It takes time, determination, and an eye for aesthetics. I can only hope that most restorers don’t end up with mouthpieces so chewed up they can’t be fixed.  My foray into the world of restoration was a fun time. Will I do it again? Probably, I mean I still have to make a mouthpiece for the Kaywoodie Apple. Just not today; and probably not tomorrow. There are two block of briar that somehow got pencil marks and drill points marked all over them. They’ll see a band saw in about two days and most definitely will feel various grits of sandpaper rubbing across them as their shapes are extracted.

Enjoy the before and after pictures below, smoke in peace, and take care of your pipes. Someday your son or daughter will cherish the memory you leave to them once you’re no longer there. Oh yea, resistance was futile so I included is a picture of the Quail Egg I made for myself during this process. As for the bent bulldogs, they’re destined to receive either bamboo or horn shank extensions/replacements. I really had a hard time thinking about getting rid of them, as they still will make great shop pipes. The Kaywoodie apple will also get a new stem… someday.

James (of JSEC Pipes http://jsecpipes.com/

Figure 7. Finished and Restored

Figure 8. Kaywoodie Bulldog

Figure 9. Yello-Bole Danish

Figure 10. Kaywoodie Bulldog

Figure 11. Yello-Bole Danish

And the pipe that resulted for Briar calling my name

A Frustrating Brigham 1 Dot Rehabilitation


This old Brigham came to me in a box pass here in Canada. Brigham pipes were made in Canada in the old days and had an aluminum tenon/filter holder. When I took it out of the pass I thought it would be an easy clean up and I could put it back in the box on the next pass through. The other day I took it out to clean it up and this is what I found when I took the stem out. The aluminum tenon/filter holder had literally been eaten away. The hard rock maple filter must have been the original and it too had been eaten away. It was stuck in the corroded and rough tenon and I could not get it off. I used a light to shine down the mortise and the aluminum end of the filter was stuck in the airway. It was perfectly situated to not block the airway at all but it was there. The stem also had some thick white build up all around the button end. The only good part of the mess was that there were just a few small tooth dents on the stem. The bowl exterior was in good shape. The inside of the bowl was caked with a very tarry and oily aromatic smelling stuff. The rim was thick with the same tars as the bowl.

I used a hack saw to cut off the aluminum filter holder/tenon. I cut it off the same length as a regular tenon and used a file sandpaper to clean up the rough edges after the cut. Once that was done the maple filter had to be coaxed out with a dental pick until it broke free and came out. I do not believe it was ever removed since the day it was purchased from Brigham. It was unbelievably tarred and oily. The end of the filter that was stuck in the airway was more of a problem. The aluminum seems to have bonded to the walls of the mortise. I tried the freezer method to see if it would break free – no luck. I went on to clean and restain the bowl as described below before filling the bowl with cotton bolls and alcohol to see if the tars will break free from around the aluminum. I am going to let it sit over night with the soak and see what happens. The soaking did not work. So I tried to drill it out I started with a bit the same size as the metal end of the filter. I worked my way up to larger bit to open it and see if I could back it out. The trouble is the situation of the insert is right against the opening into the bowl so I opened it as wide as I could without damaging the airway. So now there is a small metal tube in the end of the airway that is open to the bowl. It is probably ¼ inch deep so it will act like a sleeve in the airway. It looks to me that it will stay there!

I cleaned off the rim with acetone on a cotton pad while carefully keeping the acetone off the sides of the bowl. I also followed that with micromesh pads – sanding it with 1500-6000 grit pads. There were three dent marks at between one and two o’clock on the photo above. I steamed them out with a hot knife and wet cloth. These dents easily came out of the rim and the surface was smooth and after sanding they virtually disappeared. I reamed the bowl back to bare wood and sanded the remaining surface of the bowl.

I worked on the stem quite awhile. I used emery cloth, medium grit to remove the white build up and the tooth marks on the stem. They were not too deep but would not lift with heat. Once I had them removed I worked on the stem with 240 grit sandpaper and 400 and 600 grit wet dry sandpaper to remove the scratches. Then I worked over the stem with 1500-12,000 grit micromesh pads. When the stem was shiny I took it to the buffer and buffed it with White Diamond. I gave it several coats of Obsidian Oil to bring the vulcanite some life. Then I gave the stem multiple coats of carnauba wax to protect it. The first picture below is of the underside of the stem and the second one is the topside of the stem. The tooth marks and scratches are gone.

I restained the rim of the bowl with medium brown aniline stain and wipe it on and off with a cotton pad. I was trying to match the smooth portions on the side of the shank. The finished stain was a perfect match to the rest of the bowl. I buffed the rim with White Diamond as well and waxed it with Halcyon II wax to give the bowl a shine. I buffed it with a clean flannel buff. The finished pipe is pictured in the last series of photos.