Blog by Steve Laug
In November, I received an email from a fellow in Missoula, Montana, USA regarding several pipes that he wanted to sell and wanted to know if I was interested or knew of others who might be. He wrote that one of them was a cased, unsmoked WMC meerschaum with gold trim. I was hooked with the CASED MEERSCHAUM and we emailed back and forth a bit about the pipe. I wrote and asked if the meerschaum could be a WDC rather than a WMC and he checked and said yes it was. He said it was unsmoked and the case and pipe were in excellent condition. He was selling it for a friend of his. I asked him for photos of the pipe so I could have a sense of what he was talking about. He sent me the following photos and included a measuring tape in the photos to give me a sense of the size of the pipe. 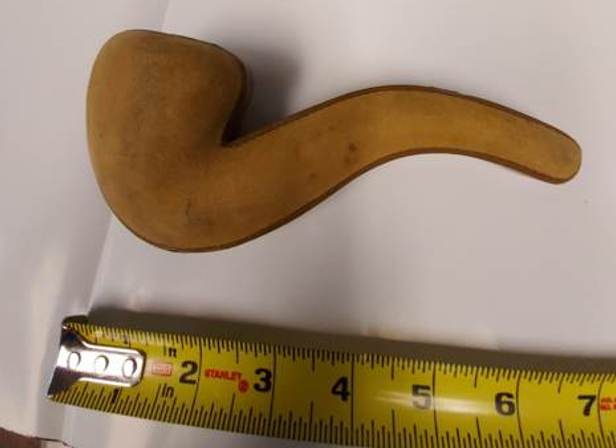 The outside of the case was a light tan suede that was very clean without much wear and tear on the leather. There was a smooth leather band around the outer edge of the top and the bottom half of the case. The brass hinges and catch on the front were in excellent condition. When he took a photo of the pipe inside I was surprised how large the pipe was. Most of the WDC meerschaums I have worked on were significantly smaller. The dimensions were length: 6 ½ inches, height: 2 ½ inches, outside diameter of the bowl: 1 ¾ inches, chamber diameter: ¾ of an inch. The lining of the case was red soft fabric (velvet??) and the lid had a gold stamped logo. It read WDC in a triangle over a banner that read Genuine Meerschaum. There was a Crown with flourishes above the WDC triangle. It is a stunning looking case and pipe.
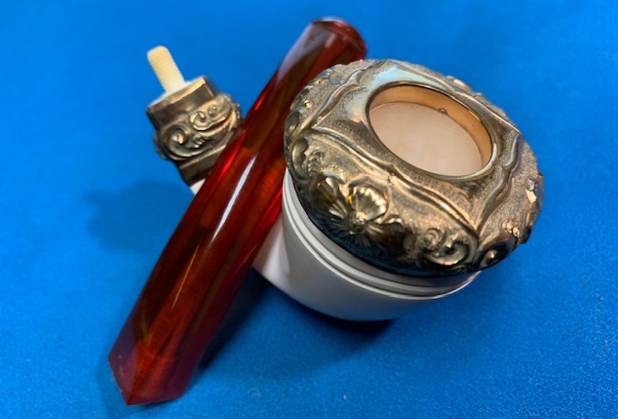
 He removed the Amberoid stem from the shank and took photos of the parts of the pipe. There was a rolled gold band around the shank end and a rolled gold rim cap that fit down into the inner edge of the bowl. The bone tenon was unused and very clean. The stem is a red coloured material that I assume from the age of the pipe is Amberoid. The second photo shows the pipe from the top looking down into the bowl. It is unsmoked and well drilled.
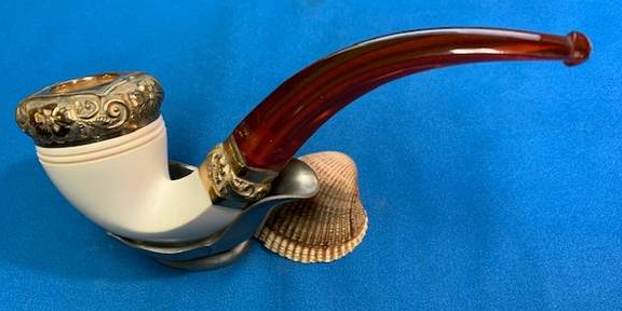
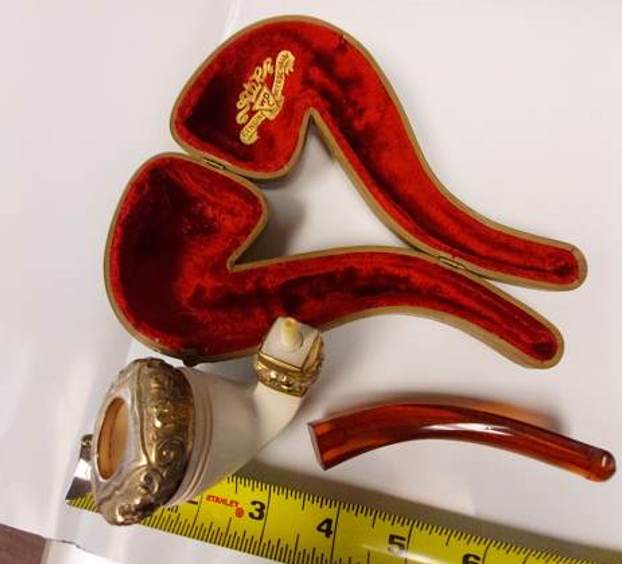
 We talked back and forth about the pipe as well as the others and came to an agreement about a price. Jeff and I sent the payment and the pipes were on their way to Jeff. When they arrived Jeff called me on FaceTime and we went through the pipes together. The whole lot are beautiful and I could not wait until they arrived in Vancouver.
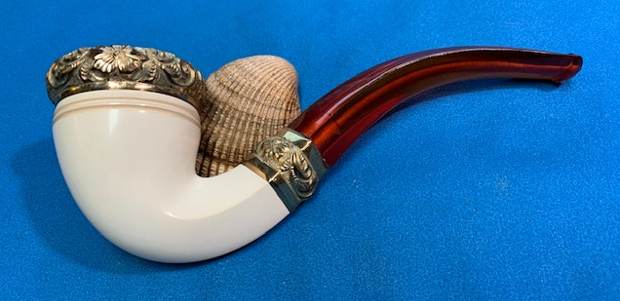
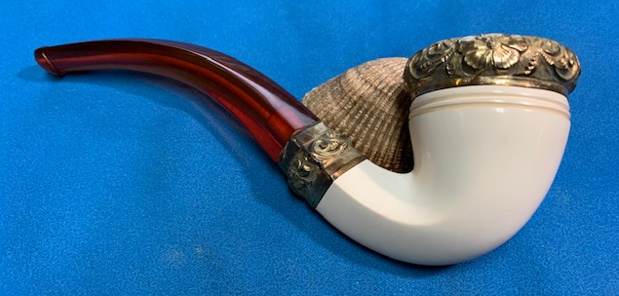
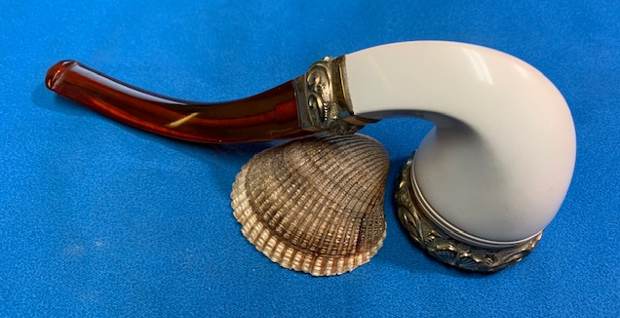
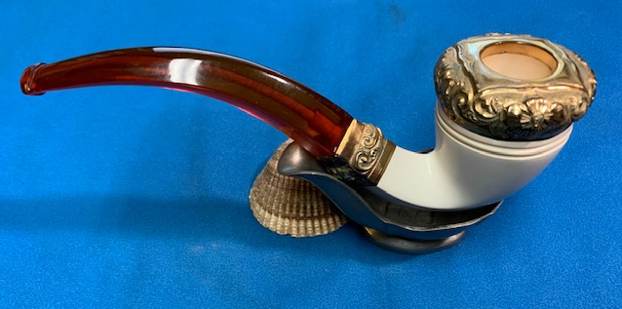
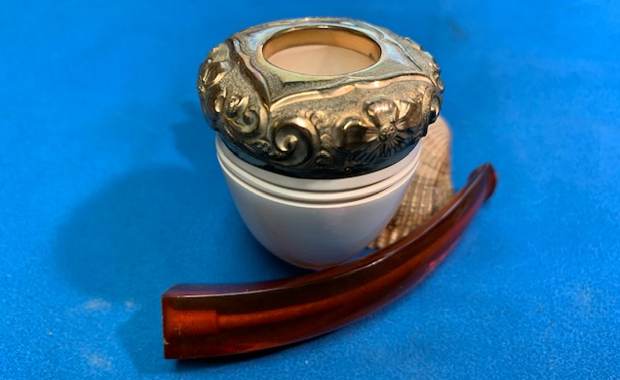
They arrived in Vancouver this week and I went through each of them with new appreciation for what we had purchased. I took photos of the WDC Meer because I knew I would be adding it to my own collection. I took a photo of the outside of the case. The leather is quite clean with some light dirt marks in the suede on both sides. The leather around the edges is in excellent condition and the brass latch and hinges are clean and working well. I opened the case and the pipe inside was even more beautiful that the pictures had shown. The meerschaum was free of debris and scratches. The rolled gold rim cap and shank end are beautiful and really set off the meerschaum. The red stem indeed was Amberoid and it is perfect with no tooth marks, chips or scratches. Overall it is a flawless looking pipe that is well over 100 years old.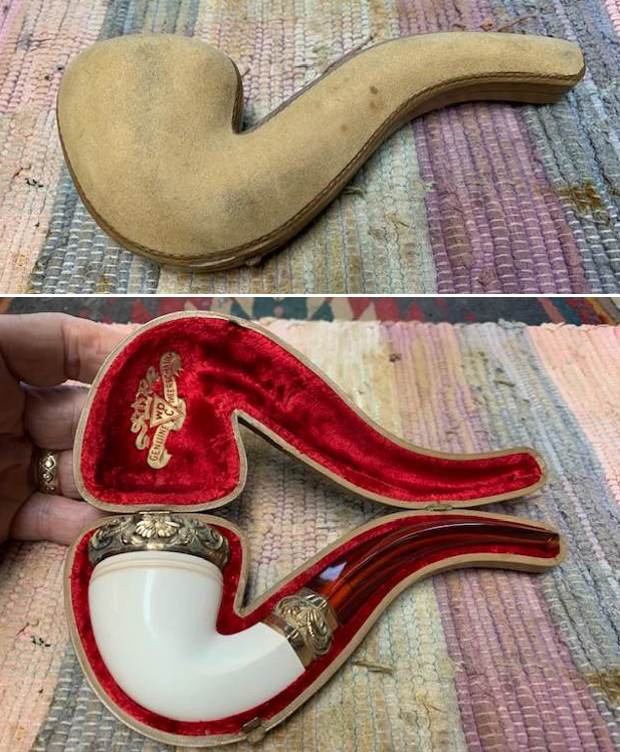
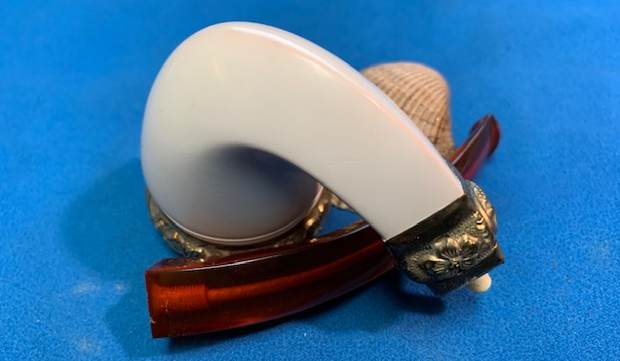
 I took the pipe out of the case and took some photos of the pipe from various angles. It is a very beautiful looking pipe with smooth and polished meerschaum, rolled gold rim cap and shank band and a red Amberoid stem. Quite stunning and yes indeed, it is unsmoked after all these years.
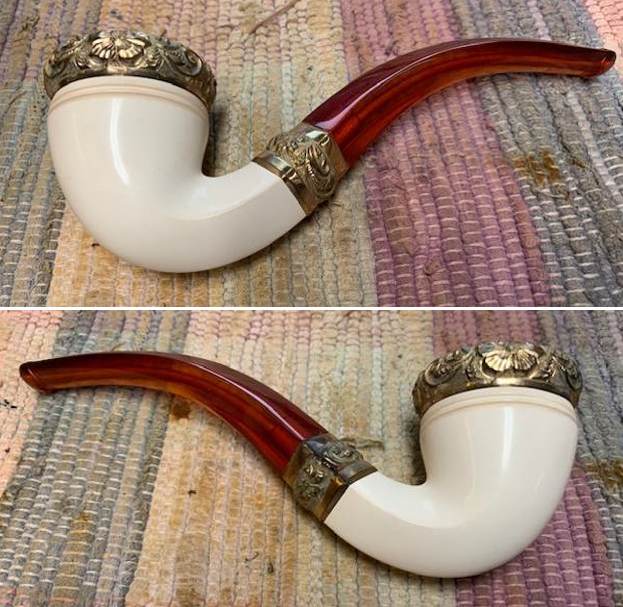
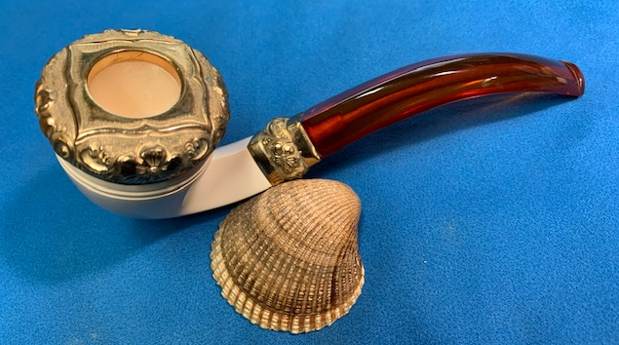
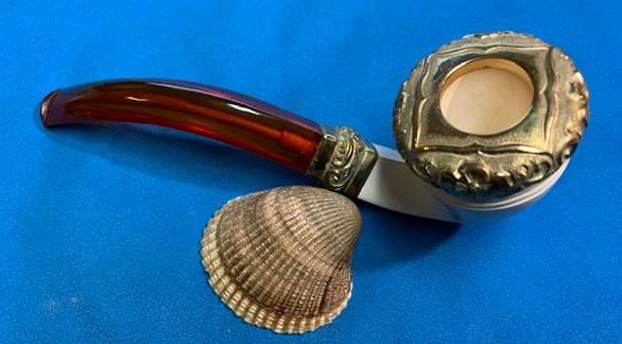
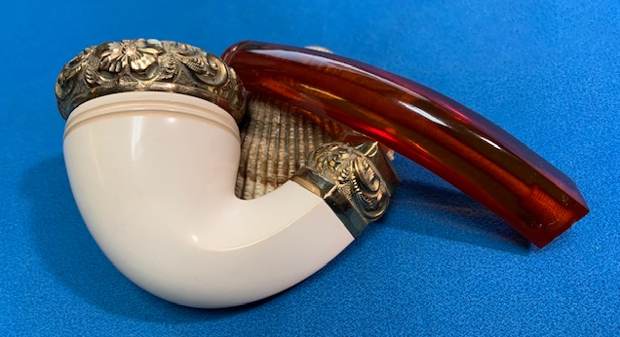
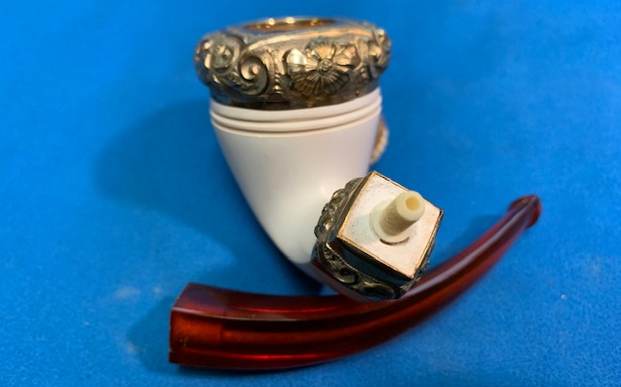
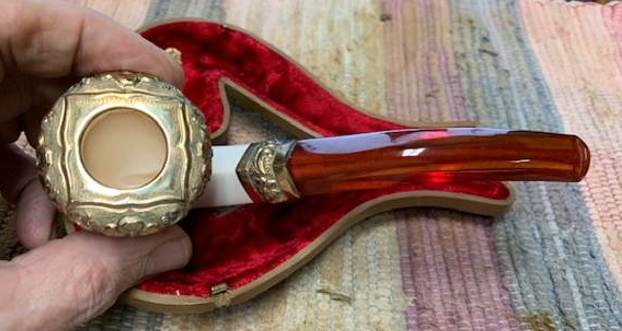
 I removed the stem from the shank and took a photo of the parts of the pipe. It is a real beauty and the parts work well together.
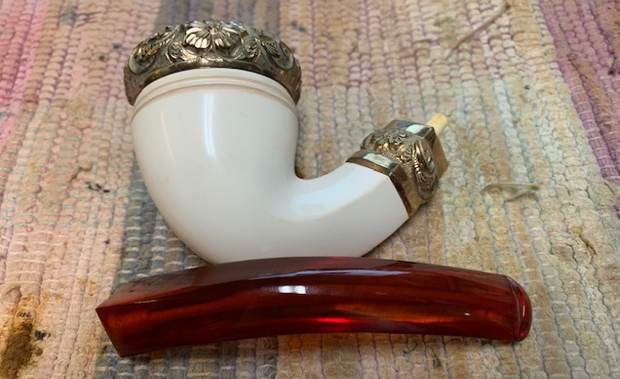 This was one of those that was a dream pipe for me to deal with. It was really spotless and very clean. I polished the meerschaum with a soft cloth and the metal on the shank and rim cap with a jewelers cloth. The pipe looked amazing with the light hand buffing. The gold rim cap and shank end look very good. The Amberoid stem also has a rich glow to it. I am glad to have bought this one and added it to my collection. Now the only remaining decision for me to make is whether to let it sit unsmoked or to fire up a bowl and enjoy it. What would you do?