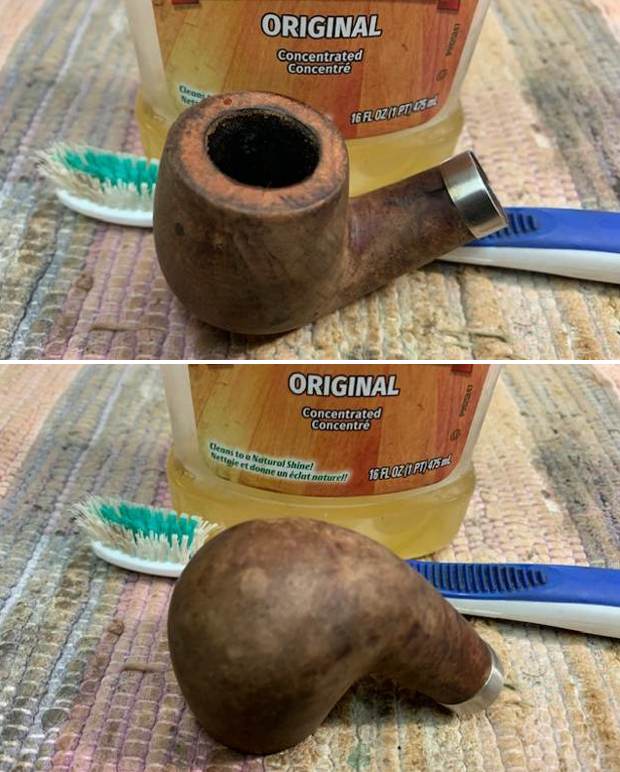
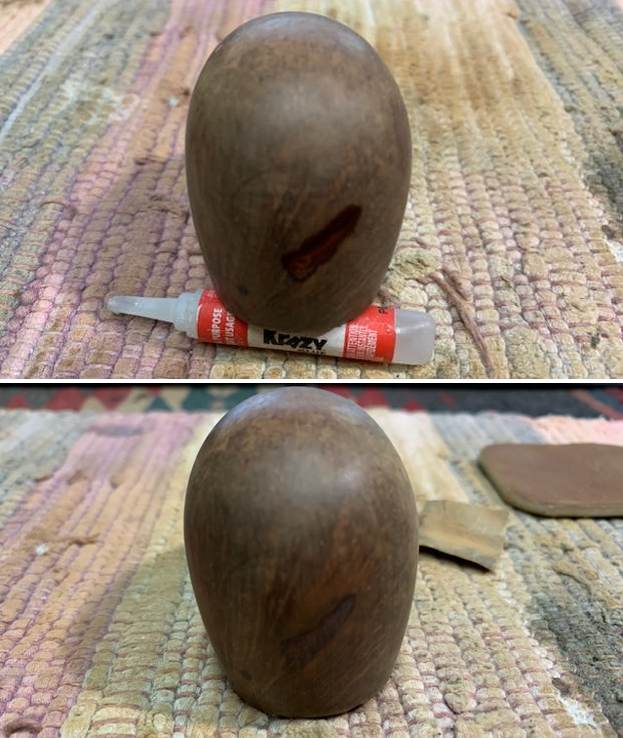
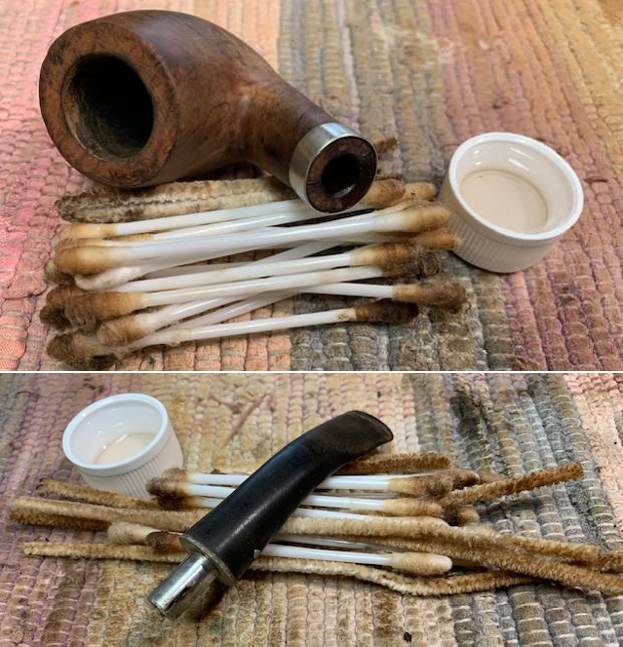
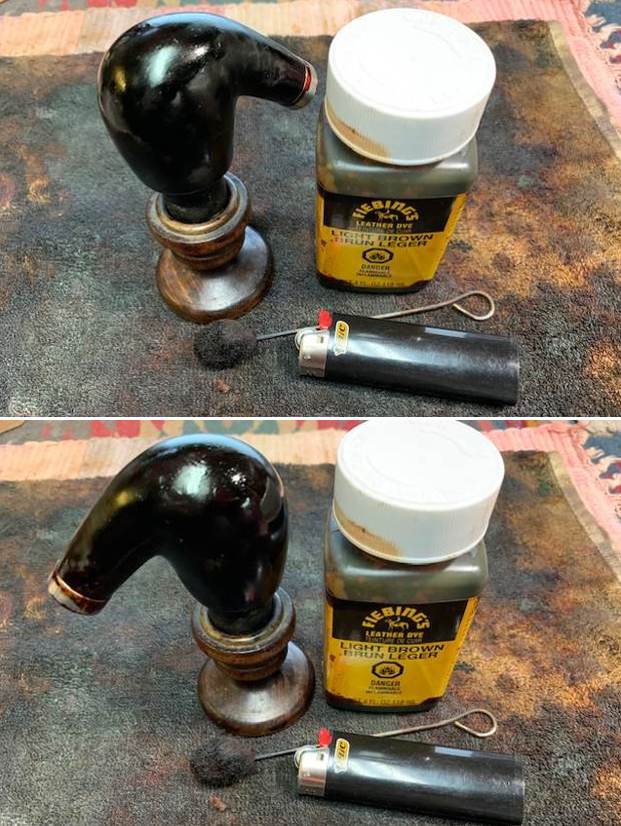
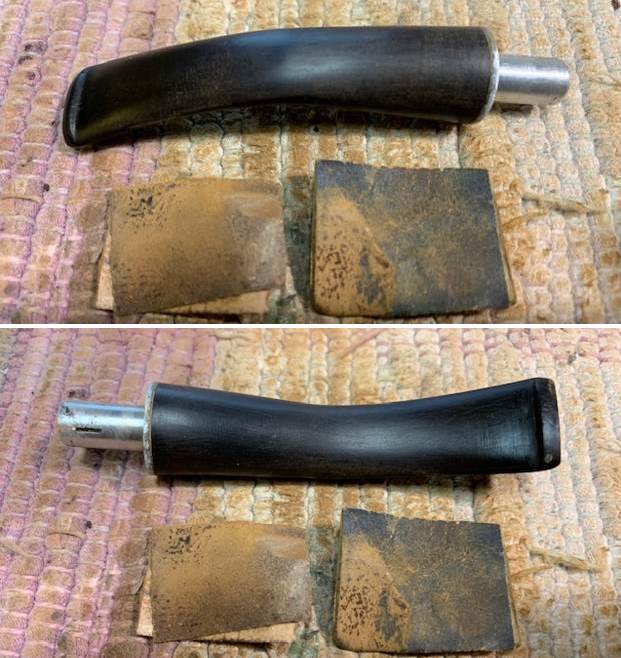
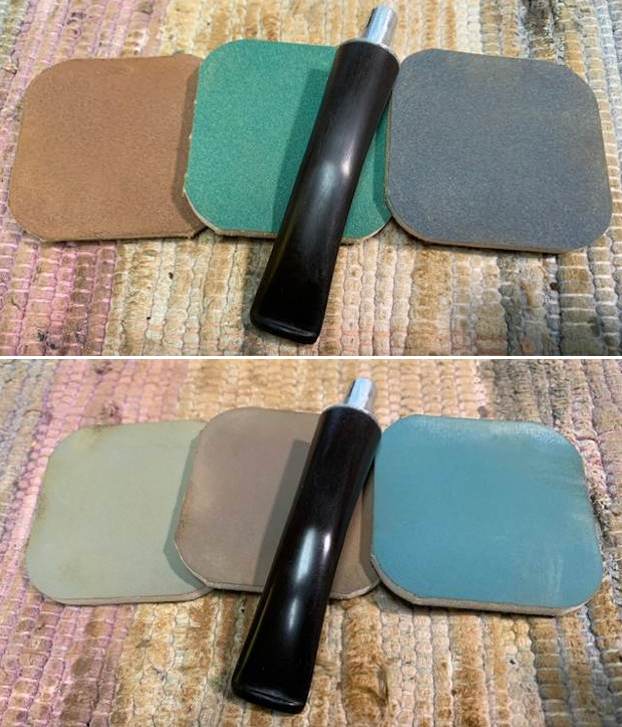
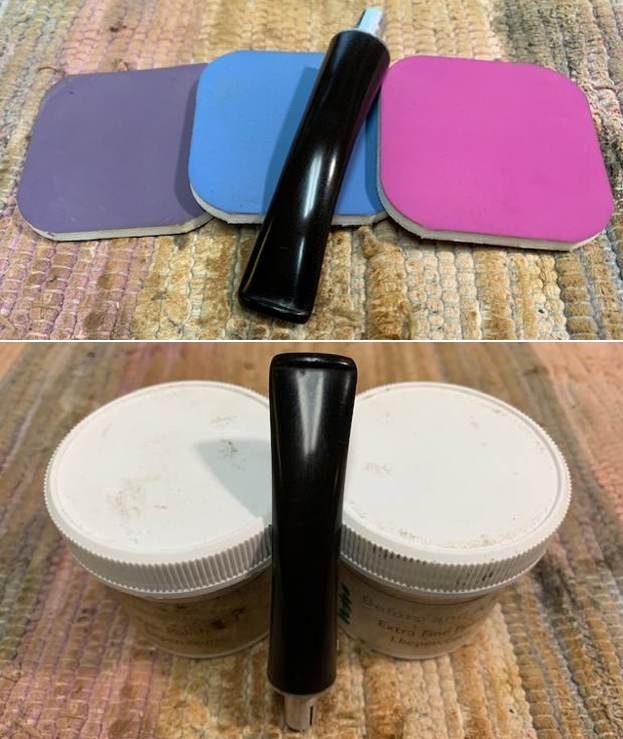
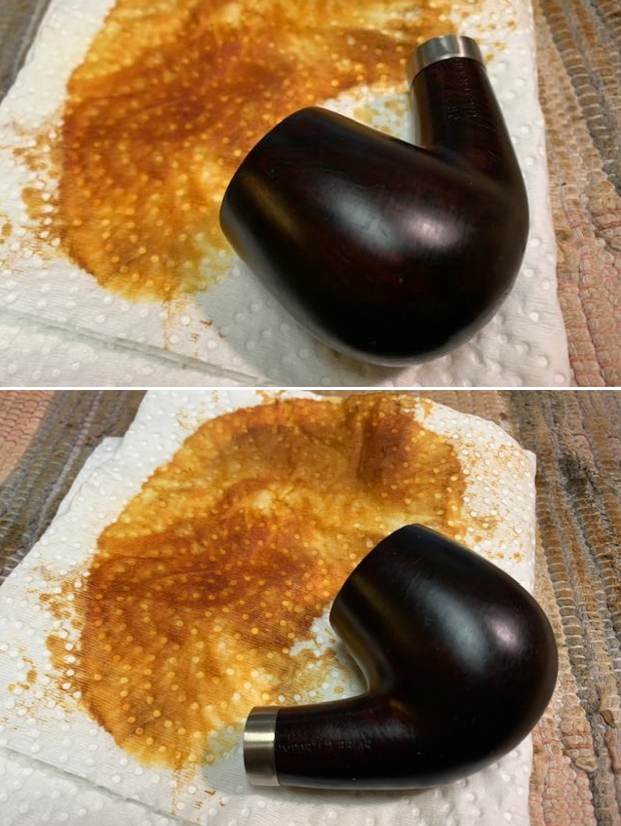
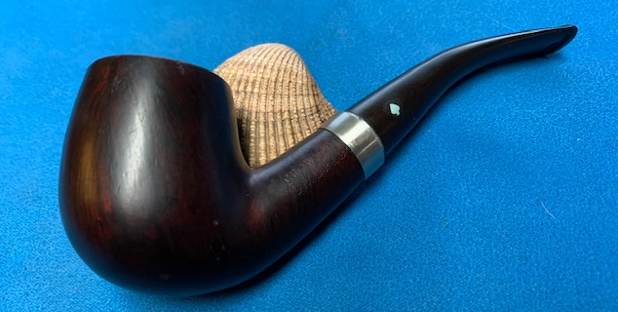
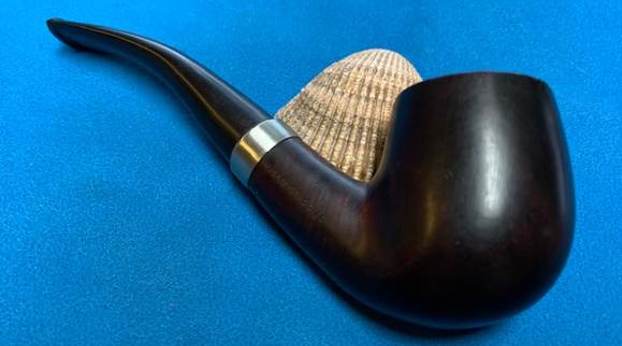
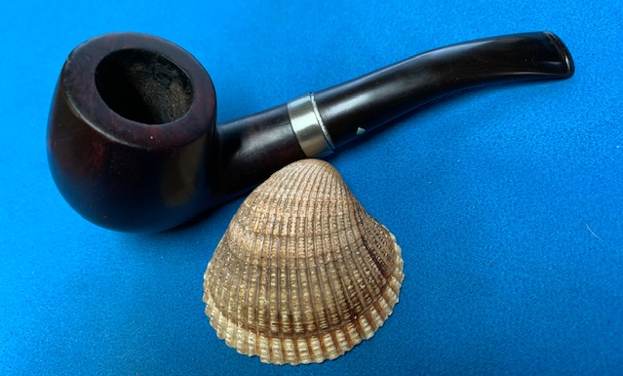
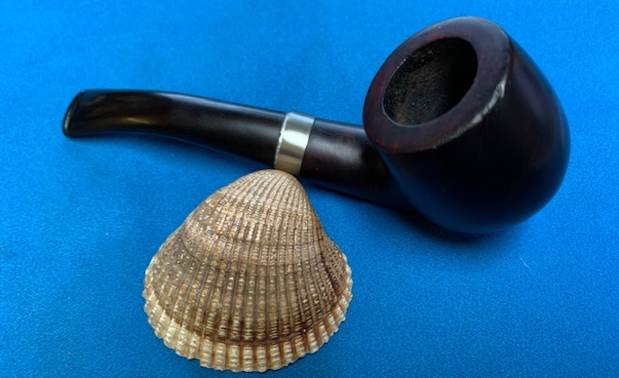
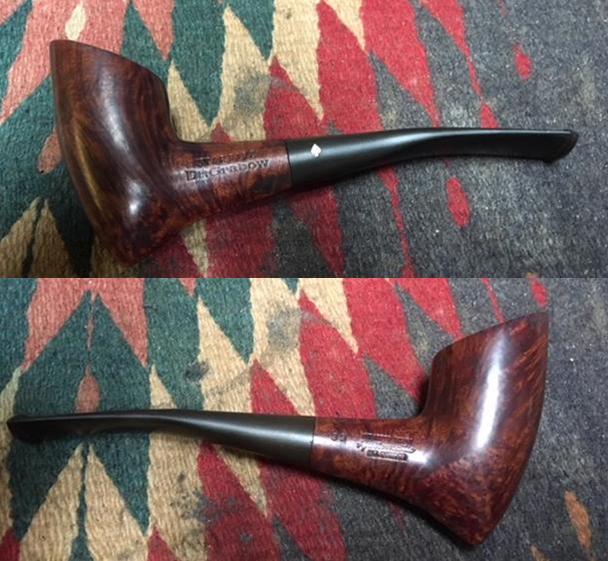
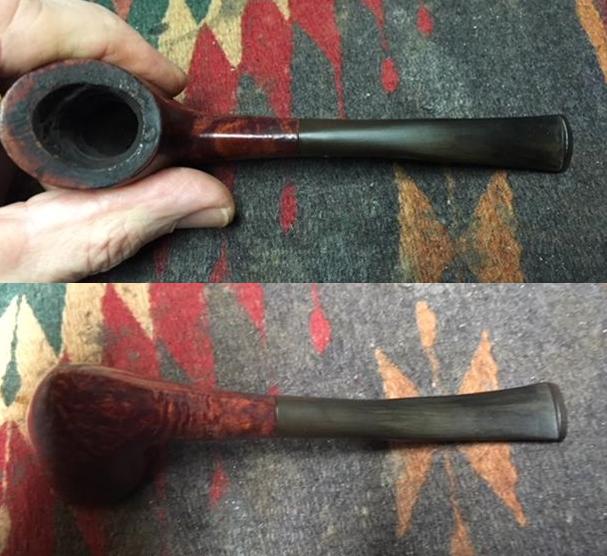
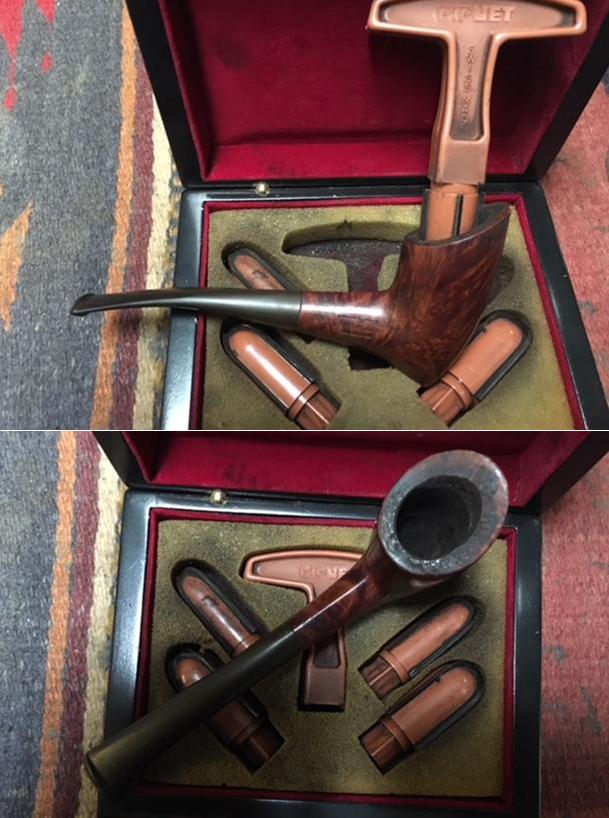
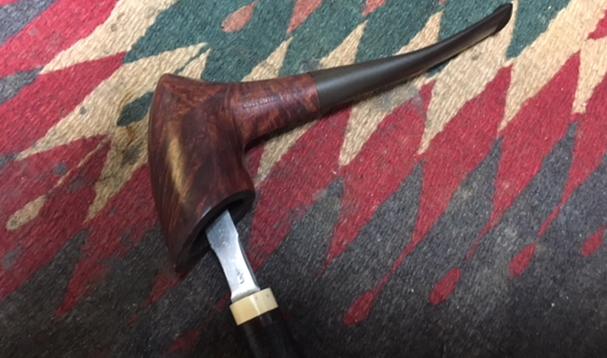
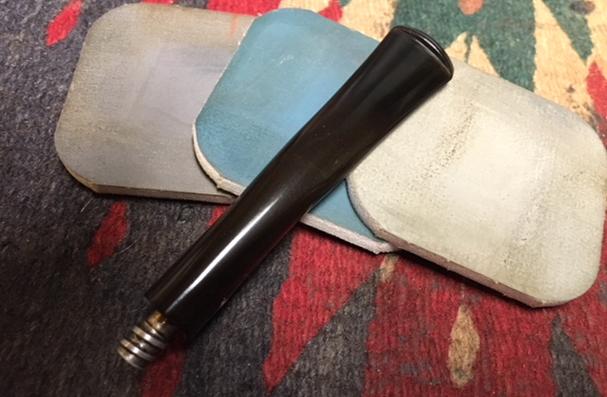
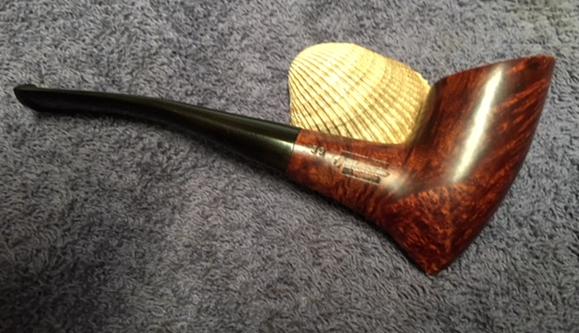
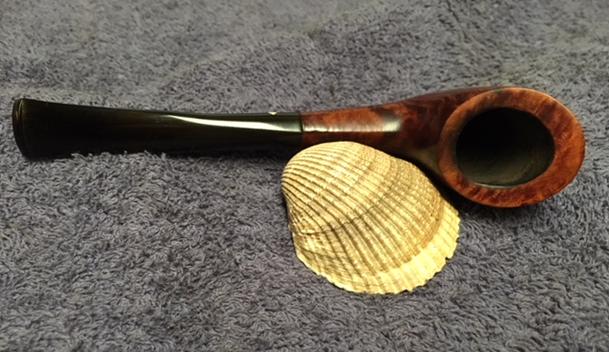
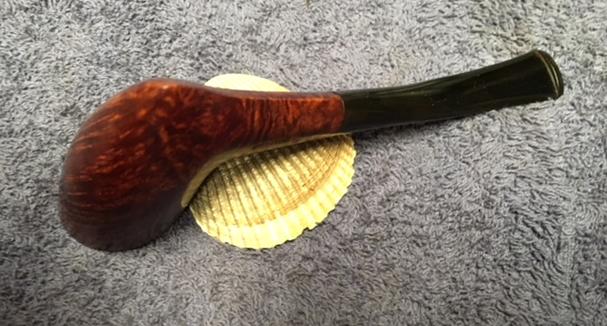
Tag Archives: Dr. Grabow pipes

Cleaning up a Crown Duke, Dr. Grabow Bent Billiard for a Memory Box of Dad


Blog by Steve Laug

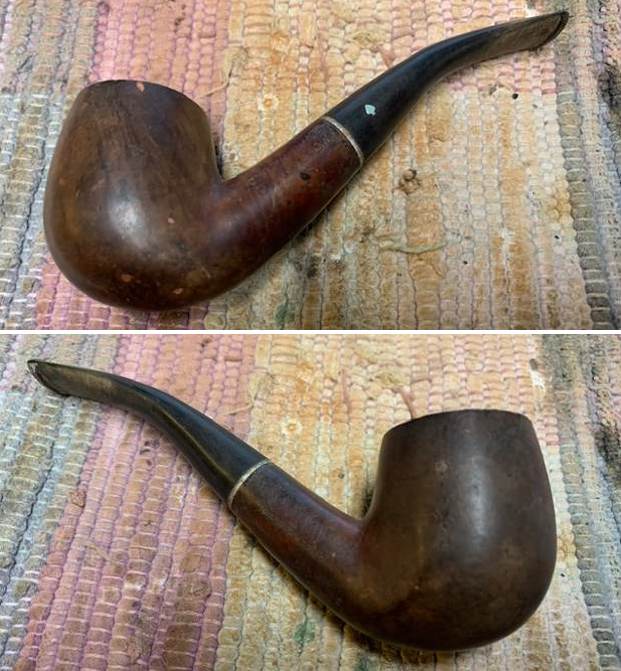
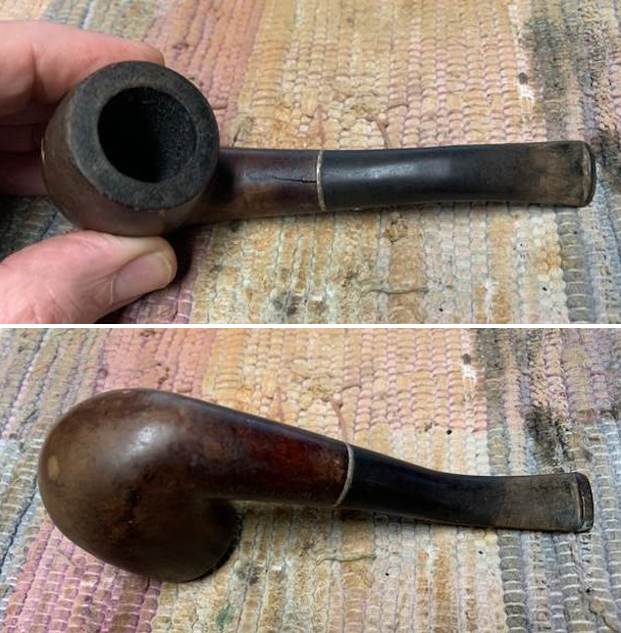
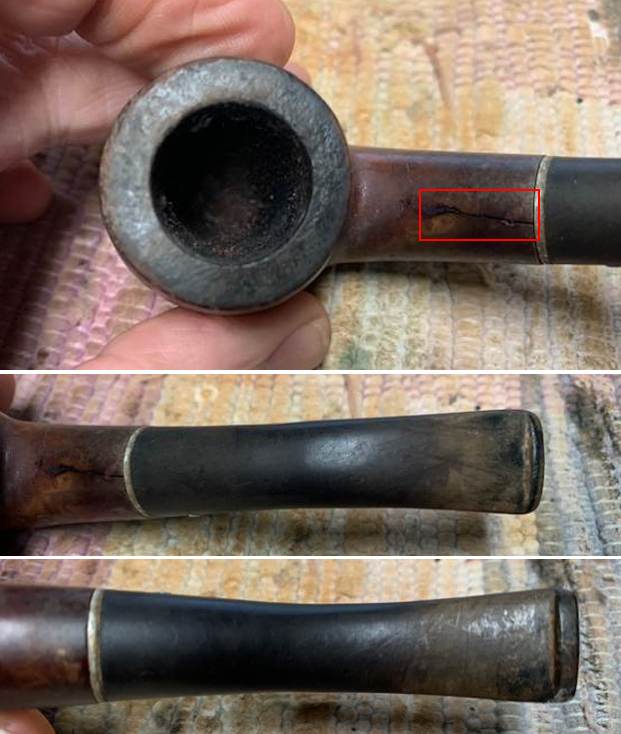
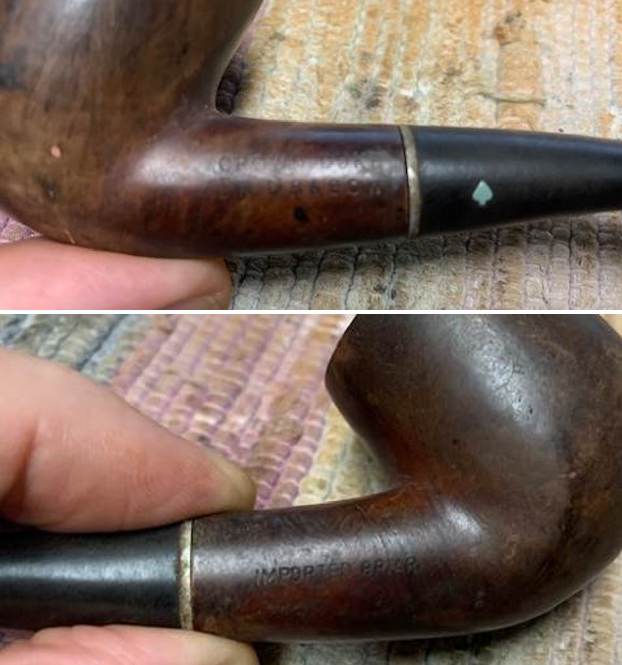
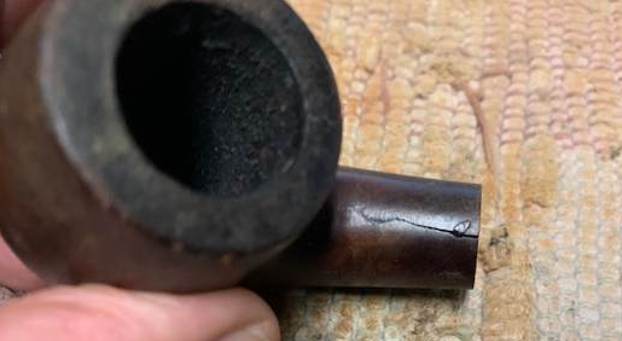
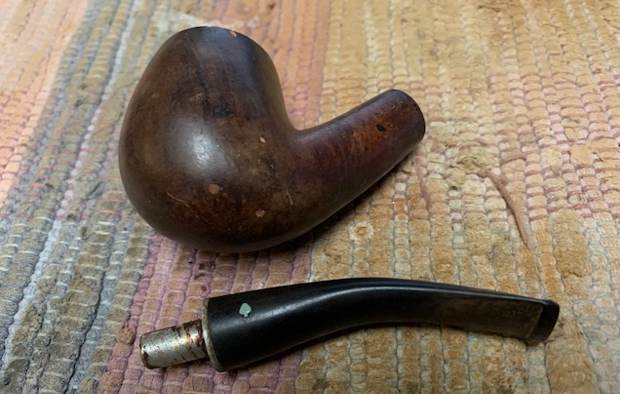
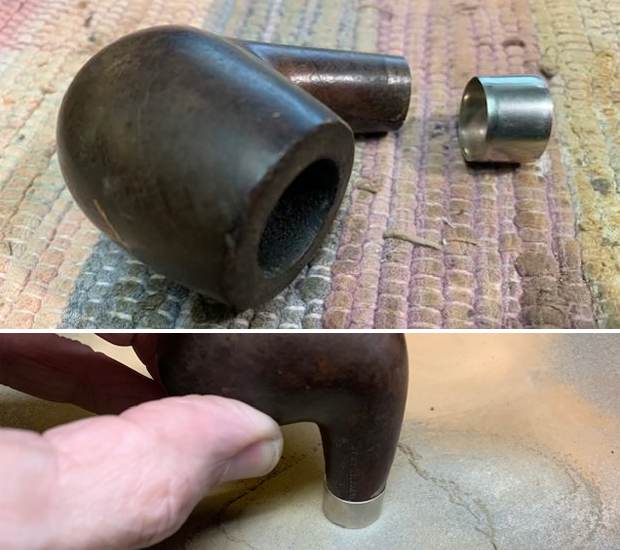
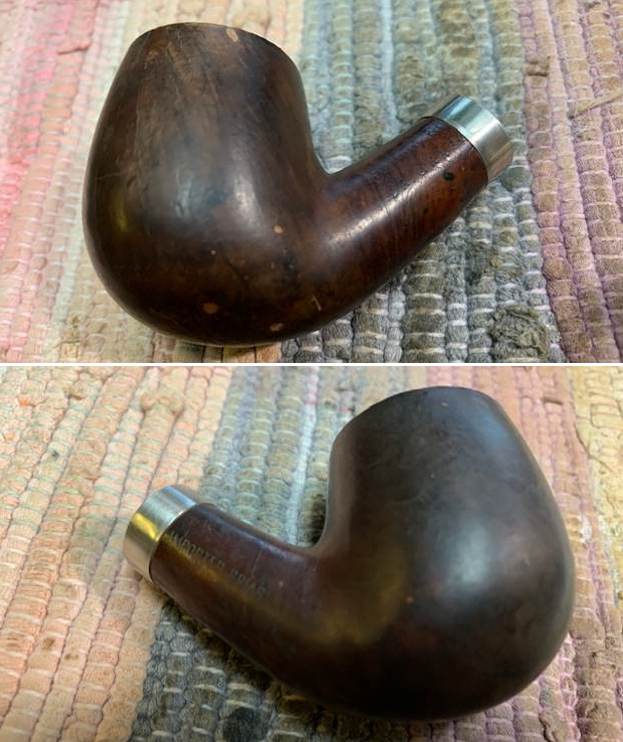
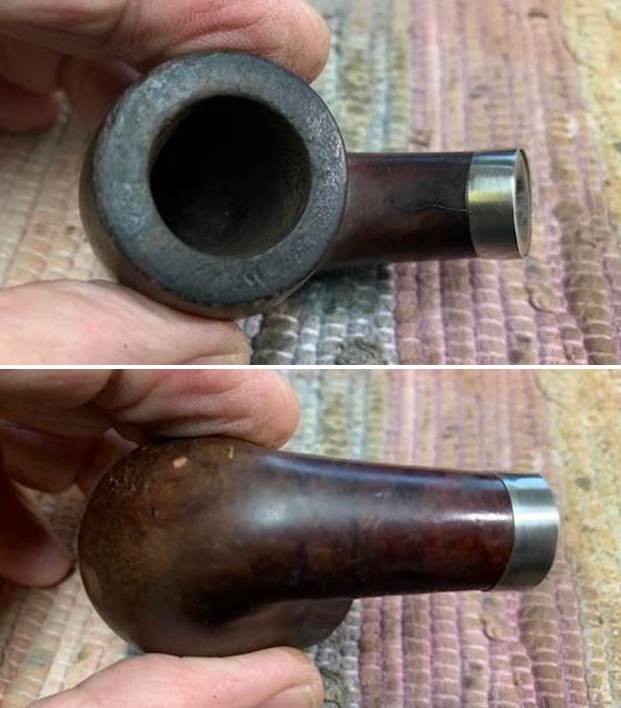
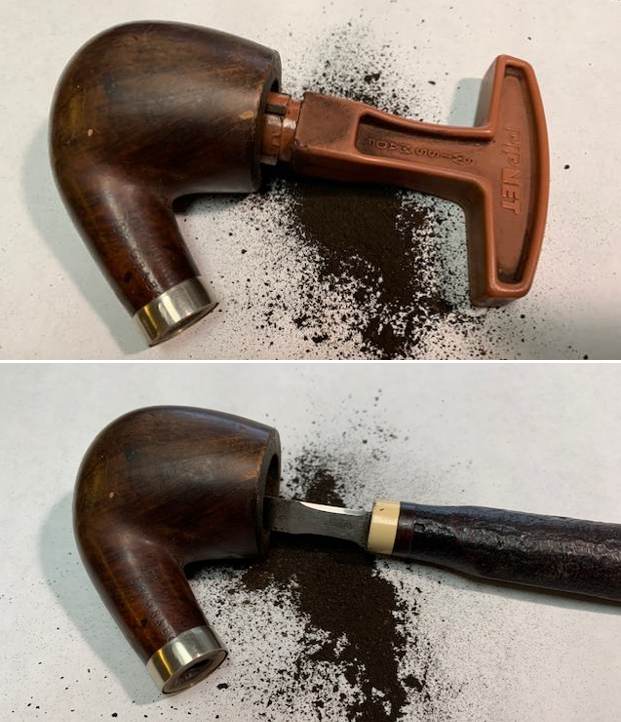
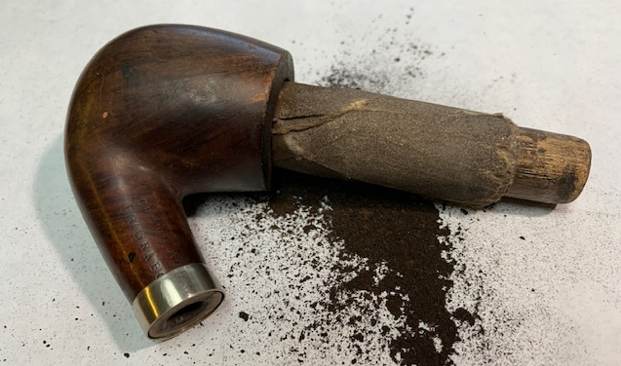
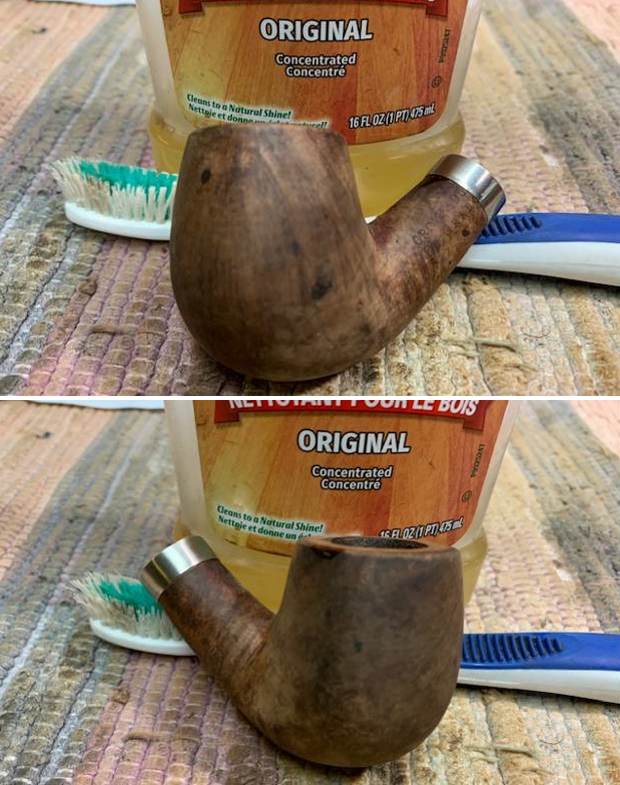
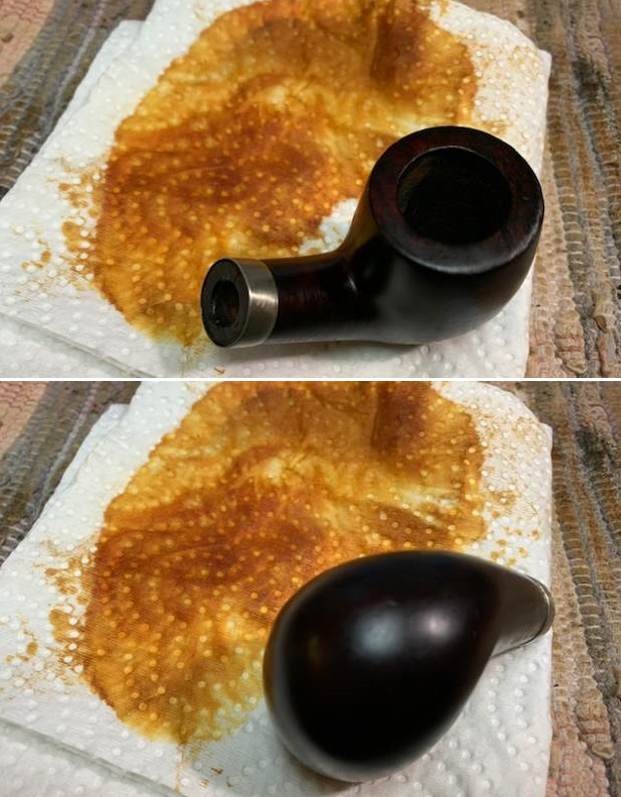
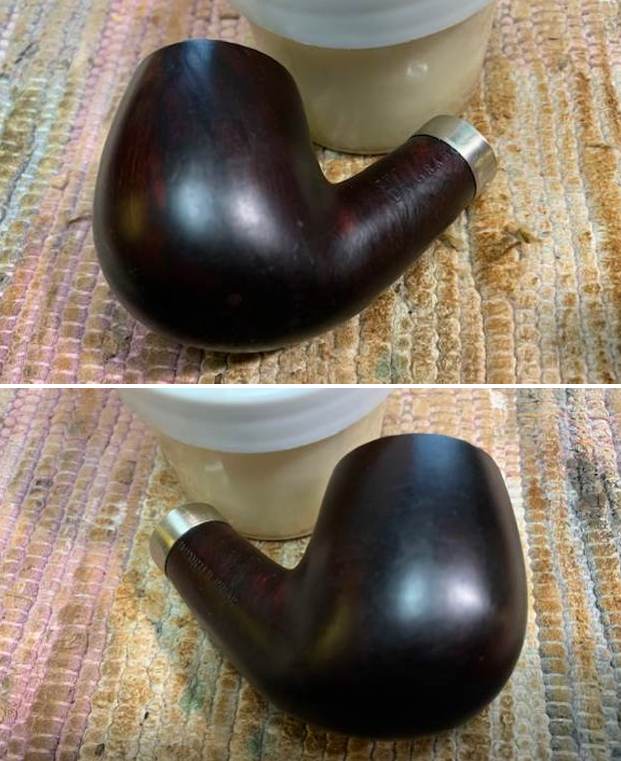
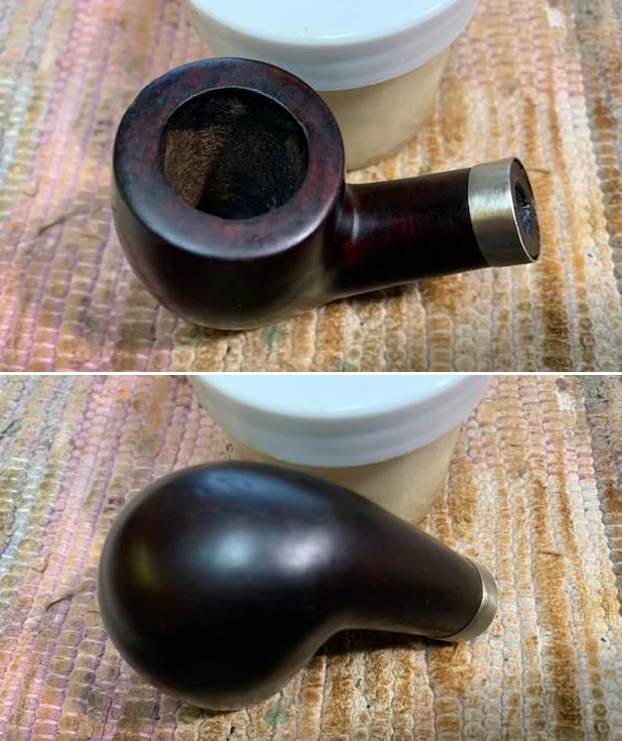
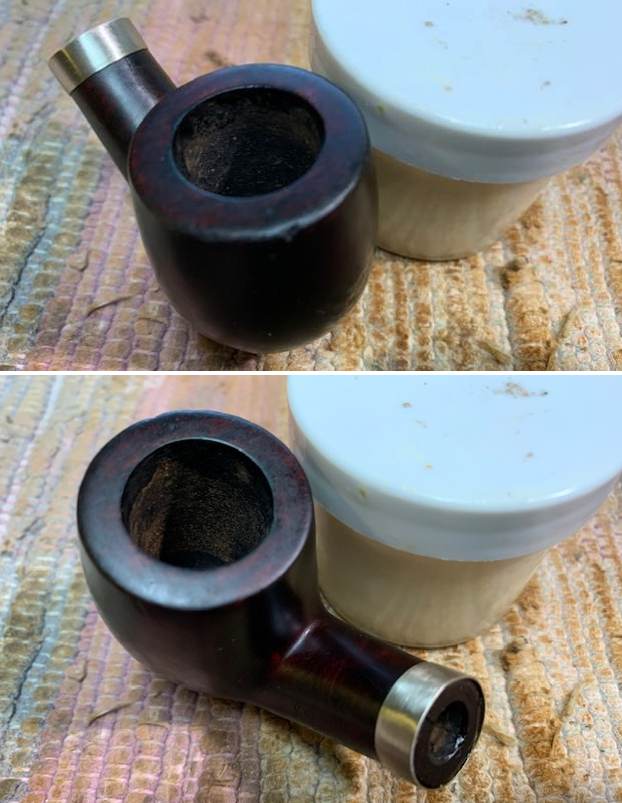
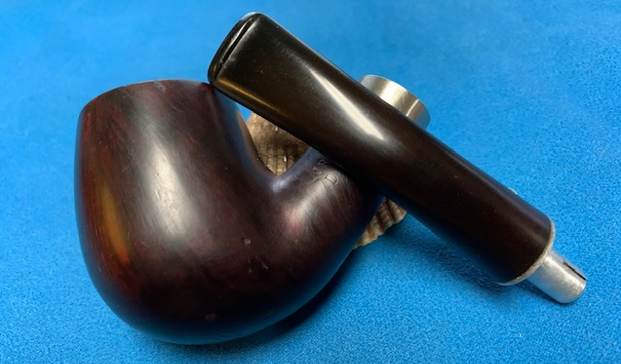
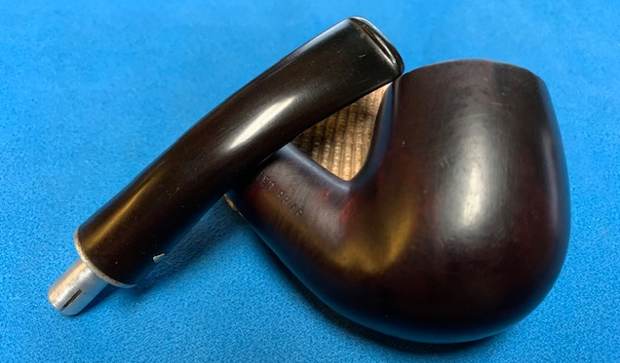
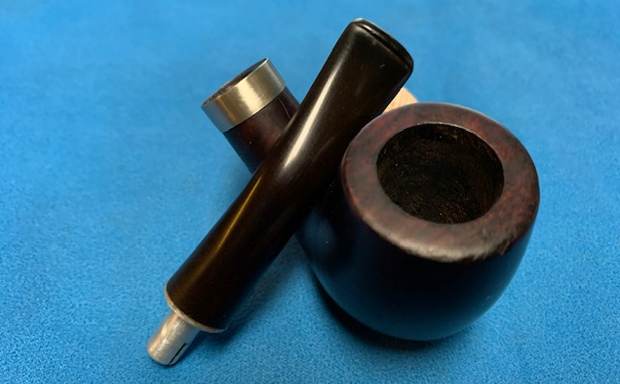
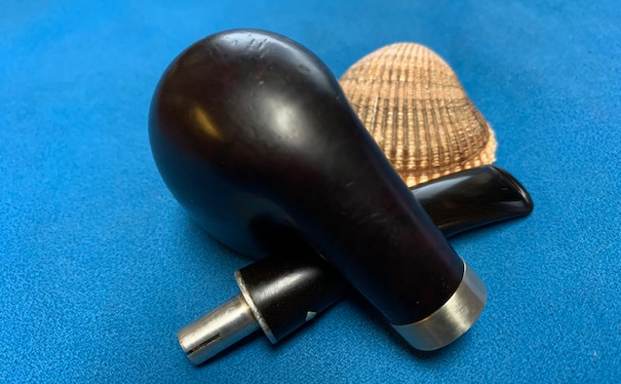
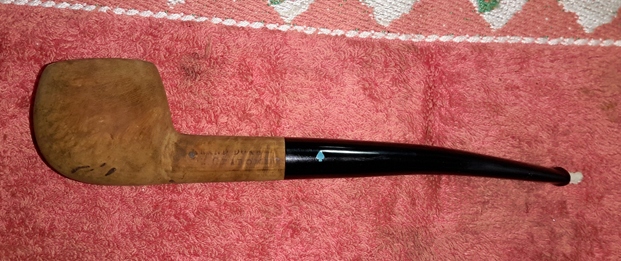
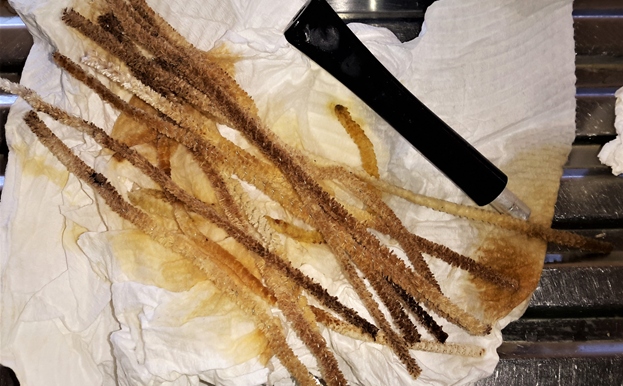
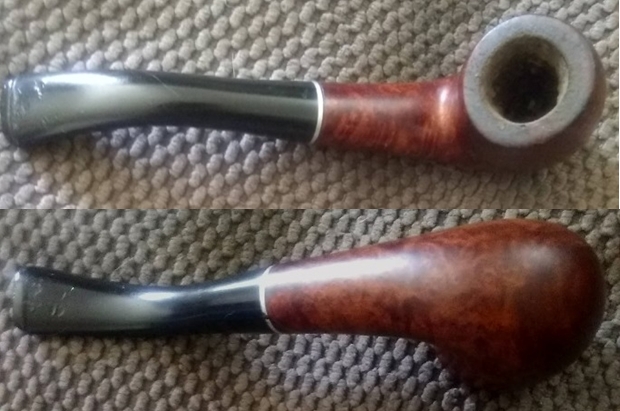
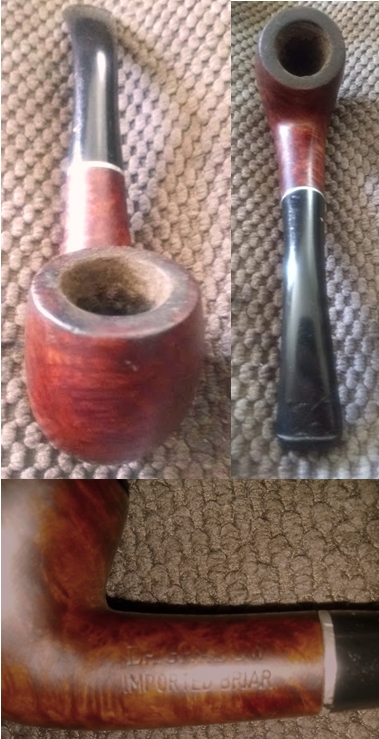
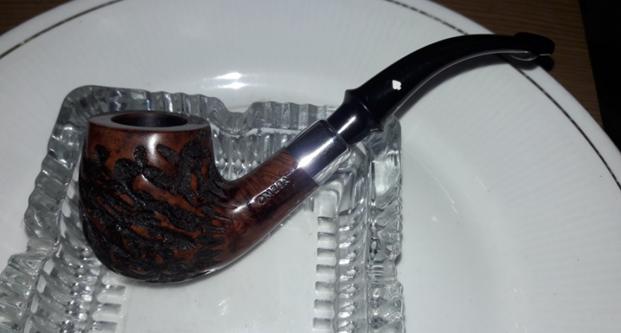
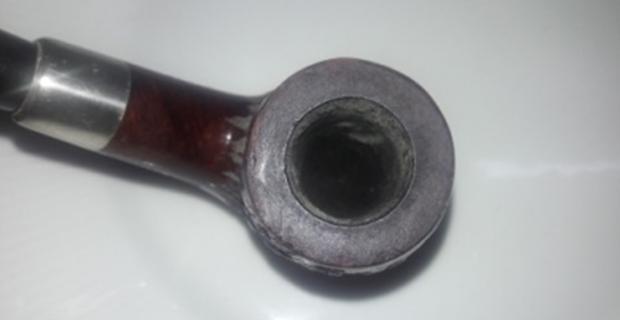
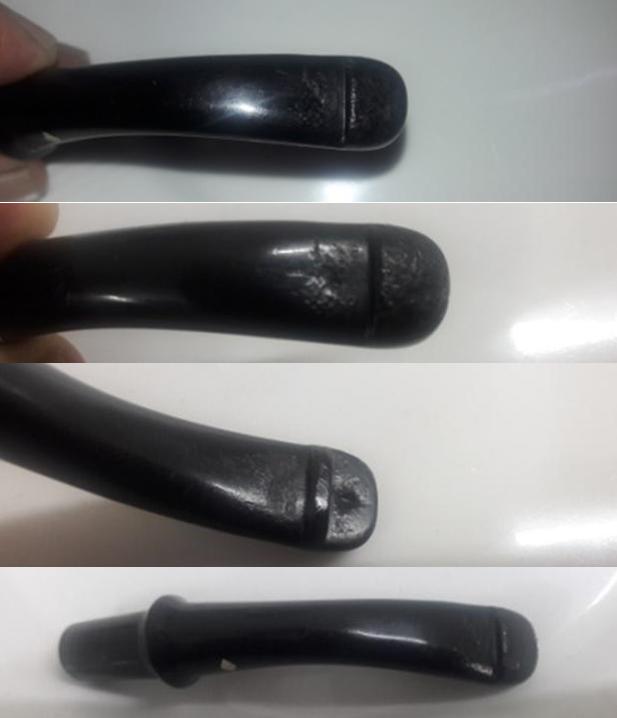
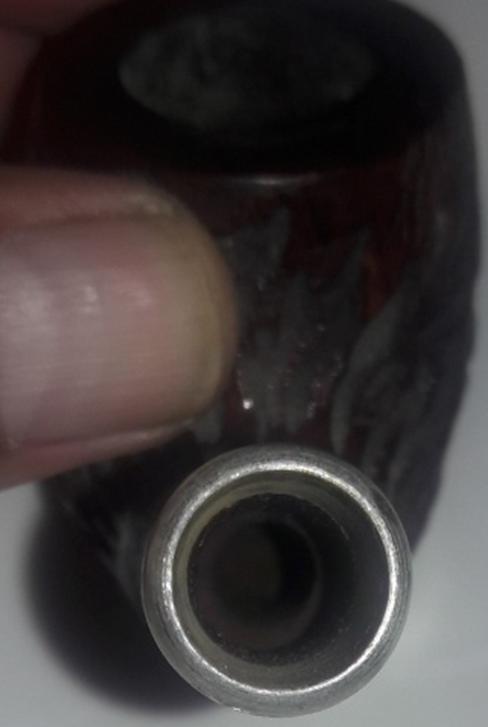
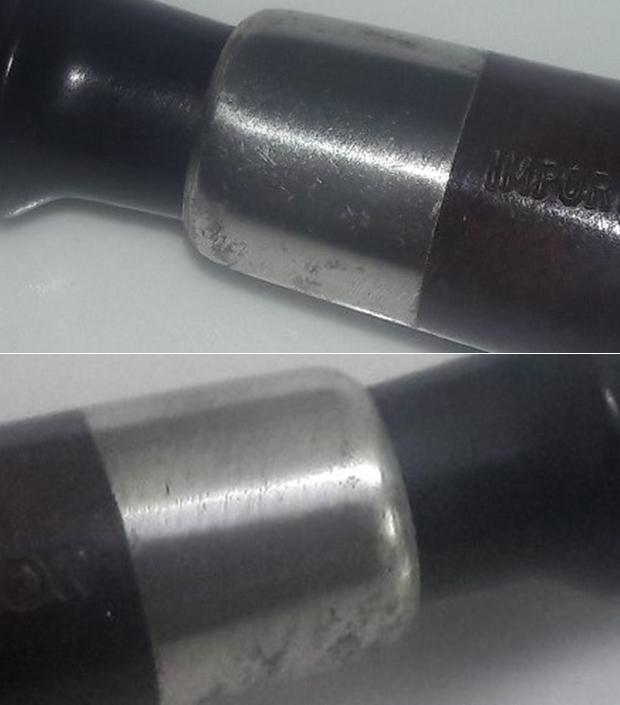
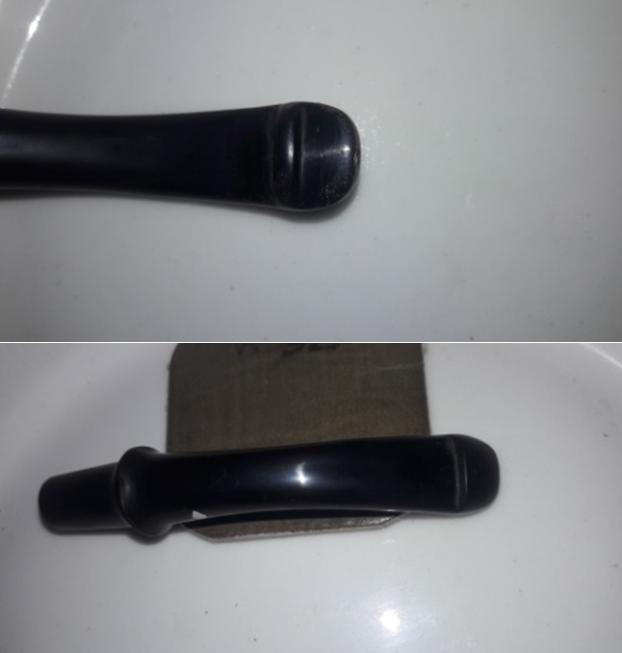
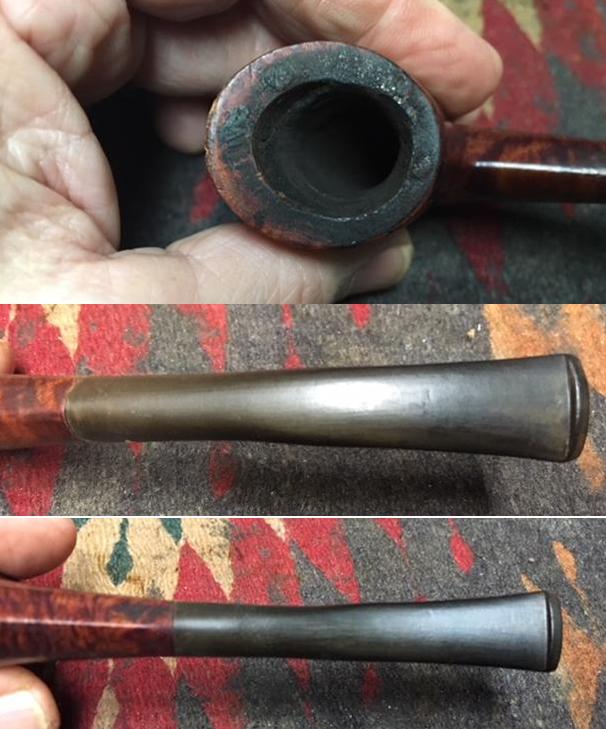
I received an email a while ago from a lady who wanted to have one of her Dad’s pipe cleaned and restored. As we emailed back and forth it was clear that it was one of those pieces that was filled with memories. I pressed to see if she was sure that she wanted it cleaned as it would remove the remnants of debris and tobacco from her Dad’s use of the pipe. She was clear that she wanted it cleaned up to look as good as possible because she was going to make a shadow box to hold the pipe and a photo and other memorabilia of her late Dad. When it finally arrived here in Vancouver I could see why she wanted it clean. The pipe was very dirty and there was a crack in the shank. The pipe had not been smoked for a long time and there was no tobacco smell in it at all. There was a hard thin cake in the bowl and lava on the rim top. The stem was oxidized and had calcification on the button end. It was a filter pipe that had been smoked without a filter so the insides were dirty. The pipe was stamped on the left side and read Crown Duke [over] Dr. Grabow. On the right side it read Imported Briar. There was a blue Grabow Spade on the left side of the taper stem. It was dirty and worn looking with some obvious fills around the bowl. I took some photos of the pipe before I started to work on it.    I took a photo of the rim top and bowl to give a clear picture of what I was dealing with. I also captured the crack in the top of the shank in the photo (I have outlined it in a red box). Other than being incredibly dirty the stem was in decent condition with light tooth chatter and light marks near the button edge.The stamping on the shank sides was faint but readable and reads as noted above.I took a better photo of the crack in the top of the shank and have included it below. It was quite wide open but came to an end in the squiggle at the end toward the bowl. I would need to glue and band it to make it solid again.I took a photo of the pipe with the stem removed to get a sense of the look of the Bent Billiard.I picked a band out of my box of bands. It is far too deep so I will need to take it down for a proper fit on the shank. I started the process by using a topping board. I then used my Dremel and sanding drum to remove the full amount I wanted gone. I finished the shaping of the band on the topping board.Once I had the fit correct, I removed it from the shank and cleaned up the area around the crack with alcohol and cotton swabs. I filled in the crack with clear super glue and clamped the crack shut. Once the glue cured I heated the band and pressed it onto the shank. I took some photos of the repaired shank and band. Now it was time to clean the bowl. I have often done the process in reverse but I really wanted to stabilize the crack before I worked on cleaning the exterior and interior of the bowl and shank. I did not want to chance making the crack worse. I reamed the cake out of the bowl with a Pipnet pipe reamer and took the cake back to bare briar. I cleaned up the reaming with a Savinelli Fitsall pipe knife and sanded the bowl walls smooth with a piece of dowel wrapped with 220 grit sandpaper. I wanted the bowl to be smooth for the display. I scrubbed the exterior of the bowl with undiluted Murphy’s Oil Soap and a tooth brush. I was able to remove the debris and grime around the bowl and clear off the lava on the rim top. I dried the bowl off with a cloth and took these photos. You can see the dark fills and spots around the bowl sides. The largest was a rough fill on the front of the bowl that was pink putty. I repaired the pink, rough fill on the front of the bowl with clear super glue. Once the repair cured I sanded it smooth with 220 grit sandpaper. It was now smooth to the touch. It would be interesting to try to blend it into the surrounding briar once I was staining it. I sanded the entire bowl with 1500 grit micromesh at the same time.I cleaned out the airway in the shank and the stem with cotton swabs, pipe cleaners and isopropyl alcohol. It took quite a few to get the tars and oils out of the airways.I buffed the pipe on the buffer with Blue Diamond and then stained it with a light brown stain. I applied the stain and then flamed it to set it. I used a black and brown Sharpie pen to stain the pinkish fill on the front of the bowl.I set the bowl aside for the stain to cure and turned my attention to the stem. I sanded out the tooth chatter and marks on the stem with 220 grit sandpaper and started the polishing with 400 grit wet dry sandpaper. It is actually beginning to look much better. I polished the stem with micromesh sanding pads – dry sanding with 1500-12000 grit pads. I wiped the stem down after each pad with an Obsidian Oil impregnated cloth to give the pads a little more bite. I polished it with Before & After Stem Polish both Fine and Extra Fine and gave it a final rub down with Obsidian Oil. I set the stem aside to dry and worked on the bowl again. By this time the stain was dry and I was able to tackle the bowl again. I wiped it down with alcohol on paper towels to make the stain more transparent. Because of the fills in the bowl I decided to leave it dark as it did a good job masking them. I buffed the bowl on the wheel with Blue Diamond to further aid the transparency. It is hard to see in the photos but in person the grain is there and not terribly hidden. The fills are hidden and other than the large one on the front of the bowl they look good. I put the stem on the bowl and buffed the pipe with Blue Diamond on the buffing wheel. I was careful when buffing around the stamping and the logo on the stem. I had decided to leave some of the nicks and marks in the briar as they were a part of the story of the pipe and its owner. I wanted it to still bear his definitive marks so that when it was in the shadow box those who knew him would remember the story of the pipe.  I did not want the pipe to look brand new as that would remove the story from it. The nickel band worked well to bind together the crack in the shank. The aluminum spacer on the stem sits up against it and looks quite nice as a joint with the band. It almost gives the band the look of a ferrule. The pipe came out quite well. The darker stain is very similar to what was originally on the pipe when it was new. It also did a good job of masking the fills around the bowl. I will soon be packing it up and sending it back to the pipeman’s daughter so she can build her tribute to her Dad. Thanks for reading the blog.

Refreshing a Dr. Grabow Sculptura Blasted Bulldog while Testing a New Deoxidizer Product


Blog by Dal Stanton

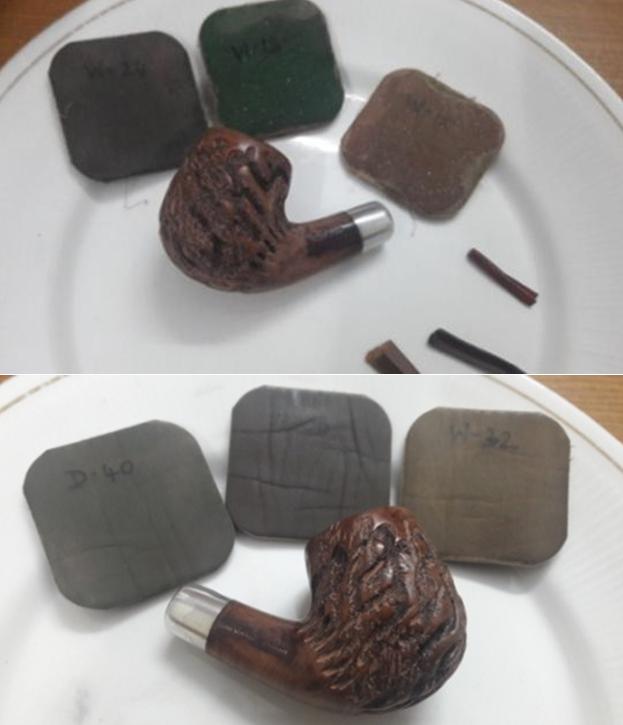
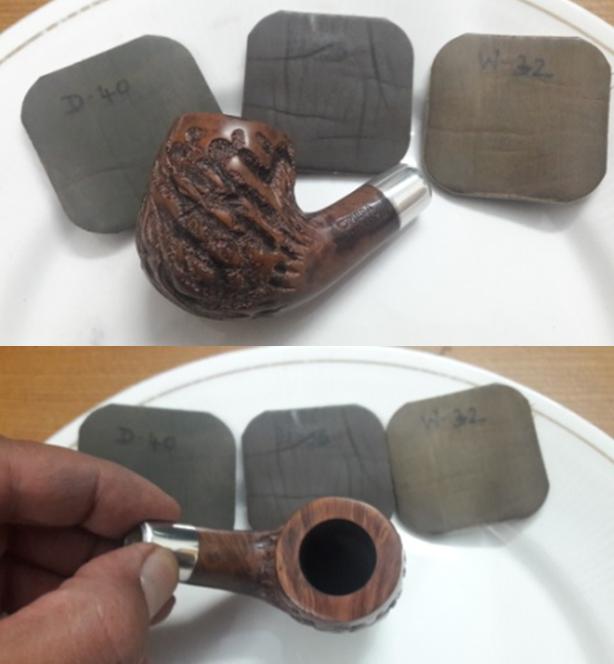
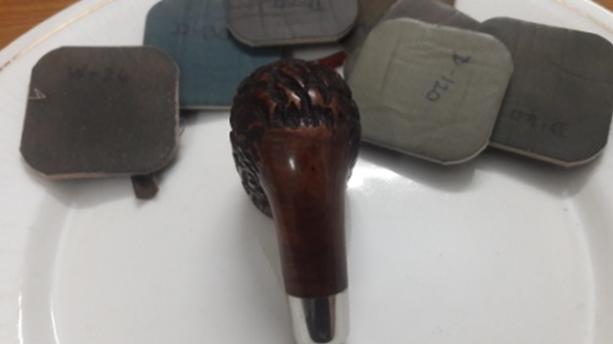
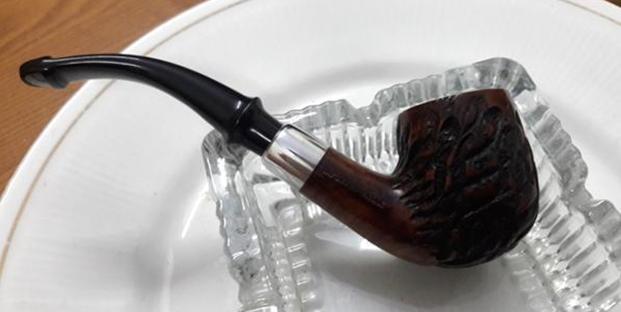
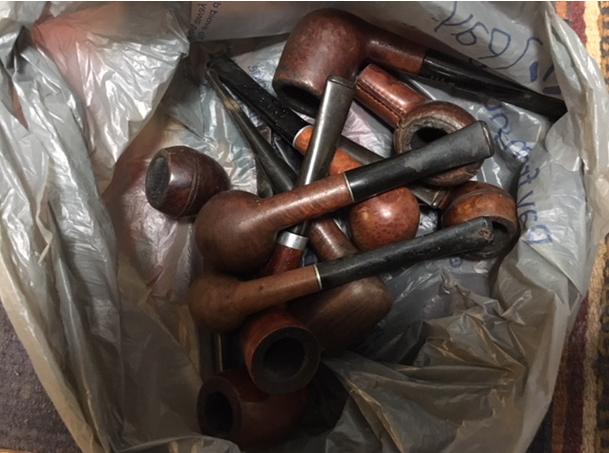
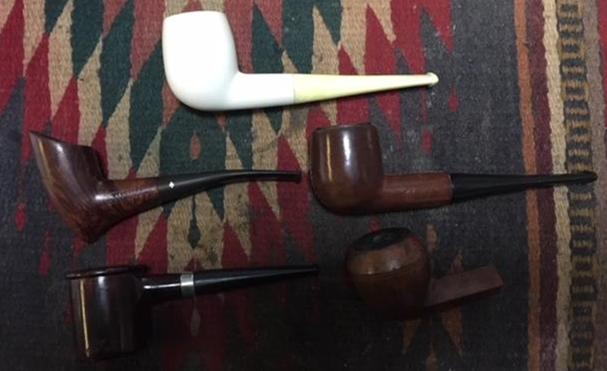
My friend and fellow pipe man restorer, Dave Shane (see: The Pipery.com) donated the pipe now on the worktable, the Dr. Grabow Sculptura, along with 12 other pipes.  Dave and I worked together several years ago in Ukraine.  Our paths met again in January of 2018 when I was in the US from Bulgaria and went to his home in the Atlanta area to catch up.  After much talk, some adult beverages and of course, sharing a few bowls together, Dave gifted me these pipes to benefit the Daughters of Bulgaria.  Some have already found their way to new stewards and the Dr. Grabow (in the picture on the far right) caught the attention of another friend and fellow pipe man, Todd.

Todd has already commissioned several pipes from The Pipe Steward and is an active contributor on several Facebook groups dedicated to pipe men and women and their pipes and tobaccos.  I became aware that Todd was an attorney specializing in international issues and especially China when he commissioned his first pipes in September of 2018 while I was still living in Bulgaria.  I had written to him asking for more patience to ‘bump him’ a bit in the queue so I could restore a special pipe commissioned by Chrystal, who was visiting us in Sofia from China. Chrystal had chosen a pipe to take back to China as a special gift for her grandfather (see: A Special Gift for Her Grandfather in the People’s Republic of China – A Sculpted Rose Billiard of Italy).  It was a special visit and write up where I was able to include great pictures of Chrystal with her grandfather and his new pipe that she had sent upon her return to the People’s Republic of China.

When Todd found out why he was being ‘bumped’ I then found out about his work and special focus and devotion to China as a country and culture.  Over time I have appreciated getting to know Todd more and we have made commitments to have bowls together when our paths ever get close enough!  I have restored some nice, collectable pipes for Todd and when he wrote me about commissioning the Dr. Grabow, along with a few other ‘low-end’ pipes, as he described them, I was intrigued.  Through our communications about commissioning the Dr. Grabow, I discovered that Todd and I share a similar view on the cost of a pipe not necessarily an accurate indicator of a better smoking experience.  Todd wrote:

I recently acquired a couple of Dr. Grabow and Kaywoodie and other older, “low-end” pipes in good condition from eBay and found the old briar to be very tasty.  As you may know, I try to reject the snobbery inherent in every aspect of so much of life; I enjoy a $10 Wrangler shirt from Walmart as much as a $100 shirt from Brooks Brothers, if not more; it fits and looks great, and that’s my major concern; the lower price is also a big help.  Snobbery is present in this hobby also.  Pipe making at $750.00 a pop is certainly good work if you can find it.  However, in my humble experience, there seems to be negligible equivalency between price and briar quality of smoking, unless of course, Covid19 has deadened my faculty of taste. Enough of my useless pontificating.  Please take a look at those six pipes and let me know your ideas. And please remember that your fine work is well appreciated by me and, I believe, many others in our hobby.

My response to Todd’s comments expressed my agreement:

Todd, I’m in total alignment with you about named pipes vs. basket pipes not being an indicator of how well a pipe smokes.  And I think you would agree, that so many ‘low end’ pipes are only ‘low end’ because they were on more of a conveyor line when they were manufactured.  Many of my restorations show that TLC with a no name throw away can produce an absolute treasure.

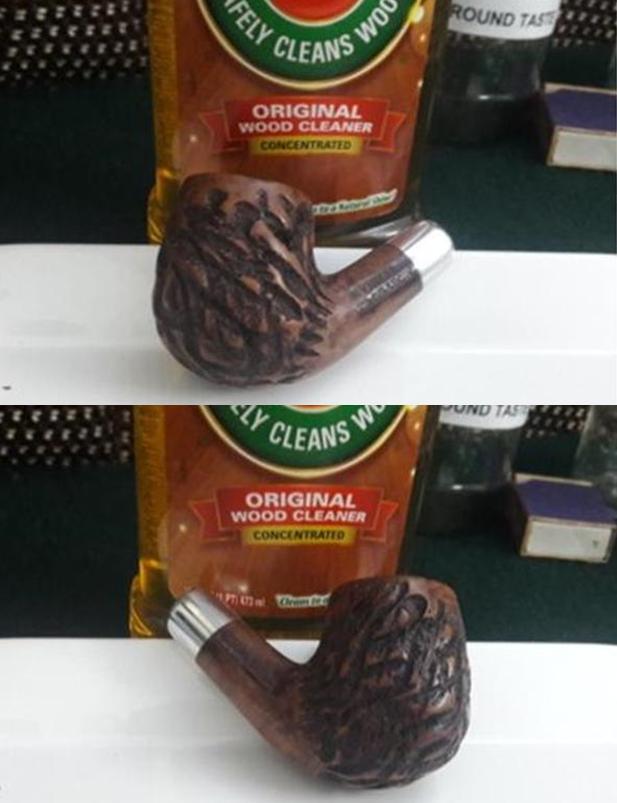
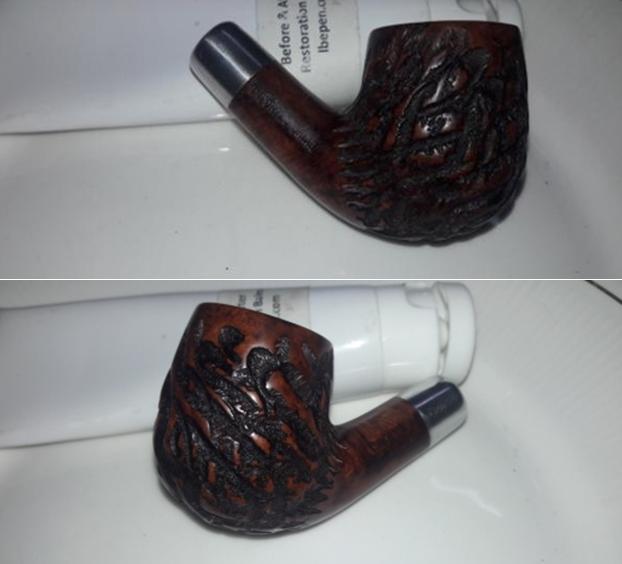
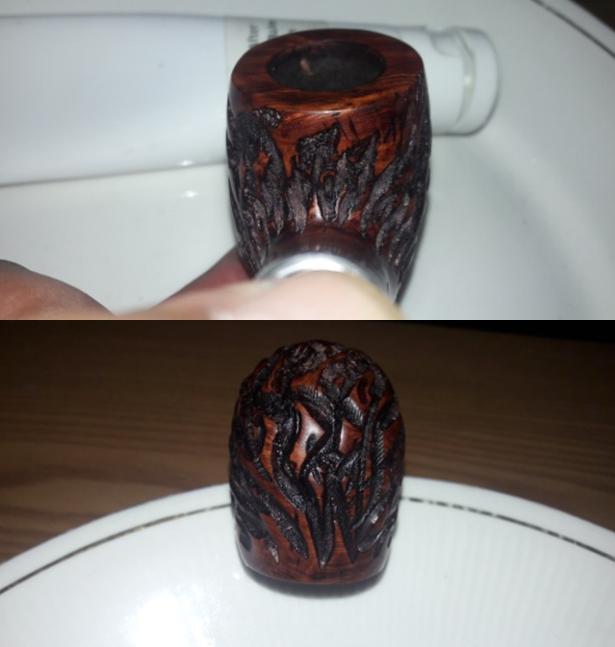
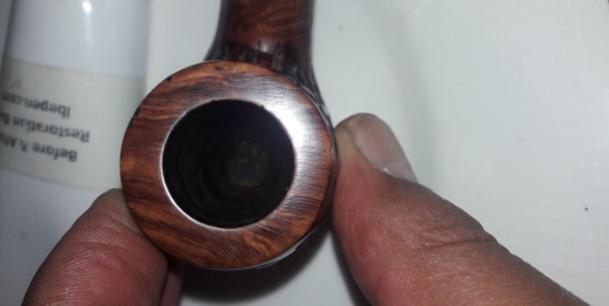
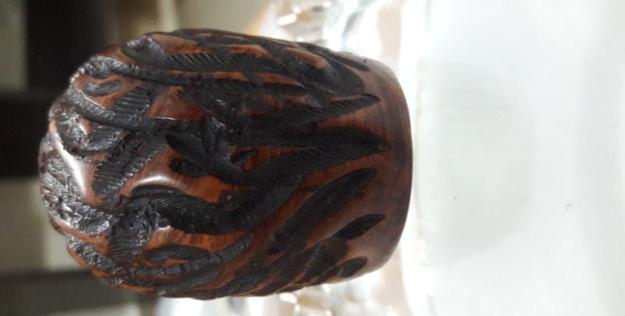
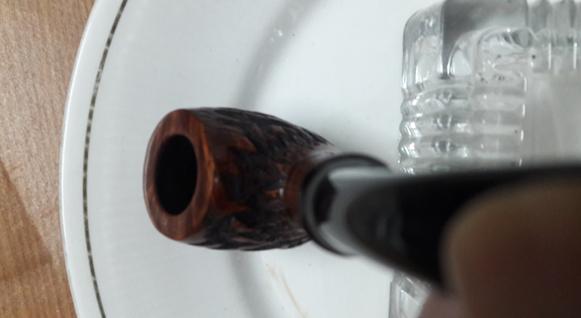
I know that there are many Dr. Grabow enthusiasts out there and to call a pipe a low-end pipe does not mean a ‘cheap’ pipe!  Sometimes of course, this IS the case, but my experience has shown that with a little help, pipes that do not cost an arm and leg can look like a million and smoke just as well as the more expensive pipes out there.  This is the first Dr. Grabow that I’ve worked on that is not upgrading an Omega – Dr. Grabow’s version of a system pipe.  Here are some pictures of the Dr. Grabow Sculptura Blasted Bulldog which whispered Todd’s name in the For “Pipe Dreamers” Only! collection which he commissioned: The nomenclature is found in a smooth briar panel on the lower right panel of the Bulldog’s characteristic diamond shank.  Stamped there is, SCULPTURA [over] DR. GRABOW.  I could find no other markings.The classic Bulldog is a fun shape and always seems to rustle up images of a bulldog smoking a pipe – but not necessarily a Bulldog shape!  The blasted Sculptura looks like Grabow’s attempt at a value pipe and it’s not half bad.  The diamond shank nickel cap/extender is interesting giving this Bulldog more of an ‘elegant’ reach than the normal short, stubby reach of the classic Bulldog.  The blasted finish is not bad too and has somewhat of a ‘Dunhill’ hue going for it with the deeper reddish tones nuancing the dark finish.

Pipedia’s short comment about the Sculptura line of Dr. Grabow in the History Timeline article states that the line was introduced in 1967 and registered by HL&T in 1972 (See  Henry Leonard & Thomas Inc. for more information about company acquisitions when Linkman sold to HL&T in 1955 and operations were moved from Chicago to Greensboro, NC).  More specific information is uncovered in the Pipedia Dr. Grabow article focusing on the myriad of Grabow models, series and lines through the years:

SCULPTURA (c1967-69?) — Newest of the RJR special offer pipes. These were sandblasted in a “big” blast. The operator stood with his hands in heavy rubber gloves and blasted away grain. He could only do about 50 pieces an hour. Prior to this, most “sandblasted” pipes were tumbled in a contraption like a cement mixer using walnut shells as the media. Dr. Grabow really never got into that but waited until they could do it “right” using glass shot.

The Sculptura line was without shape numbers and was a Grabow line which was exclusively sand blasted pipes of various shapes.  We know from this article that Sculpturas were produced ‘properly’ using the processes pioneered by London’s Dunhill.  The Sculptura was considered a ‘newer’ line of pipes because they were introduced after the acquisition that moved the Grabow production from Chicago to North Carolina.  The history of the Dr. Grabow pipe name can be explored further at Pipedia’s main Dr. Grabow article (See: LINK) which is a good read describing the history.  I would be remiss if I didn’t refresh the memory of how the Dr. Grabow name started for a line of pipes and continues to be a much-loved pipe by many which can be evidenced in a quick look at The Dr. Grabow’s Collector’s Forum.   I repeat in its entirety a Pipedia article written by the grandson of the ‘original’ Dr. Grabow, entitled, The Legend of Dr. Grabow (Written October, 2005, by Paul W. Grabow, and courtesy of DrGrabow-pipe-info.com [now defunct]):

Dr. Grabow Pipes are named after Dr. Paul E. Grabow (my deceased Grandfather), a general-practitioner physician formerly with an office on the northeast corner of Fullerton and Halsted in Chicago. His youngest son was Mr. Milford P. Grabow (my Uncle) who passed away January, 2005 in Chicago. Dr. Grabow’s other son (my Father, deceased in 1979) was Dr. William S. Grabow, a dentist who practiced in Chicago and Evanston, IL.

Milford Grabow recently recounted details of the Dr. Grabow Pipe legend in a letter to me as follows:

“To start from the beginning, the old homestead was on 2348 Seminary Ave. (Chicago) before the De Paul University bought and tore down the whole area to expand the campus. Three doors north on 2400 Seminary Ave. (corner of Fullerton) was Brown’s Drug Store, one of the old fashion community Drug stores that was popular of that area and was owned by Brown the Druggist. It had the usual ice cream counter and wire chairs and tables to serve sodas and sundaes. My Father became fast friends with his fishing buddy the Druggist. Most every weeknight after dinner while Mom did the dishes, Pop would visit Mr. Brown in the back room of the store and they would have weighty discussions about world events, fishing, politics, sports, etc. while smoking their pipes. One block west on Fullerton on the corner of Racine was the large pipe factory owned by Mr. Linkman. Mr. Linkman, when he wasn’t too busy, would join the other two in their bull sessions and the three became fast friends.

It was during one of their nightly sessions that Mr. Linkman mentioned that he was coming out with a new pipe containing some innovated improvements and was looking for a name for it. He thought if it contained a Doctor’s name it would probably sell well so he asked my Father if he would mind if he could use the Dr. Grabow name as he liked the sound of it. My Father liked the idea and was flattered to have a pipe named after him. So Mr. Linkman used the Dr. Grabow name without any formal agreement but just a “friendly understanding.”

As a child in the 1940’s and 1950’s, I remember how Grandpa loved to smoke his Dr. Grabow pipes. The pipes were generously provided to him at no cost by Mr. Linkman, apparently part of the friendly understanding. Dr. Paul E. Grabow died of natural causes in 1965 at the ripe age of 97. He had a very rich and full life and I believe pipe smoking was good to him. Through the years I’ve enjoyed watching the growth of the Dr. Grabow Pipes and sharing Grandpa’s legend with the curious.

Anyone personally familiar with additional details of this legend is requested to forward input to the undersigned.

Paul W. Grabow

With a renewed appreciation for the Dr. Grabow name, I look more closely at the Blasted Sculptura Bulldog on the worktable which shows no major issues and which is why I’m calling it a ‘refresh’.  The chamber has little cake build up and the rim has grime.  What I see that is interesting is that the draft hole at the floor of the chamber looks to be a larger opening than usual. The blasted surface has had its share of nicks, cuts and dents.  Raw briar is visible here and there over the blasted surface.The nickel shank cap has a high gloss – like it was plated.  The surface is pitted, and small scratching is visible.  This should shine up nicely.The stem has significant and what I would call, deep oxidation.  The vulcanite surface is rough, and the bit has a few compressions that need addressing.  To see more clearly the oxidation, I’ve lightened the following pictures to reveal the dreaded, greenish murk of the oxidation.  Oxidation happens to rubber mostly when overly exposed to UV lighting – sunlight.  There is no way to totally protect a stem except to keep it in a UV free environment.  Saliva also encourages oxidation.As I begin the refreshing of this Dr. Grabow, I will start with the oxidation in the stem.  I’m using this write up to test a new product that I heard about on one of the Facebook groups where I post my work and converse with fellow pipe men.  In the process of restoring pipes, the issue of oxidation in vulcanite stems is always an issue and is one of the most time-consuming parts of the process of restoration.  Finding and using products that can naturally or chemically remove the oxidation is the holy grail that is sought.  When oxidation is removed like this, it reduces sanding, time spent and can guard the stem logos stamped into the stems.  The product that I’m trying for the first time comes from www.Briarville.com and is called, ‘Pipe Stem Oxidation Remover’.  The product that I have been using is Mark Hoover’s, ‘Before & After Deoxidizer’ (www.Lbpen.com) which has in my experience had mixed reviews.  What I have found with Mark’s product is that it does great with stems having minor oxidation.  However, stems with what I call ‘deep’ oxidation, seem always to need additional sanding and prep work to remove the oxidation even with use of the product.  In fairness to Mark’s Before & After Deoxidizer, in talking with pipe man, Chris from the Netherlands, who was part of the FB discussion about deoxidizer products, he shared with me that he just acquired an ‘extra strength’ version of the Before & After product that Chris said worked much better in his experience than the ‘normal’ strength.  I’ll need to reach out to Mark to find out about this!

When I decided to order the Briarville Deoxidizer product, I had already started working on the Dr. Grabow stem using Before & After Deoxidizer.  I followed the same process steps as I normally do by starting with cleaning the airway.Knowing that the oxidation is deep, I employ 0000 grade steel wool with Soft Scrub to begin the process of breaking down the oxidation.  I do this to give a ‘head start’ on the oxidation removal before putting it through the Before & After Deoxidizer paces.After thoroughly rinsing the stem, the Grabow stem is added to the Before & After Deoxidizer along with two other pipes’ stems which have already been claimed by other stewards.After allowing the stems to soak through the night, the Dr. Grabow stem is drained of the Deoxidizer fluid.  I squeegee with my fingers and using pipe cleaners and alcohol clear the liquid from the airway.I discover that the nickel stinger thankfully, can be removed from the nickel tenon.  The vulcanite is wiped down with cotton pads wetted with alcohol to remove raised oxidation.  Following this, to start conditioning the stem, paraffin oil is applied to the vulcanite stem. The results:  After the entire process using steel wool and Soft Scrub, soaking 24 hours in the Before & After Deoxidizer, the lightened pictures detect what I can see with the naked eye – the oxidation has been mitigated some, but continues to be visible predominantly around the saddle stem. block and in the bit area.  Ugh! The Briarville Pipe Stem Oxidation Remover arrived from Briarville in Florida and the only directions were on the front label stating, “Soak Stem for 2 to 24 hours as needed for oxidation removal.”  When I opened the bottle for the first time, on impulse I decided to smell the contents to see if I could discover through olfactory investigation clues to the secret mixture which was billed to add to my pipe restoration happiness.  Mark Hoover’s Before & After secrets are only described as being fully organic – made with natural ingredients.  As I sniffed Briarville’s Deoxidizer, the first thing that struck me was that it smelled like the side-chair mouth rinse my dentist provides to remove the debris of his work.  It was interesting too, that pipe man, Chris, in the Netherlands said later when texting with him, that his first impression of the product when he gave it a whiff, was that it reminded him of Listerine!  Two similar responses to the question of the secret ingredients of Briarville’s mixture.  Chris said he would test this hypothesis of mouthwash by soaking stems in Listerine to see if the results were similar.  He said he would let me know how it turned out.I decide to put the Dr. Grabow through the paces again using the Briarville Oxidation Remover even though it had been through the Before & After process.  The bottle is shaped nicely so that most stems will fit in the bottle and be covered with the solution.  The Dr. Grabow goes into the solution and I decide to give it the maximum exposure from the outset – 24 hours.  As I do with Before & After, I add two additional stems of pipes that are in the queue after cleaning their airways alone, to join the 24-hour experiment.  I decided not to ‘prep’ the stems by scrubbing with steel wool and Soft Scrub. I considered one of the two stems as having deep oxidation.  The pristine yellow color of the fluid changed gradually during the oxidation removal process.After 24 hours, the stems were removed from the Briarville Oxidation Remover including the Dr. Grabow stem.  First, using a dry cotton pad, the stem is wiped to remove raised oxidation from the stem.  A distinctive brown color is left on the pad.  Following the initial wipe with a dry pad, the stem is additionally wiped with a cotton pad wetted with alcohol to clean thoroughly. Afterwards, as I did with the Before & After evaluation, I lighten the photo to show what I also am not now seeing with my eye – residual oxidation.  I’m not seeing the oxidation compared with the second ‘before’ picture – where the oxidation was still presenting after the Before & After Deoxidation process. As usual, I then treat the stem with paraffin oil to further condition the vulcanite and put the stem aside.I know this testing is not scientific and it could be reasoned that the more positive result with the Grabow stem with the Briarville product could have been made possible because it first had been through the Before & After process.  This is true and this method of testing is experiential and open to subjective results.  However, the other stems had similar results even though they received no prep or did they first go through the Before & After process.  The set of three pictures of each stem includes in this order: 1) Enhanced picture before treatment, 2) After treatment showing the cotton pad results, and 3) After applying paraffin oil with enhanced picture to show latent oxidation.  First, the St. Regis DeLuxe stem.Next, the stem of the Bennington Supreme:Based upon these results, I have found no reason not to continue testing and using Briarville.com’s Pipe Stem Oxidation Remover and see how it goes in the long run. Generally, I’m seeing positive results where oxidation seems significantly reduced.  Again, this was not a scientific test but my desire to see how different products work!   The cost of the 8 oz. bottle was $26.98, which included mailing to Colorado.

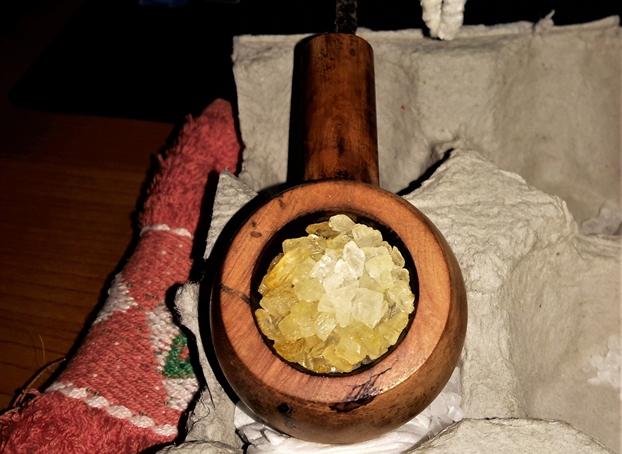
Turning now to the stummel, the chamber has a light cake – it appears as though it had recently been reamed but I start again with a clean slate.  The chamber is reamed with the Pipnet Reaming Kit using 2 smaller of the 4 blades available.  This is followed by scraping the walls of the chamber with the Savinelli Fitsall Tool.  Finally, the chamber is sanded with 240 grade paper wrapped around a Sharpie Pen.After wiping the bowl, the inspection shows a healthy chamber with no heating problems.Transitioning to the external blasted surface, the stummel is scrubbed with a cotton pad and undiluted Murphy’s Oil Soap.  A bristled toothbrush is also used to scrub the surface, the dual dome grooves, and the rim.The stummel then goes to the sink with warm to hottish water and the internal mortise is scrubbed with shank brushes using liquid anti-oil dishwashing soap.  After the stummel is scrubbed and thoroughly rinsed, it goes back to the worktable to continue the cleaning process.The internals are fine cleaned next using cotton buds and pipe cleaners wetted with isopropyl 99%.  A small dental spoon is also helpful in scraping and excavating old oil and tar buildup on the mortise wall. After some effort, the buds emerge lighter and I stop the cleaning for now. I plan later to give the stummel a kosher salt and alcohol soak to continue to freshen the internals for a new steward.With the surface cleaning completed, an inspection shows what I saw earlier.  The finish is old and worn.  There are lightened spots showing bare briar.  The rim cleaned up nicely. It doesn’t take much consideration to give the nicely blasted Grabow Bulldog a fresh finish.  To clean the surface further, a cotton pad wetted with alcohol wipes the surface and reveals what I mentioned earlier.  The dark finish has a reddish tone which is reminiscent of the Dunhill branded color that my good friend and pipe man in India, Paresh, has almost perfected in his restorations of Dunhill pipes and shared in his blogs on rebornpipes.  This Dr. Grabow will get a dark undercoat of dark brown with just a touch of black dye added. I add the black to deepen the hue a bit.  Over this primary undercoat, a red dye will be washed.  With the components needed assembled on the worktable, after wrapping the nickel shank cap with painter’s tape, I begin by heating the stummel with the hot air gun.  The warming of the briar expands it and helps it to be more receptive to the dyes.  Fiebing’s Dark Brown Leather Dye is used and with it is mixed only a drop of Fiebing’s Black.  With a cork in the chamber to act as a handle and stand, the dye mixture is applied with a folded pipe cleaner.  After application of the dye over a small patch of the briar surface, the aniline dye is flamed with a lit candle.  The alcohol combusts in the dye burning off leaving behind in the grain the dye pigment.  After thoroughly applying the dye and flaming it, the stummel is set aside to allow the newly dyed stummel to rest letting the dye settle.Next, the stem needs some attention.  The bit has some roughness and tooth chatter.  The upper button lip has a significant compression which I’m hopeful of minimizing.  To minimize or remove the biting damage to the bit the heating method is used.  Using a Bic lighter, the bit is painted with the flame back and forth. As the flame heats the vulcanite, physics takes over and the rubber expands recapturing its former shape – at least partially.  I take before pictures and the after-heating process. The large compression on the upper button is still there but I’m hopeful that sanding alone will take care of it. Next, a flat needle file is used to refresh the button lips to improve the bite hang. The filing is followed by sanding with 240 grade sanding paper focusing first on smoothing the compressions in the bit and button and then expanded to include the entire stem.  A plastic disk is used on the tenon side of the stem to prevent shouldering – keeping the edges crisp forming of the shank union. Next, moving to less abrasive sanding, wet sanding with 600 grade paper is followed by applying 0000 grade steel wool.Following the steel wool, the full regimen of micromesh pads is used starting with wet sanding with pads 1500 to 2400.  This is followed by dry sanding with pads 3200 to 4000 and 6000 to 12000.  Between each set of 3 pads, Obsidian Oil is applied to condition the vulcanite and to guard against oxidation.  I love the pop of freshly micromeshed stems! Putting the stem to the side, the stummel has rested several hours after applying the dye undercoat.  Next, after a felt buffing wheel is mounted to the rotary tool set at about 30% full power, the flamed crust is removed from the Grabow blasted surface. Following this, a cotton pad wetted with alcohol is used to wipe the newly dyed stummel surface.  This helps to blend the dye and to remove overt, excess dye.As before, in preparation of applying the red dye overcoat, the stummel is warmed using the hot air gun.I use a red dye concentrate called TransTint which can be mixed with either water or alcohol to form the base.  I mix a small amount of alcohol with the red concentrate.  With the stummel warmed, a pipe cleaner is used to ‘wash’ the red dye over the dark undercoat.  When the blasted surface is thoroughly covered with the overcoat of red, the stummel is put aside to rest again for several hours allowing the dye to settle.After a few hours, the dye has dried enough to handle the stummel.  Before turning the lights out for the night, I continue the internal stummel cleaning with a kosher salt and alcohol soak.  Being careful not to disturb the resting dye, a cotton ball is stretched and twisted to form a ‘wick’ which is guided down the mortise to the draft hole with the help of a stiff wire.  The cotton wick helps to draw the oils and tars from the internal briar walls. After the wick is in the mortise, the bowl is filled with the kosher salt and set in an egg crate to maintain stability.  Kosher salt does not leave an aftertaste like iodized salt. The bowl is then filled with isopropyl 99% until it surfaces over the salt. After about 15 minutes, after the initial alcohol has been absorbed, additional alcohol is used to top it off.  The lights are turned off allowing the soak to do its thing through the night and the dye to continue to settle in.The next morning reveals soiling in the salt and the cotton wick indicating that the process has worked.  After removing the expended salt and wiping the bowl with a paper towel I blow through the mortise to assure that the salt crystals are removed.To make sure the internals are clean and to remove any remaining debris, a few cotton buds wetted with isopropyl 99% confirm the internals are clean and refreshed.  I move on.The red overcoat wash of red dye rested through the night.  To continue the refinishing process, a cotton cloth buffing wheel is mounted on the rotary tool and set to about 40% full power.  Using Blue Diamond compound, the buffing is applied to the blasted briar. I’m waiting to attach the stem and to apply Blue Diamond to it because this phase of Blue Diamond is for the purpose of removing excess dye.  While applying the Blue Diamond, I am also careful not to overrun onto the nickel shank cap.  Polishing the metal is reserved for another buffing wheel dedicated to this purpose.  Polishing metals with Blue Diamond compound produce a black residue that can stain the briar if one is not careful.  This is the reason for dedicated buffing wheels for different materials.After the initial application of Blue Diamond compound, the surface is wiped with a cotton pad wetted with alcohol.  The purpose of this is to reduce excess dye and to help prevent dye leeching on the hands when the pipe is put into service. After the wipe down, the stummel is again buffed with Blue Diamond compound.One final measure to minimize the possibility of the dye leeching onto the hands of the new steward when the pipe is put into service.  To emulate the heating of the pipe during its initial times put into service, the stummel is warmed with the hot air gun.While the stummel is hot, an old cotton cloth is used rigorously to hand buff the stummel picking up the final vestiges of excess dye – hopefully!  Next, another cleaner cotton buffing wheel is mounted onto the rotary tool and Blue Diamond compound is applied to the waiting stem.  The nickel stinger is also reunited to the threaded tenon after being cleaned and polished with 0000 grade steel wool. With both the stummel and stem buffed with Blue Diamond, next is buffing the nickel shank cap and stinger/tenon.  Another cotton cloth buffing wheel dedicated to metals is mounted on the rotary tool.  The speed remains at about 40% full power and the nickel is shined up using the mildly abrasive compound.After completing all the applications of Blue Diamond, a felt cloth is used to wipe/buff the entire pipe including the nickel fitments.  This is done to make sure compound dust is removed before application of the wax to the stem and stummel.The last step is to mount another cotton cloth wheel to the rotary tool maintaining the same speed.  Carnauba wax is applied to the stem and stummel avoiding the nickel shank cap.  When the wax has been applied, a microfiber cloth is used to give the pipe a rigorous hand buffing to raise the shine and to disperse excess wax.The classic Bulldog shape looks great.  The Dr. Grabow Sculptura dates to the 1960s and this one looks brand new.  The extended nickel shank cap gives the Bulldog a bit of class and the renewed blasted surface is pleasing to the eye and touch.  Todd commissioned this classic Dr. Grabow and will have the first opportunity to claim him in The Pipe Steward Store benefiting the Daughters of Bulgaria.  Thanks for joining me!


Upgrading a ‘Lowly Drugstore Pipe’: A Dr. Grabow Omega Billiard


Blog by Dal Stanton

Ryan described his Dr. Grabow Omega as a lowly drugstore pipe – not me! 😊 He emailed me several months ago about his Dr. Grabow Omega and which set the table for what followed:

Dear Mr. Stanton, I recently came across one of your blog posts from 2017 detailing a restoration you performed on a Dr. Grabow Omega billiard. The final product was stunning and made me wonder whether you allow customers to send pipes in for restoration or whether commissions are limited to the pipes listed on your website. I ask because I also own a Dr. Grabow Omega and have always been bothered by the heavy red finish that completely obscures the grain. I wanted to ask (if outside commissions are accepted) whether you could perform the same sort of restoration on my pipe and about how much it might cost.  Thanks for any information you can provide!

Part of my response to Ryan shortly followed:

Ryan, Great to hear from you!  Thanks for your kind words regarding the restoration of the Omega I did. I think the Omega is a nice-looking pipe.  Dr. Grabow’s ‘Peterson’ and you share my problem with Dr. Grabow’s production of Omegas with the ‘candy apple’ finish.  It’s a quicker way to finish a factory pipe and it’s always a question about what lurks beneath the artificial gloss.  The Omega I did surprised me with a nice patch of briar beneath and left me with the question, why would anyone cover this grain with a finish like that?  I’m sure economics is a partial answer.  So, for your Omega, I would examine it closely to see if you can see some huge fills in the briar beneath the finish.  Even if it has fills, natural briar just beats candy apple even with sub-par blocks of briar, in my opinion. 

In our emailing back and forth, I discovered that Ryan too, was living in Europe at the time.  He had finished up his graduate work in Scotland and was teaching in the Black Forest region of Germany for the past 10 years and was also in the process of transitioning back to the US.  When he said he was in the Black Forest region of Germany, I perked up.  Several years ago two of our five children attended Black Forest Academy in Kandern, Germany – a very beautiful part of Europe which we enjoyed visiting several times.  Ryan sent me some pictures of his Omega from Germany, which he had used only a few times.  Here are the pictures Ryan sent: My impression of his pictures was that the Omega was practically new and not beat up at all.  Since we both were in the process of transitioning to the US, he from Germany and we from Bulgaria, the decision was made to wait till we both were settled on the other side of the pond and he would send the Omega to me.   Which brings us to the present – Ryan’s Dr. Grabow Omega is now on my worktable.  I am in Golden, Colorado, and Ryan is in Albuquerque, New Mexico.  We both are adjusting to our new realities!

The primary desire Ryan expressed was to allow the natural briar to emerge by removing the candy apple, thick factory finish.  He referenced seeing a restoration for another Omega I had done for Jenny, a former intern we had with us in Bulgaria.  She had commissioned several pipes from the For “Pipe Dreamers” Only! collection to give as gifts to the special men in her family and she kept one for herself too! (See: Jen’s Trove No. 8 – Restore & Upgrade of a Dr. Grabow Omega Smooth Billiard)  The Dr. Grabow Omega she chose for one fortunate person turned out well – before and after results were striking!This was the result that Ryan compared to his Dr. Grabow factory fresh Omega finish which shrouded the natural grain.  Ryan’s Omega appears to me to be a newer pipe off the production line and differs in the nomenclature from the former older Omega I restored.  In common is that both are stamped on the left shank flank: OMEGA [over] DR. GRABOW.  The right was stamped on Jen’s Omega, IMPORTED BRIAR, which is not present on Ryan’s Omega.

In the former Omega restoration, the biggest problem that I expressed was the finish.  I did not like it!  In my research for that Omega, I found these two comments from bloggers on a Pipes Magazine Forum discussion about Dr. Grabow Omegas’ cost, quality, and appeal, which resonated with my own thoughts regarding the positives and negative:

Positives: An Omega was the first briar pipe that I ever owned. It still gets regular use and like Brewshooter, I have no complaints with it. Bowl size is a little bit smaller than I like, but it makes for a nice quick smoke, and the military mount makes it really easy to clean. I have Savinellis that I have easily paid four times more for, and sure, they smoke a little bit better, but in terms of a good smoking instrument, the Omega will do you well as long as it is smoked properly and maintained properly.

Negative: One thing I noticed about my Omega is that it had a heavy varnish or clear coat. I sanded it and gave it a nice wax. It seems to breathe a little better now and I like seeing more of the grain. I also gave the band a bit of a brushed look with some fine grain sandpaper. It’s a nice little pipe for that quick smoke.

Ryan’s desire for his Omega is to remove the ‘candy apple’ or heavy varnish finish.  He is also hopeful that there is a nice patch of briar beneath it.  I am hopeful, too!  The second issue that Ryan expressed about his Omega was that the factory stem was made of a plastic material and not rubber or vulcanite.  I could not recall that the former Omega’s stem I had restored was plastic – I believe it was indeed vulcanite because of the way it spruced up.  Ryan shared with me that his research uncovered that Dr. Grabow started using plastic stems along the way.  Ryan said he could live with the factory plastic stem but did not like it.

When Ryan’s Omega arrived, I was curious to check out the stem as well.  The seam is different from a normal precast rubber stem – the factory seam is vertically dissecting the stem rather than a horizontal seam – the norm for rubber precast stems.  The picture below shows the vertical seam that splits the P-Lip and runs up the stem.  I would say that I agree with Ryan’s assessment.  The stem is plastic.I decided to investigate whether I could find a rubber stem that would match the Omega’s Military Mount, fancy P-Lip stem.  I sent a note to Tim West at J. H. Lowe (www.jhlowe.com) where I acquire pipe supplies and included pictures for Tim to see if I could find a non-factory match for the Omega.  Ryan had indicated to me that a factory stem with the Dr. Grabow ‘Spade’ logo was not critically important to him.  Tim’s email came saying that he had a Greek rubber stem that had similar style and shape to the Dr. Grabow Wellington stems for a few dollars. He said that they were rough and needed bending and polishing – plain with no logo on the stem. I asked Tim to send it along with 5 additional Churchwarden stems.  When the stems arrived a few days ago from Tim, I was pleased with the match he provided with the Wellington stem.  The pictures below show the comparison.  The Wellington stem is precast with rough horizontal seams running down the sides of the stem rather than vertically in comparison to the factory stem.Before beginning on the upgrade of Ryan’s Omega, I take a few fresh pictures of the stummel on my worktable.  The finish is not as ‘candy apple’ acrylic as was the first Omega I restored but the finish is thick and obstructive.  In addition to the finish, the stummel has some minor dents from normal wear.  There appears to be a round fill on the right shank side.  When the stummel is cleaned, I will need to see if this apparent fill needs attention. Because I like working on clean pipes, I first use the Savinelli Fitsall Tool to scrape the chamber.  Ryan had said that he had used the pipe only a few times – the lack of carbon cake buildup confirms this.A quick spin with one pipe cleaner and one cotton bud confirms that the internals are clean.My general approach will be to emulate what I did with the first Omega I restored that Ryan noticed.  The goal is to provide a briar canvas that will produce more natural grain pop.  To do this I start the upgrade of this Dr. Grabow Omega by using acetone on a cotton pad to see if this will be sufficient to remove the finish.  The acetone cuts through the finish efficiently.  The cotton pad shows a purple-ish or dark burgundy/Oxblood hue of the factory finish.  As I did before, I decide to put the stummel in a soak of acetone to remove the old finish more fully.With the stummel soaking in acetone, I turn to the precast Wellington stem.  Even though the stem is new, it is in a rough state.  The seam is rough from the excess rubber during the fashioning process.   Around the P-Lip button the edge is also rough as is the rubber surface itself.To begin, a small sanding drum is mounted onto the rotary tool and with care the seam edges are smoothed off.  I’m careful because the rotary tool can easily dig a wedge into the rubber if I’m too impatient!After the sanding drum, 240 sanding paper is used to sand the entire stem.  Special attention is given to the seam lines to make sure there are no factory divots remaining in the vulcanite.  The precast factory surface is not even and has ribs and small gaps.  Sanding with 240 takes some time but helps to smooth out the surface.   After 240, the entire stem is first wet sanded with 600 grade paper then 0000 grade steel wool is applied to smooth the surface further.Next, the full regimen of micromesh pads is applied starting with wet sanding using pads 1500 to 2400.  Next, the stem is dry sanded with pads 3200 to 4000 and 6000 to 12000.  Between each set of 3 micromesh pads, Obsidian Oil is applied to the stem to help guard against oxidation. Wow!  The Greek rubber Wellington stem shined up with that pop I like. After several hours of soaking in the acetone, the stummel is fished out and I take a closer look at the results.  The briar is a salmon color.  Interesting!  An inspection of the briar surface shows the minor dents I saw previously.  The round fill on the right shank is solid – second picture. To clean the surface of minor dents and scratches, sanding sponges are used.  The sanding sponges are good for not being invasive but sanding enough to clean the surface.  I start with a coarser sponge and then transition to a medium, then light grade sanding sponge.  I avoid the nomenclature on the shank during the first two sponges. Before moving on with the application of micromesh pads, I dress up the bland rim a bit.  To do this, a small internal bevel is cut in the rim to give it some additional contour.  To me, this adds a touch of class to the Omega and that’s what ‘upgrading’ is all about. Using 240 paper, a hard surface is pressed behind the sanding paper to create the fresh lines of the bevel.  This is followed again using 600 grade paper.  I like the results.Next, the stummel is sanded with the full regimen of micromesh pads to coax out the tight, compact grain.  Starting the process by wet sanding with pads 1500 to 2400, this is followed by dry sanding with pads 3200 to 4000 and 6000 to 12000.  I stay clear of the nomenclature on the shank during the wet sanding phase.  The grain emerges through the micromesh process of sanding.  The pictures show the progression.The grain is subtle on this Omega which is different from the Omega I worked on before.  That Omega had more expressive and turbulent grain patterns.  My reading about briar grains suggests that Ryan’s Omega was fashioned from a briar block that was more toward the center of the briar bole and not the edge.  The ‘edge’ blocks tend to be more twirly, expressive, and distinct but also contain more imperfections which require patching.  Whereas, blocks cut closer toward the center of the bole, have more subtle grain patterns but fewer imperfections – the wood seems to be tighter or compressed.  The grain is there but lacks distinction at this point.At this juncture, I can’t resist uniting the stummel with the unbent Wellington stem to get a sense of the progress.  I also take a picture of the factory Grabow stem.  Not bad!  Ryan will have his pick whether he’s in the mood for the factory Dr. Grabow stem or the Greek rubber Wellington stem – as far as I can see, a perfect match. As I think about the next step in coloring the stummel, I decide to bend the Wellington replacement stem.  To do this the stem is threaded with a pipe cleaner to guard the integrity of the airway during the bend.  Using the hot air gun, the vulcanite is gently warmed at the mid-stem where the bend is to happen.  To heat gradually, I rotate the stem to balance the heating and not scorch the stem.I use a small shot glass which is about 1 1/2 inches across to serve as the bending template.  As I’m heating the stem, I gently bend the stem a bit with my hands as it become supple.  When it has heated enough and the rubber has softened, the stem is placed over the glass and bent over it to form the shape.I hold the stem in place while it is taken to the sink where cool water is run over the stem, thus solidifying the bend in place. When the stem is taken back to the work table to compare with the factory stem, it looks like a match to me the first time around!  The great thing about bending rubber stems is that if you do not get it right the first time, the process is easily repeated until the bend is on target.I have given some thought to the finish to apply to the Dr. Grabow Omega bowl.  With my last Omega I applied a mixture of 2/3s-part Fiebing’s Dark Brown Leather Dye with 1/3-part Fiebing’s Black Leather Dye with the lightening option available by wiping down the bowl with alcohol later.  With this Omega, I will do the same for the dark brown/black undercoat.  However, following this, an additional step will be tried.  A wash dye with red I believe will deepen the tones and bend the finish toward a reddish palette and not toward the purplish/burgundy of the original Omega motif.  I believe this will give the pipe more eye-catching pop in the end – or this is my hope!  Applying dyes often feels like a roll of the dice – different woods absorb dyes differently and one never knows for sure what the exact results will be!  My goal is to bring out the grain distinctiveness with the undercoat and then to get in the ballpark of the right color template with the overcoat washing.  To begin, after assembling all the components on the worktable, Fiebing’s Dark Brown Leather Dye and Fiebing’s Black Leather Dye are mixed at a 2 to 1 ratio to use as the undercoat. After wiping the bowl with a cotton pad wetted with alcohol, the stummel is heated with the hot gun.  This heating expands the briar and makes the wood grain more receptive to the dye.When the stummel is heated sufficiently, the aniline dye mixture is applied to the stummel in sections with a folded pipe cleaner and then ‘flamed’ using a lighted candle.  The alcohol in the aniline dye combusts setting the dye pigment in the briar grain.  This flaming process continues as dye is applied in sections until the entire stummel is covered.The stummel is then put aside to rest for several hours.  This helps the dye to ‘settle’ and be absorbed into the wood. After several hours, the time to ‘unwrap’ the stummel has arrived – one of my favorite parts of a restoration when new dye has been applied to a stummel.  I call this phase unwrapping because the fired dye is crusted around the stummel like a shell.  The shell is unwrapped using more abrasive Tripoli compound and a felt buffing wheel mounted onto the rotary tool.  The speed of the rotary tool is set to about 25 to 30% full power – slower than usual guarding against too much heat buildup from friction generated by the more abrasive combination of compound and felt wheel.  This combination is like a bulldozer!As the crusted dye is removed, I purge the felt wheel repeatedly with the edge of the metal rotary tool wrench.  This keeps the felt wheel softer and cleaner.  As hoped, as the Tripoli compound is applied to the crusted surface, an eye-catching landscape of grain is now more distinctive.  The pictures below show the unwrapping in process.  I love to watch this unveiling! The dye process darkens and accents the grain patterns. After the crusted dye is removed, the bowl is gently wiped with a cotton pad and alcohol.  This is done not to lighten the stummel but to blend the dye.  Little dye is removed on the cotton pad which seems to indicate that the undercoat of dye is well established.The next step, to deepen the hue and bend it more to a rich red tone, the stummel is dye washed with red dye.  The stummel is again heated, but this time the dye is washed on with a pipe cleaner without firing because the alcohol content in the red dye is not as great.  After the red dye is applied thoroughly, the lesser abrasive, Blue Diamond compound is applied to the stummel with a cotton cloth buffing wheel on the rotary tool set at about 40% full power. This removes the excess dye.  Not pictured is that I wiped the stummel a number time with a cotton pad wetted with alcohol to blend the red dye with the dark brown/black under coat.  Afterwards, Blue Diamond was again applied until the hue looked good.  Also not shown is that the Wellington stem was also polished with Blue Diamond compound with a cotton cloth buffing wheel.To refresh the Omega’s nickel shank cap, another cotton cloth buffing wheel dedicated to applying compound on metal is mounted on the rotary tool.  Blue Diamond is applied, and the bling factor of the shank cap went up a few notches! The final step is to apply carnauba wax to the entire pipe.  After mounting another cotton cloth buffing wheel, with the speed set at about 40% full power, the wax is applied to the stummel and Wellington stem – not to the nickel shank cap.  After application of the wax, the Omega is given a rigorous hand buffing to raise the shine and to remove any excess wax that may have collected on the surface.Wow, what a change!  And then the next thought, ‘Wow, maybe too much change!’  At this point I was ready to send the write up to Steve to publish on rebornpipes, but my concern continued to grow, and that small voice was gnawing inside – the finish may have gone a little too far from the original Dr. Grabow Omega motif which was bent more to the burgundy pallet than what I did, going more toward the red.  I decided to send a pre-published PDF of the write up with final presentation pictures to receive his assessment.  I expressed to Ryan that I could take the Omega back to the worktable and bend the hue back to more of a burgundy palette – that working with dyes is like a dance.  After sending that email and PDF, I waited to find out if the Dr. Grabow Omega was finished or whether I was headed back to the worktable.  Ryan’s response did not take long:

Hi Dal, I think we can definitely call it finished (and then some)! I couldn’t stop smiling as I read through your write-up because every time I thought the pipe must be nearly finalized (I was already amazed at how much better it looked after unwrapping the initial coat of dye), there would be another step in the process that made it look even better. I’m genuinely awestruck at how well it turned out. That a lowly drugstore pipe can be transformed to such a degree is a testament to the tremendous skill and care you put into your work. As far as the color is concerned, I think you chose the ideal shade: not too dark, not too light, and a perfect showcase for the more subtle grain patterns of this pipe. I wouldn’t change it one bit. The stem came out looking like a million bucks, as well, which is quite a feat considering how (literally) rough around the edges it was at the beginning. Just extraordinary work all around. I can’t thank you enough!…. Once again, thanks very much for doing such a wonderful job and taking the trouble to document each individual step. I really enjoyed reading about the restoration process and I can’t wait to see the pipe in person!

Best regards,

Ryan

The upgrade of Ryan’s Dr. Grabow Omega ‘drugstore pipe’ is an amazing transformation and a grain popping display.  The transition from the finish that clouded the grain has been replaced with a sharp, distinctive cornucopia of grain patterns.  The Wellington stem is a perfect replacement for the Dr. Grabow factory stem.  This Omega upgrade, as with all my restorations, benefits the Daughters of Bulgaria – helping women and girls who have been trafficked and sexually exploited.  Thanks, Ryan!  Thank you for joining me!

A Dr Grabow Grand Duke Prince


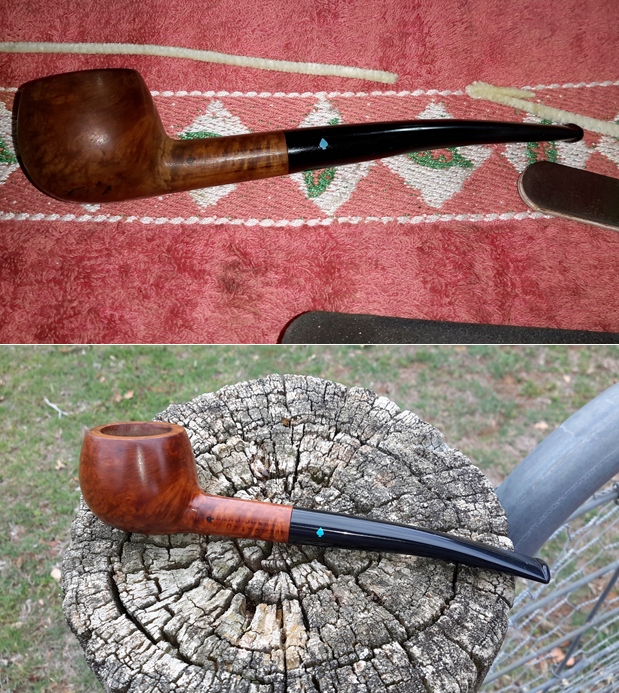
I received an email from Kevin in Australia asking if he could share some of his work with us on rebornpipes. This Dr. Grabow restoration and photos not only tell the story of the pipe but also give some information on Kevin. Thanks Kevin and welcome to rebornpipes!

Story and photos by Kevin Pallett — Australia.

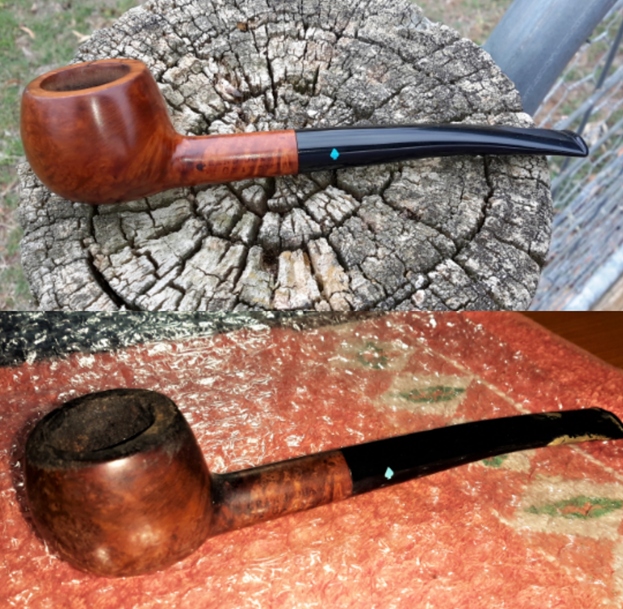
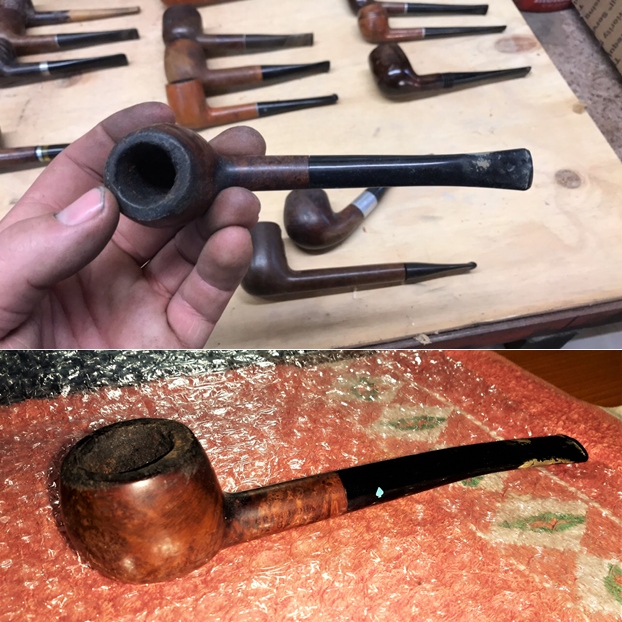
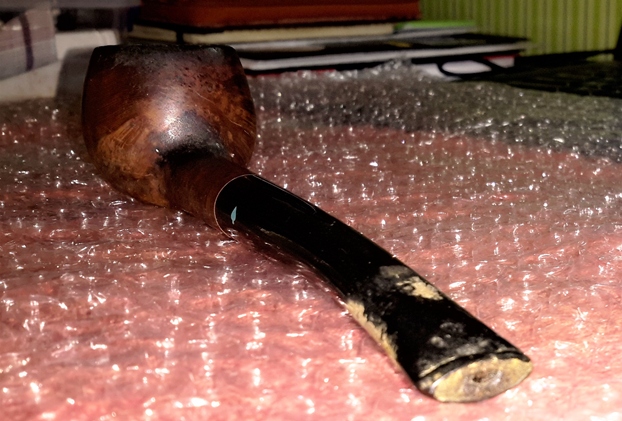
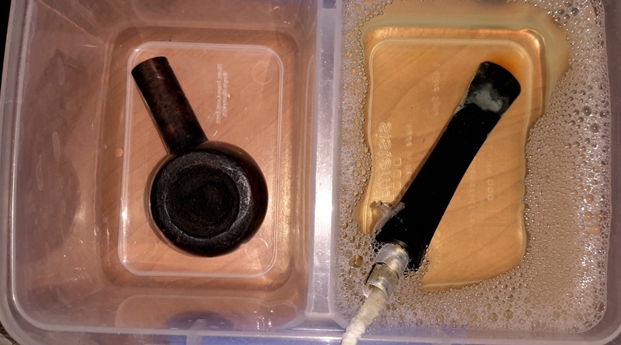
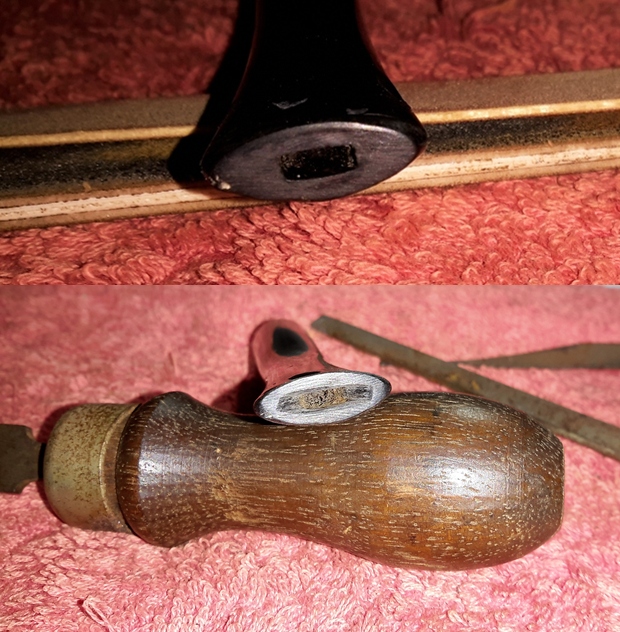
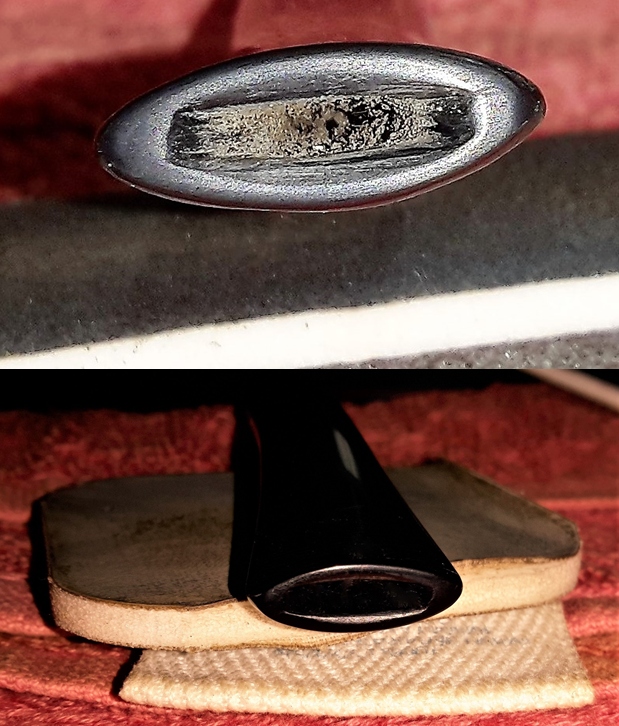
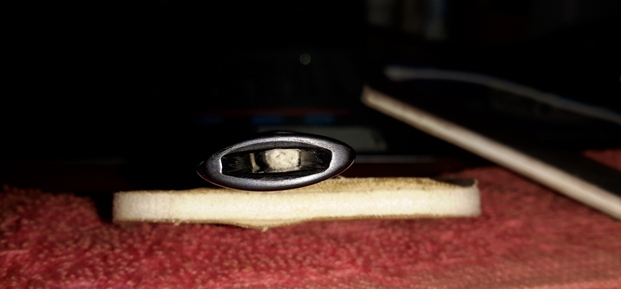
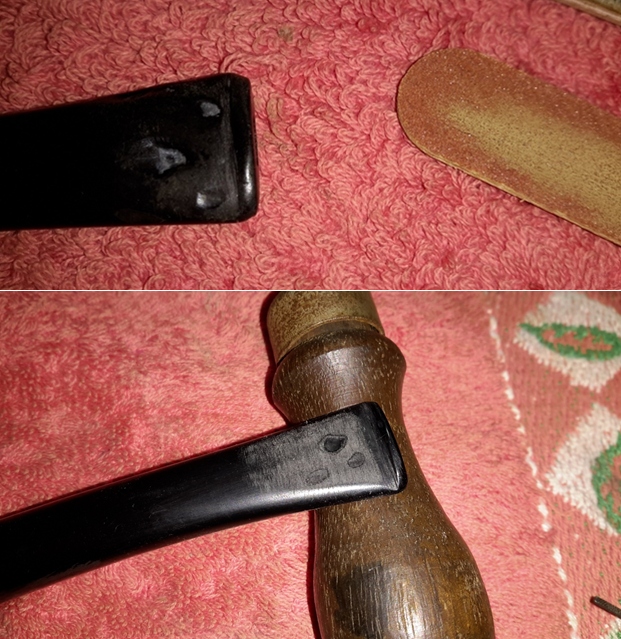
I have a few favourite pipe shapes, one of them being the Prince. There are a few variations on that theme but for me the standard shape will always take the prize. A friend of mine who is also a pipe maker was selling a bunch of estate pipes that he purchased from Ebay (The American Ebay. We live in Australia) and was looking to sell some of them. He sent me a few pics of what he had and one of them was a Dr Grabow Prince. A Grand Duke in particular. It was in bad shape with the ubiquitous bite marks and chocked up bowl. The end of the stem was horrible and how anyone would put it in their mouth was beyond me. After deciding how I was going to start on this Grand Duke, I put Vaseline on the little blue spade on the stem and put the stem into a diluted bleach bath and let it do its thing. While that was going on, I turned my attention to the stummel. It was in a bad way. Not the worst I have seen but pretty funky and in need of some de caking. Believe it or not I soaked the whole stummel in alcohol for almost 6 hours. The cake was like glass when I tried to ream it and the harder I tried the harder it got. After being soaked the cake practically fell out as I used a small picking tool to remove it. I then sanded the inside of the bowl back with a few different grades of sandpaper and then sanded the outside of the stummel to the bare briar. I was happy with the way it looked and there were no major divots to replace and it looked even better when I sanded the top of the bowl flat. A lot of the grime on top of the rim came off in the alcohol and made it easier to sand it back to the way it should look. Whoever owned it would, by the look of it bang the rim on something hard to remove old tobacco but never cleaned it out thoroughly. No cracks either, always a good sign.This was followed with a salt and alcohol treatment. Then onto the stem again. It had what look like saliva stains on the end of it. Like it had sat in someone’s mouth for hours, hence the chew marks I would guess.  After it came out of the bleach Bath, I started to clean and reshape the air hole. Although it was more of a small rectangle, and once I started to file it out, I found that it was still full of all the original swarf (or filings). It took a bit of mucking around but eventually a small bundle of vulcanite filing came out. I now knew why I couldn’t get a pipe cleaner through it, so I don’t know how the owner ever smoked it properly, or if they cleaned it out at all. It’s always nice to work with vulcanite. I know that acrylic is durable and harder to mark with teeth, but vulcanite is so easy to file, sand, buff and generally work with.

The inside of the stem was quite gross and took a lot of pipe cleaners to eventually come out clean. Perhaps these were the first pipe cleaners to go through it. As a youngster and teenager, back in the 1960’s and early to mid-1970’s, I can clearly remember the older men (Grandfather, uncles and my Dad’s friends) smoking pipes that looked like they’d been used to build a house. And if they weren’t constantly dropping out of their shirt pocket when not being used, they were hooked into the belt loop of their trousers. Thinking back now pipes didn’t have quite the collectable want or care factor back then. They were just a replaceable method of enjoying tobacco. So why would you bother going to the extreme of cleaning them on a regular basis. I first began enjoying pipe smoking as a late teen and I have to say I had the one pipe for years (a Dr Plumb full bent billiard) although I was pretty meticulous when it came to keeping it functional.

Anyway, I continued making the air hole more to my liking. You can see in the accompanying photo what I mean.  I find this shape opening makes it easier to keep clean, get a pipe cleaner through and I think it just looks and feels better. After that I put some drops of CA glue into the chew marks and filed them down. Wet and dry paper got the surface back to smooth and I buffed the surface with micro mesh pads. I love using these little pads. The tenon on these Grabow stems is a metal arrangement to house the Grabow filters which I’ve not used as they are not readily available if at all in Australia and not worth the effort of ordering. Just a little information on tobacco in Australia. For pipe smokers down here, it is not an easy hobby to pursue. 50 grams of any tobacco is $100 and higher and there is no such thing as tobacconists anymore. We have tobacco shops, but they are more like a bank of lockable cupboards. It’s illegal to display anything that might imply that the contents contain a tobacco product and the packaging itself is covered in pictures of photo shopped diseased body parts. All very charming. It’s illegal to order any tobacco product from overseas. If it’s intercepted by boarder control, it is confiscated and apparently destroyed. It’s illegal to grow your own tobacco. So, I guess you’d have to think that the authorities are trying to tell us something.

So, back to the point. I didn’t have anything left to do to the stem until I used the buffing wheels. Back to the stummel.

As I mentioned above, the stummel was in good order on the outside so I started on it with the micro mesh pads. By the time I got through all the grits it had a nice lustre to it. I did discover a few small fills, but I wasn’t going to worry about them. And by the time I’d buffed it you couldn’t really see them. I was really pleased with the way it came together and it is now one of my favourite pipes to smoke. It’s light to use and the bowl isn’t so big that you can’t fill it to the top. Which I do. It’s not a fussy pipe, it’s happy with any tobacco. I find it’s great for Burley flakes in particular. I hope you enjoyed my small account of this particular pipe. Thanks for reading if you did. Ciao, Kevin.

The Filthiest Pipe I’ve Ever Seen


Blog by Robert M. Boughton
Copyright © Reborn Pipes and the Author except as cited
https://www.roadrunnerpipes2k.com/
https://www.facebook.com/roadrunnerpipes/

You can’t judge a book by its binding.
— From the journal American Speech, 1944

INTRODUCTION
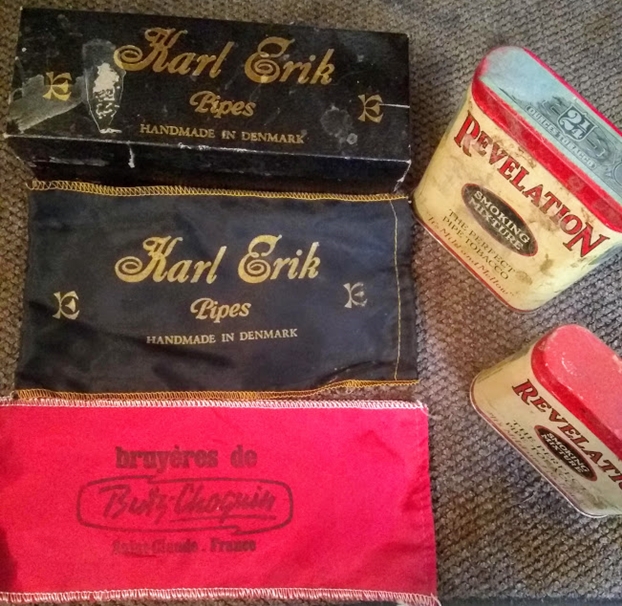
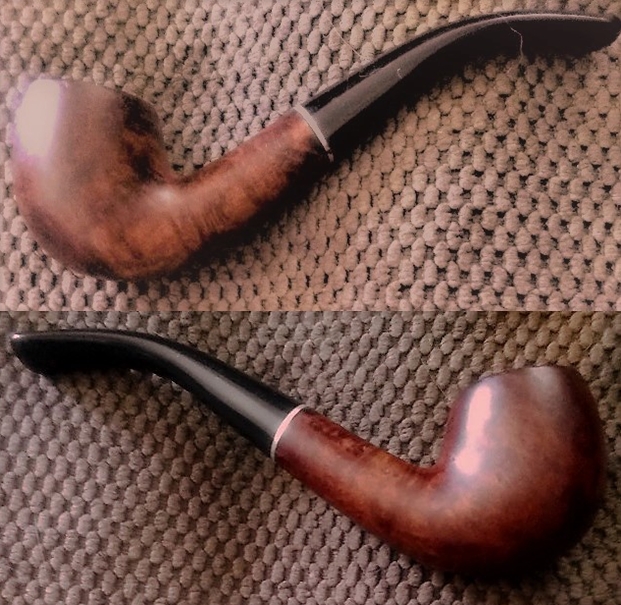
The Dr. Grabow easy bent smooth billiard I came by in a foolish case of mistaken identity on eBay looked normal enough on the outside, other than an apparent crack that wasn’t visible in any of the seller’s few photos.  The zigzag flaw extended from the top front of the bowl almost halfway down, which of course was not a good sign in a pipe when the intent was to sell it – and I definitely did not want to keep it for my own collection.  The dubious pipe came as part of a lot with two others of its ilk; an old Karl Erik box; two very nice choice sleeves – one that was also for a Karl Erik and the other for a Butz-Choquin – and two Revelation Smoking Mixture tins of indeterminate age.  Venturing a guess, I’d say they’re no newer than the pipes.

My haul, minus the Dr. G, Yello-Bole and MedicoMy impression from the poor photos provided online was that one of the pipes must have been a Butz-Choquin.  You see, the only descriptions of the pipes given in the listing were that they were “vintage,” and you guessed it, I fell for the deliberate obfuscation, and Buy Now to boot.  As the only measure of self-defense I can muster, at least I only paid about $10, with shipping included.  They turned out to be this Dr. Grabow and two Yello-Boles, one a Spartan.  The Spartan did clean up purty compared to how it was.The Dr. G. is six inches long but otherwise very small.  The height is 1.5” and the inner bowl diameter is ⅝” x 1”  As a rule, unless the particular pipe is very old or has some other special attribute, I shy away from this name and Medicos and the like, although I’ve found almost anything will sell to someone who is a fan of a given brand.  In fact, just last week at my monthly pipe meeting I sold the Spartan with a stem logo of a yellow Y in a circle to a friend who happens to be my best customer.

The friend has accumulated some great pipes from me – such as a late 1930s Kaywoodie Super Grain and a Ropp last month – and an amazing collection of antiques including a few KB&B beauties, but he admits to having a weakness for vintage Yello-Boles.  I estimated the Spartan dated to the 1960s, and my friend somehow traced it on his cell phone to 1966.  That’s what I call a Yello-Bole devotee.

At any rate, the Dr. G. billiard remained quarantined in a box for more than a year with others that are so tragic I’m sure I’ll end up using them as examples of pipes never to buy.  In short, only when it was the last pipe I had to work on did I gather the gumption to go for it.

But as I already noted, all outward appearances showed nothing I couldn’t handle without too much effort, including the odd zigzag on the bowl.  The inside turned out to be a different matter altogether, one for the books as far as I’m concerned.

RESTORATION

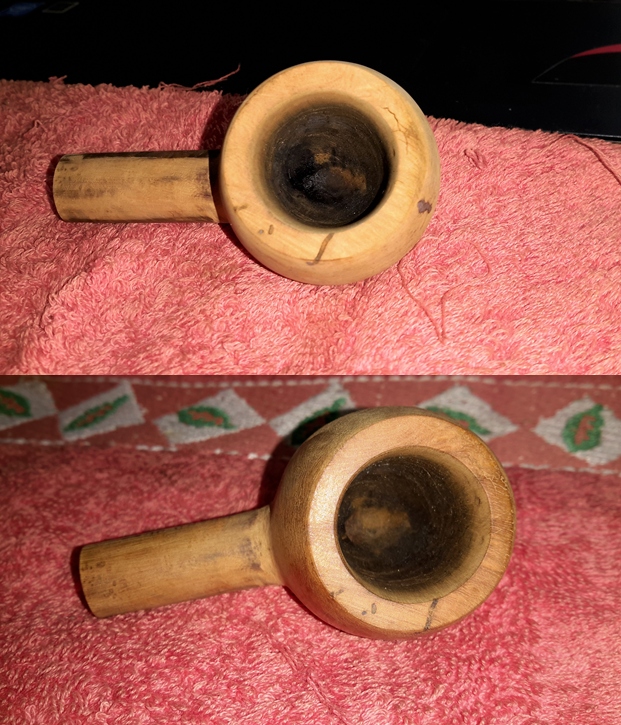
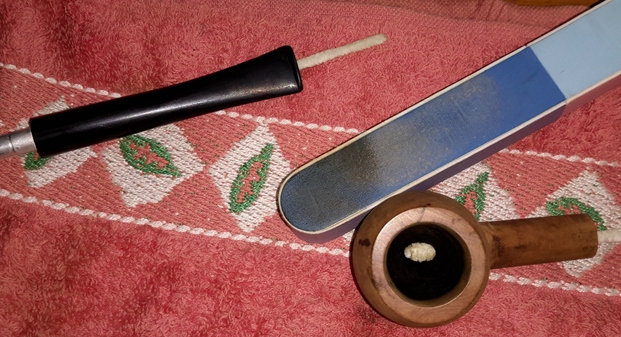
I wanted to get the pipe in a basic clean order before tackling the crack.  Starting with the light rim char and cake in the chamber, I used super fine “0000” steel wool on the rim to begin and a pen knife around the walls of the chamber that was too small to insert a reamer – meaning the one size I have.  Then I sanded the rim with 1000-grit paper and the chamber using a pinkie and 150- and 220-grit papers. I cleaned off the old blackness from the shank opening with the same steel wool and wiped down the entire stummel with purified water on a paper towel.Now the crack I mentioned is apparent.  Knowing it wouldn’t get rid of the crack, I sanded the outside of the wood with 1000-grit paper to remove the other small but pervasive blemishes. With the pipe more or less spiffed up, I could see the crack was hairline, so to speak, not penetrating the bowl in any visible way.  That was a relief as I knew I could make it go away altogether with sanding.  I tried 150-grit paper, and that looked like the end of the ostensible crack.  I followed up with 320-, 400-, 600- and 1000-grit papers.A full micro mesh progression left the briar looking absolutely fabulous, or abfab, as British interior designers like to gush about wood.  To be serious, though, which I often try not to be, knowing it drives some readers nuts but keeps me sane, the micro mesh step – if I had to choose just one from all of the routine tasks in a pipe restoration – is my favorite.  Seeing the resilience of wood, or briar anyway, that allows it to bounce back from ruin is to me what sunshine was to John Denver.  Well, not exactly, but you get the idea. The front shot above, I’m sorry to say, doesn’t show how pale most of that side was even after micro meshing.  Suffice it to say, a spot stain was necessary with Lincoln brown leather dye.  I took a little more joy in staining and flaming it. Looks like everything is going great, doesn’t it?  That’s rhetorical.  Only after thinking I was almost finished did I commence the part that turned into a singular horror the like of which I never before experienced.  Without exaggerating at all, I admit I was sure I had found a pipe that could not be cleared of all impurities, no way, no how.  I’m sure this sounds like more of my melodramatic foolery, but for once I am being as serious as I get.  I suspect I may have some kind of world record, if people registered such statistics, but no doubt Steve, if perhaps no one else, has a worse story or stories to tell.  I’d love to hear them!

To wit, I found myself at the point of having to deal with the inside of the billiard.  Nothing prepared me for the almost human resistance and downright orneriness I encountered, not to mention the smoking implement’s physical manifestation of the common human psychological condition of filthiness.

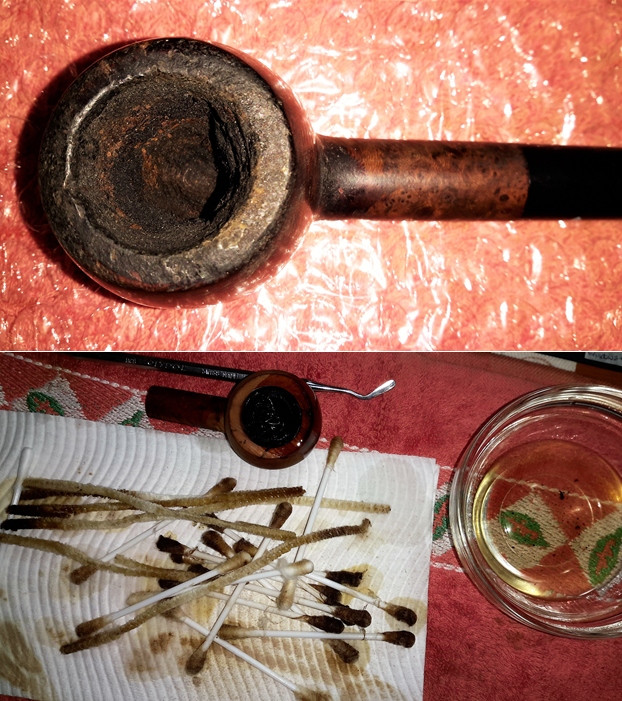
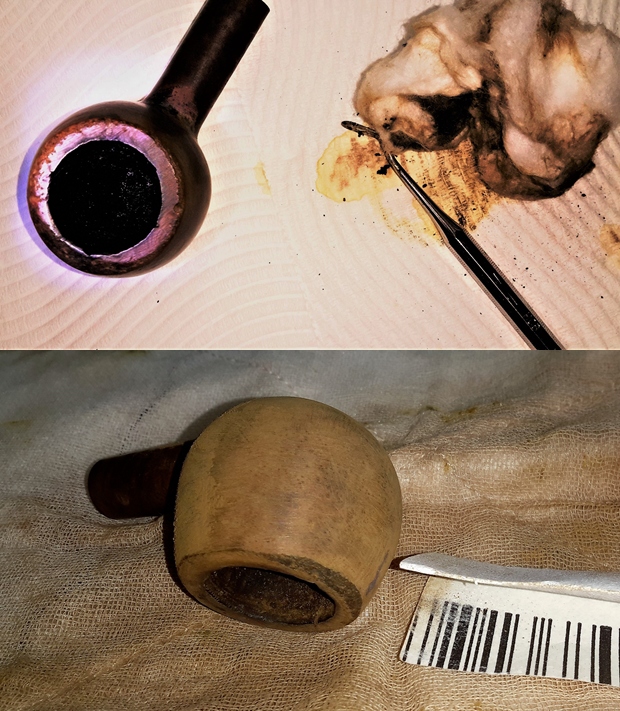
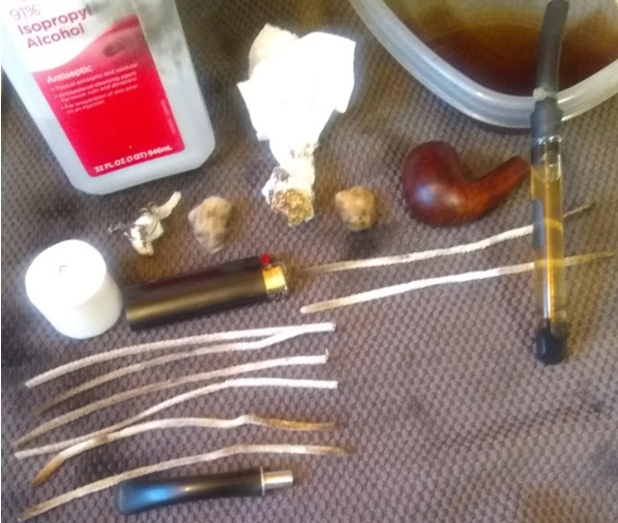
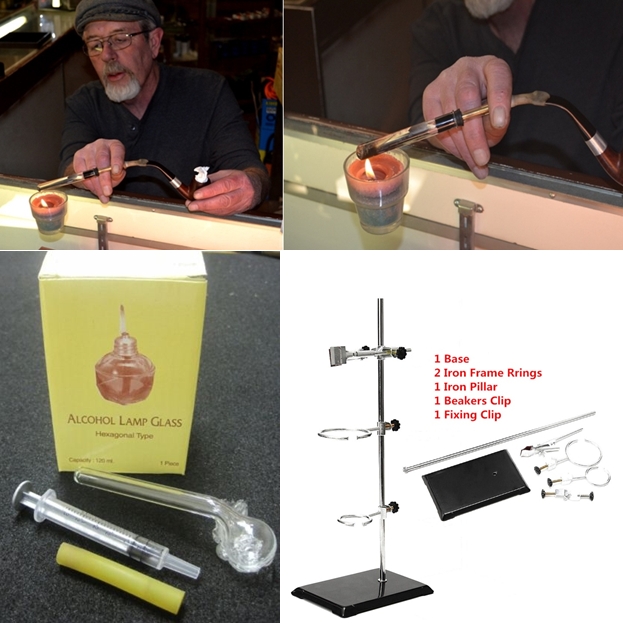
The pictures that follow, showing the pre-cleaning, retort and aftermath of all that, with nine pipe cleaners, a nylon bristle cleaner, two cotton plugs and a wasted (in the colloquial sense) candle, don’t approximate the work and time already expended on cleaning and sanitizing the inner passageways of the pipe.  I included the Tupperware with spent alcohol as a clue to how much I boiled through the guts of the thing, with the wholly unsatisfying and unacceptable final Pyrex tube as dark as every other, but it still isn’t sufficient to understand my frustration, so I’ll tell you.  I had already used up 13 tubes of alcohol, getting nowhere.I knew I could use any number of pipe cleaners dipped in alcohol on the shank and it would do no good.  And so I started again, with a fresh retort (and candle and two more cotton plugs).  After nine more tubes boiled through the pipe – that’s a total of 22 – I at last achieved a clear enough result that didn’t get darker after three trips through the bowels of the Grabow.I don’t know, maybe this isn’t so unusual.  Or maybe I need a better retort system, as I’ve been looking forward to buying, something like the first one below, probably self-made by my friend Chuck Richards, or even the other I found online.

Hand-held laboratory-style retort system made by tbus6906, eBay, and an actual lab setup from best collection999 at eBay

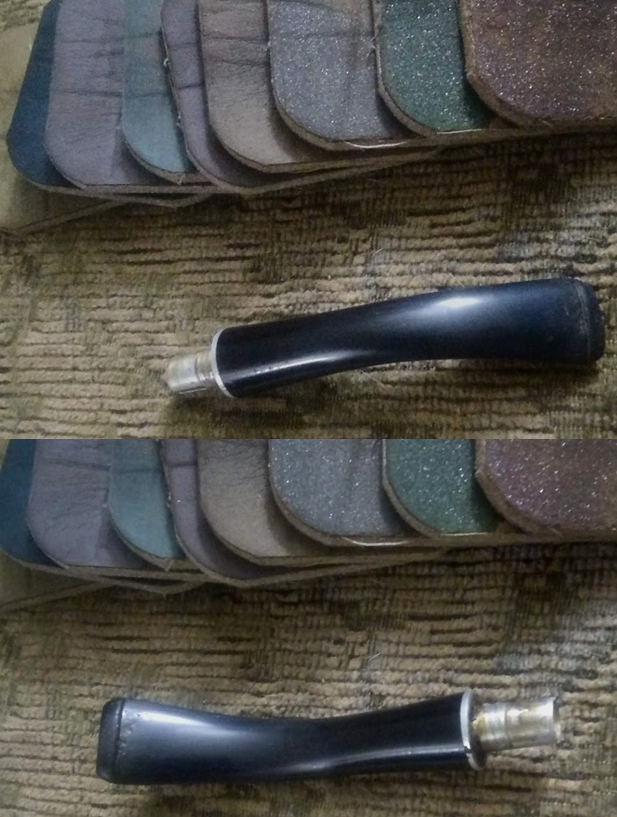
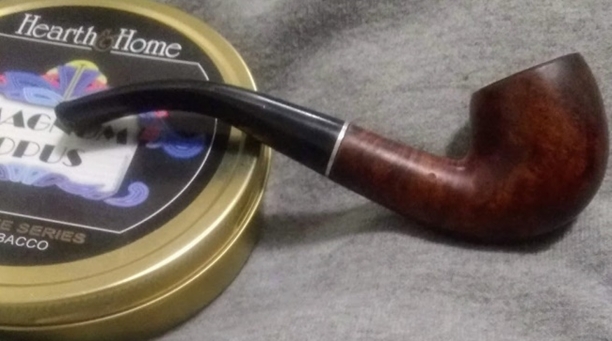
And now for the stem, starting as it appeared when I got it and after the various phases of smoothing and buffing. And here is the finished pipe, the stem machine buffed with red and white Tripoli and the stummel with White Diamond and Carnauba. That’s a Medico filter in the stem, BTW, because it’s all I have and it fits!  Besides, whoever buys the Grabow will probably toss it.

CONCLUSION
This was an unusual restore for me for a couple of reasons. One, I set out thinking the big deal was going to be fixing a bad crack, and two, the real problem ended up being hidden within.  My previous record for the number of Pyrex tubes of alcohol I had to run through a pipe was nine, for a pipe I haven’t blogged yet.  I thought that was bad until I was faced with the harsh reality of this dainty little Grabow!  It’s the right size for most women (no sexism intended but I’ll probably get flack for that), but only a man could have smoked a pipe for possibly 40 years without ever really cleaning it.  Maybe that will get me off the hook with any female smokers who read this.

Oh, yes, a note about Revelation Pipe Mixture.  Never having heard of it and suspecting it’s out of production, I found I was correct about the latter part.  It was blended by House of Windsor, which still makes about 20 mixes, mostly aromatics, in the U.S.  Revelation was a coarse-cut (based on the photo I found, despite the description as ribbon cut) American blend of bright flake and red flake Virginias, cube cut burley, Kentucky, latakia, perique and “citrus/misc.”  It seems to have been somewhat popular given a 3.1 out of 4 rating at TobaccoReviews.com.  Legend says this was Albert Einstein’s go-to mix, so it couldn’t be all that bad.  It seems a reincarnation of this tobacco is being made in bulk form and true ribbon cut, from the same ingredients.  The link to the source is below for anyone interested.  Revelation was made by Philip Morris Co. Ltd. Inc. and distributed by Continental Tobacco Co.  I guess the tins are pretty old because companies aren’t named like that anymore.

SOURCES
https://www.ebay.com/itm/Professional-Pipe-Retort-Kit-/252292269562
https://www.ebay.com/itm/50cm-Lab-Laboratory-Retort-Stands-Support-Clamp-Flask-Platform-Alcohol-Bottle-Tu/113144136090?_trkparms=aid%3D555018%26algo%3DPL.SIM%26ao%3D1%26asc%3D20131003132420%26meid%3Dea98143cf6974165b8baaa44c36acc79%26pid%3D100005%26rk%3D3%26rkt%3D8%26sd%3D312302738289%26itm%3D113144136090&_trksid=p2047675.c100005.m1851
http://www.tobaccoreviews.com/blend/1219/house-of-windsor-revelation
http://www.tobaccoreviews.com/search?Blender=House%20of%20Windsor
http://wvsmokeshop.com/revelationalternativebytheounce.aspx

Resurrecting a Tired and Worn 1937 Dr. Grabow Special 4914 Apple


Blog by Steve Laug

The next pipe on my restoration table is an interesting older pipe that appears to be made out of walnut or some other hard wood. It was tired and worn looking with the remnants of what appeared to be an oxblood stain in the wood. The stamping was dirty and worn but readable nonetheless. On the left side the pipe is stamped Dr. Grabow over Special and on the right side it is stamped with the shape number 4914 near the shank stem junction. That is followed by Pre-Smoked over Reg. US Pat. Off. The rim top was dirty and had some tar ground into it. The bowl had a light cake in it and there was a small nick on the inner right edge of the bowl. It had a hard rubber vulcanite stem with the white Linkman style propeller inset on the top of the stem. The rubber was quite hard and did not show signs of oxidation. There were tooth marks on the top and underside of the stem at the button. I took some photos of the pipe before I started my cleanup. I took some close up photos of the rim top and bowl to show its condition. The tar spots are on the surface. The nick is visible on the right side of the bowl. I also took photos of the stem to show the bite marks and wear on the stem.I took a photo of the stamping on both sides of the shank to show the condition. Interestingly once I cleaned the shank up and removed the stain the stamping was very readable.I looked up information on the Dr. Grabow Special 4914 pipe on Pipedia to see if I could identify the time period that the pipe came from. I had a hunch that it came out during the war years due to the alternative wood that had been used in its manufacture in place of the normal briar (https://pipedia.org/wiki/Dr._Grabow_Models_(Series,Line)_Names_Through_the_Years). Here is what I found out:

SPECIAL (or Special Italian Briar) post-1937, begins with 43, 49, maybe no number at all; DOLLAR DR. GRABOW 1937 or previous, may not be marked as such, begins with 43, 44, 49 Series 43 = Natural Finish (DG), c1937. Series 44 = Dark Finish (DG), c1937. Series 49 = Walnut Finish (DG), c1937.

Thus I knew that the pipe came out post 1937. I still had not confirmed the date of the pipe other than knowing that it was made after 1937. I did some more digging on Pipedia and found the following information that also helped pin down the date (https://pipedia.org/wiki/Dr._Grabow).

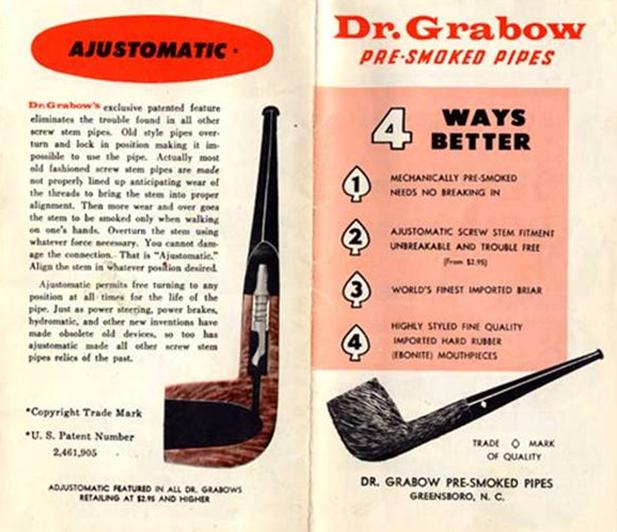
The production of the pipes started in 1930/31. In 1937 Linkman began calling his pipes “Pre-Smoked”. An ad dating from 1946 celebrates it as “America’s Most Wanted Pipes” and the text announced that each Dr. Grabow was broken in on the Linkman’s Automatic Smoking Machine with fine Edgeworth tobacco, reducing the need for the new owner to spend time breaking in his pipe. In 1949 the official name read Dr. Grabow Pipe Company Inc. with seat at W. Fullerton Avenue 1150, Chicago 14, Illinois. (Thus the Linkman factory.) Series: Special, De Luxe, Supreme, Tru’ Grain, Select Grain.

That helped to pin down when the first Pre-Smoked Pipes came out on the market. I have included a couple of advertisements from the 1940s on the Pre-Smoked pipes. The advertisements were on Pipedia courtesy of Doug Valitchka. I found a similar pipe for sale on eBay (https://picclick.co.uk/Lovely-Vintage-Dr-Grabow-Special-4914-Smokers-Pipe-372388011756.html). It could very well be a twin of the pipe that I am working on. It is also made from an alternative wood, rather than briar.

I started my restoration on the pipe by wiping down the bowl with acetone on a cotton pad to remove the remnants of the oxblood finish. I took photos of the bowl after the cleanup. I sanded the bowl with 220 grit sandpaper to remove the remaining stain. I sanded the rim top to remove the stain and tars there. I worked over the inner edge of the rim with 220 grit sandpaper to remove the damaged area on the right side. It did not take too much work to remove it. I polished the rim and bowl with micromesh sanding pads – wet sanding with 1200-2400 grit pads. The bowl began to have a rich shine.When I sanded the bowl a small red putty fill showed up on the back right side of the bowl. It was slightly pitted. I filled in the pits with clear super glue to remove the damage. I sanded it with 220 grit sandpaper and then with a 1200 grit micromesh pad.I polished the bowl with red Tripoli on the buffing wheel to smooth out the wood. I heated it and stained it with the “red” tan aniline stain. I flamed it with a lighter and repeated the process until the finish had good coverage. I also gave the bowl a coat of Danish Oil with Cherry stain to highlight the grain. I cleaned out the internals in the stem and the bowl with pipe cleaners, cotton swabs and alcohol. The shank was dirty and the debris and grime that came out made fit of the stem in the shank much tighter.I set the bowl aside and worked on the stem. I sanded the surface of the stem with 220 grit sandpaper to remove the tooth chatter and the lighter tooth marks. I cleaned it up a soft cotton pad to remove the debris. I filled in the deeper tooth marks with clear super glue to repair them. I set the stem aside to let the repairs cure. I sanded the hardened repairs with 220 grit sandpaper to blend them into the surface of the vulcanite.I polished stem with micromesh sanding pads – wet sanding with 1500-2400 grit pads and dry sanding with 3200-12000 grit pads. I wiped the stem down with Obsidian Oil after each pad. When I had finished polishing with the last pad, I gave it a final coat of Obsidian Oil and set it aside to dry. This small war era Dr. Grabow Pre-smoked apple is a unique alternative wood pipe. It has interesting swirled grain around the bowl and cross grain across the shank. The grain really is interesting. The rim top looks much better. The vulcanite stem is high quality and shined up well. I buffed the bowl and the stem with Blue Diamond polish to raise the shine on the briar and the vulcanite. I was careful to not buff the stamping and damage it. I gave the bowl and stem multiple coats of carnauba wax. I buffed the entire pipe with a clean buffing pad to raise the shine. I hand buffed it with a microfiber cloth to deepen the shine. The finished pipe is shown in the photos below. The rich oxblood stain allows the grain to really stand out while hiding the fill in the bowl side of this little pipe and it works well with the rich black of the vulcanite stem. The dimensions of the pipe are: Length: 5 1/4 inches, Height: 1 1/2 inches, Outside Diameter: 1 inch, Diameter of the chamber: ¾ of an inch. This little Linkman’s Grabow apple fits nicely in the hand and makes a great pocket pipe. Thanks for walking through the restoration with me.

Transforming a Dr. Grabow “Omega”


Blog by Paresh Deshpande

“Mirror, mirror on the wall, who is the prettiest of them all?” asked this “Omega”, looking deeply into my eyes!!!!! How I wish I could have promptly replied that it was “YOU”…. but I could not get myself to say so!!!!! It was then that I decided to work on this pipe and make an attempt at its transformation.

This bent billiards has “OMEGA” stamped on the left side of the shank over “DR. GRABOW” in block capital letters while on the right side it is stamped “IMPORTED BRIAR”. A nickel ferrule adorns the end of the shank and is devoid of any stampings. An “ACE OF SPADES” on the left side breaks the monotonous black of the stem. I searched pipedia.com for information about the brand and try to place the period when this model was introduced by Dr. Grabow. The site has very detailed information about the brand and various models and is a highly recommended read. I have extracted only the relevant portions here:-

Dr. Grabow pipes are the quintessential American brand. Made with care in the Blue Ridge Mountains of North Carolina, this 60-year-old line of inexpensive tobacco pipes is a favorite among new pipe smokers for its consistency and good taste. The famous smoking pipe brand gets its name from the owner Dr Grabow, a general physician who lived in Chicago.

Made in America since the 1930’s, Dr. Grabow tobacco pipes were named after “the good doctor” to help polish the smudged image of smoking a pipe to newly tobacco-leery American public. The line of pipes bearing Dr. Grabow’s name have become one of the best known pipe brands in North America.

The Dr Grabow pipes first began with Louis B Linkman of the M.Linkman and Co of Chicago. The trademark “Dr Grabow” itself actually begun at about 1932 and had the US patent number 1.896,800.

The birth of the Dr Grabow smoking pipe is simple enough. It started off when Dr Grabow himself and his acquaintance Dr Linkman regularly visited the local pharmacist at Brown’s Drug Store in Lincoln Park Chicago.

Dr Linkman was on the lookout for a doctor’s name to Christian an innovative line of pipes in order to mellow out the smoking apparel’s smoggy image. He asked Dr Grabow to allow him to use his name to which he agreed and the name has stuck since then. Linkman continued to manufacture his Dr Grabow pipes until 1953. 

The earliest of these exclusive pipes were stamped both with Linkman’s and Dr Grabow. They included a propeller emblem that was white in color at the top of the mouthpiece.

In 1944 the white propeller emblem was replaced with a white spade, a move that heralded the introduction of Linkman’s new Dr Grabow pipes. All of the newer entries included most of the earlier favorites as well as “TRU-GRAIN” and “SELECT”. Later models of Dr Grabow pipes were described as Imported Briar.

I further searched pipedia.com and found detailed and comprehensive information on the various lines and models of Dr. Grabow through the years and was able to date this Omega to 1975. Here is the link; https://pipedia.org/wiki/Dr._Grabow_Models_(Series,Line)_Names_Through_the_Years

INITIAL VISUAL INSPECTION

The first thing that struck me like a jolt was the reddish brown/ very dark reddish purple, OMG!!!! I cannot even describe the color of the stain on this pipe; it was that unappealing to the eye to say the least. It just surprises me as to why my grand old man even bought it, if he had indeed bought it. You just feel like turning away from it. To add to its color woes, the stummel is covered in dust and grime of storage from all these years. The stummel has Custombilt like rustication emanating from the joint where the shank and stummel meet and move away from the bottom towards the rim top. Within this rustication we have very fine thin lines. The raised portion of these rustication have the same reddish brown coloration while within these rustication, it has dark color. The shank is plain and devoid of any rustication. There appears to be some kind of coat covering the entire stummel. All said and done, this coloration has to go!!!!! How am I going to do it, I really do not know, but IT HAS TO GO!!!!!! The chamber is lightly caked and has overflow of lava on the rim top. This will have to be cleaned and sanded down if the rim top surface is damaged underneath the overflowing lava. The inner and outer edge has minor dents and dings.The stem appears to be ebonite and has a plastic feel to it. The stem is a copy of the famed Peterson’s P-Lip button with the difference in the bore being dead center on the end of the button as opposed to being on the top surface. It has extensive damage to the upper and lower surface of the lip. It is peppered with tooth chatter and has one deep bite mark each on both the surfaces. This will have to be addressed.The mortise is relatively clean and air flows freely through the airway in the pipe and shank.The nickel ferrule has lost its shine and shows minor spots of corrosion. I think it will polish up nicely.THE PROCESS

I had made a promise to this pipe that I shall make it “the prettiest of them all…” (Well, actually it was like “TRY” really) and thus the first and most logical start point was to address the color of the stummel. To make this pipe attractive, I felt that I should attempt to do the following:-

(a) Highlight the rustications.

(b) Get some shine on the stummel.

(c) Attempt to reveal the grains on the smooth shank.

(d) Highlight the contrast between the raised portions of the rustication with that of within the rustication.

Having identified what needs to be done, I turned my attention to how it could be done. SWOT analysis dictated that I needed to adopt processes which did not require any stains or coatings of lacquer as I did not have any. Also since I do not have any mechanical equipment, I had to adopt simpler and manual techniques. I decided that the best and easiest course of action for me would be to get rid of the original stain.

I started by reaming the chamber with a Kleen Reem pipe reamer and fabricated knife. I removed the complete cake from the chamber. I further sanded down the walls of the chamber with a 220 grit sand paper to smooth the walls and took the cake back down to the bare briar. I gently scraped out the little overflow of lava from the rim top. I also cleaned out the mortise and the shank with cue tips and pipe cleaners dipped in alcohol.Once the chamber was cleaned, I turned my attention to the stummel and tried to get rid of the lacquer coating. I started by wet sanding with a 1500 grit micromesh pad and soon realized that it would not work. I tried sanding with 800 grit sand paper without any success. Soon I found myself sanding the stummel with 150 grit sand paper. The lacquer was very difficult to get rid off and after a considerable time, I was finally able to completely remove the lacquer coating. Believe you me, my fingers had started to hurt and sitting at the table for 3-4 hours at a stretch caused cramps in my back. But the end result was pleasing.

Then began the arduous and time consuming process of sanding the stummel with micromesh pads. I proceeded to sand the stummel with micromesh pads, going through wet sanding with 1500-2400 pads and dry sanding with 3200- 12000 grit pads. I was very pleased with the way the stummel had turned out. I decided that I liked this finish and after further cleaning and polishing, the stummel would look just beautiful. Once I was through with micromesh pads, I cleaned the stummel with undiluted Murphy’s oil soap and tooth brush. I paid special attention to the deep areas of the rustication, thoroughly cleaning it with the brush. I dried the bowl with cotton cloth and paper towels.I rubbed “Before and After Restoration balm” in to the stummel with fingers deep into the rustications and let it rest for a few minutes before I buffed it with a horse hair brush. Finally, I polished the stummel with a soft cotton cloth and muscle power!!!! I also polished the nickel ferrule with a jeweler’s cloth. Luckily, the corrosion was superficial and polished up nicely. Turning my attention to the badly damaged stem, I start by cleaning it with cotton pads dipped in isopropyl alcohol. I flamed the stem surface with a Bic lighter to raise the tooth chatter. The deeper tooth chatter and bite marks were filled with clear CA superglue. Thereafter began the time consuming process of curing, sanding with flat head needle file, 220 grit sand paper and finally by micromesh pads. In all, I had to repeat the fill and sand procedure thrice before resorting to final polish using micromesh pads. I also cleaned out the internals of the stem with pipe cleaners dipped in alcohol. To finish the pipe, I rubbed a small quantity of Halcyon wax II on to the stummel and gave it a nice polish. The pipe now does look stunning. I love the way the pipe has turned out and I can proudly reply back to this Omega “IT’S YOU!!!!!!” The finished pipe is shown below.

New Life for a Damaged Meerschaum-lined Dr. Grabow


Blog by Steve Laug

Not too long ago I sent a meerschaum lined pipe to Jim. He received it and sent me a note saying that he had sent two pipes to me to have a look at and refurbish. The first of them was a Bullnose shaped pot. I already restored and posted the write up of the restoration of the pipe on the blog (https://rebornpipes.com/2018/05/13/breathing-new-life-into-a-london-royal-bullmoose-pot/). The second was an interesting quarter bent Dublin that had a meerschaum lining. The pipe is stamped on the top of the shank Meerschaum-lined over Dr. Grabow and on the underside of the shank it is stamped Imported Briar. It had some nice grain on the sides of the bowl and shank. It had an oval shank. The rim top had some damage on it and the meerschaum lined bowl was heavily caked and the rim top had an overflow of lava. There were also pin holes and nicks in the rim top. The stem was lightly oxidized and there was tooth chatter on the top and the underside of the stem near the button. The top edge of the button and the bottom edge of the button also had tooth wear. The underside of the stem was stamped ITALY. The pipe that Jim sent to me was in rough shape. He said that when he received it he was turning it over in his hands and dropped it. When it hit the ground the bowl fractured on the underside along the length of the bowl and shank. There were multiple cracks. There was also a crack on the back left side of the bowl that extended from the edge of the rim to the bend in the shank. The cracks on the side of the bowl flowed through some of the large putty fills on the left rear of the bowl. There were also fills running the front of the bowl from top to bottom. The internals were dirty but it looked like the meerschaum lining was undamaged under the thick cake. I took close up photos of the rim top and the stem to show the general condition of the bowl and stem surfaces. The close up of the rim top shows the dents and caking on the lining of the bowl. There is a thick cake in the bowl and lava overflow on the top surface. The stem was in decent condition. There was some tooth chatter on the top and underside near the button. Fortunately there were no deep tooth marks in the vulcanite.I carefully reamed the meerschaum lined bowl with a Savinelli Fitsall Pipe Knife to scrape back all of the cake. I worked on the bowl lining and also the top edge of the bowl. I wrapped some 220 grit sandpaper around a Sharpie Pen and sanded the inside walls of the bowl and the rim edge.I dampened a cotton pad and scrubbed off the rim top and the meerschaum lining in the bowl. I was able to remove most of the build up and tars on the rim and bowl. I cleaned out the internals of the shank and the mortise with cotton swabs, pipe cleaners and alcohol until the interior was clean.I rubbed the bowl down with Before & After Restoration Balm to clean, rejuvenate and enliven the briar. I buffed it with a clean cotton towel to polish it. Under the grime the cracks in the bowl and shank bottom and on the side of the bowl became very visible. I took photos of the cracks on the bottom and side of the bowl. The crack on the bottom looks like a long crack but in reality it was a series of shorter cracks. The crack on the left side of the bowl flows from the rim top through two separate fills.I cleaned out the cracks with alcohol and cotton swabs to clean out the debris. I drilled small micro drill holes at the end of each crack to try to stop the spread of the crack. I filled in the cracks with clear super glue and pressed them together and let the glue dry. I sanded the repaired areas smooth to blend them into the surface of the briar around them. I used a walnut stain pen to colour the sanded areas around the repairs.I refilled some of the damaged fills on the shank/bowl junction and sanded them smooth. I touched those up with a stain pen. I stained the bowl with a light brown aniline stain to blend in the repairs and the rest of the stain on the pipe. I flamed it with a Bic lighter and repeated the process of staining and flaming it. I applied the stain to the top of the bowl with a cotton swab to avoid staining the meerschaum lining on the rim top. I wiped down the bowl with alcohol on a cotton pad to smooth out the stain on the bowl surface. It did a good job of blending into the repaired cracks on the left side of the bowl and the underside of the bowl and shank. I polished the briar with micromesh sanding pads – wet sanding with 1500-2400 grit pads and dry sanding with 3200-12000 grit pads. The photos that follow show the progress. I used a Maple stain pen to touch up the repairs one more time. I scrubbed the bowl with Before and After Restoration Balm. I rubbed it into the surface of the briar to enliven, clean and protect the briar. Buffing the balm also evened out the stain on the rim top and the repairs. I buffed the bowl with a cotton cloth to polish the briar. I set the bowl aside and turned my attention to the stem. I sanded the stem with 220 grit sandpaper to remove the oxidation on the surface of the vulcanite. I sanded out the tooth chatter and also sanded the tooth marks on both sides.I polished the stem with micromesh sanding pads – wet sanding the stem with 1500-2400 grit pads and dry sanding it with 3200-12000 grit pads. The photos show the increasing shine on the stem. I finished by polishing it with Before & After Pipe Stem Polish – both Fine and Extra Fine and hand buffed it with a soft cloth. This Meerschaum-lined Dr. Grabow Dublin turned out really well with a mix of interesting grain underneath the grime and the damaged finish. The grain really is really nice and the repaired cracks look cosmetically much better. The rim top looks much better. It should have a long life ahead of it and provide a good smoke. The vulcanite stem is high quality and shined up well. I buffed the bowl and the stem with Blue Diamond polish to raise the shine on the briar and the vulcanite. I was careful to not buff the stamping and damage it. I gave the bowl and stem multiple coats of carnauba wax. I buffed the entire pipe with a clean buffing pad to raise the shine. I hand buffed it with a microfiber cloth to deepen the shine. The finished pipe is shown in the photos below. The rich light brown stain allows the grain to really stand out on this little pipe and it works well with the rich black of the vulcanite stem. I will be sending it back to Jim in a few days. I will pack it up with his first pipe and get it in the mail to him. I know that he is looking forward to enjoying a bowl in it. Thanks for walking through the restoration with me.

Paresh’s Grandfather’s Pipe #3 – A Dr. Grabow Starfire


Blog by Steve Laug

I have repaired pipes for Paresh in India over the past four months and not long ago he sent me seven of his Grandfather’s pipes to restore. It is an interesting assortment of older pipes that come from the period of 1937-1950s. His Grandfather worked for the Indian Railroad many years and was a pipeman. Paresh is also a pipeman and recently found out that his Grandfather smoked a pipe as well. The third of the pipes is an older Dr. Grabow Starfire Adjustomatic Tomahawk #21. It is stamped on the right side of the shank Starfire over Dr. Grabow. From what I can find out the pipe was part of the Continental X-Series that came in 12 unique shapes that were originally released in 1959. When the Continentals were first put into production they may have been available only by coupon in the Westbrook, Emperor and Sculptura lines, but they were available in the regular production–non coupon lines such as Viscount, Starfire and Eldorado. The coupon pipes were given XO shape numbers while the regular production lines (meaning sold in retail stores) were given standard shape numbers. The XO numbers were never stamped on the pipes, but the regular production pipes will sometimes have a stamped shape number. This particular pipe that I am working on for Paresh is a Starfire line pipe. I have included the following shape chart to help identify the pipe. It is the third pipe down in the column on the right side – shape #21. (Quoted from the late Ed James, a man who knew a lot about Grabow pipes and who is dearly missed by those of us who knew and enjoyed his company.  http://pipesmagazine.com/forums/topic/3-year-journey-complete-set-of-continental-x-series-pic-heavy.) I took the following photos of the pipe before I stated to work on it. It was probably one of the dirtiest of the pipes that Paresh’s wife Abha sent me – even then it was not that dirty because she had removed much of the cake bowl and the grime in the wire rustication.  The rim top has lava that has overflowed from the bowl and filled in the wire rustication. It is quite thick and hard. It will need to be scraped off when I started the cleaning. I am not sure what the inside edge of the rim looks like at this point because of the lava overflow. The outer edge of the bowl looks pretty good with a little wear on the front edge and back right side. The bowl still the remnants of cake left behind that I will need to take care of. I also took a close up photos of both sides of the stem. The stem significantly overclocked to the right giving the pipe an odd look. You can see the tooth chatter and calcification on the top and underside of the stem just in front of the button. It appears that the stem must have had a softee bit that was later cut off and left behind the debris.I always enjoy getting some background information on the pipeman whose pipes I am restoring when I am working estate pipes from the family members. If you have followed rebornpipes for a while you have read a few of these summaries from estates like Kathy’s Dad, Barry’s Dad and Farida’s Dad. Each of them did a great job summarizing their fathers’ estates. Since the next group of seven pipes that I will be working came to from India and belonged to the Grandfather of Paresh, I asked him to write a short tribute to his Grandfather. What follows is his writeup.

Respected Sir,

Now that the first batch of my Grandfather’s pipes has reached you, I would like to share my memories of him with you, the aim being to provide you with an insight to his personality, the era in which he lived, and a brief history associated with the pipes that I have inherited from him.

My Grandfather, Ananta (named after an exotic seasonal white flower having lovely fragrance), was born in a small coastal town of Konkan region of Maharashtra, India, in 1918. These were very turbulent times when India’s freedom struggle against British rule was gathering momentum and the atmosphere was charged with “Quit India Movement”. Having completed his graduation from Bombay, he joined Railways in 1937. This also marked the beginning of his journey into the world of pipe smoking!!!!!

Having seen his potential, in 1945, he was sponsored by the Government to visit England, for gaining further experience and expertise in his profession. This was a period when India’s Independence was round the corner and efforts were being made to train Indians for various administrative appointments in future Independent India. He returned back to India after a year, in 1946 and with him came some pipes that he had purchased in England. I believe a few of his Petes, Barlings, Charatans and GBDs are from this visit.

In 1947, when the British finally left India for good, my Grandfather was gifted pipes by his British peers, subordinates and Superior Officers as a parting gift. He stayed in touch with a few of them over all these years, even visiting them in 1959-60. Some of his later era Charatans and Barlings and Petes are from this trip. He quit smoking in early 1970s (before I was even born!!!!) and his pipes were packed up. There were a number of pipes which were used as TINDER for lighting fires (CAN’T BELIEVE IT…… I have not overcome my grief of this loss till date!!!!!) due to ignorance!!!!!!

My Grandfather was a very strict disciplinarian and temperamental (I did not know this as he was neither when dealing with me as I am the youngest of all his grandchildren!!!!!! He was always the most understanding and loving person in my life). I later learned that in his office, he was not to be disturbed when his pipe was lit, as he would be in his thinking/ contemplating mode while it was just the opposite as he lit his pipe in the evening while at home, when he would be at his relaxed best!!!!.

The interesting part is that neither of us knew that we each smoked a pipe until after his demise in Jan 2018!!!! In our culture, to this day, smoking or alcohol consumption is socially never talked about (mute acceptance!!!). It was during his last rites that absent mindedly I lighted my pipe and looking into the flickering flames of his funeral pyre, remembered and recollected all the wonderful memories and talks that we had shared. No one said a word to me about my lighting up a pipe!!!!!! Immediately thereafter, I rejoined my duty station. A few days later, my wife, Abha, received a box from my Uncle with a note that said “Grandfather would have loved Paresh to have these”. This box contained a collection of his fountain pens and 8-10 of his pipes (since then as my folks are winding up his belongings, I have received 2-3 packets and a large number of pipes, some in decent condition and some in unspeakable state). Abha immediately messaged me with pictures of these pipes and pens. I had been collecting and restoring (no major repairs, though) fountain pens since long and immediately recognized some of them as highly collectibles, however, pipes were a totally different ball game! I was inexperienced with no knowledge/ information regarding various brands/ pipe makers, shapes and materials. I knew nothing about the value of these pipes, nothing about pipe restorations, nothing about caring for them; I mean zero knowledge about collecting pipes. I smoked some real cheap Chinese pipes which were readily and unfortunately, the only ones, available in India and some inexpensive pipes from eBay India!!!!! Also regular pipe cleaning, pipe rotation, pipe cleaners and such things were unknown to me.

Thus, to know more about the REAL pipes, I embarked upon the journey of exploring finer nuances of pipe brands/ makers, their history and watching “How to videos” on packing a pipe, cleaning, repairing and caring for ones pipes. I found it extremely interesting and satisfying. It was while meandering through this confusing quagmire of pipe world that I came across rebornpipes.com website and eventually established contact with you, Mr Steve, who has since been my mentor, guide and GURU, making this journey a wonderful and satisfying experience.

Sir, there is one more thing that I need to thank you for and that is when you asked me to write a brief about my grandfather and his pipes, I realized how little I knew about him, in fact, knew nothing, as I was not even aware that he was a “pipeman” as no one in my family ever spoke about it being taboo subject and since he had quit a long time before I was even born!!!! This led me to ask the elders in my family, questions on the subject and came to know the above details. I cannot thank you enough for prodding me to get to know my grandfather and his pipes a lot better. Sir, these pipes of his, with your help and guidance, will remain with me forever in mint condition……

Thanks Paresh for this great descriptive take of your Grandfather. It really gives me a sense of the pipes that you have sent me and what they meant to him. It is obvious from the variety of pipes that you sent and the overall condition that he knew how to choose good quality pipes and obviously enjoyed smoking them throughout most of his life.

Paresh’s wife Abha cleaned the pipes before she sent them to me here in Canada and did an amazing job cleaning them up. She reamed the bowls, cleaned the rims and scrubbed the exterior of the pipes and the stems with Murphy’s Oil Soap and cleaned off the buildup on the stems. She had removed much of the cake on this pipe and done a great job cleaning the exterior of the bowl. The lava on the rim top was very hard and thick so she left that behind so as not to damage the top edge. The stamping on the right side of the shank was very readable. The stem was oxidized on both sides of the stem and had quite a bit of tooth chatter and calcification on both.

Since the stem was an adjustomatic according to what I had read I decided to work on the alignment before working on the rest of the pipe. I removed the stem and heated the metal tenon and stinger to loosen the tars and oils that had hardened on it. Once it was heated I turned the stem into the mortise and adjusted it by turning it clockwise until all was aligned.I let the heat dissipate from the stem and then removed it from the shank and started my work on the bowl itself. I cleaned up the cake in the bowl with a Savinelli Fitsall Pipe Knife and took the rest of the cake off until I had bare briar walls. I wanted to check out the condition of the interior of the bowl. It looked very good once it was cleaned off. There was no checking or cracking on the bowl walls. There was no sign of burn out inside. I scraped the rim top with the sharp edge of the Savinelli Knife and took off the thick lava that was there. I used a brass bristle wire brush to clean out the cake from the wire rustication on the surface. You can see the thick chunks of lava that came off the rim top on the white sheet of paper.I scrubbed the exterior of the bowl and shank with Murphy’s Oil Soap and a tooth brush to clean out the debris I left behind from the rim clean up. I also used the brass bristle brush with the soap to work over the rustication on the rim top. I rinsed it in running water and dried it off with a cloth. I restained the rim top with a Walnut stain pen to match the colour of the rest of the bowl. I touched up random spots on the shank and bowl sides where the finish was worn or nicked.I cleaned out the mortise and the airway in the shank with pipe cleaners, cotton swabs and alcohol. It took a lot of scraping and scrubbing to remove all of the thick tars and oils that had accumulated around the Grabow spoon stinger.I worked Before & After Restoration Balm deep into the briar to clean, enliven and protect it. I worked it into the finish with my fingertips. I worked it into the rim and shank end. I set it aside for a few minutes to let the balm work. I wiped it off and buffed it with a soft cloth to polish it. The briar really began to have a deep shine. I took some photos of the bowl at this point to mark the progress in the restoration. The bowl is really beginning to look good and the pipe is waxed I think it will really have a rich glow to wire rusticated finish.  I set the bowl aside and worked on the stem. I used a brass bristle wire brush to clean off the spoon stinger enough that I could remove it and clean out the rest of the stem. I cleaned up the stinger and the airway in the stem with pipe cleaners, cotton swabs and alcohol until they were clean. I would buff the metal with the buffing wheel to take off the rest of the staining later. I sanded out the tooth chatter and the calcification on both sides of the stem at the button with 220 grit sand paper.I polished the stem with micromesh sanding pads – wet sanding with 1500-2400 grit sanding pads and dry sanding with 3200-12000 grit pads. I wiped the stem down with Obsidian Oil after each sanding pad. I finished polishing the stem with Before & After Pipe Stem Polish both Fine and Extra Fine to remove the last of the scratches. I gave it a final coat of Obsidian Oil and set it aside to dry. With the stem polished I put it back on the pipe and lightly buffed the bowl and more heavily buffed the stem with Blue Diamond. I gave the bowl several coats of Conservator’s Wax and the stem multiple coats of carnauba wax. I buffed the pipe with a clean buffing pad to raise the shine and hand buffed it with a microfiber cloth to deepen the shine. The pipe polished up pretty nicely. The finished pipe is shown in the photos below. I have four more of Paresh’s Grandfather’s pipes to finish and then I will pack them up and send across the sea to India where he can carry on the legacy. I know that he is looking forward to having them in hand and enjoying a bowl of his favourite tobacco in memory of his Grandfather. Thanks for walking through the restoration with me as I worked this pipe over.


Craig’s Pipes #4 – Restoring a Dr. Grabow Starfire 39


Blog by Steve Laug

In my previous 3 blogs on Craig’s pipes I spoke of the five pipes that I am working on for him. In this blog I am taking on the fourth of his pipes – one of my favourite Dr. Grabow shapes – Starfire 39. It was another one with a cake in the bowl that was thick and hard. Once more I am going to include what Craig wrote me about his pipes. I have included it in the previous three blogs but I think it adds context to the bunch.

I was recently given a bag of pipes…literally, a BAG of 20 or so pipes that are 50+yrs in age and VERY used. I was wondering if you would have time to either Skype or FaceTime with me, and go through what I have in order to determine which are worth sending to you to have them refurbished. If you would be so kind, I’d really appreciate it.

We met on FaceTime and he pulled out a grocery bag with no rhyme or reason to it. It was filled with a jumble of no name or low-end drug store pipes. The only pipes that stood out for me were an old WDC Campaign pipe and a Grabow Starfire. He had several others that he liked. But we excluded all but five of the pipes. The amount of work necessary to bring them back was not worth the price. These are the five that we chose to work on. As I finish them, I will include the link to the blog covering that pipe.

– A No Name Meerschaum that looked interesting – https://rebornpipes.com/2018/01/31/is-it-a-meerschaum-looks-like-one-feels-like-one-but/
– A leather clad billiard marked R20 and bearing a shield – https://rebornpipes.com/2018/02/01/rejuvenating-a-leather-clad-billiard/
– A Wally Frank Bulldog marked Natural Unvarnished lacking a stem https://rebornpipes.com/2018/02/02/craigs-pipes-3-restemming-and-restoring-a-wally-frank-natural-bulldog/
– A Dr. Grabow Starfire 39 that had great grain
– A WDC Campaign underslung pipe

After our conversation, he packed up the pipes and threw the rest of the pipes in a separate bag for me to scavenge parts. The box did not take too long to get to Vancouver and when it did I opened the box and had a look. Here are pics of what I saw – there were two bags inside. One bag held the discards for the scrap pile and the other held the five pipes he wanted restored. The fourth pipe was the pickaxe shaped Dr. Grabow on the upper left of the above photo, just below the meerschaum. The briar was very dirty with lots of grime and residue that had hardened on the surface of the bowl around the front and right side of the bowl.  It was hard to tell what the rim top was like because of the lava overflow from the bowl up and over the scooped rim. The outer edges had some nicks at the front of the bowl. The inner edge looked pretty rough but I could not tell if it was just the lava or actually damage to the briar. There appeared to be some darkening on the rim but it may also be thin tars and oils. The bowl had a thick cake in it and remnants of tobacco. The shank is stamped on the left side Starfire over Dr. Grabow. On the right side it is stamped with the shape number 39 at the shank stem junction and next to that it reads Imported Briar over Adjustomatic over Pat.2461905. The patent is for the Adjustomatic apparatus in the stem. The stem was in pretty decent condition with some scratches on the top and underside at the button and a light oxidation. I took the following photos of the pipe before I started cleaning it up. I took close up photos of the bowl and rim top as well as the stem. The rim top had been beaten on a hard surface to knock out the dottle and there were some nicks along the outer edge of the bowl, particularly on the front edge. There was a lot of overflow on the rim, particularly heavy on the back side. The stem had some minor tooth chatter on both sides near the button and scratching on the surface. There were some small nicks on the top side of the stem. It was lightly oxidized and it was slightly overturned to the right. The Dr. Grabow metal “spear” stinger was missing. The pipe was very dirty.I looked up the brand and the line on Pipedia to see what I could find out about it. I have often wondered about how Grabow came up with the names like Regal, Eldorado, Starfire etc. The article solved that mystery for me so I have included that portion for easy reference. The link is:(https://pipedia.org/wiki/Dr._Grabow_Models_(Series,Line)_Names_Through_the_Years).

Before I get started in this section here is a great piece of trivia that I learned from a devoted and caring Dr. Grabow employee recently. You have probably wondered, as I have, just where these names originated or what inspired them. Maybe you have even guessed the connection, but I sure didn’t! When this employee mentioned this to me, he brought it up like a riddle: “THINK CARS!” Now, see if you came up with what I did:

Eldorado — Cadillac

Viscount — Dodge (Car built by Chrysler Corporation of Canada Ltd, for Canadian Markets only ca1959.)

Starfire — Oldsmobile (The original Oldsmobile Ninety-Eight Starfire, named after the Lockheed F9413 Starfire fighter jet, was first introduced as a show car in 1953 at GM’s Motorama along with the Buick Skylark and the Cadillac Eldorado.)

Regal — Buick

Savoy — Plymouth (by the way, my friend at Dr. Grabow didn’t say, but there was also a Plymouth BELVEDERE!)

Riviera — Buick, I think first produced for model year 1963, which would have made it known in 1962. The pipe name precedes that, but maybe I missed something.

Lark – Studebaker

All of these cars had roots or beginnings in the 1950s and early 1960s I believe, and perhaps I should do a little more research along those lines to get more accurate facts. If anyone finds better info, just let me know. I never thought of a “car” connection, but had looked at some sort of Royalty thing, what with the DUKEs, VISCOUNT, ROYALTON AND SAVOY, etc. I haven’t checked to see if they were also car names or not.

The article also included the following information on the date of the line. It stated that the STARFIRE (c1956) — First appears in a magazine ad for $3.50 as early as December 1956. “E” selection of briar was used on both the Starfire and Westbrook.

I also wanted to refresh my memory on the Patent information for the Adjustomatic stem and found a page from a catalogue in the same Pipedia article. I have included that page below. The description of the patented system and the cutaway picture are helpful in understanding how the system works.Armed with a refreshed memory I was eager to dive into the restoration of the Starfire. It really was a beautiful piece of briar and I could not wait to see the finished pipe. I started by removing the stem. I found that not only was the stinger apparatus missing but it had actually broken off in the tenon itself. I knew from past experience that the stinger were threaded and unscrewed from the tenon. In this case the upper part of the spade stinger had been twisted off leaving the stem clogged and useless. There was no airflow in the stem at all as the broken stinger cut off all air. I used a piece of wire to pry the edges of the broken stinger to the middle of the tenon, thinking I might be able to use some needle nose pliers to twist it out. But that did not work. It was time to resort to more intrusive measures. I set up my cordless drill and a small drill bit and drilled the tenon. I was careful to keep the bit in the centre of the tenon so as to not damage the threads should I want to put a new stinger in place. It was not too long before the broken stinger end came out on the drill bit. I blew air through the stem and was happy that it was clear and unimpeded.I used a piece of 000 steel wool to clean off the debris from the threads and body of the metal tenon. I cleaned the airway in the stem, shank and mortise with pipe cleaners, cotton swabs and alcohol. I scrubbed those areas out until the pipe cleaners and swabs came out clean.The stem was slightly overturned so I worked it back and forth until it lined up. That is the purpose of the Adjustomatic system. I took photos of the pipe with the stem in place and aligned. I reamed the bowl with a PipNet reamer starting with the smallest cutting head and working my way up to the second cutting head as it was the same diameter as the bowl. I reamed it back to bare briar. I cleaned up the remnants with a Savinelli Fitsall Pipe Knife. I carefully sanded the scooped rim top with 220 grit sandpaper to remove the thick lava coat and to minimize the damage on the front outer edge of the bowl.I polished the bowl and rim with micromesh sanding pads – wet sanding it with 1500-2400 grit pads and dry sanding with 3200-12000 grit pads. I wiped the bowl down after each pad with acetone to clean off the sanding dust. The photos show the progress of the polishing. I decided to do this before the deep cleaning with Before & After Restoration Balm this time. I decided to leave the rim unstained as the polishing had blended the colours with the bowl really well. Instead I worked some Before & After Restoration Balm into the surface of the briar with my finger tips to deep clean the finish, enliven and protect the wood. I worked the balm into the rim top to polish the cleaned up area. I let it sit for a few minutes and then buffed it with a cotton cloth. The grain in the wood came alive and there was a rich shine to the briar. I took some photos of the bowl at this point to mark the progress in the restoration. I set the bowl aside in my rack and worked on the stem. I started by sanding it with 220 grit sandpaper to remove the light oxidation, tooth chatter and nicks in the surface.I worked over the stem with micromesh sanding pads. I polished out the sanding scratches and marks from the reshaping work. I wet sanded it with 1500-2400 grit pads and dry sanded it with 3200-12000 grit pads and wiped it down with Obsidian Oil after each one. When I finished with the last micromesh pad I gave it a final coat of oil and let it dry.

With the stem polished I put it back on the pipe and buffed the entire pipe with Blue Diamond polish on the buffing wheel. I buffed it with the polishing compound until it was shiny. I gave the entire pipe several coats of carnauba wax and buffed it with a clean buffing pad to raise the shine. I hand buffed it with a microfibre cloth to deepen the shine. The stem and the bowl polished up pretty nicely. The finished pipe is shown in the photos below. This is the fourth of Craig’s five pipes. Once I finish the last of the pipes I will pack them up and get them out to him. I am looking forward to hearing what he will think once he has them in hand. Thanks for walking through these restorations with me. Once again I can’t help thinking that the pipeman who gave Craig these pipes would be happy that they are back in service and that Craig is carrying on the pipeman’s trust with them. Cheers.