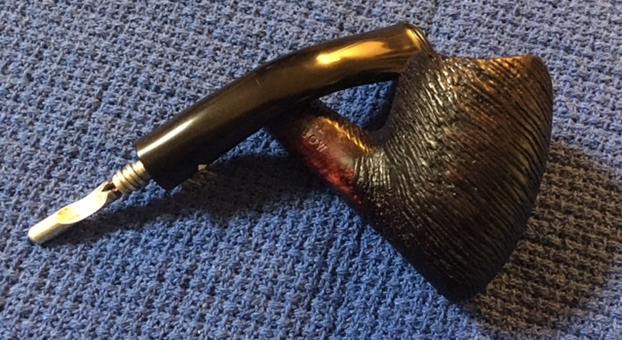
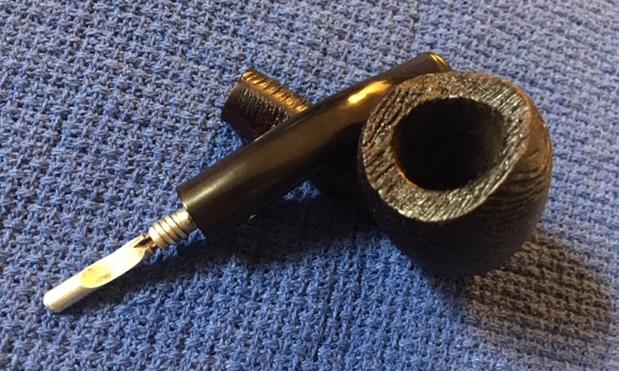
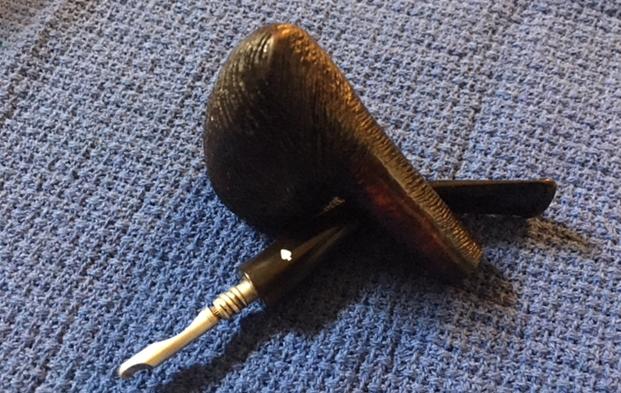
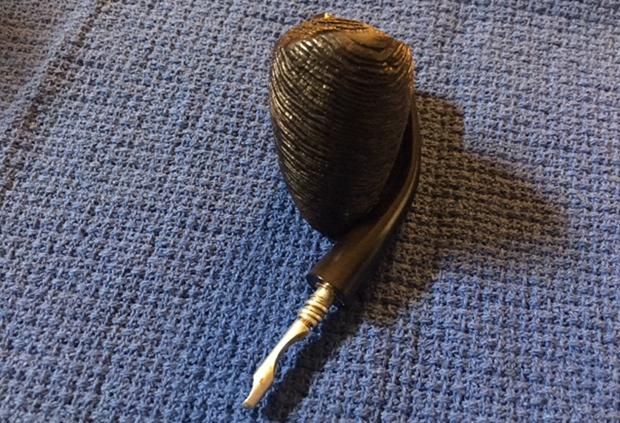
Tag Archives: realigning an overclocked stem

New Life for an American Made Pipes By Lee Limited Edition 3 Star Rhodesian


Blog by Steve Laug

The next pipe on the worktable is another American made pipe from Pipe by Lee out of New York City. I will give more information on the brand later in the blog. This one is a classic smooth finished, beautifully grained Rhodesian with a vulcanite saddle stem. It has some great flame grain around the bowl and shank sides with birdseye on the rim and shank top and heel of the bowl. Jeff and I purchased it along with other pipes from a fellow in Cornwall, Pennsylvania. The pipe is stamped on the left side of the shank and reads Pipes by Lee [over] Limited Edition. On the right side it is stamped and reads An Authentic Imported Briar. On the underside of the shank is carved ’51 [over] Rochester with an underline. Jeff and I were speaking about the pipe and we remembered that the fellow we bought it from in Pennsylvania went to Rochester Institute of Technology, New York and he bought the pipe at that time – 1951. The pipe is dirty with a thick cake in the bowl and some light lava on the rim top. The finish was dusty and there was dust in the twin rings around the rim cap. It was also ground into the finish around the sides of the bowl. The vulcanite saddle stem is oxidized, calcified and has tooth marks and chatter on the top and underside near the button. Jeff took some photos of the pipe before he started his cleanup work. He took a photo of the bowl and rim top to show their general condition. You can see the light lava on the rim top and the thick cake in the bowl. The stem is oxidized, calcified and has tooth marks and chatter on both sides near the button.      Jeff took some photos of the sides and heel of the bowl to give an idea of the grain around the bowl and shank. It has some great grain around the bowl sides and bottom – a mix of birdseye, straight and flame grain. I cannot wait to see what it looks like once it is cleaned and polished.   He took a photo of the stamping on the sides of the shank to capture it for me. It is clear and readable. Aaron Henson written about the restoration of a Pipes By Lee 3 Star Rhodesian similar to this on in the past so I turned there first to read about it. I am including the link to the blog if you wish to check it out on your own. (https://rebornpipes.wordpress.com/wp-admin/post.php?post=37004&action=edit&classic-editor).

Aaron had included pic of the flyer to the left that gives a sense of the hierarchy of  the brand. I know that even though the flyer says it goes up to 5 stars I have seen 7 star pipes in the past.

I turned to Pipephil to get a feel for the history of the brand and have included a screen capture of the pertinent section on the site below (http://www.pipephil.eu/logos/en/logo-l3.html). I am also including the side bar information that was on the site.

This brand was distributed by Stewart-Allen Co, Inc. NY. Grading (ascending): 1 to 5 stars Early pipes have seven pointed brass stars, middle run have five points and later pipes are stamped with coloured gold stars. Lee seconds: Briar Lee , Gold Coast.

I turned to Pipedia for any additional information as did not find anything new. I have included the link in case some of you might want to check it out (https://pipedia.org/wiki/Lee).Now I had a pretty good idea of how the pipe was stamped and made. With that information I moved forward to work on the pipe itself and see what I had to do with it. Jeff had done an amazing job in removing all of the cake and the lava on the rim top. He had reamed the bowl with a PipNet Pipe Reamer and cleaned up the remnants with a Savinelli Fitsall Pipe Knife. He took the cake back to bare briar so we could check the walls for damage. He scrubbed the exterior of the bowl with Murphy’s Oil Soap and a tooth brush to remove the grime on the bowl and rim and was able to remove the lava and dirt. He cleaned out the interior of the bowl and shank with pipe cleaners, cotton swabs and alcohol until they came out clean. He cleaned the stem with Soft Scrub to remove the grime on the exterior and cleaned out the airway with alcohol, cotton swabs and pipe cleaners. He soaked the stem in Before & After Deoxidizer and rinsed if off and recleaned the inside of the stem with alcohol and pipe cleaners. I took photos of the pipe before I started my part of the restoration. I took some photos of the rim top and stem. The rim top and bowl looked very good. The damage to the front left inner edge and right rear inner edge of the bowl are visible in the photo. The close up photos of the stem shows the tooth marks and chatter on the top and underside of the stem near the button.  The stem is also slightly overclocked to the right.I took a photo of the stamping on the sides and underside of the shank to show the condition after the cleanup. It looks good.  I removed the stem from the shank and took a photo of the pipe at this point. You can clearly see the condition, size and shape of the pipe.I started my part of the restoration work on this pipe by addressing the overclocked stem. I heat the tenon in the stem to loosen the glue that holds it and then twisted the stem into position and aligned it on the shank. I let the pipe cool and the glue reset before removing the stem.I addressed the damage and darkening on the edge of the rim, particularly on the front and rear of the inner edge. I used a folded piece of 220 grit sandpaper to remove the damage to the bowl.  I started polishing the edge with 400 grit wet dry sandpaper.  I sanded the outside of the briar with micromesh sanding pads to polish the finish. I wet sanded with 1500-12000 grit sanding pads and wiped it down with a damp pad after each pad.   I worked some Before & After Restoration Balm into the surface of the briar with my fingertips to clean, enliven and protect the briar. I let the balm sit for about ten minutes and then buffed with a cotton cloth to raise the shine. The photos show the bowl at this point in the restoration process.  I set the bowl aside and turned my attention to the stem. I “painted” the stem surface with the flame of a lighter to lift the tooth marks. I was able to lift most of them using this method. I filled in the remaining marks with black super glue and set the stem aside while the repairs cured. I sanded the stem with 220 grit sandpaper and 400 grit wet dry sandpaper to remove the scratching in the vulcanite.  I polished the stem with micromesh sanding pads – dry sanding with 1500-12000 grit sanding pads. I wiped it down after each sanding pad with a cloth containing some Obsidian Oil. I finished polishing it with Before & After Pipe Stem Polish – both Fine and Extra Fine and buffed it off with a cotton cloth.   This Pipes by Lee Limited Edition 3 Star Rhodesian is a nice looking pipe. The finish looks very good and the grain stands out. I put the stem back on the bowl and buffed the pipe with Blue Diamond on the buffing wheel. I carefully avoided the stamping on the shank sides during the process. I gave the bowl and the stem multiple coats of carnauba wax on the buffing wheel and followed that by buffing it with a clean buffing pad on the buffer. I hand buffed the pipe with a microfiber cloth to deepen the shine. The finished pipe is an excellent example of the pipes that were made by Pipes by Lee. The flow of the grain and the way the shape follows it is very well done. Give the finished pipe a look in the photos below. I can only tell you that it is much prettier in person than the photos capture. The dimensions of the pipe are Length: 5 ½ inches, Height: 1 ½ inches, Outside diameter of the bowl: 1 ¾ Chamber diameter: 7/8 of an inch. This interesting Pipes by Lee Rhodesian is a great looking pipe in excellent condition. Thanks for walking through the restoration with me as I worked over another beautiful pipe. I will be adding it to the rebornpipes store soon. If you want to add it to your collection send me an email or a message! Thanks for your time.


Restoring a Kaywoodie Meerschaum Dublin


Blog by Paresh Deshpande

Another surprise pick from my grandfather’s collection is this pipe which I have selected to work on. John Bessai in Rhodesian shape, which I had recently restored, was also a surprise pick in his collection since he had never been to USA, let alone Cleveland, Ohio and this is where most of the Bessai pipes were sold. Well, this pipe now on my work table is a Kaywoodie made from block meerschaum!! I was aware that KBB made briar pipes with meerschaum insert, but block meerschaum pipes, that I was not aware of.

The meerschaum on my work table is a classic Dublin with a stout meerschaum shank and a vulcanite stem. The stummel is sans any stampings and the only way it can be identified as being a Kaywoodie is the trademark cloverleaf insert on the stem and the four holed stinger tenon. However, the cloverleaf insert in this stem differed from the other Kaywoodie stems that I have previously worked on in that here the stem is marked with a “black cloverleaf inside a white dot” as against the white cloverleaf in other Kaywoodie pipes.I searched the internet for more information on Meerschaum line of Kaywoodie pipes. I visited the website, brothersofbriar.com and came across this valuable piece of information from one member, kwguy, who probably, from his comment, appears to have worked for KBB. I have extracted below, the relevant portion of the thread.

“Kaywoodie Block Meerschaums were made from 1938 to the mid 1960’s. The meerschaum pipe business by Kaywoodie was revitalized when Paul Fischer was hired and emigrated from Austria to run the meerschaum pipe department. Kaywoodie meerschaums were available in earlier years but not as prominently as when Paul Fischer came on board. He left in 1960 to make meerschaums under his own name. We continued to make them for several years after he left until we could no longer import meerschaum from Turkey”. (http://www.brothersofbriar.com/t21079-kaywoodie-block-meerschaum)

Another piece of information was available on pipedia.com which I have reproduced below.

HINTS ON COLLECTING, DATING AND PRICING KAYWOODIES
Examine Logo, Stampings and Fitment. The pre-WWII Kaywoodies had elongated white cloverleaf logos and large screw-in fitments (with the possible exception of the pre-1925 and “export” Kaywoodies, which had no fitments). Some of the pre-1936 Kaywoodies were stamped (on the shank) with a cloverleaf around KBB. Sometime between 1936 and 1947, the better pipes were marked with a black cloverleaf inside a white dot. However, because many of the pipes in the 1968-69 catalog still show this type of logo, the black-in-white logo merely indicates a “post 1936” vintage.

Based on the information gleaned from the above sources, it is safely concluded that the Kaywoodie meerschaum pipe presently on my work table is from the period between 1936 to late 1960s.

INITIAL VISUAL INSPECTION
The stummel has developed a nice coloration on the surface, darker on the lower half of the stummel and darkest on the shank. The entire stummel is covered in minor nicks and scratches with slightly deeper ones seen on the front and behind the bowl. There is a patch, similar to what would be seen on a briar when exposed to water, on the front of the bowl. Since this would be my first inherited meerschaum pipe restoration, I shall tread very carefully in addressing these issues. There is thick build up of cake in the chamber with a thicker layer at the bottom half of the chamber. The condition of the inner walls of the chamber can be ascertained only after the cake has been removed completely. No apparent cracks or damage to the stummel surface is seen from the outside, save for a few scratches and nicks/ dents. The rim top has darkened due to thick overflow of lava. There are a large number of dings and chips to the rim top which are visible through the lava overflow. This will be a challenge to address. The inner and outer edge shows minor chips, the result of striking the edges against a hard surface to remove dottle. The shank end of the pipe has an aluminum threaded spacer ring which extends in to the mortise, separating the shank end from the stem end when threaded in. This spacer ring is in pristine condition. The mortise is blocked due to accumulated dried oils, tars and remnants of ash, greatly restricting the air flow.The vulcanite stem has deep tooth indentations and minor tooth chatter on upper and lower surfaces as well on both the button edges. The stem shows minimal signs of oxidation which really is surprising. The air flow through the stems is laborious to say the least. The four holed metal stinger tenon is covered in dried oils and tars with a blocked breather hole near the threads. The alignment of the stem logo and stummel is off center when the stem is fully threaded in to the mortise with a slight overturn. These issues will need to be addressed.THE PROCESS
I started this project by reaming the chamber with size 1 followed by size 2 head of PipNet reamer. With my smaller fabricated knife, I scraped out all the carbon from difficult to reach areas. I used a 220 grit sand paper, pinched between my thumb and forefinger, to sand the inner walls of the chamber of the pipe. Once I had reached the bare walls, I wiped the chamber with a cotton pad dipped in isopropyl alcohol. This removed all the residual carbon dust and also rid the chamber of all ghost smells. The walls of the chamber are nice and solid with no signs of heat fissures or cracks. Using a sharp knife, I gently scraped out the overflow of lava from the rim top. The dents and chips on the rim surface are now clearly visible.I followed up the reaming by cleaning the stummel surface. I sand the stummel with a folded piece of 220 grit sandpaper followed by 600 and 800 grit papers. This was done with utmost care and diligence as I did not want to sand away a lot of meerschaum material from the surface and also wanted to preserve the nice golden hued color taken on by the meer from being smoked. A few deeper chips and gouges were left unaddressed as it would have led to loss of lot of meerschaum material. Also these dents and dings appear like a soldier’s battle scars and worn with pride!! Similarly, I worked the rim top and addressed the dents and scratches from the surface. The chipped inner and outer edge was leveled by creating a slight bevel on either edge with 220 grit sandpaper. I cleaned the mortise and air way of the pipe using hard bristled and regular pipe cleaners, q-tips dipped in alcohol. The mortise and the draught hole were given a final clean with shank brushes dipped in alcohol. I dried the mortise with a rolled paper napkin. The shank internals and the draught hole are now nice and clean with an open and full draw.I polished the top of the bowl and rim edges with micromesh sanding pads to remove all of the tar and lava that was on the surface. I wet sanded it with 1500-2400 grit pads and dry sanded with 3200-12000 grit pads. I wiped the bowl down with a damp cloth to remove the dust that was left behind by the sanding. While I was working on the bowl top I also worked over the sides and bottom of the bowl to polish them as well. I wanted to minimize the scratching but not necessarily remove them all. I cleaned out the internals of the stem using hard bristled and regular pipe cleaners dipped in alcohol. The deep bite marks on the stem were flamed using a Bic lighter. However, this did not work. From my experience, I have learnt that getting rid of the oxidation from and around the surface to be filled helps in subsequent better blending of the fill with the stem surface. With a folded piece of used 150 grit sand paper, I sand the area that is required to be filled. I cleaned the sanded portion of the stem with cotton pad dipped in alcohol and spot filled the damaged area with a mixture of activated charcoal and clear superglue. I set the stem aside for the fill to cure. Once the fill had cured, I sand the fills to match the surrounding stem surface with a flat head needle file. I sharpened the lip edges using a needle file and sand the entire stem with 220 followed by 400, 800 and 1000 grit sand paper to achieve an exact match. This also helps to reduce the sanding marks left behind by the more abrasive 220 grit paper as well as eliminated the oxidation seen on the stem. I was so engrossed and preoccupied with the task at hand that I missed out on taking pictures of this process.

To bring a deep shine to the stem, I went through the complete set of micromesh pads, wet sanding with 1500 to 2400 grit pads and dry sanding with 3200 to 12000 grit pads. I wiped the stem with alcohol after each pad and rubbed it down with Extra Virgin Olive oil. It was at this stage that I addressed the issue of overturned four holed stinger by heating it with the flame of a Bic lighter. This loosens the glue and I under-turn the stinger. I let the stinger cool down and re-harden the glue. I re-heated the stinger and fitted the stem in to the mortise, tightening it till the stem and shank were perfectly aligned. I let the stinger sit in this position till it had cooled down and the glue had hardened again. Now the fit of the stem and the shank is perfectly aligned. To finish, I re-attach the stem with the stummel. I mount a cotton cloth buffing wheel on to my local machine which is similar to a Dremel.  I set the speed at about half of the full power and applied White Diamond compound to each of the three pipes. I wiped/ buffed the pipe with a soft cotton cloth to clear it of any leftover compound dust. I then mounted another cotton cloth wheel on to the polishing machine and applied several coats of carnauba wax over the stummel and the stem. I finished the restoration by giving the pipe a rigorous hand buffing using a microfiber cloth to raise the shine further. The completed pipe, with the shining white and golden hued meerschaum stummel, contrasting with the shiny black stem, looks lovely, fresh and vibrant; the photographs speak for themselves. Thanks for the read…………..Cheers!!

Paresh’s Grandfather’s Pipe #3 – A Dr. Grabow Starfire


Blog by Steve Laug

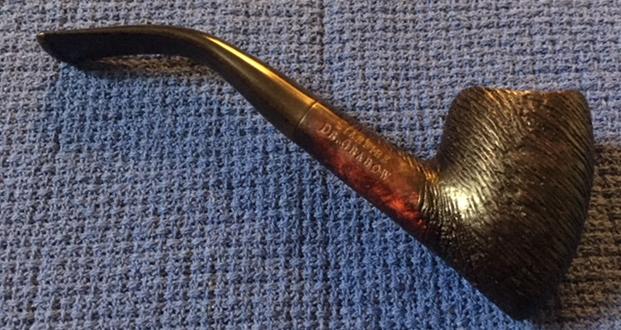
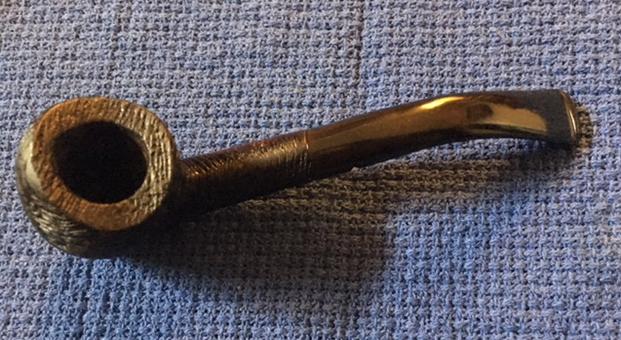
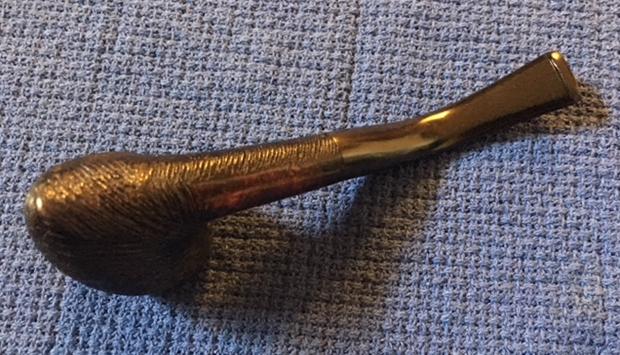
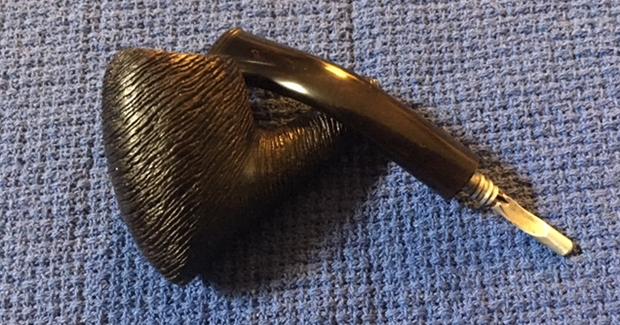
I have repaired pipes for Paresh in India over the past four months and not long ago he sent me seven of his Grandfather’s pipes to restore. It is an interesting assortment of older pipes that come from the period of 1937-1950s. His Grandfather worked for the Indian Railroad many years and was a pipeman. Paresh is also a pipeman and recently found out that his Grandfather smoked a pipe as well. The third of the pipes is an older Dr. Grabow Starfire Adjustomatic Tomahawk #21. It is stamped on the right side of the shank Starfire over Dr. Grabow. From what I can find out the pipe was part of the Continental X-Series that came in 12 unique shapes that were originally released in 1959. When the Continentals were first put into production they may have been available only by coupon in the Westbrook, Emperor and Sculptura lines, but they were available in the regular production–non coupon lines such as Viscount, Starfire and Eldorado. The coupon pipes were given XO shape numbers while the regular production lines (meaning sold in retail stores) were given standard shape numbers. The XO numbers were never stamped on the pipes, but the regular production pipes will sometimes have a stamped shape number. This particular pipe that I am working on for Paresh is a Starfire line pipe. I have included the following shape chart to help identify the pipe. It is the third pipe down in the column on the right side – shape #21. (Quoted from the late Ed James, a man who knew a lot about Grabow pipes and who is dearly missed by those of us who knew and enjoyed his company.  http://pipesmagazine.com/forums/topic/3-year-journey-complete-set-of-continental-x-series-pic-heavy.) I took the following photos of the pipe before I stated to work on it. It was probably one of the dirtiest of the pipes that Paresh’s wife Abha sent me – even then it was not that dirty because she had removed much of the cake bowl and the grime in the wire rustication.  The rim top has lava that has overflowed from the bowl and filled in the wire rustication. It is quite thick and hard. It will need to be scraped off when I started the cleaning. I am not sure what the inside edge of the rim looks like at this point because of the lava overflow. The outer edge of the bowl looks pretty good with a little wear on the front edge and back right side. The bowl still the remnants of cake left behind that I will need to take care of. I also took a close up photos of both sides of the stem. The stem significantly overclocked to the right giving the pipe an odd look. You can see the tooth chatter and calcification on the top and underside of the stem just in front of the button. It appears that the stem must have had a softee bit that was later cut off and left behind the debris.I always enjoy getting some background information on the pipeman whose pipes I am restoring when I am working estate pipes from the family members. If you have followed rebornpipes for a while you have read a few of these summaries from estates like Kathy’s Dad, Barry’s Dad and Farida’s Dad. Each of them did a great job summarizing their fathers’ estates. Since the next group of seven pipes that I will be working came to from India and belonged to the Grandfather of Paresh, I asked him to write a short tribute to his Grandfather. What follows is his writeup.

Respected Sir,

Now that the first batch of my Grandfather’s pipes has reached you, I would like to share my memories of him with you, the aim being to provide you with an insight to his personality, the era in which he lived, and a brief history associated with the pipes that I have inherited from him.

My Grandfather, Ananta (named after an exotic seasonal white flower having lovely fragrance), was born in a small coastal town of Konkan region of Maharashtra, India, in 1918. These were very turbulent times when India’s freedom struggle against British rule was gathering momentum and the atmosphere was charged with “Quit India Movement”. Having completed his graduation from Bombay, he joined Railways in 1937. This also marked the beginning of his journey into the world of pipe smoking!!!!!

Having seen his potential, in 1945, he was sponsored by the Government to visit England, for gaining further experience and expertise in his profession. This was a period when India’s Independence was round the corner and efforts were being made to train Indians for various administrative appointments in future Independent India. He returned back to India after a year, in 1946 and with him came some pipes that he had purchased in England. I believe a few of his Petes, Barlings, Charatans and GBDs are from this visit.

In 1947, when the British finally left India for good, my Grandfather was gifted pipes by his British peers, subordinates and Superior Officers as a parting gift. He stayed in touch with a few of them over all these years, even visiting them in 1959-60. Some of his later era Charatans and Barlings and Petes are from this trip. He quit smoking in early 1970s (before I was even born!!!!) and his pipes were packed up. There were a number of pipes which were used as TINDER for lighting fires (CAN’T BELIEVE IT…… I have not overcome my grief of this loss till date!!!!!) due to ignorance!!!!!!

My Grandfather was a very strict disciplinarian and temperamental (I did not know this as he was neither when dealing with me as I am the youngest of all his grandchildren!!!!!! He was always the most understanding and loving person in my life). I later learned that in his office, he was not to be disturbed when his pipe was lit, as he would be in his thinking/ contemplating mode while it was just the opposite as he lit his pipe in the evening while at home, when he would be at his relaxed best!!!!.

The interesting part is that neither of us knew that we each smoked a pipe until after his demise in Jan 2018!!!! In our culture, to this day, smoking or alcohol consumption is socially never talked about (mute acceptance!!!). It was during his last rites that absent mindedly I lighted my pipe and looking into the flickering flames of his funeral pyre, remembered and recollected all the wonderful memories and talks that we had shared. No one said a word to me about my lighting up a pipe!!!!!! Immediately thereafter, I rejoined my duty station. A few days later, my wife, Abha, received a box from my Uncle with a note that said “Grandfather would have loved Paresh to have these”. This box contained a collection of his fountain pens and 8-10 of his pipes (since then as my folks are winding up his belongings, I have received 2-3 packets and a large number of pipes, some in decent condition and some in unspeakable state). Abha immediately messaged me with pictures of these pipes and pens. I had been collecting and restoring (no major repairs, though) fountain pens since long and immediately recognized some of them as highly collectibles, however, pipes were a totally different ball game! I was inexperienced with no knowledge/ information regarding various brands/ pipe makers, shapes and materials. I knew nothing about the value of these pipes, nothing about pipe restorations, nothing about caring for them; I mean zero knowledge about collecting pipes. I smoked some real cheap Chinese pipes which were readily and unfortunately, the only ones, available in India and some inexpensive pipes from eBay India!!!!! Also regular pipe cleaning, pipe rotation, pipe cleaners and such things were unknown to me.

Thus, to know more about the REAL pipes, I embarked upon the journey of exploring finer nuances of pipe brands/ makers, their history and watching “How to videos” on packing a pipe, cleaning, repairing and caring for ones pipes. I found it extremely interesting and satisfying. It was while meandering through this confusing quagmire of pipe world that I came across rebornpipes.com website and eventually established contact with you, Mr Steve, who has since been my mentor, guide and GURU, making this journey a wonderful and satisfying experience.

Sir, there is one more thing that I need to thank you for and that is when you asked me to write a brief about my grandfather and his pipes, I realized how little I knew about him, in fact, knew nothing, as I was not even aware that he was a “pipeman” as no one in my family ever spoke about it being taboo subject and since he had quit a long time before I was even born!!!! This led me to ask the elders in my family, questions on the subject and came to know the above details. I cannot thank you enough for prodding me to get to know my grandfather and his pipes a lot better. Sir, these pipes of his, with your help and guidance, will remain with me forever in mint condition……

Thanks Paresh for this great descriptive take of your Grandfather. It really gives me a sense of the pipes that you have sent me and what they meant to him. It is obvious from the variety of pipes that you sent and the overall condition that he knew how to choose good quality pipes and obviously enjoyed smoking them throughout most of his life.

Paresh’s wife Abha cleaned the pipes before she sent them to me here in Canada and did an amazing job cleaning them up. She reamed the bowls, cleaned the rims and scrubbed the exterior of the pipes and the stems with Murphy’s Oil Soap and cleaned off the buildup on the stems. She had removed much of the cake on this pipe and done a great job cleaning the exterior of the bowl. The lava on the rim top was very hard and thick so she left that behind so as not to damage the top edge. The stamping on the right side of the shank was very readable. The stem was oxidized on both sides of the stem and had quite a bit of tooth chatter and calcification on both.

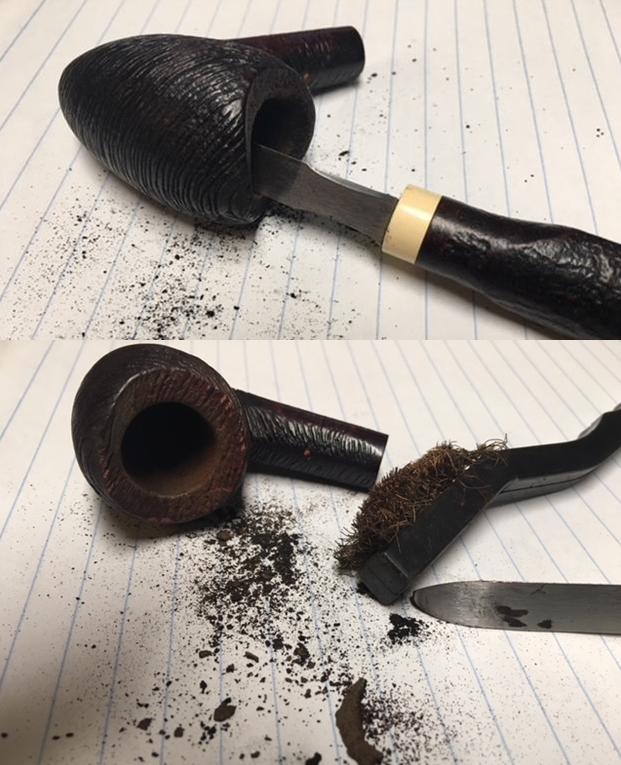
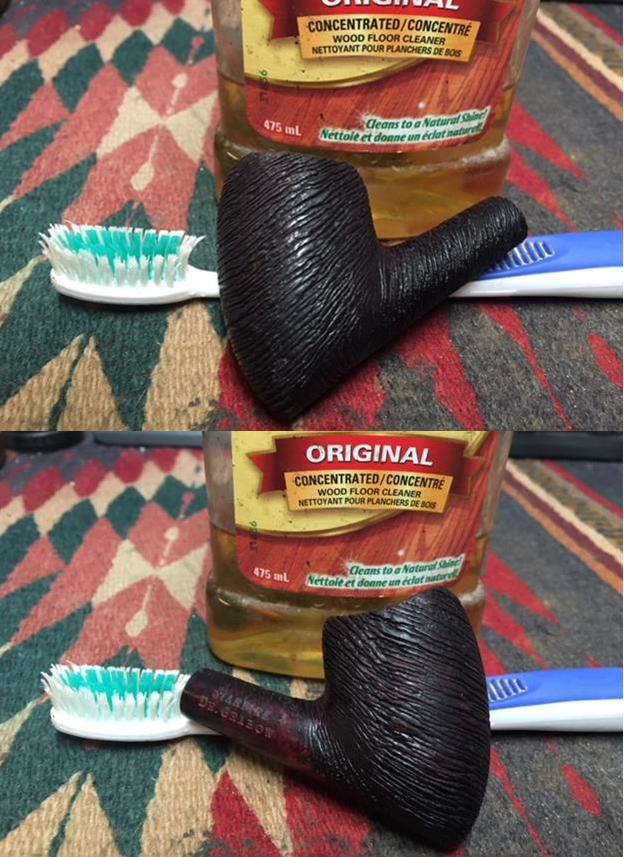
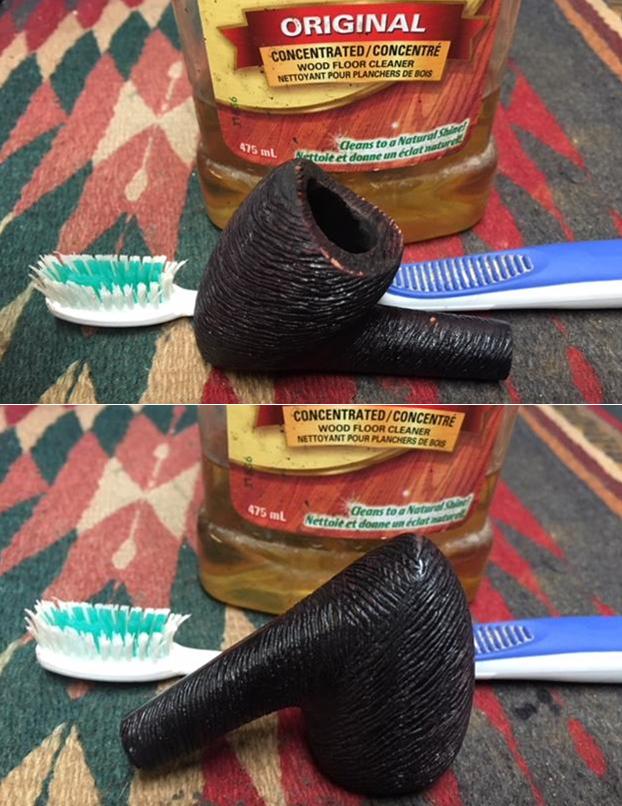
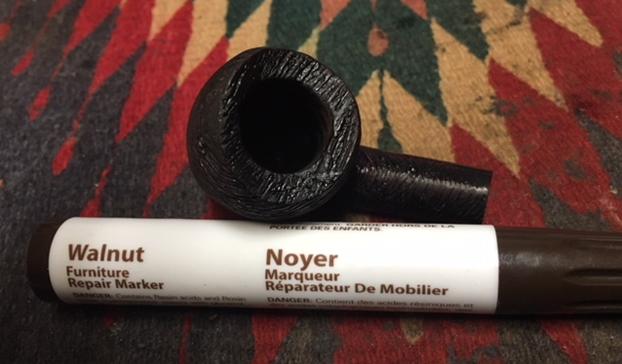
Since the stem was an adjustomatic according to what I had read I decided to work on the alignment before working on the rest of the pipe. I removed the stem and heated the metal tenon and stinger to loosen the tars and oils that had hardened on it. Once it was heated I turned the stem into the mortise and adjusted it by turning it clockwise until all was aligned.I let the heat dissipate from the stem and then removed it from the shank and started my work on the bowl itself. I cleaned up the cake in the bowl with a Savinelli Fitsall Pipe Knife and took the rest of the cake off until I had bare briar walls. I wanted to check out the condition of the interior of the bowl. It looked very good once it was cleaned off. There was no checking or cracking on the bowl walls. There was no sign of burn out inside. I scraped the rim top with the sharp edge of the Savinelli Knife and took off the thick lava that was there. I used a brass bristle wire brush to clean out the cake from the wire rustication on the surface. You can see the thick chunks of lava that came off the rim top on the white sheet of paper.I scrubbed the exterior of the bowl and shank with Murphy’s Oil Soap and a tooth brush to clean out the debris I left behind from the rim clean up. I also used the brass bristle brush with the soap to work over the rustication on the rim top. I rinsed it in running water and dried it off with a cloth. I restained the rim top with a Walnut stain pen to match the colour of the rest of the bowl. I touched up random spots on the shank and bowl sides where the finish was worn or nicked.I cleaned out the mortise and the airway in the shank with pipe cleaners, cotton swabs and alcohol. It took a lot of scraping and scrubbing to remove all of the thick tars and oils that had accumulated around the Grabow spoon stinger.I worked Before & After Restoration Balm deep into the briar to clean, enliven and protect it. I worked it into the finish with my fingertips. I worked it into the rim and shank end. I set it aside for a few minutes to let the balm work. I wiped it off and buffed it with a soft cloth to polish it. The briar really began to have a deep shine. I took some photos of the bowl at this point to mark the progress in the restoration. The bowl is really beginning to look good and the pipe is waxed I think it will really have a rich glow to wire rusticated finish.  I set the bowl aside and worked on the stem. I used a brass bristle wire brush to clean off the spoon stinger enough that I could remove it and clean out the rest of the stem. I cleaned up the stinger and the airway in the stem with pipe cleaners, cotton swabs and alcohol until they were clean. I would buff the metal with the buffing wheel to take off the rest of the staining later. I sanded out the tooth chatter and the calcification on both sides of the stem at the button with 220 grit sand paper.I polished the stem with micromesh sanding pads – wet sanding with 1500-2400 grit sanding pads and dry sanding with 3200-12000 grit pads. I wiped the stem down with Obsidian Oil after each sanding pad. I finished polishing the stem with Before & After Pipe Stem Polish both Fine and Extra Fine to remove the last of the scratches. I gave it a final coat of Obsidian Oil and set it aside to dry. With the stem polished I put it back on the pipe and lightly buffed the bowl and more heavily buffed the stem with Blue Diamond. I gave the bowl several coats of Conservator’s Wax and the stem multiple coats of carnauba wax. I buffed the pipe with a clean buffing pad to raise the shine and hand buffed it with a microfiber cloth to deepen the shine. The pipe polished up pretty nicely. The finished pipe is shown in the photos below. I have four more of Paresh’s Grandfather’s pipes to finish and then I will pack them up and send across the sea to India where he can carry on the legacy. I know that he is looking forward to having them in hand and enjoying a bowl of his favourite tobacco in memory of his Grandfather. Thanks for walking through the restoration with me as I worked this pipe over.


Restoring a Kaywoodie Prime Grain 40 Saddle Stem Billiard??


Blog by Steve Laug

In my gift box of pipes to refurbish there was a small Kaywoodie pipe that I would have called a Lovat but as I learned in looking up the line and shape number I would find that Kaywoodie called it something different. The red arrow points to the KW shape 40. KW

It is stamped on the left side of the shank Kaywoodie over Prime Grain over Imported Briar. On the right side of the shank it is stamped with the shape number. The stem was a short saddle stem. The pipe is in decent shape – certainly restorable. The finish was gone but there was some great grain on the back, front and sides of the bowl. The rim was a mess – out of round, scratches and knocked about enough to lose its sharp profile and edges. The bowl looked as if it had been reamed with a pocket knife. There was an oddly formed cake due to the scraping with the knife. The stem was clean but the button was misshapen with a large part of the top edge missing. The inside of the shank was dirty and the threaded tenon was black with a tarry build-up.KW1

KW2

KW3

KW4 Holding the pipe in hand I would call it a Lovat. Look at the pictures above and see if you would not agree to the shape designation. The problem is I turned to the Kaywoodie shape and line chart below and found that pipe shape #40 is designated as a saddle stem billiard. The first red arrow in the first shape chart below highlights the description on the catalogue picture. The second red arrow points out the line – Prime Grain – a mid-priced pipe in the KW line. So it looks like the pipe is a saddle stem billiard – even though personally I would still call it a Lovat.KW5 The next photo is a close of the state of the rim. You can see the knife damage on the inner edge of the rim and the scratches, dents, rounding that has been done to the top and outer edge of the bowl. The rim really was the part of this pipe that was in the worst condition.KW6 The next photo shows the rounded outer edges of the rim and the state of the KW thread stinger apparatus. It is a three hole stinger even though the inlaid black cloverleaf in white seems to point to an early era KW pipe.KW7 To begin work on repairing the rim edges I needed to ream the bowl. I used a PipNet reamer to take the bowl back to bare wood. I find that doing that gives me a clean surface to work on with the inner rim edge. The second photo below shows the freshly reamed bowl.KW8

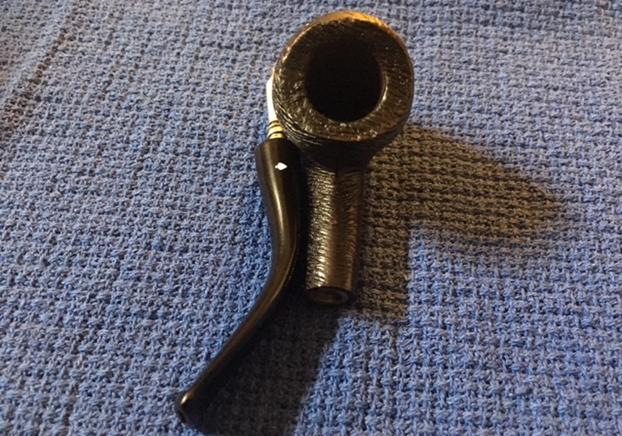
KW9 With the bowl reamed it was time to top the bowl. This would be a fairly serious topping job – not a light one. There was a lot of damage to remove and it would take a fair bit of sanding to bring the top back to flat with sharp outer edges. I used my normal topping board and 220 grit sandpaper to top the bowl. I sand it in a clockwise circular motion.KW10 I checked my progress quite often as I topped the bowl. I sanded until the damage to the top of the rim and outer edge were gone. The process also cleaned up much of the damage to the inner edge of the rim as well.KW11 I wiped the stinger and the bowl down with acetone on cotton pads to clean up the aluminum stinger and to remove the remaining finish on the bowl and shank.KW12 The stem was overclocked about a ¼ turn. I used a lighter to heat the stinger until the glue was warm in the stem and then turned it back into the mortise and realigned the stem.KW13

KW14 The bowl had some deep, sharply edged dents in the briar. I cleaned them out and then used clear super glue and briar dust collected from topping the bowl to fill the dents.KW15

KW16

KW17 I sanded the patches with 220 grit sandpaper and then with medium and fine grit sanding sponges to remove the excess and blend them into the surface of the briar.KW18

KW19

KW20 I built up the top of the button with black super glue until it was close to the original thickness. I would sand and reshape it once it had cured.KW21 I stained the bowl with a dark brown aniline stain thinned 3 parts to 1 part alcohol. I flamed it and restained until the finish had an even coverage.KW22

KW23 I hand buffed the bowl and shank with a cotton cloth that served to give it a light polish and also smoothed out the stain on the surface of the bowl, rim and shank.KW24

KW25

KW26

KW27 The stain was still too opaque to my liking and hid the grain on the pipe so I wiped it down with isopropyl alcohol on cotton pads to remove some of it and allow the grain to show through the finish.KW28

KW29

KW30

KW31 The photo below shows the pipe when I had finished wiping it down with alcohol. The finish is exactly what I was aiming for. I wanted it to be a warm brown that hid the repairs to the dings in the finish. It worked well.KW32 I sharpened the edge of the button with a needle file and then sanded the stem with 220 grit sandpaper and a medium and fine grit sanding sponge.KW33

KW34

KW35 I continued to sand with micromesh sanding pads – wet sanding with 1500-2400 grit pads and dry sanding with 3200-12,000 grit pads. Between each set of three pads I rubbed the stem down with Obsidian Oil and then continued with the next set. When I had finished sanding with the 12,000 grit pad I rubbed it down a final time and then buffed it with White Diamond on the buffing wheel.KW36

KW37

KW38

KW39

KW40 I buffed the bowl and stem with White Diamond, cautiously around the stamping on the shank. I gave it multiple coats of carnauba wax and lightly buffed the pipe with a soft flannel buff. The finished pipe is shown below.KW41

KW42

KW43

KW44 In the process of repairing the inner edge of the rim I used a folded piece of sandpaper to bevel the inner edge to bring it back to round and to deal with the divot out of the left side of the edge. The finished rim is shown in the close up photo below. The inner edge is better than it was when I started and looks close to round. I have included a variety of photos of the rim and the stem for your viewing. This should be a great smoking old Kaywoodie.KW45

KW46

KW47