Blog by Steve Laug
 I have quite a few of the pipes in this collection that we purchased from the older gentleman. He sent me the photos and I was amazed at what I saw. You have seen many of the pipes that he had. These included Dunhill, BBB, Orlik, Barclay Rex, a cased Ben Wade, an H. Simmons all briar, Hardcastles and some Meerschaums. There were also some assorted others that I will get to in the days ahead. It was a great collection.
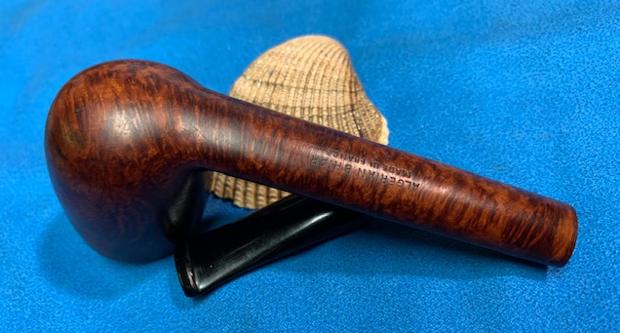
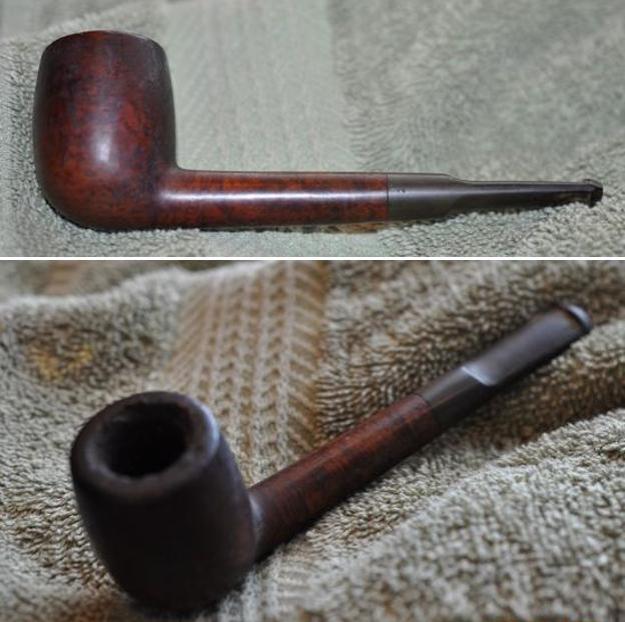
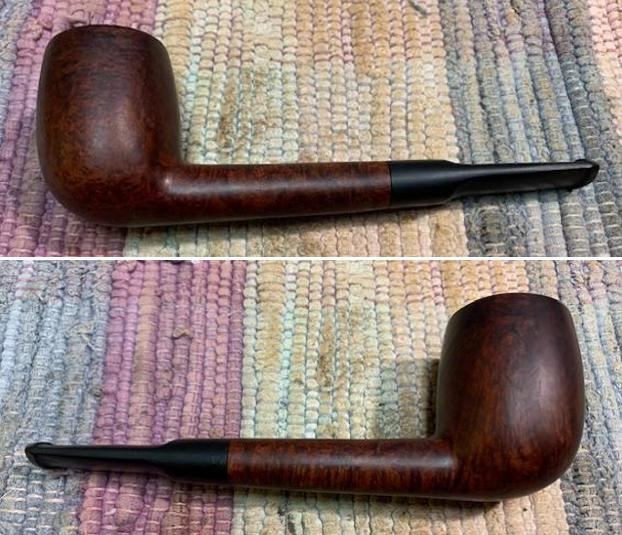
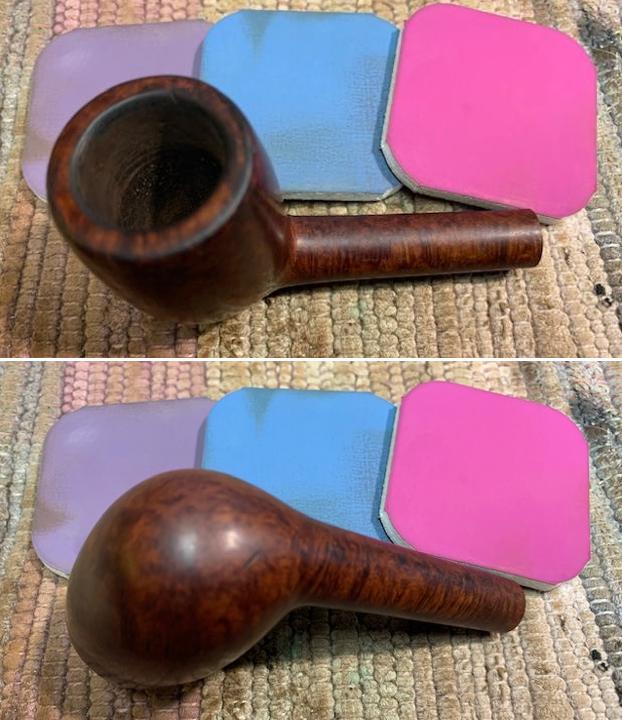
Now it was time to work on some of the single pipes that he had. The next one of these is a beautifully grained Canadian that is stamped on the underside of the shank. It reads ALGERIAN BRIAR [over] Made in France [over] 421. The stamping is clear and readable. It is a nice looking Canadian. The short taper vulcanite stem does not have any stamping on either side. It is the lower pipe in the above photo.
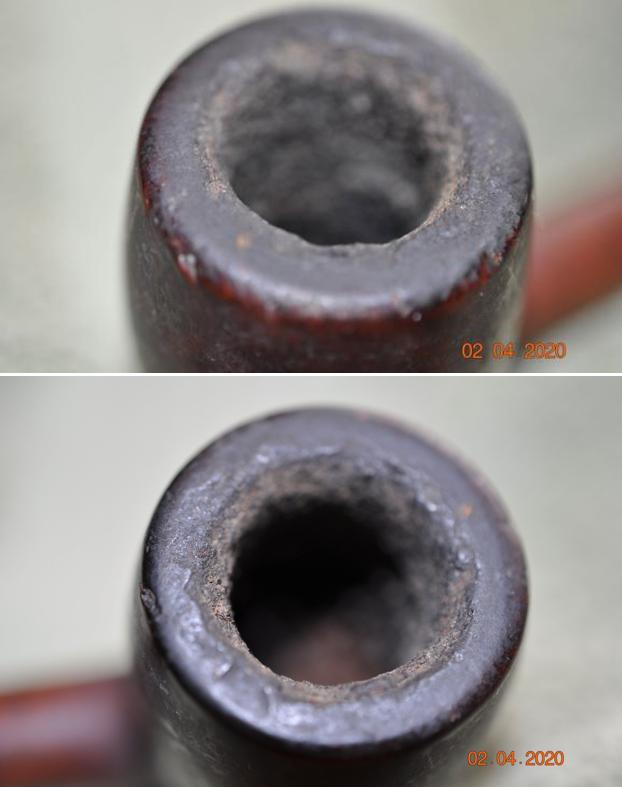
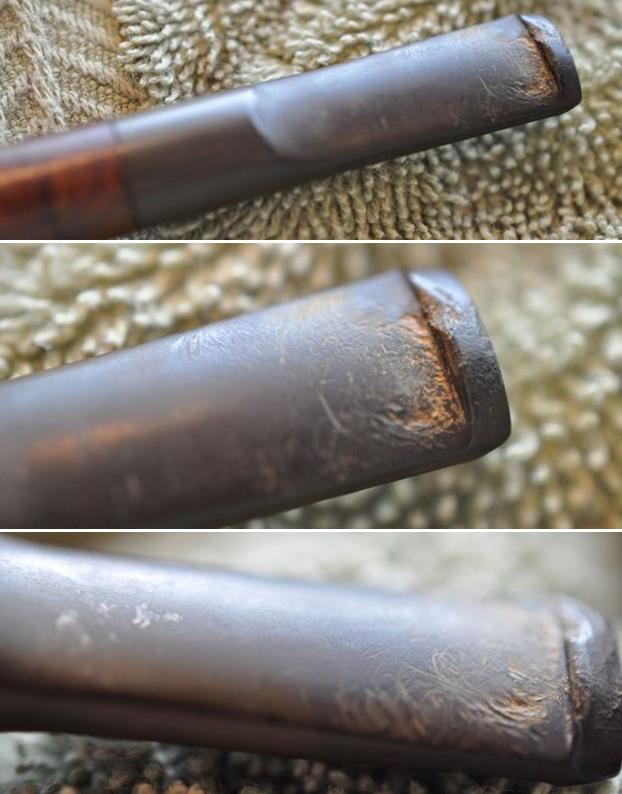
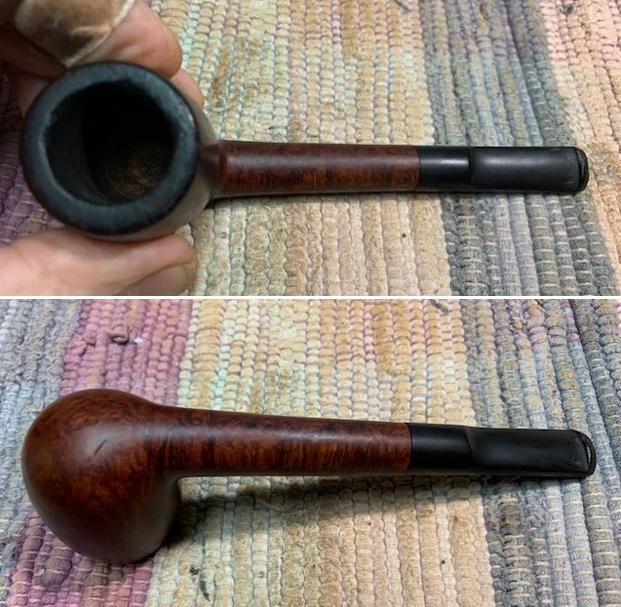
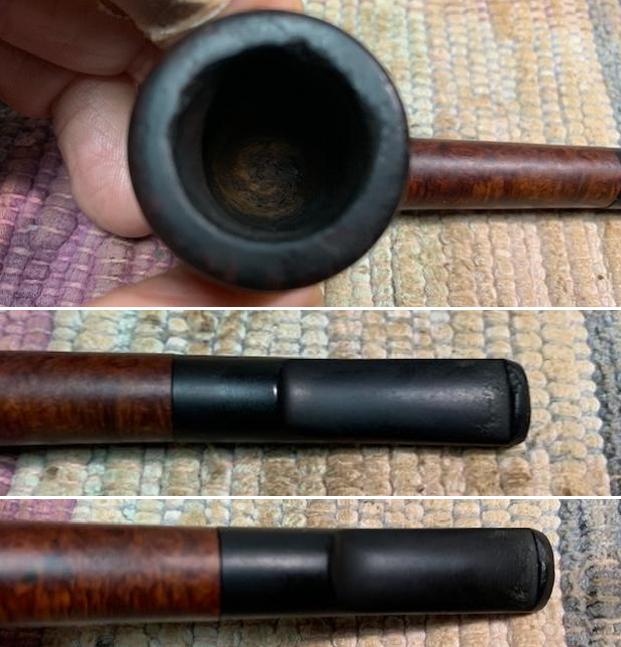
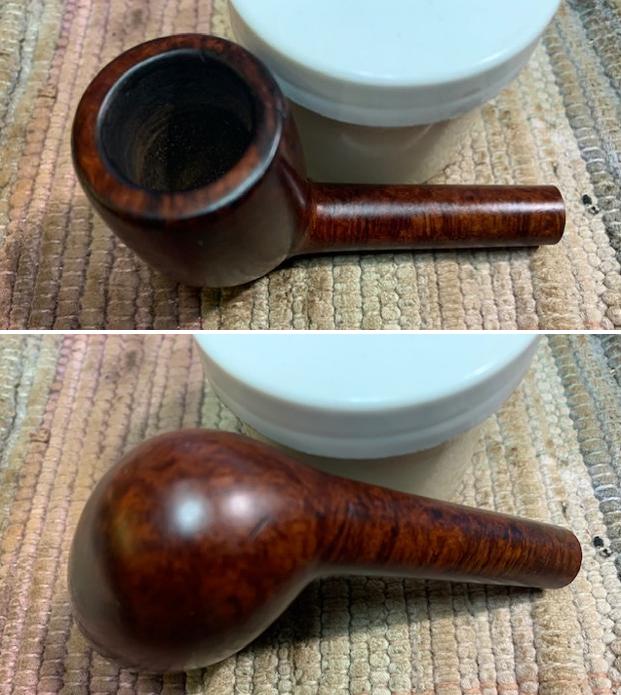
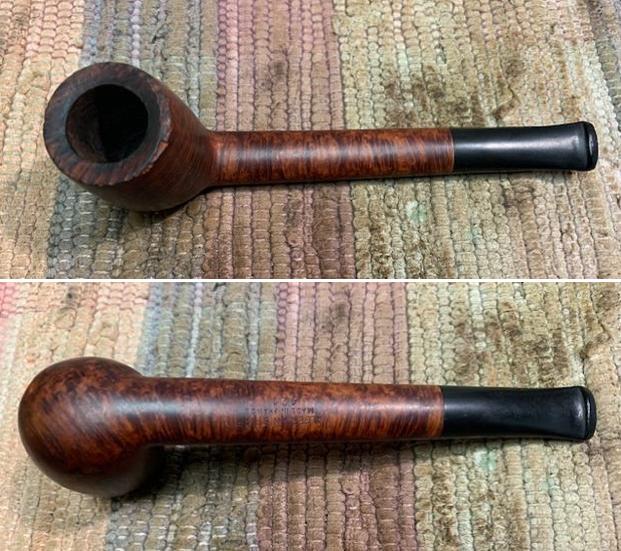
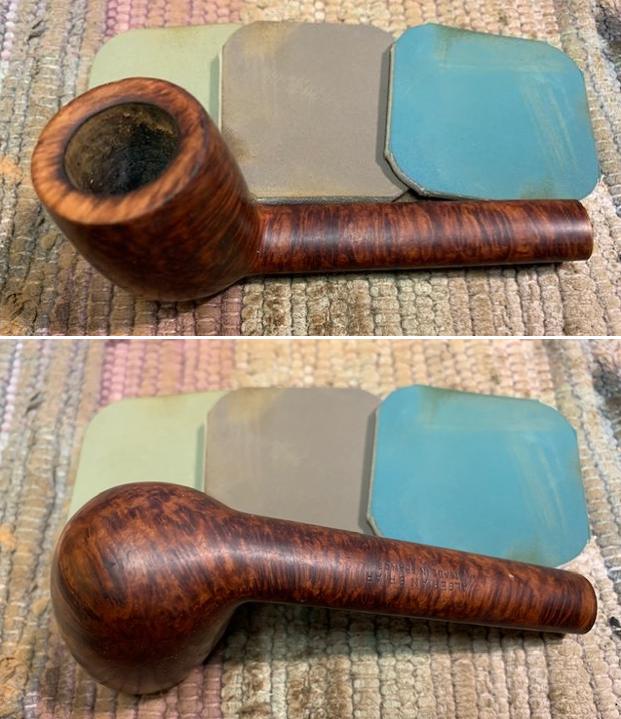
Jeff took some photos of the ALGERIAN BRIAR 421 CANADIAN before he worked his magic in cleaning up the pipe. It is a an interesting pipe with a lot of potential and what appears to be some great grain under the grime and debris of the years.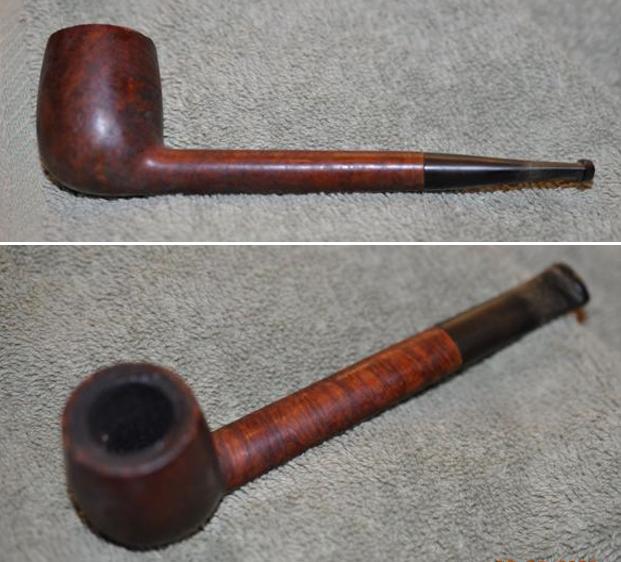 Jeff took photos of the bowl, rim top to show the thickness of the cake in the bowl and the thick lava on the rim top. The rim top and both inner and outer edges are so thickly covered that it is hard to know their condition. It appears that there are some nicks and chips on the outer edge that are quite deep. All of the issues will become clearer after the clean up. He took photos of the top and underside of the vulcanite stem showing the oxidation, calcification, tooth marks, chatter and wear on the stem and button.
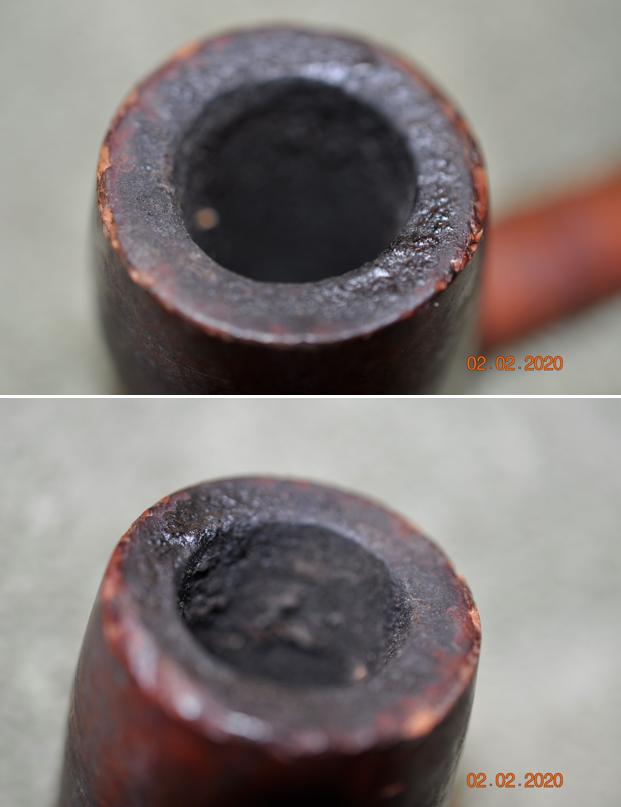
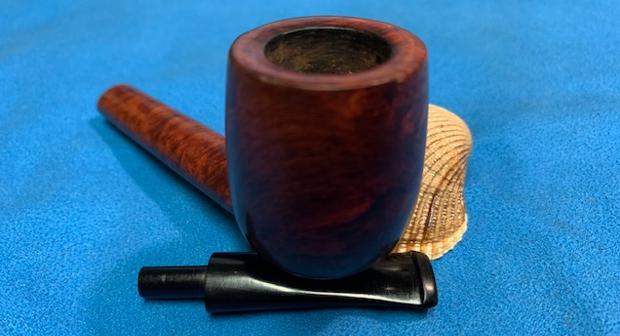
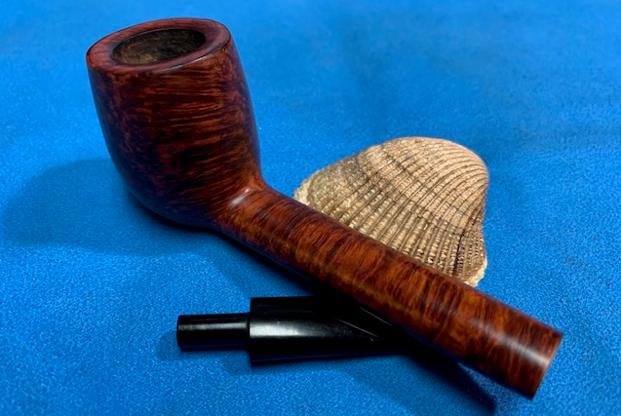
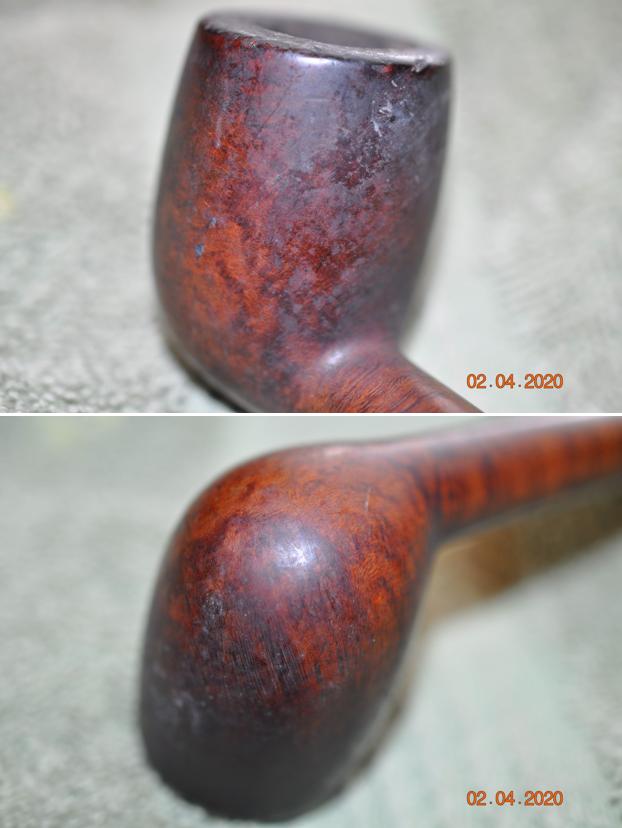
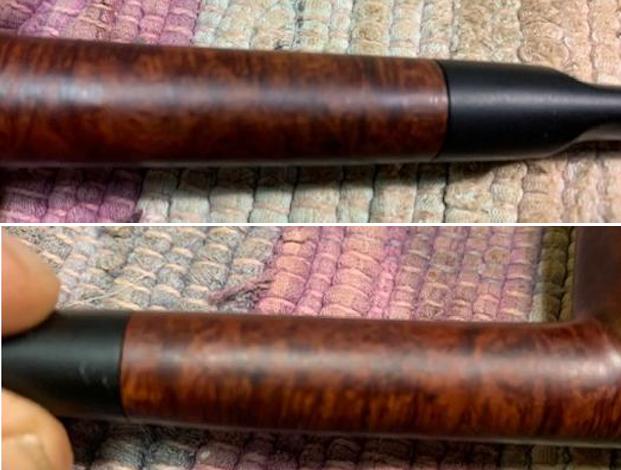
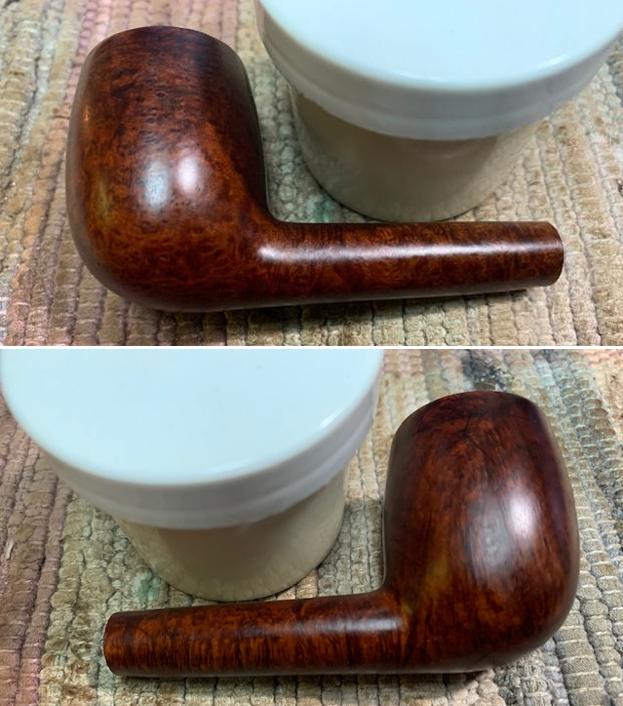
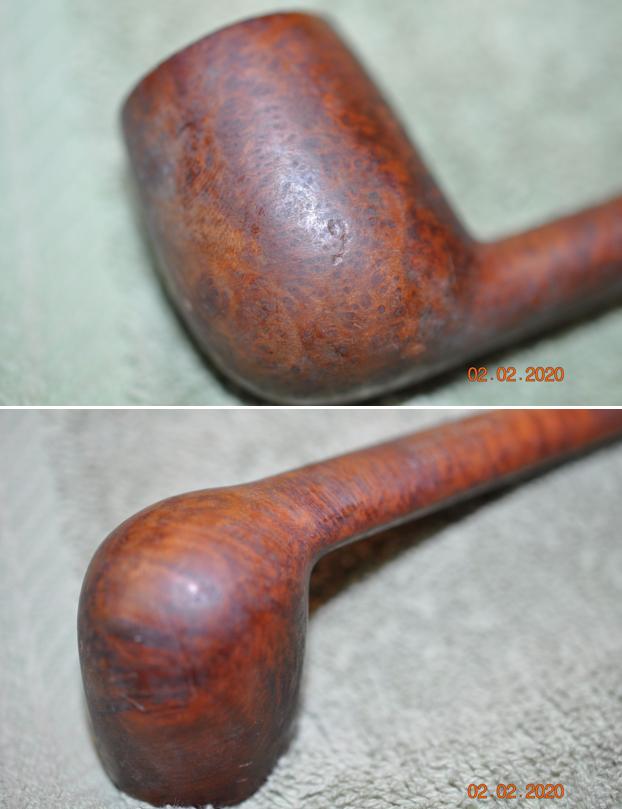
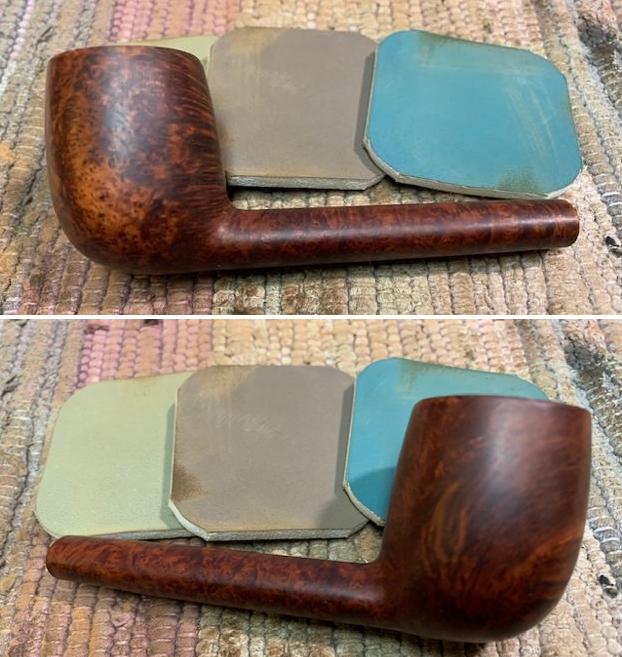
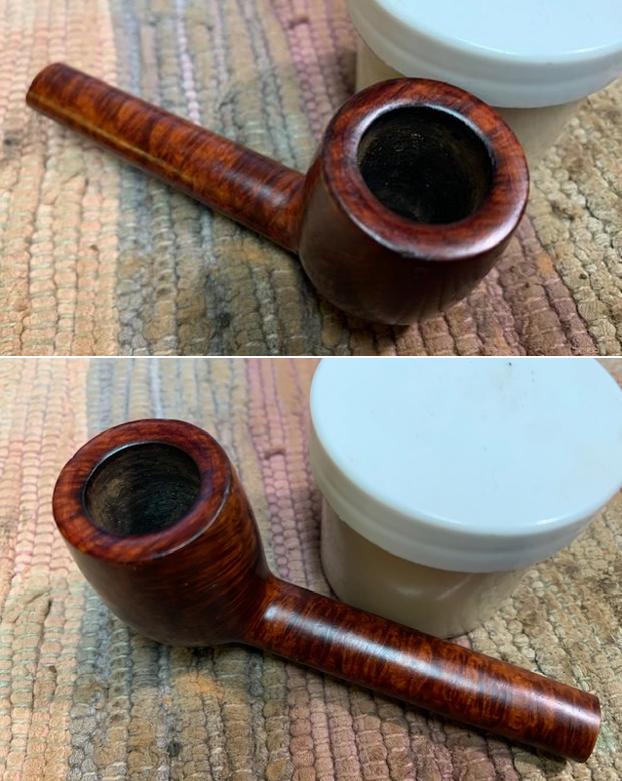
 Jeff took photos of the sides and heel of the bowl to show the condition of the briar. You can see the beautiful shape of the bowl and some interesting grain even through the dirt and debris of many years.
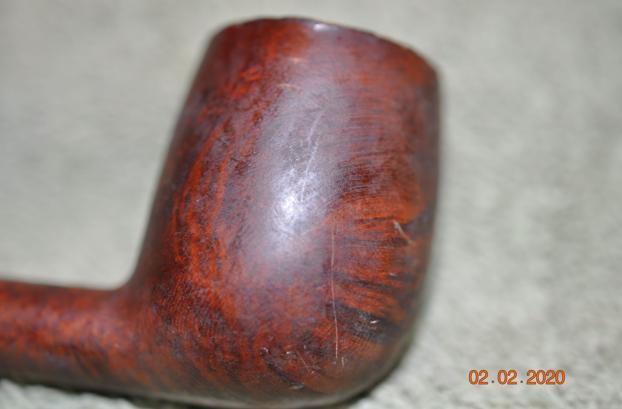
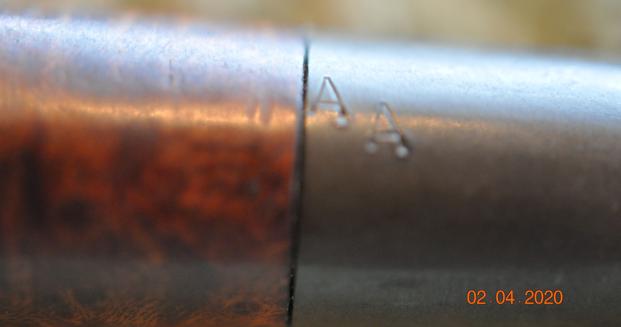
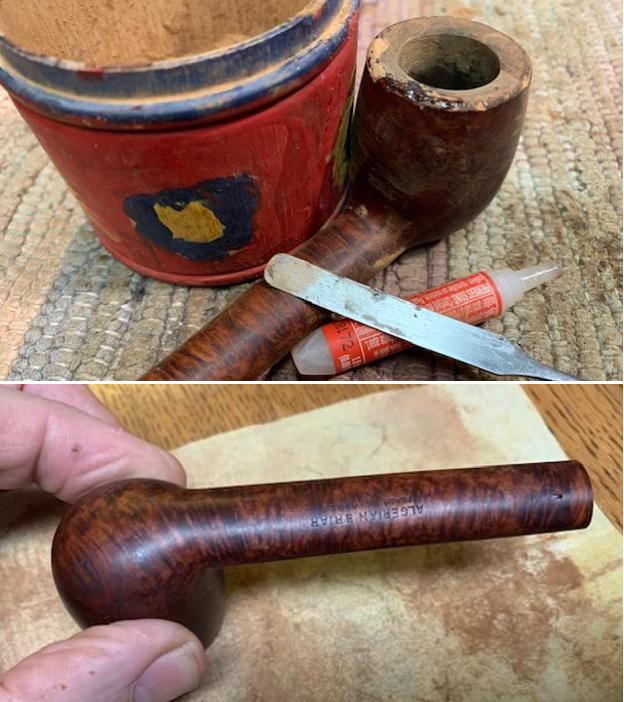
 Jeff took a photo of the stamping on the underside of the shank to show the clarity and readability of the stamp. It reads as mentioned above.
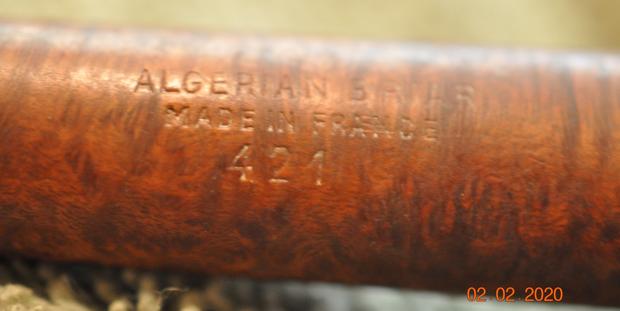 This Algerian Briar French Made Canadian is a great looking pipe. Because the old gentleman that we bought the pipes from intimated that he purchased it at the Manhattan Barclay-Rex store I wonder if these were pipes made for them. I was unable to pin down any information regarding the date this pipe was made but the fact that it is among the old timers I have been working on makes me think it is older as well.
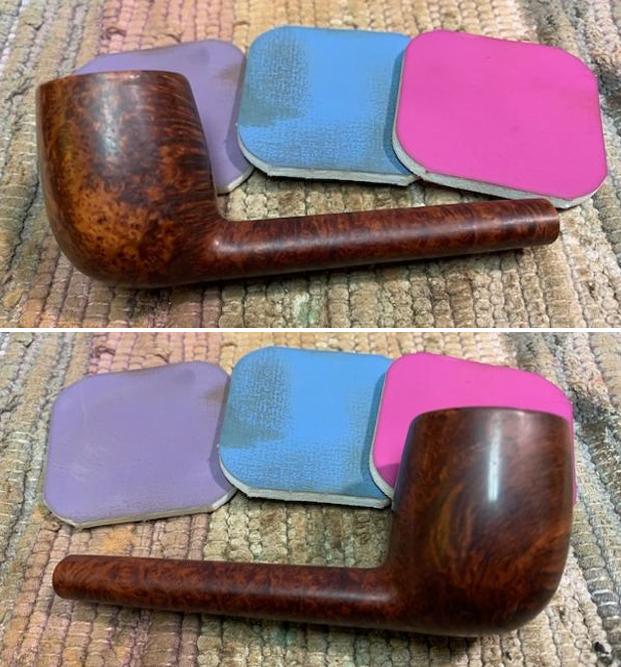
Jeff carefully cleaned the pipe. He reamed it with a PipNet pipe reamer and then cleaned up the reaming with a Savinelli Fitsall Pipe Knife. He scrubbed out the internals of the shank, stem and shank extension with alcohol, pipe cleaners and cotton swabs until the pipe was clean. He scrubbed the exterior of the bowl with Murphy’s Oil Soap and a tooth brush to remove the grime and grit on the briar and lava on the rim top. The finish looks much better and has a deep richness in the colour that highlights the dimensions of the grain. The rim top was in rough condition with nicks and gouges on the top and on the inner and outer edges. He soaked the stem in Briarville’s Pipe Stem Deoxidizer and scrubbed it with Soft Scrub to remove the remnants of oxidation. When the pipe arrived here in Vancouver I was amazed that it looked so good. Here are some photos of what I saw. 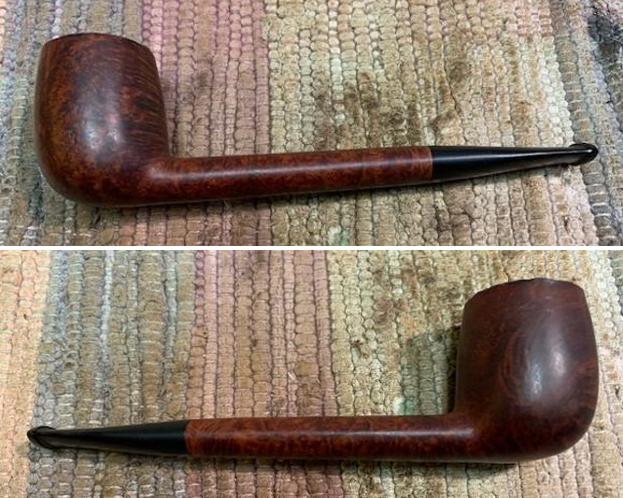
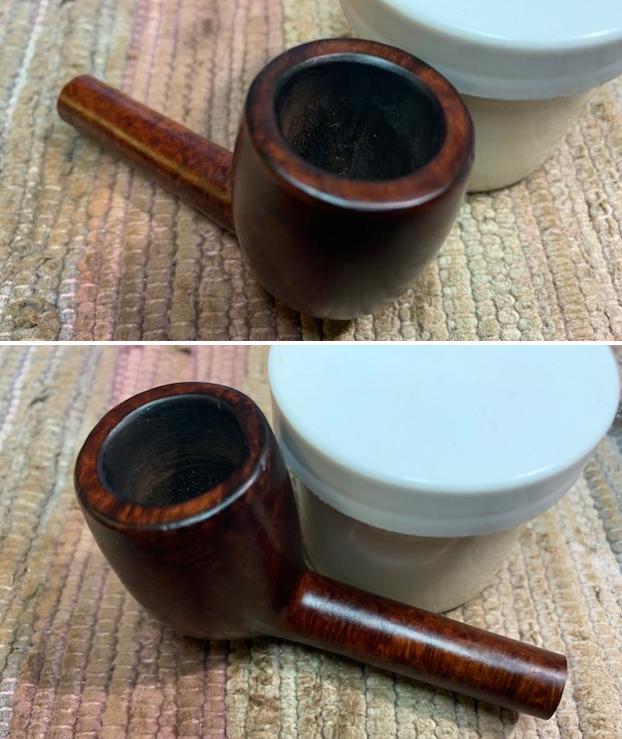
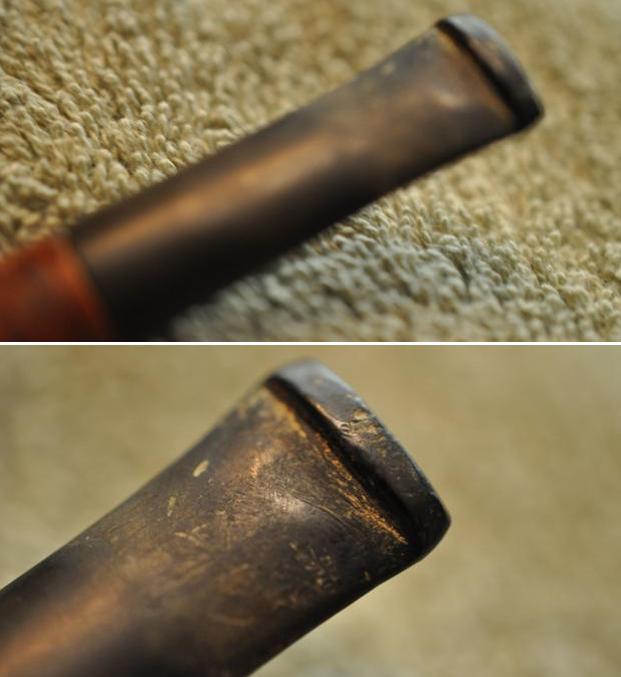
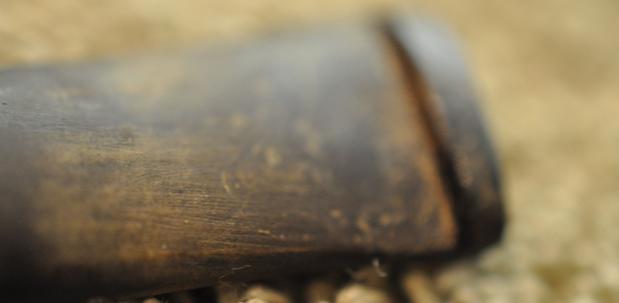
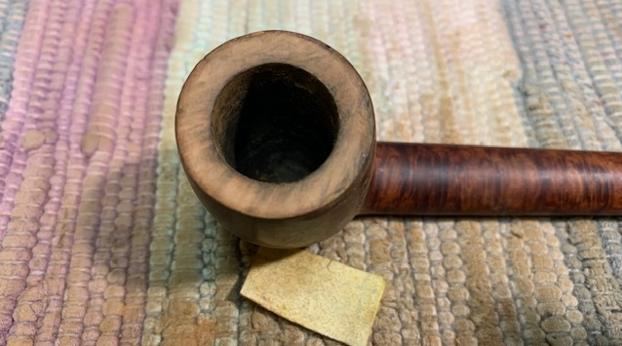
 I took some close up photos of the rim top and the stem surface. The top and inner and outer edge of the rim were in rough condition. There was serious damage back outer edge of the bowl. The stem had deep tooth marks just ahead of the button and on the button surface.
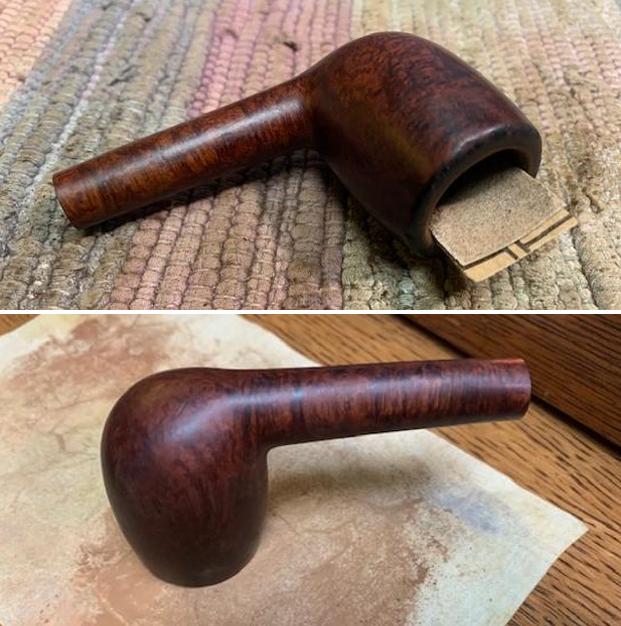
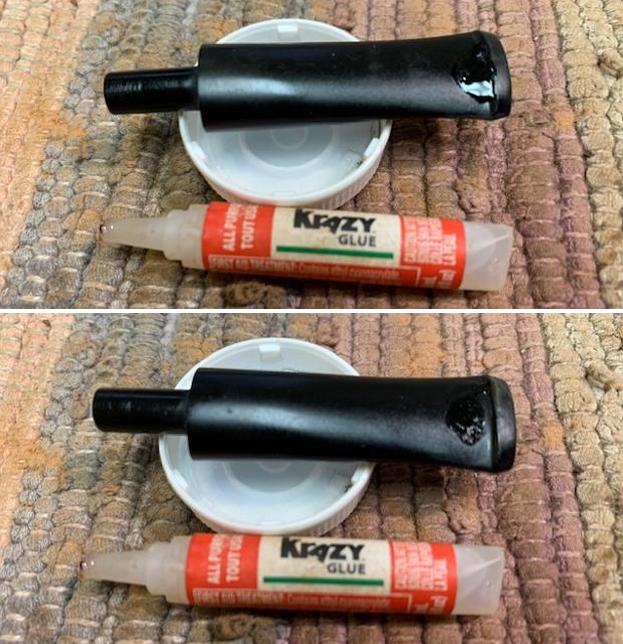
 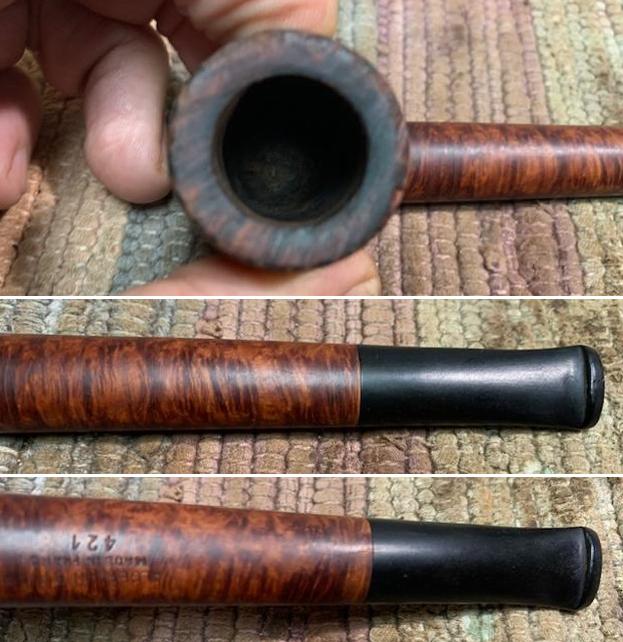 I removed the stem from the shank and took a photo of the parts of the pipe.
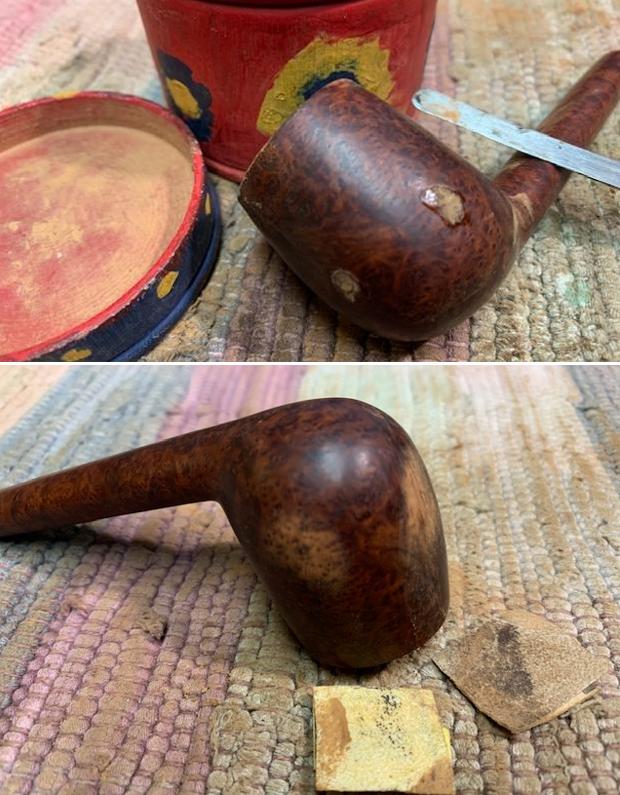
 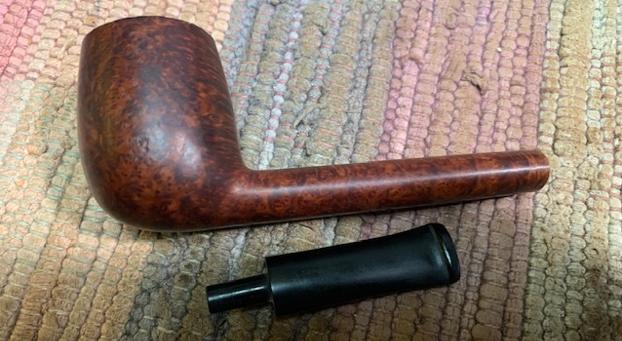 I started my work on the pipe by dealing with the damaged rim top and edges. I worked on the inner edge cleaning up the bevel with 180 grit sandpaper. I rebuilt the damaged outer edge on the bowl on the back of the pipe with clear CA glue and briar dust. I topped the damaged rim top on a topping board with 220 grit sandpaper to smooth out the damage. I used a folded piece of 220 grit sandpaper to smooth the roughness on the outer edge of the rim.
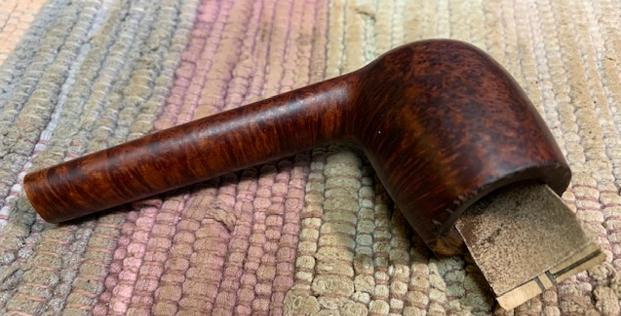
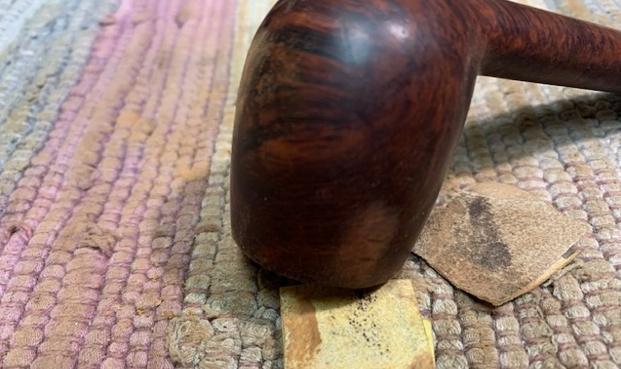
 Next I turned to the gouges in the sides of the bowl. I filled them in with clear CA glue and briar dust. Once the repairs cured I sanded them smooth with 180 and 220 grit sandpaper.
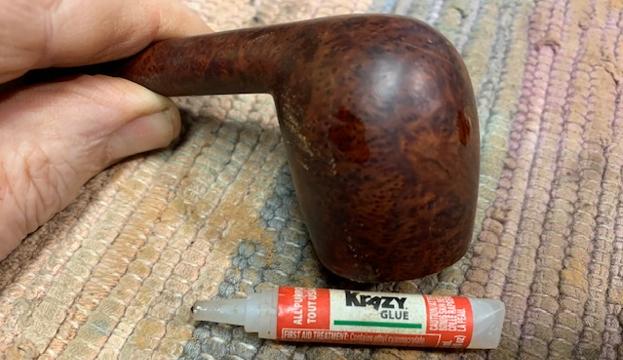
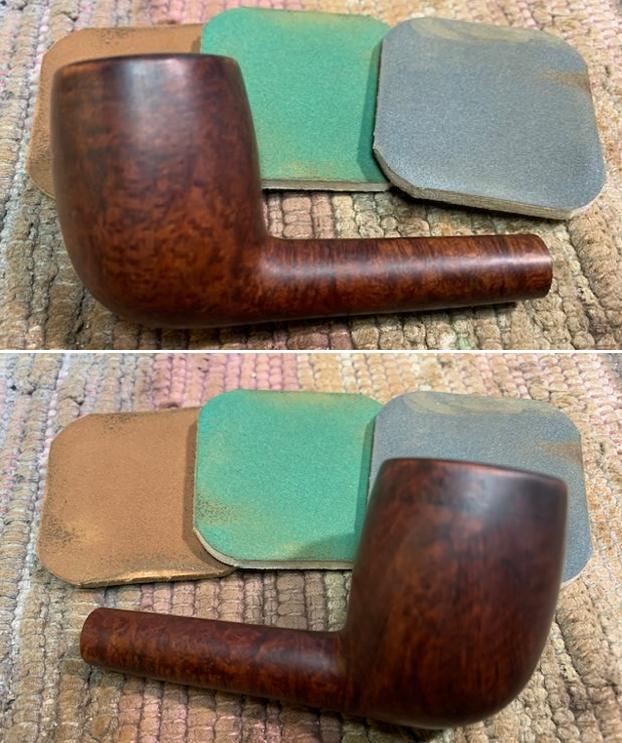
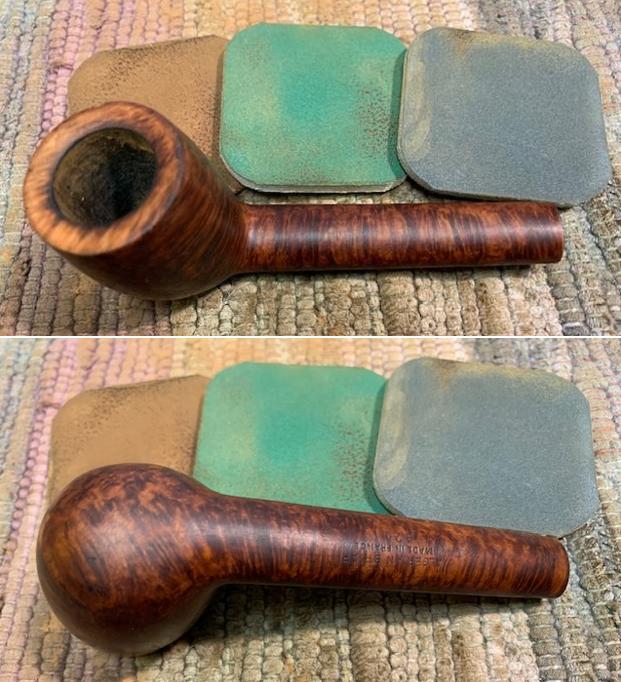
 I polished the briar with micromesh sanding pads – dry sanding with 1500-12000 grit pads. I wiped the briar down after each grit with a damp cloth. The grain began to really stand out.
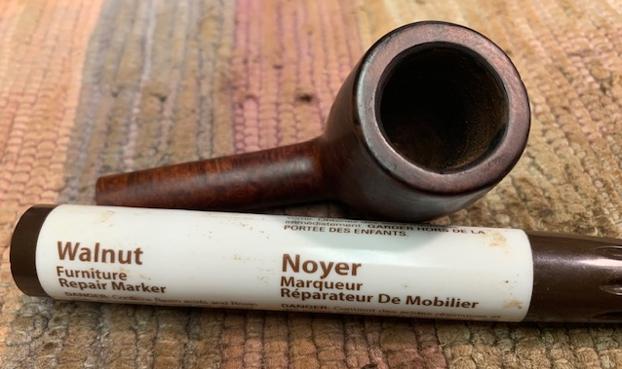
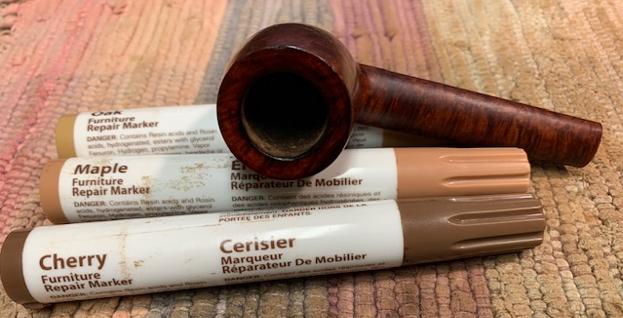
 Once it was finished I stained the rim top and edges with a combination of Cherry, Maple and Oak stain pens to blend the areas I had sanded into the rest of the bowl.
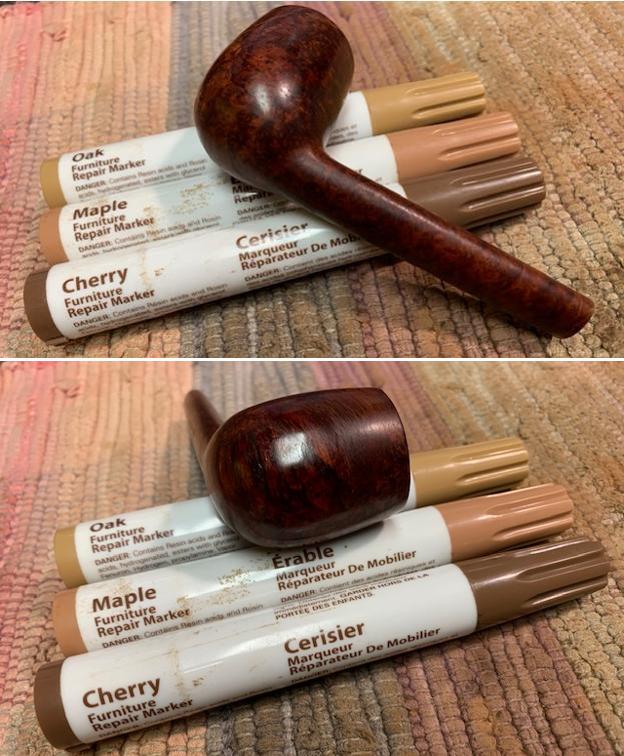
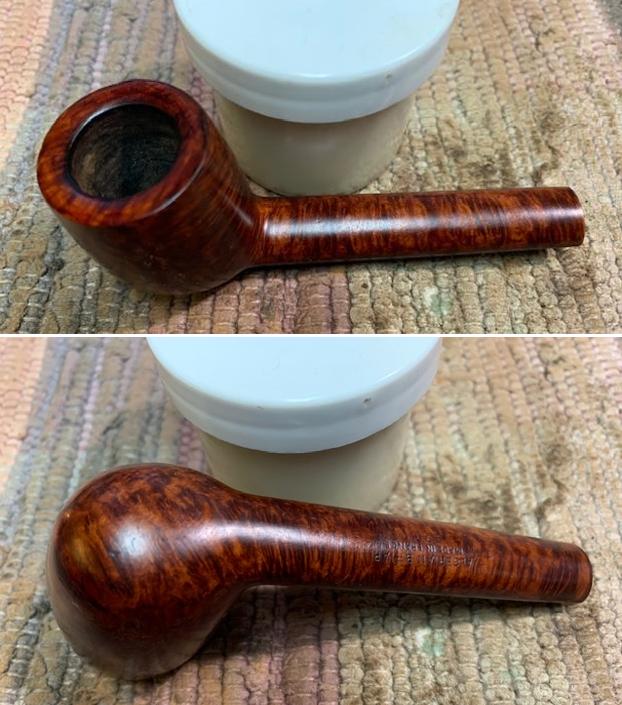
 I worked some Before & After Restoration Balm into the surface of the bowl and shank with my fingertips to clean, enliven and protect the briar. I let the balm sit for 15 minutes and then buffed with a cotton cloth to raise the shine. The photos show the bowl at this point in the restoration process.
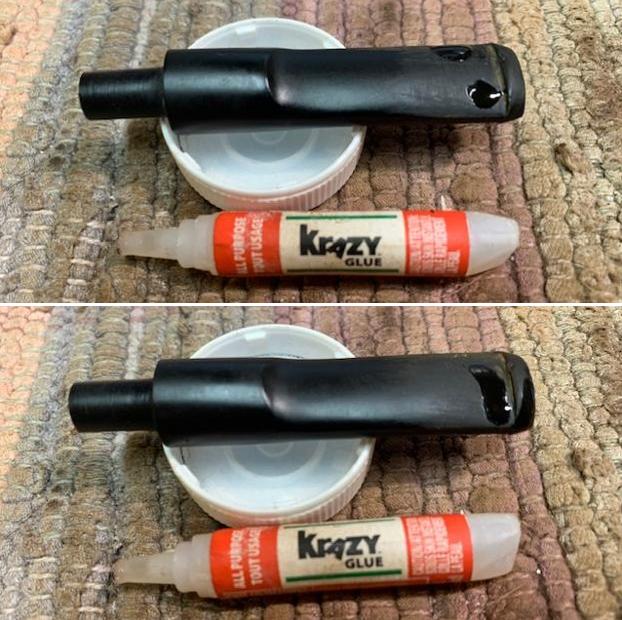
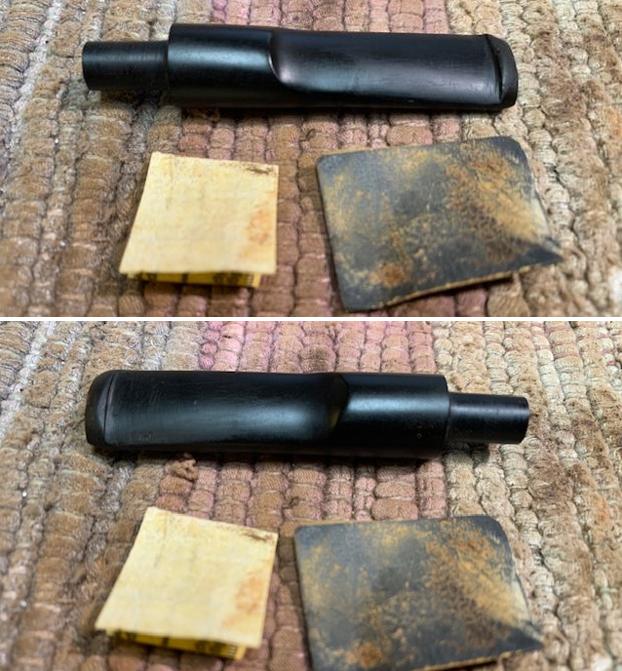
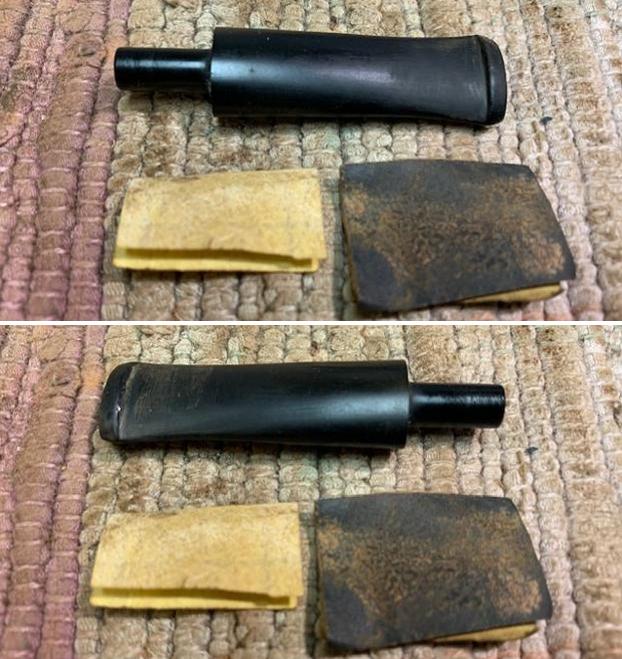
 I set the bowl aside and turned my attention to the stem. I “painted” the stem surface with the flame of a lighter to lift the marks. Many lifted all the way but those that remained I filled in with clear CA glue. Once it cured I sanded it with a folded piece of 220 grit sandpaper to blend them in the rest of the stem surface. I started polishing the stem with 400 grit wet dry sandpaper. As I sanded it I was not surprised to find flecks of metal in the rubber which helped in dating the pipe to the war years of the 30s and 40s.
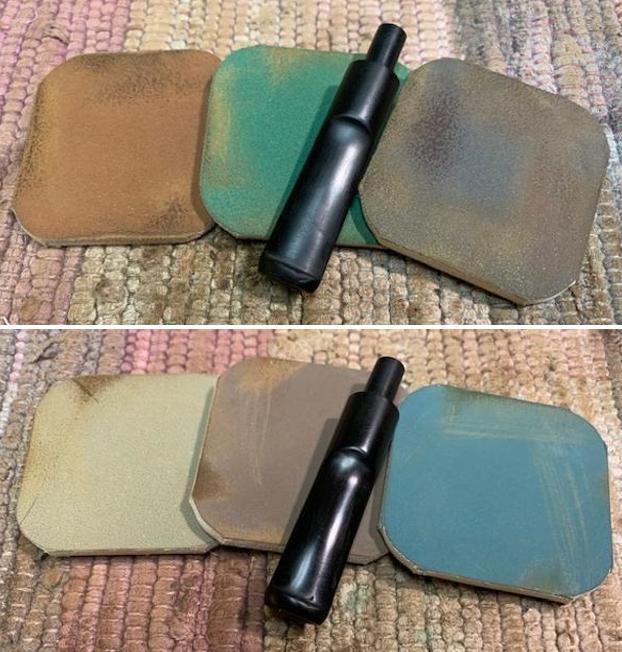
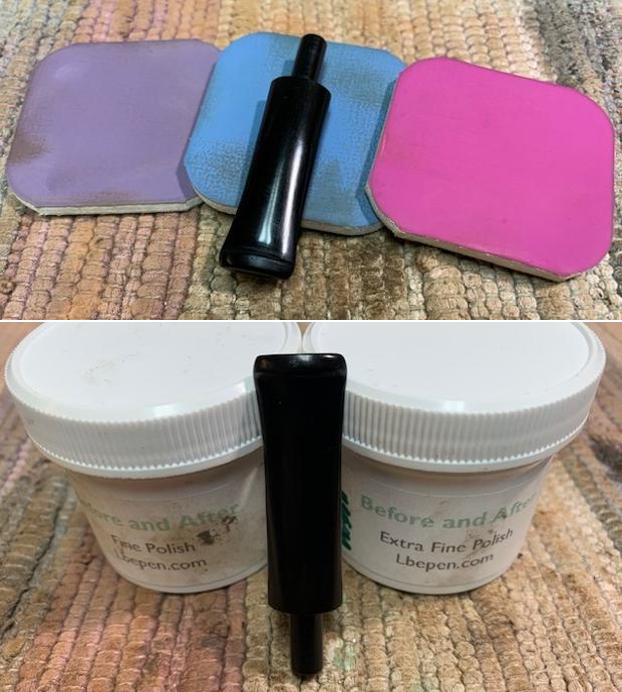
 I polished the stem with micromesh sanding pads – dry sanding with 1500-12000 grit sanding pads. I wiped it down after each sanding pad with Obsidian Oil. I polished it with Before & After Pipe Stem Polish – both Fine and Extra Fine. I gave it a final coat of Obsidian Oil.
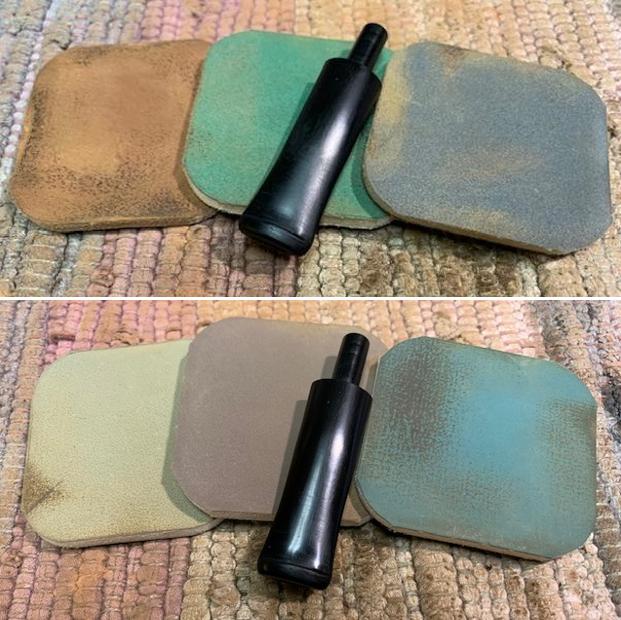
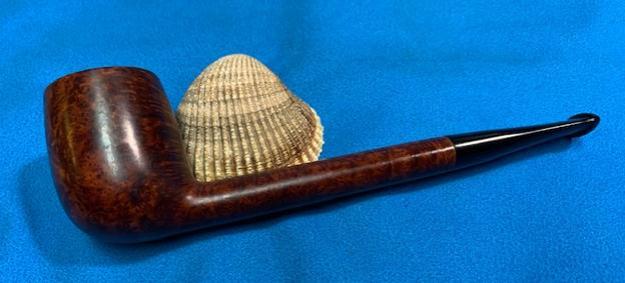
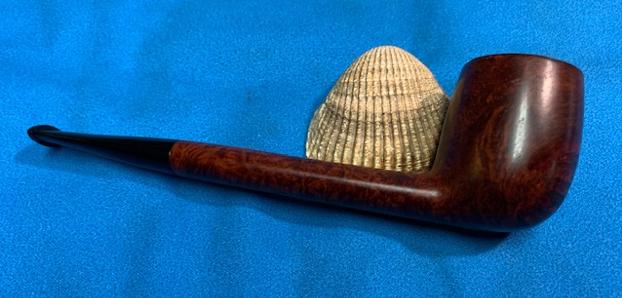
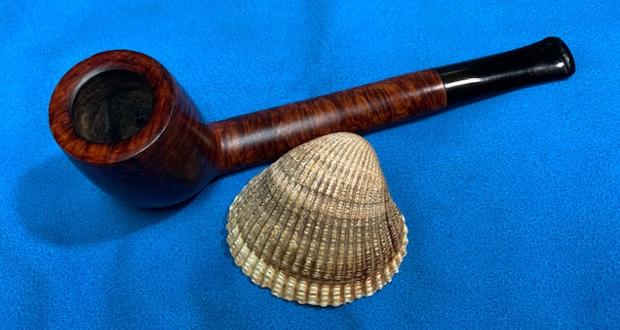
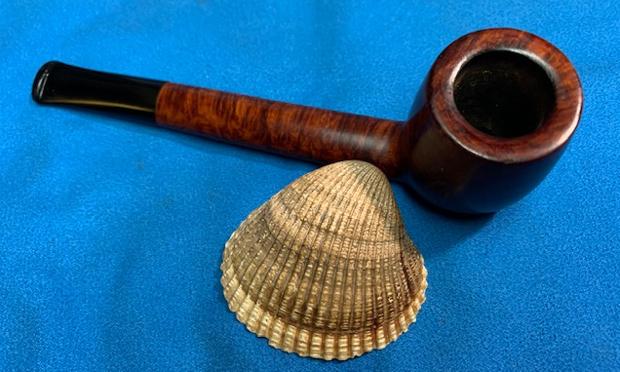
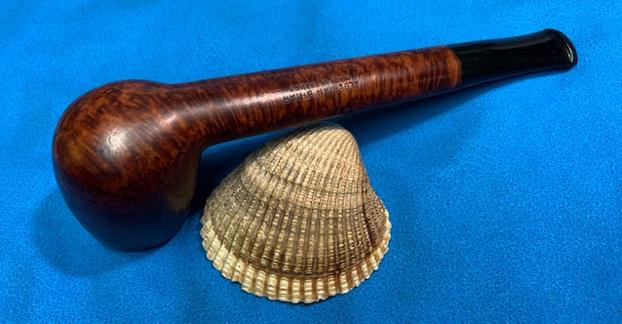
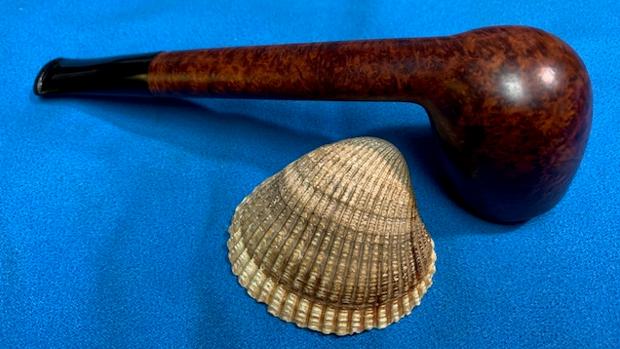
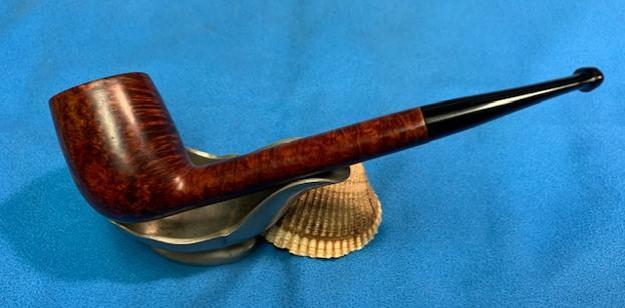
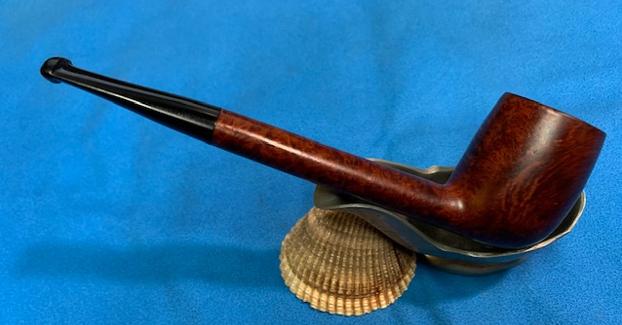
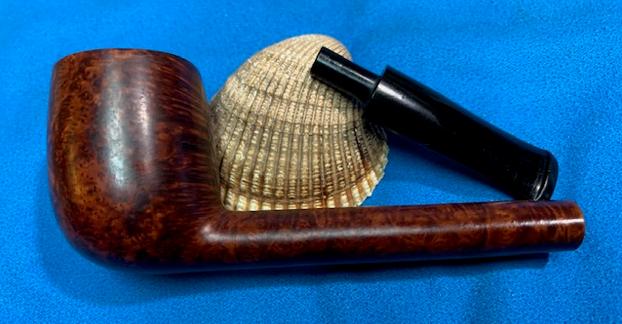
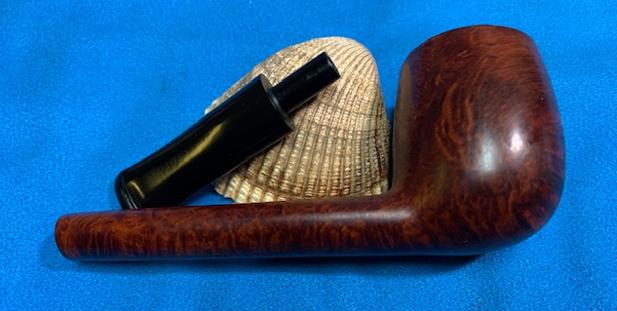
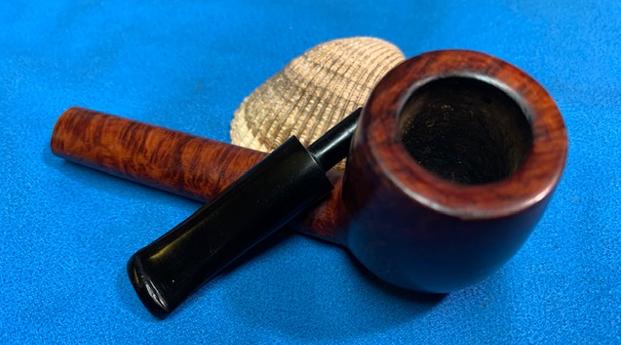
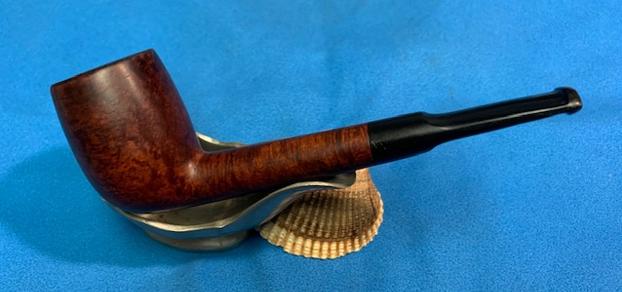
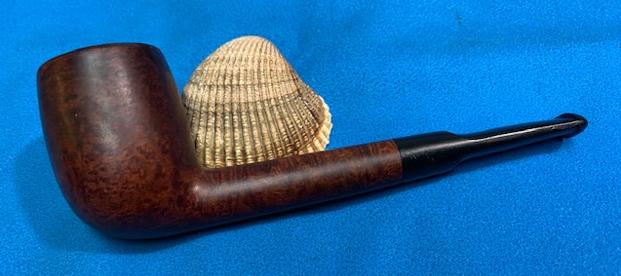
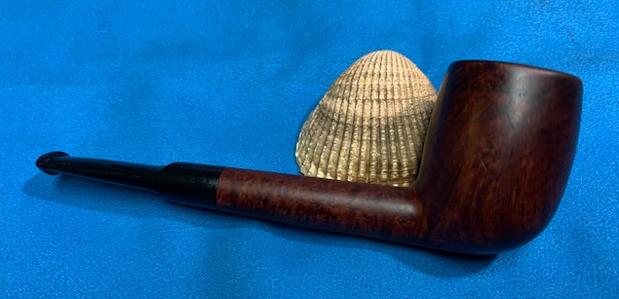
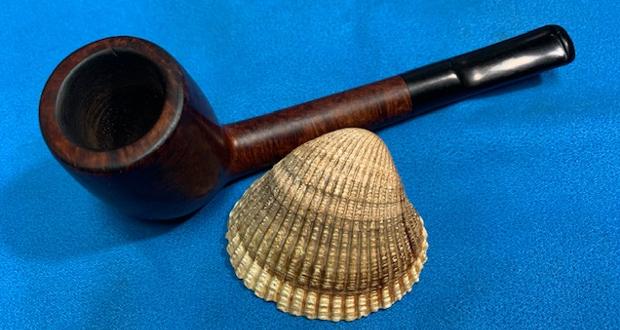
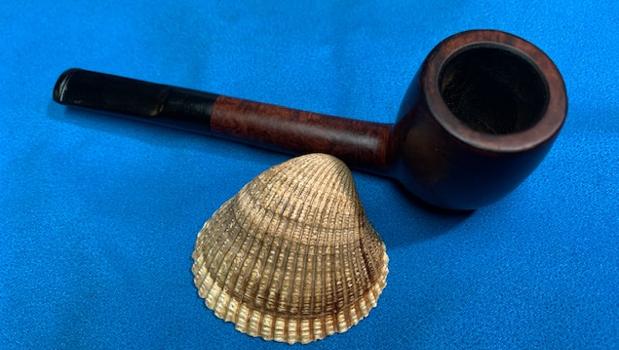
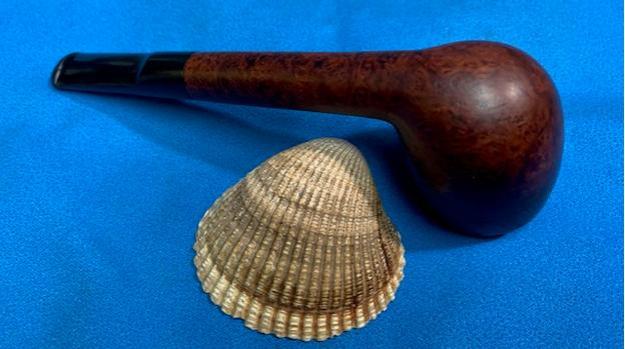
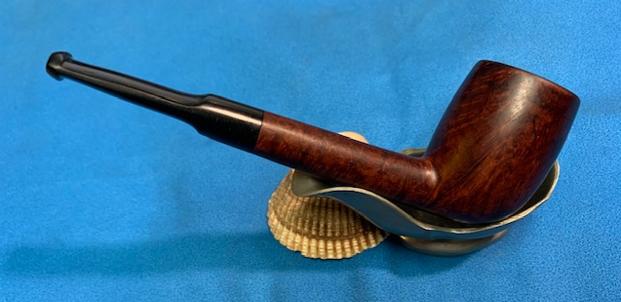
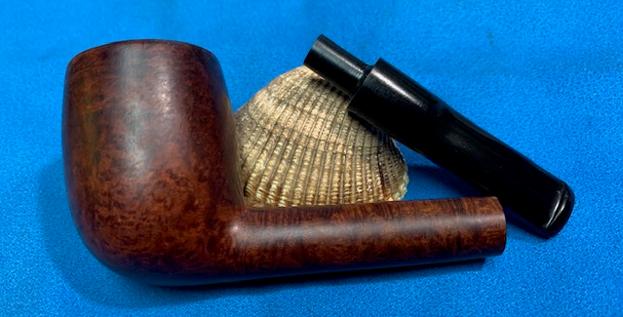
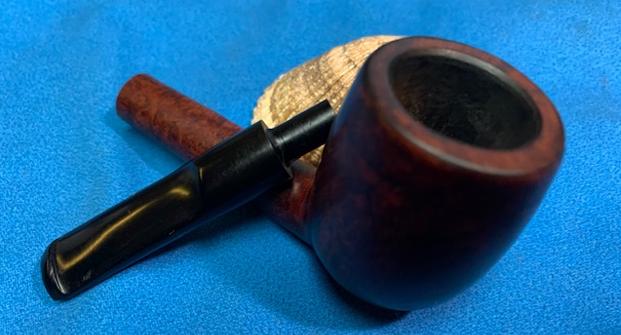
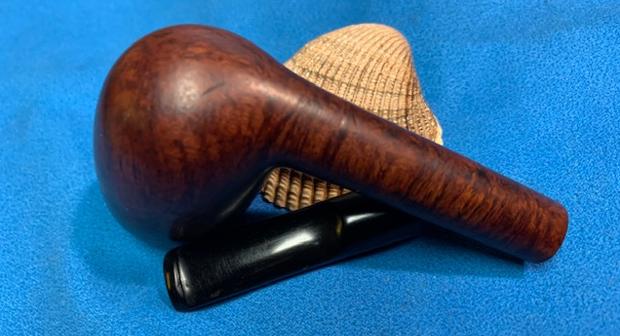
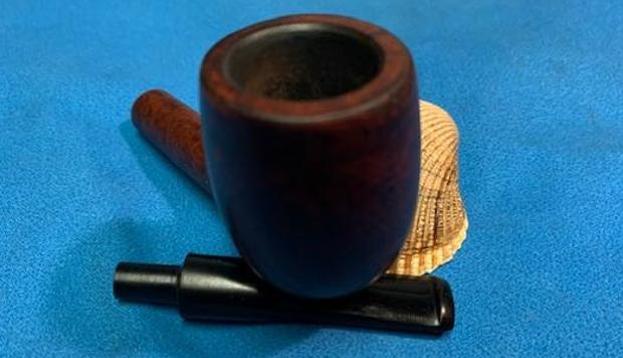
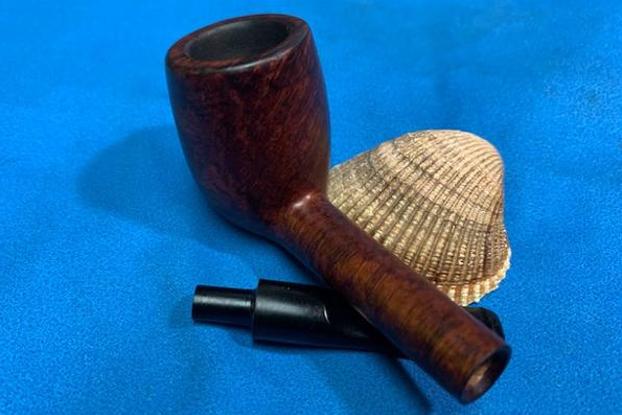
 With the bowl and the stem finished I put the beautiful Algerian Briar 421 Canadian back together and buffed it on the wheel using Blue Diamond to give it a shine. I gave the bowl and the stem multiple coats of carnauba wax on the wheel. I buffed it with a clean buffing pad to raise the shine. I hand buffed it with a microfiber cloth to deepen the shine. It really has some great looking grain. The dimensions of the pipe are – Length: 5 ¾ inches, Height: 1 ½ inch, Outside diameter of the bowl: 1 1/8 inches, Chamber diameter: ¾ of an inch. The weight of this large pipe is 1.13 ounces /31 grams. This Algerian Briar Canadian is another great find in this collection. I try to use the same prop with the pipes I photograph to give a sense of size and proportion of the pipe. You can see from the dimensions given above this is a petite pipe that makes this small shell seem quite large. It is much more beautiful in person than these photos can capture. I will be putting it on the rebornpipes store soon. If you would like to add it to your collection let me know. This is another pipe that has the possibility of transporting the pipe man or woman back to a slower paced time in history where you can enjoy a respite. Thanks for walking through the restoration with me.