I spoke with Todd Bannard of Briar Sweat and Tears last fall when I visited his shop about the possibility of him crafting a pipe for me. We talked in generalities with no particular focus in mind other than that I wanted a chubby apple or Rhodesian shaped pipe with a Cumberland stem. As I looked at the pipes he had on his table I really liked the sandblast finish that he was doing on those pipes so I decided that it would be sandblasted.Later in the fall I was gifted some birthday cash and also knew that some Christmas cash was coming so I called Todd and the process began. Through our emails back and forth we came to the conclusion that the shape would be his take on a Comoy’s 499 – a chubby shanked Rhodesian. With that shape in mind and the Cumberland stem I left it to his discretion regarding stain colours and the details. I was excited to see what he would come up with. There is something about having been in a pipe maker’s shop and seeing his tools and craftsmanship firsthand that gives another dimension to process of a commission that is not present through phone and emails conversations.I thoroughly enjoyed working with Todd on this pipe.
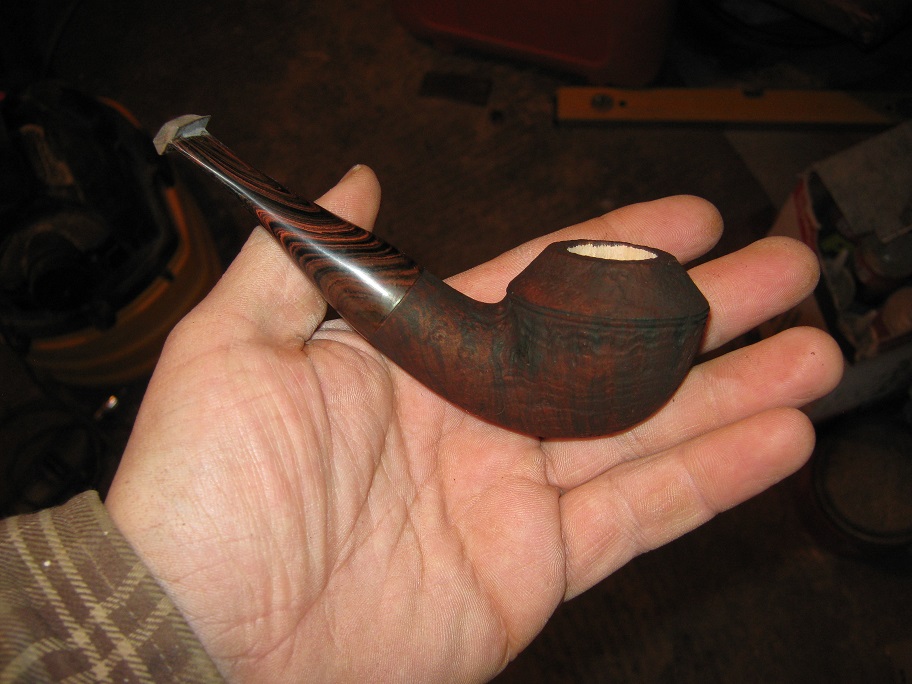
Those of you who have commissioned a pipe before will understand the excitement I had when I turned on the computer and found I had received an email from Todd regarding the pipe. When I saw the title and return I thought maybe it was more details regarding the pipe he was working on. But it was more than just details. It was a quick note about where he was at with the pipe and a photo of my pipe! I was thrilled with the look of the pipe at this stage. I have included that photo as a bit of a teaser to give you an idea of what it looked like at this stage in the process. The shape was perfect – it was exactly what I had wanted. The stain contrast was also very nice to my eye. The chunky shank and stem were also on target. And truly what can I say about the horizontal striations on the Cumberland stem. Wow. He still had work to do but wanted me to have an idea of what was coming.
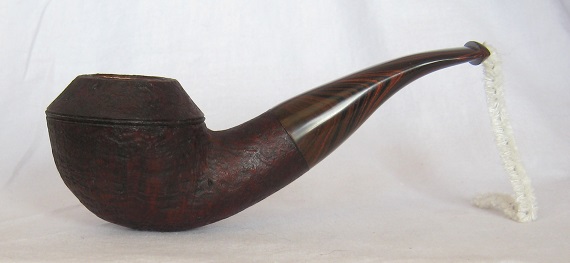
With the arrival of that photo my impatience grew. I did not bug Todd because I hate having that done to me but I could not wait. Not long after the first photo another email arrived with the photo below of the finished pipe. We emailed back and forth a bit about it and I asked if he could do a bit more of a bend in the stem. Otherwise it was perfect.

He bent the stem slightly as I had asked and then later sent me the next photo of the pipe.
I answered Todd’s email and told him the pipe looked perfect except for the fact that it was not in my hands yet ;). The only thing that would have been better in this deal in my mind would have been for me to have been closer to the shop so that I could have driven over and picked it up. But such as it was I would have to wait for it to be shipped. I paid the bill and Todd packed it up and sent it to me via Canada Post. He packed a couple of samples of tobacco with the pipe so that when it arrived I would have something new to try out.
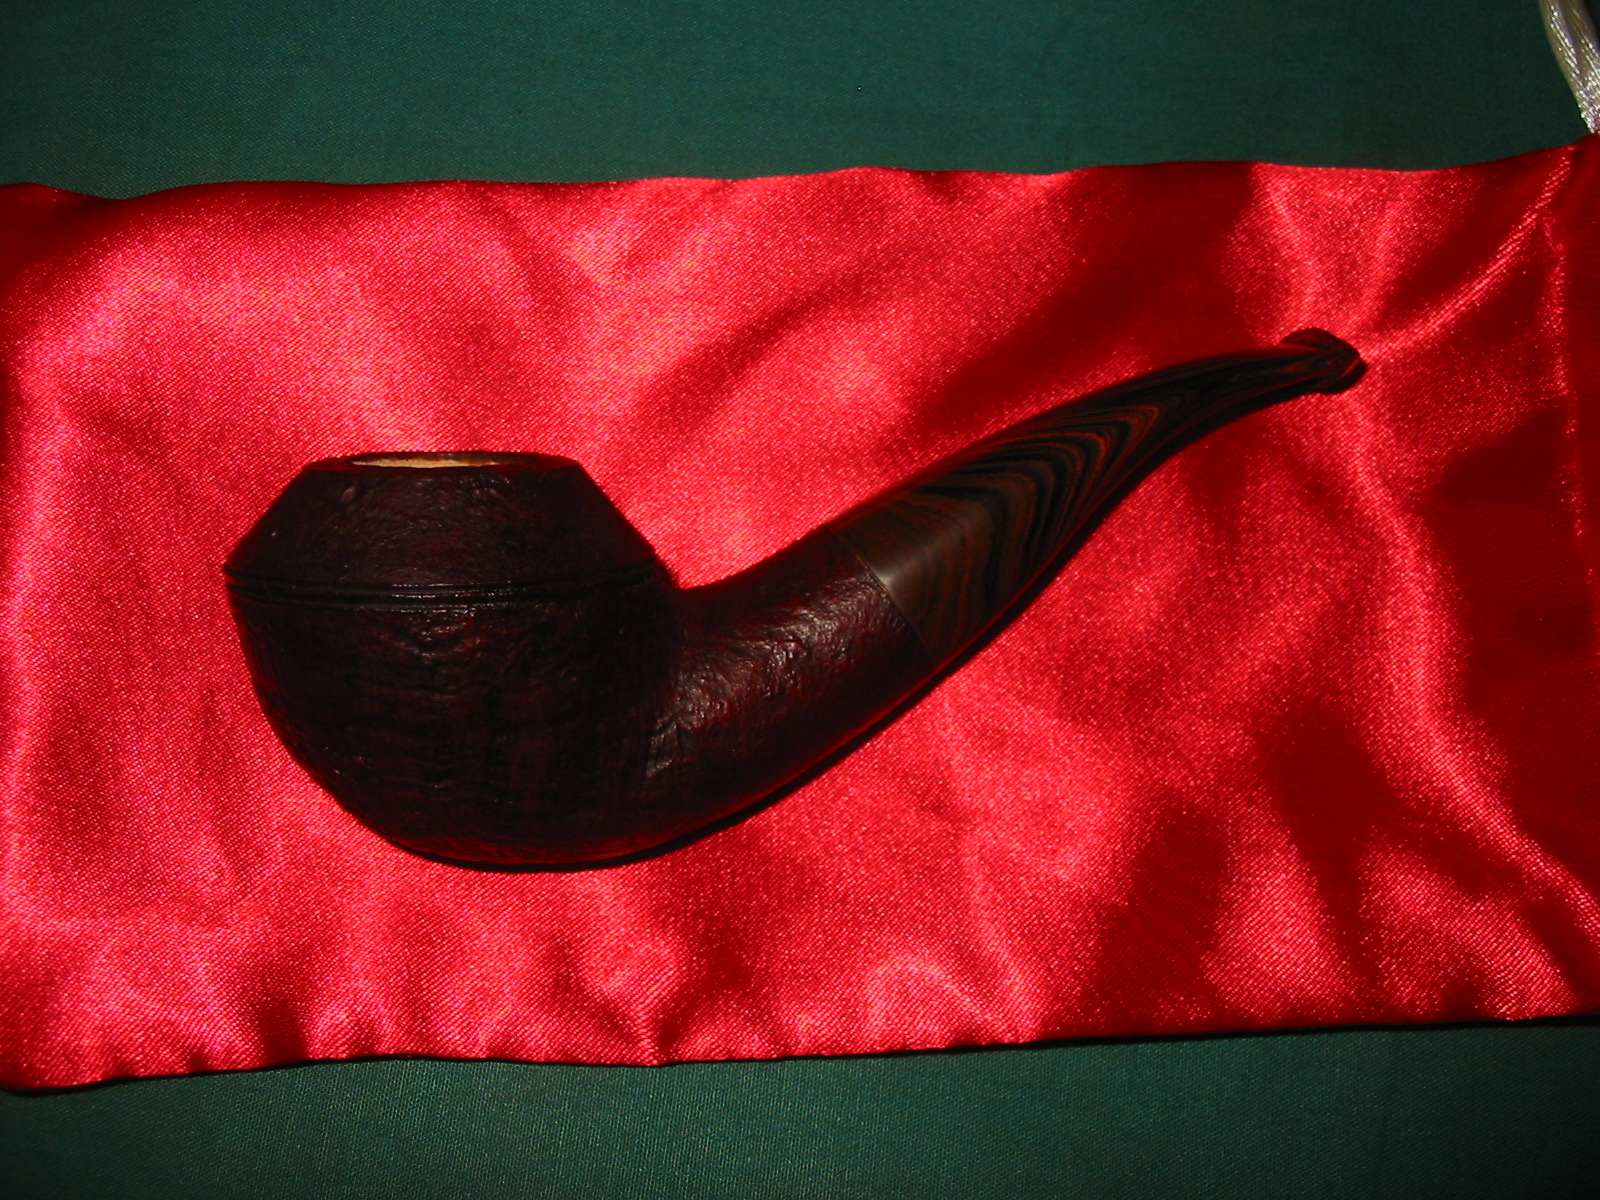
It did not take long before it arrived. I came home from work one afternoon to find the box sitting on my dining room table with a lot of other uninteresting mail. I opened the box, pushed aside the packing material and took out the two samples of tobacco. There, in the middle of the material sat a bright red pipe sock. It was here. I took the sock out of the box, opened it and took out my new pipe. My daughters laughed at my excitement. I was like a kid opening a present that held the gift he was waiting for inside of the wrappings. Once it was out I turned it over and over in my hands taking in its beauty. It was exactly as I had imagined it as Todd and I had talked about it. He had captured it well. I had to take a photo of it as it looked it when it arrived. The red of the pipe bag picked up the red in the stain on the pipe.
I took the pipe apart, because it is my nature to see how things are made. The drilling was perfect and the stem airway lined up perfectly with the opening in the end of the mortise. The slight divot on the bottom of the mortise is from the drilling of the airway into the bowl. That drilling is a straight shot that comes out in the center of the back wall at the bottom of the bowl. I noticed that Todd had funneled the end of the tenon for good airflow. The tenon was very short – something I had not seen before on a handmade pipe. There was plenty of length for a good seat in the mortise as it too was also drilled more shallowly than I had seen. The fit against the end of the mortise was snug with no gap between the tenon end and the end of the mortise. Nicely done Todd. The drilling in the stem was clean and smooth. There were no rough edges in the tenon or stem. The tenon is an integral part of the Cumberland stem and not a Delrin tenon. The button was just the right thickness for me as I like it with a slight shelf to hold behind my teeth but not too thick. The slot was well made and a flattened oval at the end of a flared airway – thus keeping the airway consistent diameter from the bottom of the bowl to the end of the slot. The draught was easy and quiet. To pull air through the stem was effortless. This always bodes well for a new pipe.
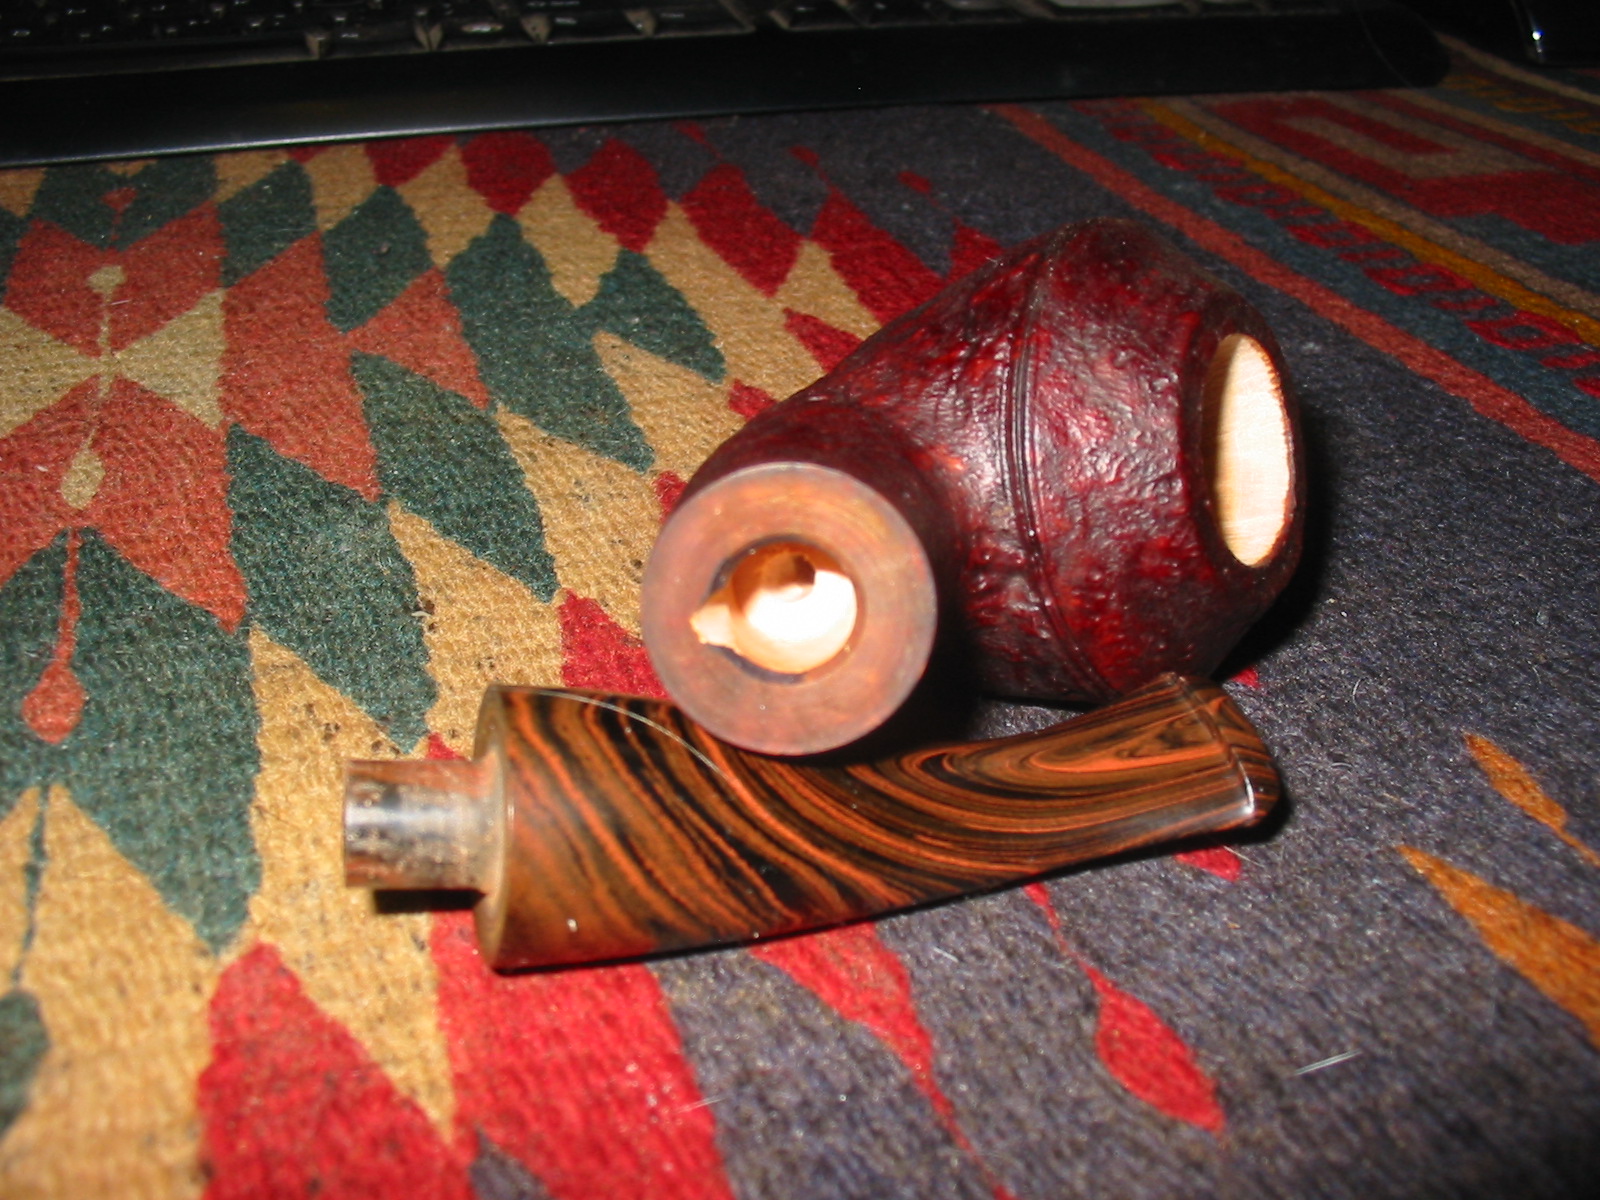

I wrote Todd and asked about the short tenon and mortise and received this reply:“A short, fat (3/8″ rather than 1/4 or 5/16″) tenon allows a guy to have the same surface area for the mortise tenon fit (so the same “stiffness” of fit) but allows you to drill the airway dead center in the mortise (you can tip the drill more than if the mortise is an inch deep). So the integrity of the airway is not compromised, the pipe passes a cleaner, etc.” Interesting concept and one that seems to work well on this pipe.
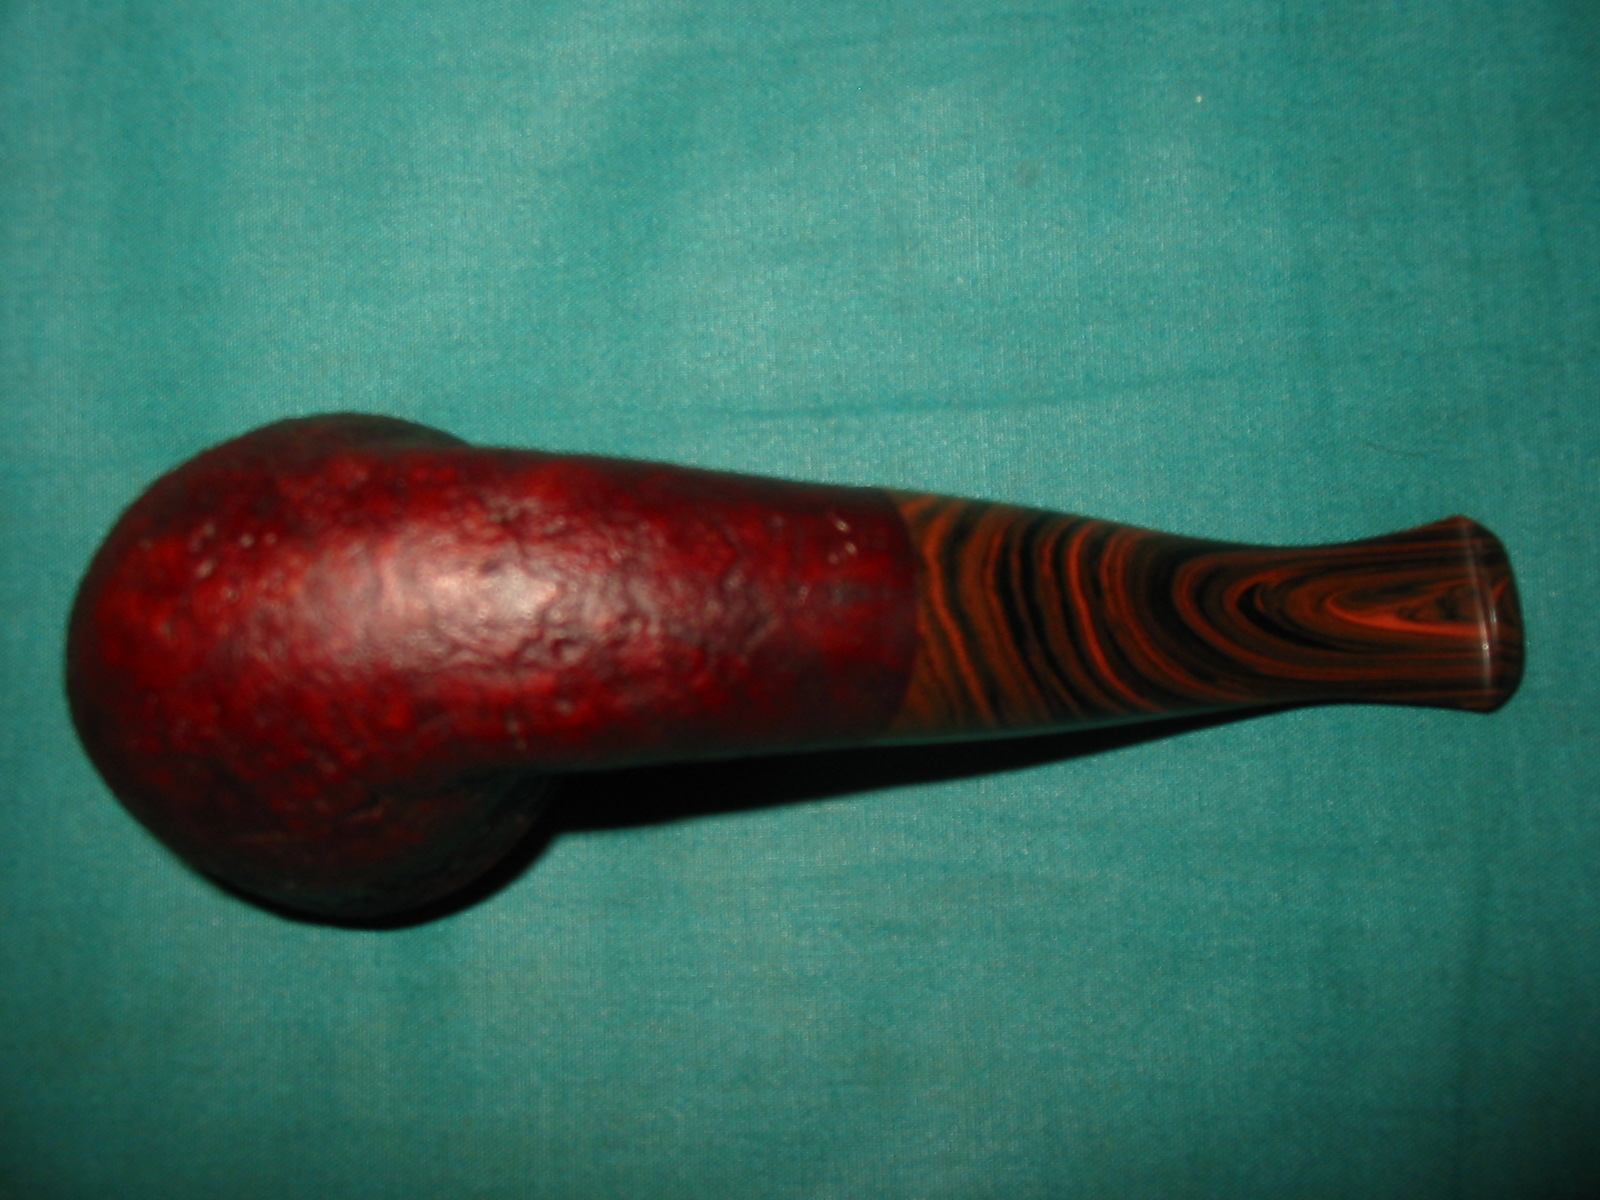
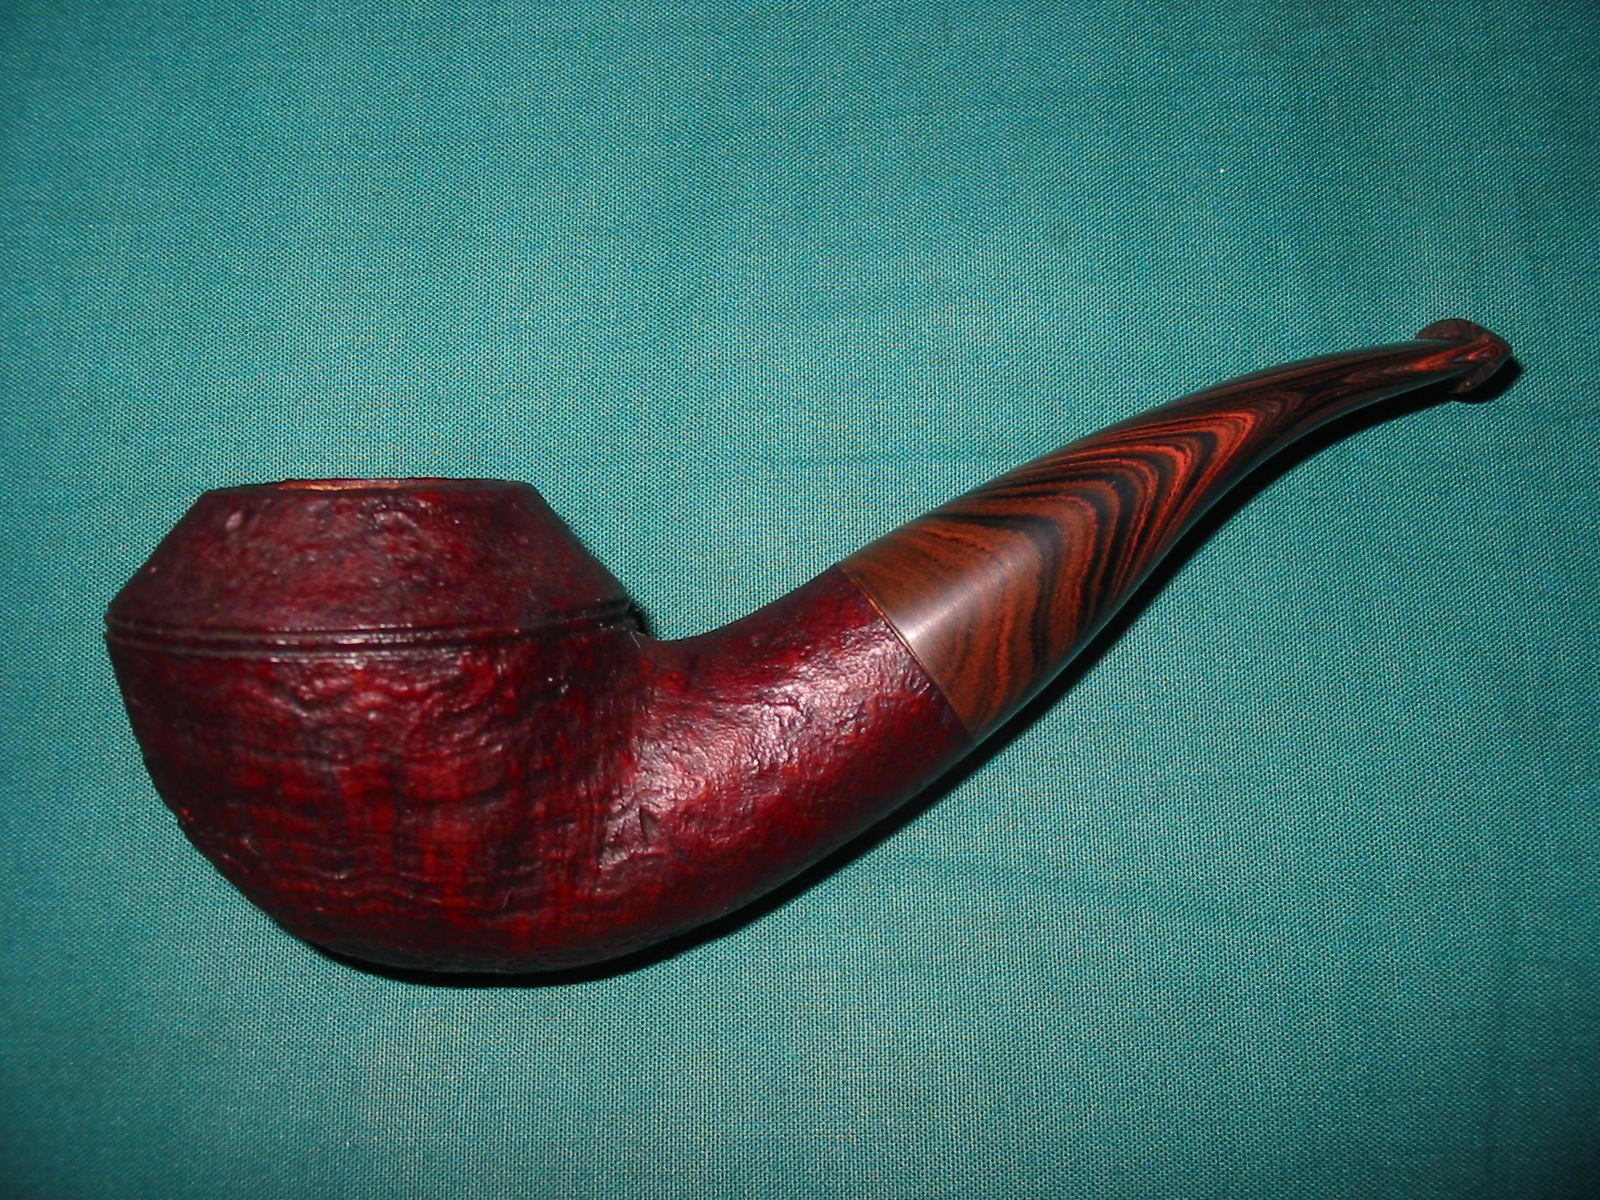
I took the pipe to the worktable to look it over and just enjoy the craftsmanship before I loaded it up to smoke the inaugural bowl. I have to tell you the shape and finish went beyond what I had in mind when Todd and I talked about it. It is beautiful. The length of the pipe is 5 1/8 inches and the bowl height is 1 3/4 inches. The bowl diameter is 1 3/4 inches. The chamber diameter is 3/4 inches and depth is 1 1/2 inches. The lay of the shape to the grain is superb. The blast reveals that the grain on the sides of the bowl are nearly identical and the birdseye grain on the top and bottom of the bowl and shank are very nice. Todd did a shallow blast that revealed some of the intricacies of the briar but did not make the blast craggy or deep. The parallel rings around the cap on the Rhodesian are nicely done and close enough together to give the cap a classic look. The angle of the cap is perfect in my mind and captures the Comoy’s shape nicely.It looks to me that he used a dark brown stain on the undercoat to sit deep in the nooks and crannies of the blast and then an oxblood stain to cover that and give the pipe a warm hue.Whatever the combination, in real life it is a perfect match to the colours in the Cumberland stem as shown in the photo below.

Earlier last year Todd cut a Cumberland stem for me from some material he had in the shop that had a horizontal flow to the Cumberland. I really liked the look of the stem then and asked him to use the same material here. Todd stained the pipe to match the colour of the stem. The overall flow of the bowl and shank is brilliant and the colours are beautifully matched from rim to the end of the shank. It has a gentle taper,both on the sides and the top and bottom, from the shank to the button. It has a slight bend to it that gives it a stylized look. Todd did a great job shaping the stem and capturing a shape that really works with this pipe. The stem is nicely finished with no marks or scratches in the Cumberland. The tenon is integrated with the stem and cut into the Cumberland. The fit in the mortise and against the shank is snug. He countersunk the end of the mortise to make for a snug fit of the stem to the shank. The end of the tenon is funneled slightly for a smooth transition from the mortise when it is in place.
The overall construction of this pipe is very well done. It is light in the hand and in the mouth. It is well balanced and has a shape that fits well in my hand. There was one slight detail in the blast of the pipe that bothered me but it in no way affects its smoking ability. It was truly cosmetic in nature. It involved the shank/stem junction. When it first came it appeared that the stem diameter was bigger than that of the shank on the left side. It seemed that the stem was larger. It bugged me and my daughter who knows her father well suggested that I measure the diameter of both as it probably was an Illusion. I did that and upon closer inspection I found that there was a slight ridge on the shank itself and Todd had matched the stem to the ridge. I decided to fire him an email and ask him about it. I wrote this to him:“The stem fits very well against the shank – no light! Cool. When I first looked at it, it seemed like the left side of the stem was a bit larger in diameter as was the top of it… then when I took it off I found that there was a slight ridge in the briar from the blast and went aha!! How do you do the blast on the shank?”
Todd wrote back and replied: “The blast, going right to the stem, is something that I’m trying to work out, rather than have a band of smooth wood and then a “cutaway” where the blast starts. I’ve been told to “fake” the blast and sort of rusticate that part, but I think what I did worked pretty good, not perfect but next time! As for the rings, I taped them off, blasted the top, taped that off and blasted the bottom. I can’t stand fudgy blast work, and I’ll sacrifice depth of blast to keep the integrity of the shape. I have a Castello with a lovely blast but it’s just a molten lump of no real shape because of what they did to it.” Once I had done the work and received Todd’s response that solved the question for me.

For its inaugural smoke I loaded a bowl of McClelland’s Blue Mountain. I am not sure if I will make it a Virginia or an English tobacco pipe but for this smoke I chose this blend. I went for a walk along the river near my work and enjoyed a rare sunny day in Vancouver. The pipe draws well; lighting was not a problem and it delivered a smooth dry smoke. When I emptied the bowl the briar had coloured inside but not burned! That is always a fear of mine in breaking in a new pipe. I enjoyed the day and the dry cool smoke and I watched the ducks on the water. It seems like this pipe will take very little time to break it in as it already delivers an effortless smoke.
Thanks Todd for delivering a well-made pipe at a great price. It was great to work with you on the commission and I enjoyed the communication during the process. I am looking forward to this pipe being one of my favourites in the years ahead.It is certainly made to outlive me! If you have not tried one of Todd’s pipes they are worth purchasing. He makes a great pipe and is a pleasure to work with. Check out his work on his website http://briarsweatandtears.com/ If you don’t see something you like send him an email or give him a call. He can certainly carve a pipe for you that will exceed what you have in mind. You cannot go wrong with a Briar Sweat and Tears Handmade Pipe.
