Blog by Robert M. Boughton
 Copyright © Reborn Pipes and the Author except as cited
https://www.roadrunnerpipes2k.com/
https://www.facebook.com/roadrunnerpipes/
Grace is neither gentleness nor fragility. Grace is treating yourself, others and even inanimate objects with respect.
— Kamand Kojouri, Iranian-born novelist and poet
INTRODUCTION
A former roommate, one of Stephen King’s Constant Readers, once remarked with ridicule-tainted respect that I have always been attracted to needful things. He was speaking of someone I met not long before then whose tragic life had left him wounded to the core, one of the results being his over-demanding, often verbally corrosive and manipulative treatment of me. The roommate, who like almost everyone had plenty of his own flaws if less obvious and abusive, said my other acquaintance was no friend of mine.
“That may be true,” I replied, “but I’m his friend and the only one he seems to have, and I just can’t give up on him because that’s not what friends do.”
The physically and emotionally damaged person I undertook to help ended up becoming and remaining my genuine though stormy friend until he died at home 14 years later from an unusual and excruciating autoimmune disorder for which there is no cure. He was 46.
My affinity for care-challenged pipes, therefore, should come as no surprise. I try to avoid those with fatal flaws such as bad cracks or burnouts and for the most part reject any with serious holes in the stem, but as a restorer I prefer estate pipes that need some real attention to rehabilitate as opposed to the few I find ready to sell or to keep in my collection with minimal effort on my part.
I don’t even remember how the Hardcastle Special Selection #7 smooth bulldog came into my custody or why I chose to ignore the obvious void of vulcanite below the lip on the underside of the stem. Other than that handicap, the pipe was nowhere near as mistreated as I’ve seen but was plagued enough by dings, scratches and other problems to keep me happy.
One final initial note: I repaired this bulldog to almost like-new condition more than a year ago but failed to blog it because of personal distractions that have left me with a large backlog. I sold it for next to nothing to one of my present housemates who decided he wanted me to refinish it as a black dress pipe. The same pipe is the subject of Part 2 of my series on that subject, and so I was going to include this original restoration in that blog. But anyone who reads my harrowing account of the experience that could be called too much of a bad thing will understand why I broke the overall work into two blogs.
Intrigued by the atypical presence of a stinger in the Hardcastle, and an unusual one at that, I searched online for such phenomena with a faint hope of dating the bulldog. Of course, at the top of the list was one of Steve’s blogs from 2014. No other road I found led anywhere close to Rome, as it were. Steve’s pipe is a Dental Briar brandy, bearing the Registered Design Number 857327, with a unique – or bizarre – dental stem, a system-type metal rod in the shank extending to the mortise hole, and a different short stubby little stinger of its own. Here is the Dental Briar stinger before Steve’s restoration and the pipe after his usual fantastic work. Steve narrowed the date of manufacture to the Family Era and concluded his pipe was created from 1949-1967 using the National Registry link below. However, looking at the same link, I see in Table 6.5 that designs numbered 548920-861679 were registered between 1909 and 1950 and suspect the 857327 might have been pre-1949 – no disrespect intended to the master! Besides, he’s right to note that his Dental Briar could have been made at any time between its registration and 1967 when the family lost all control of the brand. His pipe is also stamped MADE IN LONDON ENGLAND on the right shank.
I am not so fortunate. The bulldog has no Registered Design Number or even the usual right shank nomenclature (London Made, British Made, Made in London England, Made in England). This nomenclature is not faded, it’s just not there. Only the left shank identifies it as a HARDCASTLE/SPECIAL SELECTION/7. All I know for sure is that I tried it out after a basic sanitization, and it was quite good.
For a great synopsis of Hardcastle’s history, see Steve’s blog below. Details are in the Pipedia link.
RESTORATION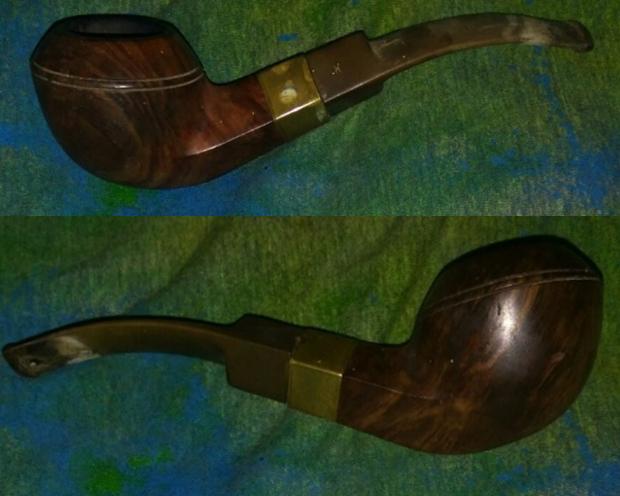
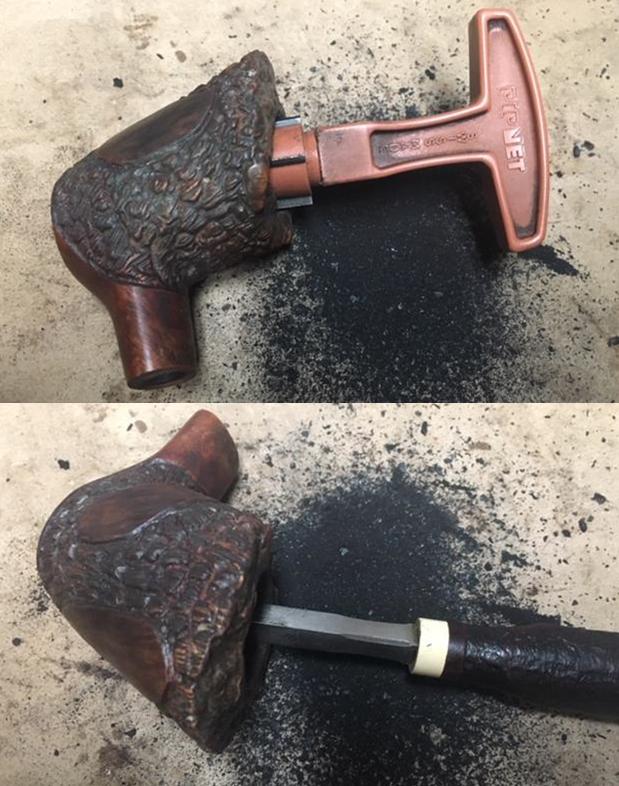
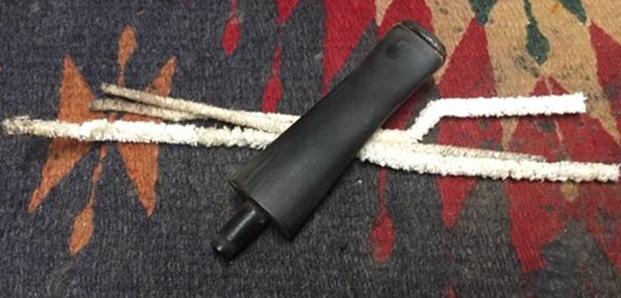
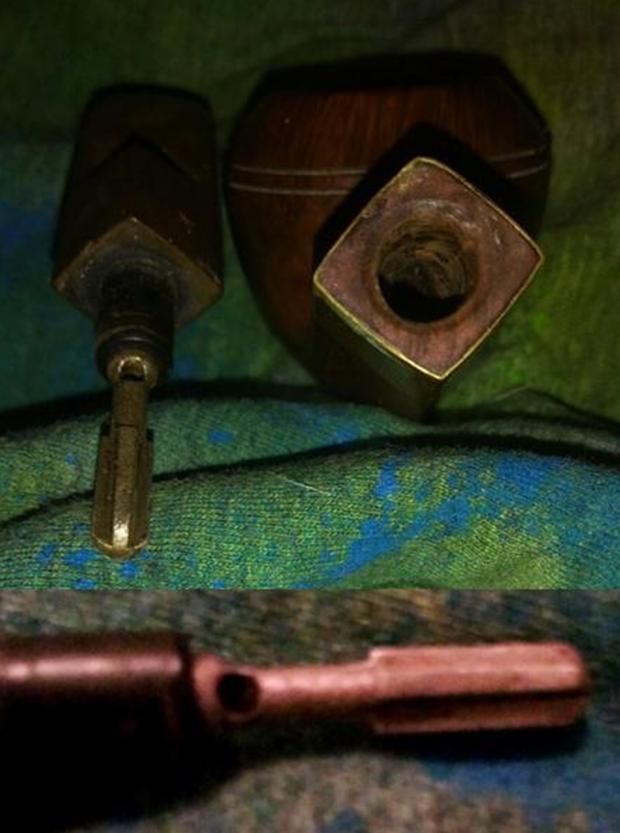 I would have removed the stinger anyway as useless, but it was also bent and more fragile than usual, and so I experienced even less than usual emotional distress heating the pointless thing with a Bic and twisting it out.
 Considering the appreciable grime, I started by swabbing the stummel first with purified water and then alcohol. In hindsight, I should have skipped the water method that had little effect. The blemishes stand out even more after the cleansing with alcohol.
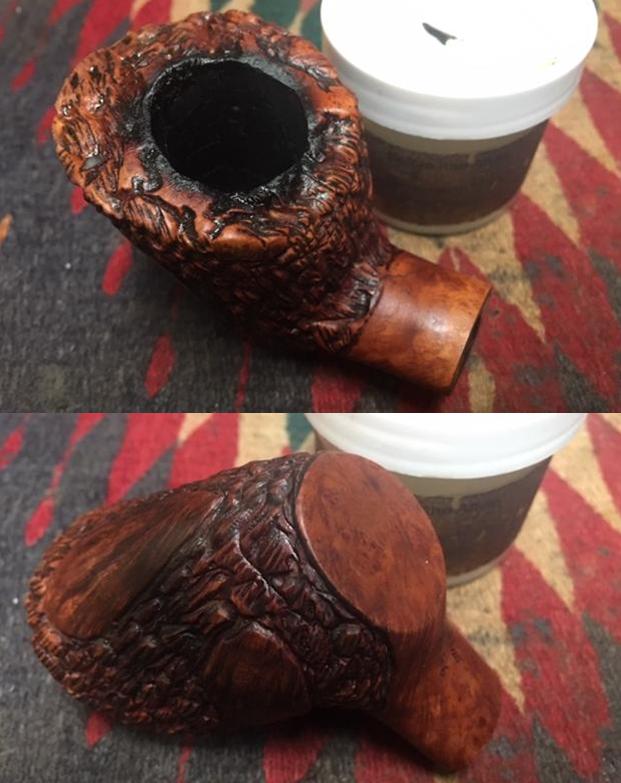
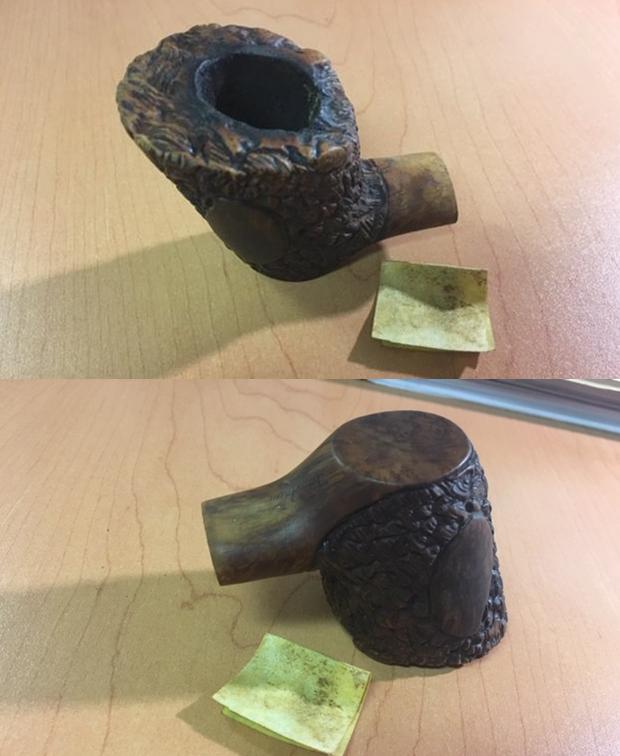
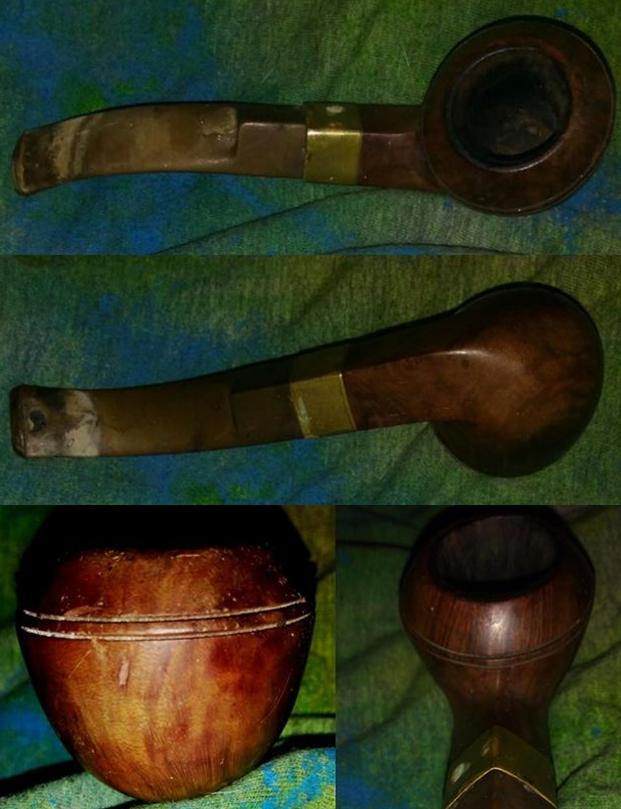
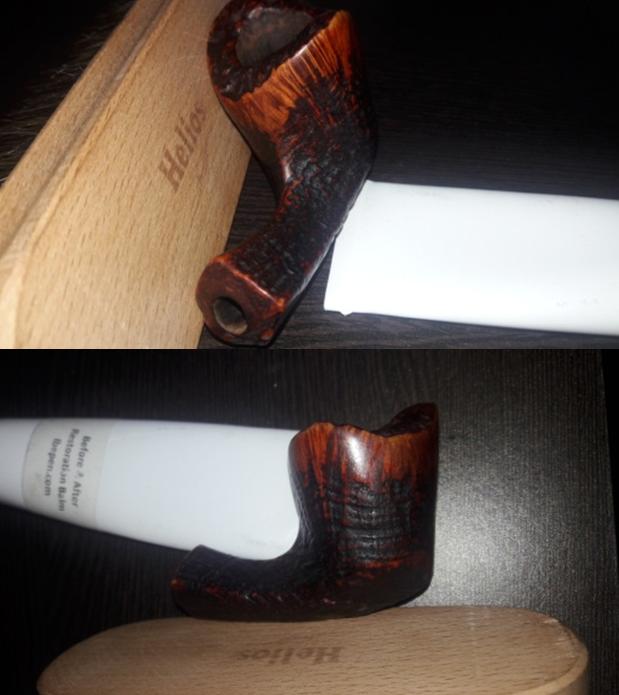
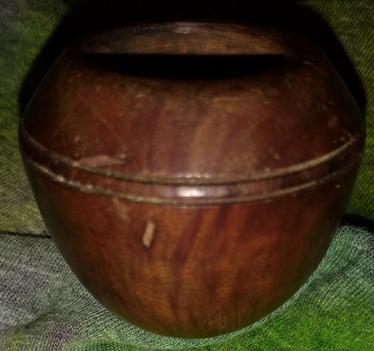 The one shot below showing the minor rim damage, an unevenness being the only bad part, and decent chamber condition was taken with a flash and therefore looks pre-water and -alcohol cleaning. I’m still having to do the best I can with a cell phone cam. I used 150-, 220-, 320- and 400-grit papers to start shaping up those areas.
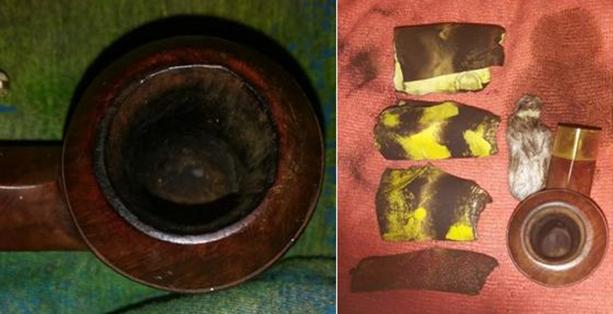 After that I re-addressed the chamber and unevenness of the rim with a Senior Reamer and the blade from my Peterson’s Pipe Tool and made them a little better with 150-400-grit paper.
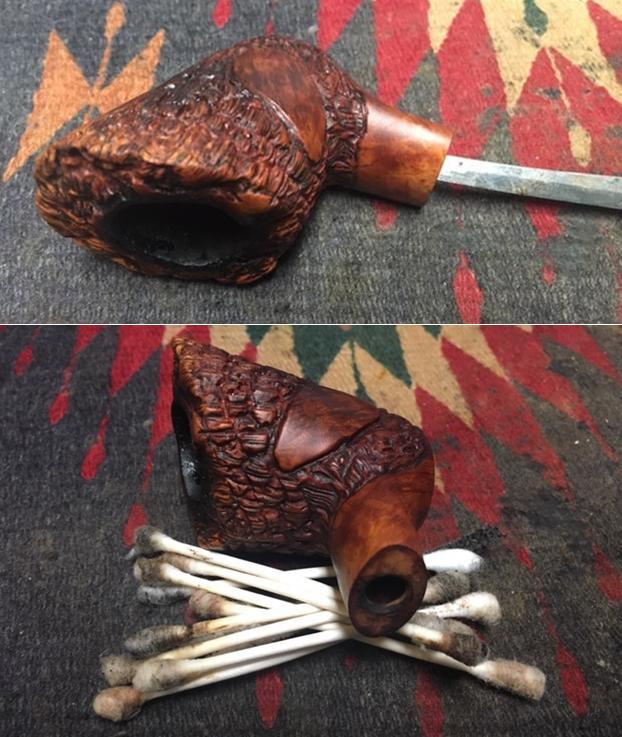
 I gave the shank a preliminary alcohol cleaning and retorted the pipe with a meerschaum stem that wasn’t crippled by a hole but somehow forgot to snap a pic of the latter.
 With 220- and 320-grit papers I was able to remove the dings and scratches as well as giving the chamber a semi-final what-fer.
 For some reason, the band popped off, and I still wasn’t happy with the color. I decided to go at it once more with the 220.
 A full micro mesh buff made the old pipe begin to shine as it should.
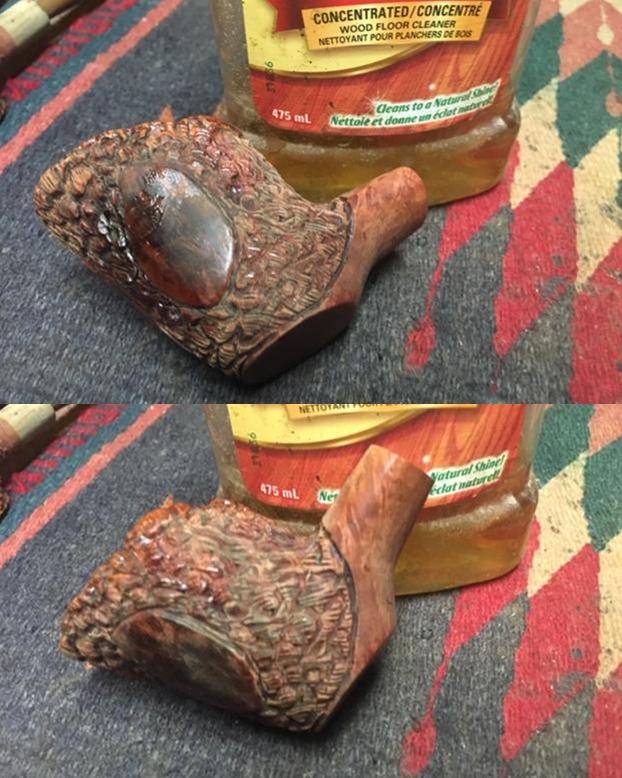
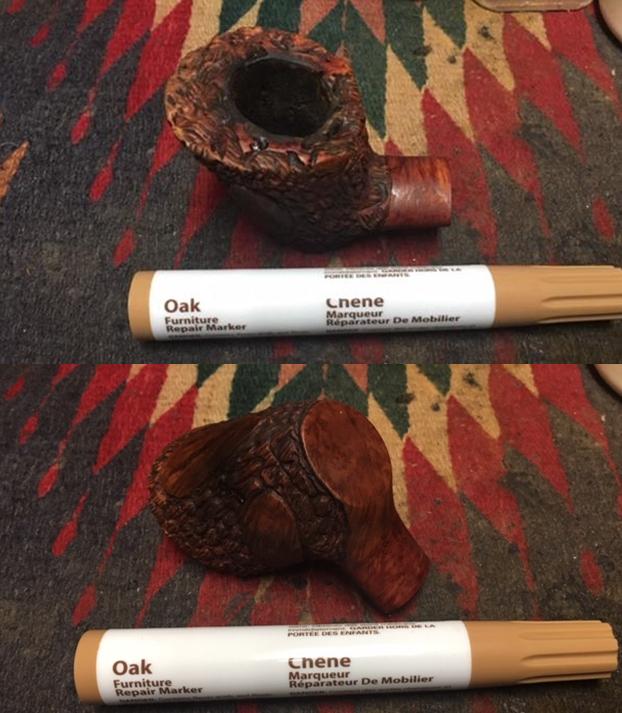
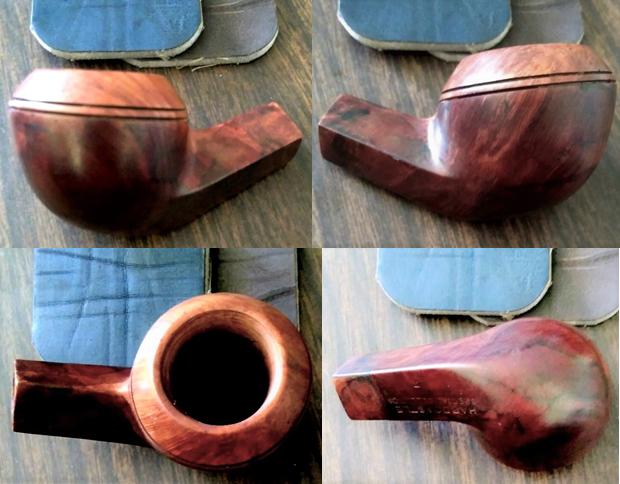
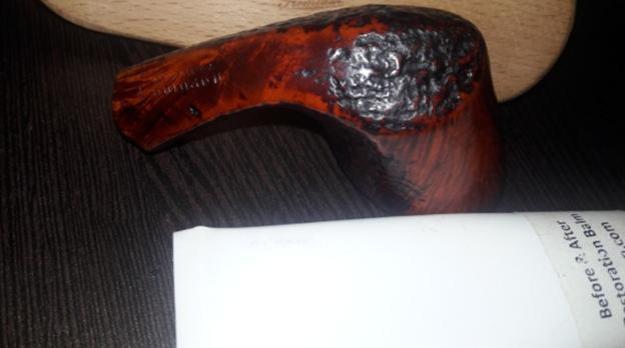
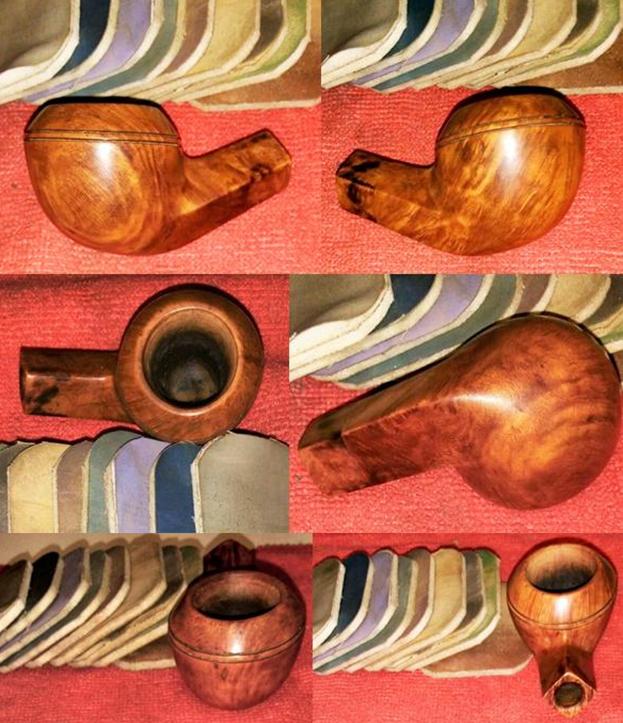 By now I should be somewhat known for fancying two-tones with bulldogs and Rhodesians where the top of the bowl above the two lines curves upward to the rim. For the most part, at least, I’ve left this area lighter than the rest of the stummel, although on occasion I’ve dabbled in darkening it with, say, maroon stain. This one screamed at me to lighten the top of the bowl as usual under these circumstances. And so I stained the stummel below the lines with Lincoln brown leather dye, flamed it and after letting it cool took off the char and a little of the darker color with 8000 and 12000 micro mesh pads. By the way, I was alarmed when I got a look at the first pic below and noticed what to every appearance seems to be a wicked and poorly repaired crack in the shank. I assure everyone it’s a trick of the light or whatever, as the other pics prove.
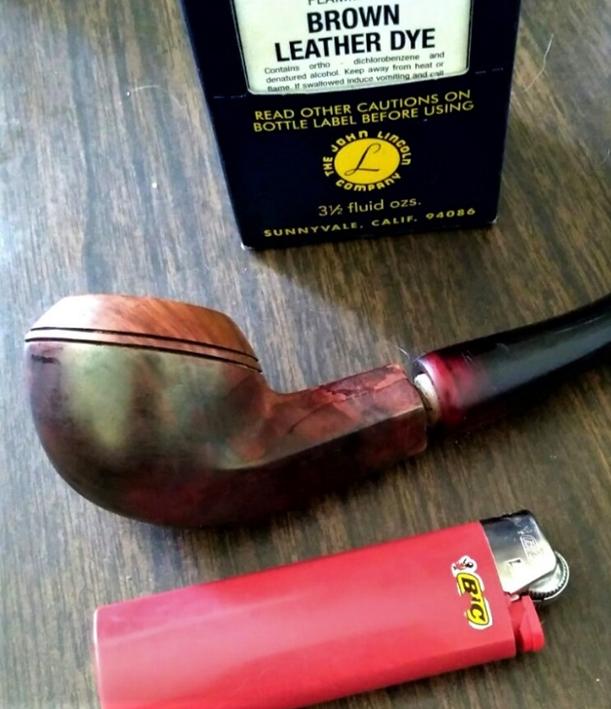
 Gluing the band on again was a formality after buffing it on the electric wheel.
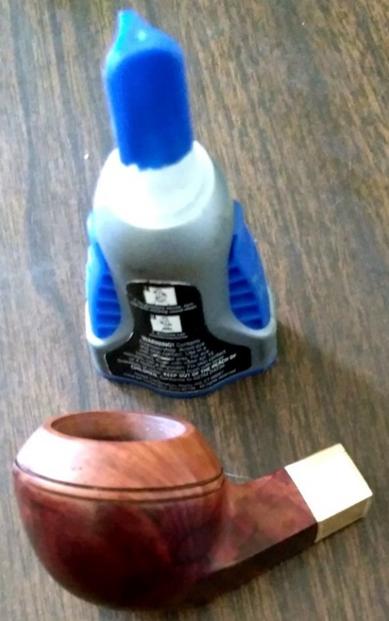 Okeydokey, then. There could be no more avoiding the chomped and degraded stem with its hole on the underside and other shortcomings.
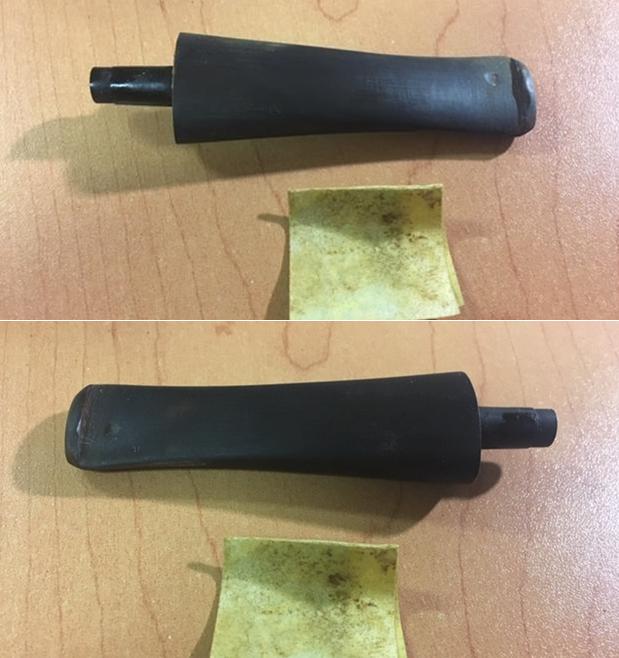
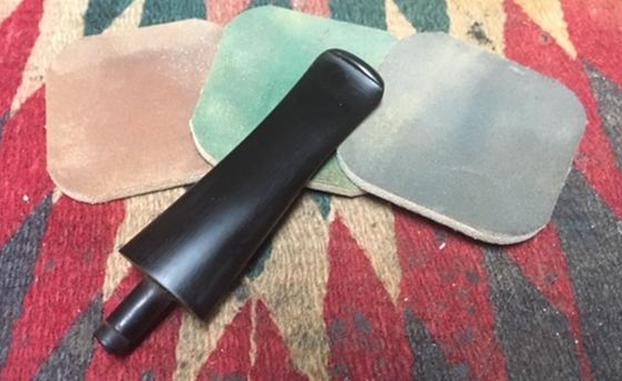
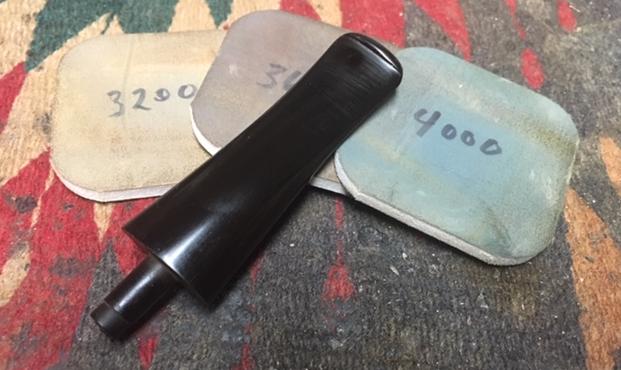
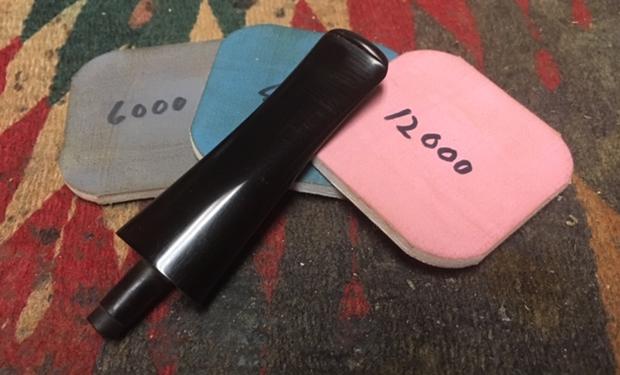
 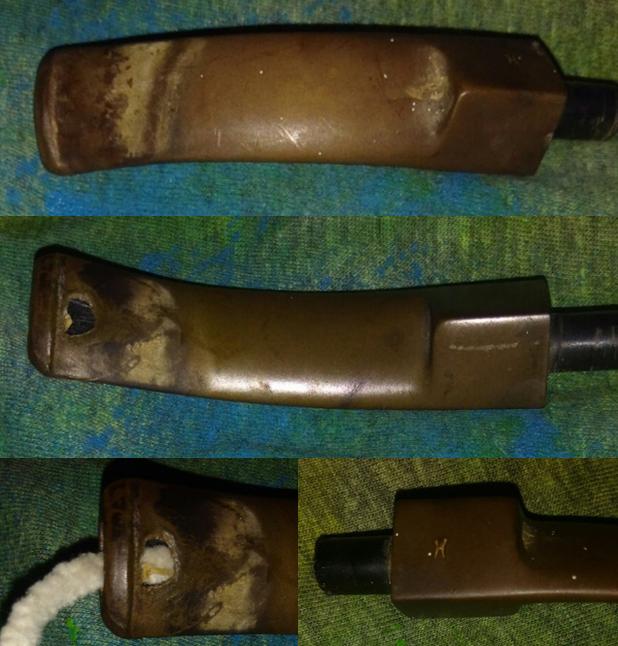 I had already given it an OxiClean soak, and it wanted repair. Just to get an idea of what the stem would look like when finished, I gave it a quickie micro mesh rub.
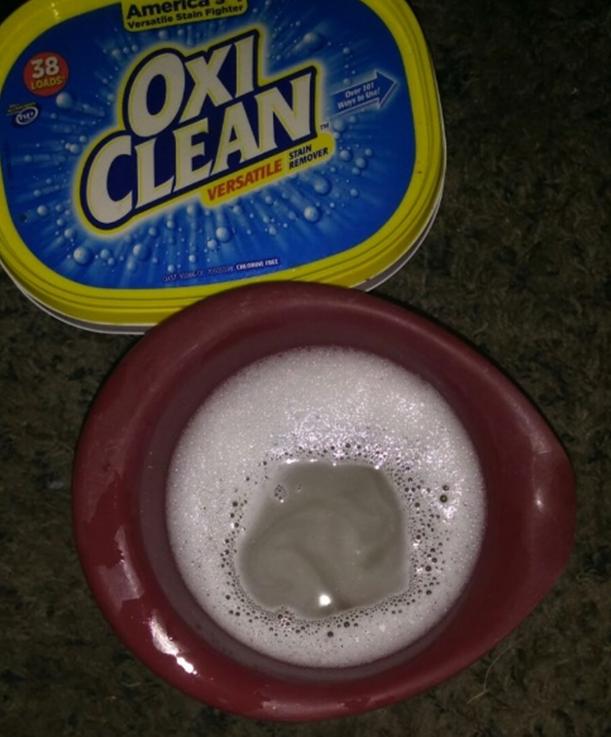
 I cut a little strip of card stock from the business leftover of someone with whom I didn’t care to do any more business and lubed it and a very small tweezers with a dab of petroleum jelly. I inserted both into the mouth opening of the stem, with the cleaner behind the paper, until they were firmly in place inside the airway to a point just below the hole. Finding my trusty old vulcanite stem that was long ago destroyed by another stem abuser, I shaved some fine flakes onto a small piece of paper with one side of a narrow, relatively smooth triangle rasp.
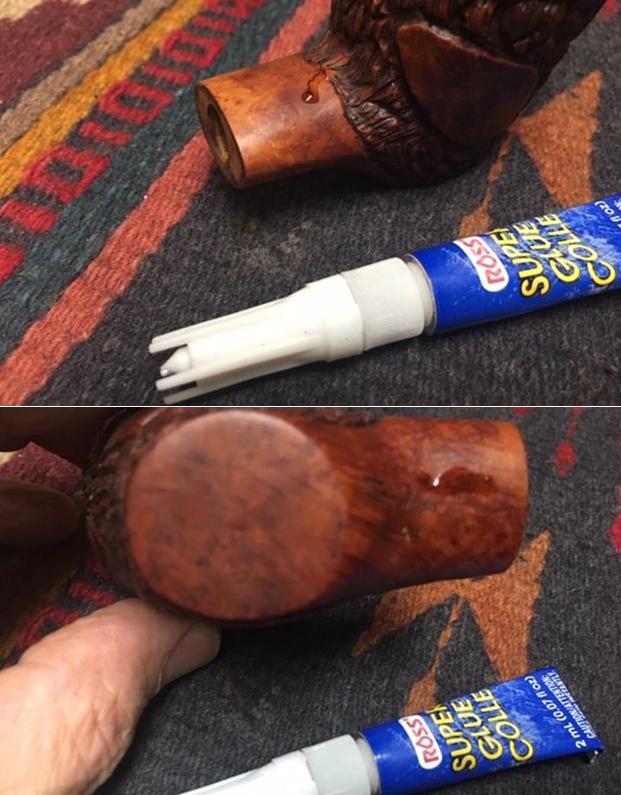
This was where I had to be prepared to act fast: I moved the flakes into a pile and added a few drops of black Super Glue, stirred the two into a gritty paste and scooped up a gob with the part of a three-piece pipe tool made for clearing tobacco from the chamber. As fast as possible without making a mess, I slapped the goop liberally over the hole and set it aside to dry, removing the card stock and tweezers when the vulcanite mixture was dry on the inside but still a little wet on the outside.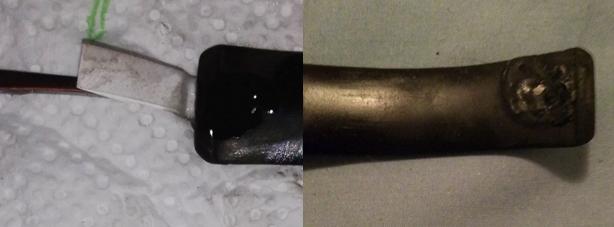 It’s a good thing I have an excellent recall of what I did in a particular restoration because the photographs I took of this project were more jumbled and duplicated than those from any other pipe on which I’ve worked. I had so many of the same thing from alternate angles and differing clarity, for example, that I had to delete quite a few to make sense of it. I concluded this was because of two things, trying different ways to get a good shot with my poor cell phone camera at the time and lack of sleep during the process. It’s clear, excuse the pun, that some of the “best” are quite indistinct. The following photos, as a result, are incomplete, but I always have the words to describe what I did.
For example, after the previous step, I started sanding with 150-grit paper and then smoothed it up with 220-, 320- and 400. A common, less serious groove resulted, and I added more of the black Super Glue/vulcanite mix and let it dry again. The mixture settled in well.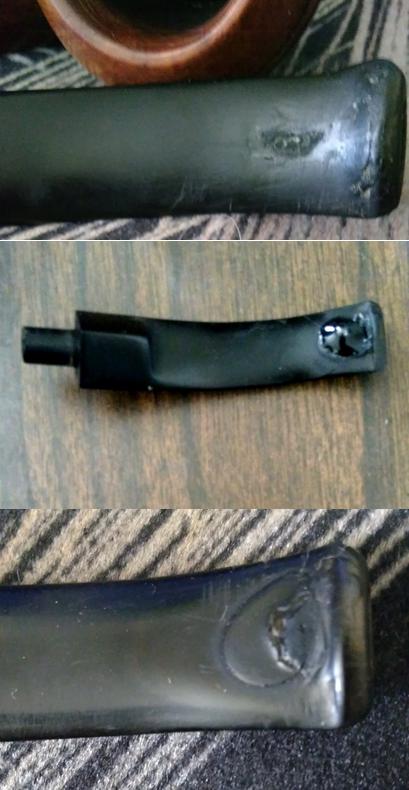 That’s when I got serious with the sanding, using 150-, 220-, 320- and 400-grit paper and super fine “0000” steel wool.
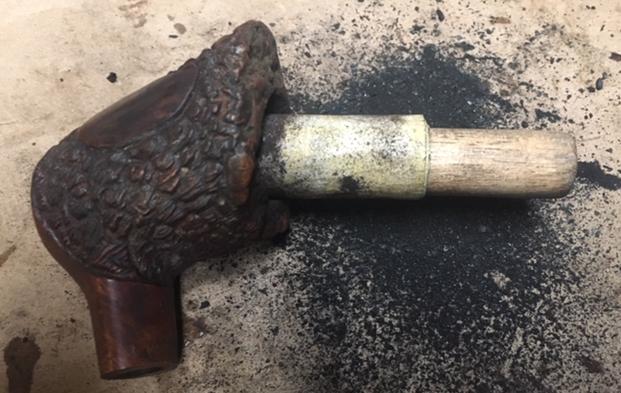
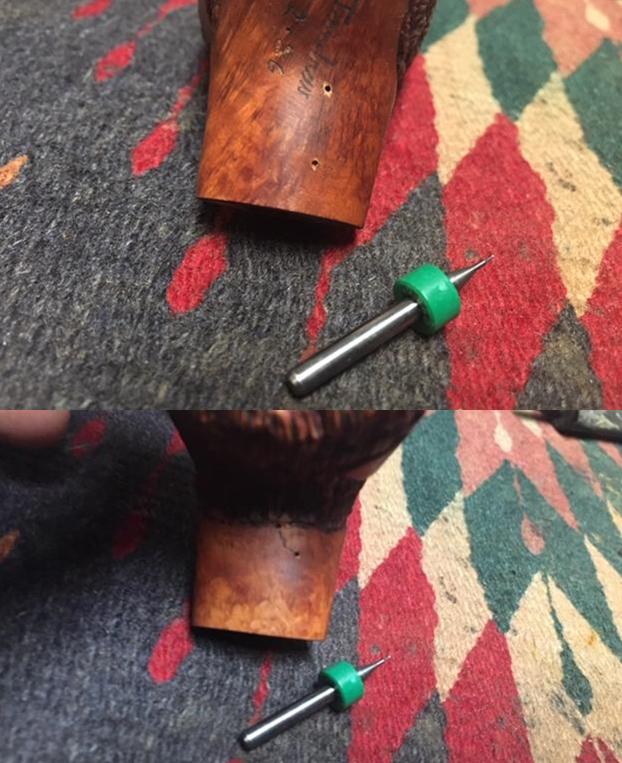
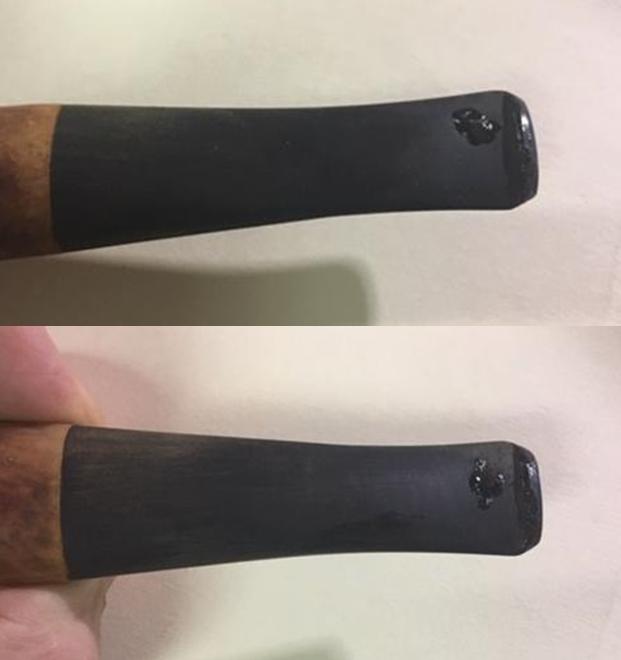
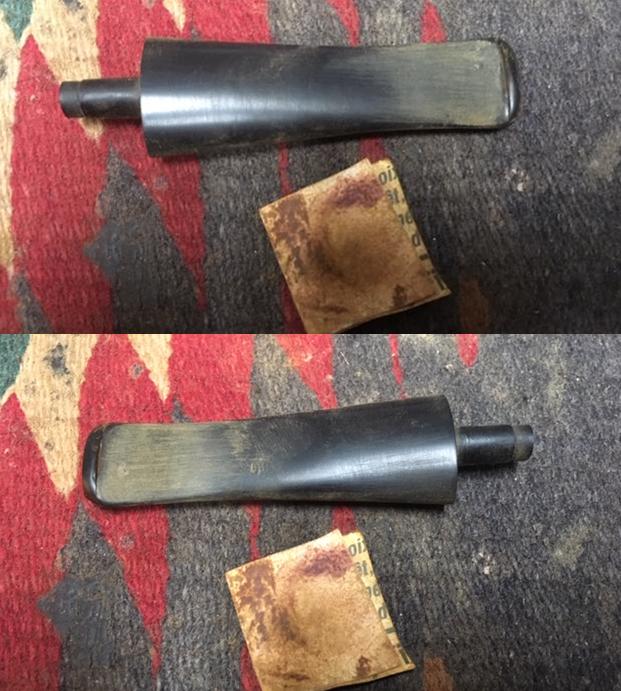
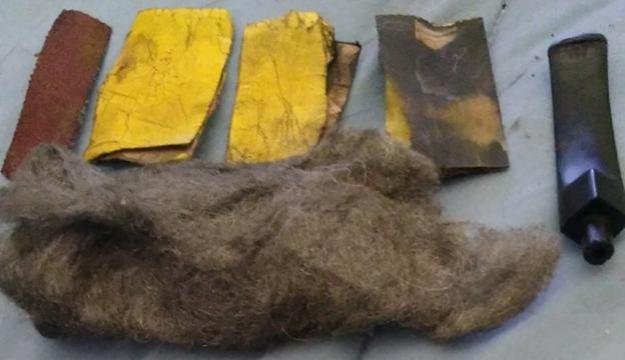 There’s still a small lump visible under the lip that I handled with as little abrasion as possible before the stem was done. And that was it – for the bottom side. I still had the top to do. In every way other than the hole in the bottom, the top was worse, although it only needed a dab of black Super Glue/vulcanite solution to fill a small divot following the same initial OxiClean soak and a more vigorous sanding before filling a small divot with. Considering again the top of the stem when I received it, close up, notice the wear below the square shank fitting before the rest of the work.
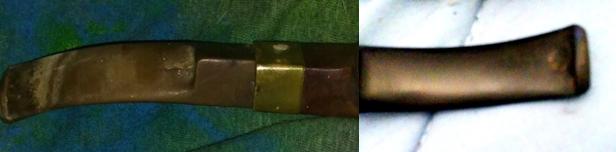
 The stem never quite fit the shank, which had been given a replacement band somewhere along the way, not to mention the band was damaged. After beginning to re-sand the bottom of the stem, the original hole caved in again. Accepting defeat, I chose a new bulldog stem I had that needed serious filing at first and then sanding of the 9mm tenon to fit the shank.
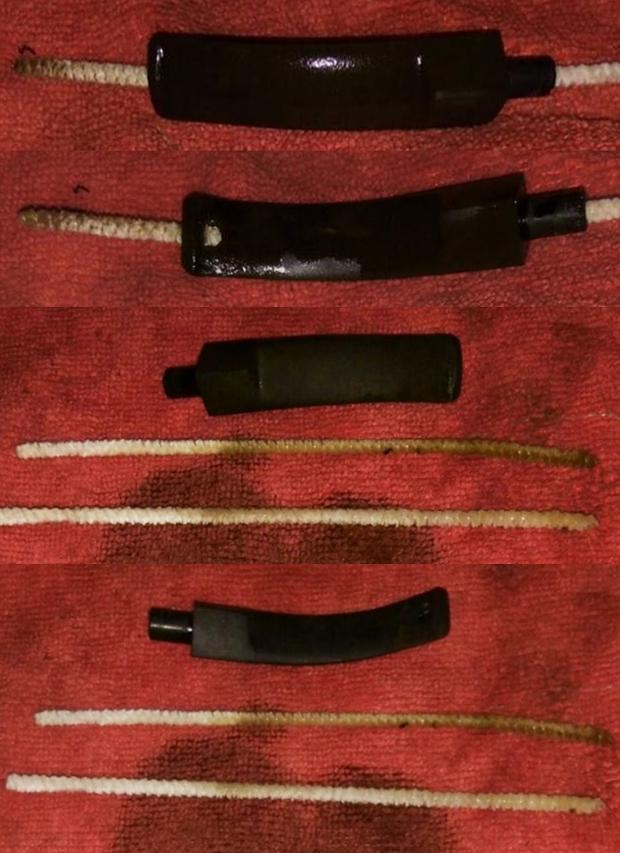
 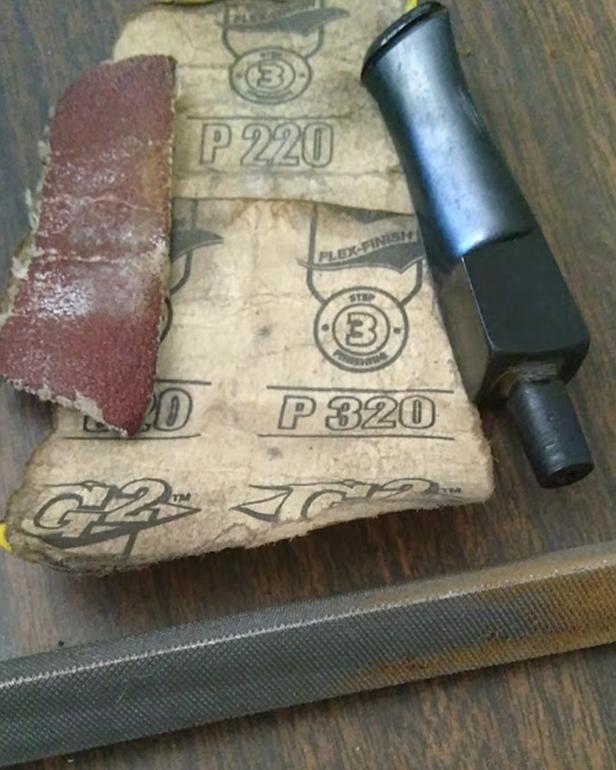 I bent the stem. That required heating the stem – with a pipe cleaner inserted through the airhole – at 210° F. for about 15 minutes and bending the nice and pliant material over a complex tool.
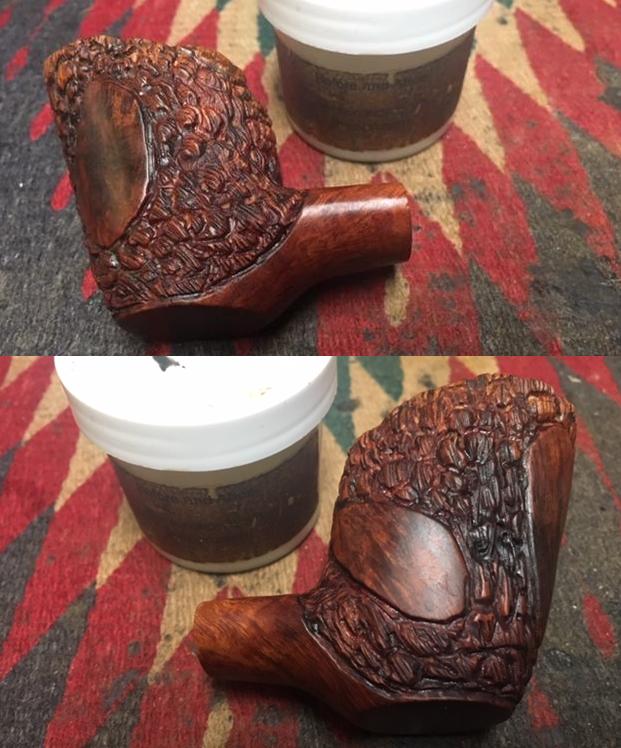
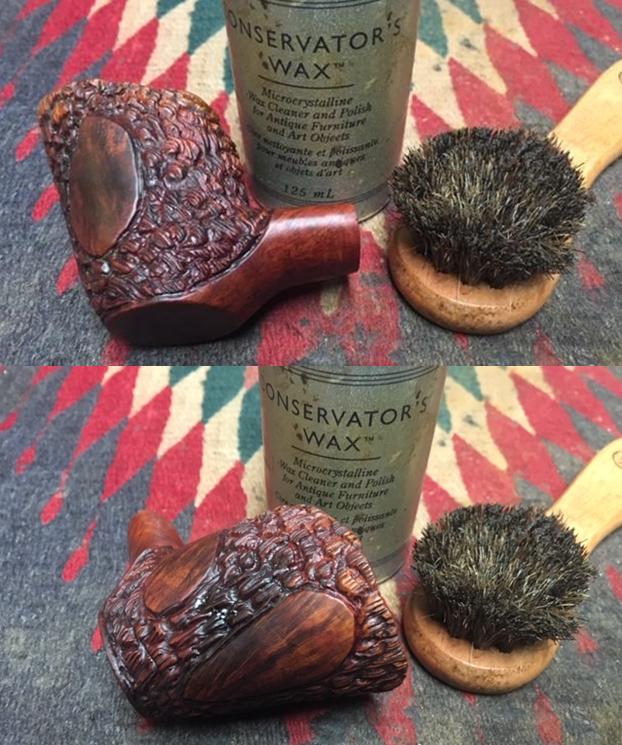
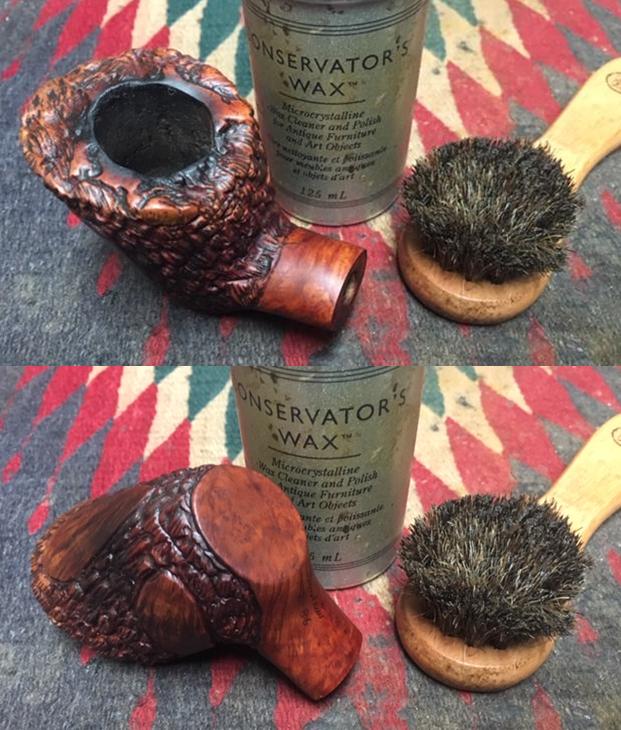
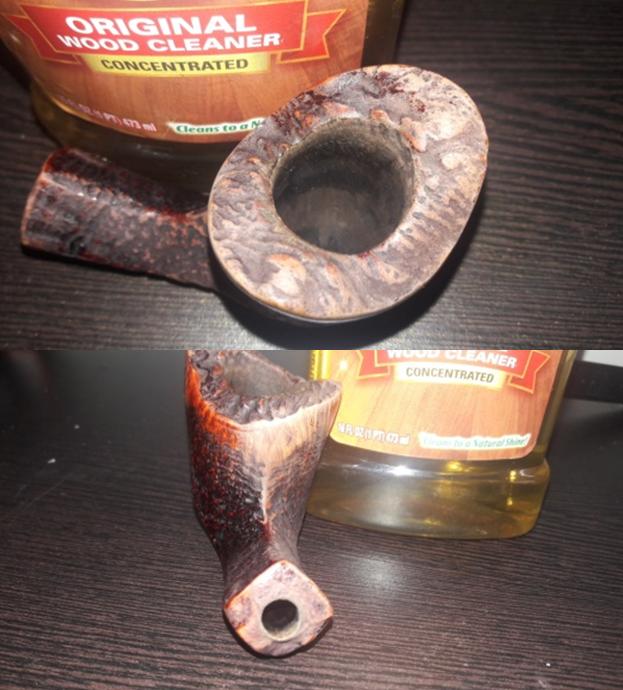
 Remembering the cell phone photos were atrocious and I had to edit them using every halfway adequate means of adjustment available with my so-called photo editor to show any similarity whatsoever to the actual result, here one last time is the stummel as it in fact looked when it was one step from completion before electric buffing.
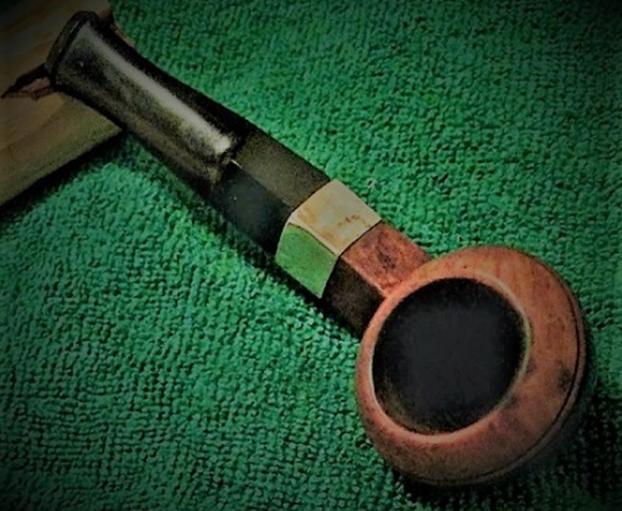
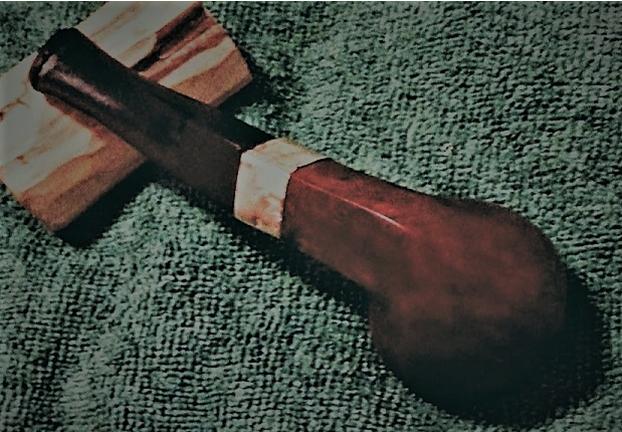
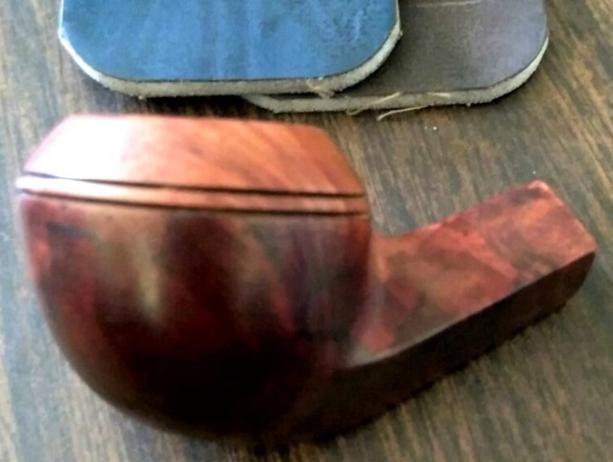 And these are the final photos of the pipe. The most offensive discrepancies to me are the obscurity of the two-tone and the lack of shine the pipe had. The bad twist on the stem in the fifth shot of the rear is all on me!


CONCLUSION
This blog being the occasion of my official announcement in this forum of my new webstore on my own site, https://www.roadrunnerpipes2k.com/, is unfortunate in that the depictive presentation almost convinced me to give up any idea of writing the blog. The poor quality and lack of photographs, as well as other stated reasons, were overwhelmingly opposed to the idea of even trying. Then I thought of the work I put into the briar and the stem alone. In the end, I know how smooth, golden brown and at least hardly blemished the Hardcastle bulldog looked when I was done with it. Whether anyone else does is of no importance to me.
SOURCES
https://rebornpipes.com/2014/06/27/a-unique-piece-of-pipe-history-almost-lost-a-hardcastles-dental-briar-reg-design-no-857327/
http://www.nationalarchives.gov.uk/help-with-your-research/research-guides/registered-designs-1839-1991/
https://pipedia.org/wiki/Hardcastle
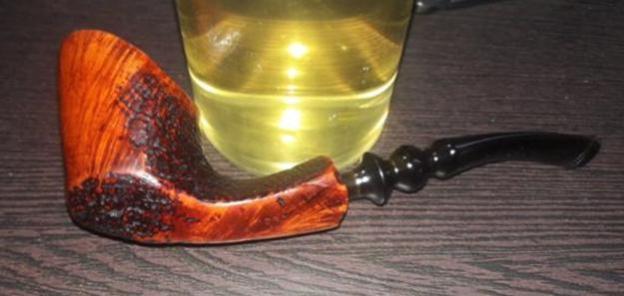
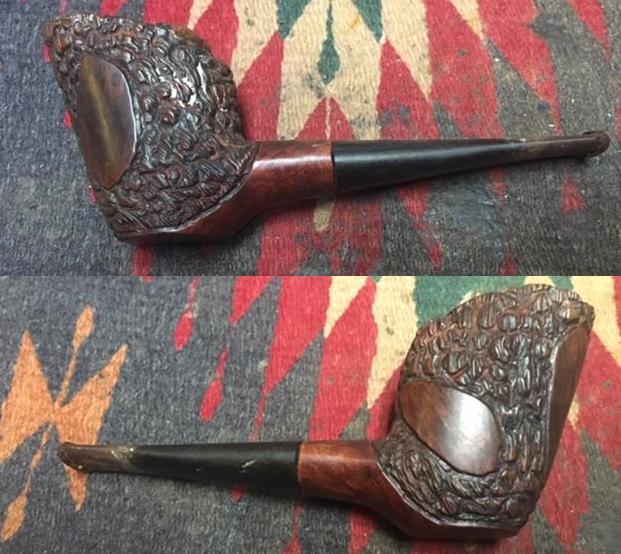
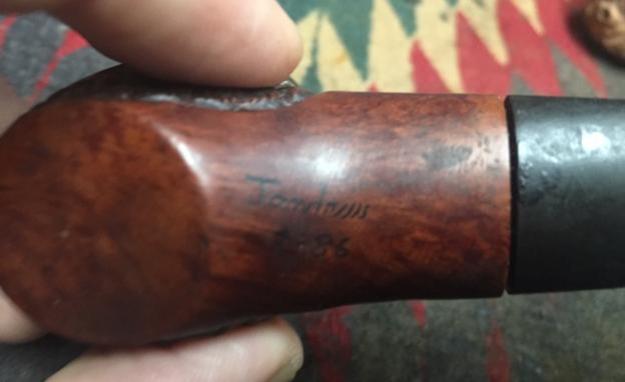
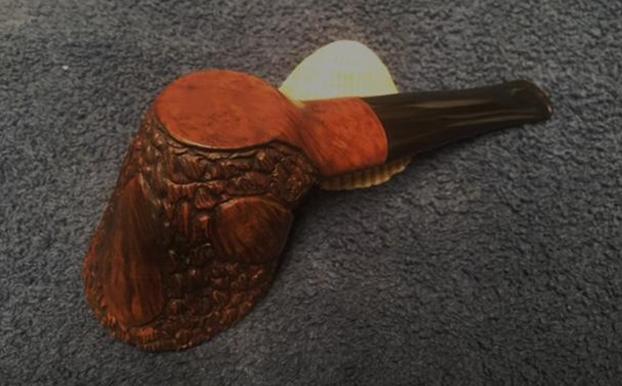
 I was surfing the net for some additional information on this particular Nording and found that this piece closely resembles the NORDING’S RUSTIC pipe. Here is the link to Nording shapes and finishes on Tobacco Pipes. (https://www.tobaccopipes.com/nording-history/)
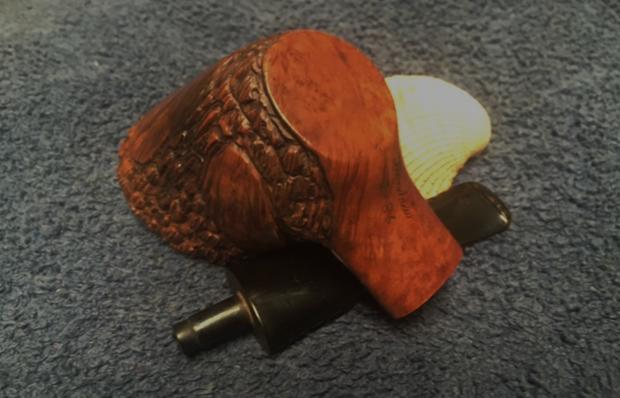
 The rustications on the shank and stummel is also dusty and filled with dirt and grime. The smooth portion of the stummel appears dull and lackluster due to dust and grime coating the stummel.
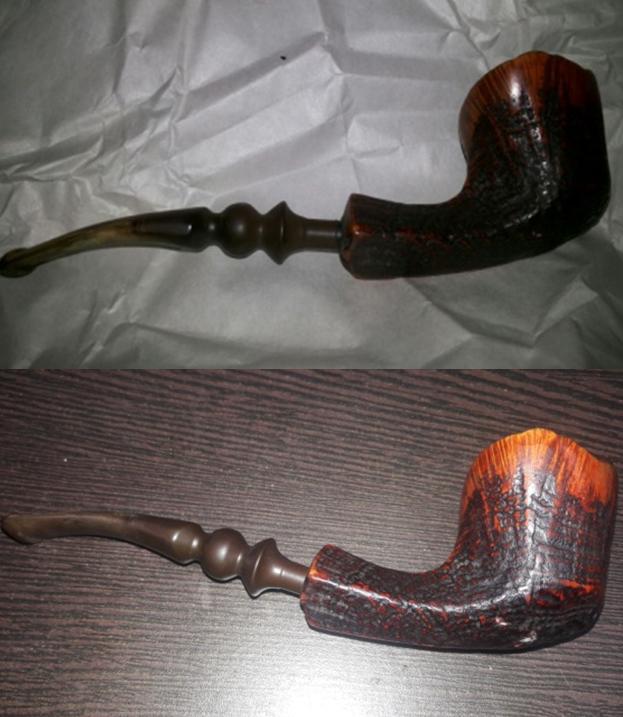
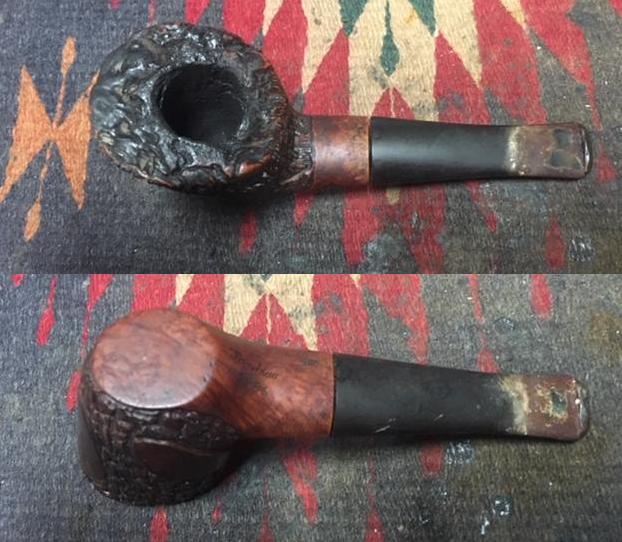
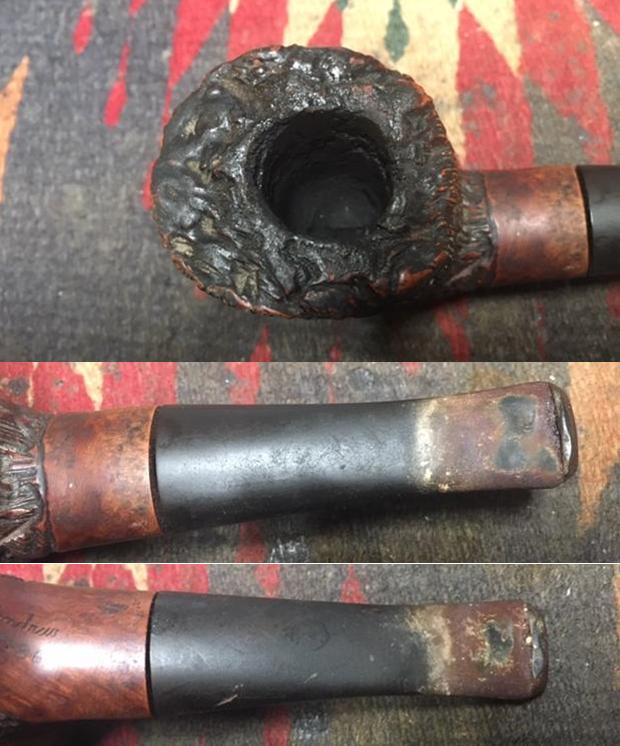
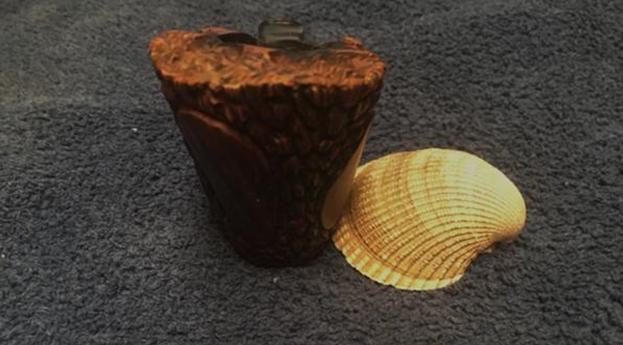
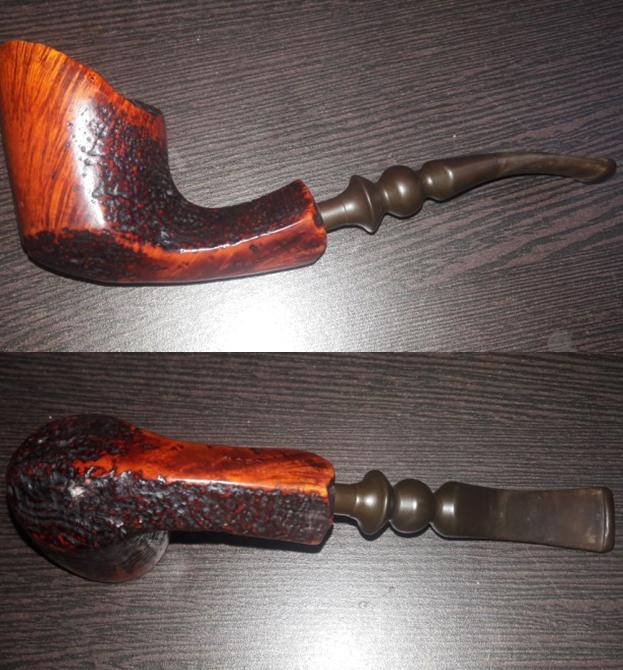
 The plateau shank end was also dirty with tars and dirt. Air does not flow freely through the shank and the mortise appears to be clogged. The stem does not seat completely in to the mortise. This will have to be cleaned.
 The stem is vulcanite and was oxidized and had some calcification on each side of the stem for the first inch ahead of the button. Apparently at some point in its life, it had a rubber Softee bit on the stem to protect it from tooth marks and chatter. It had done its job and there were no tooth marks or chatter on the surface of the stem. The stamping on the stem, though faded and covered under heavy oxidation, is visible and it will be my attempt to restore and highlight it to the extent possible.
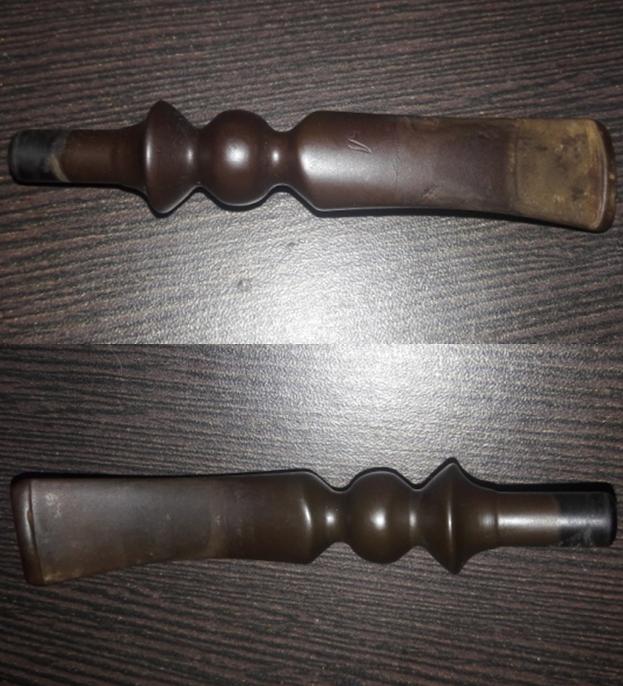 All in all, this appears to be a simple and straight forward clean up and polishing project, unless some gremlins and demons are unearthed during the process!!!!
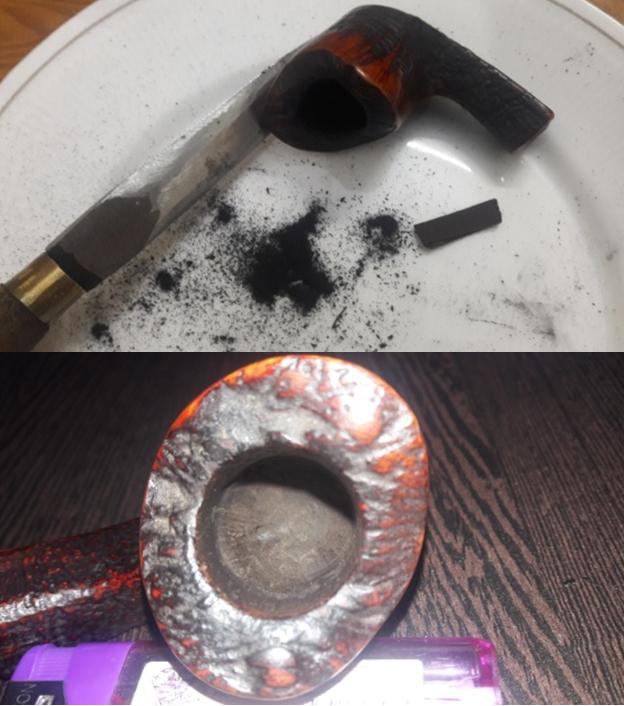
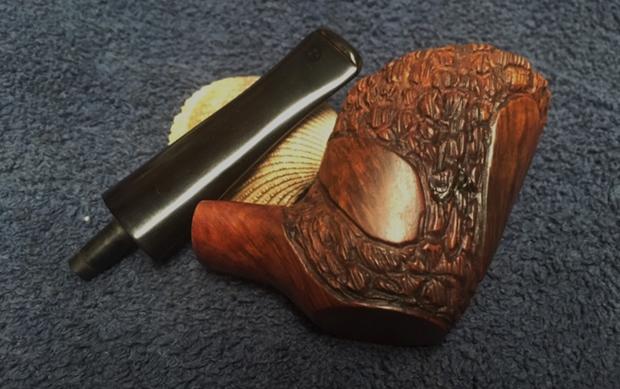
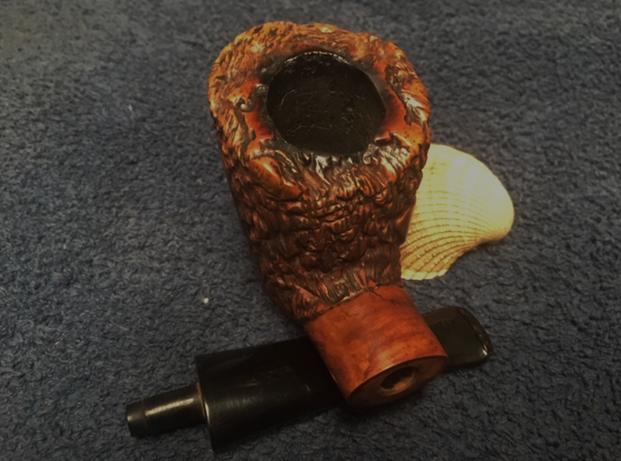
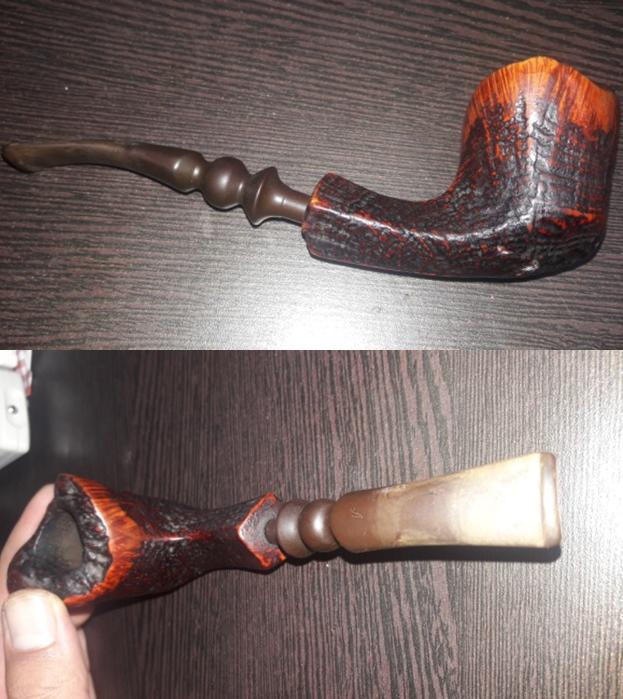
 I scrubbed the exterior of the bowl with a tooth brush and Murphy’s Oil Soap. I scrubbed the plateau rim top with a brass bristle brush to remove the tars and oil in the grooves. I rinsed the bowl with water in the sink while scrubbing the finish with the tooth brush to remove the dust and grime.
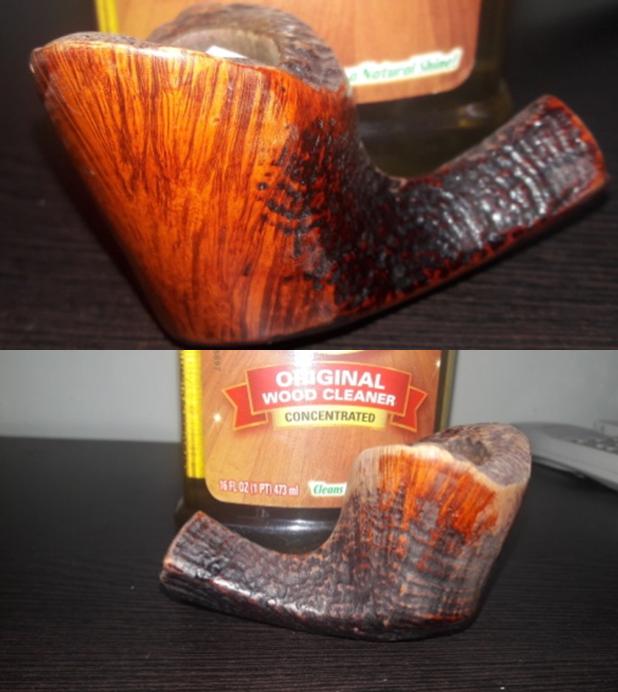
 I scrubbed out the mortise with a dental spatula. I cleaned the airway in the shank and stem with pipe cleaners, cotton swabs dipped in alcohol. Once the grime was removed the pipe smelled good and looked good.
 I rubbed some Before & After Restoration Balm into the surface of the briar to enliven, clean and preserve it. I rubbed it in with my fingertips working it into the briar. I worked it into the plateau rim, shank end, smooth portion of the stummel and the sandblast on the sides of the shank and the bowl. I buffed it into the finish with a horsehair shoe brush. I set it aside for a little while to let the balm do its work. I buffed it off with a cotton cloth and a shoe brush.

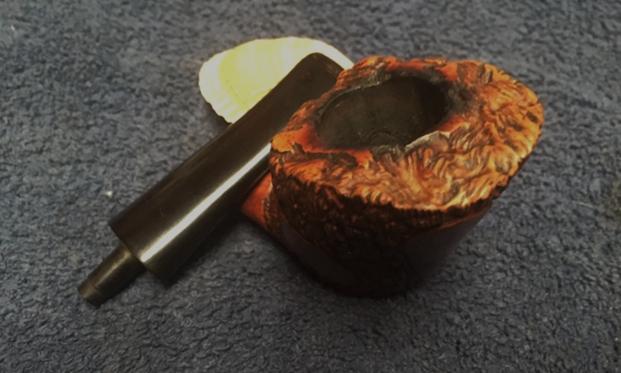
 I set the bowl aside and turned my attention to the stem. I flamed the surfaces of the stem with a Bic lighter to raise very minor tooth chatter to the surface as well loosen the oxidation from the stem surface. This was followed by sanding the oxidation and the calcification on the stem with 220 grit sandpaper. I was able to remove the oxidation and the calcification.
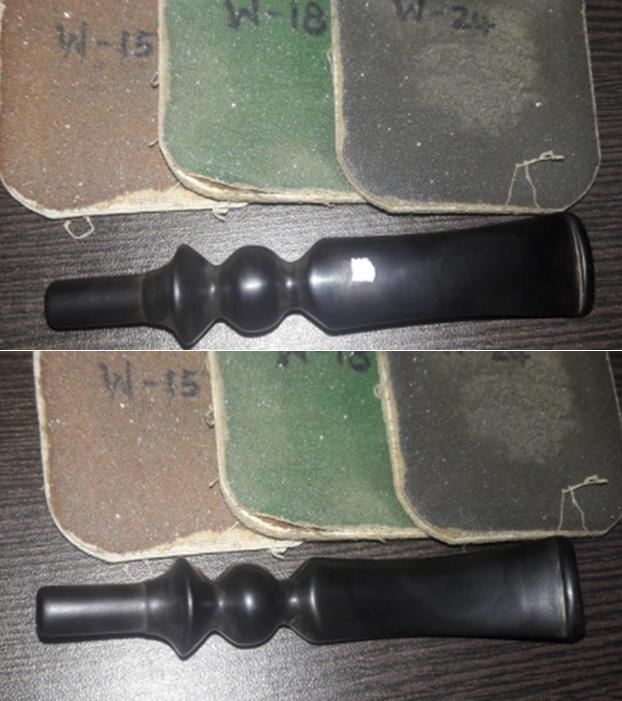
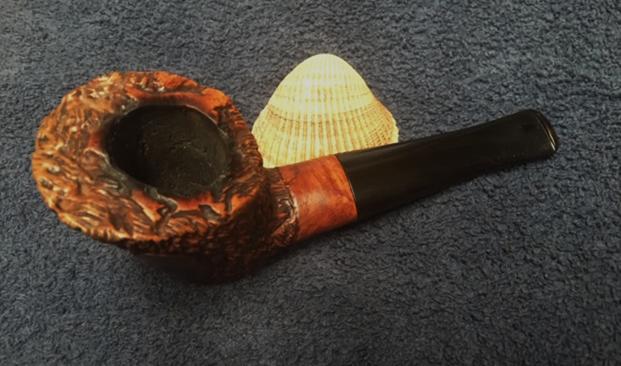
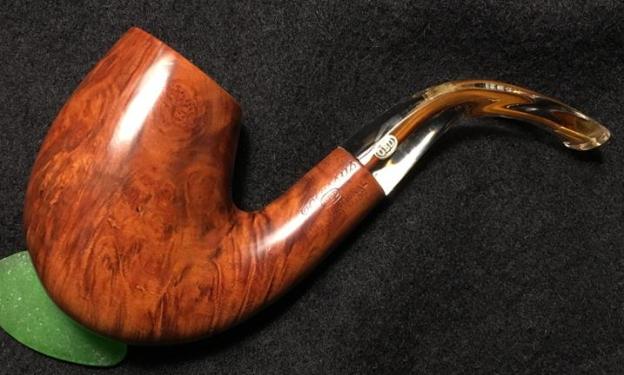
 I finished this restoration by applying a small quantity of PARAGON Wax on the stem and smooth briar surface and HALCYON II wax on the rusticated surface. I let it set for a few seconds and thereafter polished it with a soft cotton cloth. The finished pipe looks nice and with the shiny black fancy vulcanite stem, the red and dark hues of the pipe are further accentuated. The finished pipe is shown below.