Tag Archives: Dunhill Shell Pipes

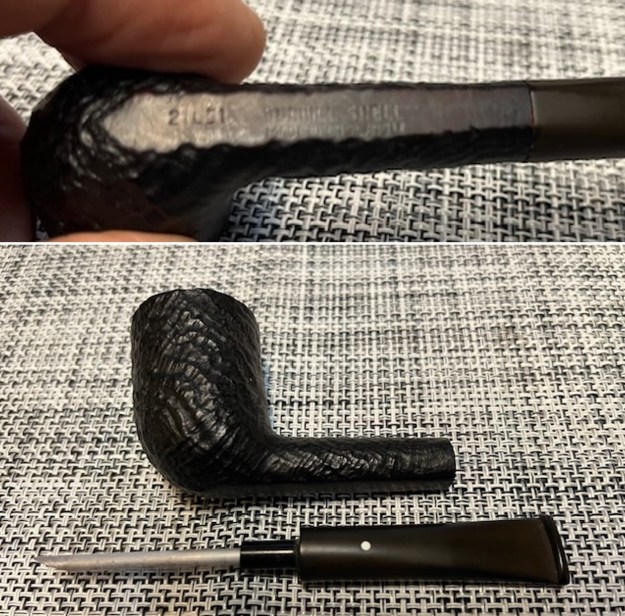
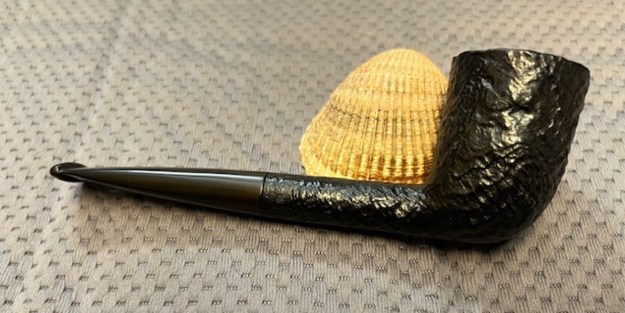
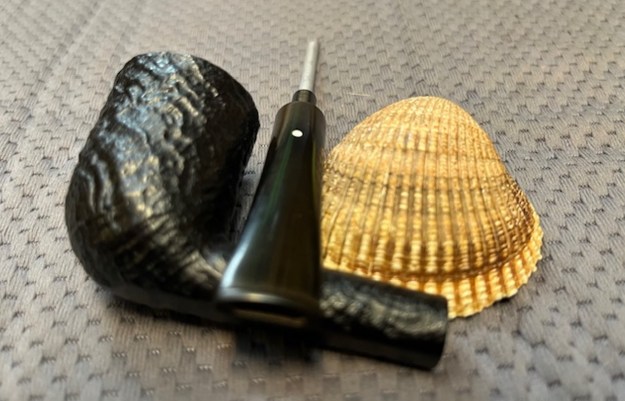
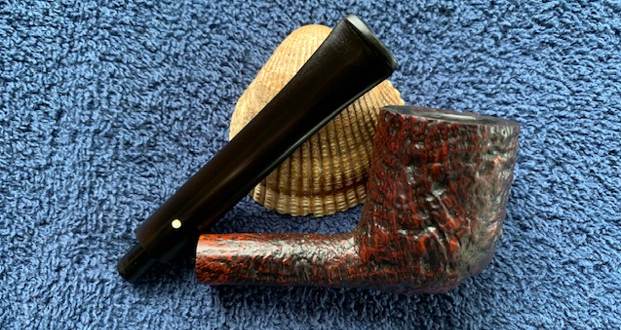
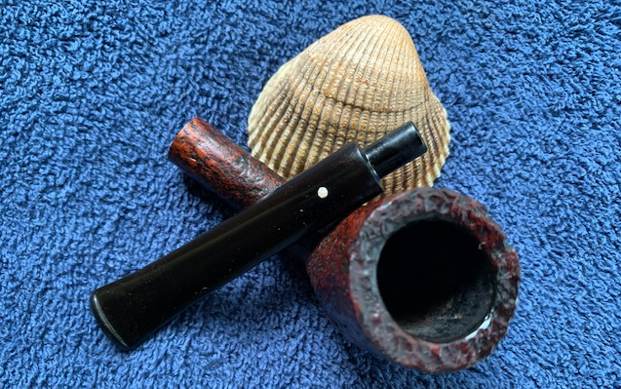
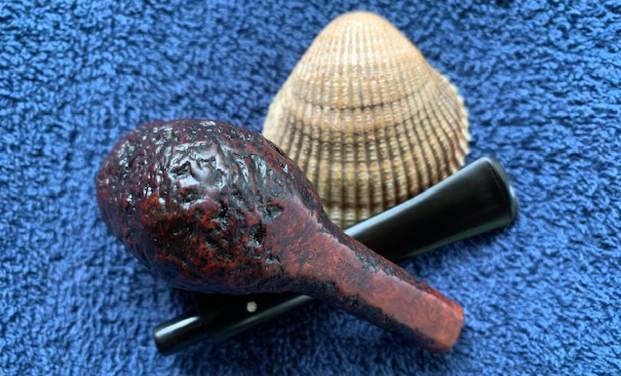
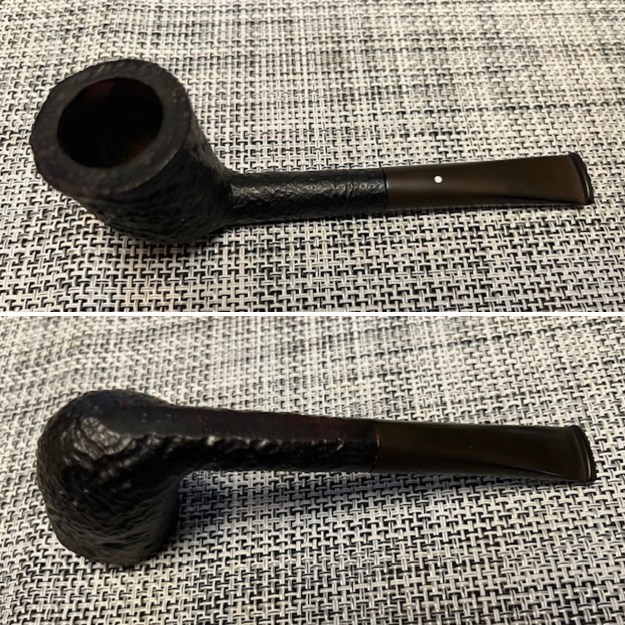
Another Old Timer – A Patent No. Dunhill Shell Briar 40 Made in England Lovat


Blog by Steve Laug

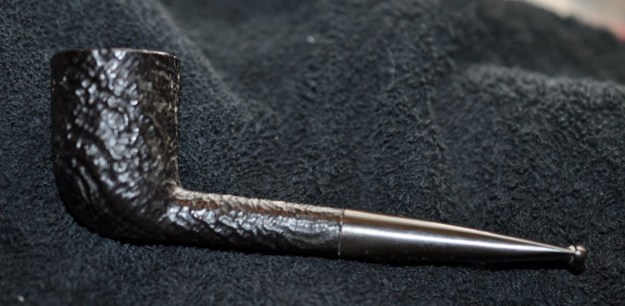
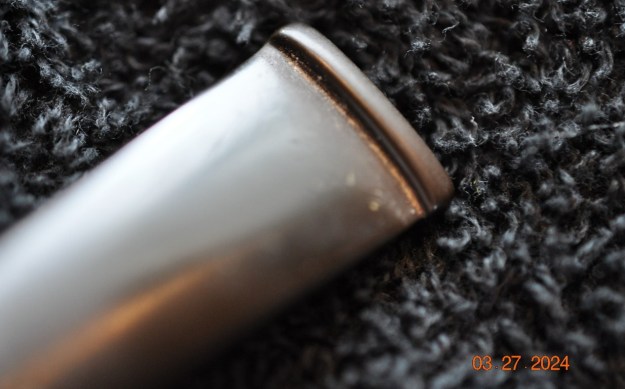
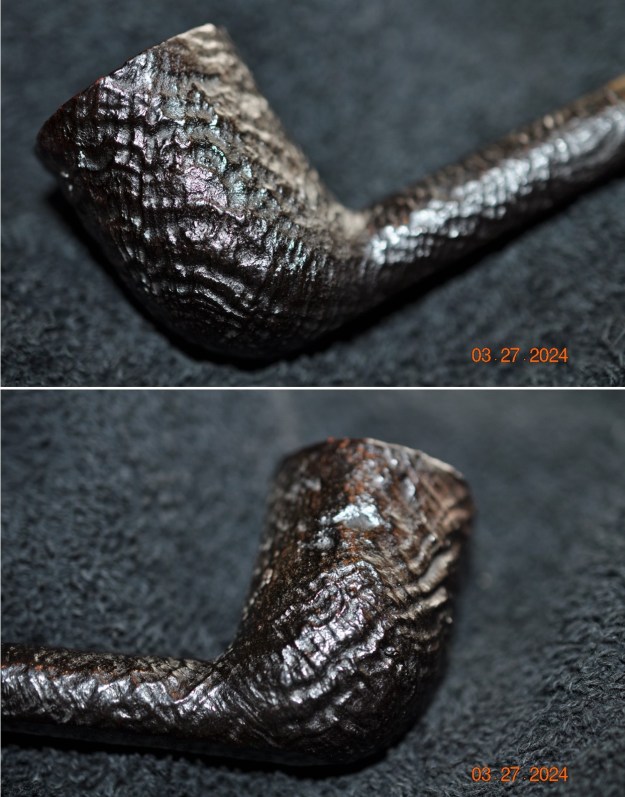
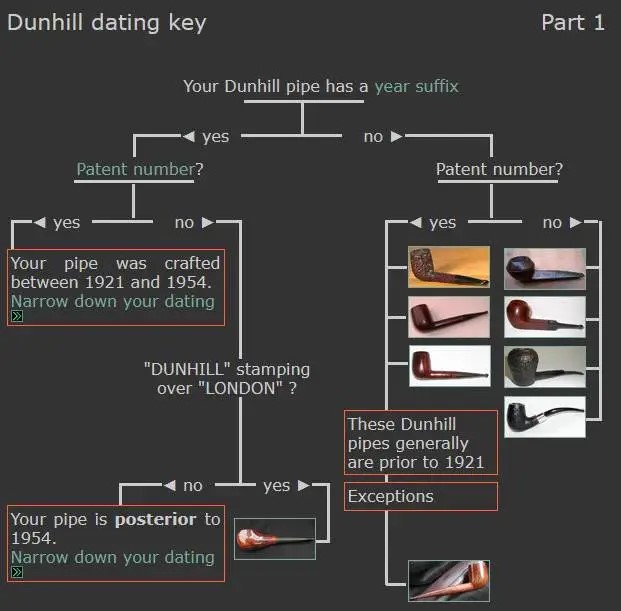
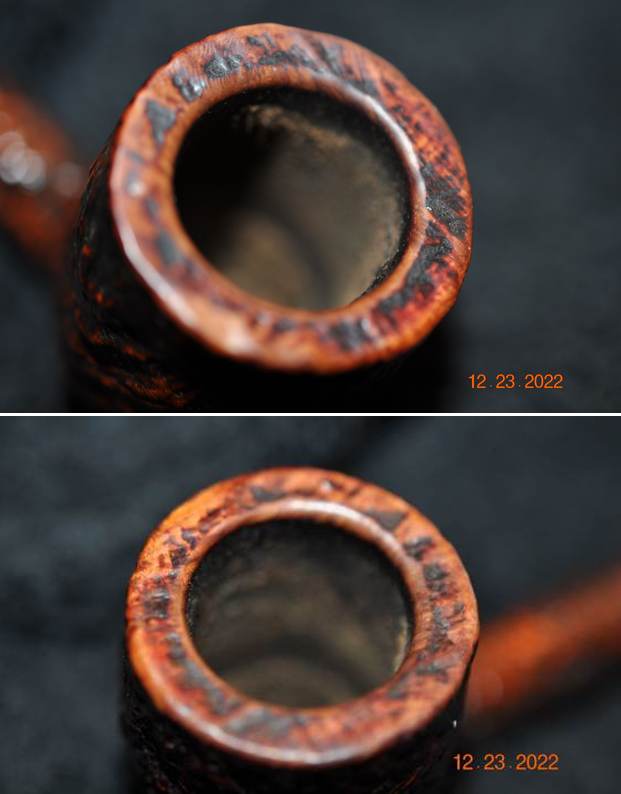
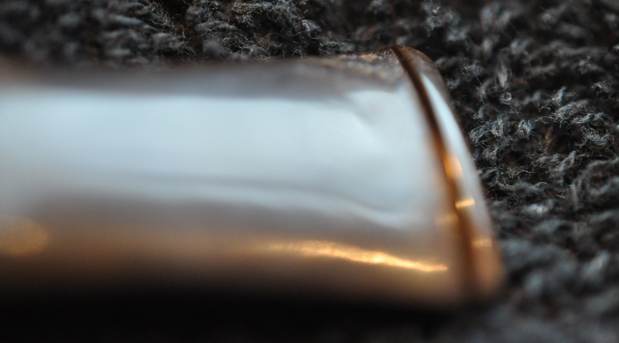
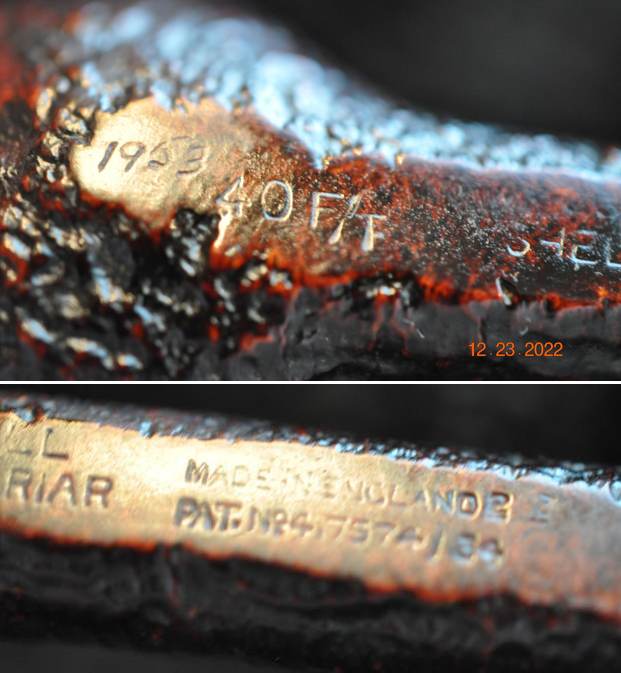
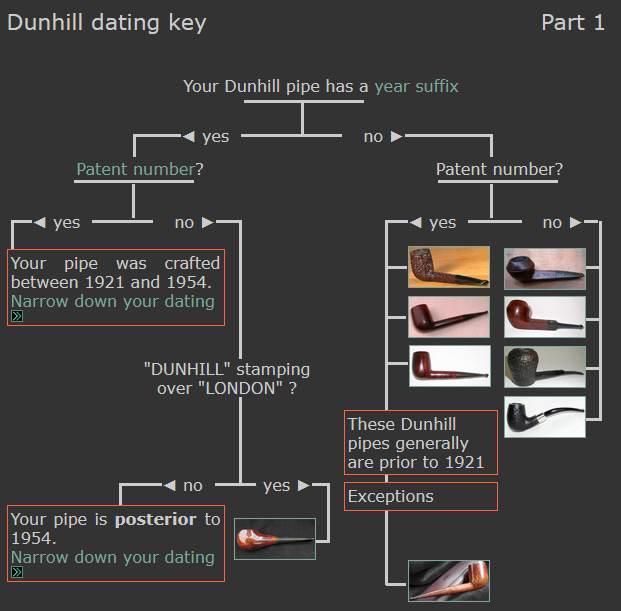
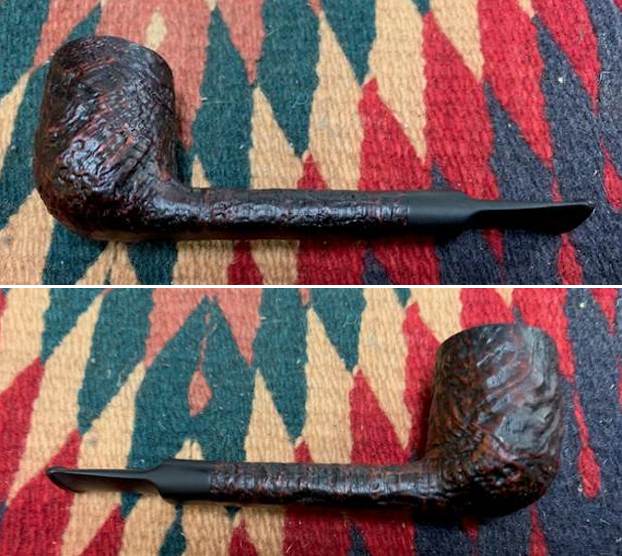
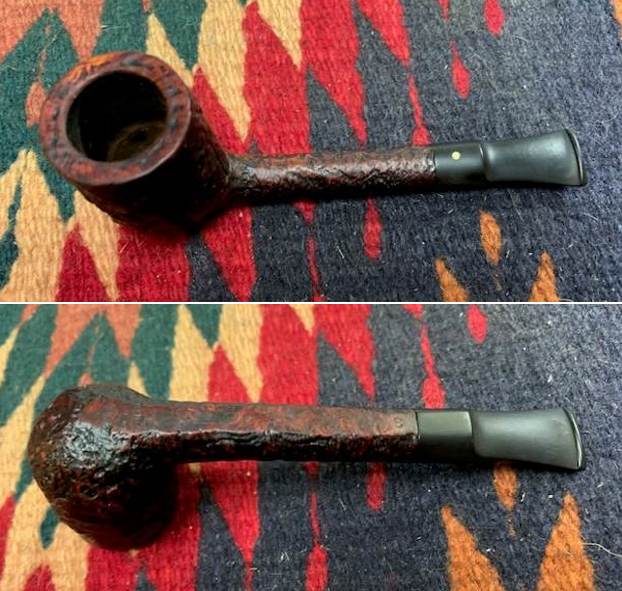
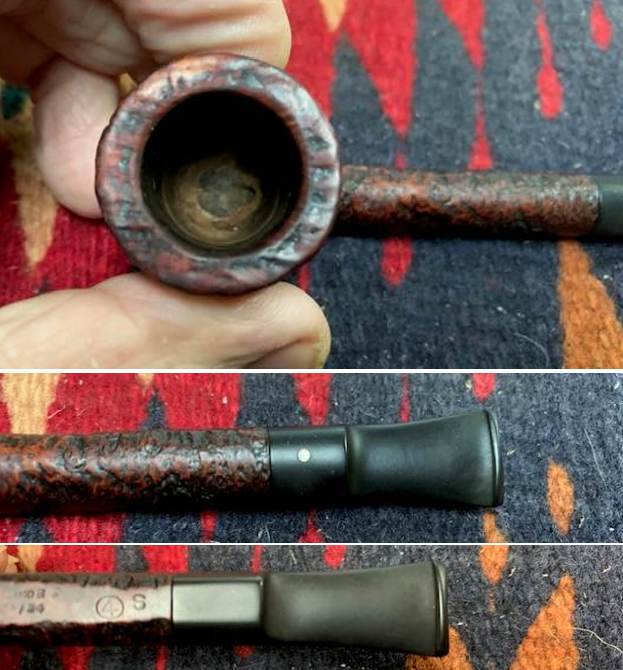
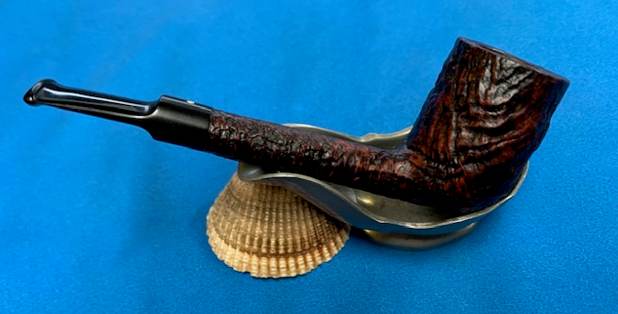
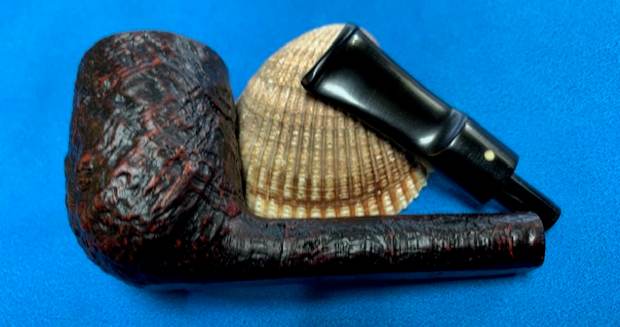
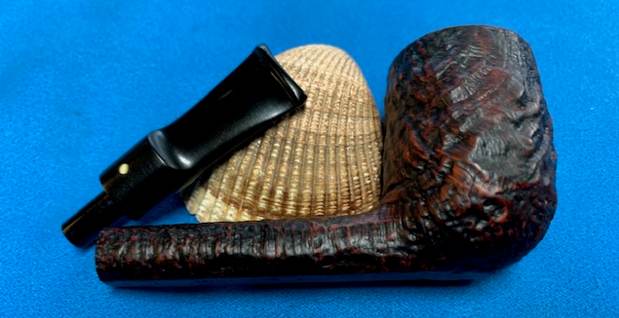
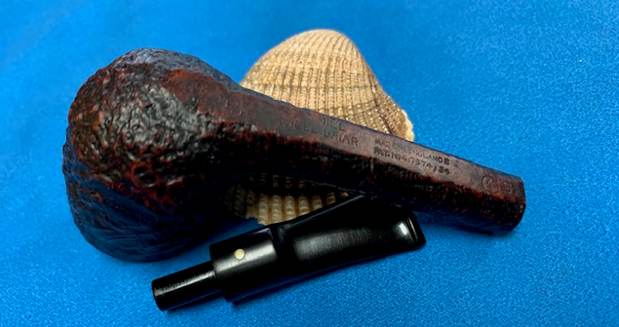
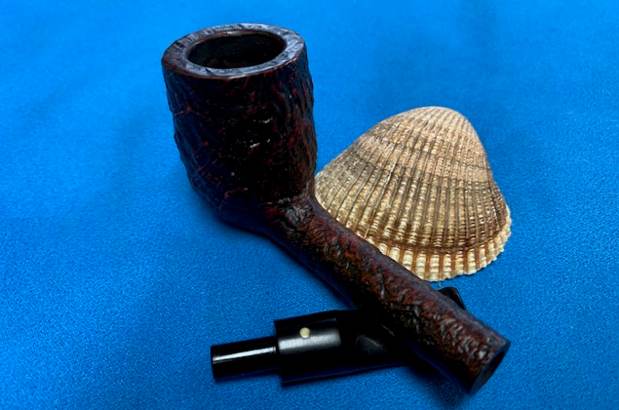
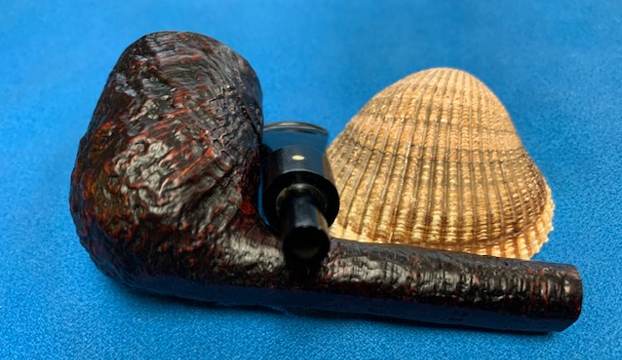
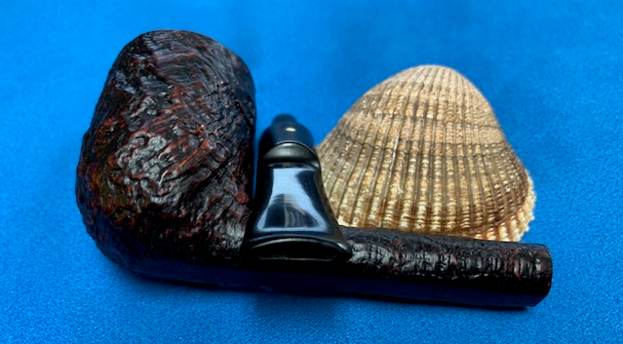
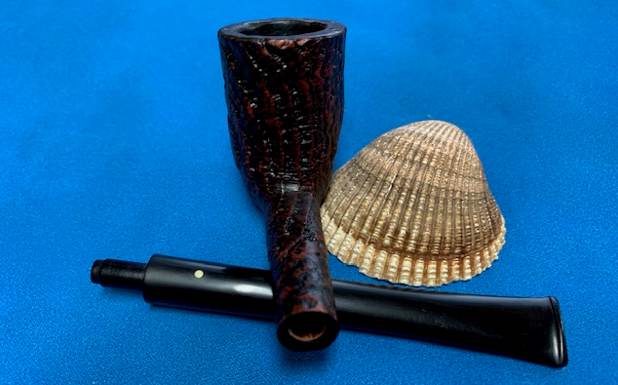
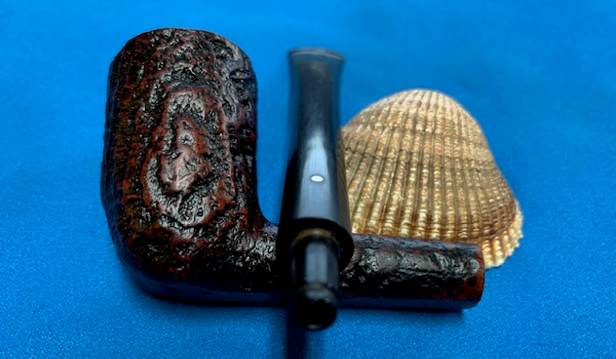
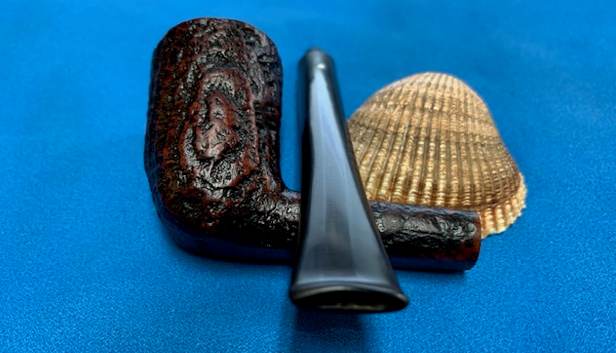
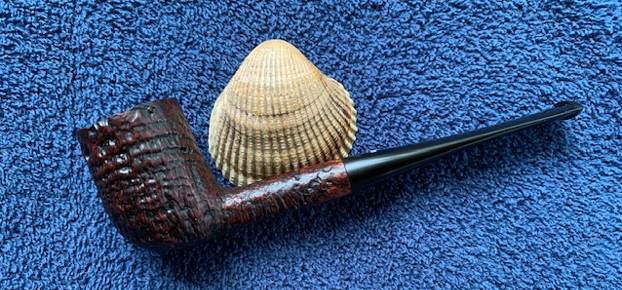
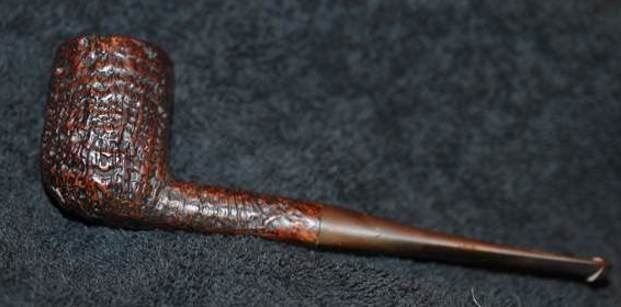
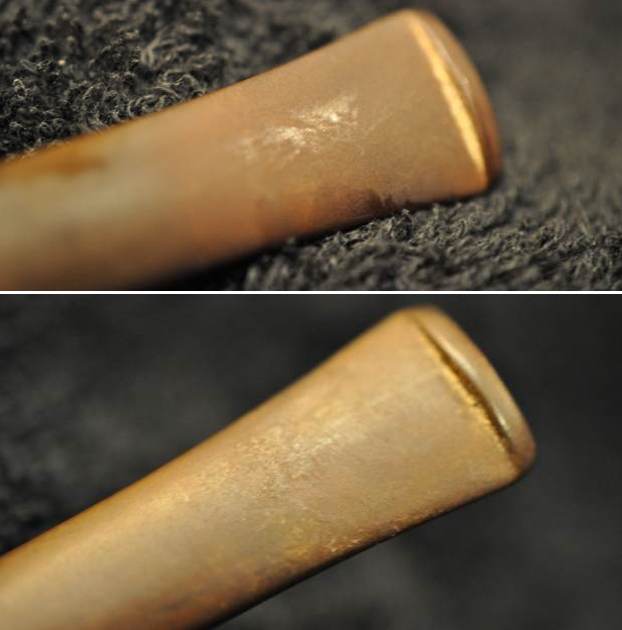
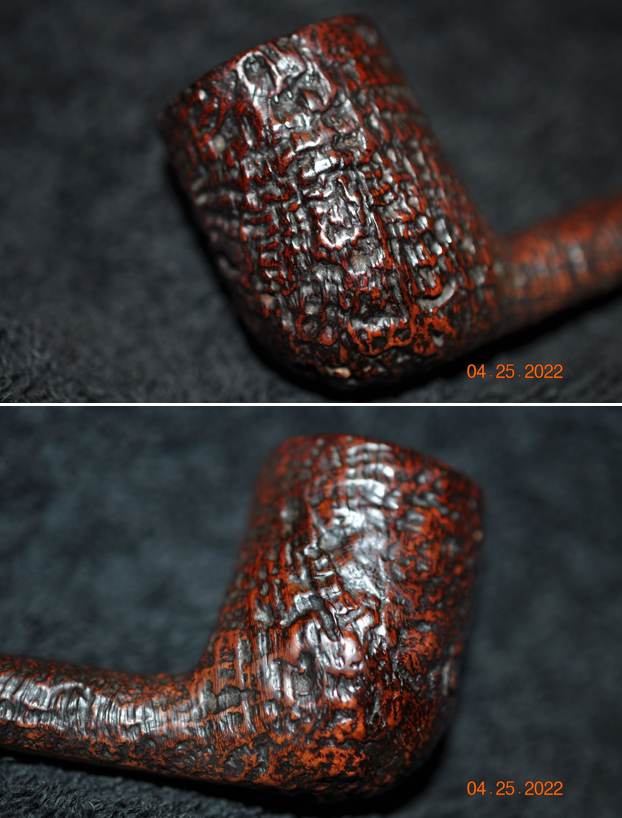
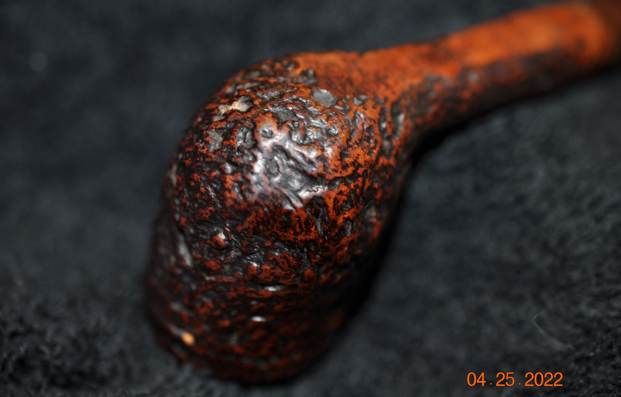
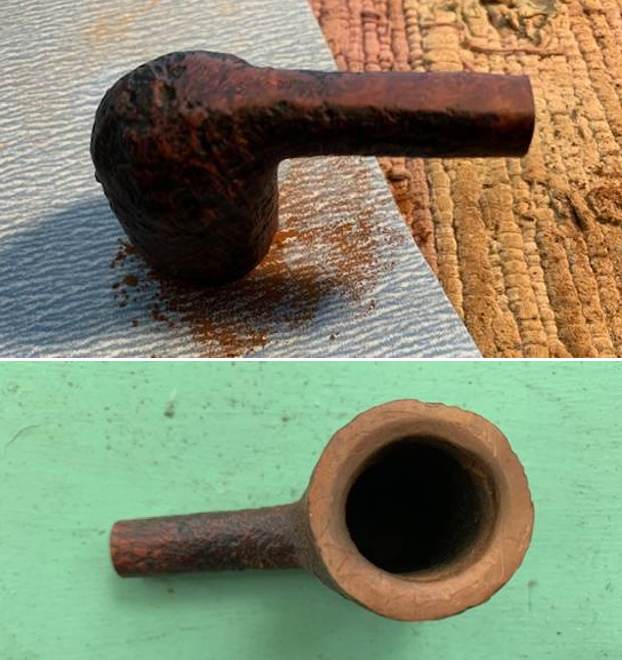
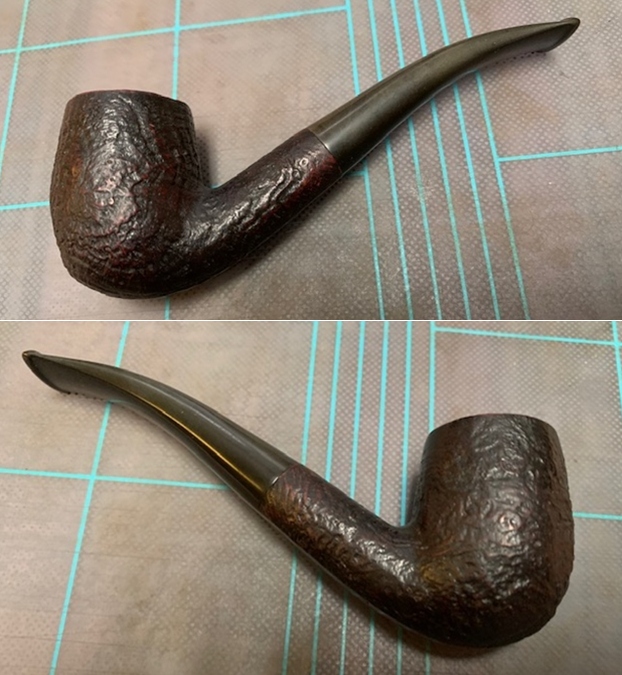
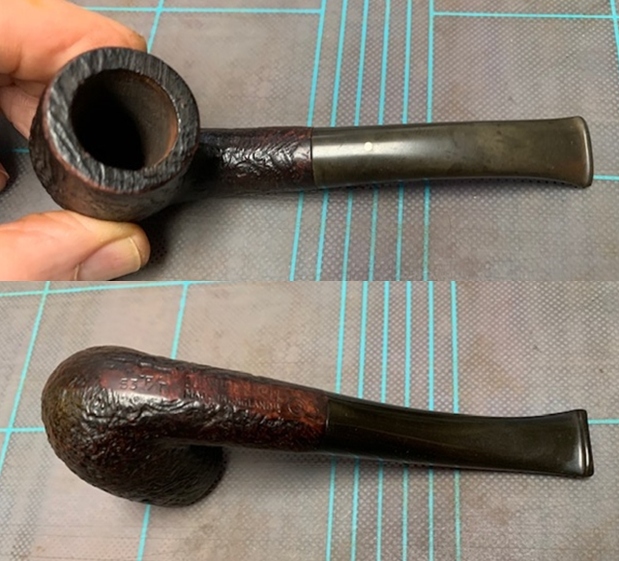
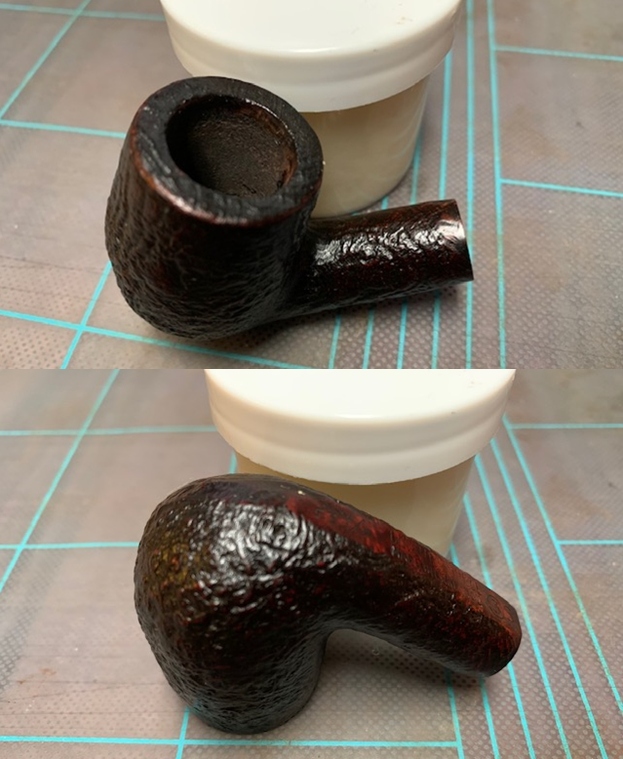
The next pipe on the table came to us from a group of pipes that Jeff and I purchased from a fellow in Copenhagen, Denmark on October 3, 2022. It is a Dunhill Shell Lovat that is in good condition. It is stamped on a smooth panel on the underside of the shank. On the heel of the bowl someone scratched 1953. Then it is stamped with the shape number 40 F/T followed by Dunhill [over] Shell Briar. Next to that it is stamped Made in England followed by the date number superscript 2 and next to that superscript 3. Underneath that it reads Pat. No. 417574/34. After that it is stamped with a 4 in a circle [followed by] S for shell. The stamping is clear and readable as noted above. The pipe has a mix of black, cordovan and brown stains on a sandblast finish and some amazing grain that the shape follows well. The finish was dusty around the nooks and crannies of the sandblast but otherwise fairly clean. The bowl had a light cake and there was some light lava on the sandblasted rim top or edges. The short saddle stem was oxidized, dirty and had tooth marks and chatter ahead of the button. Jeff took photos of the pipe to show what it looked like before he started working on it. He took photos of the bowl and rim top to show their condition and of the stem to show the condition of both sides of the stem. The photos of the sides and heel of the bowl show the deep sandblast grain on the pipe. It is a beauty.  The stamping on the underside of the shank is shown in the photo below. It looks very good and faint but readable. It reads as noted and explained above. Jeff captured the detail in the photos below. One of the first things I like to do is to unpack the stamping and understand each element in it. I turned to Pipephil helpful site (http://pipephil.eu/logos/en/dunhill/shell-briar1.html). The stamping is interpreted as follows: The scratched date 1951 is in question. The number 40 is the shape number for a Lovat. The F/T is the designation for a Fishtail stem. The Dunhill Shell is the finish which is corroborated the S at the end of the stamping. The size of the pipe is a Group 4. The 2 3 following the D of England gives the date the pipe.Pipephil also has some helpful dating keys on the site that are basically flow charts that you can walk through to date your pipe (http://pipephil.eu/logos/en/dunhill/cledat-en1.html). I turned to Part 1 of the Dating Key and followed the chart. This pipe has a suffix of 2 3 following the D in England. It is raised and underlined so that took me to the section on the chart below (column one) which instructed me that the pipe could be dated as being made between 1921 and 1954. The date stamp 2 3 which made the pipe a 1952 Shell that was sold in 1953.I followed the link following the “Your pipe was crafted between 1921 and 1954. Narrow down your dating”. That took me to Page 2 of the dating key (http://pipephil.eu/logos/en/dunhill/cledat-en1b.html). The first column on the left led me to the section on 1…4 where the directive of dating the pipe is spelled out as follows: 1950 + suffix which gives the  pipe a date of 1954.I then turned to Pipedia’s section on Dunhill Root Briar to get a bit of background on the Duhill finishes (https://pipedia.org/wiki/Dunhill#Root_Briar). I quote:

Shell
A deep craggy sandblast with a black stain finish (usually made using Algerian briar) – the color of the stain used has varied over the years. Although there is some doubt as to them being the first to sandblast pipes, Dunhill’s Shell pipes, and the sandblasting techniques developed to create them are considered one of Dunhill’s greatest and most lasting contributions to the art of pipe making.

The documented history of Dunhill’s inception of the Shell is largely limited to patent applications — there are no catalog pages or advertisements promoting blasted pipes at the time. The preliminary work on the English patent (No. 1484/17) was submitted on October 13, 1917. The patent submission was completed half a year later, on April 12, 1918, followed by the granting of the English patent on October 14, 1918. This was less than a month before the end of The Great War on November 11th.

In 1986 Dunhill released a line of premium Shell finish pipes – “RING GRAIN”. These are high-quality straight grain pipes which are sandblasted. Initially only Ring Grain, but now in two different finishes. In 1995 the “Shilling” was introduced with Cumberland finish – it is an extremely rare series. These pipes exhibit a deeper blast characteristic of that of the 1930’s – mid-1960’s (and the limited ‘deep blast’ pipes of the early 1980s) and show a fine graining pattern. These are considered the best new Dunhills by many enthusiasts today and are very rare. The finish is sometimes described as tasting like vanilla at first, with the taste becoming more normal or good as the pipe breaks in.

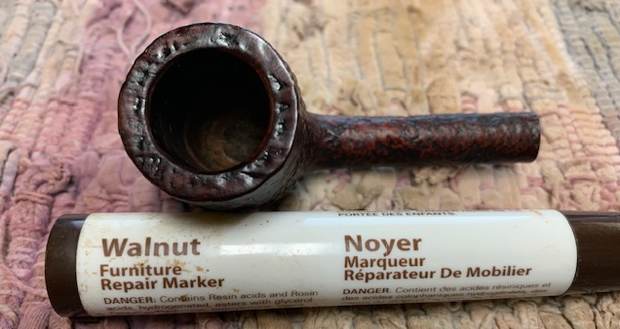
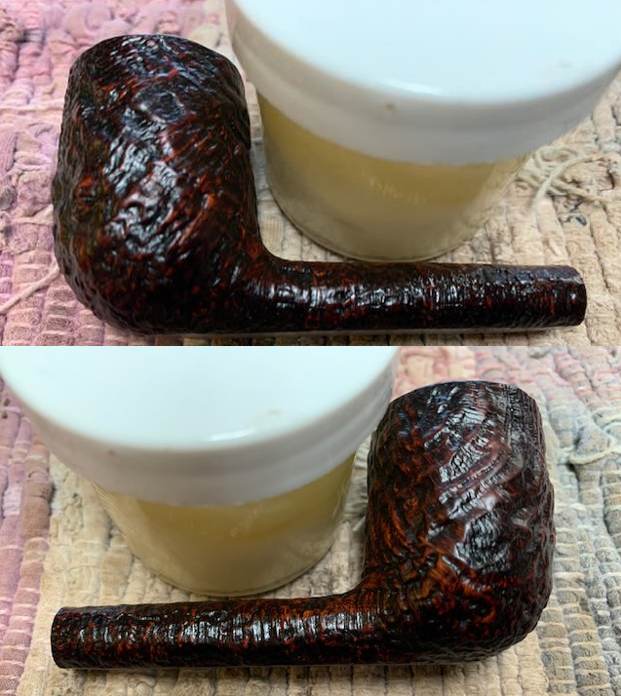
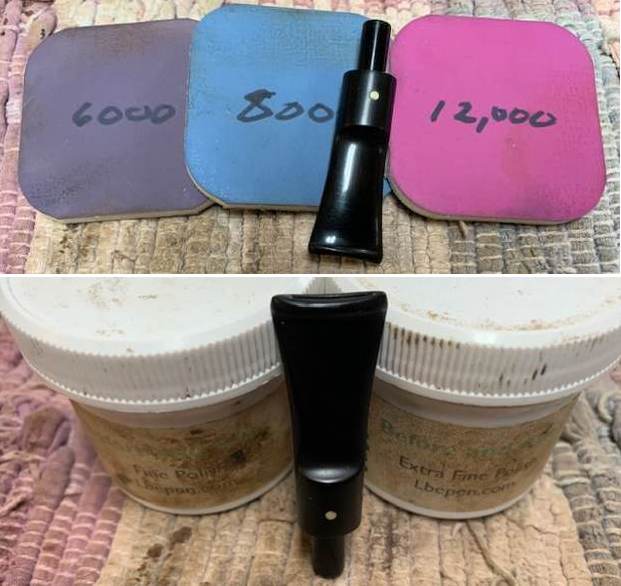
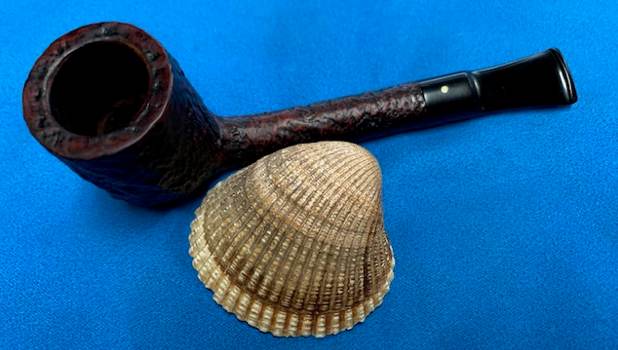
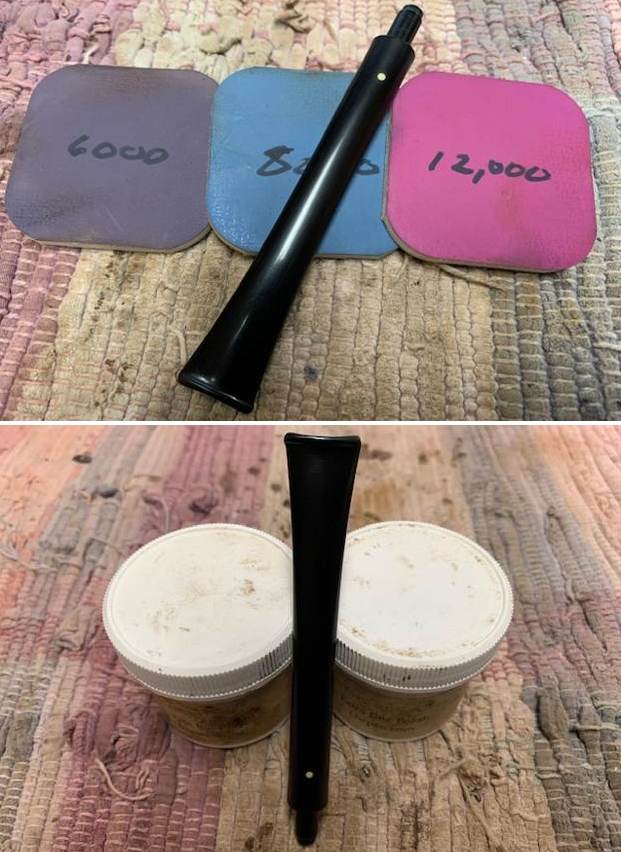
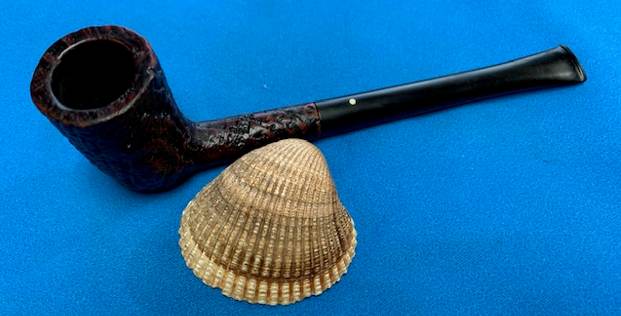
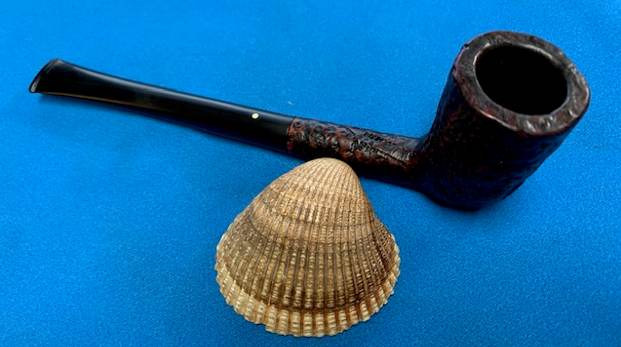
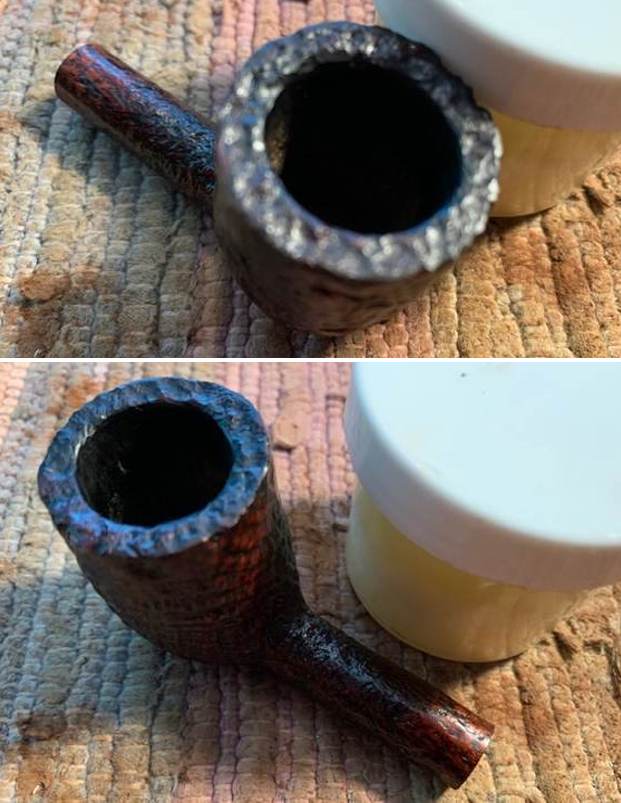
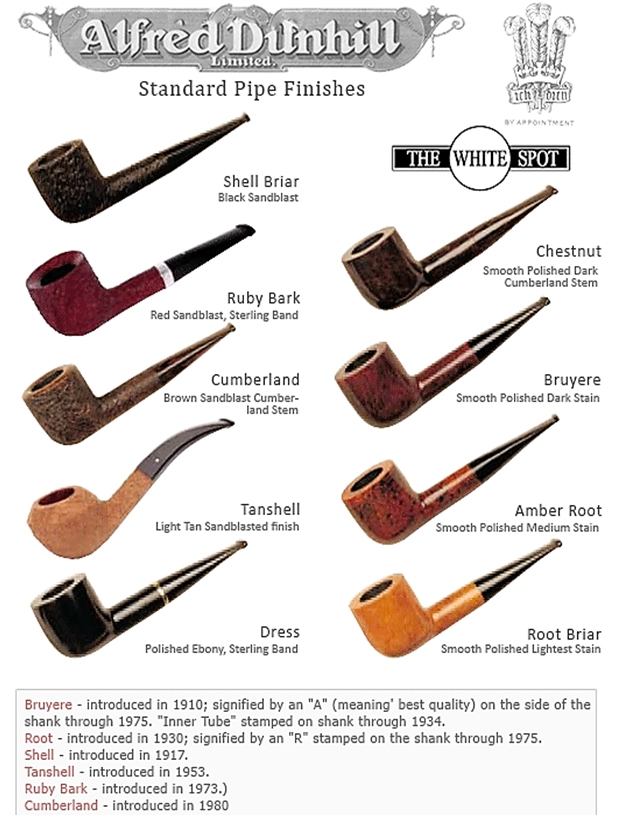
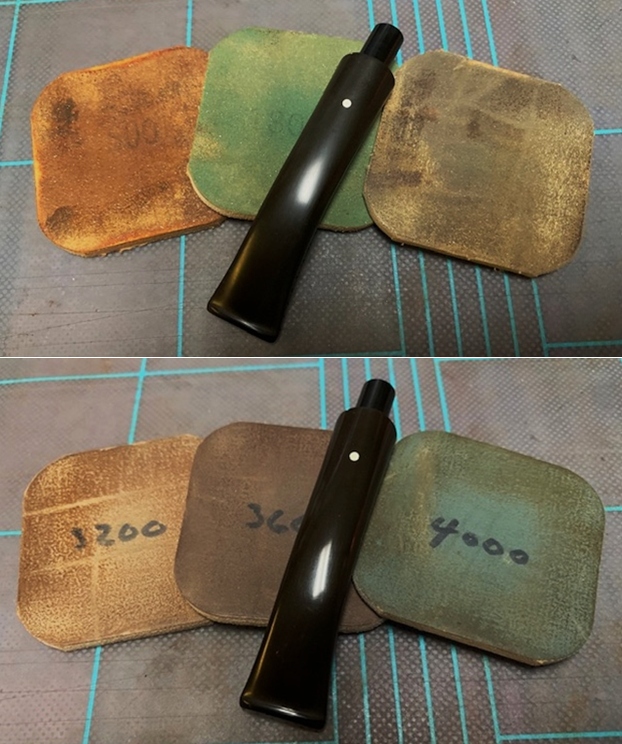
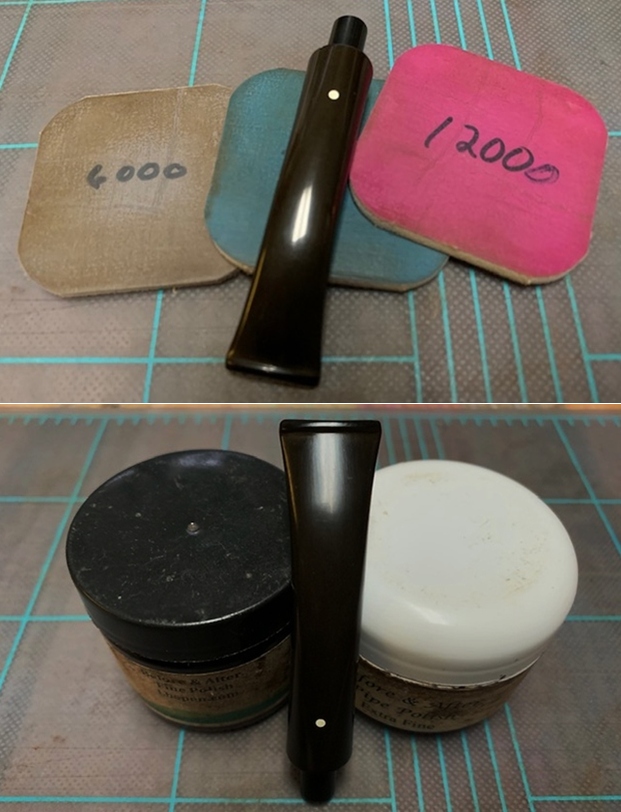
I have also included a chart from the site from Dunhill spelling out the Standard Pipe Finishes and giving short information and a timeline. I turned to work on the pipe itself. Jeff had done an amazing cleanup of the pipe. He reamed the light cake with a PipNet reamer and cleaned up that with a Savinelli Fitsall Pipe Knife. He scrubbed the internals of the bowl and stem with alcohol, cotton swabs and pipe cleaners. He scrubbed the externals with undiluted Murphy’s Oil Soap and rinsed the bowl off with running water. He soaked the stem in Briarville’s Pipe stem Deoxidizer and once it had soaked rinsed it off with warm water to remove the residual solution. He dried it off and rubbed it down to remove any oxidation that was still on the stem. The pipe looked very good when I received it. I took a photo of the rim top to show the condition. You can see the clean bowl. It almost looks as if it was never smoked to the bottom of the bowl. The stem came out looking quite good. There are some tooth marks and chatter on both sides ahead of the button.  I took a photo of the underside of the shank to show the stamping. The photo clearly shows the stamping and is actually more readable in the photo than in person. I removed the stem from the shank and took a photo of the pipe parts to show what I was working with. It is a nice looking pipe.The bowl was in such good condition that I had to do some minimal work with it. I touched up the stain on the worn spots on the rim with a walnut stain pen. I rubbed the briar down with Before & After Restoration Balm. I worked it into the briar with my fingertips and a horsehair shoe brush to work it into the nooks and crannies of the sandblast finish. The product works to clean, enliven and preserve the briar. I let it sit for 10 minutes then I buffed it with a cotton cloth to deepen the shine. The briar really comes alive with the balm. I “painted” the stem surface on both sides to lift the dents. The heat lifted the ones on the top completely and the ones on the underside for the most part. I filled in the two small remaining marks on the underside of the stem with clear CA glue. Once it cured I sanded repairs out with 220 grit sandpaper and started the polishing with 400 grit wet dry sandpaper. I polished the vulcanite with micromesh sanding pads – 1500-12000 grit pads. I wiped it down with Obsidian Oil after each sanding pad. I used Before & After Pipe Polish – both Fine and Extra Fine to further polish the stem.  This 1952 Patent No. Dunhill Shell 40 F/T Lovat has a beautiful, unique Dunhill Sandblast finish that is very deep and craggy. The dark mixed black/brown/red finish highlights some great grain around the bowl and shank. It has some great rugged sandblast that Dunhill specialized in making. The polished black vulcanite short saddle stem adds to the mix. I put the stem back on the bowl and buffed the pipe with Blue Diamond on the buffing wheel being careful to not buff the stamping. I gave the bowl multiple coats of Conservator’s Wax and the stem multiple coats of carnauba wax on the buffing wheel and followed that by buffing it with a clean buffing pad. I hand buffed the pipe with a microfiber cloth to deepen the shine. The finished Dunhill Shell 40 F/T Lovat is quite nice and feels great in the hand. Give the finished pipe a look in the photos below. The dimensions of the pipe are Length: 5 inches, Height: 1 ¾ inches, Outside diameter of the bowl: 1 1/8 inches, Chamber diameter: ¾ of an inch. The weight of the pipe is .92 ounces/26 grams. Thanks for walking through the restoration with me as I worked over another beautiful pipe. If you are interested in adding it to your collection I will be adding it to the British Pipe Makers Section of the rebornpipes store. Thanks for your time.
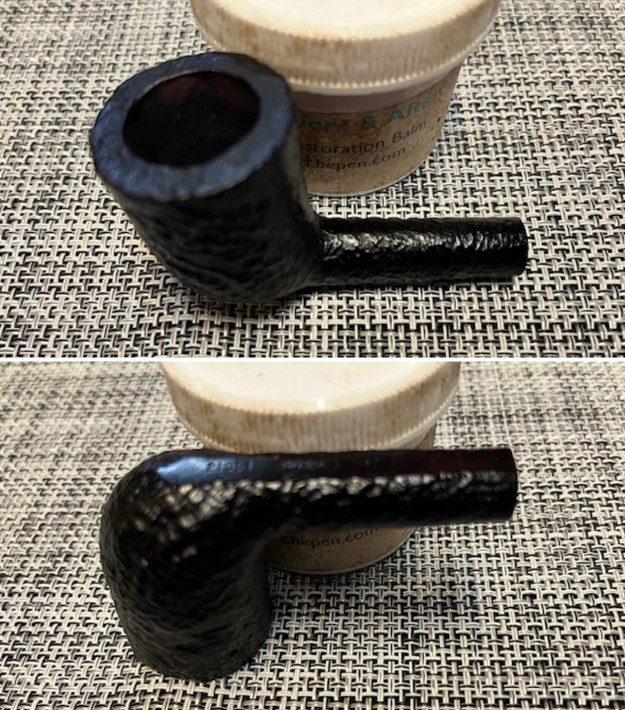
An Old Timer – A Patent No. Dunhill Shell 42 Made in England Dublin


Blog by Steve Laug

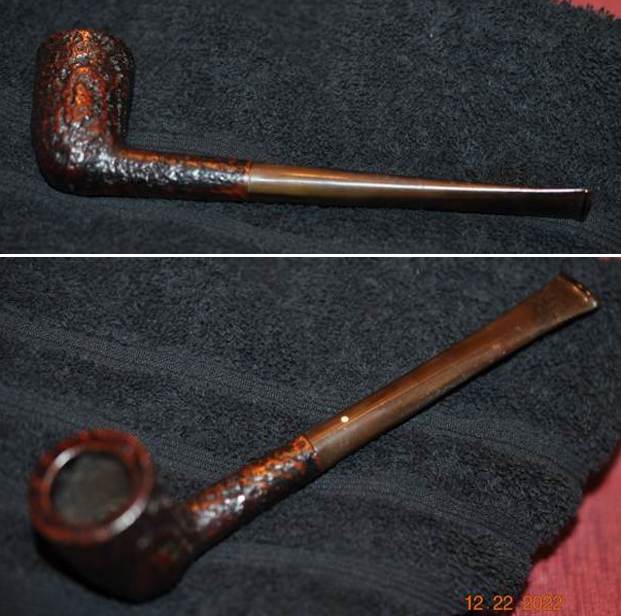
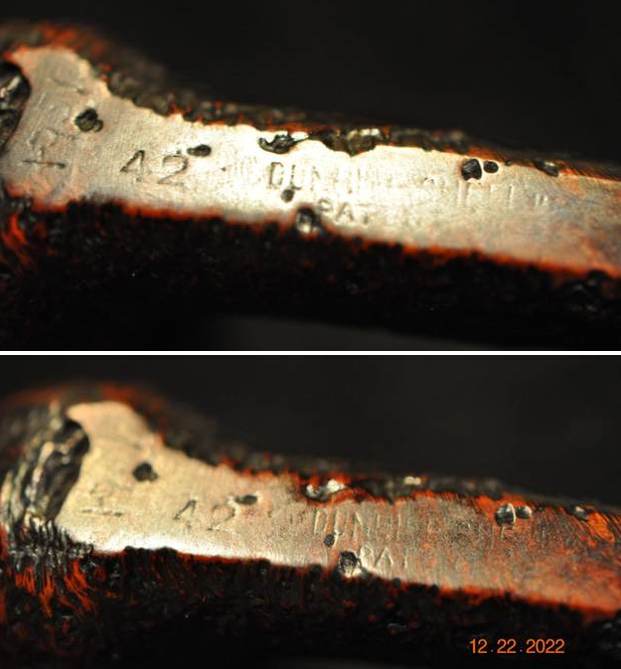
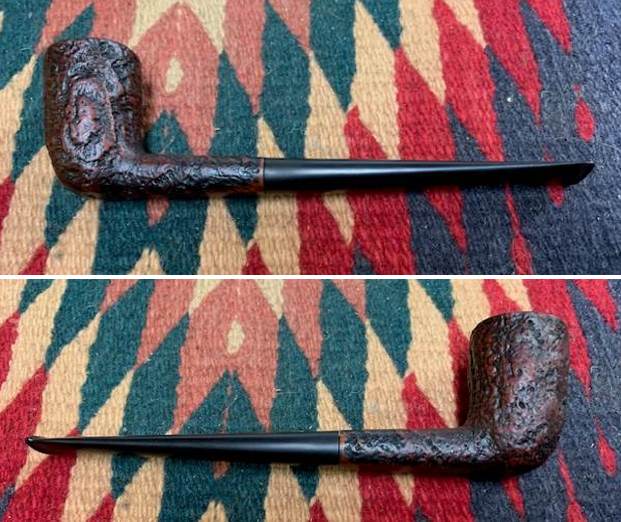
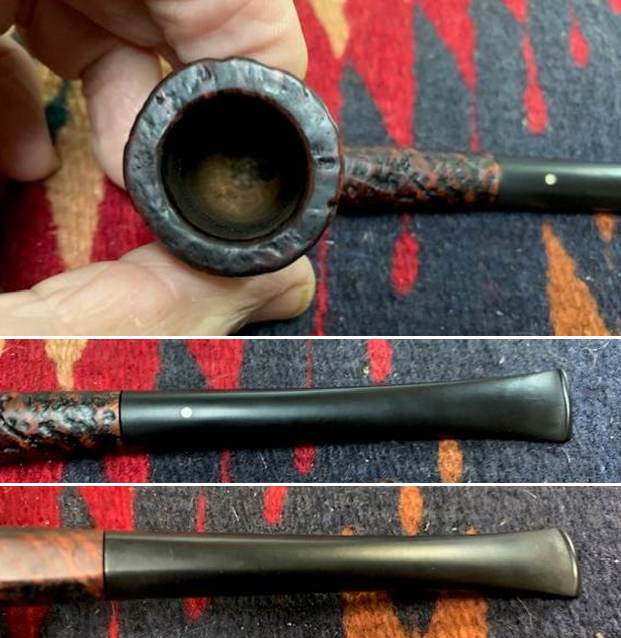
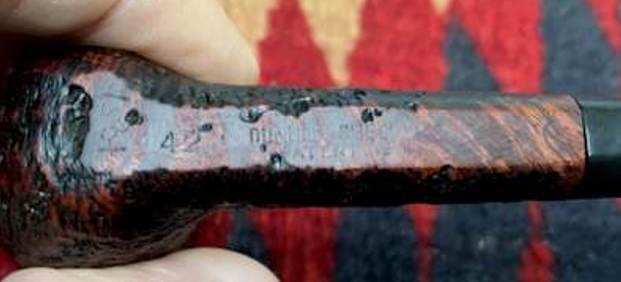
The next pipe on the table came to us from a group of pipes that Jeff and I purchased from a fellow in Copenhagen, Denmark on October 3, 2022. It is a Dunhill Shell Dublin that is in good condition. It is stamped on a smooth panel on the underside of the shank. On the heel of the bowl someone scratched 1951. Then it is stamped with the shape number 42 F/T followed by Dunhill Shell [over] Patent No. 417574/34. That is followed by Made in England followed by the date number 4 (faint but under a bright light seems to be a 4). So the dating is a bit of a mystery – 51 or 54? I lean toward the 54 date but it is not certain. After that it is stamped with a 4 in a circle [followed by] S for shell. The stamping is clear until the Made in stamp and shape number. The pipe has a mix of black, cordovan and brown stains on a sandblast finish and some amazing grain that the shape follows well. The finish was dusty around the nooks and crannies of the sandblast but otherwise fairly clean. The bowl had a light cake and there was some light lava on the sandblasted rim top or edges. The taper fishtail stem was oxidized, dirty and had tooth marks and chatter ahead of the button. Jeff took photos of the pipe to show what it looked like before he started working on it. He took a photo of the bowl and rim top to show their condition and of the stem to show the condition of both sides of the stem. The photos of the sides and heel of the bowl show the deep sandblast grain on the pipe. It is a beauty.   The stamping on the underside of the shank is shown in the photo below. It looks very good and faint but readable. It reads as noted and explained above. Jeff captured the detail in the photos below.One of the first things I like to do is to unpack the stamping and understand each element in it. I turned to Pipephill helpful site (http://pipephil.eu/logos/en/dunhill/shell-briar1.html). The stamping is interpreted as follows: The scratched date 1951 is in question. The number 42 is the shape number for a Dublin. The F/T is the designation for a Fishtail stem. The Dunhill Shell is the finish which is corroborated the S at the end of the stamping. The size of the pipe is a Group 4. The 4 following the D of England gives the date the pipe.Pipephil also has some helpful dating keys on the site that are basically flow charts that you can walk through to date your pipe (http://pipephil.eu/logos/en/dunhill/cledat-en1.html). I turned to Part 1 of the Dating Key and followed the chart. This pipe has a suffix of 4 following the D in England. It is raised and underlined so that took me to the section on the chart below (column one) which instructed me that the pipe could be dated as being made between 1921 and 1954. The date stamp 4 which made the pipe a 1954 Shell.I followed the link following the “Your pipe was crafted between 1921 and 1954. Narrow down your dating”. That took me to Page 2 of the dating key (http://pipephil.eu/logos/en/dunhill/cledat-en1b.html). The first column on the left led me to the section on 1…4 where the directive of dating the pipe is spelled out as follows: 1950 + suffix which gives the  pipe a date of 1954.I then turned to Pipedia’s section on Dunhill Root Briar to get a bit of background on the Duhill finishes (https://pipedia.org/wiki/Dunhill#Root_Briar). I quote:

Shell
A deep craggy sandblast with a black stain finish (usually made using Algerian briar) – the color of the stain used has varied over the years. Although there is some doubt as to them being the first to sandblast pipes, Dunhill’s Shell pipes, and the sandblasting techniques developed to create them are considered one of Dunhill’s greatest and most lasting contributions to the art of pipe making.

The documented history of Dunhill’s inception of the Shell is largely limited to patent applications — there are no catalog pages or advertisements promoting blasted pipes at the time. The preliminary work on the English patent (No. 1484/17) was submitted on October 13, 1917. The patent submission was completed half a year later, on April 12, 1918, followed by the granting of the English patent on October 14, 1918. This was less than a month before the end of The Great War on November 11th.

In 1986 Dunhill released a line of premium Shell finish pipes – “RING GRAIN”. These are high-quality straight grain pipes which are sandblasted. Initially only Ring Grain, but now in two different finishes. In 1995 the “Shilling” was introduced with Cumberland finish – it is an extremely rare series. These pipes exhibit a deeper blast characteristic of that of the 1930’s – mid-1960’s (and the limited ‘deep blast’ pipes of the early 1980s) and show a fine graining pattern. These are considered the best new Dunhills by many enthusiasts today and are very rare. The finish is sometimes described as tasting like vanilla at first, with the taste becoming more normal or good as the pipe breaks in.

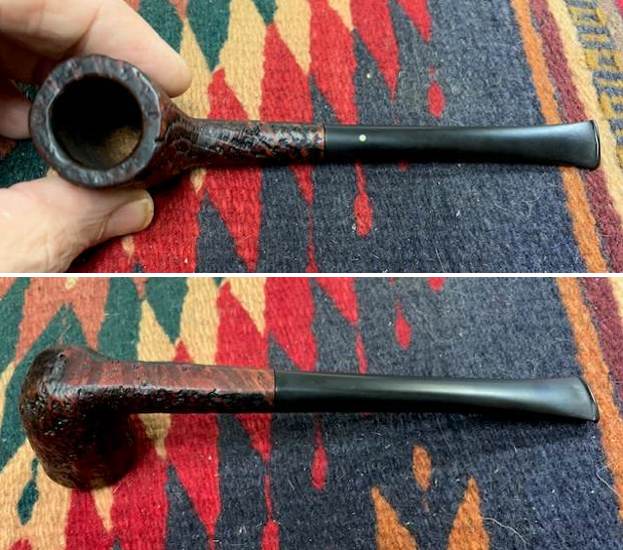
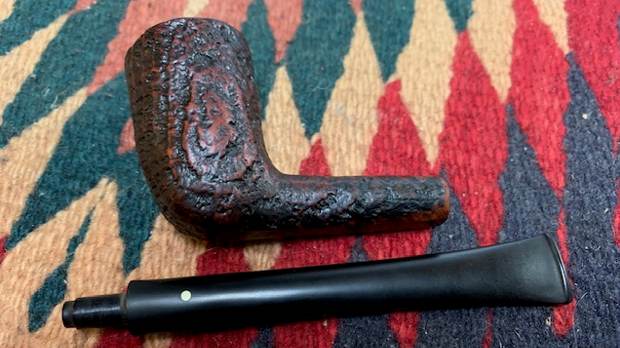
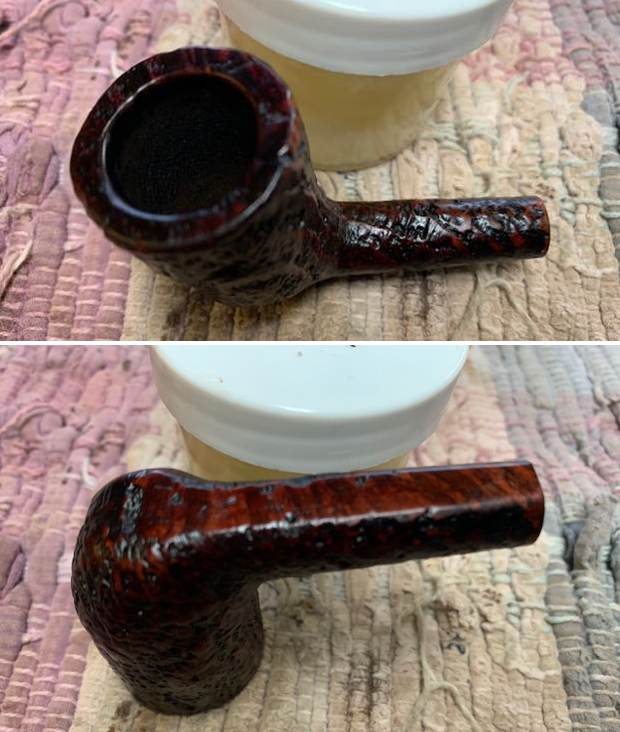
I have also included a chart from the site from Dunhill spelling out the Standard Pipe Finishes and giving short information and a timeline. I turned to work on the pipe itself. Jeff had done an amazing cleanup of the pipe. He reamed the light cake with a PipNet reamer and cleaned up that with a Savinelli Fitsall Pipe Knife. He scrubbed the internals of the bowl and stem with alcohol, cotton swabs and pipe cleaners. He scrubbed the externals with undiluted Murphy’s Oil Soap and rinsed the bowl off with running water. He soaked the stem in Briarville’s Pipe stem Deoxidizer and once it had soaked rinsed it off with warm water to remove the residual solution. He dried it off and rubbed it down to remove any oxidation that was still on the stem. The pipe looked very good when I received it. I took a photo of the rim top to show the condition. You can see the clean bowl. It almost looks as if it was never smoked to the bottom of the bowl. The stem came out looking quite good. There are some tooth marks and chatter on both sides ahead of the button.I took a photo of the underside of the shank to show the stamping. The photo clearly shows the stamping and is actually more readable in the photo than in person. I removed the stem from the shank and took a photo of the pipe parts to show what I was working with. It is a nice looking pipe.The bowl was in such good condition that I had to do some minimal work with it. I touched up the stain on the worn spots on the rim with a mahogany stain pen. I rubbed the briar down with Before & After Restoration Balm. I worked it into the briar with my fingertips and a horsehair shoe brush to work it into the nooks and crannies of the sandblast finish. The product works to clean, enliven and preserve the briar. I let it sit for 10 minutes then I buffed it with a cotton cloth to deepen the shine. The briar really comes alive with the balm. I “painted” the stem surface on both sides to lift the dents. The heat lifted the ones on the top completely and the ones on the underside for the most part. I filled in the two small remaining marks on the underside of the stem with clear CA glue. Once it cured I sanded repairs out with 220 grit sandpaper and started the polishing with 400 grit wet dry sandpaper. I polished the vulcanite with micromesh sanding pads – 1500-12000 grit pads. I wiped it down with Obsidian Oil after each sanding pad. I used Before & After Pipe Polish – both Fine and Extra Fine to further polish the stem.  This 1954 Patent No. Dunhill Shell 42 F/T Dublin has a beautiful, unique Dunhill Sandblast finish that is very deep and craggy. The dark mixed black/brown/red finish highlights some great grain around the bowl and shank. It has some great rugged sandblast that Dunhill specialized in making. The polished black vulcanite taper stem adds to the mix. I put the stem back on the bowl and buffed the pipe with Blue Diamond on the buffing wheel being careful to not buff the stamping. I gave the bowl multiple coats of Conservator’s Wax and the stem multiple coats of carnauba wax on the buffing wheel and followed that by buffing it with a clean buffing pad. I hand buffed the pipe with a microfiber cloth to deepen the shine. The finished Dunhill Shell 42 F/T Dublin is quite nice and feels great in the hand. Give the finished pipe a look in the photos below. The dimensions of the pipe are Length: 6 ½ inches, Height: 1 ¾ inches, Outside diameter of the bowl: 1 1/8 inches, Chamber diameter: ¾ of an inch. The weight of the pipe is .95 ounces/27 grams. Thanks for walking through the restoration with me as I worked over another beautiful pipe. If you are interested in adding it to your collection I will be adding it to  the British Pipe Makers Section of the rebornpipes store. Thanks for your time.

Restoring a Patent Dunhill Shell Briar 253 Billiard


Blog by Steve Laug

The next pipe on the table is another Dunhill Group 4 size Shell Briar Billiard with a taper stem that is proportionally well done. It has a three digit the shape number that I will define below. This is another pipe from the group which Jeff and I purchased on 04/26/2022 from a woman who contacted us from Cleveland, Ohio, USA. They had belonged to her husband’s father. We spent time chatting with her and arrived at a price and she sent the pipes to Jeff. It included 28+ pipes along with this one.

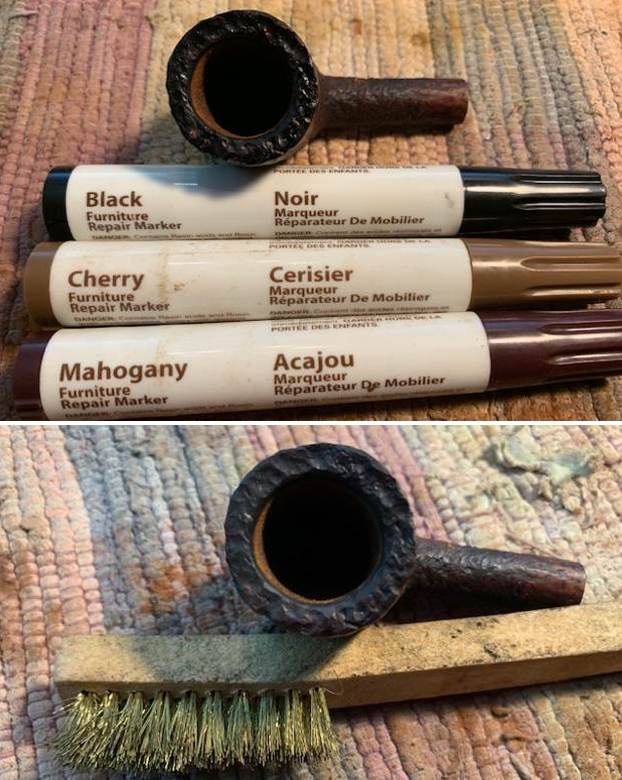
This Dunhill Billiard is stamped on the underside and reads 253 on the heel of the bowl followed by Dunhill followed by what I think is Shell Briar though it is very faint. The Made in England stamp is not present and there is no date stamp. The remnant of a circle and what I think would be a 4S by comparative size. Underneath the Dunhill stamp there is a partial stamp PATENT No…. with everything following gone. The finish was very dirty with spots of grime and debris stuck on it. The bowl had a thick cake in the bowl and heavy lava overflowing onto the rim top. The rim top appeared to have burn on inner edge. It was hard to know what was under the lava at this point. The stem had calcification, oxidation and tooth marks and chatter on both sides ahead of the button. The button itself appeared to be in good condition. Jeff took photos of the pipe before he started his clean up work on it. He took photos of the bowl and rim top to show the condition. You can see the thick cake in the bowl and rim top and edges. The lava is so thick that is hard to know what the edges and top look like underneath. The sandblast on the rim top is also completely filled in with tar and lava. The stem was heavily oxidized, calcified and has tooth marks and chatter on both sides ahead of the button. The white spot on the stem was missing as well. Overall the pipe is a real mess. Jeff took a photo of the sandblast finish around the bowl side and heel. It was nice looking if you can see through the grime ground into the rugged, deep blast. He took photos of the stamping on the underside of the bowl, shank and stem. The stamping is quite worn, but is partially readable. It reads as noted above. Now it was time to begin to work on the stamping on the pipe. The stamping was very faint but some of it was readable. I knew it was a Dunhill Shell or maybe Shell Briar (not sure). I knew the shape number was 253 a billiard. I knew there was a partial Patent No. Stamp but the number itself was not visible. I turned to Pipedia for some help with what I could ascertain from the partial stamping (https://pipedia.org/wiki/Dunhill#Bruyere). The first quote below give the short version of the finish. I quote from it below.

Shell – A deep craggy sandblast with a black stain finish (usually made using Algerian briar) – the color of the stain used has varied over the years. Although there is some doubt as to them being the first to sandblast pipes, Dunhill’s Shell pipes, and the sandblasting techniques developed to create them are considered one of Dunhill’s greatest and most lasting contributions to the art of pipe making.

The documented history of Dunhill’s inception of the Shell is largely limited to patent applications — there are no catalog pages or advertisements promoting blasted pipes at the time. The preliminary work on the English patent (No. 1484/17) was submitted on October 13, 1917. The patent submission was completed half a year later, on April 12, 1918, followed by the granting of the English patent on October 14, 1918. This was less than a month before the end of The Great War on November 11th.

In 1986 Dunhill released a line of premium Shell finish pipes – “RING GRAIN”. These are high-quality straight grain pipes which are sandblasted. Initially only Ring Grain, but now in two different finishes. In 1995 the “Shilling” was introduced with Cumberland finish – it is an extremely rare series. These pipes exhibit a deeper blast characteristic of that of the 1930’s – mid-1960’s (and the limited ‘deep blast’ pipes of the early 1980s) and show a fine graining pattern. These are considered the best new Dunhills by many enthusiasts today and are very rare. The finish is sometimes described as tasting like vanilla at first, with the taste becoming more normal or good as the pipe breaks in.

With that information clear for me I wanted to identify the shape number and try to pin that down (https://pipedia.org/wiki/Dunhill_Shape_Chart). I turned to the section on the 3 digit Shape Numbers and read it. I quote it below.

A 3-digit system (“Interim”) was developed that showed a logical approach to identify pipes in terms of size, mouthpiece, and shape, with the 1st digit being the size, the 2nd digit the mouthpiece, and the 3rd digit the shape, i.e. the old “85” became a “321” which was a group 3 Apple with taper mouthpiece. This was soon to be replaced by a more detailed, formal 4- and 5-digit system around 1978.

With the information on the 3 digit stamp not making clear enough the meaning of the number I turned to another link on Pipedia (https://pipedia.org/wiki/Dunhill_Shapes_List) to a shape list that Eric Boehm put together for Dunhills. It is amazing to see the sheer number of variations on the Billiard shape. I copied several 3 digit numbers in the list as it includes the shape 253.

  • 252 Billiard, tapered bit 4 5¾” 1950, 1969 3
  • 253 Billiard, tapered bit 4 57/8″ 1950, 1969 3 (This is the pipe I am working on. It is a tapered bit Billiard.)
  • 260 Billiard, tapered bit 2 5½” 1950, 1969 3

I knew that the pipe shape number locked in a time period 1950, 1969 – a  time span that I probably would not be able to narrow down further due to the missing date stamp.

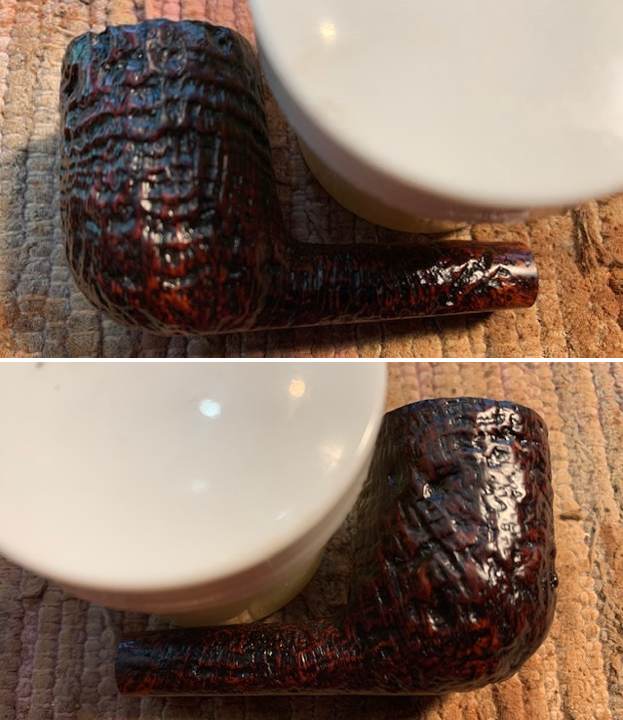
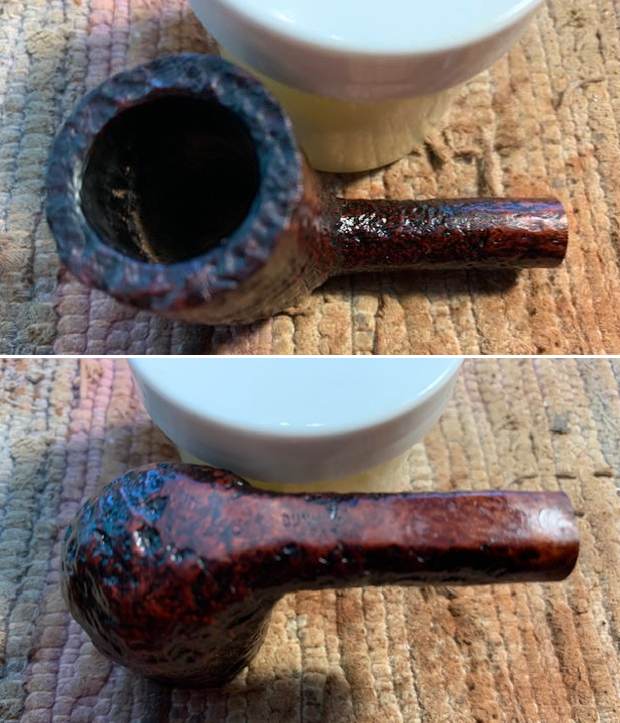
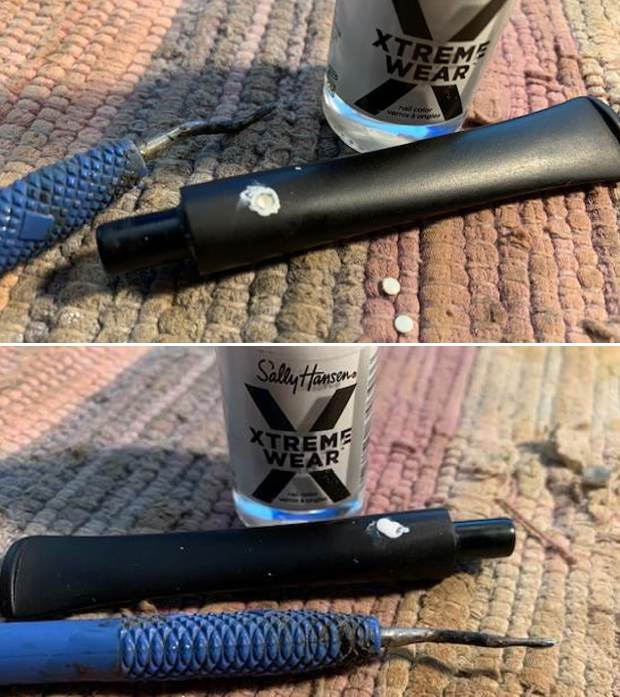
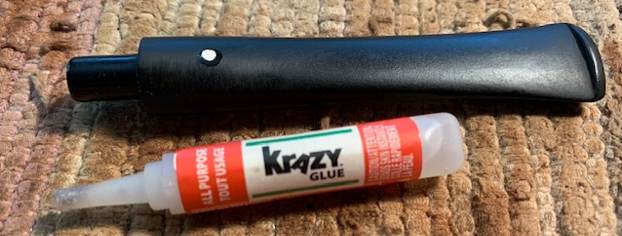
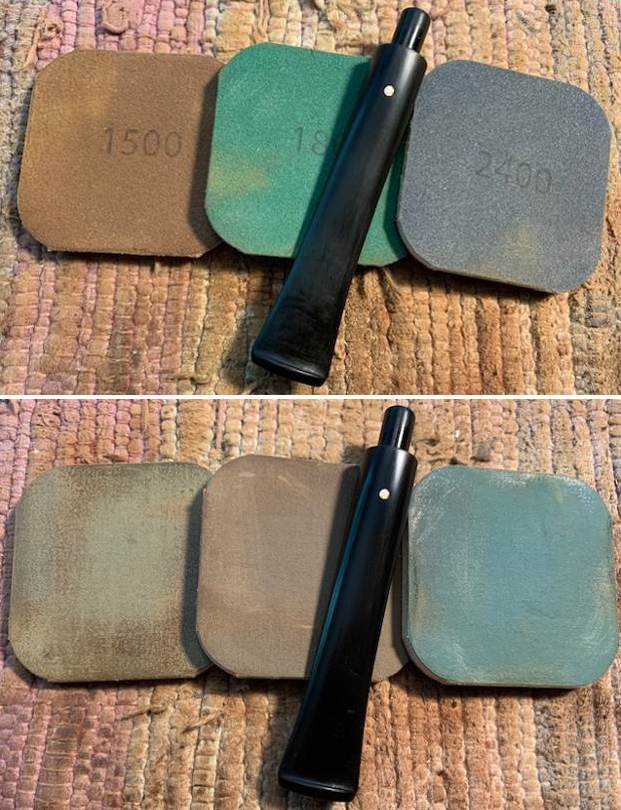
Armed with that information I turned to work on the pipe itself. Before he sent it to me, Jeff had done an amazing job cleaning the pipe. It almost looked like a different pipe after his work. He reamed the pipe with a PipNet pipe reamer and removed the rest of it with a Savinelli Fitsall Pipe Knife.  He scrubbed the bowl with undiluted Murphy’s Oil Soap with a tooth brush. He rinsed it under running warm water to remove the soap and grime. He cleaned out the inside of the shank and the airway in the stem with isopropyl alcohol, cotton swabs and pipe cleaners. He soaked the stem in Briarville’s Pipe Stem Deoxidizer and then rinsed it off with warm water. He scrubbed the stem with Soft Scrub and a tooth brush and rinsed it off with warm water. It looked amazing when I took it out of the package of pipes he shipped me. I forgot to take photos before I started my work on the stem so the top down photo shows the start of my repair to the missing white spot. I took photos of the pipe when I remembered.  The rim top was cleaner and the inner and outer edge of the bowl showed some damage. The rim top had smooth spots that would need to be worked on and the sandblast surface had been worn off. The stem surface looked good with the oxidation gone and light but visible tooth chatter on either side of the stem. The White Spot was also missing from the stem top. I took a photo of the stamping on the underside of the shank. It is faint and barely readable as noted above.I took the stem off the shank and took a photo of the parts of the pipe. It is another great looking Dunhill Shell Briar with a craggy blast. I started my portion of the work on this pipe by addressing the damage to the inner edge of the bowl. I used a folded piece of 220 grit sandpaper to smooth out the edge and give it a slight bevel to deal with the chipping and cutting on the inner edge. I also lightly topped the bowl to give it a smooth working surface and to remove the deep cuts and chips.I used a series of burrs on my Dremel to copy the finish that was on the good spots on the rim and sides. I took a photo of the burrs and the rim top once I had finished the rustication process. It looked better and once stained to match the bowl it would look very good.I used a Mahogany, Cherry and Black Stain Pen to restain the rim top and the inner bevel of the rim edge. Once it dried I worked it over with a brass bristle wire brush. The rustication I did on the top of the rim approximated the depth of the sandblast around the sides of the bowl and gave the rim top a very tactile feel.The bowl looked good at this point so I rubbed it down with Before & After Restoration Balm. I worked it into the surface of the bowl and shank with my fingertips and a horse hair shoe brush to clean, enliven and protect the briar. I let the balm sit for about 10-15 minutes and buffed with a cotton cloth to raise the shine. I set the bowl aside and turned my attention to the stem. I decided to build up the missing White Spot on the stem top. I used some acrylic white spots and acrylic white fingernail polish to fill the hole. I layered in the spots and fingernail polish. I continued until the spot was smooth and set it aside to cure. Once the acrylic hardened I sanded it smooth and put a drop of clear CA glue on it to seal it and make the surface smooth. I polished the vulcanite stem with micromesh sanding pads – dry sanding with 1500-12000 grit pads. I wiped it down with Obsidian Oil after each sanding pad. I used Before & After Pipe Polish – both Fine and Extra Fine to further polish the stem and gave it a final coat of Obsidian Oil to finish it. This Sandblasted Patent Dunhill Shell Briar 253 Taper Stem Billiard is a great looking pipe now that it has been restored. The rich Shell Briar sandblast finish that highlights the grain and works well with the polished vulcanite stem. I put the stem back on the bowl and carefully buffed the pipe with Blue Diamond on the buffing wheel using a light touch on the briar. I gave the bowl and the stem multiple coats of carnauba wax on the buffing wheel and followed that by buffing the entire pipe with a clean buffing pad. I hand buffed the pipe with a microfiber cloth to deepen the shine. The finished Dunhill Shell Briar 253 Billiard is a Group 4 size pipe that will be a great smoker. Give the finished pipe a look in the photos below. The dimensions of the pipe are Length: 5 ¾ inches, Height: 1 ¾ inches, Outside diameter of the bowl: 1 ¼ inches, Chamber diameter: ¾ of an inch. The weight of the pipe is 28 grams/1.02 ounces. I will be adding the pipe to the British Pipemakers Section of the rebornpipes store shortly. If you are interested in adding it to your collection be sure to let me know. I take a moment to remind myself and each of us that we are trustees of pipes that will outlive us and the lives of many other pipe men and women who carry on the trust of their care and use. Thanks for reading this blog and my reflections on the pipe while I worked on it.

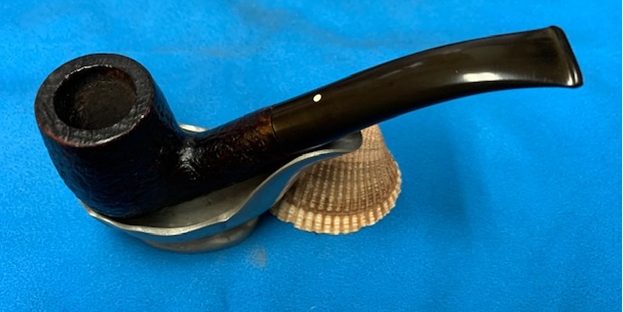
A Nice Break – a 1971 Dunhill Shell 53 F/T Group 3 Bent Billiard


Breathing Life into a 1971 Dunhill Shell 53 F/T Group 3 Bent Billiard

Blog by Steve Laug

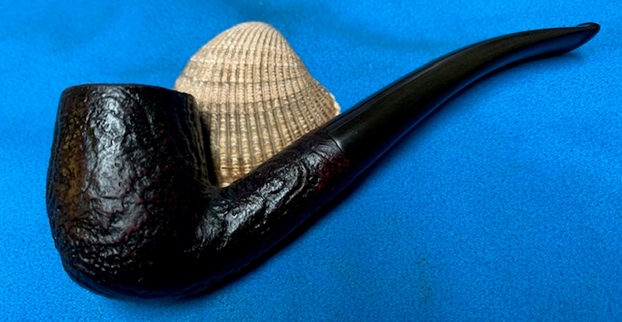
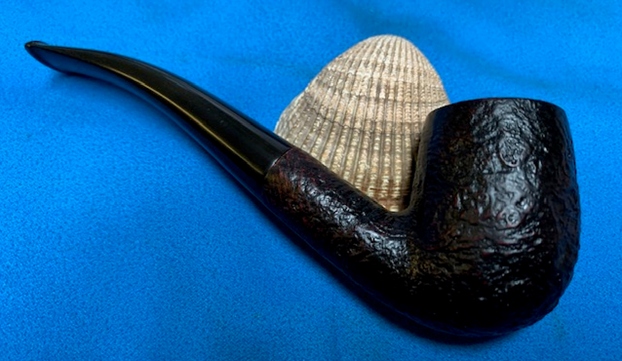
The next pipe on the table came to us from an estate that Jeff and I purchased from an old pipeman in the St. Louis, Missouri in the US. It is a Dunhill Shell Bent Billiard that is in decent condition. It still has the tag in the bowl from the time the older gentleman purchased it. It is stamped on a smooth panel on the underside of the shank. On the heel of the bowl it is stamped with the shape number 53F/T followed by Dunhill Shell [over] Made in England11. That is followed by 3 in a circle followed by S for shell. Interpreting that stamp it is as follows: The 53 is the shape for a bent billiard and the F/T is the stem shape – a Fish Tail stem. The Dunhill Shell is the finish which is corroborated the S at the end of the stamping. The 11 following the D of England gives the date the pipe was made and identifies it as 1971. The stamping is clear and readable. The pipe has a mix of brown stains on a sandblast finish and some amazing grain that the shape follows well. The finish was dirty with dust around the nooks and crannies of the sandblast. The bowl had been reamed and cleaned before the older gentleman purchased it. The stem was lightly oxidized but there were no tooth marks or chatter. The stem has the Dunhill White Spot logo on the top of the taper stem. I took photos of the pipe to show what it looked like before I started working on it. I took photos of the bowl and rim top to show how clean they were and of the stem to show the light oxidation and lack of damages to the surface of the stem on either side.The stamping on the underside of the shank is shown in the photo below. It looks very good and readable. It reads as noted and explained above.I took a photo of the pipe as a whole including the label that was in the bowl when we received it. It is fascinating to see that when he purchased the pipe he paid $300USD for it. He had said he picked it used in the 1970s. The shape number on the tag is incorrect and should read 53 instead of 63. I turned to Pipedia’s section on Dunhill Root Briar to get a bit of background on the Duhill finishes (https://pipedia.org/wiki/Dunhill#Root_Briar). I quote:

Shell

A deep craggy sandblast with a black stain finish (usually made using Algerian briar) – the color of the stain used has varied over the years. Although there is some doubt as to them being the first to sandblast pipes, Dunhill’s Shell pipes, and the sandblasting techniques developed to create them are considered one of Dunhill’s greatest and most lasting contributions to the art of pipe making.

The documented history of Dunhill’s inception of the Shell is largely limited to patent applications — there are no catalog pages or advertisements promoting blasted pipes at the time. The preliminary work on the English patent (No. 1484/17) was submitted on October 13, 1917. The patent submission was completed half a year later, on April 12, 1918, followed by the granting of the English patent on October 14, 1918. This was less than a month before the end of The Great War on November 11th.

In 1986 Dunhill released a line of premium Shell finish pipes – “RING GRAIN”. These are high-quality straight grain pipes which are sandblasted. Initially only Ring Grain, but now in two different finishes. In 1995 the “Shilling” was introduced with Cumberland finish – it is an extremely rare series. These pipes exhibit a deeper blast characteristic of that of the 1930’s – mid-1960’s (and the limited ‘deep blast’ pipes of the early 1980s) and show a fine graining pattern. These are considered the best new Dunhills by many enthusiasts today and are very rare. The finish is sometimes described as tasting like vanilla at first, with the taste becoming more normal or good as the pipe breaks in.

I have also included a chart from the site from Dunhill spelling out the Standard Pipe Finishes and giving short information and a timeline.I turned to work on the pipe itself. It was very clean with just some dust on the finish. The stem was going to take a bit of work but the bowl was quite simple. The bowl had been reamed and cleaned and the shank was spotless. If the pipe had been smoked at all it was lightly smoked and did not even smell of tobacco. So I rubbed the briar down with Before & After Restoration Balm. I worked it into the briar with my fingertips and a horsehair shoe brush to work it into the nooks and crannies of the sandblast finish. The product works to clean, enliven and preserve the briar. I let it sit for 10 minutes while I worked on the stem. After the time passed I buffed it with a cotton cloth to deepen the shine. The briar really comes alive with the balm. I set the bowl aside and turned my attention to the stem. Because it was in such good condition I polished the vulcanite with micromesh sanding pads – 1500-12000 grit pads. I wiped it down with Obsidian Oil after each sanding pad. I used Before & After Pipe Polish – both Fine and Extra Fine to further polish the stem.  This Dunhill Shell 53F/T Bent Billiard is a beautiful sandblast with the unique Dunhill Sandblast finish made in 1971. It is a great looking pipe that is in almost new condition. The dark finish that is identified as a black stain highlights some great grain around the bowl sides and the heel. It has some great rugged sandblast that Dunhill specialized in making. The finish on the pipe is in excellent condition and the stain works well to highlight the grain. The polished black vulcanite taper stem adds to the mix. With the dust gone from the finish and the bowl it was a beauty and is eye-catching. I put the stem back on the bowl and buffed the pipe with Blue Diamond on the buffing wheel being careful to not buff the stamping. I gave the bowl multiple coats of Conservator’s Wax and the stem multiple coats of carnauba wax on the buffing wheel and followed that by buffing it with a clean buffing pad. I hand buffed the pipe with a microfiber cloth to deepen the shine. The finished 53 F/T Bent Billiard is quite nice and feels great in the hand. Give the finished pipe a look in the photos below. I can only tell you that like the other pipes I am working that it is much prettier in person than the photos capture. The dimensions of the pipe are Length: 5 inches, Height: 1 ¾ inches, Outside diameter of the bowl: 1 1/8 inches, Chamber diameter: 5/8 of an inch. Thanks for walking through the restoration with me as I worked over another beautiful pipe. This pipe will be added to the British Pipe Makers section of the rebornpipes store soon. If you want to add it to your collection send me an email or a message! Thanks for your time.
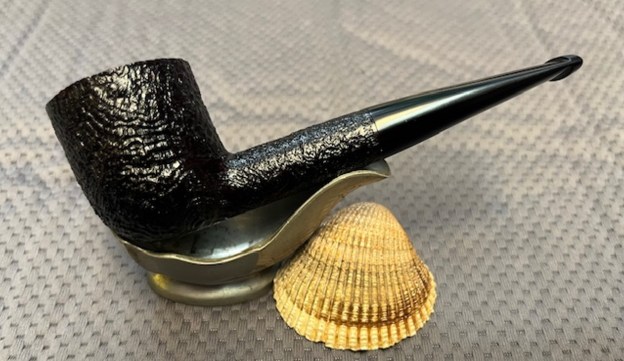
Restoring a long awaited Dunhill Shell Briar 483FT 4S Don


Blog by Steve Laug

Not too long ago Jeff sent me pictures of a pipe that someone had sent him an email about. They were selling it and the price was not too bad for what it was. Interestingly it was a shape that I have been looking for, for several years. It was Dunhill shape that they called a Don. It had a Shell finish with deep sandblasting around the bowl and a smooth crowned rim top and base. The shank was very short and capped with a vulcanite button. The stem was a thin military bit fishtail with a broad flare at the button. The pipe is stamped on the base as follows: 483F/T over DUNHILL SHELL. Under that it was stamped Made in England with the numbers 8 and 9 following he D in England. From my research that means the pipe was made in 1968 and sold in 1969. There is a Circle 4S stamped as well – 4 referring to the size of the pipe (Group 4) and S referring to the Shell finish on the bowl. The pipe is very dirty with grime and dust in the sandblast finish. There is a thick cake in the bowl and an overflow of lava and tars on the crowned rim top. The base is dirty and has some scratching around the stamping but it is readable. The vulcanite shank cap was oxidized as and dirty. Then thin stem was oxidized and there were light tooth marks and chatter on the surface of the stem on both sides ahead of the button. Otherwise it is a clean looking stem. Jeff took photos of the pipe before he started his cleanup work. Jeff took photos of the rim top from various angles to show the condition of the bowl and rim as I described above. The finish appears to be okay beneath the grime and the inner and outer edge of the rim look very good under the thick cake and lava overflow. There do not appear to be any nicks of dents in the smooth briar crown of the rim. He took photos of the sides of the bowl showing the deep and rugged sandblast that I like on these Dunhill Shell pipes. This one was exceptional. You can also see the vulcanite shank cap in the photos. I have included the last photo is this series even though it is a little blurry because it captured the blast on the lower part of the left side of the bowl. Jeff took a photo of the stamping on the smooth heel of the bowl. It is a little double stamped but is still readable. There was a lot of grime and debris in the stamping and on the base.He took photos of the stem to show the oxidation as well as the wear on the button. You can also see the calcification, tooth marks and chatter on both sides.Using the information on pipephil’s site I was able to confirm my interpretation of the stamping spelled out above (http://pipephil.eu/logos/en/dunhill/shell-briar1.html). The 483F/T stamp tells me the pipe is a shape number 483 (a Don) while the F/T tells me that the stem is a fish tail stem. The Shell Briar stamp refers to the sandblast finish. The number 8/9 following the Made in England stamp identifies the date as 1968 and sold in 1969. The circled 4 is the Group bowl size. The S is the stamping for the Shell Briar finish.

With that in mind I turned to work on this pipe. When Irene and I met with Jeff and Sherry on the Oregon Coast he sent me back with a bag of cleaned pipes and this was one of them. Jeff had done a great job in cleaning up this Dunhill. He had reamed the bowl with a PipNet reamer and cleaned up the remnants with a Savinelli Fitsall Pipe Knife. He took back the thick cake to the walls of the bowl. He also scraped off the lava and grime on the rim. He scrubbed the exterior of the bowl with Murphy’s Oil Soap and a tooth brush to remove the grime on the bowl and rim and rinsed it off with warm running water. He cleaned out the interior of the bowl and shank with pipe cleaners, cotton swabs and alcohol until they came out clean. The rim top looked much better when you compare it with where it started. He cleaned the stem with Soft Scrub to remove the grime on the exterior and cleaned out the airway with alcohol, cotton swabs and pipe cleaners. He soaked it in Before & After deoxidizer and rinsed it clean after wards I took some photos of the pipe as I saw it. It was a beautiful piece of sandblasted briar. To show how clean the rim top and stem really was I took a close-up photo of the rim and stem. The bowl was clean and cake free. The rim top is quite clean and the inner edge of the bowl has all of the lava removed. The crowned rim looks great. The vulcanite fishtail stem looks very good. The surface and the button edge appear to be in good condition. There were some small tooth marks and chatter on both sides but it looked good.I took a photo of the shank cap to show that it still had some oxidation but it was in good shape.I took the stem off the pipe and took photos of the bowl sides to show the rich and deep sandblast on the craggy sides of the bowl. I took a photo of the stamping and the heel of the bowl. It looks a lot better. You can see the double stamping on most of the stamp – readable but also has a ghost!I started my part of the restoration of the pipe by polishing the crowned rim top and the vulcanite shank cap with micromesh sanding pads. I dry sanded with 1500-12000 grit pads and wiped the surface of both down with a damp cloth between each sanding pad. I worked some Before & After Restoration Balm into the finish of the bowl and the rim top. I worked it into the surface with my fingertips and a horsehair shoe brush to clean, enliven and protect the wood. I let the balm sit for 10 minutes and buffed it off with a soft cotton cloth. I took photos of the pipe at this point in the process to show what the bowl looked like at this point. I set the bowl aside and turned my attention to the stem. I also sanded out the tooth marks and chatter on the surface of the vulcanite with a folded piece of 220 grit sandpaper. I followed the 220 grit sandpaper with 400 grit wet dry sandpaper to minimize the scratching.    I polished the stem with Denicare Mouthpiece Polish to take out the oxidation at the button edge and on the end of the mouthpiece. I buffed the stem with a microfiber cloth.I polished out the scratches with micromesh sanding pads – wet sanding with 1500-12000 grit pads. I wiped the stem down after each sanding pad with Obsidian Oil. I polished it with Before & After Pipe Stem Polish – both Fine and Extra Fine. Once I had finished the polishing I wiped it down with Briarville’s No Oxy Oil and set it aside to dry. I am happily on the homestretch with this pipe and I really look forward to the final look when it is put back together and polished and waxed. I put the bowl and stem back together. I polished the bowl and stem with a light touch of Blue Diamond on the buffing wheel. I gave the bowl multiple coats of Conservator’s Wax and the stem multiple coats of carnauba wax. I buffed the pipe with a clean buffing pad to raise the shine. I hand buffed it with a microfiber cloth to deepen the shine. The pipe polished up pretty nicely. The rugged sandblasted bowl really looked good with the polished black vulcanite. This 1968 Dunhill Shell Briar 483F/T Group 4 Size Don was a fun pipe to work on. The Don really has a classic Dunhill look in a Shell Briar finish that catches the eye. The combination of red and black stains really makes the pipe look attractive. It is a comfortable pipe to hold in the hand. The finished pipe is shown in the photos below. The dimensions of the pipe are Length: 6 ½ inches, Height: 2 inches, Outside diameter of the bowl: 1 3/8 inches, Chamber diameter: ¾ of an inch. This pipe is staying with me. I look forward to loading a bowl of a favourite Virginia and enjoying this pipe. Thanks for reading this blog and my reflections on the pipe while I worked on it. This is an interesting estate to bring back to life.

An Easy Sprucing up of a 1949 Dunhill Shell # 52 F/T


Blog by Paresh Deshpande

Believe you me friends, this is FUN!! Being able to work on different pipes, be able to choose your project, choose a brand you wish to work on, is an exhilarating experience for me. Prior to the Mumbai Bonanza striking me, I was restricted mostly to working on my inherited collection of pipes, each complete with its stem challenges and similar stummel condition and was getting slightly monotonous to say the least.

I was fortunate enough to have heeded the advice of my dear friend and mentor, Mr. Steve, and struck a deal with a trash collector from Mumbai. He did not know what he was selling and I did not know what I was buying as we reside in different cities!! The argument that Mr. Steve presented was that if not anything, I shall at least have some spares and this was logical. I struck a deal and here are pictures of the pipes that I received in this lot.  This lot contains some very nice collectible pipes, a few well known brand pipes and some mediocre pipe brands. Overall, with seven Dunhills, a Preben Holm #1, a couple of Made in England Pete System pipes, Charatan’s, Custom-Bilt, Stanwell and other assorted pipes, I would say that I had hit a huge jack pot!!! Hence, I like to call this find as “Mumbai Bonanza”.

The pipe that I decided to work on from this find is a smallish full bent Dunhill Shell billiard, and is marked in pastel blue circle in the picture below (the ones circled in red and yellow are completed projects). This is a beautiful deeply sandblasted billiard with a lovely tactile feel in the hand. The play of dark red brown hues on the sandblast makes for a visual treat. It is stamped on a smooth surface on the foot and the underside of the shank with the shape number 52 followed by F/T followed by DUNHILL Shell Made in England 9 (9 is underlined) 0 all in a straight line over PATENT No 417574/34 followed by an encircled 3 at the shank end. This stamping indicates that this pipe is a fishtailed group 3 sized shell and dates this pipe to being manufactured in 1949 and sold in 1950.  The Trademark Dunhill White Dot adorns the top of the vulcanite stem. The stampings are deep, crisp and clear.With this information, I move ahead with the restoration of this beautiful sandblasted Dunhill bent billiard.

INITIAL VISUAL INSPECTION
The chamber has a thick layer of even and smooth cake which indicates that the pipe has been well used but also well cared for by its previous Steward. From what I can see, the chamber walls appear to be without any damage. The chamber is odorless. There is an overflow of lava on the blasted rim top surface. The inner and outer rim edges appear to be in pristine condition. The mortise is clean and so is the shank airway. The stummel boasts of some beautiful deep sandblast pattern all around. It is dirty with grime and oils filling in much of the craggy finish. The briar, in this condition also, looks amazing. I can’t wait to see after I have worked on it. The round shank of the bent billiard flows into a bent tapered stem which has a flare, like a fish tail, at the button end and hence the stamp F/T. The vulcanite stem shows significant damage to the button end with deep bite marks on both upper and lower surface of the stem. The lip is also severely damaged and will have to be reshaped. In this project, repairs to the damaged stem will be a major challenge, however if compared to previous stem repairs, this should be a cake walk.

THE PROCESS
Since the stem has significant damage, and from my experience of stem repairs, this will be time consuming and laborious part and hence I start this project by tackling the stem first

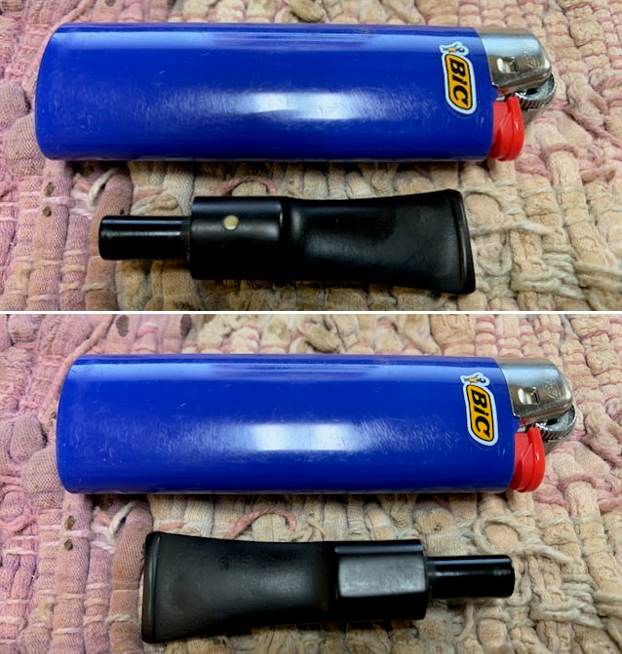
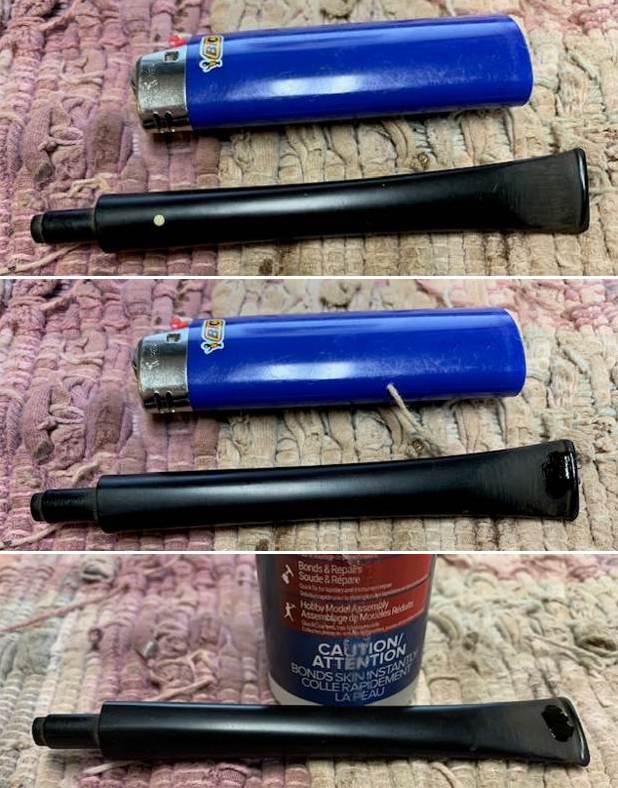
Now that I was clear about the path to be followed, I first flame both the surfaces of the stem with a Bic lighter. The heat from the flame raises the vulcanite to the surface and takes care of the tooth chatter that was seen earlier. I sand the stem with a folded piece of 220 grit sand paper to get rid of the oxidation, have a clear idea of the areas which require fill and its extent while providing a smooth surface for the intended fill. I cleaned out the internals of the stem with hard bristled and regular pipe cleaners dipped in isopropyl alcohol. Once I was satisfied with the internal cleaning, I wiped the stem surface, particularly the damaged button end, with a cotton pad and alcohol to remove any traces of dirt and grime.To begin the stem repairs, I prepared a mix of CA superglue and activated charcoal and generously applied it over the damaged surface and set it aside for curing over night. Before moving ahead, I would like to mention here that I had applied this mix to achieve sufficient thickness which would help during the filing and sanding while shaping the button and achieving the correct stem profile.While the stem repair was set aside to cure, I moved ahead to deal with the stummel repairs. I start the reaming with a size 1 head of the PipNet reamer and progress to size 2 head. I further clean the chamber with a folded piece of 180 grits sand paper to sand out the remaining traces of cake and expose the walls of the chamber to ascertain that there are no cracks/ heat fissures. Using my fabricated knife, I gently scrapped away the lava overflow. I wiped the chamber with a cotton pad dipped in isopropyl alcohol to remove the carbon dust left behind by all the reaming and sanding process. This also eliminated all traces of old smells from previous usage. The walls of the chamber were solid with no damage. Continuing with the cleaning regime, using a soft brass wired brush I gently scraped away the thick lava coat in the blast of the rim. With a hard bristled tooth brush and dipped in undiluted Murphy’s oil soap, I very deliberately scrubbed the sandblast finish on the stummel and the rim top. The stummel and rim top was dried using paper napkins and soft cotton cloth and set it aside to dry out naturally. The stummel looks fresh and clean. Next, I rub a small quantity of “Before and After Restoration Balm” in to the briar with my finger tips and let it rest for a few minutes. The balm almost immediately works its magic and the briar now has a nice vibrant appearance with the beautiful contrasting hues colors that are unique to this sandblast pipe, on full display. I further buff it with a horse hair shoe brush. After I had applied the balm, the rim top surface appeared too darkened and unclean. I was not happy with the way the rim top looked at this stage and decided to further clean it. I scrapped the rim top surface with a brass wired brush with a bit more pressure than I normally apply. The rim surface appeared clean as can be seen in the picture below. I reapplied the balm, hoping that the surface would look clean with the sandblast patterns showing themselves proudly. But alas!! The rim top surface appeared as before, blackened and unclean. I was at my wits end when after repeated cleaning with the brass brush with increasing pressure each time, the rim top surface appeared as before, dark and unclean. Mind you readers, being a sandblasted surface, topping really was not an option that I desired to adopt. I let the rim top surface be, satisfied that it was clean and sans any old lava overflow. In my exuberance to appreciate the beautiful and rugged patterns on the stummel caused by sandblasting, I missed out on cleaning the mortise and the shank airway. This is what exactly I addressed at this stage. Using bristled and regular pipe cleaners dipped in isopropyl alcohol, I first moistened the oils, tars and gunk in the mortise. Thereafter, with my fabricated spatula, I scrapped out all the tars and oils from the mortise. As I progressed with my cleaning, eventually the pipe cleaners started coming out clean indicating that the shank internals are clean.I set the stummel aside and turned my attention to the stem repair. The fill had cured nicely and I moved ahead and began the process of filing and shaping the button end with a flat head needle file. For a better blending, I further sand the entire stem with 220 followed by 400, 600 and 800 grit sand paper. This helps to reduce the sanding marks left behind by the more abrasive 220 grit paper. To bring a deep shine to the vulcanite stem, I went through the complete set of micromesh pads, wet sanding with 1500 to 2400 grit pads and dry sanding with 3200 to 12000 grit pads. I wiped the stem with alcohol after each pad and rubbed it down with Extra Virgin Olive oil to rehydrate the vulcanite. The repairs have blended in very well and the stem now looks shiny black and beautiful. The internals of the stem was once again cleaned out using alcohol and pipe cleaners to clear the airway of all the debris resulting due to the sanding. The finished stem is shown below. To finish, I re-attach the stem with the stummel. I mounted a cotton cloth buffing wheel to my local machine which is similar to the Dremel.  I set the speed at about half of the full power and applied White compound to the entire pipe. I wiped/ buffed the pipe with a soft cotton cloth to clear it of any leftover compound dust. I then mounted another cotton cloth wheel on to the polishing machine and applied several coats of carnauba wax. I finished the restoration by giving the entire pipe a rigorous hand buffing using a microfiber cloth to raise the shine further.The completed pipe looks lovely, fresh and vibrant. The deeply sandblasted surface proudly displays the contrasting dark brown hues which was the hallmark of Dunhill Shell pipes with a nice tactile feel in the hand. It surely is one of the best looking sandblasted pipes and will find a place of pride in my humble collection. As and when I load this pipe with my favorite tobacco (I love my English blends…) and sip my scotch, I wish this dude could tell me all about its past life!! Ah, this would be bliss…cheers!

New Life for Farida’s Dad’s Final Pipe – a Dunhill 5203 Shell Billiard


Blog by Steve Laug

I have had the last Dunhill from Farida’s Dad’s estate sitting on a cupboard behind my desk and every time I sit down I look at it and think that I need to finish it up. I sold the rest of the estate and purchased this one myself so that I could have some time to work on it. Yes you are right, read between the lines – I wanted to put off working on it. Well, this morning I sat down at the desk and posted a couple of blogs and then turned and there it was looking at me. I decided then and there to pick it up and do the work to finish this estate.

The pipe came from the estate of an elderly gentleman here in Vancouver. I met with his daughter Farida over a year ago and we looked at his pipes and talked about them then. Over the Christmas 2017 holiday she brought them by for me to work on, restore and then sell for her. There are 10 pipes in all – 7 Dunhills (one of them, a Shell Bulldog, has a burned out bowl), 2 Charatan Makes, and a Savinelli Autograph. This is the last of the lot – a lone Dunhill Billiard with a saddle stem. His pipes are worn and dirty and for some folks they have a lot of damage and wear that reduce their value. To me each one tells a story. I only wish they could speak and talk about the travels they have had with Farida’s Dad. The first photo shows the underside of the shank and its virtual illegibility under the tars and filth on the finish.You can see from the above photo the challenge that the pipe I am working on today will be. The stamping identifies it as a Dunhill Shell Billiard with a saddle stem. It is stamped on the underside of the heel and shank on a smooth flat area. On the heel is the shape number, a 4 digit number – 5203. I looked on Pipephil to get the lowdown on the shape number (http://www.pipephil.eu/logos/en/dunhill/shapes.html). I quote that below:

Dunhill pipes are stamped with a four digit code.

Digit 1: (from 1 to 6) denotes the size of the pipe (the group).

Digit 2: denotes the style of the mouthpiece (0,1=tapered, 2=saddle)

Digit 3 and 4: denote the generic pipe shape (in yellow in the chart on top)

Example: 5102 — (5 = size | 1 = tapered stem | 02 = Bent)

When 5 digits occur, the meaning of the 4 first remain the same

The one I am working on, 5203, is thus a SIZE 5 (Group 5), saddle stem (2) billiard (03) shaped pipe. The rest of the stamping is DUNHILL SHELL over MADE IN ENGLAND with the underlined superscript 34 after the D in ENGLAND. The number 34 tells me the date the pipe was made 1994.

My work on each of these pipes has already caused a lot of discussion on the Facebook Tobacco Pipe Restorers Group. The ongoing debate of Restoration vs. Preservation has filled a lot of ongoing airtime on the group. I do not care to relive or recount that as I am only following the directives of the daughter of the original deceased pipeman. She wanted them restored to usable condition so others can carry on her father’s love of these pipes. She is quite happy with the finished results and others of his pipes are now all over the world being enjoyed by the next generation of pipemen.

When first looked at the pipe here is what I saw. The bowl was thickly caked and the cake had flowed over onto the sandblast finish on the rim top forming hard lava that made the top uneven. There was a serious burn mark on the front edge of the bowl causing the rim to have a dip in the surface. It was hard to know if there was damage to the inner edge of the rim and I would not know until I removed some of the grime. The outer edge looked far very good all around the bowl except for the front. The finish was invisible under the thick coat of oils and grime that covered the bowl and shank. In fact at this point I had no idea what the stamping looked like because it was covered. I have wondered as I cleaned the other pipes in this lot if the oily build up was just a part of the life lived in the Antarctic. The stem was oxidized and very dirty. There was a thick sticky, oily substance on the surface of the stem and a calcification that I could scrape with my fingernail. There were tooth marks and chatter on both sides in front of the button as well as damage to the edges of the button. I took photos of the rest of the pipe to show what it looked like before I started the cleanup work. I took close up photos of the bowl and rim top as well as the stem. You can see the condition of the rim top and bowl in the first two photos. The damage to the rim top and the front outer edge is very visible even under the grime and lava. The inner edge looks like it has some damage on the backside. I won’t really know the full story until I remove the thick lava overflow on the surface. The stem had tooth chatter and some deep bite marks on the top and the underside of the stem just ahead of the button. The button itself also showed wear and damage. It has been a while since I have worked on the pipes that belonged to Farida’s Dad. I thought it might be helpful to remind us all of the background story of these pipes. Here is the material that I quoted in previous blogs. I have included both the written material and the photo that Farida included of her Dad. Here is what she wrote:

My dad, John Barber, loved his pipes. He was a huge fan of Dunhill and his favourite smoke was St. Bruno. No one ever complained of the smell of St. Bruno, we all loved it. I see the bowls and they’re large because he had big hands. When he was finished with his couple of puffs, he would grasp the bowl in the palm of his hand, holding the warmth as the embers faded. The rough bowled pipes were for daytime and especially if he was fixing something. The smooth bowled pipes were for an evening with a glass of brandy and a good movie. In his 20s, he was an adventurer travelling the world on ships as their radio operator. He spent a year in the Antarctic, a year in the Arctic and stopped in most ports in all the other continents. He immigrated to Canada in the mid-fifties, working on the BC Ferries earning money to pay for his education. He graduated from UBC as an engineer and spent the rest of his working life as a consultant, mostly to the mining companies. Whatever he was doing though, his pipe was always close by.

She sent this photo of him with his sled dogs in the Antarctic sometime in 1953-1954. It is a fascinating photo showing him with a pipe in his mouth. He is happily rough housing with his dogs. A true pipeman, he seems oblivious to the cold. Thank Farida for sending the photo and the story of your Dad. I find that it explains a lot about their condition and gives me a sense of your Dad. If your Dad was rarely without a pipe I can certainly tell which pipes were his favourites. In fact the condition of the billiard I am working on now makes me wonder if it is not the one in his mouth in the photo below.As I looked back over all of her Dad’s pipes that I have restored each of them had rim damage and some had deeply burned gouges in the rim tops. The bowls seemed to have been reamed not too long ago because they did not show the amount of cake I would have expected. The stems were all covered with deep tooth marks and chatter and were oxidized and dirty. The internals of the mortise, the airway in the shank and stem were filled with tars and oils. These were nice looking pipes when her Dad bought them and they would be nice looking once more when I finished.

Here are the links to the previous seven blogs that I wrote on the rest of the finished pipes. The first was a Dunhill Shell oval shank pot (https://rebornpipes.com/2018/02/04/restoring-a-1983-dunhill-shell-41009-oval-shank-pot/). The second was a Dunhill Classic Series Shell Billiard (https://rebornpipes.com/2018/02/08/faridas-dads-pipes-2-restoring-a-1990-lbs-classic-series-dunhill-shell-billiard/). The third pipe was a Savinelli Autograph (https://rebornpipes.com/2018/02/15/faridas-dads-pipes-3-restoring-a-savinelli-autograph-4/).The fourth pipe was a Dunhill Red Bark Pot that was in rough shape (https://rebornpipes.com/2018/03/10/faridas-dads-pipes-4-restoring-a-dunhill-red-bark-pot-43061/). The fifth pipe was a Dunhill Root Briar Bent Billiard (https://rebornpipes.com/2018/07/07/faridas-dads-pipes-5-restoring-a-dunhill-root-briar-56-bent-billiard/). The sixth pipe was a Charatan’s Make Distinction https://rebornpipes.com/2018/08/22/faridas-dads-pipes-6-restoring-a-charatan-make-distinction/. The seventh pipe was a Charatan’s Make Belvedere https://rebornpipes.com/2018/12/05/faridas-dads-pipes-7-restoring-a-charatans-make-belvedere-48dc-pot/.

Like most work the refurbisher does, this walks a fine line between restoration and preservation. The deciding feature for me regarding this pipe was the wishes of the family. They wanted the pipe to be cleaned and smoked by someone who could carry on the pipe man’s legacy of their Dad. None of them was interested in the pipes for themselves. They had no desire to keep them and memorialize their Dad and Grandad in that manner. I understand that to work on this pipe the way they wanted meant changing the current state of the pipe to bring it back closer to the way it was when their Dad bought it.

I decided to change things up a bit in the routine on this one. Holding it in my hand to ream and clean was a dirty prospect so I decided to scrub the thick grime off the exterior of the bowl and shank. The grit was deep in the sandblast finish rendering the pipe almost smooth. I scrubbed it with a tooth brush, a brass bristle wire brush and Murphy’s Oil Soap. I worked hard to get the grime out the grooves and crevices of the blast. I also worked on the rim top to remove the tars and oils that had formed a hard lava coat on the rim top. I worked on the burn damage as well on the front top and edge of the bowl. I rinsed the bowl under running water to remove the debris from the scrubbing. I reamed the bowl with a PipNet reamer. I used two of the four cutting heads to clean out the cake. The bowl was thickly caked I started with the smaller of the two and worked my way up to the second which was about the same size as the bowl. I cleaned the remnants with a Savinelli Fitsall Pipe Knife and scraped it back to bare briar. I finished by sanding the inside of the bowl with a dowel wrapped in sandpaper. I scraped the top of the rim with the edge of the Savinelli Fitsall Pipe Knife to remove the lava. I decided to start with the rebuilding of the rim top the bowl. I wiped the rim top down with isopropyl alcohol on a cotton pad to clean off the damaged areas on the front edge and on the rear inner edge. On the damaged front edge I started by laying down a coat of clear super glue on the gouged out burned area. On top of that I layered some briar dust with a dental spatula. I repeated the process of layer until the damaged area was level with the rest of the rim top. I used the brass bristle wire brush to texture the surface of the rim top over the repaired area to match the rest of the rim. I did the same layering process on the inner edge at the back of the bowl. When I had finished the rebuild I textured that area with the wire brush as well. The photos tell the story of the process. I worked over the inner edge of the rim with a folded piece of sandpaper to smooth it out and bring the damaged edges into round. The rim top was beginning to look normal. It would take a bit more texturing but it was looking a lot better.With the externals clean it was time to clean out the mortise and shank and airway into the bowl and the airway in the stem with alcohol, cotton swabs and pipe cleaners. I scraped the mortise with a dental spatula and a pen knife to loosen the tars before cleaning. I worked on the bowl and stem until the insides were clean.I used a needle file to sharpen the edges of the button on both sides of the stem. I sanded the “crud” off the stem and the tooth marks out of the topside of the stem. The underside would take a bit more work so I spent a lot more time cleaning out the large tooth mark on the stem near the button with sandpaper and alcohol and cotton swabs.It took some work to clean out the damaged area on the underside of the stem. Once I had it clear of debris I wiped it down with alcohol. I  filled in the deep tooth mark on the underside and the small tooth mark and rebuilt the button on the topside using clear super glue. I set the stem aside to let the repairs cure.I decided to stain the bowl with a dark brown stain. It would go over the black stain that was in the grooves of the sandblast. Once it had set I would wipe off the excess stain and buff the bowl and rim to get the finish I wanted. The photos tell the story. I applied the stain and flamed it with a lighter to set it in the grain. I repeated the process until I was happy with the coverage. Once the stain had cured I wiped the bowl down with isopropyl alcohol on cotton pads to make it more transparent. I wanted to be able to see the contrast between the dark brown and the black in the crevices of the finish. I rubbed down the briar with Before & After Restoration Balm. I worked it into the nooks and crannies of the sandblast finish to clean, enliven and protect the new finish. It also evened out the stain coat and gave the stain a dimensional feel. I let the balm sit for a little wall and then buffed it with a horsehair shoe brush. I buffed the bowl with a cotton cloth to raise the shine. I set the bowl aside and turned my attention to the stem. I sanded out the repairs on the stem surface on both sides with 220 grit sandpaper to blend them into the surface of the vulcanite.I polished the stem with micromesh sanding pads – wet sanding with 1500-2400 grit micromesh sanding pads and dry sanding it with 3200-12000 grit pads. I rubbed the stem down with Obsidian Oil after each pad. I polished it with Before & After Pipe Polish – both Fine and Extra Fine and buffed it into the vulcanite with a cotton pad. When I finished I gave it a final rub down with the oil and set it aside to dry.  With the stem polished I put it back on the pipe and lightly buffed the bowl with Blue Diamond. I did not want to get the buffing compound in the sandblast finish. I buffed the stem with a more aggressive buff of Blue Diamond. I hand rubbed the bowl several coats of Conservator’s Wax and the stem several coats of carnauba wax and buffed the pipe with a clean buffing pad to raise the shine. I hand buffed it with a microfiber cloth to deepen the shine. The pipe polished up pretty nicely. The finished pipe is shown in the photos below. This is the last of Farida’s Dad’s pipes that I am restoring from his collection. I am looking forward to hearing what Farida thinks once she sees the finished pipe on the blog. This Dunhill Shell 5203 Billiard will soon be on the rebornpipes store if you want to add it to your rack. The dimensions are Length: 6 inches, Height: 1 7/8 inches, Outside diameter of the bowl: 1 1/4 inches, Chamber diameter: 3/4 inches. Thanks for walking through the restoration with me as I worked over the last of her Dad’s pipes. With the completion of this one I have finished this estate. Thanks for walking through the restoration and reclamation of this lot of pipes. It has been an interesting journey for me and a continuance of my education. Cheers

Restoring the 12th Pipe from Bob Kerr’s Estate – A Dunhill Shell Briar 197 F/T Billiard


Blog by Steve Laug

In my ongoing work on Bob Kerr’s Estate I seem to be making a dent. I am working my way through the Dunhills in his collection – the Shell and Tanshell pipes. I am cleaning them for the family and moving them out into the hands of pipemen and women who will carry on the trust that began with Bob and in some pipes was carried on by Bob. In the collection along with the Dunhills are a good bevy of Petersons, some Comoy’s and Barlings as well as a lot of other pipes – a total of 125 pipes along with a box of parts. This is the largest estate that I have had the opportunity to work on. I put together a spread sheet of the pipes and stampings to create an invoice. I was taking on what would take me a fair amount of time to clean up. I could not pass up the opportunity to work on these pipes though. They were just too tempting.

I sorted the pipes into groups of the various brands and had a box of 25 different Dunhill pipes in different shapes, styles and sizes. I decided to work on the Dunhills first. It was a great chance to see the shape variety up close and personal. The photo below shows the box of Dunhill pipes.I am making progress on the 25 Dunhills with only 13 more to go. I went through the box of Dunhills shown above and chose the 12th sandblast pipe to work on – another Group 4 Shell Billiard with a long repair band. It is stamped on the underside of the bowl heel and the shank with the following information. The shape number 197 F/T is on the heel followed by Dunhill over Shell Briar. The Made in England stamp and any size or date stamp has been obscured by the long repair band on a cracked shank covers the rest of the stamping so I cannot date it. The nickel band is split but since it is glued in place it is not movable and will be left as is. The nickel band is a bit overwhelming in terms of it being the first thing that catches the eye. There is not much to be done with that. The round shank and band however flow into a tapered fishtail stem that is oxidized and has tooth marks and chatter near the button. There is some calcification on the first inch of the stem ahead of the button and there is some light damage to the top of the button. The Shell Briar finish is dirty but nonetheless there is something quite beautiful about the repaired pipe. There is grime and tars filling in much of the craggy finish. The bowl had a light cake and some lava overflowed on the rim top. Bob had gone to a lot of work to repair this one and keep it in his rotation. I think there is still a lot of life left in this little billiard. With a little work this pipe would look good once again. I took pictures of the pipe before I started working on it. I took some close up photos of the rim top, stem and the banded shank to show what I was dealing with. Judging from the condition this little billiard was in and the amount of work that went into banding and repairing the shank, I think I can safely say that it was another one of Bob’s favourite pipes. The cake in the bowl not quite as thick and the lava on the rim top was less so it makes me wonder how long after he repaired it that he actually used this pipe. You can see the cake and tobacco in the bowl. The stem was dirty, oxidized, calcified and had a lot of tooth chatter on the top and underside for about an inch ahead of the button. You can see the length of the nickel band on the shank but what you cannot see is what is visible with a light down the shank. The band holds together several cracks in the shank. They have been well repaired and the band has been glued in place and fitted nicely to the shank.I took a photo of the underside of the band to show the split in the nickel. It is smooth and has been glued to the shank so it is not easily removable and also not necessary to remove. I will need to fill in the crack and sand and polish it smooth.I took a photo of the stamping on the underside of the bowl and shank. It was weak but still readable.

I am sure if you have read the restoration work on the previous pipes you have already read what I included about Bob Kerr, the pipeman who held these pipes in trust before I came to work on them. Also, if you have followed the blog for long you will already know that I like to include background information on the pipeman whose pipes I am restoring. For me, when I am working on an estate I really like to have a sense of the person who held the pipes in trust before I worked on them. It gives me another dimension of the restoration work. I asked Brian if he or his wife would like to write a brief biographical tribute to her father, Bob. His daughter worked on it and I received the following short write up on him and some pictures to go along with the words. Thank you Brian and tell your wife thank you as well.

I am delighted to pass on these beloved pipes of my father’s. I hope each user gets many hours of contemplative pleasure as he did. I remember the aroma of tobacco in the rec room, as he put up his feet on his lazy boy. He’d be first at the paper then, no one could touch it before him. Maybe there would be a movie on with an actor smoking a pipe. He would have very definite opinions on whether the performer was a ‘real’ smoker or not, a distinction which I could never see but it would be very clear to him. He worked by day as a sales manager of a paper products company, a job he hated. What he longed for was the life of an artist, so on the weekends and sometimes mid-week evenings he would journey to his workshop and come out with wood sculptures, all of which he declared as crap but every one of them treasured by my sister and myself. Enjoy the pipes, and maybe a little of his creative spirit will enter you!

I have included one of Bob’s wood carvings to give you an idea of what he daughter wrote about above. You can see his artistry in the carving that is patterned after British Columbia’s Coastal First Nations people. To me this is a sea otter but perhaps a reader may enlighten us.

Having already worked on 11 other pipes from Bob’s estate I had a pretty good feel for how he used and viewed his pipes. I am coming to the end of the Shell and Tanshell pipes (2 more to go). I learned to tell which pipes were his favoured ones and which were his work horses. I could get a sense of the ones that accompanied him into his carving shop. In many ways it was as if he was standing over my shoulder while I cleaned up his pipes. With that in mind I turned to work on the 12th of his pipes. I reamed the bowl to remove the cake on the walls and the debris of tobacco shards that still remained. I used a PipNet pipe reamer to start the process. I followed that with a Savinelli Fitsall Pipe Knife to clean up the remaining cake in the conical bottom of the bowl. I sanded the bowl with 220 grit sandpaper wrapped around a piece of dowel. It smooths out the walls and also helps bring the inner edges back to round. With the bowl reamed it was time to work on the rim top and remove the thick lava coat in the blast of the rim. I used the Savinelli Fitsall knife to scrape away the high spots of lava and a brass bristle tire brush to work on the rim top and remove the buildup there. It also worked to minimize the rim damage a bit.With the bowl reamed and rim top cleaned I scrubbed the sandblast finish. This is pretty much my process in cleaning either sandblast or rusticated finishes. I scrubbed it with undiluted Murphy’s Oil Soap and a tooth brush to remove the grime from the grooves and canyons of the blast. I worked over the tarry lava overflow on the rim with the tooth brush and a brass brush. I rinsed the pipe under running water to remove the grime. I dried it off with a soft towel. The pictures below show the finish after scrubbing and rinsing. The outer edges of the rim were in good condition but the finish was worn off so I used a Mahogany stain pen to touch up the rim top and edges. I have found that particular stain pen matches the colours on the Shell Briar quite well. It is transparent enough to let the other under colours show through and blends in well with the existing stain.I decided to work on the crack in the nickel band first. I fill in the small open areas with clear super glue. It has the advantage of not only being clear but will also flow underneath the band bonding it to the briar. Once the glue cured I sanded the repaired area with micromesh sanding pads to smooth it out. I polished the band with the micromesh pads – wet sanding with 1500-2400 grit pads and dry sanding with 3200-12000 grit pads. I wiped the band down with a cotton pad after each sanding. I worked some Before & After Restoration Balm into the sandblast finish of the bowl and the rim top. I worked it into the nooks and crannies of the sandblast surface with my fingertips to clean, enliven and protect the wood. I let the balm sit for about 20 minutes and buffed it off with a soft cotton cloth and then polished it with a horsehair shoe brush. I took photos of the pipe at this point in the process to show what the bowl looked like at this point. I scraped out the inside of the mortise with a dental spatula to break away the tarry buildup on the walls of the shank. I cleaned out the internals of the bowl, shank and the airway in the shank and the stem with alcohol, pipe cleaners and cotton swabs until they came out clean. It was very dirty in the shank and stem but now it not only looks clean but smells clean. I gave the bowl several coats of Conservator’s Wax and buffed it with a shoe brush after each coat of wax to raise the shine. The bowl looks really good at this point. The sandblast grain just shines and is showing all of the different layers of colour that make up a Dunhill Shell finish. I set the bowl aside and turned my attention to the stem. I sanded out the majority of the marks and tooth chatter on the surface of the vulcanite with a folded piece of 220 grit sandpaper. I followed the 220 grit sandpaper with 400 grit wet dry sandpaper to minimize the scratching. The two papers combined did a pretty decent job of getting rid of the tooth marks and chatter as well as the oxidation and calcification. As I work on this stem, I am pretty sure that the tenon is Delrin. That makes sense – a broken shank and a snapped tenon. It is not too often that I get to sing the praises of another repair person. But I have to because this repair guy was amazing. He did a great job on rebuilding this old guy and giving it life.I polished the stem with Denicare Mouthpiece Polish to take out the oxidation at the button edge and on the end of the mouthpiece. I also worked hard to scrub it from the surface of the stem at the tenon end.  I polished out the scratches with micromesh sanding pads – wet sanding with 1500-2400 grit pads and dry sanding with 3200-12000 grit pads. I wiped the stem down after each sanding pad with Obsidian Oil. I polished it with Before & After Pipe Stem Polish – both Fine and Extra Fine. Once I had finished the polishing I gave it a final coat of oil and set it aside to dry. I put the bowl and stem back together. I polished the bowl and stem with Blue Diamond to polish out the scratches in the briar, the nickel band and the vulcanite. I gave the bowl multiple coats of Conservator’s Wax and the stem multiple coats of carnauba wax. I buffed the pipe with a clean buffing pad to raise the shine. I hand buffed it with a microfiber cloth to deepen the shine. The pipe polished up pretty nicely. The contrast of colours that show up in the sandblast of the Shell briar bowl looked good with the polished black vulcanite. The long nickel band actually does not look too bad and this well repaired Shell Briar 197 F/T Billiard has a long life ahead of it for the next pipeman who takes on the trust of Bob’s pipes. It really has that classic Dunhill look that catches the eye. The finished pipe is shown in the photos below. The dimensions of the pipe are Length: 6 1/2 inches, Height: 1 7/8 inches, Outside diameter of the bowl: 1 3/8 inches, Chamber diameter: 3/4 of an inch. This is the 12th Dunhill and the 11th Shell from the many pipes that will be coming onto the work table from the estate. Thanks for reading this blog and my reflections on the pipe while I worked on it. I am having fun working on this estate.

Restoring the 11th Pipe from Bob Kerr’s Estate – A Dunhill Shell Briar 104 F/T Oval Shank Billiard


Blog by Steve Laug

In my ongoing work on Bob Kerr’s Estate I seem to be making a dent. I am working my way through the Dunhills in his collection – the Shell and Tanshell pipes. I am cleaning them for the family and moving them out into the hands of pipemen and women who will carry on the trust that began with Bob and in some pipes was carried on by Bob. In the collection along with the Dunhills are a good bevy of Petersons, some Comoy’s and Barlings as well as a lot of other pipes – a total of 125 pipes along with a box of parts. This is the largest estate that I have had the opportunity to work on. I put together a spread sheet of the pipes and stampings to create an invoice. I was taking on what would take me a fair amount of time to clean up. I could not pass up the opportunity to work on these pipes though. They were just too tempting.

I sorted the pipes into groups of the various brands and had a box of 25 different Dunhill pipes in different shapes, styles and sizes. I decided to work on the Dunhills first. It was a great chance to see the shape variety up close and personal. The photo below shows the box of Dunhill pipes.I am making progress on the 25 Dunhills with only 14 more to go. I went through the box of Dunhills shown above and chose the 11th sandblast pipe to work on – another Group 4 Shell Billiard with an oval shank and tapered stem. It is stamped on the underside of the bowl heel and the shank with the following information. On the heel it reads 104F/T which is the shape number followed by Dunhill over Shell Briar. That is followed by Made in England 0 which would identify it as made in 1960. Next to the stem/shank junction (under the band) is a 4S which gives the size of this Shell pipe. Stem is oxidized, tooth marks and chatter near the button, some calcification. The oval shank of this billiard flows into a tapered stem that is oxidized and has tooth marks and chatter near the button. There is some calcification on the first inch of the stem ahead of the button and there is some light damage to the top of the button. The Shell Briar finish is dirty but nonetheless is beautiful. There is grime and tars filling in much of the craggy finish. The bowl had a thick cake and lava overflowed on the rim top. The inner edge of the bowl shows some damage but the extent will not be clear until the bowl is reamed and the rim top cleaned. The shank has a nickel repair band that really cheapens the look. It is loose so I plan on examining the shank carefully to see if it is really necessary or was just added as bling. With a little work this pipe would look good once again. I took pictures of the pipe before I started working on it. I took some close up photos of the rim top and stem to show what I was dealing with. Judging from the condition this little billiard was in I think I can safely say that it was another one of Bob’s favourite pipes. The cake in the bowl is another thick one and the lava on the rim top is also very thick. You can see the cake and tobacco in the bowl. The stem was dirty, oxidized, calcified and had a lot of tooth chatter on the top and underside for about an inch ahead of the button. The button surface was also marked with tooth chatter. I removed the loose band from the shank so I could read the stamping on the shank. I took a photo of the stamping on the underside of the bowl and shank. It was clear and readable.I am sure if you have read the restoration work on the previous 8 pipes you have already read what I included about Bob Kerr, the pipeman who held these pipes in trust before I came to work on them. Also, if you have followed the blog for long you will already know that I like to include background information on the pipeman whose pipes I am restoring. For me, when I am working on an estate I really like to have a sense of the person who held the pipes in trust before I worked on them. It gives me another dimension of the restoration work. I asked Brian if he or his wife would like to write a brief biographical tribute to her father, Bob. His daughter worked on it and I received the following short write up on him and some pictures to go along with the words. Thank you Brian and tell your wife thank you as well.

I am delighted to pass on these beloved pipes of my father’s. I hope each user gets many hours of contemplative pleasure as he did. I remember the aroma of tobacco in the rec room, as he put up his feet on his lazy boy. He’d be first at the paper then, no one could touch it before him. Maybe there would be a movie on with an actor smoking a pipe. He would have very definite opinions on whether the performer was a ‘real’ smoker or not, a distinction which I could never see but it would be very clear to him. He worked by day as a sales manager of a paper products company, a job he hated. What he longed for was the life of an artist, so on the weekends and sometimes mid-week evenings he would journey to his workshop and come out with wood sculptures, all of which he declared as crap but every one of them treasured by my sister and myself. Enjoy the pipes, and maybe a little of his creative spirit will enter you!

I have included one of Bob’s wood carvings to give you an idea of what he daughter wrote about above. You can see his artistry in the carving that is patterned after British Columbia’s Coastal First Nations people. To me this is a sea otter but perhaps a reader may enlighten us.Having already worked on 10 other pipes from Bob’s estate I had a pretty good feel for how he used and viewed his pipes. Even with the pipes so far I could tell which ones were his favoured ones and which were his work horses. I could get a sense of the ones that accompanied him into his carving shop. In many ways it was as if he was standing over my shoulder while I cleaned up his pipes. With that in mind I turned to work on the 11th of his pipes. I reamed the bowl to remove the cake on the walls and the debris of tobacco shards that still remained. I used a PipNet pipe reamer to start the process. I followed that with a Savinelli Fitsall Pipe Knife to clean up the remaining cake in the conical bottom of the bowl. I sanded the bowl with 220 grit sandpaper wrapped around a piece of dowel. It smooths out the walls and also helps bring the inner edges back to round. With the bowl reamed it was time to work on the rim top and remove the thick lava coat in the blast of the rim. I used the Savinelli Fitsall knife to scrape away the high spots of lava and a brass bristle tire brush to work on the rim top and remove the buildup there. It also worked to minimize the rim damage a bit.I decided to check out the shank and see if I could find a crack once the band was removed. I examined it with a lens under a bright light and sure enough there was a crack on the underside of the shank that went through the circle 4S. It was a fine hairline crack but the band served to keep it that way. I have circled the crack to show its location.I will need to reband the shank but I think I will use a much narrower band that maintains the integrity of the look and does not compromise the repair. I decided to start with that part of the restoration and see what I could do. I used the Dremel and sanding drum to take the band down as much as I could and still hold onto it. Then I used 220 grit sandpaper and “topped” the band to a point where it worked to do the job it was created for but was far less intrusive. I was able to only cover the S and part of the 4 so it was a lot better than when I started. Here are some photos of the process. Photo 1 shows the original width of the band. Photo 2 shows the Dremel and sanding drum. I used the sanding drum held sideways (horizontal to the shank end) and reduced the width of the band as much as I could without damaging the end of the shank.Photo 3 shows the process of “topping” the band on the topping board with a new piece of 220 grit sandpaper. Using this method after the Dremel allowed me to remove the sharpness of the edge and also even out the edge. Photo 4 shows the width of the band from the side. I was able to reduce by just over half.I cleaned up the shank end with a little alcohol and a q-tip and then glued the band in place with white all-purpose glue. Once the glue dried and the band was solidly in place I took the photos below to give an idea of the new look of the band. I have included the first photo below to show the contrast of what the band originally looked like and what the band looks like now. I cleaned up the excess glue around the newly fit band and then worked some Before & After Restoration Balm into the sandblast finish of the bowl and the rim top. I worked it into the nooks and crannies of the sandblast surface with my fingertips to clean, enliven and protect the wood. I let the balm sit for about 20 minutes and buffed it off with a soft cotton cloth and then polished it with a horsehair shoe brush. I took photos of the pipe at this point in the process to show what the bowl looked like at this point. I polished the nickel band and edges to dress it up and give it a cleaner appearance using worn micromesh sanding pads. The photos below tell the story. I scraped out the inside of the mortise with a small pen knife to break away the tarry buildup on the walls of the shank. I cleaned out the internals of the bowl, shank and the airway in the shank and the stem with alcohol, pipe cleaners and cotton swabs until they came out clean. It was very dirty in the shank and stem but now it not only looks clean but smells clean.  I gave the bowl several coats of Conservator’s Wax and buffed it with a shoe brush after each coat of wax to raise the shine. The bowl looks really good at this point. The sandblast grain just shines and is showing all of the different layers of colour that make up a Dunhill Shell finish. I set the bowl aside and turned my attention to the stem. I sanded out the majority of the marks and tooth chatter on the surface of the vulcanite with a folded piece of 220 grit sandpaper. I followed the 220 grit sandpaper with 400 grit wet dry sandpaper to minimize the scratching. The two papers combined did a pretty decent job of getting rid of the tooth marks and chatter as well as the oxidation and calcification. There were still a few small tooth marks that needed work. I polished the stem with Denicare Mouthpiece Polish to take out the oxidation at the button edge and on the end of the mouthpiece. I also worked hard to scrub it from the surface of the stem at the tenon end. I polished out the scratches with micromesh sanding pads – wet sanding with 1500-2400 grit pads and dry sanding with 3200-12000 grit pads. I wiped the stem down after each sanding pad with Obsidian Oil. I polished it with Before & After Pipe Stem Polish – both Fine and Extra Fine. Once I had finished the polishing I gave it a final coat of oil and set it aside to dry. I put the bowl and stem back together. I polished the bowl and stem with Blue Diamond to polish out the scratches in the briar and the vulcanite. I gave the bowl multiple coats of Conservator’s Wax and the stem multiple coats of carnauba wax. I buffed the pipe with a clean buffing pad to raise the shine. I hand buffed it with a microfiber cloth to deepen the shine. The pipe polished up pretty nicely. The contrast of colours that show up in the sandblast of the Shell briar bowl looked good with the polished black vulcanite. This 1960 Dunhill Shell 104 F/T oval shank tapered stem Billiard turned out really well and I was able to reduce the size and overall presence of the band and make it standout less at first look. Once again it really has that classic Dunhill look that catches the eye. The finished pipe is shown in the photos below. The dimensions of the pipe are Length: 5 3/4 inches, Height: 1 3/4 inches, Outside diameter of the bowl: 1 1/4 inches, Chamber diameter: 3/4 of an inch. This is the 11th Dunhill and the 10th Shell from the many pipes that will be coming onto the work table from the estate. Thanks for reading this blog and my reflections on the pipe while I worked on it. I am having fun working on this estate.


Restoring the 10th Pipe from Bob Kerr’s Estate – A Dunhill Shell 660 Saddle Stem Billiard


Blog by Steve Laug

In my ongoing work on Bob Kerr’s Estate I seem to be making a dent. I am working my way through the Dunhills in his collection – the Shell and Tanshell pipes. I am cleaning them for the family and moving them out into the hands of pipemen and women who will carry on the trust that began with Bob and in some pipes was carried on by Bob. In the collection along with the Dunhills are a good bevy of Petersons, some Comoys and Barlings as well as a lot of other pipes – a total of 125 pipes along with a box of parts. This is the largest estate that I have had the opportunity to work on. I put together a spread sheet of the pipes and stampings to create an invoice. I was taking on what would take me a fair amount of time to clean up. I could not pass up the opportunity to work on these pipes though. They were just too tempting.

I sorted the pipes into groups of the various brands and had a box of 25 different Dunhill pipes in different shapes, styles and sizes. I decided to work on the Dunhills first. It was a great chance to see the shape variety up close and personal. The photo below shows the box of Dunhill pipes.I went through the box of Dunhills shown above and chose the 10th sandblast pipe to work on – a Group 4 Shell Billiard with a saddle stem. It is stamped on the heel and the underside of the 660 followed by Dunhill over Shell. Then it reads Made in England 7, Circle 4S – Group 4 size Shell made in 1968. The round shank of the billiard flows into a short saddle stem that is oxidized and has tooth marks and chatter near the button. There is some calcification on the first inch of the stem ahead of the button and there is some light damage to the top of the button. The Shell finish is very craggy and has a deep blast. It is dirty with grime and tars filling in much of the craggy finish. The bowl had a thick cake and lava overflowed on the rim top. The bowl had tobacco stuck in the lava on the cake on the walls of the bowl like the other pipes from this estate. With a little work this pipe would look good once again. I took pictures of the pipe before I started working on it. I took some close up photos of the rim top and stem to show what I was dealing with. Judging from the condition this little billiard was in I think I can safely say that it was another one of Bob’s favourite pipes. The cake in the bowl is another thick one and the lava on the rim top is also very thick. You can see the cake and tobacco in the bowl. The saddle stem was dirty, oxidized, calcified and had a lot of tooth chatter on the top and underside for about an inch ahead of the button. The button surface was also marked with tooth chatter. The sharp edge defining the button was worn down and almost smoothed out. It will be an interesting challenge to bring back to life.I took a photo of the stamping on the underside of the bowl and shank. It was clear and readable.I am sure if you have read the restoration work on the previous 8 pipes you have already read what I included about Bob Kerr, the pipeman who held these pipes in trust before I came to work on them. Also, if you have followed the blog for long you will already know that I like to include background information on the pipeman whose pipes I am restoring. For me, when I am working on an estate I really like to have a sense of the person who held the pipes in trust before I worked on them. It gives me another dimension of the restoration work. I asked Brian if he or his wife would like to write a brief biographical tribute to her father, Bob. His daughter worked on it and I received the following short write up on him and some pictures to go along with the words. Thank you Brian and tell your wife thank you as well.

I am delighted to pass on these beloved pipes of my father’s. I hope each user gets many hours of contemplative pleasure as he did. I remember the aroma of tobacco in the rec room, as he put up his feet on his lazy boy. He’d be first at the paper then, no one could touch it before him. Maybe there would be a movie on with an actor smoking a pipe. He would have very definite opinions on whether the performer was a ‘real’ smoker or not, a distinction which I could never see but it would be very clear to him. He worked by day as a sales manager of a paper products company, a job he hated. What he longed for was the life of an artist, so on the weekends and sometimes mid-week evenings he would journey to his workshop and come out with wood sculptures, all of which he declared as crap but every one of them treasured by my sister and myself. Enjoy the pipes, and maybe a little of his creative spirit will enter you!

I have included one of Bob’s wood carvings to give you an idea of what he daughter wrote about above. You can see his artistry in the carving that is patterned after British Columbia’s Coastal First Nations people. To me this is a sea otter but perhaps a reader may enlighten us.Having already worked on 9 other pipes from Bob’s estate I was beginning to get a feel for how he used and viewed his pipes. Even with the pipes so far I could tell which ones were his favoured ones and which were his work horses. I could get a sense of the ones that accompanied him into his carving shop. In many ways it was as if he was standing over my shoulder while I cleaned up his pipes. With that in mind I turned to work on the 10th of his pipes. I reamed the bowl to remove the cake on the walls and the debris of tobacco shards that still remained. I used a PipNet pipe reamer to start the process. I followed that with a Savinelli Fitsall Pipe Knife to clean up the remaining cake in the conical bottom of the bowl. I sanded the bowl with 220 grit sandpaper wrapped around a piece of dowel. It smooths out the walls and also helps bring the inner edges back to round. With the bowl reamed it was time to work on the rim top and remove the thick lava coat in the blast of the rim. I used the Savinelli Fitsall knife to scrape away the high spots of lava and a brass bristle tire brush to work on the rim top and remove the buildup there.With the bowl reamed and rim top cleaned I scrubbed the sandblast finish. This is pretty much my process in cleaning either sandblast or rusticated finishes. I scrubbed it with undiluted Murphy’s Oil Soap and a tooth brush to remove the grime from the grooves and canyons of the blast. I worked over the tarry lava overflow on the rim with the tooth brush and a brass brush. I rinsed the pipe under running water to remove the grime. I dried it off with a soft towel. The pictures below show the finish after scrubbing and rinsing. I scraped out the inside of the mortise with a small pen knife to break away the tarry buildup on the walls of the shank. I cleaned out the internals of the bowl, shank and the airway in the shank and the stem with alcohol, pipe cleaners and cotton swabs until they came out clean. It was very dirty in the shank and stem but now it not only looks clean but smells clean.  I worked some Before & After Restoration Balm into the briar on the bowl and the rim top. I worked it into the nooks and crannies of the sandblast surface with my fingertips to clean, enliven and protect the wood. I let the balm sit for about 20 minutes and buffed it off with a soft cotton cloth and then polished it with a horsehair shoe brush. I took photos of the pipe at this point in the process to show what the bowl looked like at this point. I gave the bowl several coats of Conservator’s Wax and buffed it with a shoe brush after each coat of wax to raise the shine. The bowl looks really good at this point. The sandblast grain just shines and is showing all of the different layers of colour that make up a Dunhill Shell finish. I set the bowl aside and turned my attention to the stem. I sanded out the majority of the marks and tooth chatter on the surface of the vulcanite with a folded piece of 220 grit sandpaper. I followed the 220 grit sandpaper with 400 grit wet dry sandpaper to minimize the scratching. The two papers combined did a pretty decent job of getting rid of the tooth marks and chatter as well as the oxidation and calcification. There were still a few small tooth marks that needed work.I polished the stem with Denicare Mouthpiece Polish to take out the oxidation at the button edge and on the end of the mouthpiece. I also worked hard to scrub it from the surface of the stem at the tenon end.There were two small tooth marks on the underside of the stem that needed a bit of attention. I filled them in with some clear super glue. I set it aside to dry. Once the glue dried I sanded the repairs smooth with 220 grit sandpaper to blend them into the surface of the stem. I polished out the scratches with micromesh sanding pads – wet sanding with 1500-2400 grit pads and dry sanding with 3200-12000 grit pads. I wiped the stem down after each sanding pad with Obsidian Oil. I polished it with Before & After Pipe Stem Polish – both Fine and Extra Fine. Once I had finished the polishing I gave it a final coat of oil and set it aside to dry. I put the bowl and stem back together. I polished the bowl and stem with Blue Diamond to polish out the scratches in the briar and the vulcanite. I gave the bowl multiple coats of Conservator’s Wax and the stem multiple coats of carnauba wax. I buffed the pipe with a clean buffing pad to raise the shine. I hand buffed it with a microfiber cloth to deepen the shine. The pipe polished up pretty nicely. The contrast of colours that show up in the sandblast of the Shell briar bowl looked good with the polished black vulcanite. The swirled grain “target” on the right side of the bowl is quite stunning. This 1968 Dunhill Shell 660 Saddle stem Billiard turned out really well and I was able to repair the tooth marks on the underside of the stem. It really has that classic Dunhill look that catches the eye. The finished pipe is shown in the photos below. The dimensions of the pipe are Length: 5 ¼ inches, Height: 1 3/4 inches, Outside diameter of the bowl: 1 1/4 inches, Chamber diameter: 3/4 of an inch. This is the 10th Dunhill and the 9th Shell from the many pipes that will be coming onto the work table from the estate. This pipe is already sold to a fellow who wrote me an email after the first restoration. I quote part of that now as it gives testimony to our small pipesmoking community.

“Hello, I must say this is an incredibly small world. I’ve been following rebornpipes for a while now and when i saw your first write up about Bob Kerr I was incredibly surprised,  he was a prominent member of the community here on Pender Island and has been greatly missed.  I would be honored to buy one of his Dunhills…  Thanks for your time. — Jon”

The pipe will be heading over to Pender Island with the Tanshell Pot early this week. I think Jon will enjoy it! Thanks for reading this blog and my reflections on the pipe while I worked on it. I am having fun working on this estate.