Blog by Steve Laug
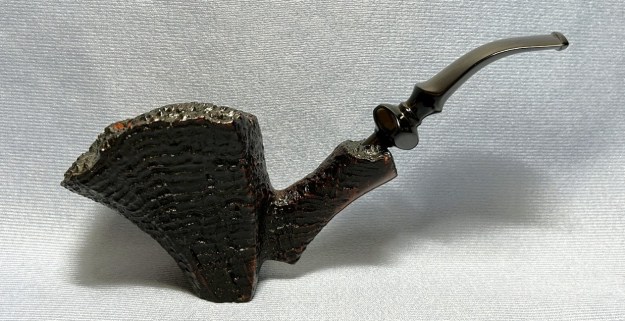
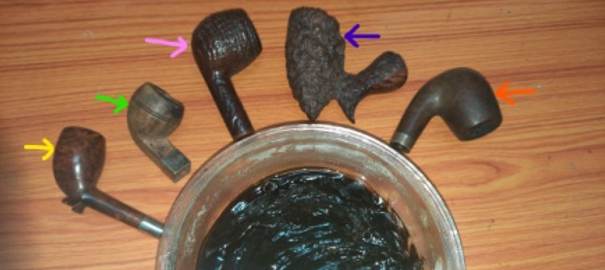
This is a continuation of the work that began with an email from Anthony, a reader of rebornpipes asking if I would be willing to help him clean up his Dad’s pipes. He wrote; “I have a few pipes (8 or so) that haven’t been smoked in 15 years. They were my dad’s. I would like to get someone to restore them”. We chatted back and forth via email and the long and short of the story is that I have eight of his Dad’s pipes in my shop now to work on. The photo below shows the mixture of pipes that he sent me. There are some interesting shapes and most are very dirty and have very little if any of the original finish left on the briar. All have an overflow of carbon on the rim top and all have chewed, damaged stems and buttons. Anthony remembers his Dad smoking them throughout the years he was growing up so they went from regular use to being boxed and stored. They will need a lot of TLC to bring life back to them but it should be fun to give it a go. I went through the pipes and assessed their condition and contacted him and got the go ahead to proceed on the lot. I have completed the restoration of six of the pipes. The next pipe I chose to work on was the tall freehand with plateau on the rim and the shank end. It too had a replacement vulcanite stem – it is the second pipe down on the left hand column in the above photo. I have circled it in red. It is a tall freehand with a 1/4 bent stem. It is a really pretty straight grain with patterns of rustication on the bottom portion of the bowl. It has plateau on the top and on the end of the shank. The plateau finish has what looks like mold or at least water damage on both the top and end of the shank. There is also water damage around the end of the shank. The stem that is on it is again a replacement twin bore/bite proof stem that is chewed and for all intents and purposes destroyed. The fact that most of these pipes have a replacement twin bore bite proof stem tells me a lot about Anthony’s Dad’s habitual gnawing on his pipes. The stem is ruined with large pieces tooth marks and holes on both the top and underside extending from the chewed button into the surface of the stem. I will need to find a different stem. The pipe is stamped on the underside of the shank with the number 0 and under that Harcourt over Hand Carved in Denmark. The bowl had a thick cake, and some lava overflow under the water damage. The finish was gone and very washed out looking. Even the dirt and grime were anemic. I took photos of the pipe to show its overall condition when it arrived at my work table.
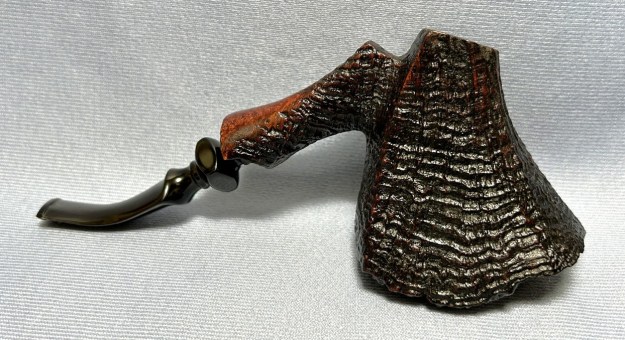
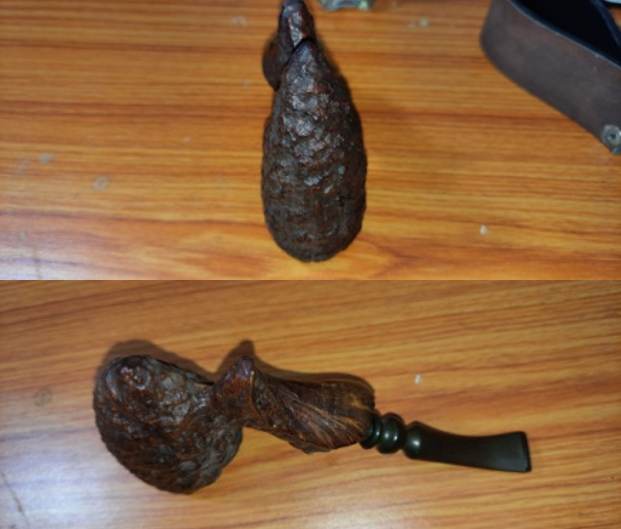
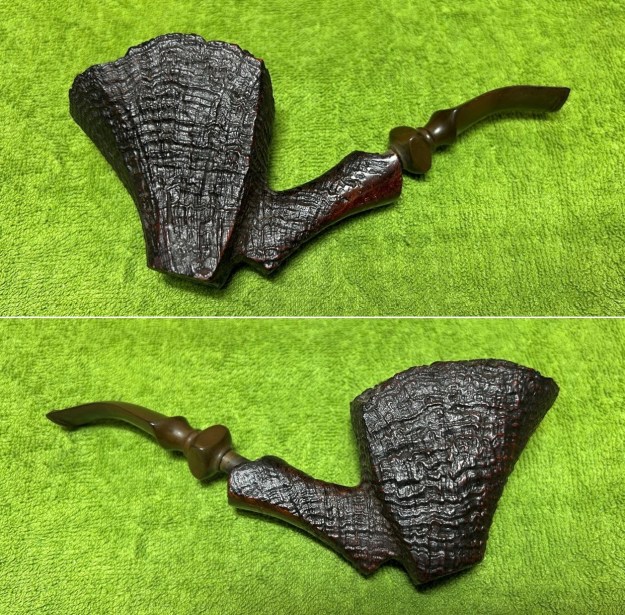
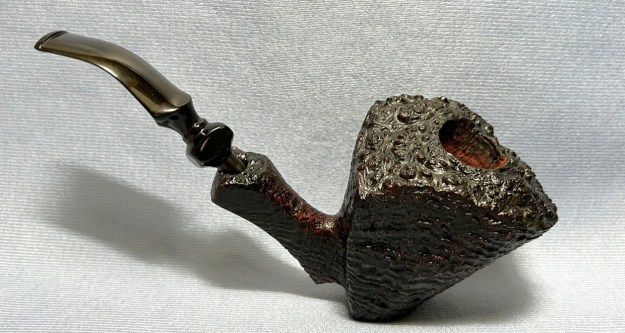
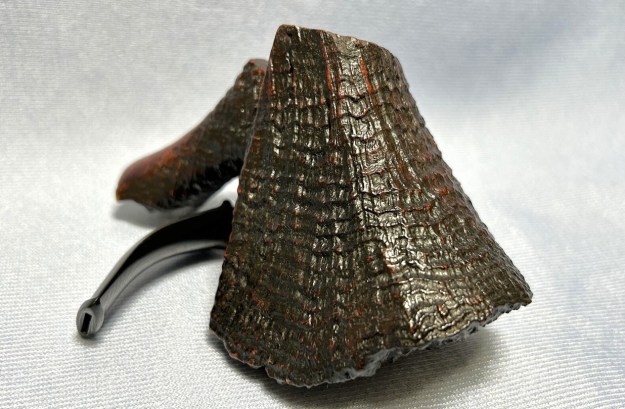
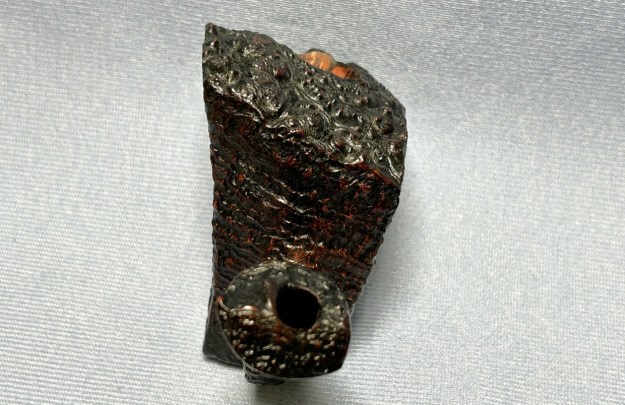
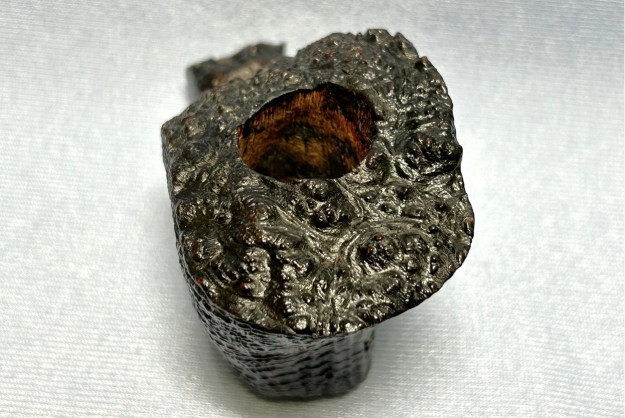
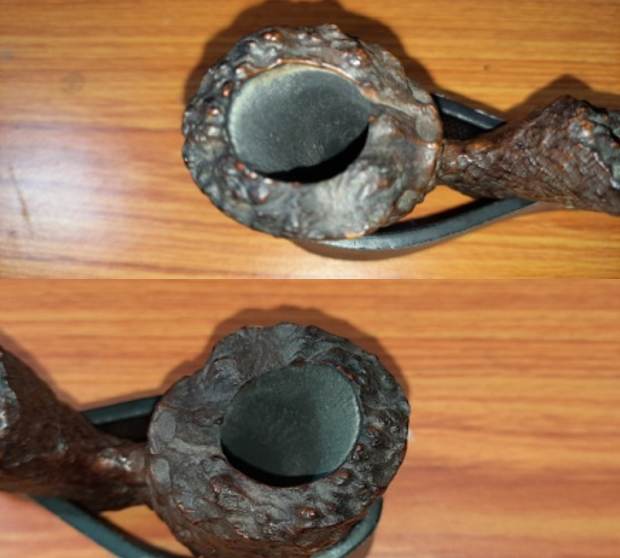
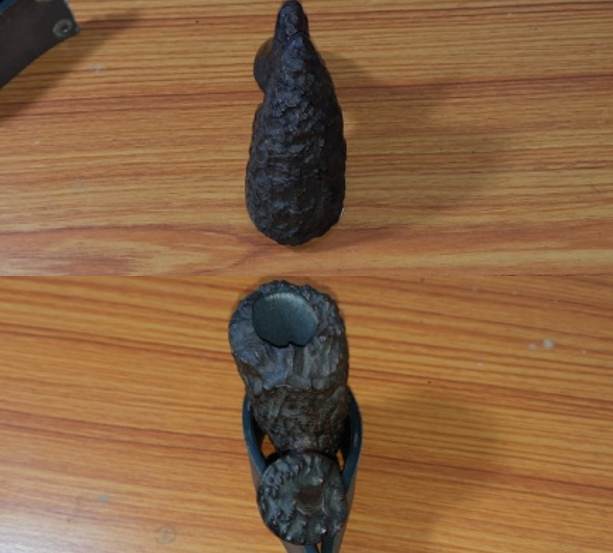
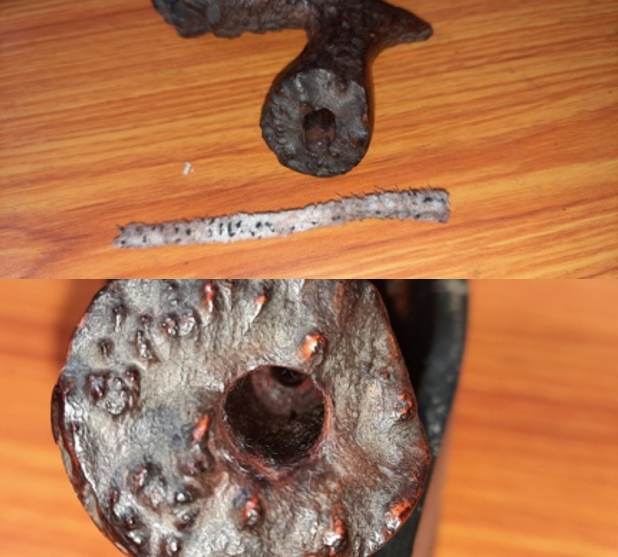
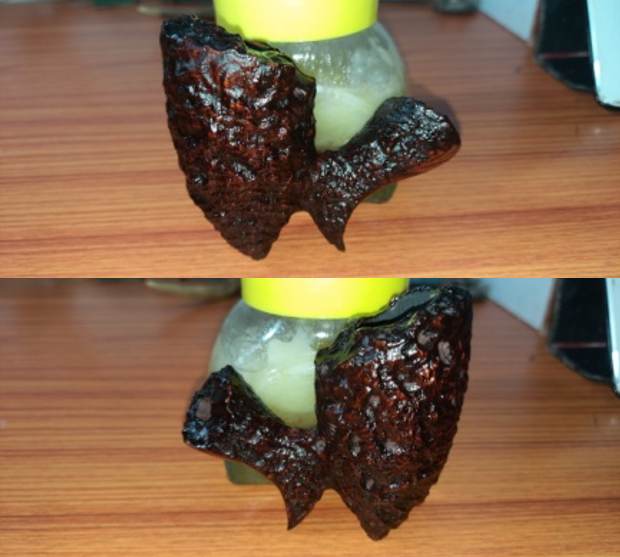
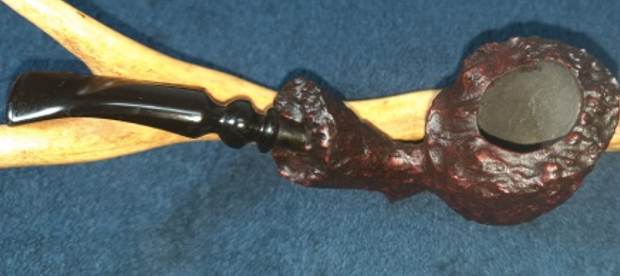
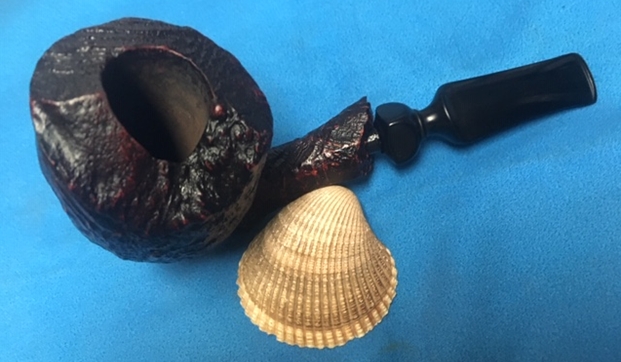
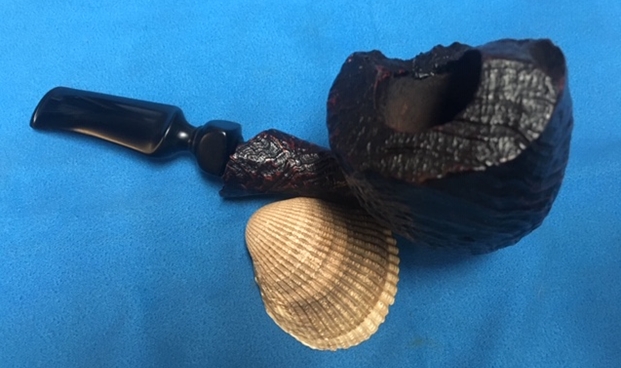
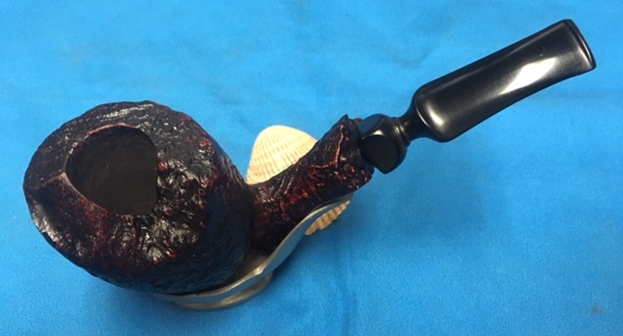
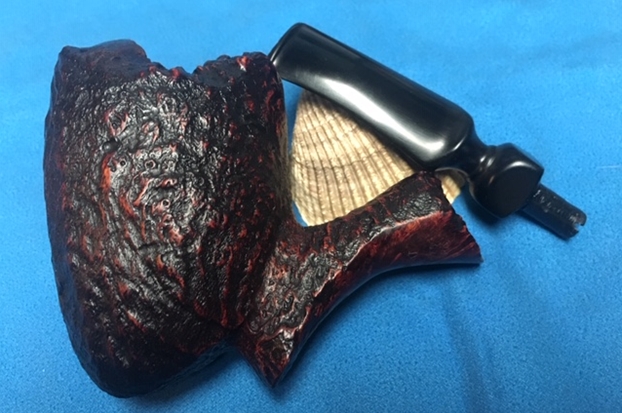
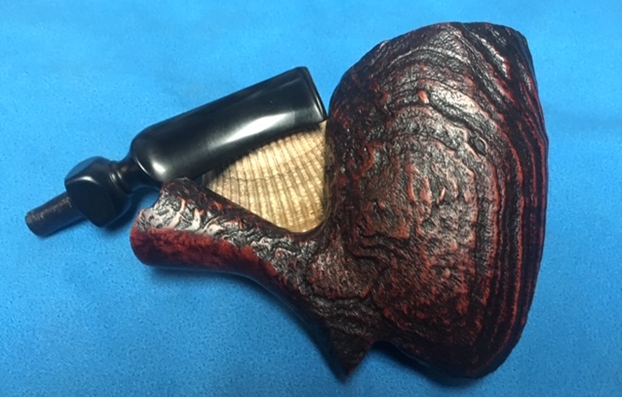
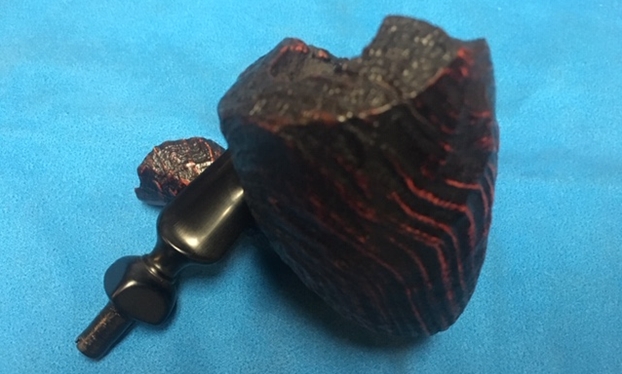
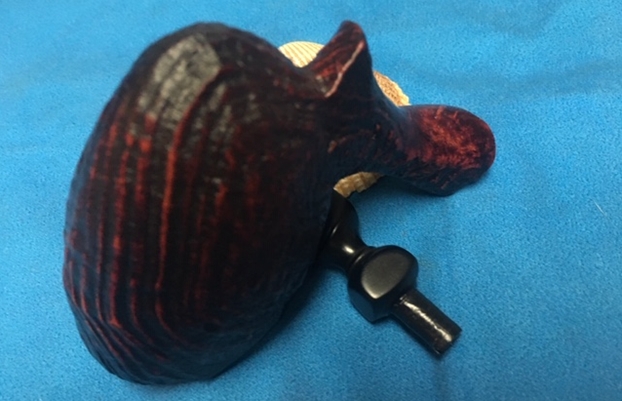
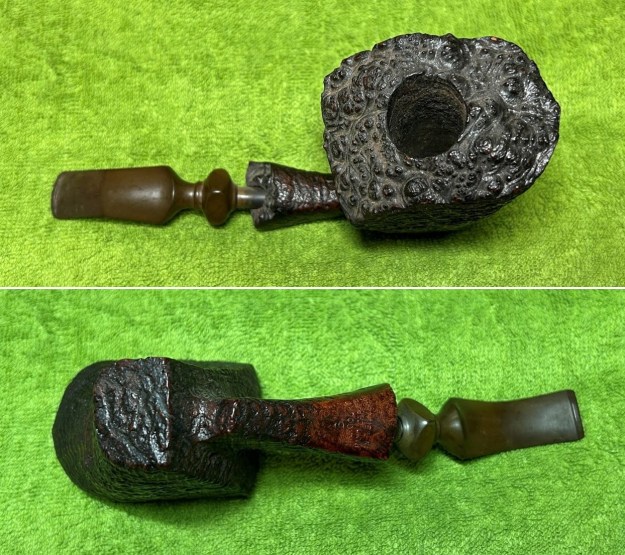
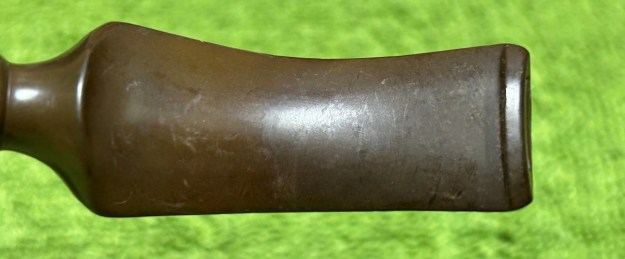
 I took some close up photos of the bowl, rim top and the stem to show what I was going to be dealing with on this pipe. The plateau rim top was in rough condition – mold filled in the grooves and valleys of the plateau. There was also some lava overflowing from the bowl that had filled in the grooves. The plateau on the shank end was worse than the rim top (if possible). The finish worn off and there was water staining all around the shank end.
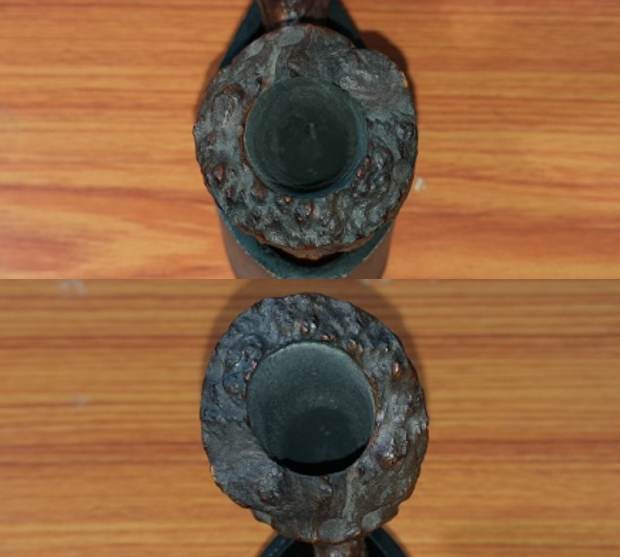
 The water damage around the end of the shank was darker than the rest of the finish. It was water stained and those are hard to remove.
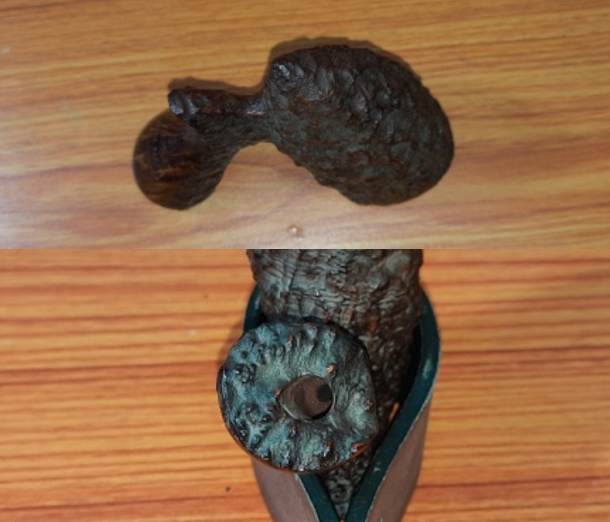
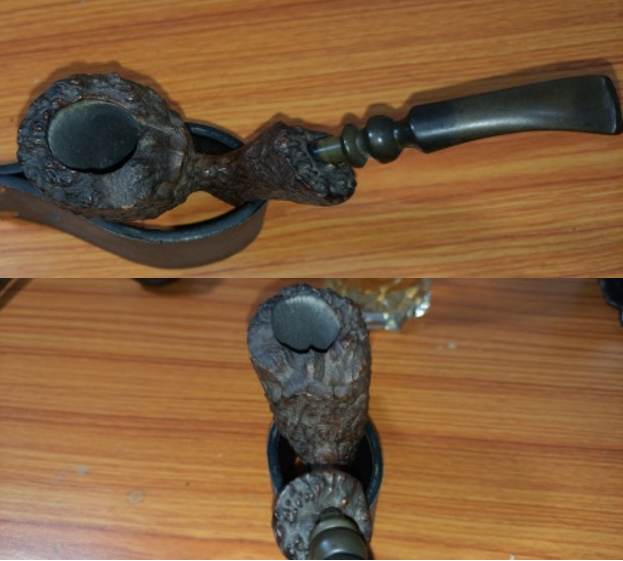
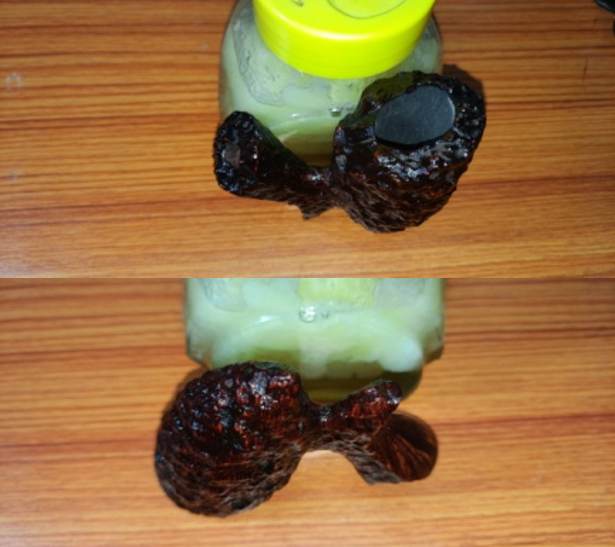
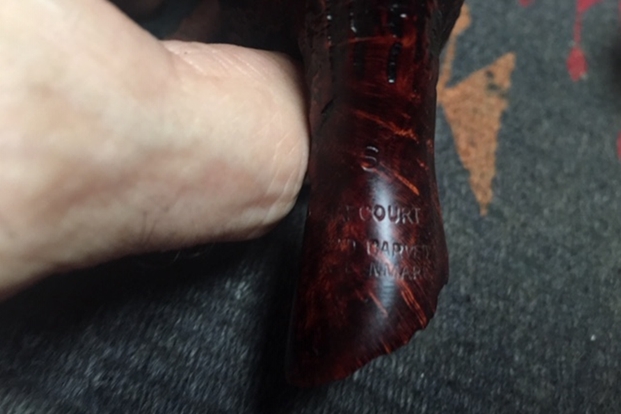
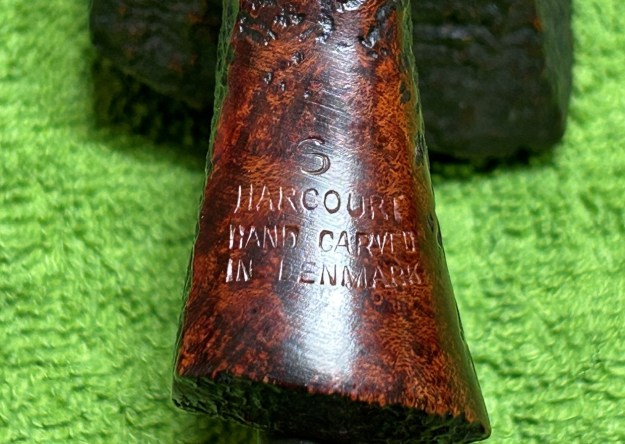
 I took a photo of the stamping on the underside of the shank. It reads 0 over Harcourt. Underneath that are two lines reading Hand Carved over In Denmark.
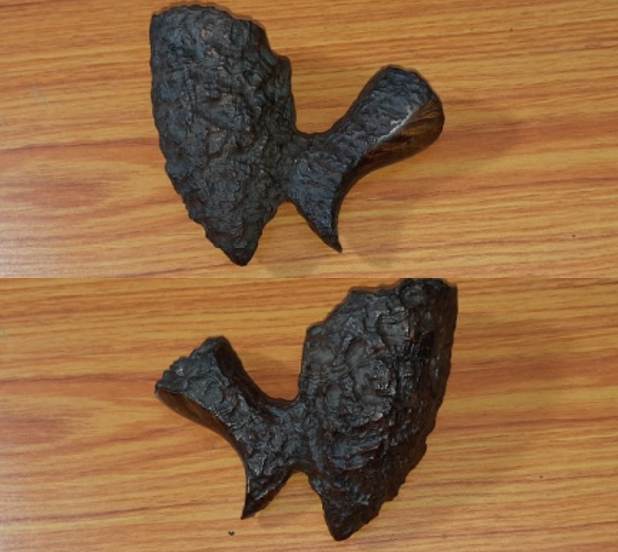
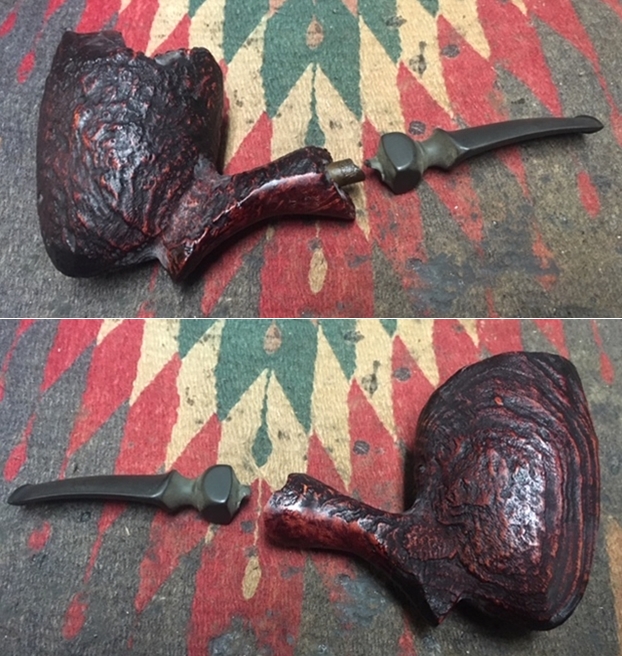
 The stem was ruined you can see from the second and third photos below. The “bite proof” stem evidently was not bite proof. Anthony’s Dad had gnawed through the twin bore and left holes in the deep tooth marks on the stem. It would need to be replaced.
 I had some vague memory about the Harcourt brand that had a connection to Preben Holm and the stamping seemed a lot like the way that he stamped his pipes. I did a bit of research on the brand to see the connection. The first place I looked was on Pipedia at the following link: https://pipedia.org/wiki/Harcourt. There I found the following information which I quote in full.
The brand Harcourt was produced by Preben Holm (†) for Dunhill to secure a share of the Danish fancy boom for Dunhill’s principal pipe dealers. Later Erik Nørding made Harcourt pipes for a shorter period. These pipe are sometimes (partially) rusticated.
It had been reported that the second generation of Harcourt pipes were sold exclusively through Dunhill stores, but we now know through Rich Mervin that the Brick Church Pipe Shop, a chain of 3 stores in NJ sold Danish freehands in the 1970s and 80s including Knute, Ben Wade, and Harcourt. They were also an authorized Charatan and Dunhill retailer. So, apparently Harcourt freehands were sold through at least some Dunhill dealers as well as the Dunhill stores.
I then turned to the pipephil site at this link and found out some more information on the brand. http://www.pipephil.eu/logos/en/infos/harcourt1.html. I followed the links there to some photos of a boxed pipe and the stamping on the shank.
This box contains a pipe carved for Dunhill in the 1970s. Harcourt pipes were Dunhill’s answer to the passion Danish style raised during this period.
 There was also a photo of the stamping on Preben Holm’s designed Harcourt that is recognizable by the characteristic shape of the pipe as well as by the stampings on its shank. The stampings in the photo are identical to the pipe I am working on. It is stamped with an 0 over HARCOURT and underneath that it reads HAND CARVED over IN DENMARK.
From the two sites I was able to make the connection between the pipe I am working on and the Harcourt pipes that were made by Preben Holm. The connection between Preben Holm and Dunhill’s desire to tap into the Danish Freehand market in the US was also helpful as it gave me a potential date for the pipe. It was made in the 1970s – the height of the Danish period in the US.
So now I knew that Anthony’s Dad had purchased this pipe during the 1970s from a shop probably somewhere in California. Possibly even the pipe shop that Anthony’s Mom had written about called “Andre’s,” around 1969 or ’70. She said it was a unique shop, originally located in Los Gatos, or Campbell, California she thought. She said that it later moved to the Alameda area in San Jose. Anthony’s Dad also bought his favorite tobacco blends there so it makes sense to me that he may have also purchased the pipe there. Perhaps Anthony will let us know when he reads this.
Once again I am including the tribute that I asked Anthony to write about his Dad and his pipe smoking once again in case some of you missed that and wanted to have some background. Here is what Anthony sent: When my dad died 6 years ago, my mom asked if I wanted my dad’s old pipes. He was a long time pipe smoker, ever since I was a kid I can remember him sitting on the couch smoking his pipe inside. He worked at IBM and used to smoke his pipe in his office before they changed the laws in California. So you can imagine he had quite the collection over the years.
I took his pipes and put them in storage for a few years, I myself recently quit smoking cigarettes and decided to take up pipe smoking as it was easier on the wallet. I asked in /r/pipetobacco if anyone could recommend a pipe restoration service and someone told me about rebornpipes.com. I was hesitant but after looking at the blog I knew it would be a good place to send my dad’s pipes.
My dad loved smoking his pipes, sitting out by the pool in the sun taking a nap or in the garage wood working. The house was my mom’s area and the garage was my dad’s area. I spent hours sitting out in the garage as a kid watching the niners or a’s and giants on tv while doing woodworking projects. I hope to do the same with my kids these days.
I’m not sure if my dad smoked other tobacco but I remember Captain Black was the kind he smoked regularly. He had tins of it in the garage, full and empty and would turn the old tin jars into storage for odds and ends, like screws or washers or miscellaneous stuff.
I remember when I played little league my dad would sit in the stands and smoke his pipes. One of my teammates asked “What is that smell?” and I ashamedly said “Oh that’s my dad’s pipe…I’ll go tell him to put it out” and my teammate said “No man, it smells good!”. It’s funny how the little conversations over the years you remember.
Another time when I was in 3rd grade or so we learned how smoking was bad for you (this was back in the 80s). I remember I asked my teacher if smoking a pipe was bad for you too….and she hesitated and said “Not as bad as cigarettes, since you don’t inhale it”. After that I was no longer worried about my dad smoking.
Knowing my mom I have no idea how my dad pulled this off but he managed to smoke his pipe in the house. I guess she liked the smell of it. Recently when I was waiting for my girls to get out of school I was sitting on a side street smoking my pipe and someone walked by and thanked me for bringing the pipe back. He said his dad used to smoke a pipe and he loved the smell. As did mine. The only difference is my daughters complain constantly about the smell of my car, but that is mostly because I smoke cigars too.
Anyway, grab some fine tobacco, light up a bowl and sit back and relax. I don’t have a pool like my dad did but you can catch me working on my laptop sitting in my driveway smoking a nice pipe, especially one of these restored pipes from reborn pipes….I can’t wait to smoke them.
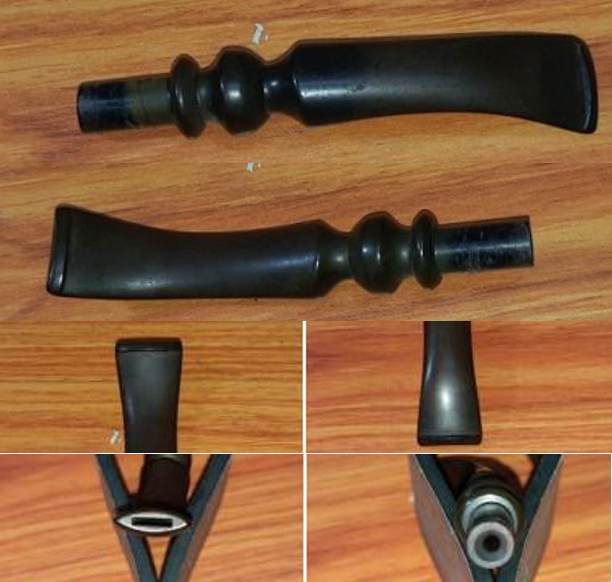
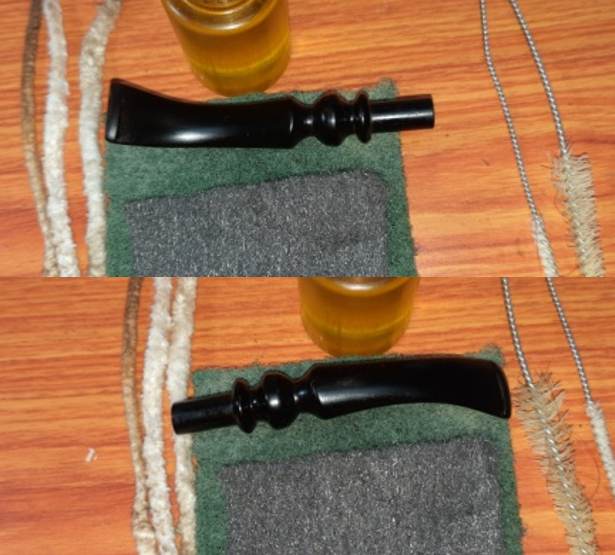
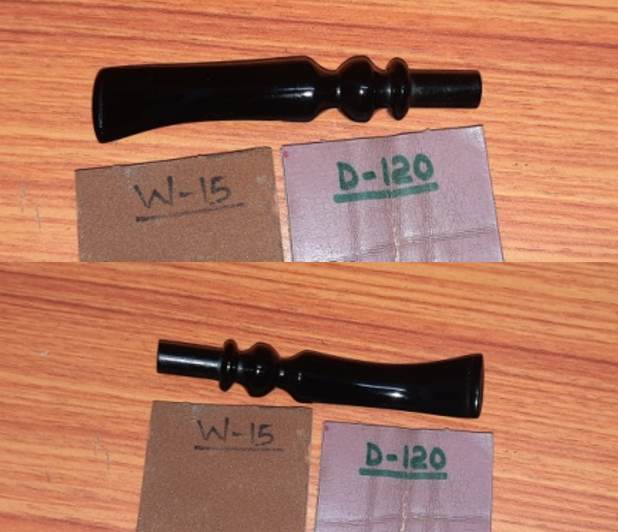
Thanks Anthony, that gives me a sense of who your Dad was and how he enjoyed his pipes. I was ready to turn my attention to this seventh pipe. I went through my can of stems and found a stem that I really like the looks of. There was something classic about it and simple that looked right with the pipe. It was about ½ inch longer than the replacement stem. The tenon was the right length for the shank and once it was cleaned up it would look good. I would need to put a slight bend in the stem to fit the flow of the shank and pipe. It was lightly oxidized but otherwise a pretty clean saddle stem. I took photos of the two stems together to show how they compared. I heated the new stem with a heat gun to soften the vulcanite enough to bend it. When it was flexible I bent it over the end of the buffing wheel to get the proper bend on the shank. I put the stem in the shank and took photos of the newly bent stem. The fit was good. I liked the look of the bend and the flow of the pipe.
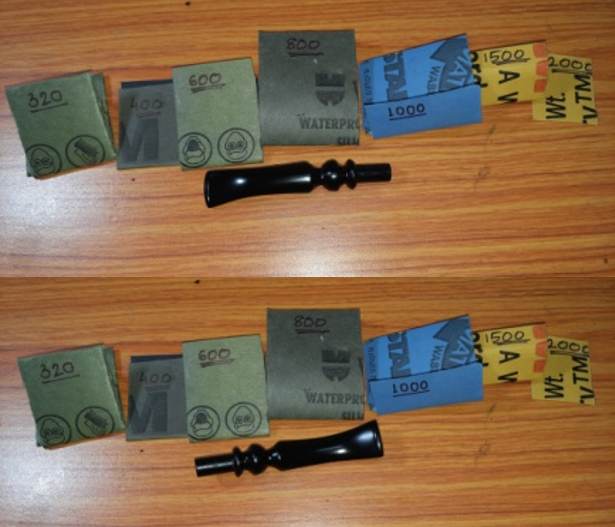
 I sanded down the circumference of the tenon with 150 and 220 grit sandpaper. It did not take too much work to get the stem to fit well in the shank the way I wanted. I sanded the oxidation off the surface of the stem and sanded out the tooth chatter and light tooth marks on the top and underside of the stem at the button.
  I polished the stem with micromesh sanding pads – wet sanding with 1500-2400 grit pads and dry sanding with 3200-12000 grit pads. I wiped the stem down with Obsidian Oil after each sanding pad. I polished the stem with Before & After Pipe Stem Polish – both Fine and Extra Fine to finish removing the light scratches that remained. I gave stem another coat of the oil after that and set it aside to let the oil dry.
 I set the stem aside and worked on the bowl. I reamed it back to bare briar using a PipNet pipe reamer to remove as much of the cake as I could. I finished with a Savinelli Fitsall pipe knife and then sanded it with 220 grit sandpaper wrapped around a dowel.
 There were some deep gouges and flaws in the briar on the left side toward the bottom half of the bowl. I cleaned the area and filled them in with drops of clear superglue. When the glue cured I sanded them back to blend into the surrounding bowl side.
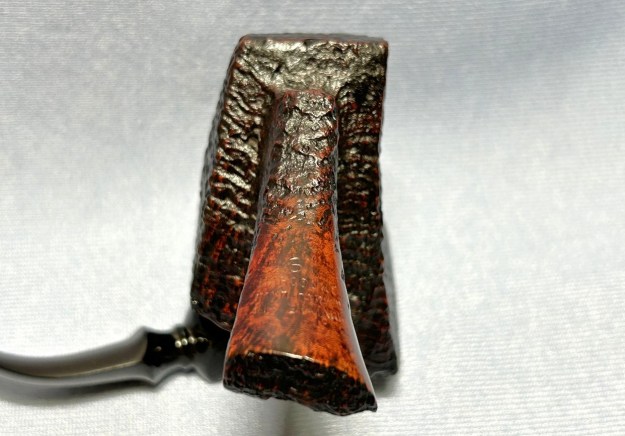
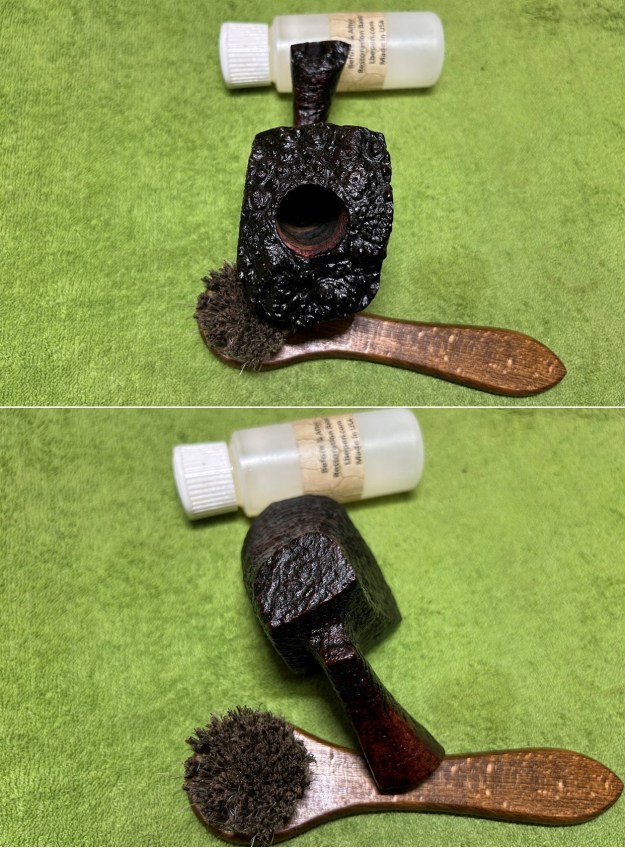
 I worked some Before & After Restoration Balm into the nooks and crannies of the sandblast finish on the rim top, bowl and shank. I worked it deeper into the grooves with a horsehair shoe brush. The balm works to clean, enliven and protect the briar. I really like the way it brings life to the briar. When I wipe it off with a soft cloth it not only adds a shine but takes away the grime that is in the finish.

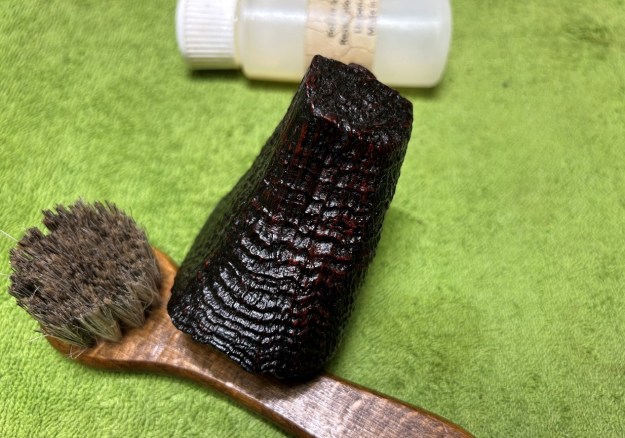
 I needed to stain the bowl to get some coverage on the water damaged areas. Even after sanding they were darker than the rest of the briar. I stained the pipe with Fiebing’s Tan stain. It seems the tan stain may be improperly labelled because everything seems to come out like it has been stained with oxblood or cordovan stain. It brought the red out of the briar. I applied the stain and flamed it with a lighter. I repeated the process until the coverage was even around the bowl.

 Once the stain had cured I buffed the bowl with Blue Diamond on thebuffing wheel to polish the stain and smooth out the finish. The pipe is looking good. The finish is a little too opaque for me so I will need to address that shortly.
 I decided to make the finish less opaque by polishing it with micromesh sanding pads. I sanded with 1500-12000 grit sanding pads to make the finish more transparent. The photos below show the process.


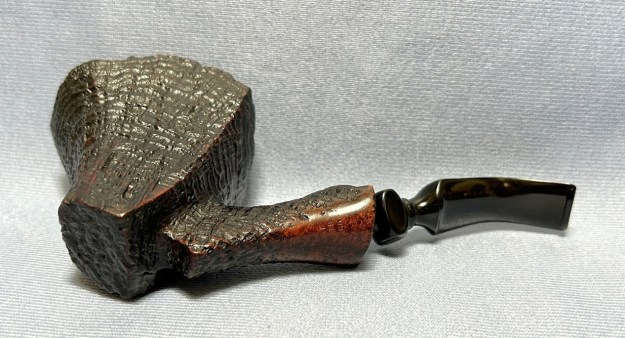
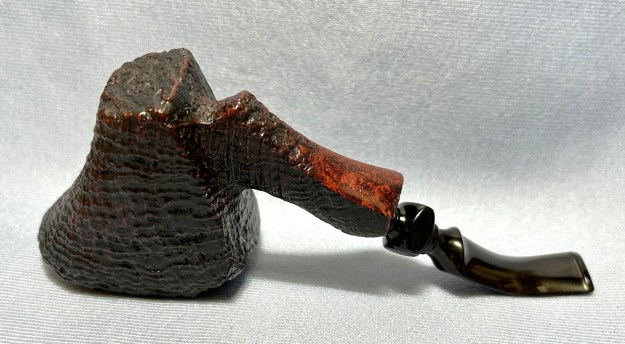
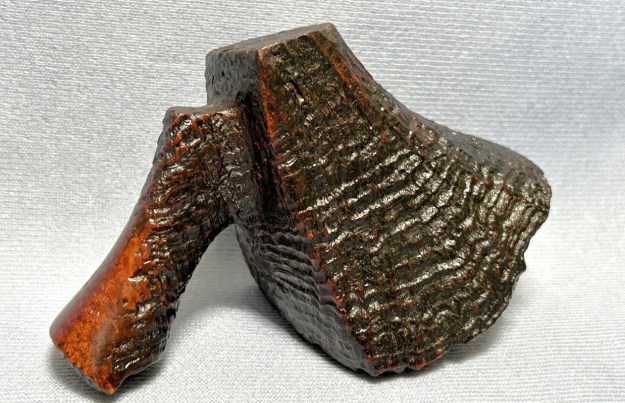
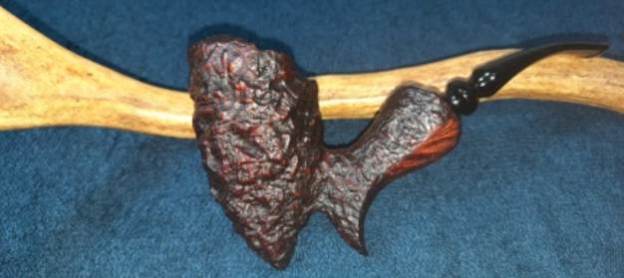
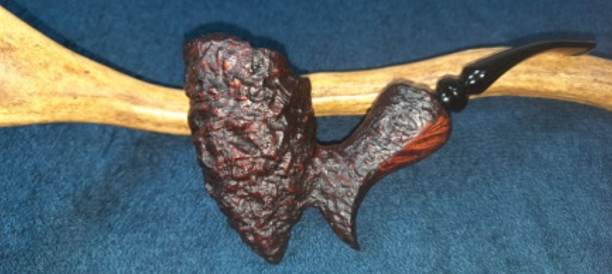
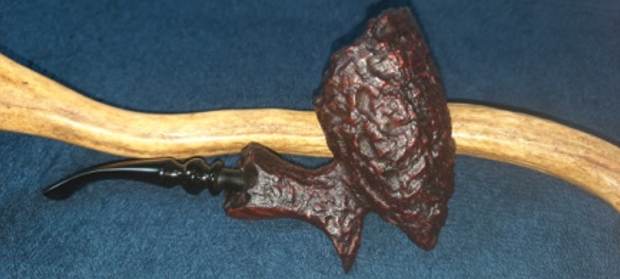
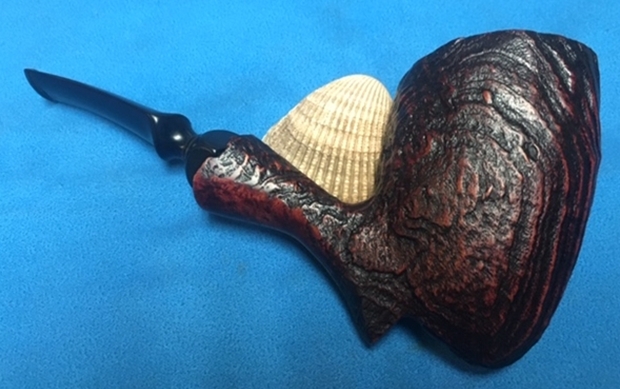
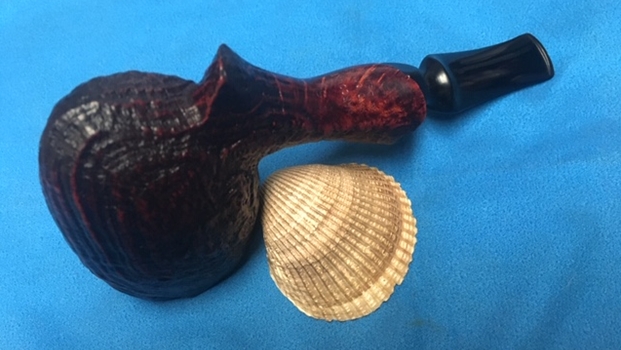
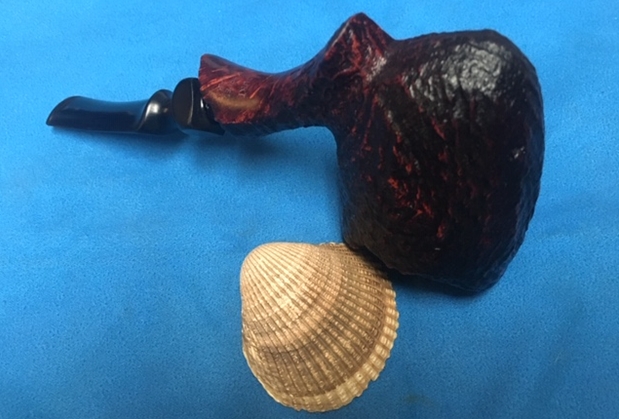
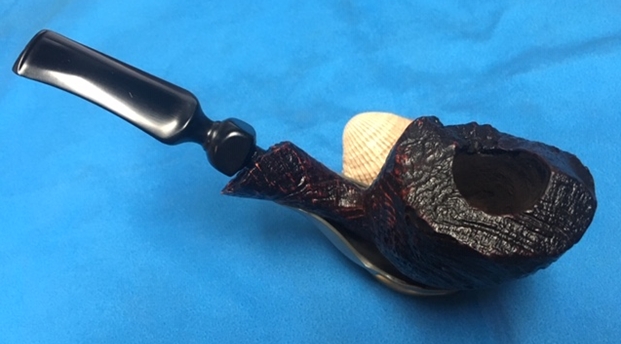
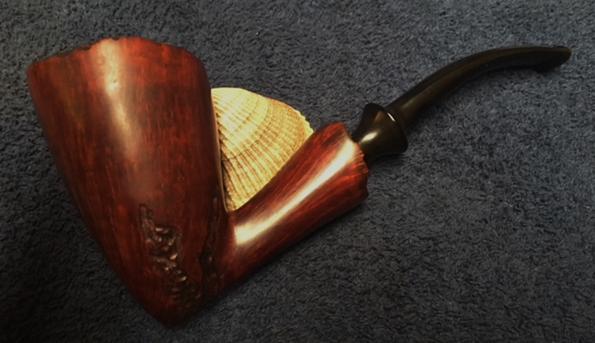
 I put the pipe back together and polished the bowl with multiple coats of Conservator’s Wax and the stem with multiple coats of carnauba wax. I buffed it with a clean buffing pad to raise the shine. I hand buffed it with a microfiber cloth to deepen the shine. The pipe polished up pretty nicely. The finished pipe is shown in the photos below. This is seventh of eight pipes that I am restoring from Anthony’s Dad’s collection. I am looking forward to hearing what Anthony thinks once he sees the finished pipe on the blog. Once I have the remaining pipe finished I will pack them up and send them back to him. It will give him opportunity to carrying on the trust from his Dad. The dimensions are Length: 7 inches, Height: 3 1/8 inches, Outside diameter of the bowl: 2 inches, Chamber diameter: 7/8 inches. Thanks for walking through the restoration with me as I worked over this pipe from Anthony’s Dad’s collection. One more freehand pipe remains and will soon follow in the days ahead keep an eye out for it.


 The markings on the pipe were nice and clear. The underside of the shank read S [over] Harcourt [over] Hand Carved [over] in Denmark. There were no other marks. I went straight over to Pipedia to see what I could find about Harcourt and it confirmed the information I already knew:
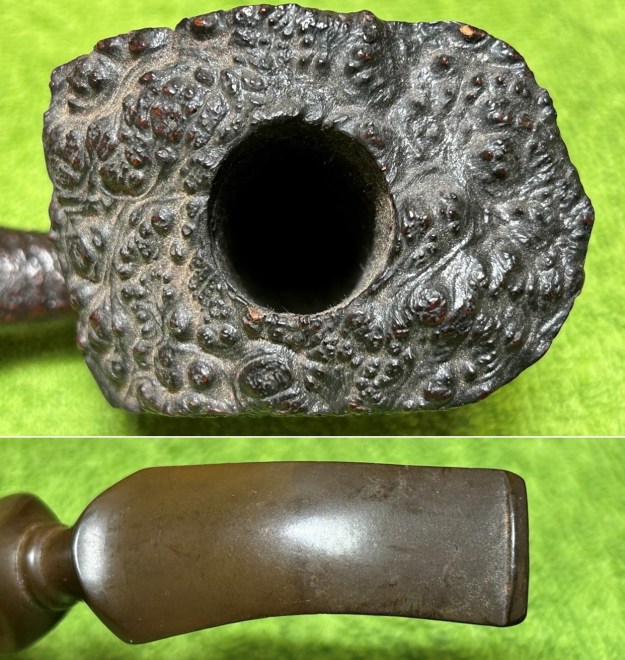
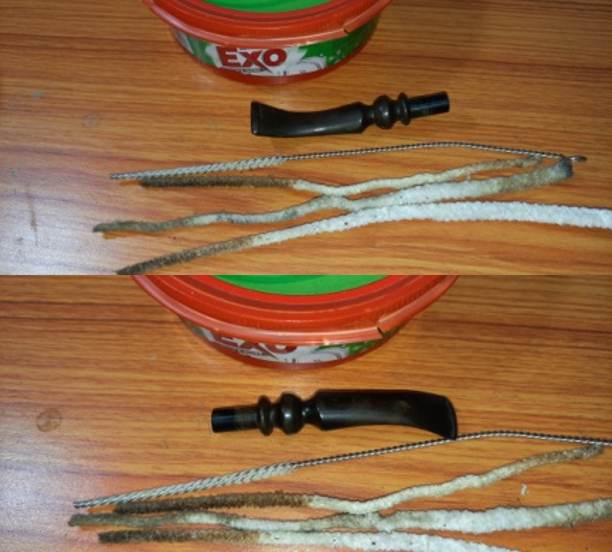
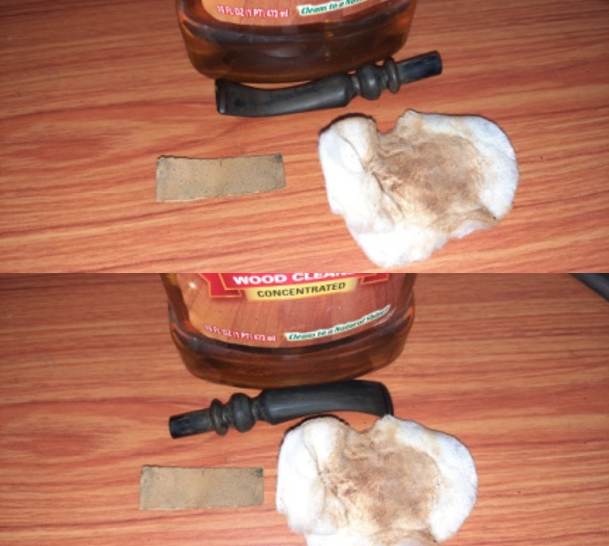
 Let’s get cleaning! I cleaned the inside of the stem with both pipe cleaners and cotton swabs dipped in 99% lemon-infused isopropyl alcohol. I scrubbed thoroughly to make sure the interior was clean. It was fairly dirty inside.
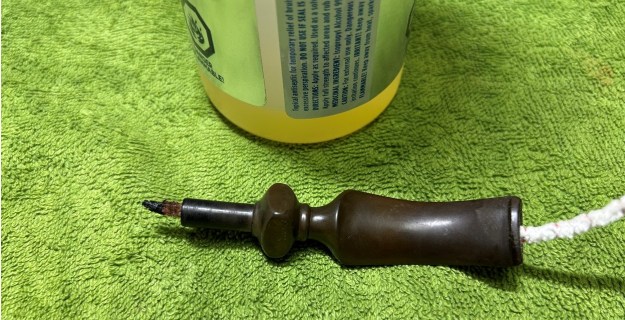
 The goal of the next step is the removal (or minimization) of oxidation. Going to my sink, I used cream cleanser, cotton rounds, and a toothbrush, and scoured the stem to remove as much surface oxidation as possible. As the photos show, the result is a hideous brownish mess – but better off the stem than on it.
 Once the stem was reasonably clean, I soaked it overnight in some Briarville Stem Oxidation Remover. This solution works to draw oxidation in the stem to the surface. This is a major aid and an important step in ensuring a clean stem. The following day, I drew the stem out from its bath and scrubbed the lingering fluid with a toothbrush.
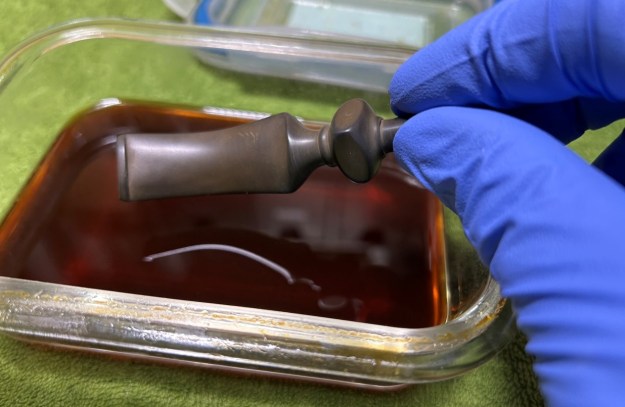 The penultimate step for the stem is sanding. I use all nine of the micromesh sanding pads (1,500 through 12,000 grit) to sand out flaws, even out the vulcanite, and provide gentle polishing of the finished surface. I also apply pipe-stem oil while using the last five micromesh pads. There was a wonderful, deep black shine to the stem when I was done.
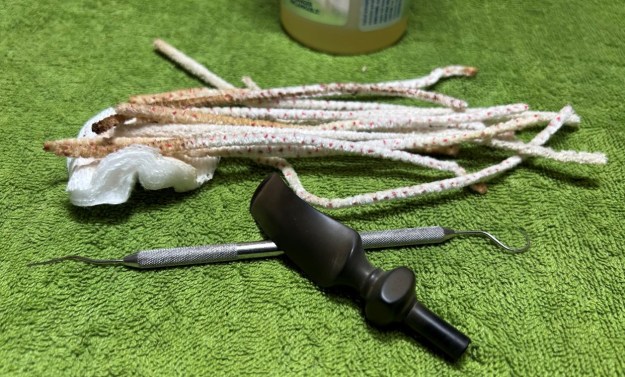
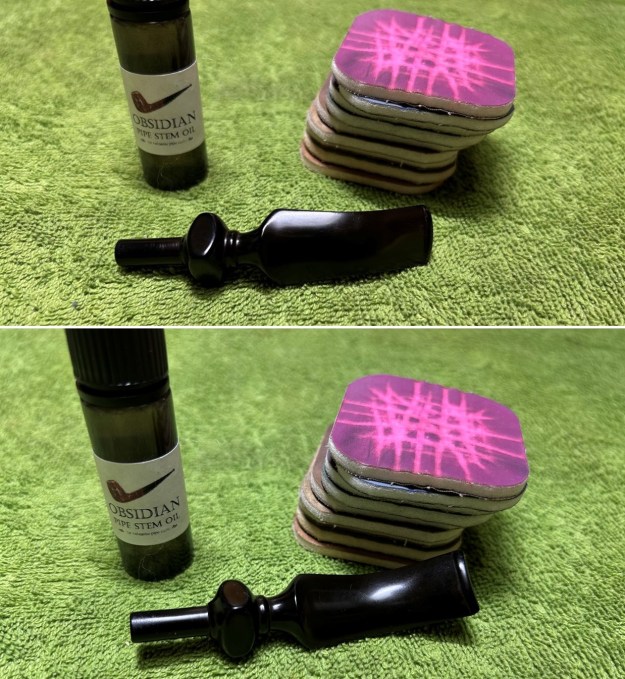 Now that the stem is (nearly) complete, I can move on to the stummel. The first step for me is to ream out the bowl – that is to say, remove all the cake inside the bowl. This accomplishes a couple of things. First (and most obviously), it cleans the bowl and provides a refurbished chamber for future smoking. Second, when the old cake is removed, I can inspect the interior walls of the bowl and determine if there is damage or not. I used a reamer, a pipe knife, and a piece of sandpaper taped to several wooden dowels. Collectively, these ensure that all the debris is removed.
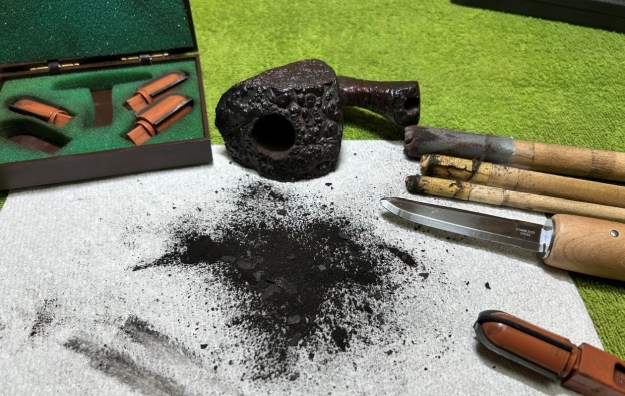 Similar to the stem, I then cleaned the stummel with both pipe cleaners and cotton swabs dipped in 99% lemon-infused isopropyl alcohol. It took quite a bit of cotton to get clean.
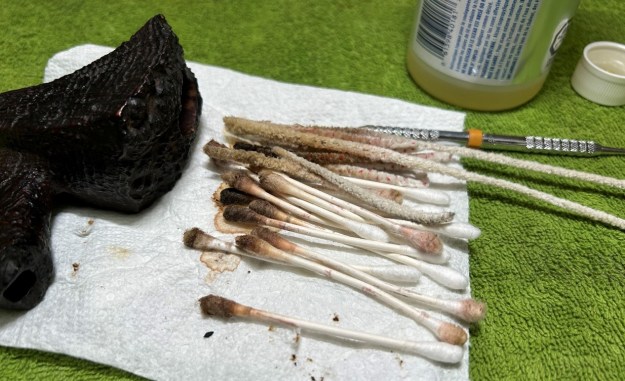 I then decided to ‘de-ghost’ the pipe – that is to say, exorcize the remaining filth from the briar. I filled the bowl and the shank with cotton balls, then saturated them with 99% isopropyl alcohol. I let the stummel sit overnight. This caused any remaining oils, tars and smells to leach out into the cotton.
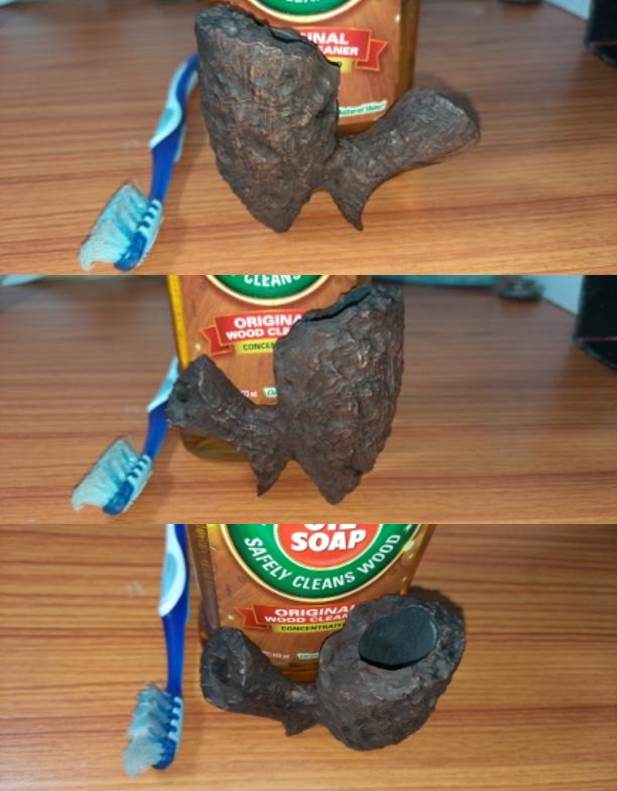
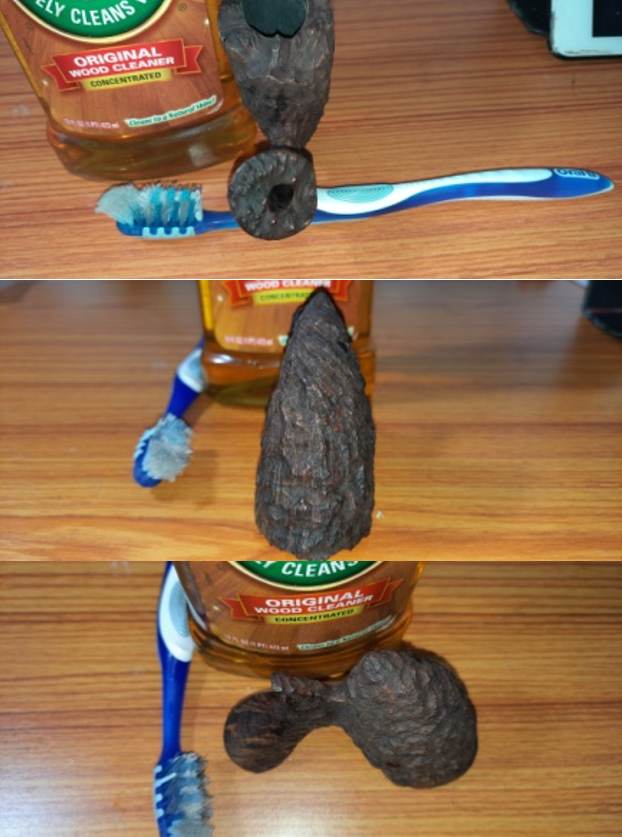
 To tidy up the briar, I also wiped down the outside with some oil soap on cotton rounds (and a toothbrush on the plateau rim). This does a good job of cleaning any latent dirt on the surface of the briar. The last step of the cleaning process is to scour the inside of the stummel with some soap and tube brushes. This is the culmination of a lot of hard work in getting the pipe clean.
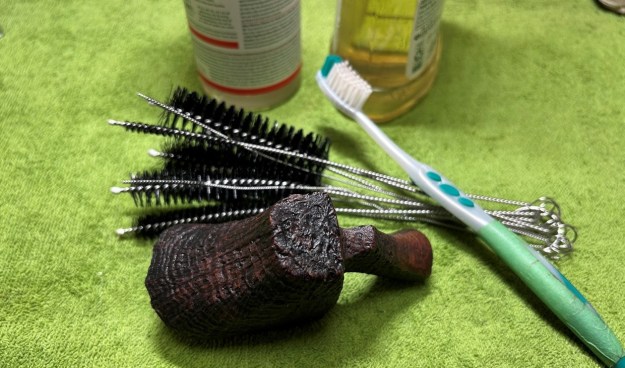 No micromesh needed on this stummel. I rubbed some Before & After Restoration Balm into the briar and let it sit for 20 minutes or so. The balm moisturizes the wood and gives a beautiful depth to the briar. I then buffed it with a microfibre cloth.
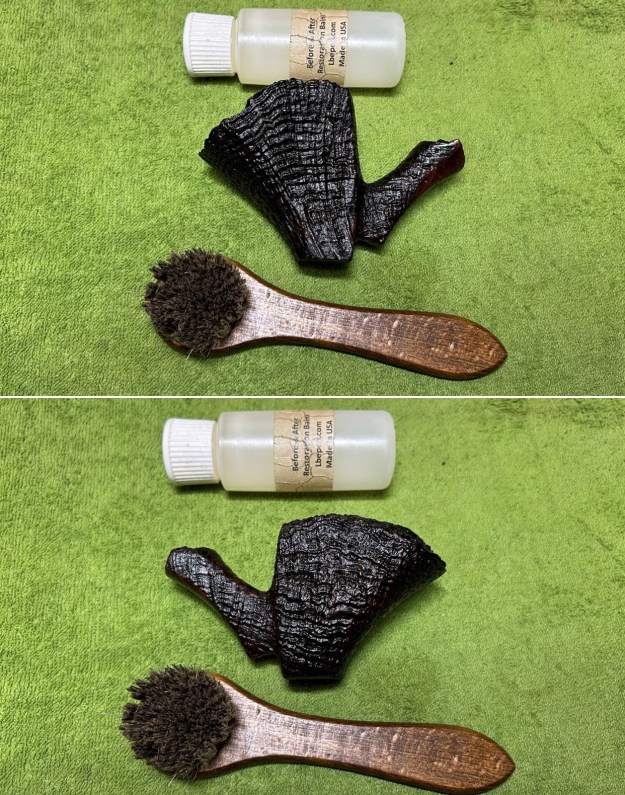
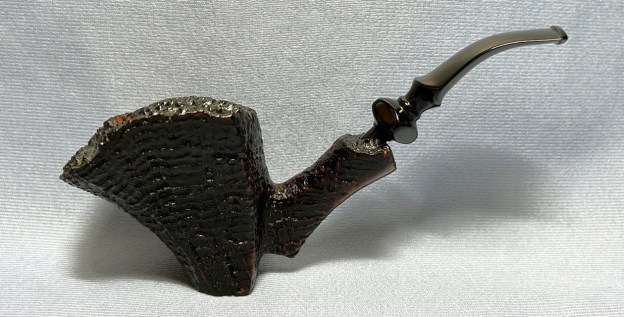
 For the final step, I took the pipe to my bench buffer and carefully polished it – with three coats of conservator’s wax. This procedure makes the pipe look its best – the stummel sings and the stem glows.
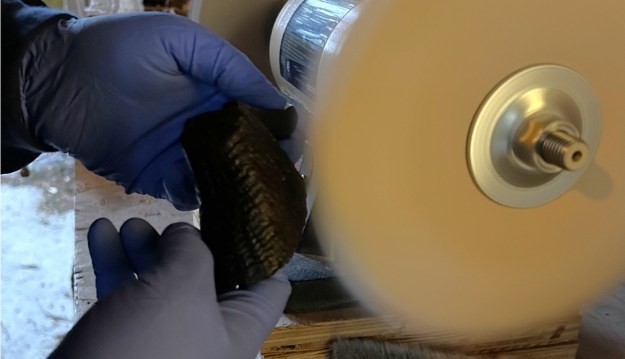 All done! This Harcourt S freehand looks fantastic again and is ready to be enjoyed by its new owner. It was a pleasure to work on. It’s a heavy pipe, but a gorgeous pipe. The approximate dimensions of the pipe are as follows: length 6¾ in. (171 mm); height 2⅞ in. (75 mm); bowl diameter 1⅞ in. (49 mm); chamber diameter ¾ in. (20 mm). The weight of the pipe is 3⅓ oz. (100 g). I hope you enjoyed reading the story of this pipe’s restoration as much as I enjoyed restoring it. If you are interested in more of my work, please follow me here on Steve’s website or send me an email at kenneth@knightsofthepipe.com. Thank you very much for reading and, as always, I welcome and encourage your comments.