Blog by Steve Laug
The next pipe is the third of four Peterson’s and the first of a case set of Bulldogs that came to me from a friend of mine for me to work on. The pair (pipes 3 and 4) came in a nice leather cast that was travel/time worn on the top and underside and damaged on the edges. My friend sent me some photos of the case and the pipes that I am including here. It was not a large case but a common style carrying case for pipes of this era. I am hoping to do some work and narrow down the dates on the pair of pipes.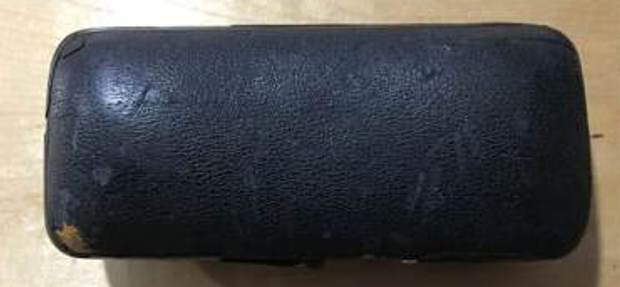 The inside of the case was lined with soft golden suede. The case was fitted for the pipes that it contained – a straight and a bent bulldog with similar finishes. The lid of the case had a logo on it that was a gold and burgundy oval that read PETERSON’S over Dublin & London. It was dirty but not in bad condition.
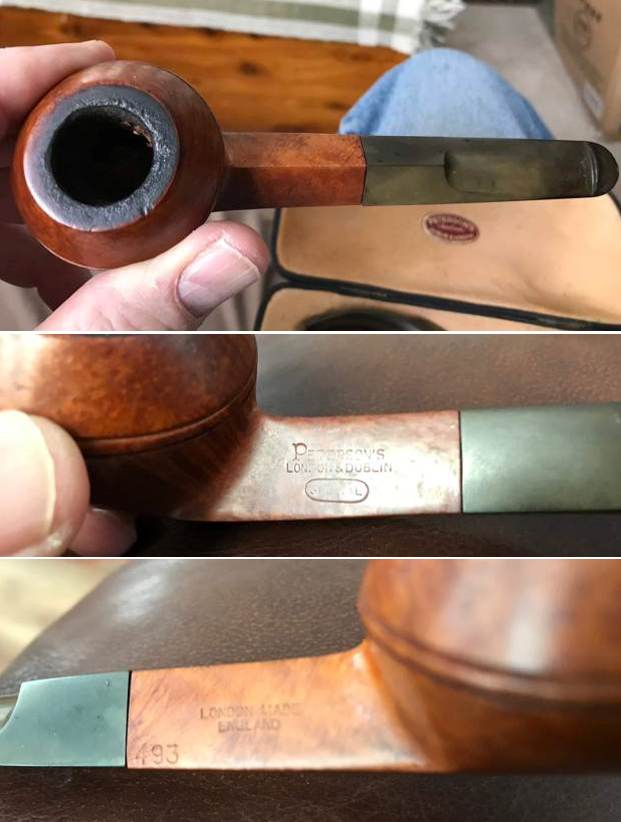
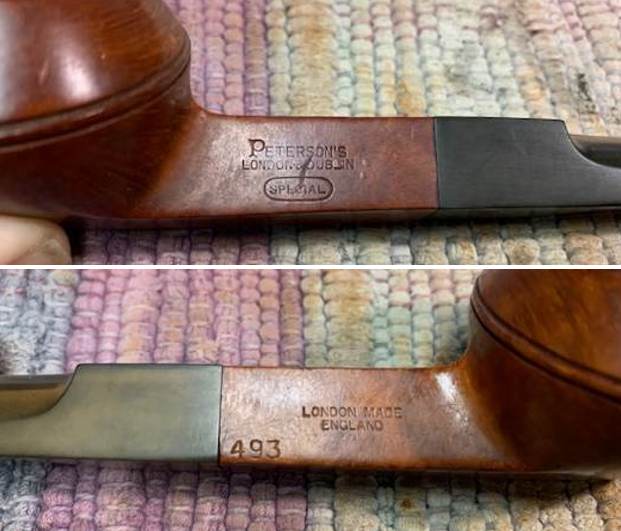
  The finish on both pipes was dirty and tired looking but the grain peeked through the grime and oils on the finish. I decided to work on the top pipe first – the Bent Bulldog 80S. The rim top was had hash marks on the left side and had a thick lava build up. The inner edges of the rim looked like there was both burn damage and reaming damage. The outer edge looked good. The stamping on the shank sides was clear and readable. It is stamped on the left side and reads Peterson’s [over] London & Dublin [over] an oval with the word SPECIAL stamped inside. On the right side of the shank it is stamped London Made [over] England. There is no “P” logo on the stem. The stem is lightly oxidized and there is a large chip out of end of the P-lip that will need to be repaired if possible. I have included the pictures that my friend sent me before I took on the pipes. The first shows the rim top with the issues described above. The second and third photos show the stamping as noted above.
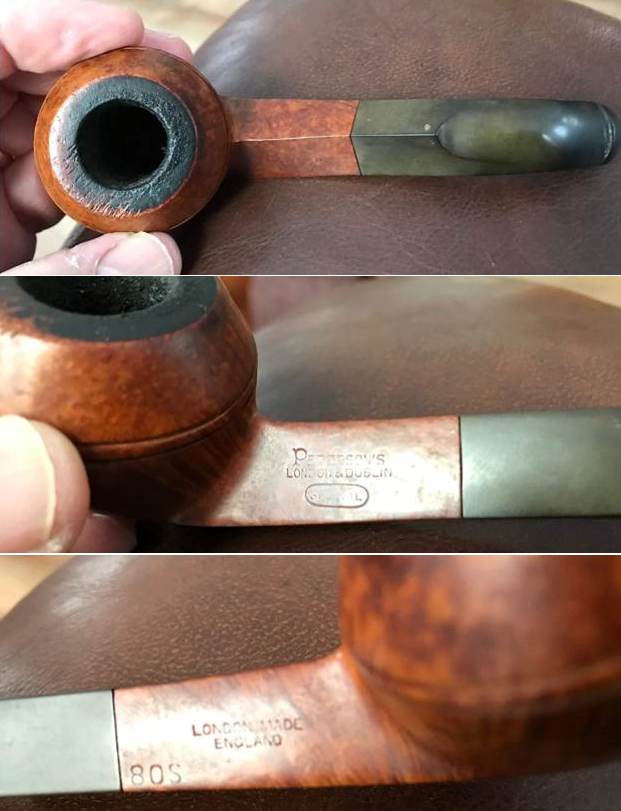 It took nearly a month for the pipes to arrive in Canada for me to work on. I took photos of them to have an idea of what I was dealing with. You can see from the photos what I saw. The finish is was dirty but the pipe had some amazing grain on the shank and bowl sides. Rim top showed cuts or marks on left side and a thick lava build up. The inner edge of the bowl had some lava and it looked like a bit of damage from burn or reaming. The outer edge of the bowl was in surprising good shape. There was tobacco debris in the bowl and a thick cake. The original style stem is present and is oxidized and has the damage on the end of the button as noted above. You will see that damage clearly in the photos below.
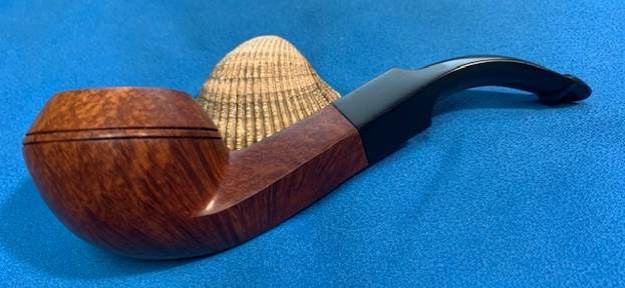
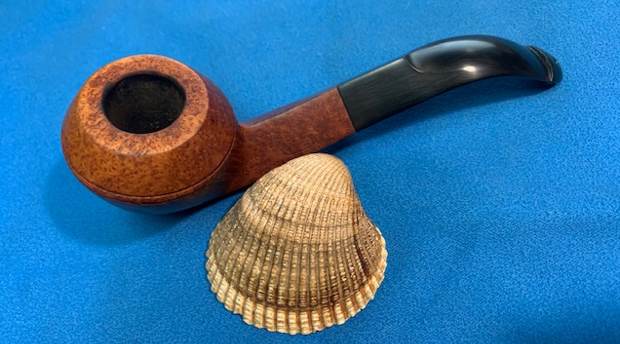
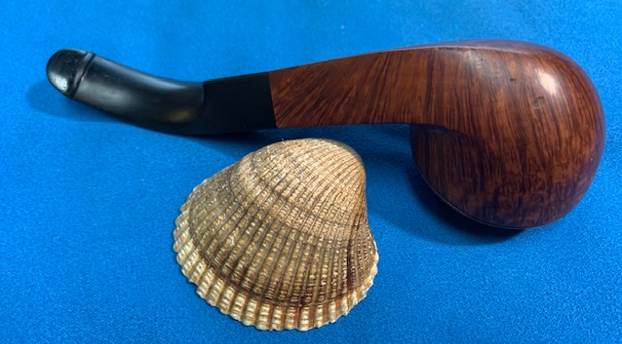
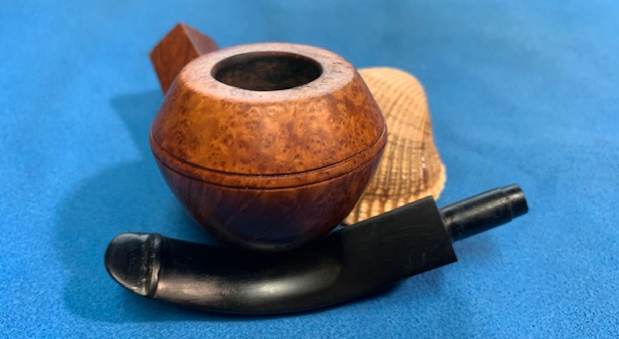
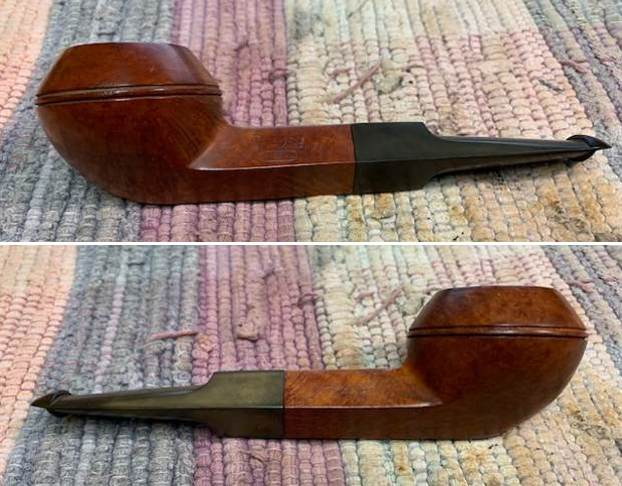
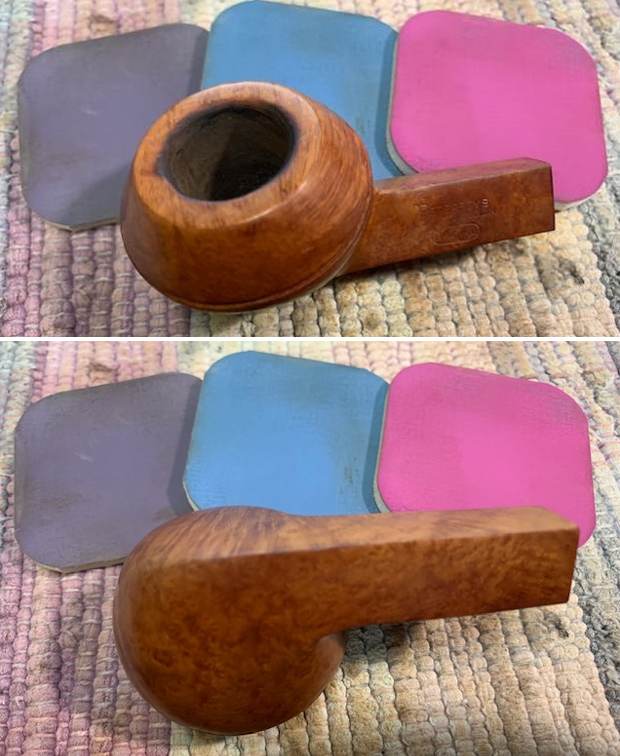
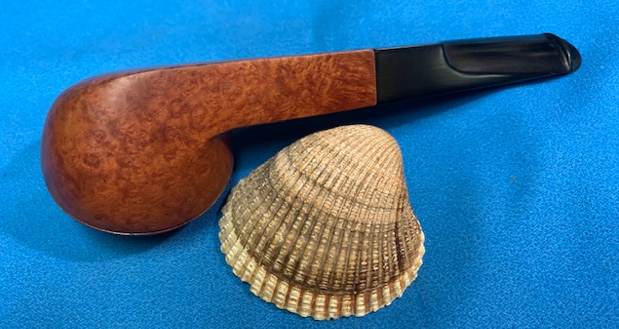
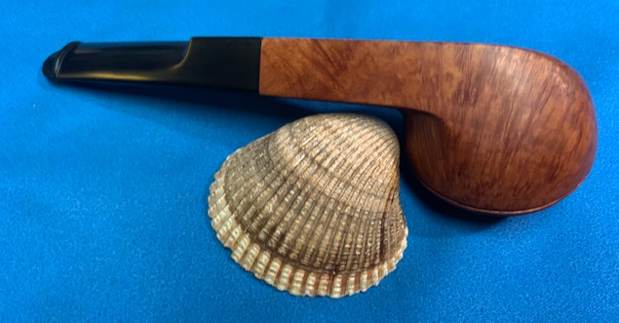
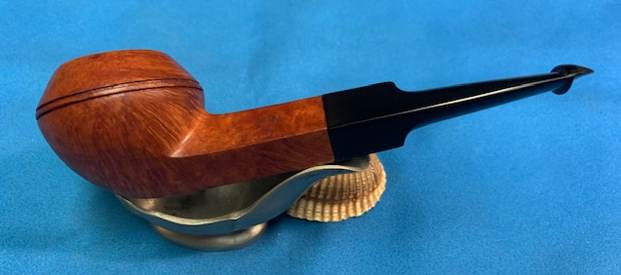
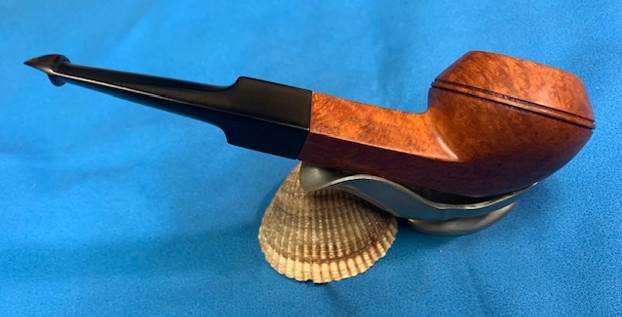
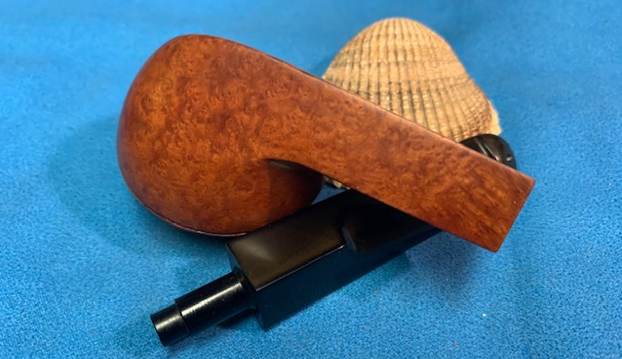
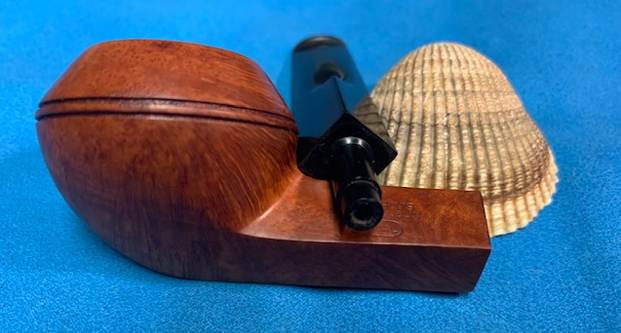
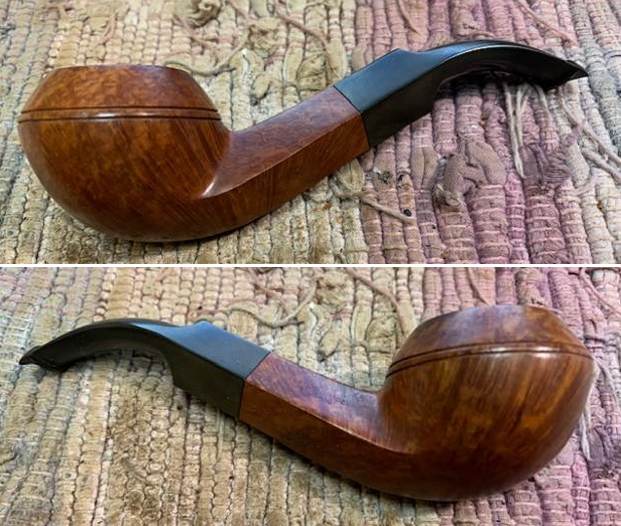
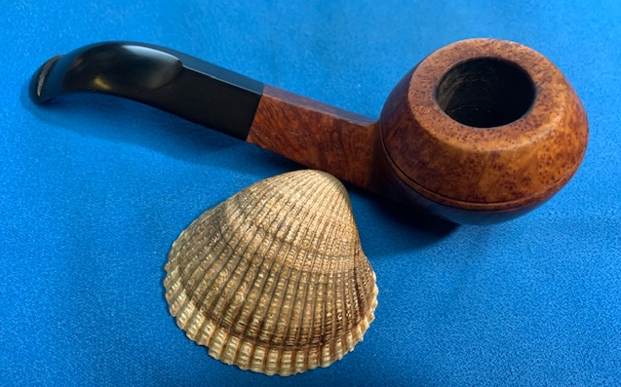
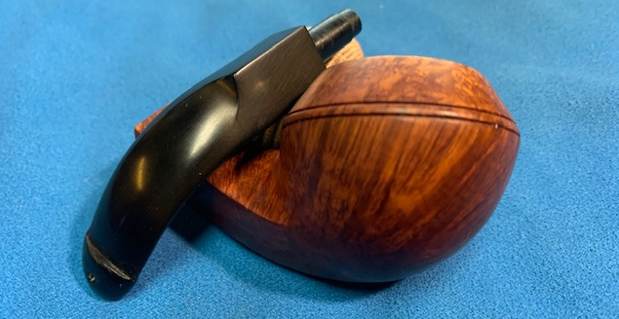
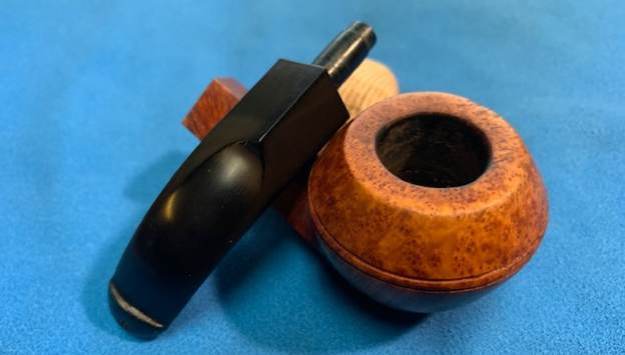
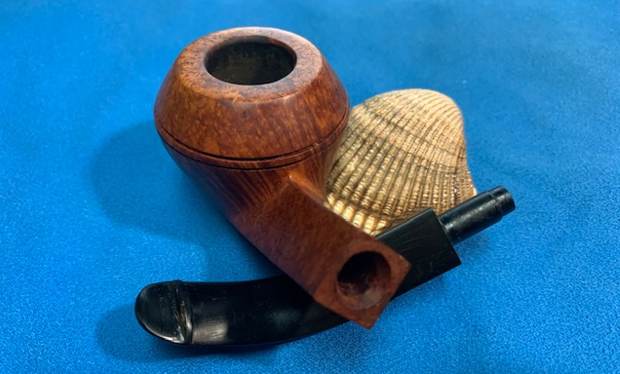
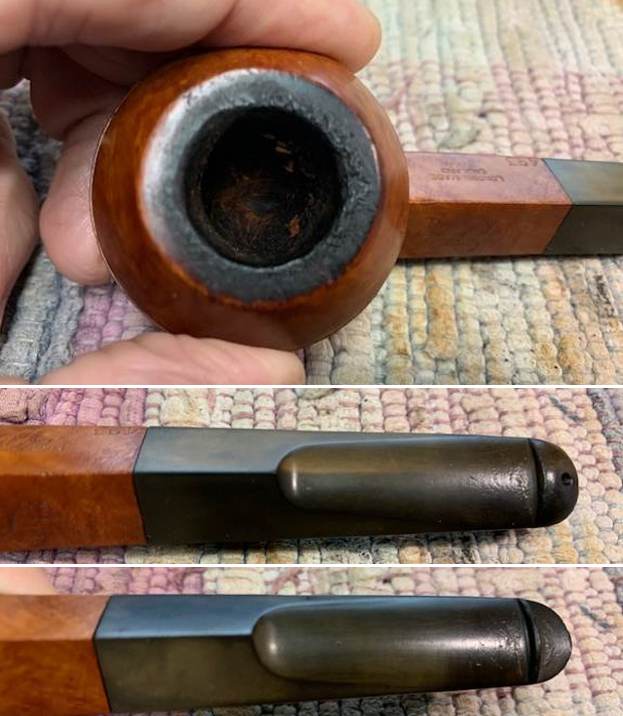
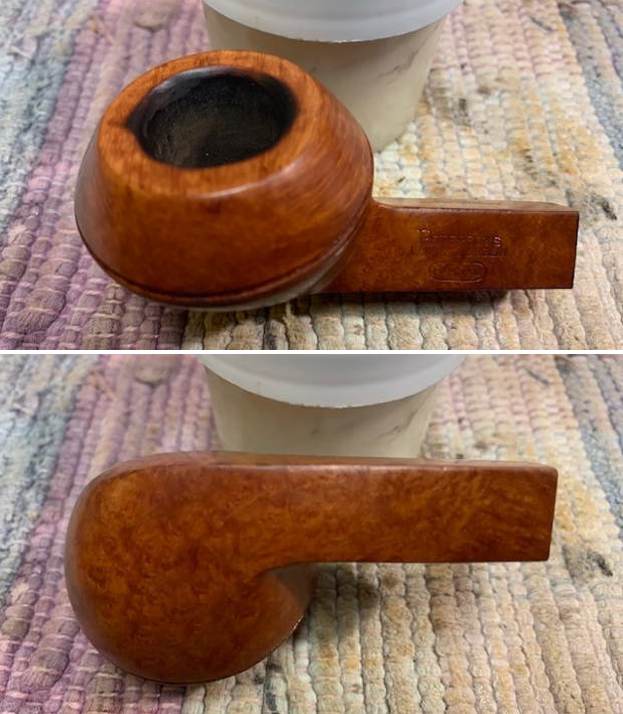
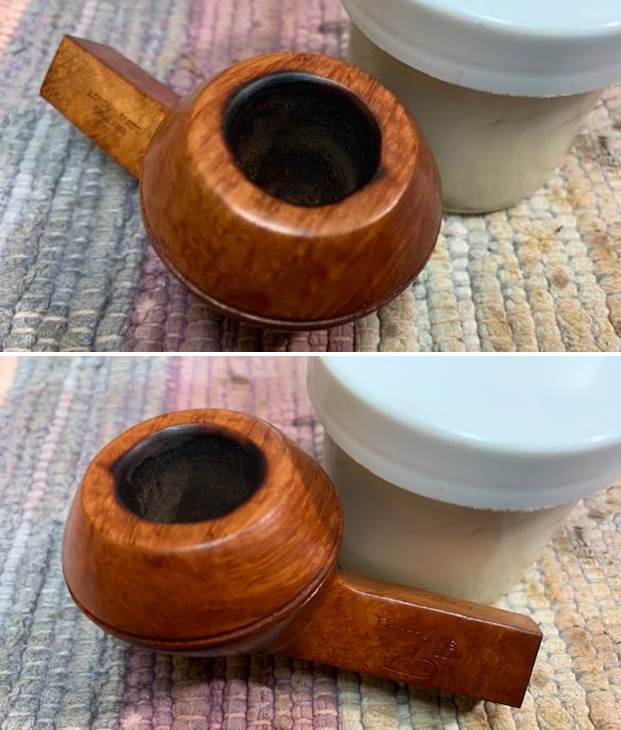
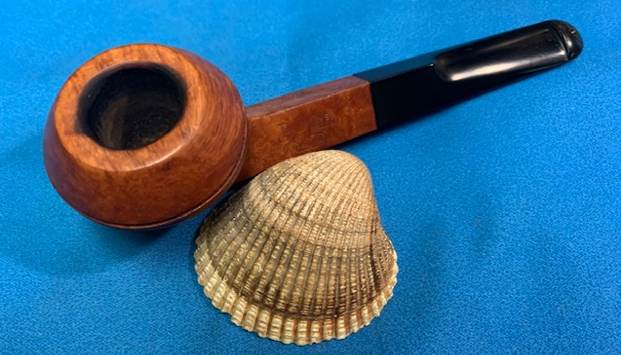
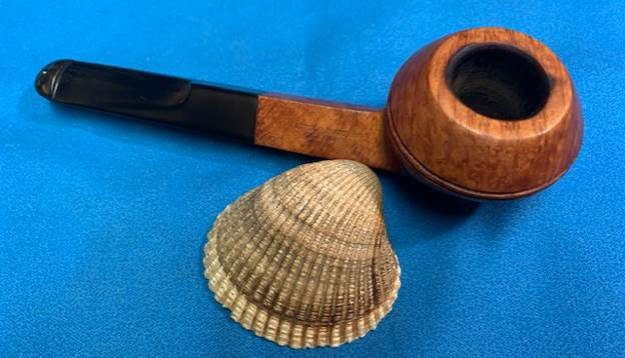
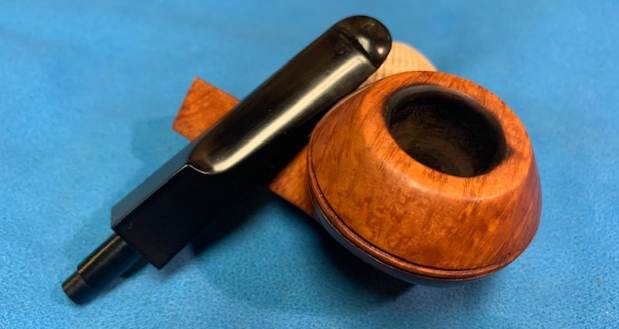
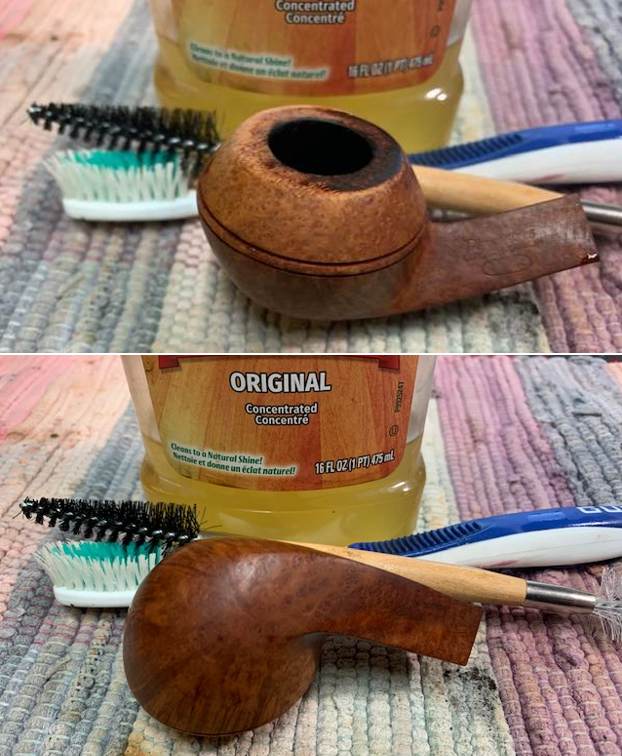
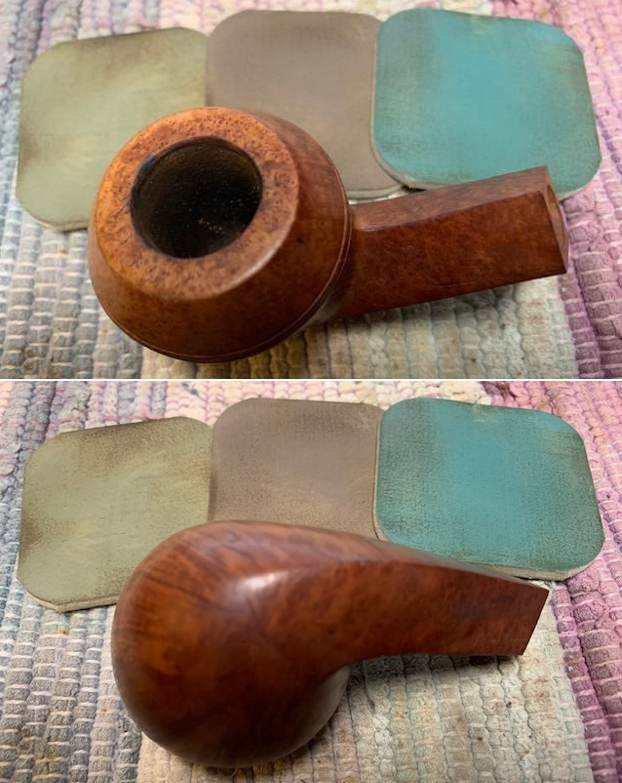
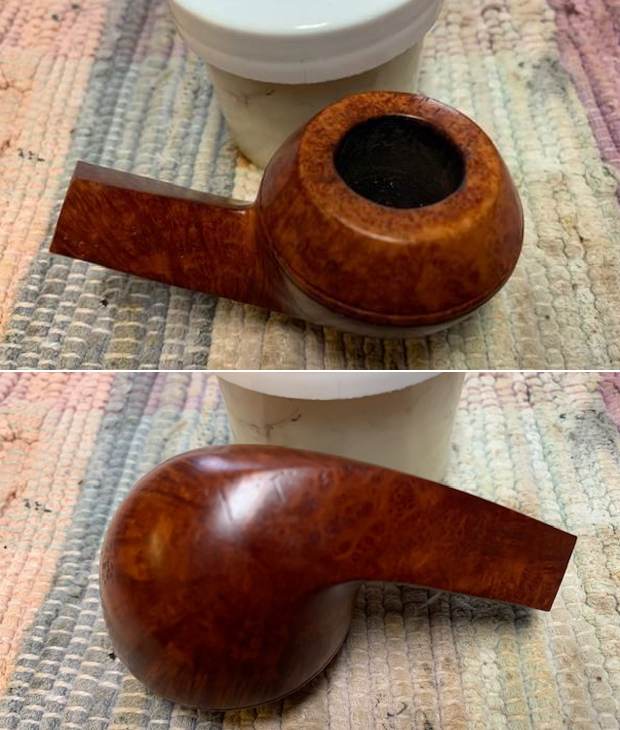
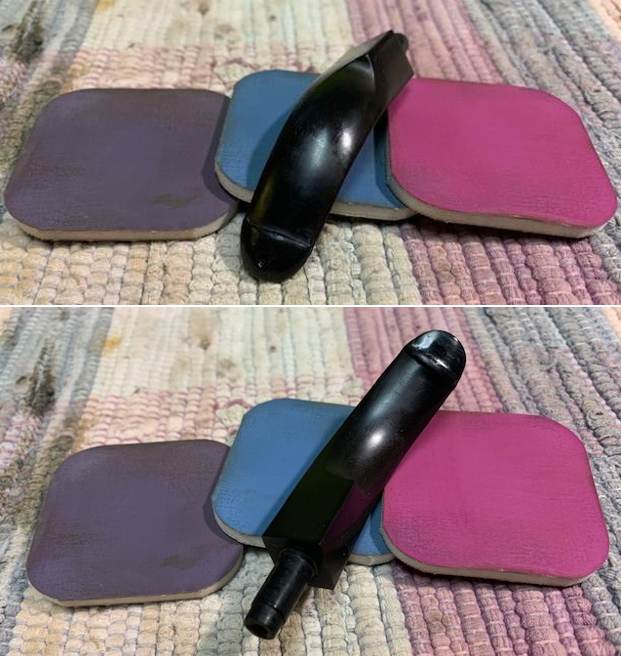
 I took some photos of the rim top, bowl and stem to capture the condition of the pipe. You can see the cake in the bowl. There is a lava coat and some darkening. There was damage all around the inner edge of the bowl. You can see the hash marks/scratches on the rim top. The P-lip stem appears to be in good condition at first glance other than light oxidation. However a close look at the button will reveal the damage on the stem.
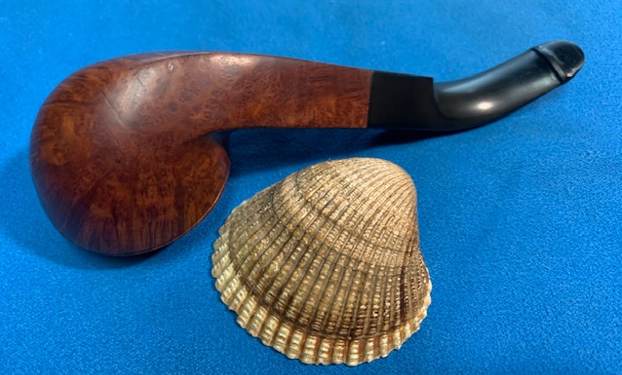
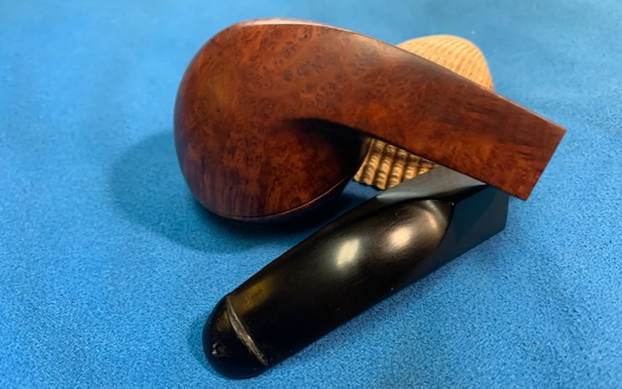
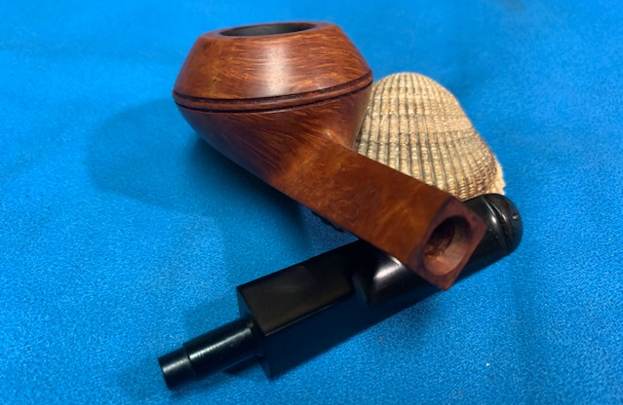
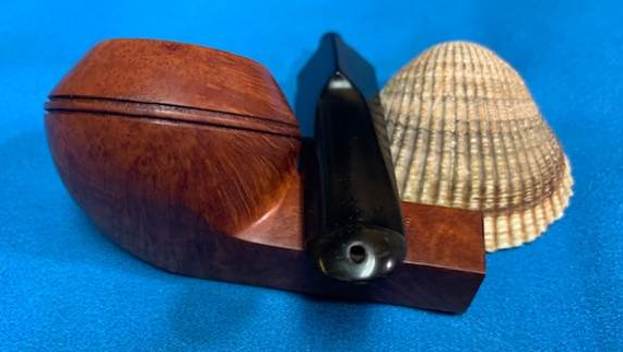
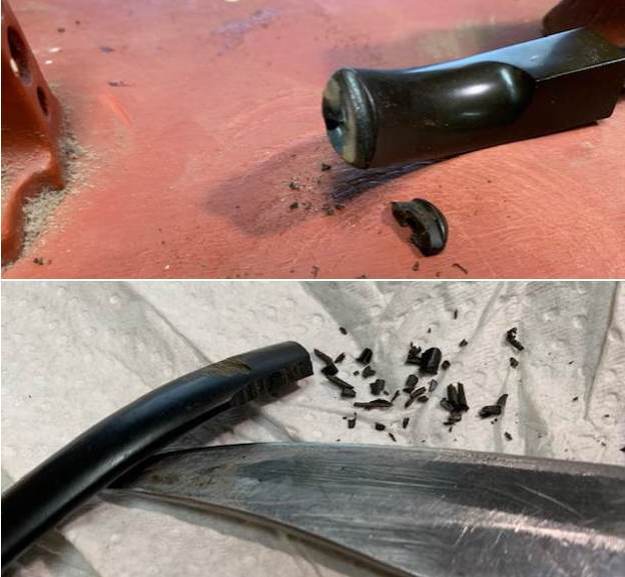
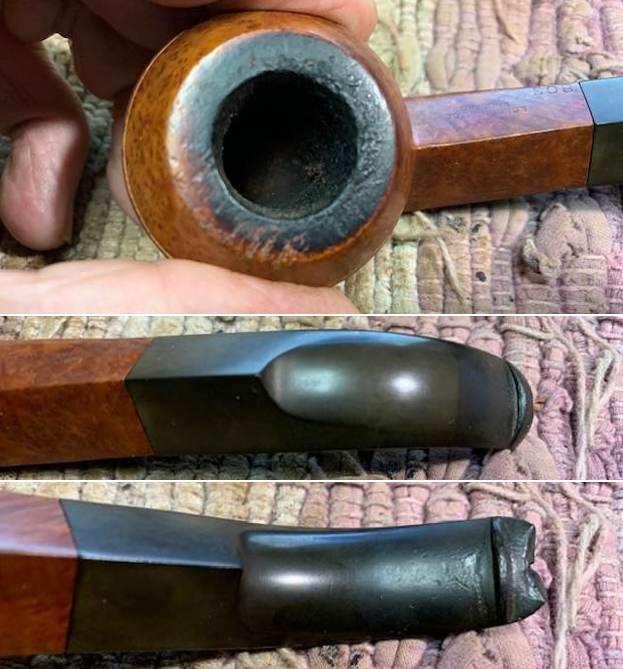 I took some photos of the chipped stem to give a clearer sense of the damage to that area. Combined with the photos above you can see the extent of the damage. It was going to be slow, tedious work to rebuild that.
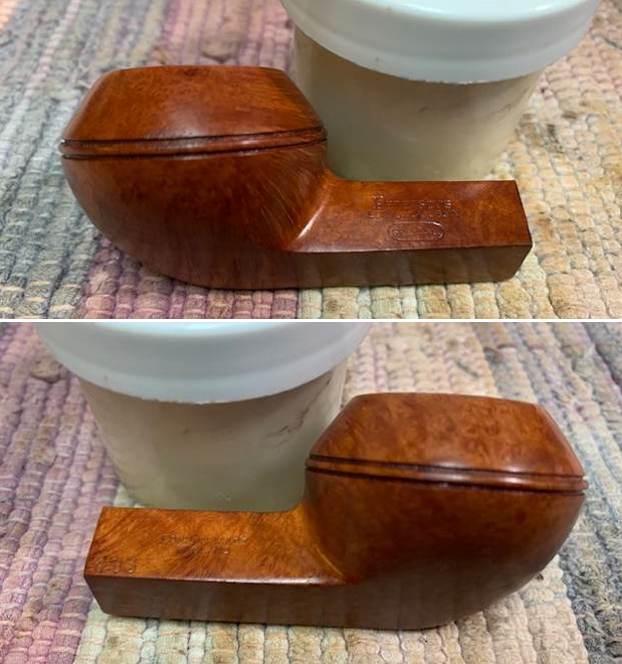
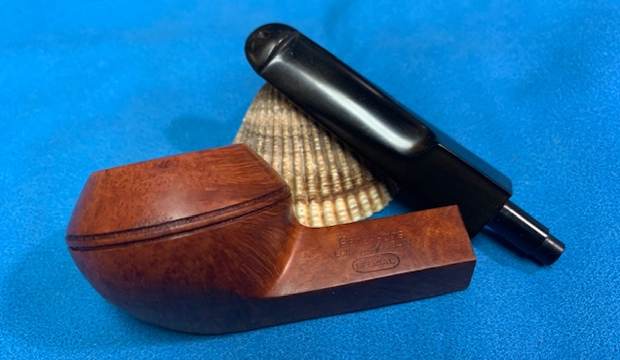
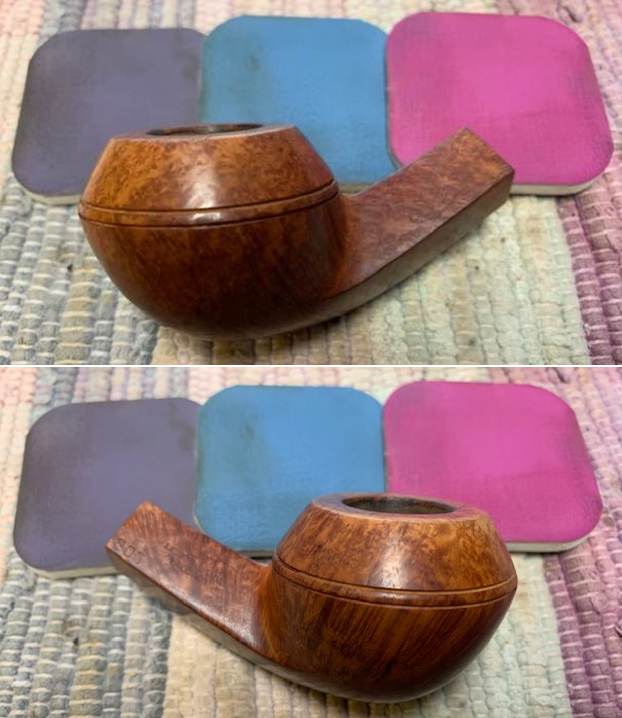
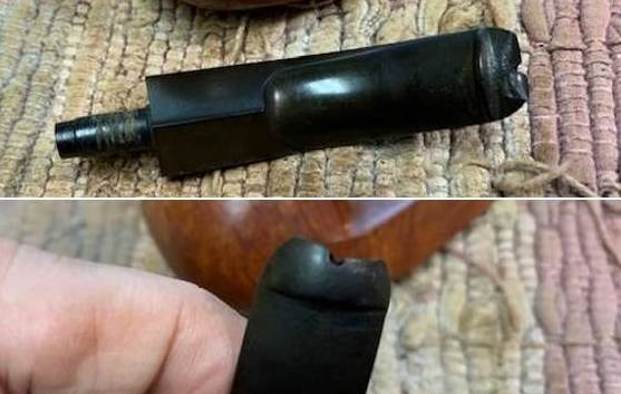 I took photos of the stamping on the shank sides. They were clear and readable as noted above.
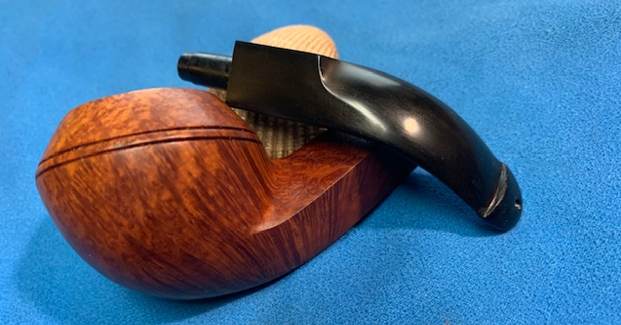
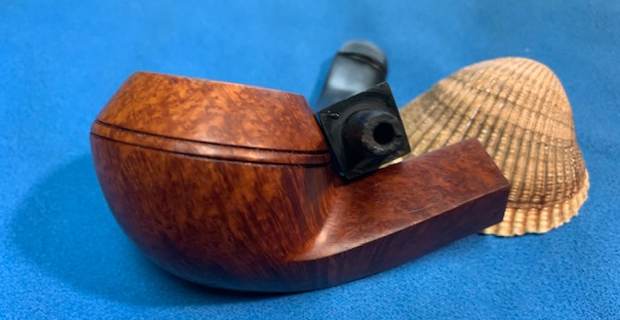
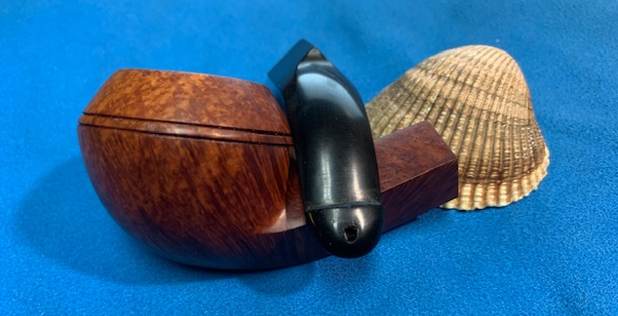
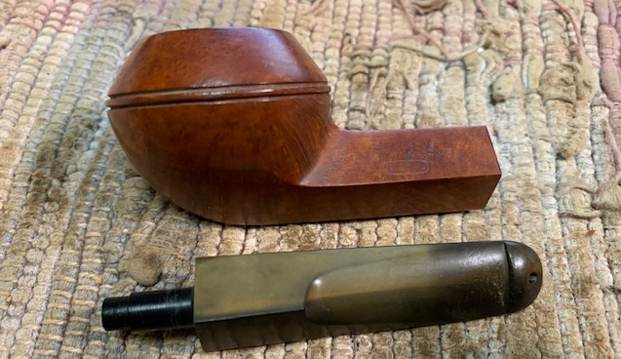
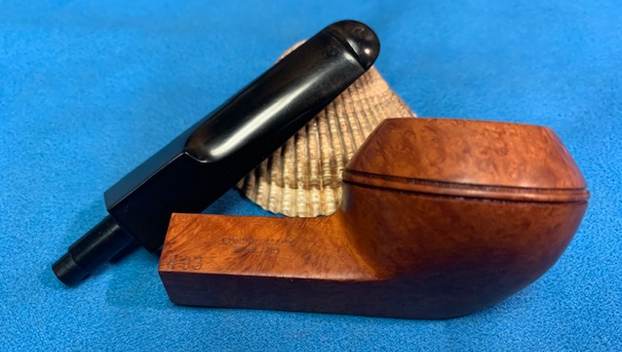
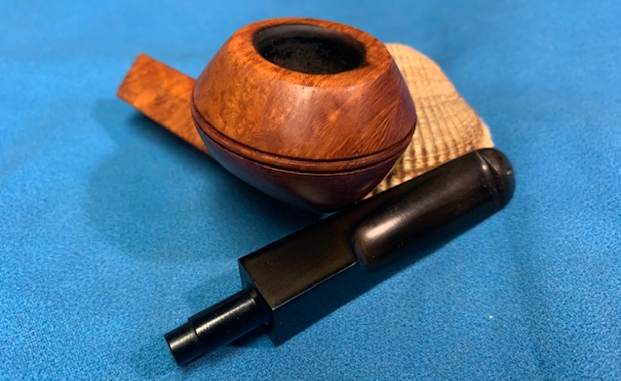
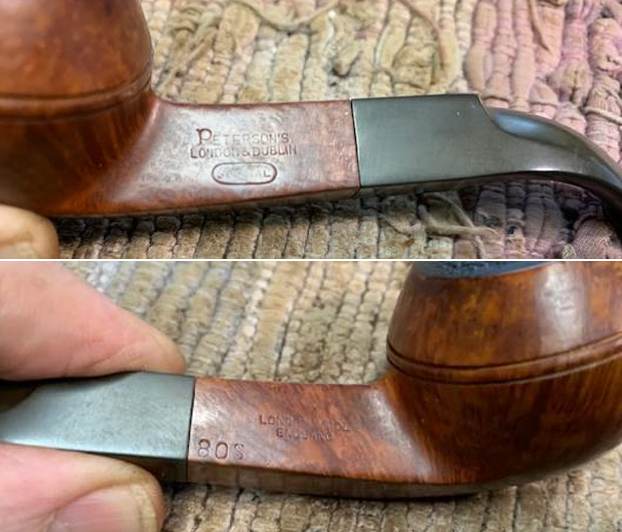 I removed the stem from the bowl and took a photo of it to show its appearance. The saddle portion of the stem is slightly deeper than the newer 80S bulldogs that I have worked on. It is a nicely proportioned stem.
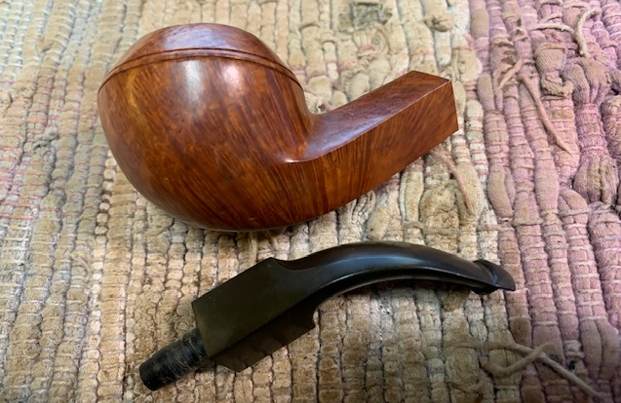 Before I started the restoration process on the pipe I wanted to see if I could pin down a time period for the London Made England Special.
I turned to the section on that stamping in the book, The Peterson Pipe by Mark Irwin & Gary Malmberg. I quote from the section on the COM stamp on page 296-297 below:
Peterson maintained a factory in England for about a quarter of a century, from the late 1930s to ’62. Corporate transcripts and London business periodicals suggest that the London operation on White Lion Street was about to get underway in ’37. Only a handful of London hallmarked Petersons are documented, stamped with the date marks 1936 and 1939, and these have no COM stamp. Their output would be limited by the onset of the Battle of Britain in July 1940, but it seems reasonable to suppose pipes were made at the London factory during WWII, inasmuch as the K&P Staff Register lists twelve employees earning wages there in January ’44. London hallmarked Petersons have been identified with dates of 1949-54. Most London-made Petersons in a collector’s inventory were made in these postwar years, from 1949 until the closing of the factory in ’62… the presence of one variation of another on a pipe is not by itself a reliable indicator of its age.
That information narrowed the date of manufacture to the time period between 1949-1962. That is not a long period of time to be sure but now it was time to account for the stamping SPECIAL in an oval. What did that mean? Is there more specifics that can be learned with that stamp?
I turned to page 313 of the above Peterson Pipe book and read the following on the SPECIAL Stamp.
SPECIAL Stamp – used on special order or small batch custom pipes, it will often appear under other stamps, such as PETERSON’S SYSTEM, DE LUXE or DUBLIN & LONDON. Used frequently on pipes cut by master carver Paddy Larrigan.
So it appears that this set of Bulldogs were made in London in a limited time period and perhaps were made by Paddy Larrigan himself. Was he perhaps visiting the London factory in those post war years? I guess we will never know for sure but it kind of a nice thought regarding the pipes.
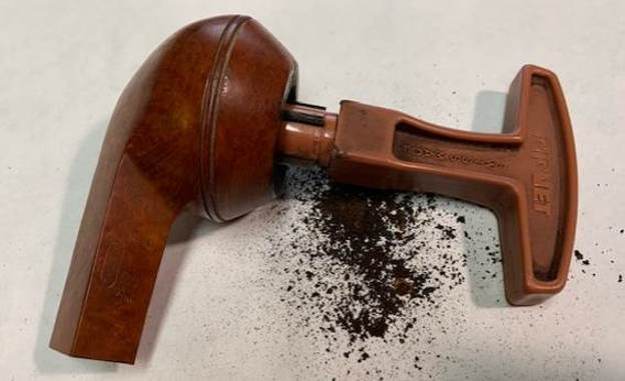
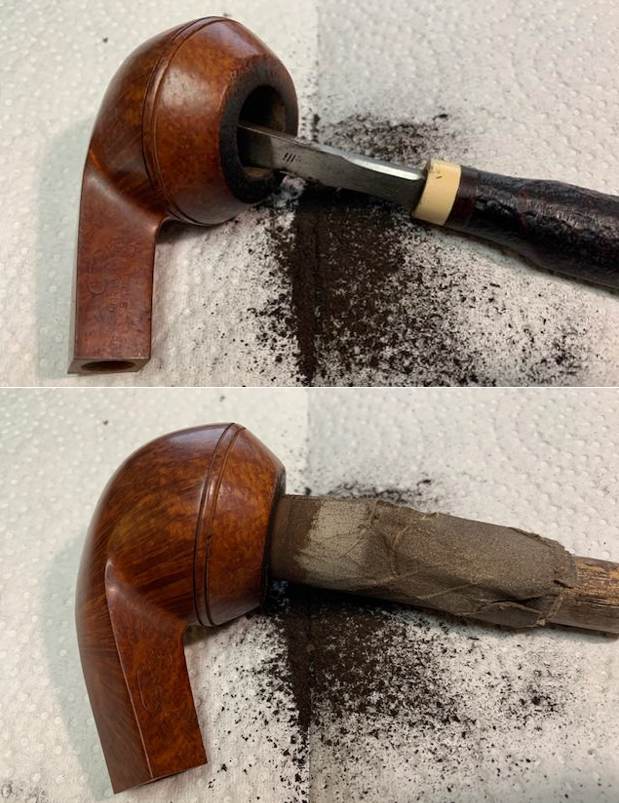
Armed with this information I started working on the pipe. I reamed the bowl with a PipNet pipe reamer to remove the cake from the bowl. I cleaned up the remaining cake with a Savinelli Fitsall Pipe Knife. I sanded the bowl with 220 grit sandpaper wrapped around a piece of dowel to smooth out the inside of the bowl. The walls looked very good with no checking or heat damage. 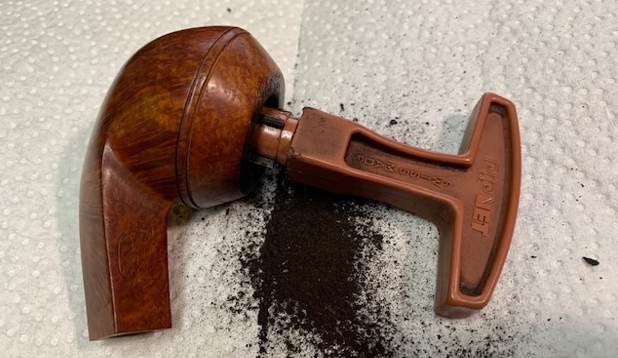
 I cleaned out the shank with pipe cleaners, cotton swabs and 99% alcohol to remove the oils from the walls. It was filthy and when I was finished it smelled clean and fresh. I cleaned out the inside of the stem with alcohol and pipe cleaners.
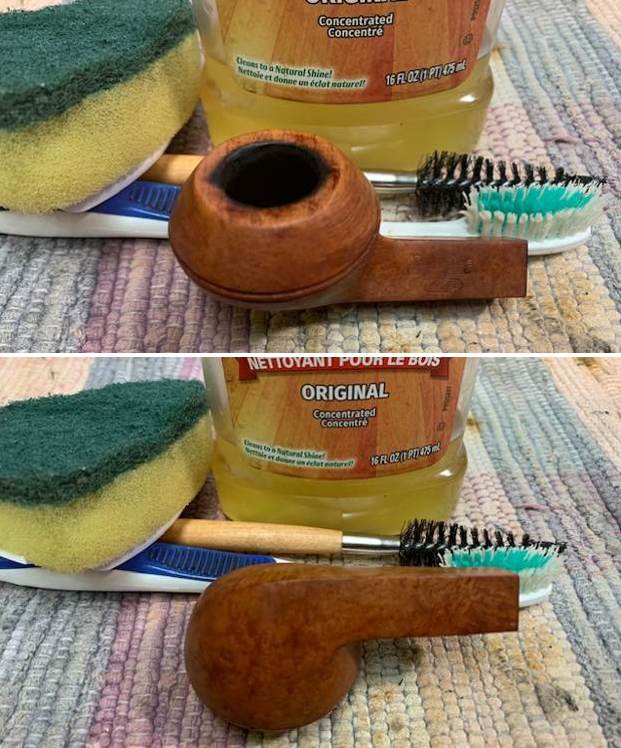
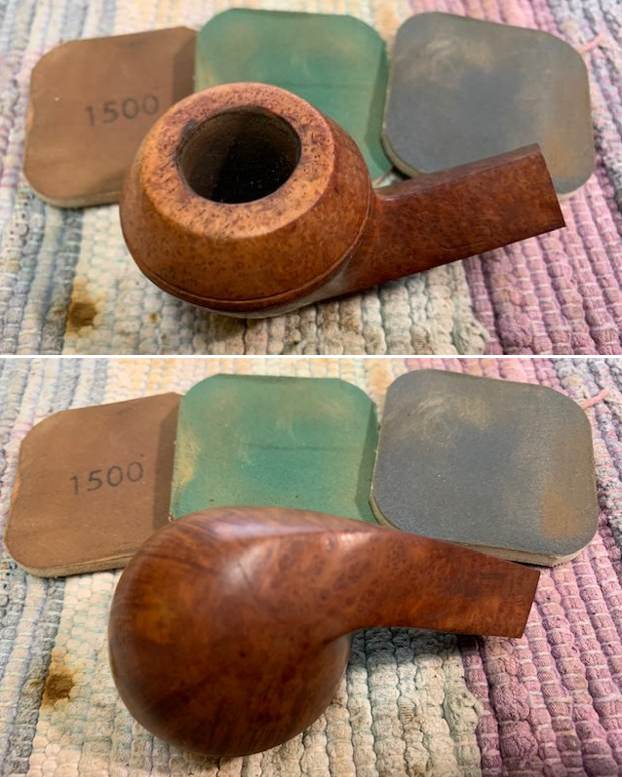
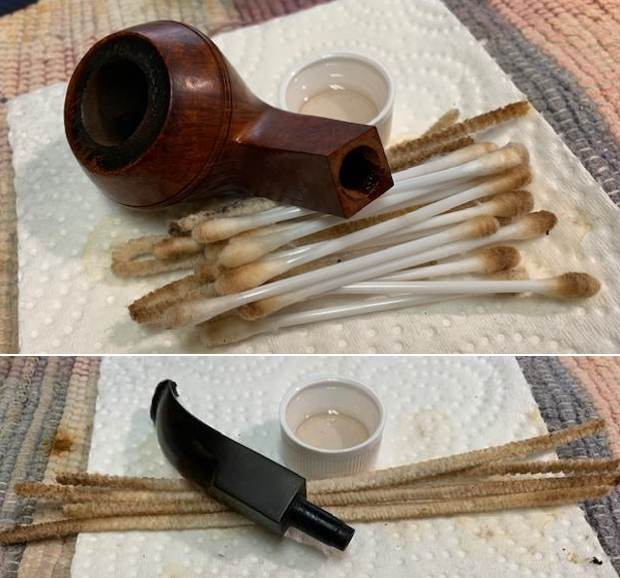 I scrubbed the bowl with undiluted Murphy’s Oil Soap to clean off the thick oils and grime ground into the surface of the briar. I used a shank brush to clean out the mortise The bowl looked and smelled much better and the grain really began to stand out clearly.
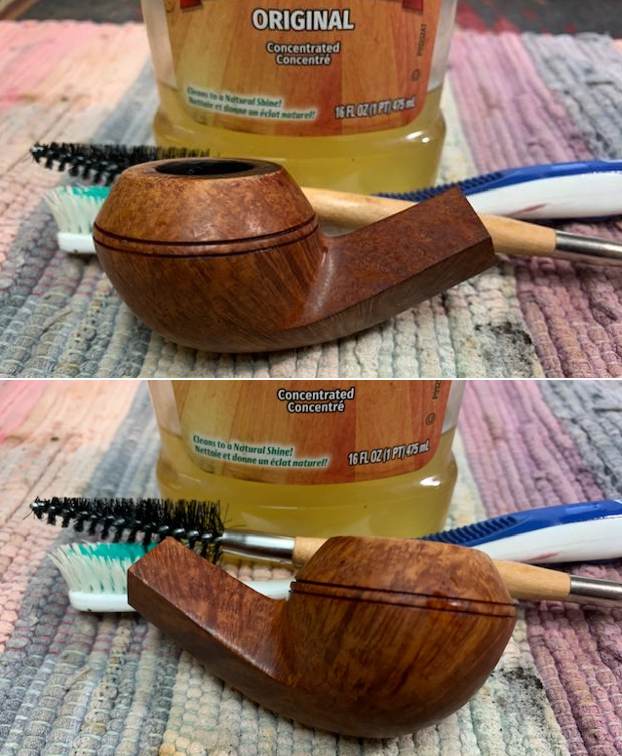
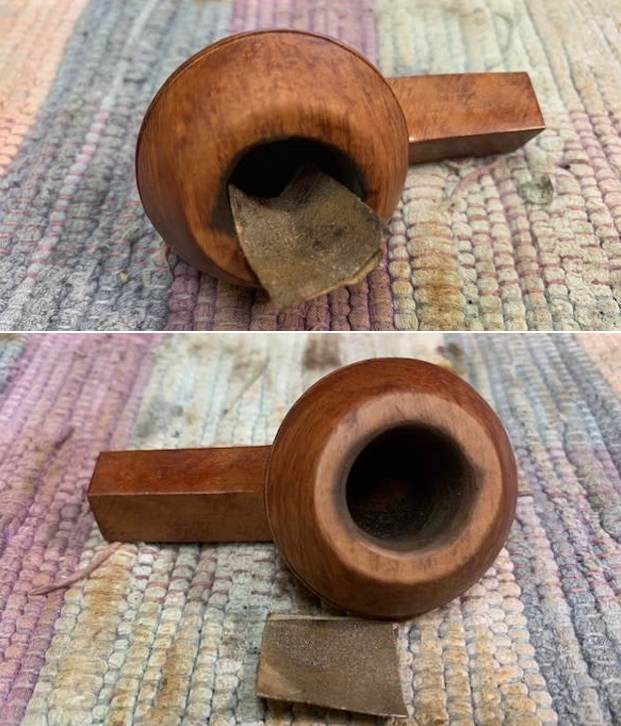
 I worked over the top and the inner edge of the bowl with 220 grit sandpaper to smooth out the burned edge and the damaged rim top. It definitely came out looking much better. I try to steam out the dents a bit more to reduce them more. The trick on these old pipes is not to go overboard on the repairs but to leave a bit of the story behind as it changes the shape and feel of the pipe.
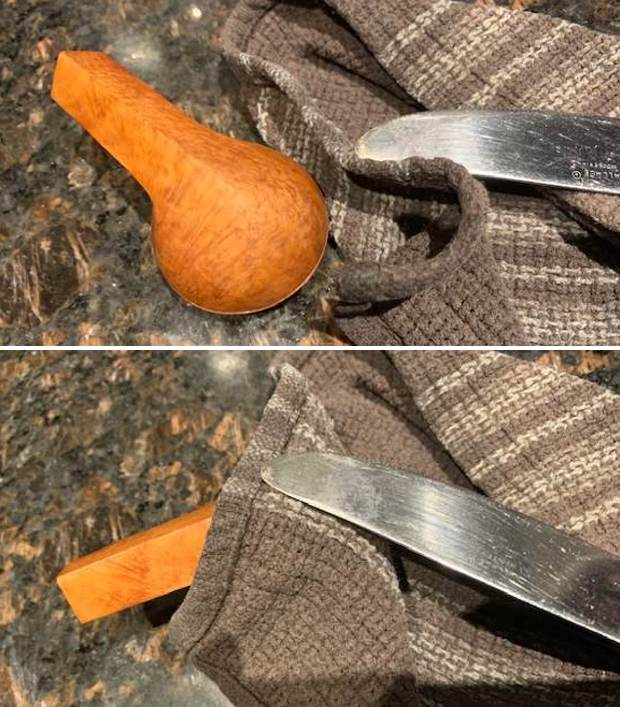
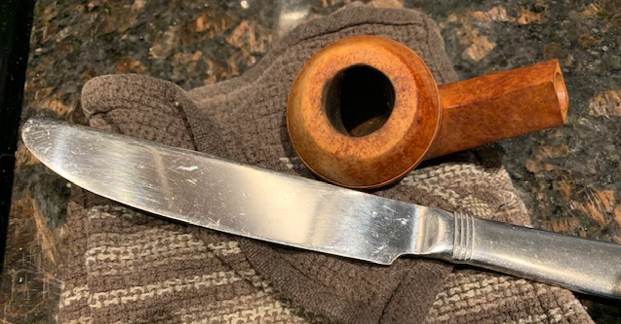
 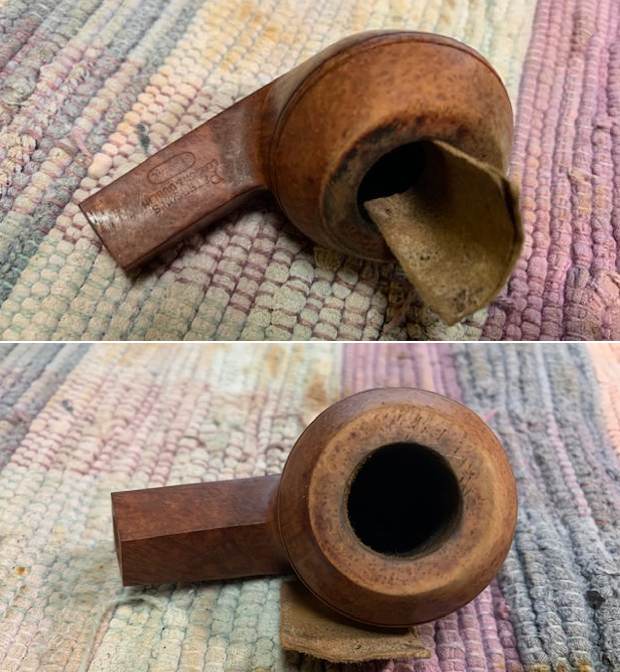 I steamed out the dents/hatch marks on the top of the bowl using a hot butter knife and a wet cloth. I heated the knife on my gas stove and then pressed it against the wet cloth. The steam generated caused the dents to lift. I repeated the process until I was unable to lift them any more. While it is not perfect it is certainly better.
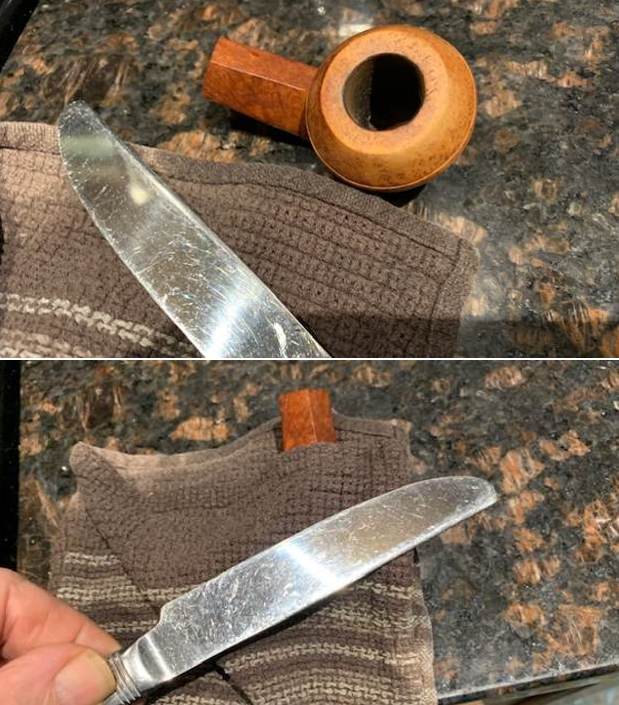
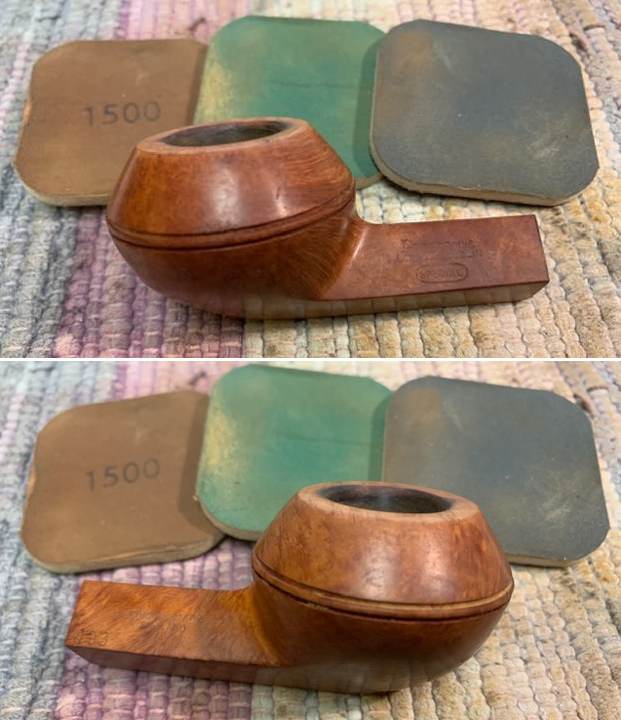
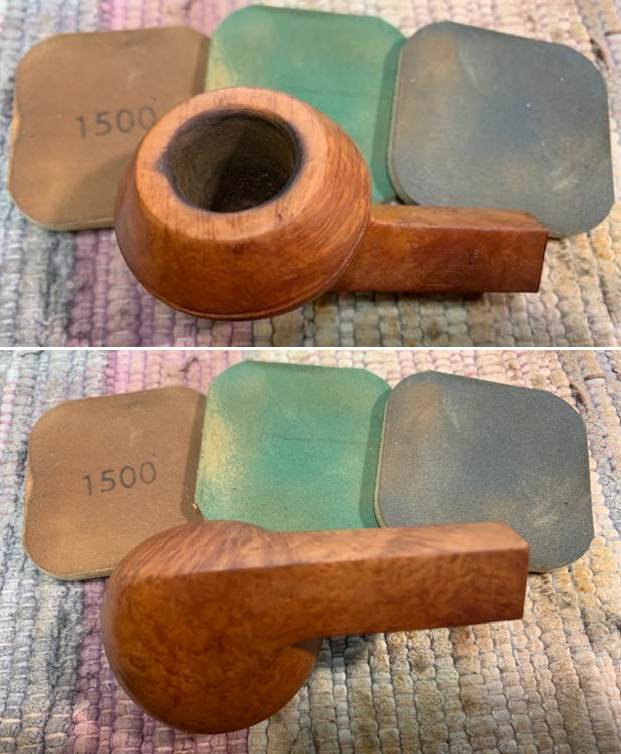
 I polished the briar (carefully avoiding the areas where the pipe is stamped on the shank sides) with micromesh sanding pads. I dry sanded it with 1500-12000 grit sanding pads. I wiped it down after each pad with a damp cloth to remove the sanding debris.
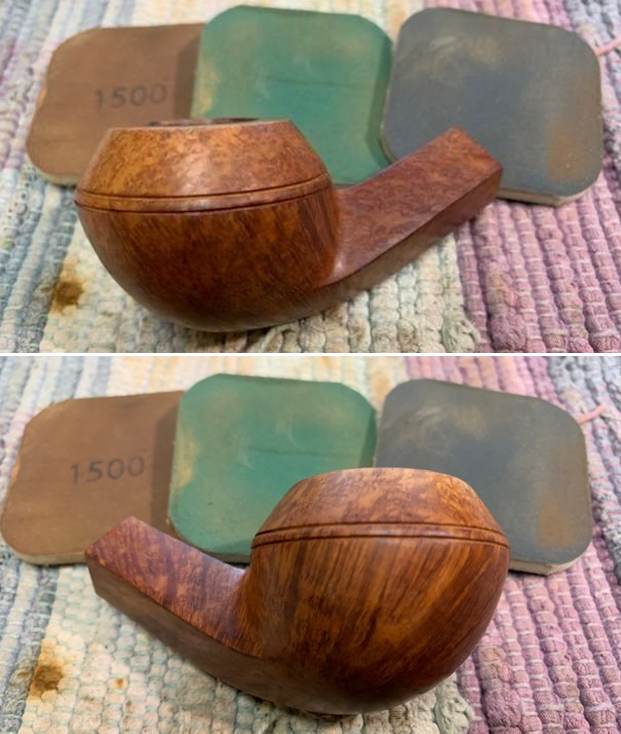
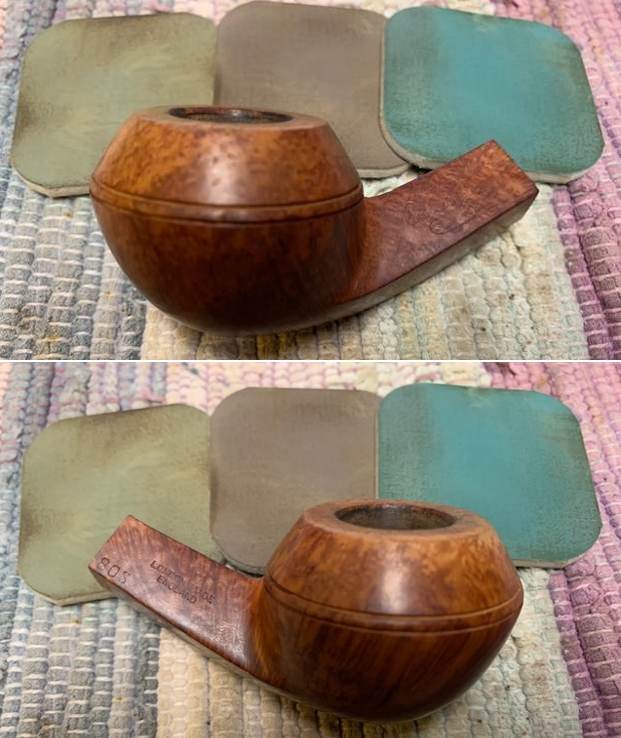
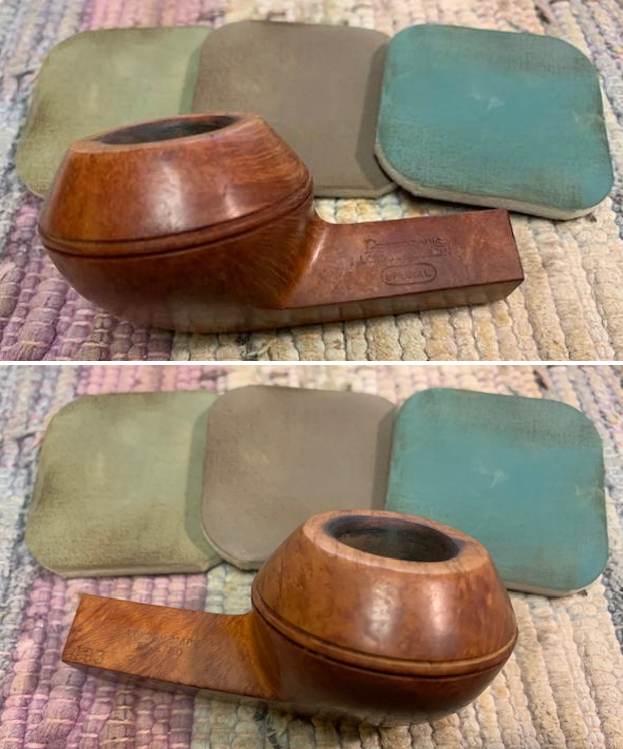
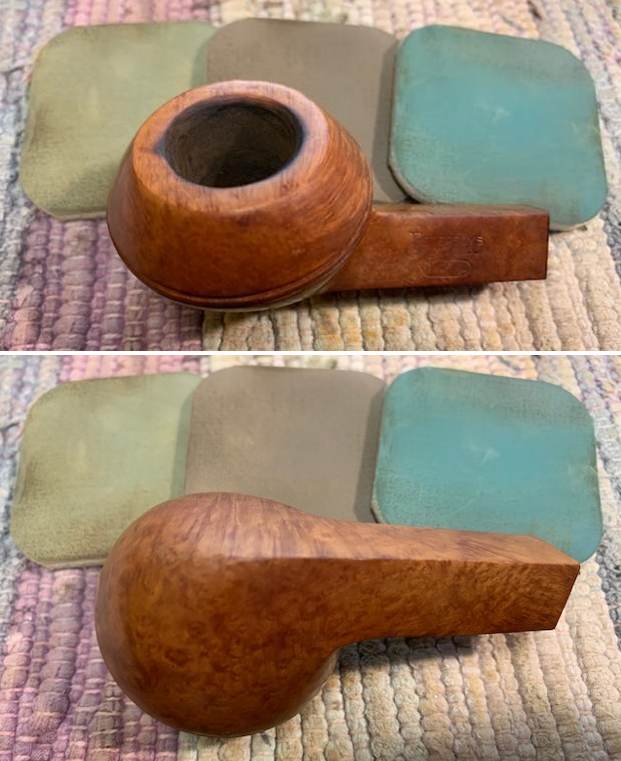
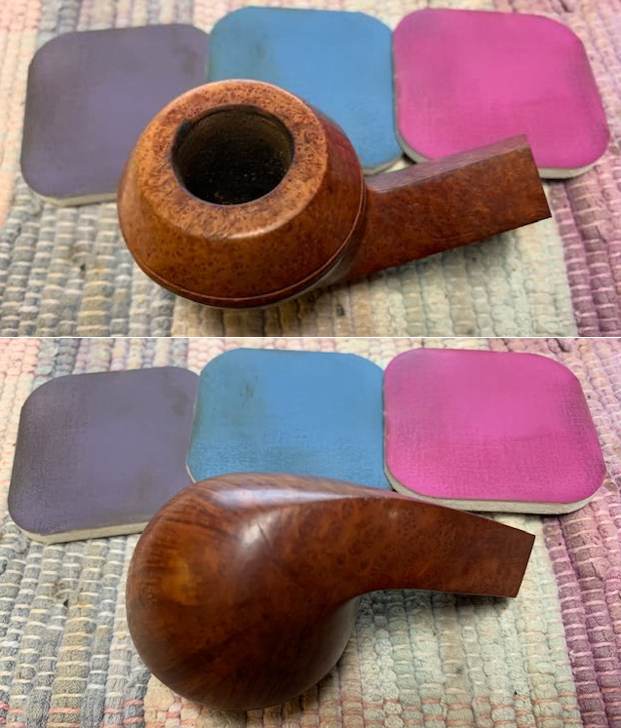 I worked some Before & After Restoration Balm into the surface of the smooth briar with my finger tips. The product is amazing and works to clean, enliven and protect the briar. I let it sit on the briar for 10 or more minutes and then buff it off with a soft cloth. It really makes the grain sing.
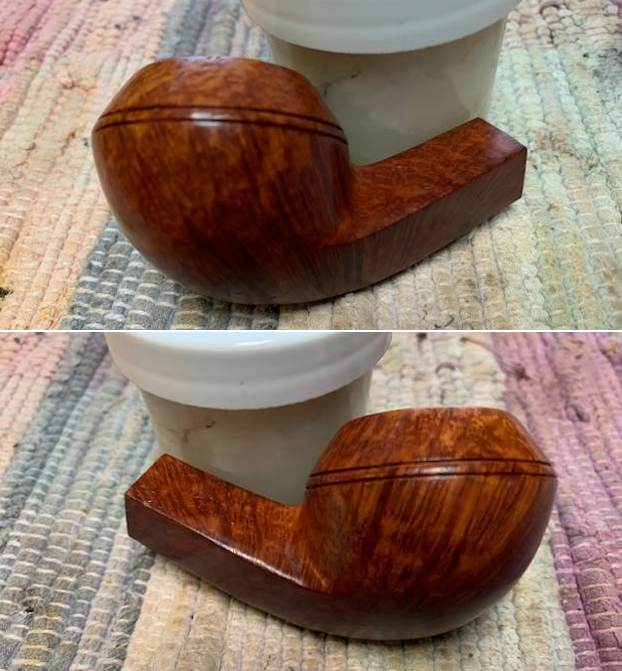
 I set the bowl aside and turned my attention to the stem. This repair would be a series of new experimental processes that would require many in process adjustments. I am including the total process below. I decided to try something a little different in rebuilding the button end of the P-lip. I cut a chunk of vulcanite off a stem to start with and sawed it into smaller, flatter pieces. I shaved more vulcanite off of a donor stem to add to the mix. The process would take several steps. I flattened out the underside of the button with a file to provide a ledge to build on. I would do that portion first before rebuilding the rounded end of the stem.
 I greased a pipe cleaner with Vaseline and inserted it pointing upward to be able to rebuild the underside of the button. I coated the underside of the area with black CA glue and then some shavings of vulcanite. When that had cured to touch I mixed a batch of activated charcoal powder and black CA glue to make a putty.
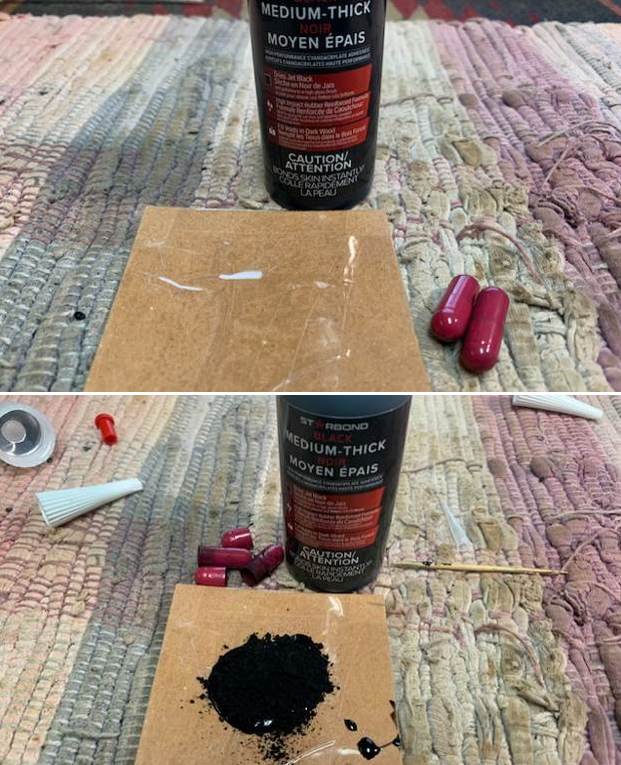
 I set the stem aside to let the mix of vulcanite/charcoal powder and black CA glue harden. Once it had hardened I used a small file to flatten out the repair and recut the button edge. I started the initial shaping of the flattened underside. The next step will be to reshape the rounded end of the button making sure that the airway opens on the top side of the button as it was originally.
  I greased a pipe cleaner and inserted it in the airway and bent it upward to be able to rebuild the area around the opening. It is tricky to rebuild the button as the airway is on top of the button rather than in the end. I built up the area around the end of the button with Black rubberized CA glue. I wanted to flatten it as much as possible so that I could connect a piece of another P-lip stem.
 Once the repaired area had hardened I used a topping board to flatten out the end. I cut off the end of another P-lip with a hacksaw. I cut through the middle of the exit of the airway on the top of the stem as that would match what is left of the damaged stem end.
 I drilled two small holes in the end of the cut off button and the stem. The holes would allow the CA glue to go deep in the holes and add to bind the cut off tip to the end of the stem.
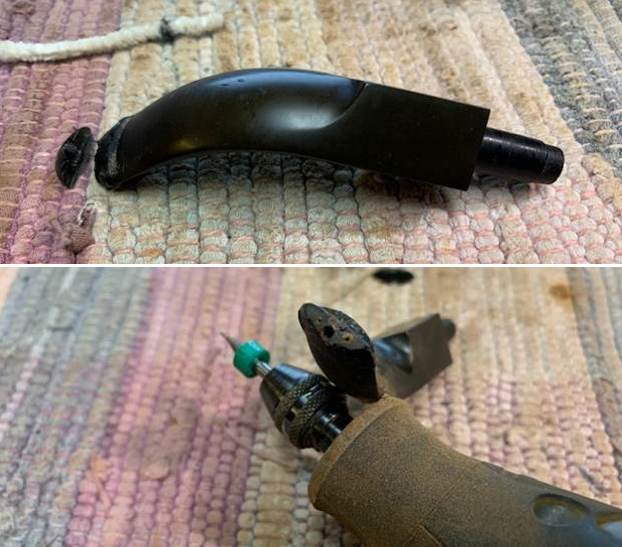 I coated the ends of the piece and the stem with clear super glue and worked it into the drilled holes. I pressed the pieces together while aligning the airway in the stem and in the piece of button. I set it aside to let the repair cure.
 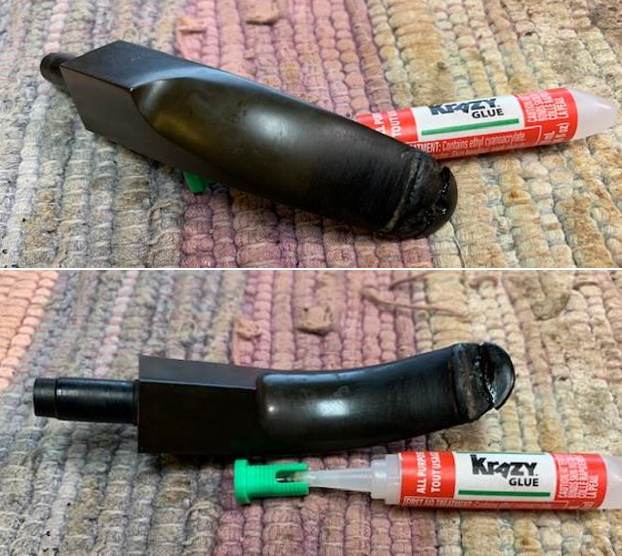 I filled in the joint spots with black super glue and again let it cure. It would take several layers of black super glue to build it up and make it even. I let it cure between each layer of the repair and flattened it with sandpaper and a file between the layers.
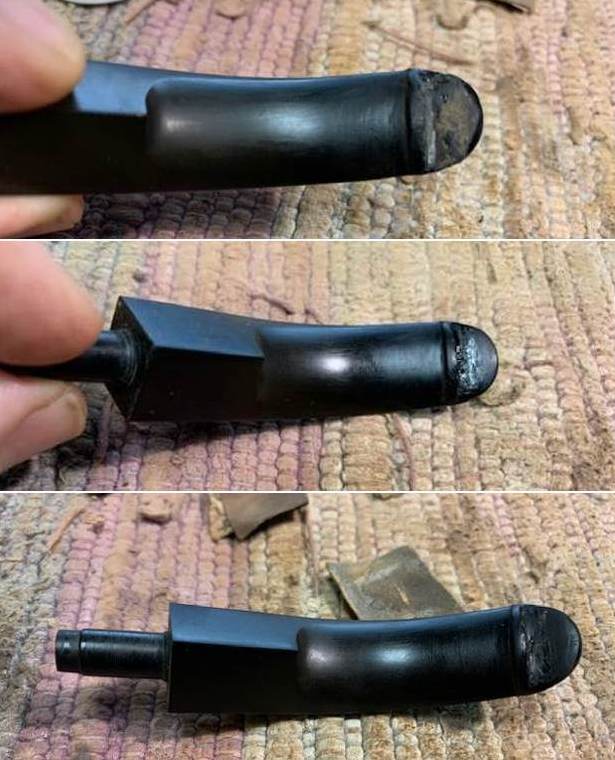
 I did the small touch ups on the air bubbles and edges with clear super glue and set it aside to cure. The stem was starting to look much better.
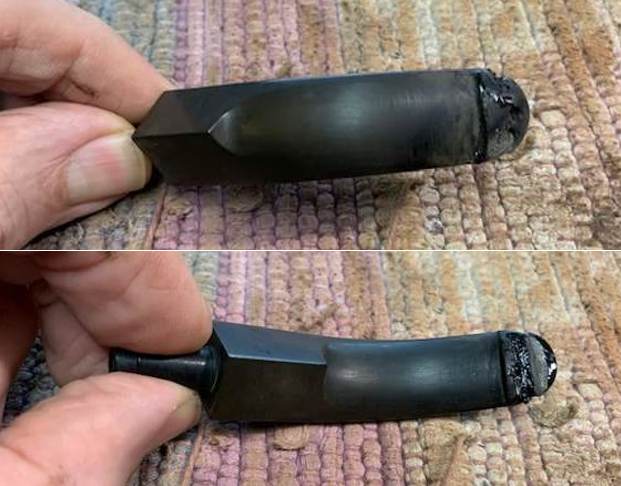
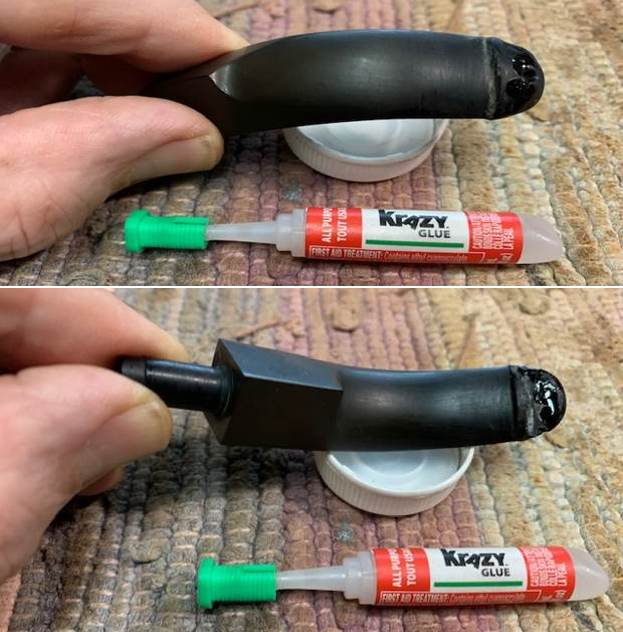 I reshaped the stem end carefully so as not to damage the stem further. I used a folded piece of 220 grit sandpaper to smooth out the joint of the repair. I filled in the spots in the repair that came up in the shaping process with clear super glue. I let them cure and smoothed out the repair with 220 grit sandpaper. Once I was done with the shaping the button looked very good.
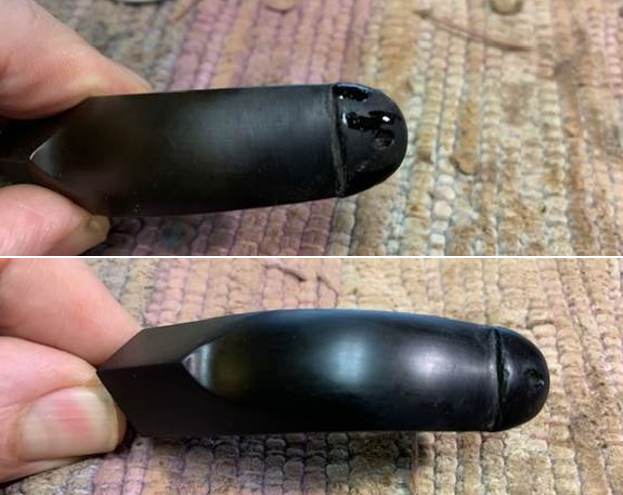
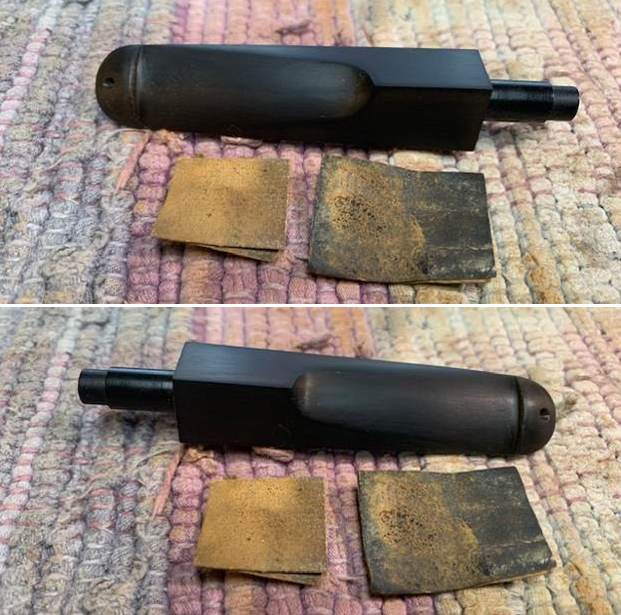
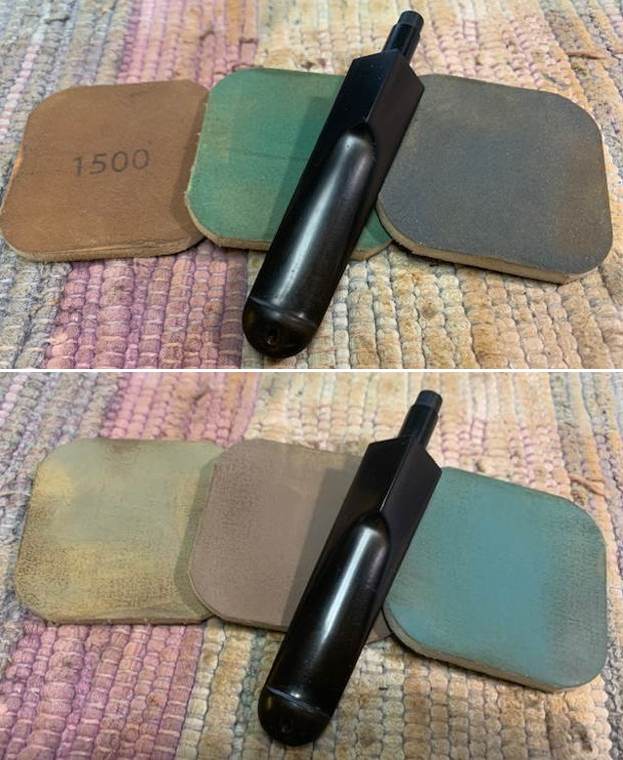
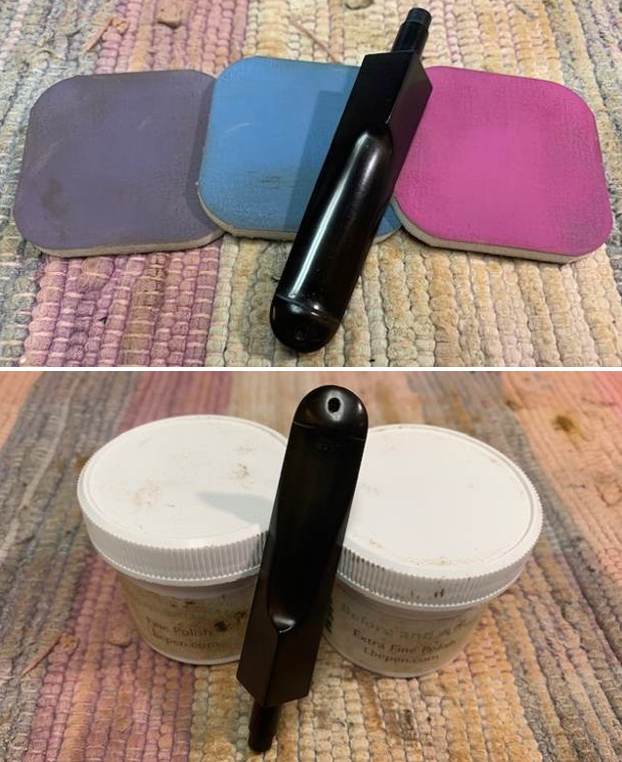
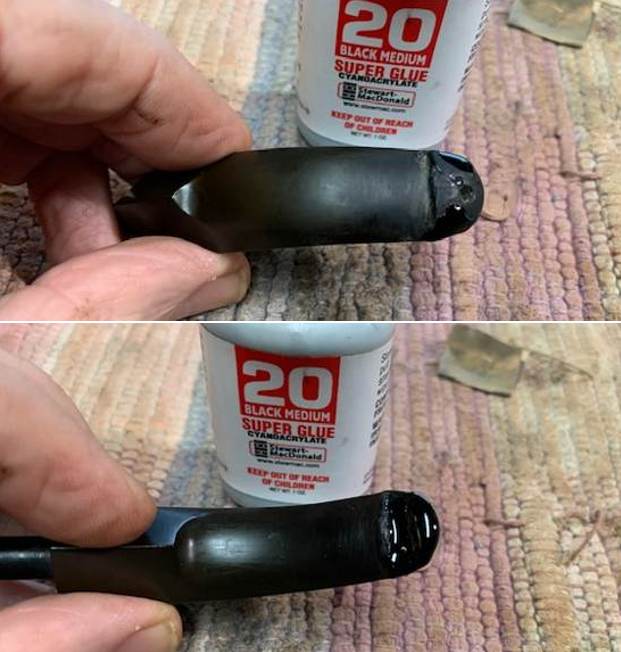
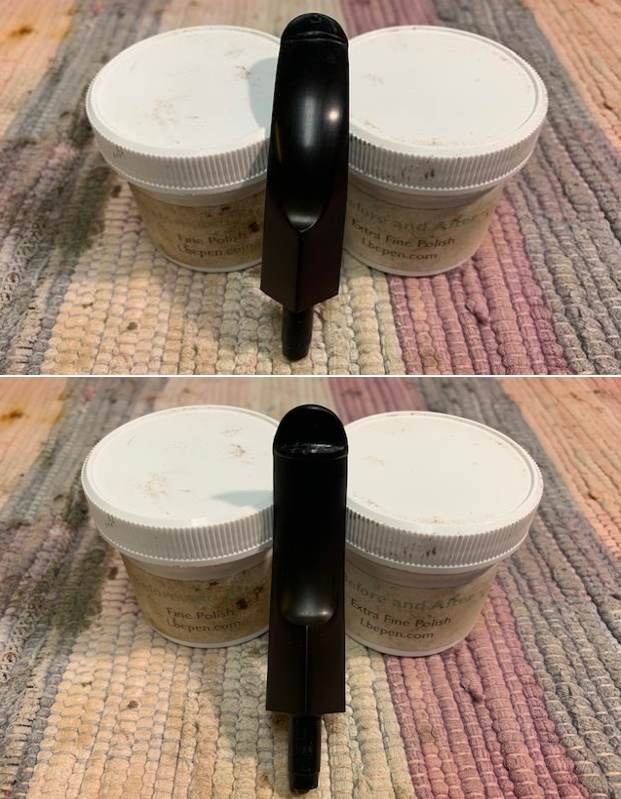
 I polished the vulcanite stem with 1500-12000 micromesh sanding pads. I wiped down the stem with Obsidian Oil after each sanding pad. I have an oil impregnated piece of cloth that I use after each pad. I polished it further with Before & After Stem Polish both Fine and Extra Fine polishes. I gave it a further coat of Obsidian Oil and set it aside to dry.
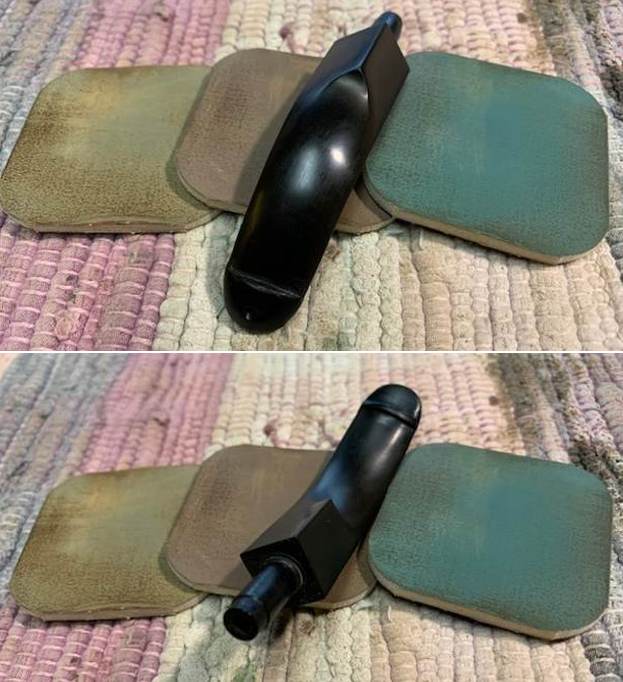
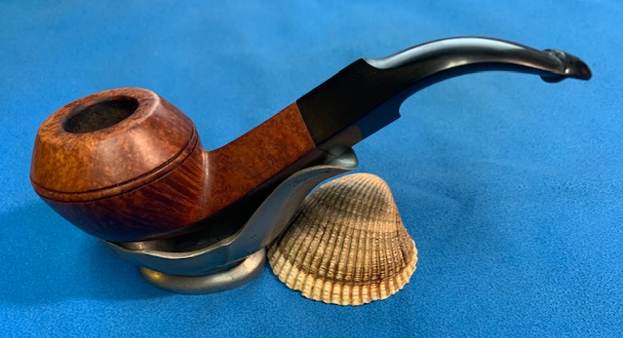
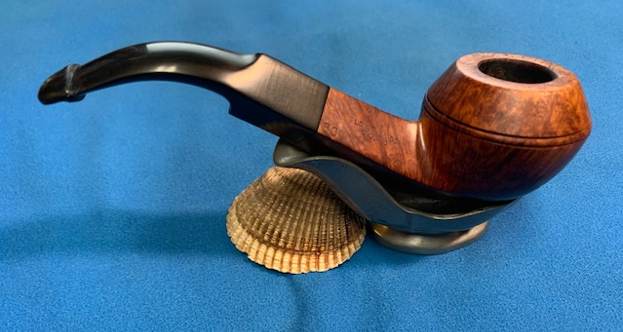
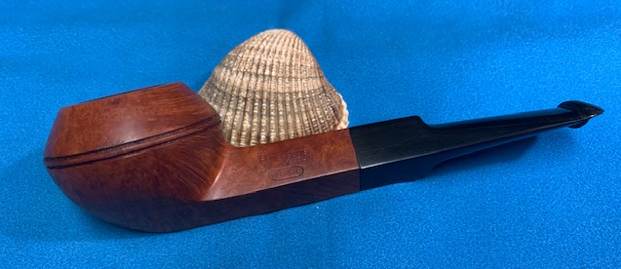
 I put the pipe back together – the bowl with its rebuilt stem. This smooth finished Peterson’s London & Dublin SPECIAL 80S Bent Bulldog is a real beauty with great grain around the bowl. The P-lip style black vulcanite stem with the rebuilt P-lip button works very well with the medium brown briar. This English made Bent Bulldog is a very collectible part of Peterson’s history. The grain on the bowl is quite beautiful and came alive with the buffing. I used Blue Diamond on the buffing wheel on the bowl and very carefully on the rebuilt stem. I gave both multiple coats of carnauba wax on the wheel then carefully buffed the pipe with a clean buffing pad to raise the shine. I hand buffed it with a microfibre cloth to deepen the shine. The English made Peterson’s SPECIAL 80S Bent Bulldog feels great in the hand. It is lightweight and beautiful. The dimensions of the pipe are Length: 5 ½ inches, Height: 1 ½ inches, Outer diameter of the bowl: 1 ¼ inches, Chamber diameter: ¾ of an inch. The weight of the pipe is 1.73 ounces/49 grams. This the last of the four pipes I have to work on from my friend’s collection and then I will send them all back to him. Thanks for walking through the restoration with me. Cheers.