Tag Archives: Bic lighter and oxidation

Reborn Huckster Pipe – Is It a GBD 9438?


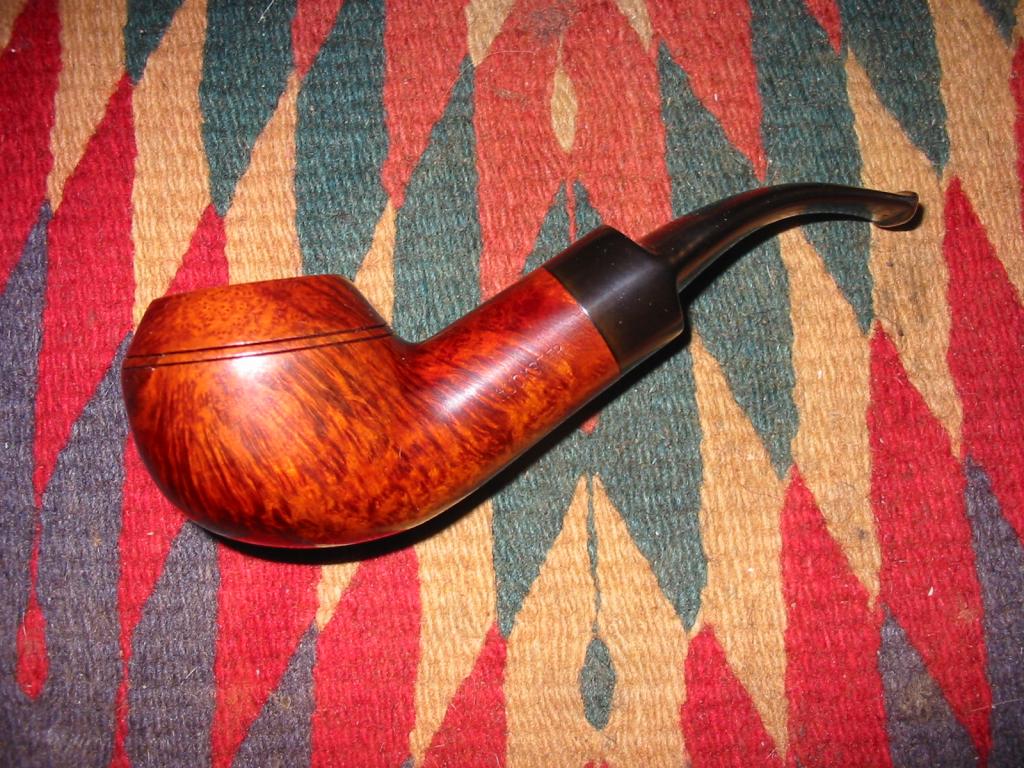
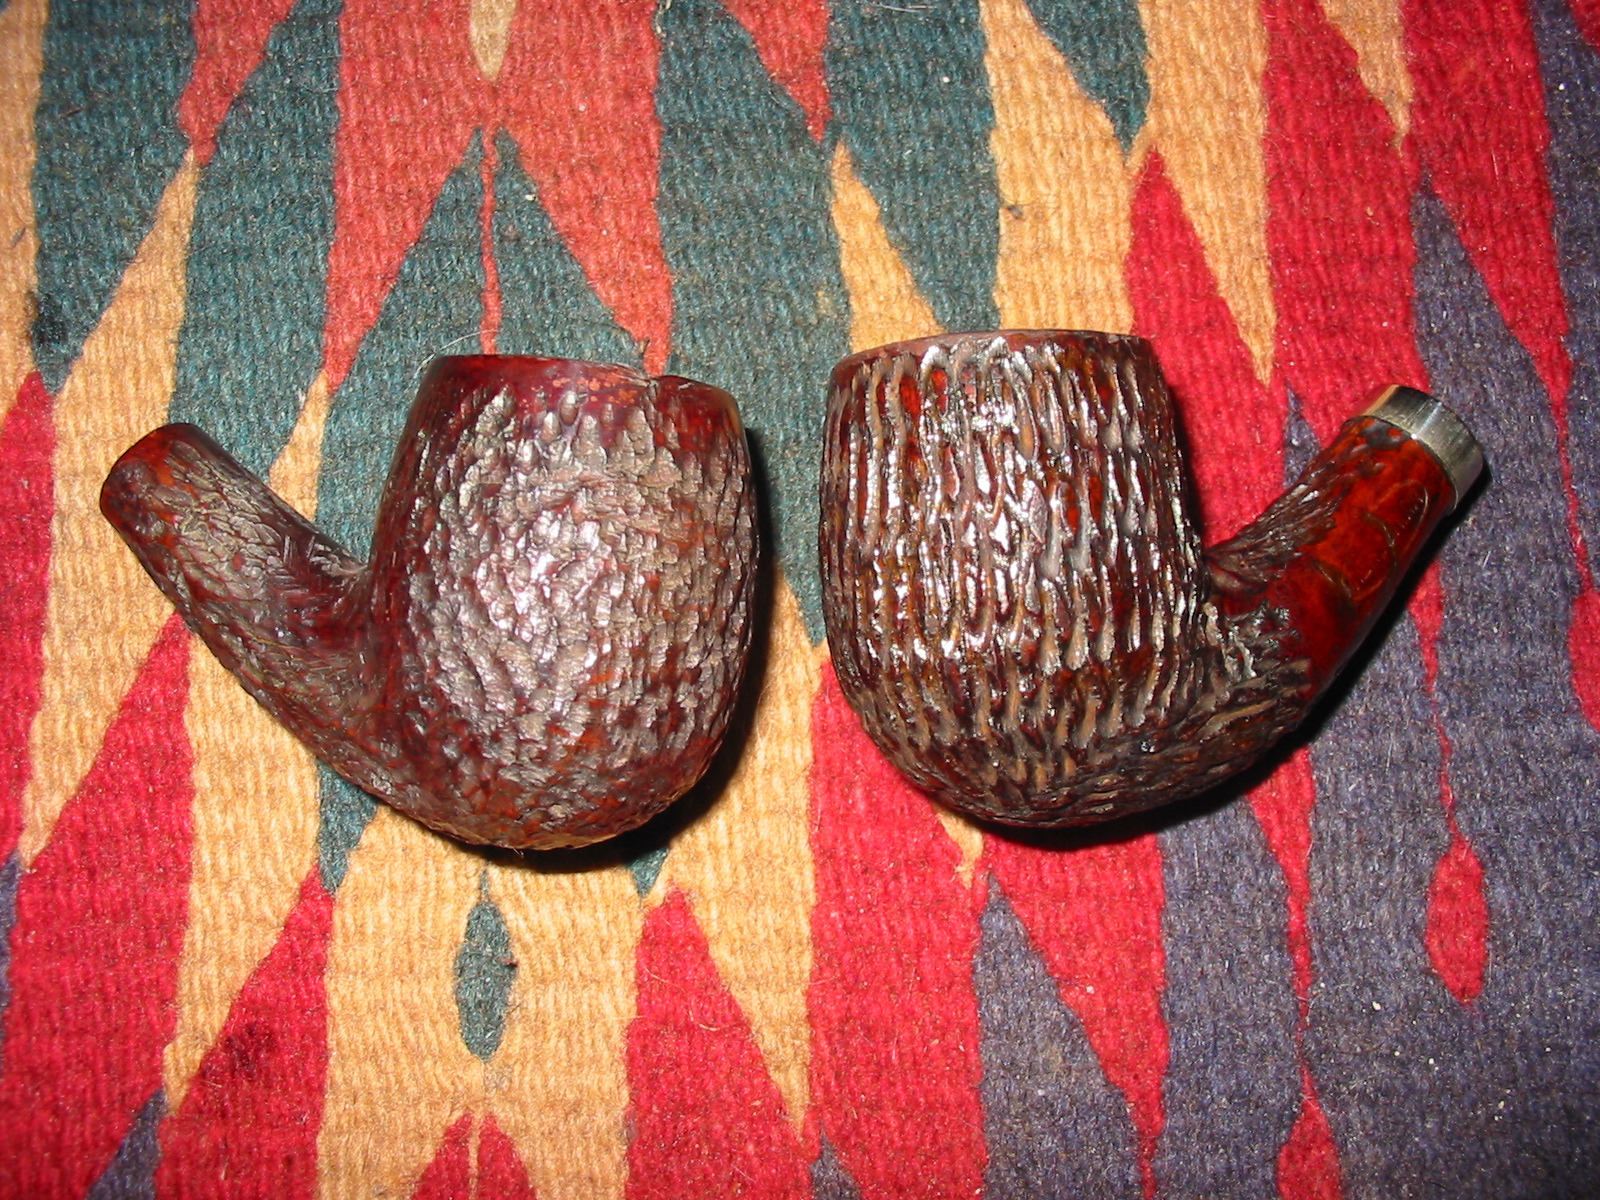
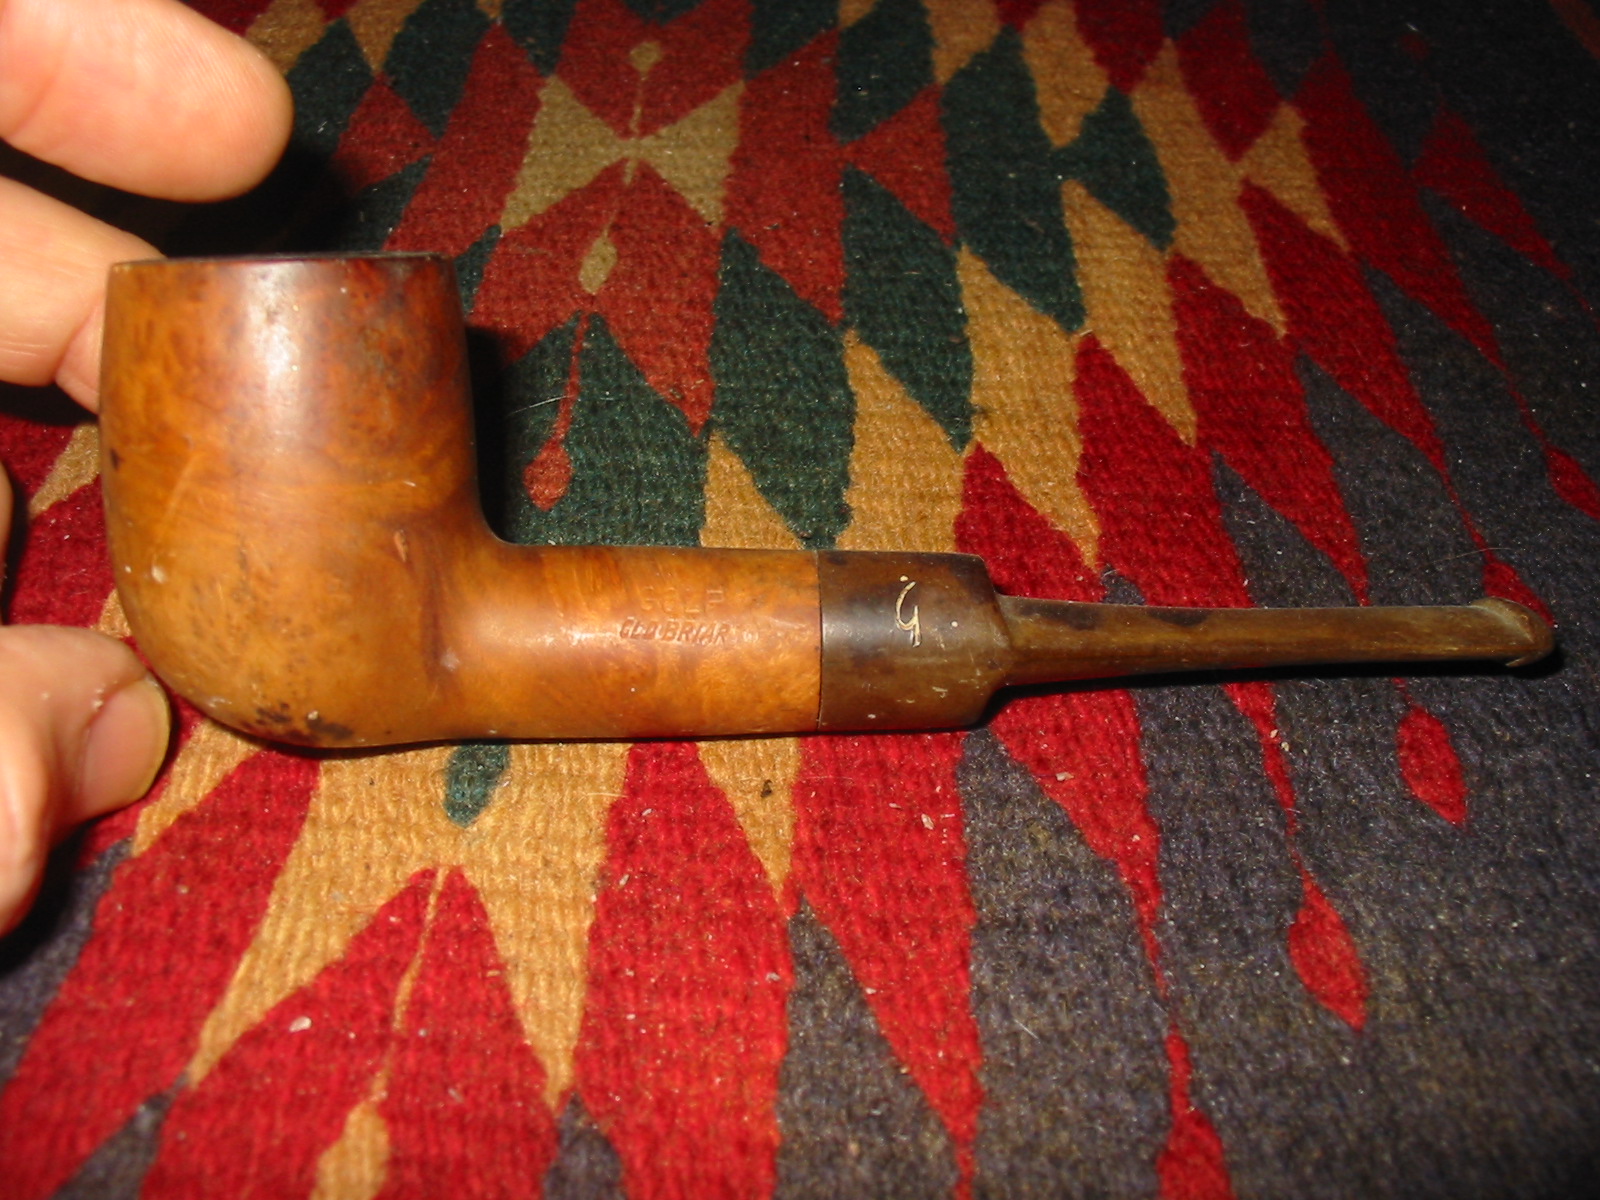
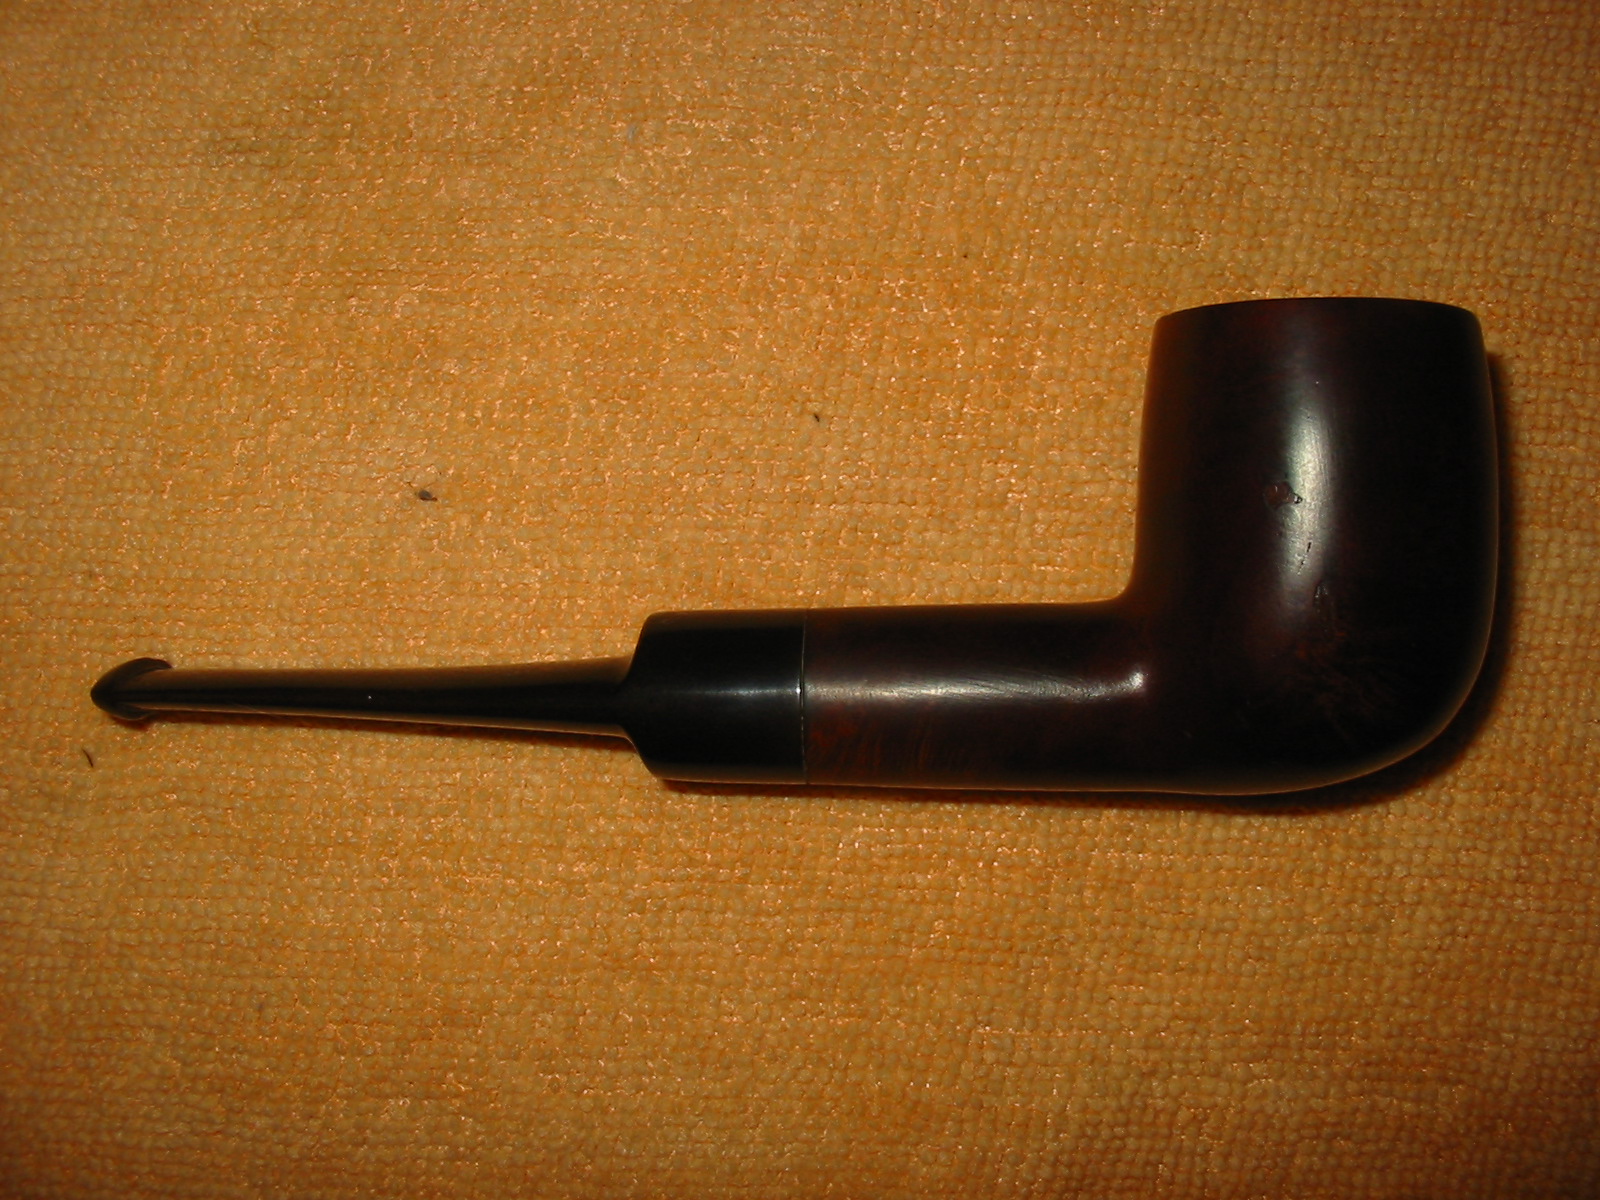
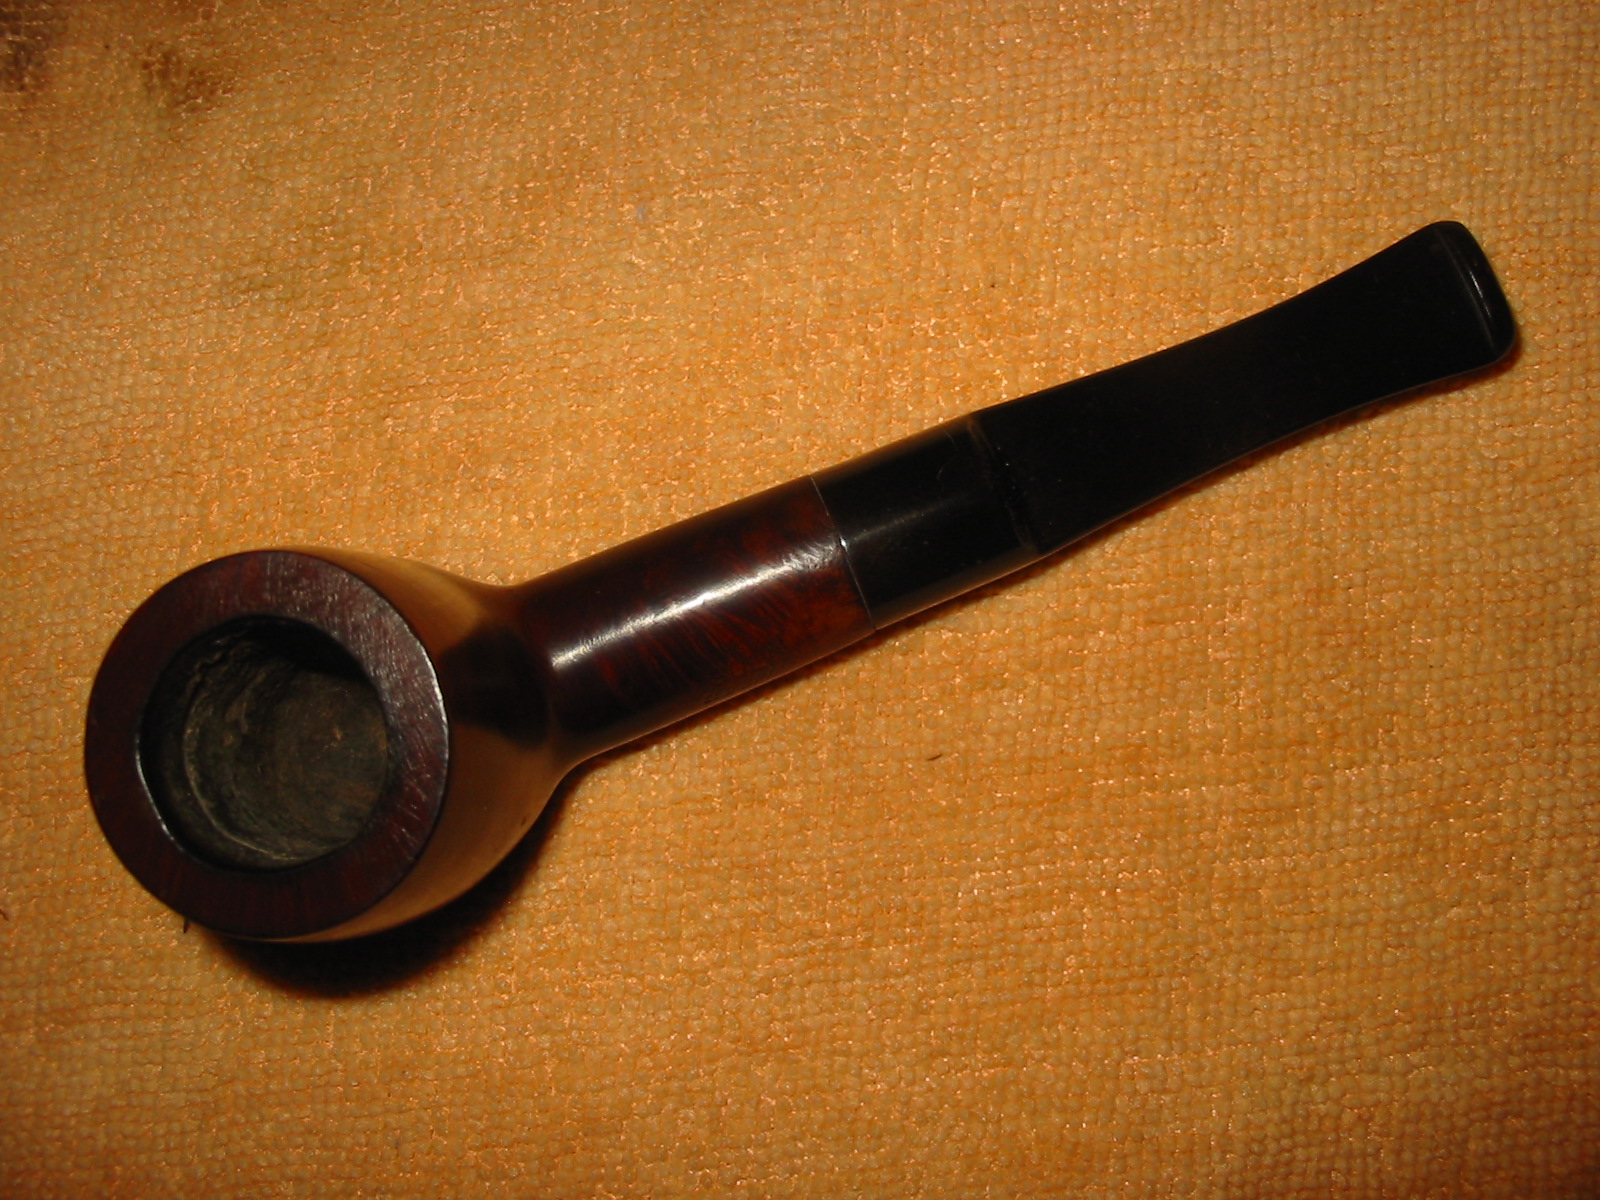
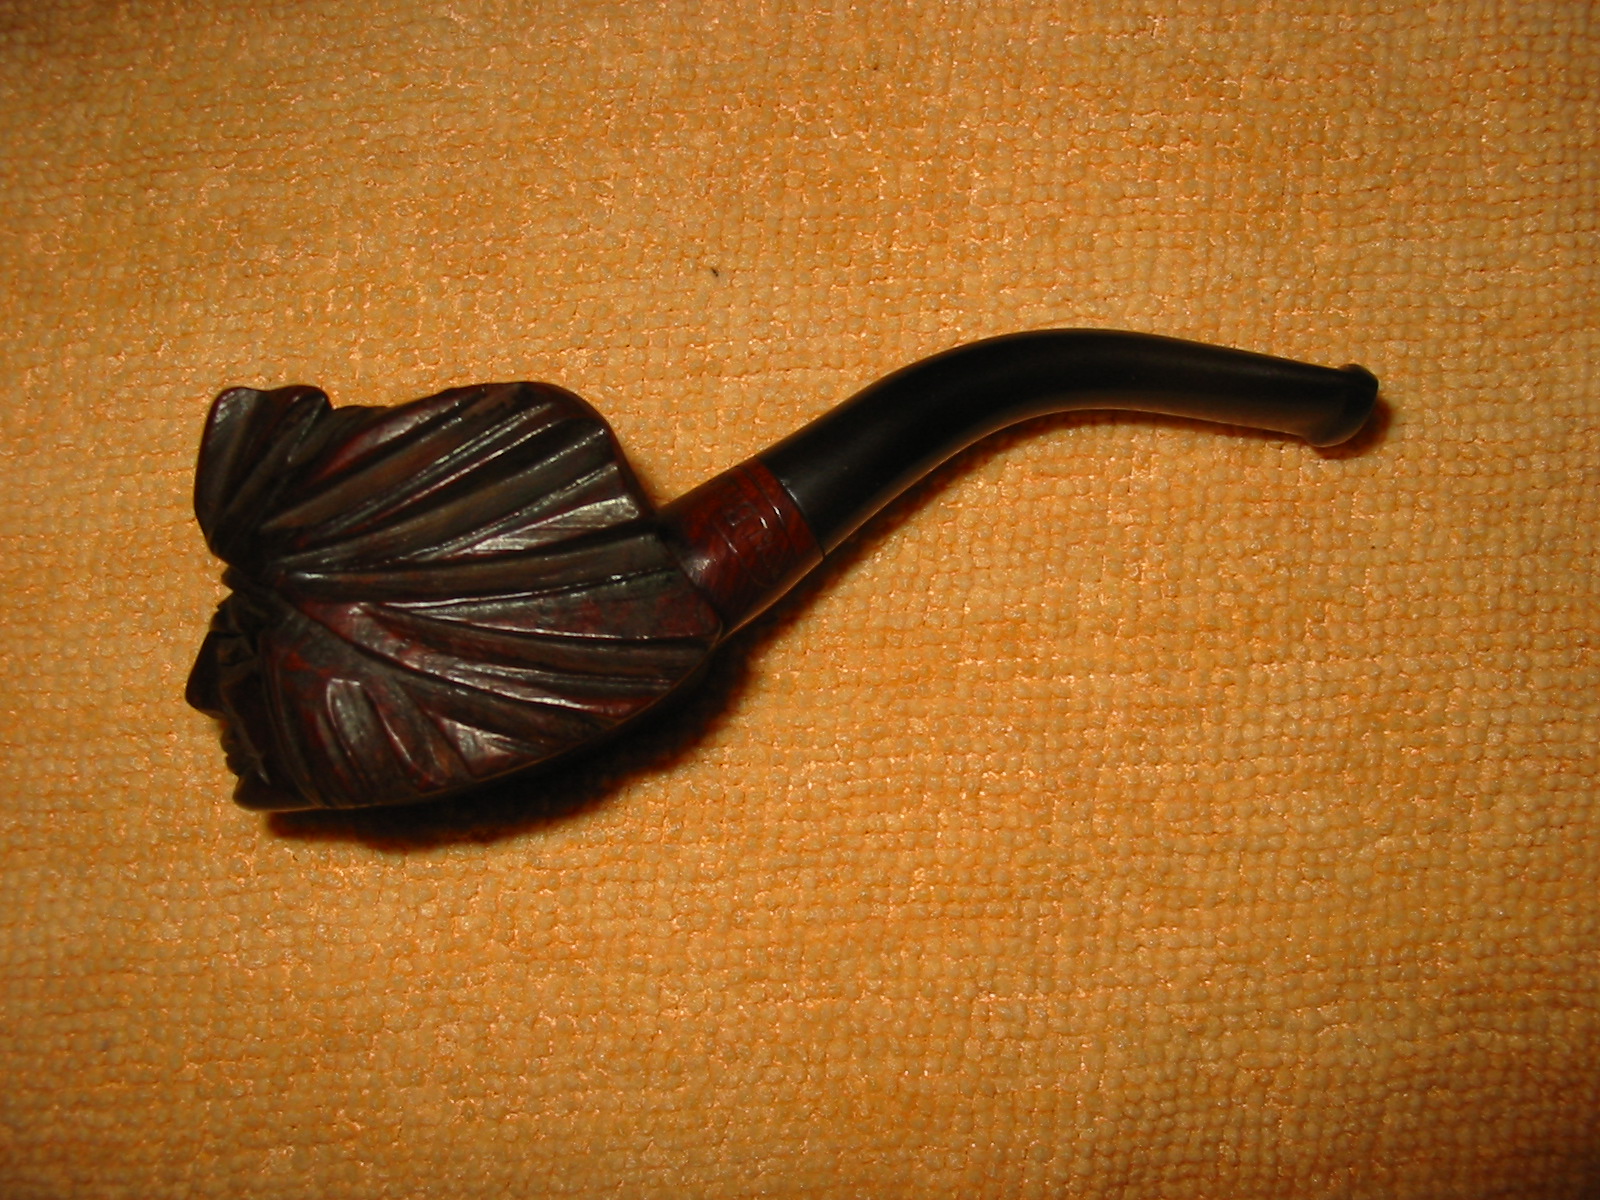
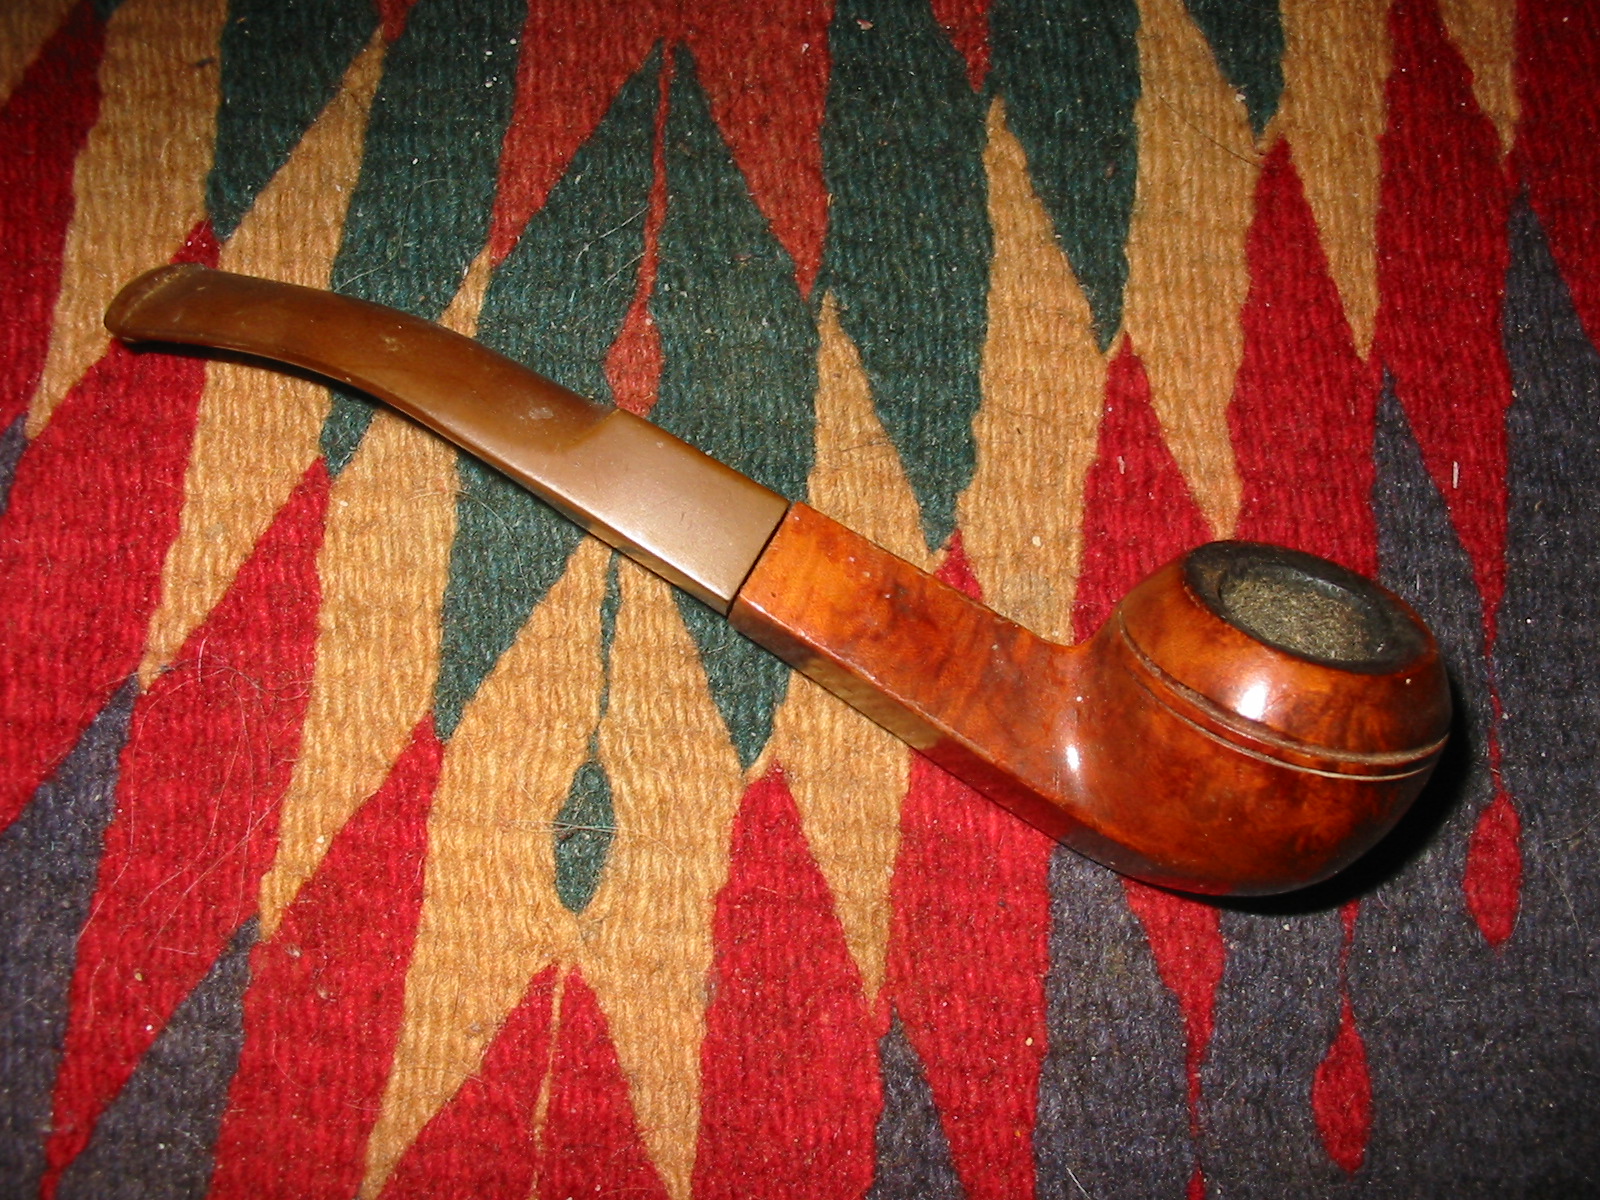
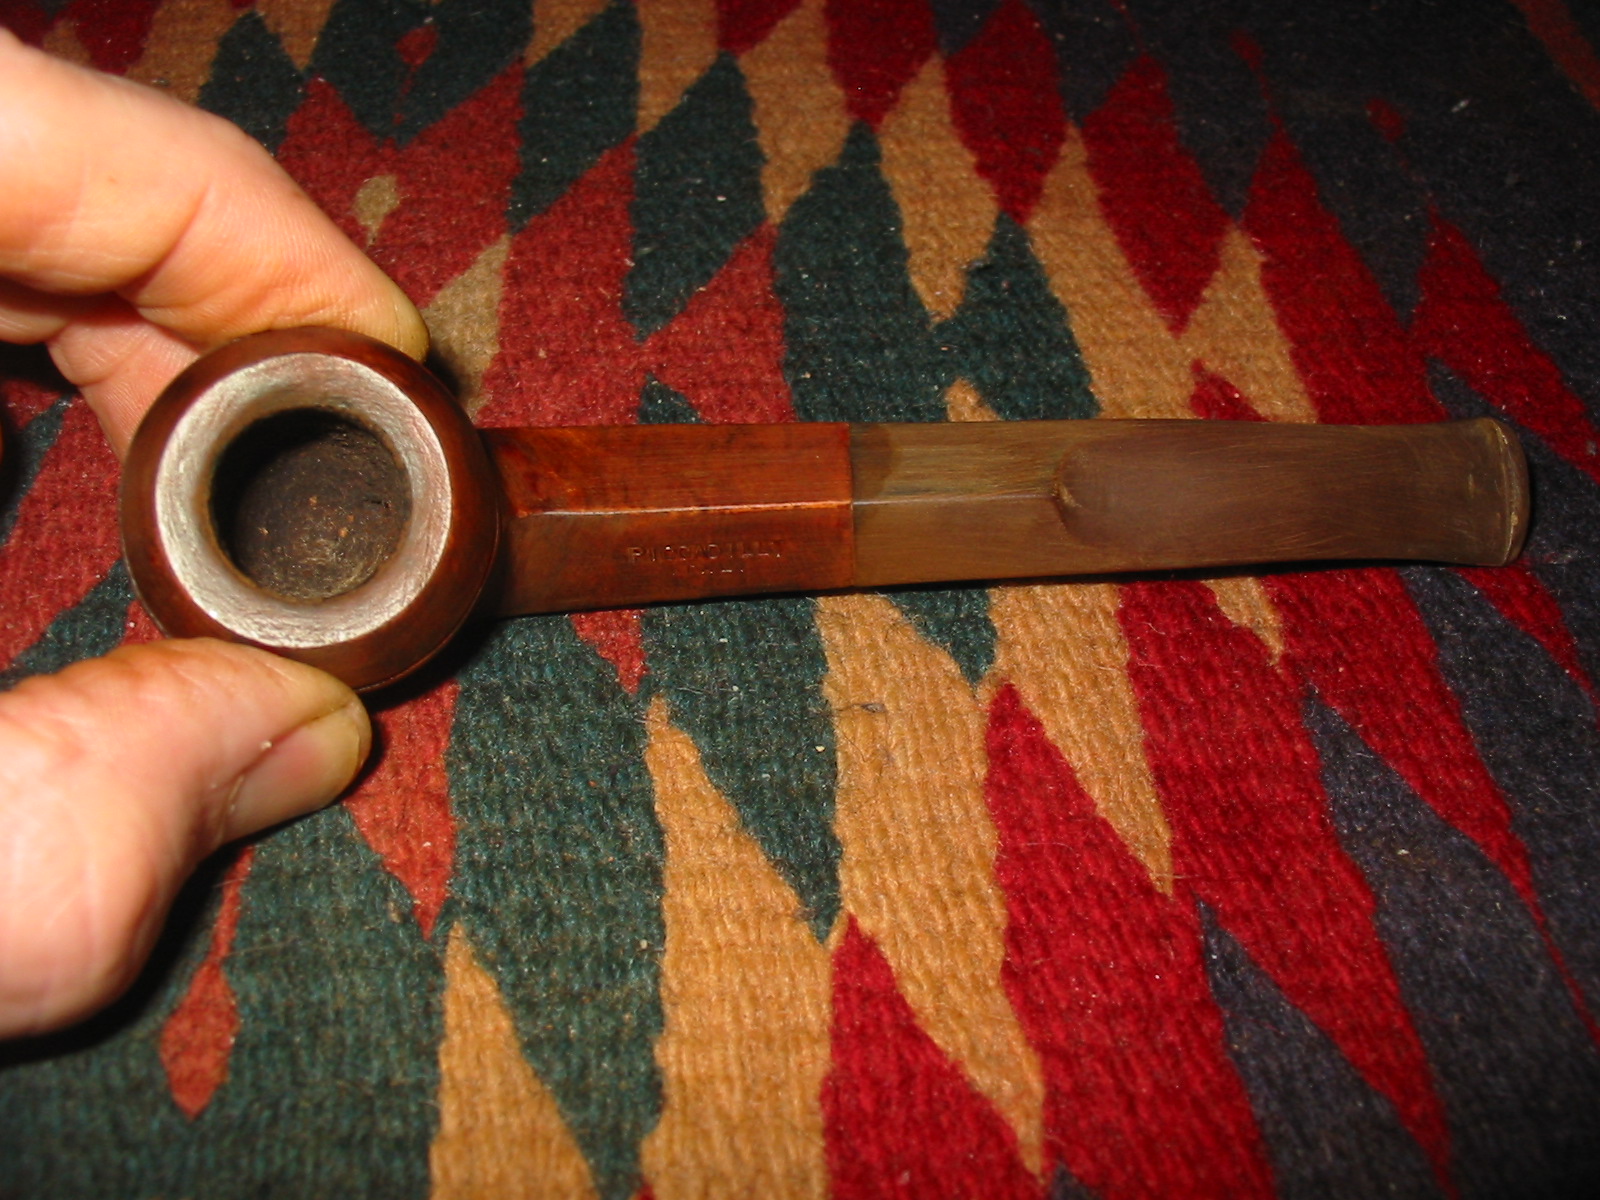
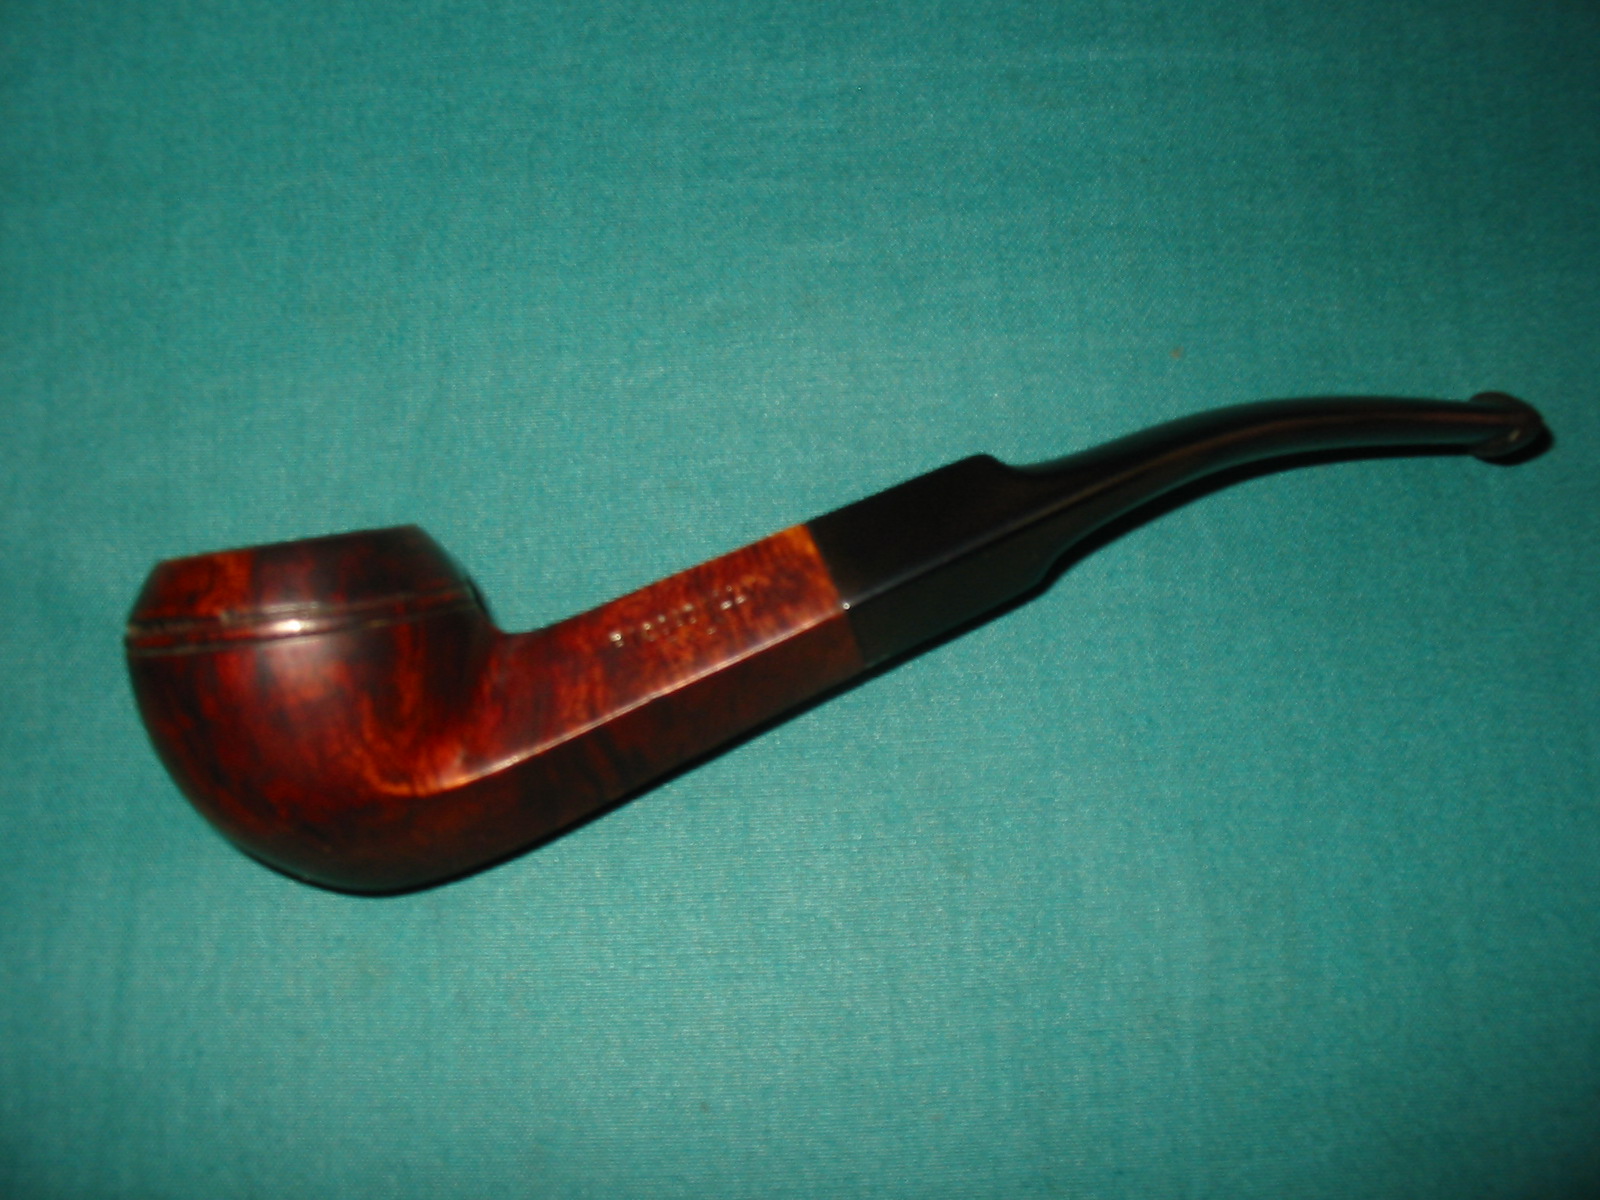
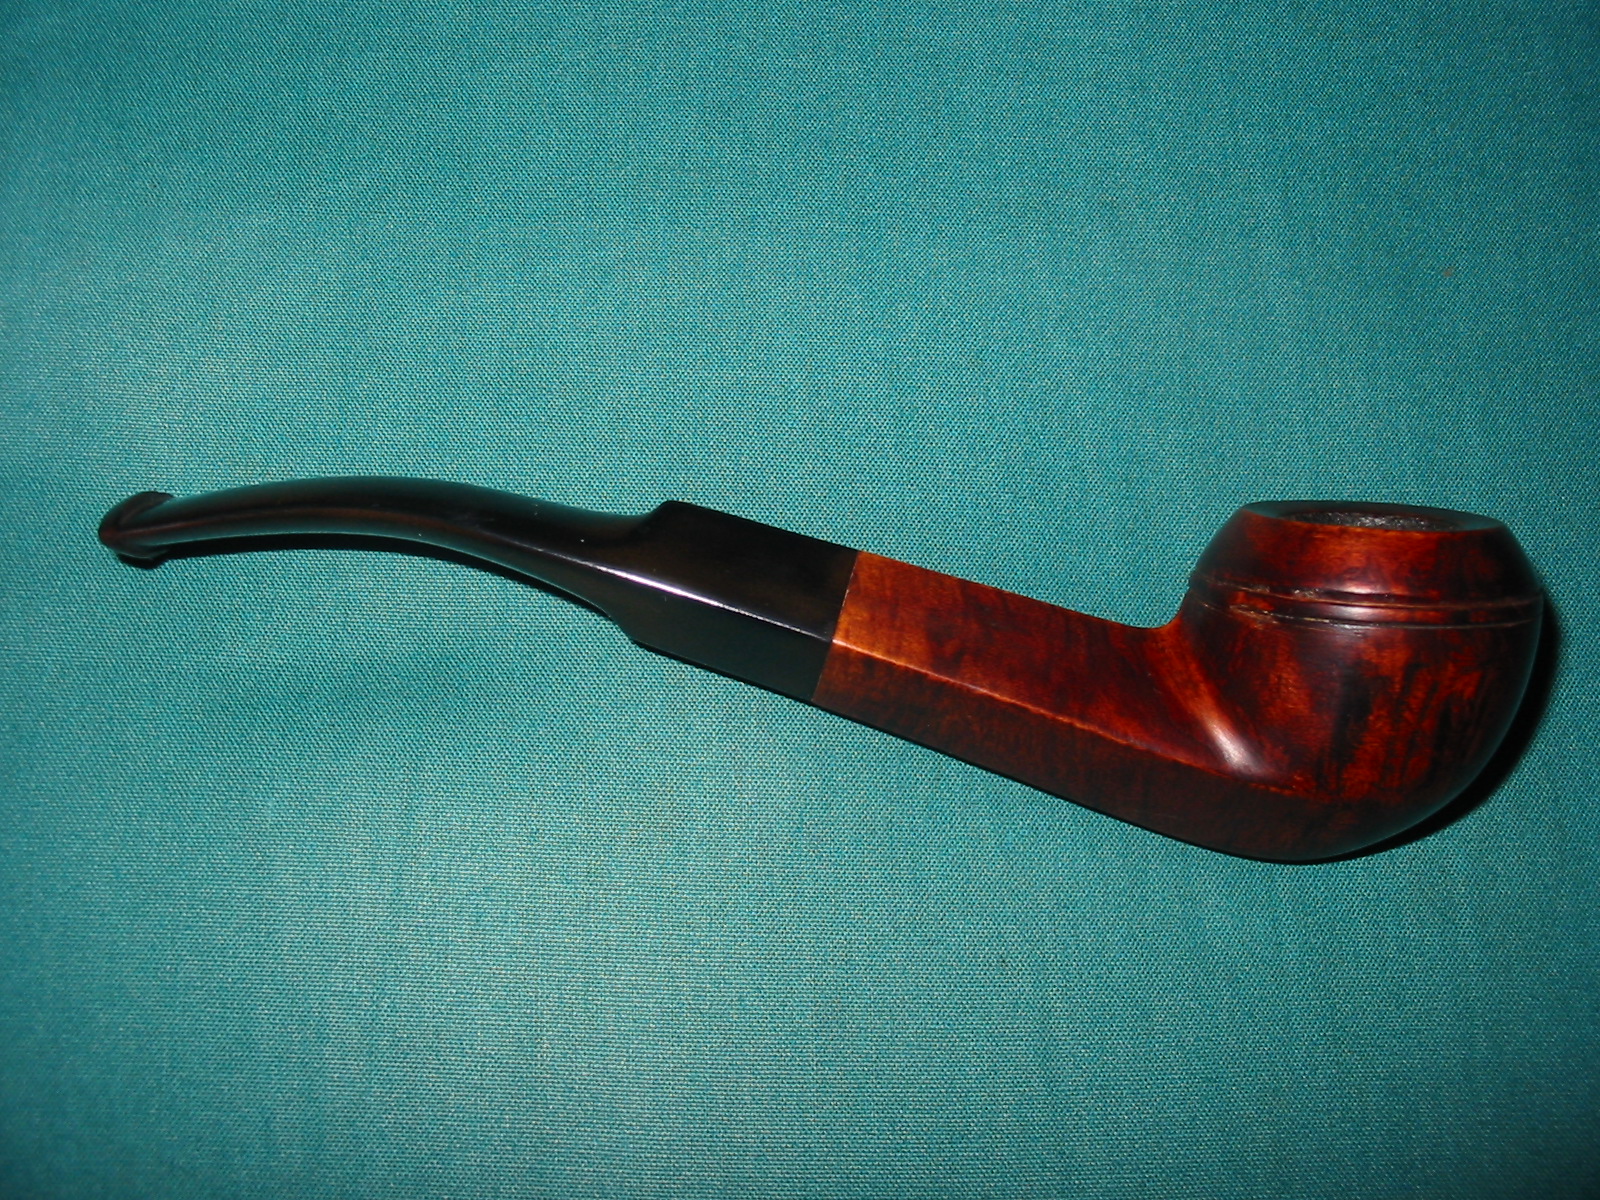
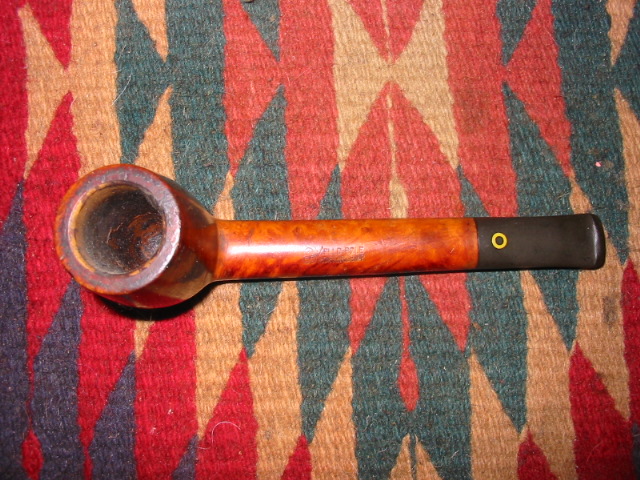
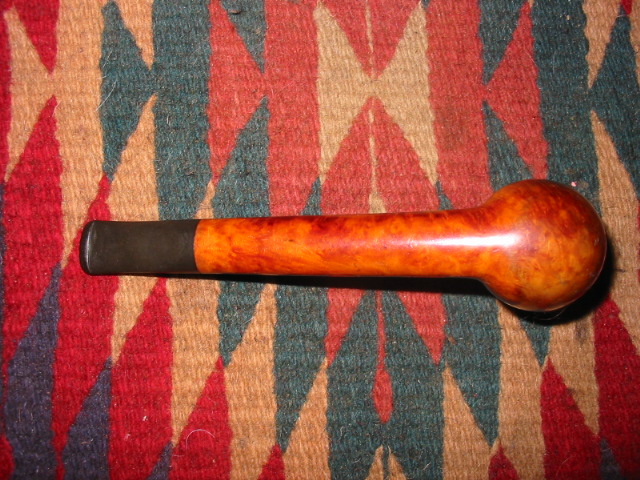
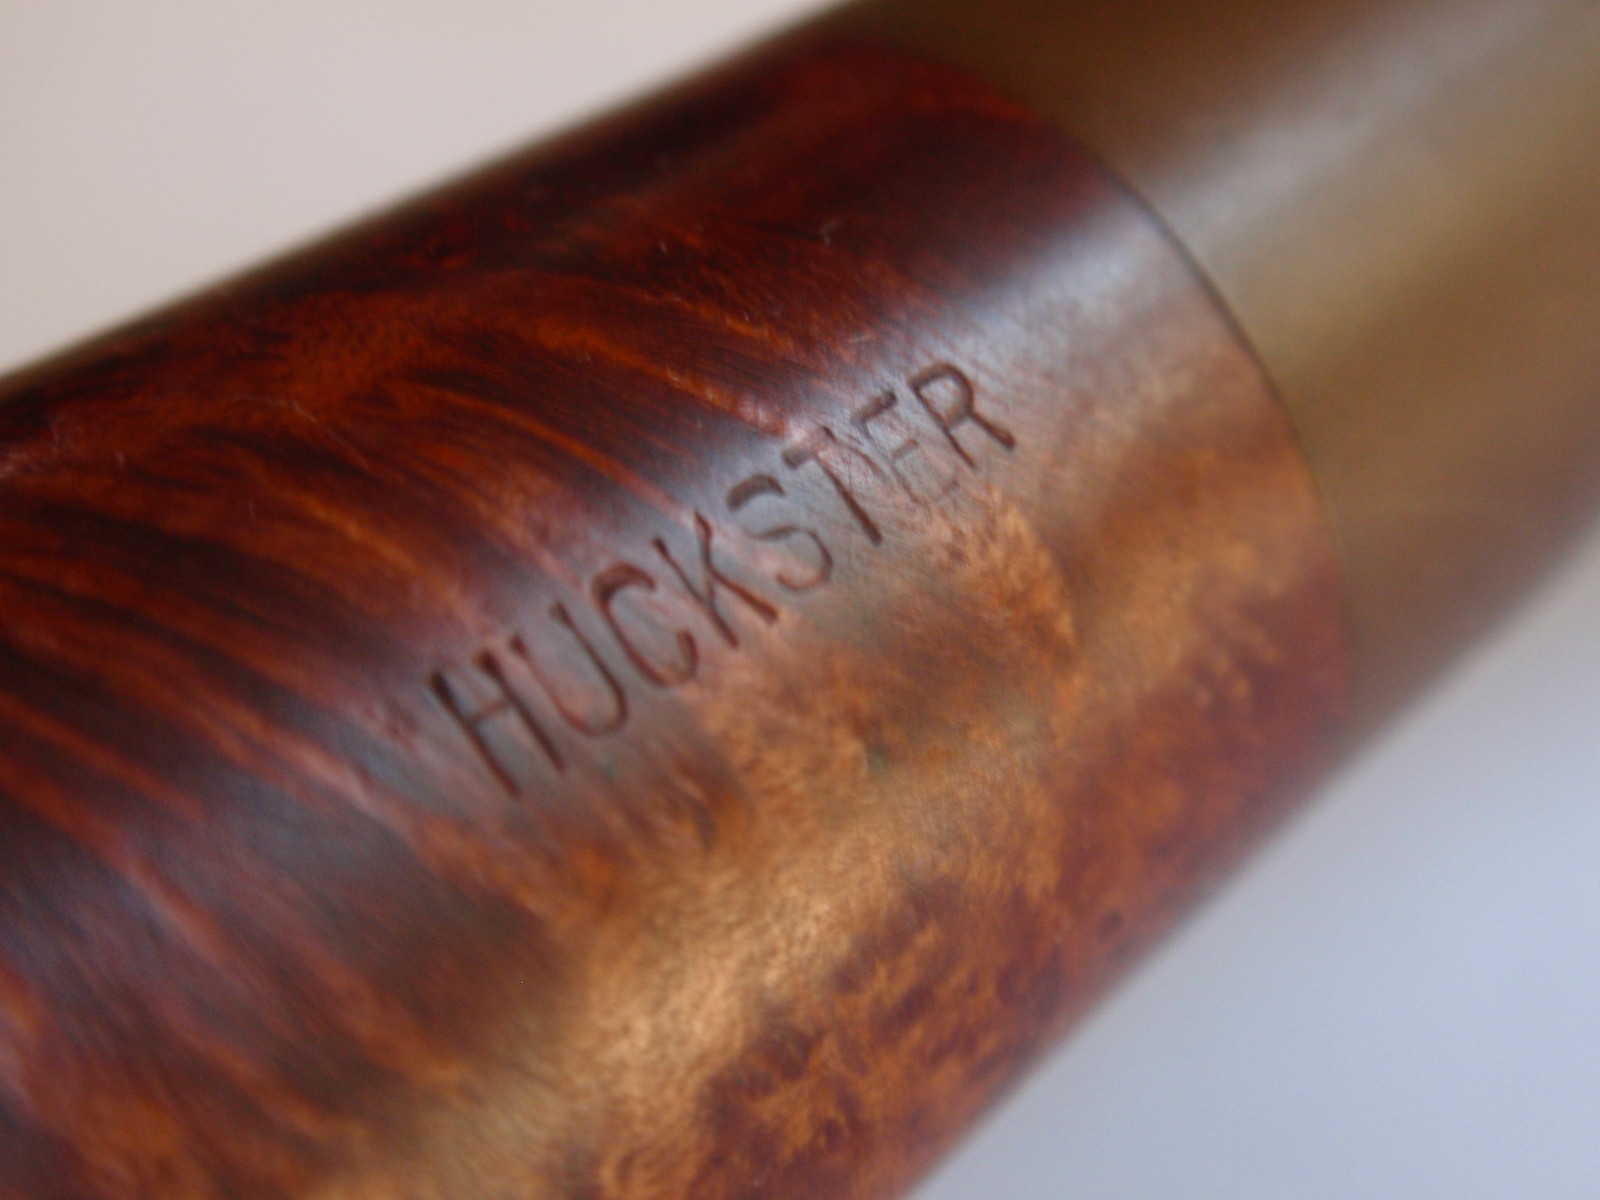
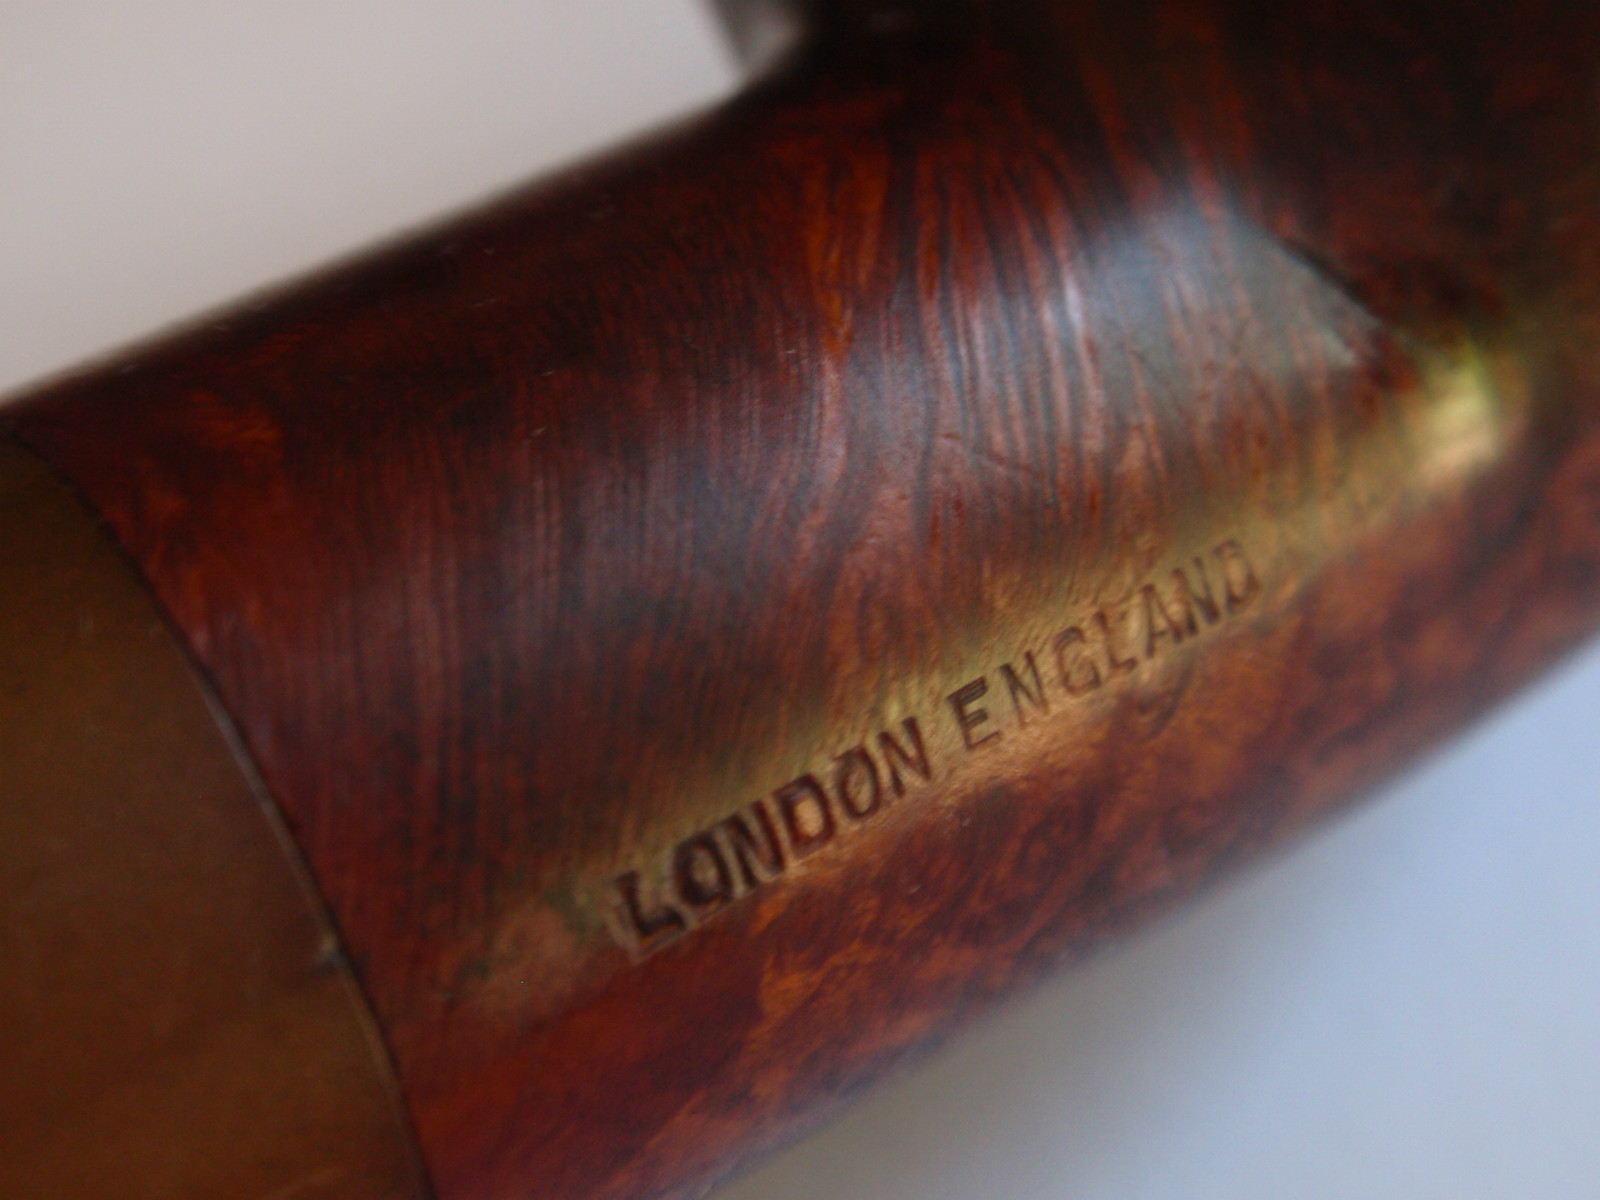
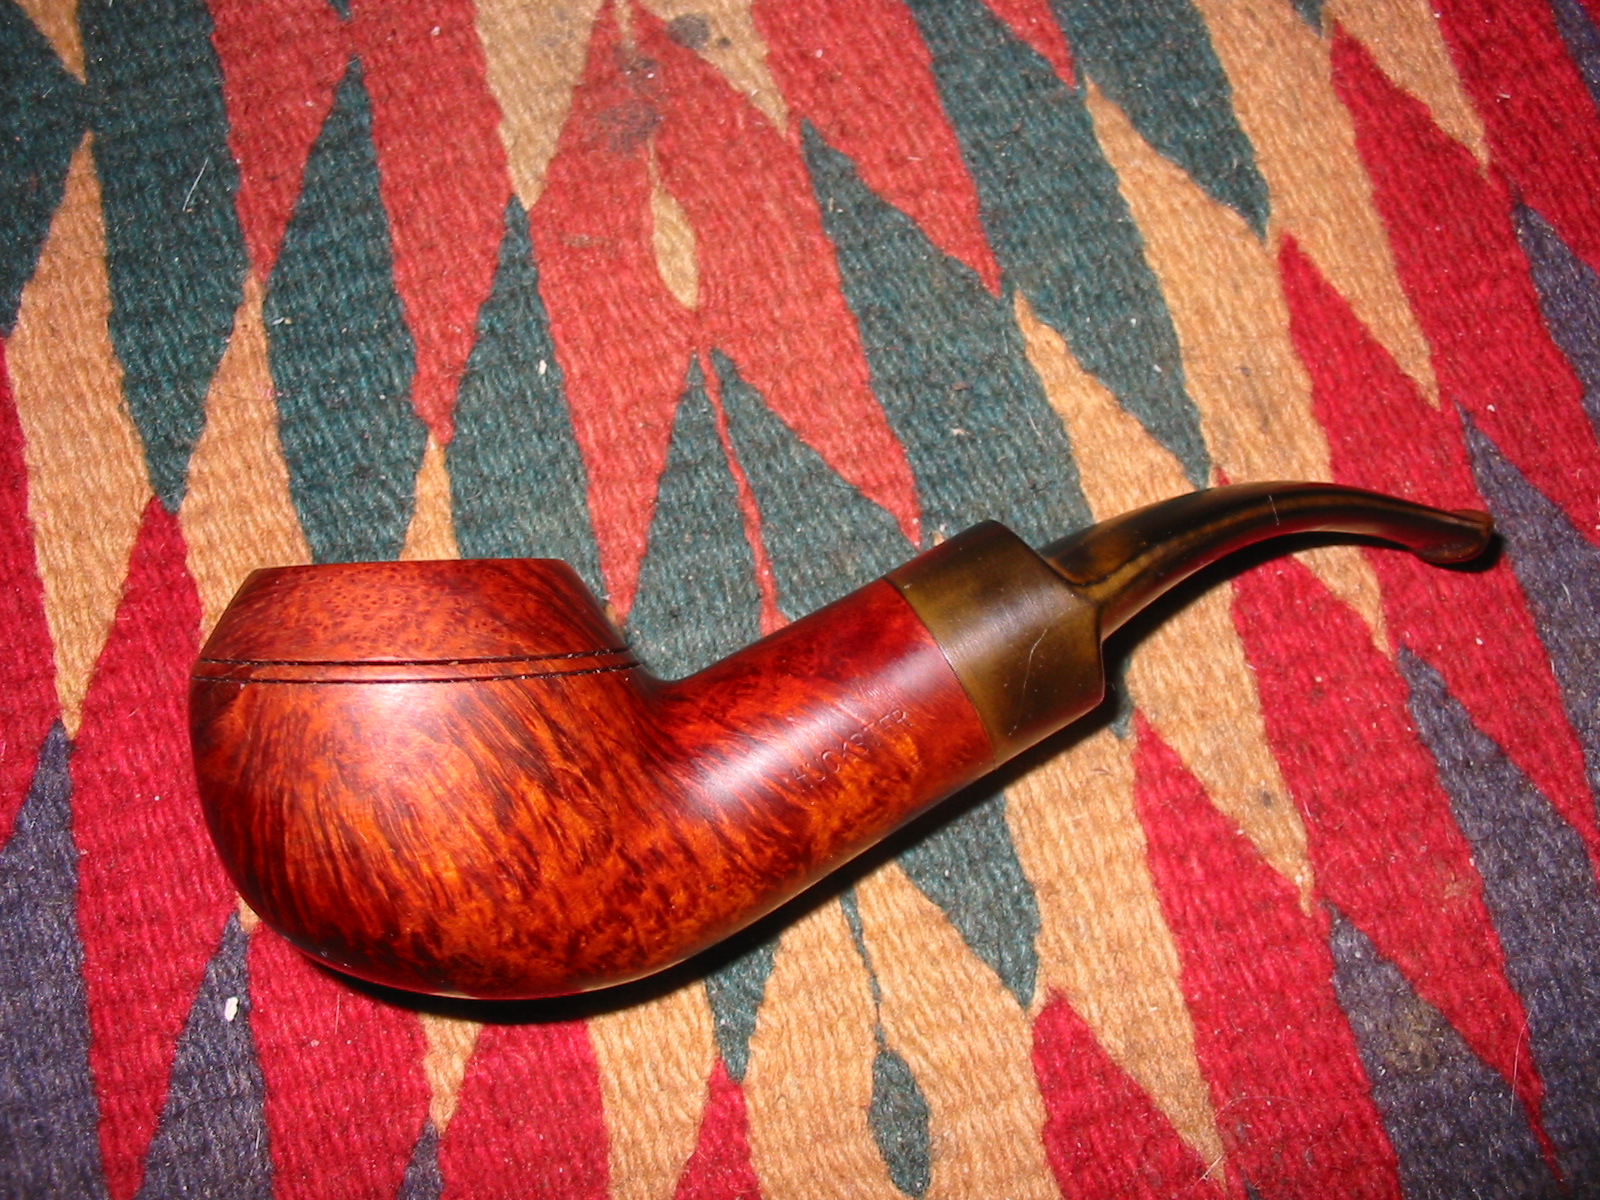
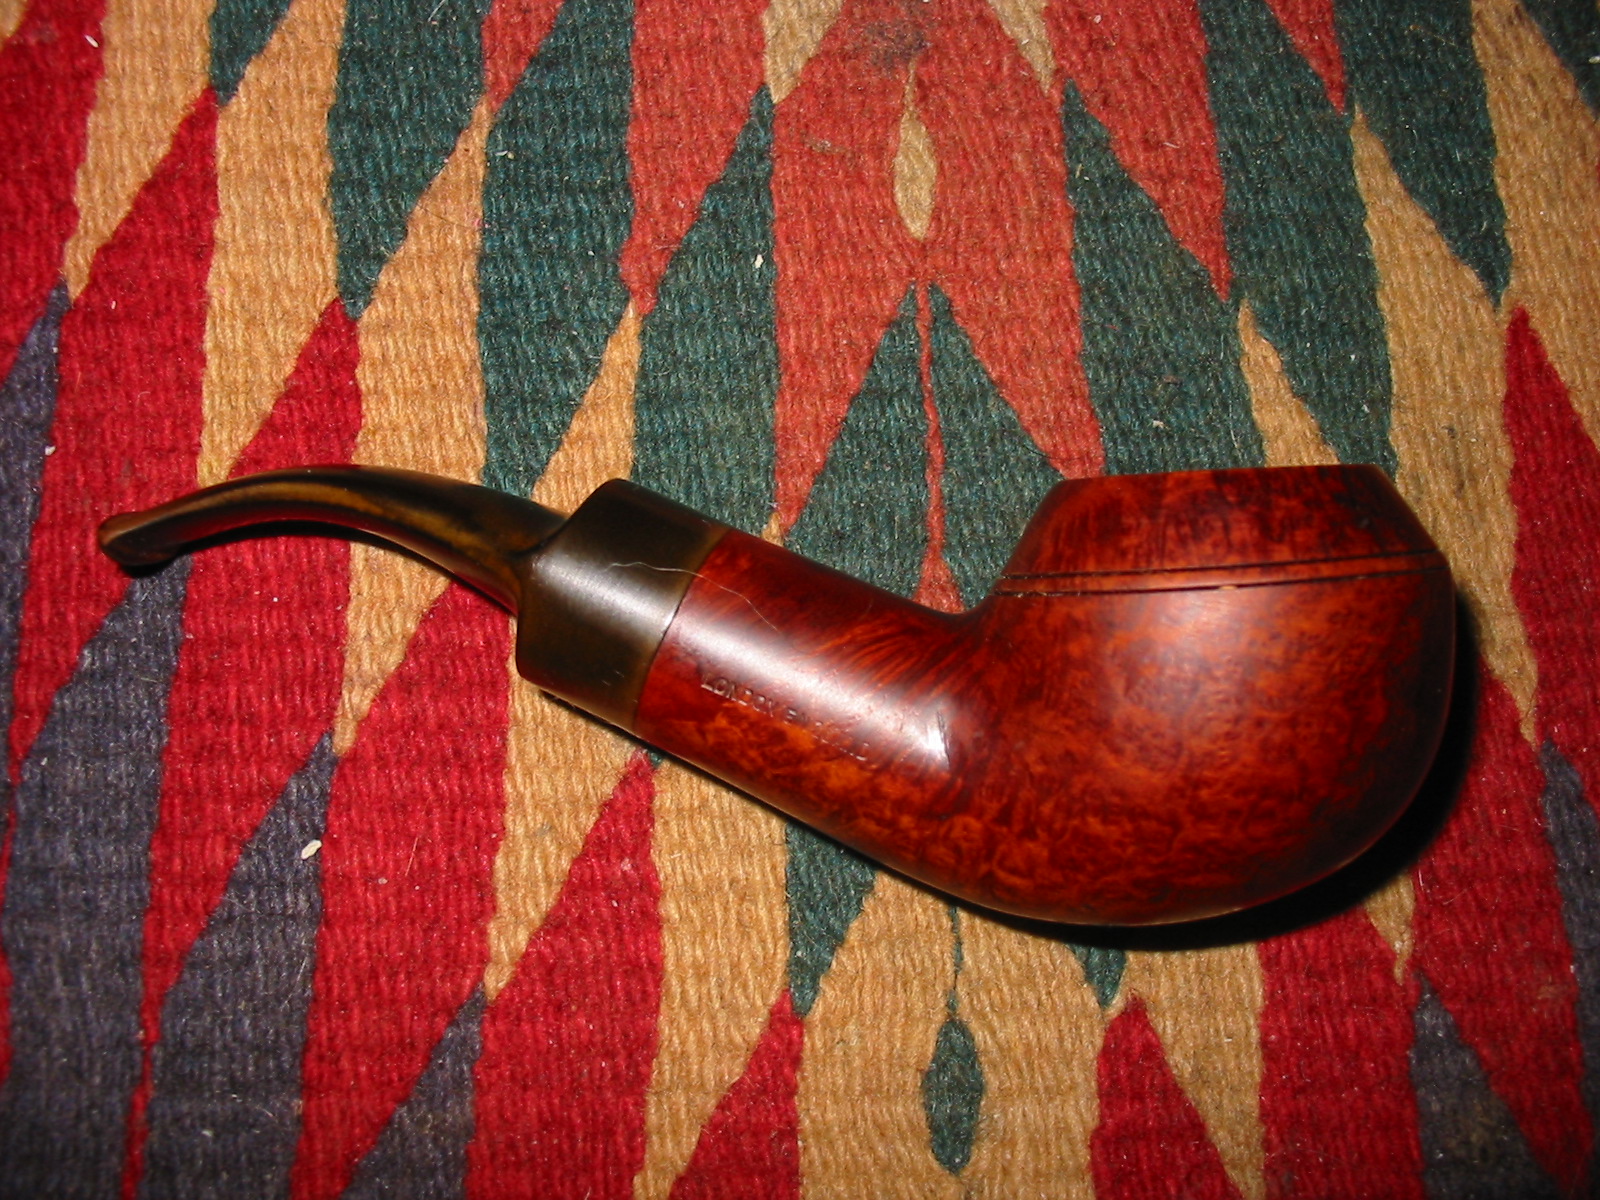
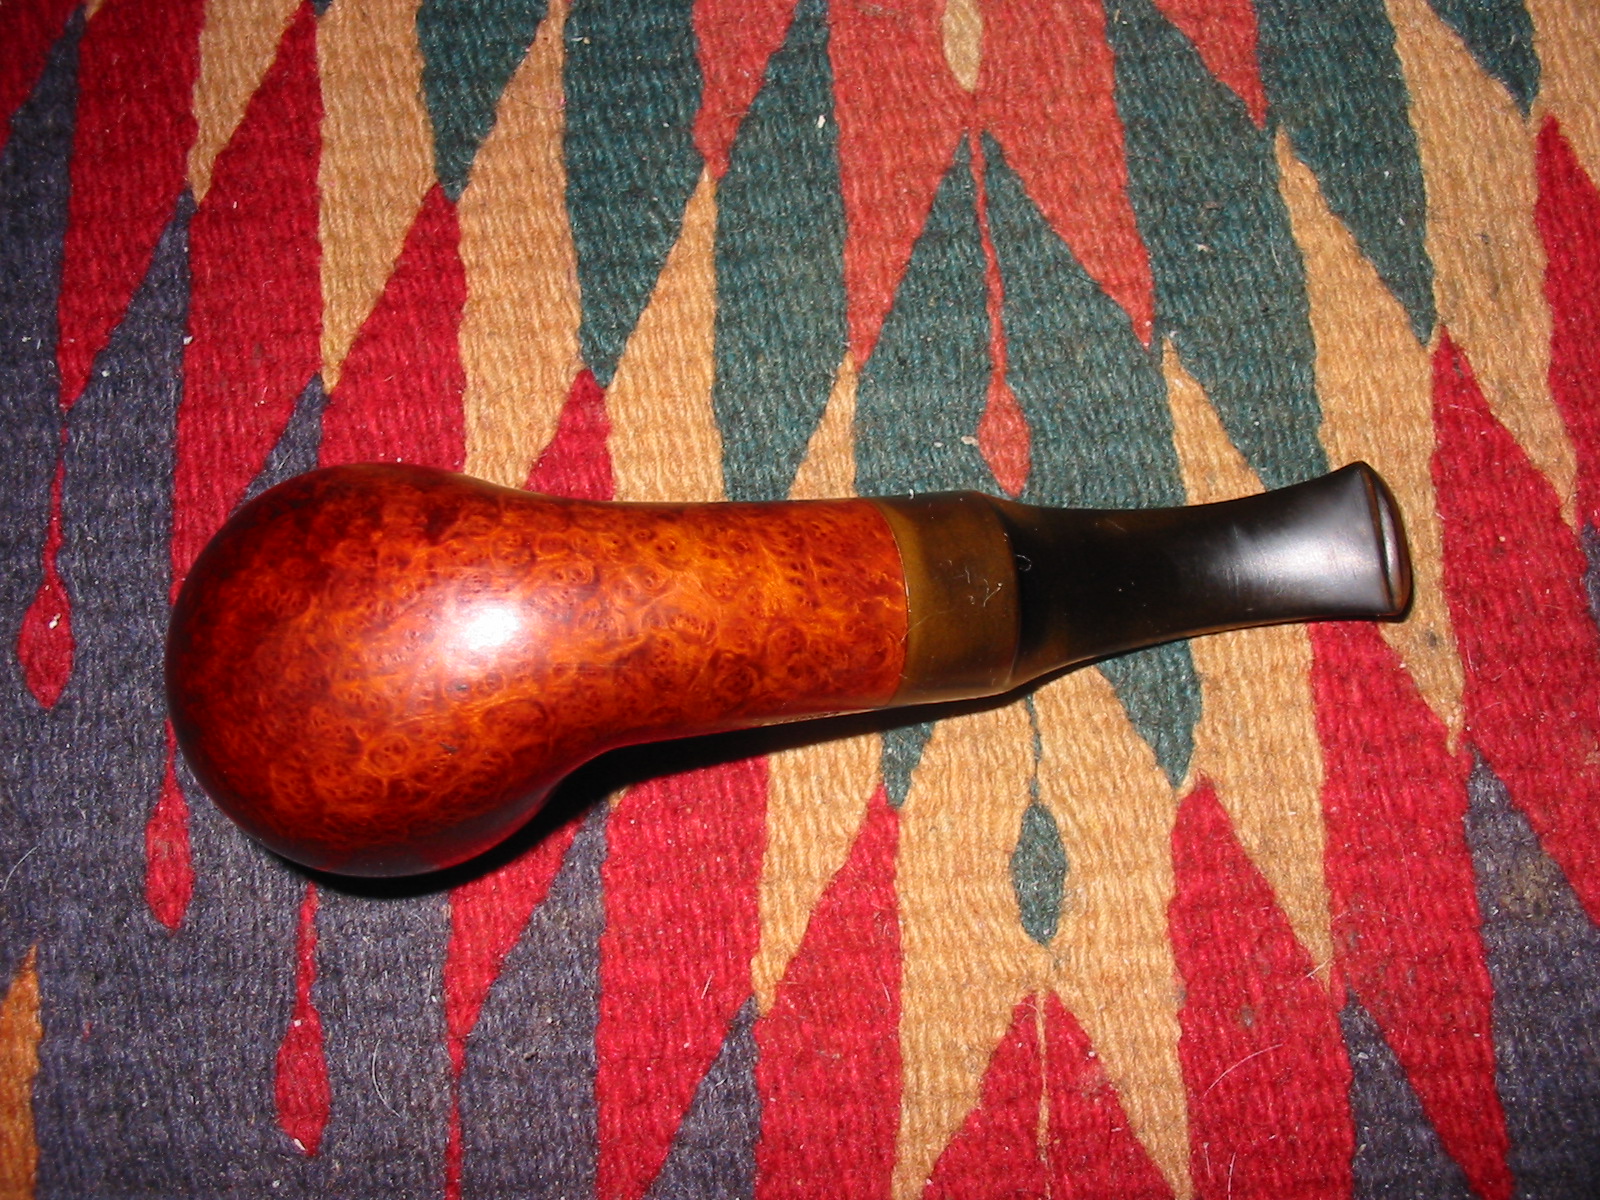
When I hear the word Huckster I think of an aggressive salesperson or a promoter, a snake oil salesman or someone not to be trusted. The definition from the dictionary is one who uses aggressive, showy, and sometimes devious methods to promote or sell a product. The stamping on this pipe is HUCKSTER on the left side of the shank. On the right side of the shank it is stamped LONDON ENGLAND. The pipe is clearly either made by GBD or by someone doing an amazing copy of the GBD 9438 shape. The shape is perfect in comparison with my GBDs of this shape number. I have been researching on the internet to see if I can find out who the pipe was made by/for and develop some background on it but so far I have found nothing.

Hukster5

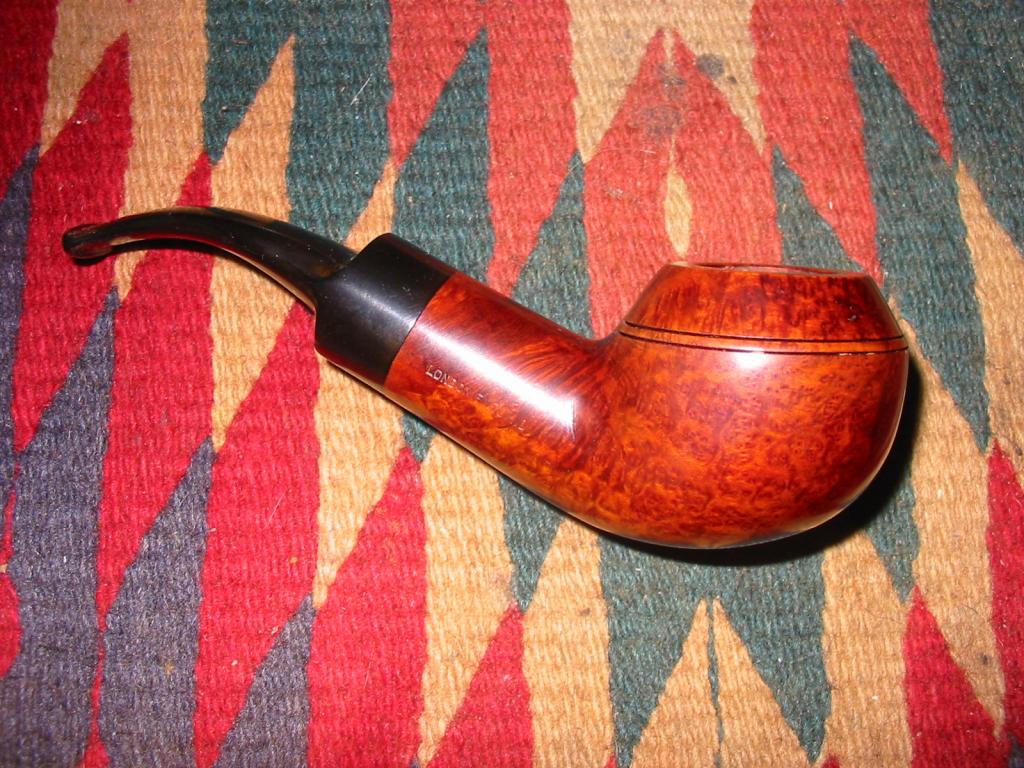
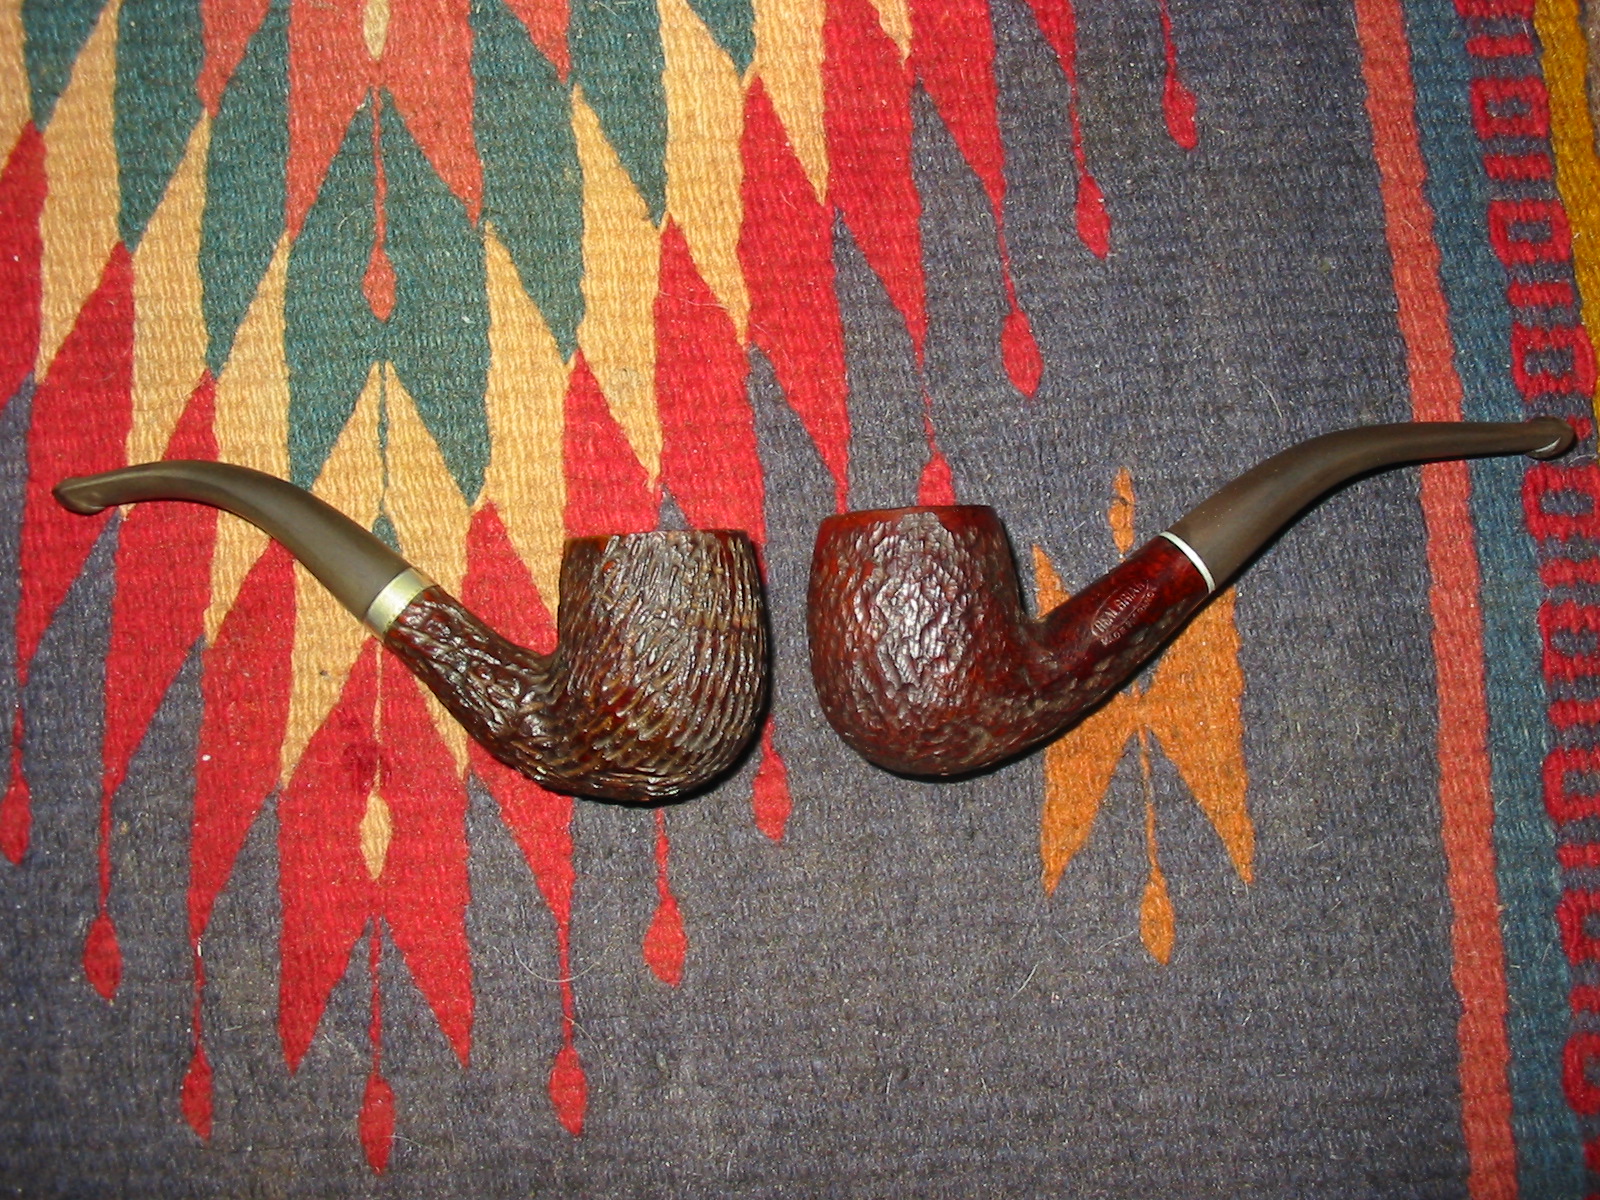
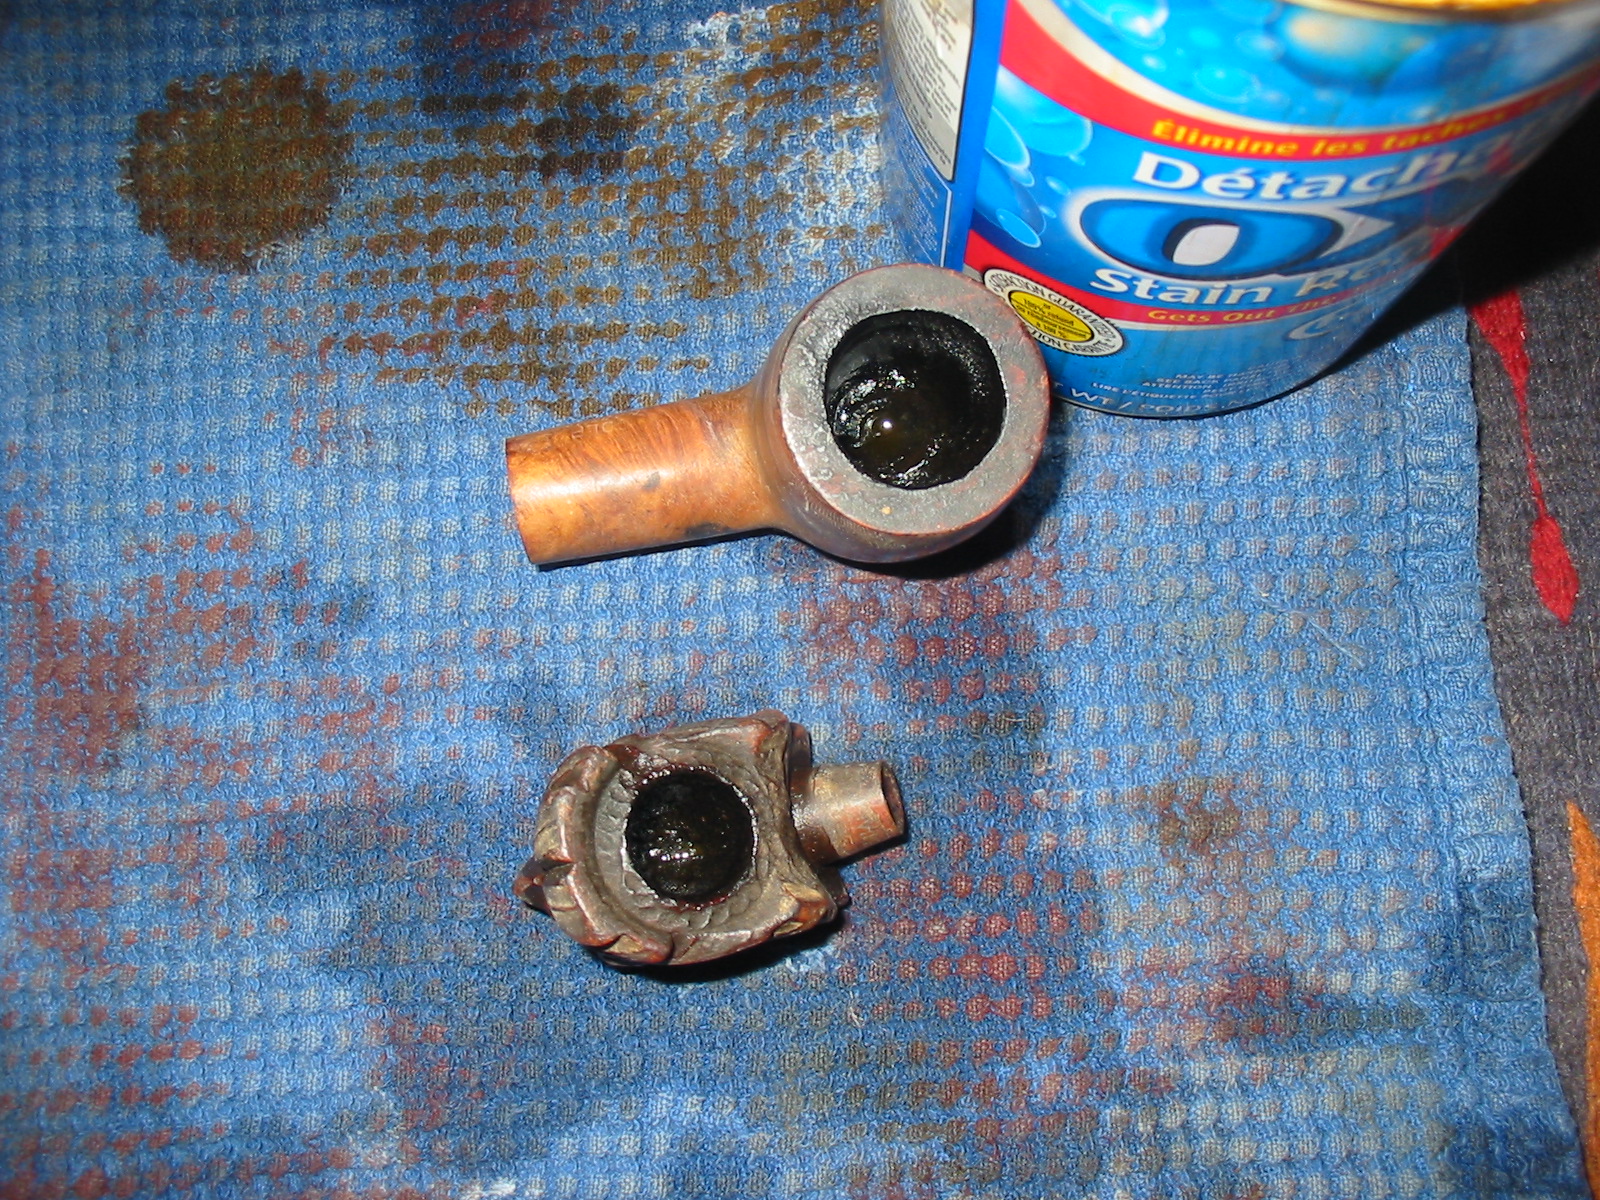
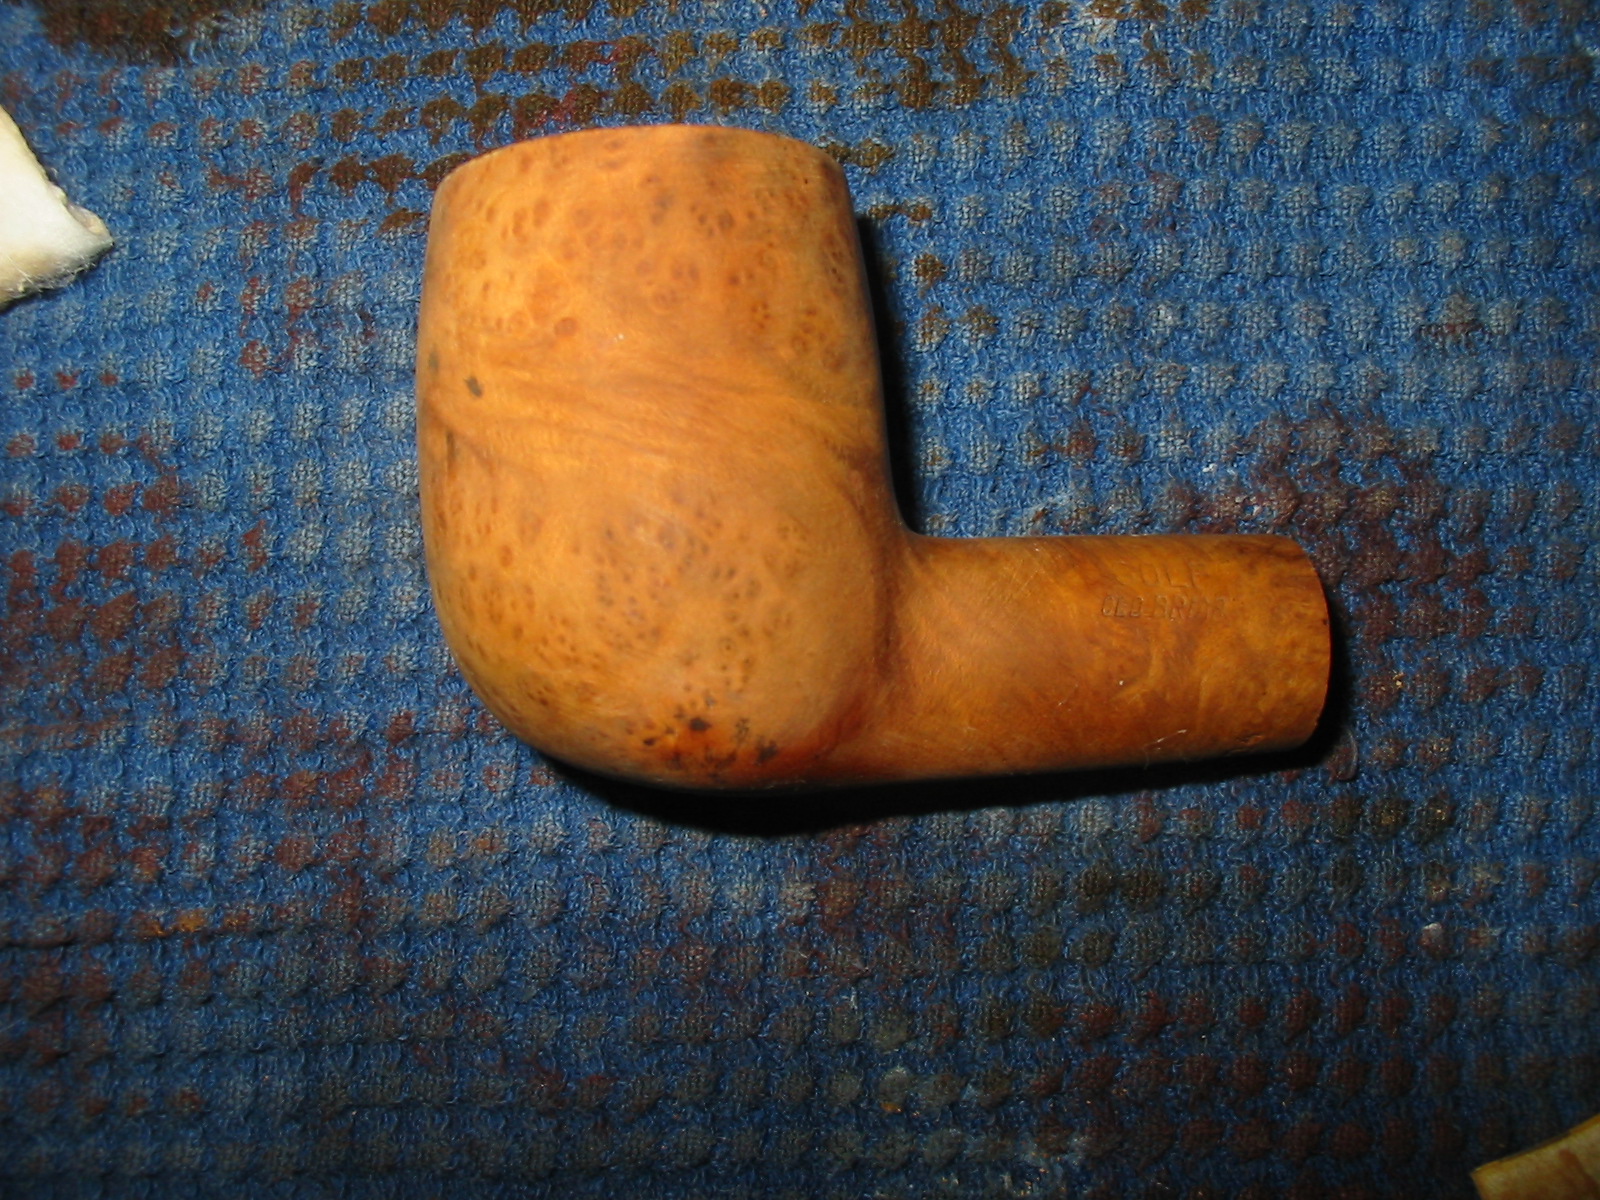
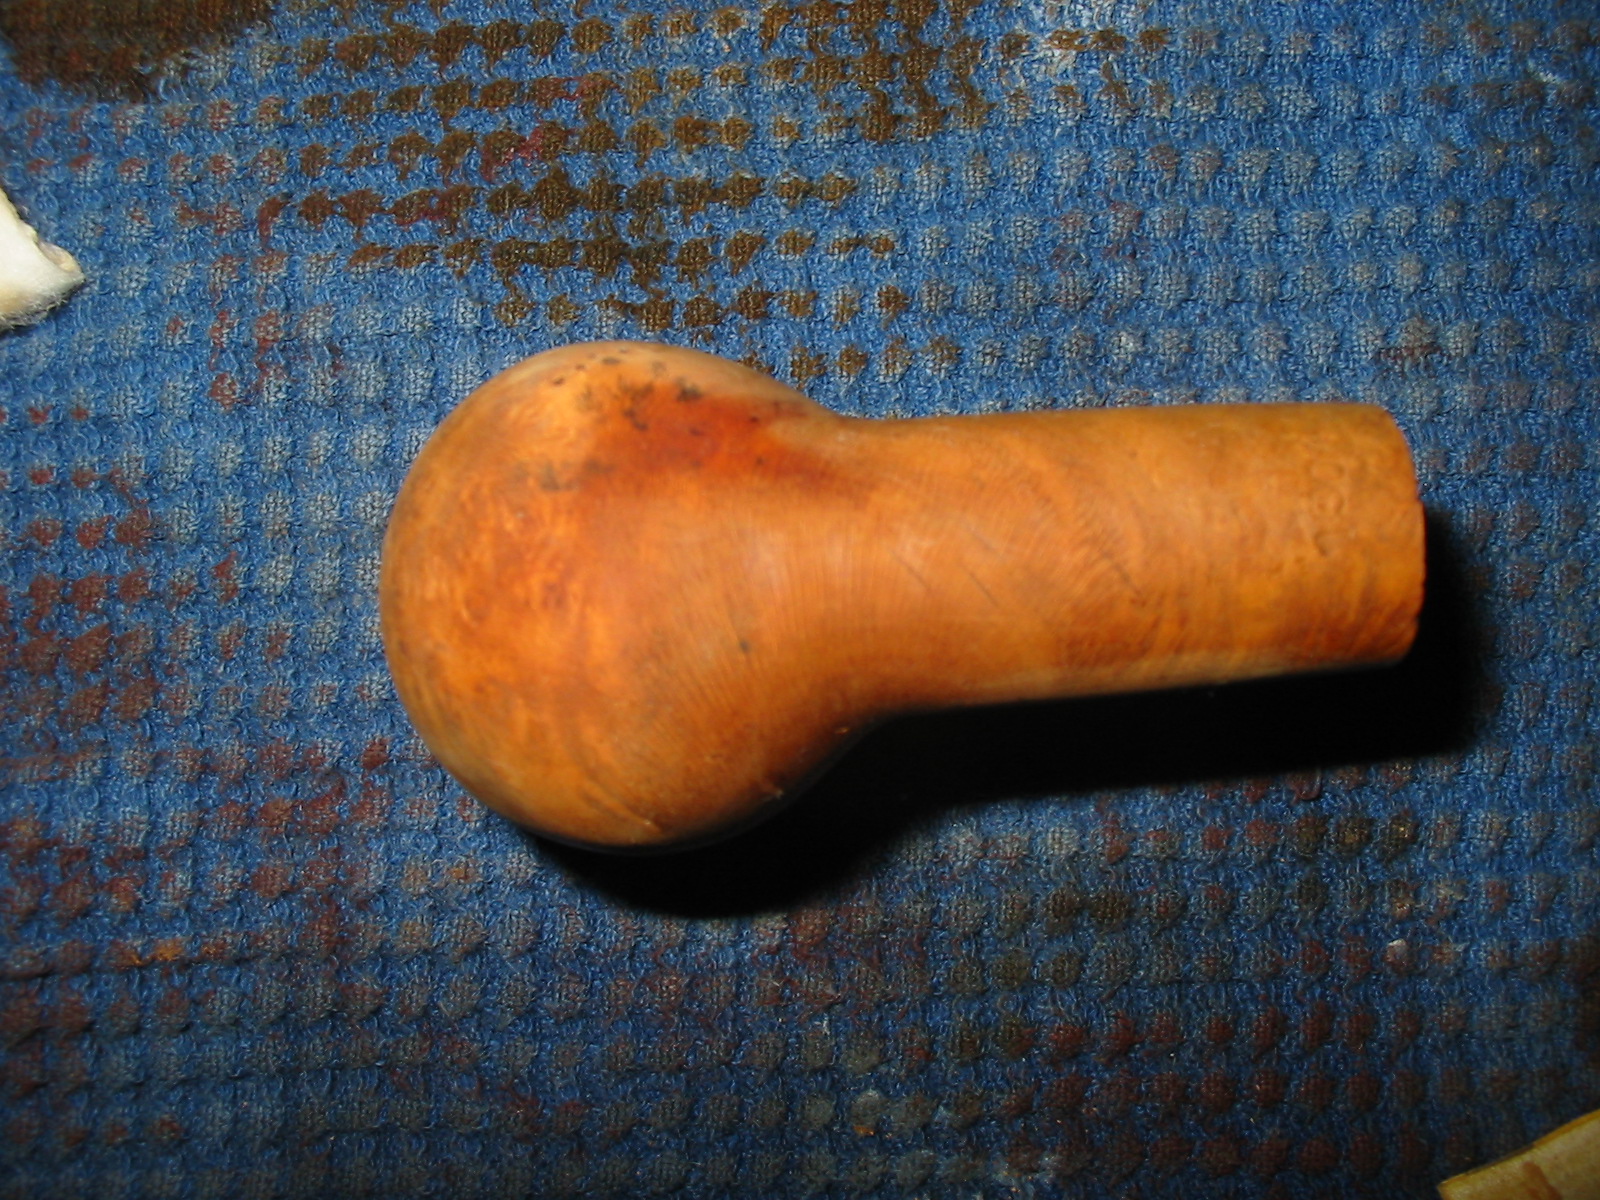
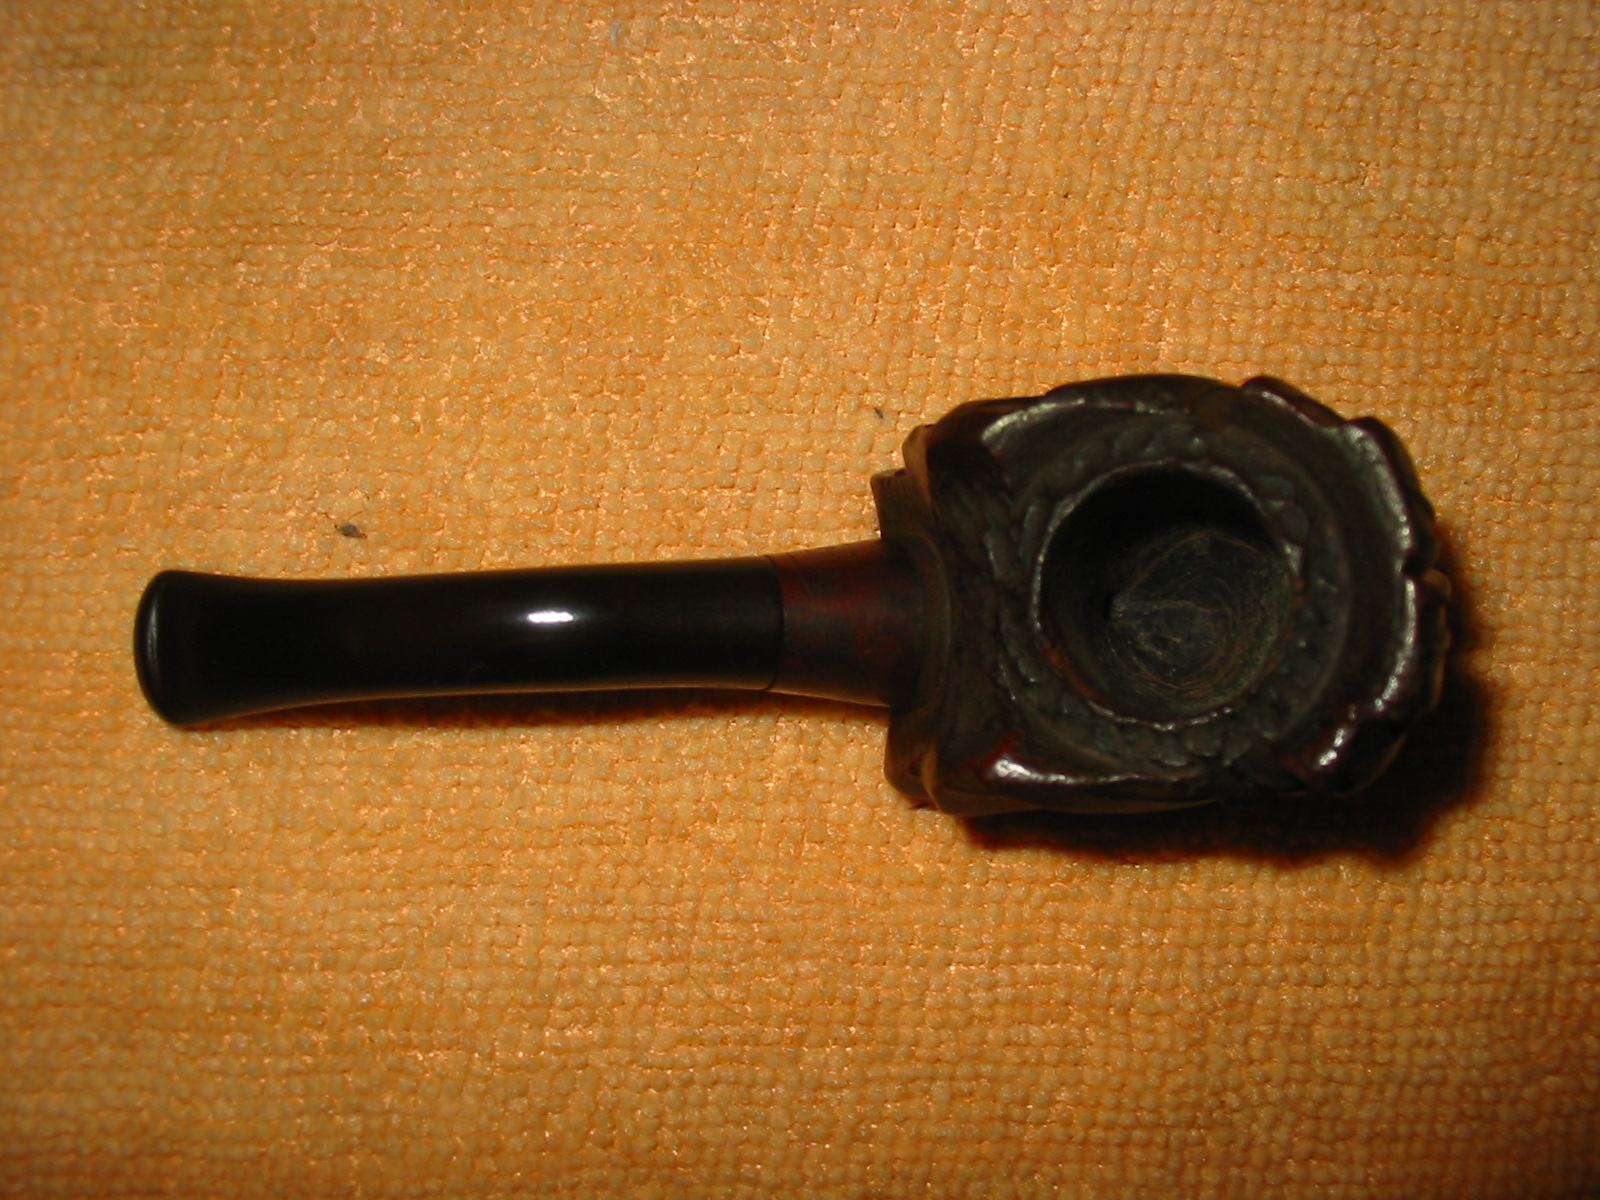
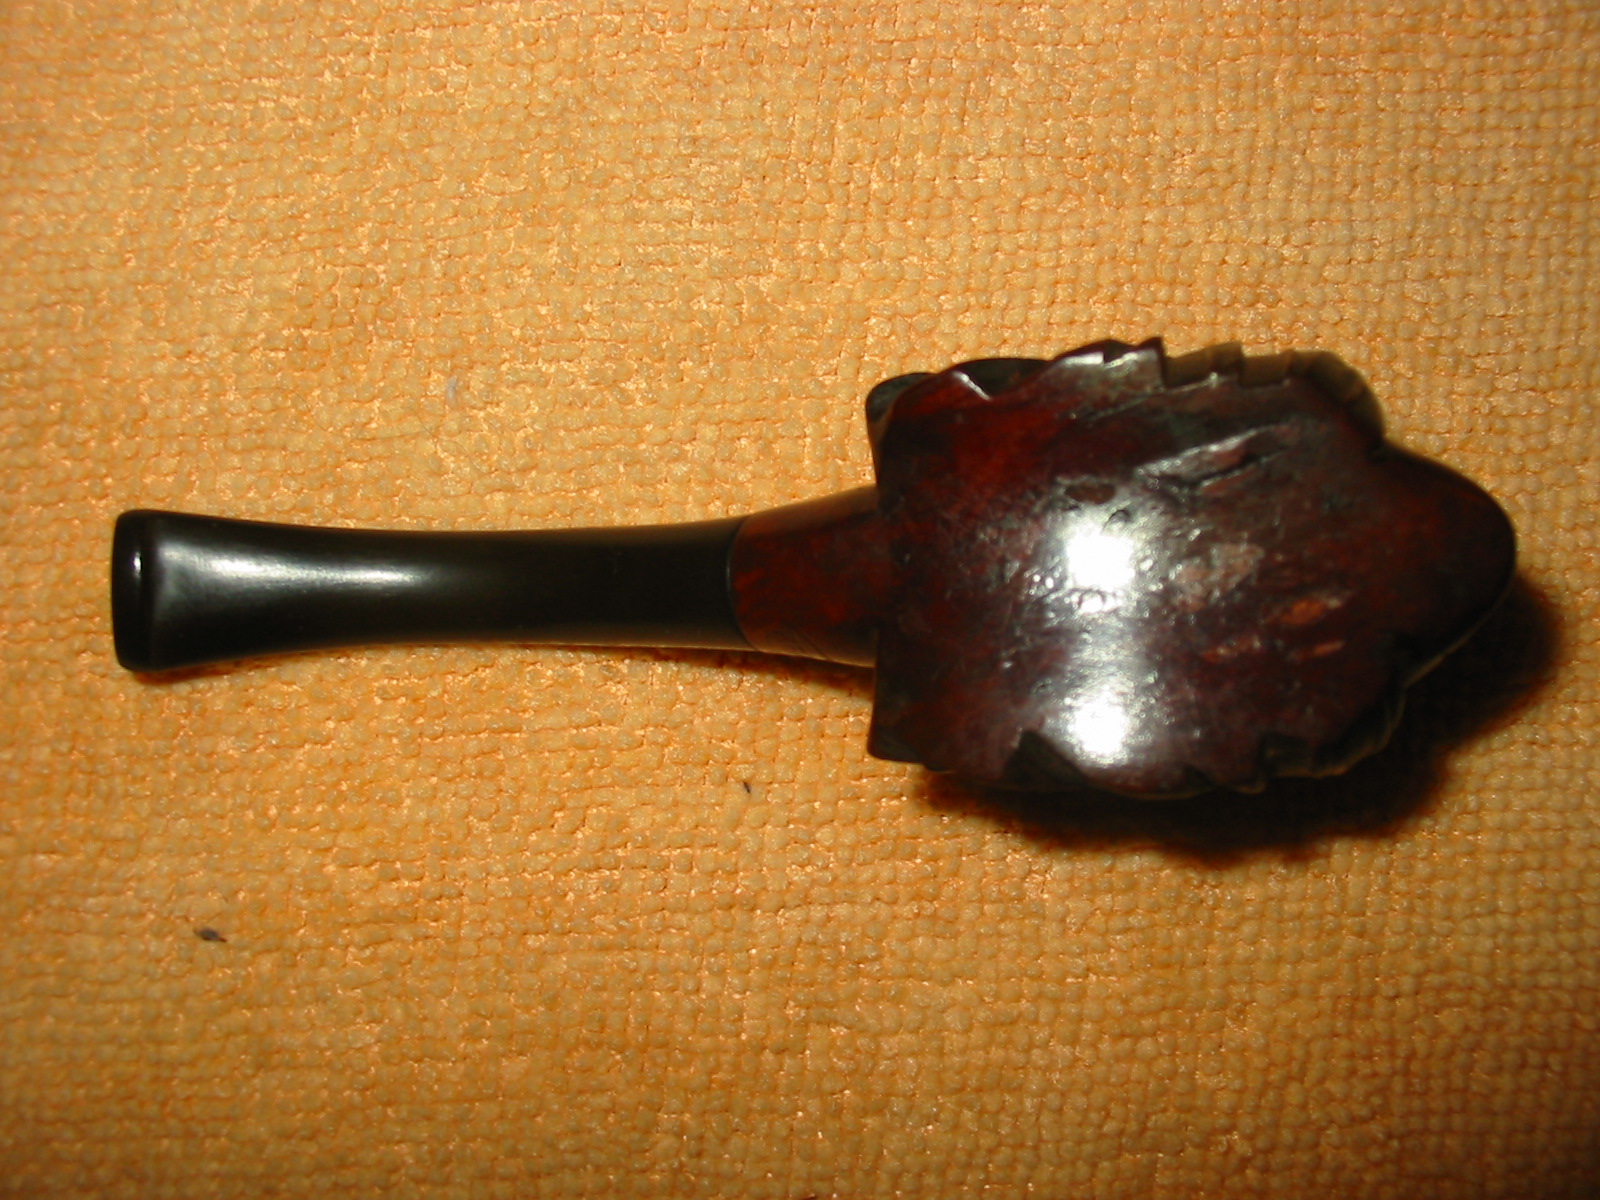
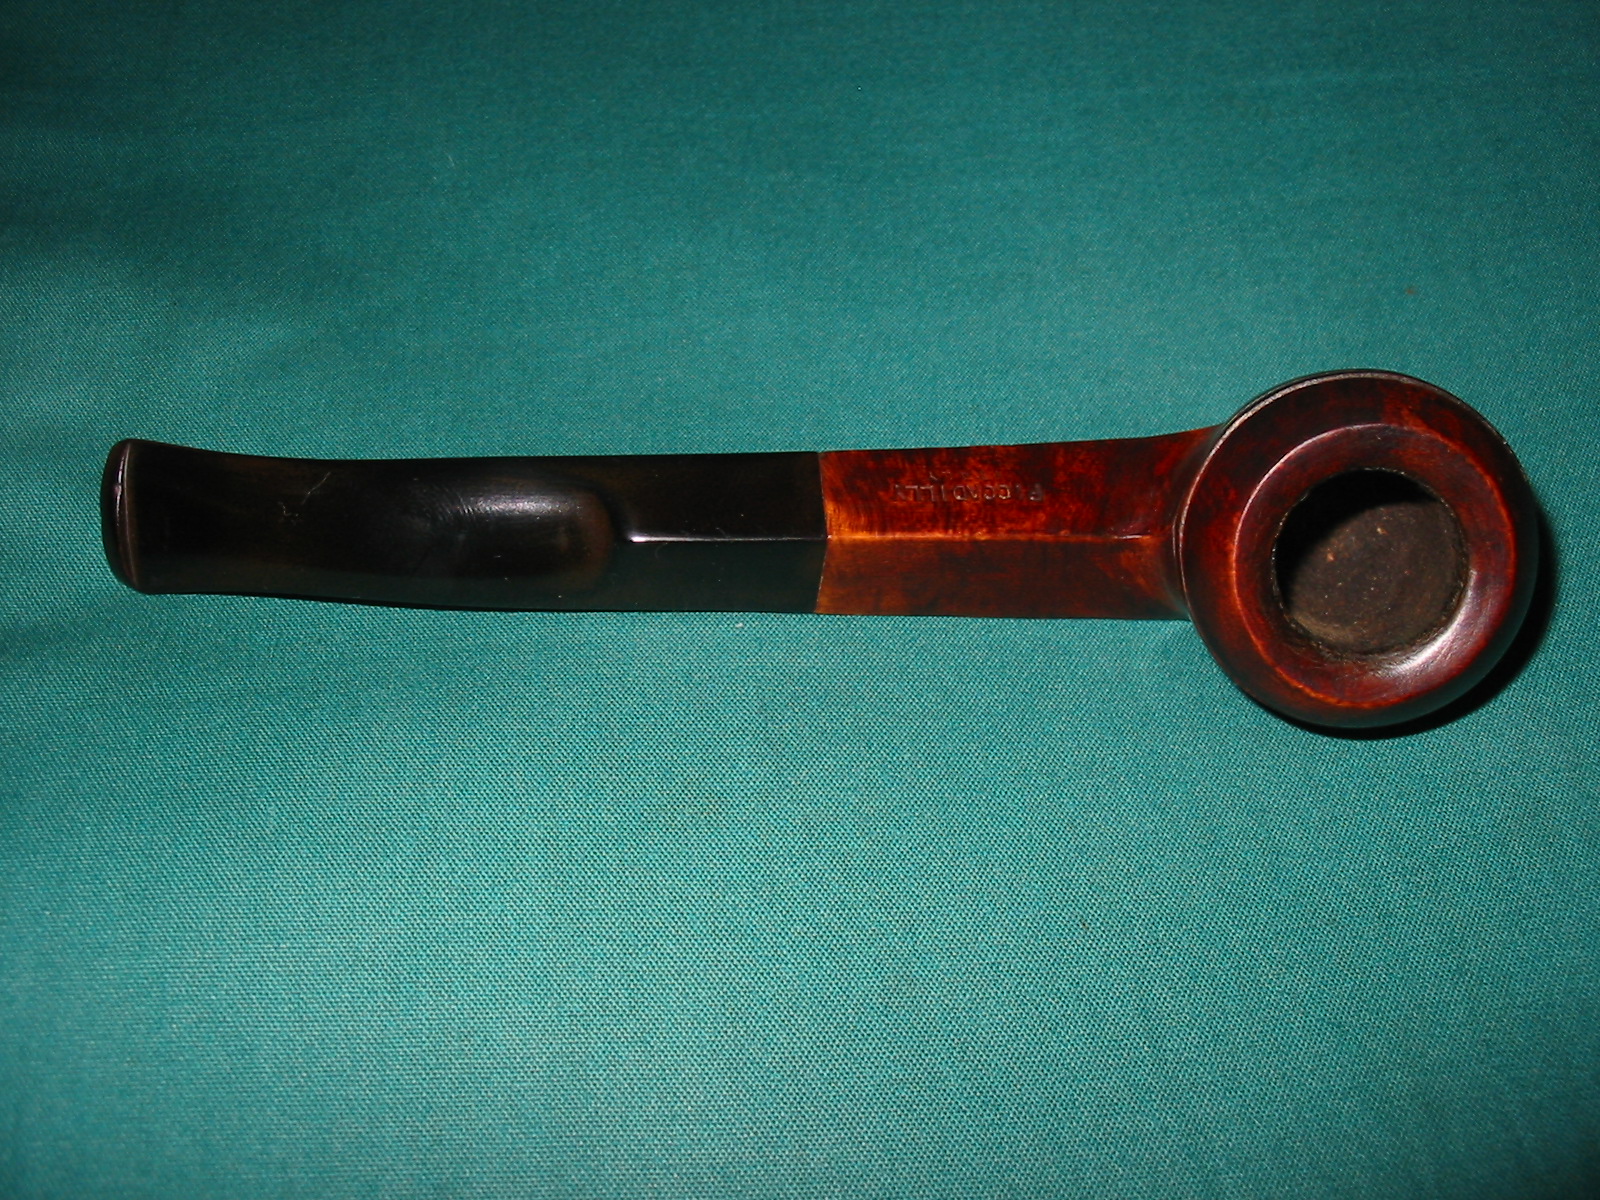
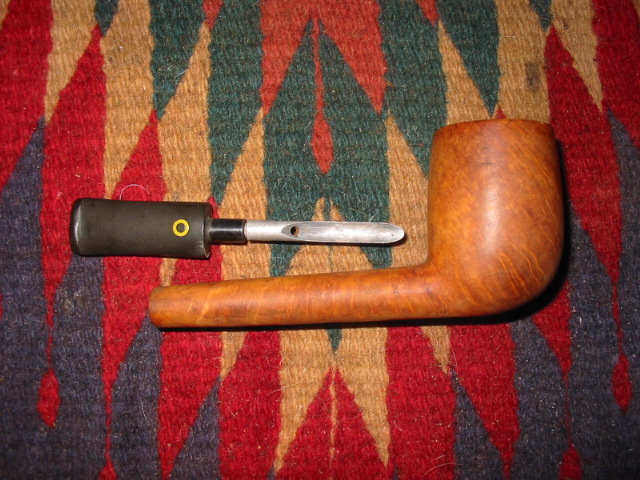
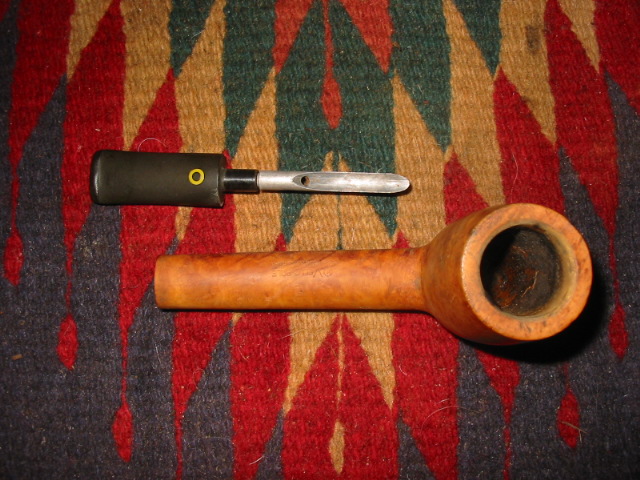
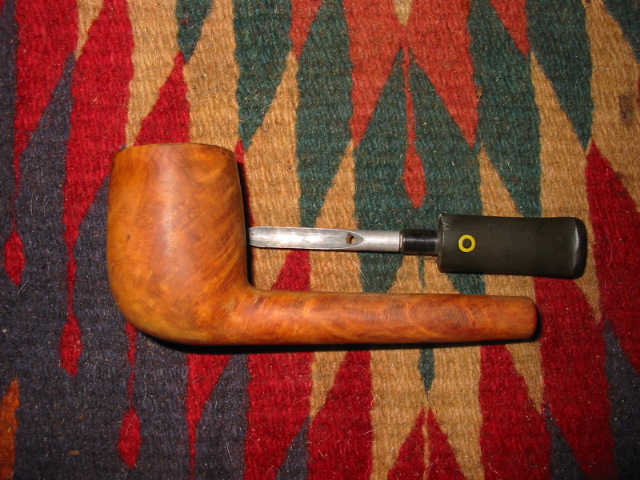
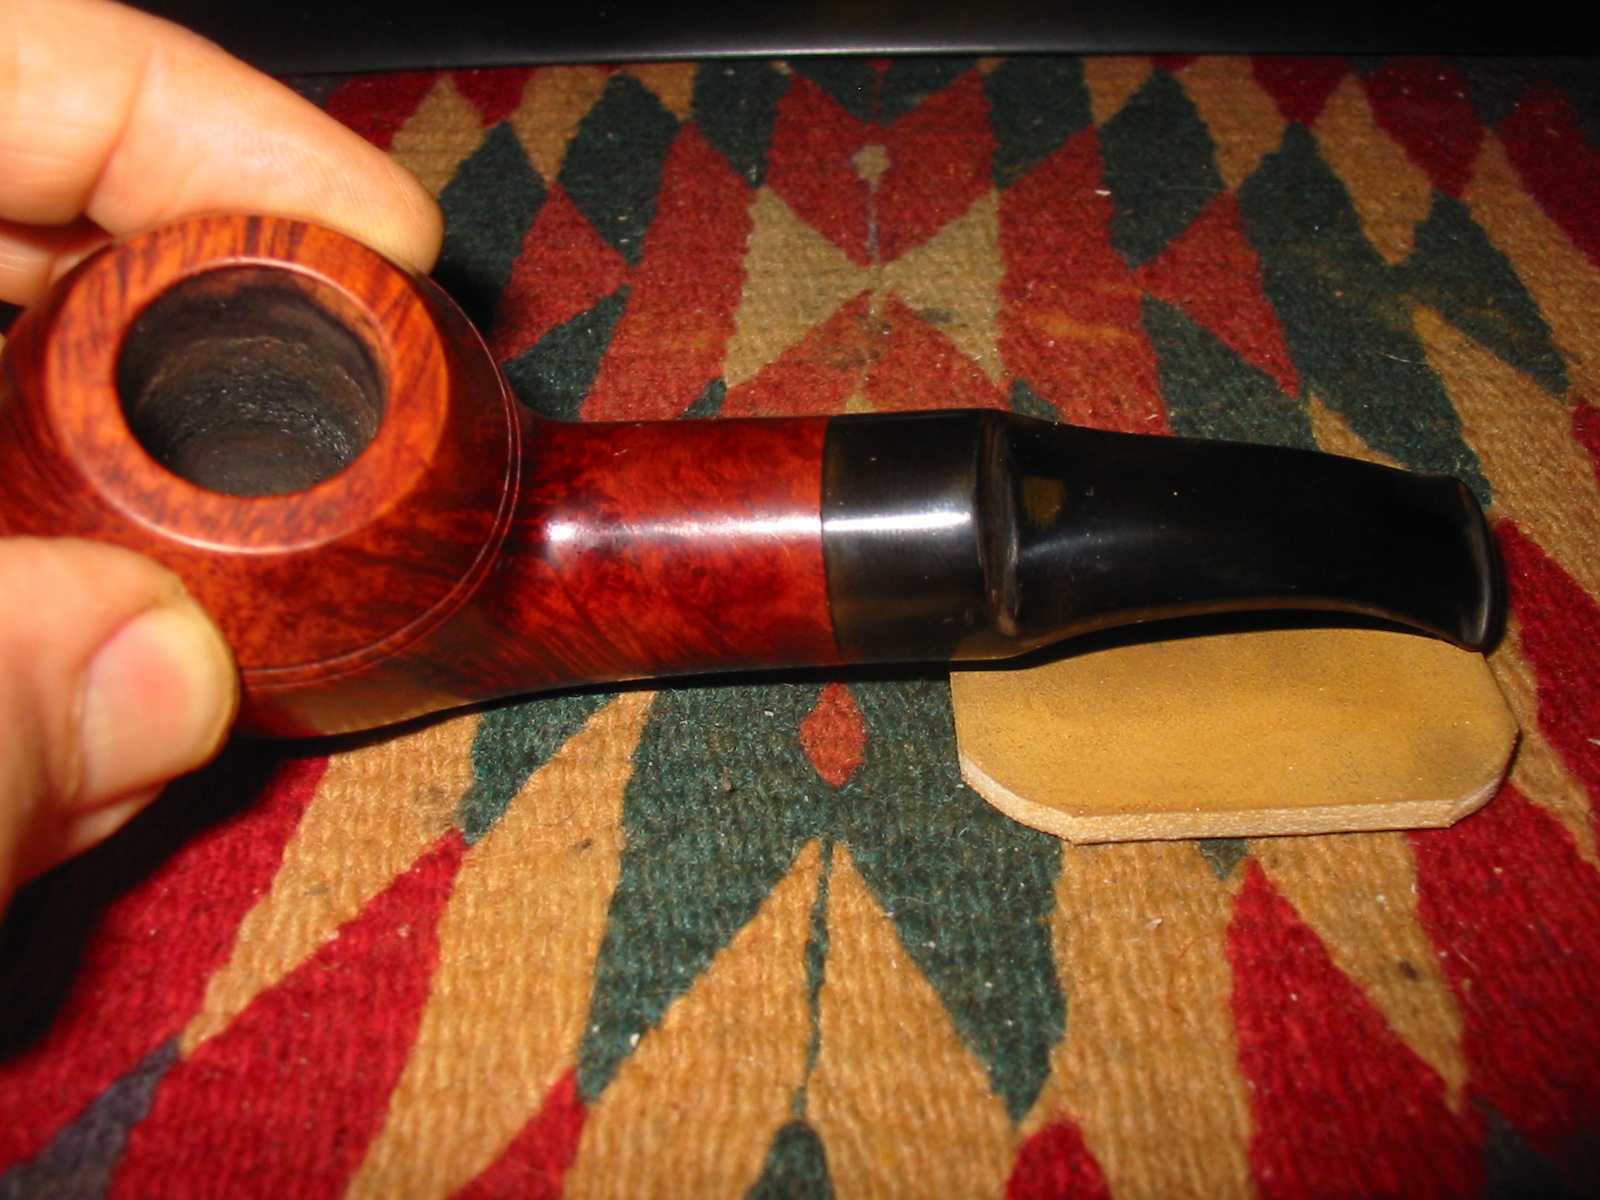
The five pictures below were included in the EBay sale by the seller of the pipe. While they are out of focus they gave me a clear enough picture to place the bid. I was one of a few bidders on this one so I picked it up for a very good price in comparison to that of GBD 9438s. When it arrived I was happy to see that the seller’s photos actually were poor in comparison to the pipe that I held in my hand. The grain is extremely nice – the left side and the bottom of the shank and bowl have some beautiful birdseye grain. The right side has great flame grain. The front of the bowl has a bald spot with a well hidden fill in the grain (In the photos it is just above the lighter spot on the front of the bowl. There were a few dents that would need to be steamed out of the finish but the stain and finish was impeccable. The rim was unblemished with no burn marks. There were a few small sand pits in the bowl above the double rings. The bowl had a slight cake in the bottom half but the shank is clean and spotless with some raw briar that has not been stained with smoking. If it weren’t for the slight cake in the bottom of the bowl it would appear to be unsmoked. The stem was badly oxidized and did have one slight tooth dent on the underside near the button. I think that the seller must have cleaned up the pipe before selling as there were also scratches from sanding on the stem – top and bottom sides.

Hukster1

Hukster3

Hukster4

Hukster6

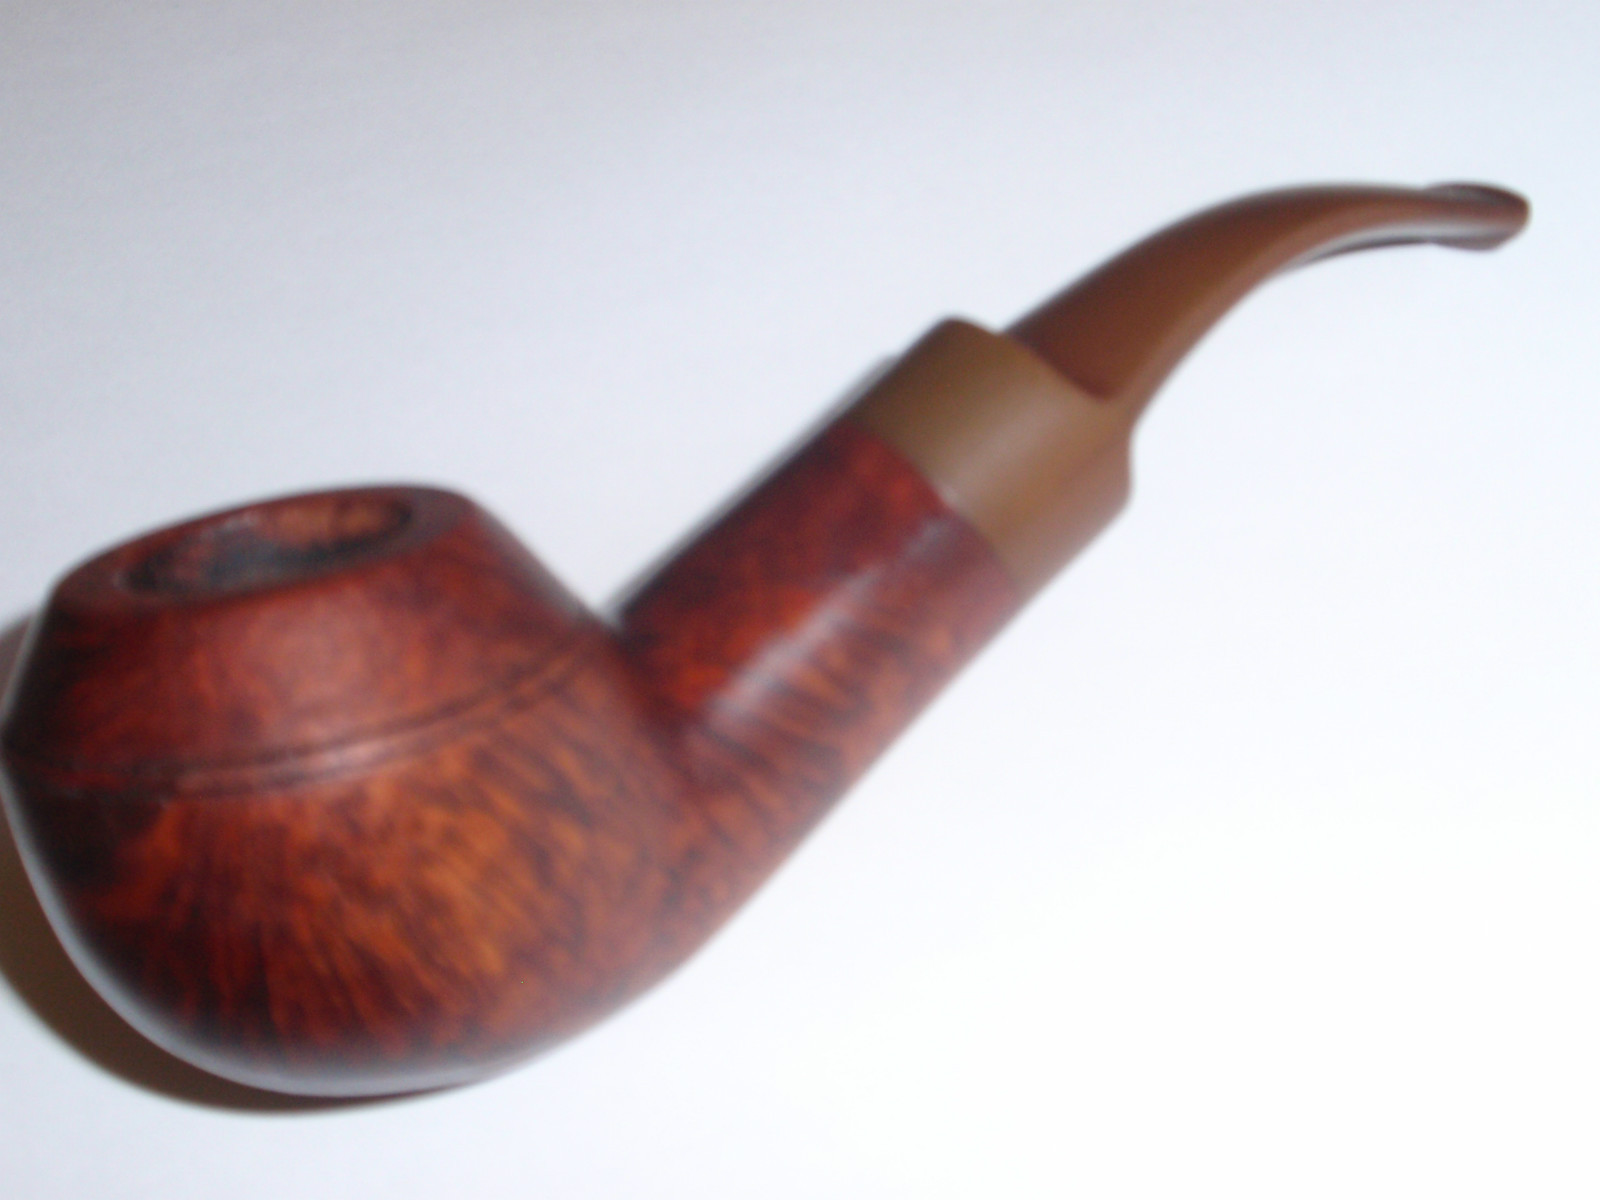
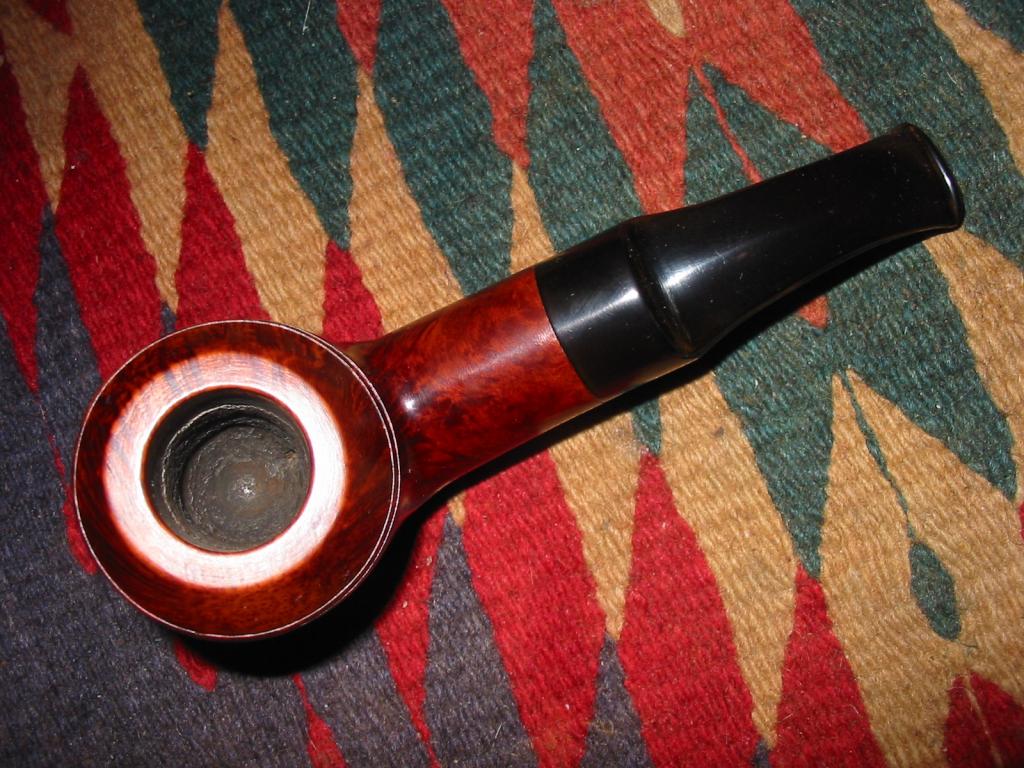
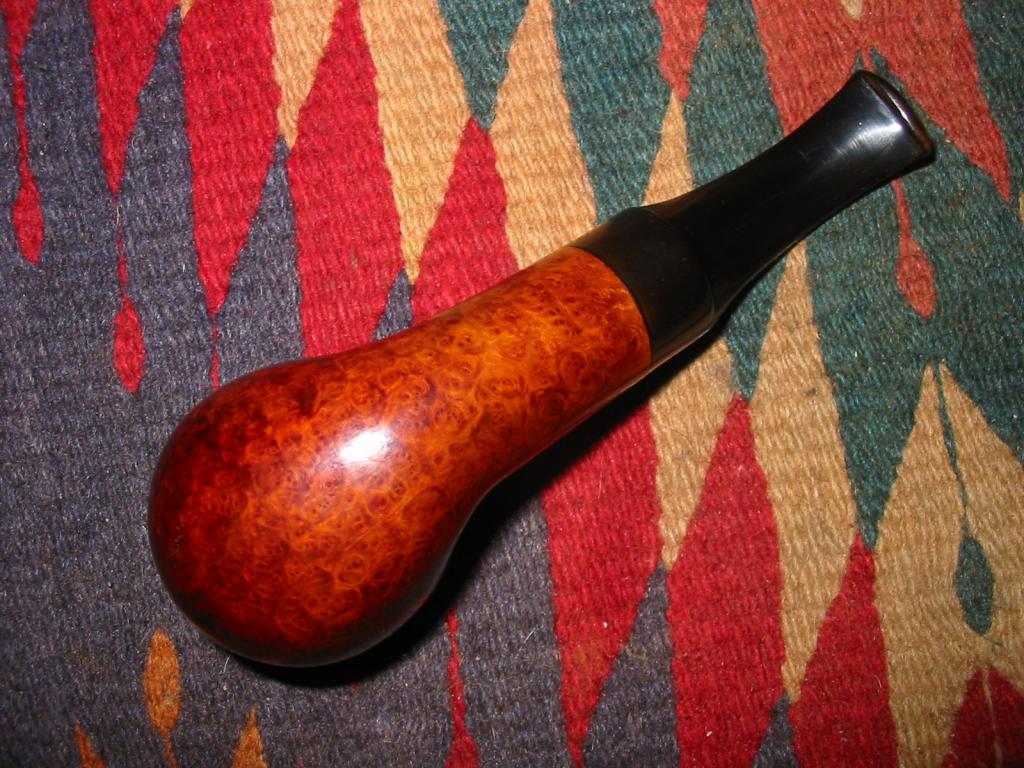
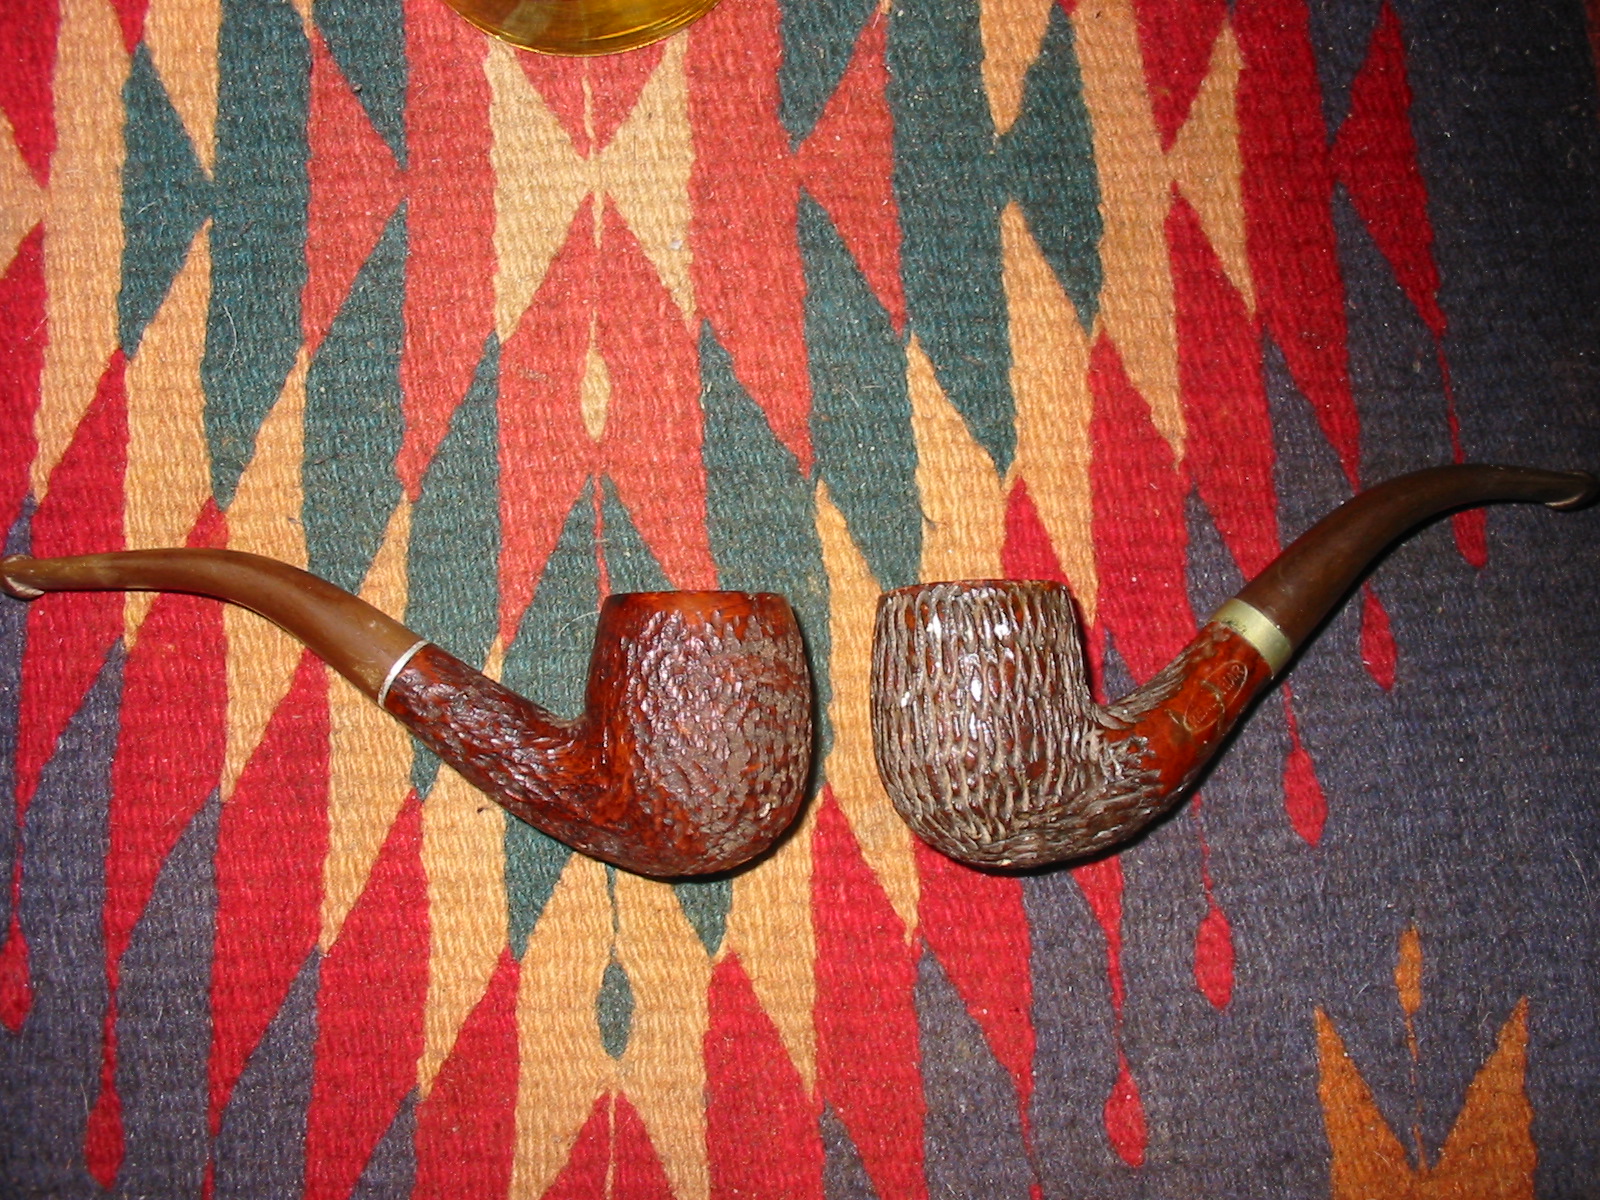
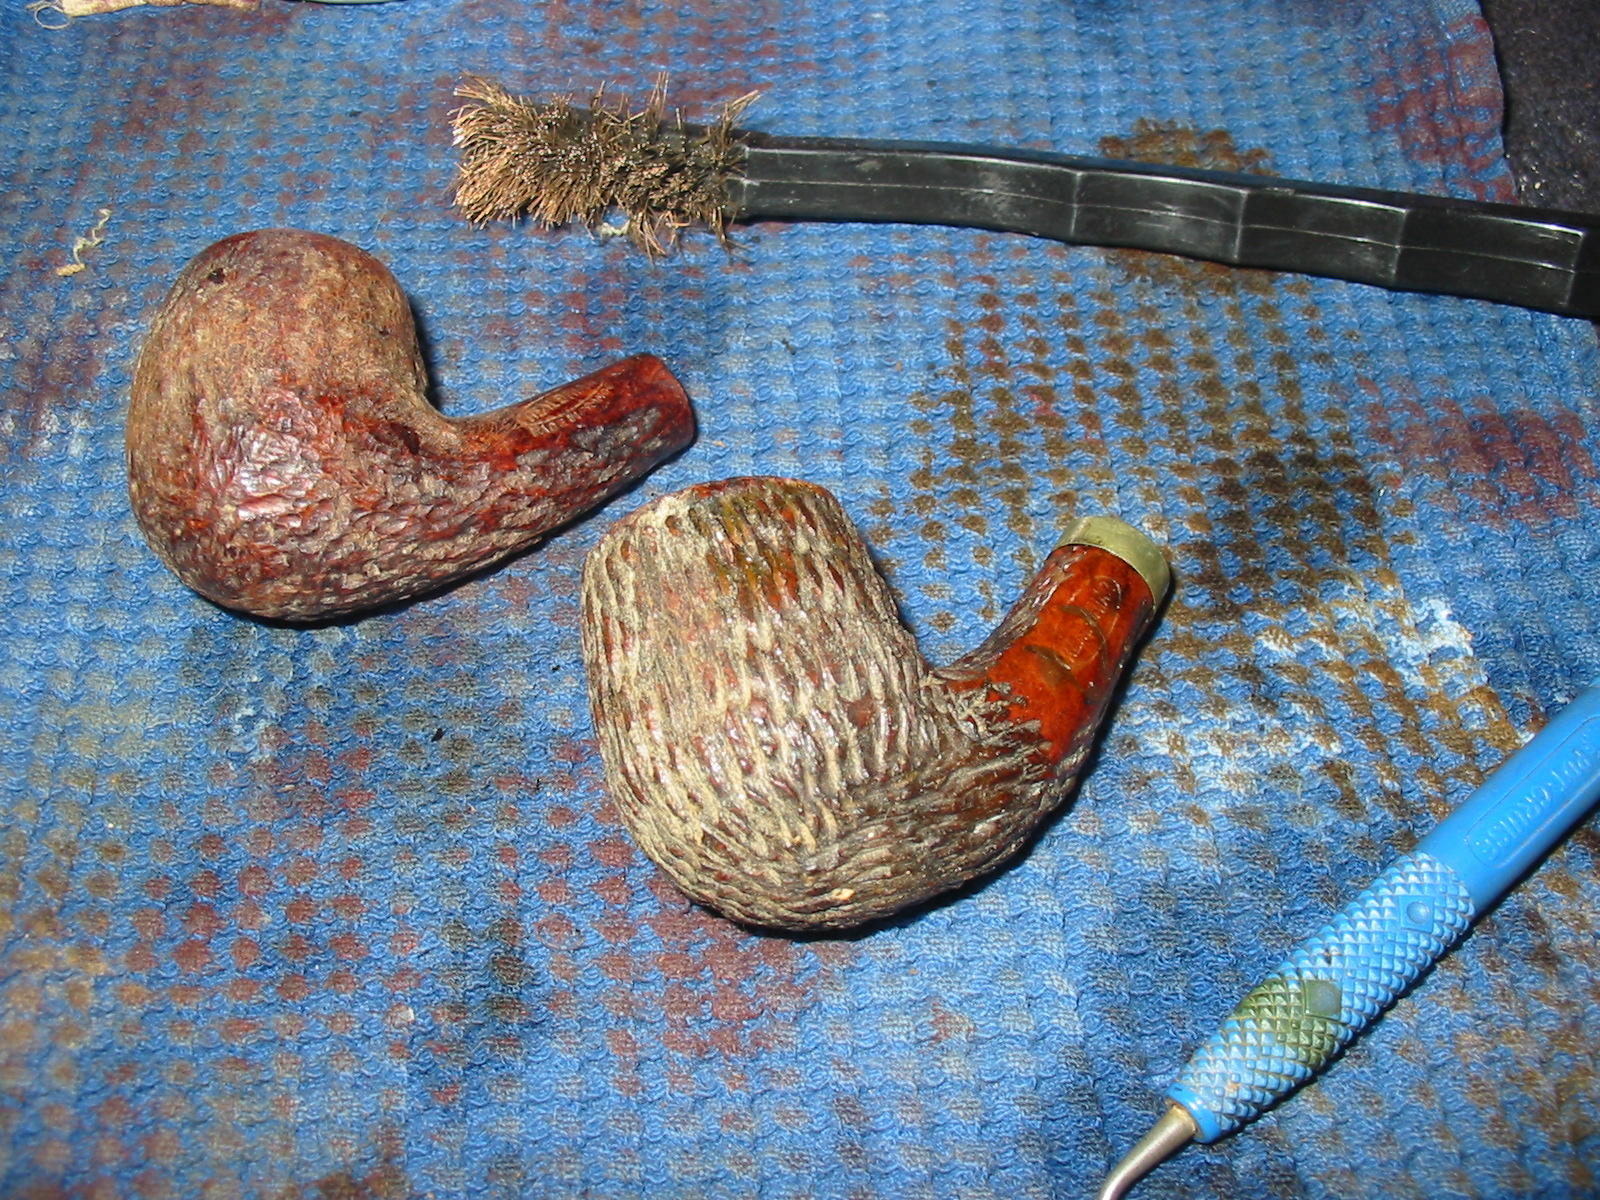
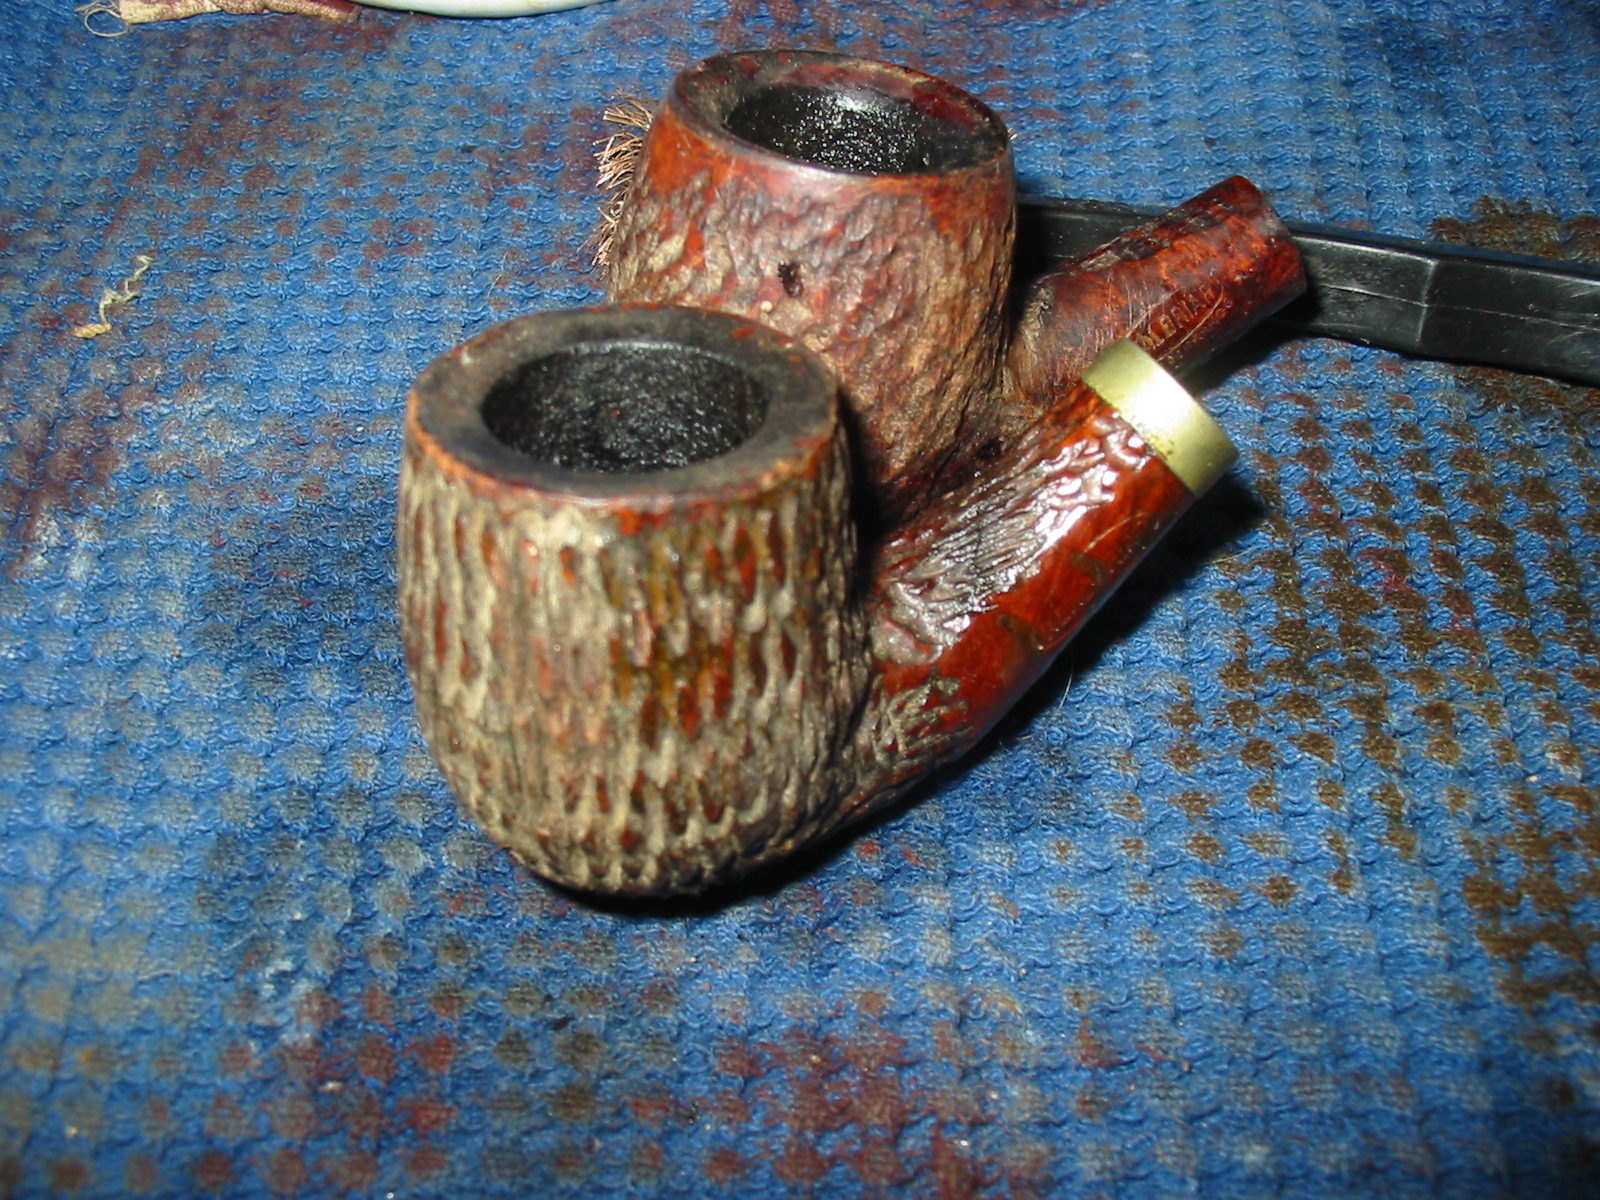
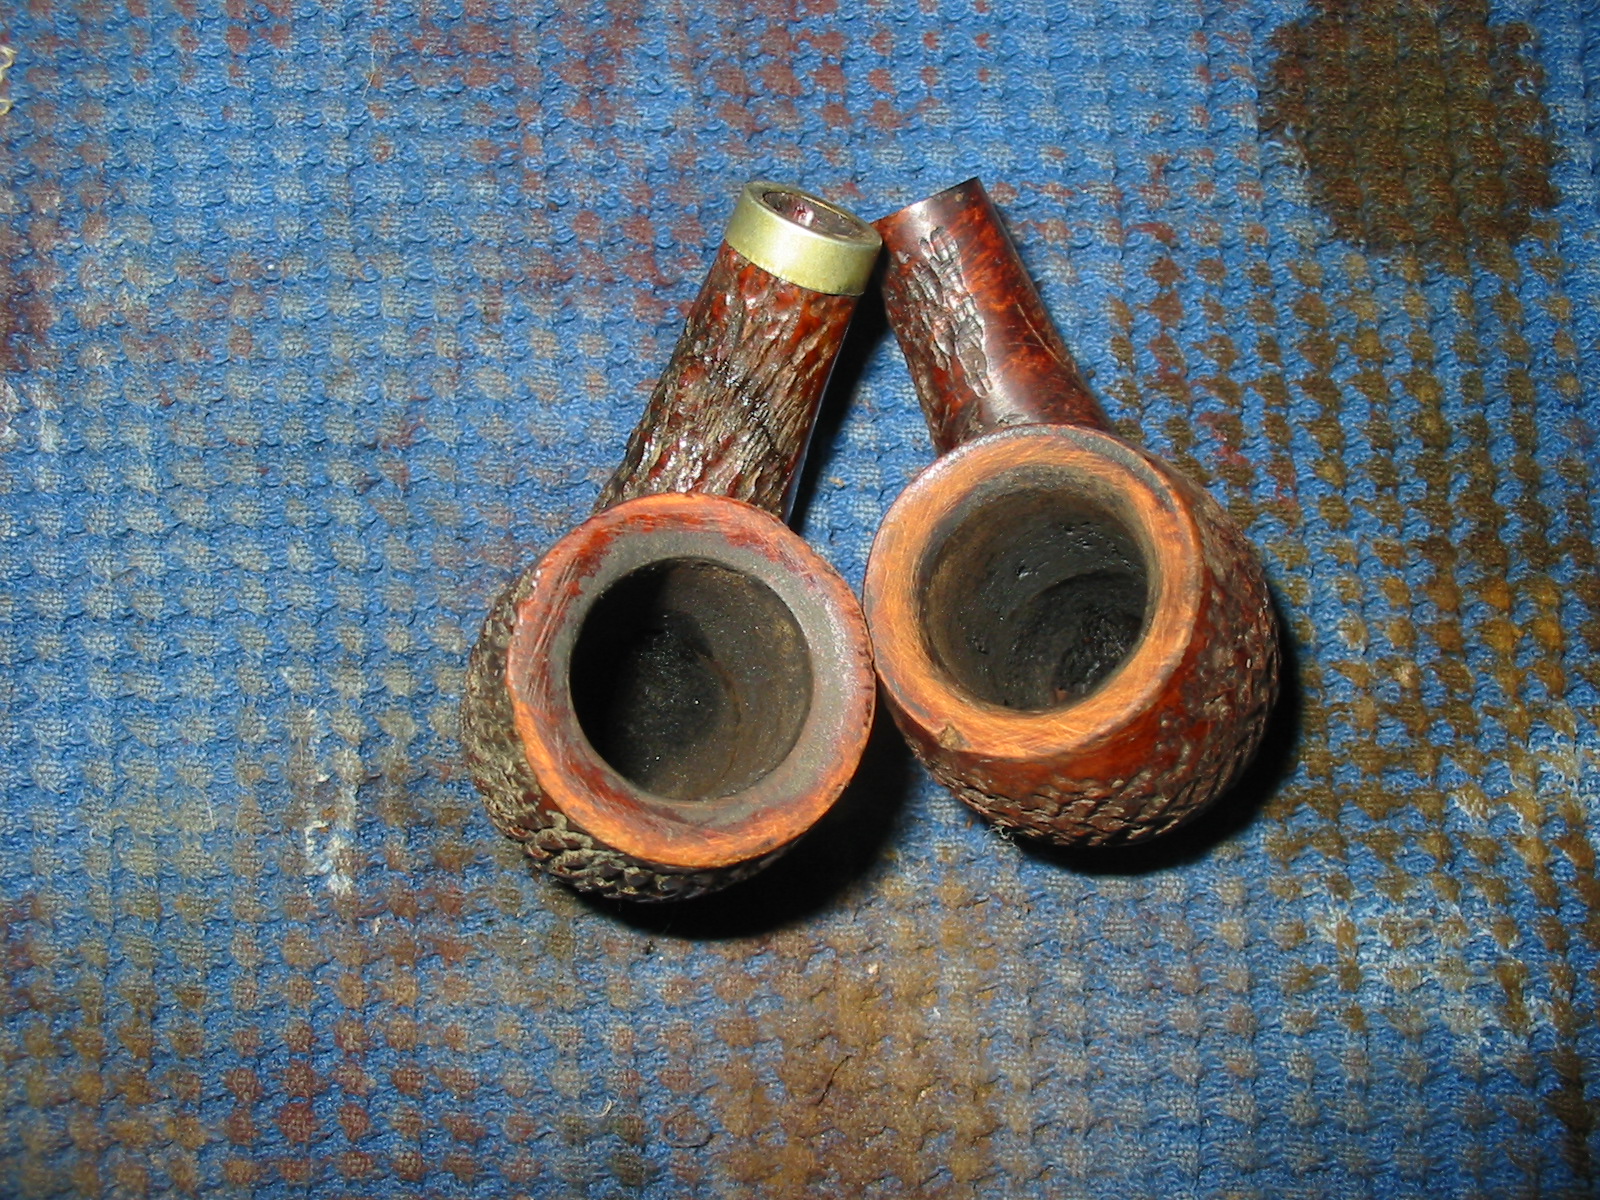
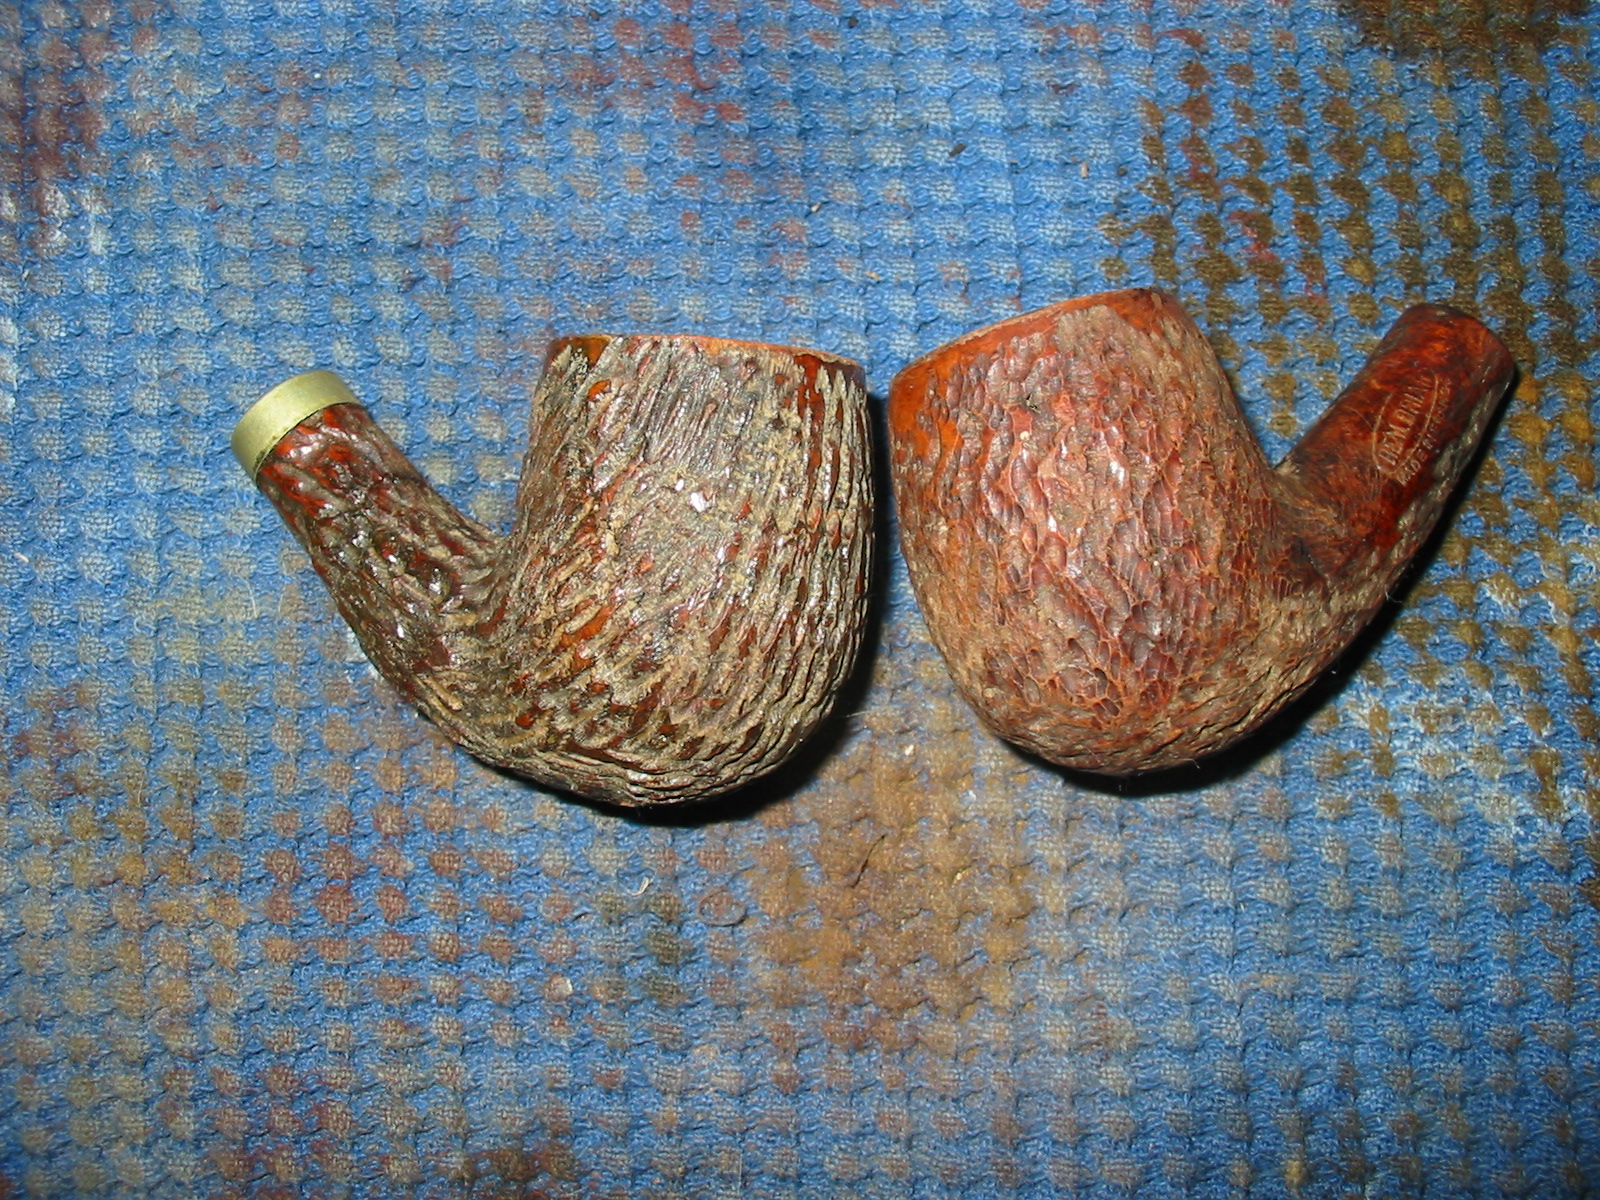
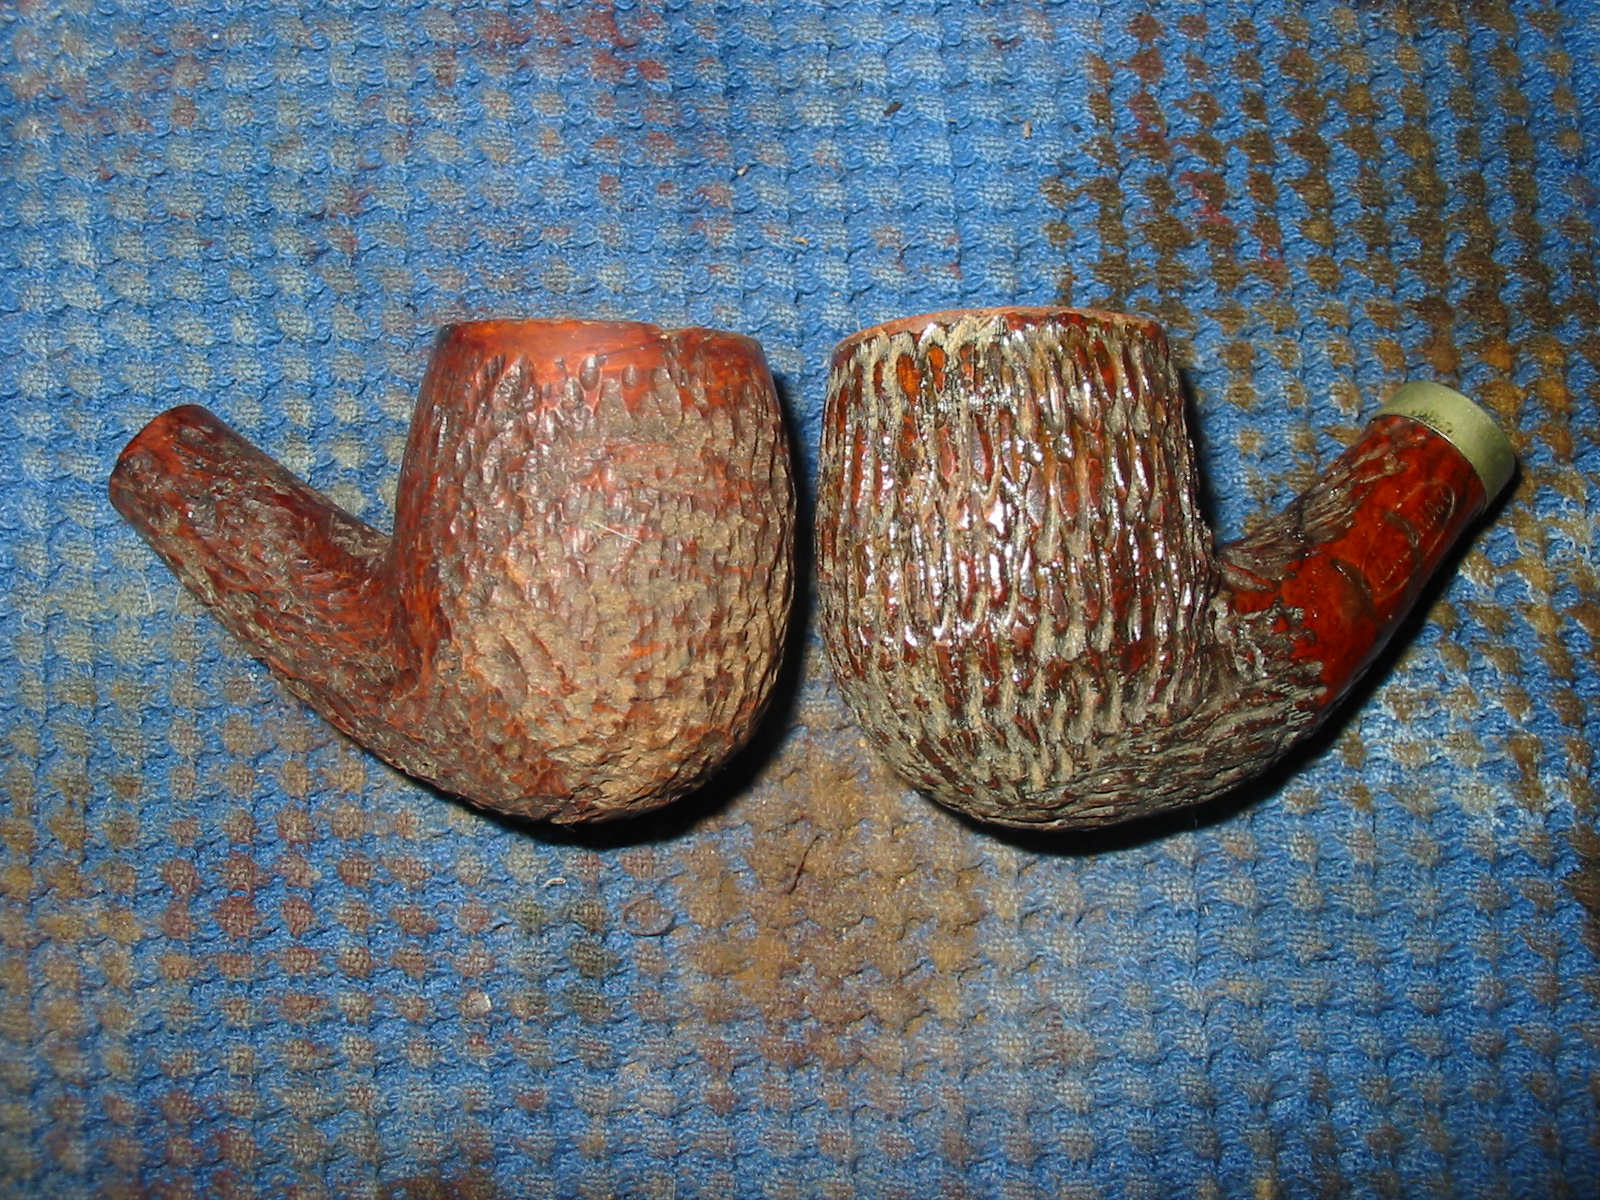
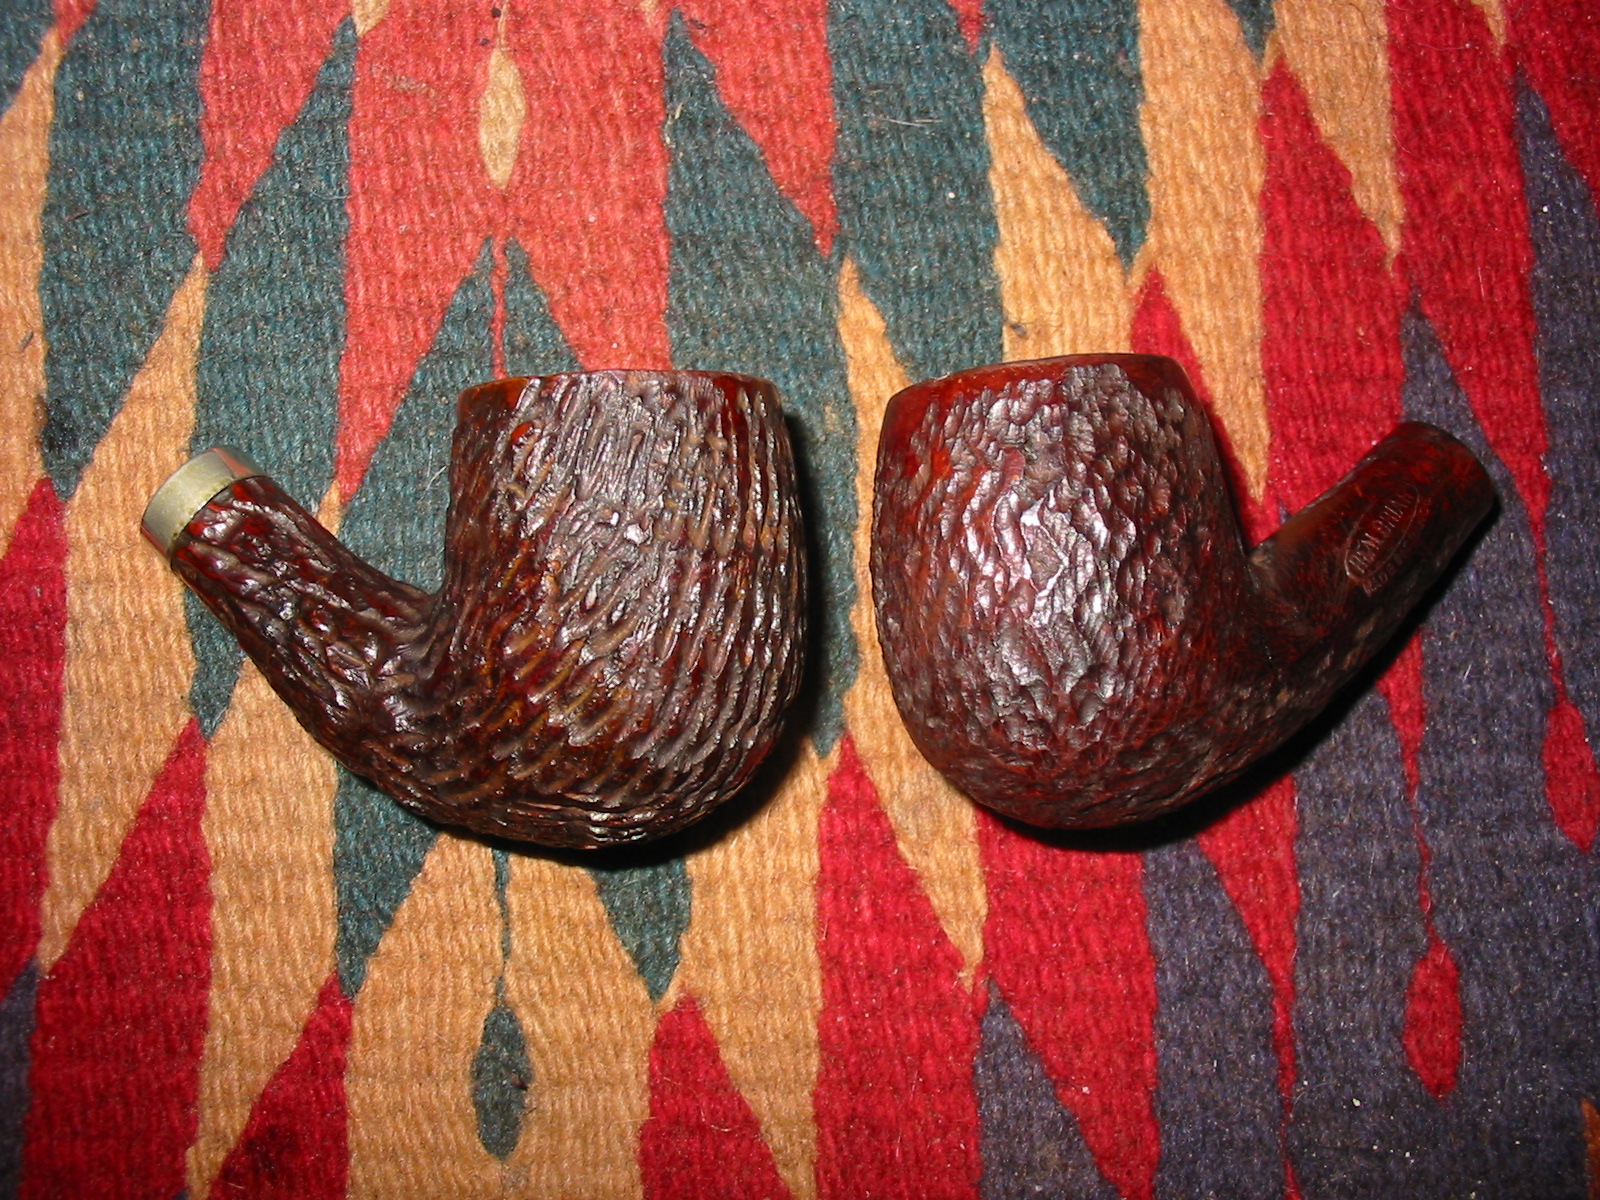
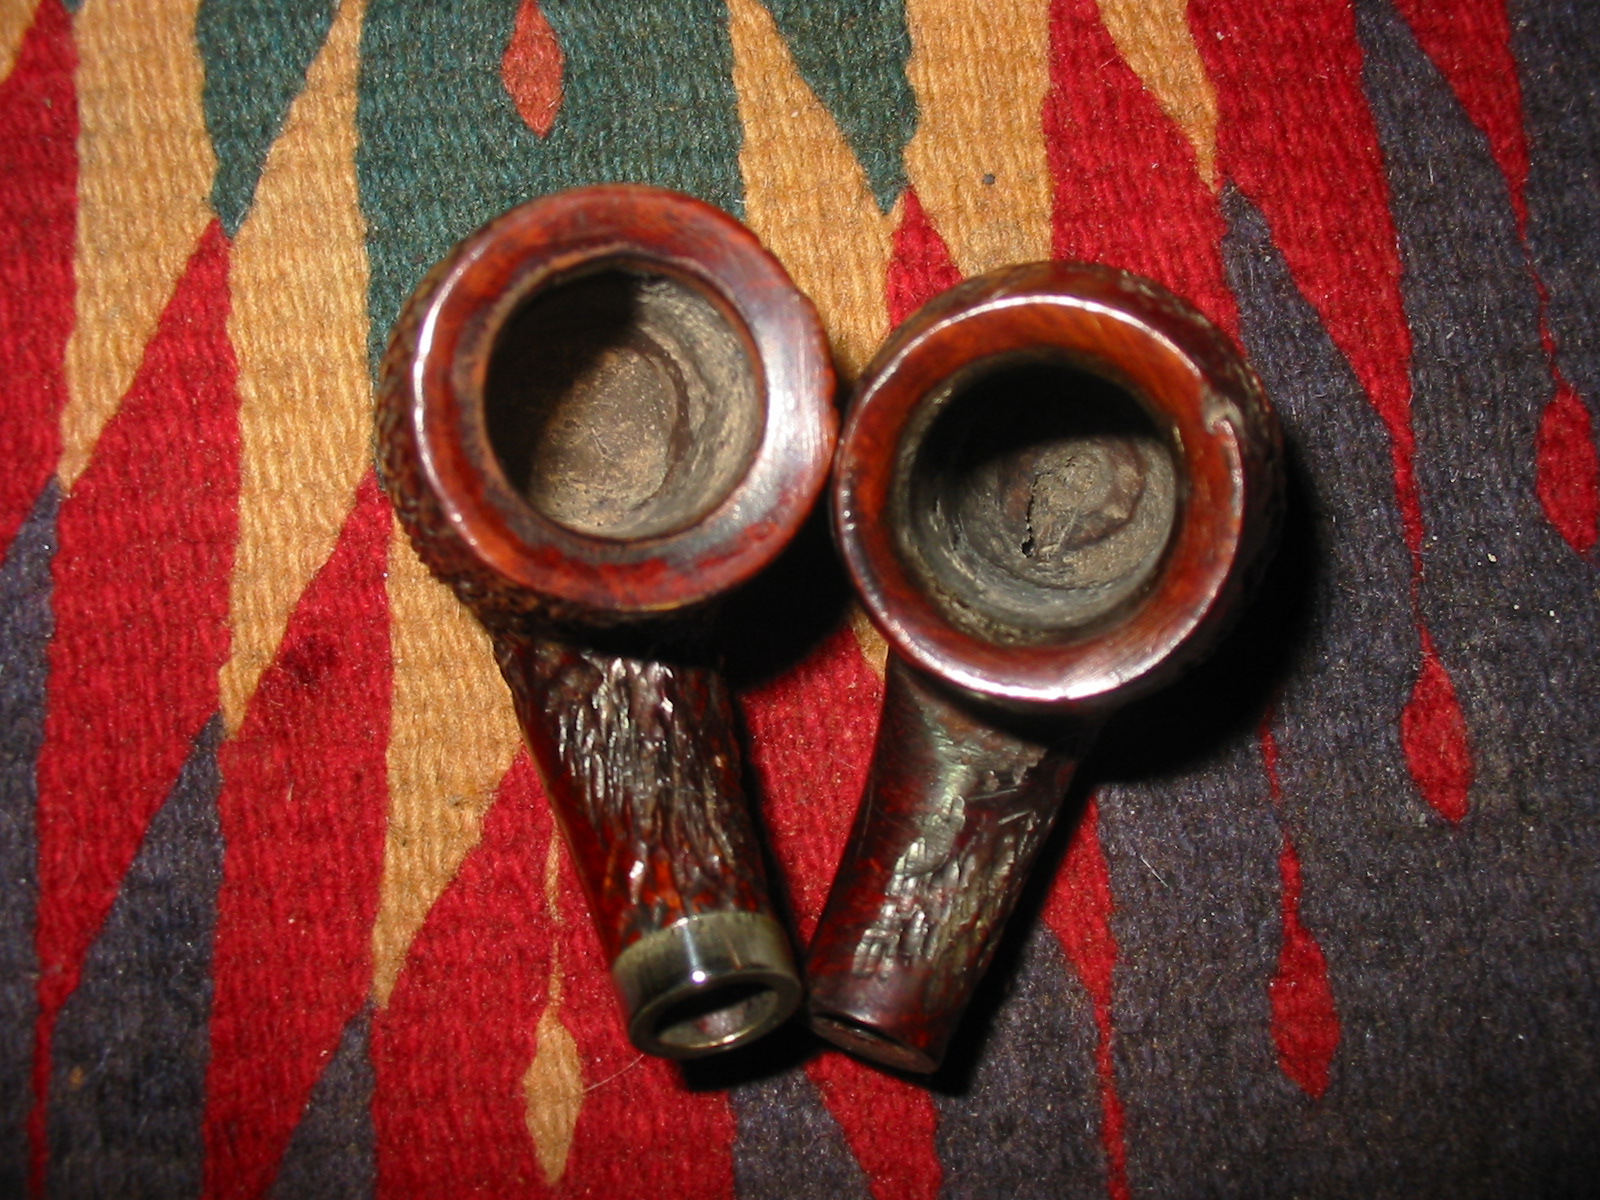
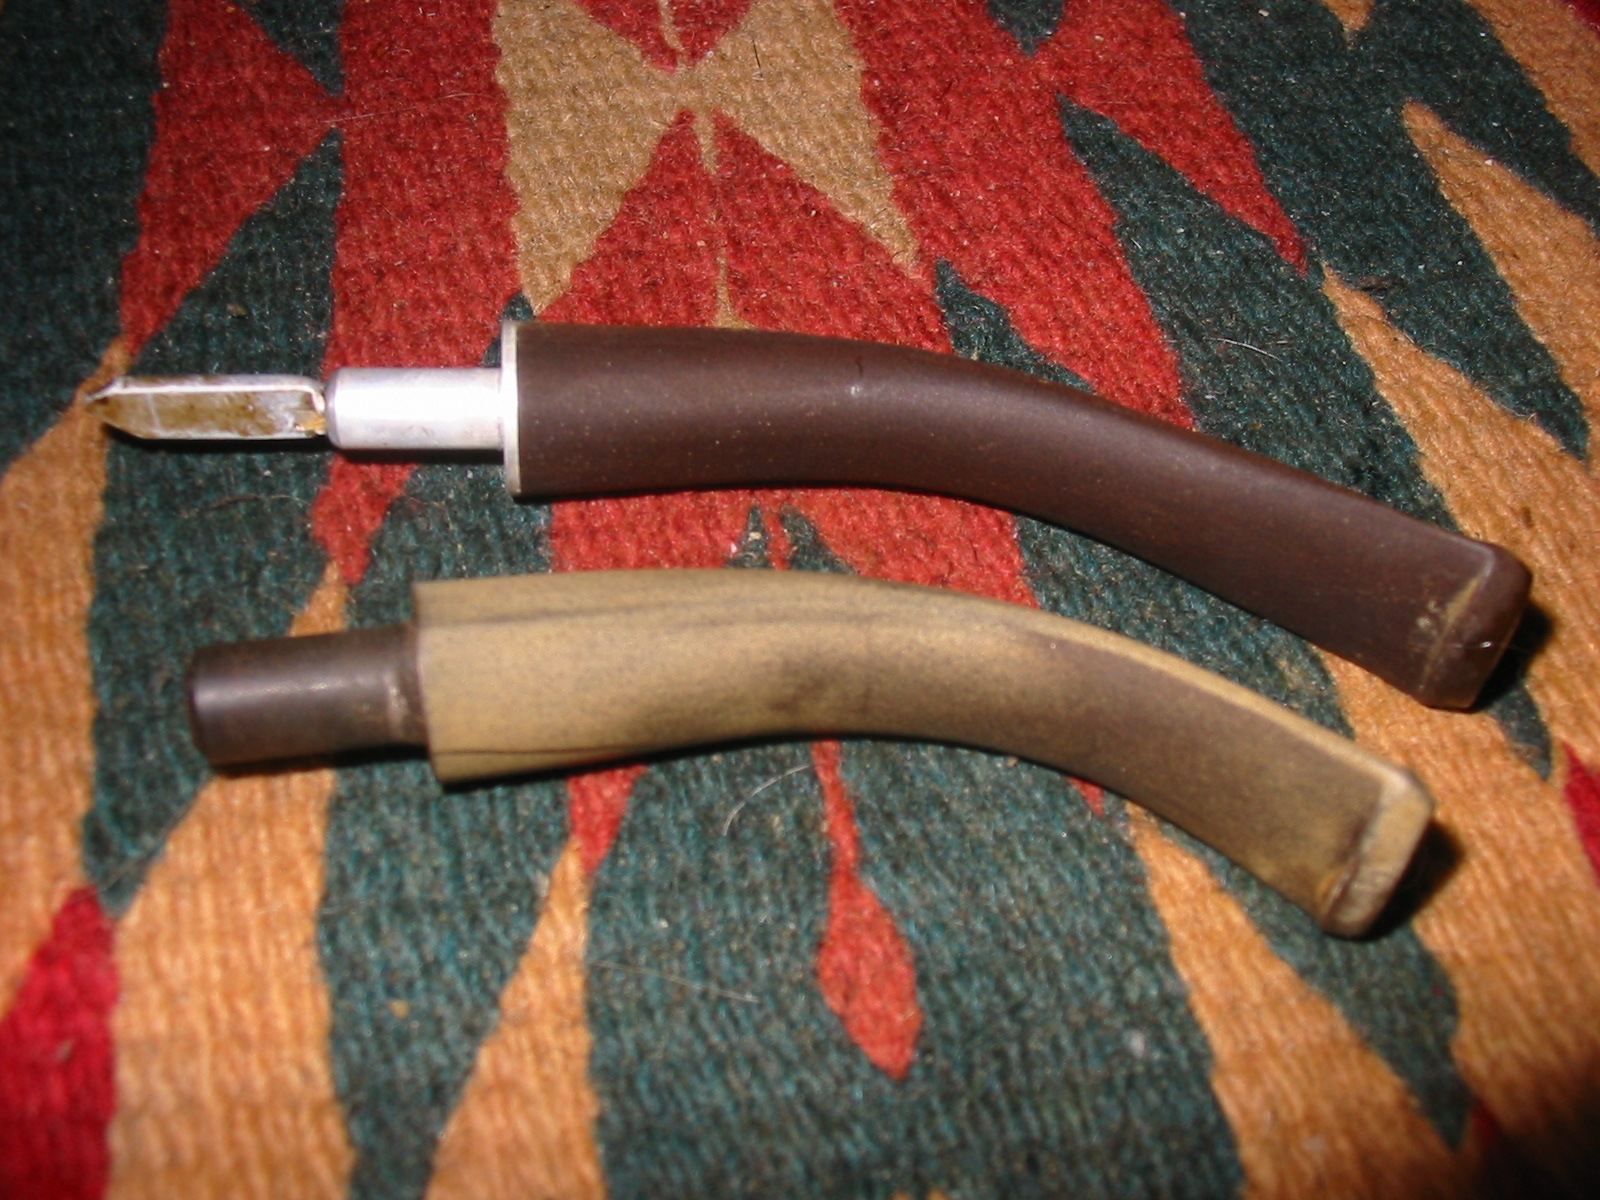
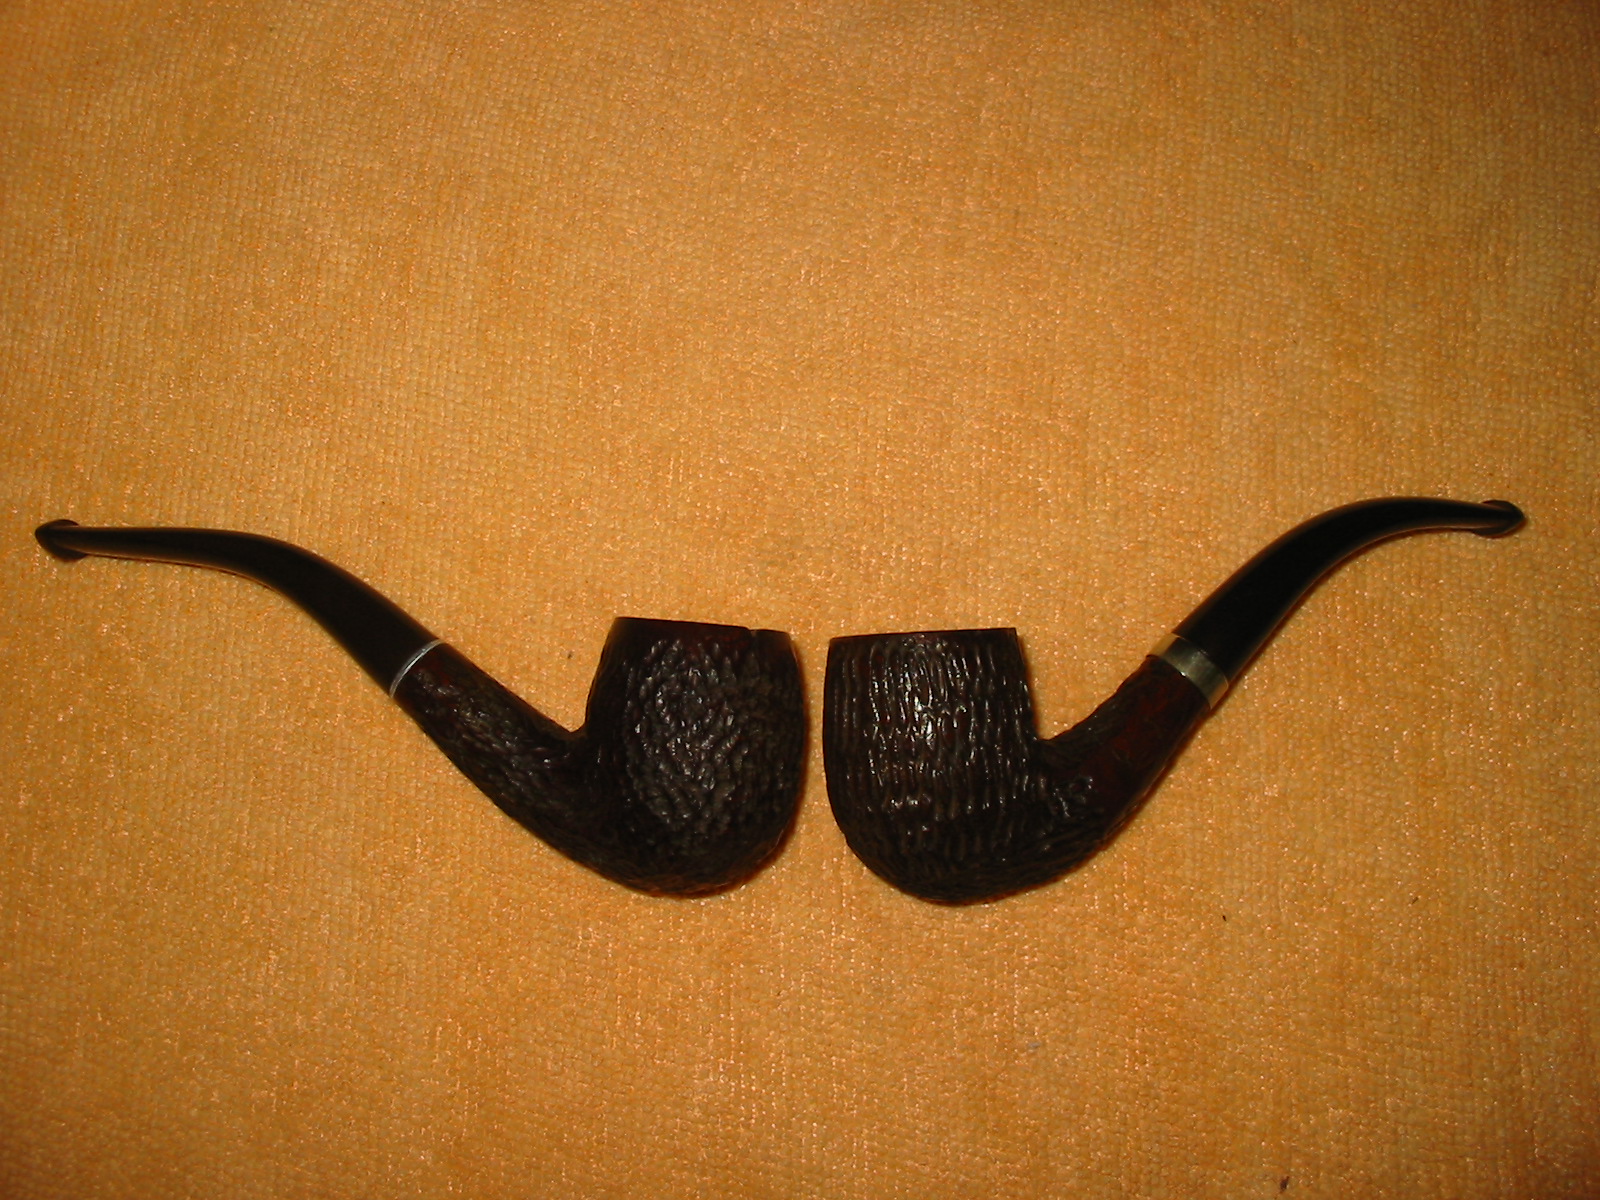
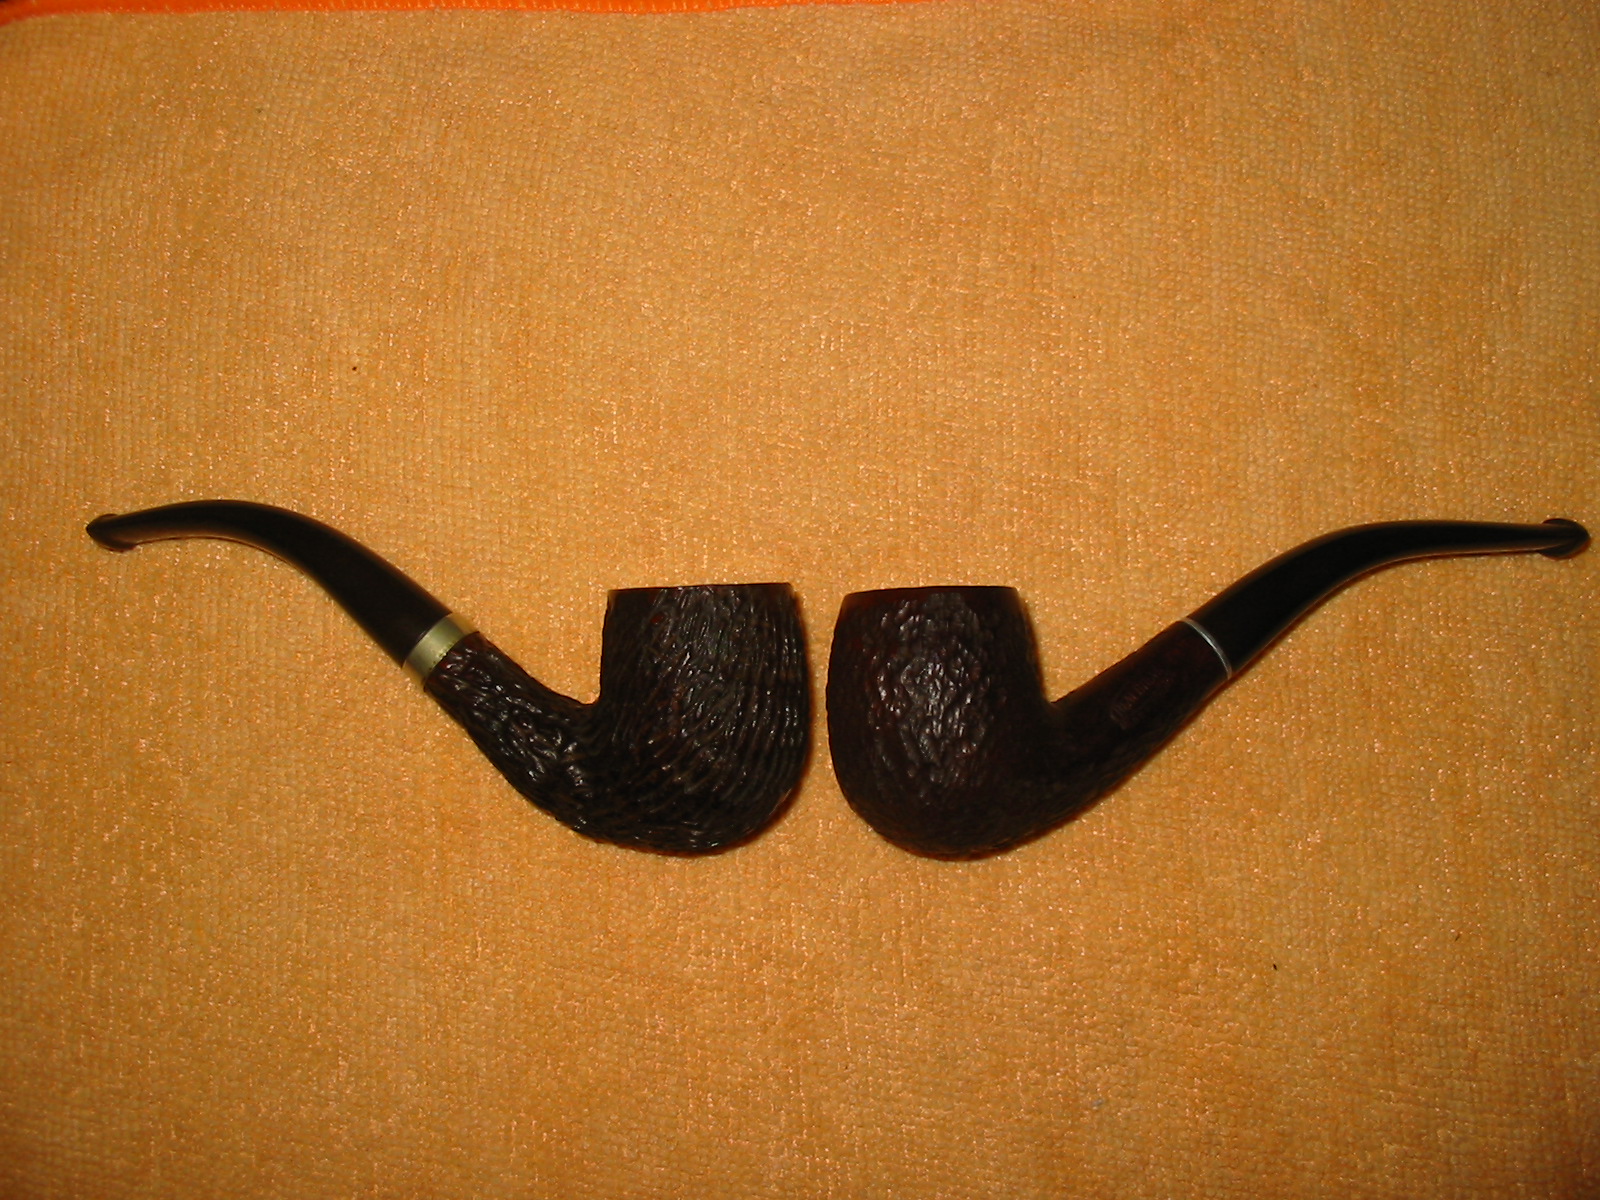
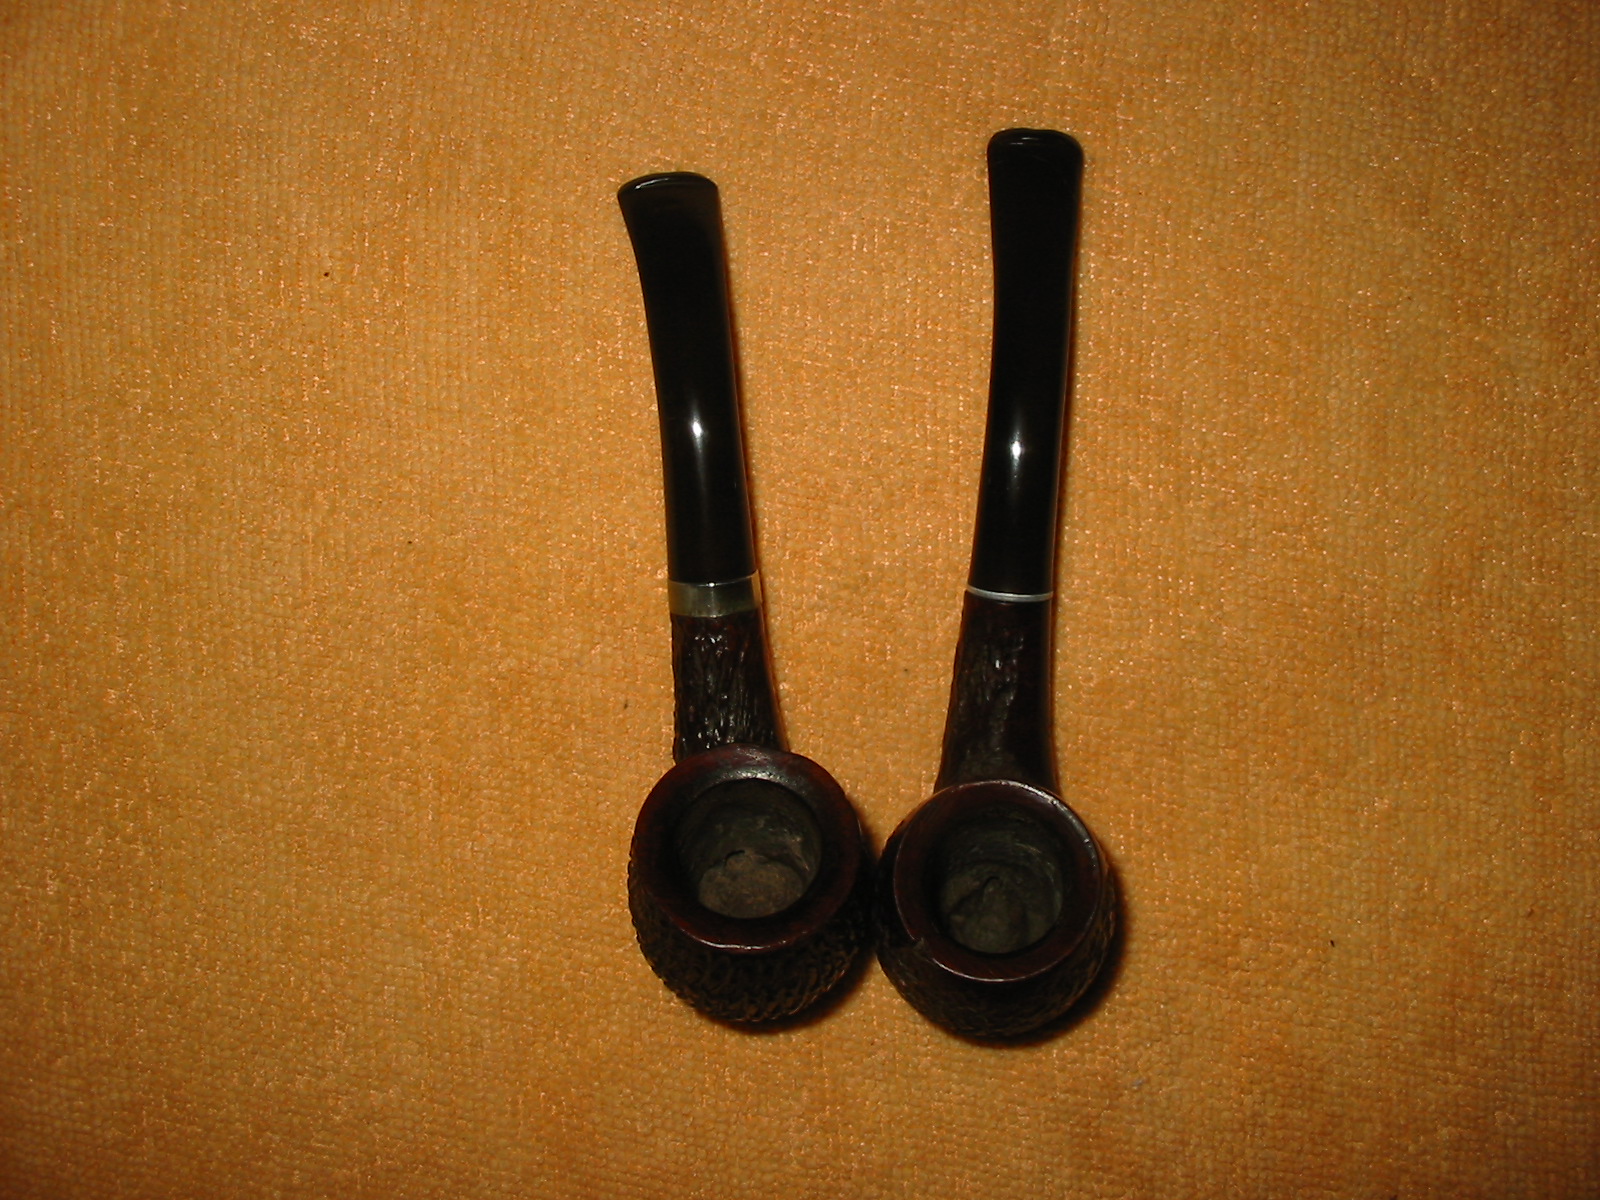
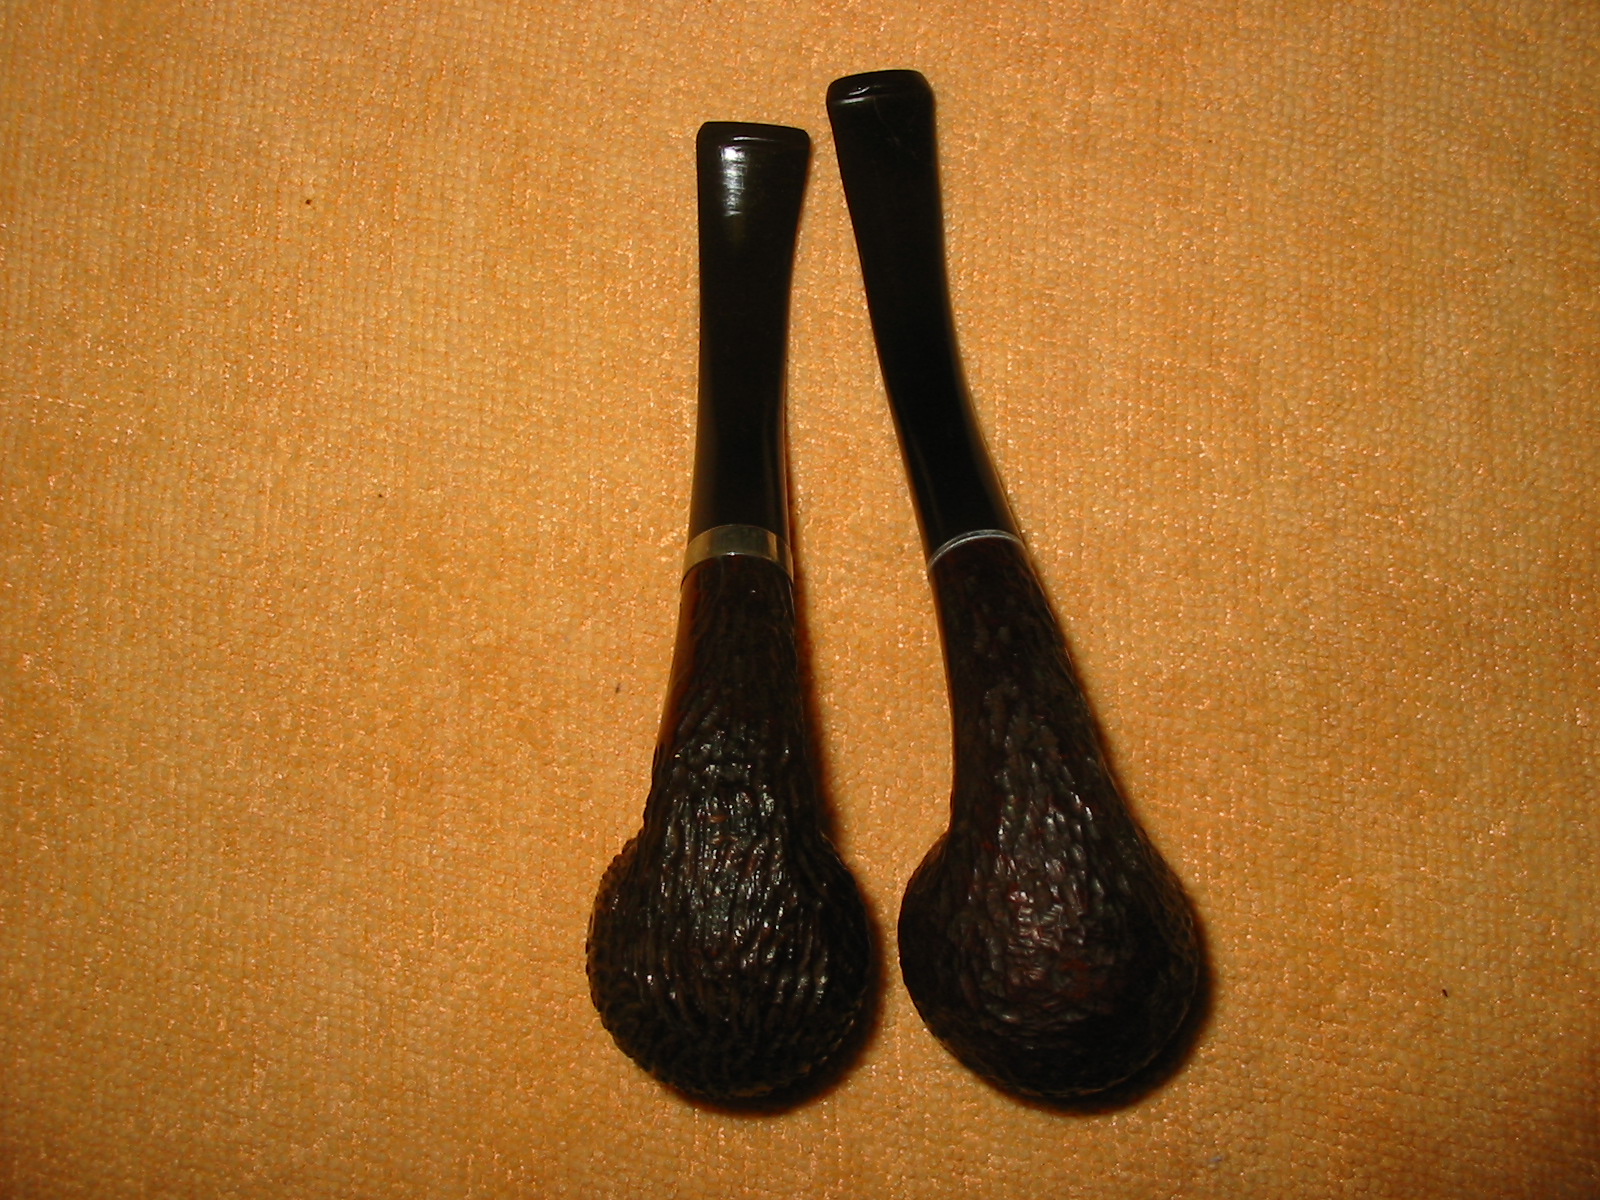
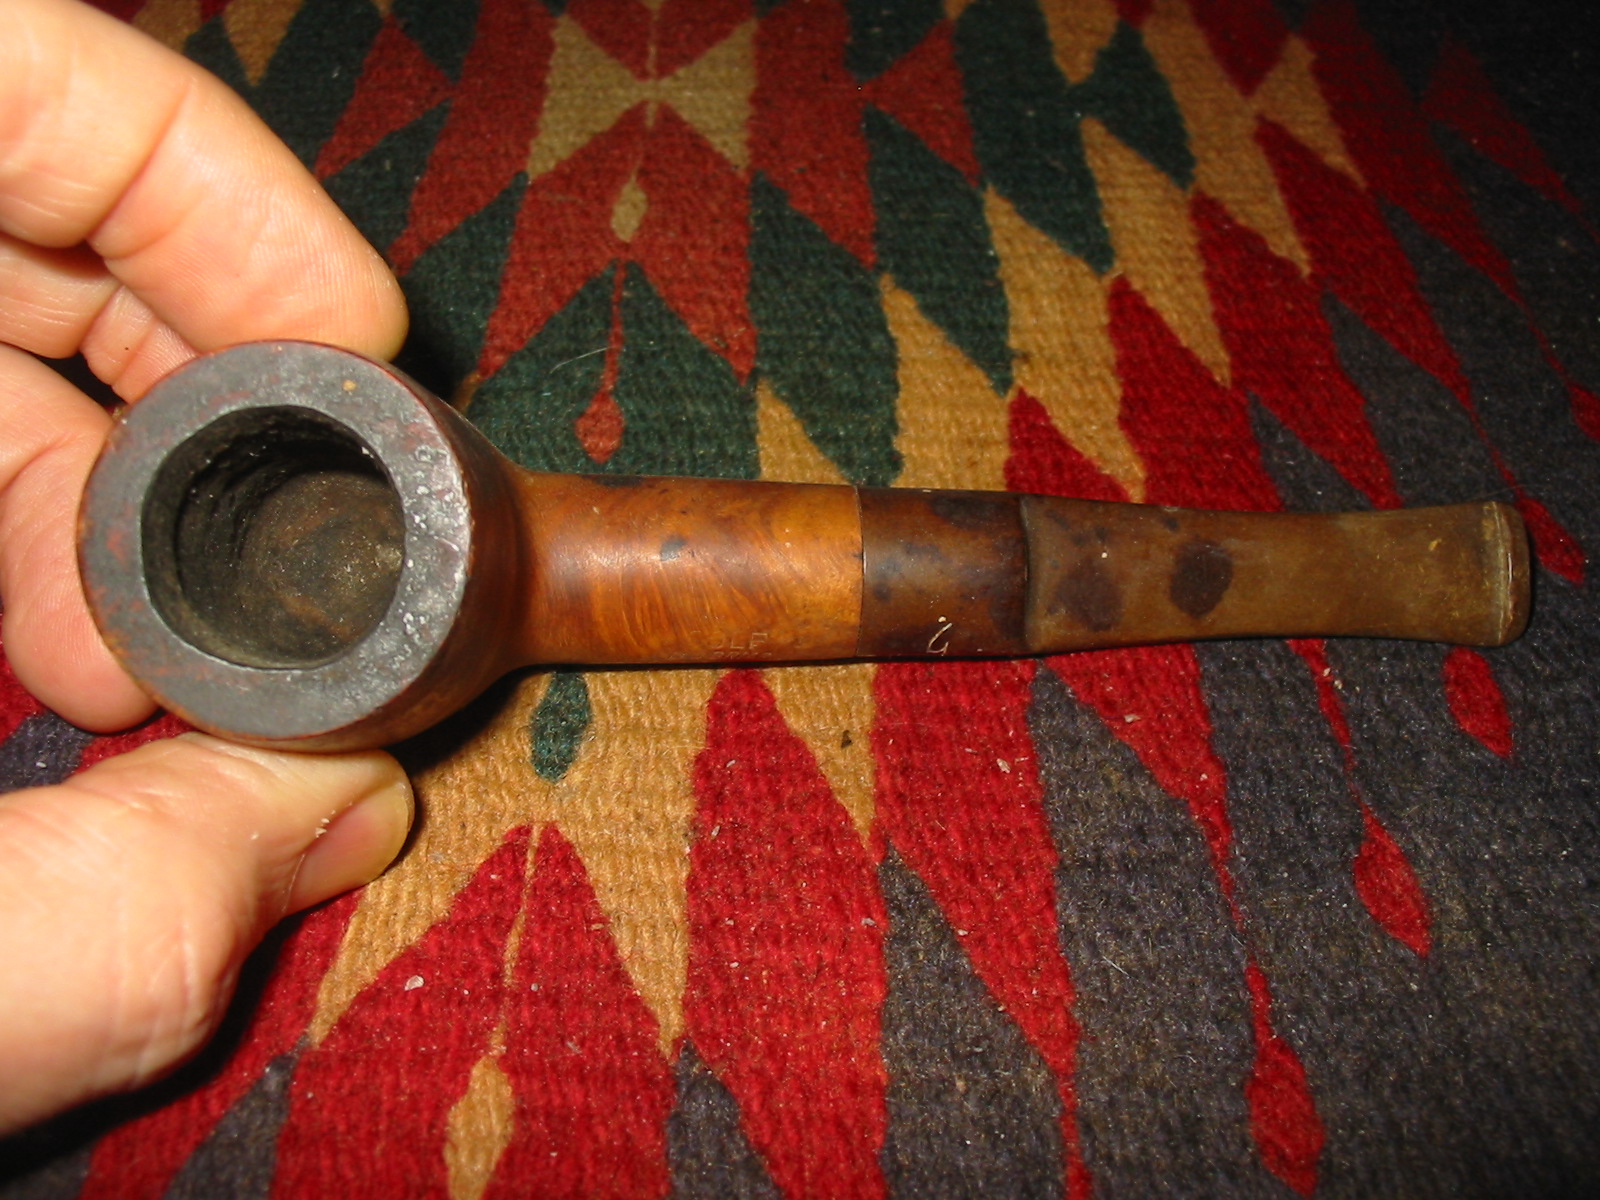
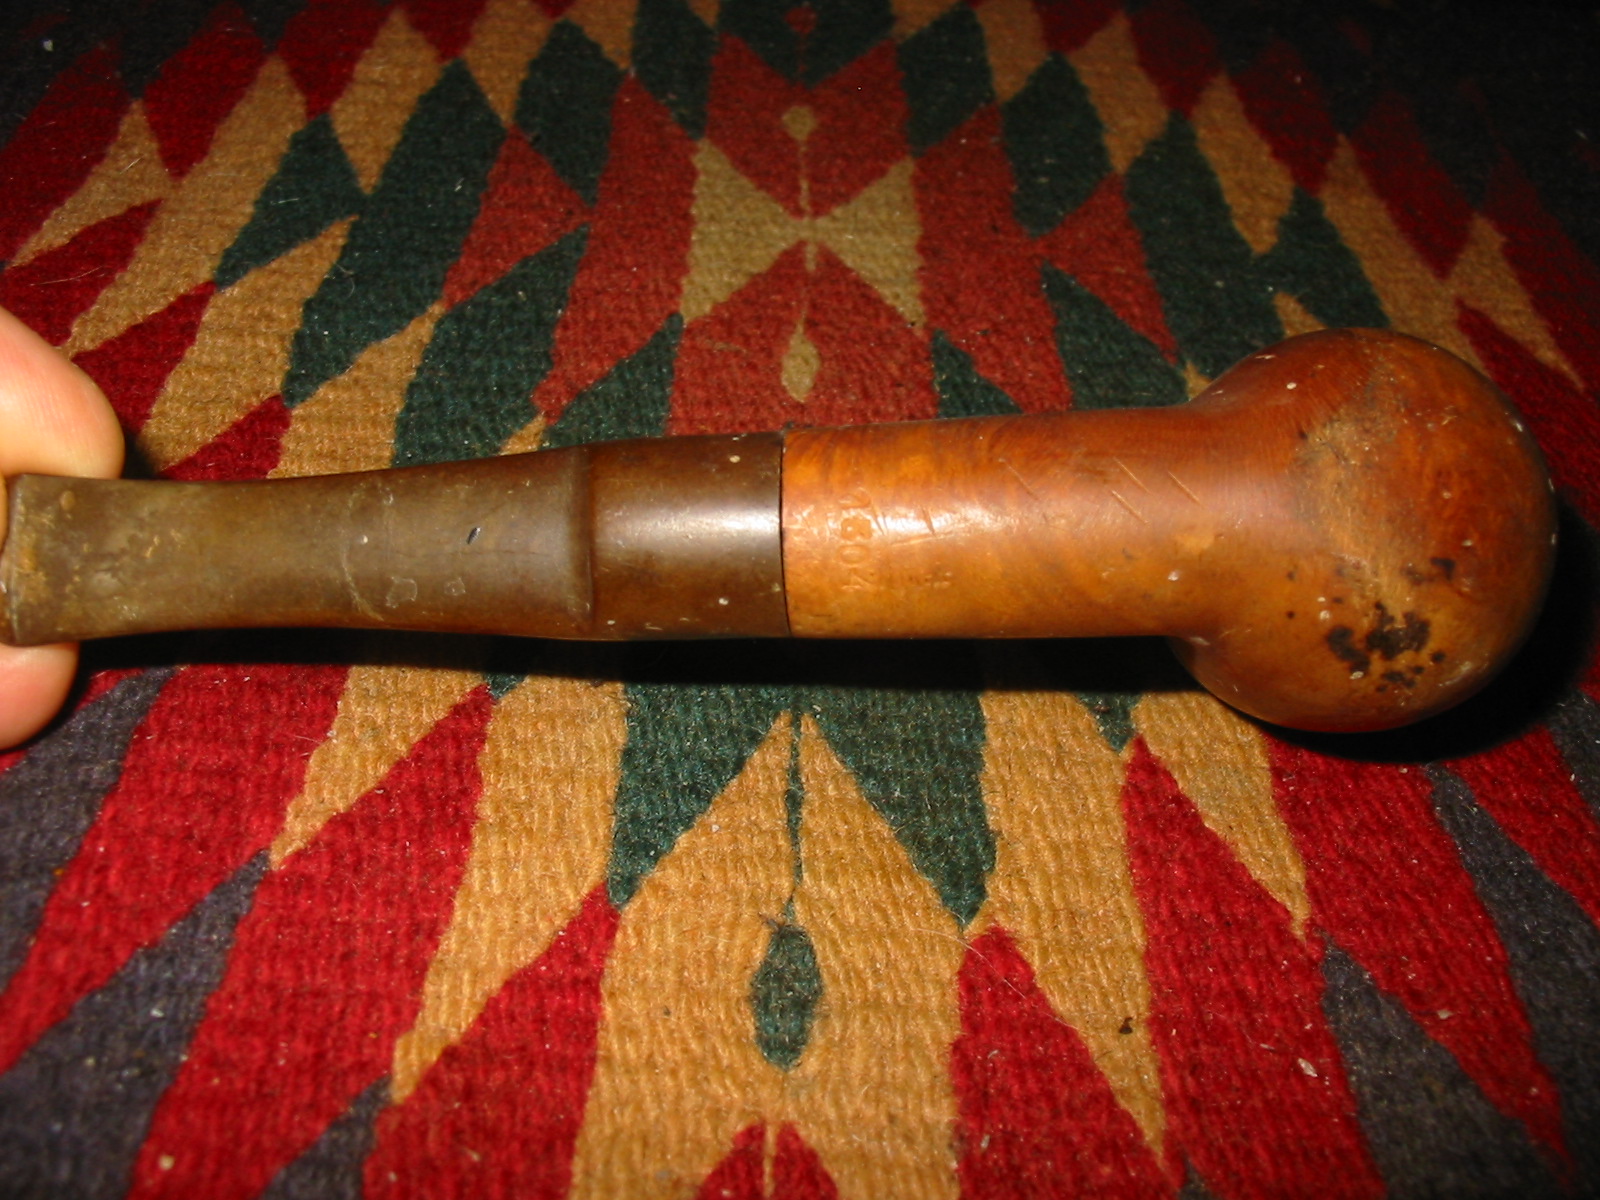
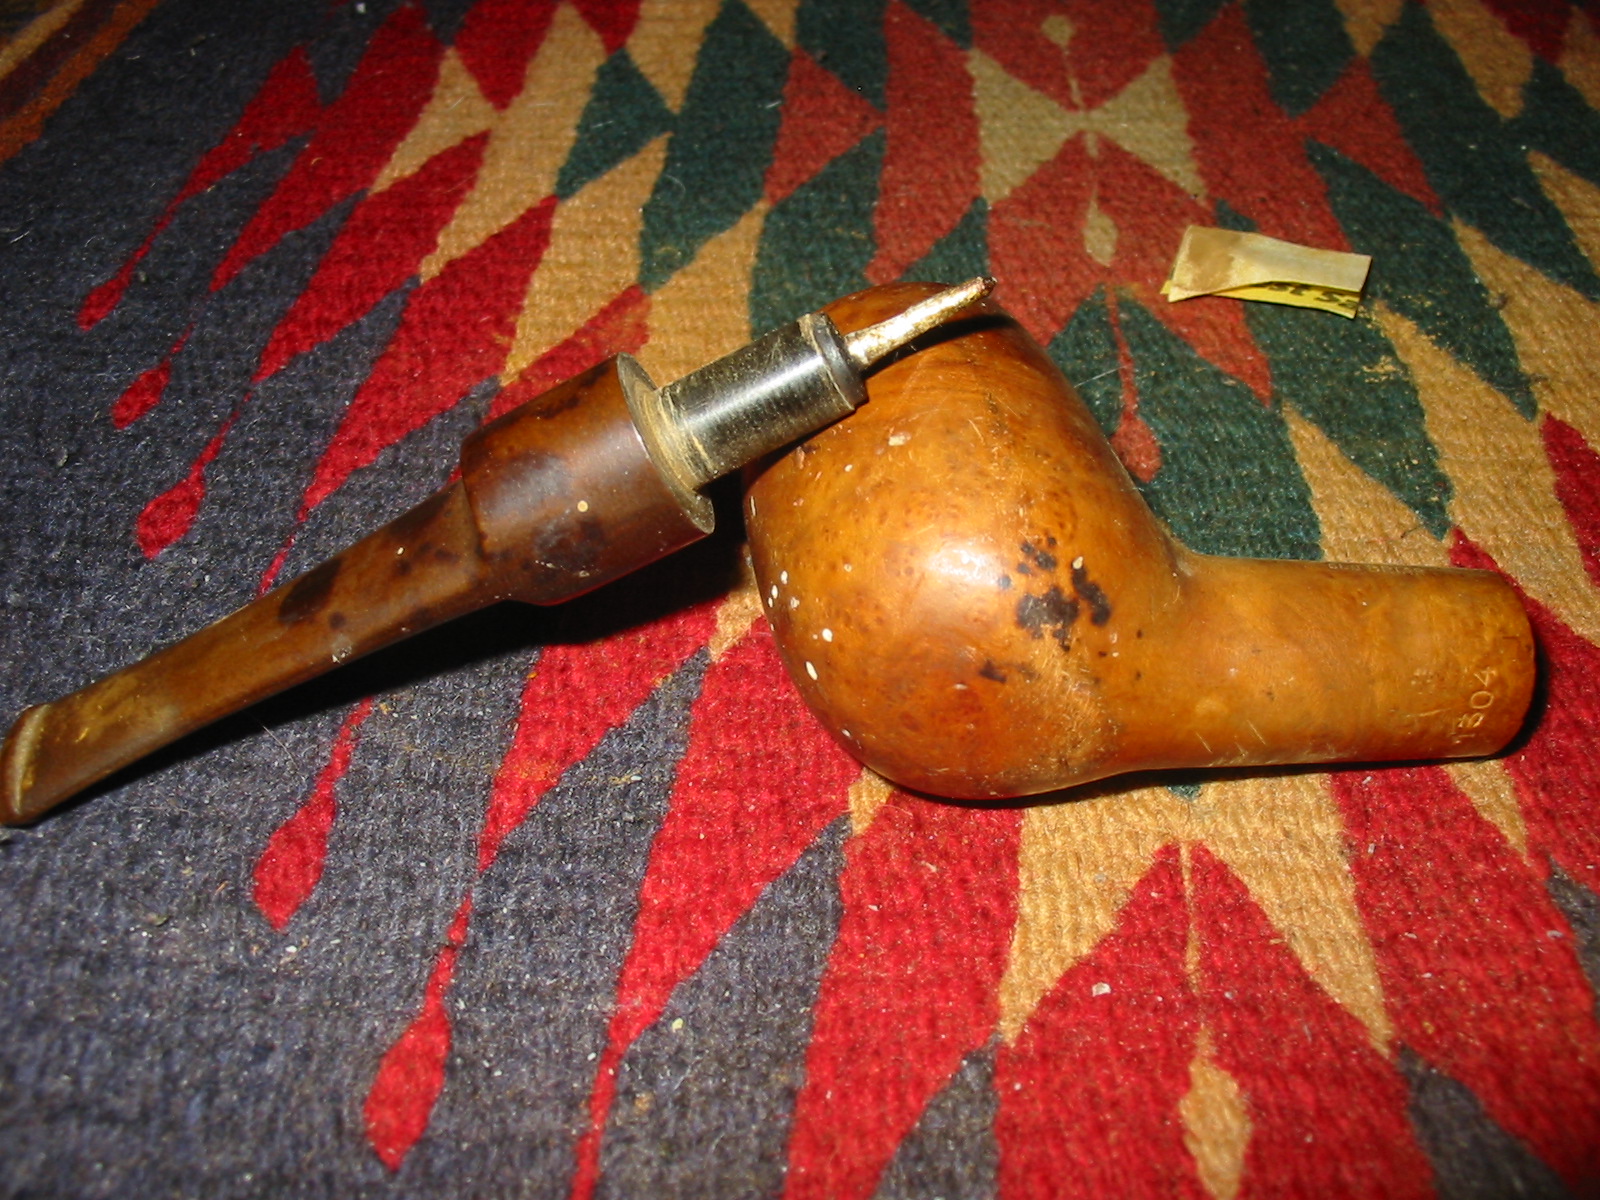
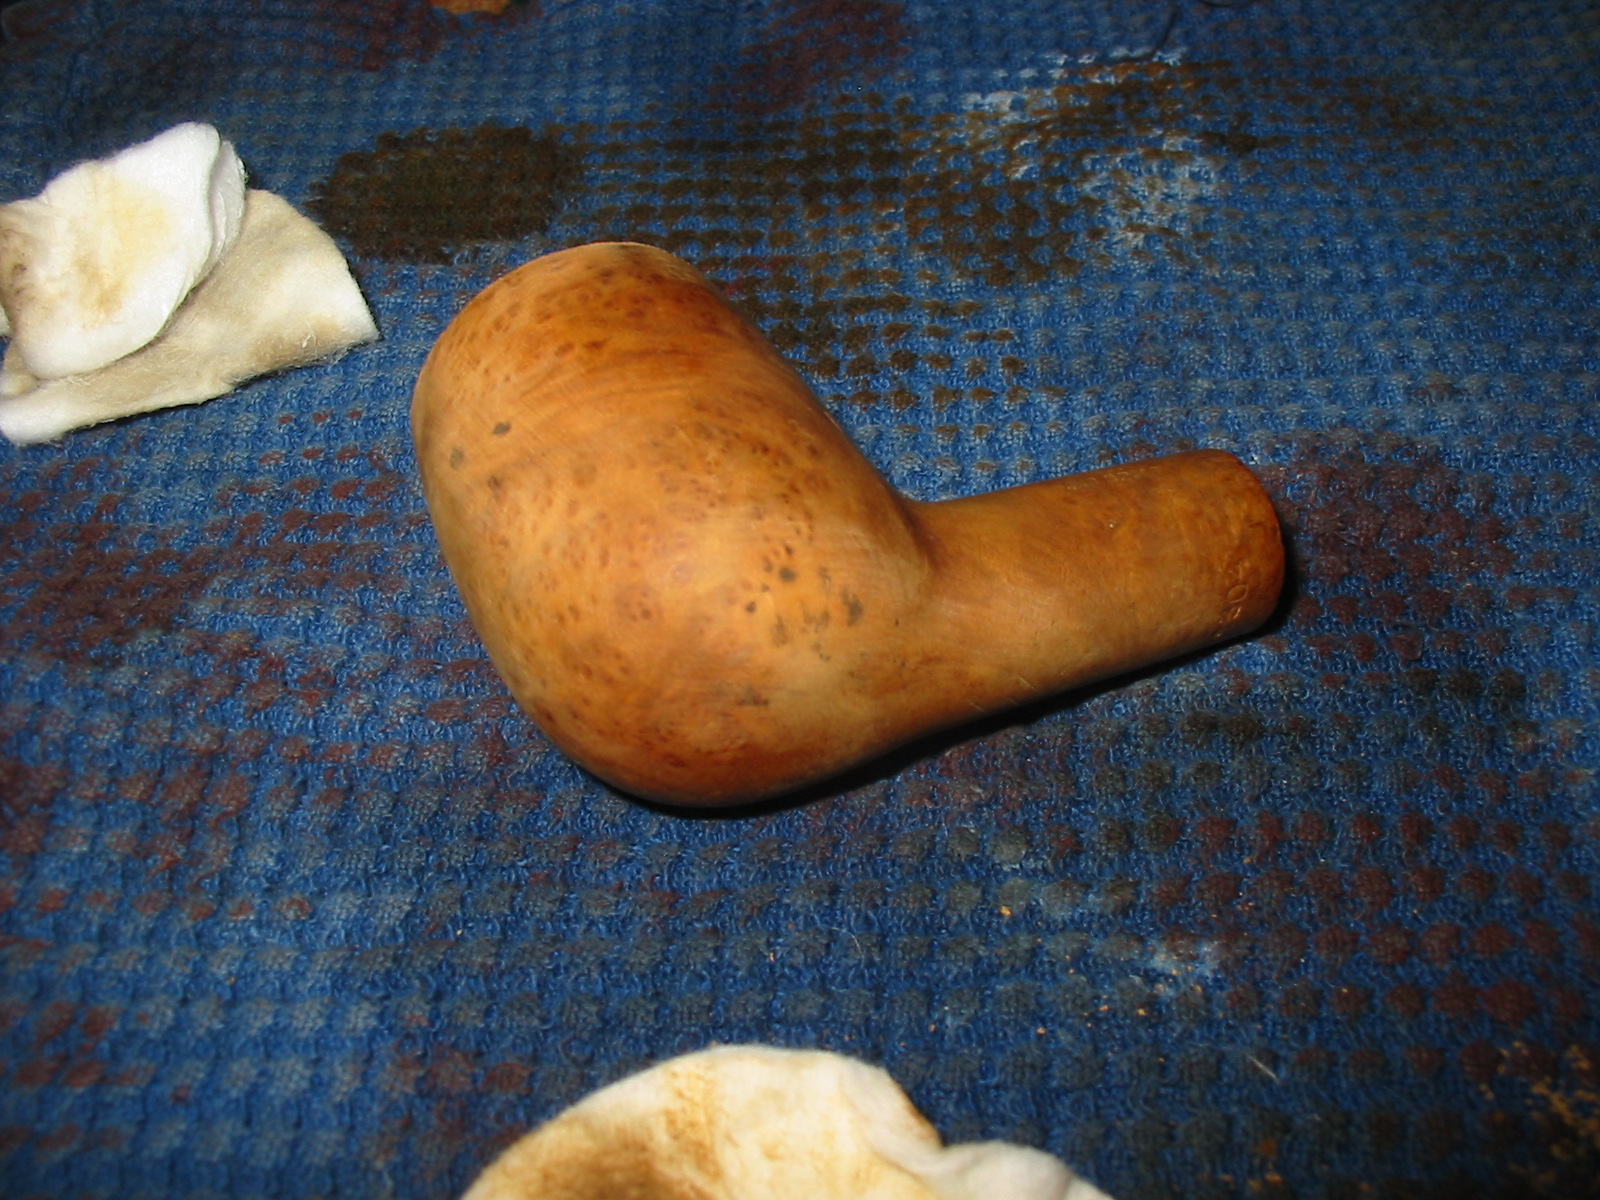
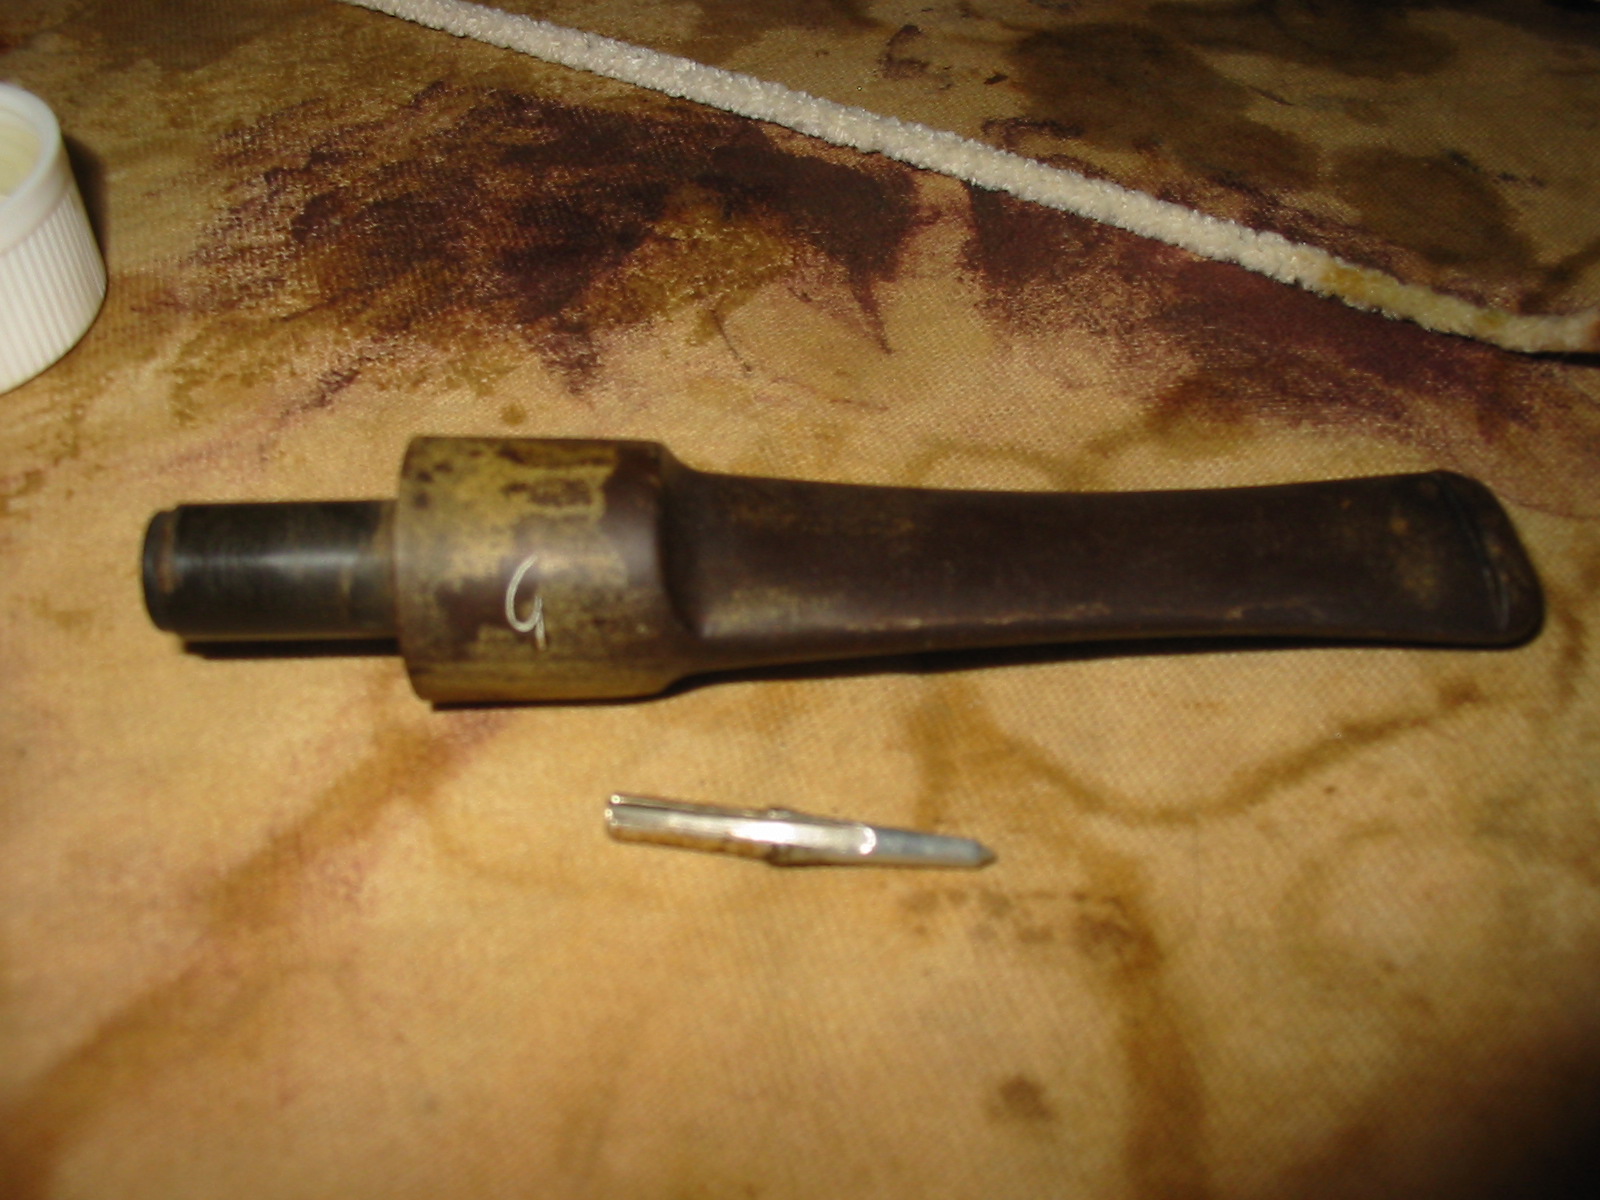
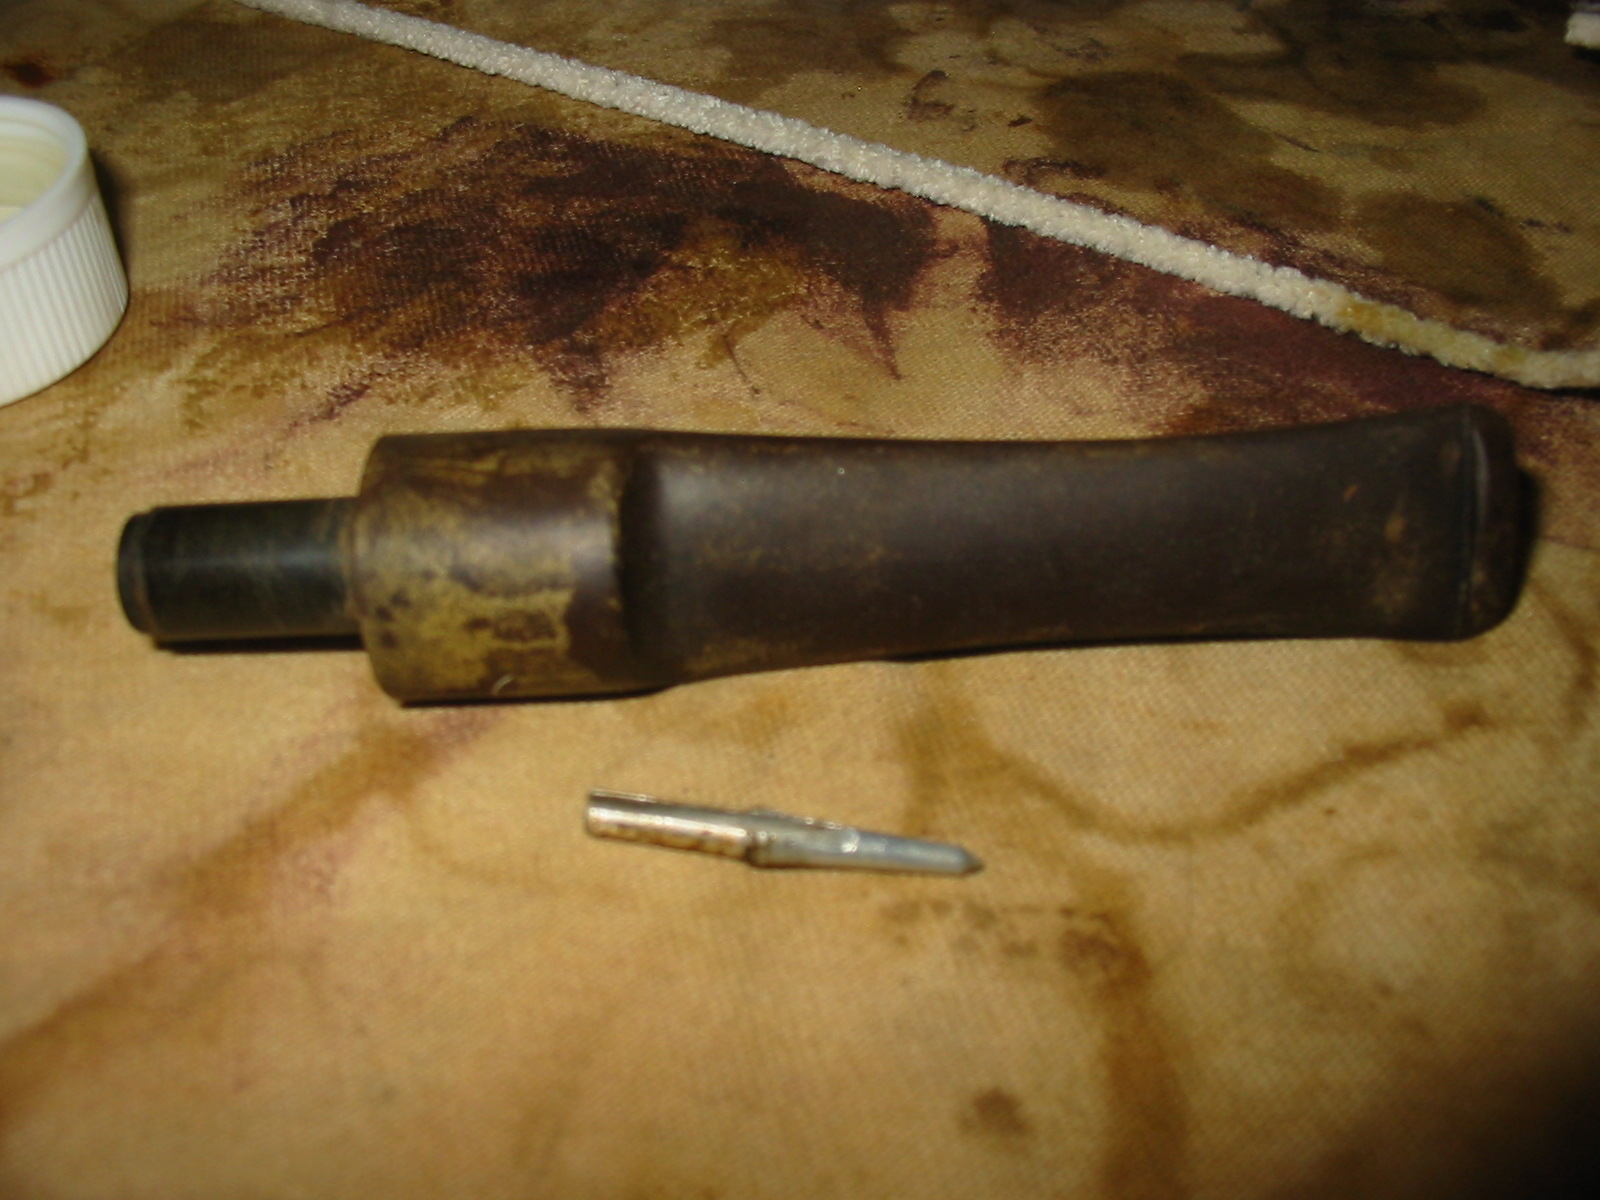
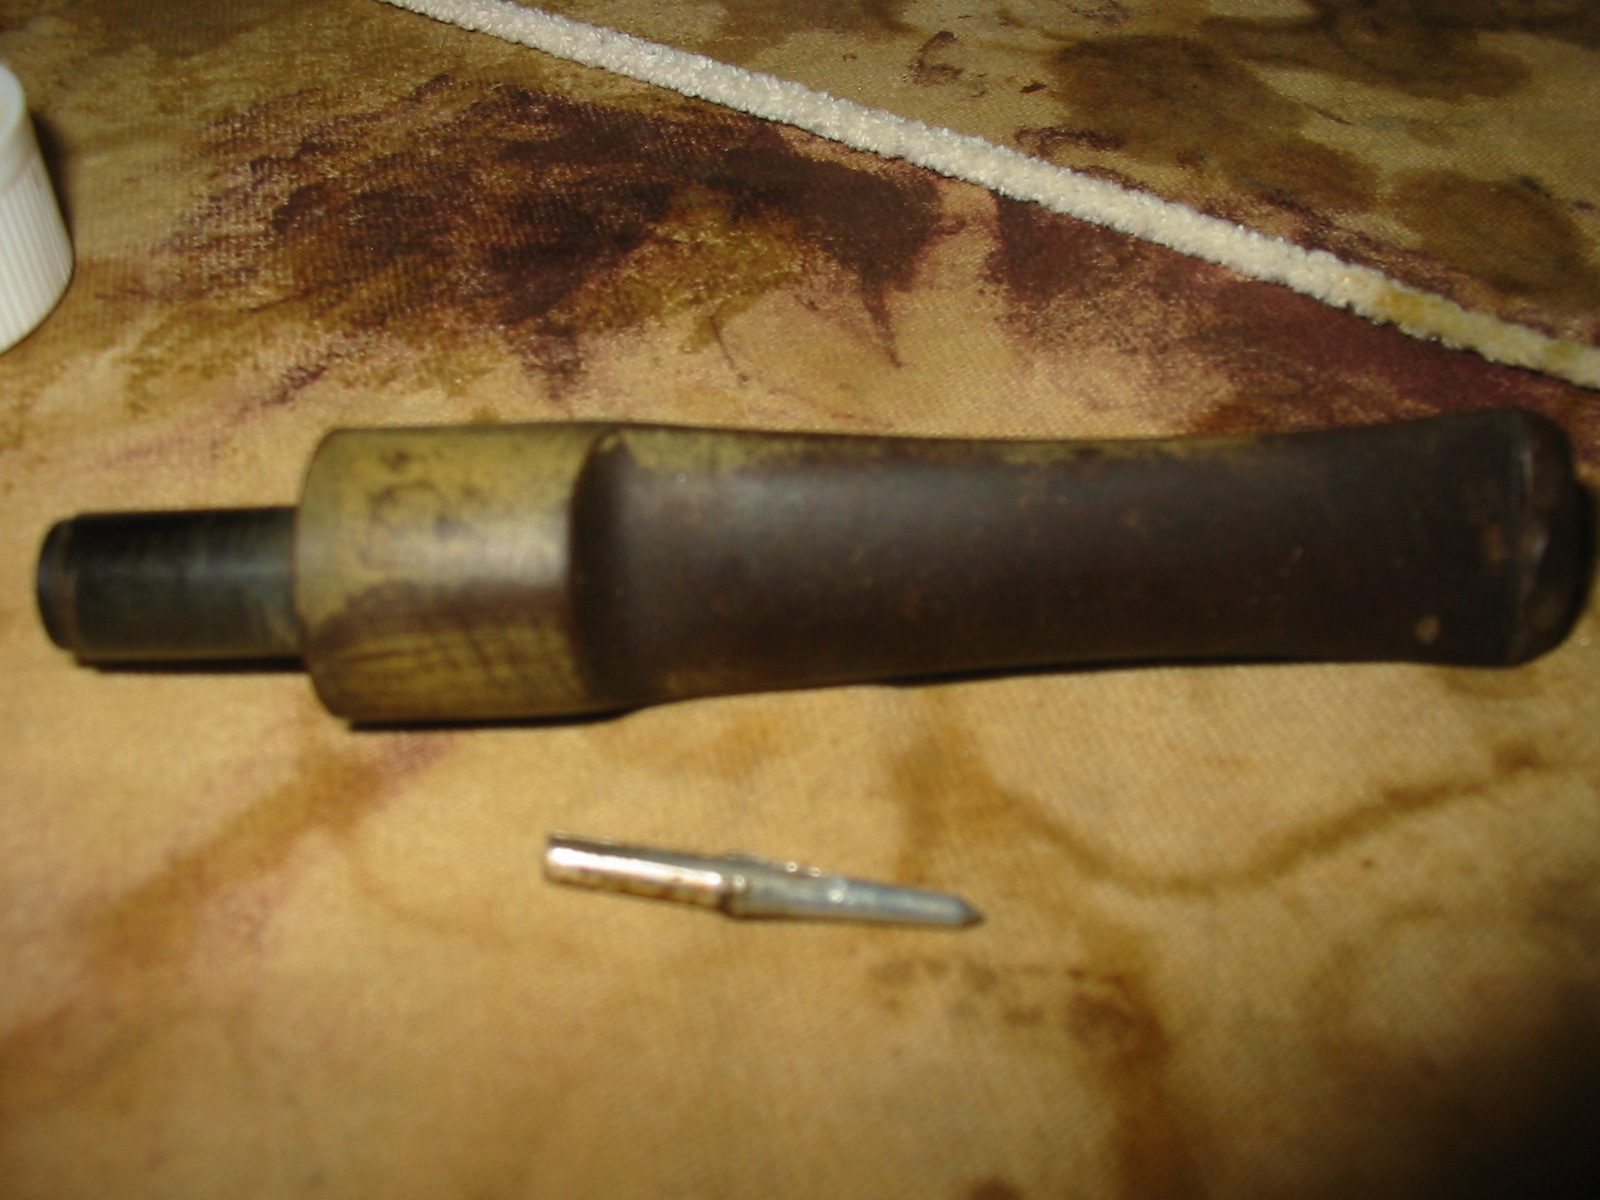
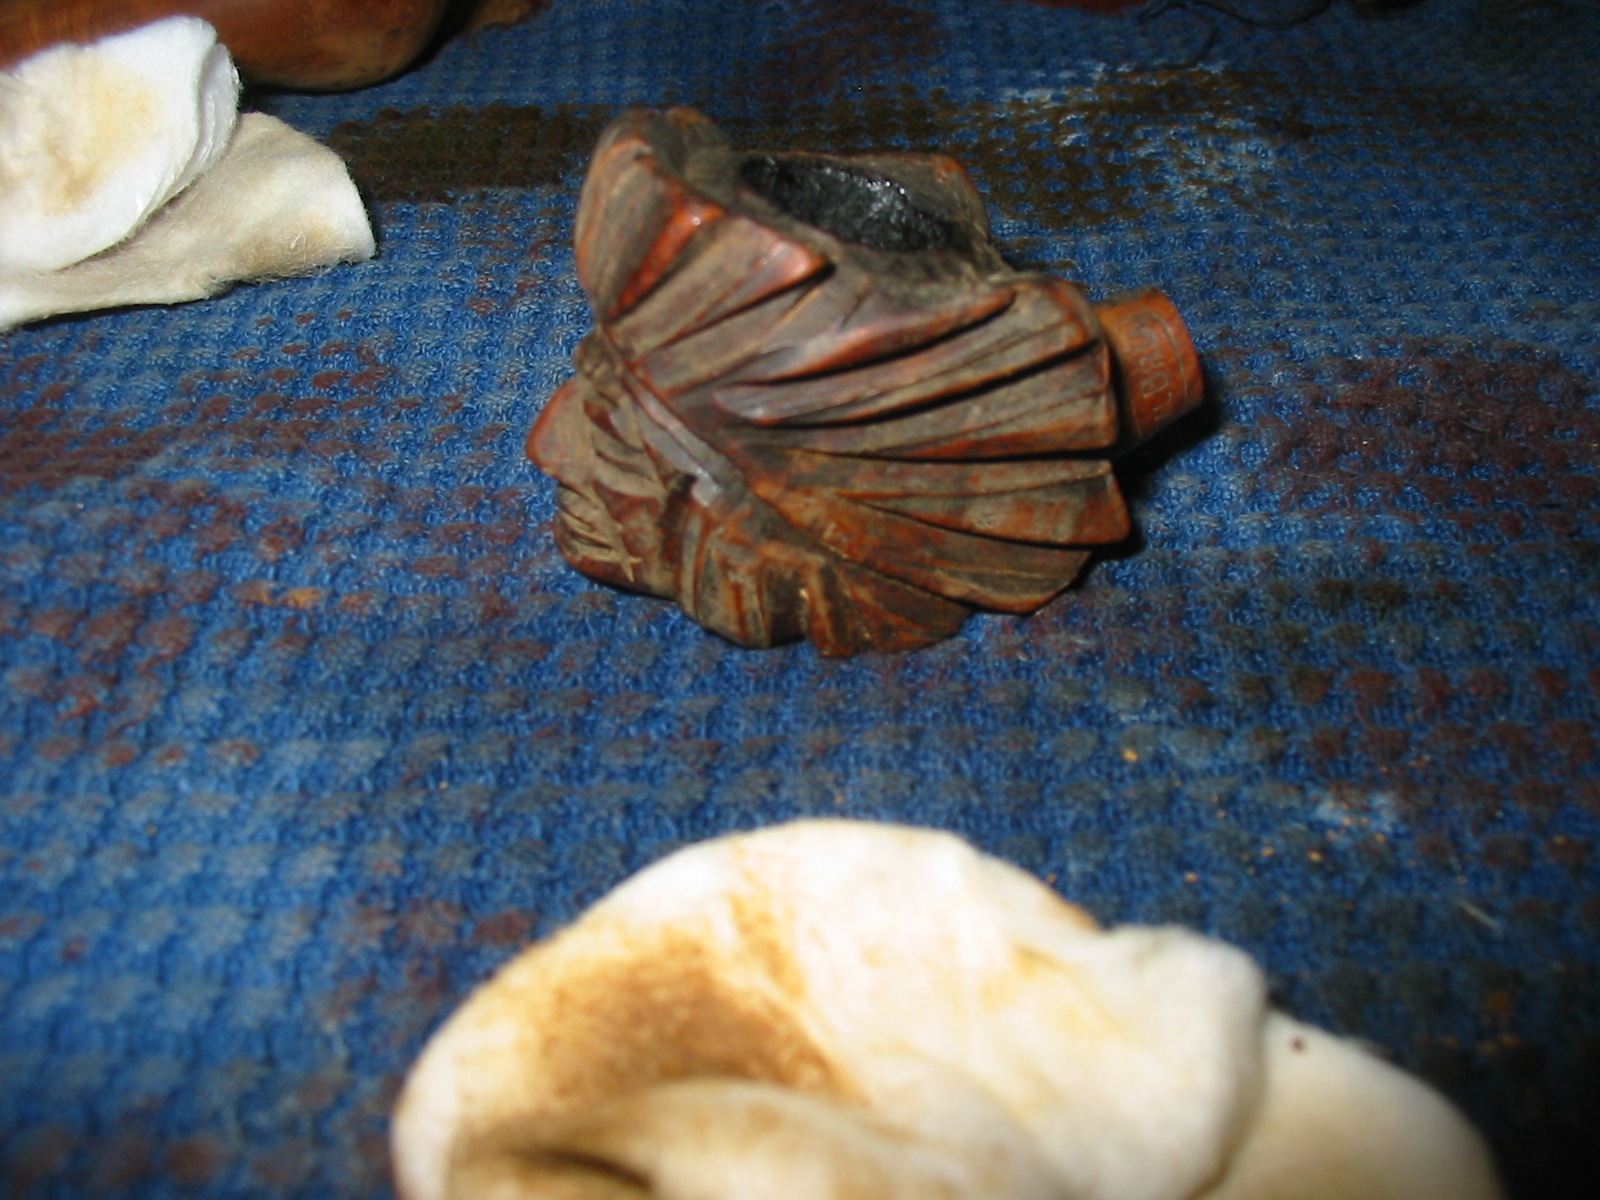
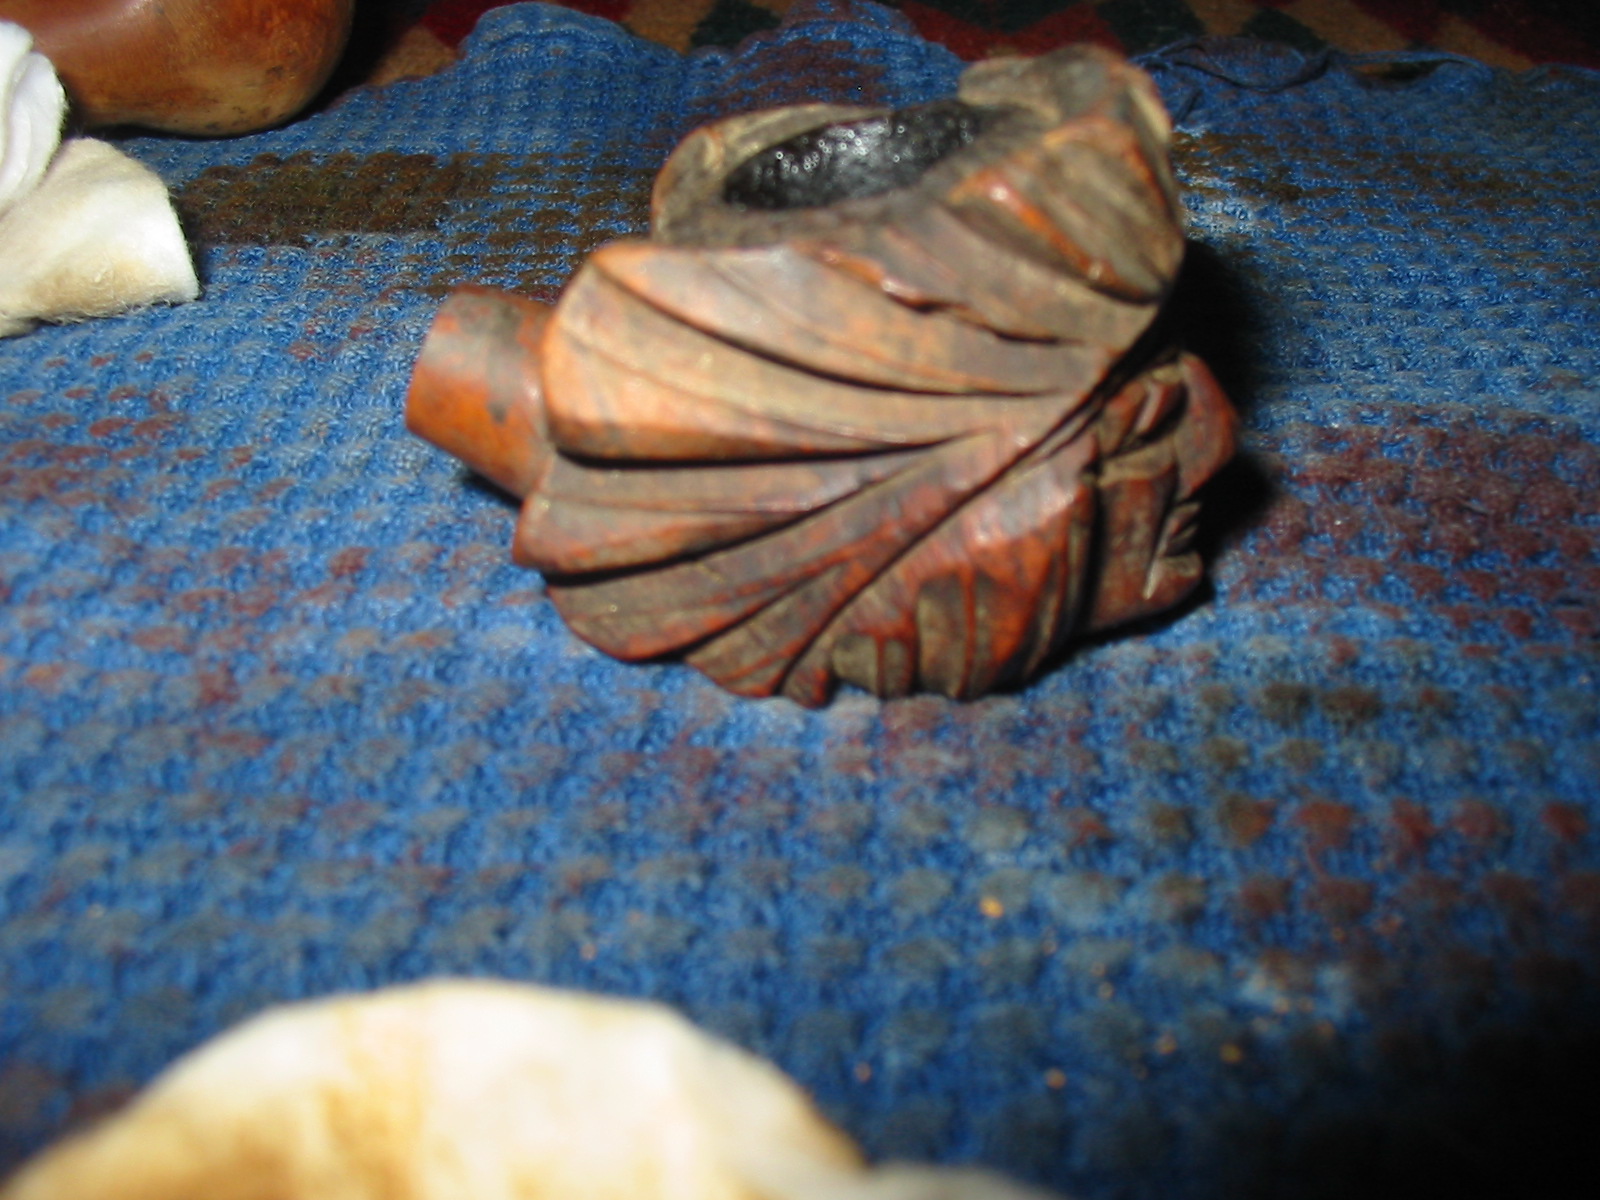
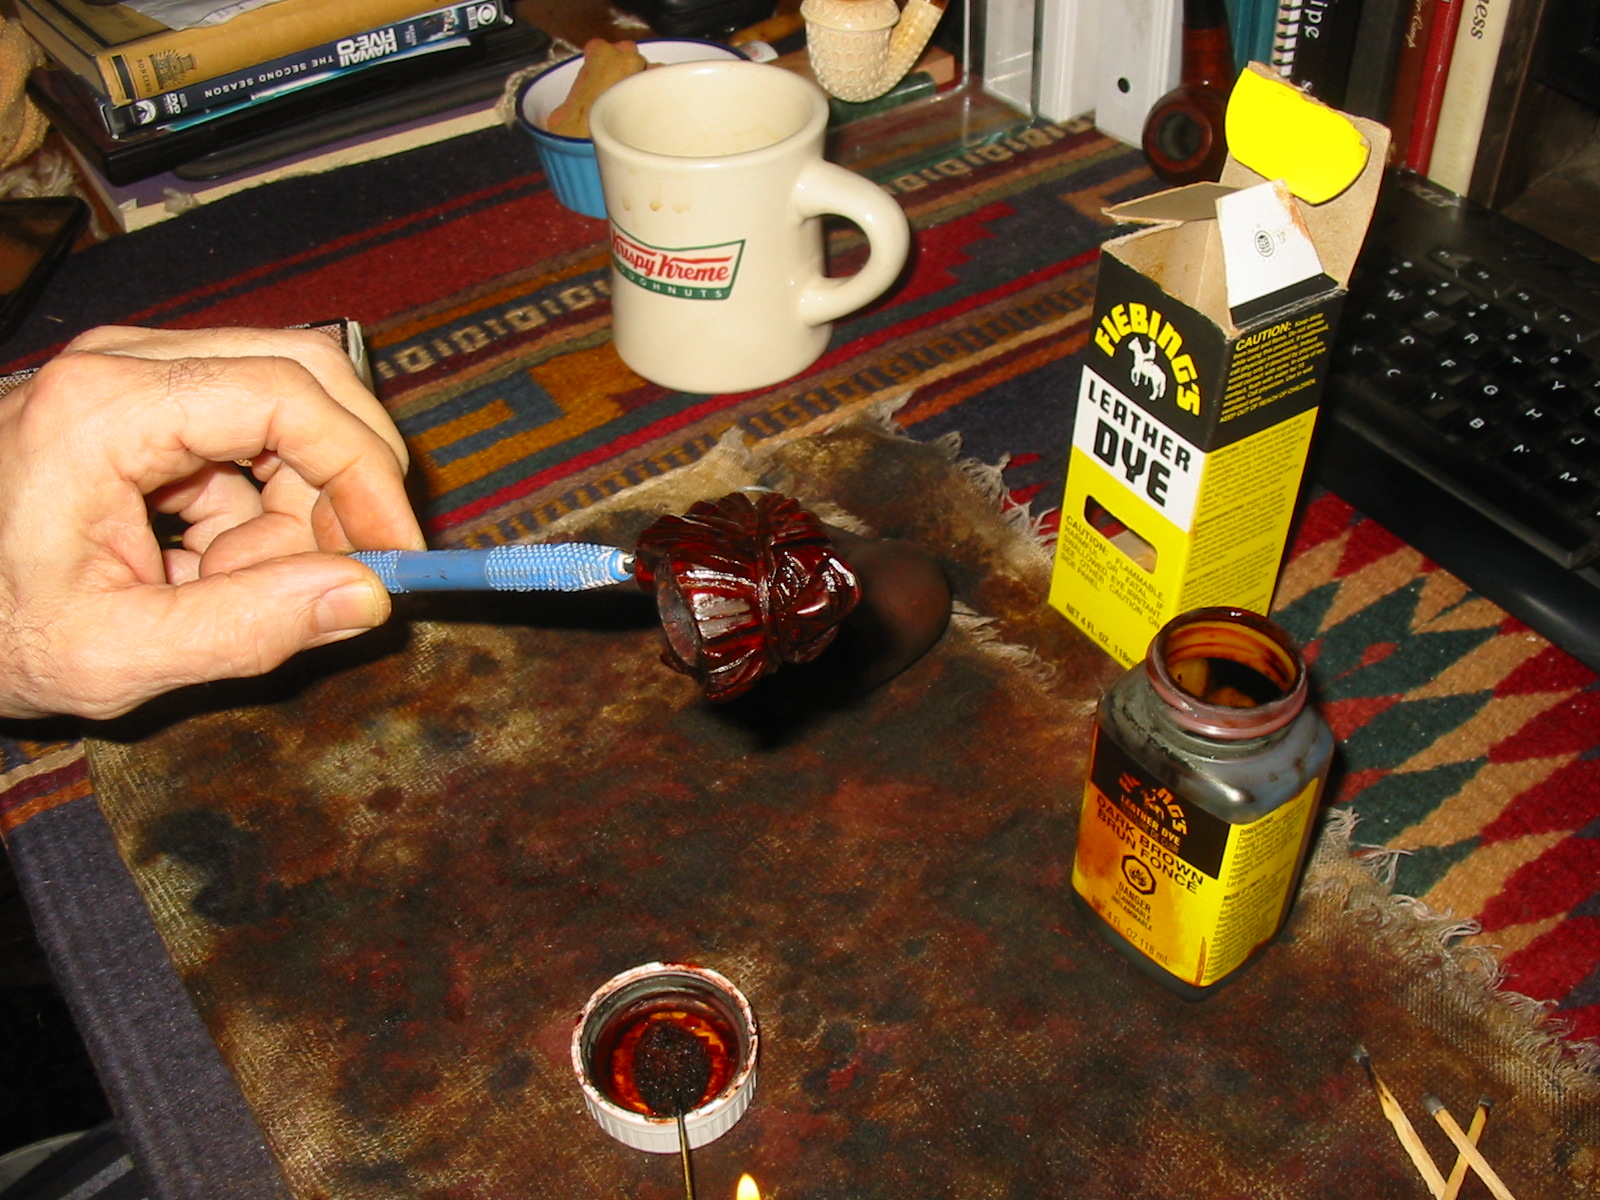
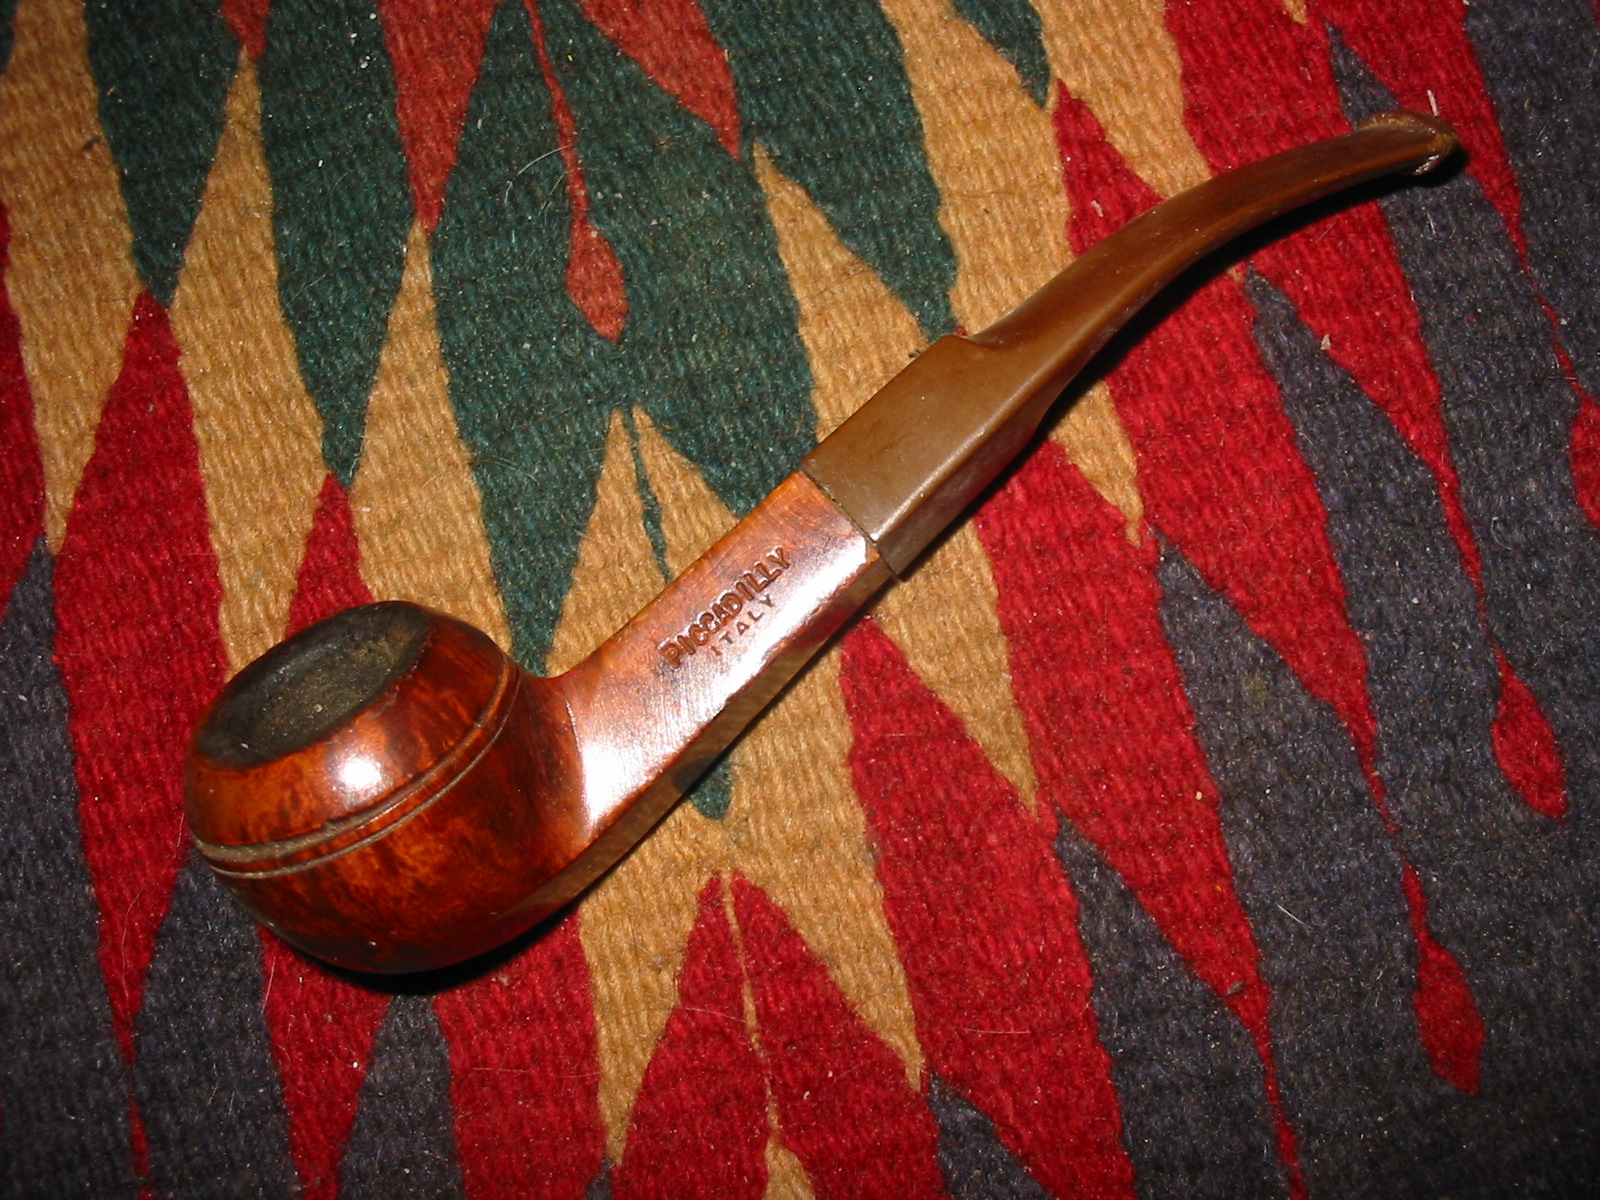
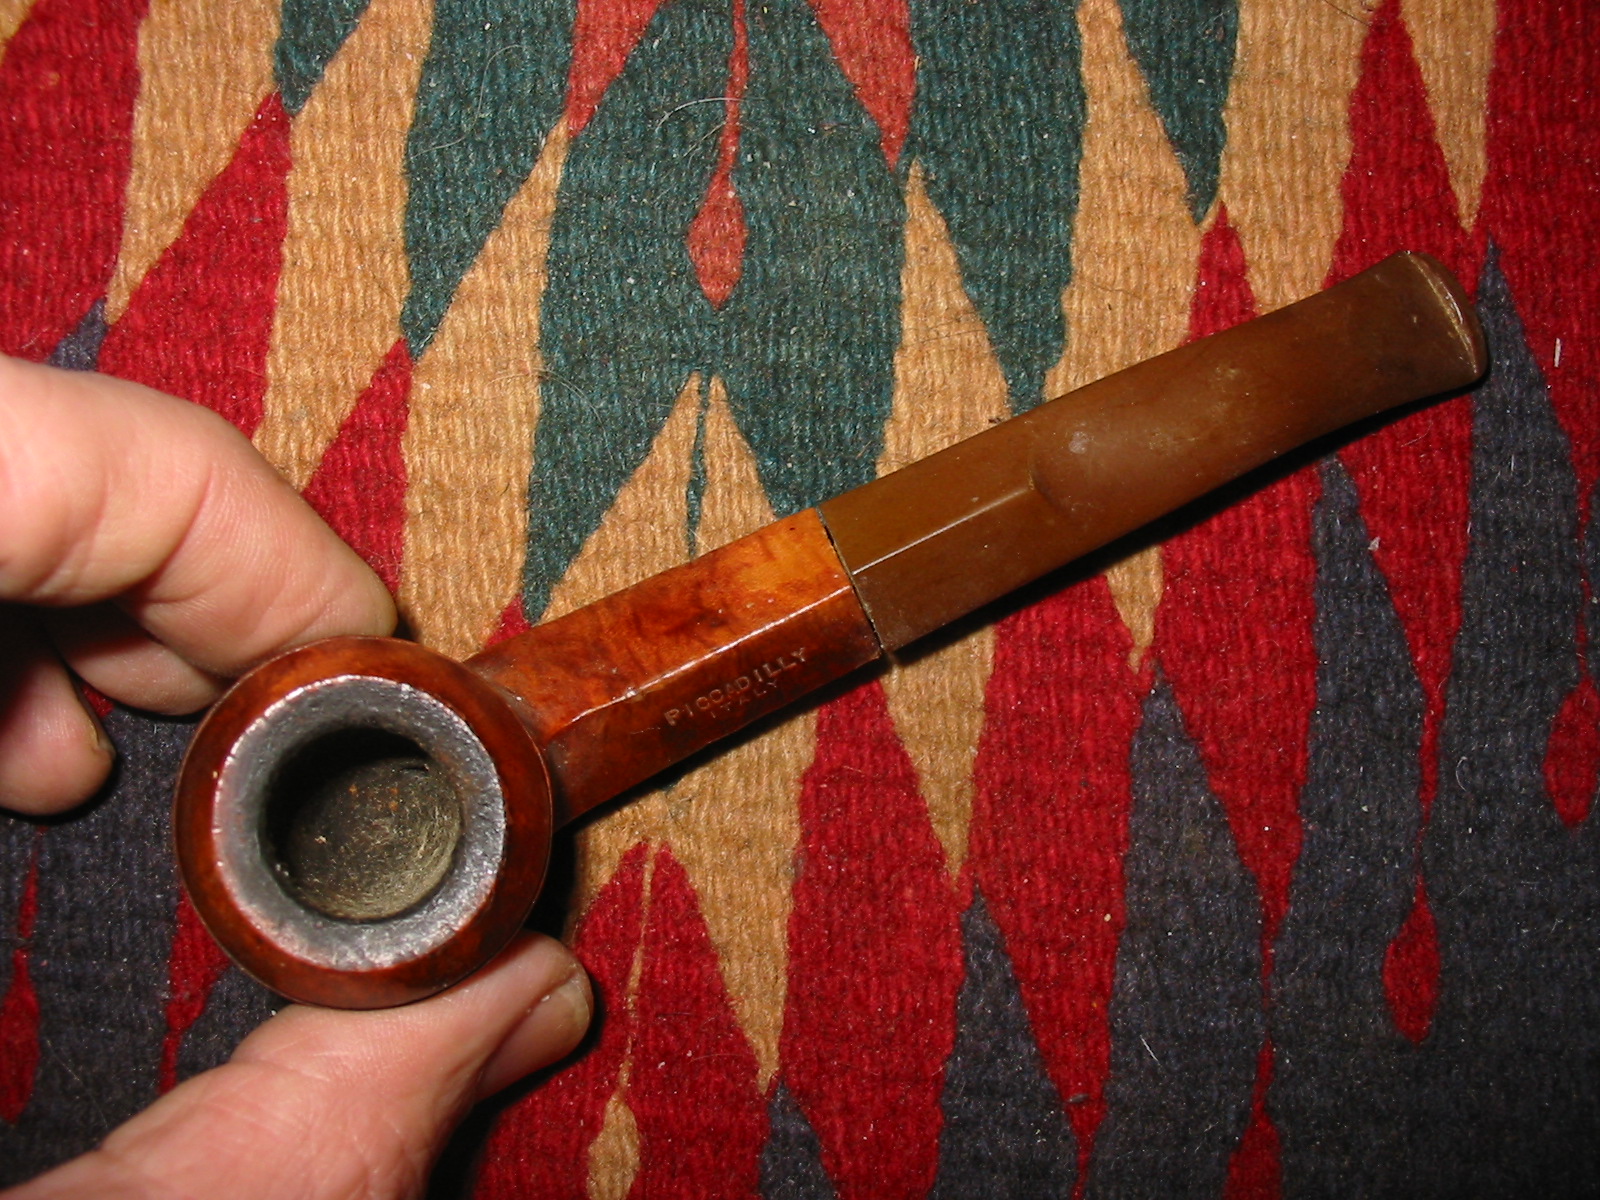
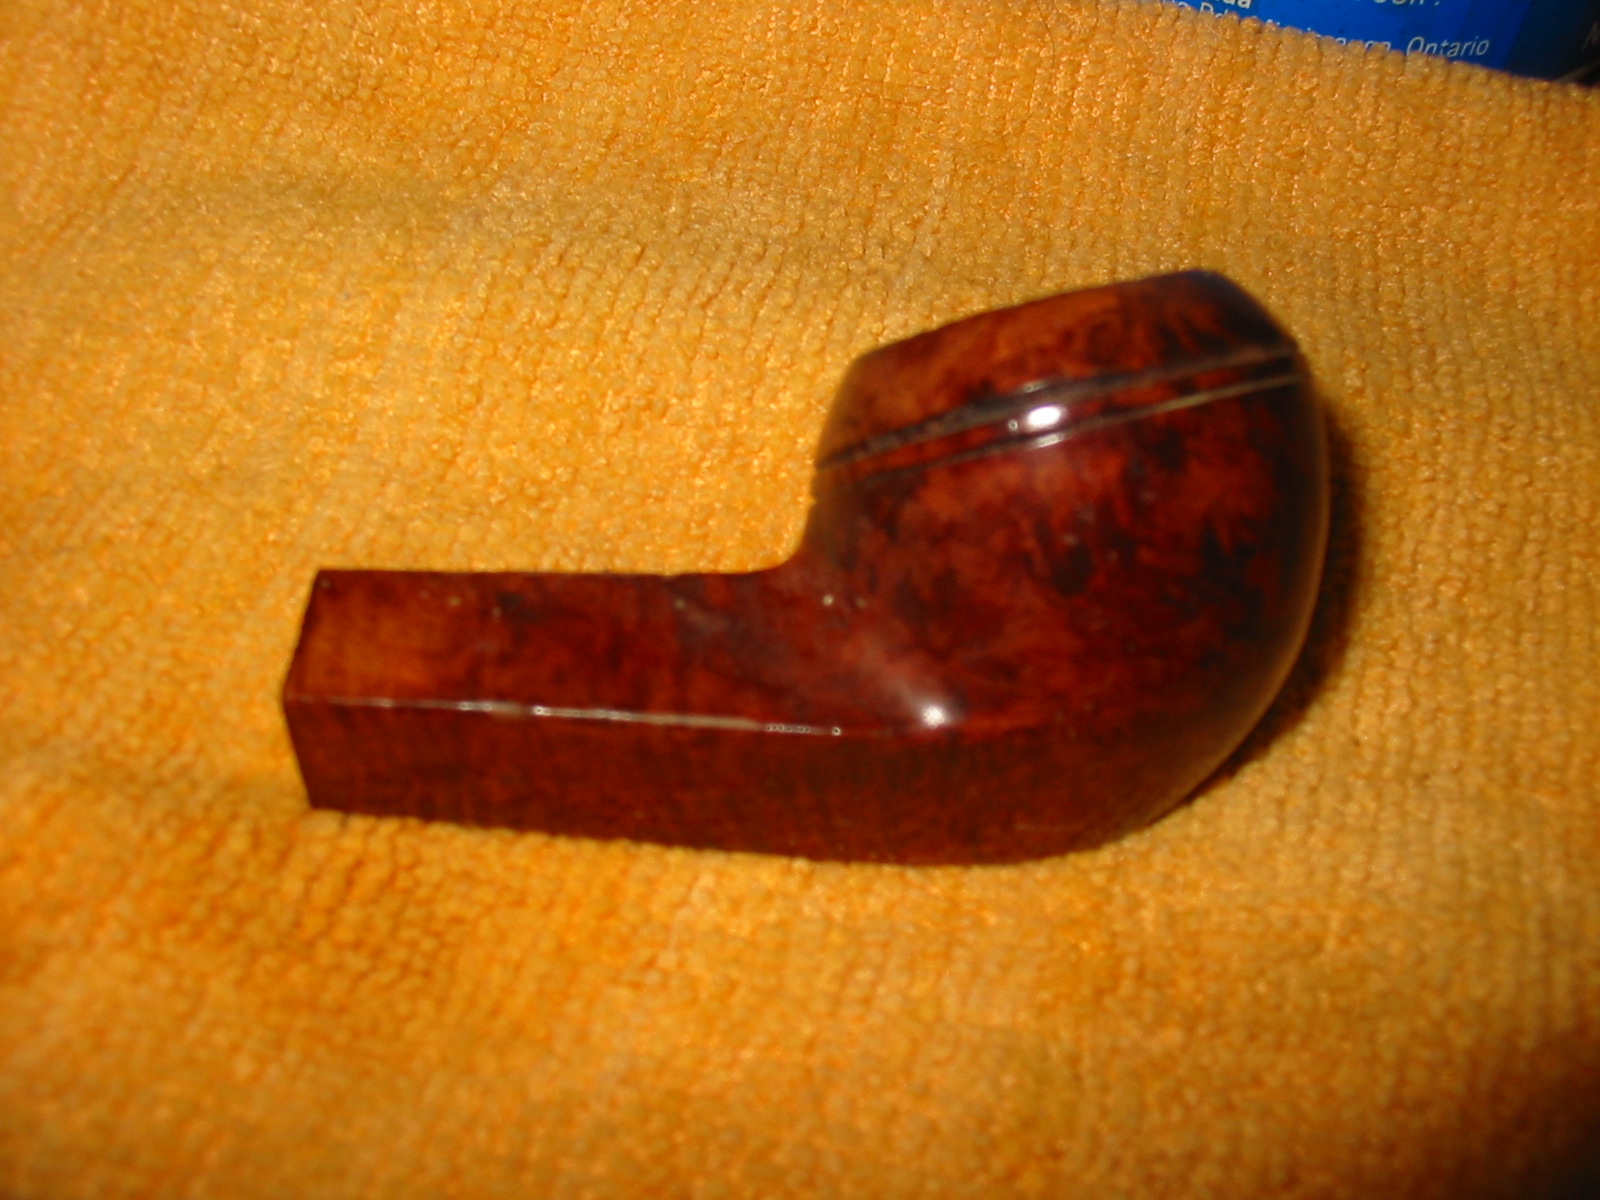
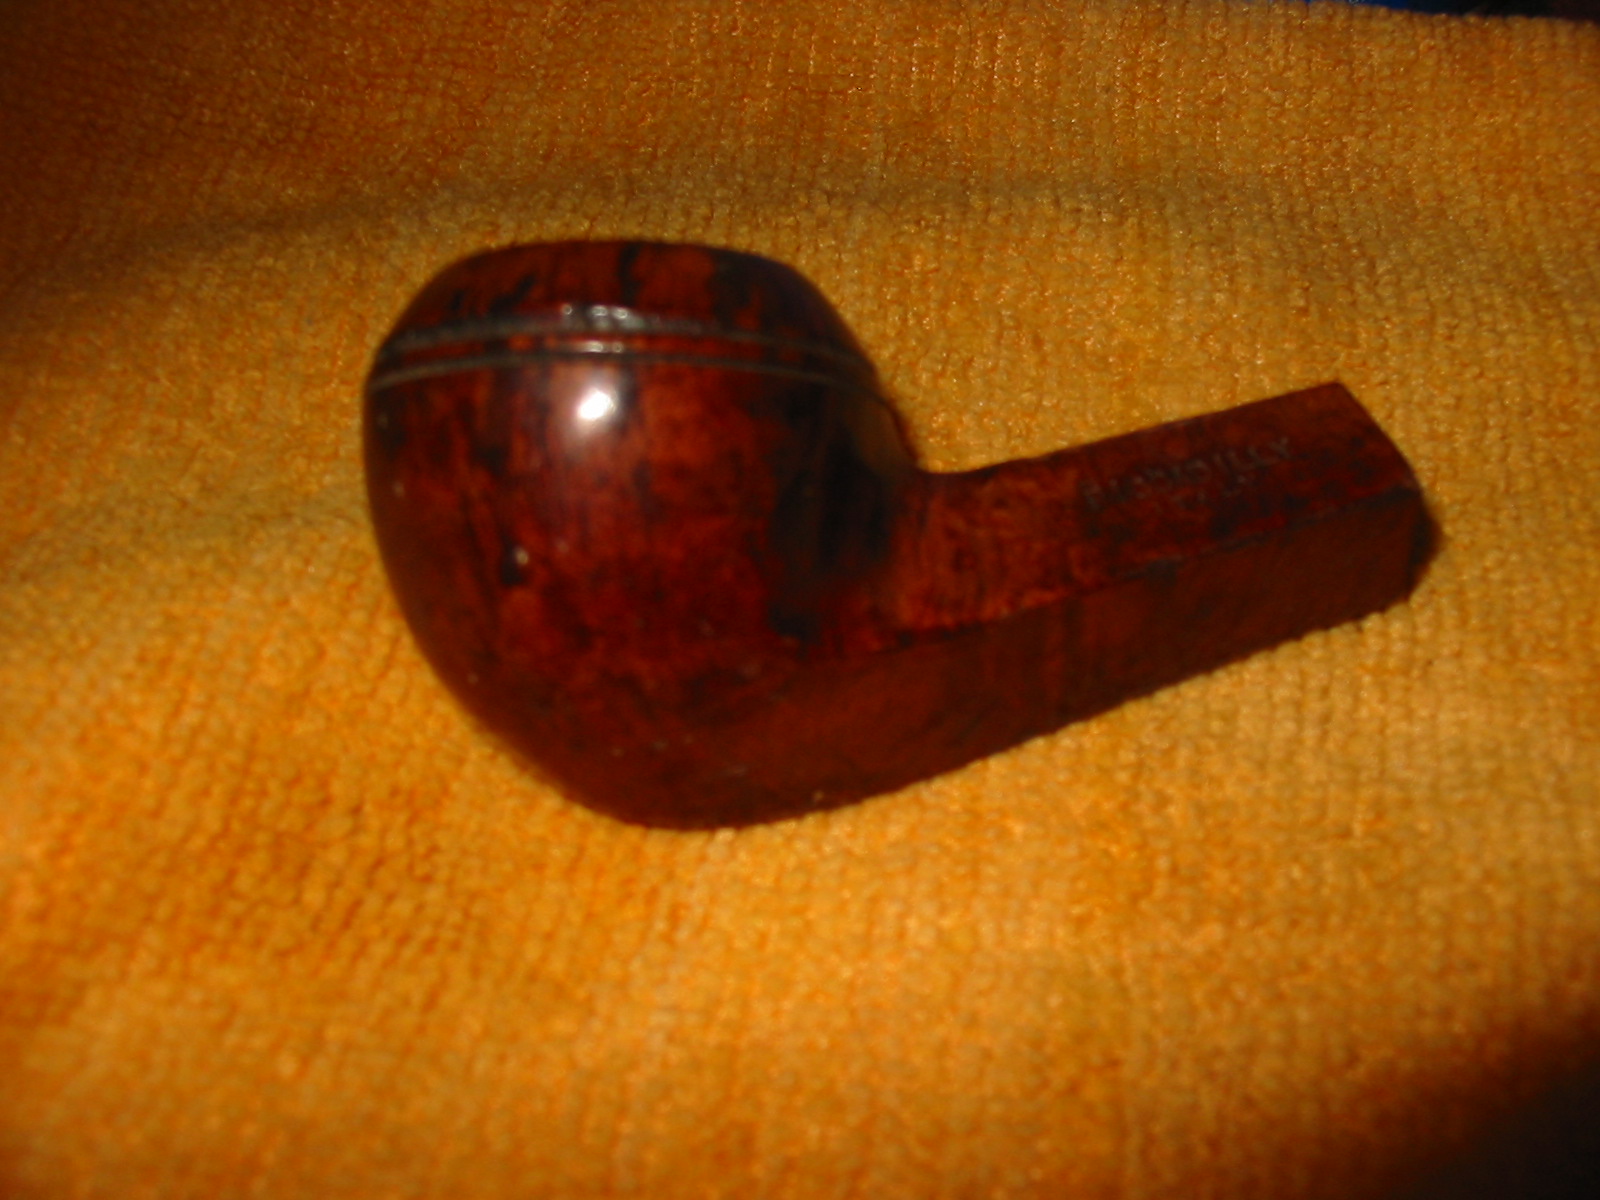
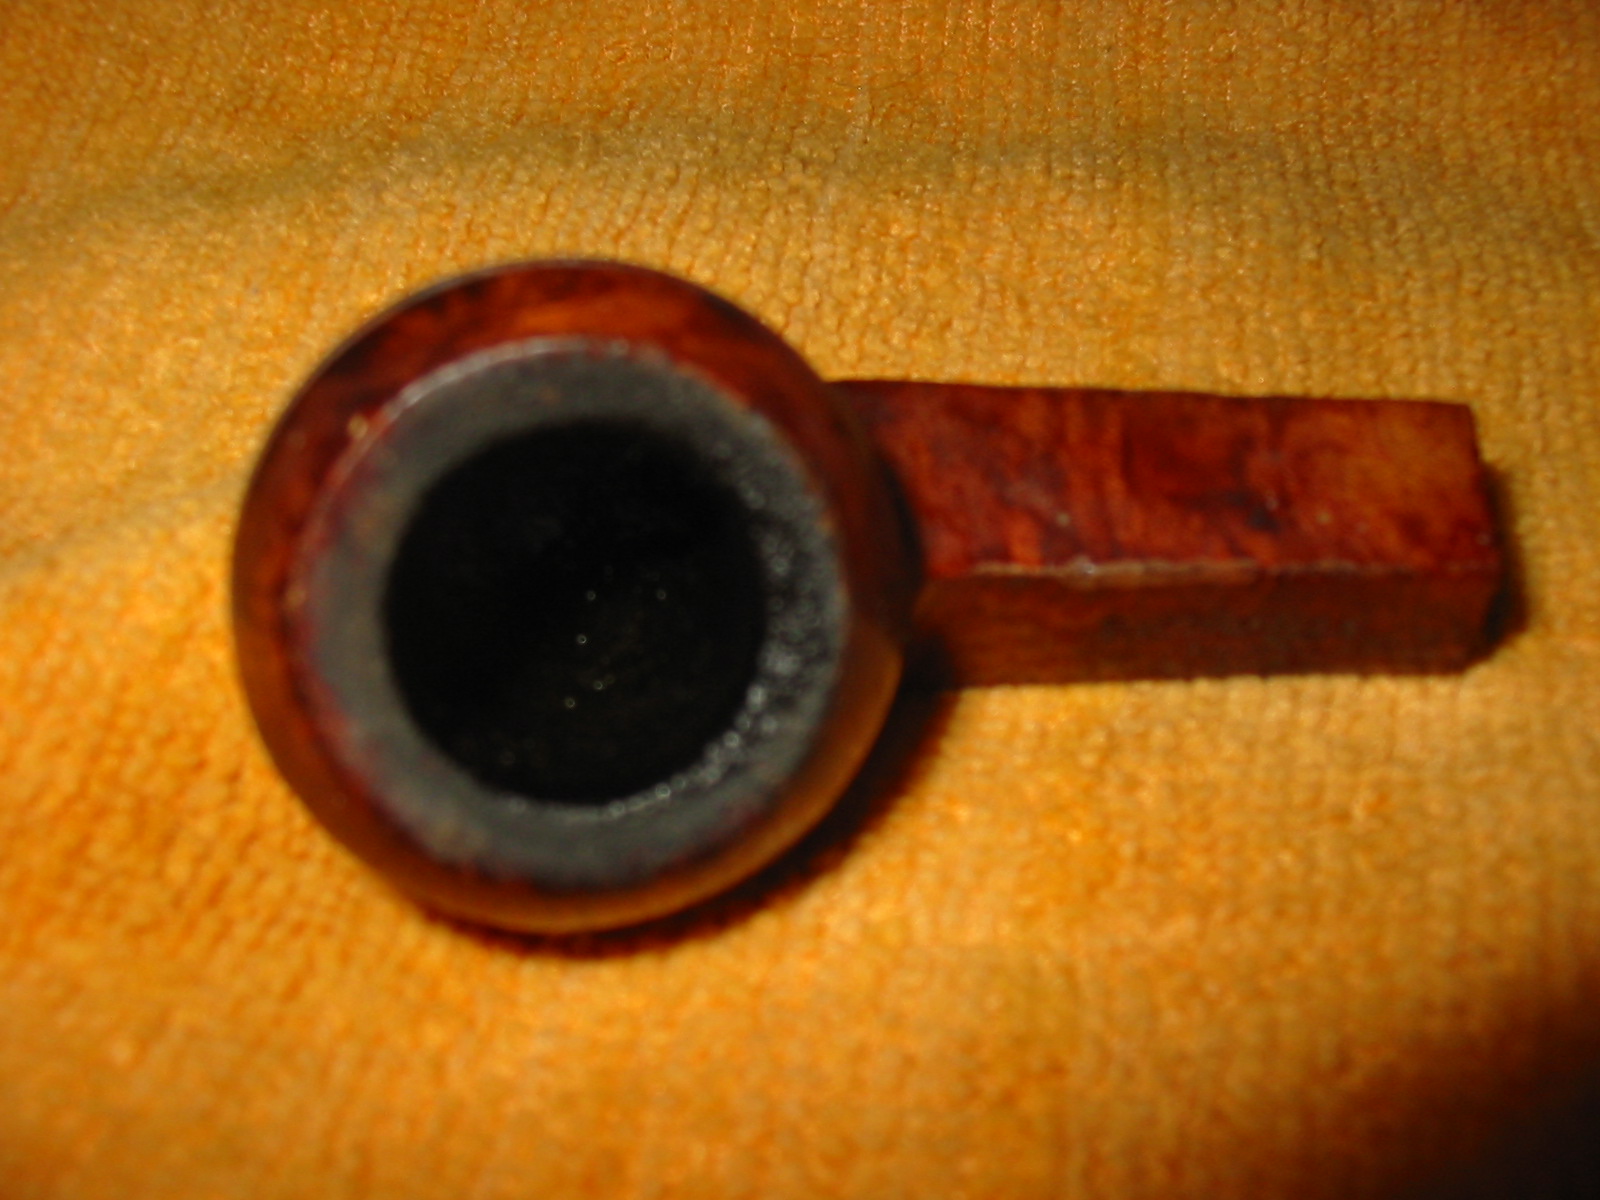
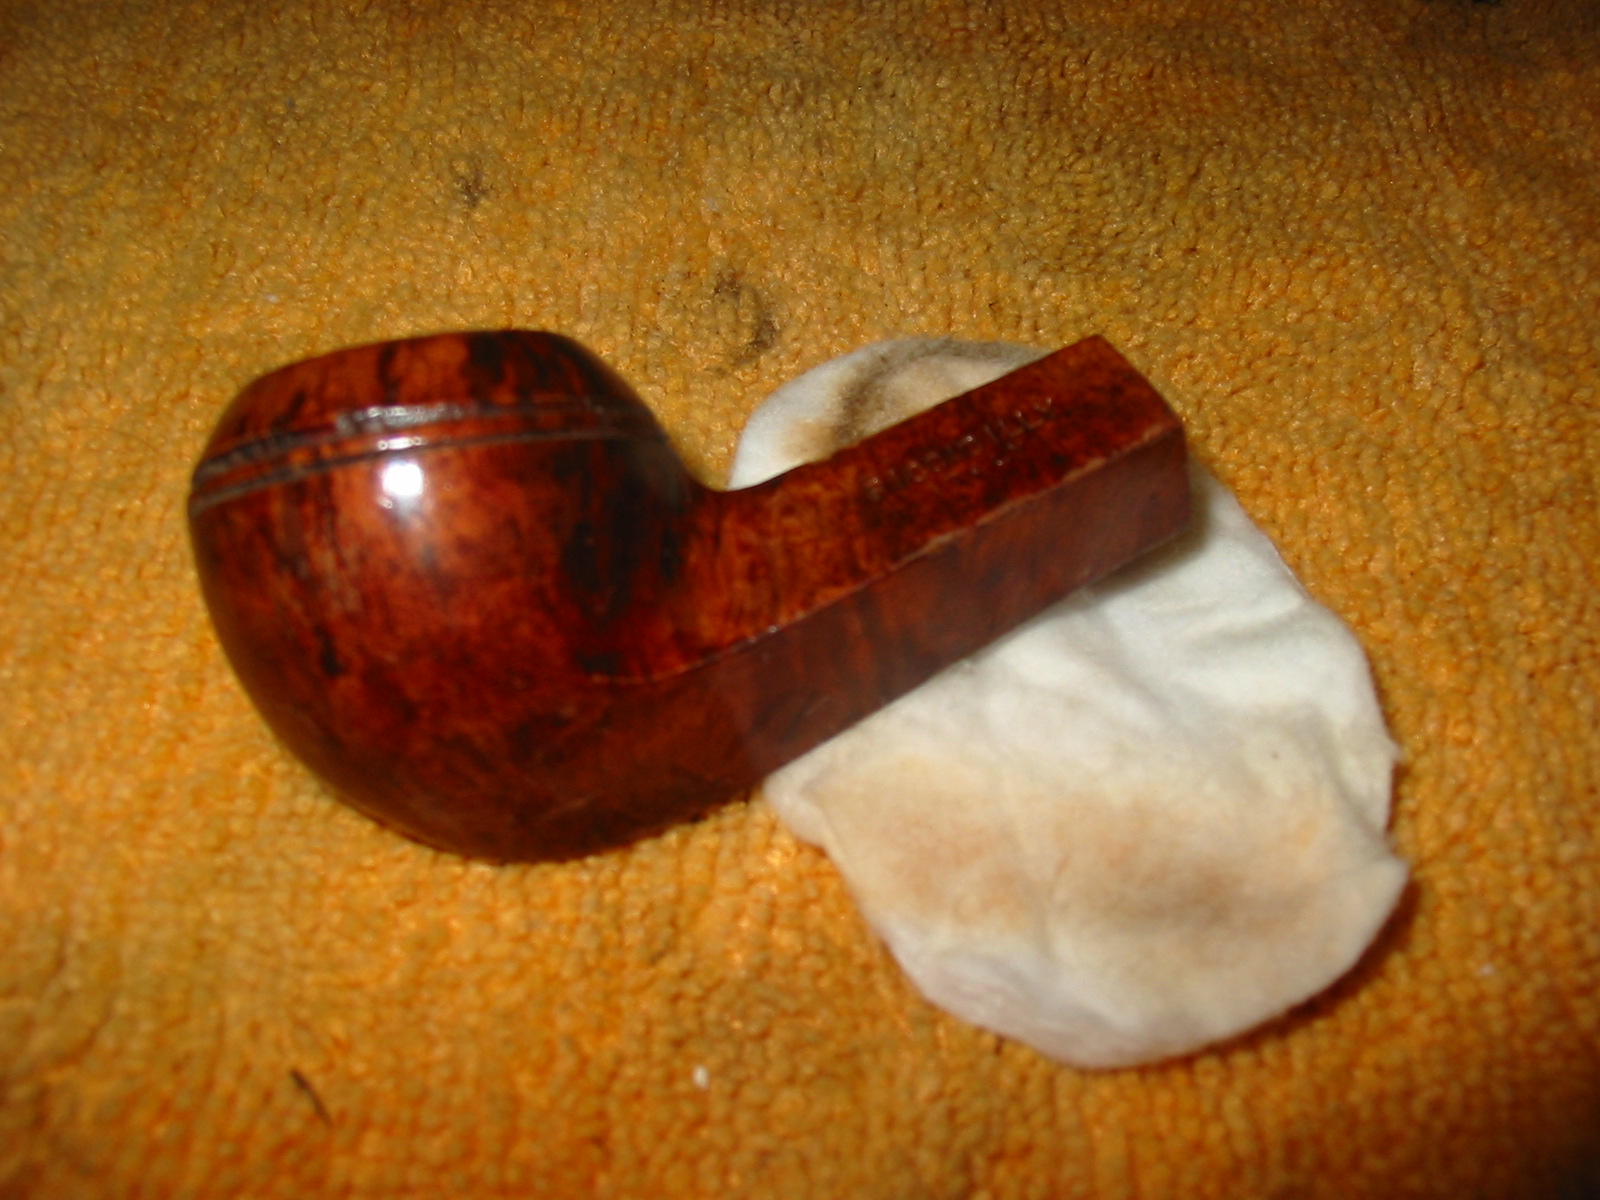
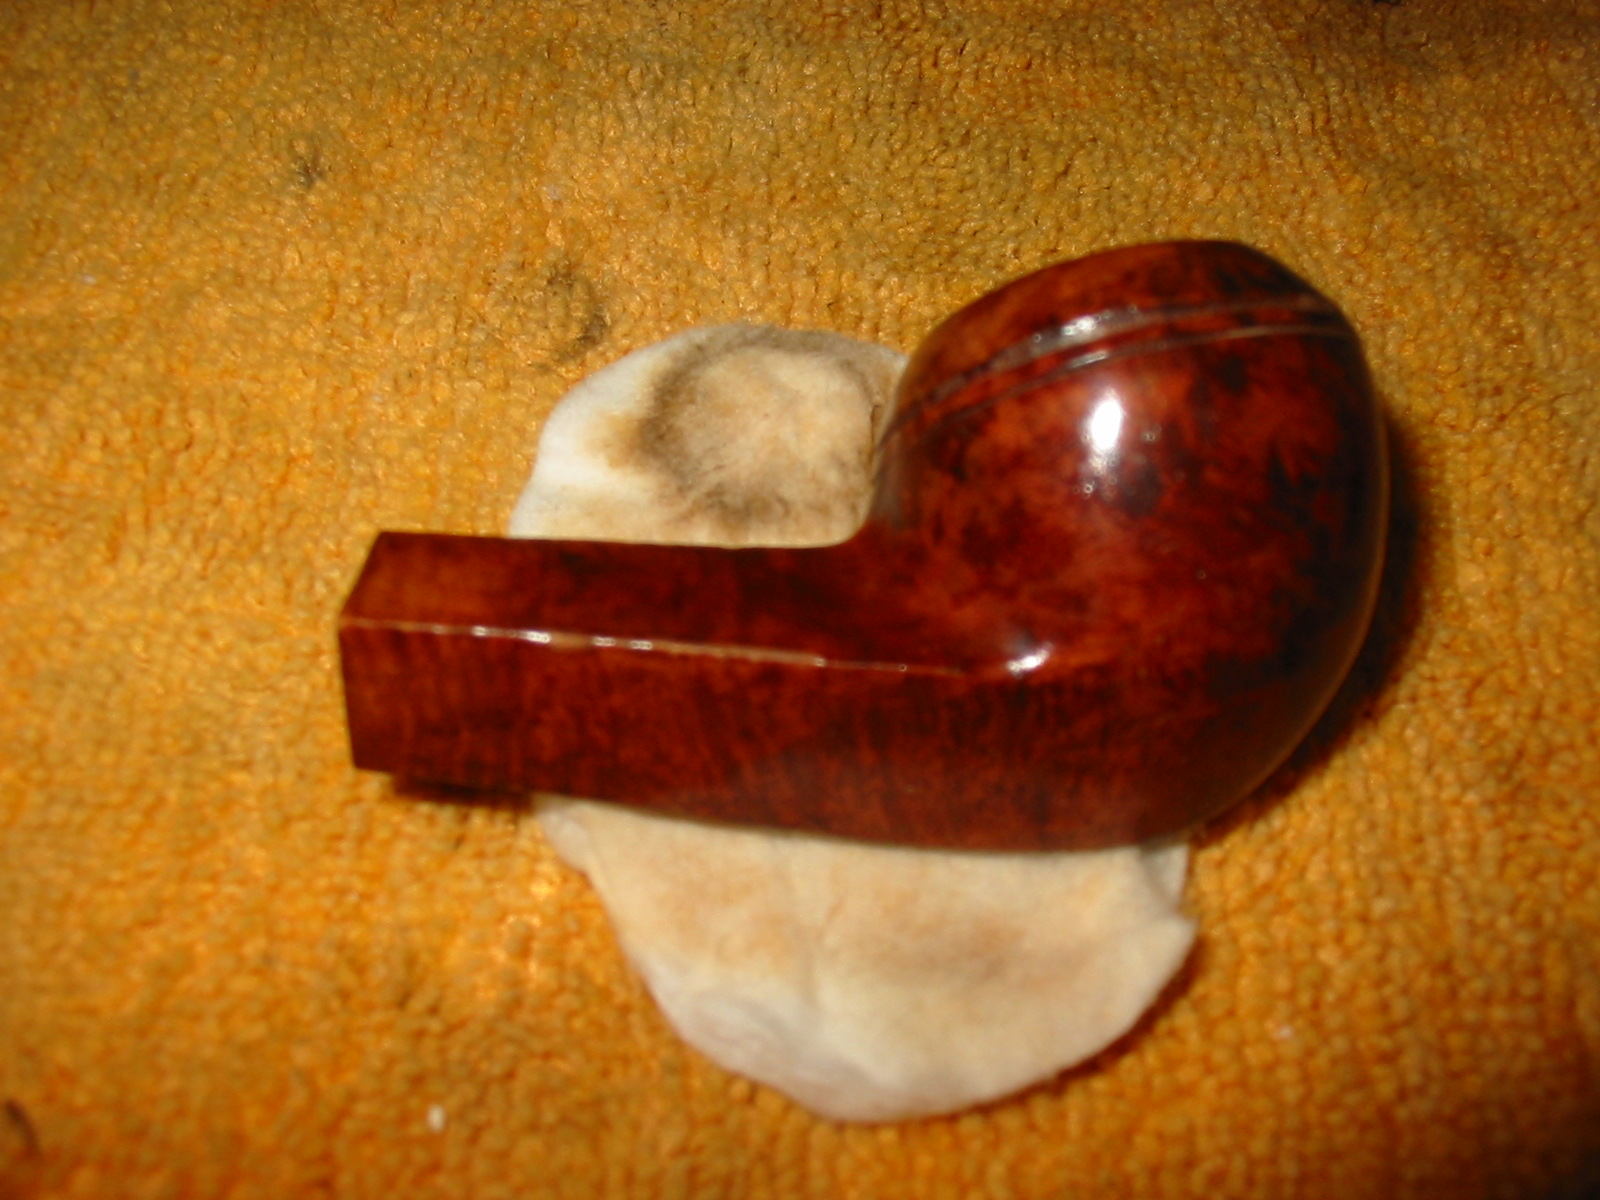
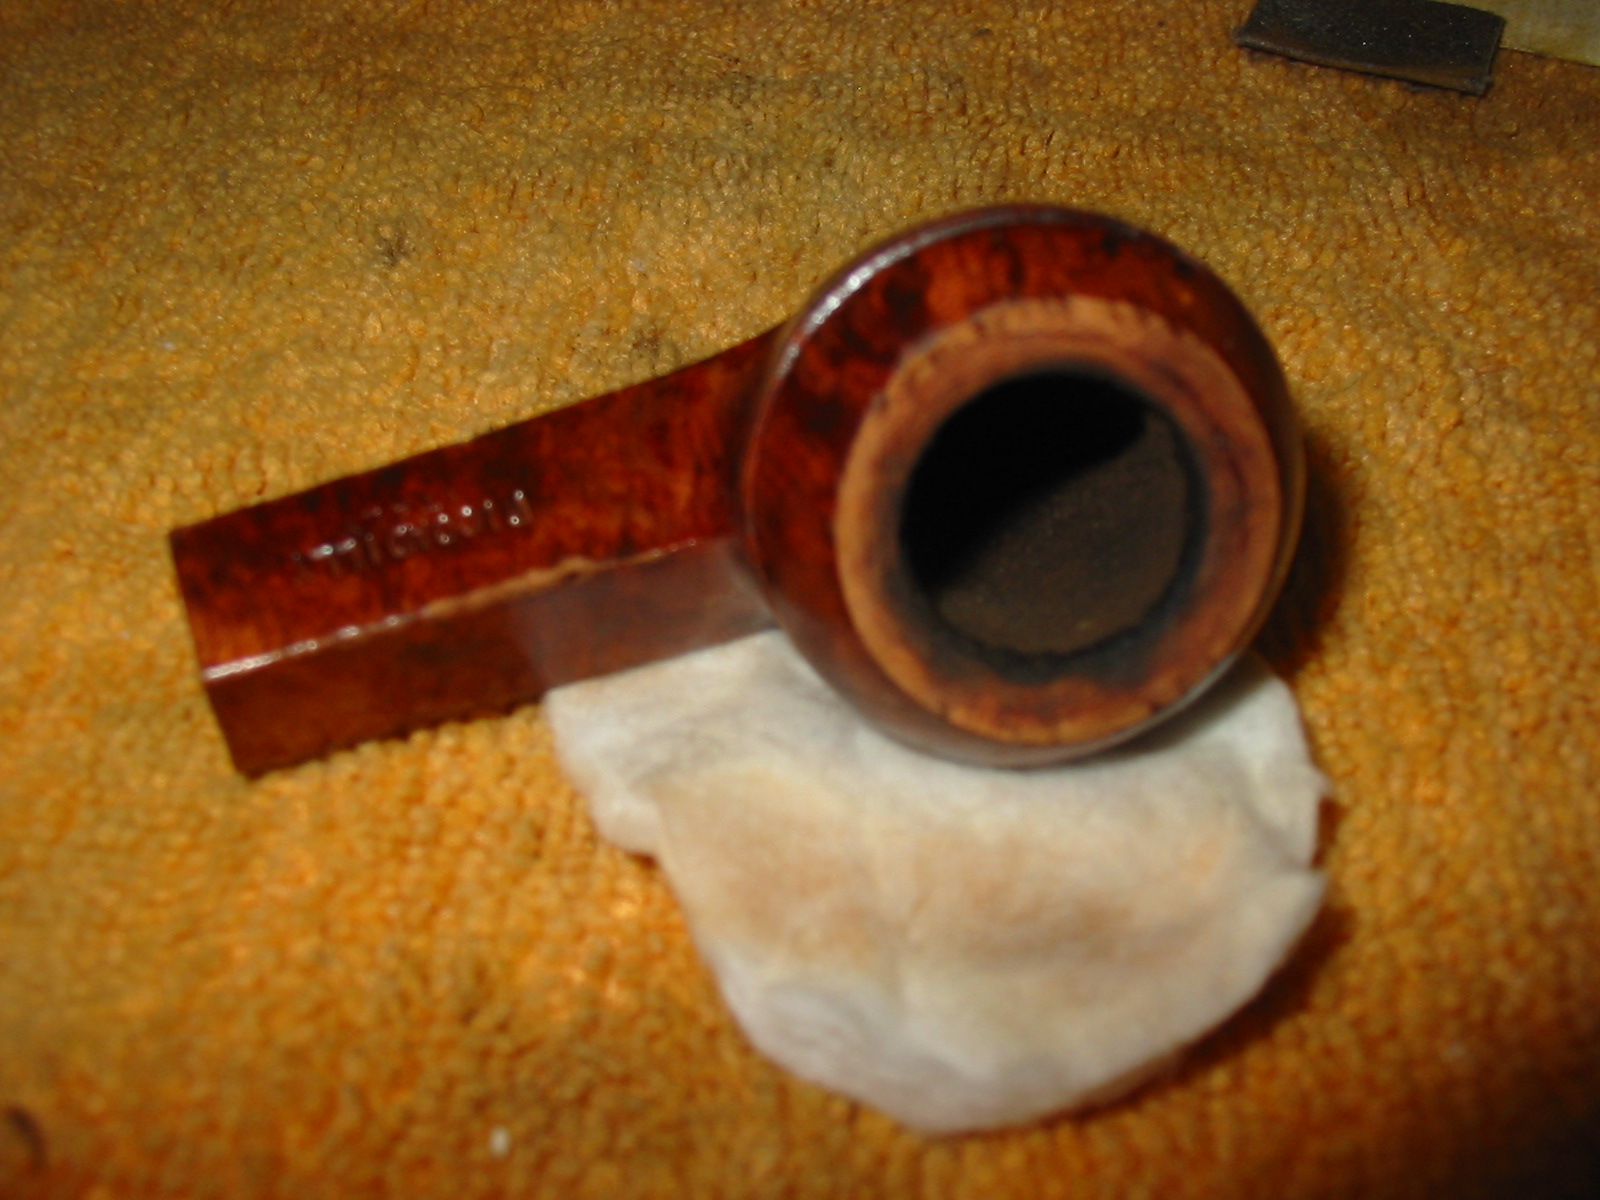
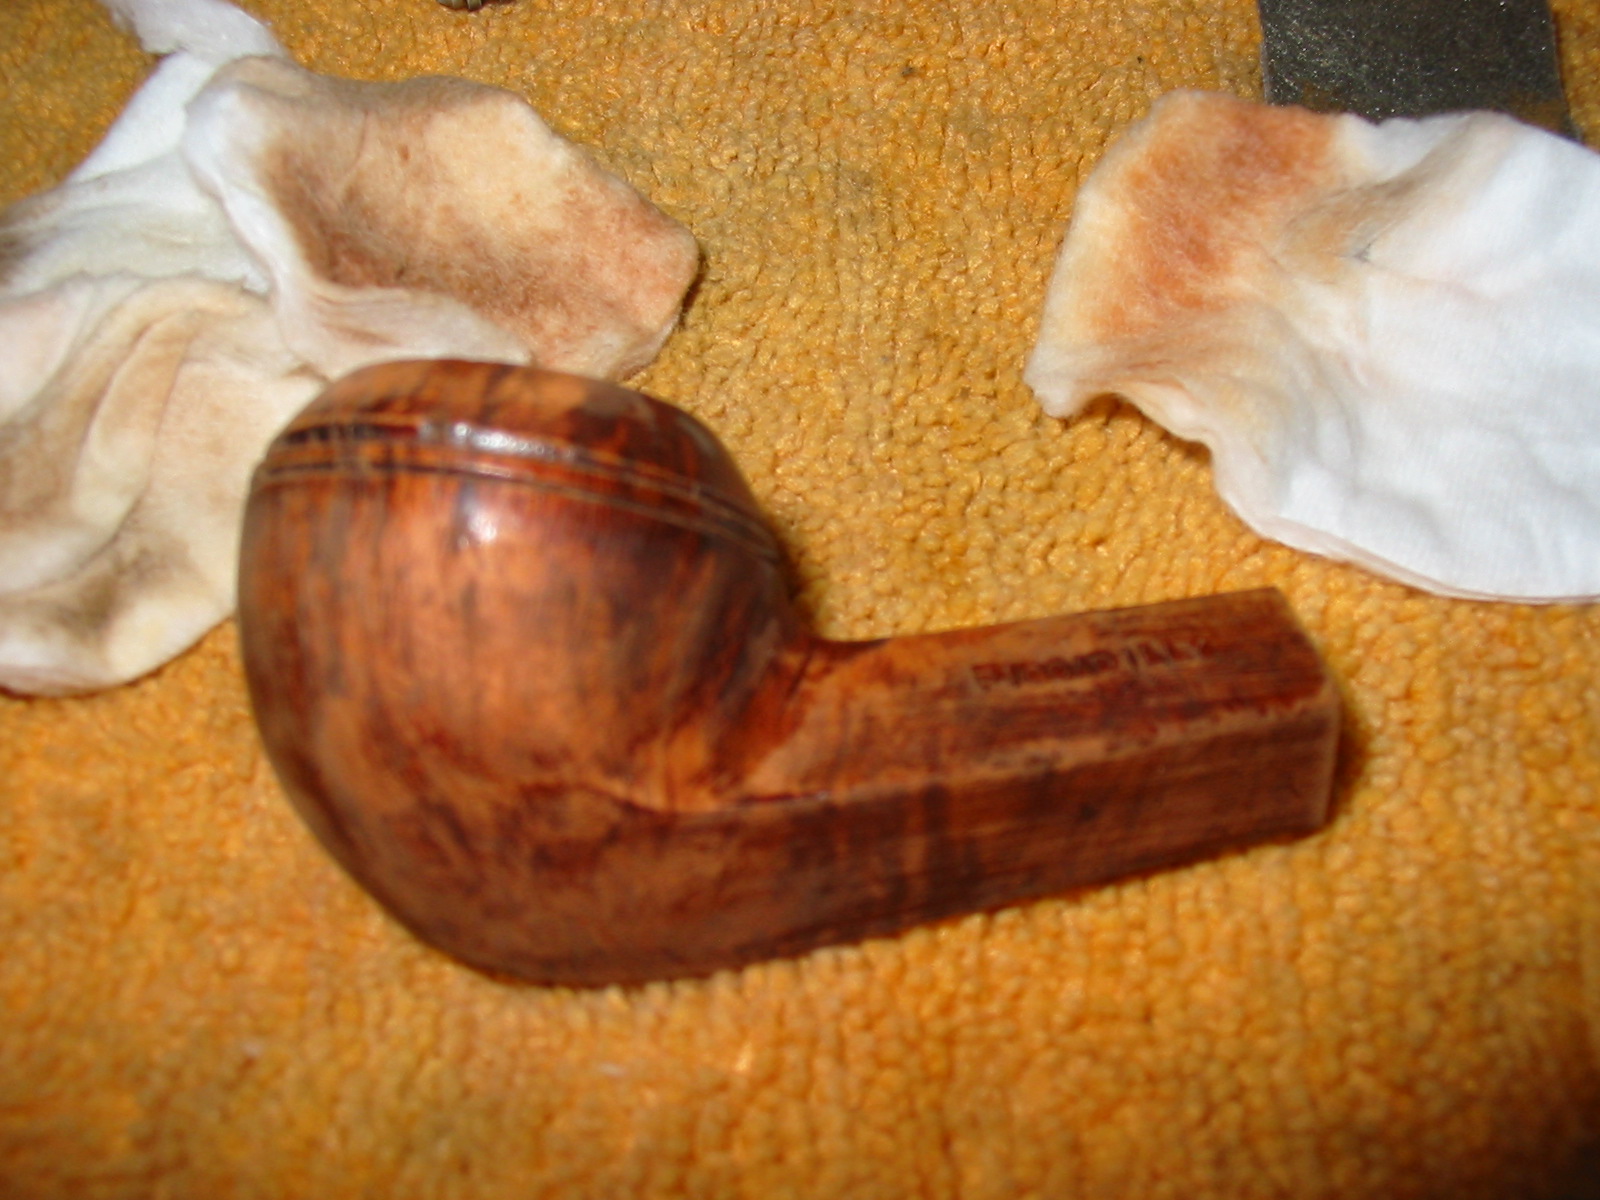
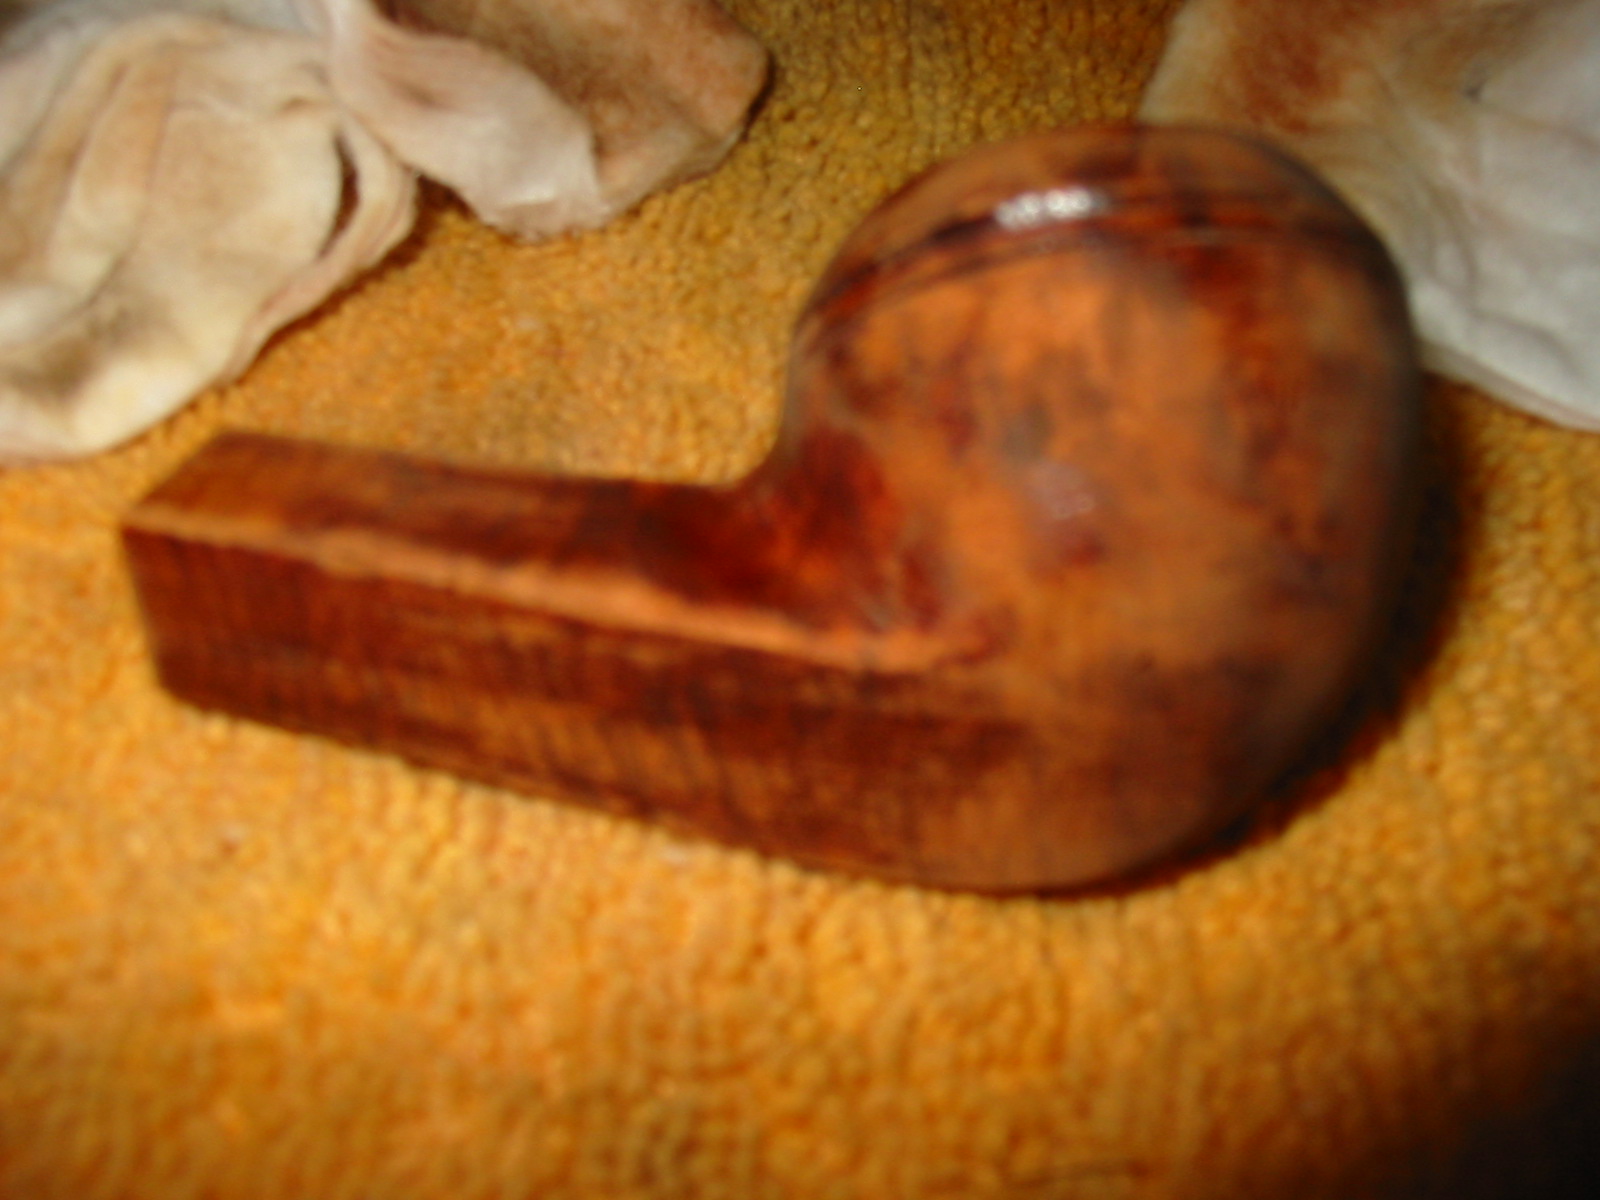
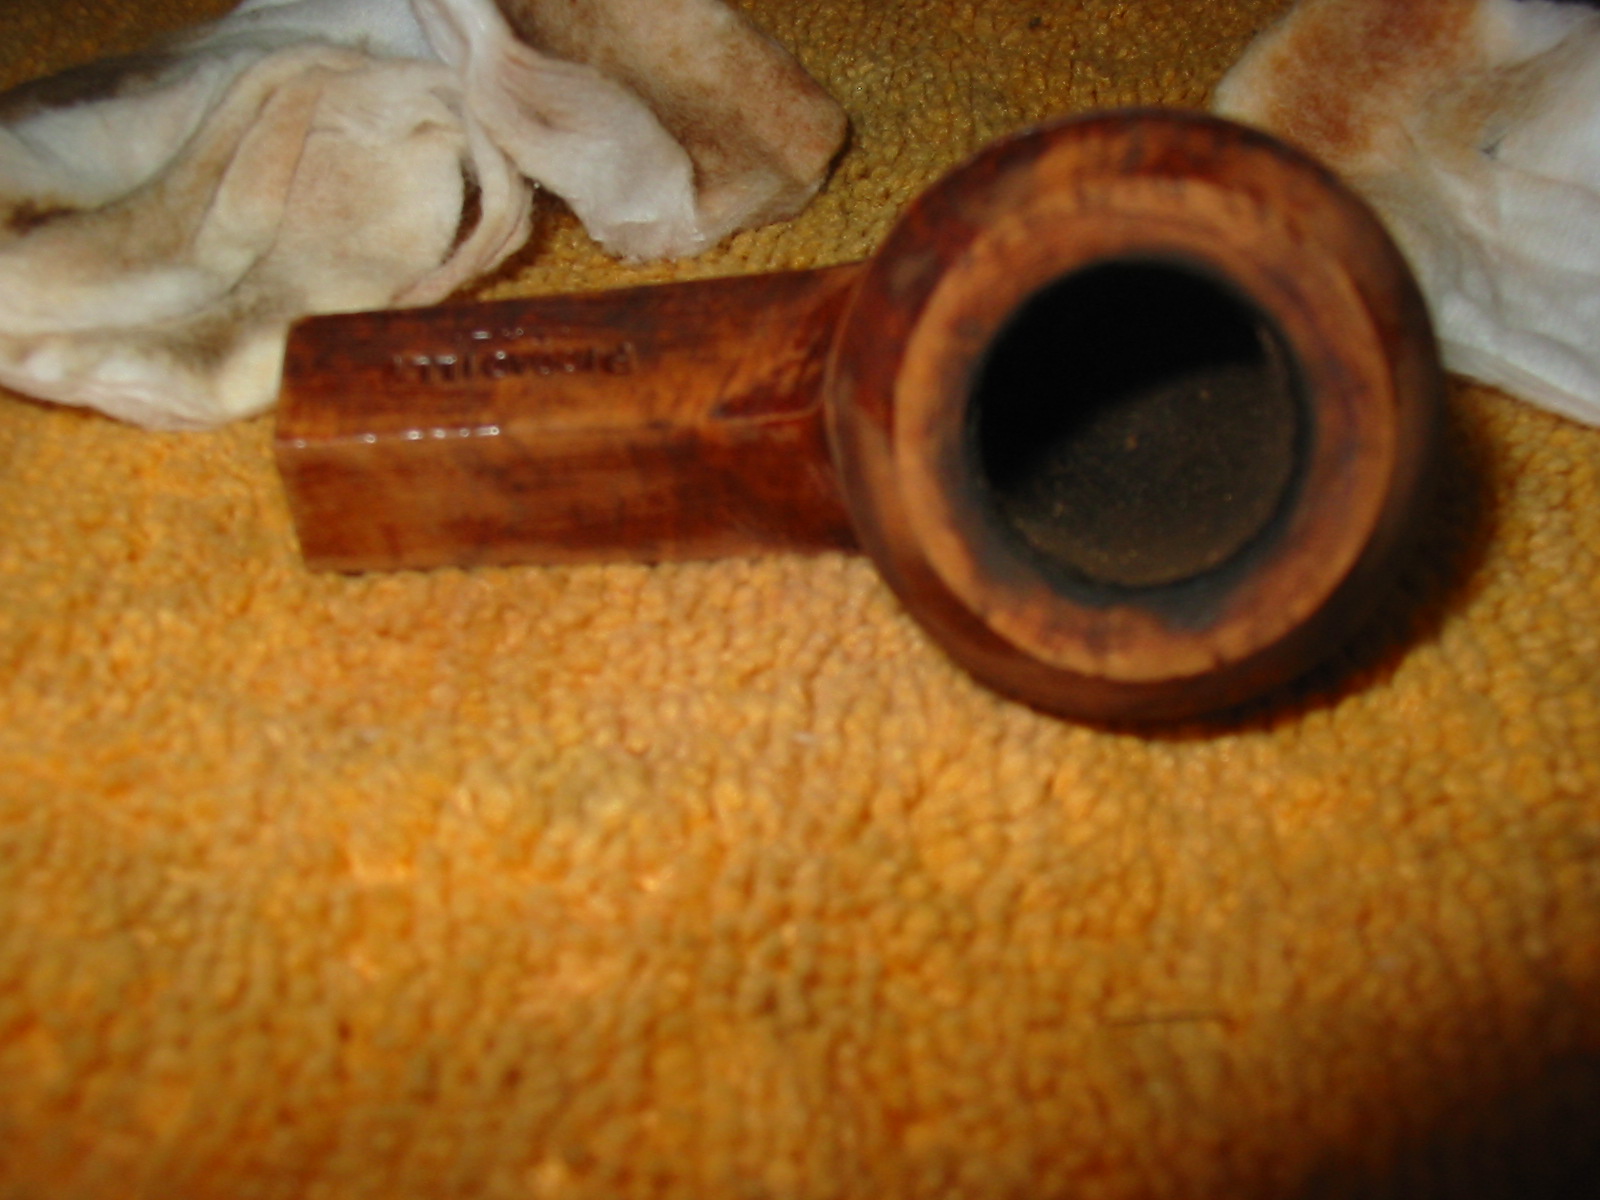
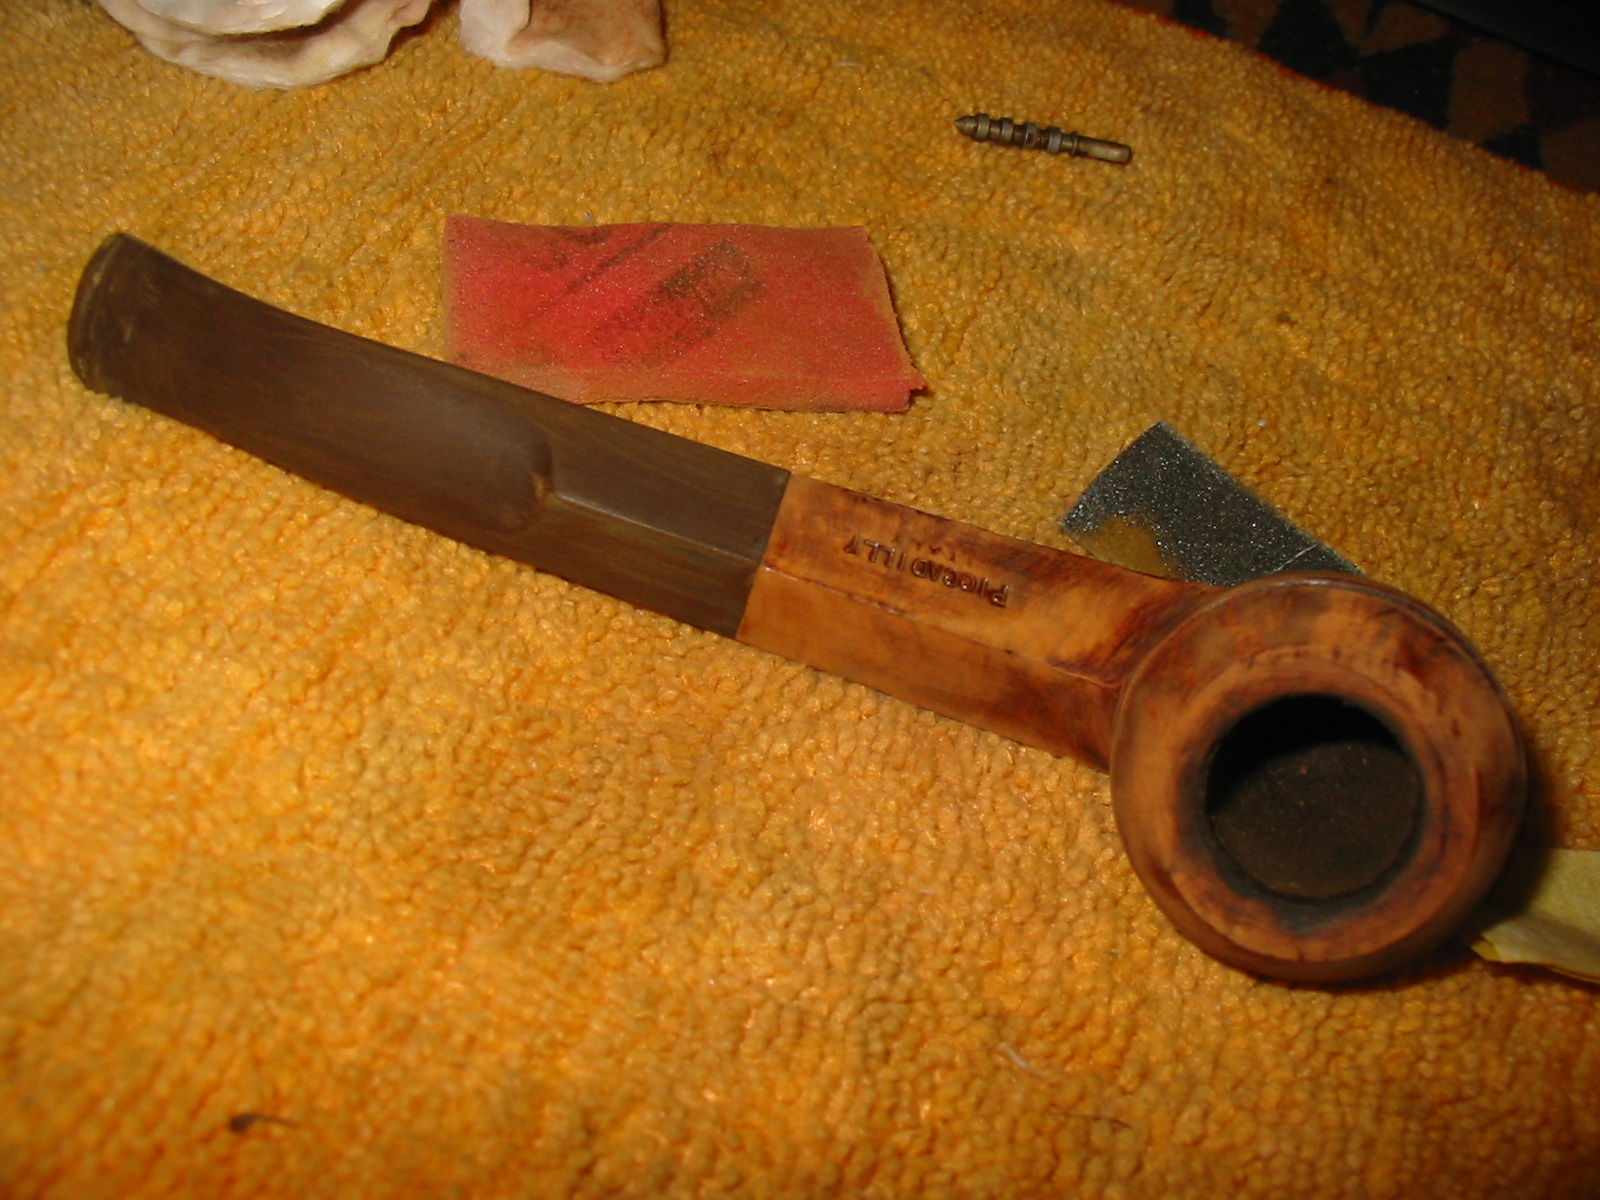
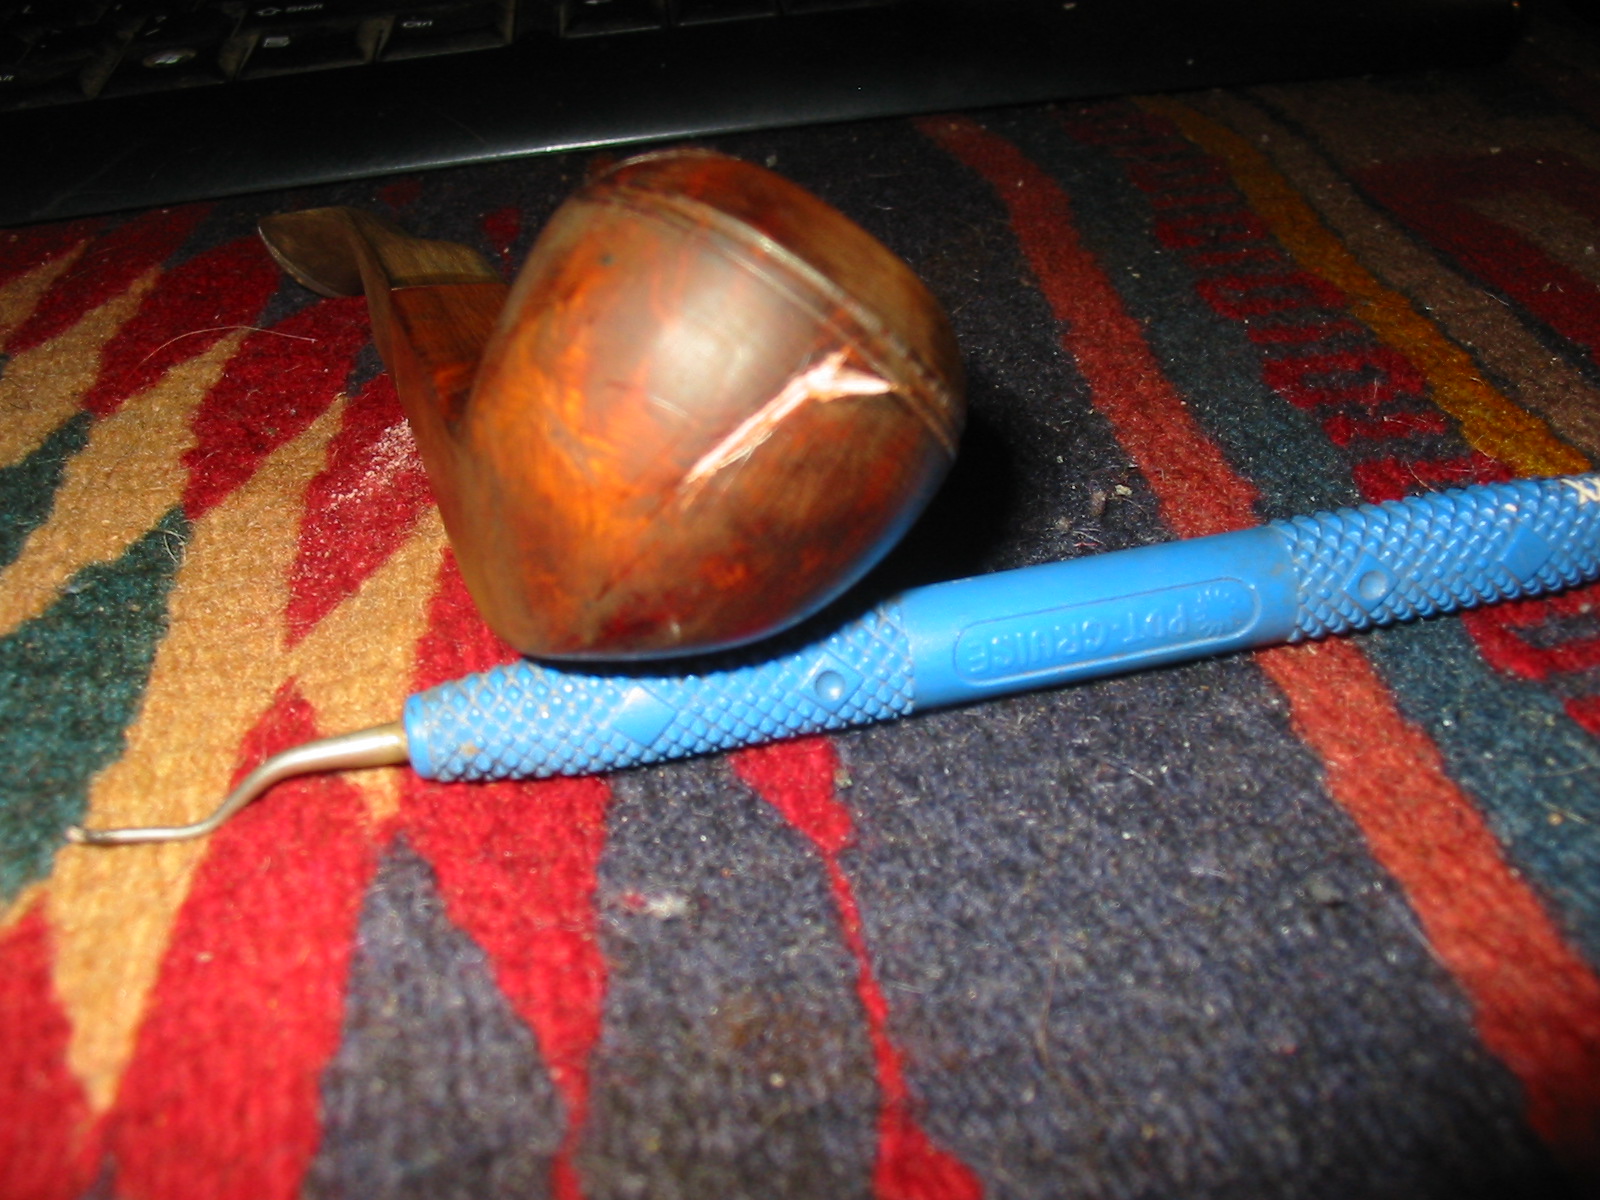
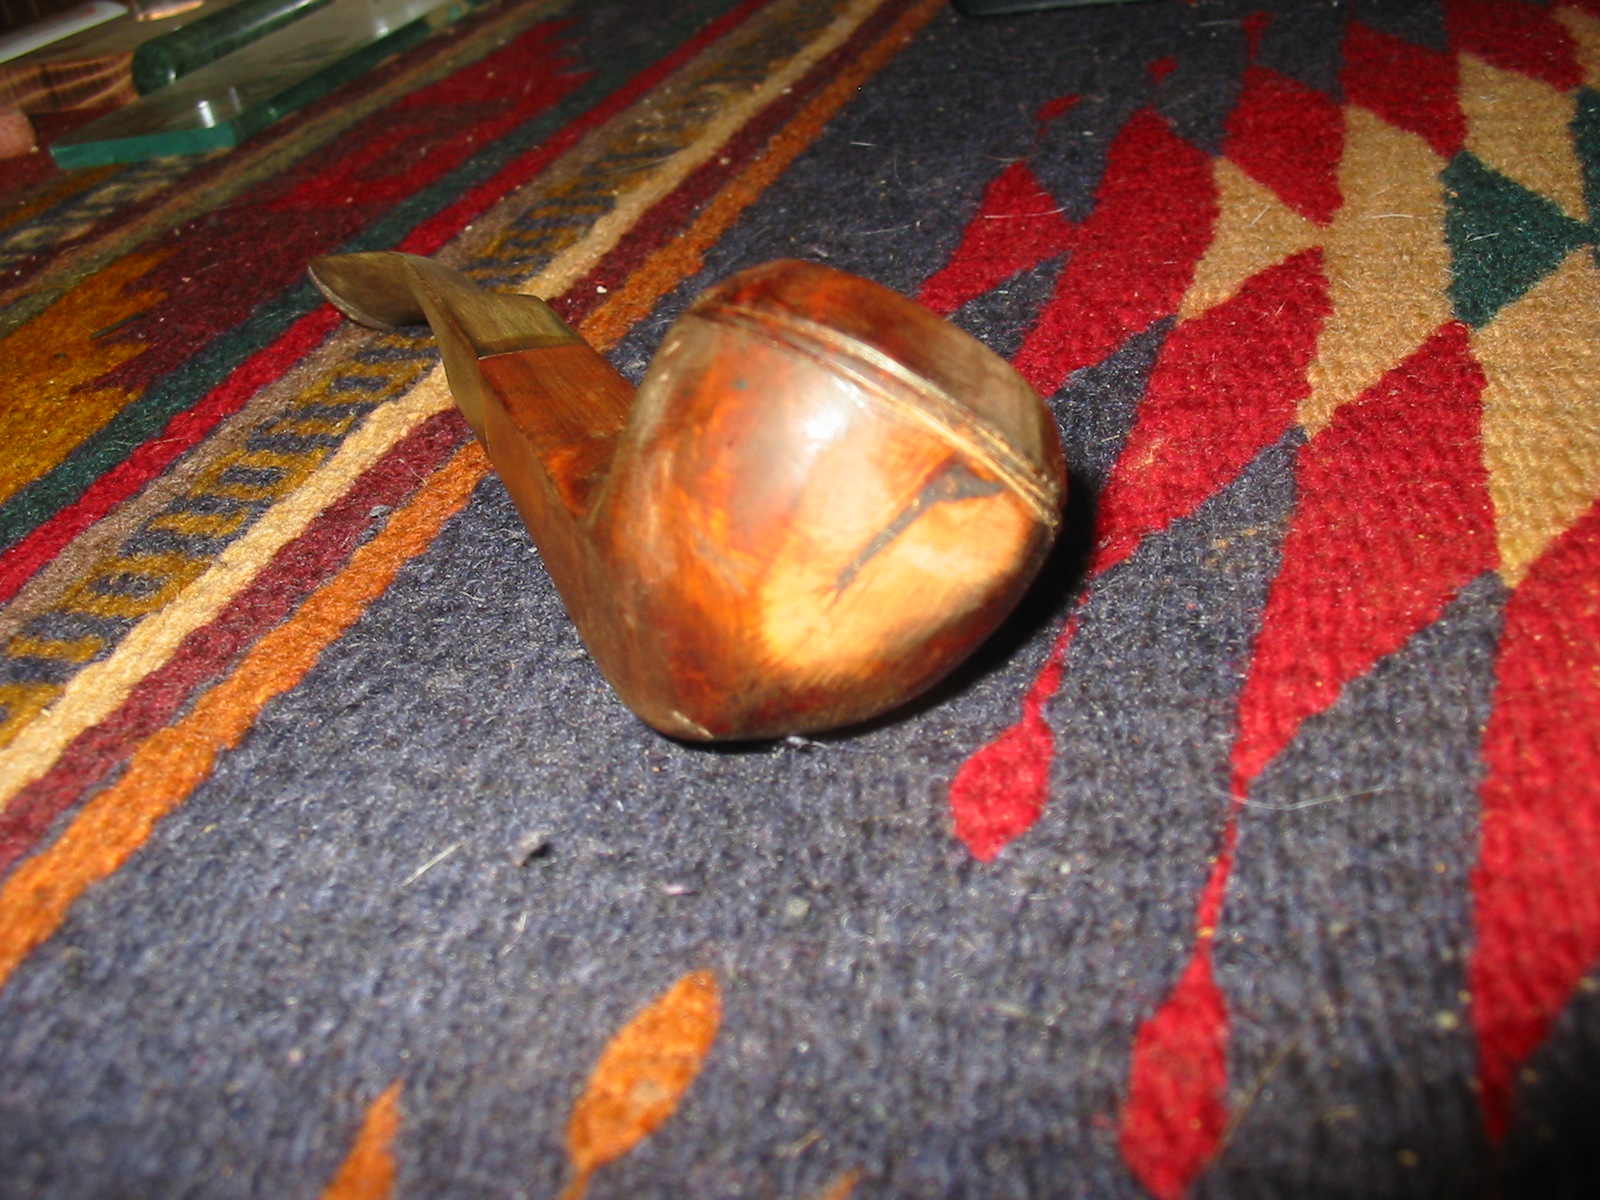
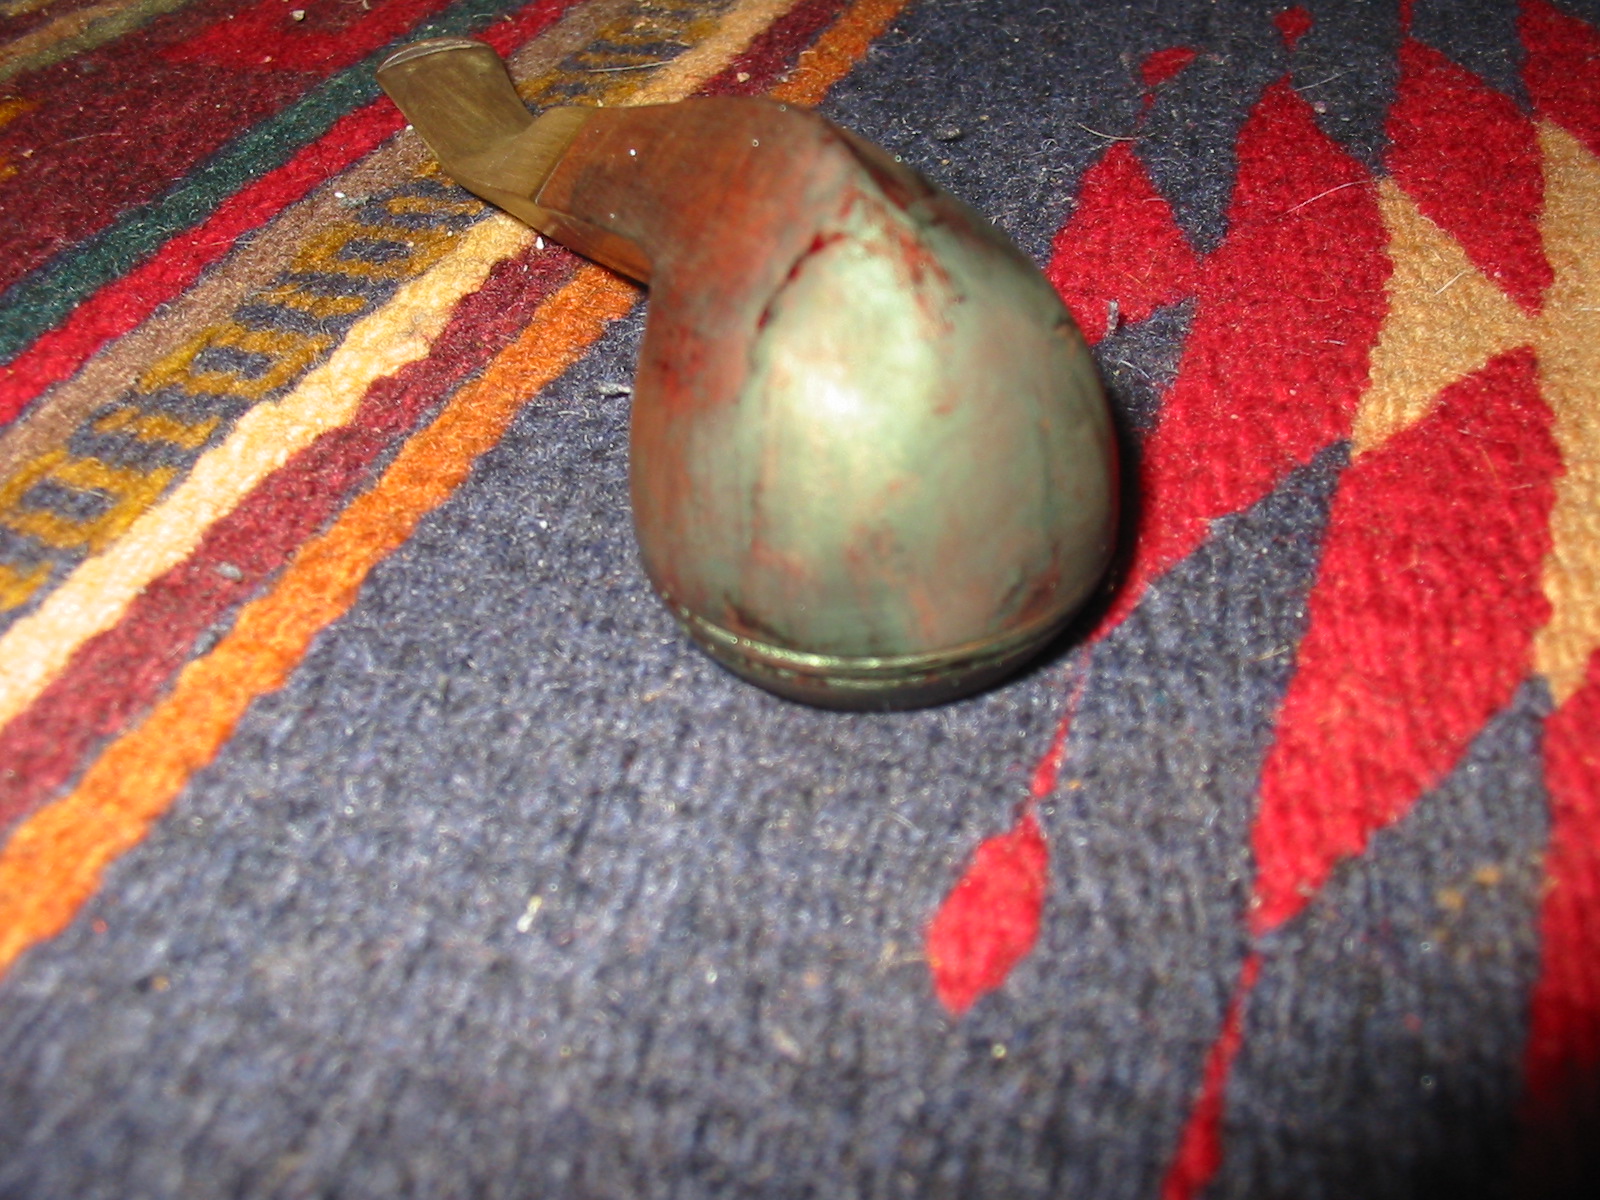
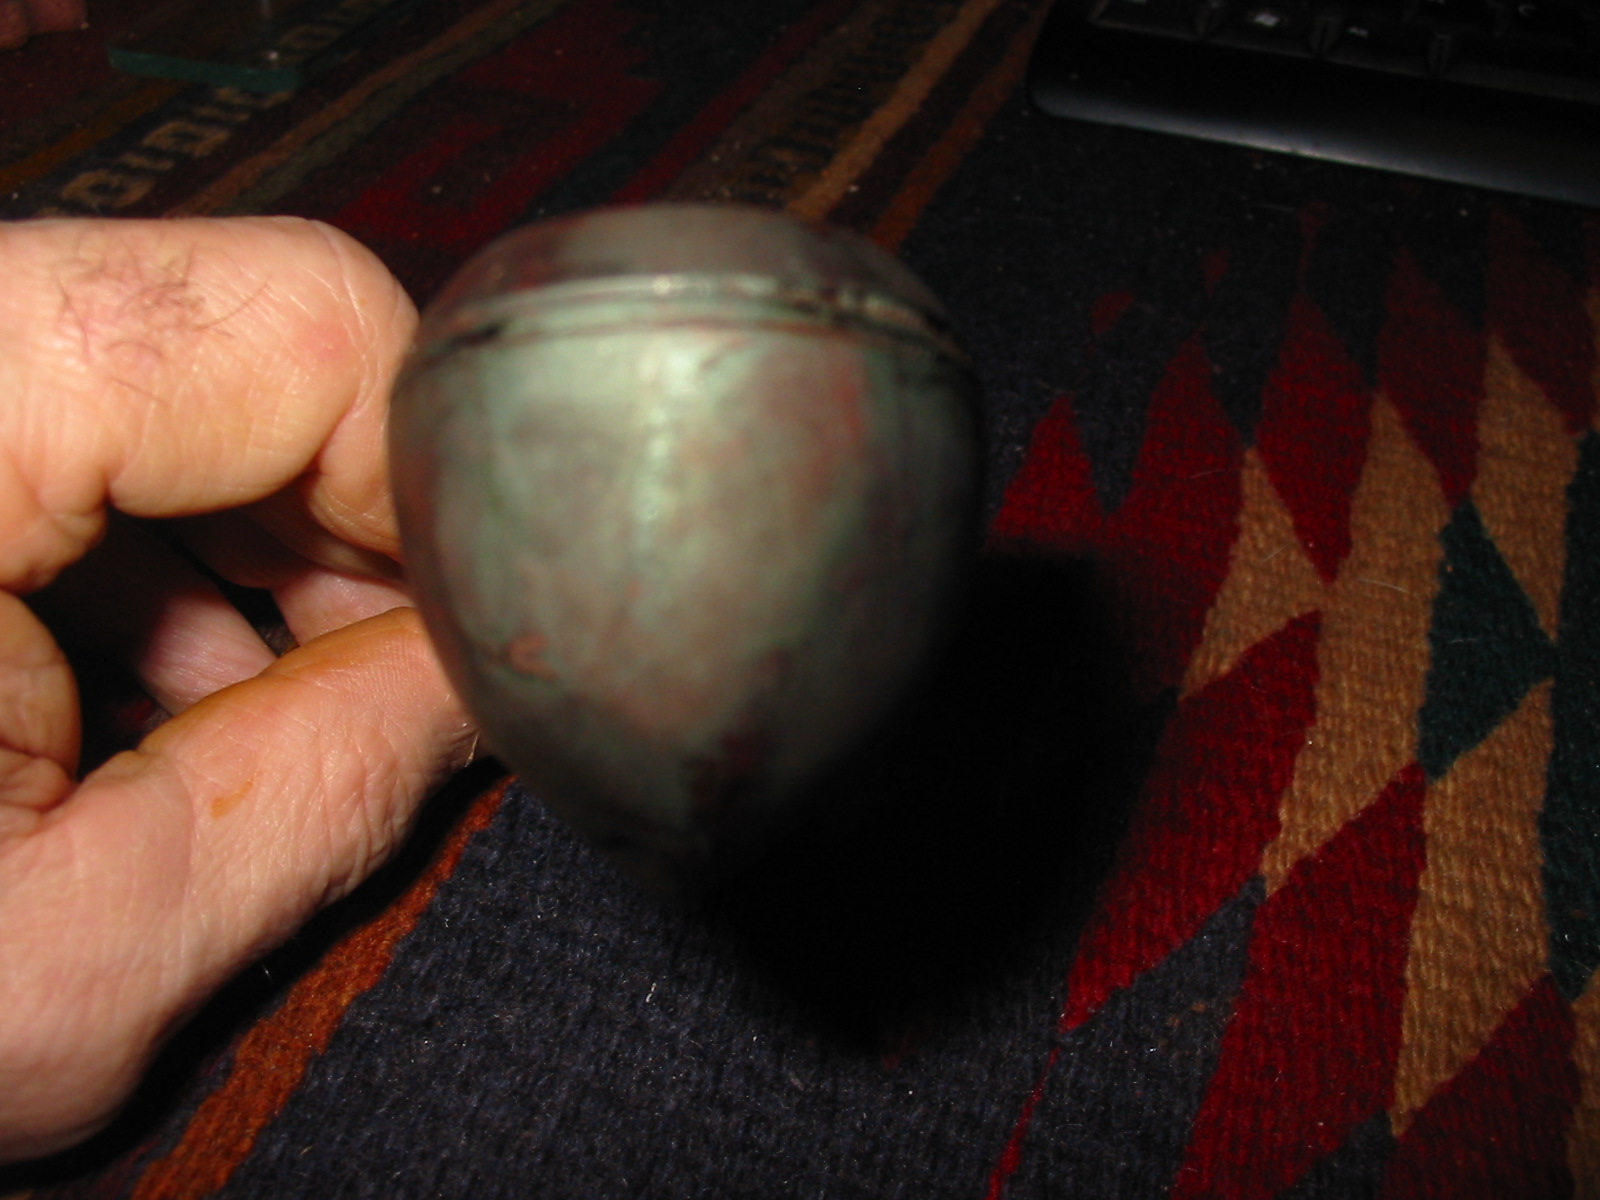
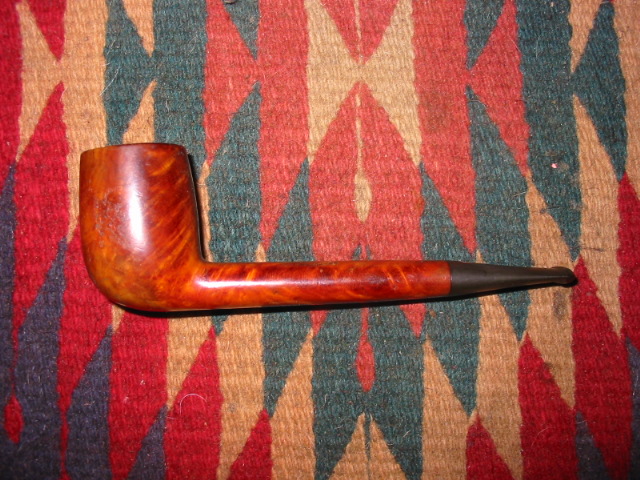
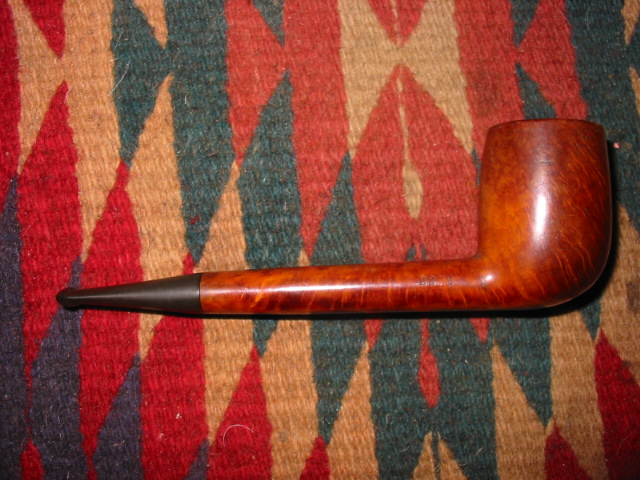
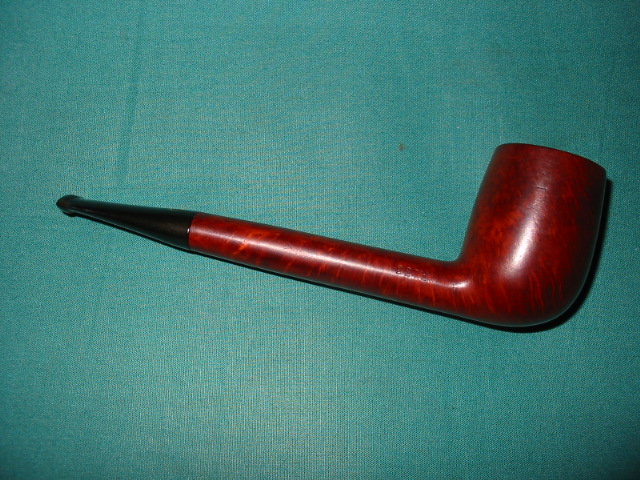
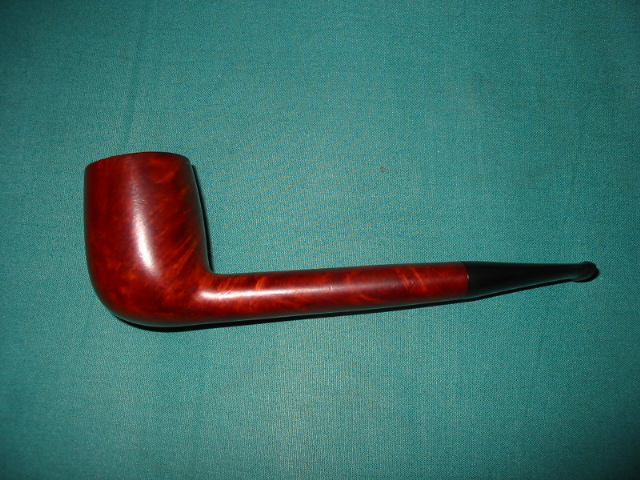
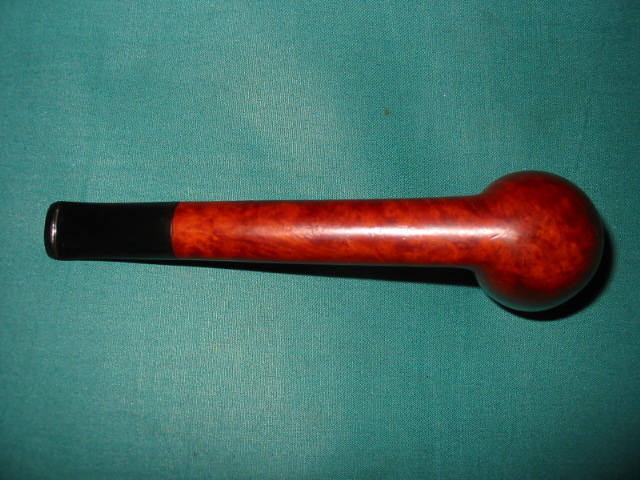
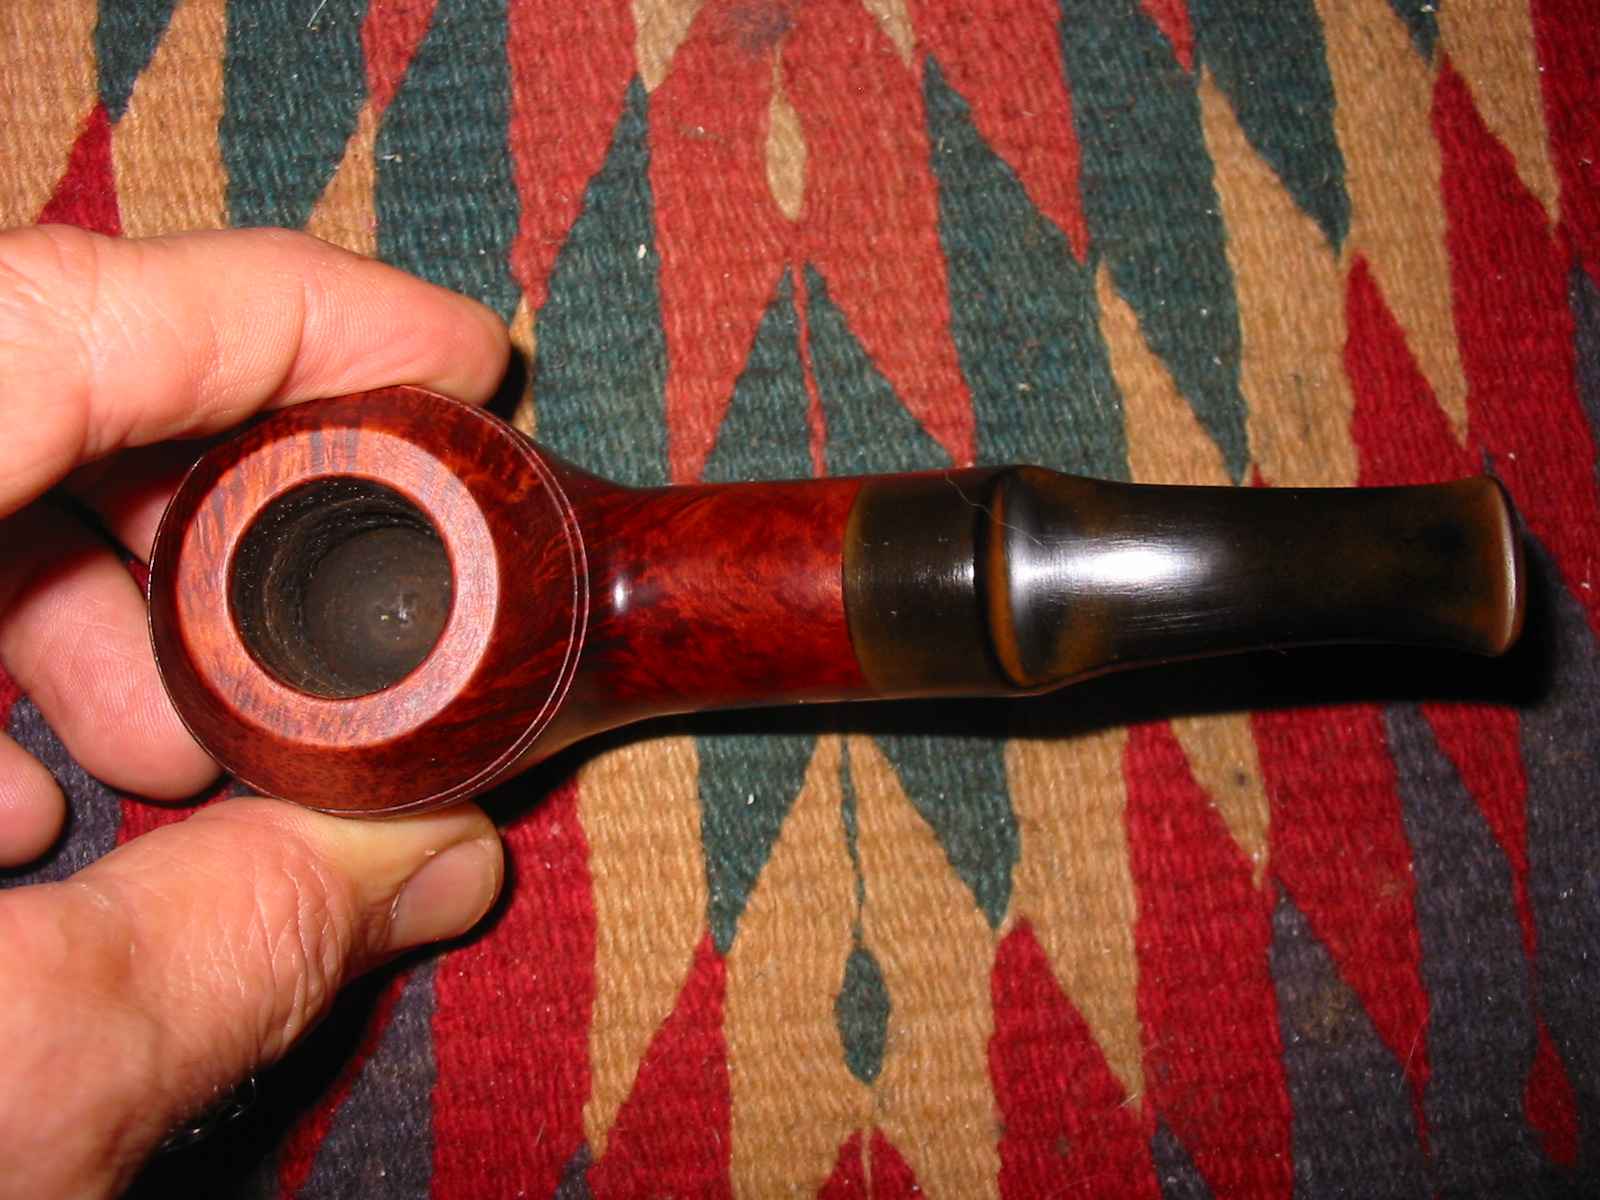
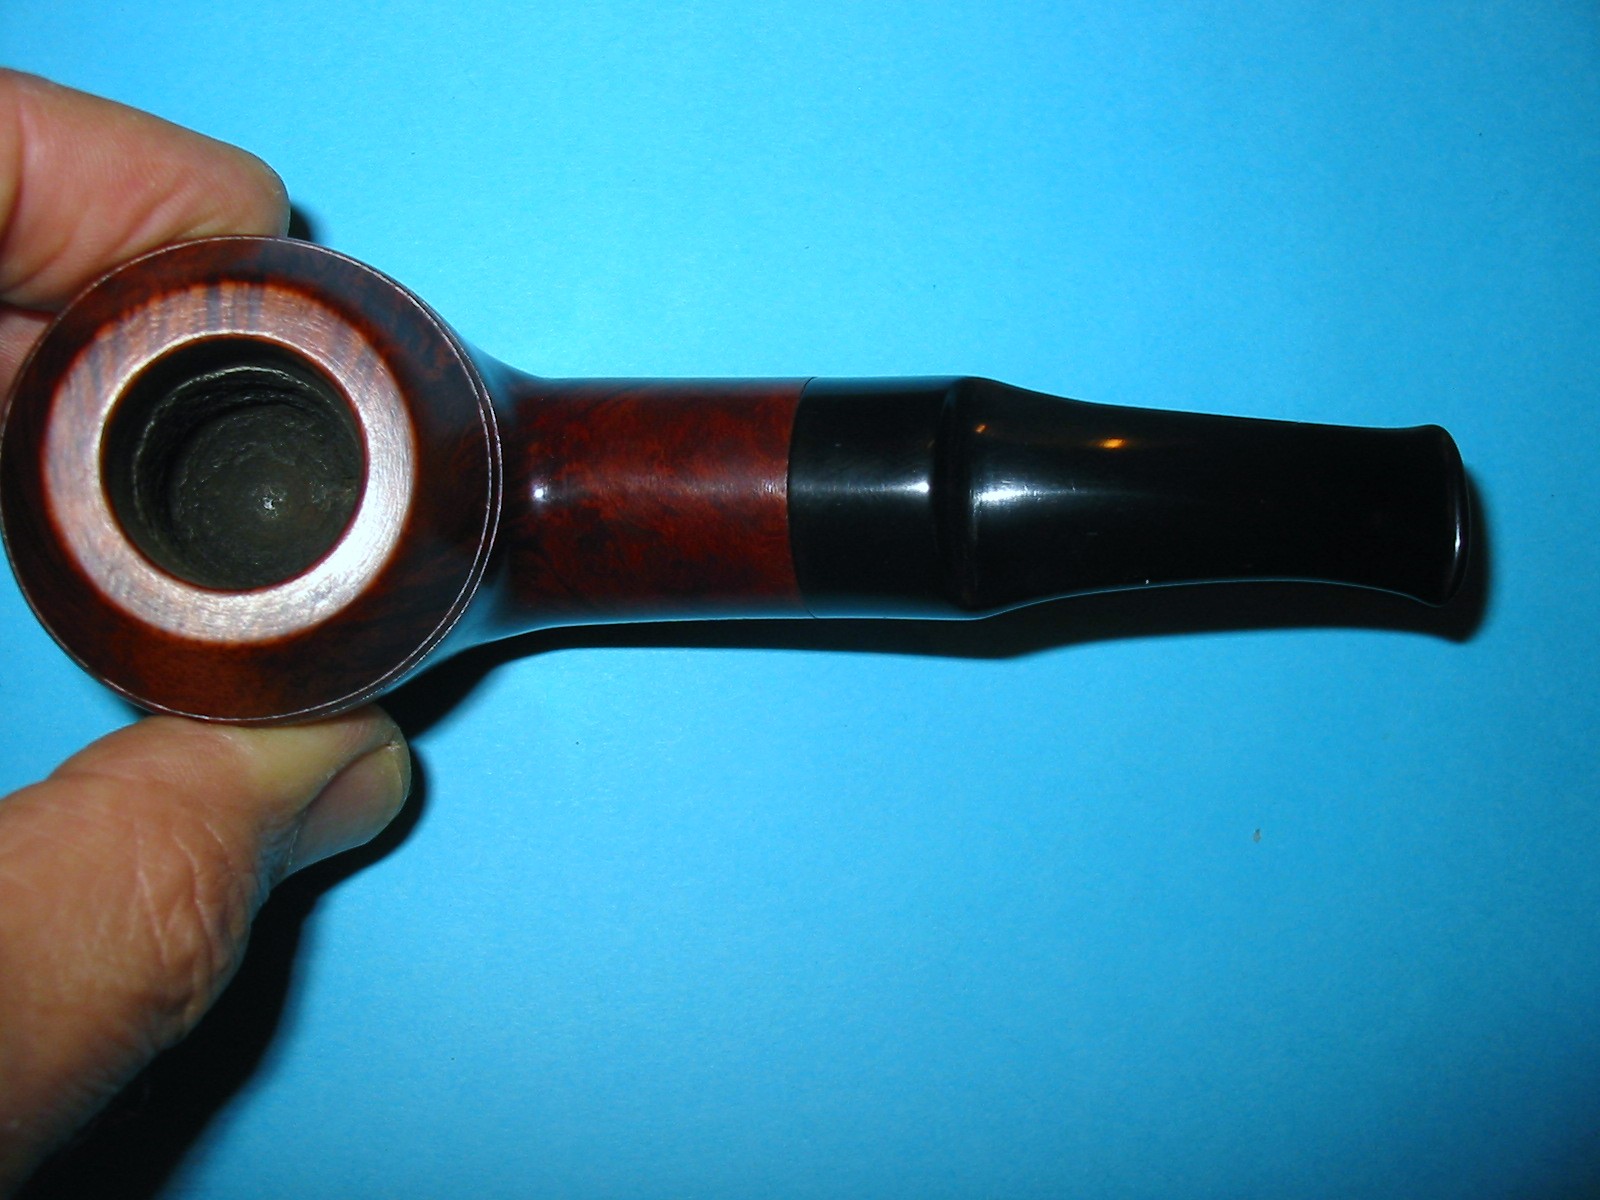
When it arrived I took the next four photos to show what the pipe looked like before I worked on it. My description above formulated by and large from the photos online was accurate though in fact the pipe was very clean.

IMG_1416

IMG_1417

IMG_1418

IMG_1419

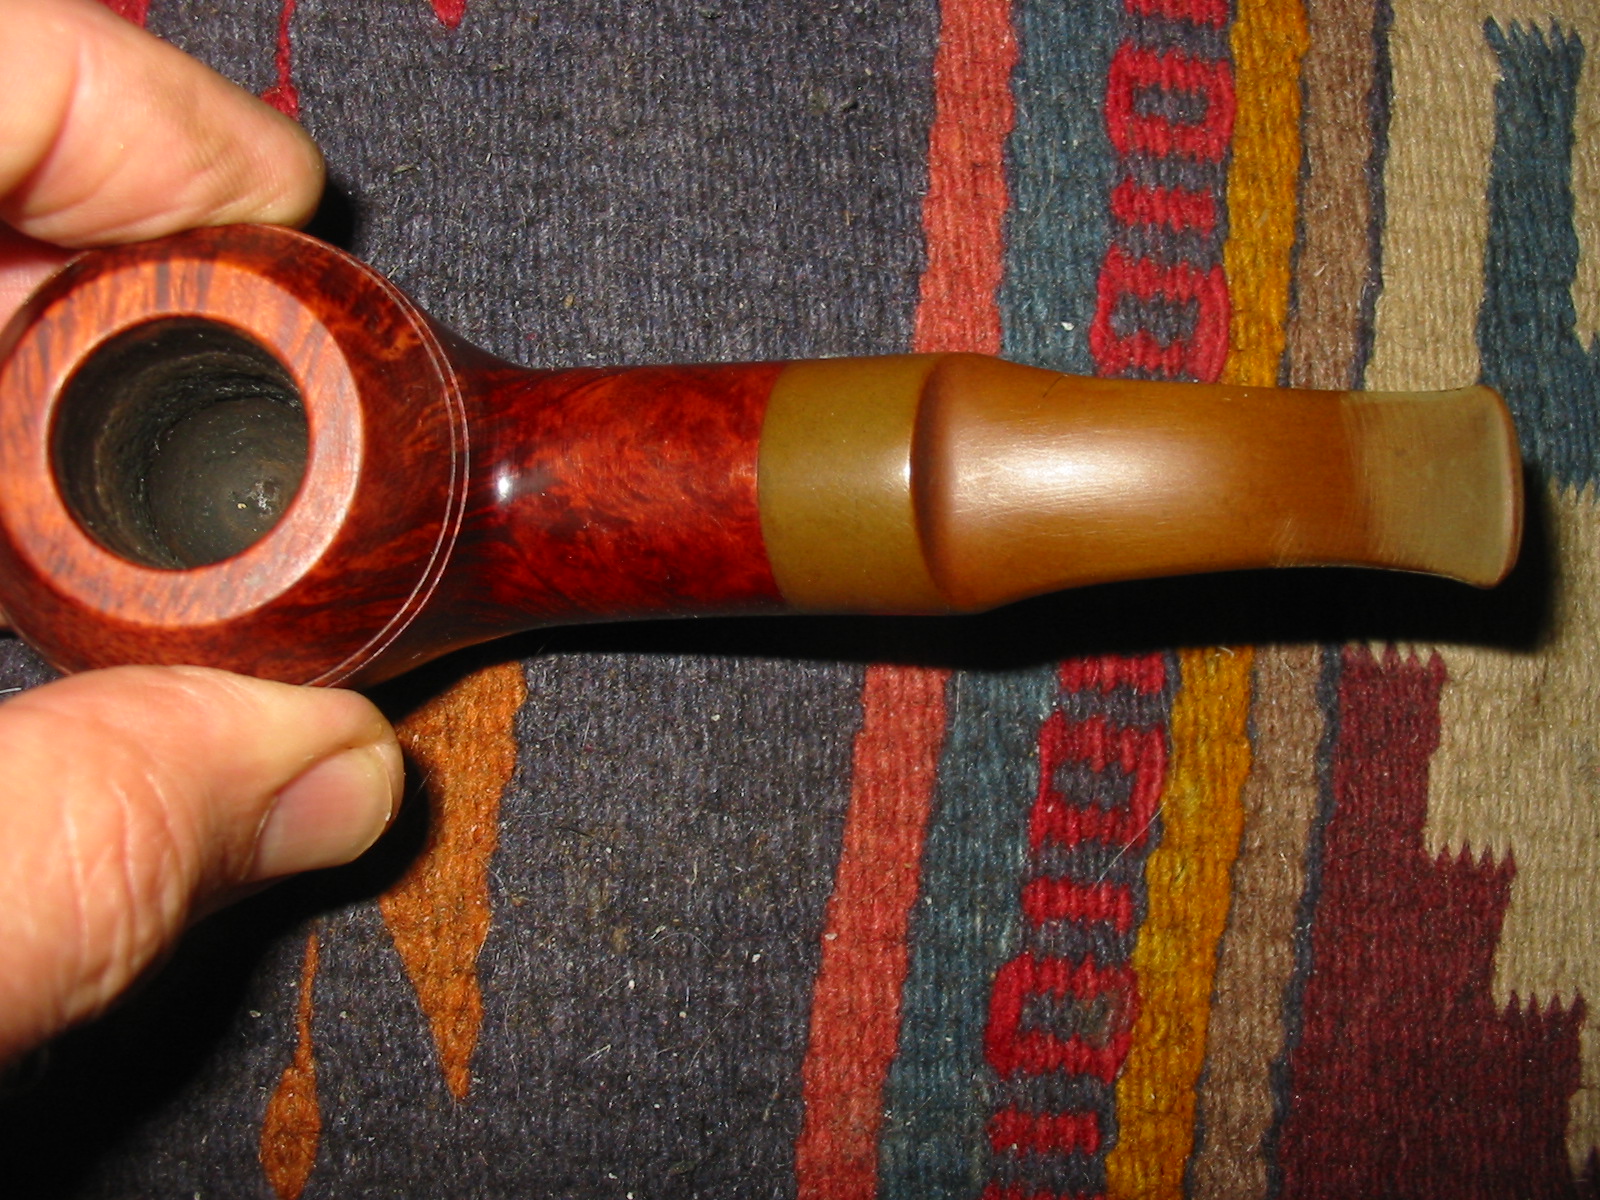
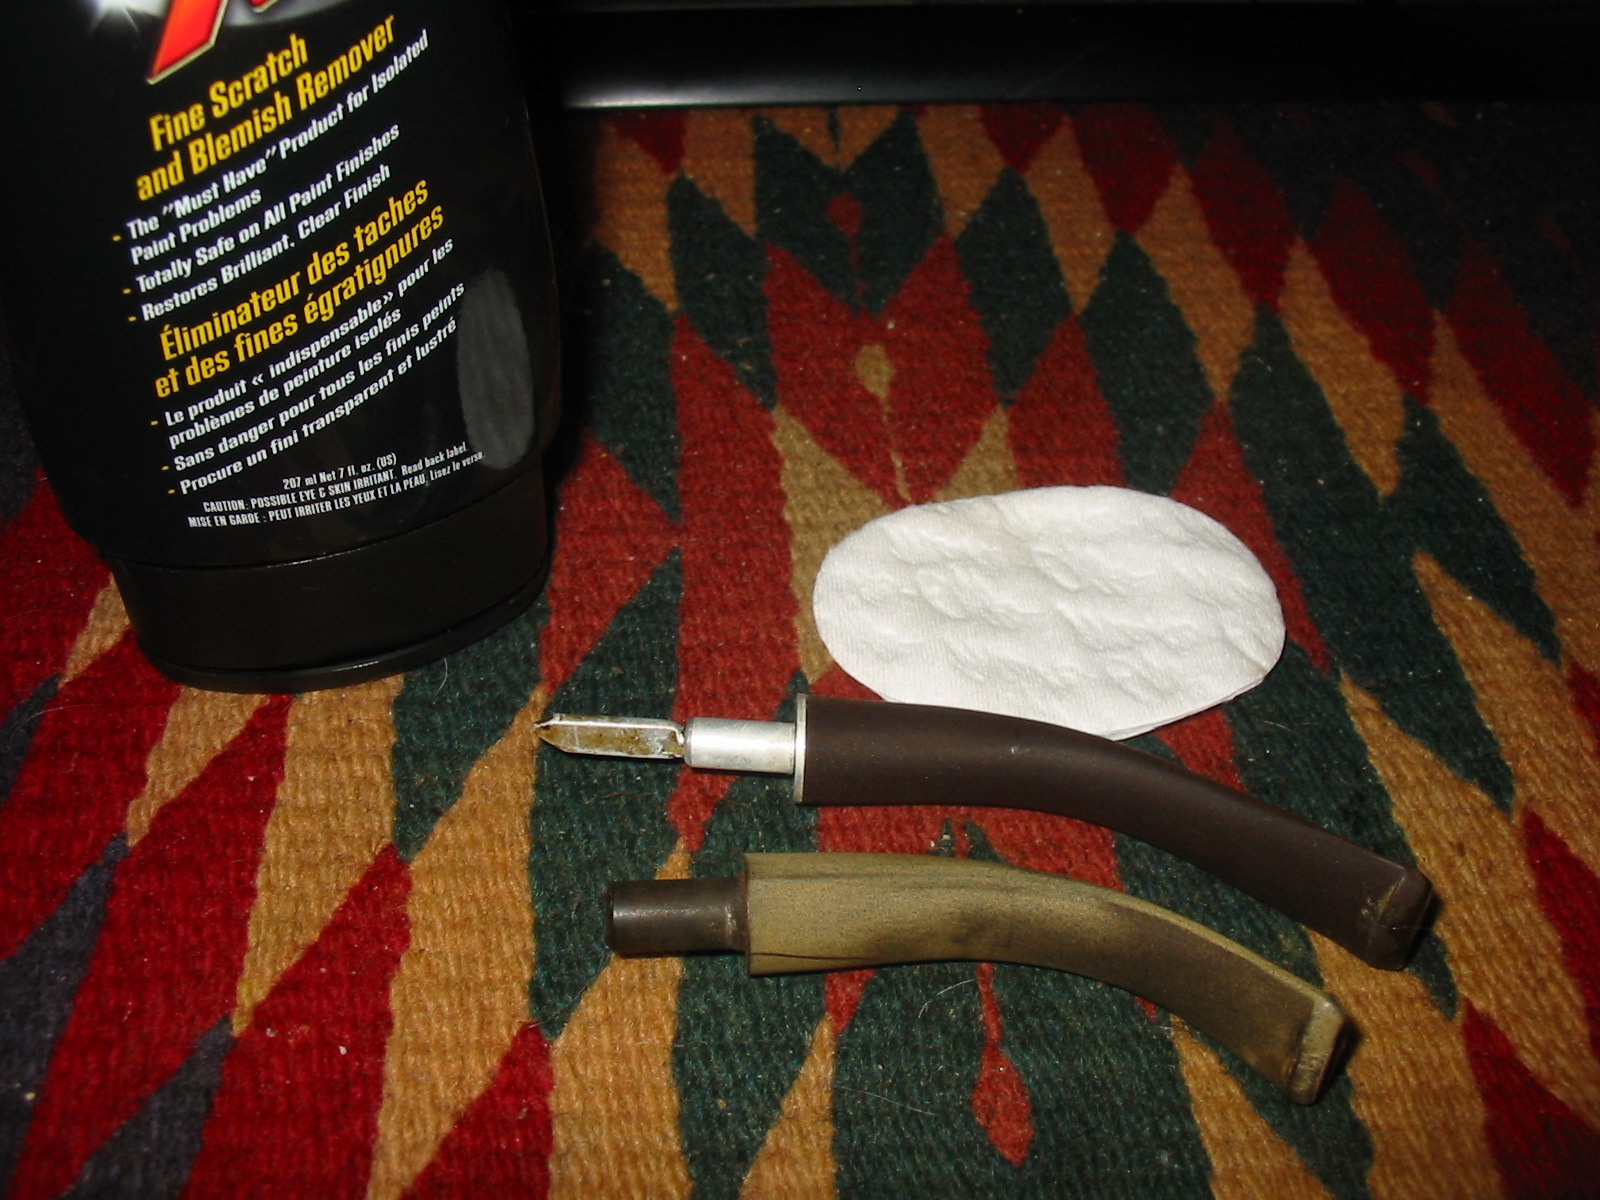
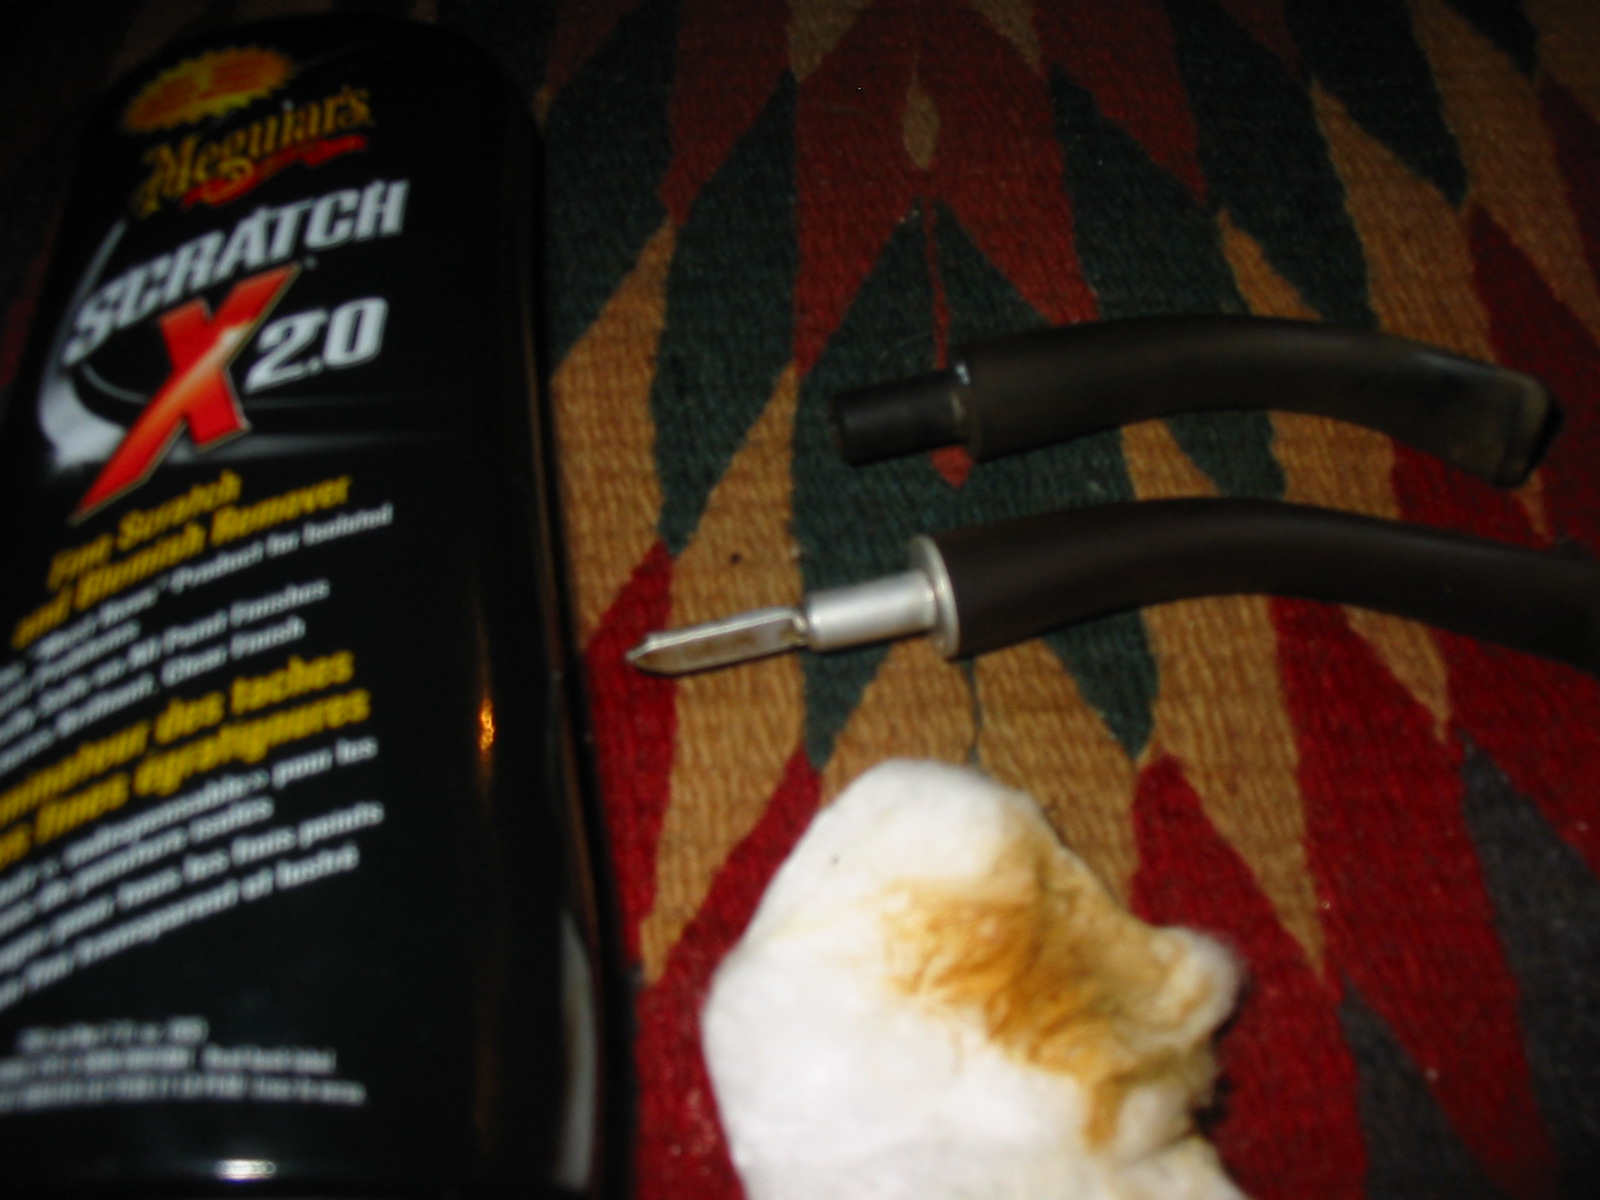
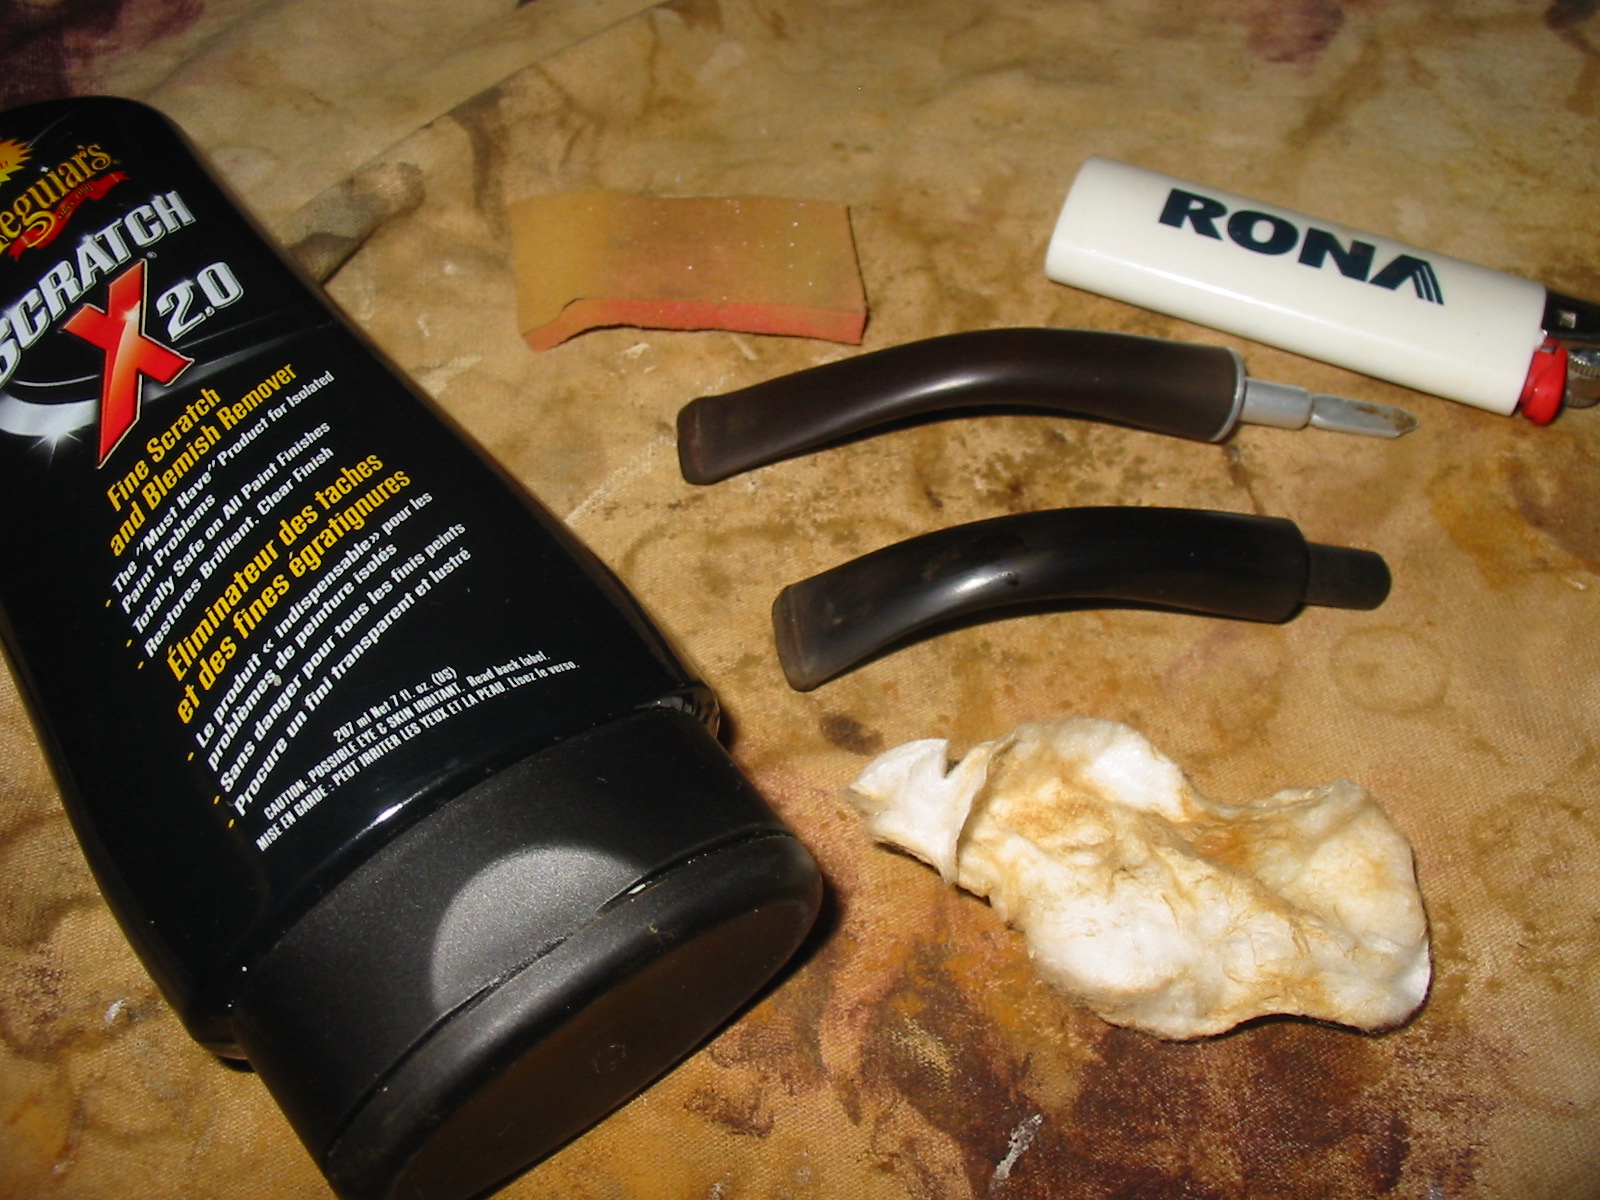
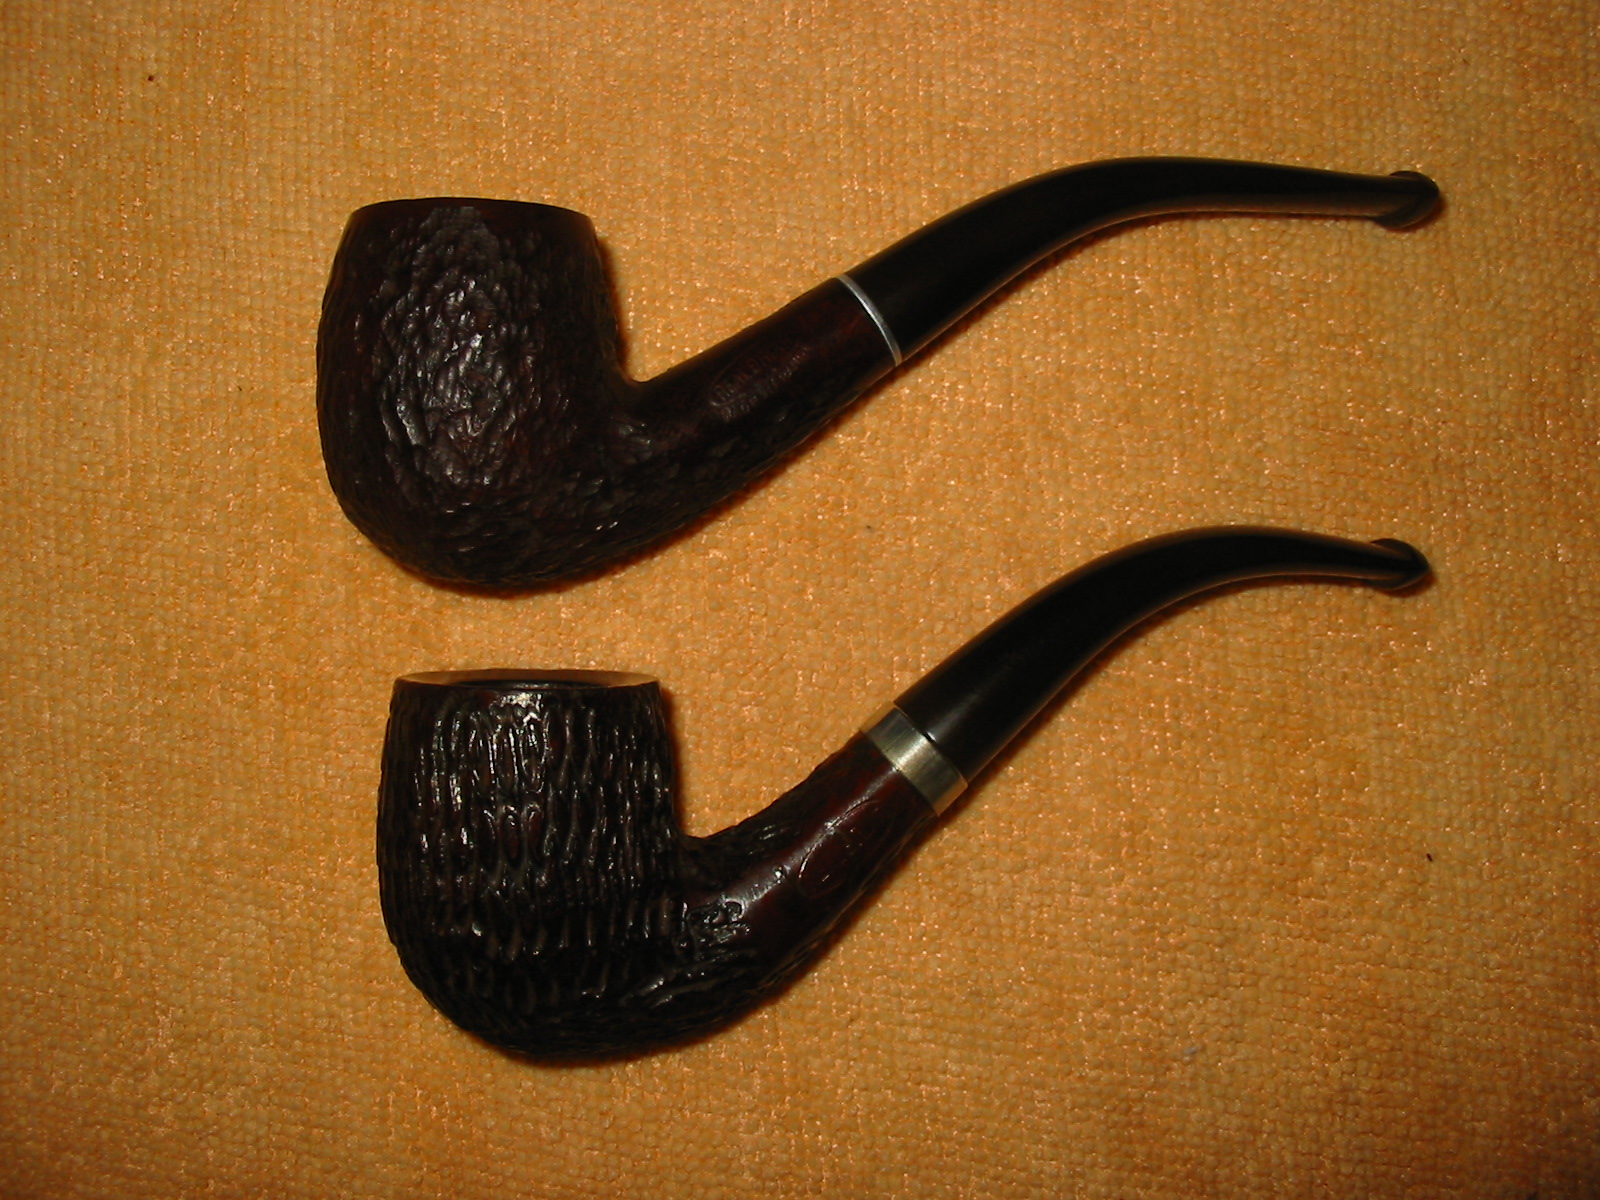
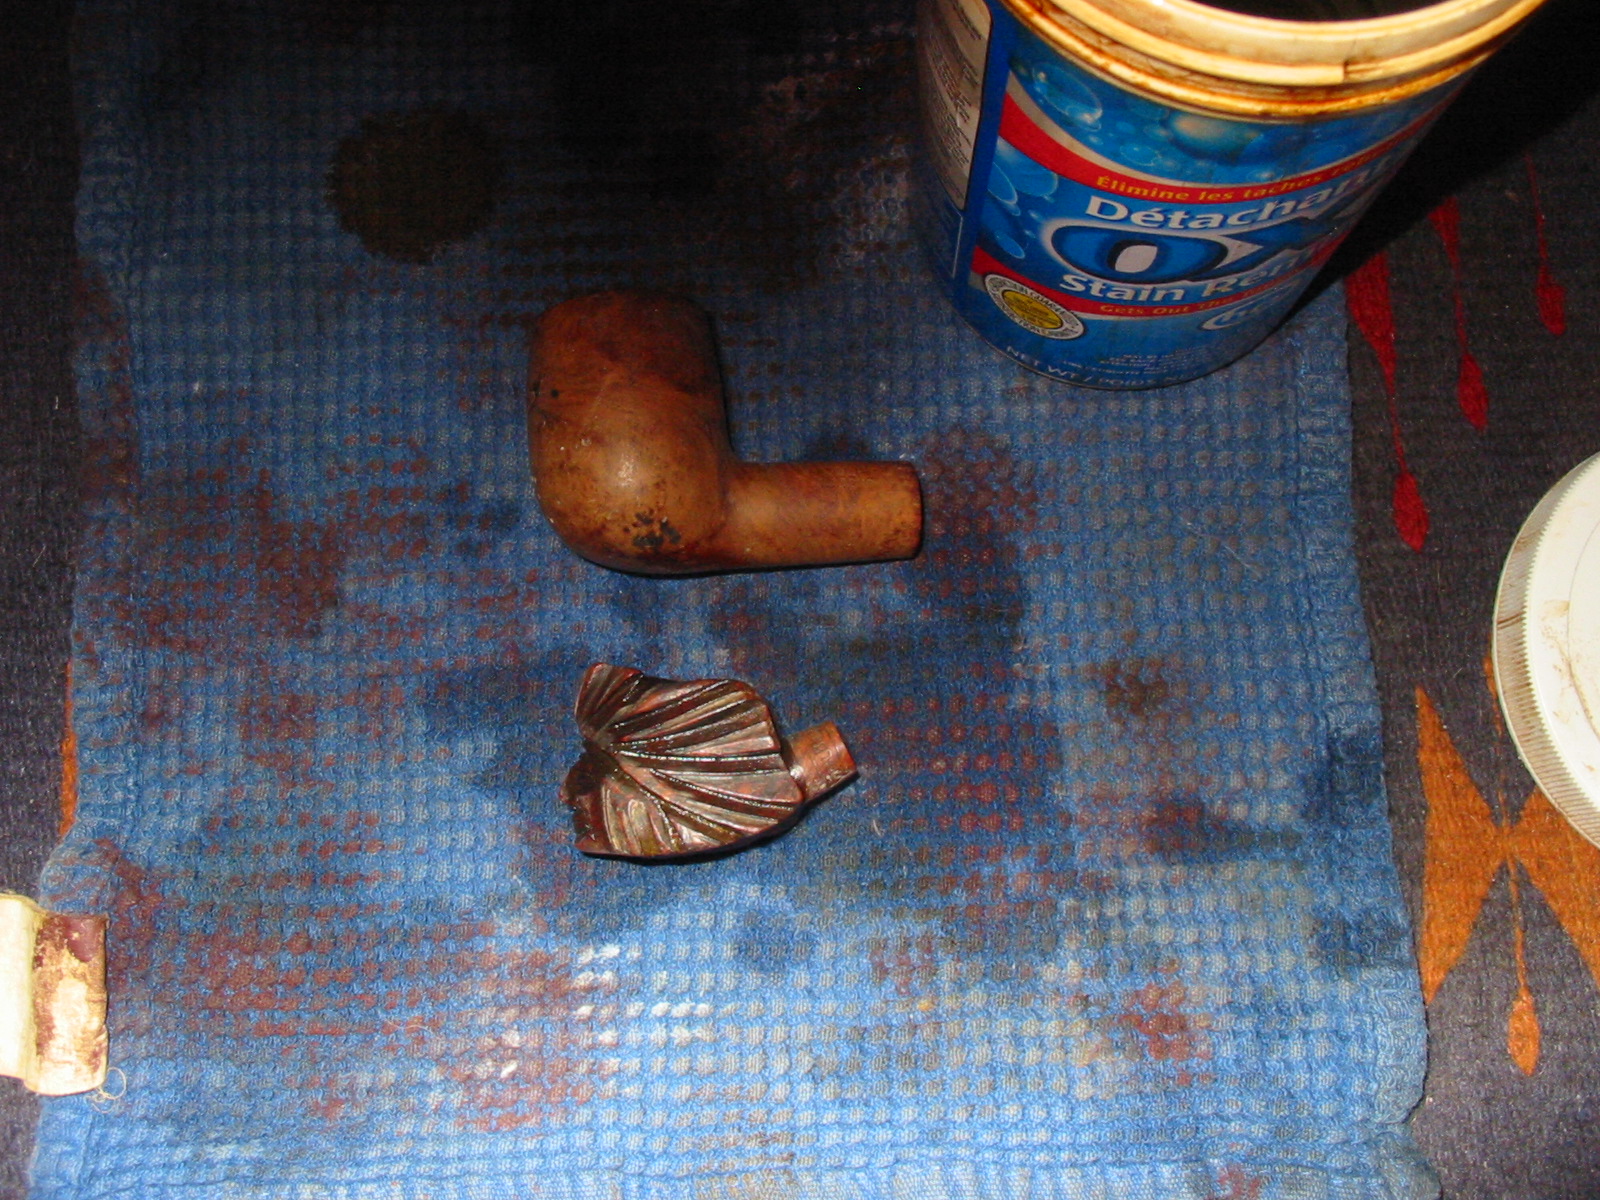
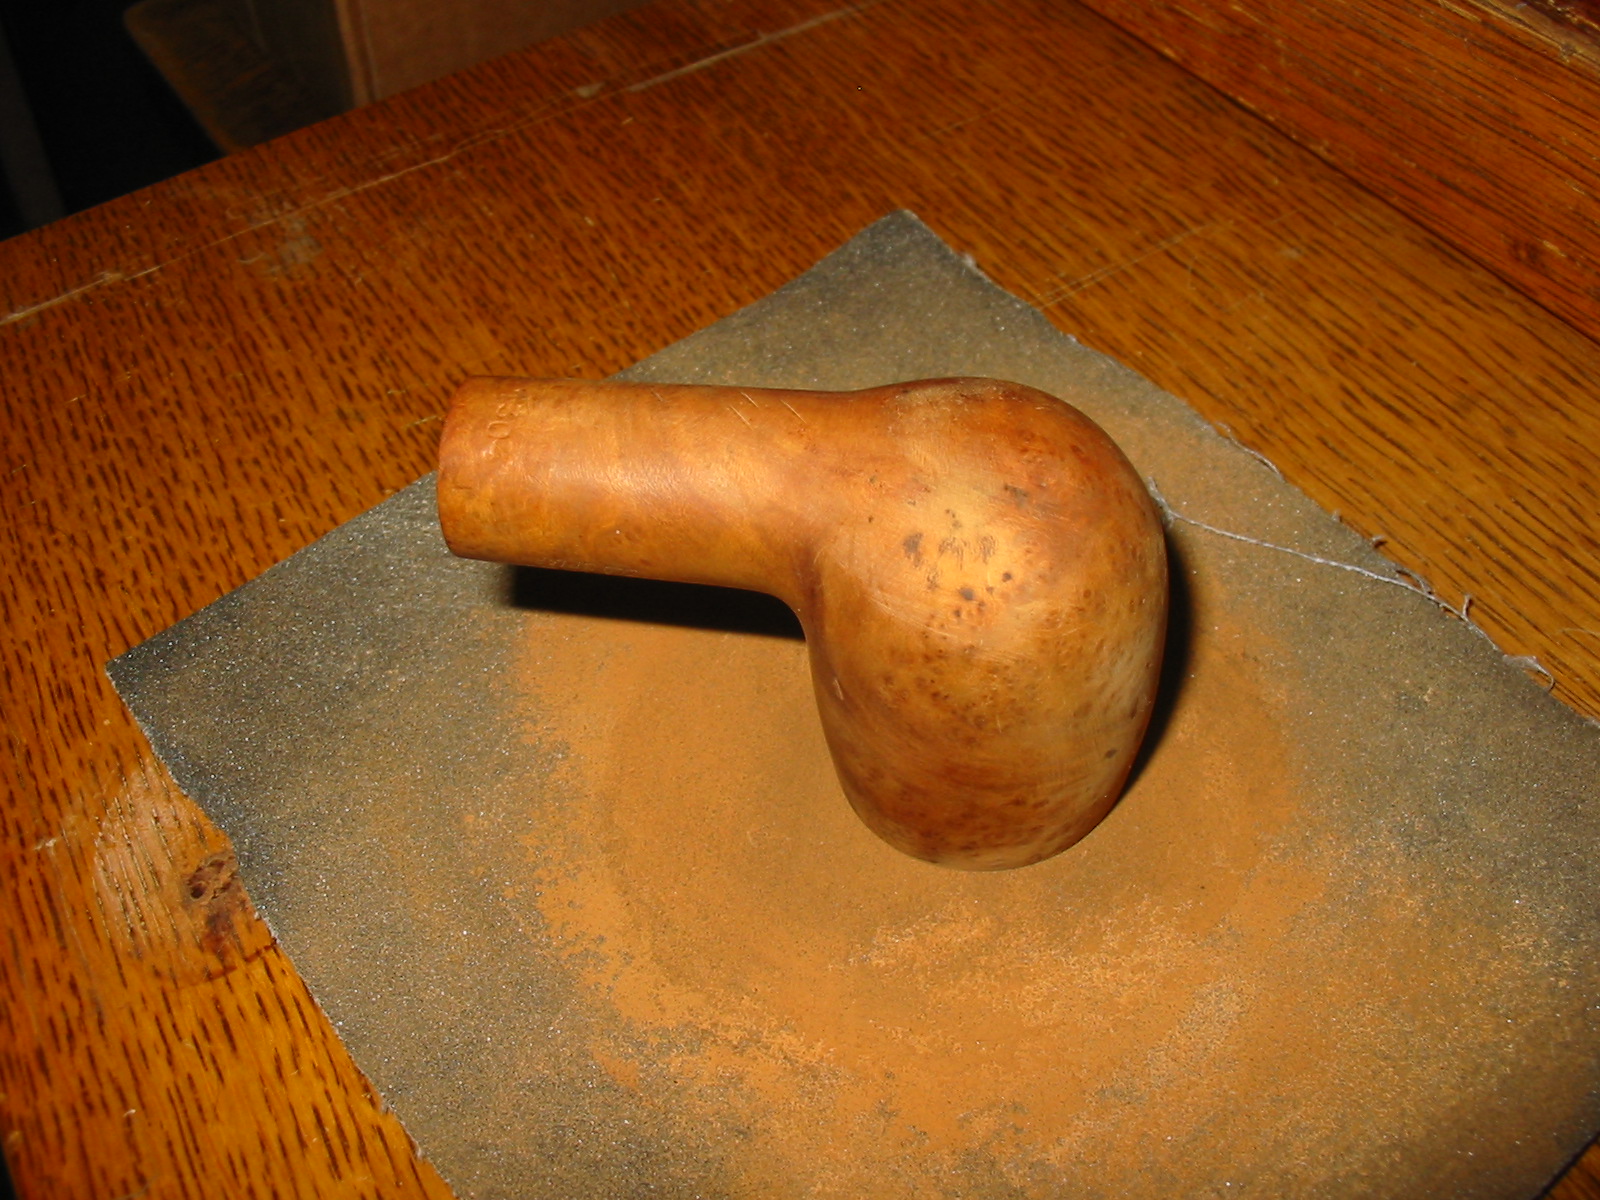
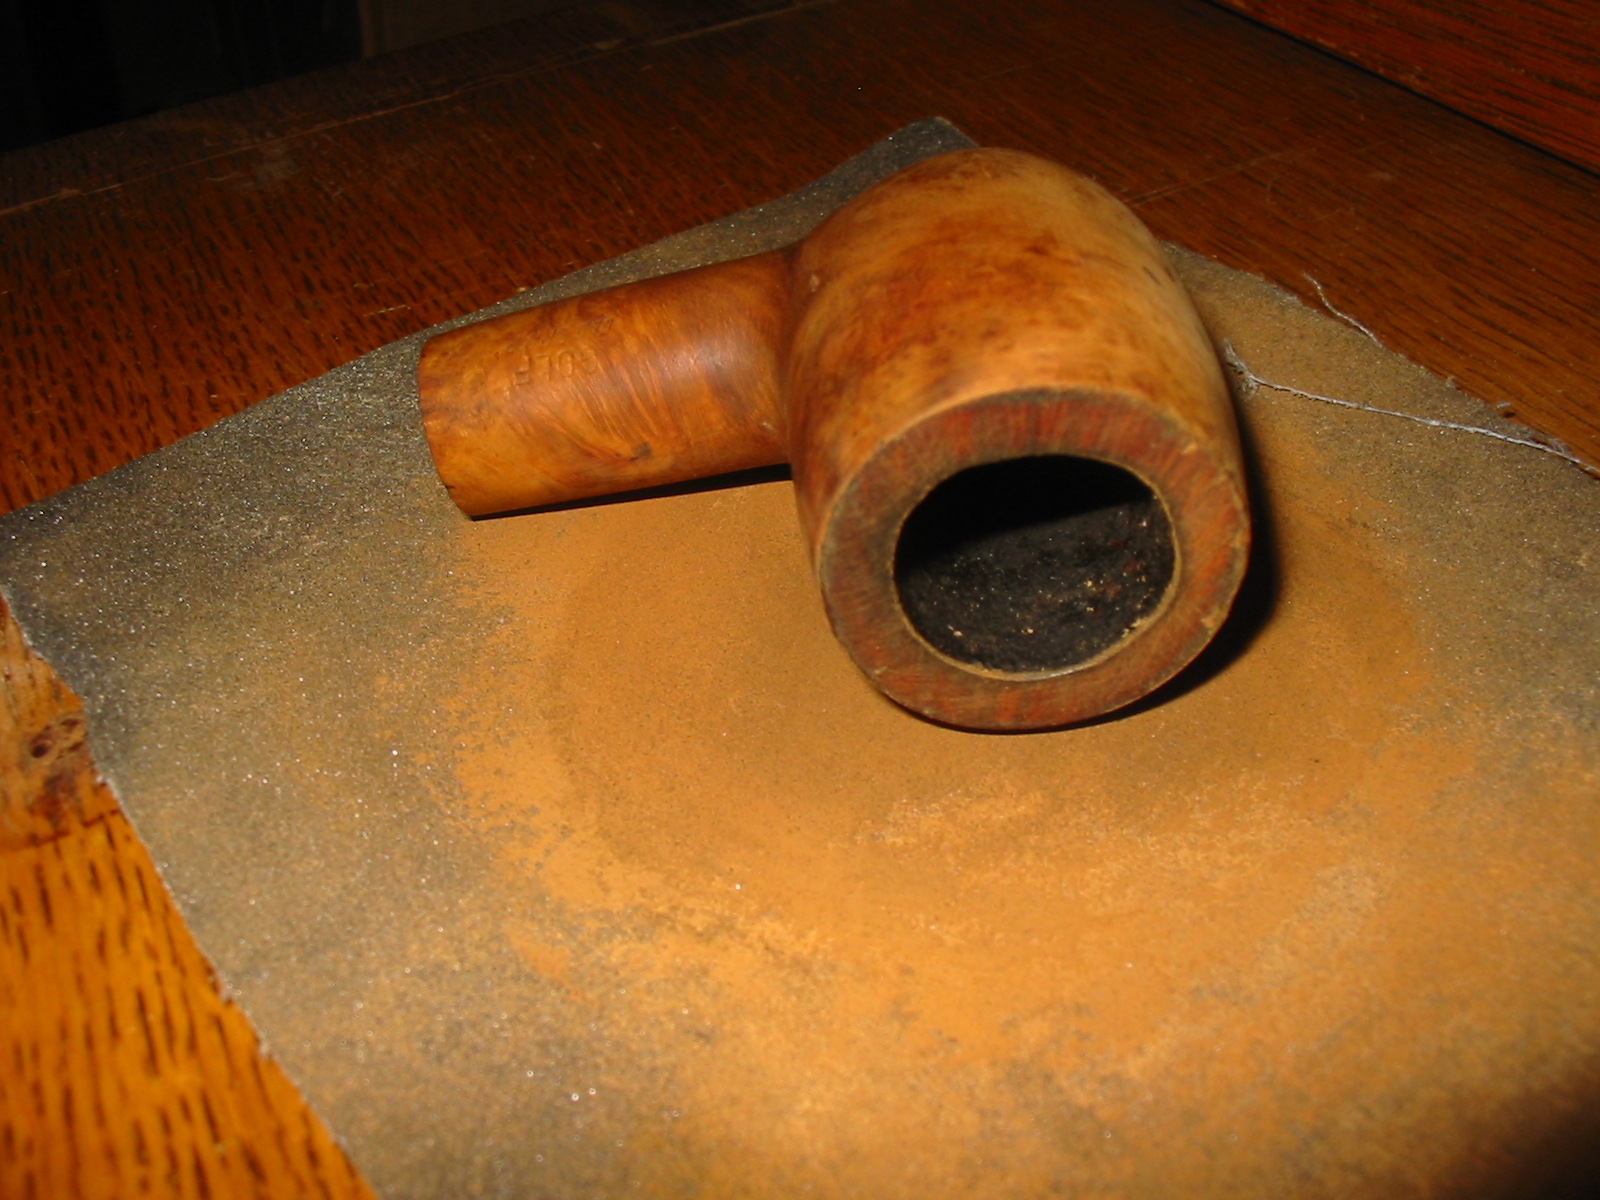
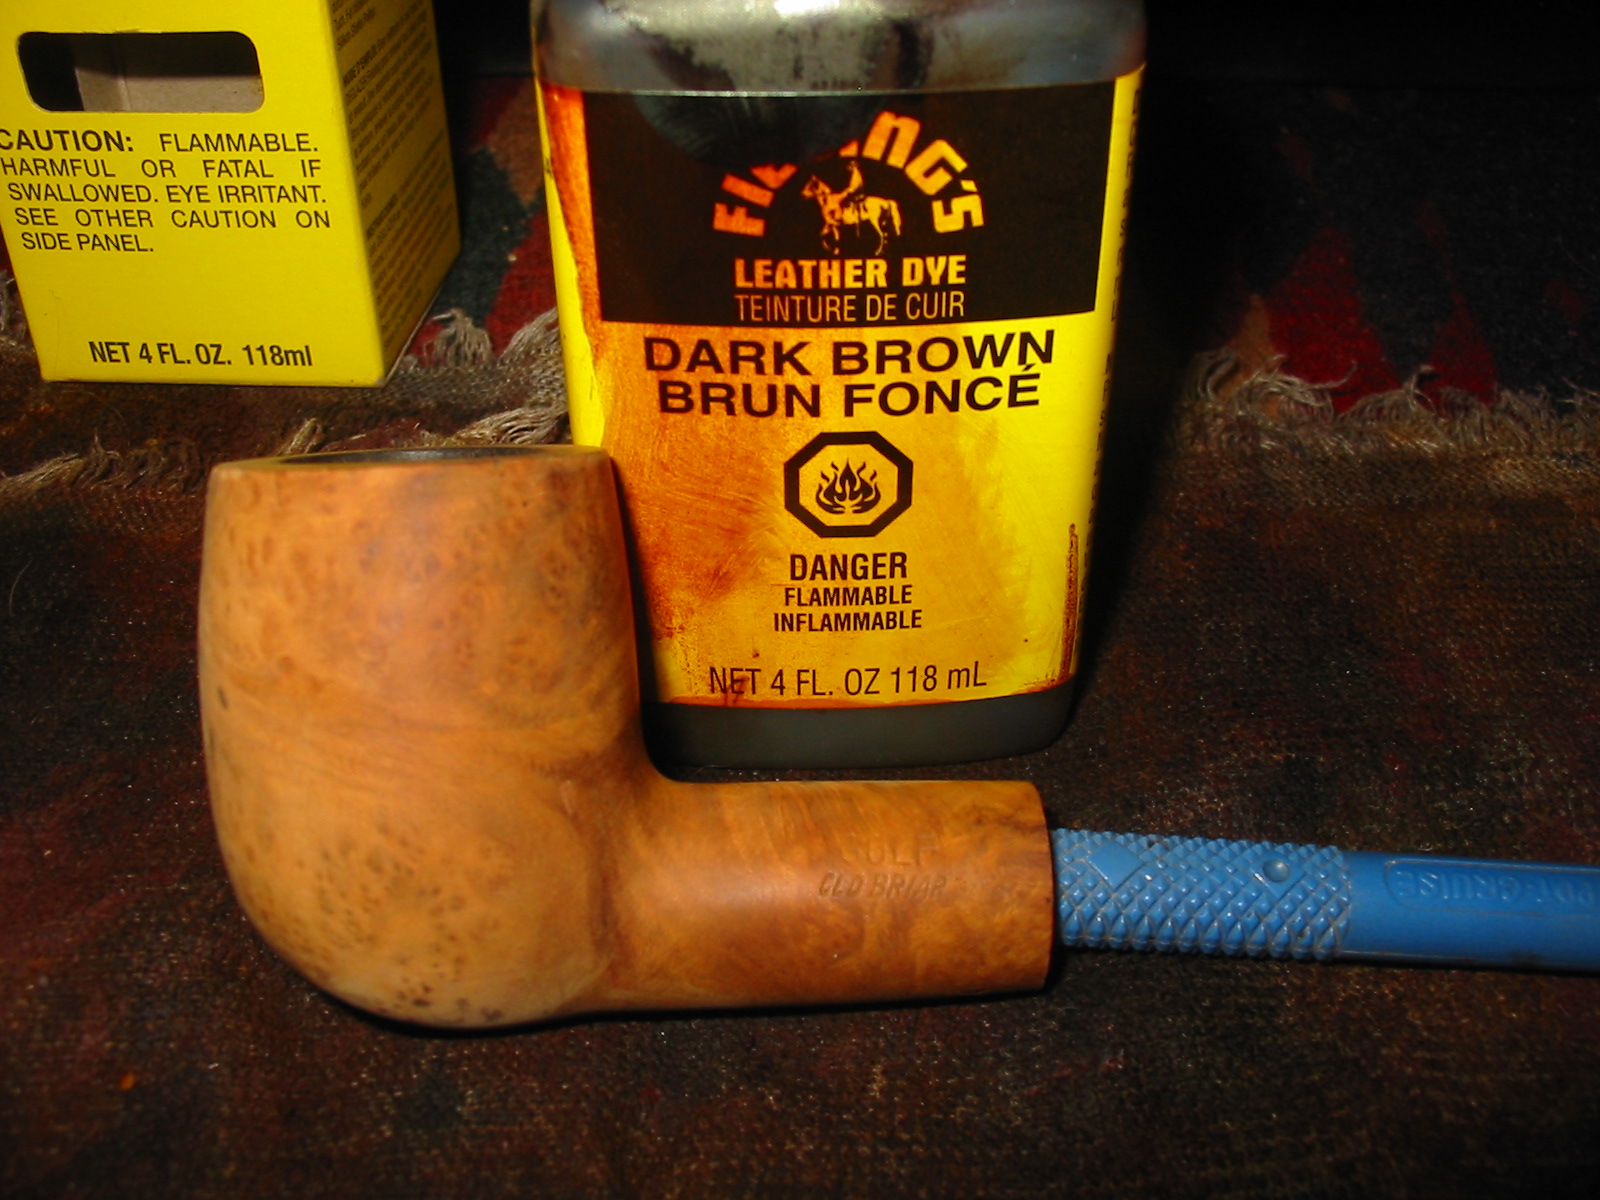
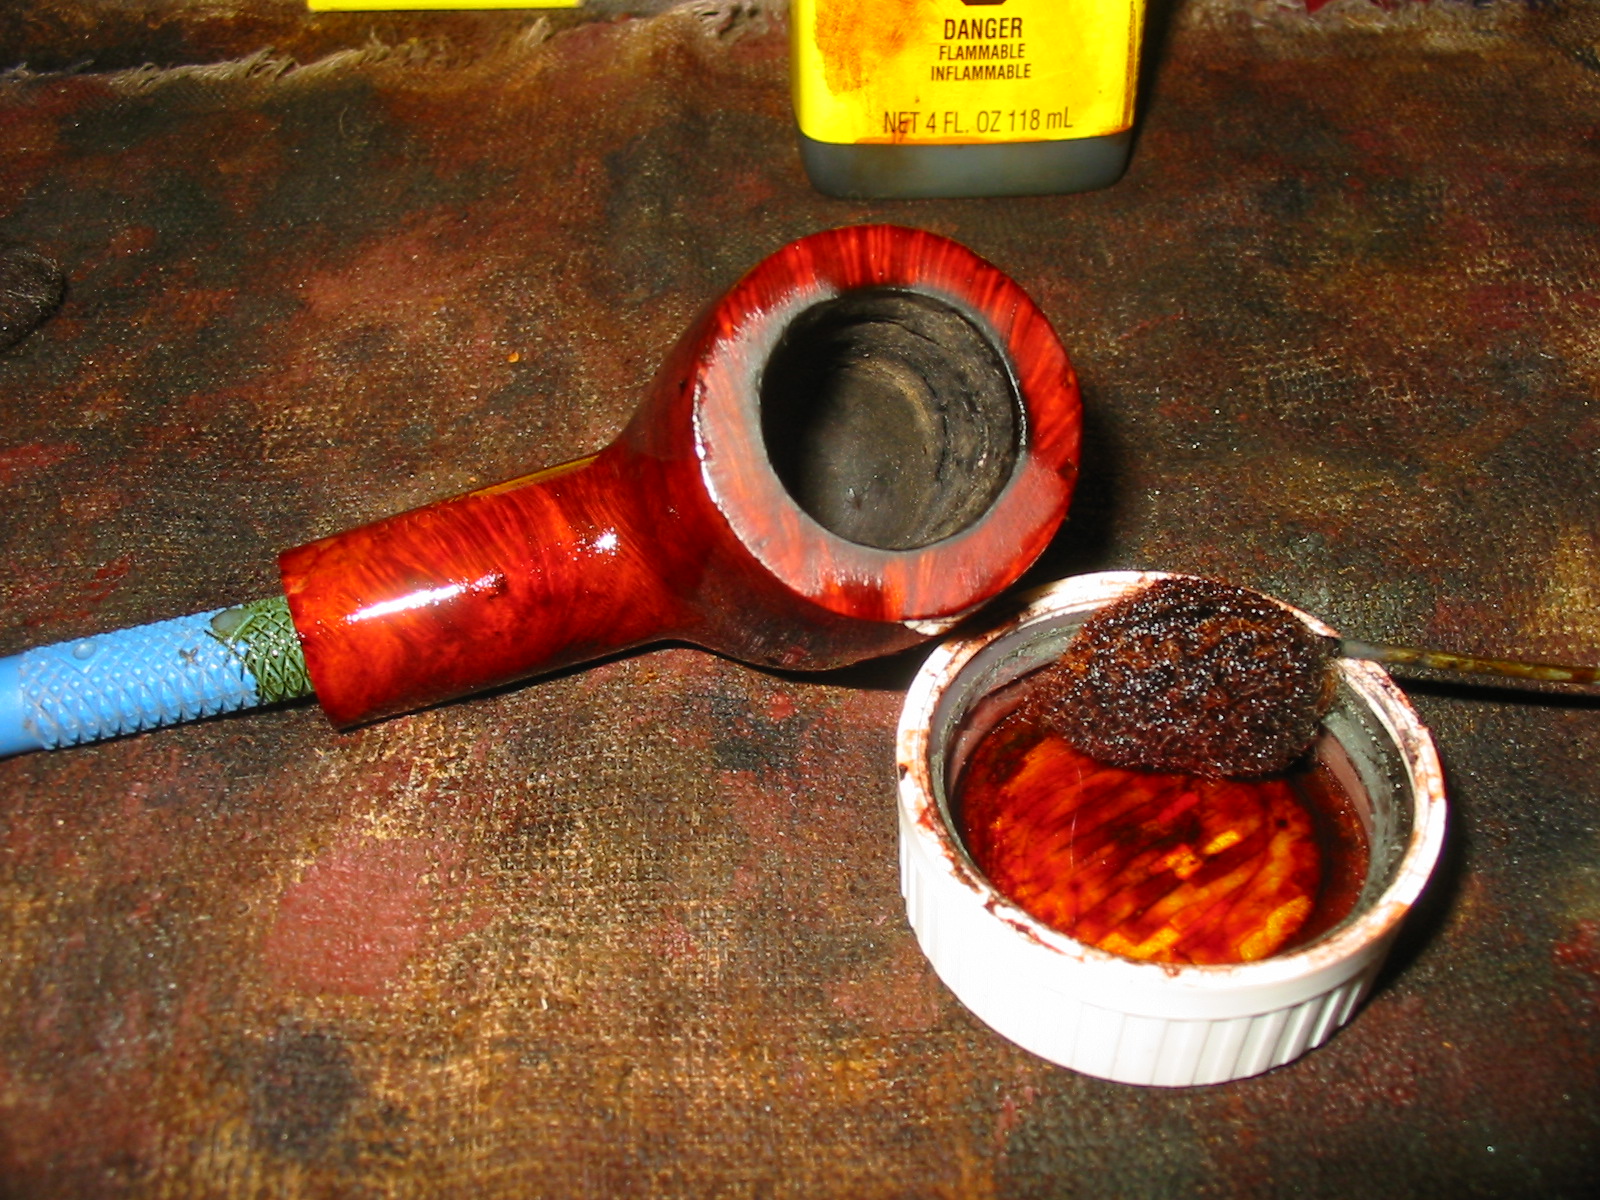
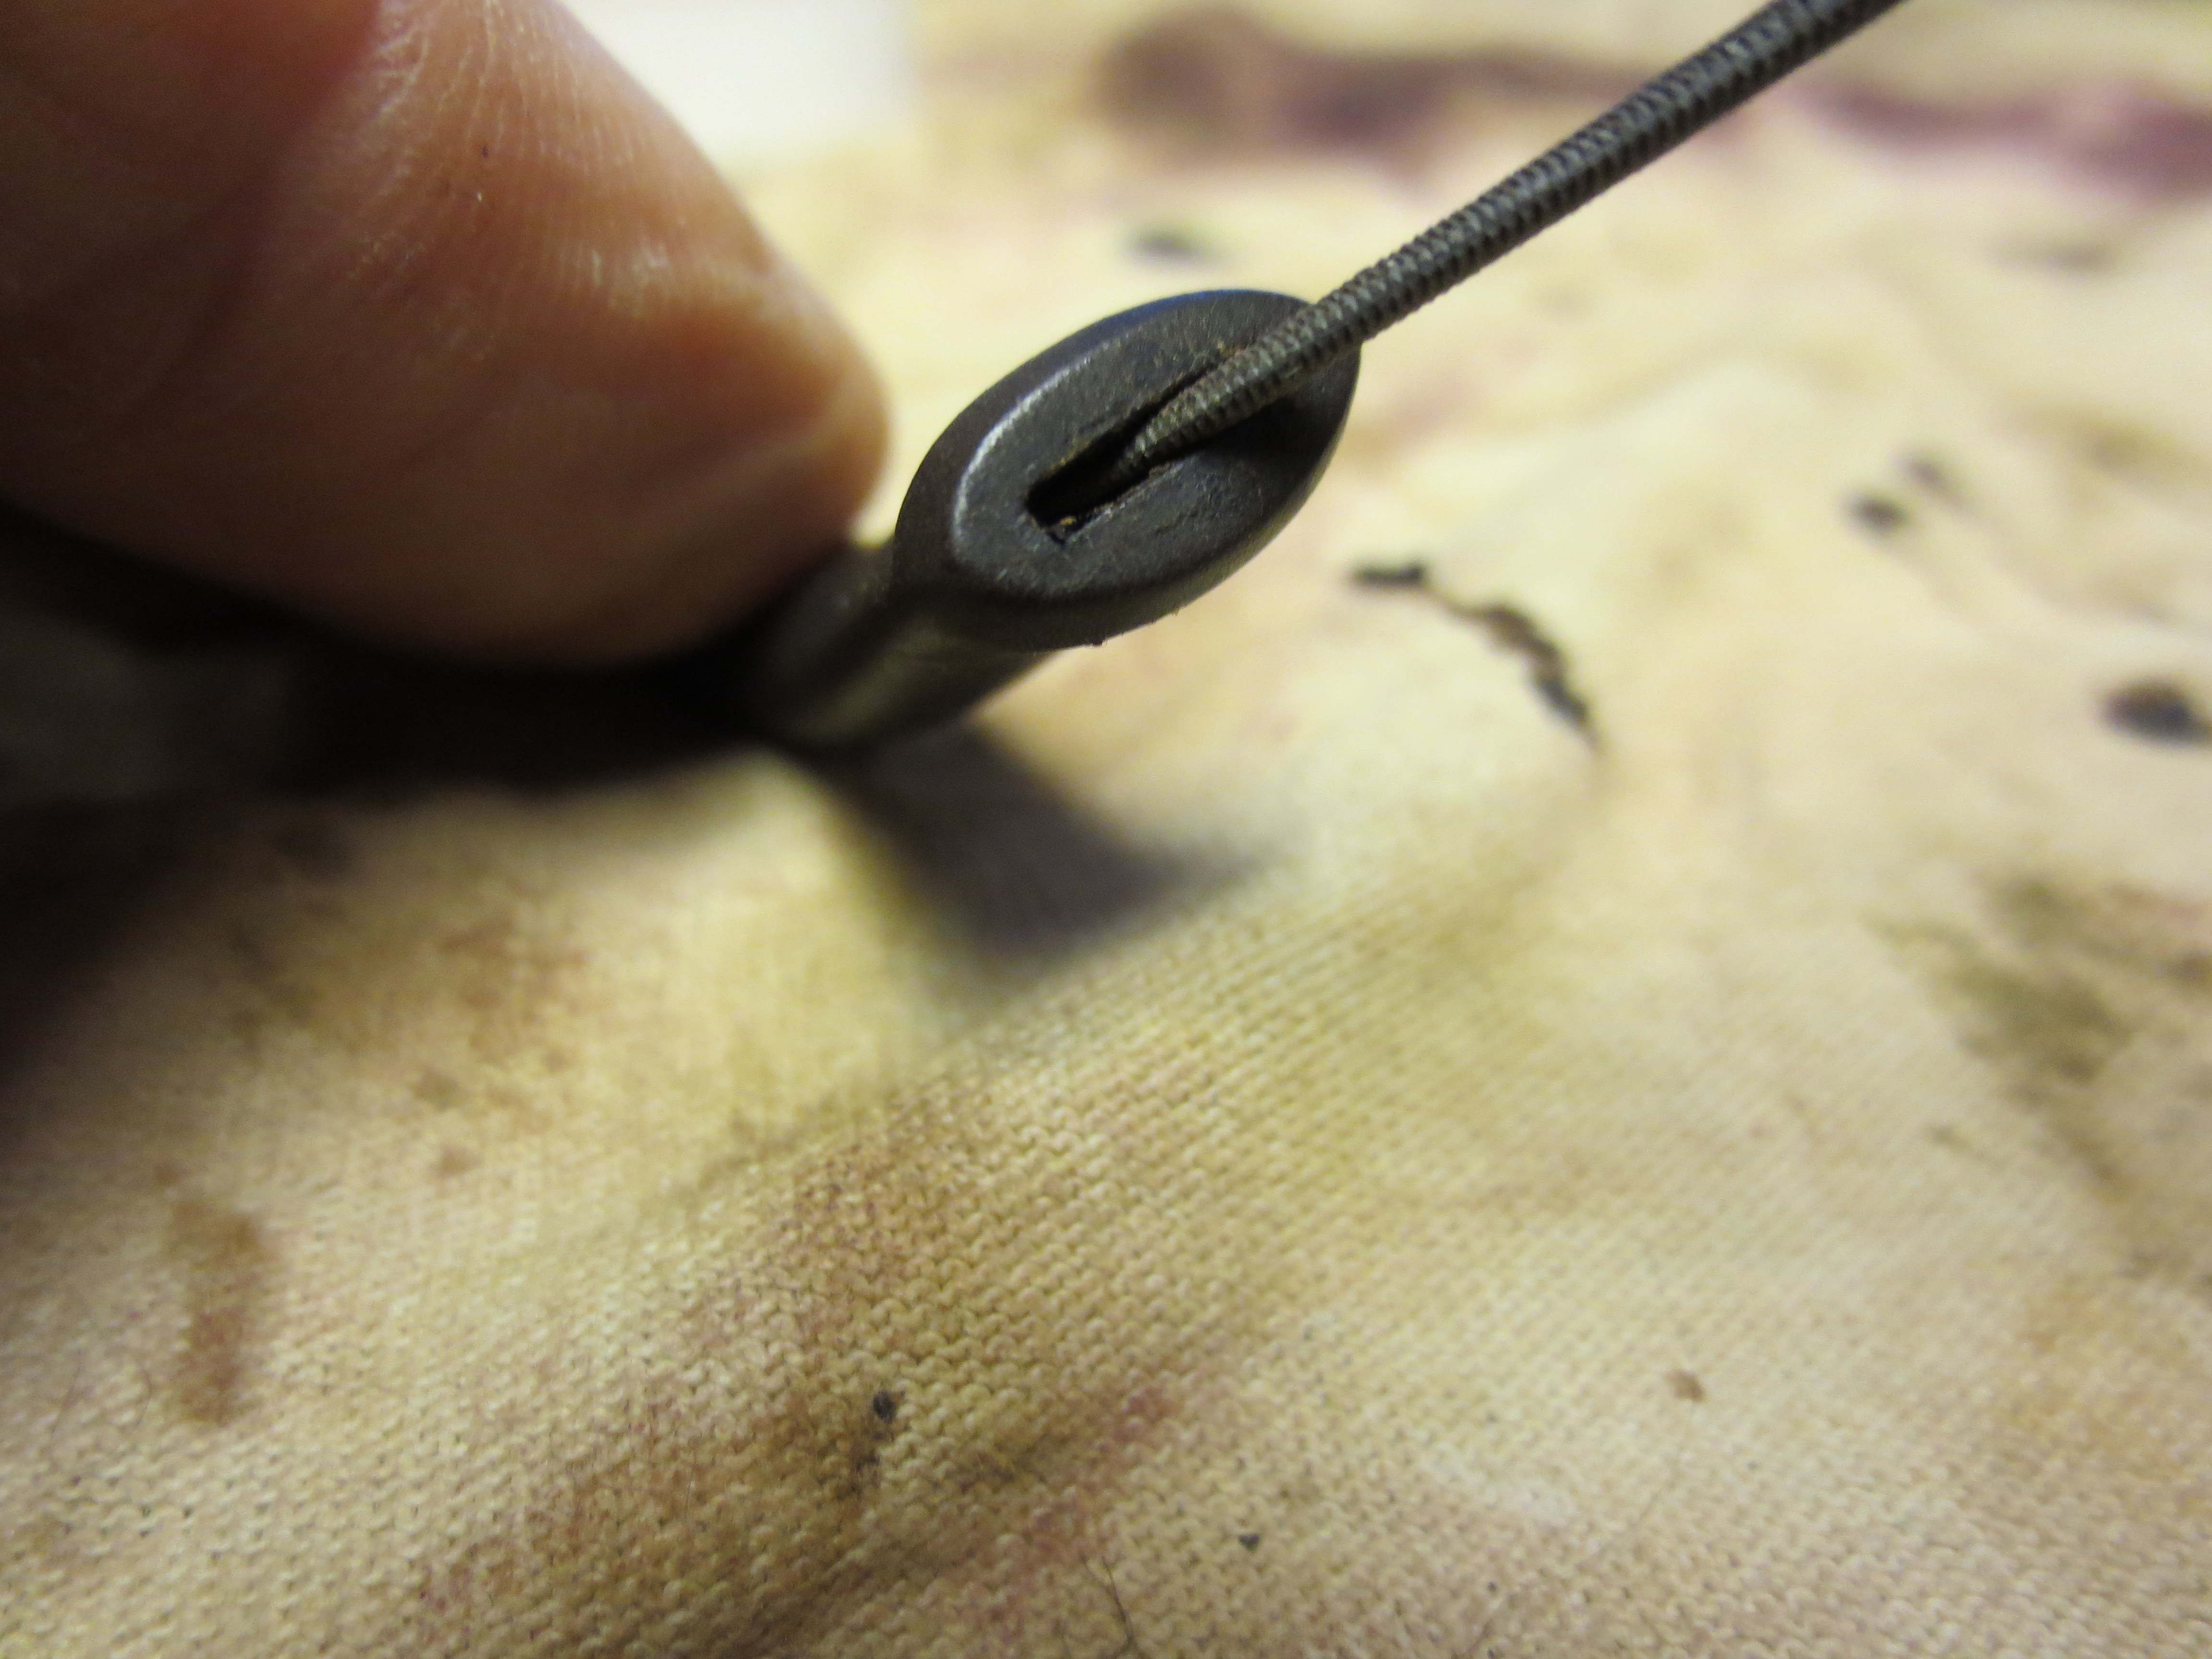
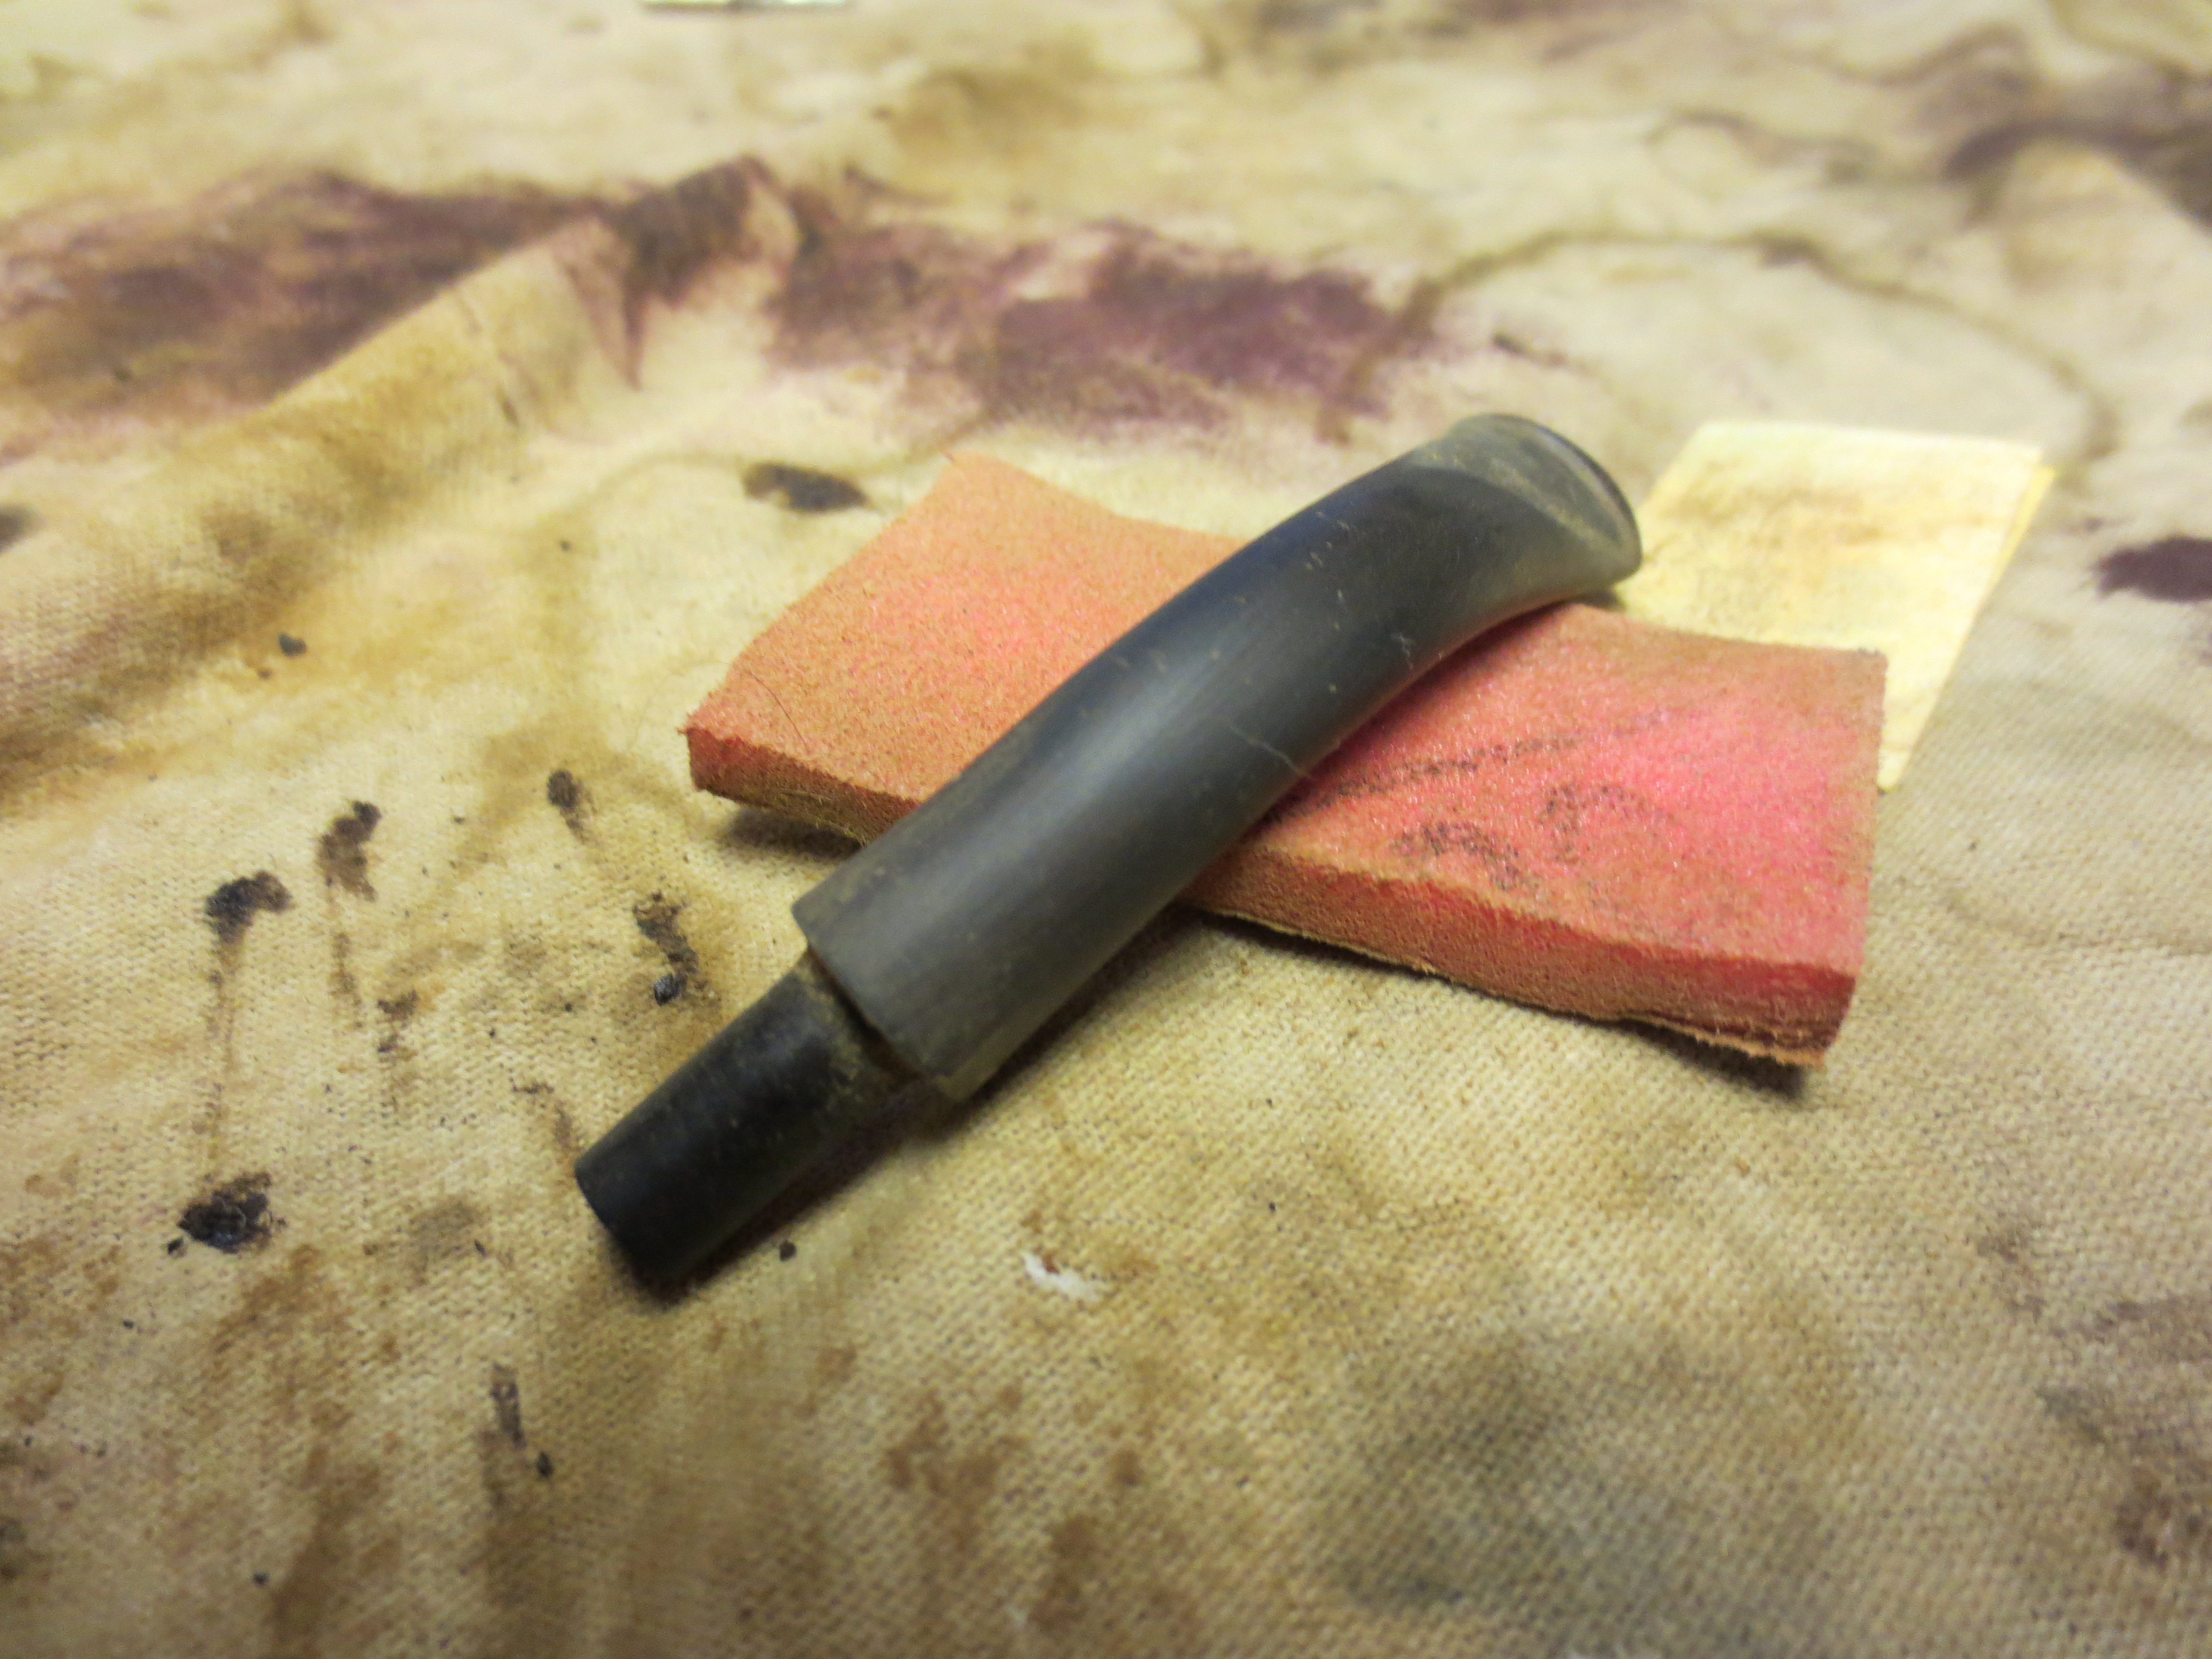
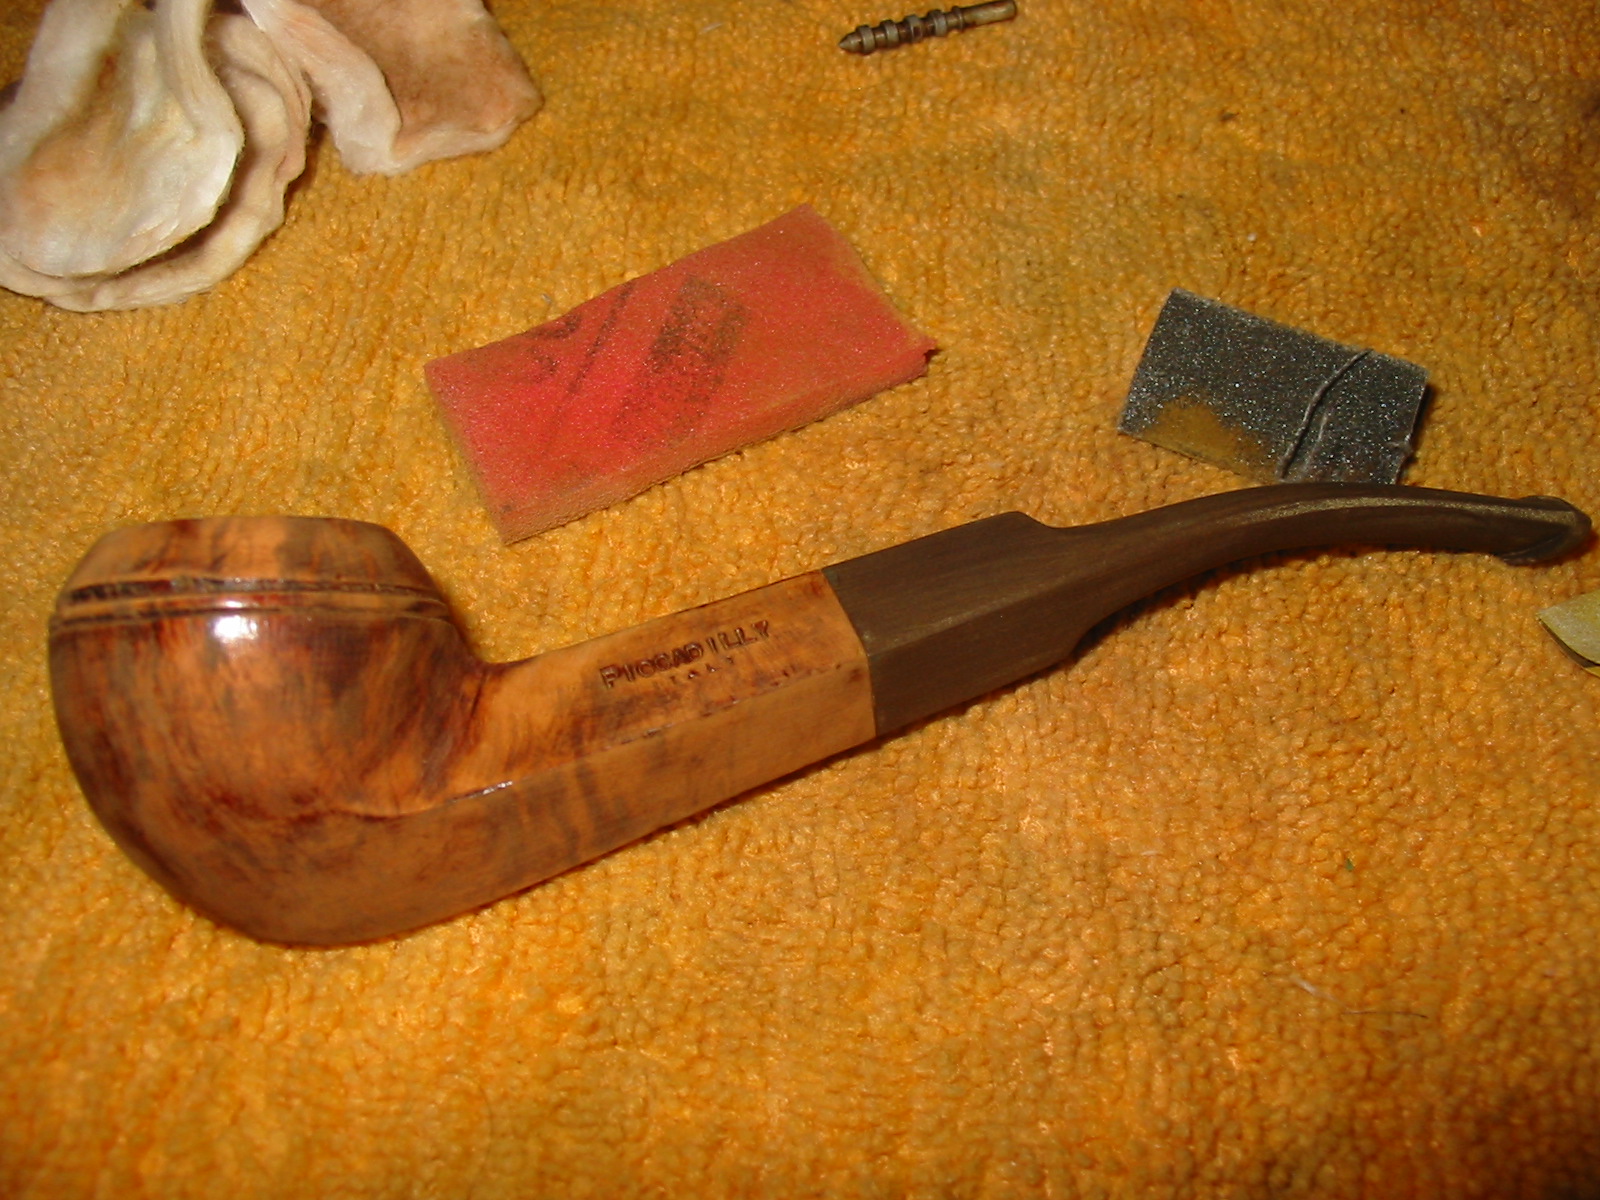
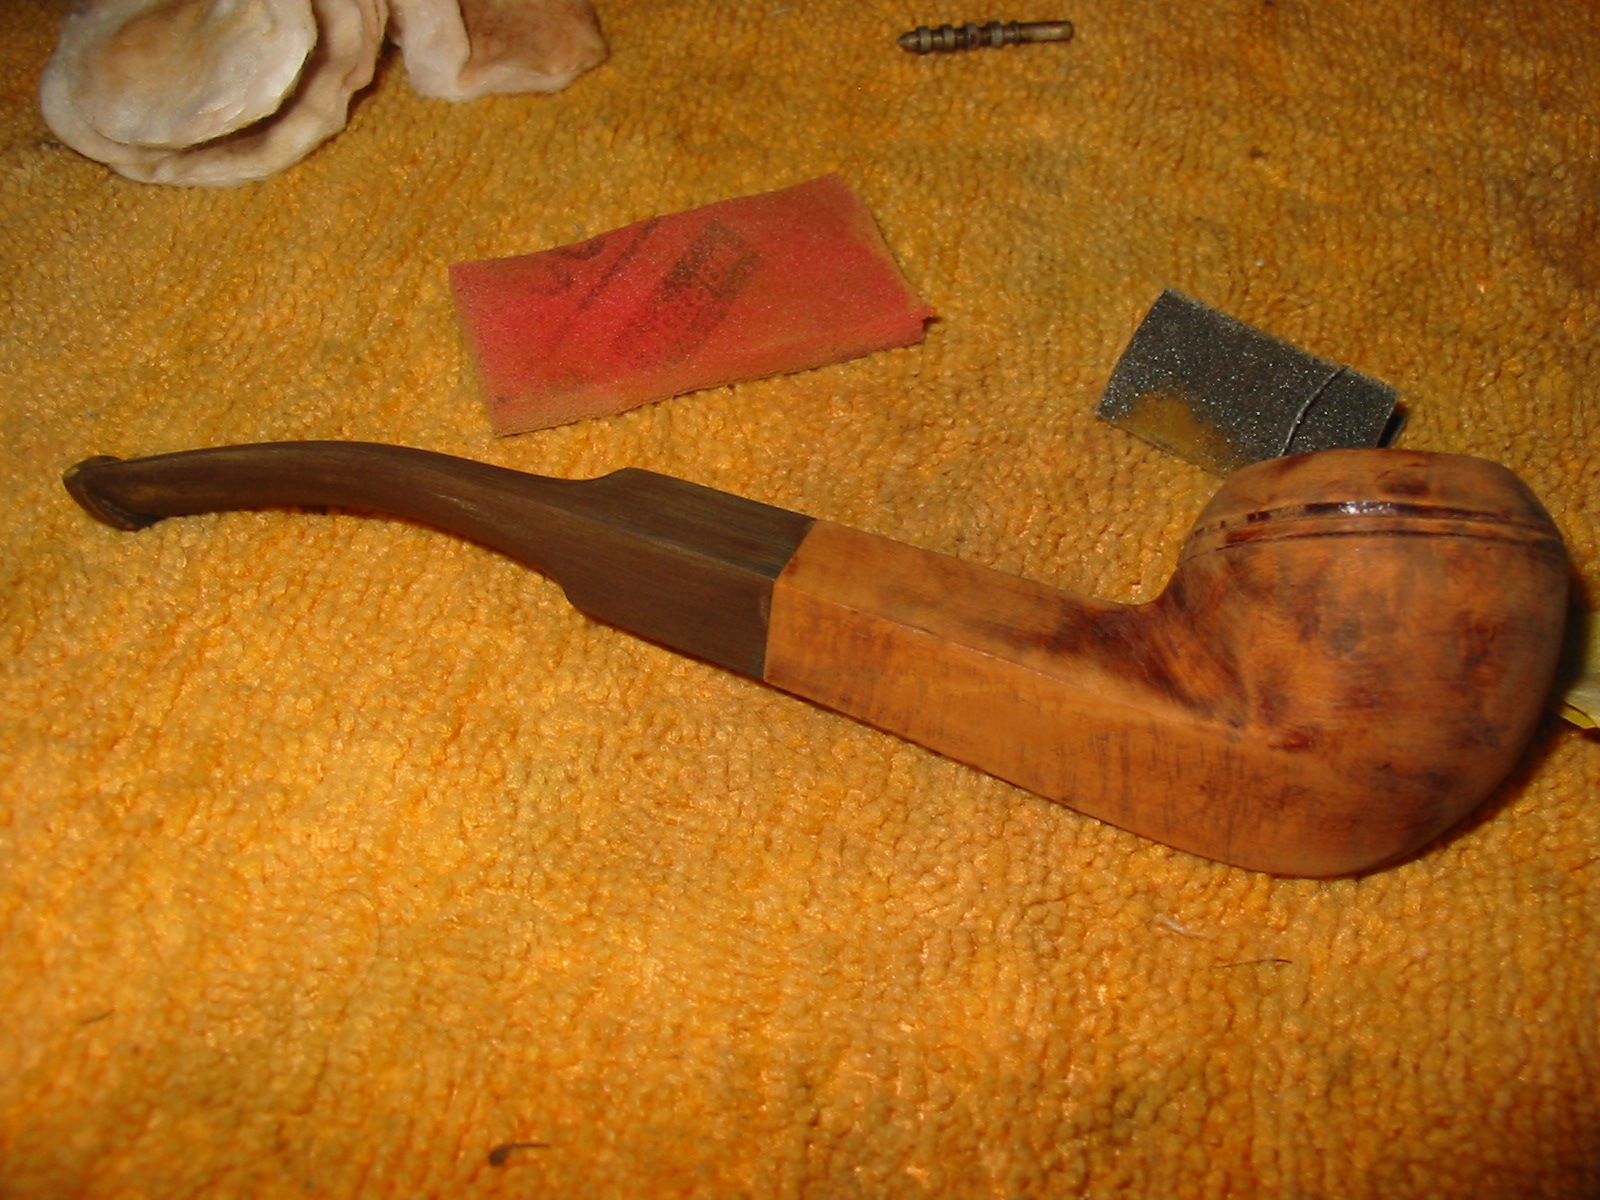
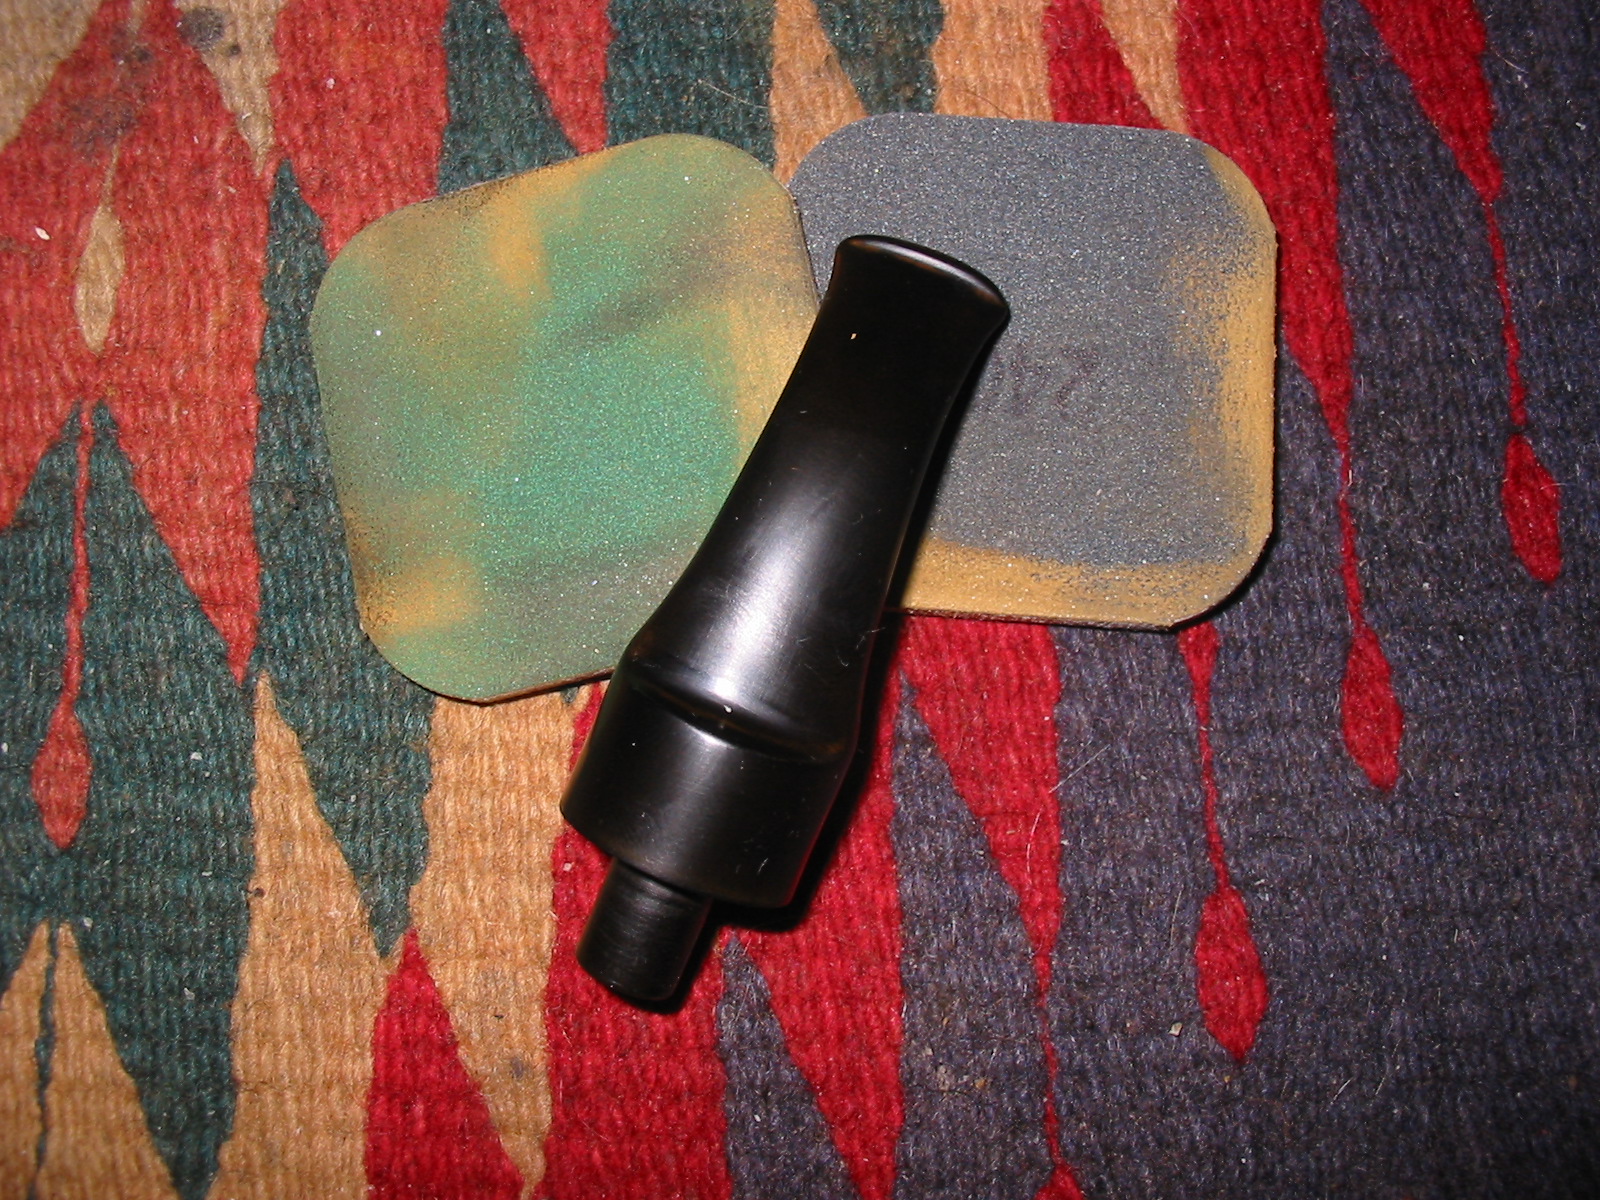
The bowl did not require any work other than a quick cleaning of the shank – more by habit than necessity. The stem on the other hand required a lot of work. I sanded it with a medium grit sanding sponge to break up the oxidation. I also used the flame of a Bic lighter to paint the surface of the stem. The flame from the lighter also raised the slight tooth indent next to the button. This combination of methods removed a large portion of the oxidation as can be seen in the next four photos below.

IMG_1421

IMG_1422

IMG_1423

IMG_1424

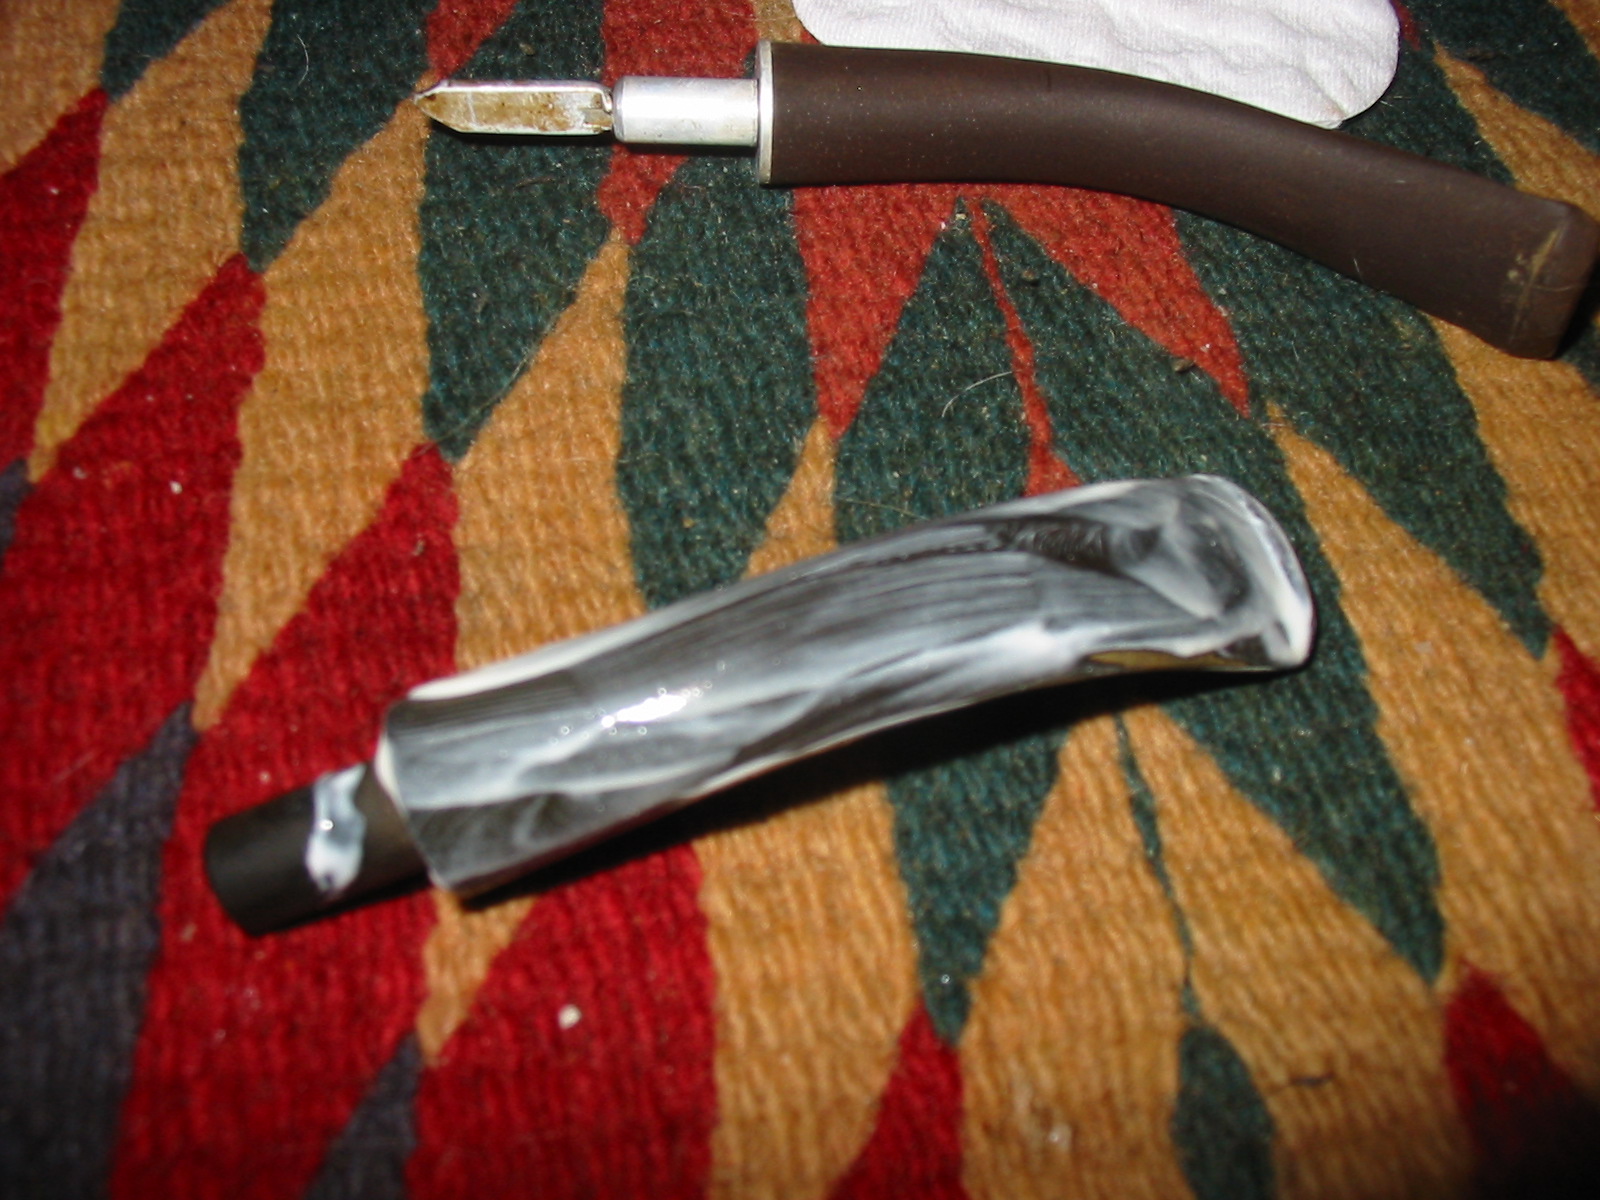
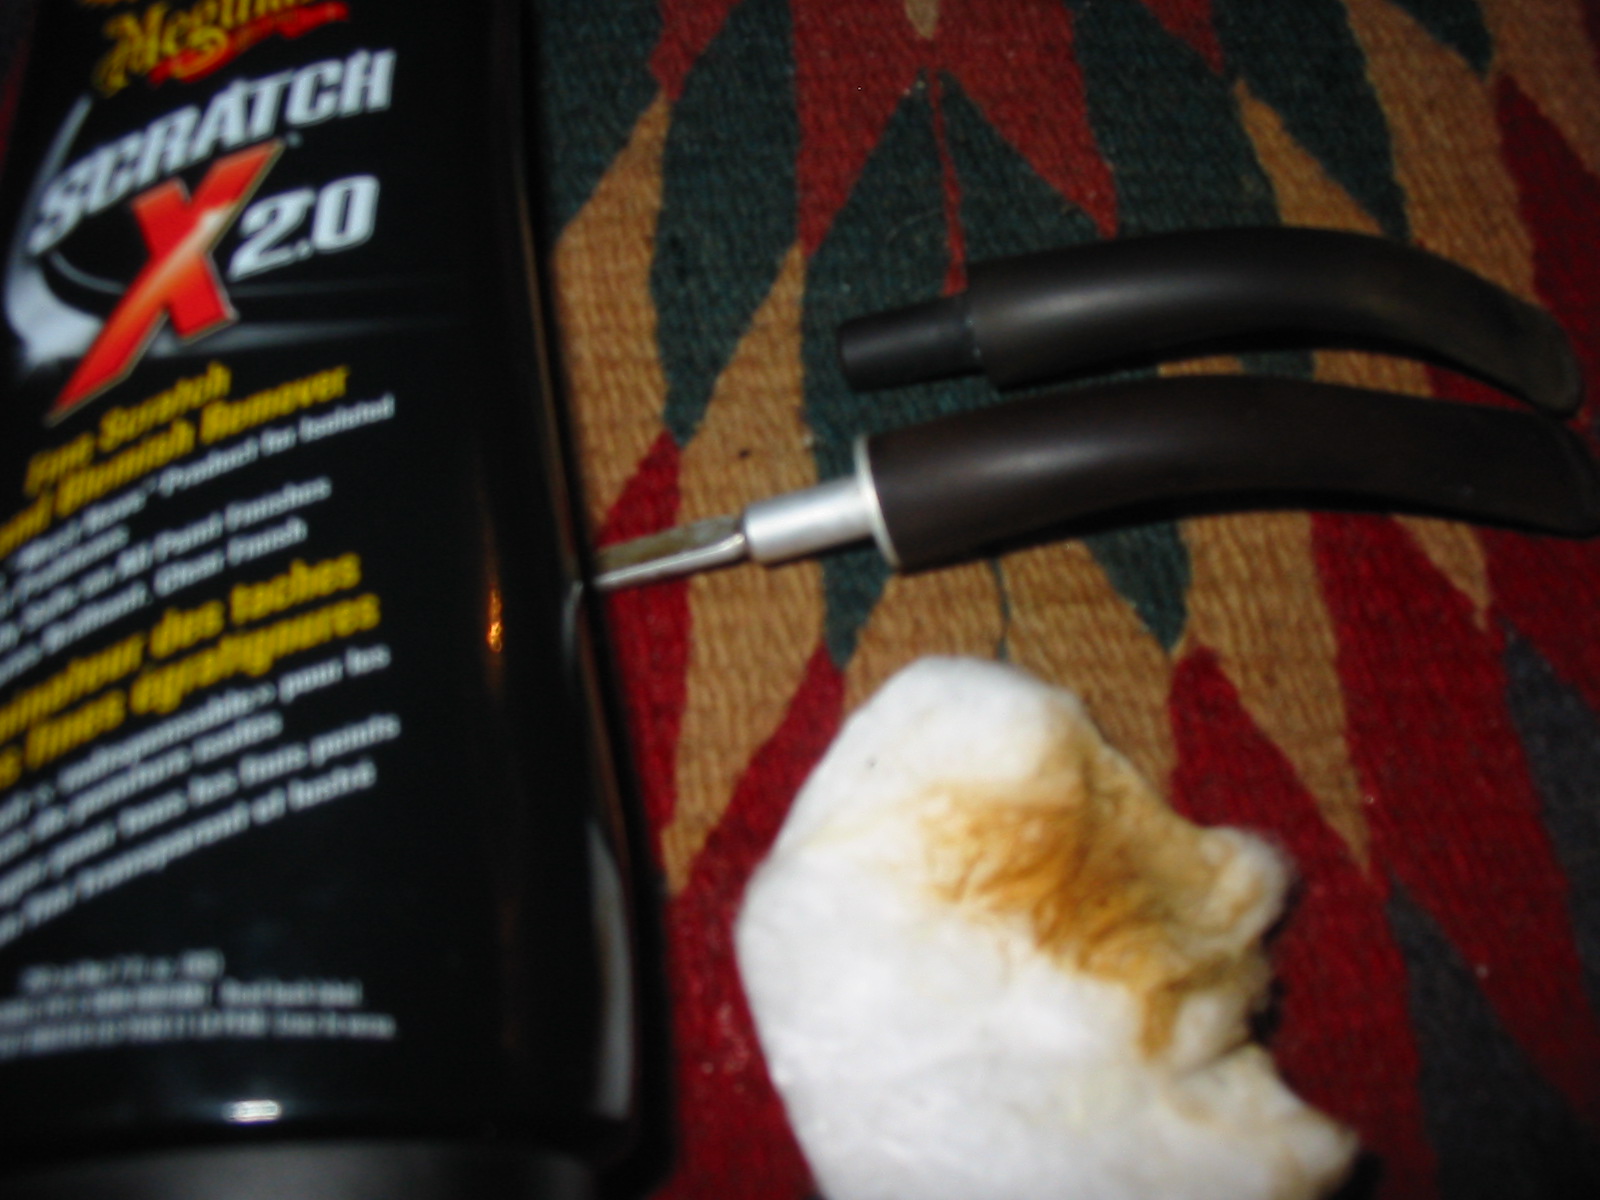
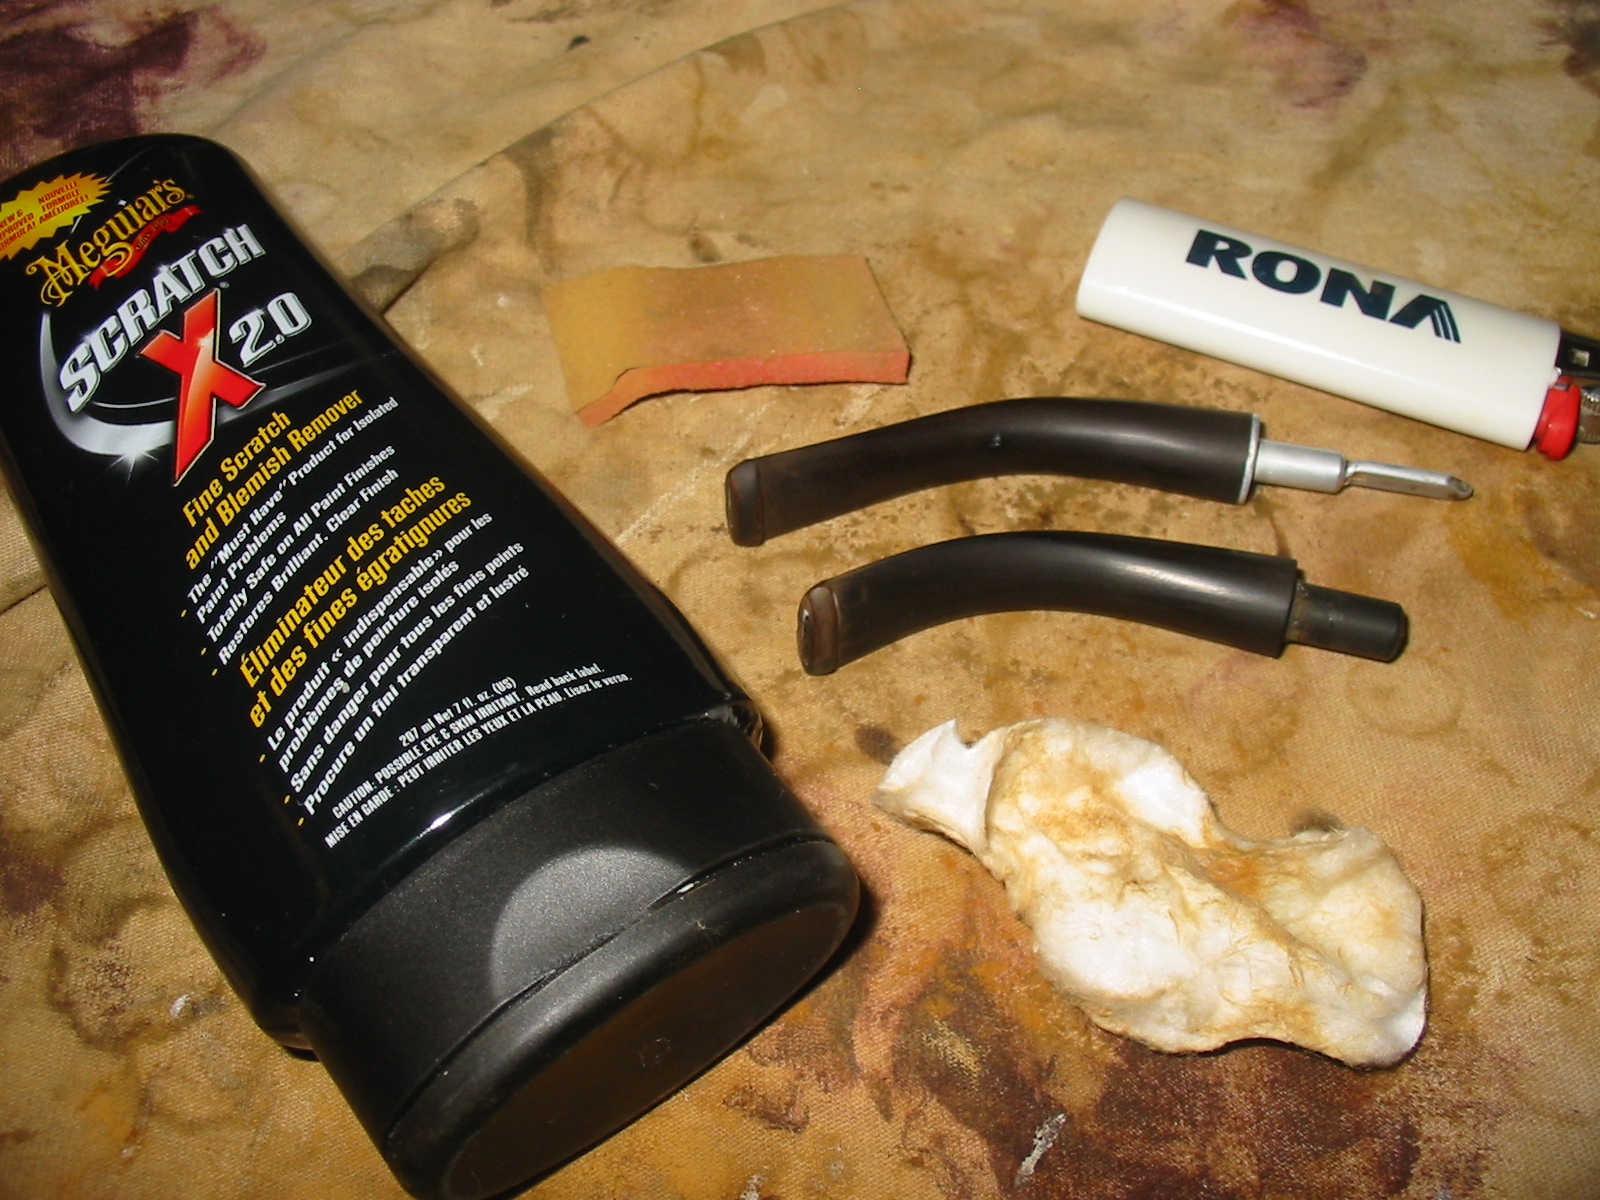
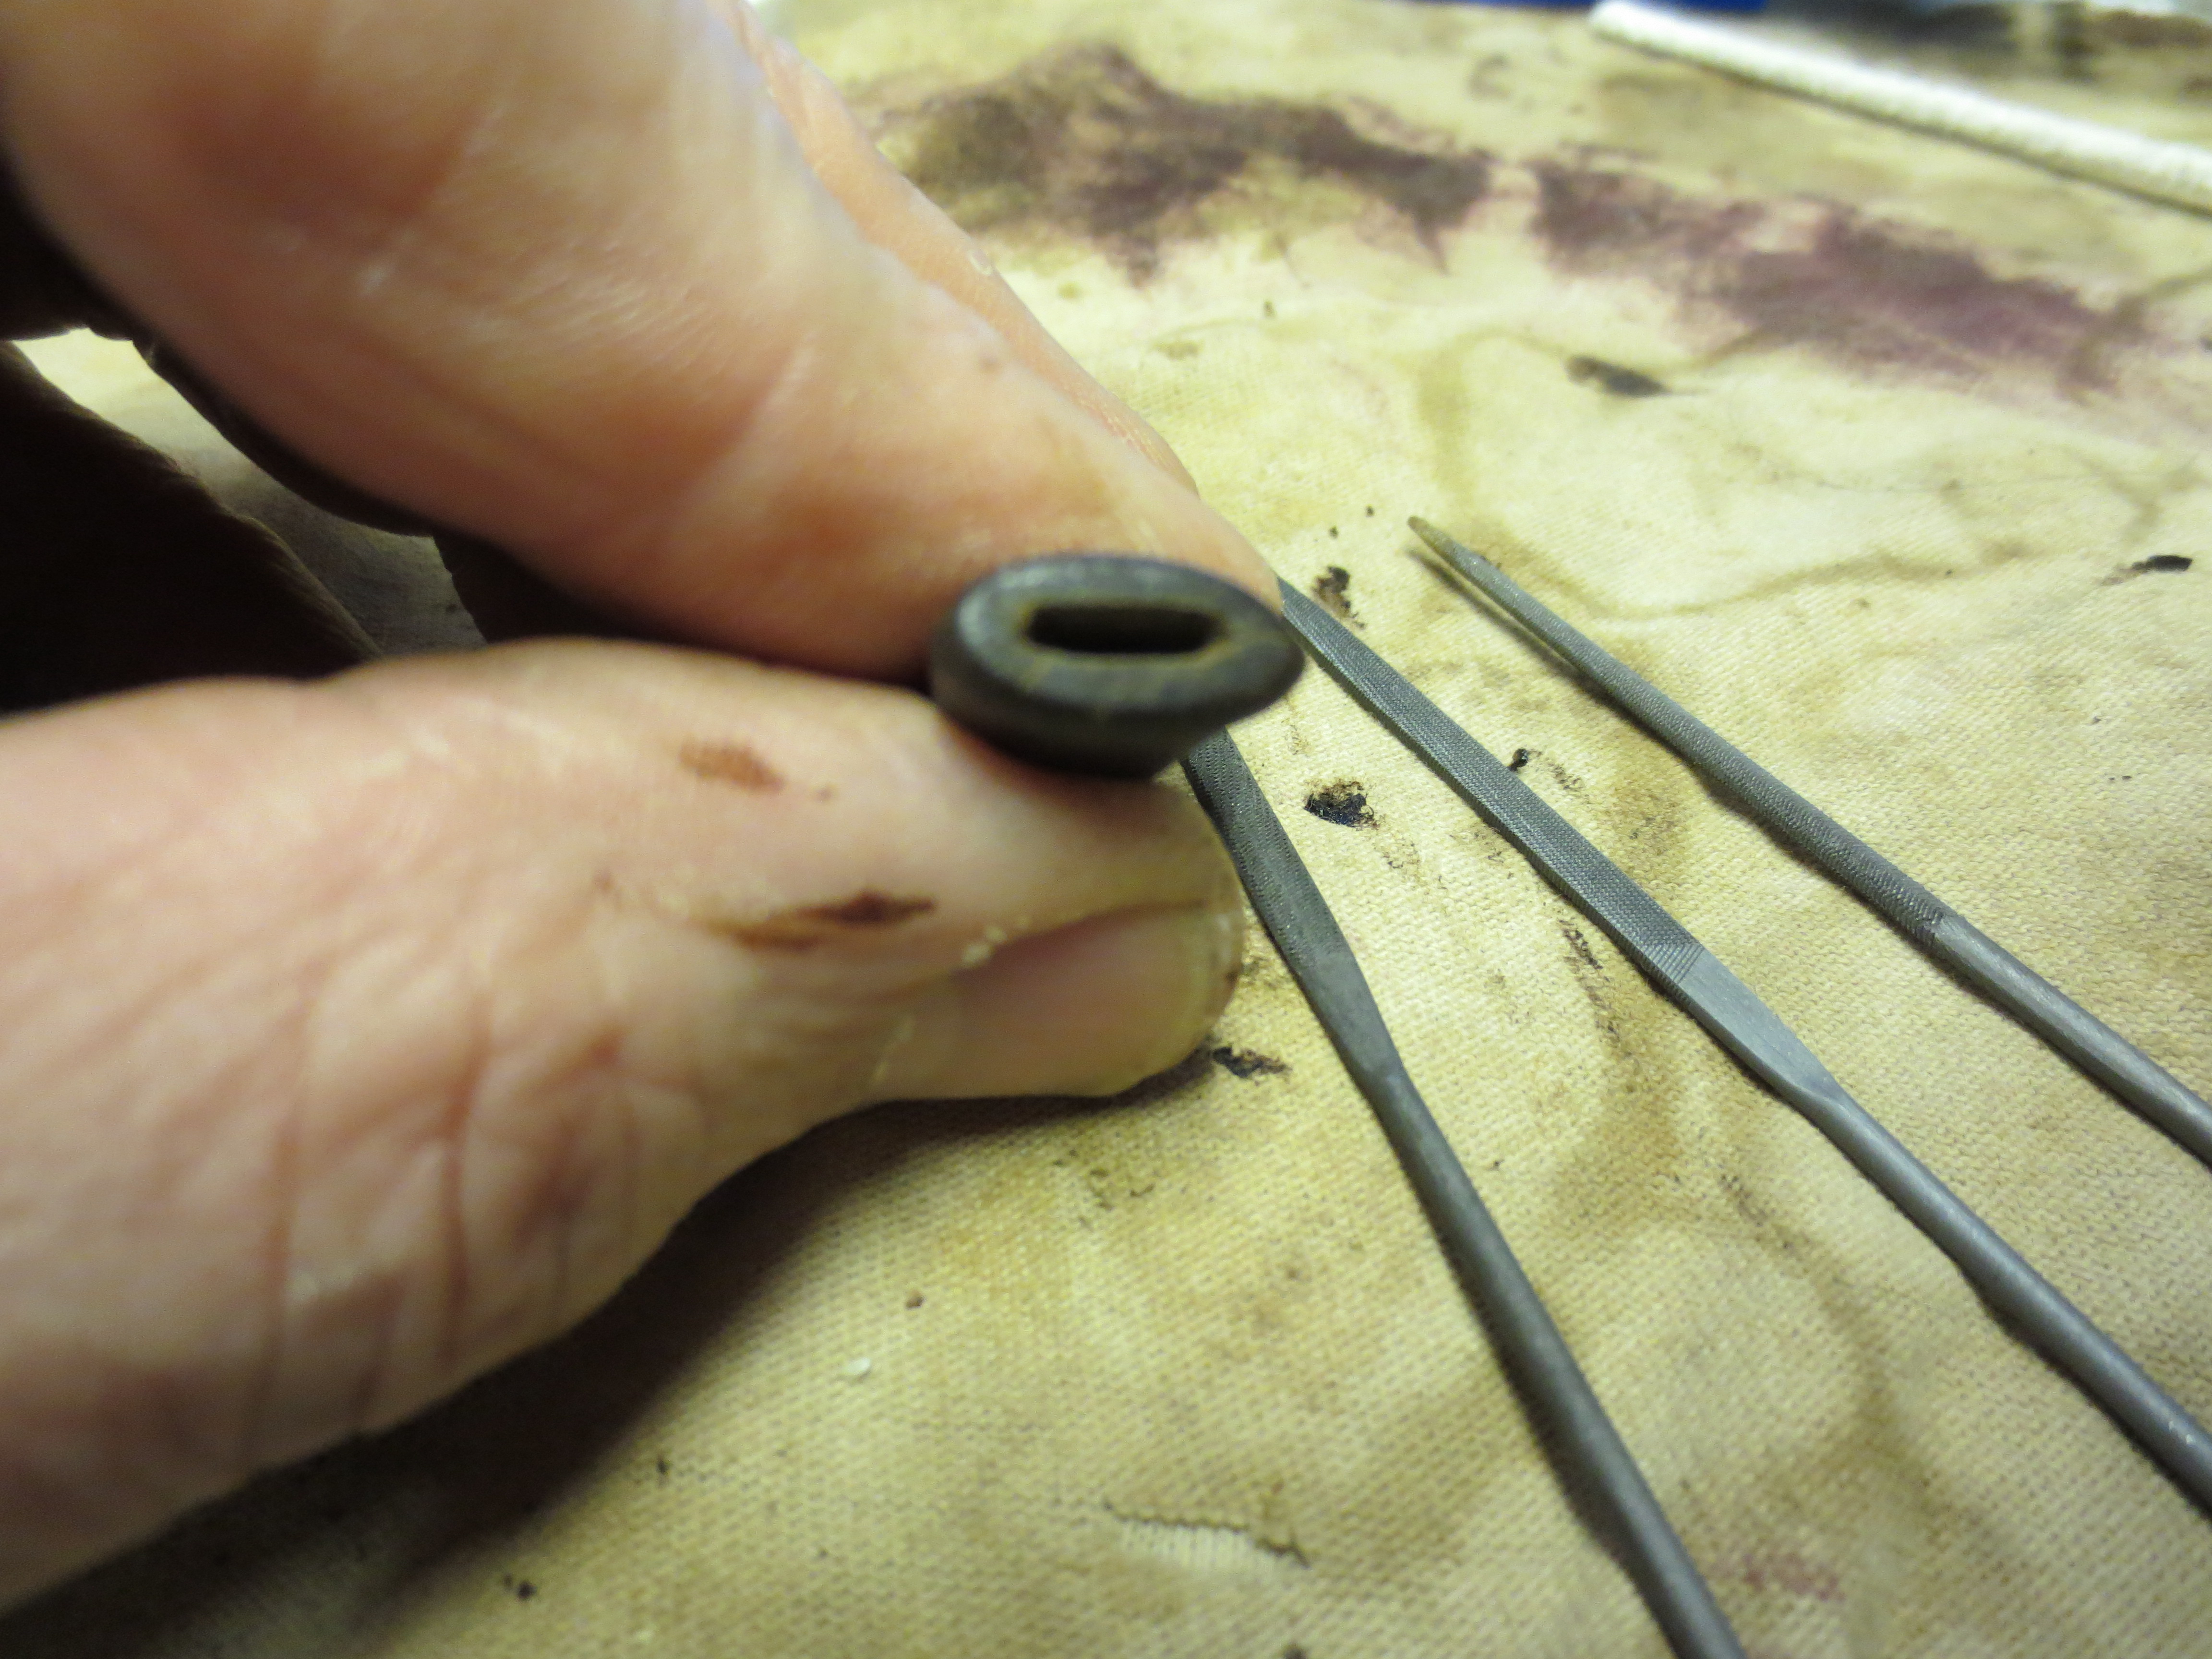
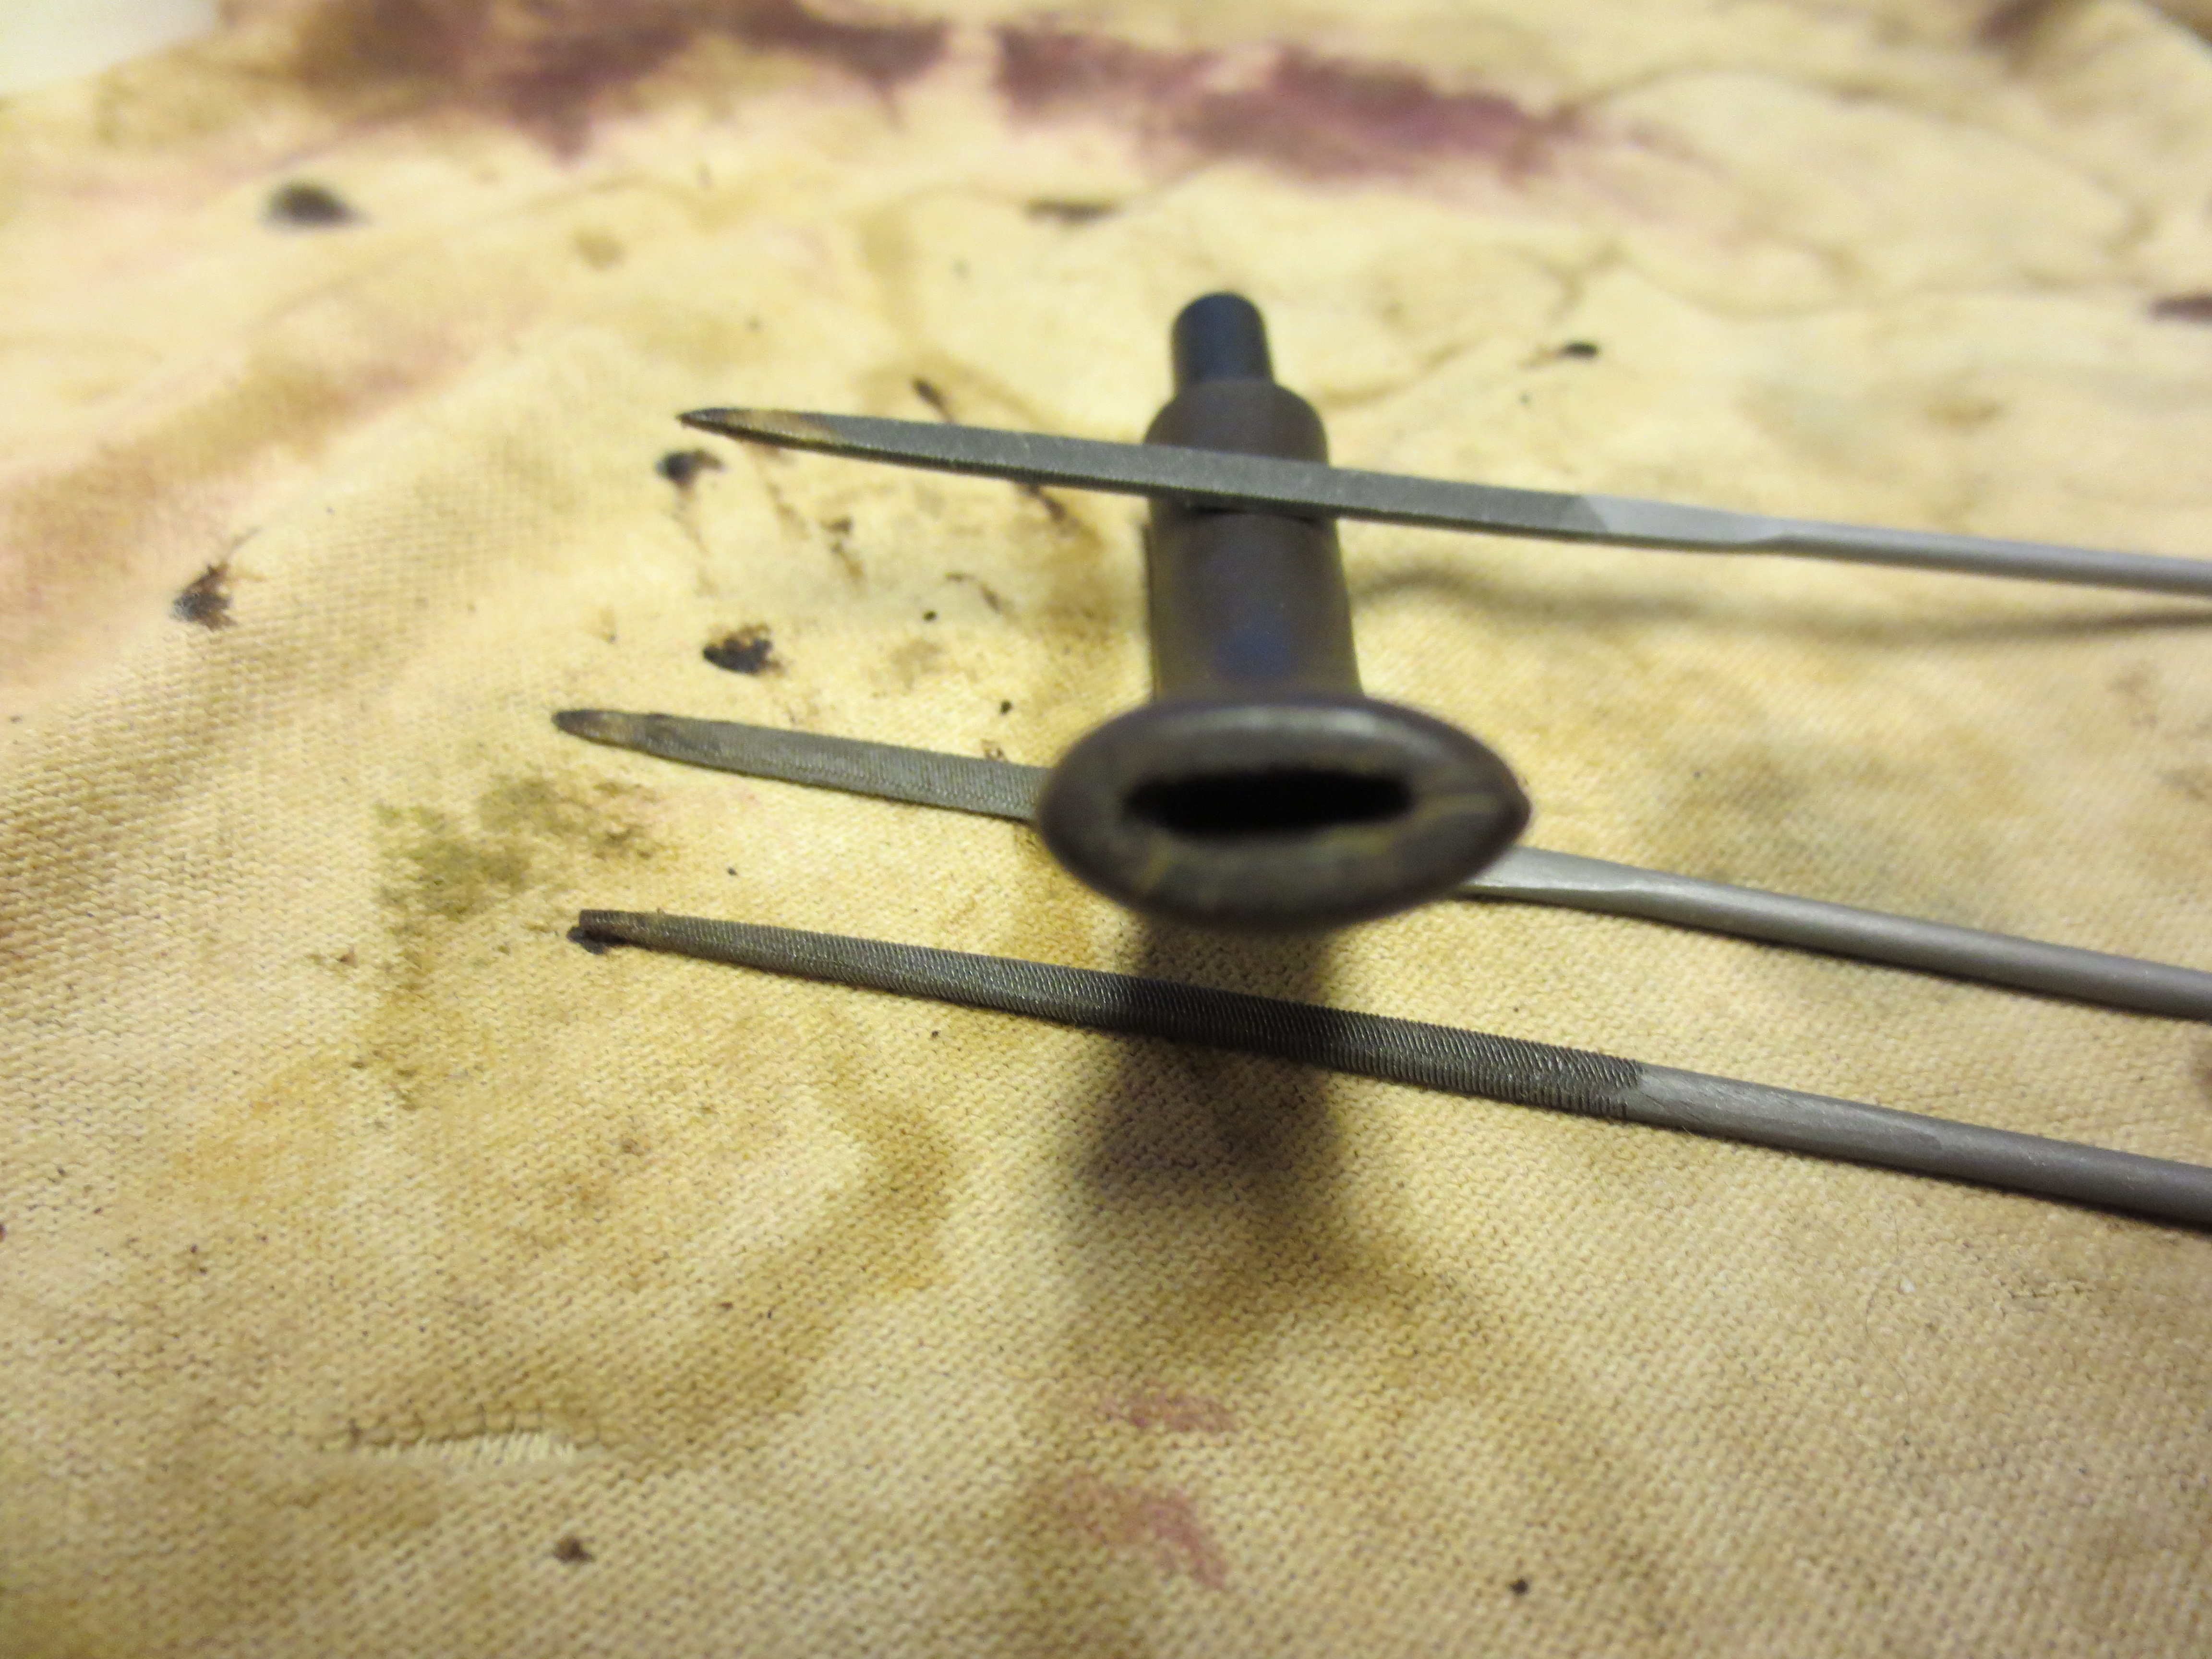
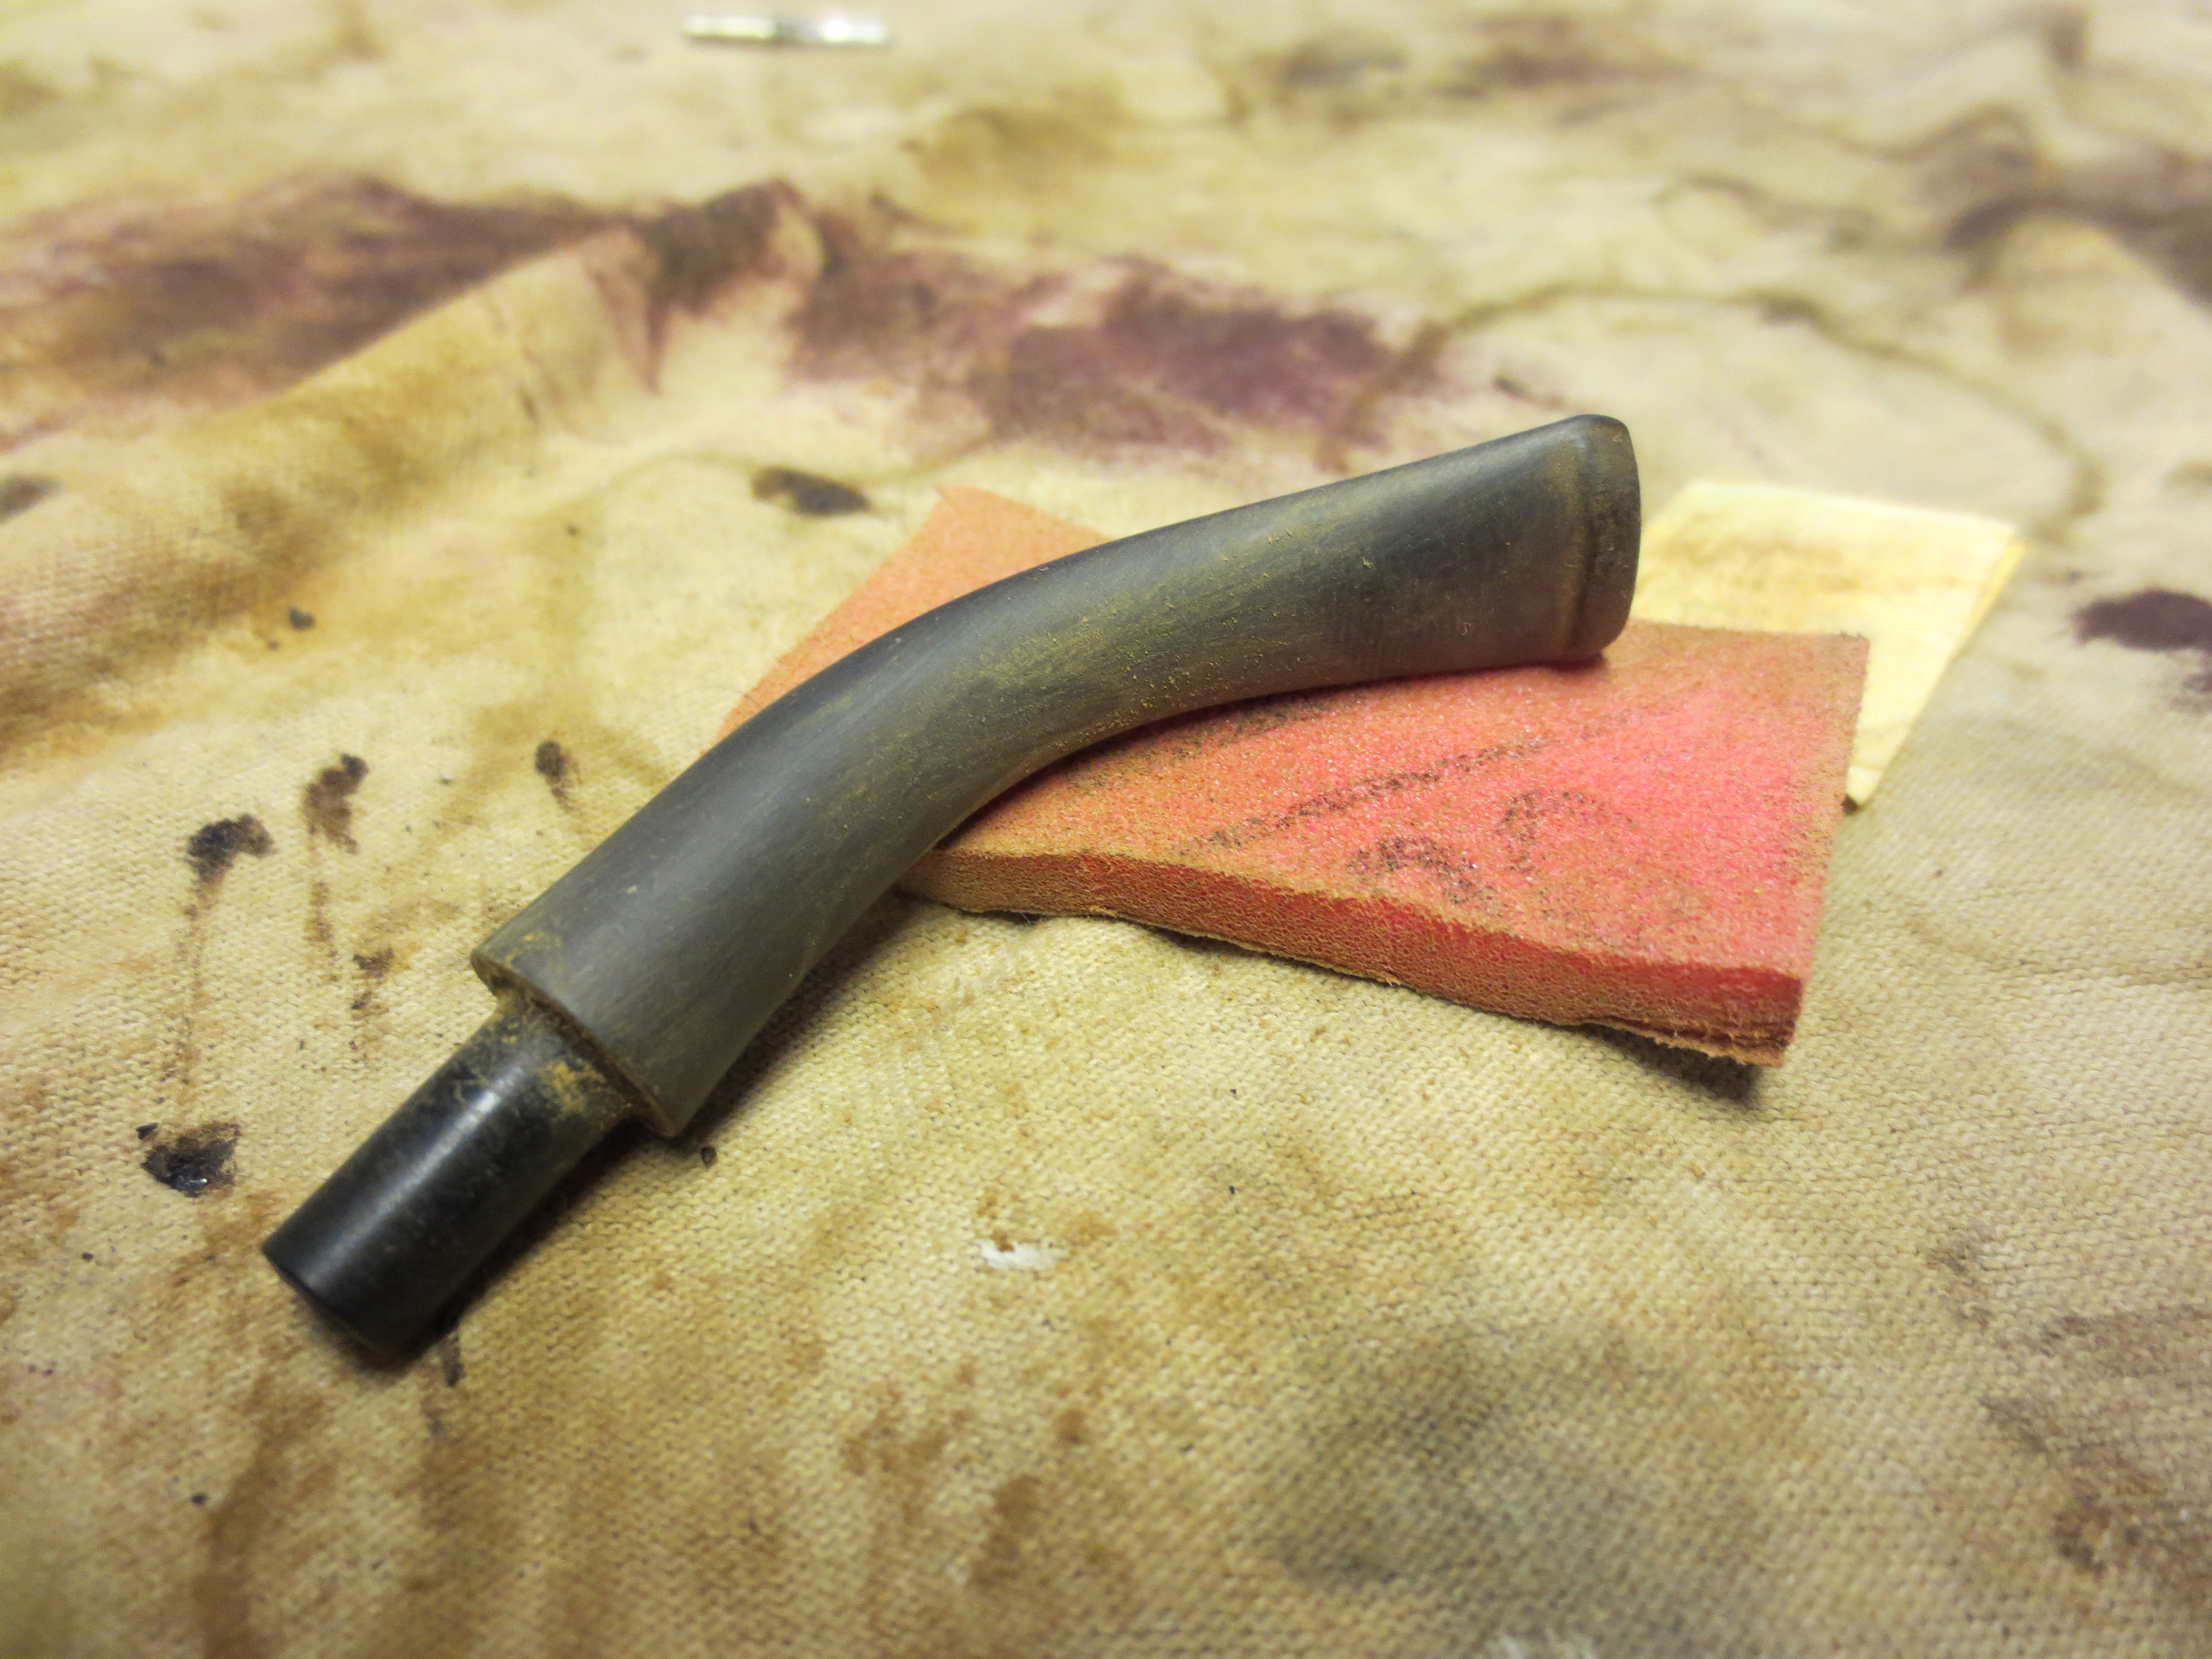
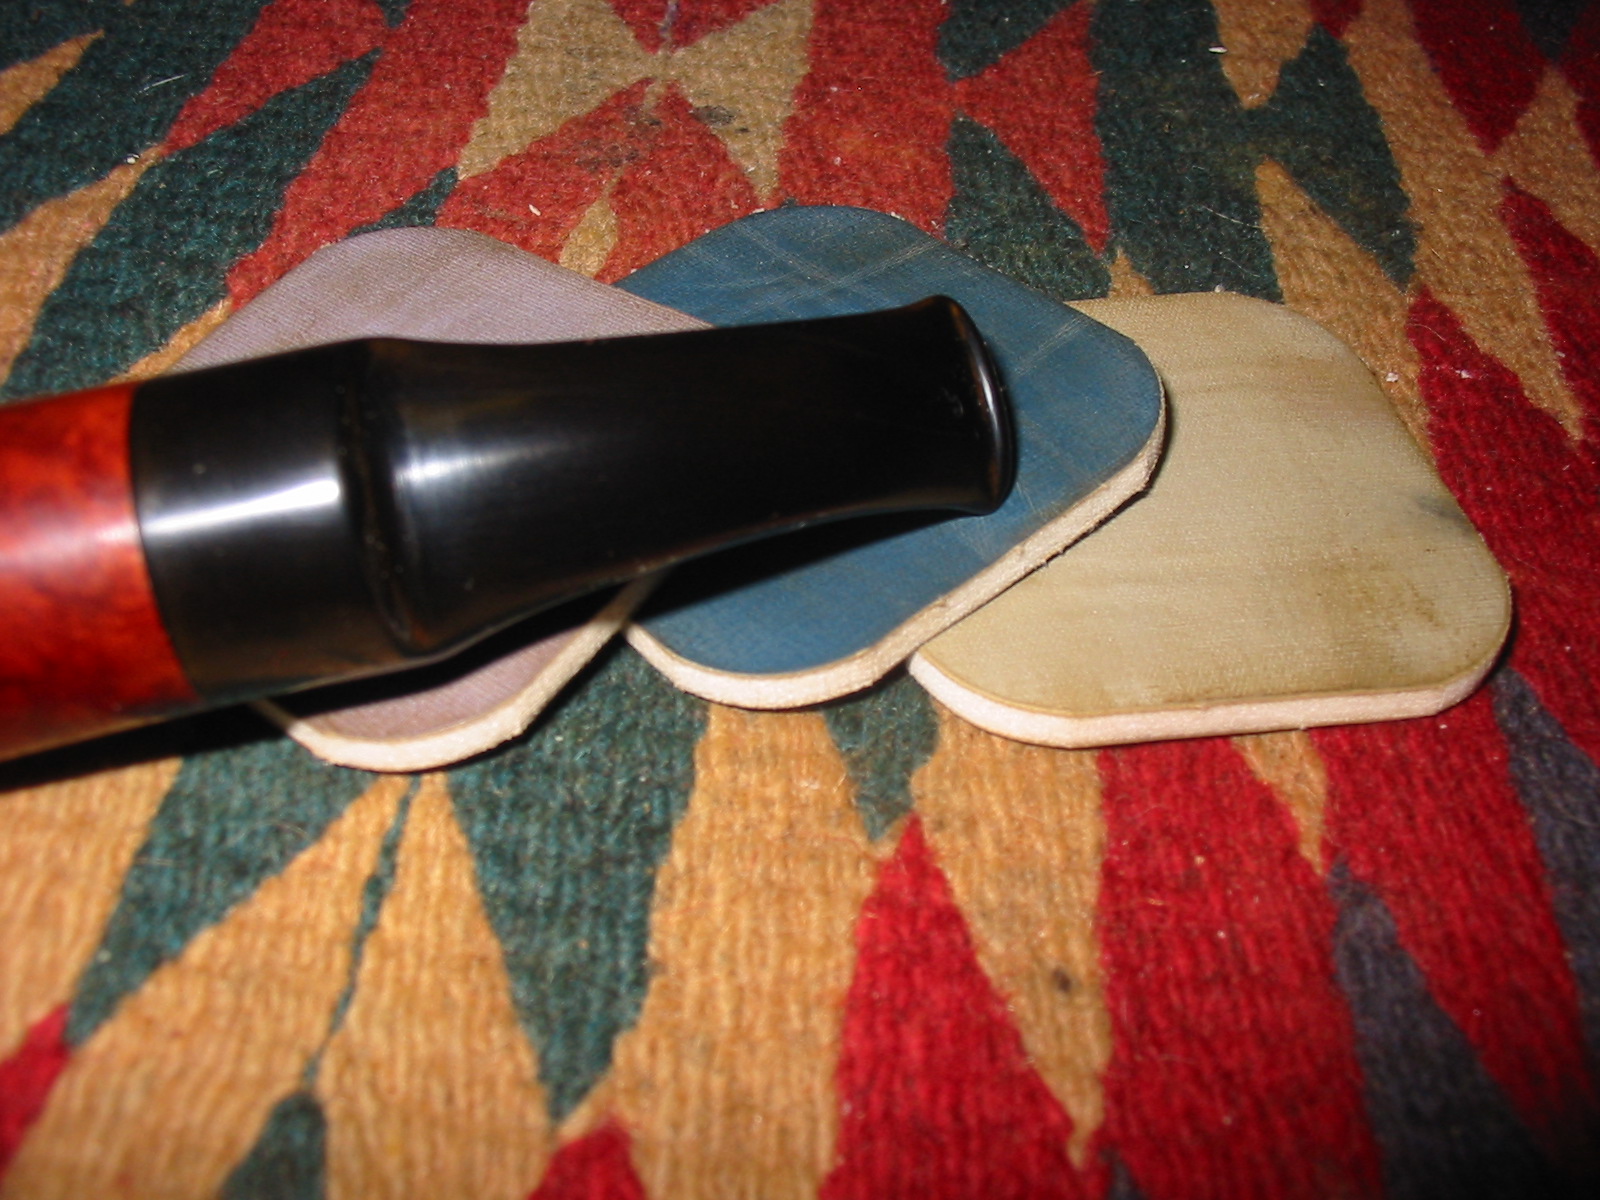
I then sanded the stem with micromesh sanding pads. I wet sanded with 1500, 1800 and 2400 grit sanding pads. I wet the pad by dipping it in a bowl of water and then sand the stem with it. Once I had wet sanded with those grits of micromesh I followed by dry sanding with 3200-12,000 grit micromesh pads. The next series of five photos show the progress of the sanding. I took it to the buffer after the wet sanding and buffed it with Tripoli to get an idea of where I stood with the oxidation. I also ran the flame over the hard to get angles on the saddle and against the button to further remove hard to get oxidation.

IMG_1425

IMG_1426

IMG_1430

IMG_1431

IMG_1432

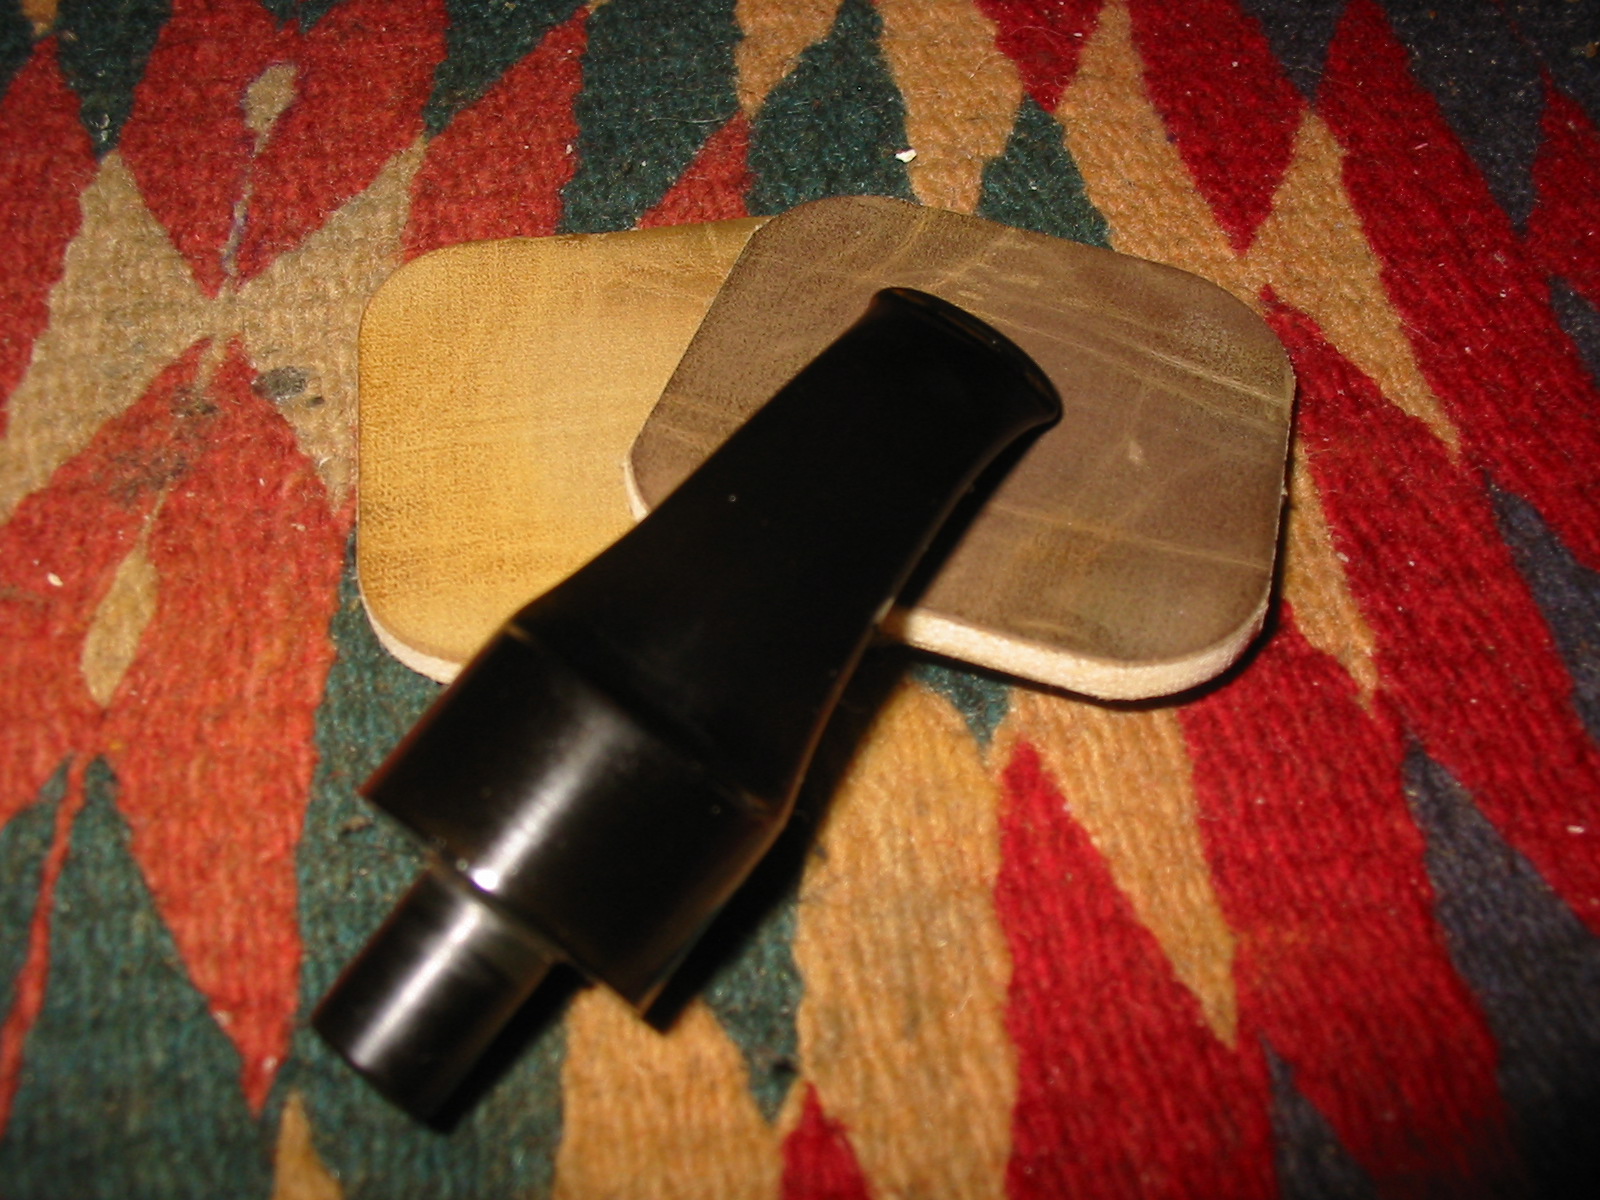
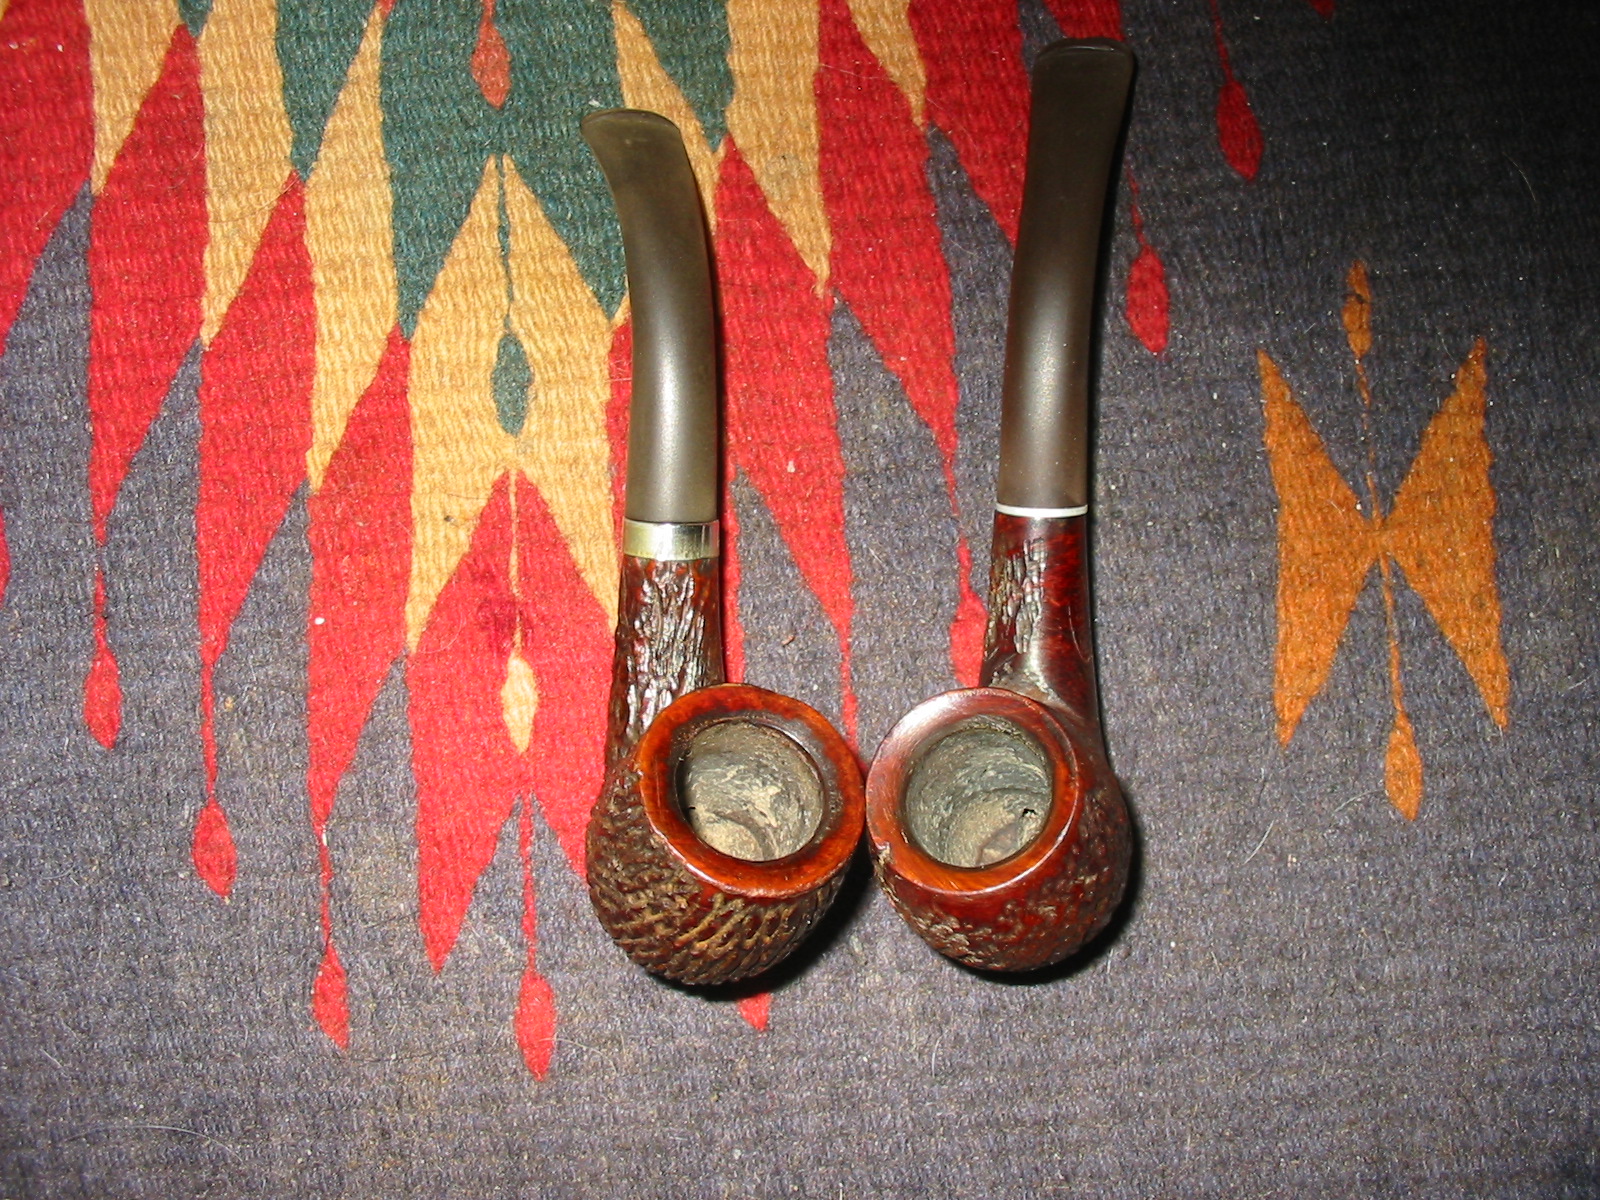
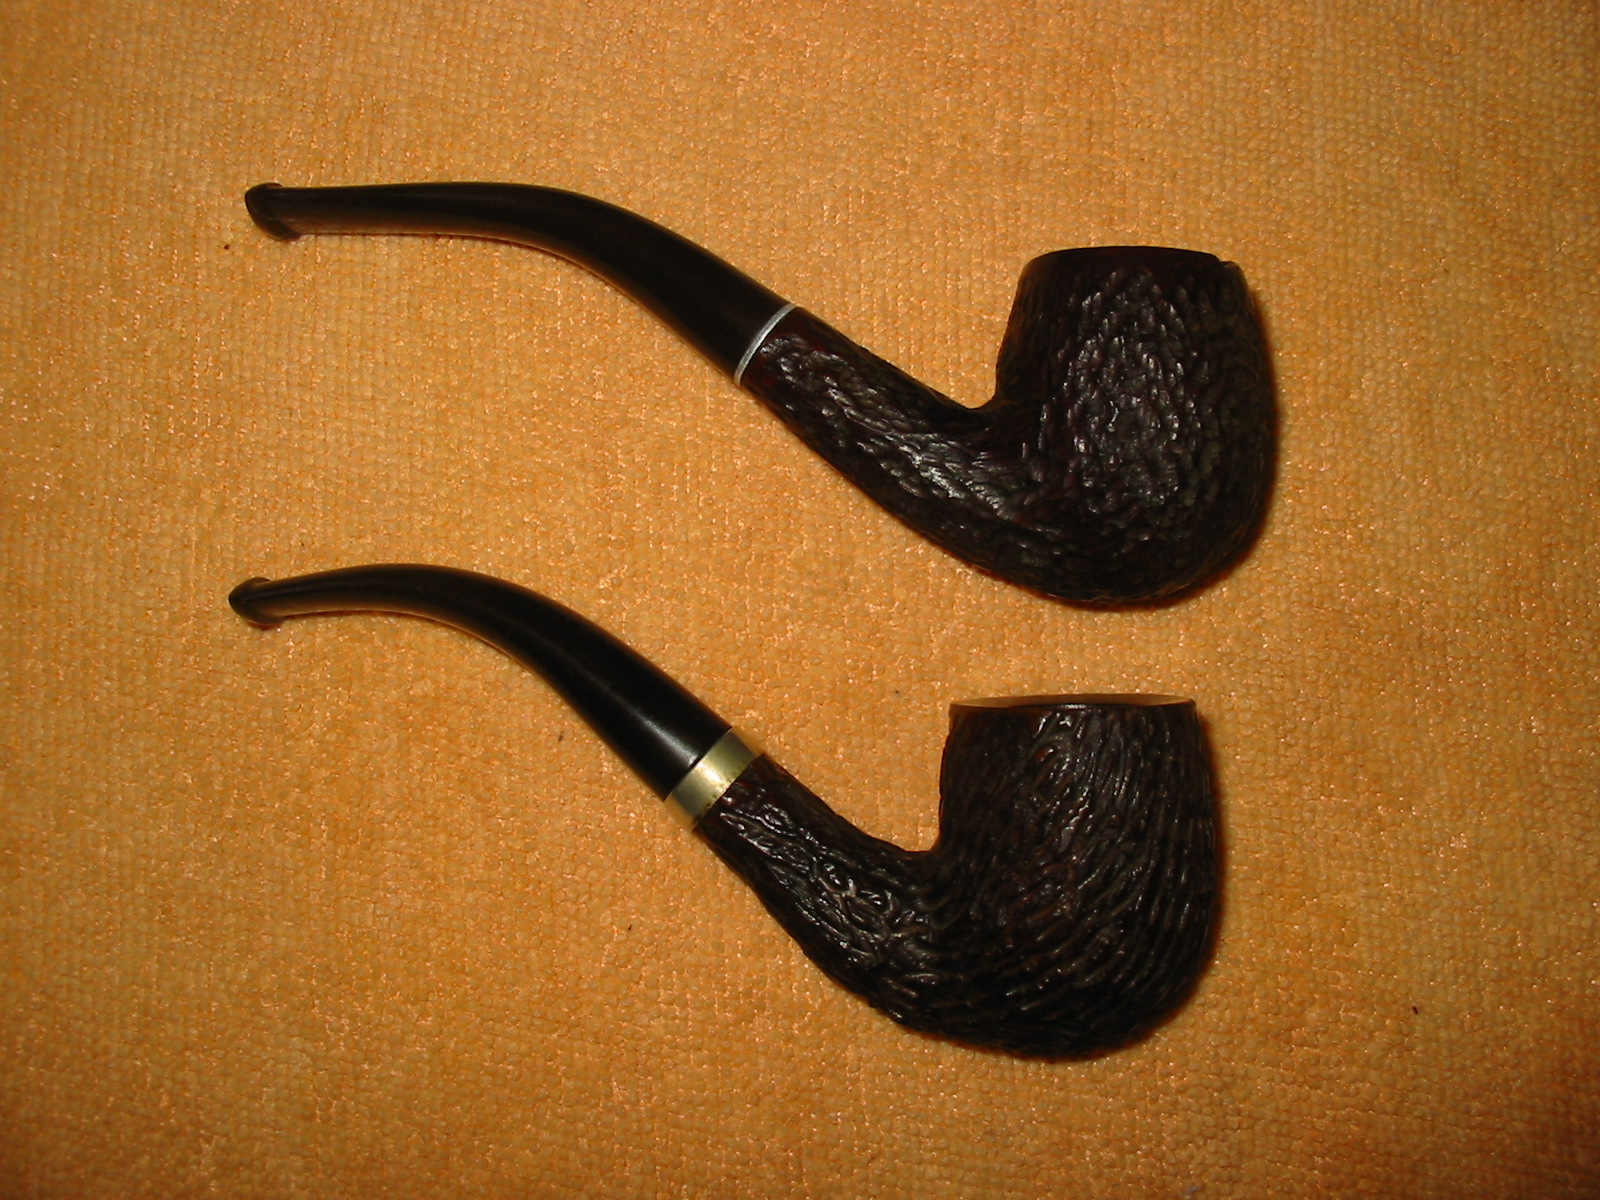
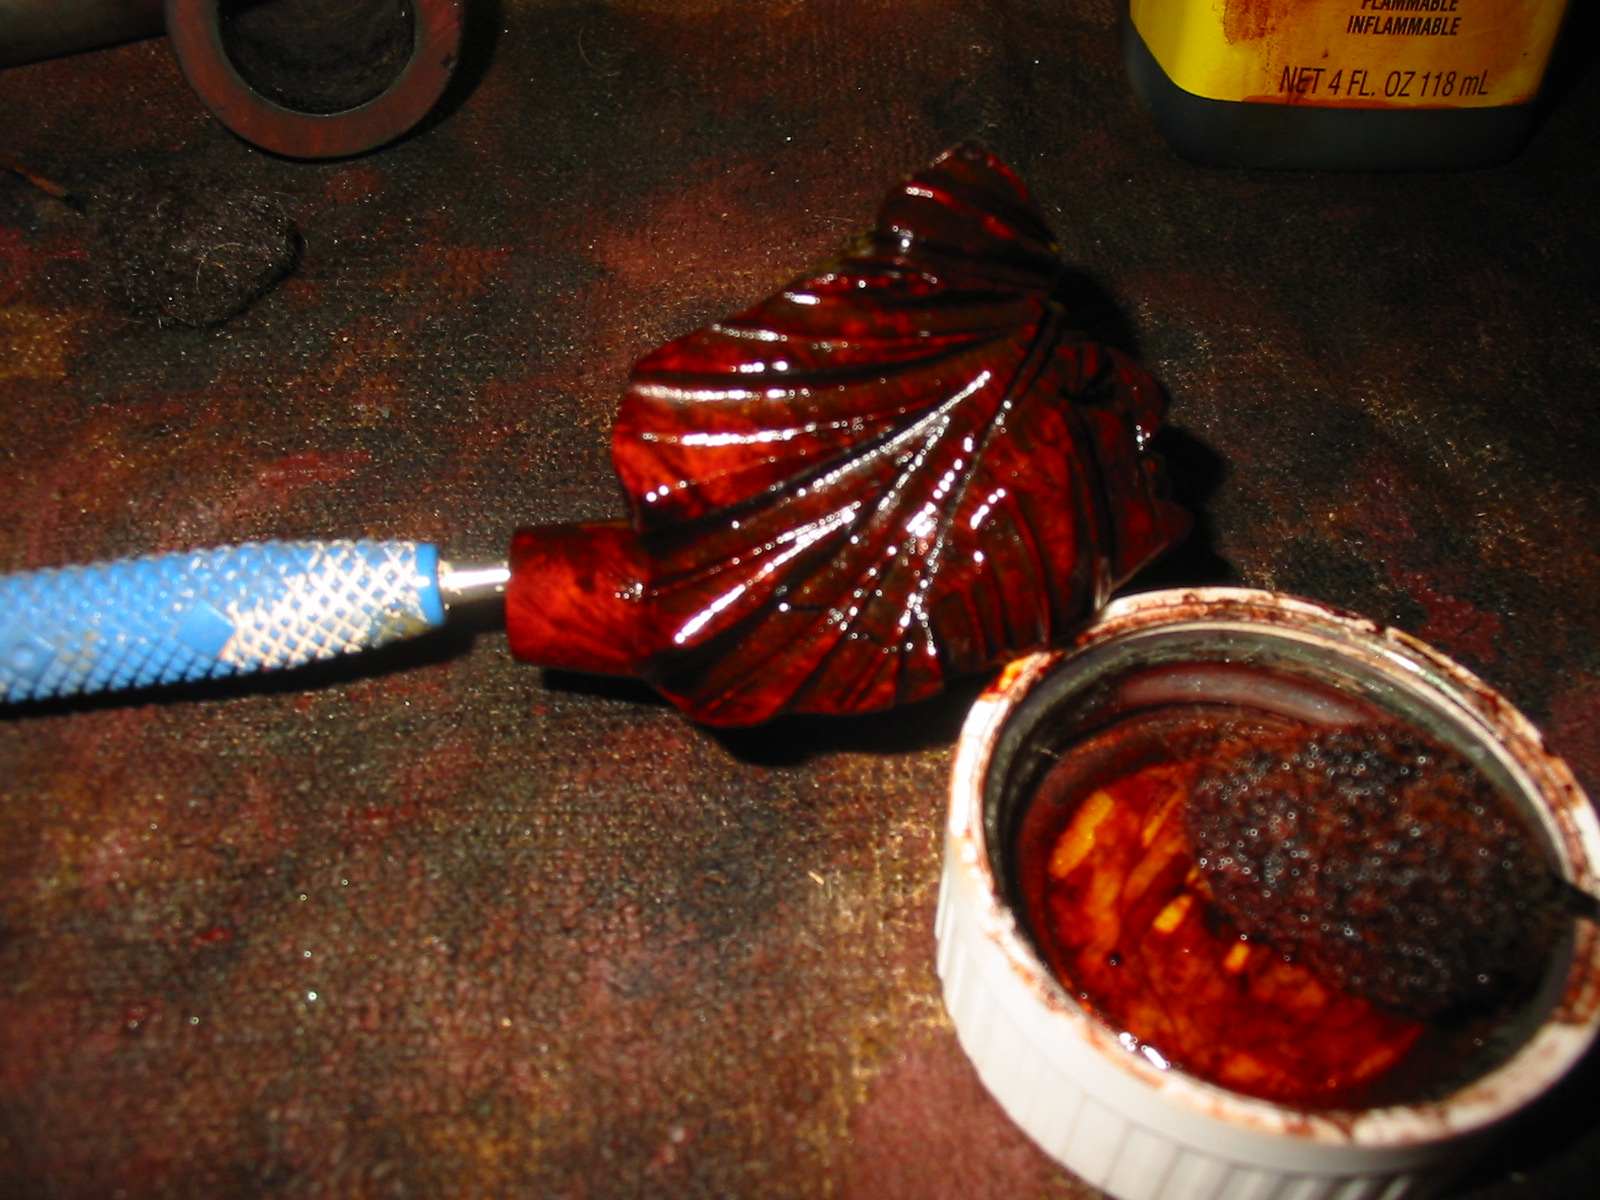
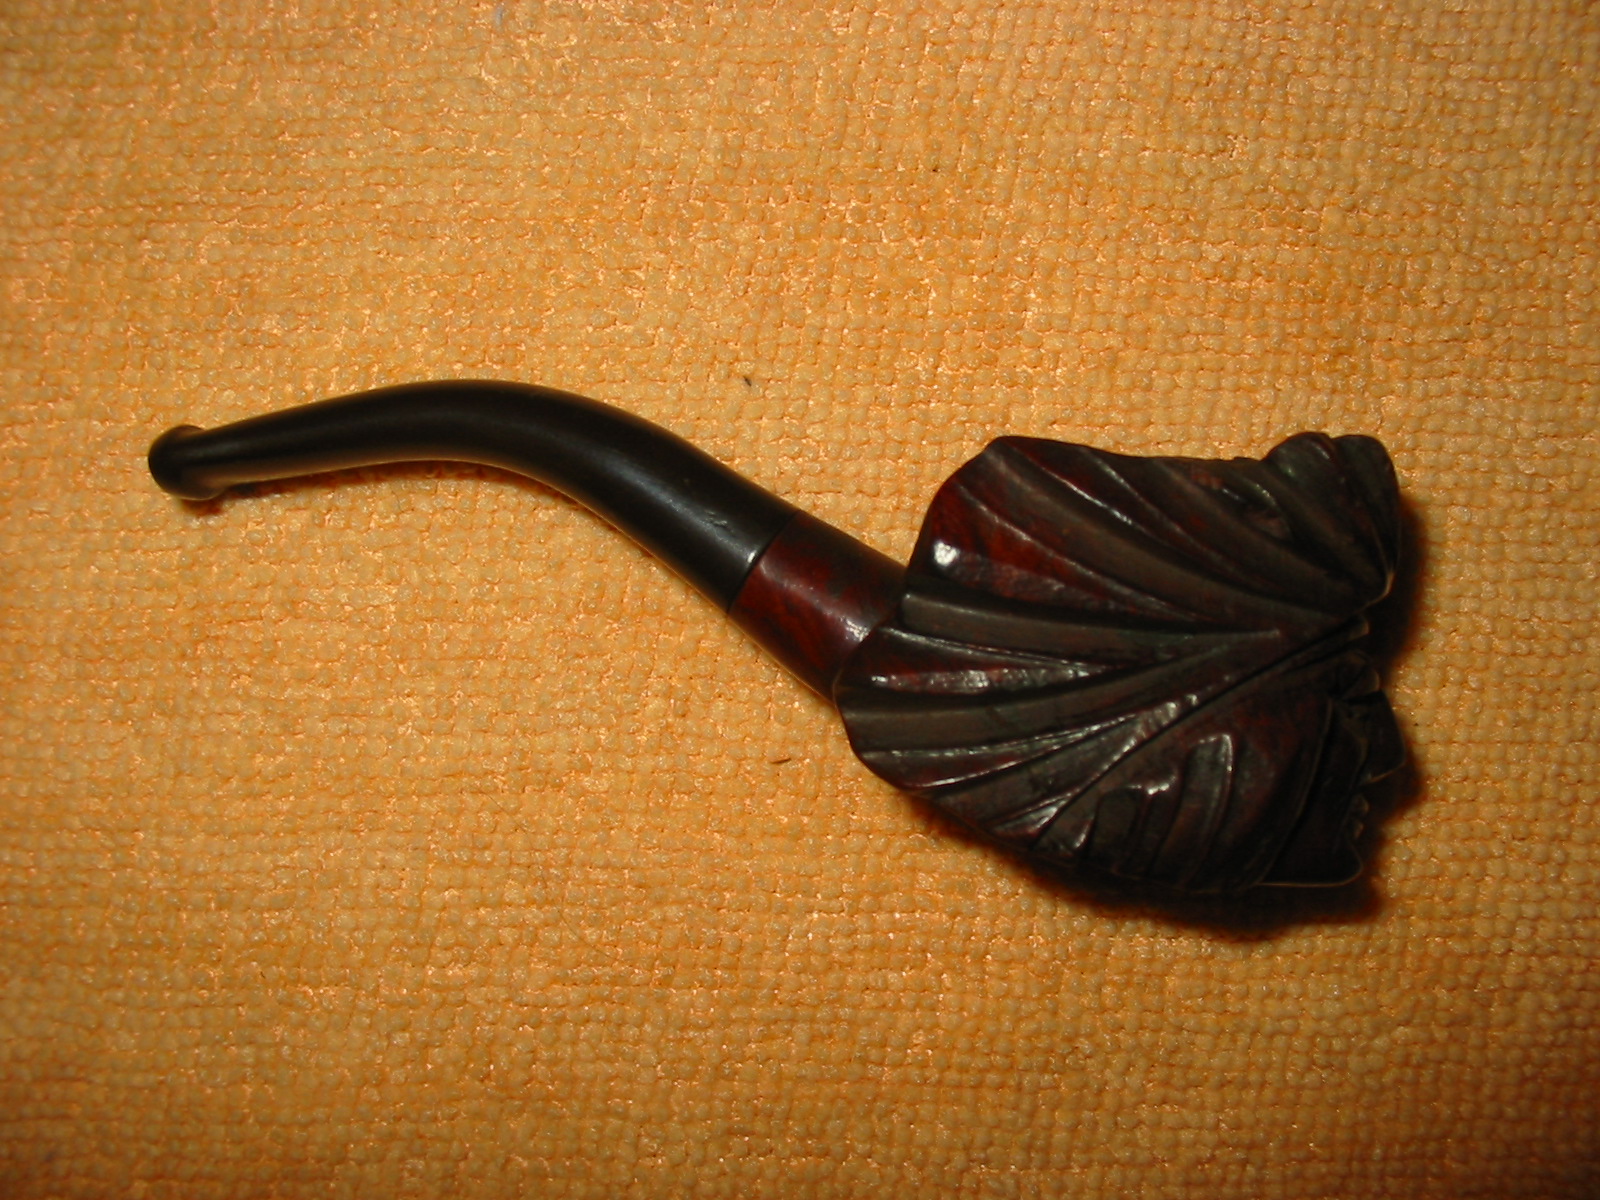
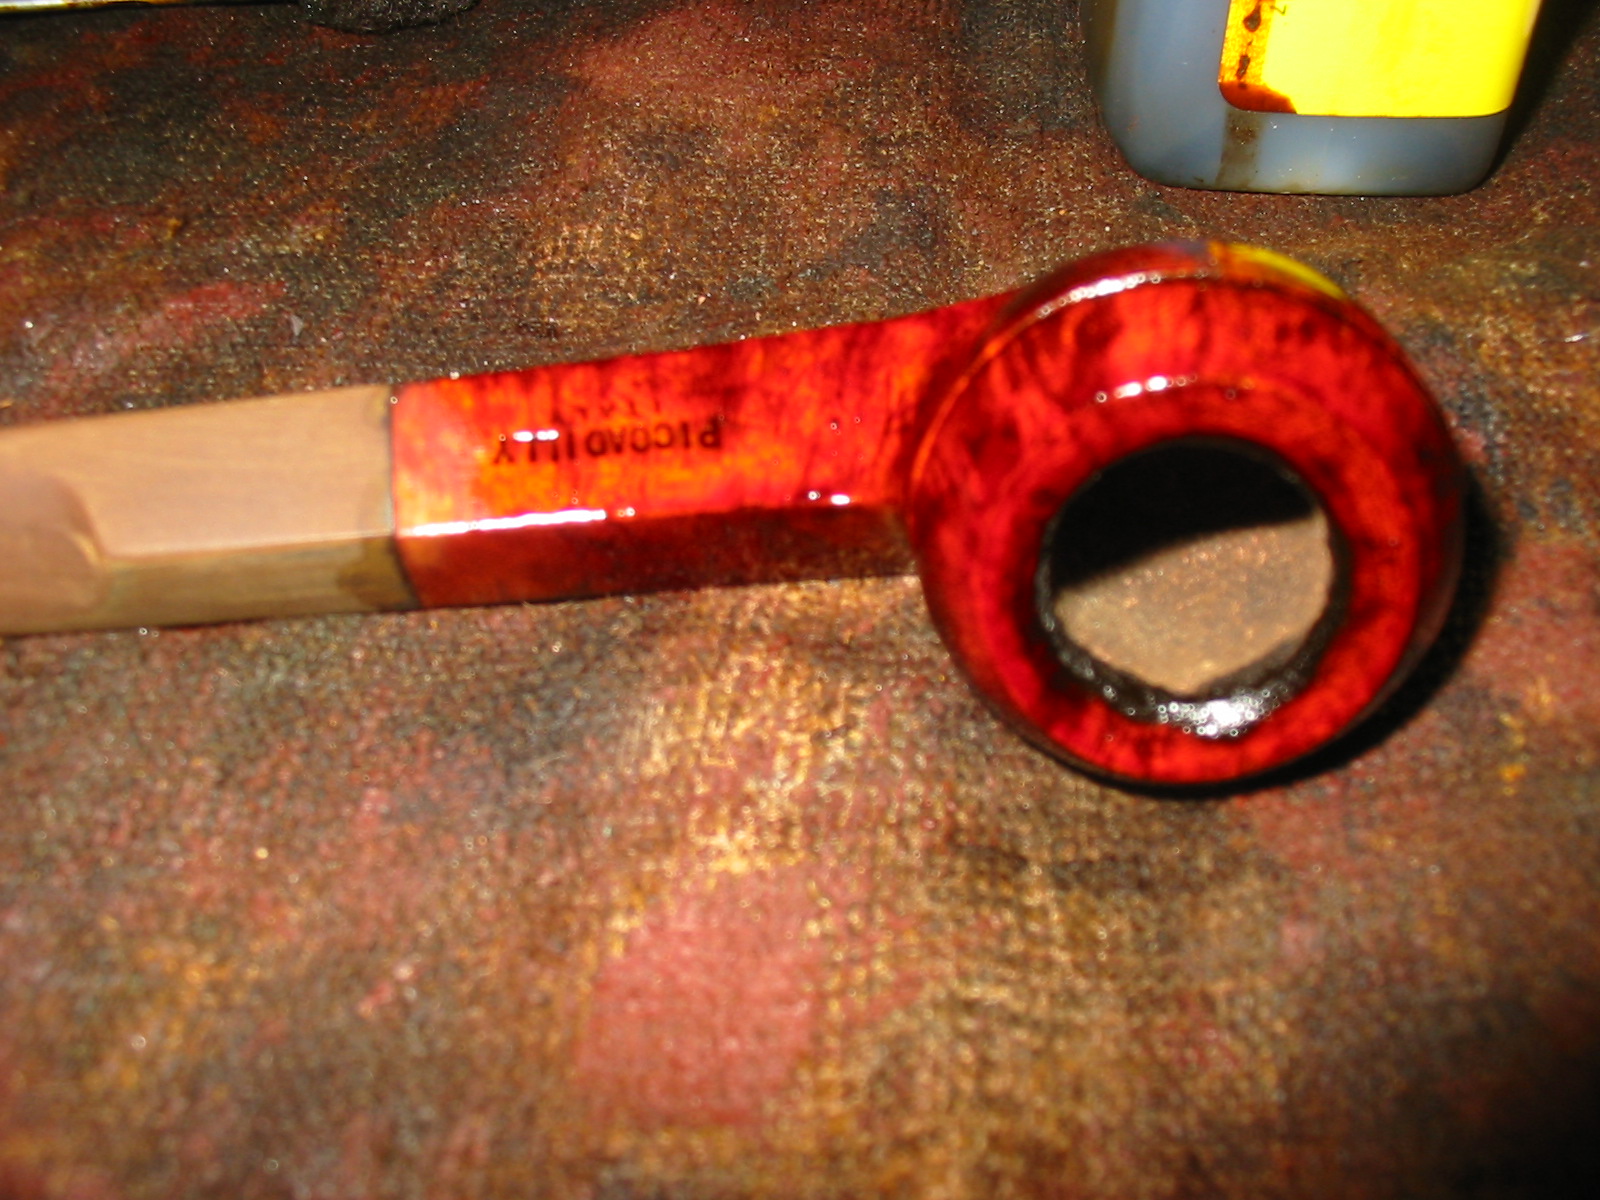
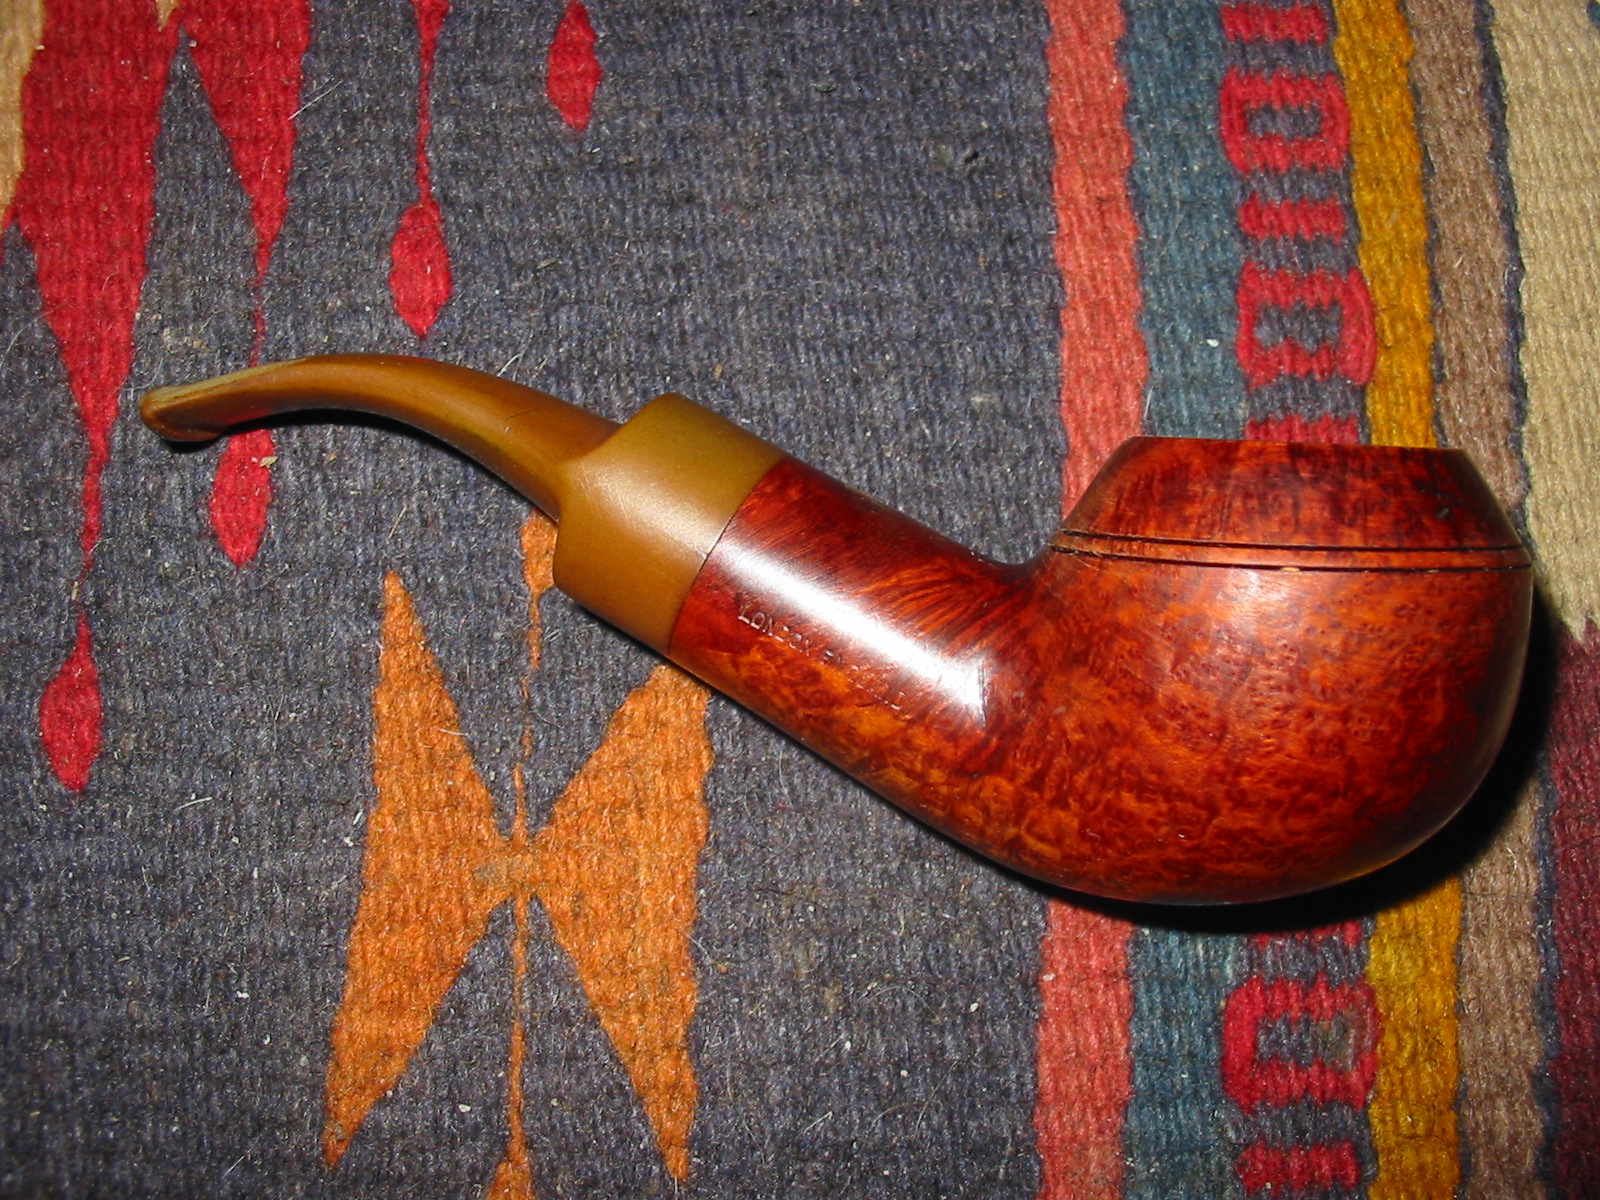
After I was finished sanding with the final grit of micromesh I rubbed the stem down with Obsidian Oil and once it was dry buffed it with White Diamond. I then buffed a final time with a blue plastic polishing bar. I gave the bowl and stem multiple coats of carnauba wax and buffed it with a soft, clean flannel buff to raise the shine on the bowl and stem. The next four photos show the finished pipe.

IMG_1455

IMG_1457

IMG_1458

IMG_1459

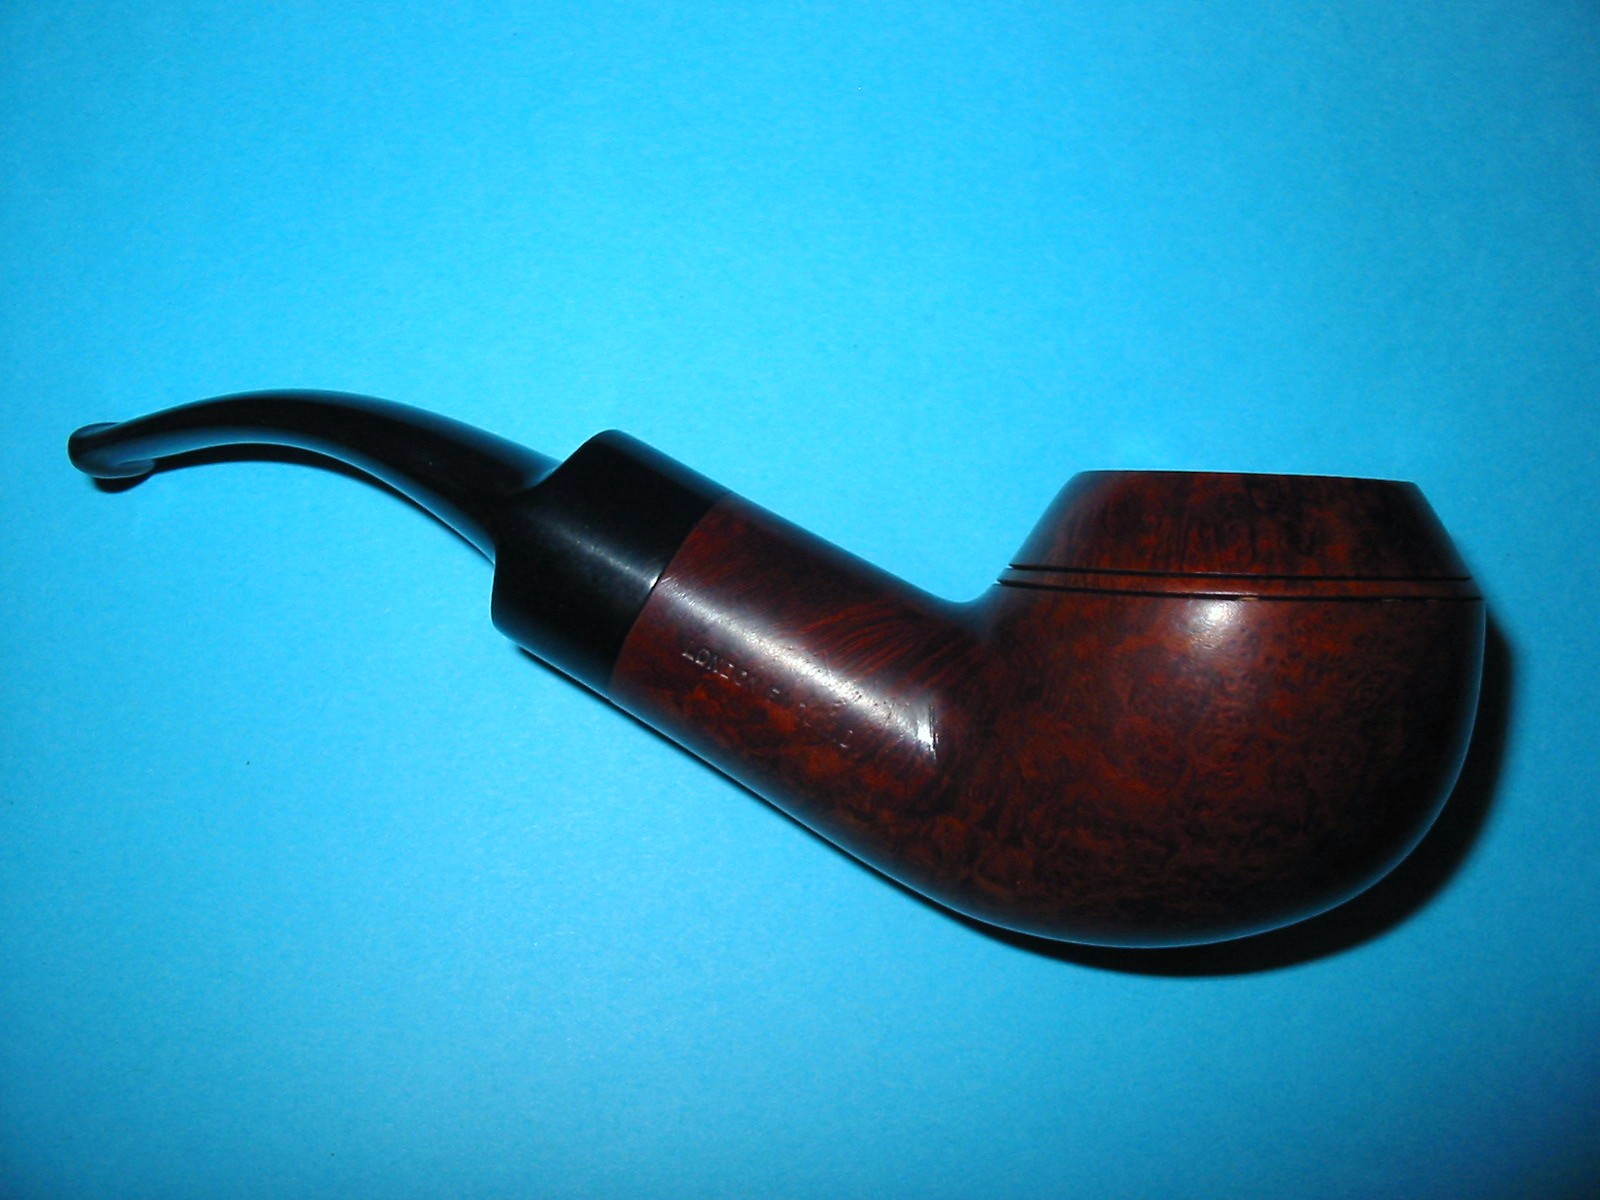
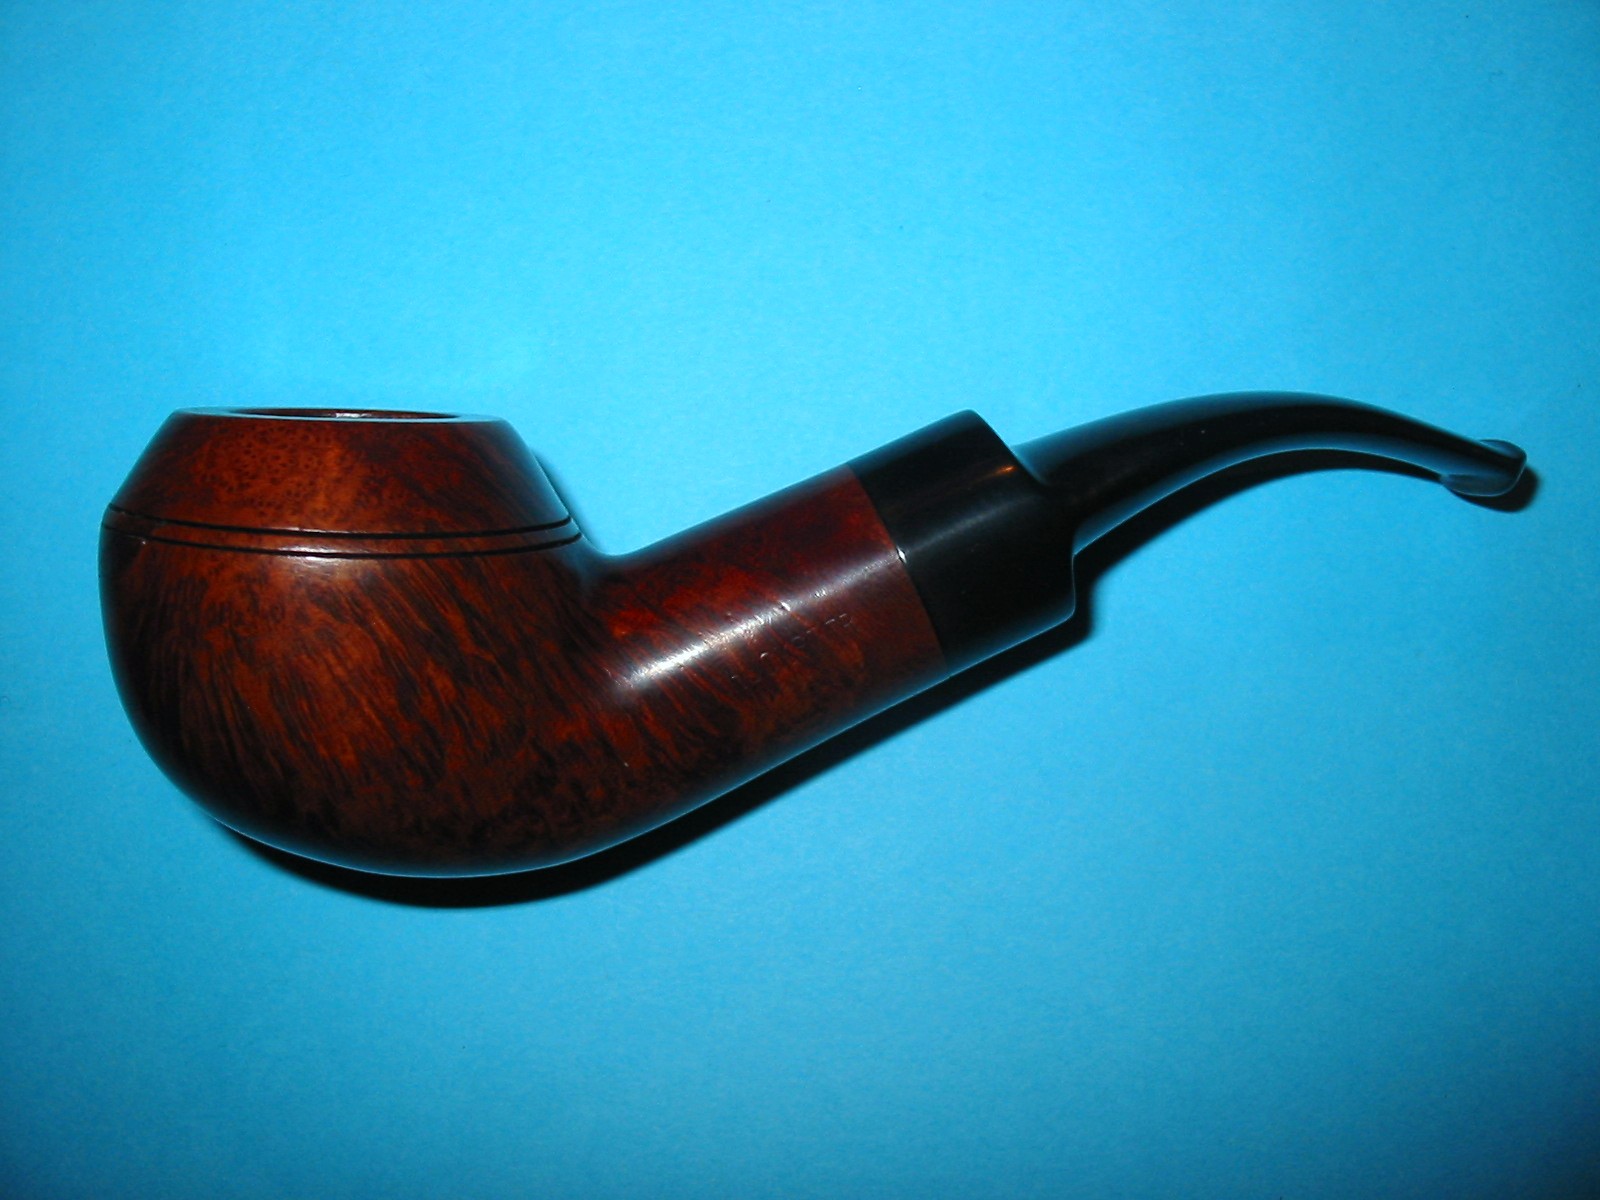
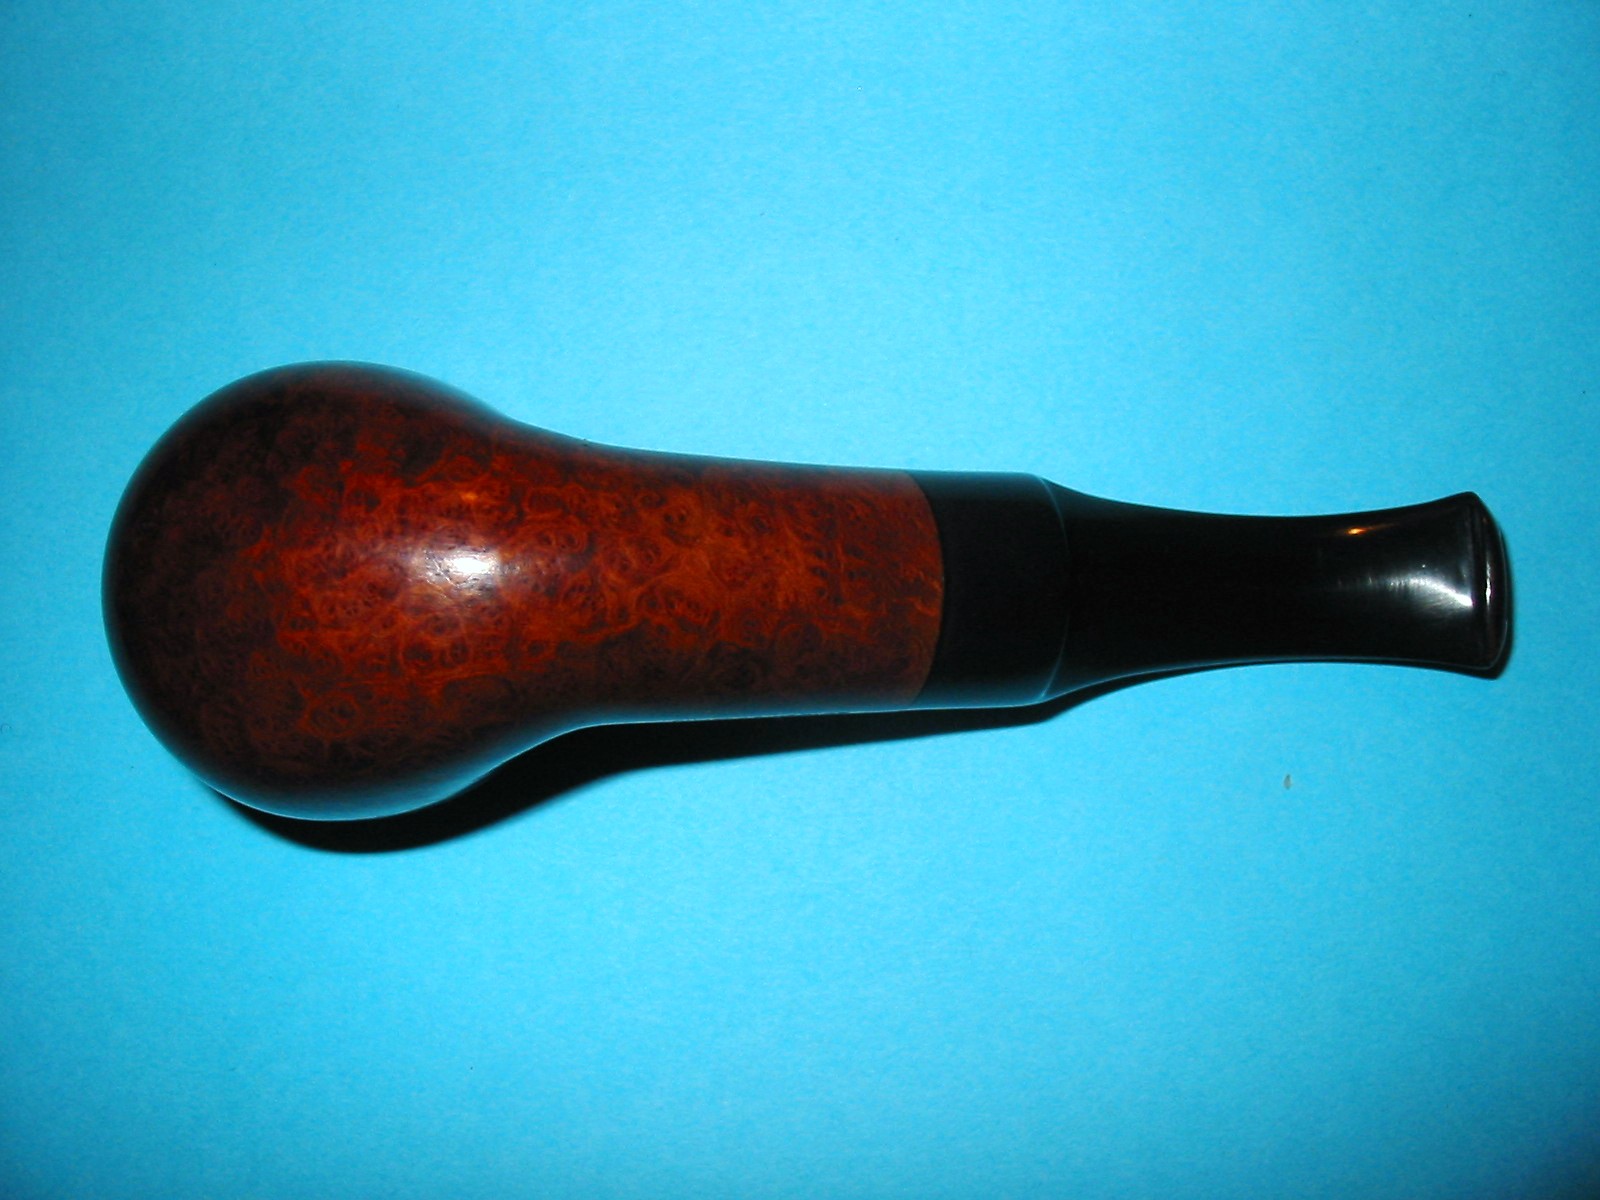
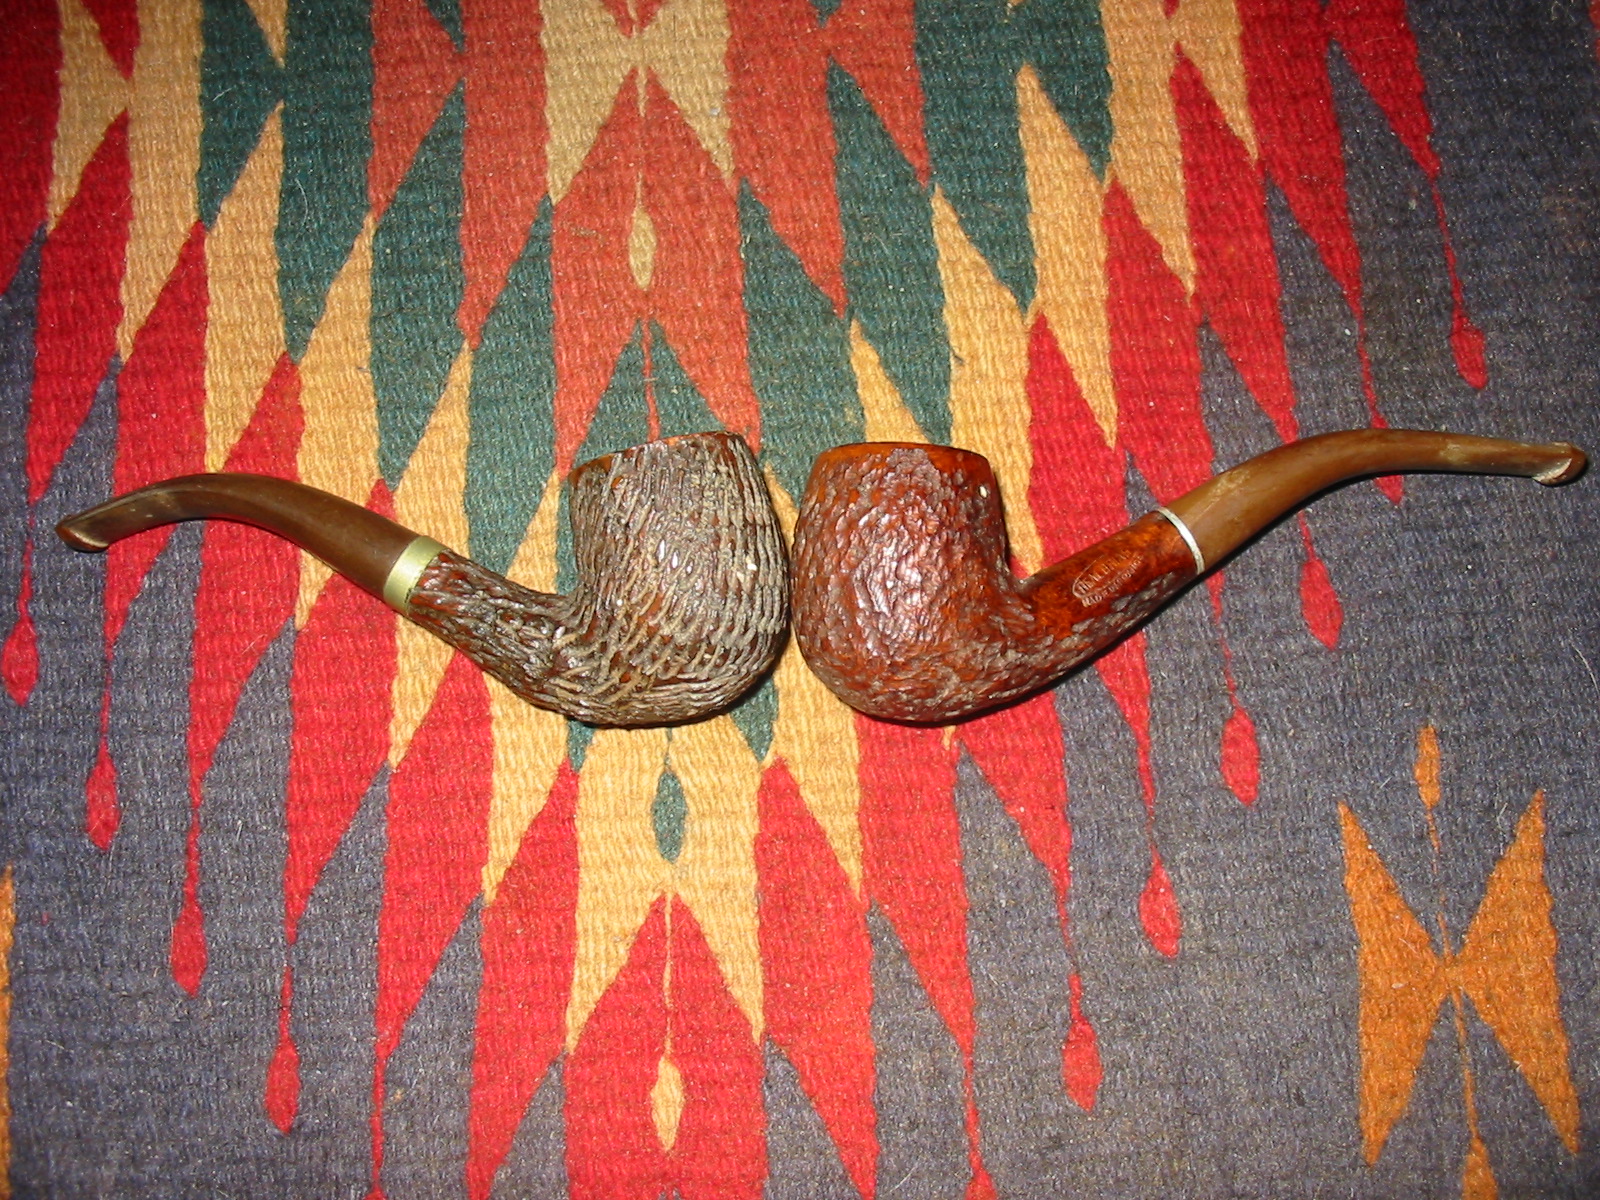
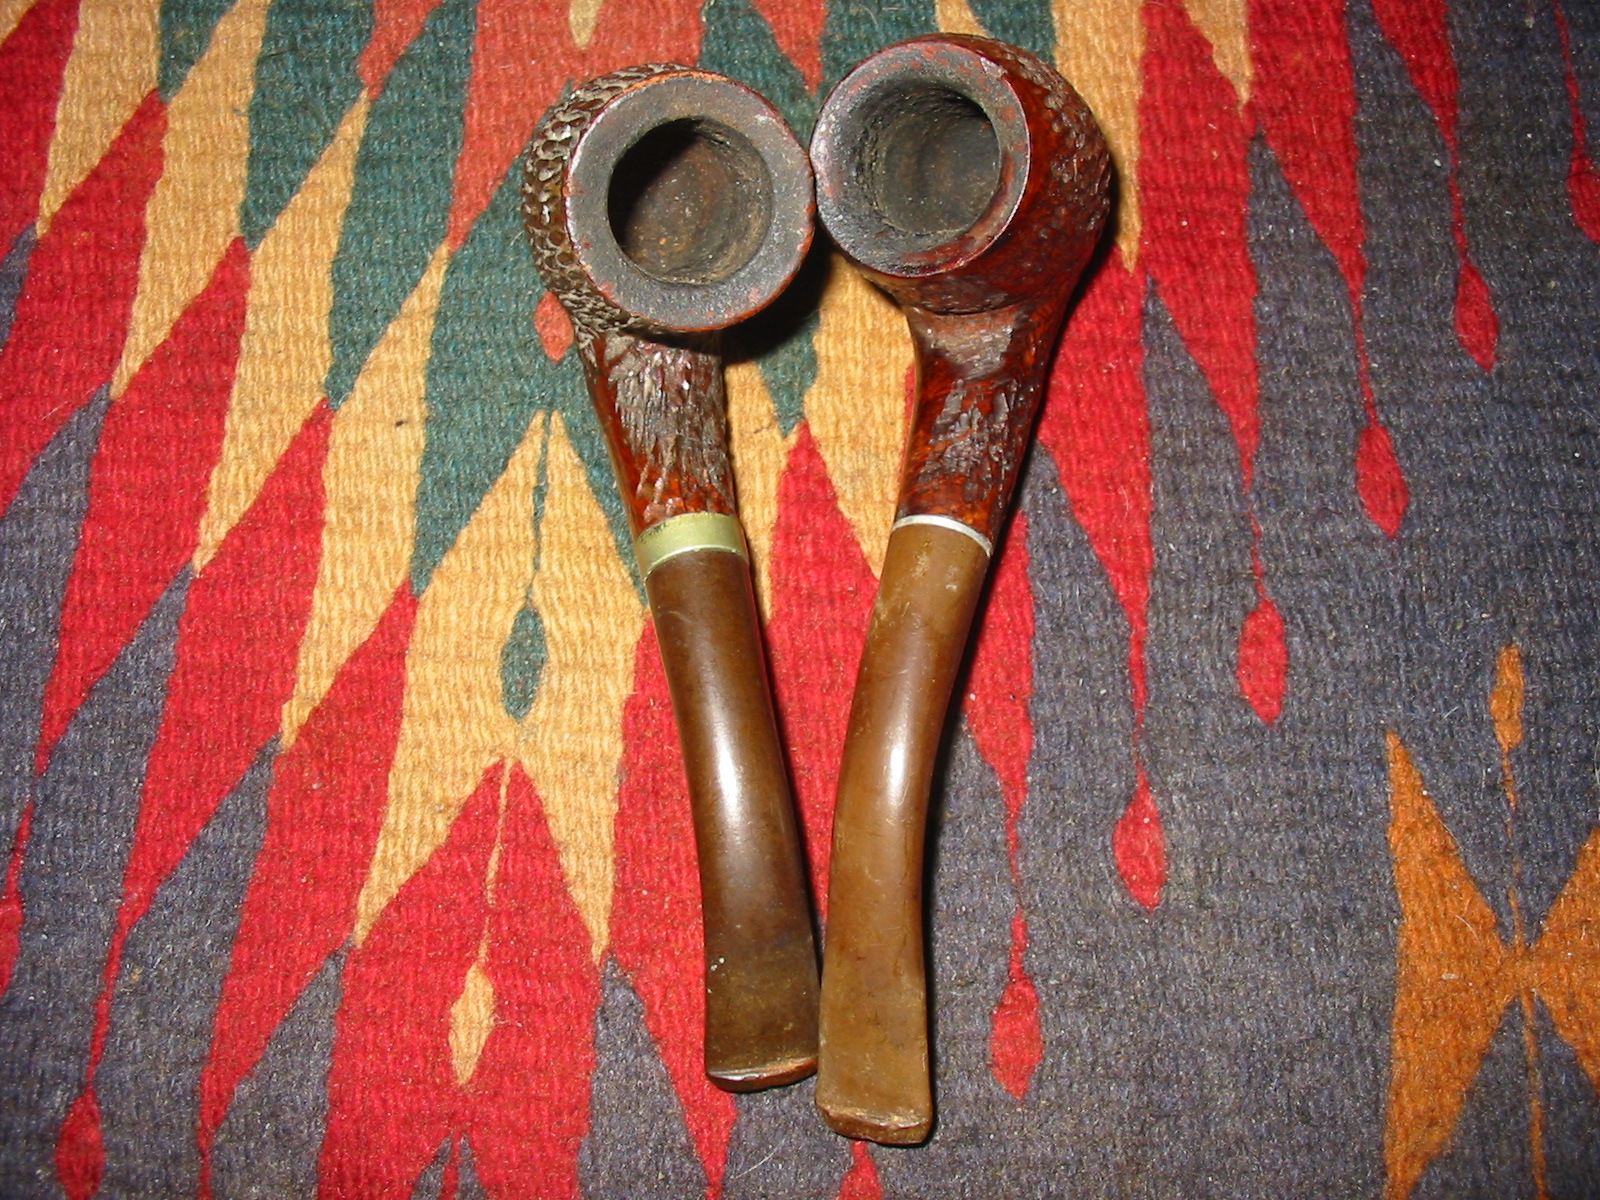
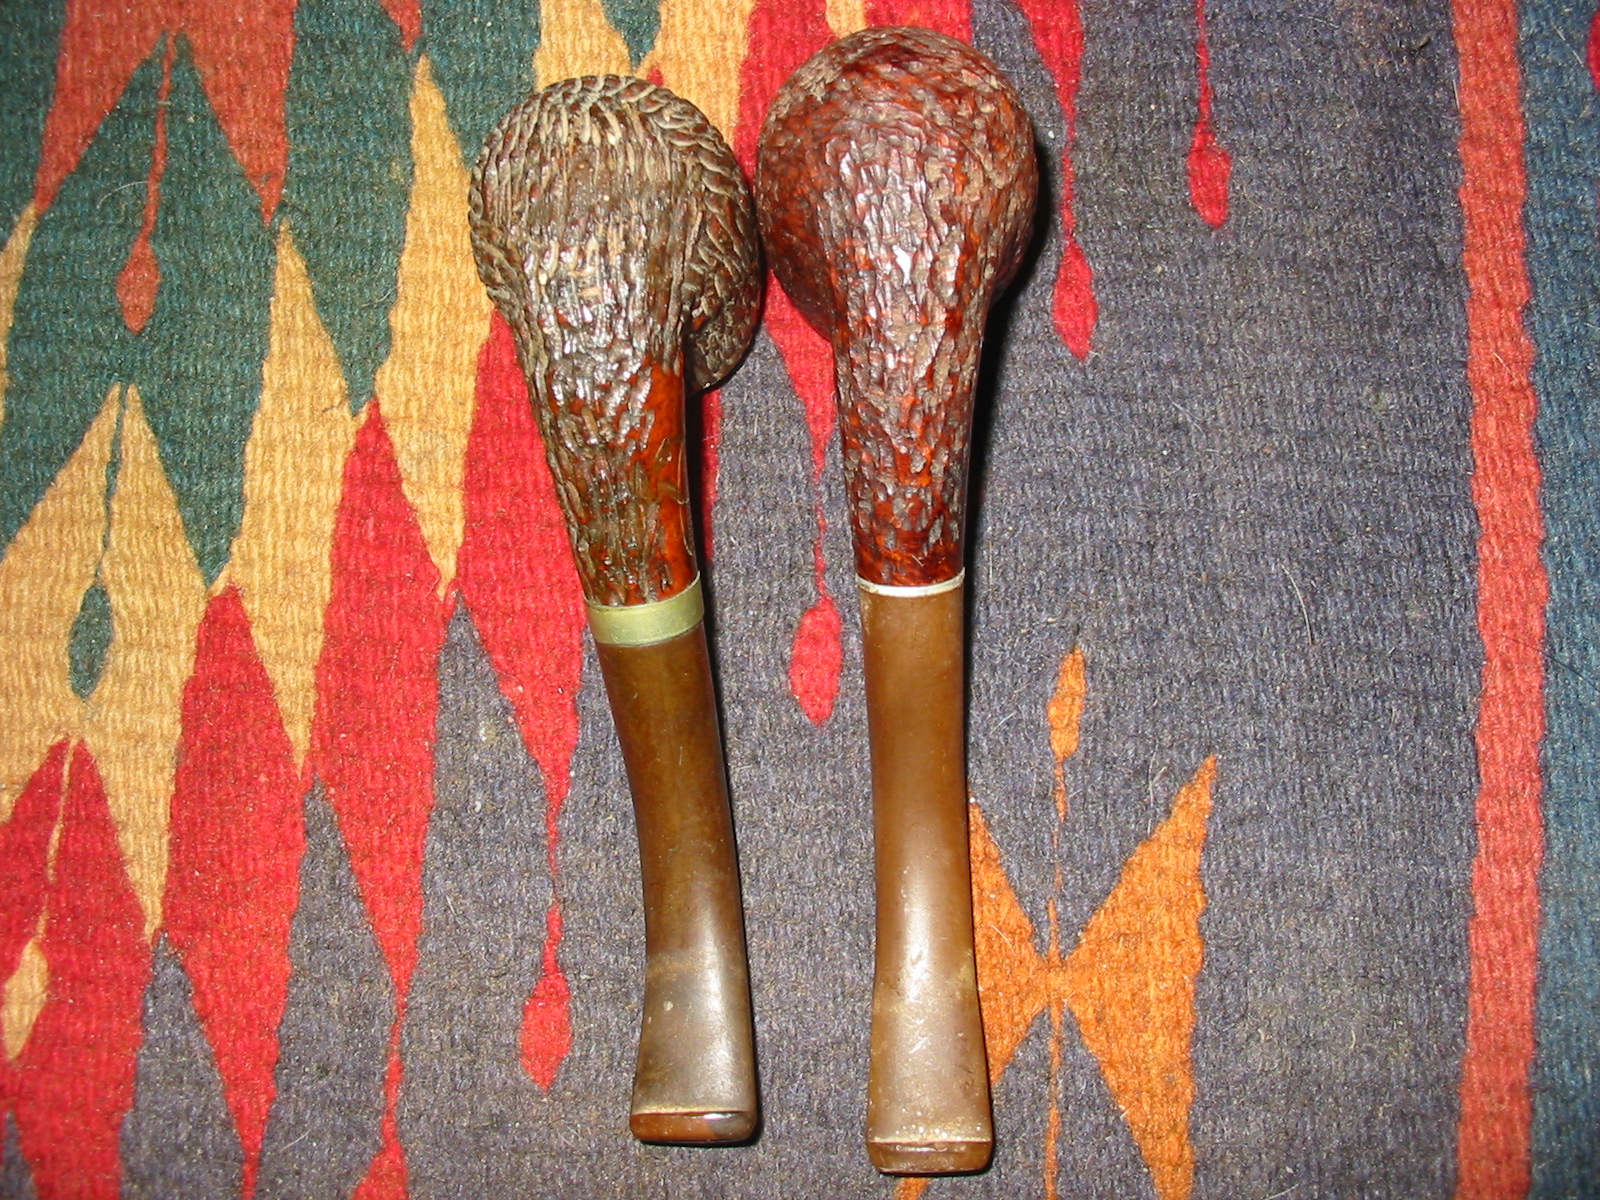
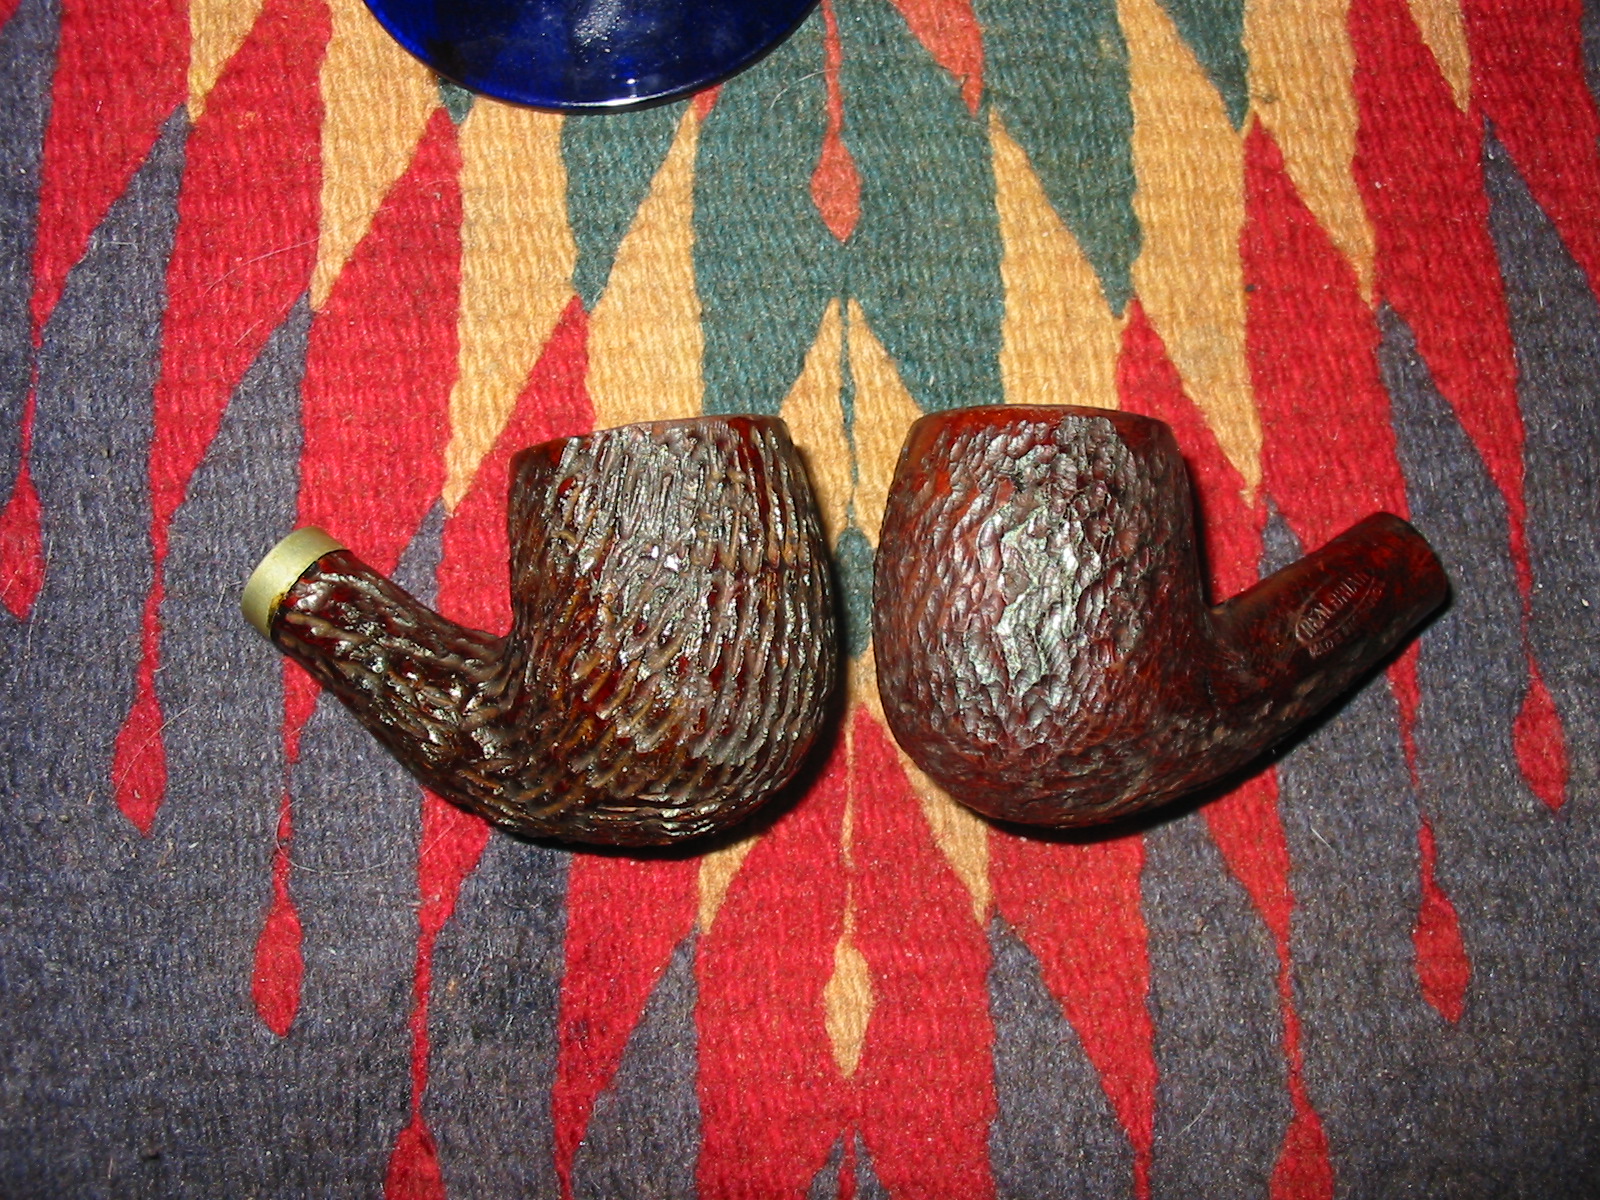
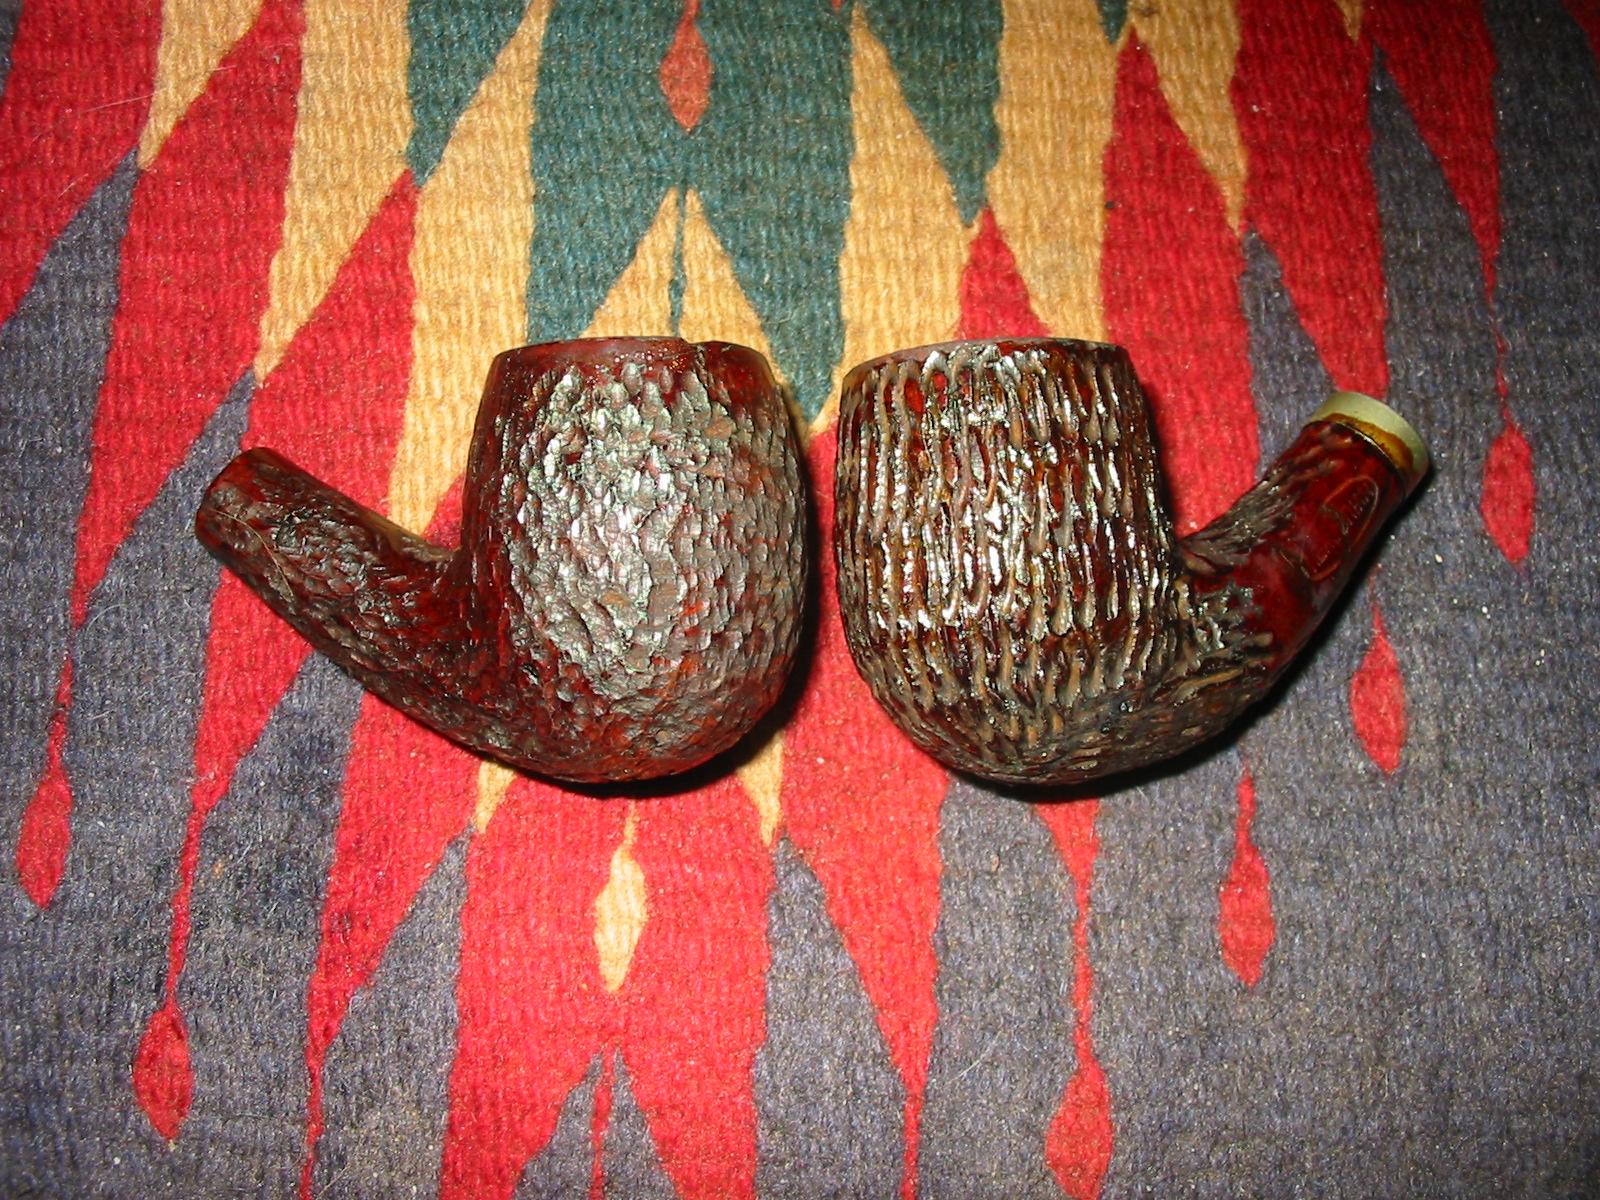
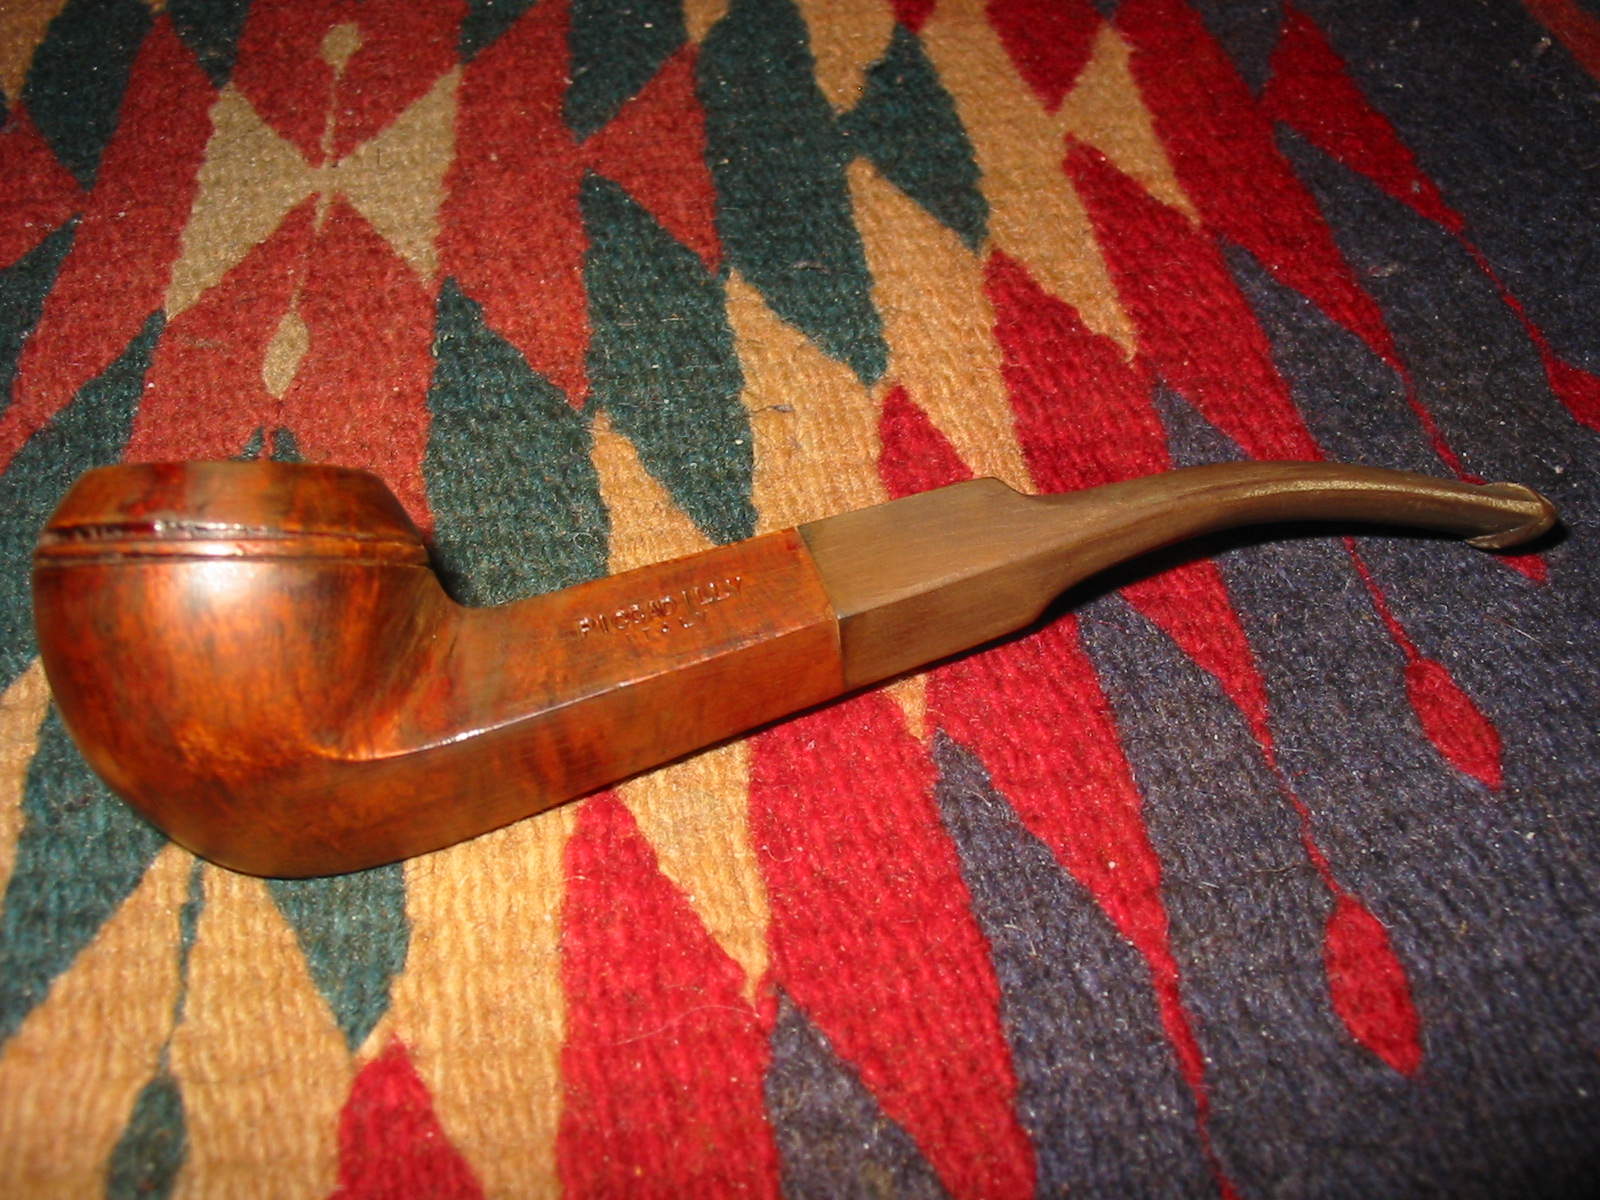
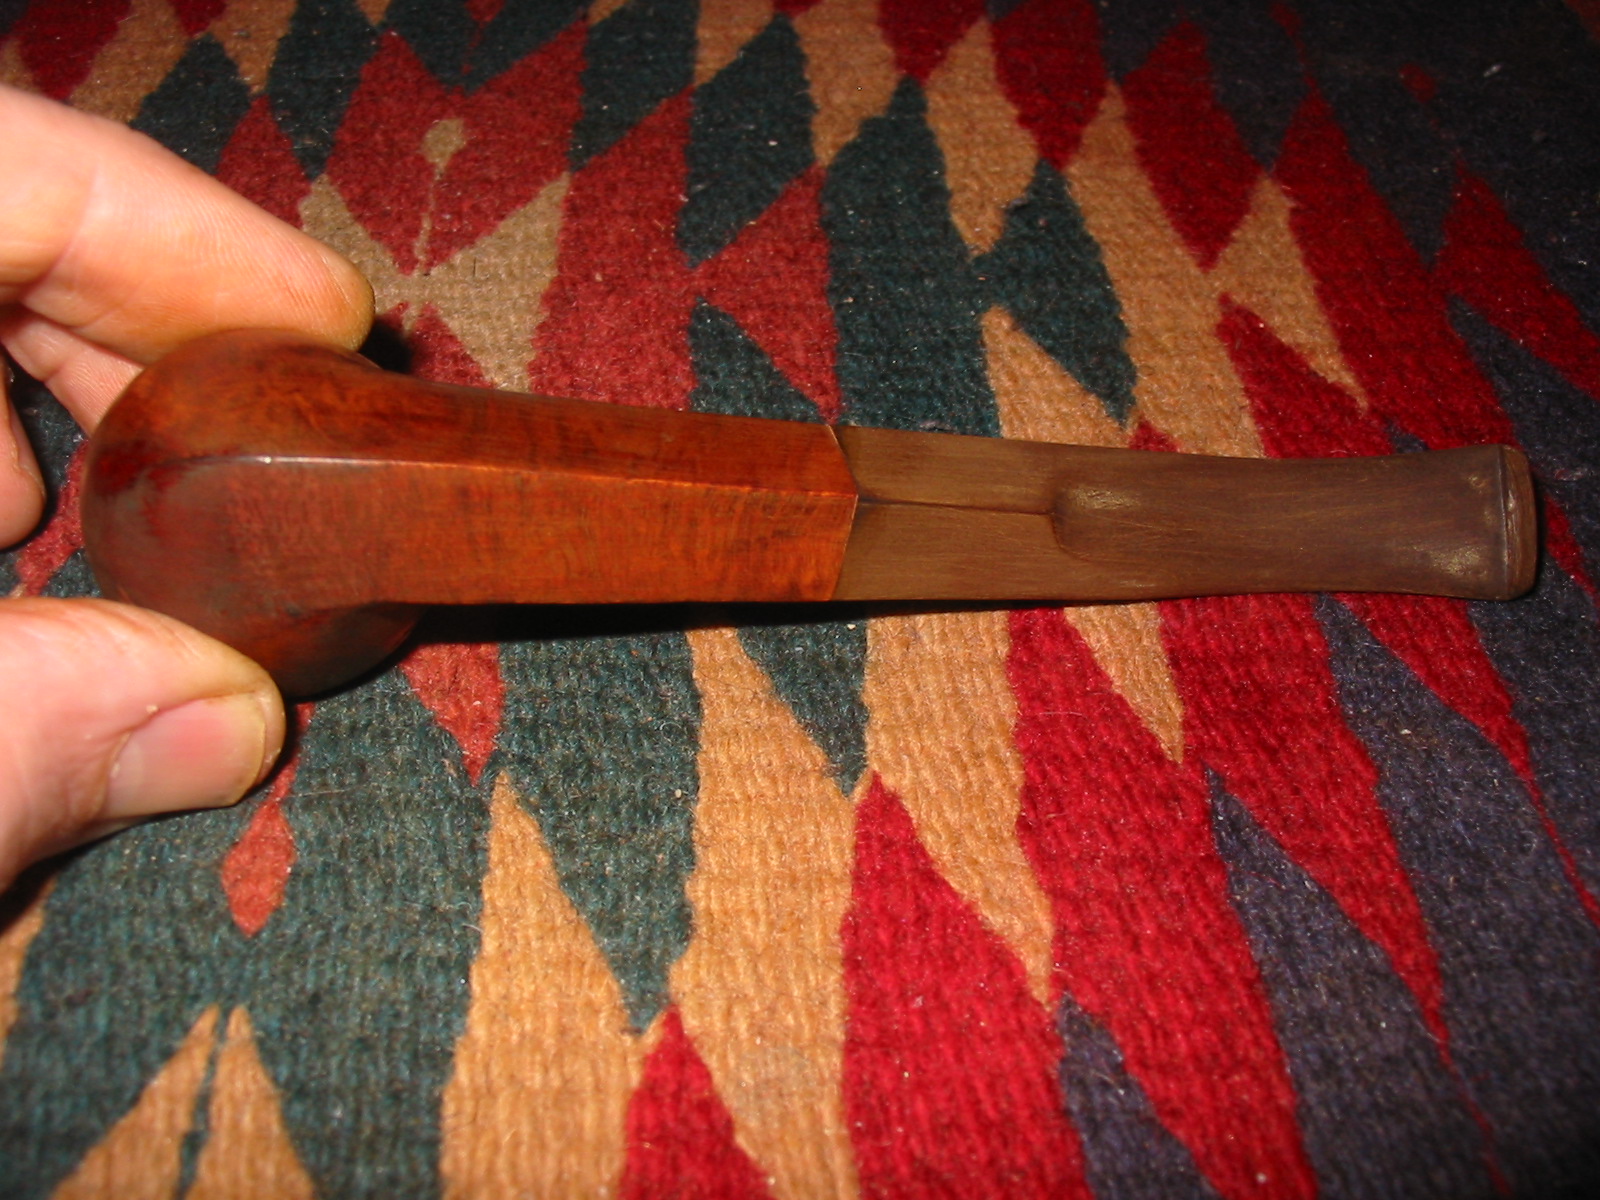
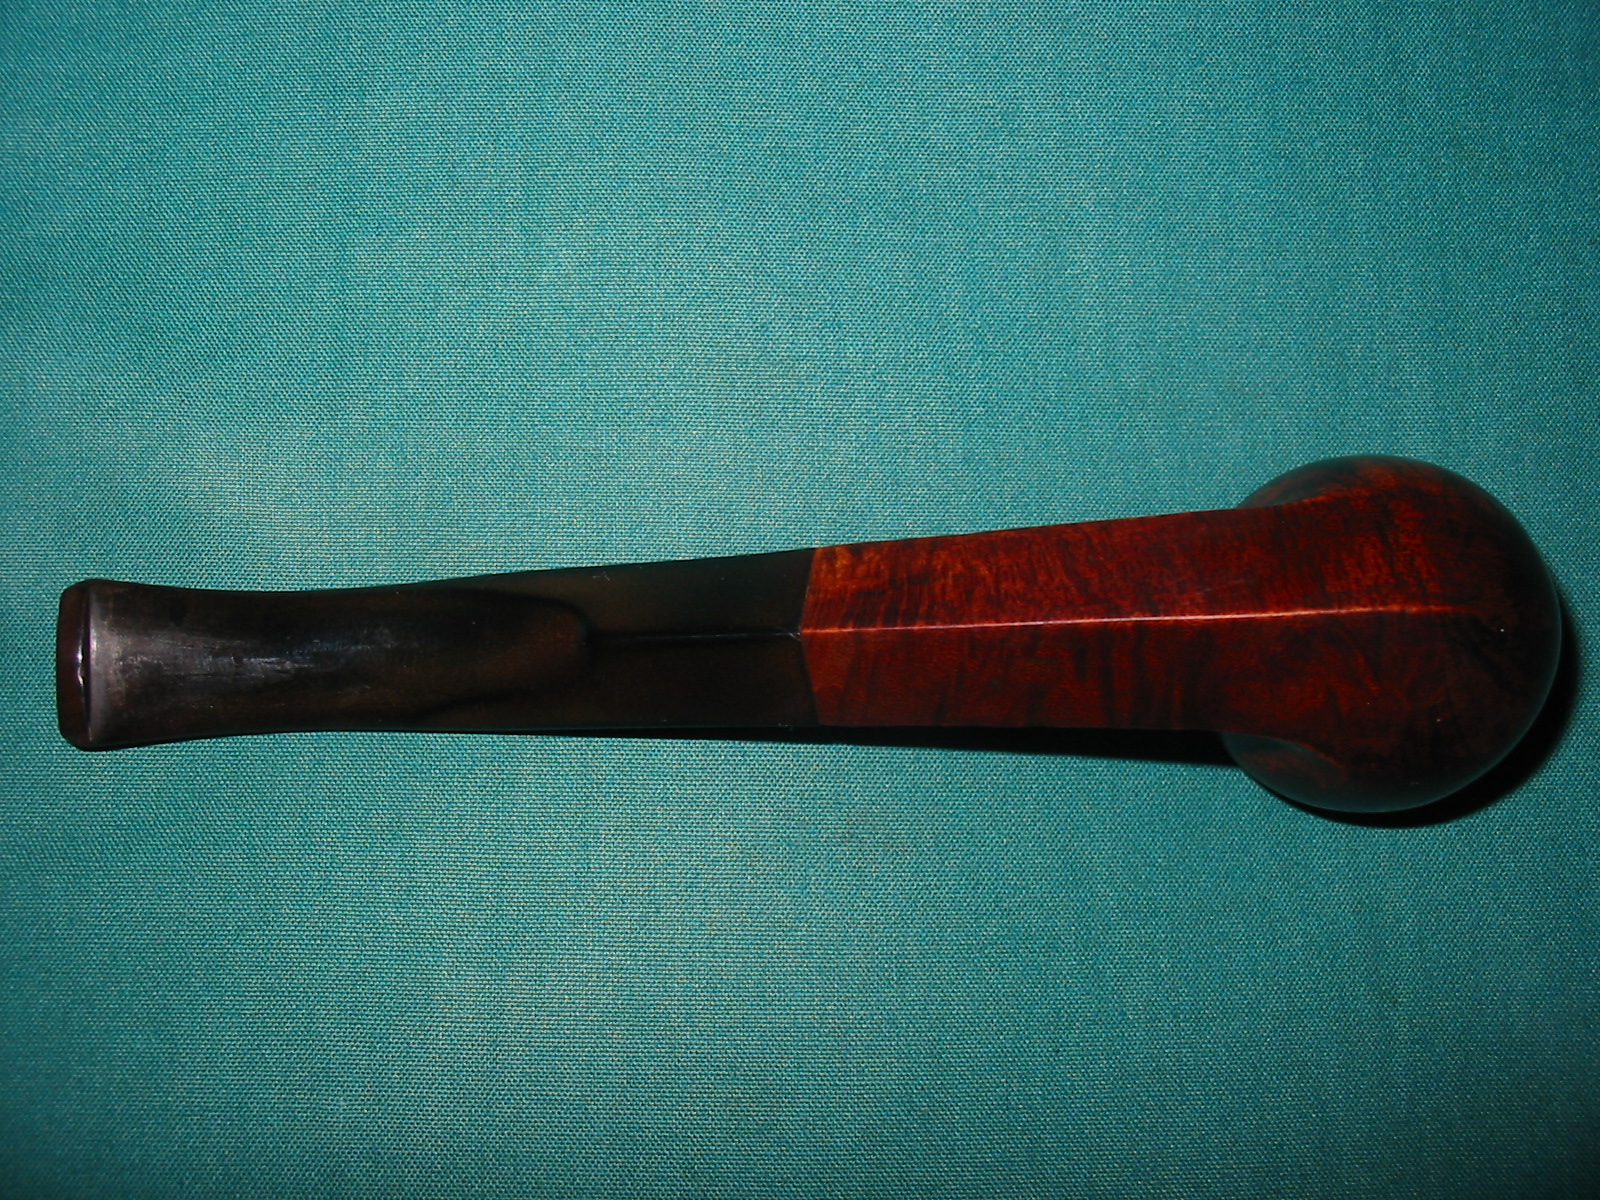
Here are a few more shots with a different background
Huckster1

Huckster2

Huckster3

Huckster4

Restored a Pair of Older Real Briar Bent Billiards


The last two pipes I received in the gift package from a friend on Smokers Forums were these two older rusticated bent billiards. The pipes are both stamped Real Briar in an Oval on the shank. There is no other stamping to help identify country of origin or maker. The rustication on the pipe on the left is more refined and almost like a sandblasted look and feel. The rustication on the other one is rustic and less refined. The pipe on the left has an aluminum tenon with a thin aluminum wafer built into the stem itself and has a blade like stinger attachment. The pipe on the right has a push stem with a sterling silver band. The rims on both were chamfered into the bowl and both were heavily caked with tars and resins. The bowls were in need of a ream. The shanks were dirty and tarry. The finish on both was dirty with dust and grime set into the rustication on the bowl. The aluminum and the silver band were tarnished. The stems were both oxidized and both had matching tooth dents on the top and bottom of the stem about a quarter inch from the button. The first series of four photos shows the state of the pipes when they arrived to my work table.

ImageImageImageImage

I removed the stems and placed them in an Oxyclean bath and placed the bowls in an alcohol bath (99% isopropyl alcohol). I scrubbed the bowls in the bath with a soft bristle brass tire brush as seen in the pictures below. The bowls and stem soaked overnight to let the bath do its work. When I took them out the next morning I scrubbed the bowls some more with the brass brush and dried the bowls off. I also sanded the rims with 320 grit sandpaper to remove the tars and the damage to the surface of the rim. The rims were chamfered so this was done by hand with a small folded piece of sandpaper held at the angle of the chamfer. The next series of five photos show the bowls after the scrubbing and rim work.

ImageImageImageImageImage

I finished my work in cleaning the bowls by wiping down the bowl surfaces with acetone on a soft cotton pad. With that work they were ready to be stained. I chose a dark brown aniline stain thinned with alcohol 2:1. I applied it with the dauber and then flamed it to set the stain. Stained it a second time and flamed it. Then I took it to my buffer to buff with a light touch on a White Diamond wheel. The next six photos show the developing shine that the bowls and the rims took on with the buffing. I still needed to clean the sterling silver band on the one bowl.

ImageImageImageImageImageImage

At this point in my process I set the bowls aside and worked on the stems. The first two photos below show what they looked like when I took them out of the Oxyclean bath and dried them off. The oxidation was by no means gone but it had softened considerably and was easier to remove. The four photos that follow show the stem in the process of polishing it with Maguiar’s Scratch X2.0. I applied the scrub by hand and rub it into the stem surface and then wipe it and polish it with a cotton pad. I find on this kind of oxidation it works to remove the surface material that the Oxyclean raised and gives me a clean surface to work on with the micromesh sanding pads. The last two of the four photos show the stems after the polish with the cotton pads.

ImageImageImageImageImageImage

At this point I reinserted the stems in the bowls and worked on the stems in the bowl with fine grit sanding sponges to remove the remaining oxidation. I then removed them from the bowl and continued sanding them.

ImageImage

The next two photos show the stem after sanding with the sanding sponge and then reapplying the Maguiar’s polish. The remaining oxidation is very clear around the button and at the end of the stem near the tenon. I used the Bic lighter method and ran flame along the surface of the stem from front to back while really working over the button area and the tenon end of the stem with the flame. The idea is to move the flame fairly quickly along the surface of the stem while be careful not to burn or heat the stem too much. It burns off the oxidation and is easier to work with using the micromesh sanding pads afterwards.

ImageImage

After all the preliminary cleaning of the stems and removing the oxidation I worked on the stems with micromesh sanding pads. I wet sanded with 1500-3200 grit micromesh pads. I found that the water gives the pads a bit of bite in the sanding process. I have a small cup of water that I dip the edge of the pad in when sanding. I then finished by dry sanding with 4000-12,000 grit micromesh pads. I then polished it a last time with Maguiar’s Scratch X2.0 and then coated the stem with Obsidian Oil and finally multiple coats of carnauba wax.

ImageImage

The final series of six photos shows the finished pair of Real Briar Pipes. I polished the silver band with some silver polish before giving them all a quick buff with carnauba wax and a soft flannel buff for polishing. Both pipes are cleaned, polished and ready to smoke.

ImageImageImageImageImageImage

Restored Golf Old Briar Billiard


This Golf Old Briar Billiard is the fourth pipe of the six that a friend from Smokers Forums sent my way. This one was the kind of challenge I enjoy. The briar was in pretty good shape under all the dirt and paint and black tarry deposits on the rim and the sides of the bowl. The pipe is stamped Golf in script over Old Briar in block type. On the underside of the shank near the stem it is also stamped with the shape number 1304. I am not sure who made the Golf brand of pipes but I saw several on Pipephil’s site with the name and different logos. It is an interesting piece and quite hefty. It is not large in terms of length or height but in terms of bulk. The finish was shot as you can see and would take some work to remove all the stains and paint flecks on the bowl. There were also some very visible fills on the bowl sides. The stem was very oxidized and had some odd oil like patterns on it that remain a mystery to me as to the cause. There was also a script G on the stem but it was merely applied to the surface rather than stamped into the stem material.

ImageImageImageImage

In the photo below I wanted to show the unique stinger apparatus in the stem. It was removable but seems very tiny in proportion to the size of the pipe. It is a needle point with a slot in the top surface that the smoke is drawn through. There is not much surface area to collect the moisture so I am not altogether sure of the effectiveness of the stinger. The stem was stuck so I had to put it in the freezer for several hours before I could remove it from the shank without breaking things. Once I took it out of the freezer it was fairly easy to remove.

Image

I put the stem in the Oxyclean bath with the one from the figural pipe. I also put the two bowls in the alcohol bath overnight before giving them a once over. The two photos below show the pipe after I took it out of the bath to begin working on it. You can see that some of the grime was removed but the paint flecks remained as did the black stains on the bowl. These would take more work.

ImageImage

I used some acetone on a cotton pad to scrub down the bowl. The next series of two photos show how well the acetone removed the finish. It made short work of the paint and dark stains on the briar. I scrubbed it until the surface was clean. You can also see the presence of the fills that I spoke of earlier.

ImageImage

The rim of the bowl was rough so I decided to top it a slight amount to remove the damage and to clean up the surface. Since I was staining the pipe anyway there would be no problem in trying to match bowl and rim. I used my normal sandpaper on a board system and sanded the bowl in a clockwise motion to smooth out the surface. I first used a fine grit emery cloth and then followed that with 320 grit sandpaper. The first two photos below show that process and the effectiveness of it.

ImageImage

The next series of four photos show the bowl after I wiped it down with acetone again after the topping of the rim. The cotton pads show the sanding dust and surface grit that still remained on the surface of the bowl. I wanted to give it a final wash before staining it. I decided to not remove the fills on this bowl. I wanted to see if I could blend them in with the stain coat rather than replace them with the superglue briar dust patches that I generally use.

ImageImageImageImage

I chose to restain this pipe with a dark brown aniline stain thinned 2:1 with isopropyl alcohol. It is the same stain I used on the figural pipe that I posted about earlier. The next series of four photos show the process of the staining. I had my daughter help me with the photos and she was able to capture the flaming process in the last photo in this series. The flame burns quickly and blue. It burns off the alcohol and sets the stain in the grain of the briar. I love the way that flame dances on the surface of the pipe.

ImageImageImageImage

I set the bowl aside once the flame had died and worked on the stem. The next series of photos show the stem as it appeared after I removed it from the Oxyclean bath. It needed a lot of work. I had to sacrifice the painted G script as it would not survive the clean up. I used my Bic lighter technique to burn the oxidation. The process is very simple as I just move the flame over the surface of the stem never letting it stay in one place too long. I repeat the process until the surface is clean and black. I then polished the stem with the Maguiar’s Scratch X2.0 scrubbed on by hand then polished off with cotton pads. I repeated that process twice and then sanded the stem with the micromesh sanding pads 1500-12,000 grit. I finished by once again applying the Maguiar’s before putting the stem back on the pipe and taking it to my buffer to buff with White Diamond.

ImageImageImage

The next four photos show the finished pipe. It has several coats of carnauba wax applied by my buffer and buffed out to a shine with soft flannel buffing pads. The stain is a bit lighter than it appears in the photos and you can see the grain through the finish. The fills are all but invisible at a quick glance. Before I stained the fills I drew over them with a black permanent marker and then stained them. They covered very well with the marker and the dark stain.

ImageImageImageImage

Restored a Carved Figural


I received this figural pipe in the lot of six that came to me from a friend on Smokers Forums. It is a tiny pipe – measuring just over 3 ½ inches in length. It is stamped only Real Briar in a band around the shank. The carving of a First Nations Leader (as we call them here in Canada) or Native American (US) is nicely done. The bowl was cake with a rough layer of cake. The finish was dirty and some of the top coat was damaged. The rustication around the bowl rim inside the head dress was almost smooth with tars. The grooves in the feathers and facial features were dirty as well. The stem was rough and badly oxidized. There were no tooth marks or chatter on the stem. The button was very tight and I could not put a pipe cleaner through it to clean it out. Pushing a cleaner in from the tenon end only let me get about ¾ of the way up the stem. The first series of four pictures show the pipe as it arrived to my work table.

ImageImageImageImage

I removed the stem and put the bowl in an alcohol bath overnight and the stem in a bath of Oxyclean for the same duration. When I took the bowl out the next morning it was definitely cleaner however I needed to scrub it with a soft bristle toothbrush to remove the grime from deep in the grooves in the face and feathers. I also wiped the bowl down with acetone on a cotton pad to remove the remaining finish on the bowl. I reamed the bowl with my T handle PipNet reamer to get the bowl cleaned out. I also cleaned the shank with cotton swabs and Everclear and then pipe cleaners as well. I used the drill bit on the handle of my KleenReem reamer to remove the build up from the airway between the mortise and the bowl. Once the pipe was cleaned inside and out it was ready to be stained. The next series of three photos show the pipe ready to be restained.

ImageImageImage

I restained the bowl with a dark brown aniline stain that I thinned down 2:1 with isopropyl alcohol. I used the dauber that comes with the stain. I applied it heavily, flamed it and then restained it until the coverage was the way I wanted it. The next three photos show the bowl during the staining process.

ImageImageImage

The stem needed a lot of work to get the roughened surface smooth again and the oxidation off of it. I began by working on the slot in the button. I could not get a pipe cleaner through it so it would need to be opened with my needle files before I could really clean the inside of the airway. The next four photos show the progress of the slot reshaping and opening from start to finish. Once the slot was the right openness and took a pipe cleaner easily I sanded it out inside with a folded piece of 320 grit sandpaper to smooth out the file marks.

ImageImageImageImage

Once the slot was open I cleaned out the inside of the stem with Everclear and pipe cleaners and a shank brush. It took a lot of pipe cleaners as I don’t think the stem had ever been cleaned since it was first smoked. I then sanded the surface of the stem with 220 grit sandpaper to loosen the remaining oxidation and smooth out the rough surface. I then used a medium grit sponge backed sandpaper to remove the scratches left behind by the sandpaper. I used the Bic lighter technique on the stem and then sanded it with micromesh sanding pads 1500-2400 grit and then polished it with Maguiar’s Scratch X2.0 applied and rubbed off with a cotton pad. I finished sanding the stem with the remaining micromesh pads from 3200-12,000 grit, buffed it with White Diamond on my buffer and then coated it with Obsidian Oil and then multiple coats of carnauba. I also gave the bowl a buff with carnauba.

ImageImage

The finished pipe is pictured in its new finish in the next five photos. It is a proud figural that has interesting carving and a great feel in the hand. I am not much for figural pipes but this one has some endearing features for me. Thanks Bill for the gift and the opportunity to try my hand on this one.

ImageImageImageImageImage

A Reborn Piccadilly Bulldog


Blog by Steve Laug

This little bulldog came to me in a lot of six pipes given to me by a friend. Something about it caught my attention as it seemed to have a classic bulldog shape. It was in pretty rough shape. It is stamped Piccadilly over Italy. It had a thick coat of varnish over the whole bowl and shank. There were also paint flecks on the surface of the bowl and shank. The rim was tarred and black with minor dings in the wood on the outer edge. The rim was chamfered in toward the bowl and also showed some wear and tear. The bowl was pretty clean; as I am pretty sure it had been recently reamed. The stem was badly oxidized and when the pipe came to me the stem would not come out of the shank or even turn. There were no bite or tooth marks on the surface of the stem. The inside of the stem was also tarry and dirty. The first series of three photos shows the state of the pipe when it arrived.

ImageImageImage

I put the pipe in the freezer for several hours and then I was able to remove the stuck stem. It was incredible tight and very dirty. The tars seemed to have acted like glue holding the stem in the shank. I cleaned out the stem with pipe cleaners and a shank brush and then put it in a bowl of Oxyclean to soak overnight. I dropped the bowl in an alcohol bath overnight as well. The next series of five photos show the bowl and the stem the next morning after an all-night soak in the baths. You can see that the bowl is clean and incredibly shiny. The alcohol bath removed the paint flecks and the surface grime. The rim tars had softened and were ready to be removed. The varnish coat however was not even touched by the soak in isopropyl. The stem was much better than when it went in to the bath. The oxidation had softened and much of it was removed when I dried off the stem. What remained would take more work.

ImageImageImageImageImage

I then wiped the bowl and shank down with cotton pads soaked with acetone to try to break up the varnish finish. It took many wipes to cut through the finish and also to cut through the tars on the rim. I also sanded the rim with 320 grit sandpaper to remove the remaining tars and the slight burning around the inner edge of the rim. The next three photos show the result of the sanding on the rim and the wiping down of the bowl. The varnish was untouched – maybe softened a little but it did not give way at all to the acetone.

ImageImageImage

More drastic measures were going to be required to remove this thick varnish coat. It was almost acting like a coat of polyurethane. I would have to sand the finish off the bowl if I was going to remove it at all. This required care as I wanted to remove the finish and not change the shape of the bowl and shank. I used a medium grit emery cloth to break through the finish coat. The next series of three photos shows the pipe after the sanding with emery cloth. I also wiped it down again with acetone at this point to clean the finish and see what remained. You can see the stubborn remainders of the topcoat.

ImageImageImage

At this point I switched to a medium grit sanding sponge to remove more of the remaining finish. I removed the inserted stinger apparatus and put the stem back in place so that I would not change the angles on the shank where it met the stem when I sanded. It also allowed me to sand the stem and shank simultaneously and to keep the angles sharp and intact. The next three photos show the pipe after sanding with the sponge. I continued to sand until the shiny finish was gone. I then wiped it down with acetone on a cotton pad to clean the surface.

ImageImageImage

I sanded the bowl and shank with 320 grit sandpaper and then 400 and 600 grit wet dry sandpaper followed by micromesh pads from 1500-6000 grit before staining the bowl with a dark brown aniline stain thinned 2:1 with isopropyl alcohol. I wanted to give the pipe a stain so I could see if the many fills that were revealed could be camouflaged with the stain coat. My guess was that they would stand out and I would need to pick them out and refill them with superglue and briar dust. I stained and flamed the pipe several times. The next series of six photos shows the results after staining. I would indeed have to rework the fills – at least the large ones.

ImageImageImageImageImageImage

I used my dental pick to remove the old fill material – it seemed to be white putty that did not take the stain. The pick removed the white material easily and I wiped the bowl down with an alcohol wetted cotton pad to clean up the dust before refilling the flaw. I then took out my container of briar dust (I collect this from the bowls that I top) and used the dental pick to pack the flaw with briar dust. Once it was packed and overflowing I dribbled drops of superglue into the packed dust. It dries quickly so there is no time to work it or move it. Once I finished the first pack and drip I added more briar dust and redripped the glue. The three photos below show the new fill before I sanded it. The briar dust and glue are very hard and I always over fill the flaw and sand it back to smooth. I do not want any shrinkage in the fill so I work with the material as I spelled out above and over fill the flaw.

ImageImage

Image

Since the glue and dust fill dries very quickly, it can be immediately sanded. I used some fine grit emery cloth to smooth out the glue and followed that with some 240 and 320 grit sandpaper. The next two photos show the fill after I had sanded it smooth. The fill is now dark and hard. I have found from past experience that the dark fill is much easier to blend in with the stain than the white or pink putty fills.

ImageImage

After the sanding and preparation of the other fills that I replaced I restained the bowl with the dark brown aniline stain. I flamed it and restained it several times. The bowl is seen both wet and after the flaming in the three photos below. The fill is well blended into the dark stain.

ImageImageImage

Once the stain was dry I took the pipe to my buffer and buffed the bowl with Tripoli and White Diamond. The fills were still to visible to my liking so I used a trick I learned somewhere – I used a black permanent marker (Sharpie) and highlighted the grain on the pipe and also stroked in grain through the fills. Once it was finished I stained it one last time with the dark brown stain and then buffed it to a polish. The bowl was finished and I set it aside to work on the stem.

The stem needed quite a bit of work. I sanded it with the medium grit sanding sponge and then with 320 grit sandpaper and 400 and 600 grit wet dry sandpaper. The oxidation was still stubbornly remaining on the saddle and in the slope of the saddle to the flat bit. I used the Bic lighter and moved it over the surface of the stem to burn off the oxidation. I repeated this several times and then sanded the stem with 1500-4000 micromesh sanding pads. I also used the Maguiar’s Scratch X2.0 between grits of micromesh. I also used my Bic lighter to burn more of the oxidation between the grits. Once I was finished I polished the stem with Maguiar’s and then buffed with White Diamond to polish it. I gave it a coat of Obsidian Oil followed by multiple coats of carnauba wax to the stem and bowl. The final pictures show the pipe after this work. In the last photo the area that had the fill repaired is shown to detail how well the fill blends into the finished pipe.

ImageImageImageImageImage

New Life for a Yello Bole Canadian


On a recent trip to the US to visit my parents I also visited several antique malls in their city. I have three that I usually have on my list when I go there. The one I want to focus on in this post is in an old grain elevator and has three floors of many “antiques” which always surprise me because many are the same age as I am!  Anyway, on the second floor I found a booth with two pipe racks containing over a dozen older pipes. Most were junk in that they had cracked bowls and broken shanks etc. But also in the midst of it was this old Yello Bole Canadian. It had some beautiful briar in it. Yello Bole is the grade down the line for KayWoodie, or so I am told. Pipes that don’t make the grade for KW will often be stamped with the Yello Bole brand. This one was stamped KBB in a cloverleaf on the top of the shank and next to it Yello Bole over honey cured, over imported briar. The stem has the yellow circle inlaid in the vulcanite. If memory serves me correctly this is one of the older pipes in the line.

ImageImage

The bowl was in pretty clean shape. The yellow coating was still visible in the bowl and the bottom half of the bowl was very clean with just a bit of darkening to the yellow coating. The rim was dirty and dented. There were tars on the rim and some deep scratches to go along with the dents. The bowl however, was still round, it had not been ruined by a reamer going a muck. The stem was oxidized and was slightly brown. There was light tooth chatter but no dents on the surface of the stem. The overall finish of the pipe had light spots and dark spots where the finish seems to have been exposed to light or was wiped down and finish removed. There was no over coat of varnish or of lacquer just solid clean briar with a spotty stain.

ImageImage

I broke the pipe down as seen in the pictures below. The stinger apparatus can be seen in the pictures. It is an aluminum shovel like contraption with the hole near the tenon and a long shovel like extension that extends through most of the shank. I cleaned out the bowl with an alcohol scrub on cotton swabs and cleaned out the shank with a shank brush, bristle pipe cleaners and fluffy pipe cleaners and alcohol. When they came out clean I worked on the outside of the bowl. I used cotton balls and acetone to wipe down the outside of the bowl and shank. I wanted to remove the rest of the finish so that I could prepare it for restaining. I applied the acetone until the bowl was free of the stain and finish. The pictures below show the cleaned surface of the bowl. I also used the acetone and some 400 and 600 wet dry sandpaper to clean the top of the bowl and rim. A folded piece of sand paper was used on the inner edge of the rim to clean the beveled edge. Before I stained the pipe I decided to clean and polish the stem. I used the Bic lighter method mentioned in an earlier blog post to get rid of the oxidation. In the pictures below the stem has the majority of the oxidation removed using that method. I then used 400 and 600 grit wet dry sandpaper with water and my usual list of micromesh pads from 1500-6000 grit to polish the stem.

ImageImageImage

Once the stem was cleaned and polished by hand I inserted it into the bowl and used it to hold the pipe while I restained it. I used a medium brown aniline stain on this pipe to approximate the original stain and to highlight the grain. I applied it with the dauber that came with the stain and then flamed it to set the stain. I then took it to the buffer and buffed it with Tripoli to remove some of the opacity of the medium brown stain and bring the grain to life. Once that was done it was buffed with White Diamond. Both the stem and the bowl were buffed. Care should be exercised in the buffing process to not obliterate the stamping. I use a light touch when buffing around the stamping. The four pictures below show the finished pipe – ready to load with a favourite tobacco and enjoy!

ImageImageImageImage


A BIC lighter and Oxidation


Blog by Rob Hardy and Steve Laug

Thanks to a serendipitous discovery by a friend of mine, Rob Hardy (incoinnu on Smokers Forums), who also does refurbishing as a hobby we have worked out a very different method of dealing with oxidation on vulcanite stems. The long term effects of the procedure are still in the process of being worked out though it is hard to imagine any long term effects as the heat is not left on the surface of the stem for a significant amount of time at all. The short term benefit is pretty astounding.
BIC
This is what he wrote regarding his new process with my additions and after thoughts. “Those of us who love refurbishing have spent too many hours trying to remove oxidation from vulcanite stems. We all longed for some magic solution that would reverse the process of oxidation. We have tried one or all of these products in our efforts to fight back the dreaded green brown, noxious discolouration of the stem – Oxyclean, sodium hypochlorite solution from 1-12%, Armorall, Armorall Tire Foam, olive oil, stem oil, automotive lens cleaner, eye of newt, toe of frog, etc. These liquids served to either soften the oxidation or disguise it. None of them remove the problem and under a strong light or magnification it was still there. Many of us have sanded using a variety of sandpaper grits both dry and wet, micromesh sanding pads or paper, and toothpaste with micro abrasives until our fingers were sore and raw. The overall effect of this process served merely to level the surface of the stem until the oxidation would be sanded away. It is very effective but also very time consuming. Over time the shape and sharp angles of the stem are changed. There had to be a better way of dealing with this that was still effective and less labour intensive. I was fortunate to be able to purchase a lot of 17 estate pipes from my local B&M, over half of them had heavily oxidized stems. After refurbishing the Savinelli Punto de Oro that was in the lot I was considering taking up refurbishing as a new hobby. I then started on the Dunhill and K&P Peterson. The Peterson was cleaned and reamed and was ready for the stem work. There was a minute tooth mark near the button that I wanted to remove so I was using Steve Laug’s technique of applying heat to the indentation to raise the dents. Usually I do this after I have removed the oxidation and work on a clean stem. This time however, for who knows what reason the stem had not been clean at all and was an oxidized mess. To raise the tooth dent I applied the heat from a BIC lighter with the flame 1/2″ from the stem. The indentation lifted…AND THE OXIDATION DISAPPEARED! Wow! I could not believe my eyes so I continued for the length of the stem and it worked – the oxidation was gone. I used short strokes with the flame of the lighter and wipes with a wet paper towel. After each wipe the paper towel came out with yellow stains. This seemed too good to be true. Out came my jewellers’ loupe for closer examination. I had to see this close up and personal. Under the magnification I could see that the heat had evened out the surface of the vulcanite and pitting and oxidation were gone. There was only BLACK vulcanite. I stayed up until one o’clock in the morning sanding the stem up through 8000 grit micromesh. I left the waxing until this morning. This stem now looks like it did when it left the factory over 60 years ago. I was and still am amazed at the results. I had to try it again this morning on a Stanwell stem. I used the same technique with the lighter and the wet paper towel. I used a lot of caution around the logo, covering it with a wet paper towel to protect it while heating with the lighter). It took only ten minutes to clean the stem of the oxidation! What a difference in the amount of time it took to clean this stem. It is cleaned and now ready for sanding and buffing. I tried it on a third stem. I moved over the stem with the lighter, six seconds per inch of stem, before wiping with a wet paper towel. Again the towel came out with the yellow colouring of the oxidation and all that remained behind was the black vulcanite. Each of the three stems took little time to clean and all that remained to finish them was to sand and smooth and then buff and polish.” Here are just a few important pointers that Rob and I have learned in the process:

  1. Do not leave the flame in one spot, keep it moving – burning vulcanite stinks and you will ruin the stem.
  2. Use a slow 1″ side to side sweep with the flame half an inch below the stem. Repeat until the stem is completely black and then sand.
  3. As the flame moves across the surface there is a light sulfur smell that is given off as the oxidation burns.
  4. In sanding the stem use a variety of grits of sandpaper (400 and 600 grit wet dry and higher grits if you choose) then micromesh pads or paper (1500, 1800, 2400, 3200, 4000, 6000) before buffing with Tripoli and White Diamond. I have also used 0000 steel wool and found that it is a good first step before the wet dry sandpaper is used.