Tag Archives: rustication tools

Procedure for hand rusticating a pipe


I have rusticated quite a few pipes over the years and by much experimenting, with successes and failures have learned a few tricks in the process. I am by no means an expert in the process. I continue to experiment with developing different patterns of rustication and deeper, craggier finishes. I have done some rustications that have the look of old leather and others that are gritty and rough. I love the process of experimenting and seeing what I can make with the tools that I have close at hand. I am including some photos of the finishes I have done to illustrate the variety of patterns that can be achieved.

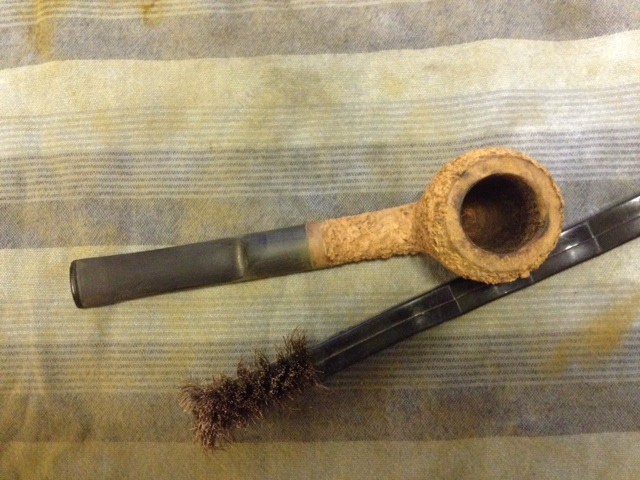
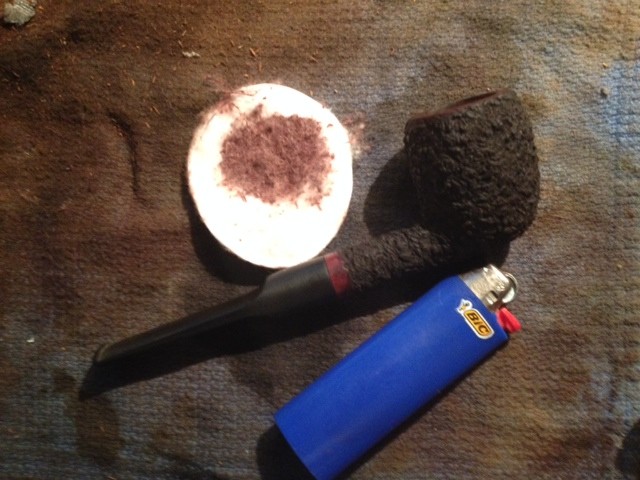
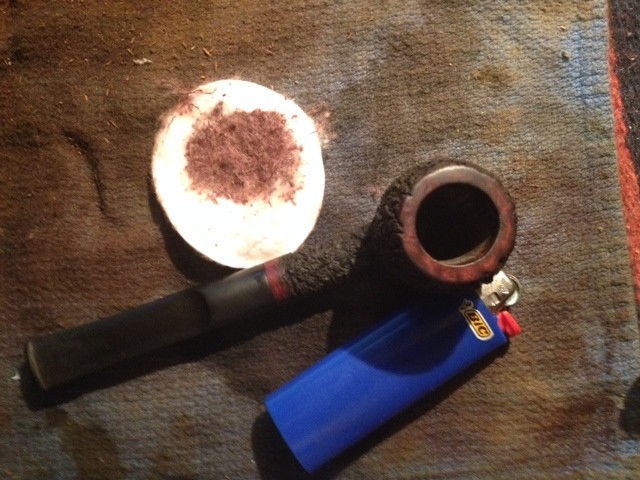
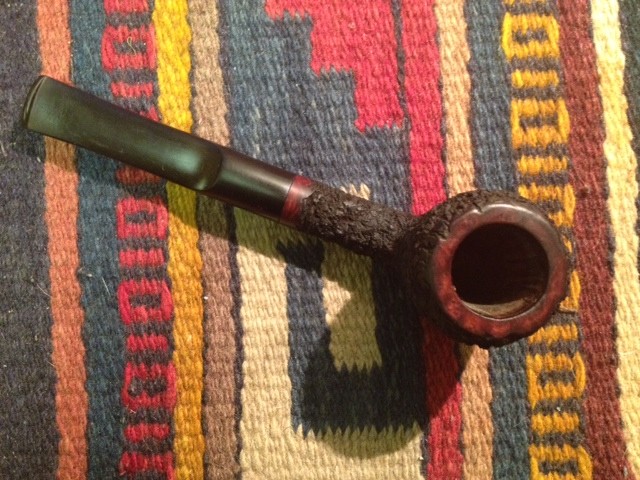
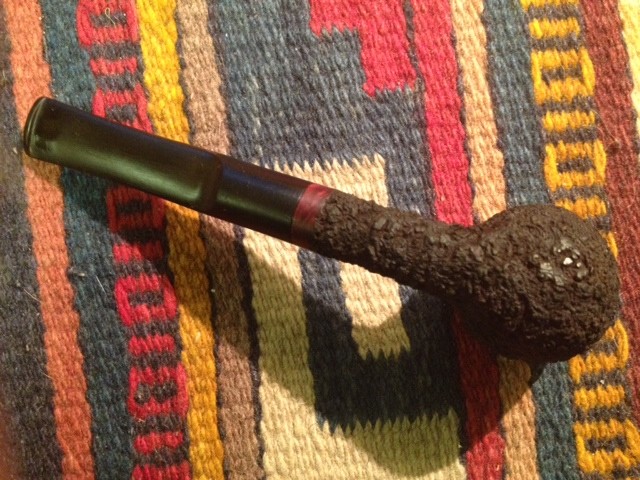
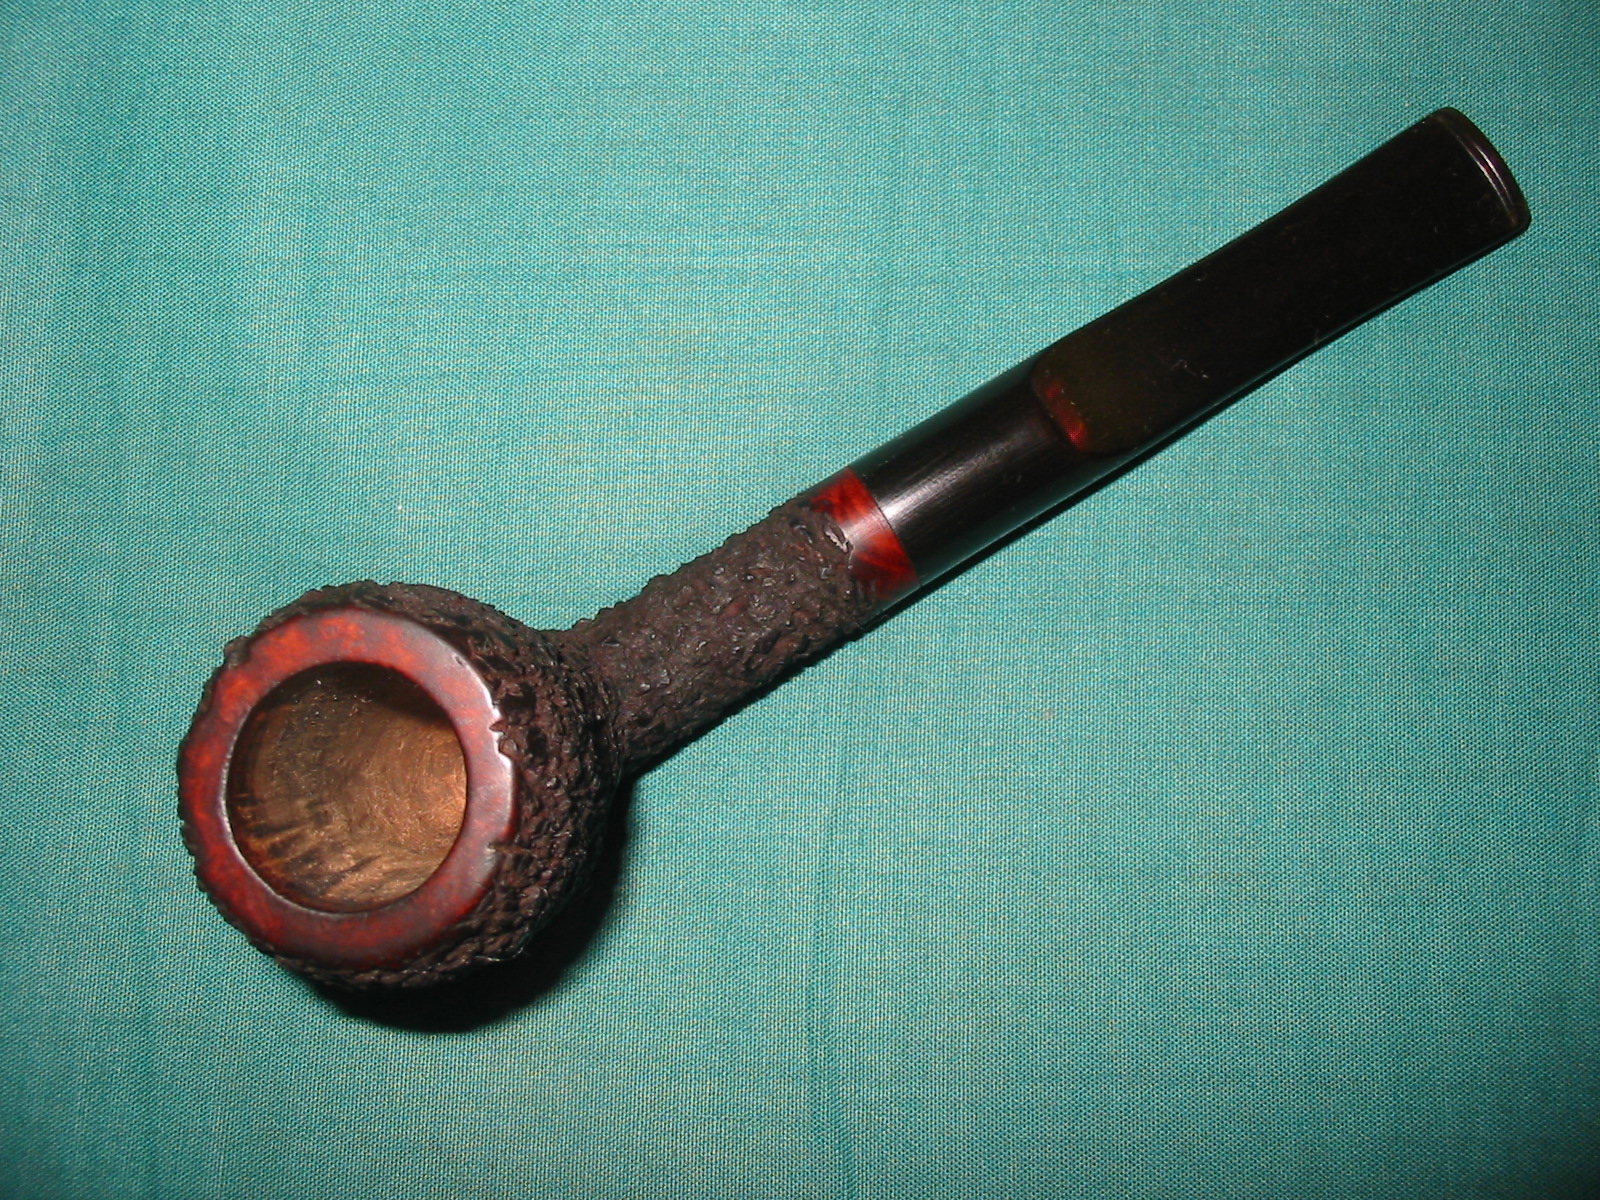
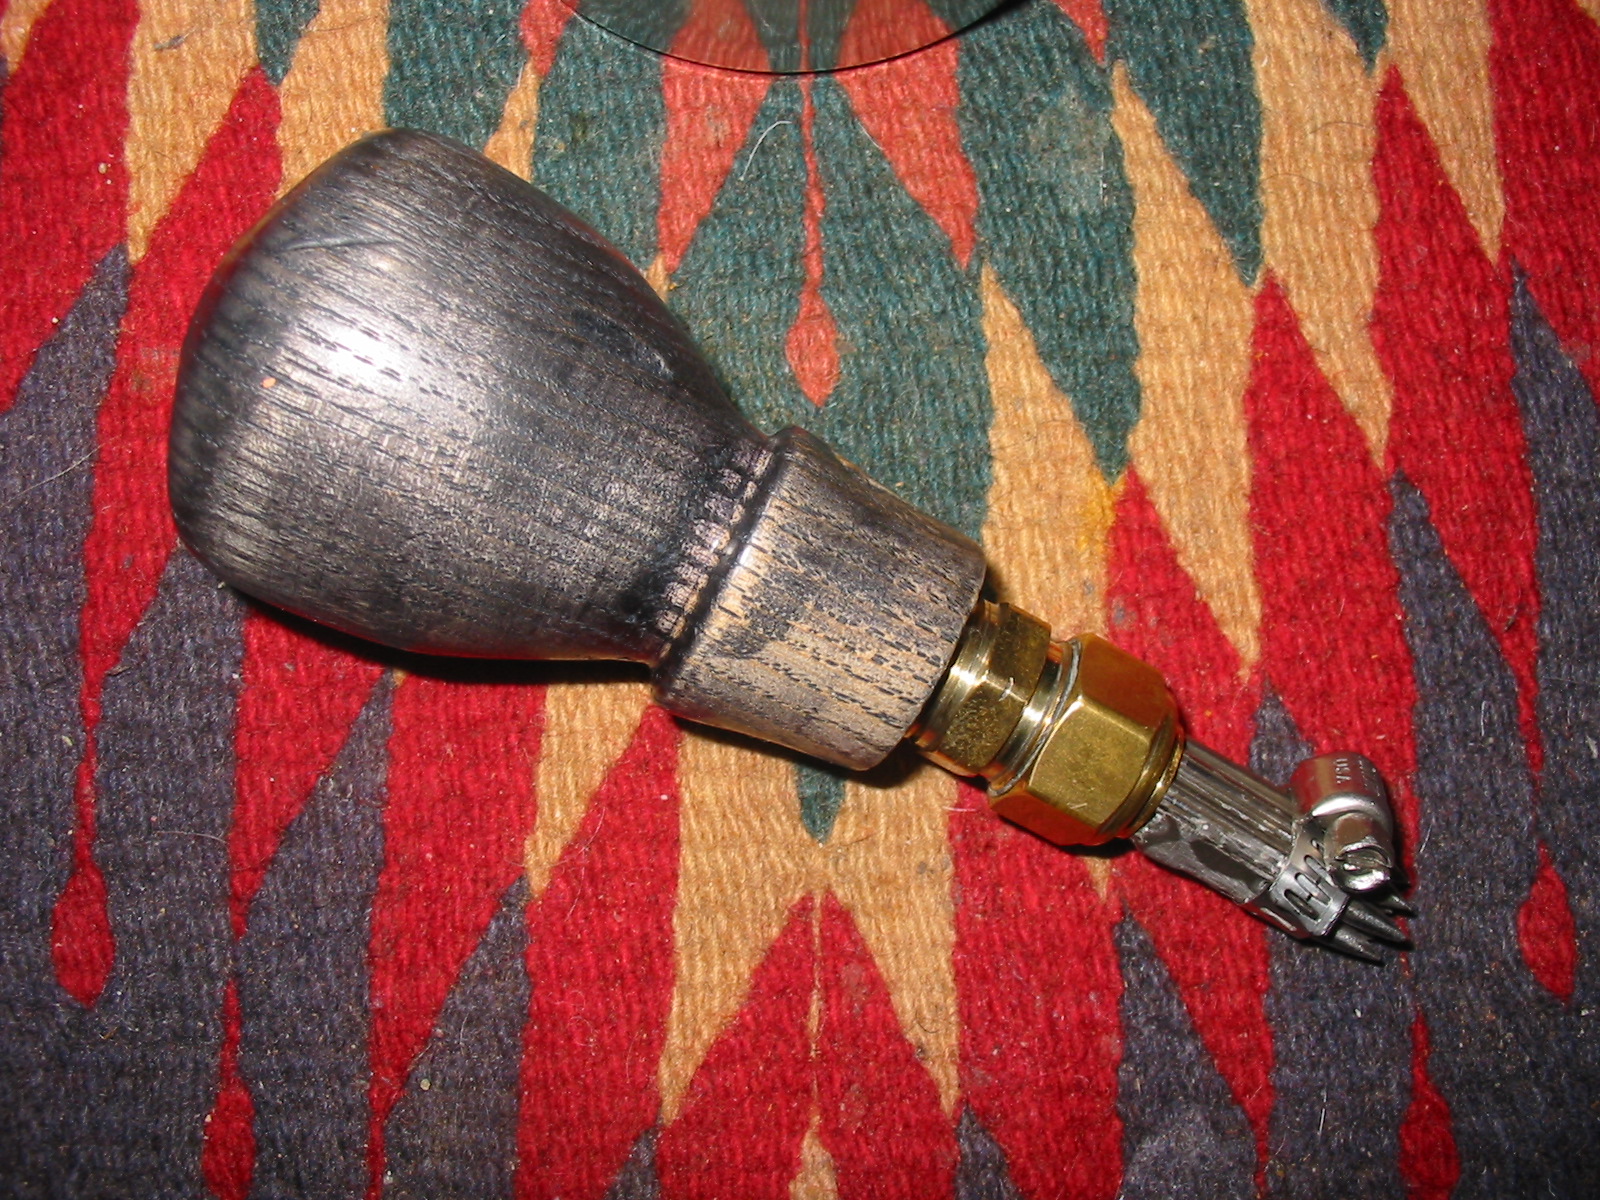
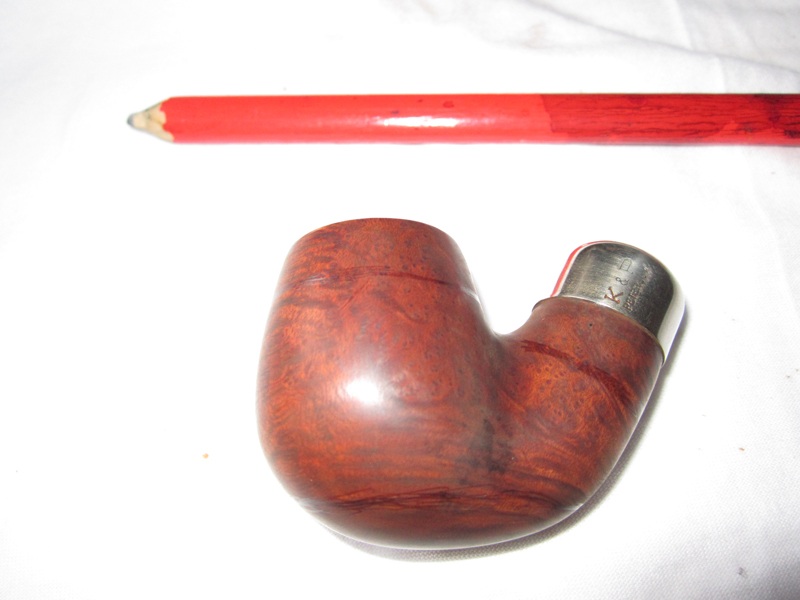
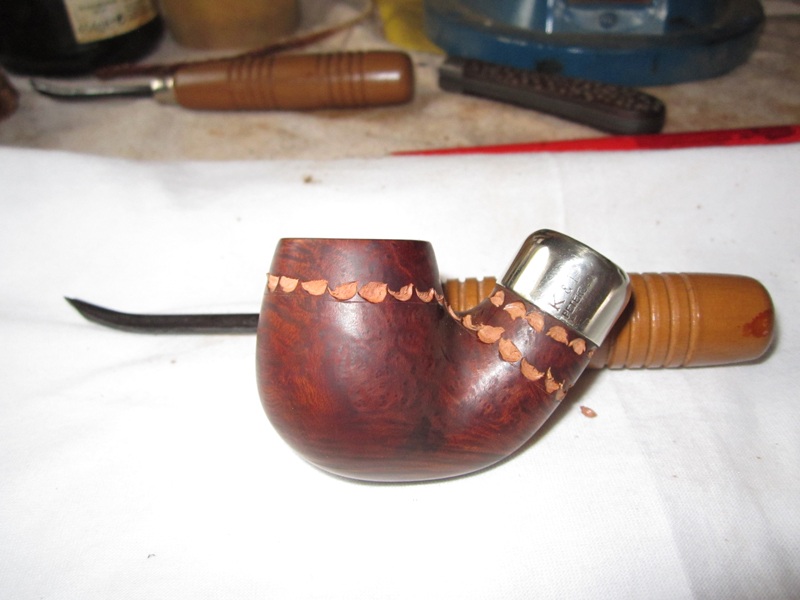
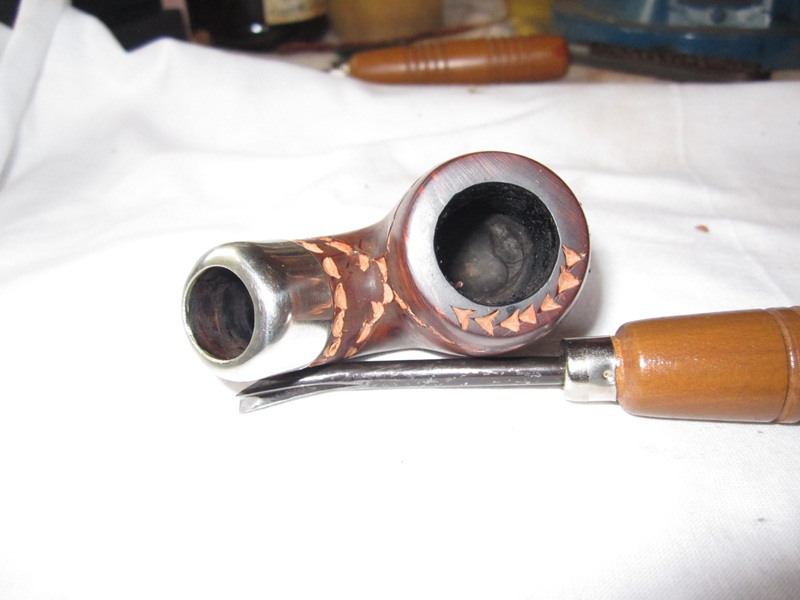
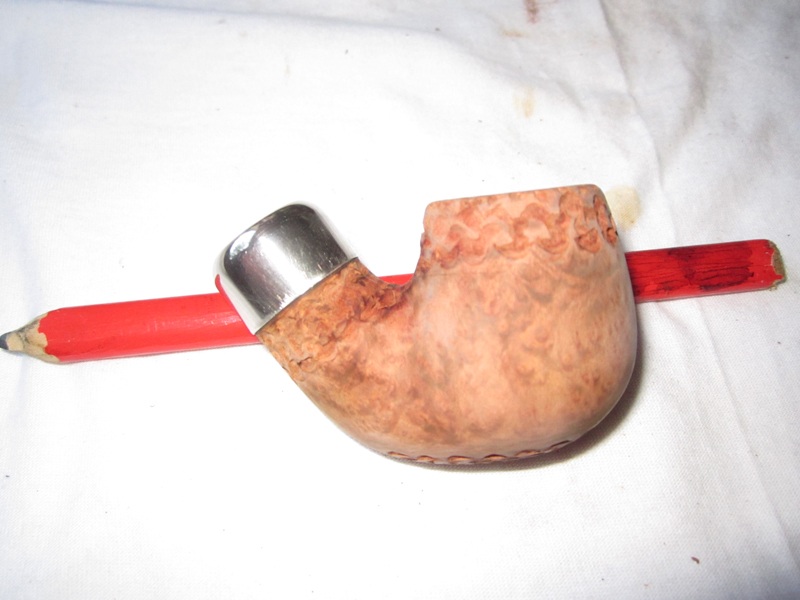
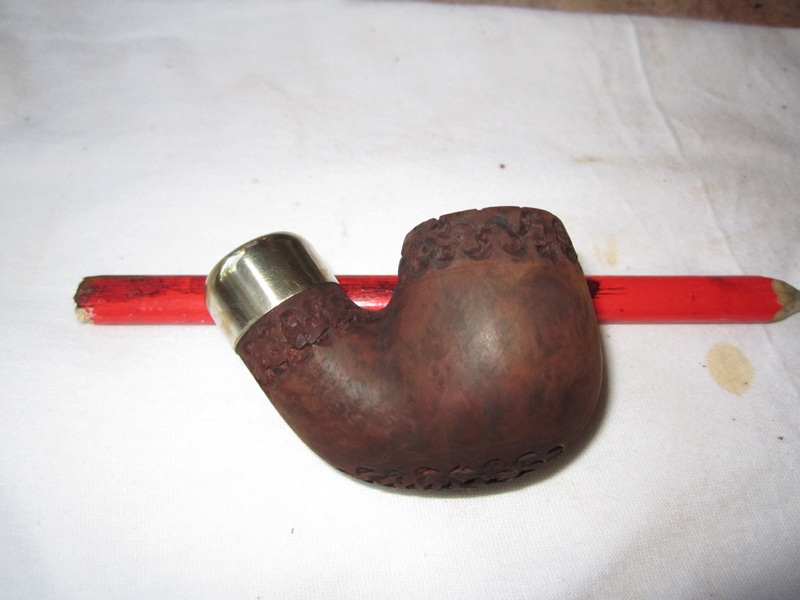
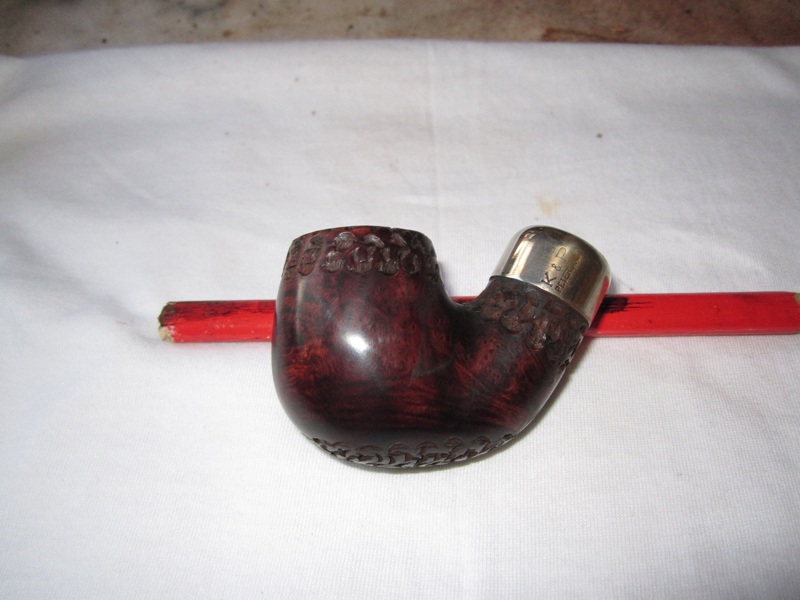
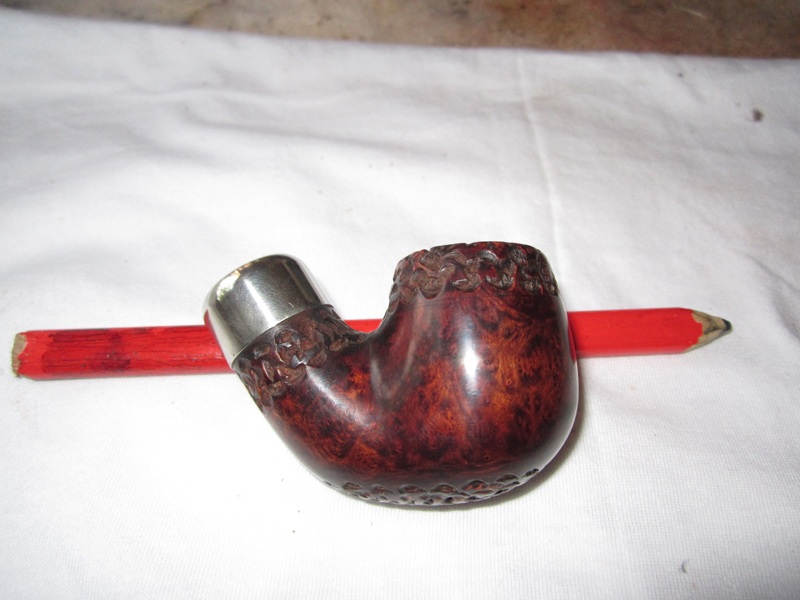
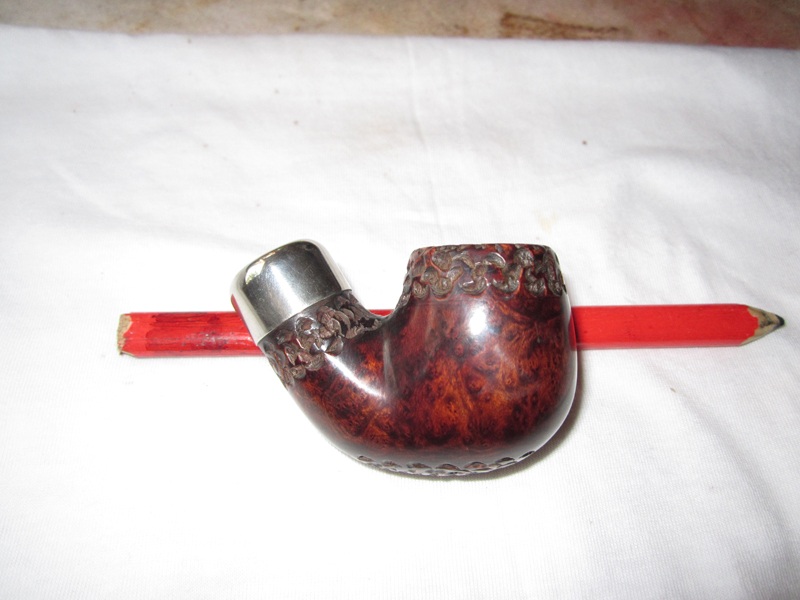
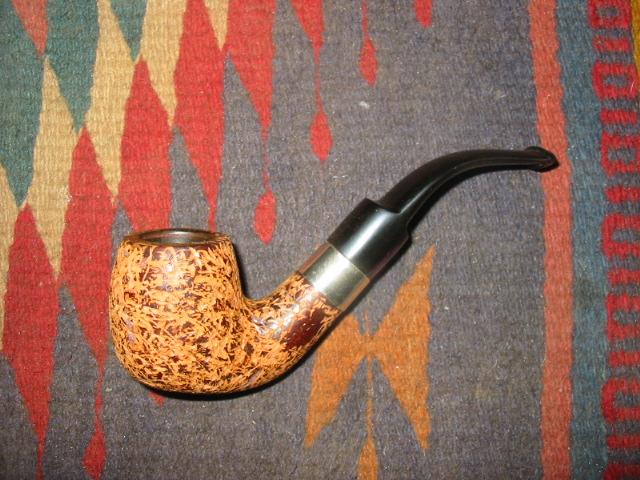
The first pipe is an author carved by John Bessai. It had so many fills in the briar that it was a mess in my opinion. It was a prime candidate for a new look. I used the handmade tool – nails in a piece of pipe to achieve the rustication and then buffed it with Tripoli to smooth out the high spots. I stained it with a black undercoat and dark brown top coat.
BessaiAfter2 BessaiAfter4
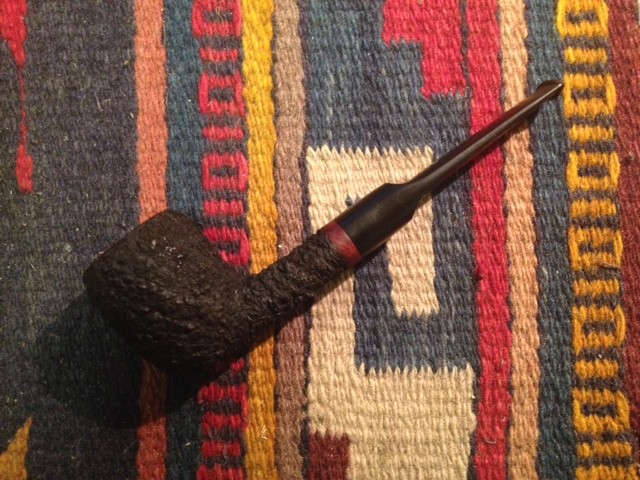
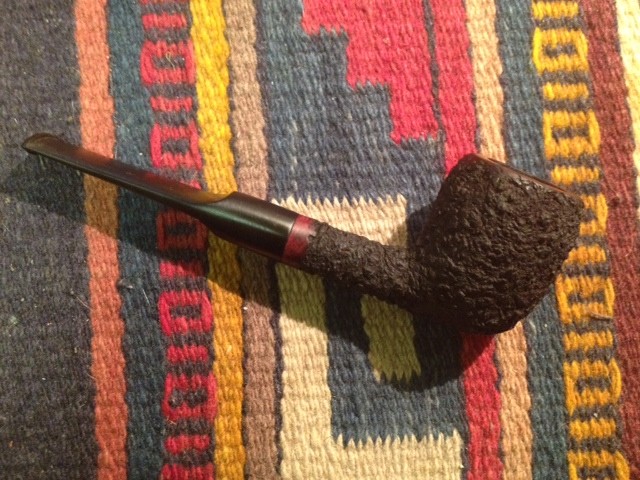
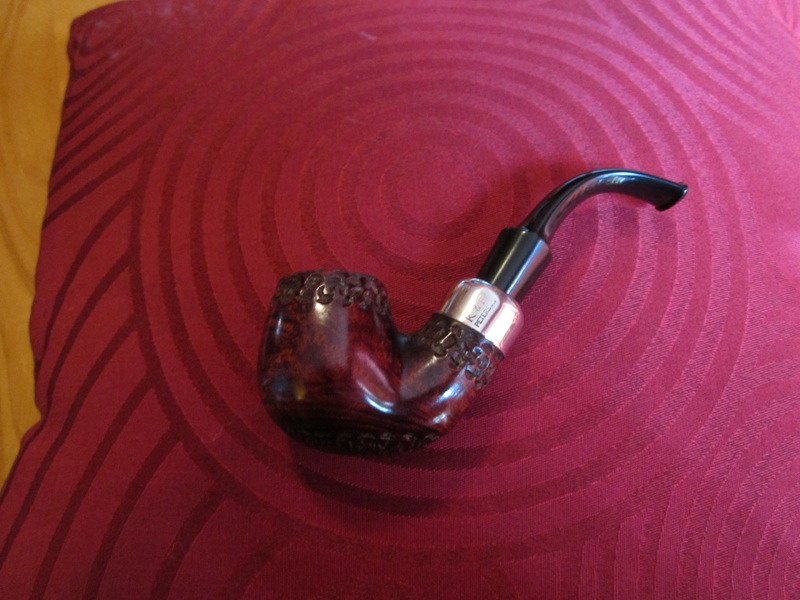
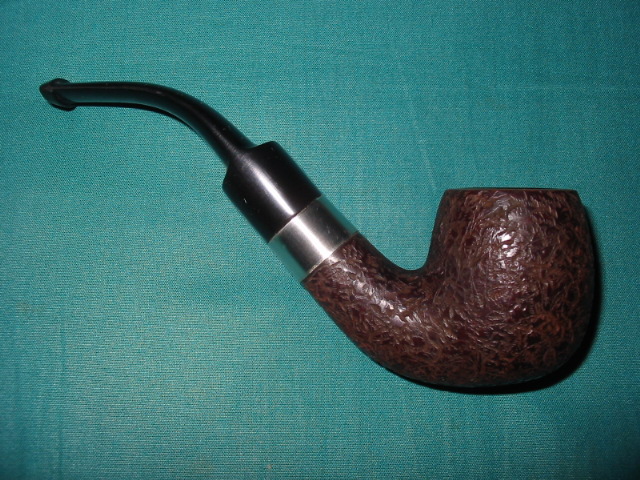
The second one is one of my own carvings. I wanted a look similar to the one on the Bessai by smoother and more leatherlike in terms of a finished look. I rusticated it with nails in a pipe, wire brushed the finish and then sanded to smooth out the high spots. I used a black understain and medium brown top stain to get the finish. finishedcarving003-1
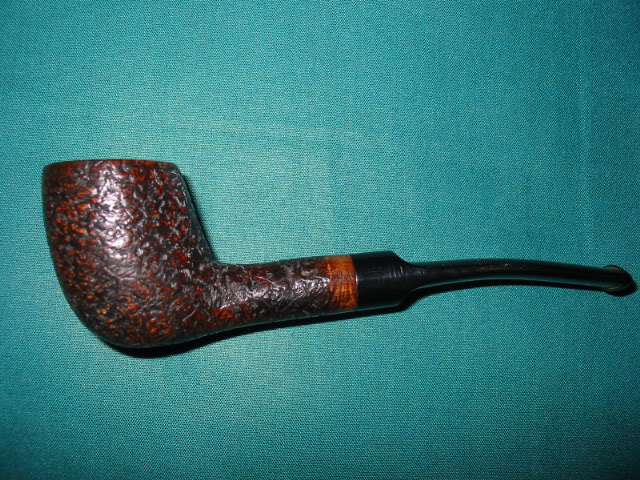
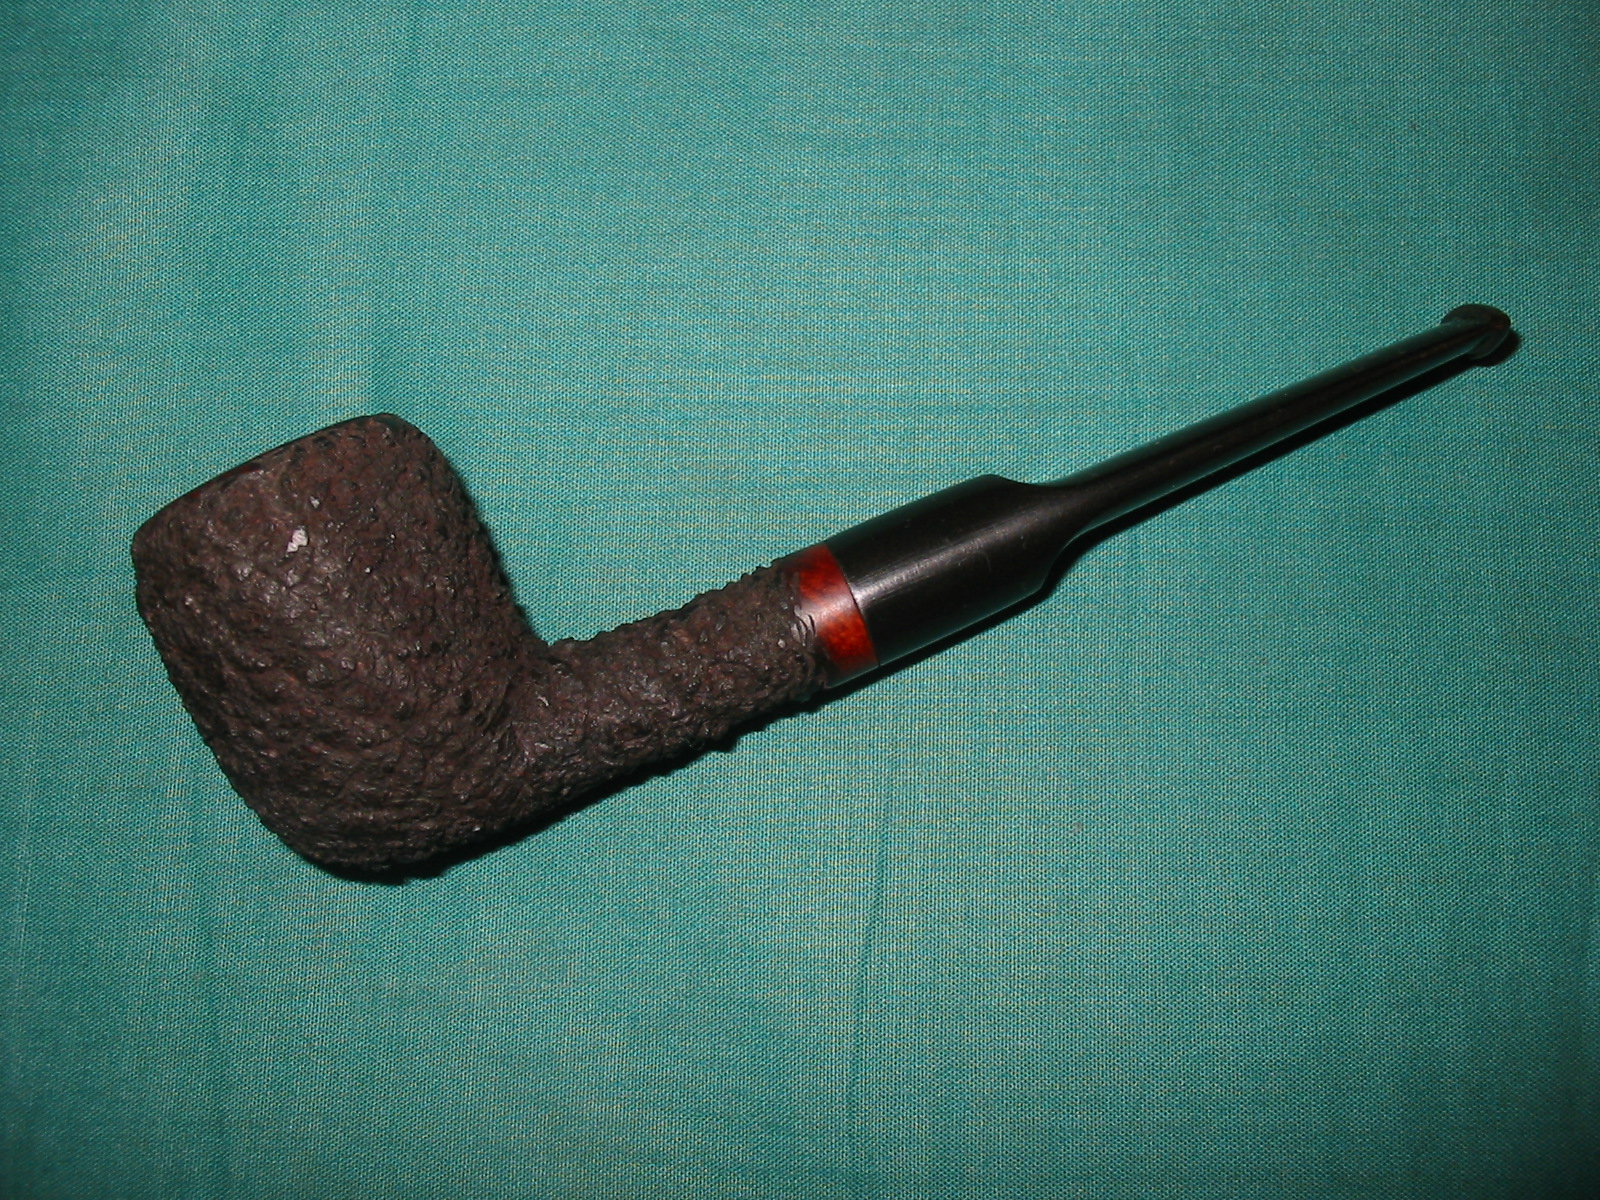
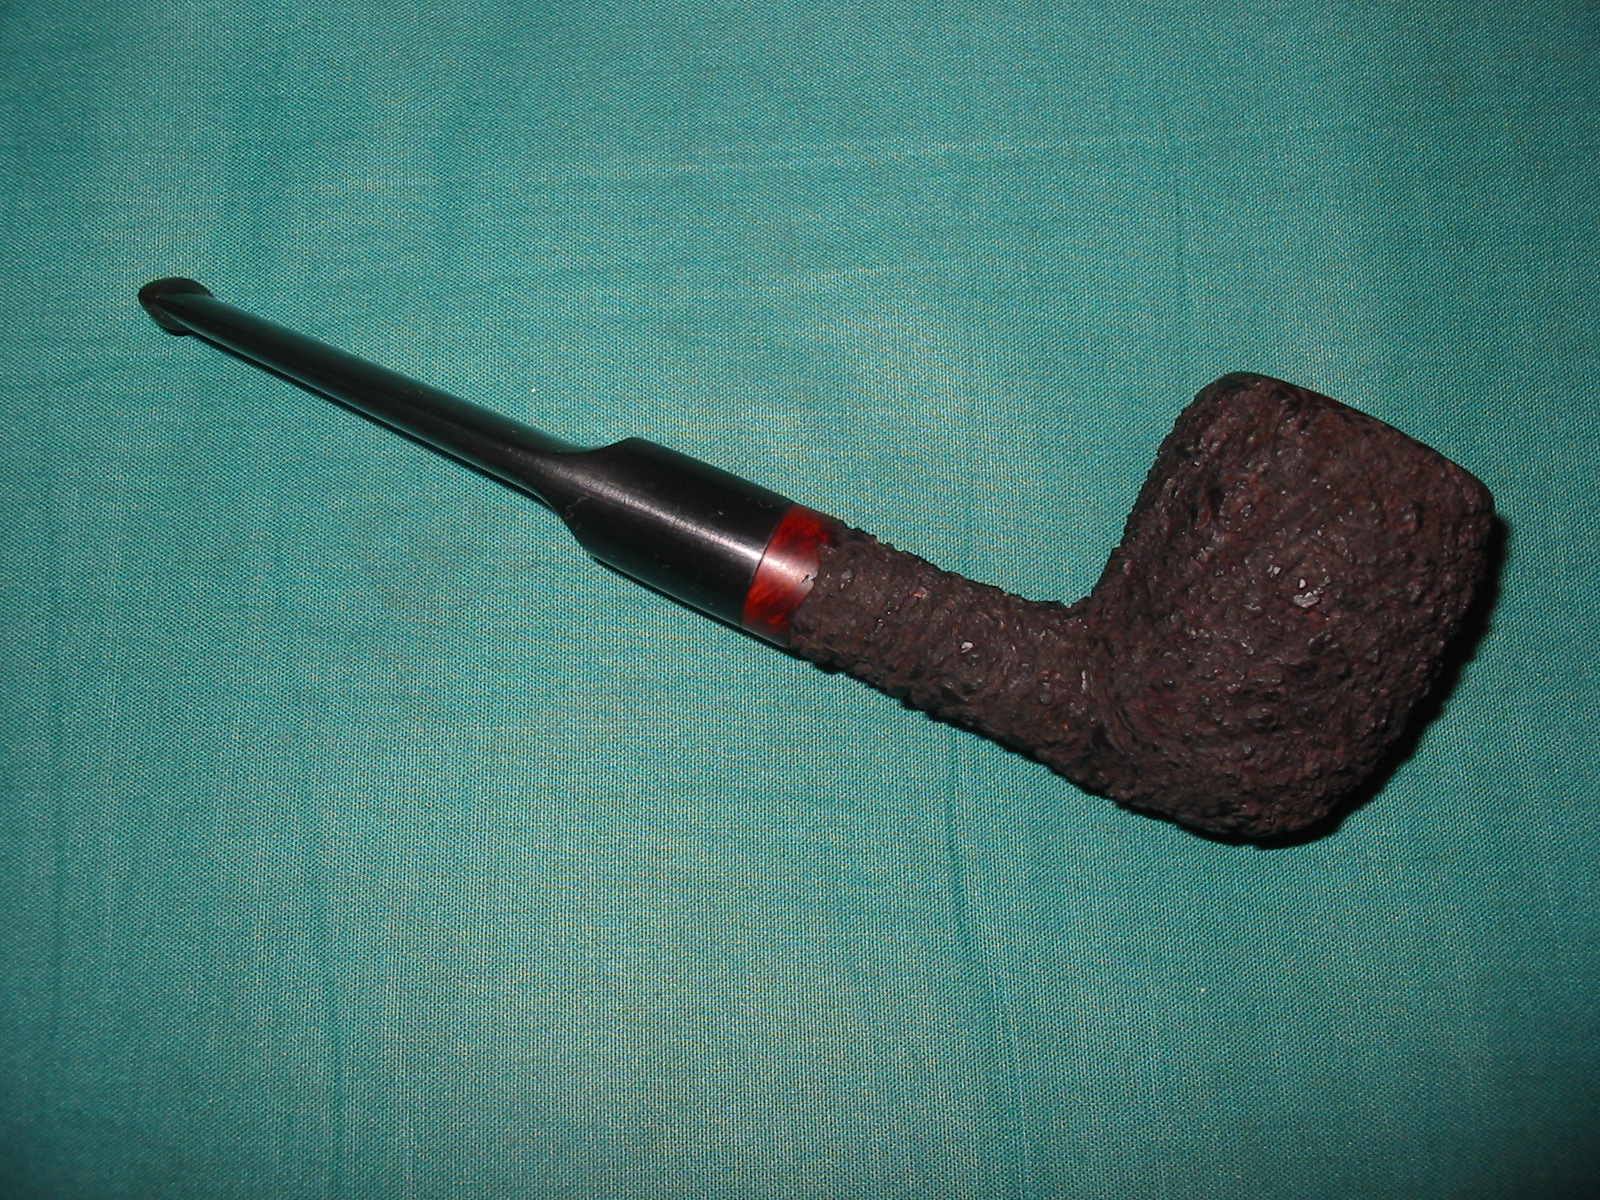
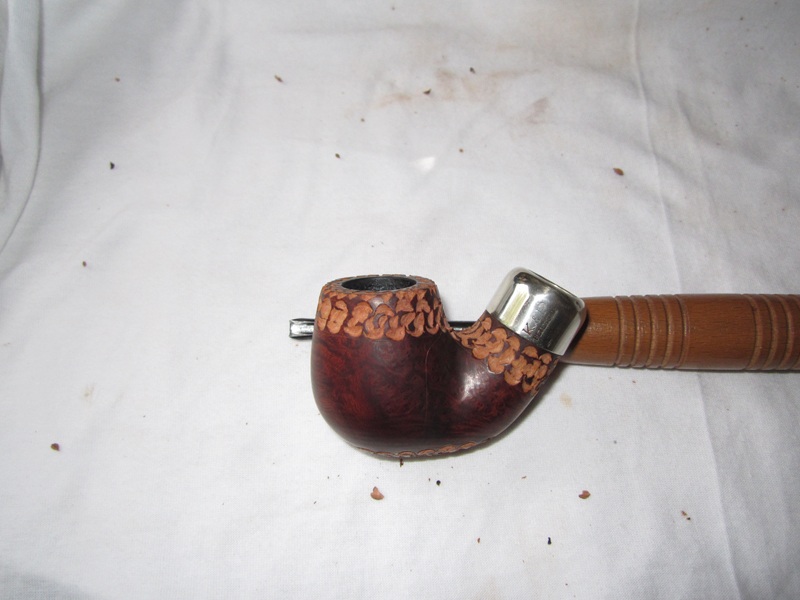
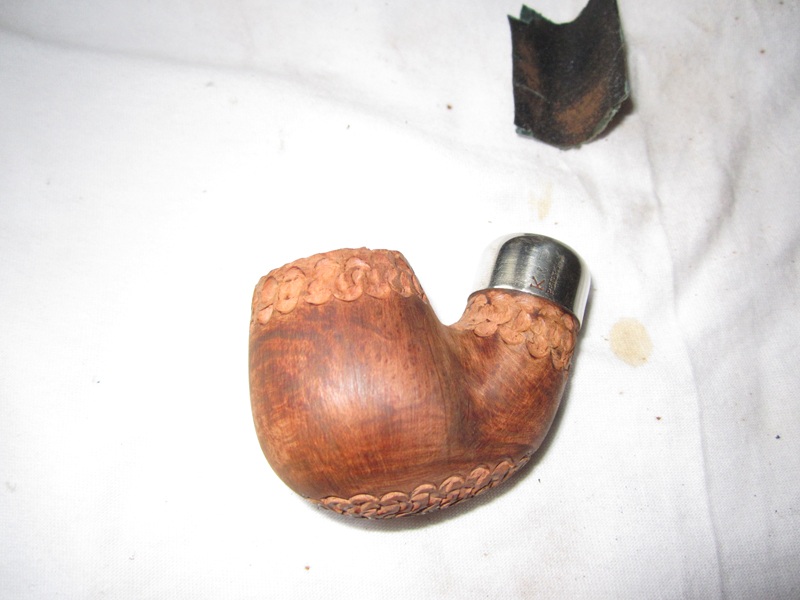
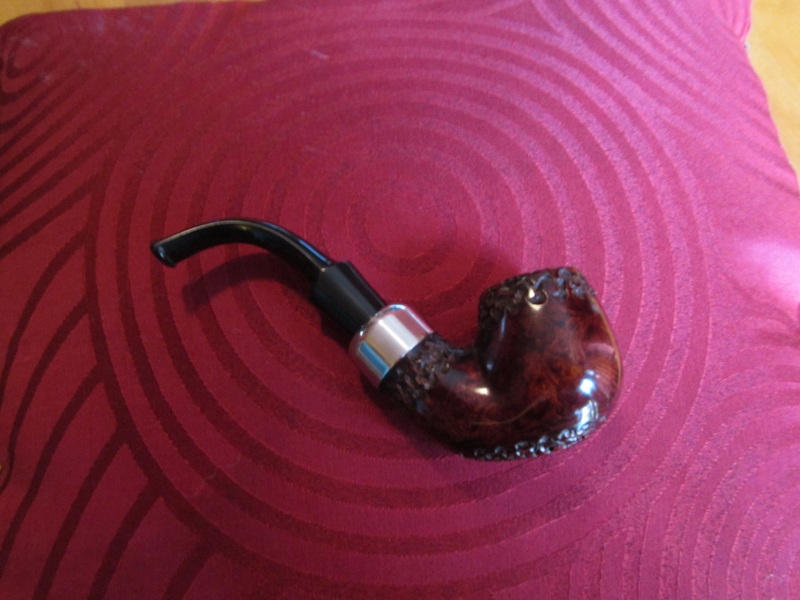
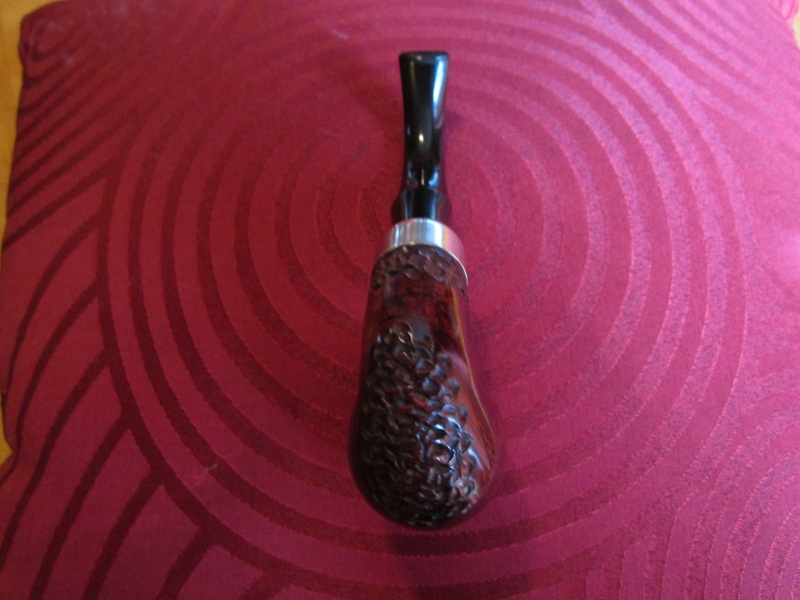
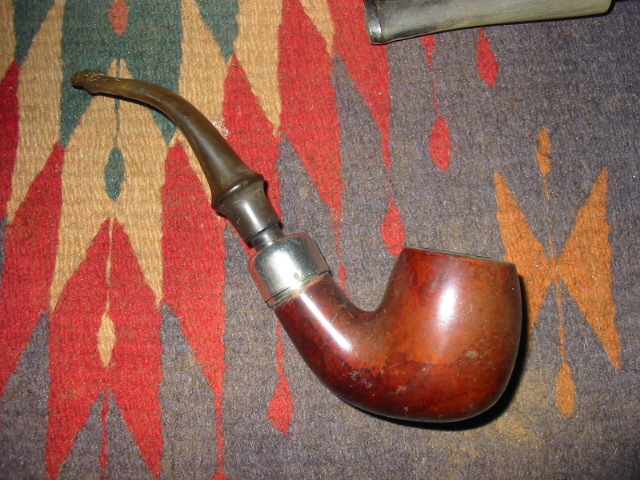
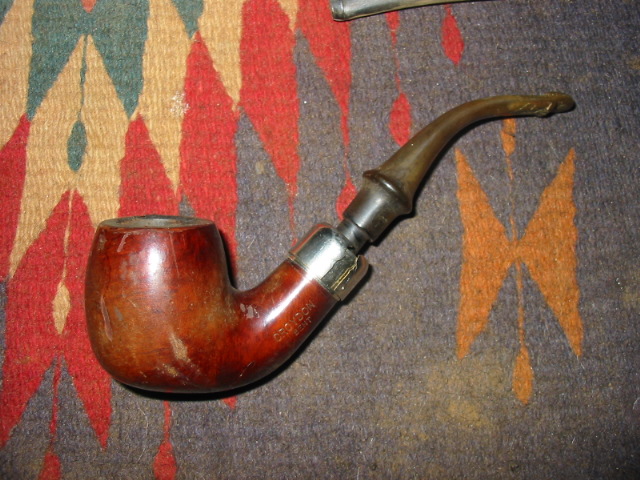
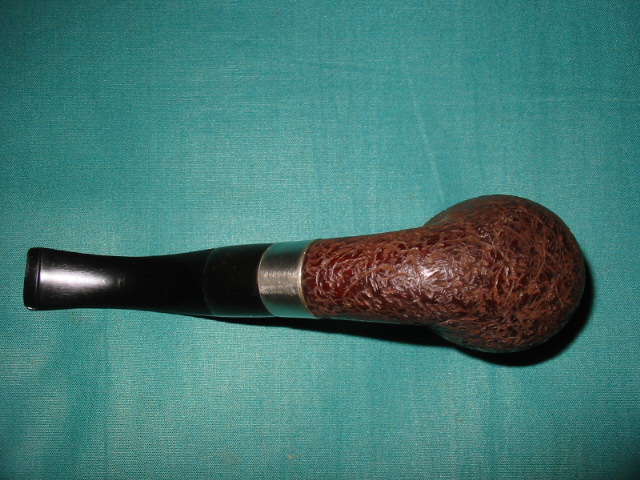
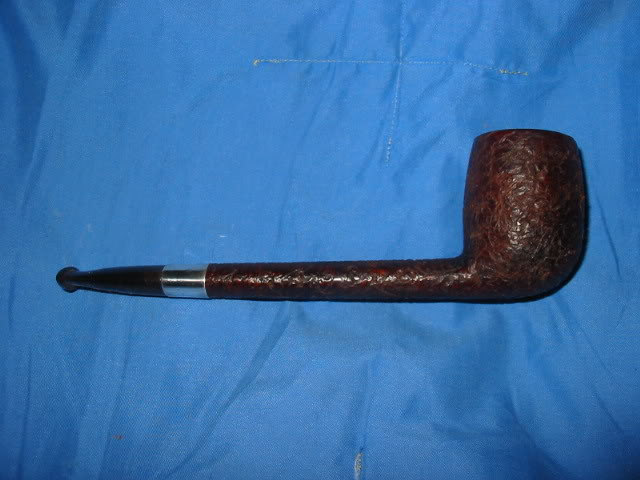
The third pipe was a small Canadian with many fills in the shank and bowl. I did a shallow rustication with the pipe and nails and then used a dark brown and medium brown stain to get the look. All three of the first pipes have a leatherlike finish to them that was achieved by sanding or buffing the highspots on the finish after rusticating.IMG_6503 IMG_6504 IMG_6506
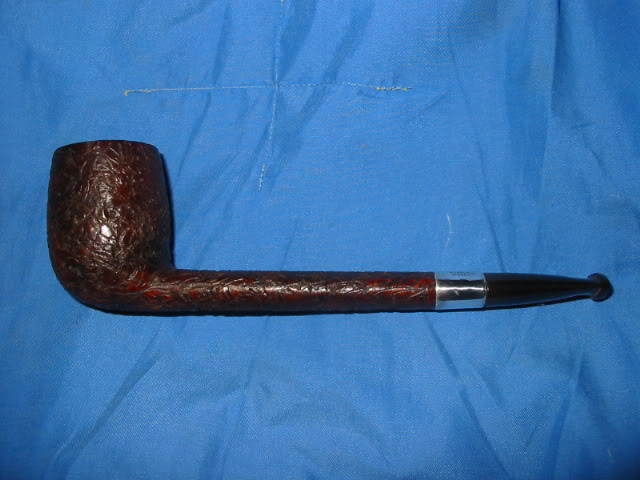
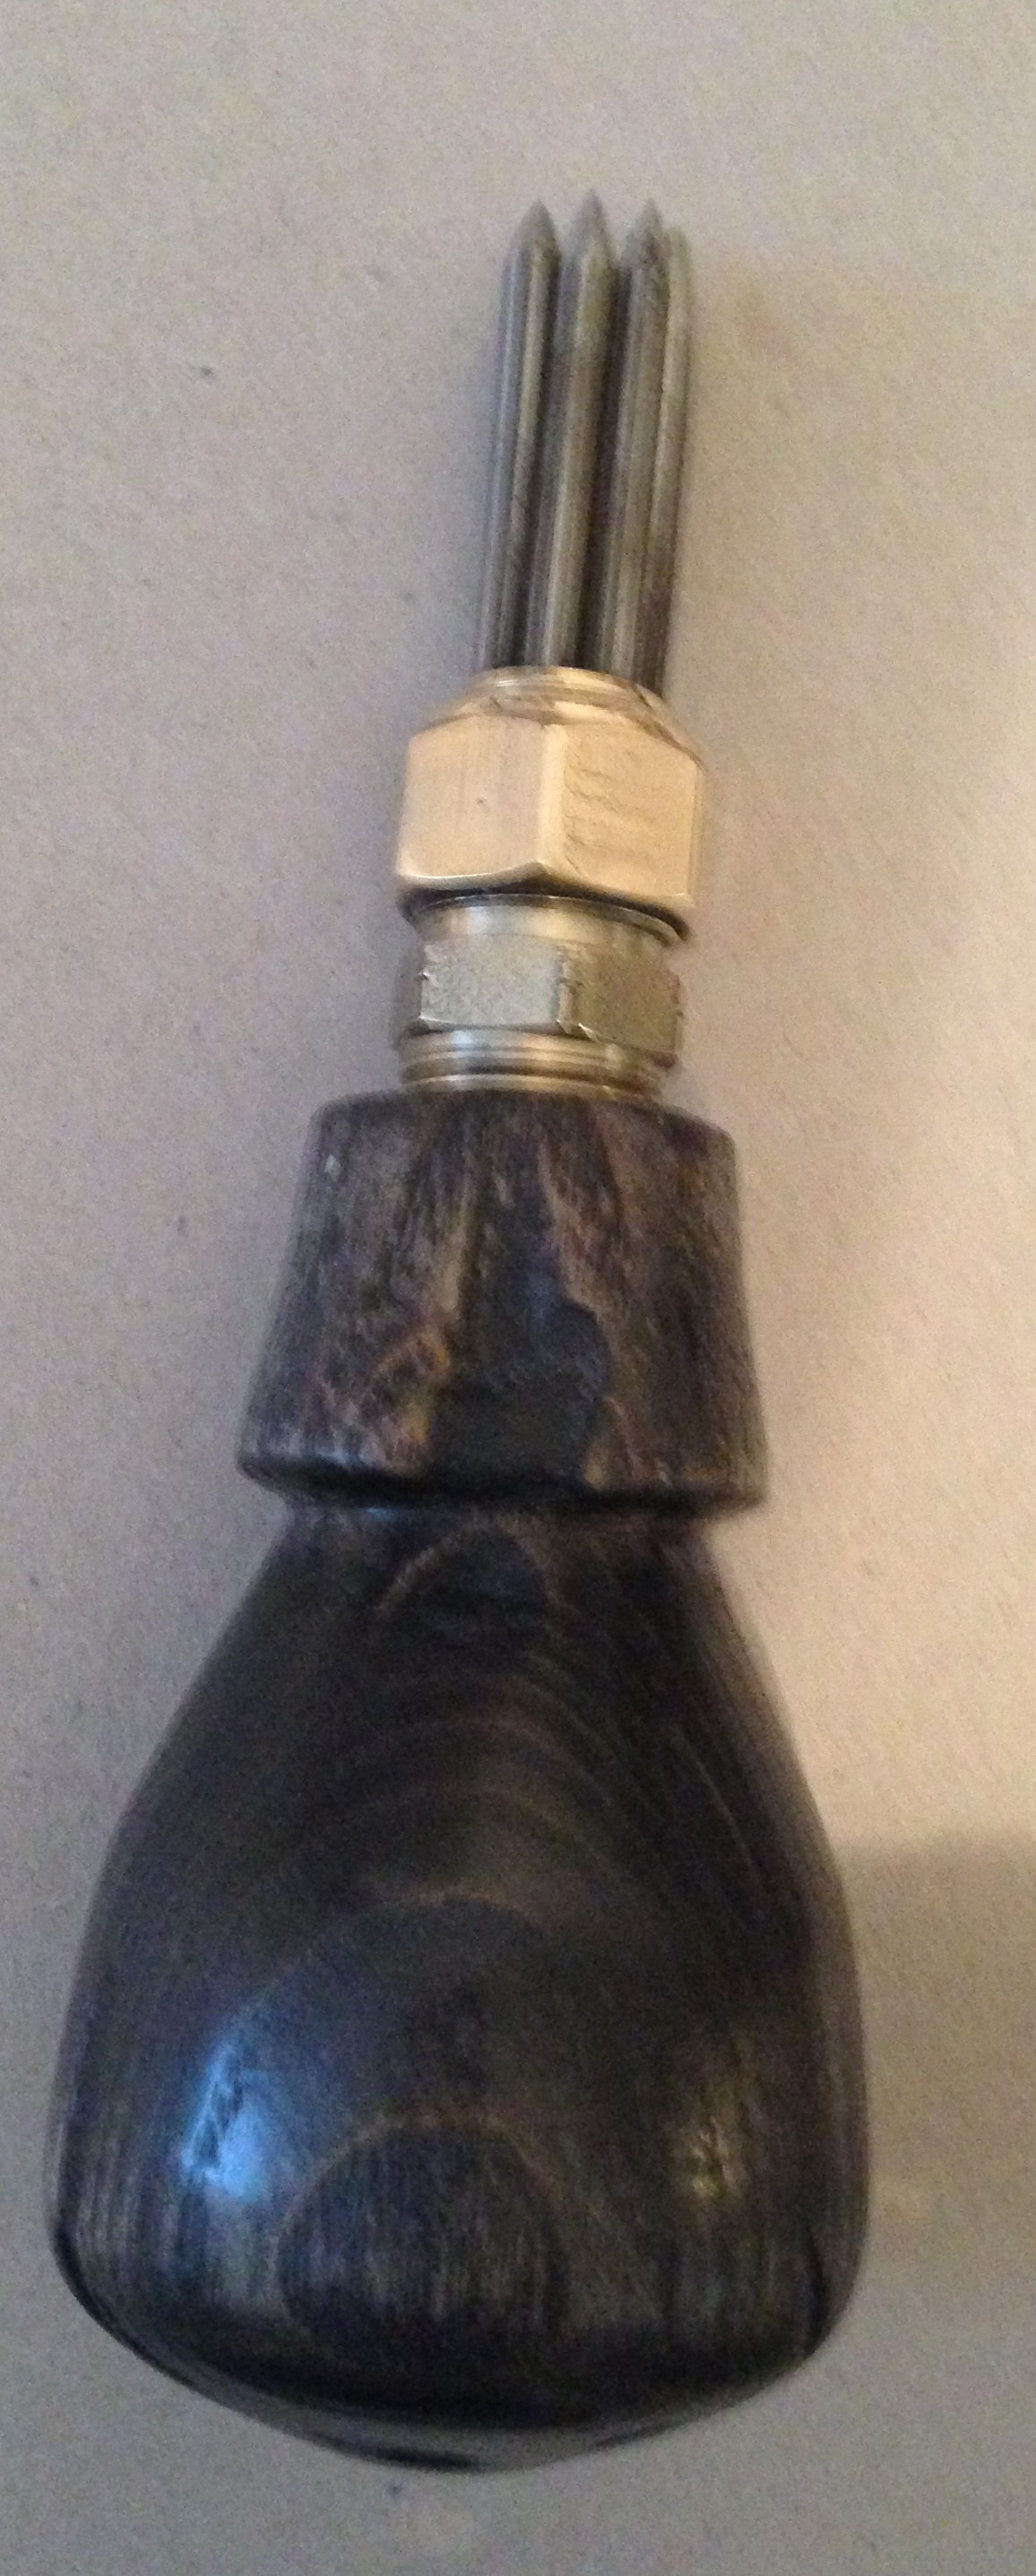
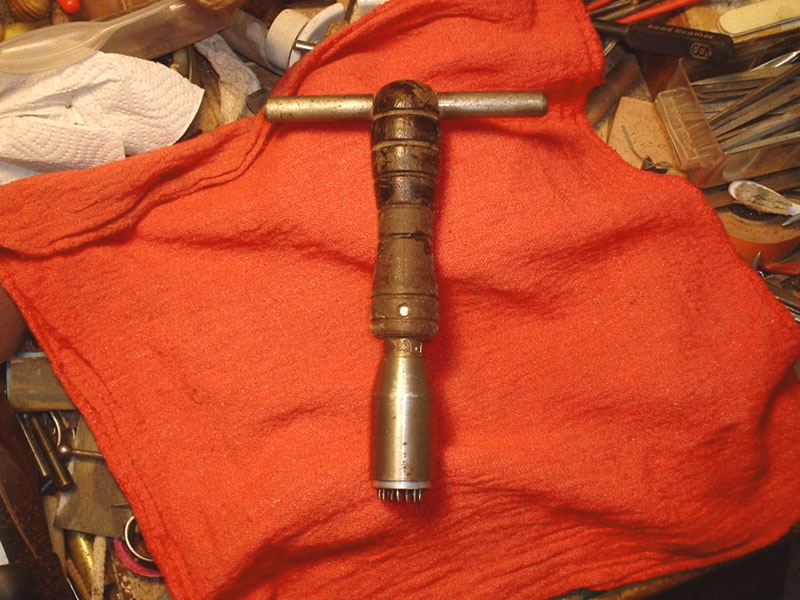
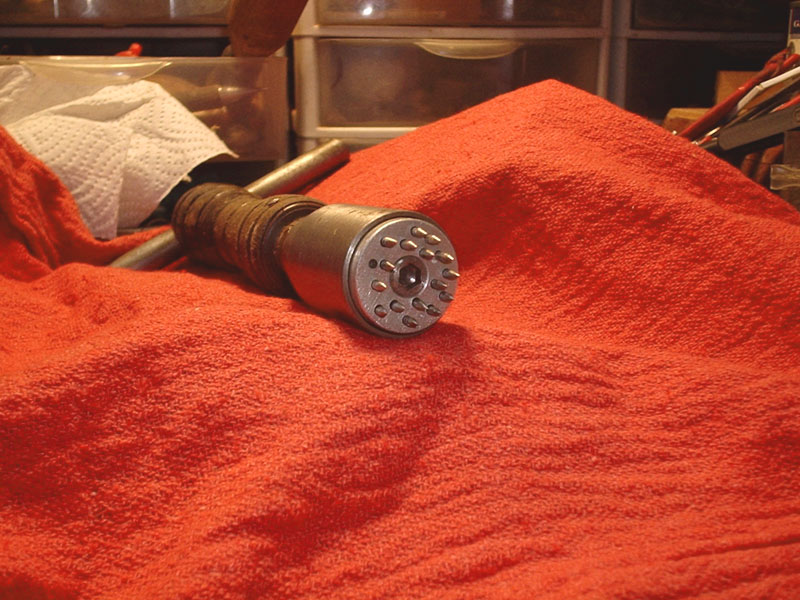
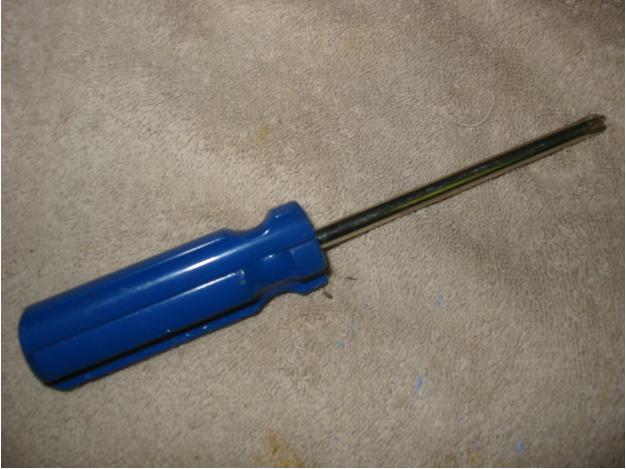
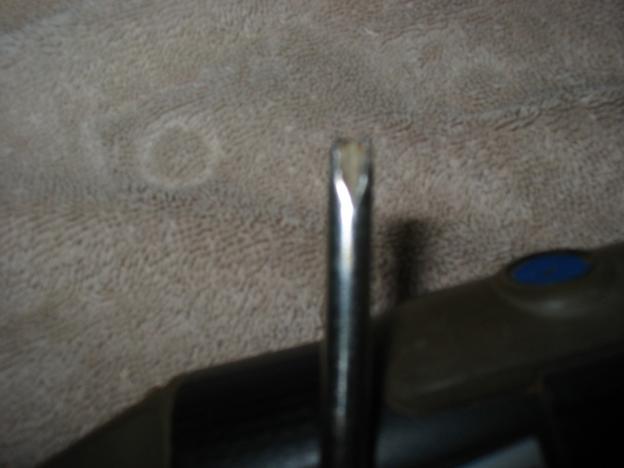
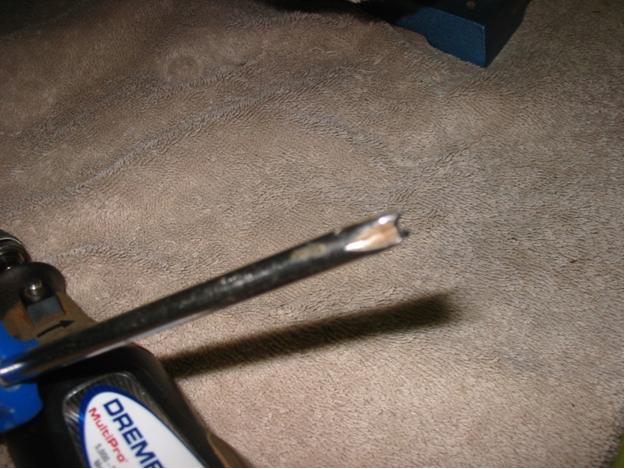
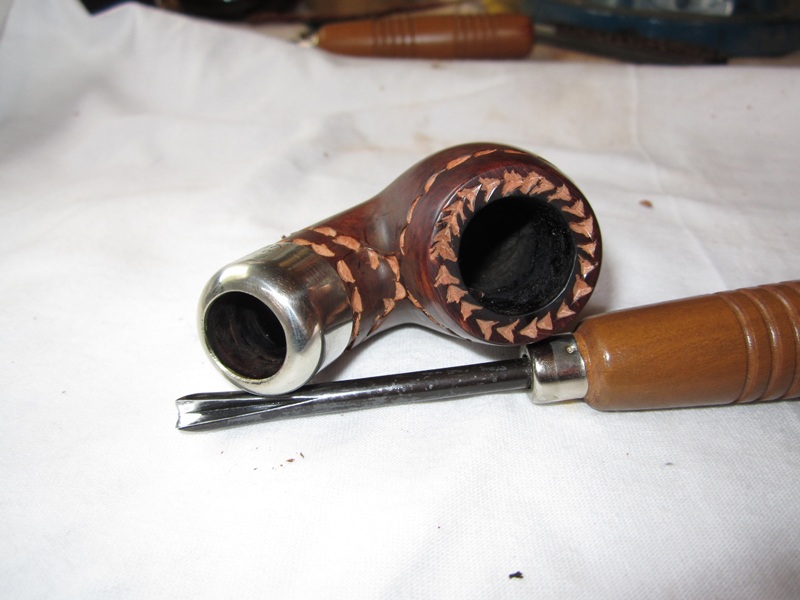
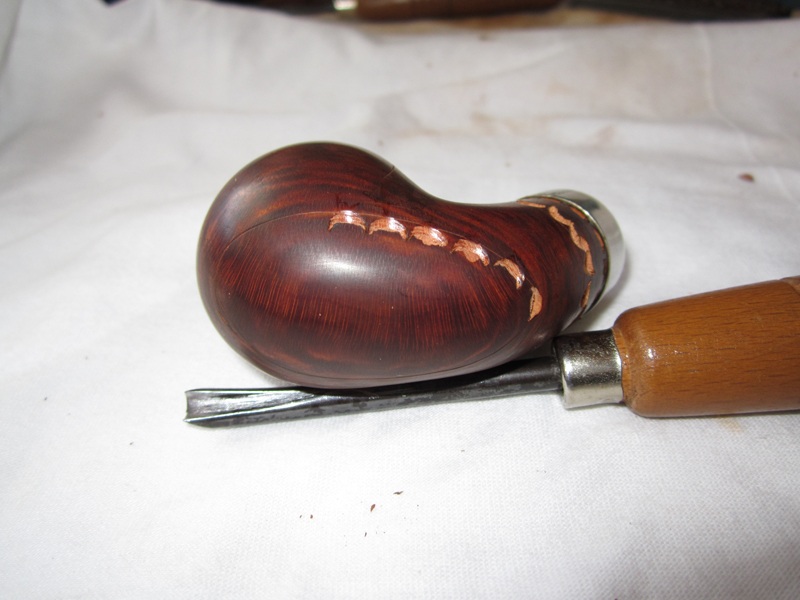
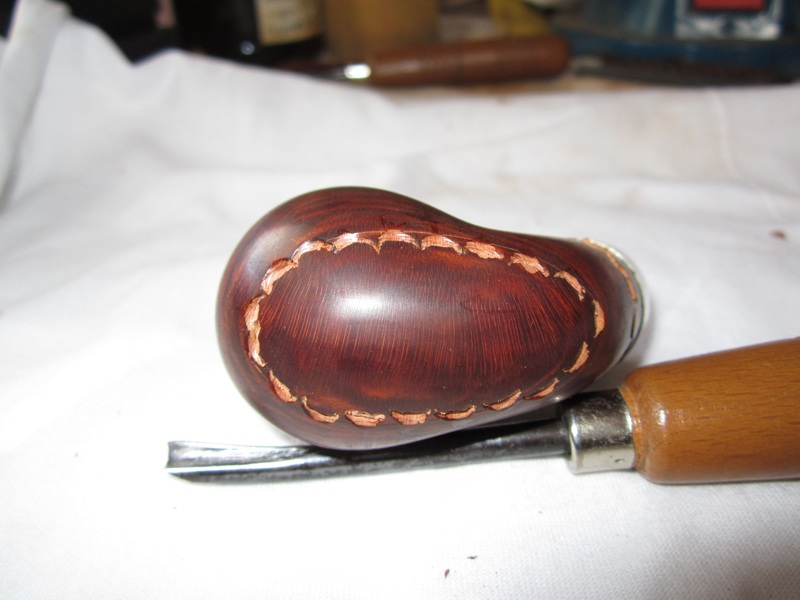
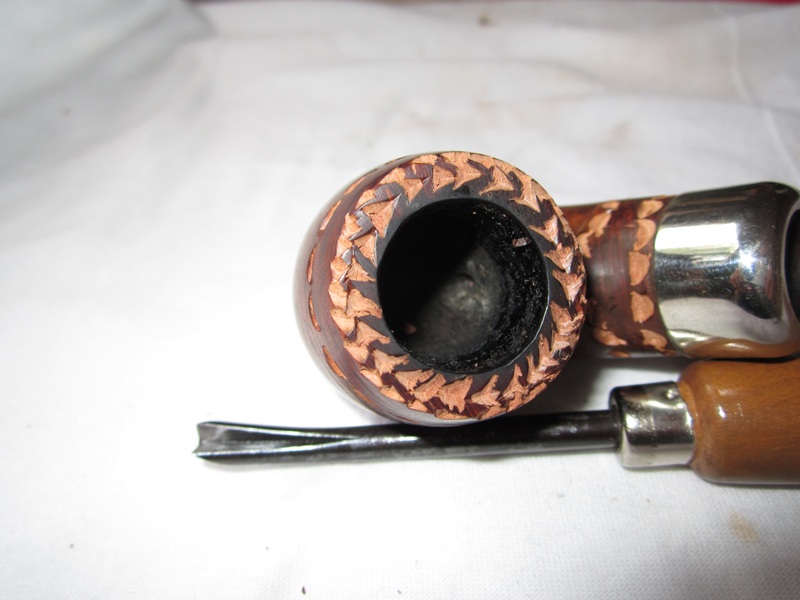
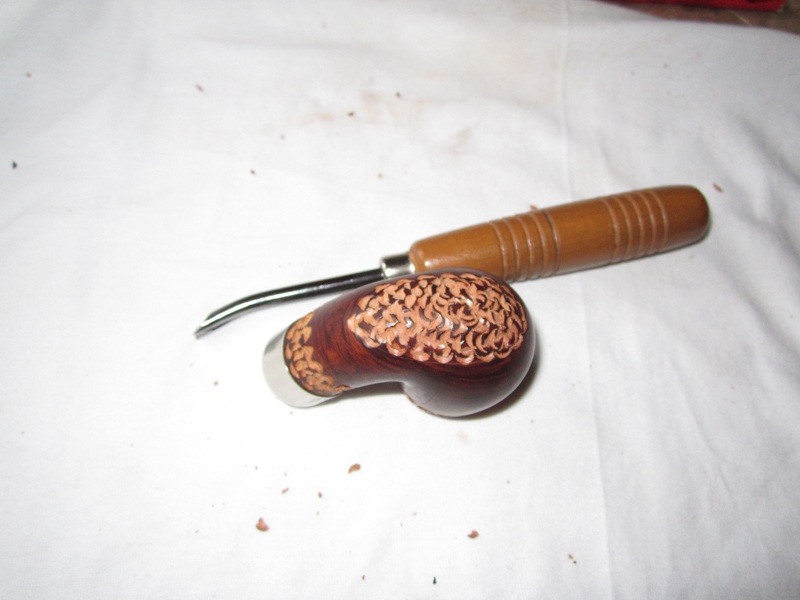
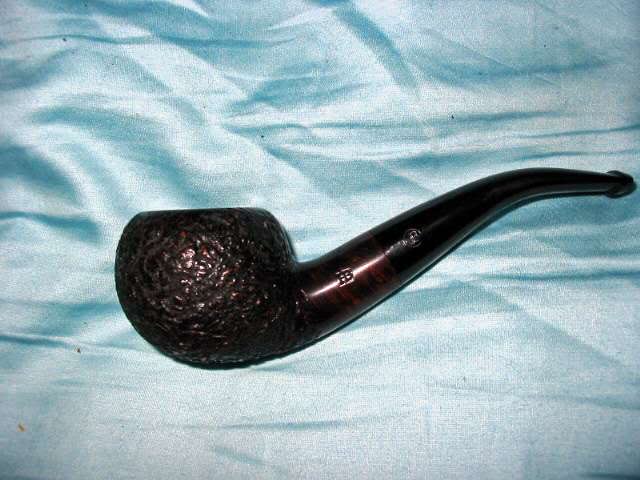
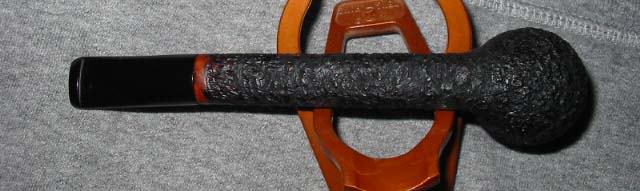
The fourth pipe pictured below was one of my creations, my first Frankenpipe composed of three different pipes. I used a Philips screwdriver that I made into a rustication tool to achieve the rustication pattern on the shank. I left areas in the pattern that were smooth. I stained the gouges with a black stain and the rest of the pipe with a medium brown stain. I wire brushed the rustication and then buffed it with Tripoli. img_6556
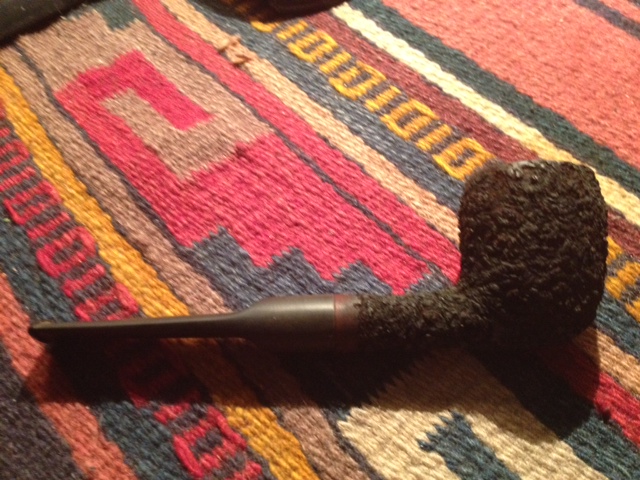
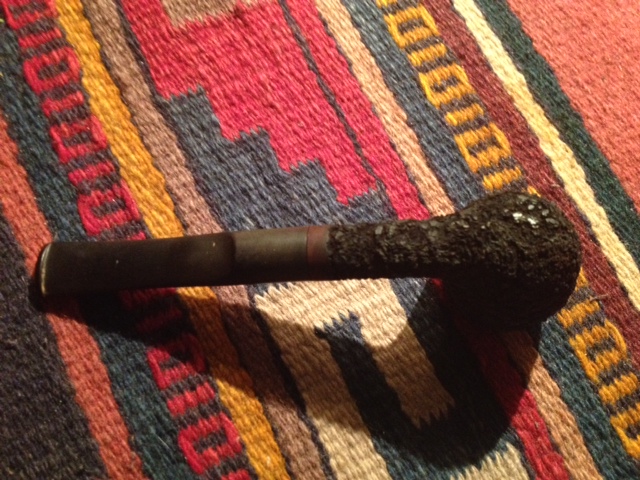
The fifth pipe pictured is another Canadian I rusticated. This one was a pipe that I finished shaping and made a stem for. The briar was bland with poor grain. It had a lot of bald spots in the briar so I decided to do a black and tan finish on it. IMG_2575 IMG_2577
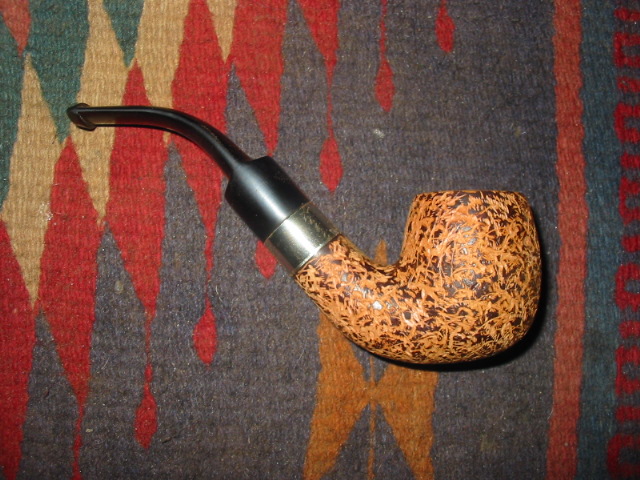
The next two rustications were done with the Philips screwdriver. I tried for two different finishes on these pipes. The first is quite deep but then brushed and buffed before staining. The idea was to give a random broken look to the pattern. I stained it with a medium brown stain. The second is a very craggy rough finish. I used the screwdriver and went over the briar three times to roughen it and give it the roughness I wanted. I reversed the stains on this one and did a medium brown understain and a black topcoat. IMG_7749 photo3
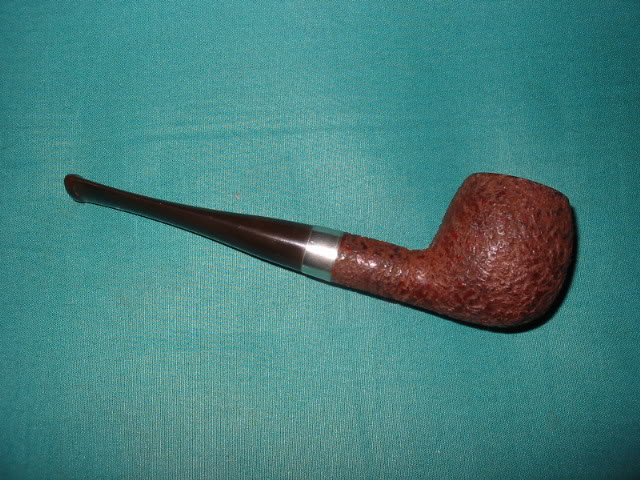
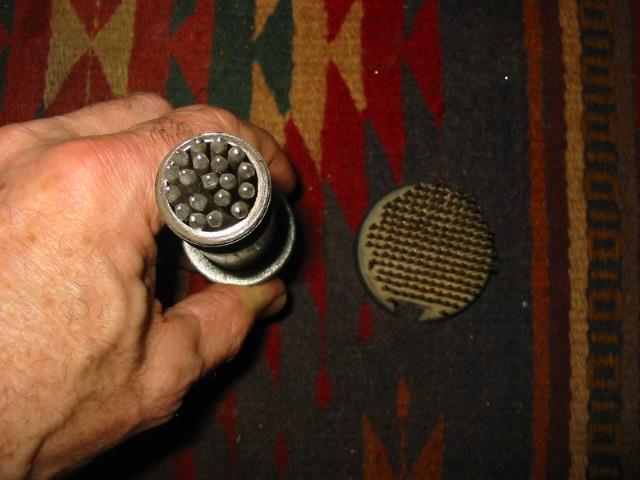
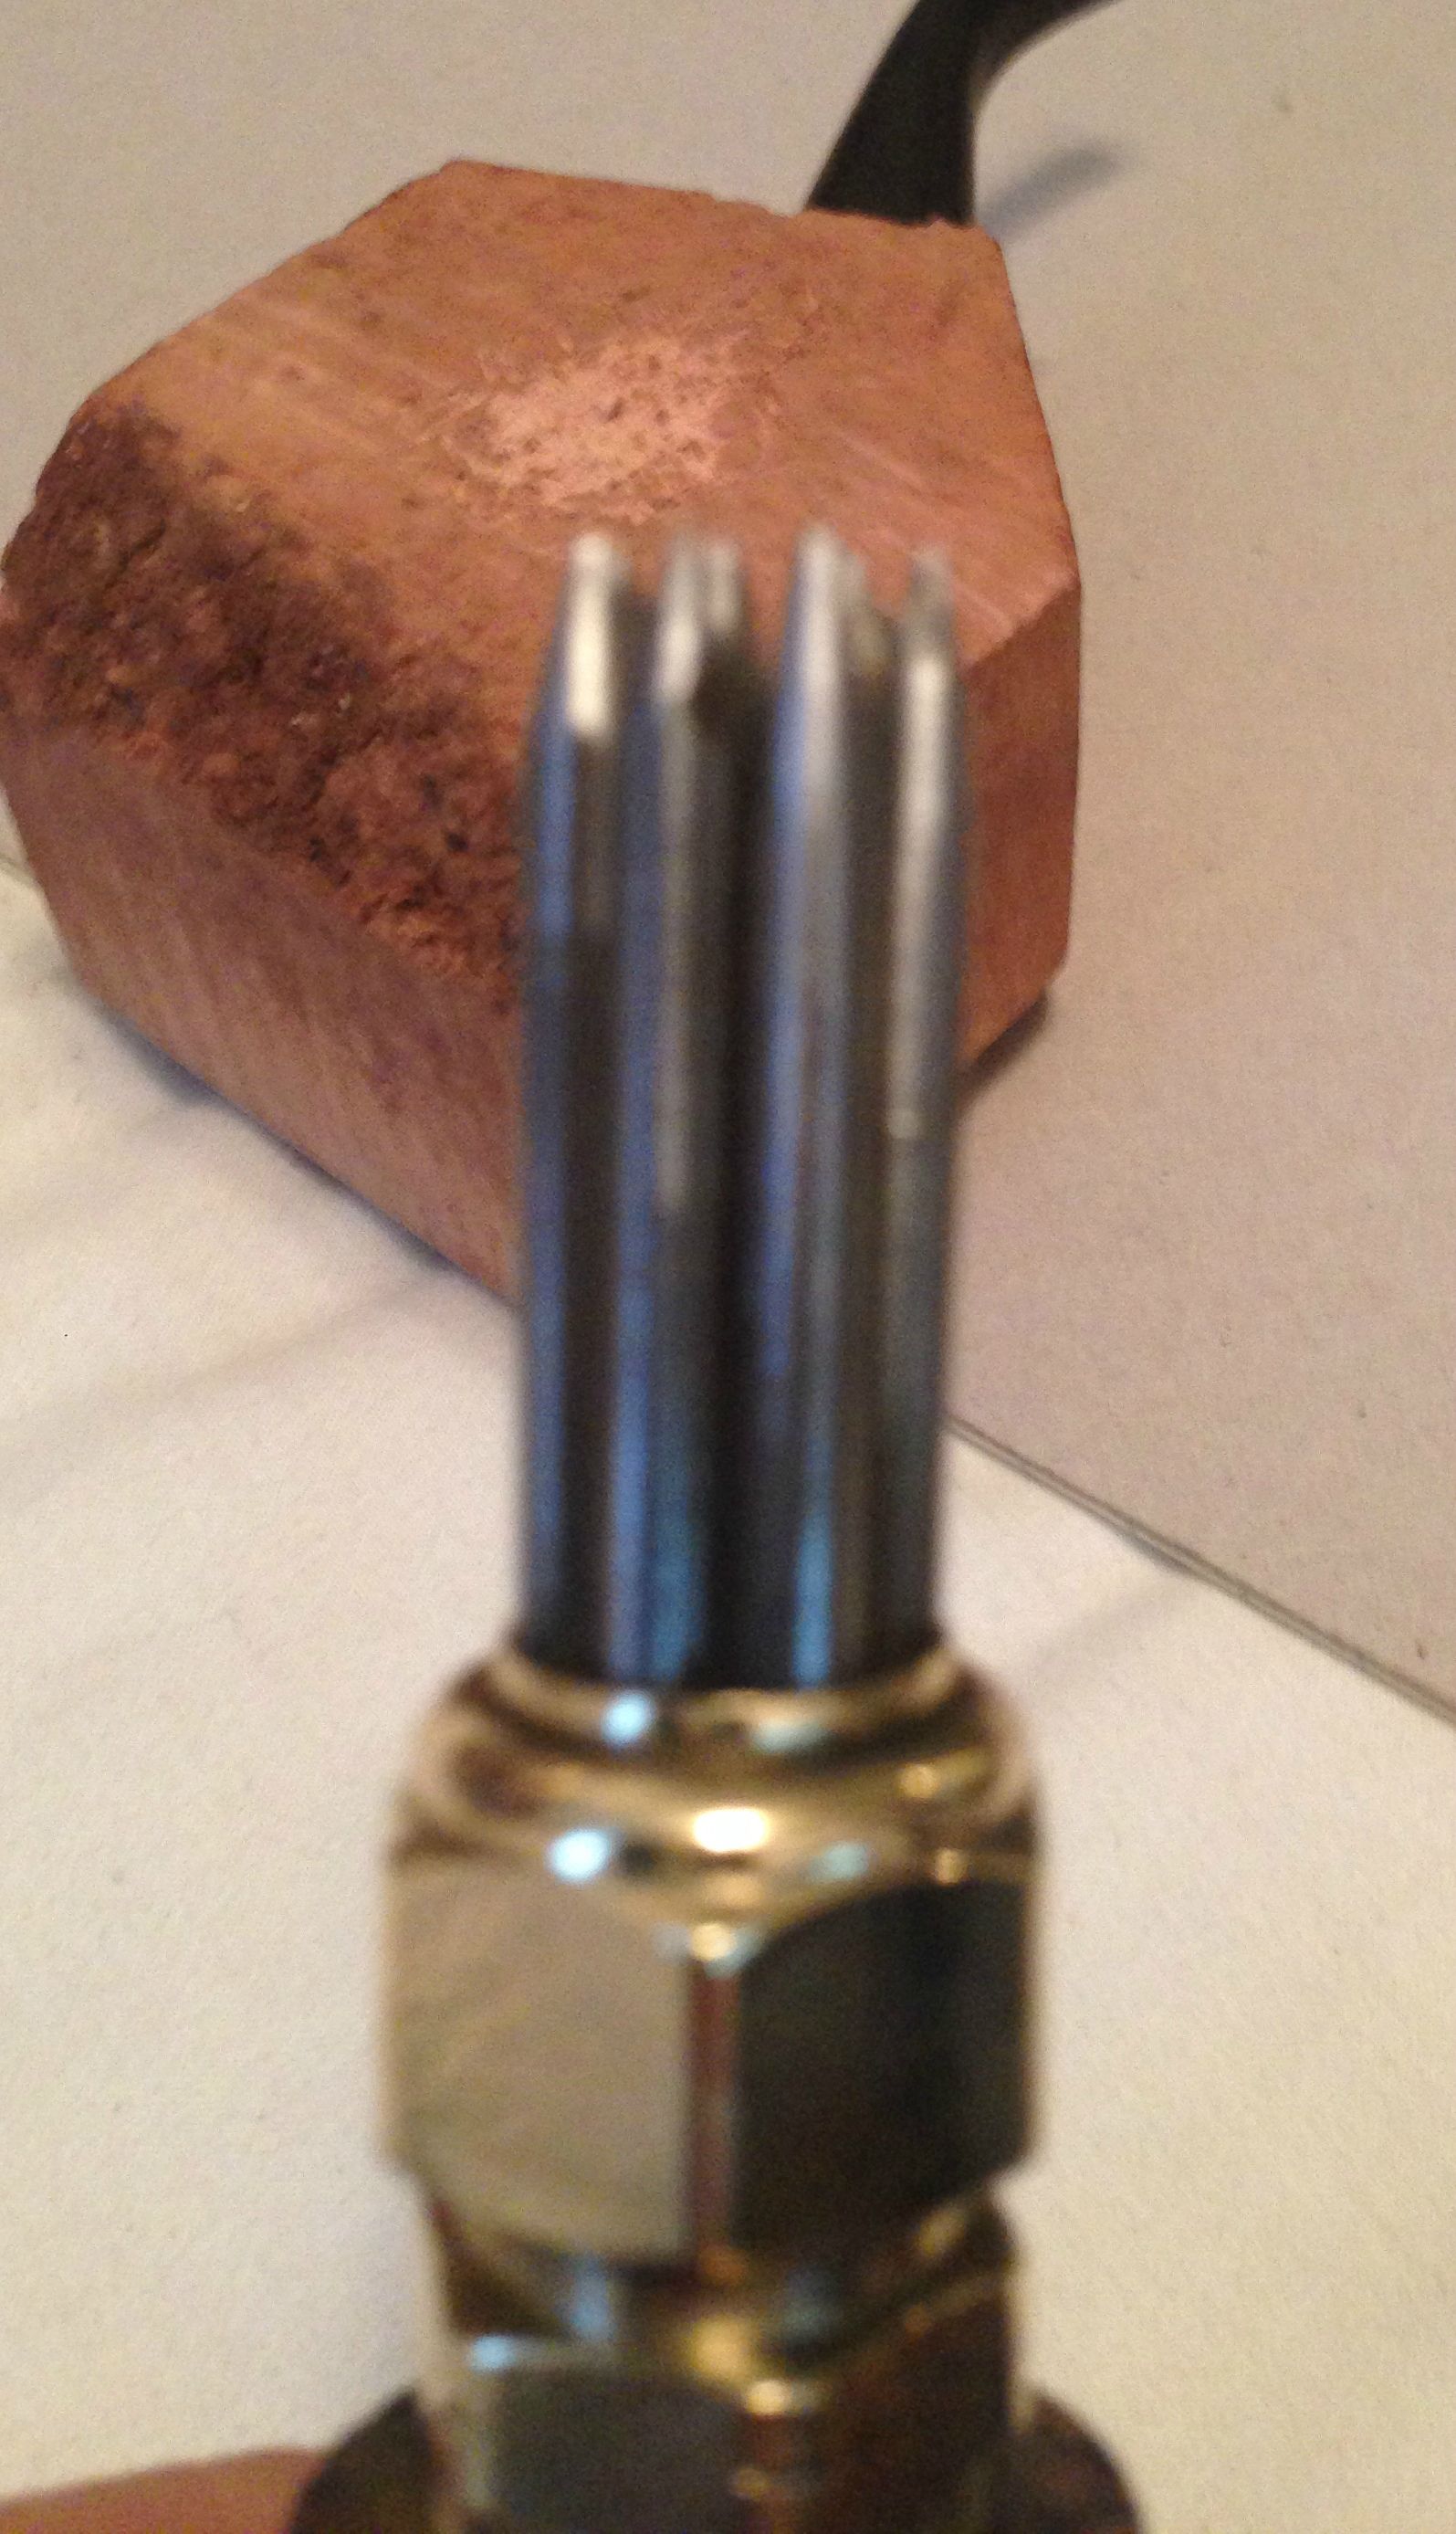
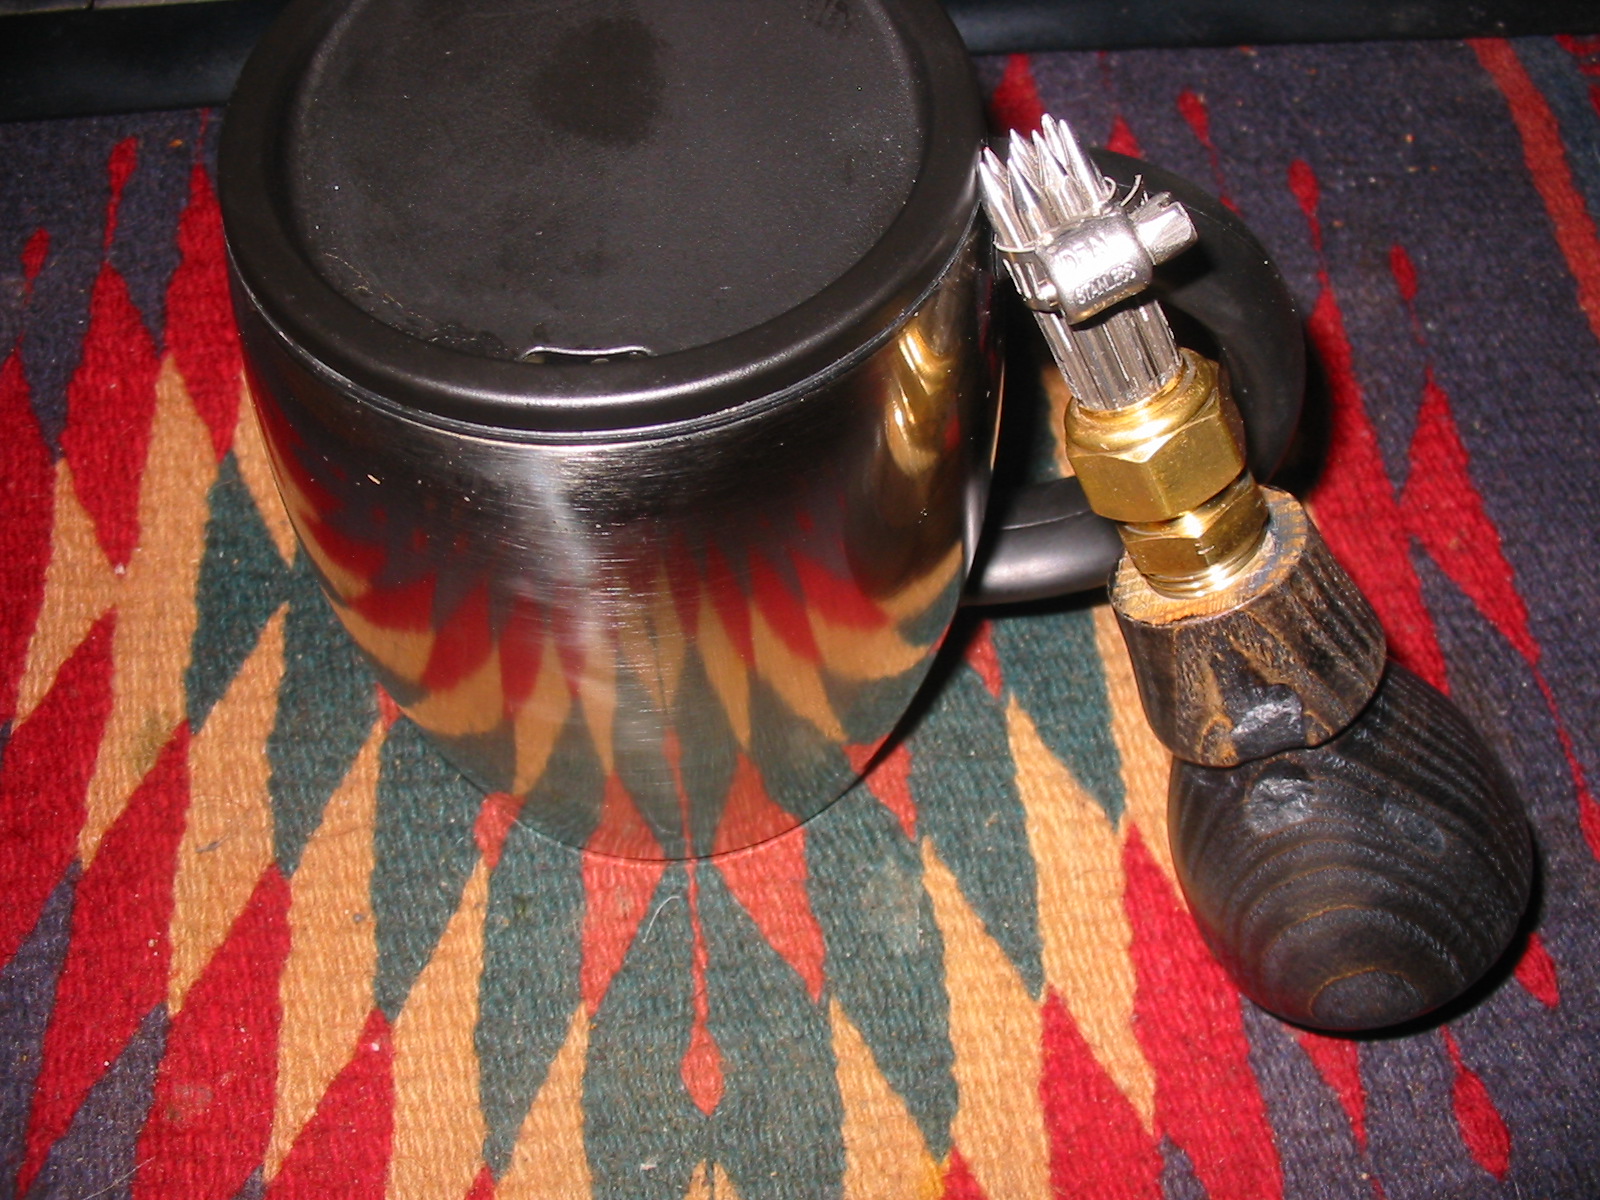
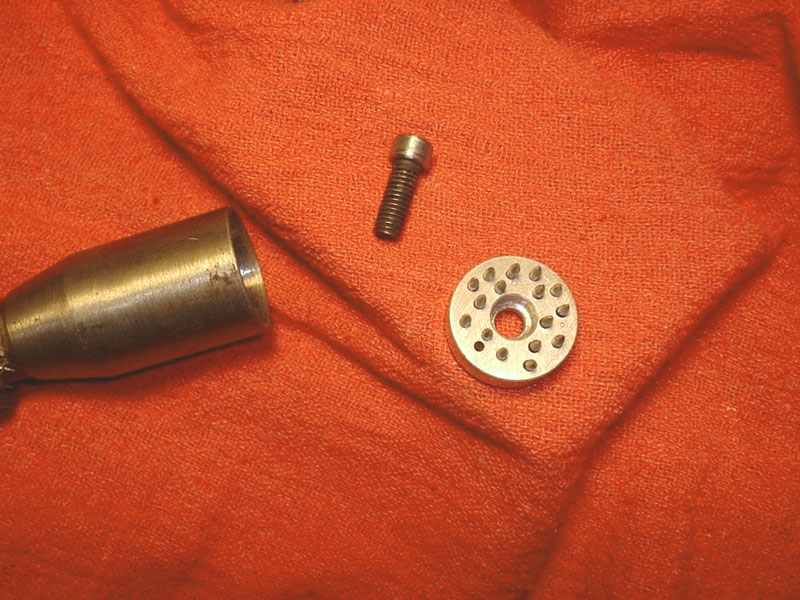
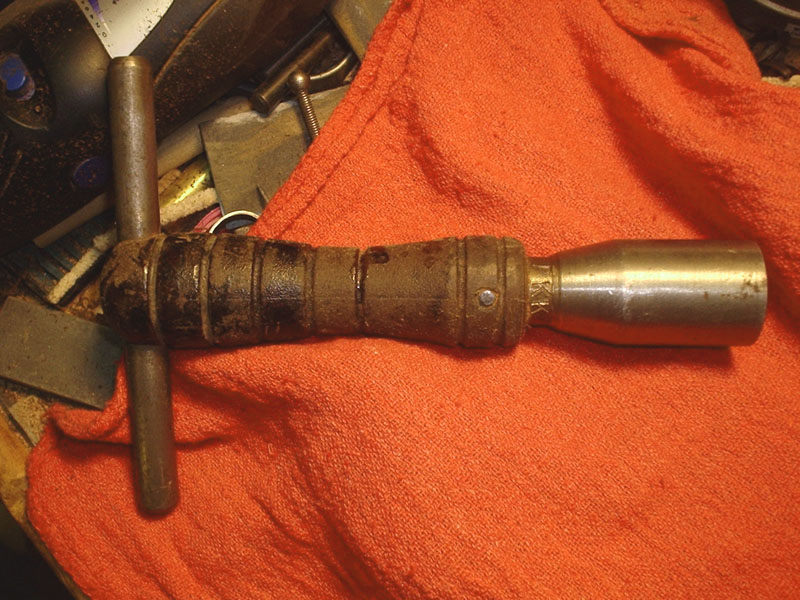
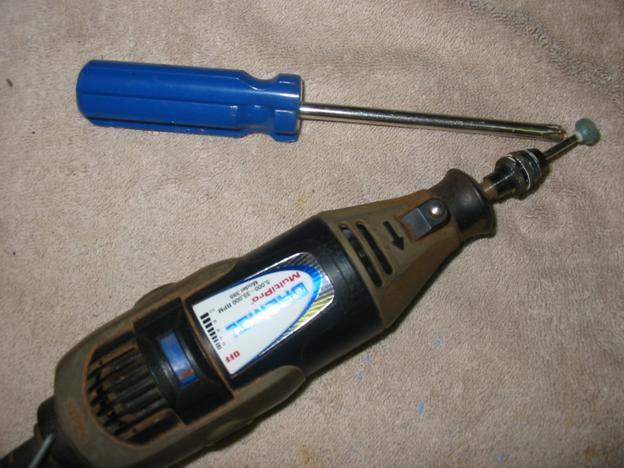
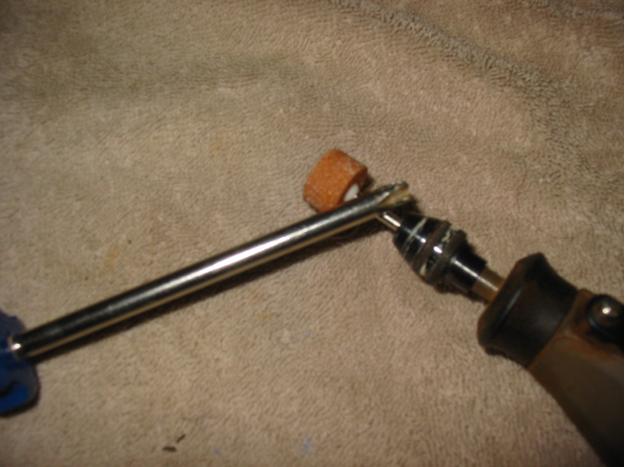
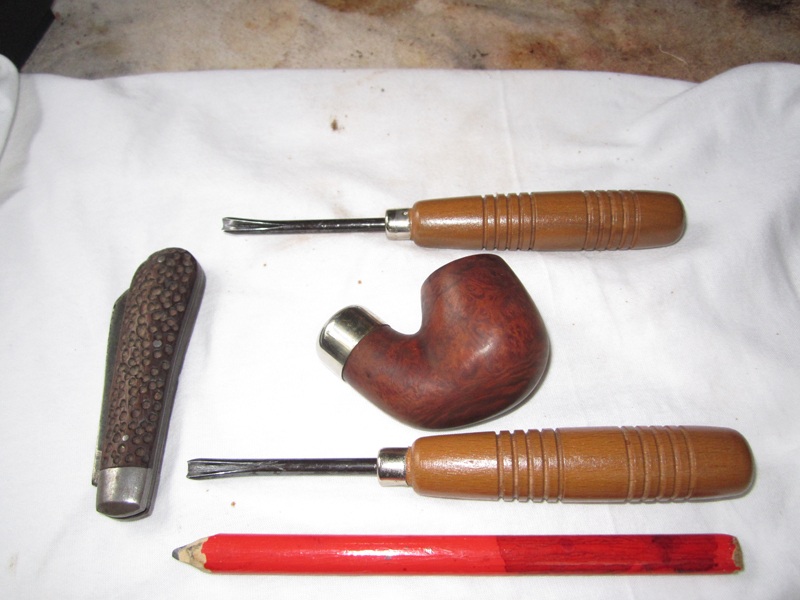
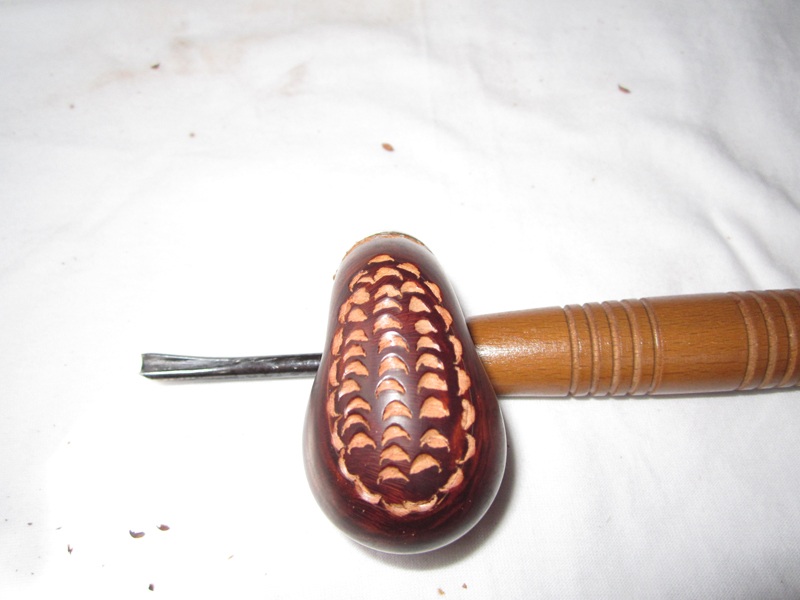
I have rusticated many other pipes using a variety of tools that I have developed or repurposed to experiment with over the years. I have used a pipe with nails, a handmade wooden handle with nails, a floral frog, a modified Philips Screwdriver a flat blade screwdriver notched and sharpened, and a Dremel tool with a variety of burrs. I have used different sizes and clusters of nails in the pipe and each one achieves a slight variation of pattern on the finished briar. Each tool delivers a different finish and look. Even with the same tool a variety can be achieved by wire brushing the finish, buffing or sanding. I have also used a combination of tools at times – the nails and the floral frog work well together to make a tighter smaller rustication while the screwdrivers and the nails also give a unique looking pattern.

However, no matter which tool I use I always follow the same process. I have broken it down into steps in the list below for ease of use.

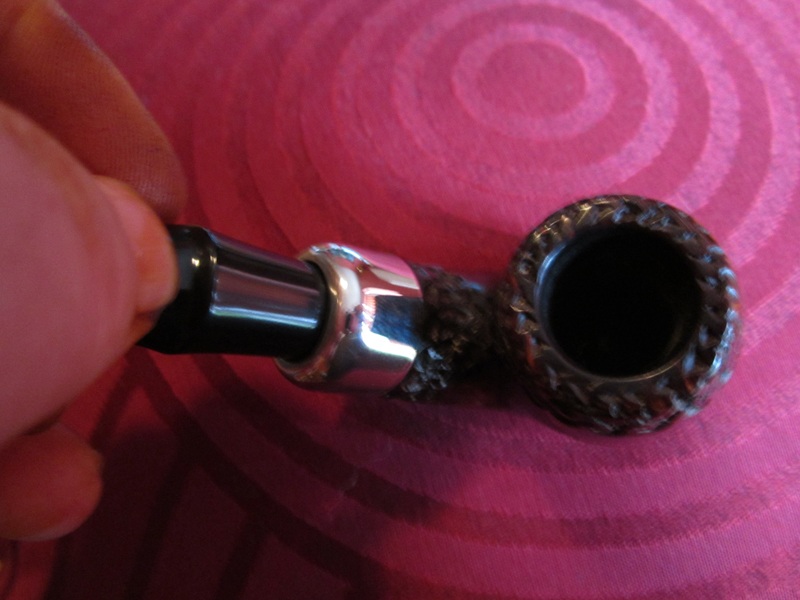
1. Clean the surface of the wood – I clean the surface of the briar with either acetone or isopropyl alcohol to remove the grime and the existing finish on the pipe. I do this because I like working on a clean surface. I know that others do not do this before rustication so the choice is yours.

2. Stain the surface with a dark stain to show contrast when rusticating – Many stain the briar with a dark stain before rusticating to make it easier to see the developing pattern in the rustication. Personally I only do this if the briar is raw and unstained. A stained pipe already has colour and the rustication shows up quite well.

3. Tape off any spots that you want to leave smooth using masking tape or painters tape. I wrap it with several layers of tape to protect the smooth wood underneath from an accidental slip when I am working the tools. I have also used scotch or cellophane tape. The idea is not to abuse the tape but use it as a straight edge to work toward and around. I often tape the shank end but you can also tape the line around the rim as well.

4. If partially rusticating a bowl mark off the area that you will rusticate with a permanent marker. On the Frankenpipe above I marked the angle of the shank and bowl junction that I wanted to rusticate.

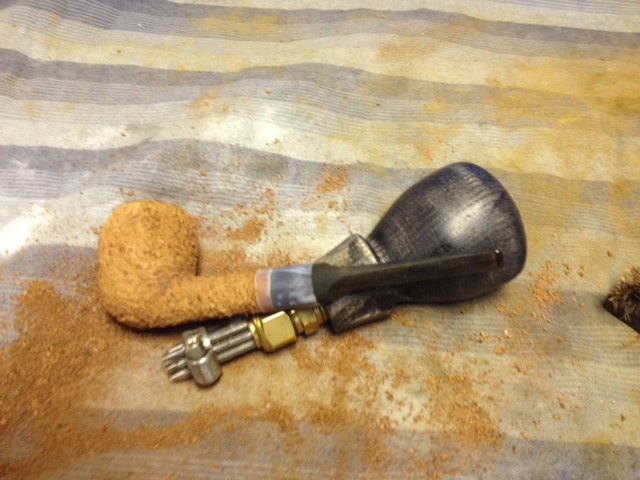
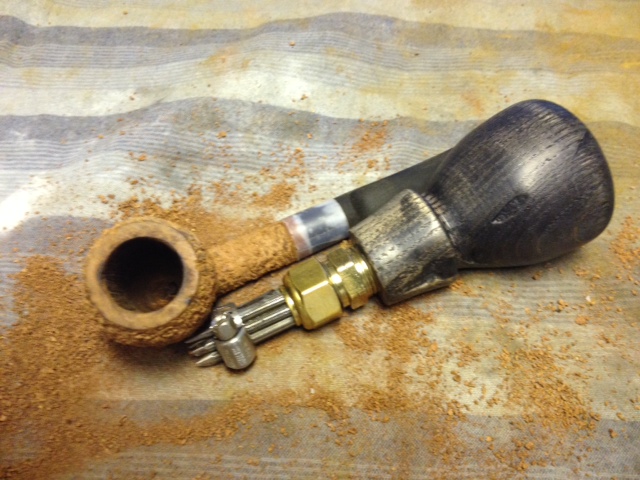
5. Choose the place on the briar to start – personally I always start on the side of the bowl when rusticating. I remove the stem and work on the bowl alone. I have seen others snap a tenon while rusticating so I remove it. I work from the side down to the bottom of the bowl. I work the bottom of the bowl and then move to the shank and work the side that connects to side I have rusticated. I then work my way around the rest of the bowl.

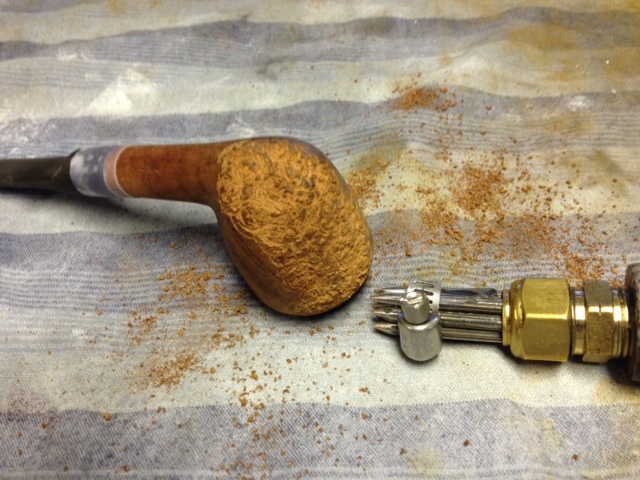
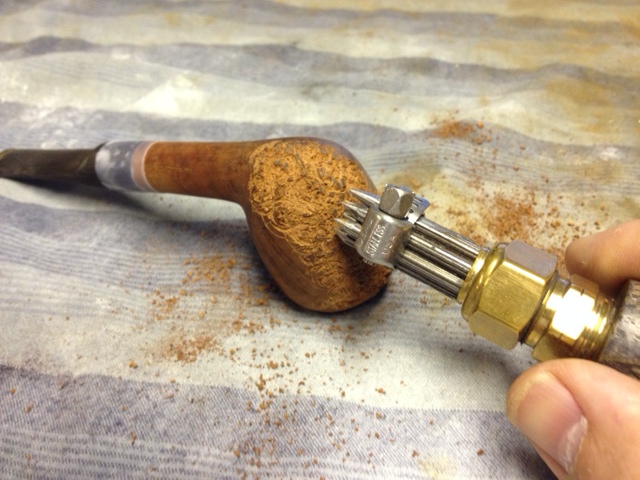
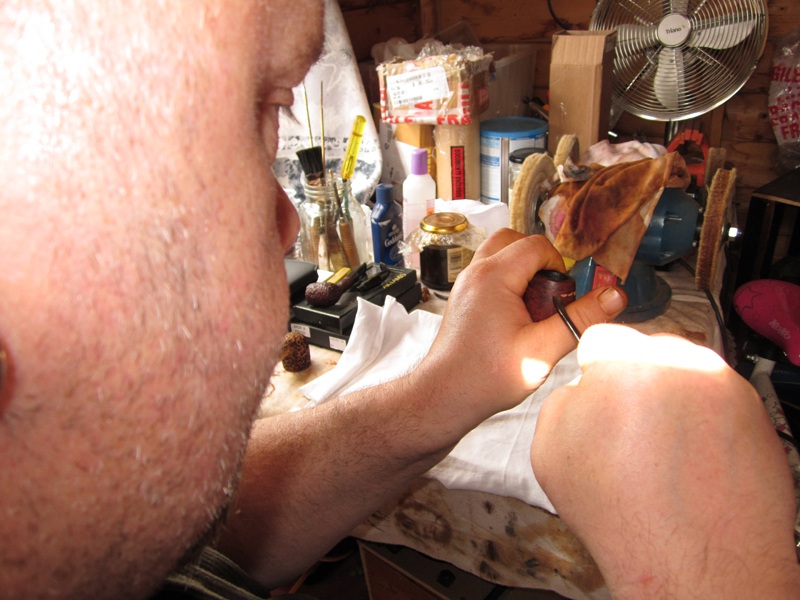
6. I rusticate by pushing the rusticator into the wood and twisting it to gouge the briar. The harder you push the tool into the briar the deeper the rustication will be. So decide how deep or rough a rustication you are aiming for and press accordingly. Do not be afraid to rusticate too deeply. Most people are too timid and end up with mere scratches on the wood the first time they try the process.

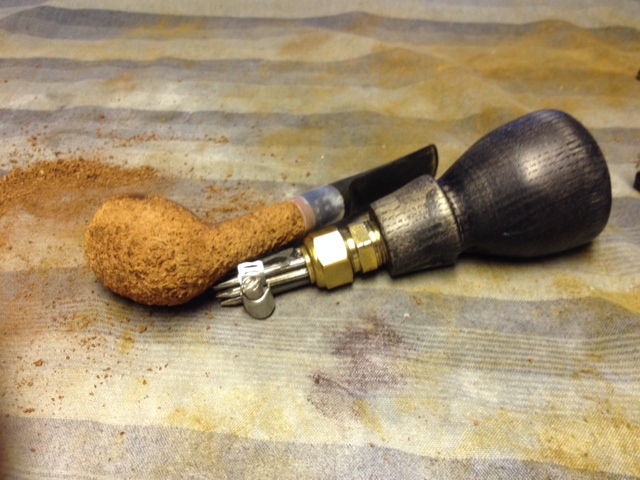
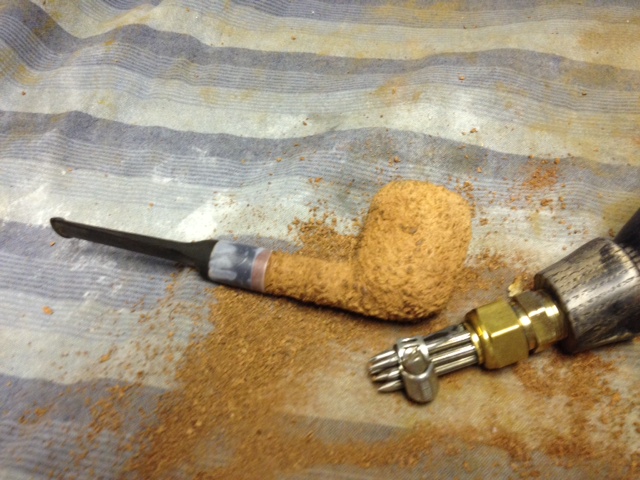
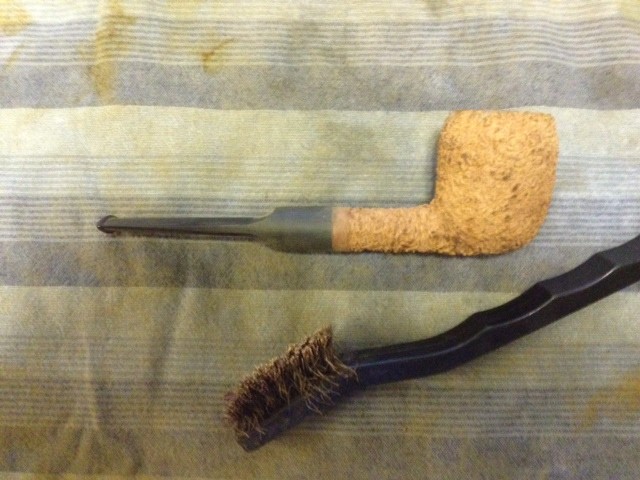
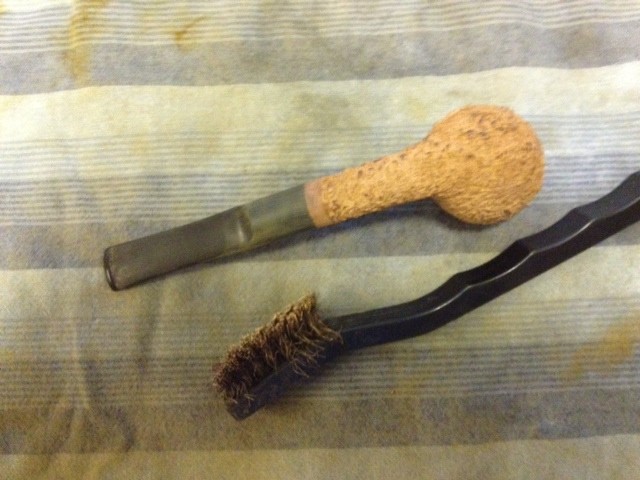
7. Use a wire brush to knock off loose pieces of briar and chips that are left behind on the surface. I brush quite aggressively as there is no fear of scratching the briar. The idea is to clean up the rustication pattern. The more aggressively you brush the more variation you will get in the pattern. You can also buff the bowl and shank at this point as well to further smooth out the surface. If it is still too rough for your liking then lightly sand the high spots with 220 grit sandpaper to knock it down further.

8. Clean off the bowl with isopropyl alcohol on a soft cloth to remove the dust left behind by rusticating and wire brushing. I do this to prepare the finish to be stained. It dries very quickly so it is not a problem to stain immediately afterwards. I also use an aniline (alcohol) based stain so it is truly not an issue.

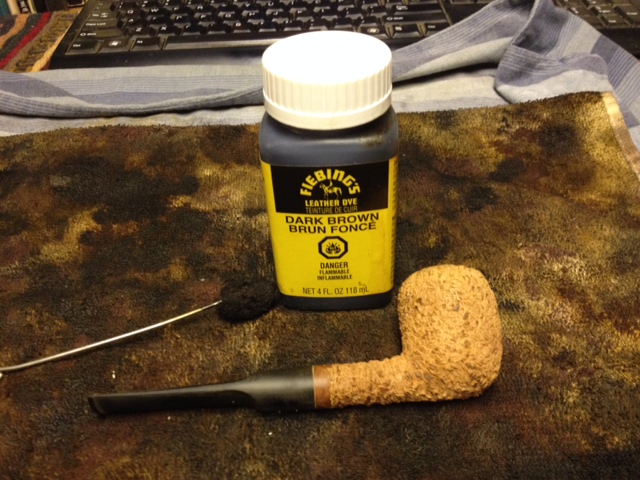
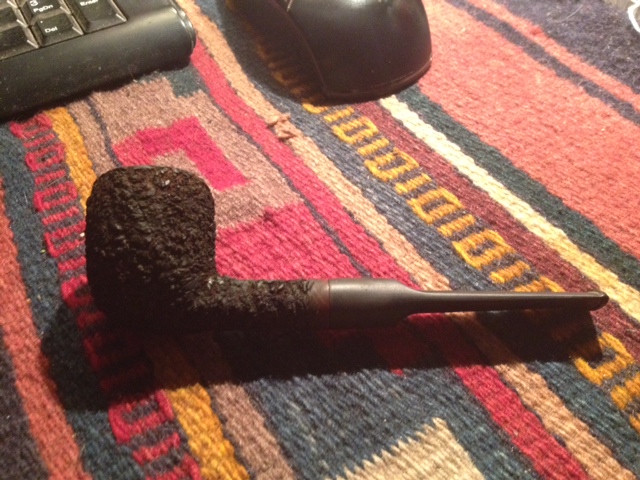
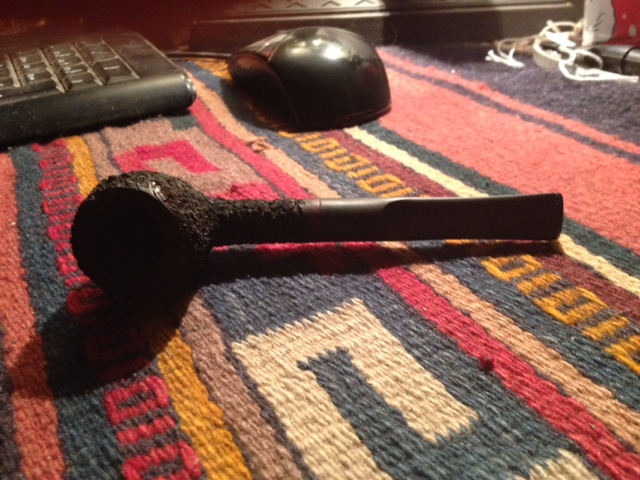
9. Stain the bowl with either the final stain or a base coat. I generally use a dark base coat and flame it with a lighter. Once it is dry wipe the high spots down with isopropyl or buff them with Tripoli. I then give the bowl a top coat of a lighter or the final stain and flame it again. I like the contrast look of dark valleys and lighter ridges on a rusticated pipe.

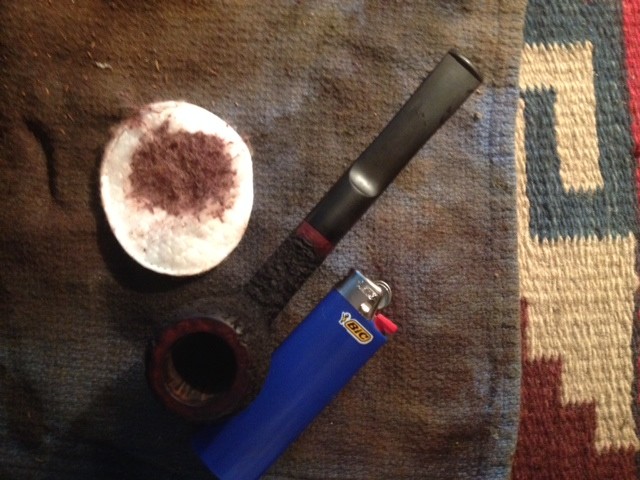
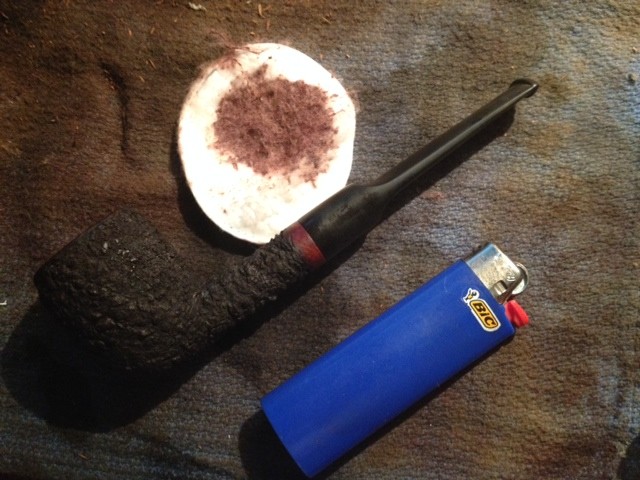
10. Buff the pipe lightly with White Diamond and then use Halcyon II wax to give the bowl a light shine. I have also used olive oil at this point instead of wax. I use a folded paper towel that has been dampened with olive oil and wipe down the bowl making sure to get into all the crevices or valleys in the finish.

That is the process I use to rusticate. The results are worth the effort to me. I like the feel of the rustication as the bowl warms in my hand. I like the looks of the finished bowl as it takes on age through use. Why not try it out on one of your own pipes or an estate that you have that is just too bland to draw your eye? Go for it and enjoy the process.

Now that the pipe has been restemmed it is time to rusticate it


I wrote about restemming this pipe in the post on Replacing a tenon in a stem with a minimum of tools (https://rebornpipes.com/2014/06/15/replacing-a-tenon-in-a-stem-with-a-minimum-of-tools/). The thing I forgot to mention is that the bowl originally had a threaded metal stem and a metal insert in the shank. I was able to remove the insert from the shank with no trouble and craft a push stem for the shank as a replacement. The stem came out great and with some work came out looking like new. In figuring out how to finish the bowl I was faced with a few choices. The briar was not terrible, I have seen worse but there were fills in the bowl. I could have picked them out and refilled them as I have done on many occasions but somehow that just did not attract me with this bowl. I had been given a rustication tool by Chris and had not used it yet so that was very attractive to me for this bowl (https://rebornpipes.com/2014/06/07/a-handmade-rustication-tool-gifted-by-a-friend-and-reader-of-rebornpipes/). The stamping on the shank was virtually buffed away so it was not something that needed to be preserved. So the decision was made. I would get to try out the new tool and see what kind of rustication pattern it would make on the briar and how comfortable it was in the hand as I pressed and twisted it into the wood. I also wanted to see if I could use it in tight spots up against the bowl and shank and close to the stem/shank junction.
rustic1
I started on the front of the bowl and pressed and turned the tool into the briar. It worked like a charm. The nails were sharp, the grouping tight and workable on the pattern, the handle was extremely comfortable and spread out the pressure across my palm. This was going to be a piece of cake. It would be no problem to finish rusticating this pipe with a lot less pain in my hands. I wrapped a strip of scotch tape around the shank to make a protective line to work toward on the shank. I wanted to leave a smooth band on the shank so this would remind me where to quit twisting the tool into the wood. The next series of eight photos show the process from start to completion. It probably took me the better part of an hour and a half to rusticate the bowl and shank. I worked it over several times during that time to get a rough finish. I wanted it to be very tactile and rough kind of like a sea rock finish so I pressed hard when I worked over the wood. I left the rim smooth as I wanted to stain it to match the band I was leaving around the shank. The two would provide some contrast to the rustic finish on the rest of the pipe.
rustic2

rustic3

rustic4

rustic6

rustic7

rustic8

rustic9

rustic10
When I finished rusticating the briar unwrapped the scotch tape from the shank. The line was fairly straight and provided a nice contrast of finishes between the stem and the rustication. Then I used a brass tire brush to knock off any loose pieces of briar on the bowl. I find that using the tire brush evens out the finish and cleans up the briar once I have finished with the hard work.
rustic11

rustic12

rustic14

rustic15
I sanded the band on the shank and the rim with a medium and a fine grit sanding sponge and a fine grit sanding sponge to prepare them for staining. I decided to use two different stains on the bowl to get some depth to the finish. I began with a dark brown aniline stain. I applied it with a wool dauber and let the stain permeate deep into the briar. I flamed it to set it. Reapplied the stain a second time and then flamed it again.
rustic16

rustic17

rustic20

rustic21

rustic22

rustic23
I wiped the bowl down with acetone and isopropyl alcohol on a cotton cloth to remove the stain from the highpoints on the bowl finish and on the band and the rim. I repeated the wash until I had the stain coat the colour I wanted. The dark brown sat deep in the grooves and the high spots were lighter in colour. I then stained the bowl with the second colour, a oxblood or cherry coloured aniline stain. I applied it with a cotton pad and daubed it onto the band, the rim and the high spots on the bowl. I flamed it, reapplied it and flamed it again. Once it was dry to the touch I hand buffed it with a soft cotton cloth.
rustic25

rustic27

rustic29

rustic30
The cherry/oxblood stain worked well on the band and the rim. It made them stand out against the darker brown of the rustication. In the light the texture of the rustication has both a dark brown look in the crevices and a reddish tint on the high spots. The contrasts in the stain on the rustication came out well and the smooth band and the rim work well with the rest of the pipe. Interestingly, and this does not always happen for me, the stain came out exactly the way I was hoping it would when I started the process.
rustic31

rustic32

rustic33

rustic34
At this point all I had left to do was to work over the stem with the micromesh sanding pads and then give it a buff to polish it. I followed my normal process on the stem. I wet sanded it with 1500-2400 grit micromesh sanding pads and dry sanded with 3200-12,000 grit pads. I rubbed the stem down with Obsidian Oil and then took it to the buffer to give a light buff with White Diamond and a blue plastic polish. I finished by giving the rim, the band and the stem multiple coats of carnauba wax and a final buff with soft flannel buffing pad. The finished pipe is shown below. It has come a long way from the neglected bowl that sat in my refurbishing box for a long time with no stem. Now it is ready to fire up and enjoy.
IMG_6848

IMG_6849

IMG_6850

IMG_6851

A Handmade Rustication Tool – Gifted by a Friend and Reader of rebornpipes


Several weeks ago now I was in correspondence with Chris, a reader of the blog and an online friend, regarding the design and crafting of a rustication tool. I had sent him pictures of the one I was currently using. I had made it using a piece of pipe. I enumerated some of the issues that I had found with the tool as I used it. These mainly concerned comfort and ease of use. The pipe worked well to stabilize the nails and keep them in place. There was no flex in the nails as I pressed them into the briar. The configuration and number of nails was fine in terms of coverage on the briar. Adding more or fewer nails did not seem to be a relevant concern as doing so would either broaden or reduce the area covered per twist of the tool. The comfort issue predominantly revolved around the end cap that I used to hold the nails in place and form the handle on the tool. When pressed into the briar the cap pressed into the palm and was uncomfortable. The pressure on the palm of the hand made it necessary to pause frequently to give the palm rest. I had modified the tool with a “T” handle and found that though it was better but still did not give comfortable hand feel when pressing into the briar.
rusticator 5

rusticator 4
Chris decided to improve on the design and come up with a far more functional and beautiful edition of the tool. It certainly would not be hard to improve on the looks and functionality of hte tool. He wrote and asked me questions regarding the tool I had and as he worked on the rusticator we exchanged a series of back and forth emails. It saw several iterations before he arrived at this version of the rustication tool. He turned the handle on his lathe to try and address the comfort issues that I had raised in our discussions. He tapped and fitted the threaded brass coupling on the handle to hold the nails. He cut back the nails with a grinder and inserted them in the brass coupling. To hold them in place he screwed on an end cap. At this point the tool looked great and was certainly easier to hold and press into the block of briar. We wondered about the length of the nails and the effect on them when the tool was pressed and twisted into the briar.
rusticator 2Before getting into the trial of the tool on the block of briar I want to point out one of the best features of the tool in my opinion. That is the method Chris used to install the nails in the brass coupling makes the nail head changeable. The coupling can be unscrewed and a new head replaced. That alone fascinates me as it will make it possible for me to do some experimenting with a variety of nail configurations and sizes in the future.

I have always wondered if the size and configuration of the nails affects the pattern of the rustication. It seems logical to me that smaller nails will make a finer rustication and approximate a sandblasted look if done properly. Larger nails will give it a more pebbled look. One of my next steps with the tool will be to craft a series of nail heads that I can experiment with.

Chris tried it out on a block he had present. He found that the nails wobbled and splayed with the pressure into the block. The major difference in this model in comparison to my pipe model is that the nails extended from the brass cap further. This length made them less solid and accounted for the play in them when used on the briar. Chris and I discussed how to stabilize them. He sent me photos of the tool with an adjustable hose clamp applied to the nails about 1 inch from the tip. This worked well but took away some of the natural beauty of the tool.

I suggested that he bind the nails together using JB Weld and see what that would do. He did and once the Weld had dried and cured he tried the tool. He found that the nails still flexed and the JB Weld broke loose.
rusticator 1

rusticator 3
After the test runs he put the hose clamp back in place for this version of the tool and sent it to me. He wrote that in future versions of the tool he will shorten the length of the nails. That should give the tool stability when pressing and turning it into the briar.

The tool arrived here in Canada while I was travelling and was waiting for me when I got home. I opened the box and took the tool out to look at it. Chris did an amazing job in crafting this rusticator. I want to thank him for sending it to me. I appreciate his willingness to pass it on to me. It will certainly get some use from me. I look forward to using it and making further recommendations for future versions. One thing I can say with certainty at this point is that it fits more comfortably in my hand than the pipe version that I was previously using. I will keep you posted on how it works. Thanks again Chris.

Here are some photos of the tool when it arrived here in Canada.
IMG_6790

IMG_6792

IMG_6793

Another Rustication Tool


Blog by Steve Laug

Last week I was chatting with Dan Chlebove of Gabrieli Pipes about how he accomplishes the rustication pattern he uses on the rusticated pipe that he makes. I have liked Dan’s rustication style since I first started following his work. One of the Gabrieli pipes that I have in my collection displays his rustication. It has a tactile, pebbly feel to it and is comfortable in the hand.

OLYMPUS DIGITAL CAMERA

We talked about it for a while as he described the tool he uses. He sent me some photos of the tool. He says that the tool was a gift from Alberto Bonfignoli, maybe 12 yrs ago. Dan had met him in Richmond and talked with him, As Alberto looked at Dan’s early work and he asked if he had a tool to rusticate. When Dan told him no Alberto insisted on having Dan’s mailing address and promised he would send him one. Dan says, “VERY kind of him to a new
pipemaker I thought. It looks very Medieval eh?”

The tool is made up of small nails held in place by a perforated piece of aluminum and held in place with a hex screw.
OLYMPUS DIGITAL CAMERA

OLYMPUS DIGITAL CAMERA

OLYMPUS DIGITAL CAMERA

OLYMPUS DIGITAL CAMERA

OLYMPUS DIGITAL CAMERA

Thanks Dan for the photos. Now I have to figure out how to craft one for myself. That looks far more kind to the palm as it is twisted into the briar than the tools that I use.

Making a Rustication Tool out of a Phillips Screwdriver


Blog by Steve Laug

I have made several rustication tools from screwdrivers in my tool box. It is a pretty simple process so I thought I would document it through text and pictures. Hopefully some of you will find this useful.

I start with a regular Phillips screwdriver which is a screwdriver with a blunted pointed tip that is shaped to fit the crossed slots in the heads of Phillips screws. It is distinguished from a Reed and Prince screwdriver which has a pointed tip. The photos below show the tip of the screwdriver before I begin working on it.
rust1

Rust2

You can choose any kind of Phillips screwdriver or Reed Prince screwdriver but I would recommend one with a comfortable handle. The one I made in the photos below has a hard plastic handle and when I am pushing and turning it into the briar it is hard on the palm of my hand so I wrap it in a thick cotton cloth for cushioning. You may wish to use one with a softer rubber coated handle to begin with.
rust3

A Dremel makes short work of the shaping and cutting process in crafting this tool. I use several Dremel bits to do the grinding. The first is an 11/16 x 3/8 inch Blue Cobalt Grinding Stone with a 1/8 inch shank. It is 2 inches in length from shaft to tip. The second is a 19/32 x 11/32 inch Brown Aluminum Oxide Cylinder Grinding Stone with a 1/8 inch shank. It is 1 1/2 inches in length from shaft to tip. I finish by polishing it with a sanding drum on my Dremel.

The next two photos show the Cobalt grinding stone on the Dremel and the work of cutting the tip off and then cutting into the grooves of the cross mark.
rust4

rust5

The next four photos show the finished work of the Cobalt grinding stone. I apologize for the poor quality of the photos but they give the idea of the process. The first photo show an end view of the four points beginning to be defined on the tip of the screwdriver. The next three photos show profile views of the tip at this point in the process. Once I get to this point it is time to change the grinding stone for the aluminum oxide stone.
rust6

rust7

rust8

rust9

The next photo shows the aluminum oxide grinding stone in the Dremel and the work ready to begin in grinding the tip to sharper and more defined points. I do this with the grinding stone held at an angle to the tip so that I can cut valleys into the cross point of the tip.
rust10

The next series of photos show the tip of the tool in its finished condition after the aluminum oxide stone has been used to cut the grooves deeply and define the points of the tool. At this point in the process I switch to the sanding drum and polish the tip and burnish the edges of the teeth.
rust11

rust12

rust13

The tool is finished and ready to be used to rusticate the surface of the briar. The method is quite simple. The tip of the tool is pressed into the surface of the briar and then twisted and turned as it cuts grooves and valleys into the briar. This is done over the entire surface of the pipe or in selected areas. The beauty of this tool is that is can be used in very tight areas of the surface such as the angle of the bowl and shank union. You can also work it carefully to leaves unmarked surface as you wish.

Peterson Rustication pictorial – Kirk Fitzgerald


When Kirk Fitzgerald posted this step by step tutorial on Smokers Forums I thought it would be great to have it on the blog. I asked Kirk if I could post it on the blog and he granted his permission. So without further introduction here is his rustication process. Kirk is the founder of the Pipe Smokers Cubby Web Forum http://www.pipesmokerscubby.com/cubby.php

I was asked if I would do a step-by-step rundown on my own rustication process, so I have rusticated my own Peterson bent bowl for this purpose.

So before we get going, let’s see what the process will do to the bowl of the pipe

Image

The pipe’s bowl, the two chisels I use, my crappy pencil and the knife I use to perma-line the boundaries for the areas to be rusticated

Image

Here we mark the rustication boundaries in pencil

ImageImageImage

Here we perma-mark the boundaries using a sharp knife to scratch out the linesImageImageImage

Notched out the shank boundary linesImage

Here’s me notching the bowl rim boundariesImage

Notched the bowl rim boundaryImage

Here I have started notching the bowl topImage

Here’s the bowl top notchedImage

Start of the base boundary notchesImage

The base boundary notches are now doneImage

This is where we are so far, getting thereImage

Start to notch the bowl rim edgeImage

Finished notching the bowl rim edgeImage

Here I have now notched the bowl top rimImage

Notching the bulk of the base interiorImage

Here I have notched out the bulk of the bowl top rim interiorImageImage

Here I have notched the remainder of the base interiorImage

Here I am starting to remove the remaining surface finish with 180 wet and dryImage

Here the remaining finish is now removed; note I have made sure it looks distressedImage

Here I have now sanded the bowl smooth using 400, 600, 1200 grit wet and dry sand paper, note the effect is looking distressedImage

Here I have applied a dark brown stain, note it is a full and generous applicationImage

Here I have applied a dark red stain, again note the fullness of the coatingImage

Now I have applied the final stain, a mid-brown, coverage is not so important with this one, a quick cover would do but I have opted for a full and generous application.Image

Now I have given the bowl an alcohol rub-down using a clean cloth and Isopropyl alcohol, note I have almost wiped the stains away, but only ‘almost’Image

I have now applied 2 very generous applications of Tripoli using the buffer wheels, this stage is vital to the finish of the bowlImage

This is after I have brutalised the bowl on the buffer wheels to remove some staining to distress the bowl furtherImage

Here I have used White Diamond on the buffer wheels to remove the Tripoli much and shine the surface a little before the waxImage

Here I have applied the first coat of wax and carnaubaImage

All done now, here is the final bowl re-attached to its polished stem.ImageImageImageImageImageImageImage

Old Croydon-Reborn


I have spent a bit of time on this old Croydon Bent (Peterson Line of seconds I believe). In fact I probably spent more time than I should have done, judging by other refurbishers throw away buckets. Sometimes I just have to see what I can make of an old tired ugly looking pipe. It is a challenge more than it is a labour of restoration. In fact it could probably be argued that when I am done with this one it really no longer should be considered a Croydon at all. I suppose it is a matter of how far one goes in the process of restoration before it becomes a totally new work of briar. In my mind this one would probably qualify for the removal of the name – or at least a hyphenated name CROYDON-REBORN.

When I received this one it was in pretty rough shape. In the pictures below you can see the state of the finish on the bowl. There were places where pieces of the lacquer finish were peeling away and falling off. The stain on the bowl was spotted and variegated. Even the many fills all over the bowl had shrunken significantly and what remained were dips and divots in the surface. The rim was one part of the pipe that was in pretty good shape. It had some tar build up and a bit of blackening but no nicks and dents. That is actually remarkable given the condition of the rest of the pipe. The silver shank cap was split in half and torn from the stem being jammed in and out of the bowl. The P-lip stem was also marked with tooth chatter, was oxidized and dented.

ImageImageImage

I did not have any end caps in my collection of pipe odds and ends so I decided to put a regular nickel band on the shank as it was thin and weakened from the broken shank cap. I cleaned the shank end with alcohol and dried it out. I heated a band and pressure fit it on the shank. There was a small gap at the edge that I filled with wood glue to give stability to the shank. I probably should have waited to apply the band but the shank seemed fragile and I wanted to stabilize it before further work on the bowl.

I have never liked the thin Peterson type stems so I decided to restem it with a saddle fish tail stem. I used my PIMO tenon turner and turned the tenon close and sanded it to a good tight fit. I used my Dremel to take down the excess diameter of the stem and worked on the ridges and seams with the Dremel. I sanded the roughness of the new stem until it was smooth with 240 grit sandpaper followed by 400 and 600 grit wet dry sandpaper and a bit of water. It was finished with the regular regimen of micromesh pads – 1500, 1800, 2400, 3200, 4000 and 6000 grit. The final polish was done on the buffer with White Diamond and carnauba wax.

The bowl was a major problem. I tried to strip the bowl using acetone and 99% Isopropyl alcohol and could not break through the finish – don’t what they coated it with but it would not let go. I resorted to sanding the bowl to try and remove the finish and sanded, sanded and re-treated it with acetone and alcohol. The finish was finally gone and I had a raw briar bowl with so many fills in it that it looked like it had freckles. I decided to try staining it with a dark brown stain to hide the fills and give it a good deep colour that was a bit opaque. Once it was dry I buffed it and polished it with wax. It looked really awful and I hated it!!! Soooo… I decided to rusticate it. I used my fist full of nails (pipe with nails inserted in it) to do the rustication that appears in the photos below. The previous coat of stain that I had applied helped with the process of rustication and I could clearly see where I needed to do a bit more work. This is when I wished that the band was not present as it would have been a bit easier to avoid contact with the band and the rusticator.

Image

ImageImage

Once the rustication was acceptable to me, and the pipe felt good in the hand I prepared it for staining. On this one that involved using the floral frog to knock off any loose chips of briar and to smooth out the surface before I wiped it down with a damp alcohol cloth. I also sanded the rim smooth and used the micromesh to get rid of any scratches. A smooth rim and a smooth spot around the Croydon stamping would look good on the finished pipe. I decided to go for an aged leather like finish on this pipe as it seemed to fit the shape and the look. I gave the pipe a coat of black stain as an undercoat and then buffed it off the high spots. I gave the entirety a coating of Fiebing’s Medium Brown for the top coat. I flamed it and after drying took it to the buffer for a light buff. I waxed it with Halcyon II and buffed it with a soft cloth to give it the final look. Below are pictures of the finished pipe. In my book it is a significant improvement over the original!

ImageImageImage

Rustication – A Pictoral Essay


Over the years I have been developing a process for rusticating pipes. I have used it on old estates that I have been given or purchased where the finish did not work for me or it had too many fills or pits. The tools I use are pictured below. The one on the left is a variation of a tool that I made from plans on Tyler Lane’s Pipe making site. It is made of a piece of black 1 inch pipe. I packed it with galvanized nails and then a cap is put on the end of it. The cap is packed with steel wool to keep the nails from shifting. I plan to make another variation on this and use a T union that will serve as a handle. The current cap is hard on the palm of the hand as I twist it into the surface of the pipe. I also want to weld the nails in place to avoid any shifting of them as I use the tool. The second tool is a florist’s frog – it has a lead base with sharp spikes (watch your hands and fingers on this one) that is used in floral arrangements. I got this at an antique shop. I want to create a wooden handle for this one to give me a bit more distance from the surface of the briar when I am working it over the wood.

I start rusticating the briar with the large tool on the left and then finish with the smaller one on the right should I want to achieve a bit different pattern or rustication. Either individually or together they provide an interesting rustication. The larger tool does the gross work and the smaller one adds finesse to the rustication.

ImageImage 

For the sake of showing the process I have chosen the following old timer – a Dr. Plumb carved apple that had a finish that I did not like. It had a carved finish of lines around the bowl and then horizontally on the shank. The original pipe is pictured below in the first two pictures to give an idea of the original state of the pipe. I also include pictures of a Canadian that is riddled with fills. It smoked great but just looked awful in my opinion. I wanted to show pictures of both a previously carved finish and one with fills to show what I see as an improvement in both of these pipes after rustication. Each one has a slightly different rustication pattern to it as I was trying to achieve something different in each case. The pictures that follow will give you an idea of how the process works from start to finish. I conclude the essay with two added pipes that I rusticated to give a broad sampling of the finished look of my rustication method.

ImageImage 

To begin the process I want to work with clean pipes that do not have any finish on them other than the stain. I put the bowls in an alcohol bath for an hour to remove all the waxes, finishes and grime that is on the outside of the bowl. I also ream and clean the pipe as I will handle it pretty roughly as I rusticate it. I don’t want added grime on my work table and hands so for me a clean pipe is what I like to work with. On the Canadian I removed the band and set it aside so that it would not be damaged in the rustication process.

ImageImage 

For the purpose of this essay I will begin with the Dr. Plumb apple. I worked the rustication tool into the wood, twisting it back and forth until it had the rough look to it as can be seen below in the picture on the left. Once that was done I gave it a coat of black aniline stain. I find that the stain facilitates seeing any part of the wood that still needed to be worked or showed a pattern that was to uniform. I reworked the rustication with the larger tool to get it a bit more rough and random looking. Once I had the rustication the way I wanted it I stained the pipe a second time using a medium brown stain. This was to be the finish coat. I stained it, flamed it to set the stain, restained and set it a second time. The result was the matte finish pictured below on the right. In the light it showed some depth and variation in colour coming through from the earlier black stain that I put on after the first rustication. The third picture from taken from above shows the finished rustication before I buffed the stem and gave the entire pipe a light buff with white diamond.

ImageImageImage    


The next step is to take the pipe to my buffer. I buffed the stem with red Tripoli and then white diamond. I buffed the bowl with white diamond to knock off some of the rough edges and to soften the edges of the rustication a bit and polish the smooth areas to highlight them. From pictures below the effect of the buff can be seen. It helps to differentiate the smooth areas from the rusticated ones and give a nice contrast to the finished look. The smooth areas have been polished and have a sheen. The rough areas have a softer glow that highlights the depth of the rustication and the pebbled finish of the pipe. The tactile surface of the “new” pipe is pleasant to the hand. It also has a better look than the pipe that existed before with the carved finish.

ImageImageImageImage 


I have included the remaining pictures to show several other pipes that I have rusticated. These will give you an idea of the variety of finishes that can be achieved with the tools. It also shows a unique texture finish that I have developed that I like and repeat. The key here is to work the process repeatedly to develop your own distinctive look and feel. Rustication is an individual process as can be seen by the wide variety in rusticated pipes seen on the market. I continue to develop my method and try different patterns and also try to repeat the ones I like.

The first set of pictures show the finished Canadian that was pictured above before rustication. I used only the larger tool on this pipe. When I had finished rusticating it to my satisfaction I used a brass whitewall brush to smooth out the rustication. I took it to the buffer and used white diamond to soften and flatten out the roughness. I wanted to have a different look with this pipe which explains the process variations. I stained it with a medium brown aniline stain and was aiming for the look of old leather. The flaws and fills on this old Canadian are now hidden and a pipe that is much more pleasing to the eye is the result.

ImageImageImage Image


The second pipe is a John Bessai bent apple. I cannot find the pictures of the pipe before rustication but I remember it well. It had many fills and flaws in the wood and was a light tan colour. The pink putty fills stood out against this nice tan backdrop. They made me always bypass this pipe in my rotation. It smoked well but it was just ugly. I would pick it up and then put it down and take another one in hand. I was going to sell it but thought I would rusticate the bowl and see what it would look like. Again I was going for a leathery look. I used only the larger tool on this one as well. Once I finished the rustication I again used the brass whitewall brush to soften the rustication and buffed it with white diamond. The final rustication before staining looked much as it does in the finished pipe. The colour of the pipe is achieved by a combination of an oxblood undercoat stain and then a buff followed by a medium brown topcoat. I left the shank smooth with the stampings still visible. To me the much improved look draws me to it and the tactile nature of the pipe in hand is a bonus. As it heats up the feel is very pleasant.    

 ImageImage

The final pipe pictured below is one I carved. It was a kit I picked up from eBay. It was a small block and stem stamped Caveman pipes. I carved the shape I saw in the block. As I did, the flaws and sand pits became visible. It became clear that once more rustication was the solution yet again. I used the larger tool followed by the brass whitewall brush to soften the rustication and give the pipe my favourite old leather look. The first two pictures below show the unstained pipe after rustication. Note that I wrapped the shank with electrical tape at the stem/shank junction to protect the stem and to give a band of smooth briar. The third two pictures show the pipe after the undercoat of black stain. The final colour (seen in the last two pictures) was achieved by a combination of a black undercoat of aniline stain and a top coat of medium brown. I buffed between coats of stain. All of the above pipes were then polished with Halcyon wax and buffed with a flannel buff.

ImageImageImageImageImageImage 


The above process is demonstrated in the four pipes pictured. It is very simple. I stained each of the pipes before I rusticated them so that I could easily see where I was working. I used the larger rustication tool on all of the pipes. For the first one I used the second tool to change the rustication and then applied stain. In the last three I used a brass whitewall brush to soften the rustication and give it a leathery texture. Once I got the desire rustication I stained the pipe again for the finished colouring. The first was merely buffed with a soft touch on a white diamond buff. The remaining three were polished by hand with Halcyon wax and then buffed with a flannel buff to give it a polished look.

Give the process a try and see what you can come up with. It is a creative outlet and a means of exercising some creativity. Let us know what the finished product looks like.