Blog by Steve Laug
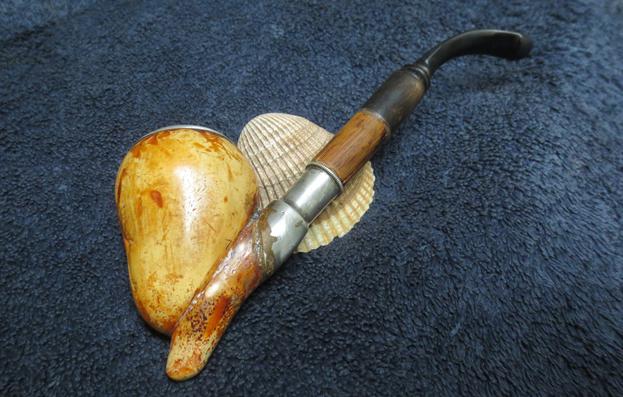
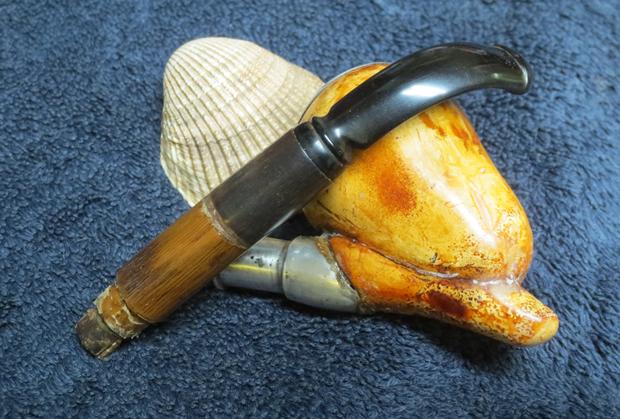
I don’t know if you agree with me or for that matter do I really care, as to me there is something that is attractive about the sheer ugliness of this old pipe. I know that beauty is in the eye of the beholder but truly this one called my name. My brother Jeff saw it on eBay and sent me the link. Both of us were drawn to its uniqueness. You have to admit that it is ugly but, come on, don’t you think it has some charm.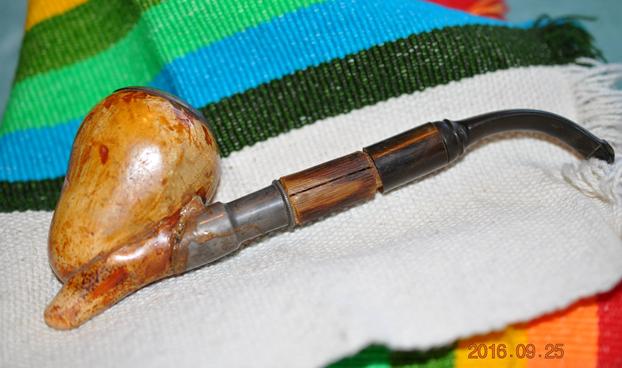 Once it arrived in Idaho my brother took some photos of the pipe. You can see how it was cobbed together out of a variety of old parts. The acorn shaped meerschaum bowl is scarred with the marks of a long hard life. There is a patina to the bowl that covers over and flows into the gouges and scars of the stone. The pointed meerschaum shank that terminates under the bowl appears to be glued onto the bowl to provide and entrance for the metal shank. I am still trying to figure out where that piece of metal came from. It is stepped down and cut at an angle before someone epoxied it onto the meerschaum shank. Inside of the metal there is a centered tube that runs to the bottom of the bowl. Carved down by hand and inserted into the end of the metal shank/mortise is a piece of Cherrywood branch that is split on the left side in the above photo. A one inch piece of horn is glued to the top of the carved branch and a vulcanite stem is screwed into the horn extension.
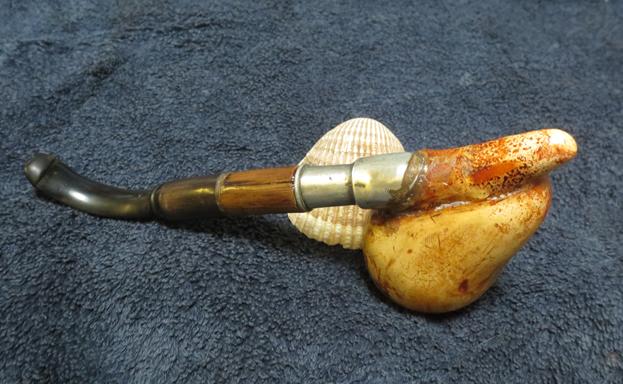
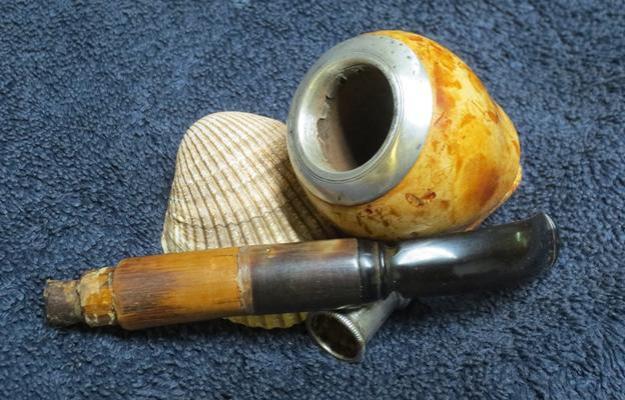
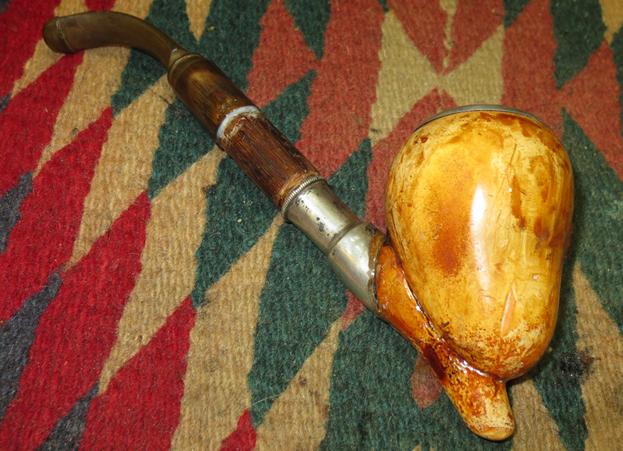
My brother took a series of photos of the bowl and shank contraption to show how it is cobbed together. Too me some of the charm of this pipe can be seen in the next series of photos. You can see the gouges in the bowl and the abundance of epoxy and glue that flows out of the joints in the shank and the metal tenon. It makes you wonder why the crafter of this Frankenpipe could not wipe the excess glue off the metal and the meerschaum. It is rock hard at this point in the pipe’s life. You can also see the mottled patina that has developed over time on the surface of the bowl.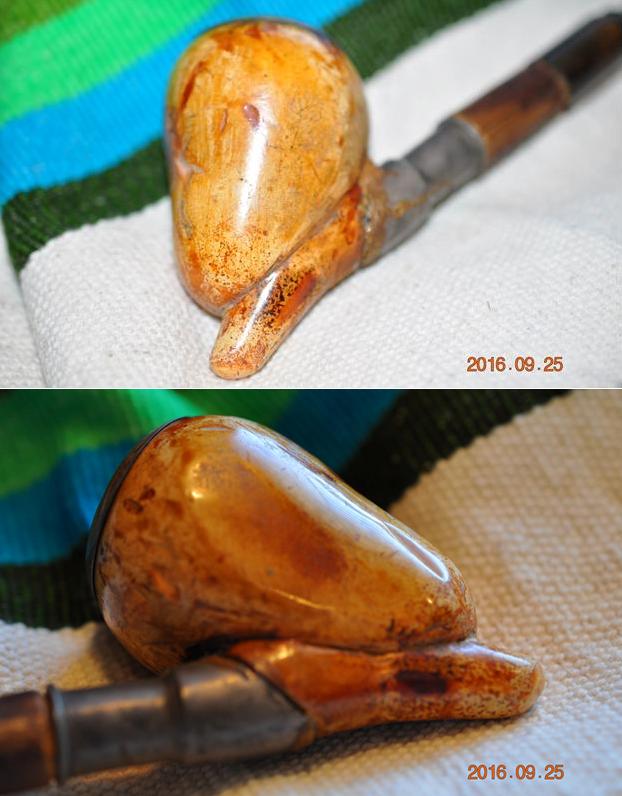

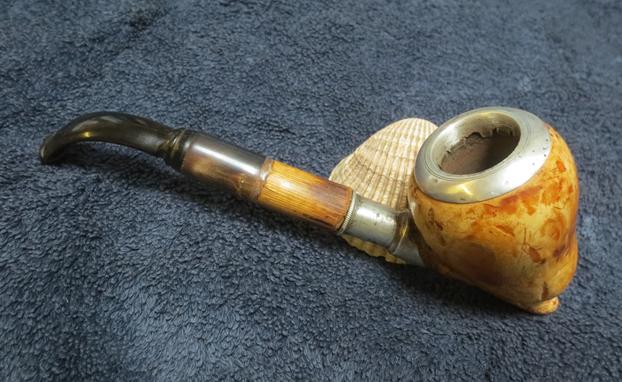
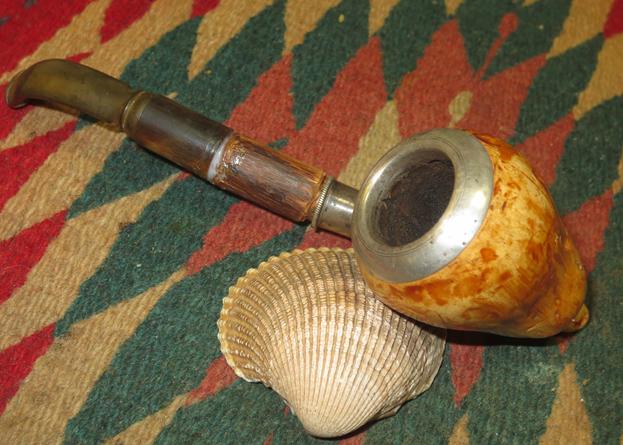
 It appears that the bowl was carved to receive a metal capped cup that is glued into the meerschaum bowl. At first glance it seemed that the cup filled the entire interior of the bowl. However, once I inspected the pipe firsthand the cup covered the rim and extended about ¼ inch into the bowl. The interior walls below the metal appear to be meerschaum.
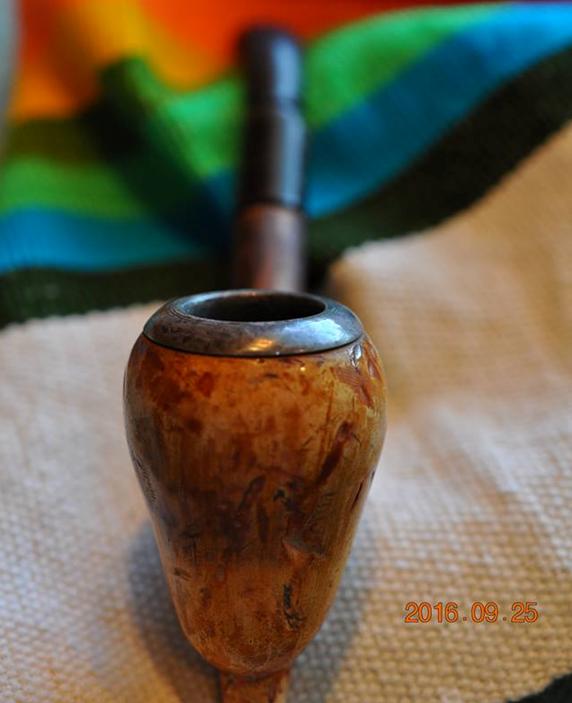

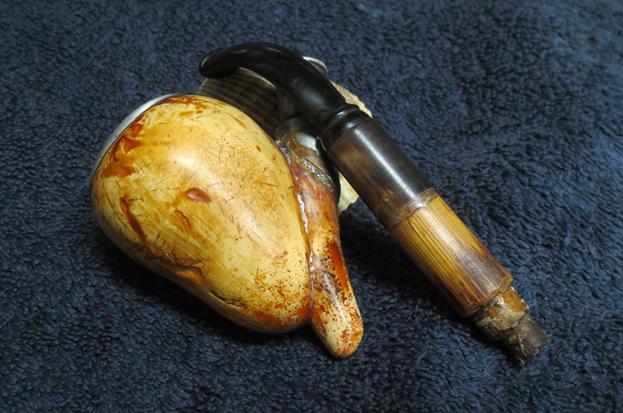
 The last pair of photos my brother sent shows the split in the side of the Cherrywood extension. It runs the length of the insert. You can also see the hand carved nature of the extension. It is carved poorly in terms of the fit in the mortise and also the fit against the horn extension on the other end. There is a large gap in the fit but the horn piece is glued solidly on the wooden extension and I think removing it would allow the wood to fall apart. The tenon end of the wood is notched to accommodate the tube that sits on the bottom half of the mortise and extends to the bottom of the bowl. Even that point in the carved wood is splintering and looks very tenuous.
 From the photos it looked like I had my work cut out for me. This “charming” and ugly old meerschaum Frankenpipe deserved at least another chance at life. It seemed like just the kind of challenge that would break up my ongoing cleaning and restoration of pipes. I was looking forward to its arrival in Vancouver. My brother did a cursory clean up on the pipe because he did not want to damage any of the parts.
Last evening I decided I was in the mood to work on this monstrosity. I took it to the work table and filled in the gap between the horn and the Cherrywood extension with some all-purpose white glue. I was in a rust to get started so I forgot to take photos before I put the glue in place. I stopped the process long enough to take some photos before I went any further in the cleanup.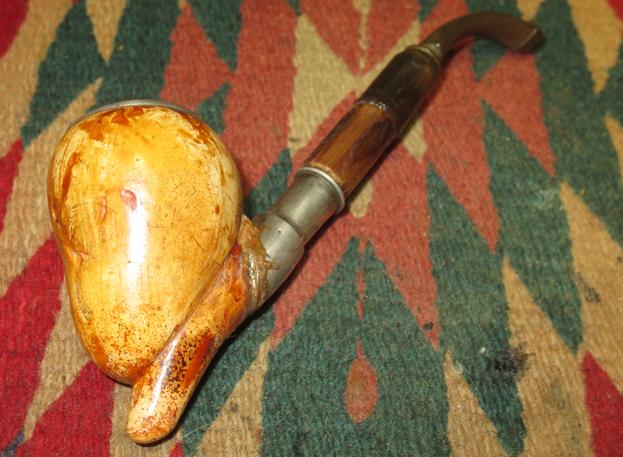
 I used an awl to push the white glue into the gap between the parts of the extension and fill in the crooked looking space. The glue would dry clear and give the look of a space between the horn and the wood. At this point I had no idea if the stem would come off or if it too had been glued in place on the shank. I took a photo of the parts of the pipe at this point in my disassembly.
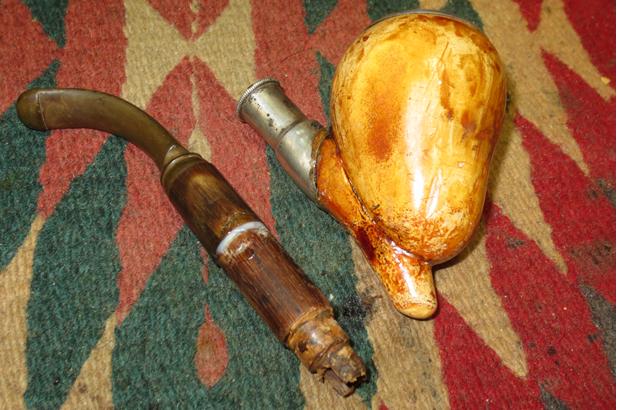 I took a close up photo of the rim cap and bowl. The bowl had been reamed by my brother and the cap wiped clean. I tried to suck air through the metal shank and found that air came out on the left side at the glued joint but it did not come out of the bowl. I plugged the left side joint with my hand and tried again. No such luck. The airway into the bowl was non-operative.
 I took some close up photos of the vulcanite stem. There were two small tooth marks – one on the top and bottom sides of the stem near the button. They are barely visible in the photos below. Otherwise the stem was lightly oxidized.
 I decided to see how far the metal bowl insert extended into the meerschaum. I was wondering if it was not like a calabash cup. I scraped out the last of the cake with a Savinelli Fitsall Pipe Knife and then sanded it with a rolled piece of 220 grit sandpaper wrapped around my finger. Once I had sanded a bit and removed the light cake that was still on the inner edge of the metal I could see that it extended into the bowl only about ¼ inch and that the rest of the bowl was meerschaum. The third photo below shows the extent of the metal cap. The lower edge of the cap is pitted and worn but it has been sanded smooth.
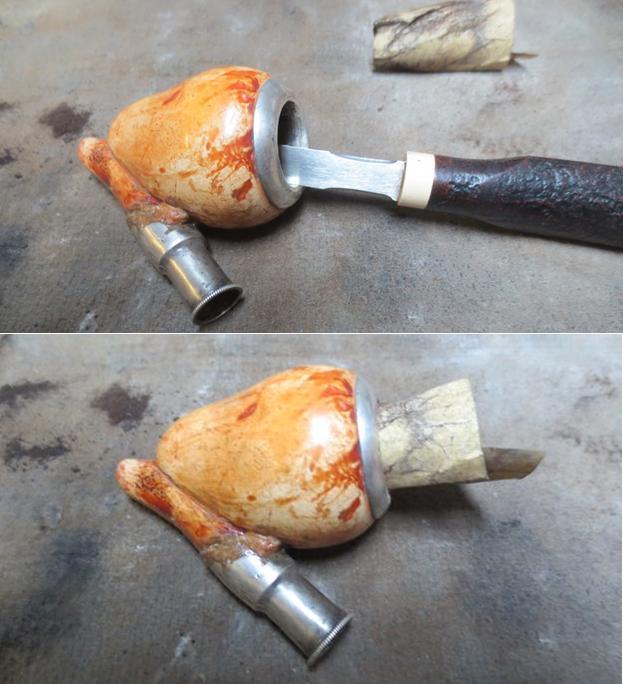
 Once I had the bowl reamed and cleaned I used a small drill bit to open the end of the metal tube in the bottom of the bowl. I pushed a piece of wire through the airway to open it up. The small tube was opened and I was able to blow air through the bowl.
I repaired the left side of the meerschaum shank joint to the bowl with clear super glue to seal off the opening that let air escape. I used a clear super glue to fill in the crack on the side of the wooden shank extension and then used white glue to fill in the gaps. I also filled in the joint between the wood and the horn extension on the shank. I gave it a thick coat of white glue, wiped off the excess glue with a dental spatula and set it aside to dry.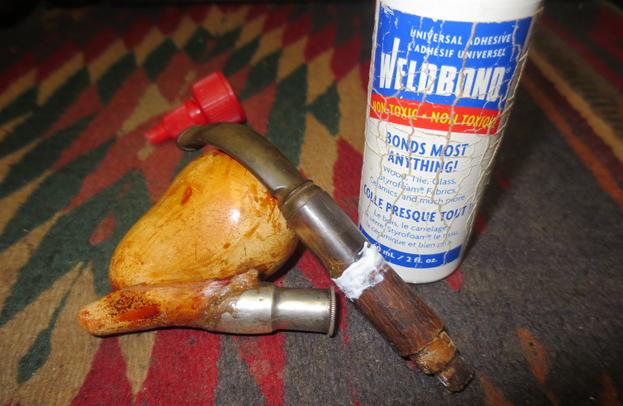 Once the glue had dried I used a small file to smooth out the joint between the two parts of the shank extension and made the transition smooth. While I was working on it I found out that the stem was not glued in place so I unscrewed it from extension making it easier to work on the repaired shank. I sanded the repairs to the wood and the connection to the horn with 220 grit sandpaper until it was smooth to the touch. I also used the file and sandpaper to clean up the notched end of the tenon. I stabilized the exterior of the tenon wood at that point with some clear super glue and let it dry.
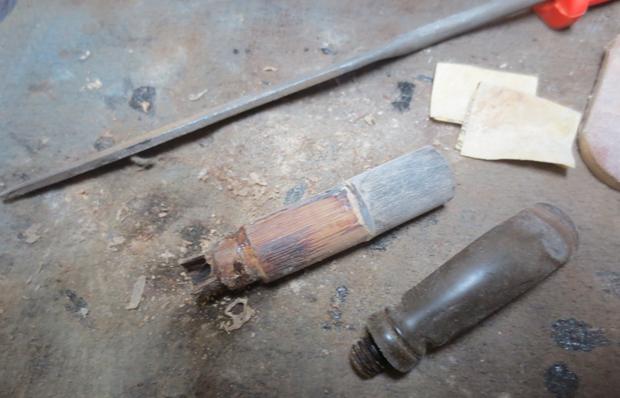 Once the glue had dried on the tenon I cleaned out the interior of the stem and extension with pipe cleaners, cotton swabs and alcohol.
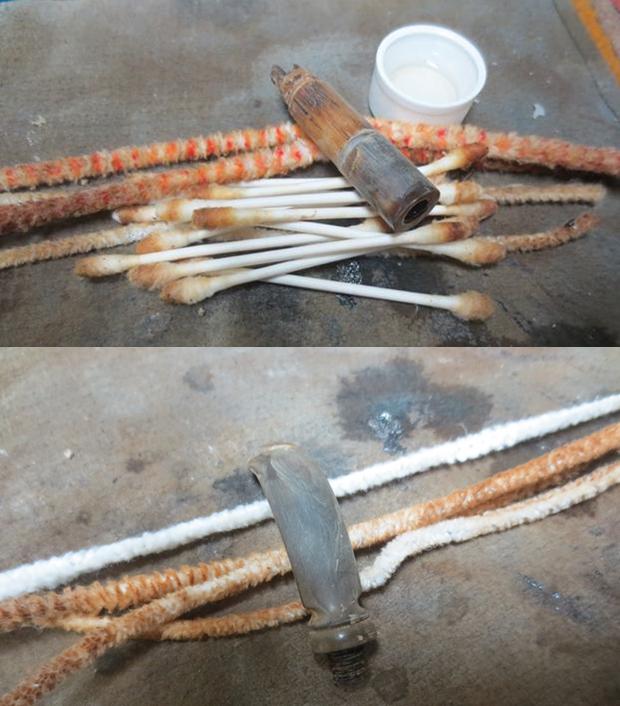 I sanded the stem to remove the tooth marks and the oxidation. I reshaped the button at the same time with 220 grit sandpaper. Notice the stamped K on the underside of the stem near the saddle. I have no idea what that signifies but I am guessing came from one of the donor pipes that gave its life to become this one.
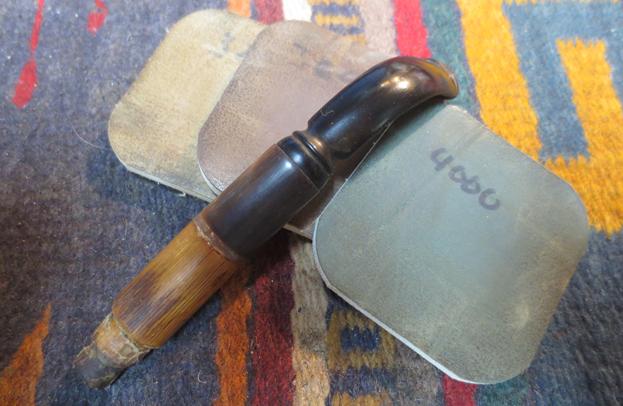
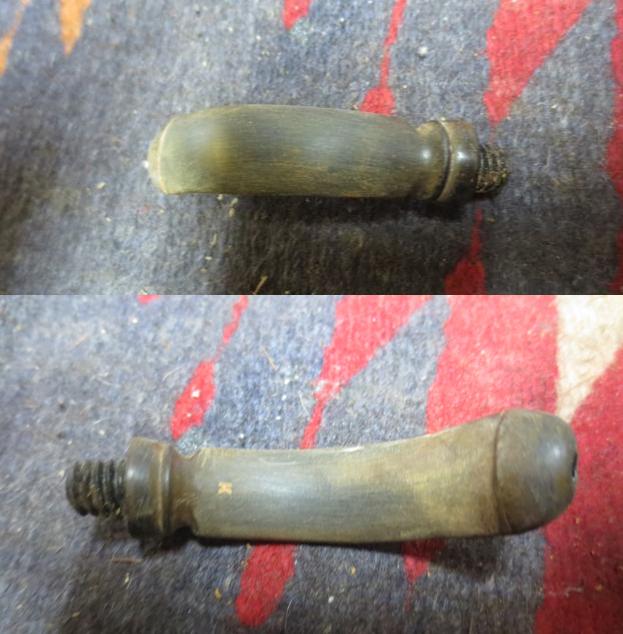 I sanded the stem with 220 grit sandpaper until I had removed the oxidation and cleaned up the button edges. I rubbed it down with Obsidian Oil to see whether there were any stubborn spots of oxidation that needed more attention. I sanded the Cherrywood insert and the horn insert to finish smoothing them out. I polished the stem and shank with micromesh sanding pads – wet sanding with 1500-2400 grit pads and dry sanding with 3200-12000 grit pads. I rubbed the stem and horn down with Obsidian Oil after each set of three pads and gave it a final coat of oil after the last set. I set the stem aside to let the oil dry.
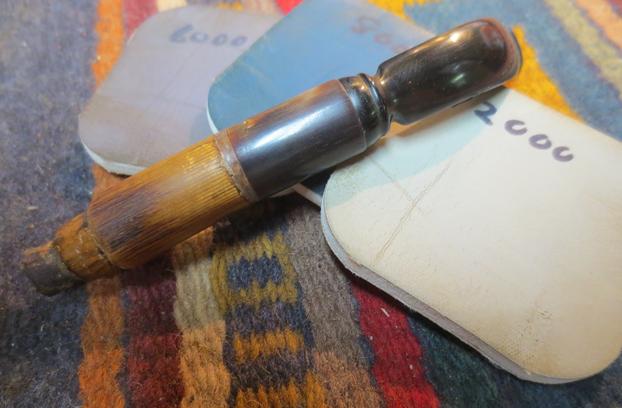 I polished the meerschaum and the metal with the same grits of micromesh sanding pads from 1500-12000 to raise a shine on the mottled and marked old bowl. The shine came back and with it all the marks of its age and its story seemed to soften.
 I am sure that by now some of you are thinking I spent too much time bringing this ugly duckling back to life but I had a good time doing so. I put the finishing touches on the pipe before taking the final photos. I gave the tenon end on the Cherrywood shank a light coating of clear fingernail polish to protect the wood and ensure a snug fit in the metal mortise. I buffed the shank and stem with Blue Diamond on the buffing wheel to raise a shine and gave the whole shank several coats of carnauba wax. I buffed the shank and stem with a clean buffing pad to protect the finished parts. I buffed the bowl and metal shank with the Blue Diamond polish and gave it a buff with a clean pad. I hand buffed the whole pipe with a microfibre cloth. The photos below show the finished pipe. When restoring these old pipes it is always a fine balance between restoration and going too far. On this one I have left the nicks and dents and even some of the overflow of epoxy so it can speak to the history of the pipe. I have only one wish regarding this old pipe – that it could speak even for a few moments and tell its story and the passion of the crafter of this Frankenpipe. Thanks for walking with me on the journey of its restoration.