Blog by Steve Laug
In a recent blog I wrote about repairing a WDC Wellington House pipe with a cracked bowl that had been half way repaired by someone else. I wrote about using JB Weld on the inside of the bowl (https://rebornpipes.com/2016/12/30/sprucing-up-a-home-doctored-wdc-wellington-house-pipe/). Some folks have been concerned about toxicity of this product in the bowl of a pipe. Even though the studies on the material have shown that once it is cured and dried the substance is neutral and there is no toxicity issues I still take several precautionary measures to minimize the possibility. First, I sand the repaired area smooth leaving JB Weld in only the repaired areas while leaving the briar bare around the repairs. Second, I mix and apply a bowl coating to the entire bowl to protect the bowl and provide an extra layer between the JB Weld and the tobacco. The coating when dry encourages a new cake to develop as the carbon/charcoal in the mixture provides a rough surface for the cake to adhere to more quickly.
In that particular blog I commented that I was out of charcoal capsules so the bowl coat would have to wait. Yesterday while I was out and about I was able to find some of the capsules that I needed for the mixture. This morning I mixed up a batch of bowl coating for the pipe. I decided to document it as I put it together and write a short tutorial on how I mix the bowl coating and apply it. The photos below show the internal and the external repair to the bowl and where it stood when I posted the blog.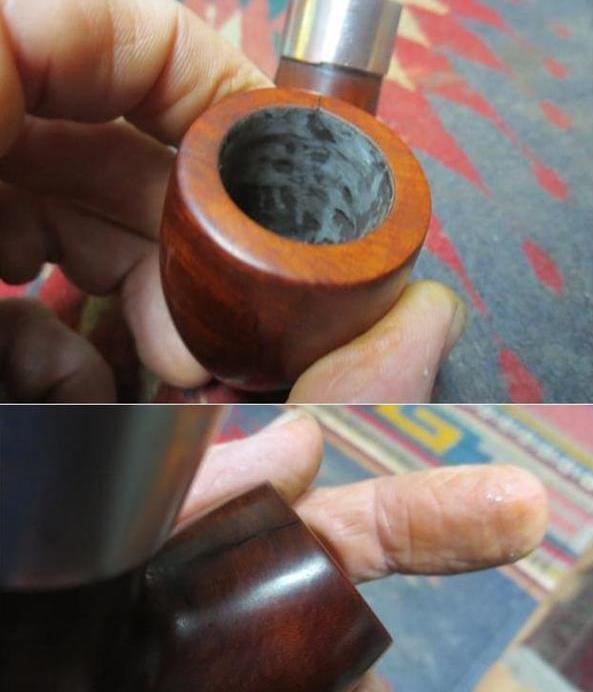 Here are the steps in the process I use along with explanatory photos.
Step 1 Assemble all the ingredients – not too many in this case. I use five Activated Charcoal capsules (food grade) and a tablespoon of sour cream. This amount of sour cream and charcoal is more than enough to coat one bowl but I find it is easier to mix this size batch with what I have. I will often do a second bowl to use up the mixture. I use a small glass bowl to mix the concoction in as I find that is easy to use and clean up afterward.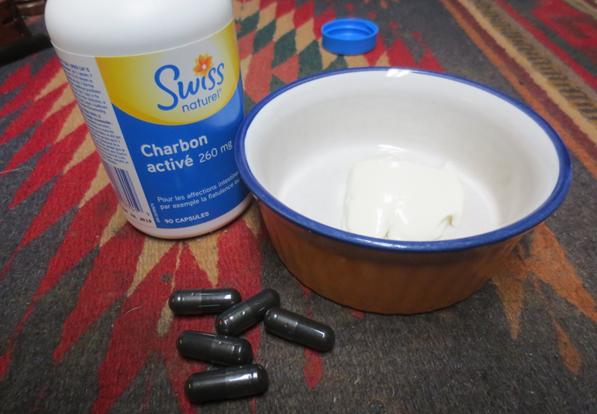 Step 2 Twist the capsules apart and dump the charcoal powder out of each half onto the sour cream in the mixing bowl. I generally break open two at a time, stirring them into the sour cream with a dental spatula. You can use anything you want to stir the mixture together.
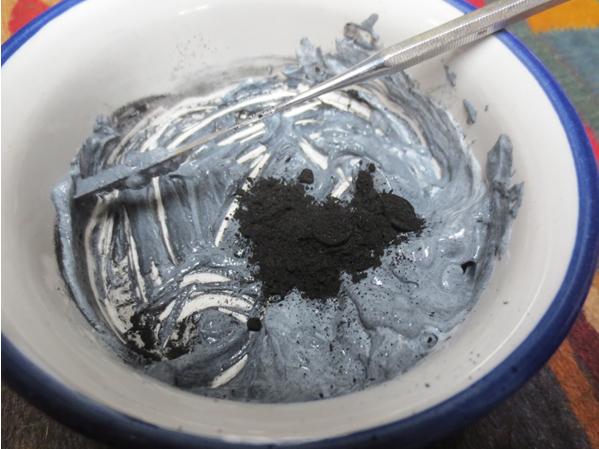 Step 3 When the ingredients are well mixed you should have a dark grey paste in your bowl. It will still smell like sour cream at this point but do not worry when it dries the smell dissipates and all that is left is a dark coating that protects the wall of the bowl. The sour cream acts as the medium for applying the charcoal powder (carbon) to the bowl walls.
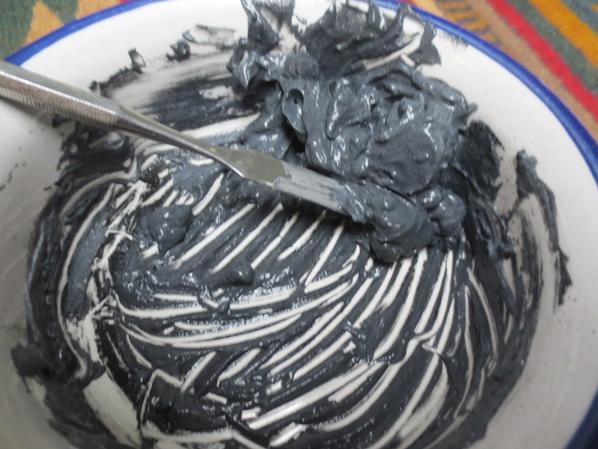 Step 4 When the bowl coating is well mixed fold a pipe cleaner in half and use it to apply the coating to the walls of the pipe. I have tried different tools to apply the mixture to the bowl walls and always come back to the folded pipe cleaner.
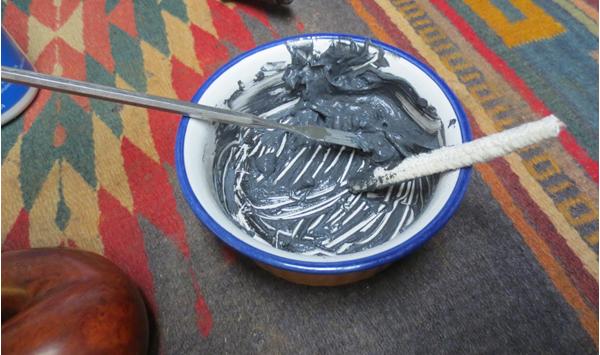 Step 5 Using the pipe cleaner put a dollop of the mixture on the bottom of the bowl and smooth it upward around the bowl sides. The first dollop will give you enough to paint half way up the bowl walls. You can put a pipe cleaner in the airway into the bowl so as not to clog it or you can be careful as you paint the mixture around that area.
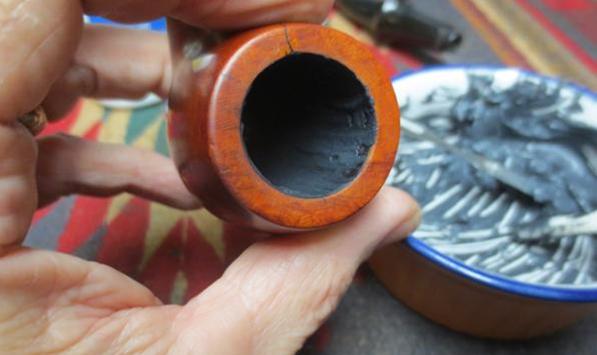 Step 6 Continue painting the mixture up the sides of the bowl to the rim. Do not worry about getting the coating on the rim as it can easily be wiped off when you have finished.
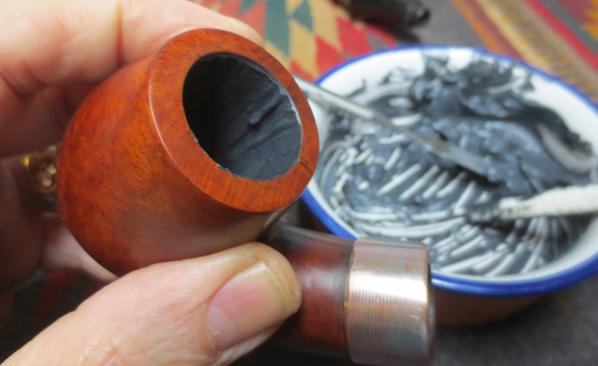 Step 7 When the entire bowl is covered I carefully run the folded pipe cleaner over the surface to smooth out any lumps or thick spots and even out the painting on the walls and bowl bottom. I add more coating as necessary for an even coverage around the bowl.
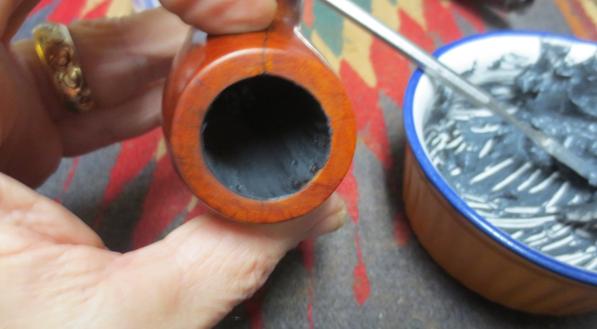 Step 8 Wipe down the mixture from the edge and surface of the rim with either your finger or a cotton pad to leave the rim top clean. Set the bowl aside in an upright position until the bowl coating has dried. I generally find that the mixture takes a good 24 hours to cure and another half day for the smell to dissipate. Once it is dry the entire bowl is a dark black colour and is dry to touch.
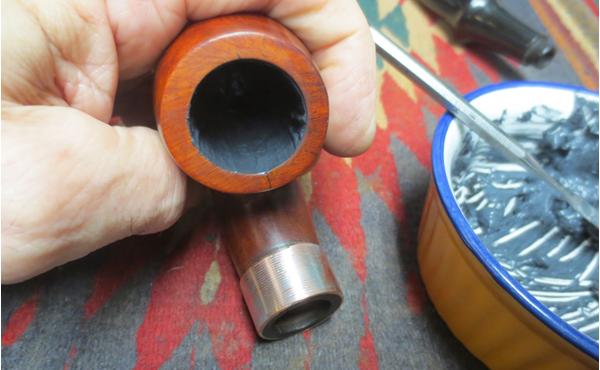 Step 9 I let the bowl sit for four or five days until it is cured and dry. Once the coating has cured the pipe is ready to load with your favourite tobacco and fire up a smoke.
That is it – not a complicated mixture or formula and not a complicated application process. It certainly may seem strange to you to make up the concoction and put it in a pipe but it is a mixture that I have used for quite a few years now and it provides that needed insulation on the walls of the bowl until a new cake has time to form. Honestly there is no residual taste of sour cream that is transferred to your first smoke. Just smoke and know that the repair on the walls of the pipe is safely covered by this added layer of insulation.
