Blog by Steve Laug
 The next pipe on my work table is another C.P.F. from the virtual pipe hunt Jeff and I did in Montana. It is an interesting piece in that it has some age on it but to my thinking it is “newer” than the other C.P.F. pipes I have been working on from that hunt. This one has no stamping on the bowl but has the C.P.F. in an oval logo stamped on the ferrule underneath a set of the expected faux hallmarks.
To me it is very much like later C.P.F./KB&B post-merger Chesterfield pipes. KB&B acquired or started the C.P.F. line sometime between 1884 and 1898” (http://kaywoodie.myfreeforum.org/archive/cpf__o_t__t_161.html). They operated the factory at 129 Grand Street, in New York City, New York. The ferrule and stem are not stamped with the dual stamp that later pipes had, so I think it is safe to assume that it is from pre-1900. I went back and read my blog post on the background of the brand and I think I was able to date this one a bit.
The C.P.F. brand was discontinued sometime between 1910-1920. I turned to a quote I found from Bill Feuerbach where he notes the following, which pins down the time frame of the discontinuation of the brand more specifically, “I have a C.P.F. Chesterfield in our office display that has a nametag from way before my time that says 1900 C.P.F. Chesterfield. It looks like most other Chesterfields you’ve seen, including the military type push stem, except this stem is horn and not vulcanite. As far as I have gathered the C.P.F. brand was phased out sometime around 1915” (http://kaywoodie.myfreeforum.org/archive/cpf__o_t__t_161.html). Interestingly, he noted that the Chesterfield name and style was later introduced in the KB&B, Kaywoodie and Yello-Bole lines. He says that the 1924 KB&B catalog shows KB&B Chesterfields. (Here is a link to the full blog on the brand: https://rebornpipes.com/2013/04/14/some-reflection-on-the-historical-background-on-cpf-pipes/).
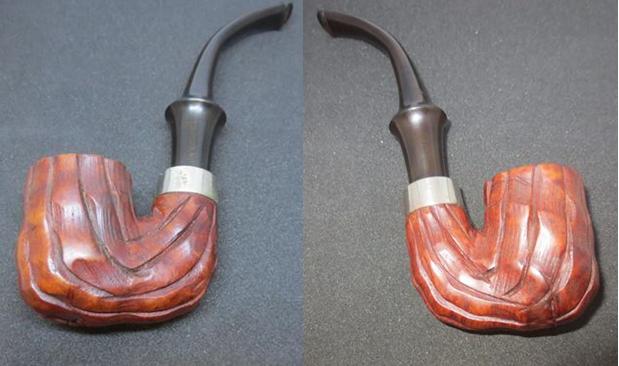
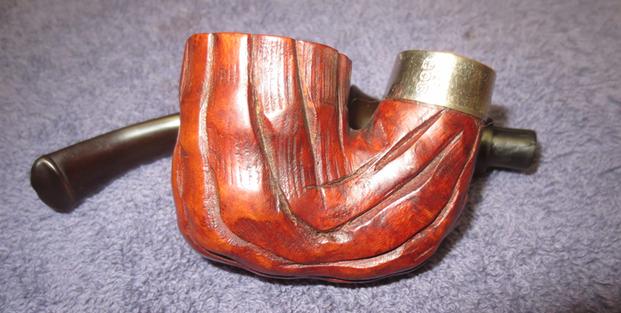
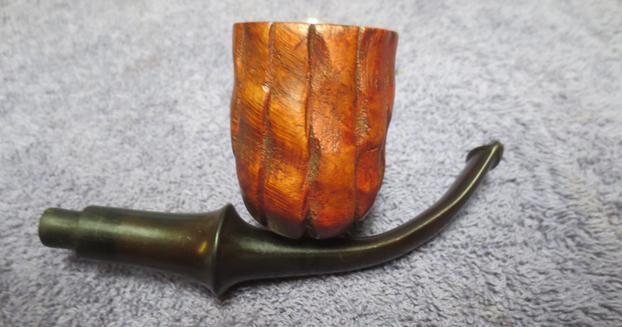
My brother Jeff took the previous and the following photos of the pipe before he cleaned it and sent it to me. It was extremely dirty with grime settled deep in all of the grooves of the rustication on the bowl. The nickel ferrule was oxidized and had turned and the stamping in the metal was not visible on the left side. The stem was oxidized and spotty looking and to my eye it had appeared to have straightened over time and lost some of the natural curve it originally had. 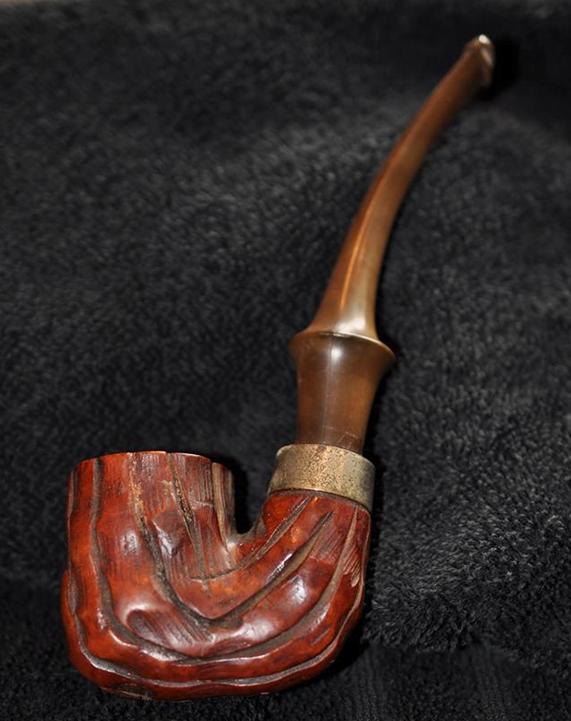
 This old pipe was in really rough shape. The rim was heavily covered in a thick lava coat and the bowl was caked with a hard carbon. It was thick against the walls with the cake thicker on the back side of the bowl. The way the cake was it was hard to tell what kind of condition the inner and outer edge of the bowl would be in until it was all removed.
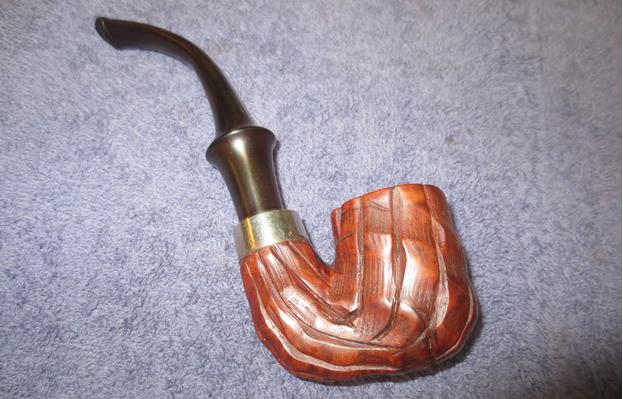
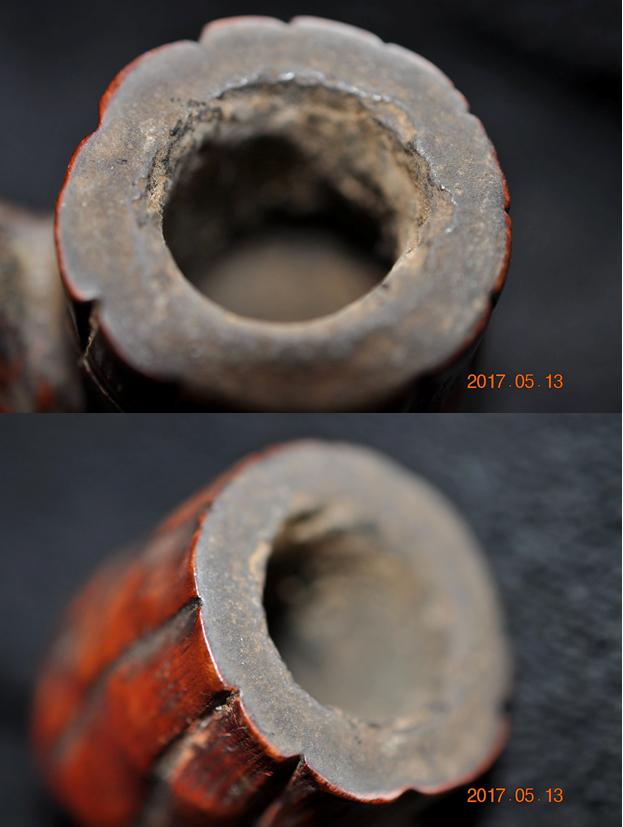 The next photo not only shows more of the rim and bowl but also the damage and heavy oxidation of the ferrule. It was rough to touch and there was a large piece missing on the end.
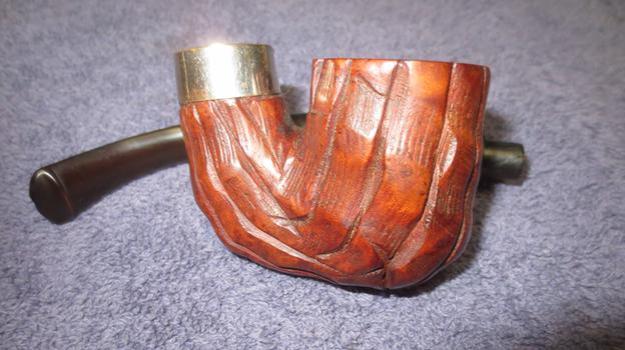
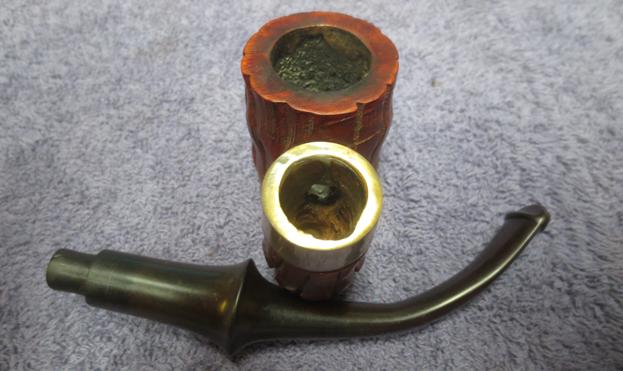
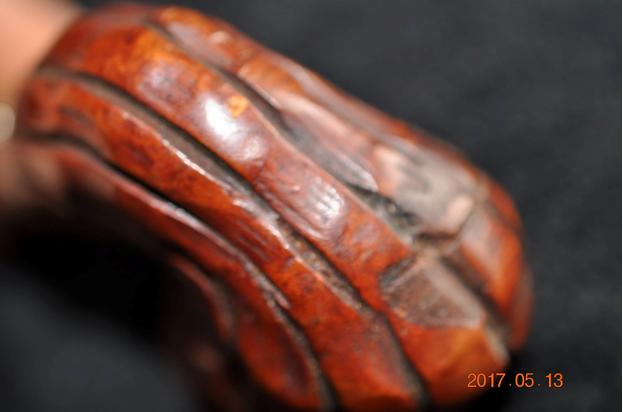
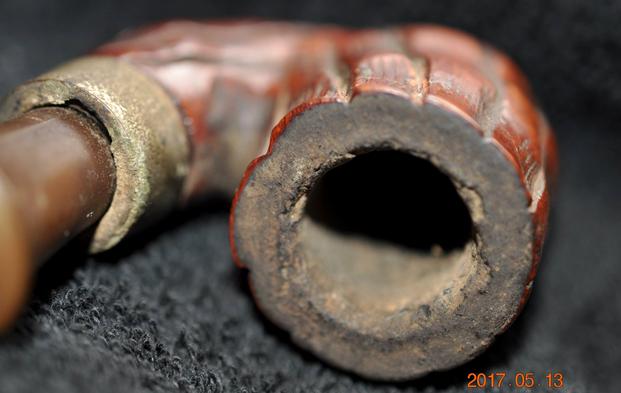 The next photos show the dirt that was caked in the grooves and carvings of the bowl and shank sides. The curved area between the bowl and the shank was really dirty. The third photo below shows the heel of the bowl and the small crack that went across the width. It was hard to tell if it was just a flaw in the briar or a true crack. Once it was cleaned up I would be better able to tell. The one thing going for it was that there was no darkening to the exterior of the heel.
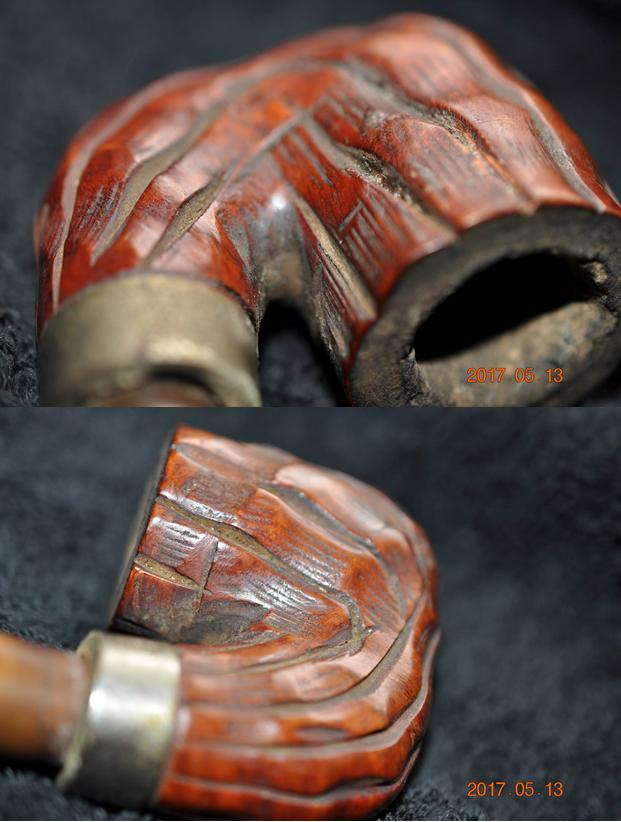
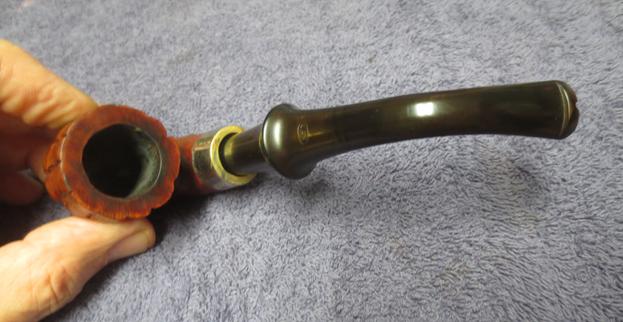
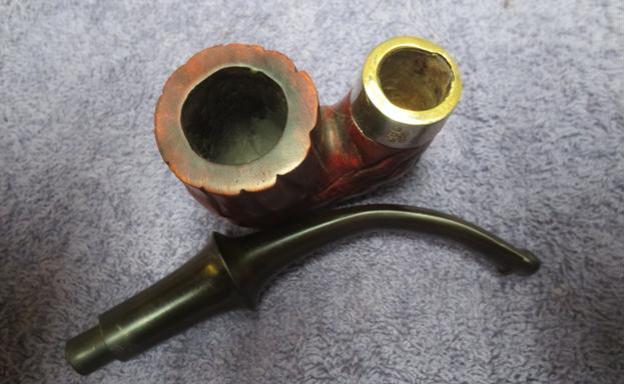
 The ferrule had come loose at some point in its life and had been reglued upside down. The C.P.F. in an oval logo and the faux hallmarks were on the bottom of the shank. The damaged spot on the ferrule had turned to the top of the shank. I wondered if the damage had been engineered when the shank had been drilled. Once again, I would know once we had cleaned it up and looked at it up close. When the stem was removed the end was wrapped up the stem about an inch with cord. This was often done to tighten the fit in the shank. I have found that on pipes this dirty that the sump below the airway in the mortise is generally filled and the sides of the mortise are so dirty that the stem no longer fits correctly in the shank.
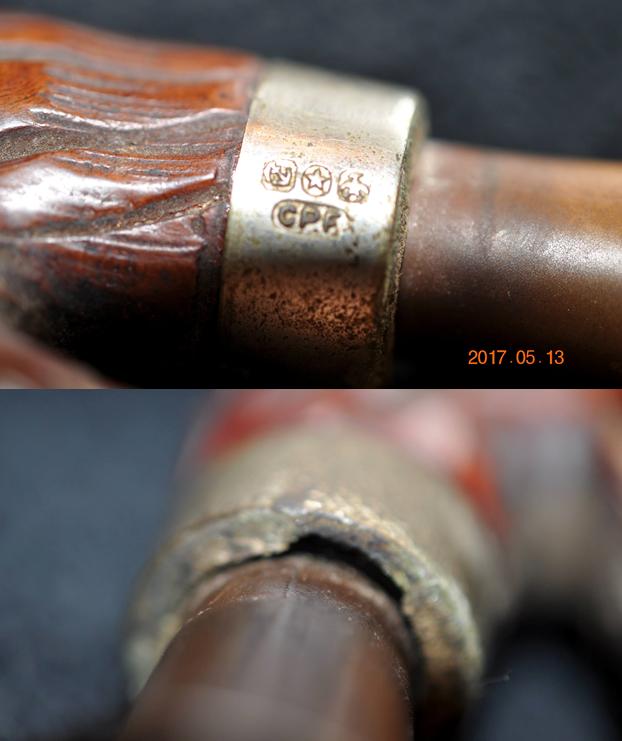
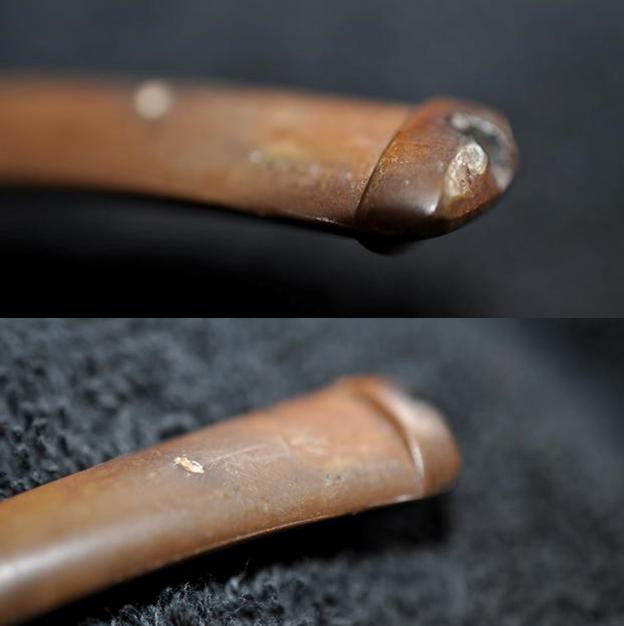
 Jeff took a photo of the shank end to show the damage to the ferrule close up. It almost looks like it is notched. I am wondering if the turned ferrule (the notch) on the top of the shank rather than the bottom was not one reason for the misfit of the stem.
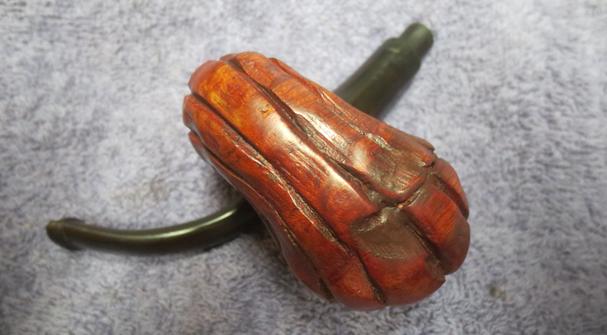
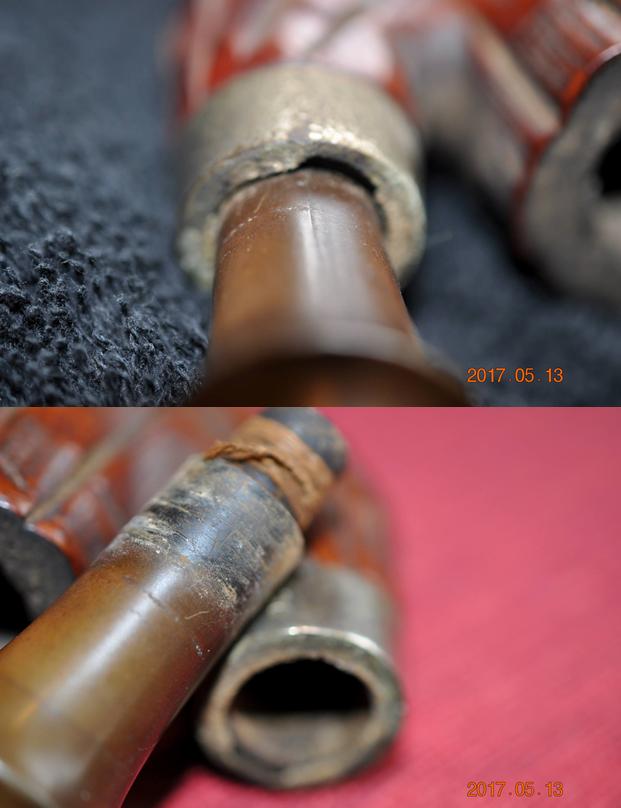
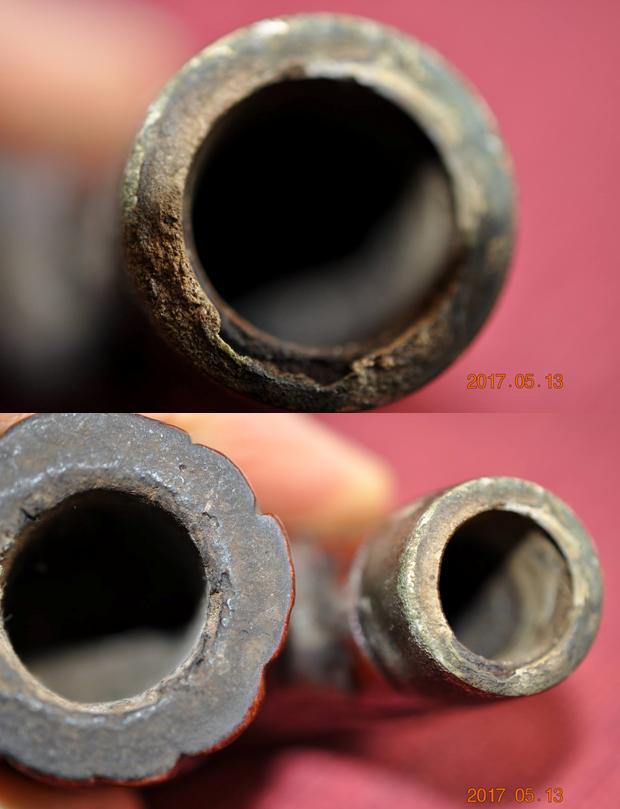 The next two photos show the wrap as he began to unwind it from the end of the stem.
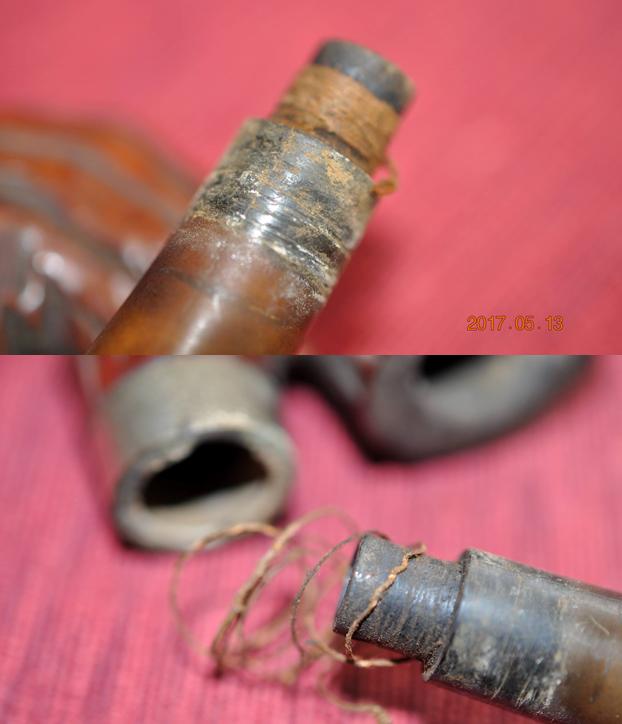 The stem was badly oxidized and it was going to be hard to get all of the oxidation off the old vulcanite. The button end had a slight notch that opened up the orific airway. I was not sure if this was original or if it was damage. The stem was stamped on the underside with the words SOLID RUBBER and on the topside near the saddle with C.P.F. in an oval. There was some definite wear and tear on the stem but surprisingly no tooth marks.
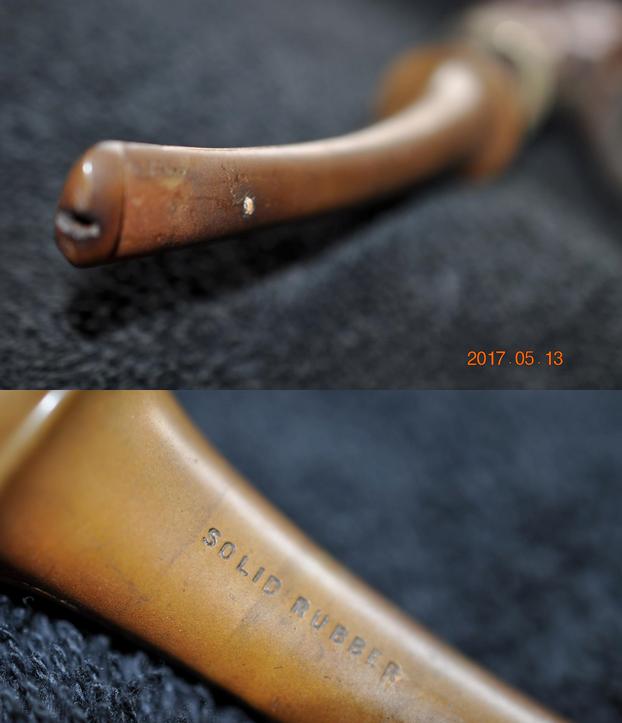
 Once again, Jeff did his usual thorough cleanup of the pipe. He reamed the bowl with a PipNet reamer, scraped the rim top with a Savinelli Fitsall Pipe Knife to clear off the lava build up. He cleaned out the internals – mortise, airway in the shank and stem with alcohol, cotton swabs and pipe cleaners. He scrubbed the exterior of the briar with Murphy’s Oil Soap to remove all of the grime and grit in the finish and clean out the areas around the issue I had noted on the heel of the bowl. He rinsed the briar under running water and dried it with a soft cloth. He soaked the stem in OxyClean to bring the oxidation to the surface and remove the grime. When the pipe arrived in Vancouver it certainly looked different than it did when we picked it up out of the sale display in Montana. I did not take photos of the pipe before I started working on it but instead got sucked into the restoration process.
I heated the ferrule with a Bic lighter to soften the glue that held the metal to the shank end. It took a bit of heating a cooling before I was able to pry the ferrule off the shank end. In the photo below you can see the glue on the shank end and the notch in the face of the ferrule. I wiped down the finish with acetone on a cotton pad paying special attention to the glue on the shank end. I wanted the shank end clean before I reglued the ferrule on it.  I painted all-purpose glue around the shank, aligned the ferrule so that the notch was at the bottom of the shank and the C.P.F. logo and faux hallmarks were on the left side of the shank as they had originally been when the pipe left the factory. I pressed the ferrule in place. Once it set on the shank I tried the stem and it fit better than previously.
 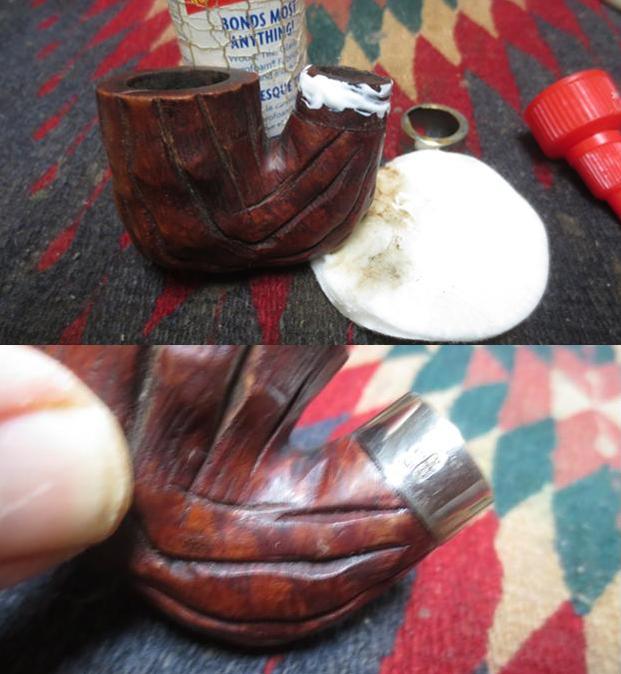 I put the stem in a bath of Before & After Pipe Stem Deoxidizer for 24 hours to let the mixture do its magic on the badly oxidized stem.
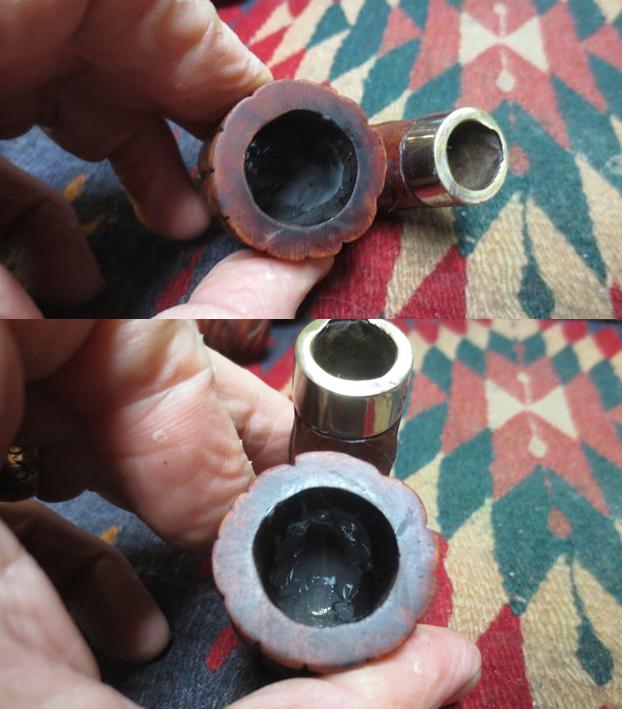
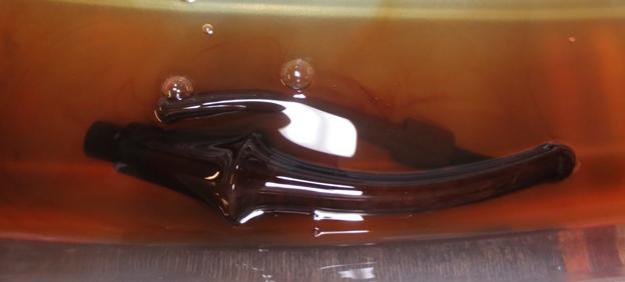 Once the bowl had been reamed clean it was clear that the cake had been reamed out before with a knife and the airway entered the bowl high. The bottom of the bowl was below the airway and because of that it made the bottom quite thin. While the bowl was not burned or damaged it was a candidate for that to happen. I mixed a batch of JB Weld and applied it to the bottom of the bowl and up the sides part way to raise the bottom of the bowl and protect it. The airway entrance was also to open so I built up the edges around it with some of the mix.
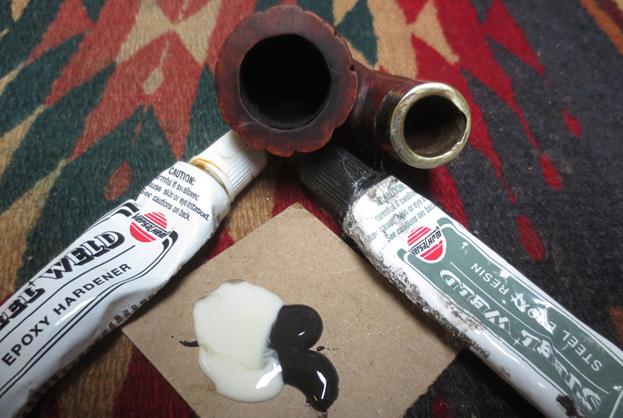
 I set the bowl aside to let the repair cure overnight, turned off the lights and called it a day. Work was so busy last week that I did not get to work on the pipe again until the weekend. The stem had soaked in the bath for 48 hours and I was hoping that the mixture had done its magic and remove the oxidation. I took it out of the bath and dried it off and ran pipe cleaners and alcohol through the airway in the stem.
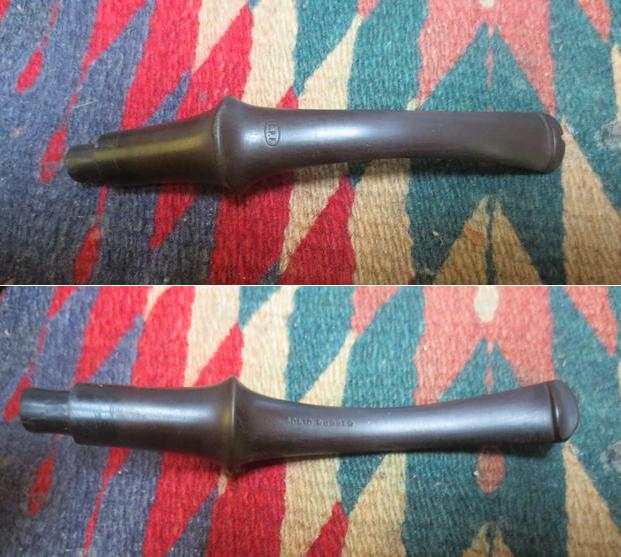 I put a pipe cleaners in the airway and heated the solid rubber stem with a candle to soften the stem enough to be able to bend it. I kept it high enough above the flame so that the rubber would not burn. Once it was soft and flexible I bent it to the point that when in the shank it sat properly in the mouth of the pipe man.
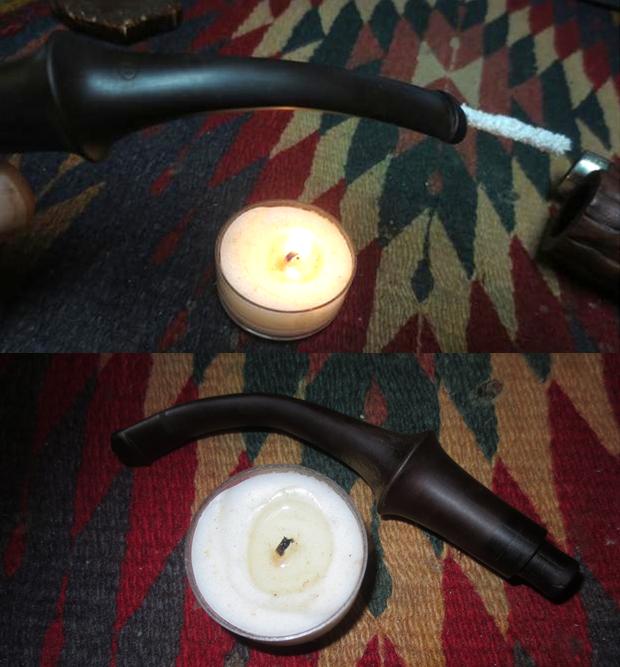 I sanded the stem with 220 grit sandpaper to remove the tooth chatter on both sides of the stem in front of the button. I reshaped the end of the button to make it more round and remove some of the damage on the edges.
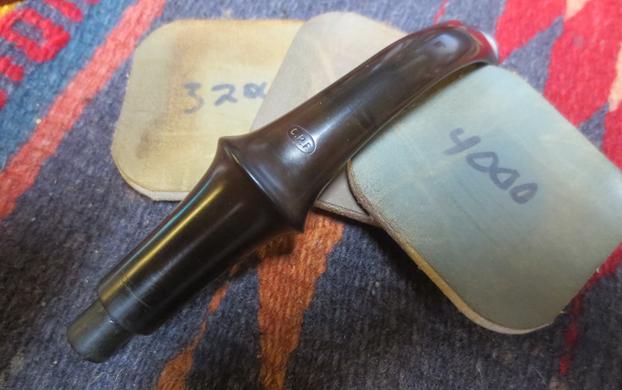
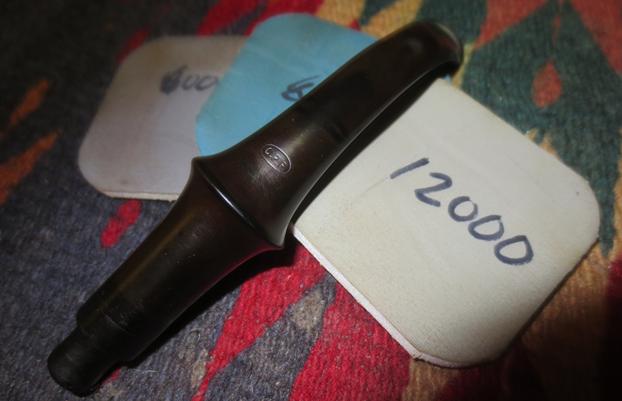
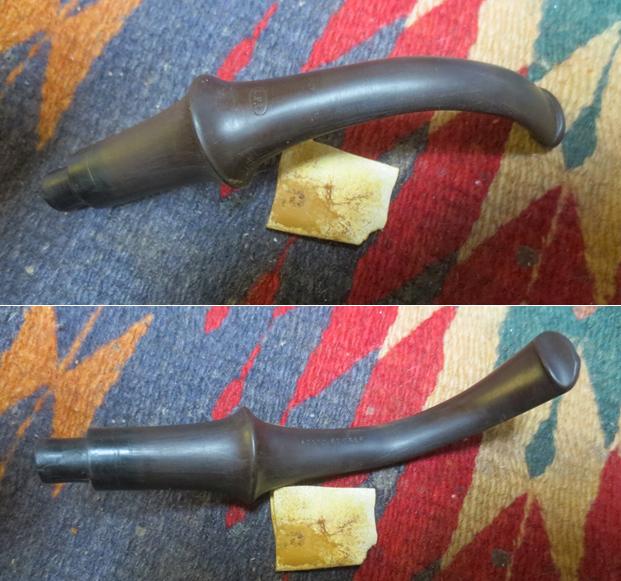 I buffed the stem with red Tripoli to remove some of the deep remnants of oxidation. I polished it with micromesh sanding pads – wet sanding it with 1500-2400 grit pads and rubbing it down after each pad with Obsidian Oil. I dry sanded it with 3200-12000 grit pads and once again rubbed it down after each pad. I gave it a last coat of oil after the 12000 grit pad and set it aside to dry.
 I examined the area on the heel of the bowl with a lens and could see that the bowl was not cracked but rather I was dealing with a flaw in the briar. I picked it clean and wiped it down with alcohol on a cotton swab to make sure that there was no debris in the crack. I pressed some briar dust into the flaw with a dental pick and spatula. I put clear super glue on top of the briar dust and let it seep into the flaw.
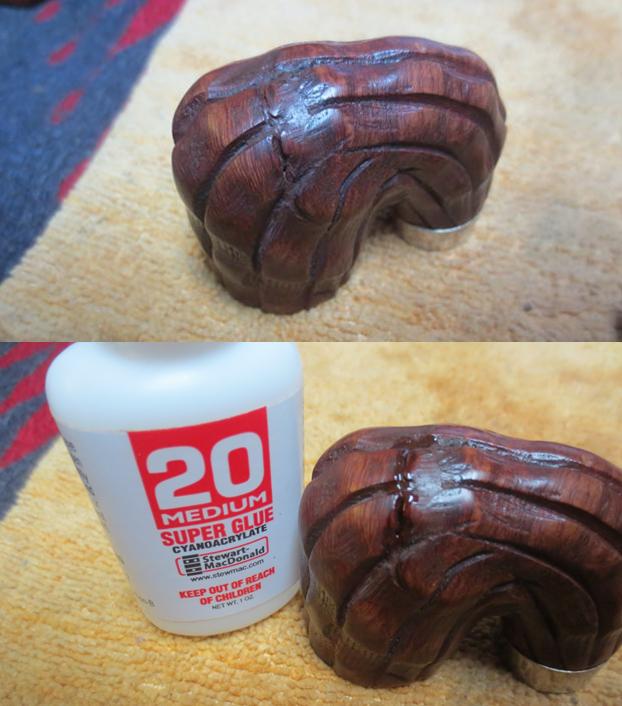 I carefully sanded the repaired area with a folded piece of 220 grit sandpaper to smooth out the repair. Once it was smooth I touched up the stain with a medium grit stain pen and buffed the bowl with Blue Diamond on the buffing wheel. I rubbed the briar down with Conservator’s Wax and when it dried, I buffed it with a clean buffing pad to raise the shine. The next photos show the bowl at this point in the process.
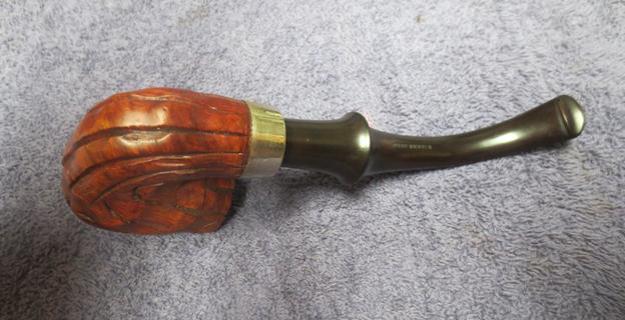
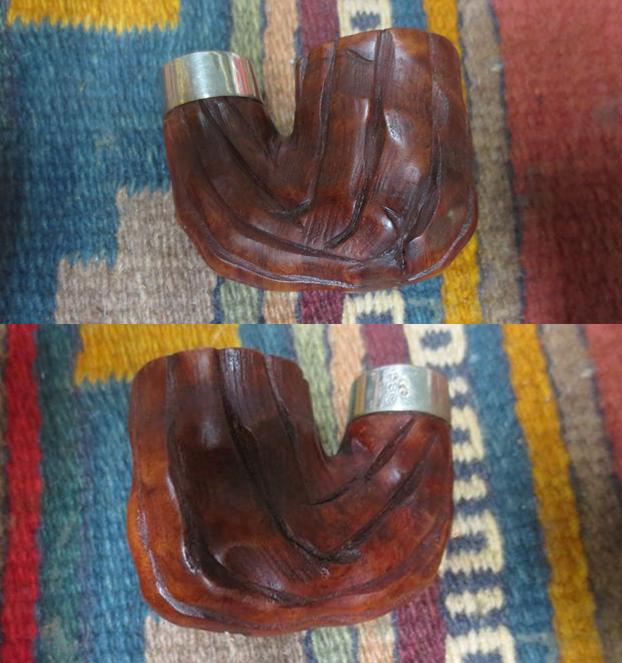 (An interesting note at this point. Looking down the bowl from the top you can see the JB Weld repair on the bowl bottom. Once this cures for about a week I will give the pipe a bowl coating of sour cream and charcoal powder.)
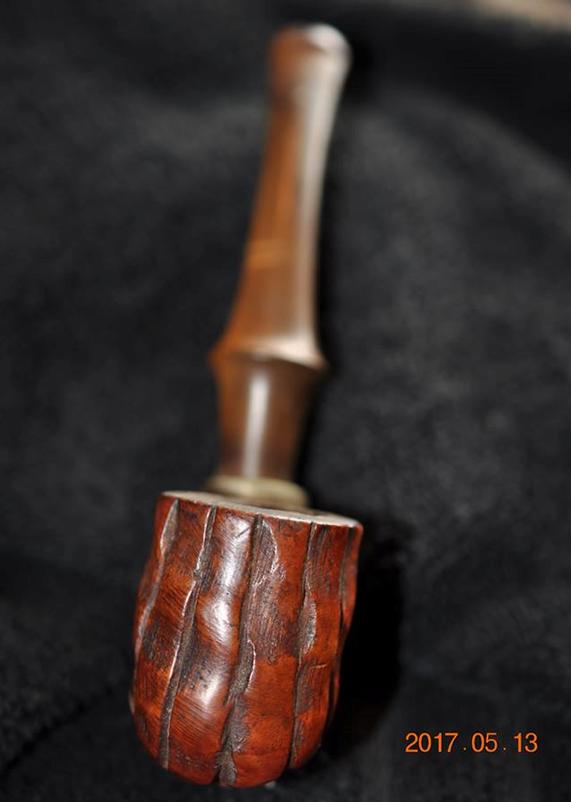
 I buffed the stem with Blue Diamond and gave it several coats of carnauba wax. I gave the bowl several more coats of Conservator’s Wax and buffed the pipe with a clean buffing pad to raise a shine on the pipe. The finished pipe is shown below. The dimensions of the pipe are Length: 6 ½ inches, Height: 1 ¾ inches, Bowl diameter: 1 3/8 inches, Chamber diameter: ¾ inches. Though the pipe is far from perfect, I think this old-timer has been given a new lease on life and should last the next pipe man for many years to come. The damages are repaired but in many ways still speak of the story of the old pipe. Hopefully the next pipe will keep the trust for this old pipe and pass it on to the next generation. Thanks for looking.