Daily Archives: August 13, 2017

Restoring a Thompson Freehand 529 with Cumberland Stem


Blog by Steve Laug

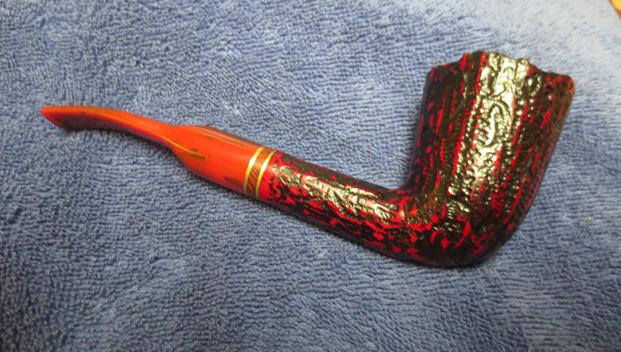
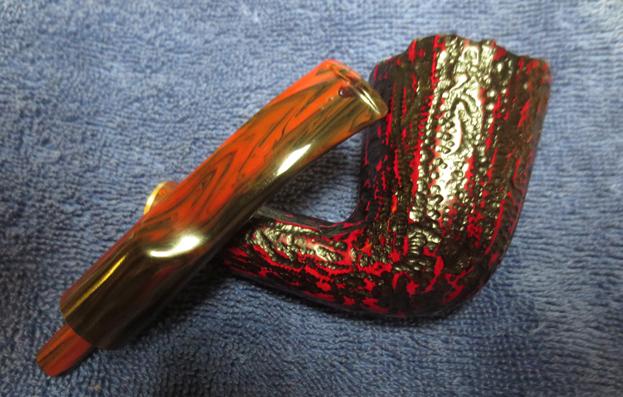
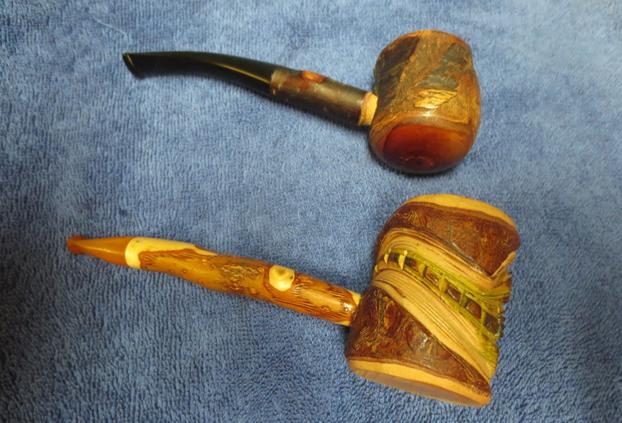
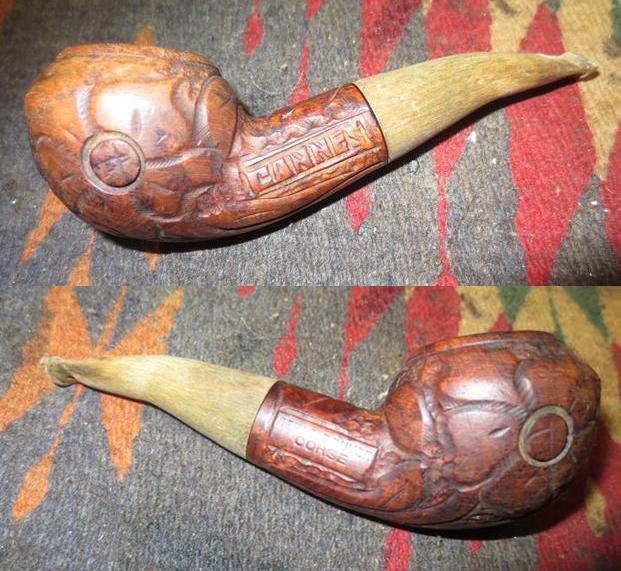
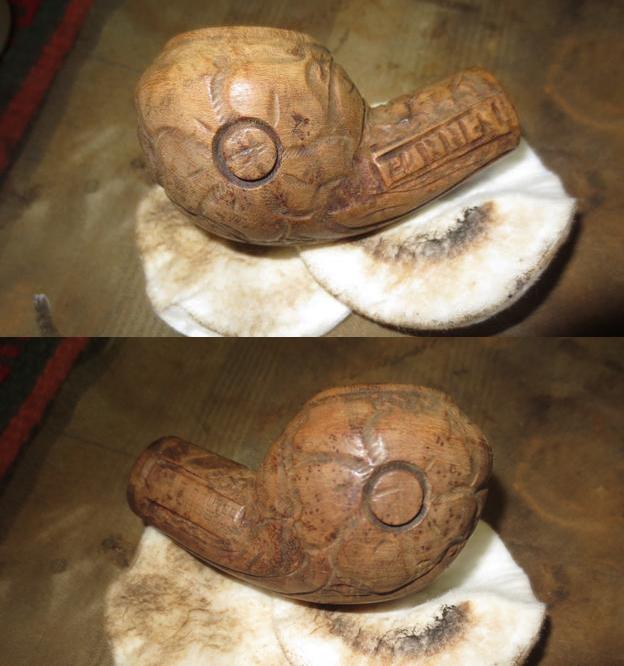
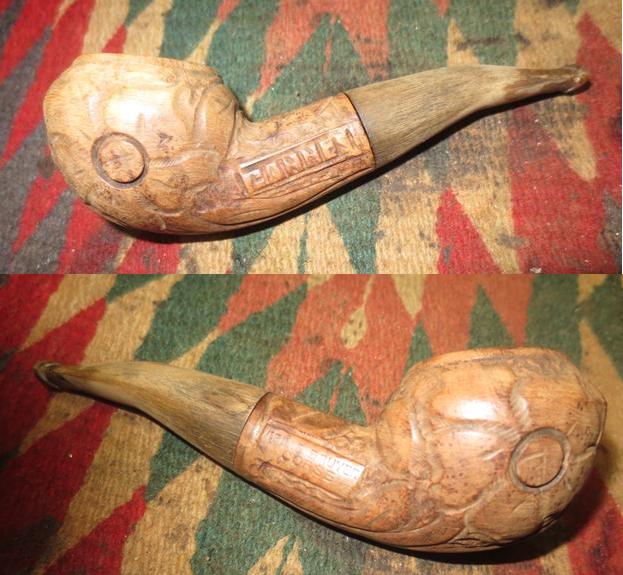
The next pipe on the worktable is a freehand with a plateau rim. It has a contrast black and red stain – red on the high spots of the rustication and black in the nooks and crannies. The rim shows the same pattern or reds and black. The shank has a band on it that is briar with brass on either side of it. The pipe was very dirty on the rim and the inside when my brother picked it up at an estate sale in Idaho. The rim had an overflow of the thick cake that filled the bowl. It had a Cumberland style acrylic saddle stem. The stem was in pretty rough shape with deep tooth marks on both the top and underside near the button and tooth marks on the button itself. There was also a bite through on the top side of the stem – mid stem just ahead of the button. It was not a large hole but it was a hole nonetheless. My brother took the following photos before he cleaned up the pipe for me.
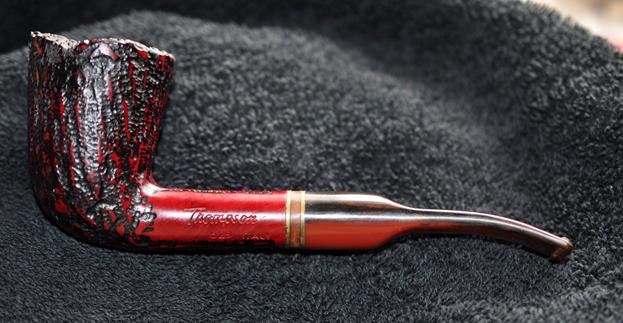
From a previous blog I wrote and one that Robert Boughton wrote I remembered that Thompson pipes were made for Thompson Cigar Company. This particular pipe was stamped on the left side of the shank with the words Thompson in script over the shape number 529 and Italy. I know that Thompson Cigar Company had pipes made in Italy, the Netherlands (Big Ben), and Turkey (the Meerschaum). Many of their Italian pipes were made by Savinelli. In checking the shape numbers of Savinelli pipes I did not find a listing for a 529 but there were others around that shape number.
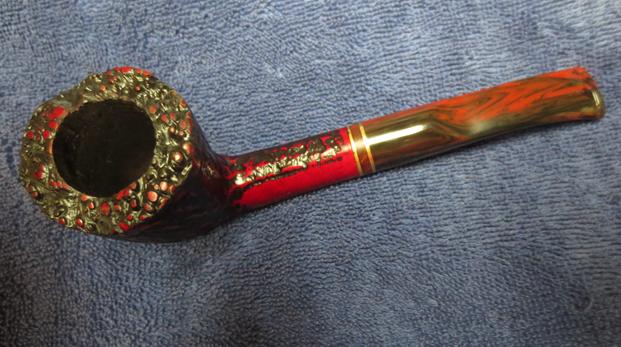
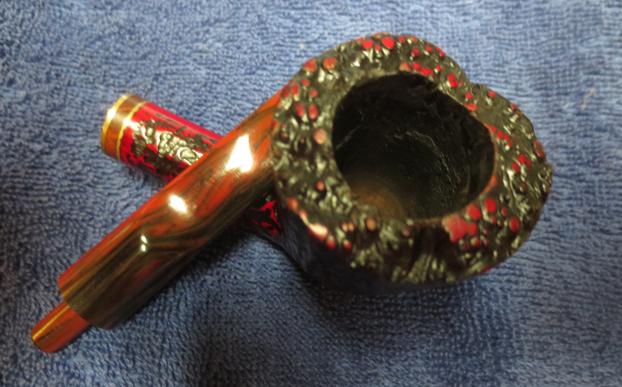
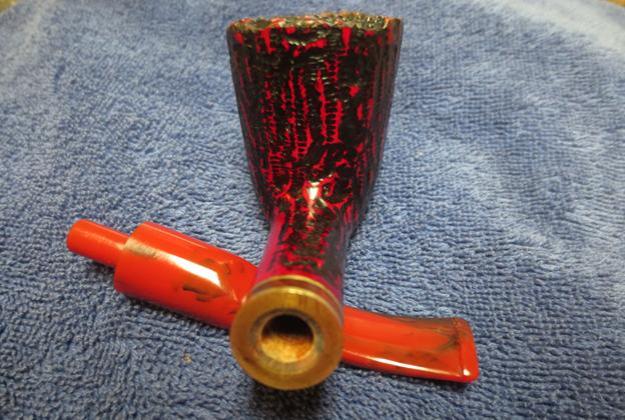
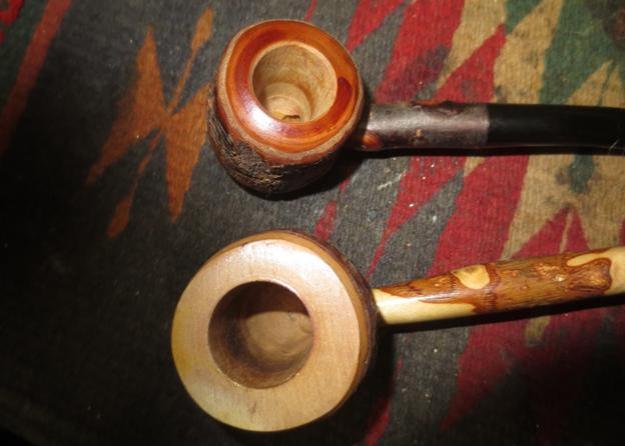
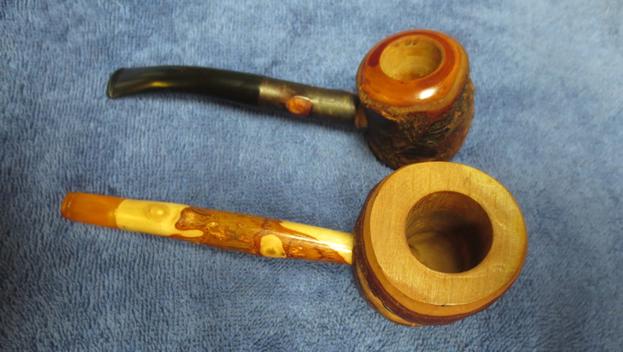
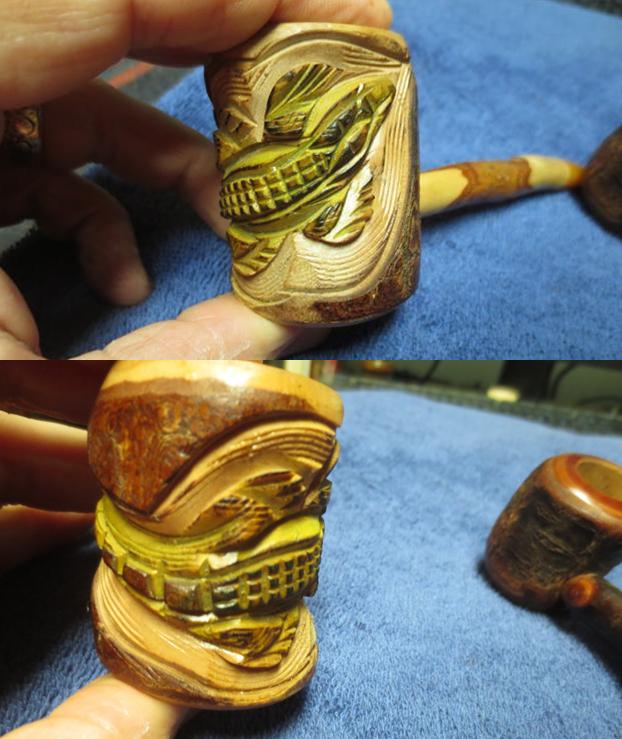
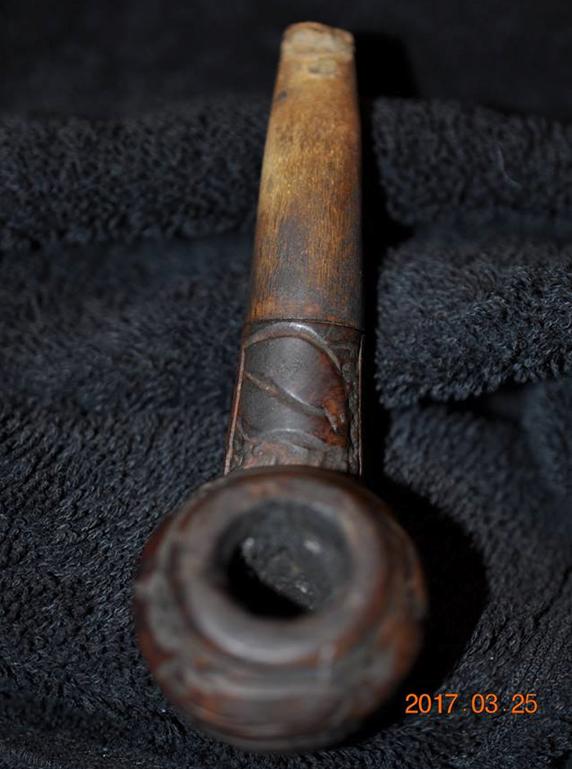
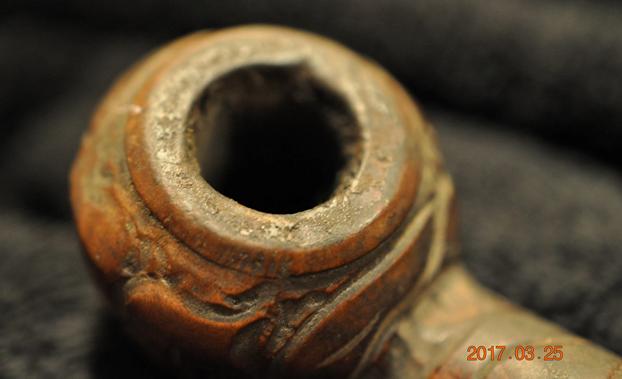
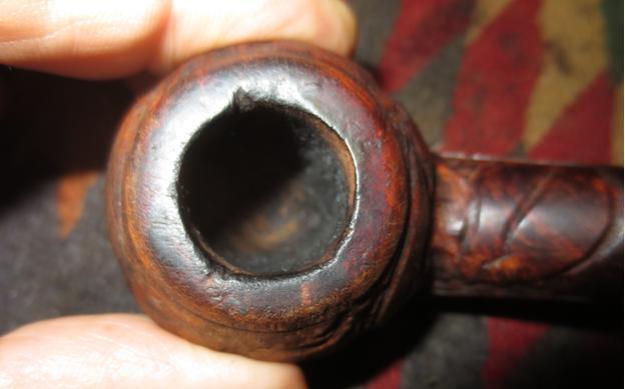
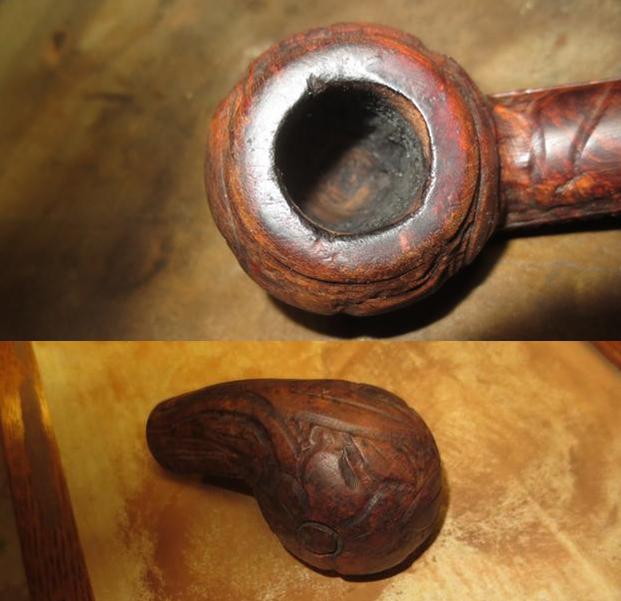
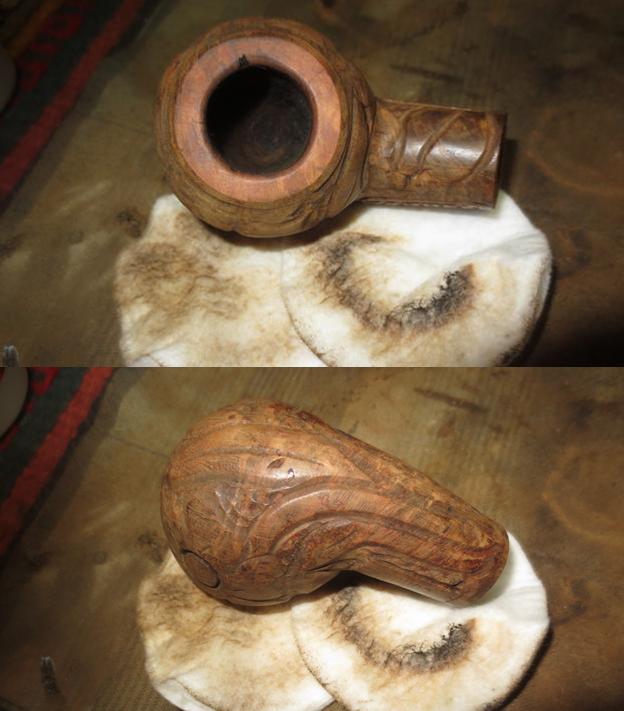
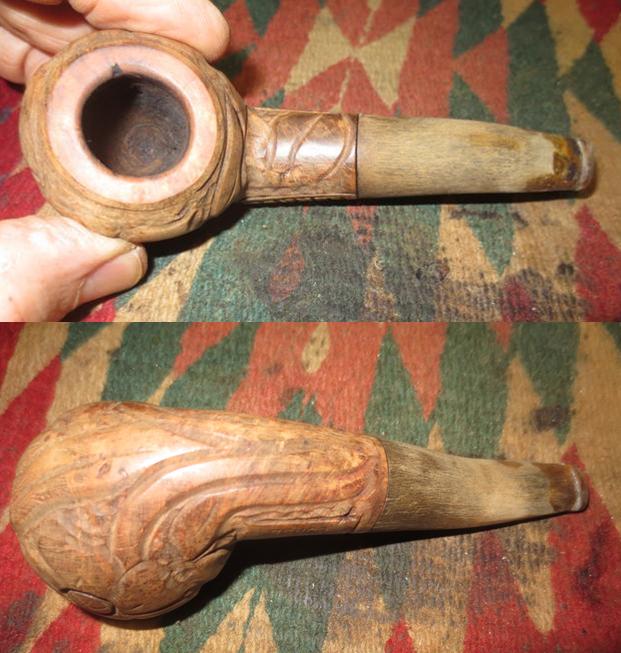
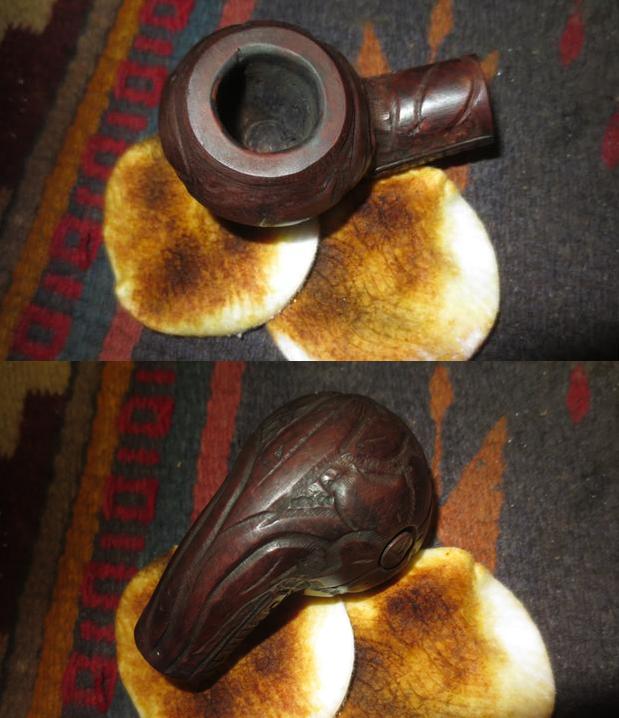
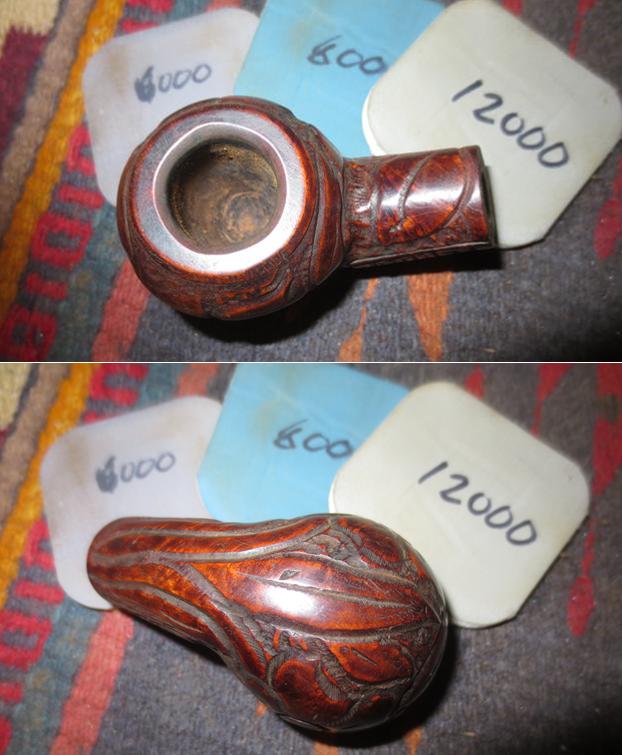
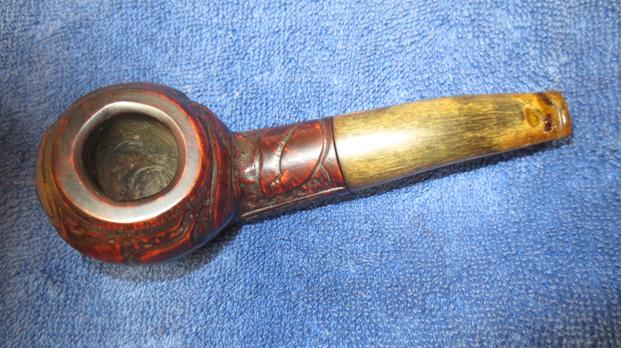
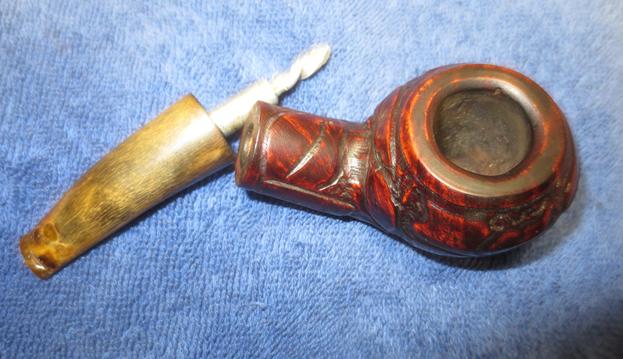
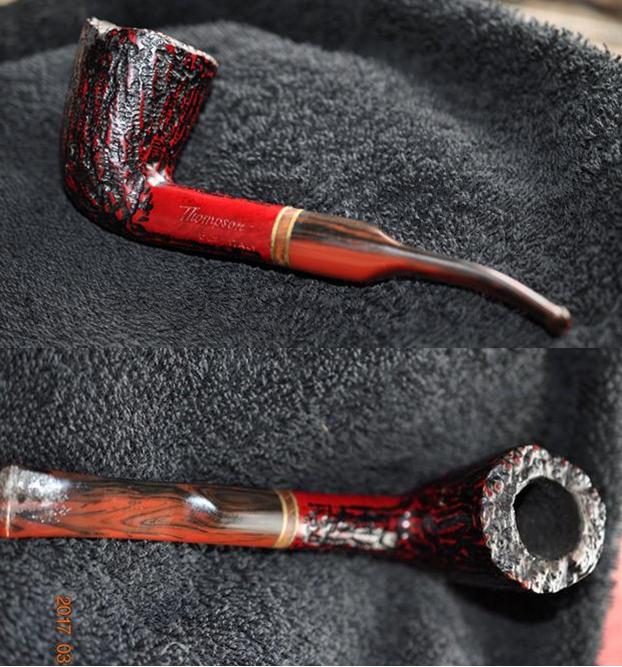
The photo Jeff took of the rim top and bowl shows the thick cake in the bowl and the lava overflow on the rim top. The insides of the pipe looked as if they had never been cleaned before. The beauty of the mess was that it probably protected the plateau top from damage.
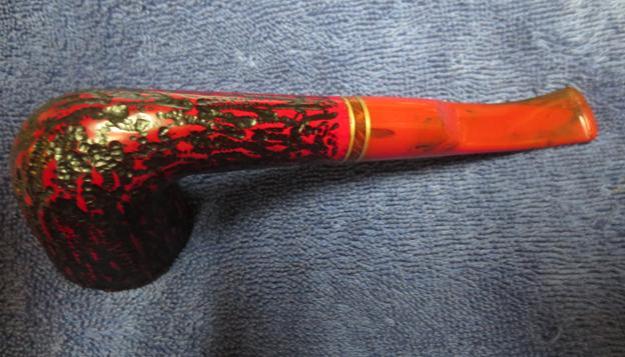
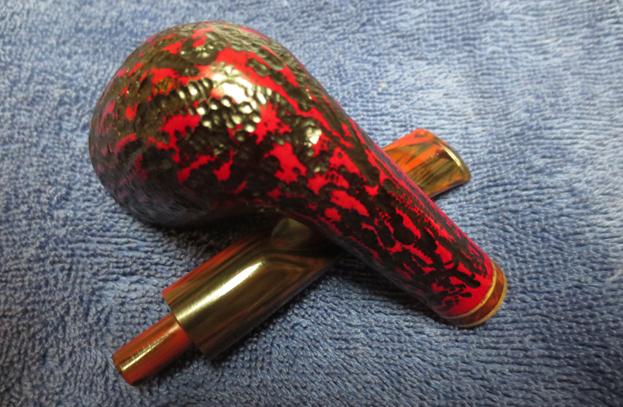
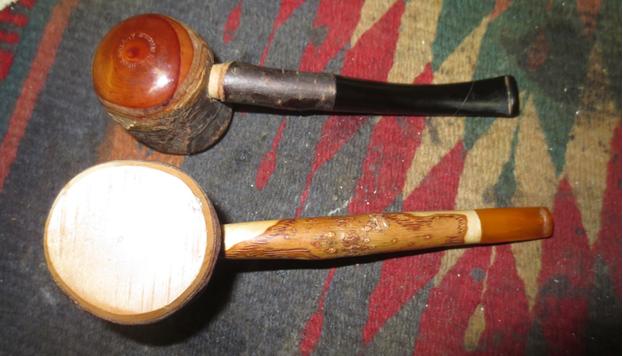
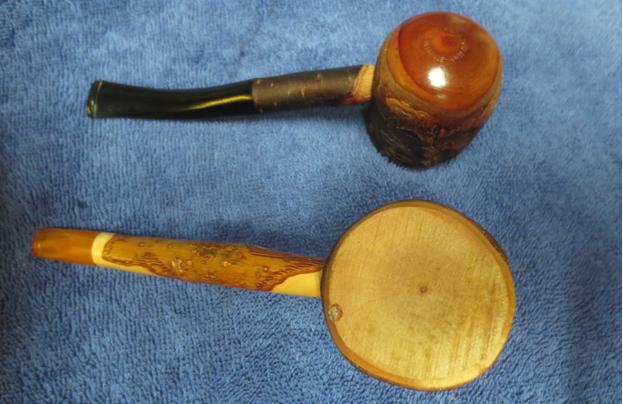
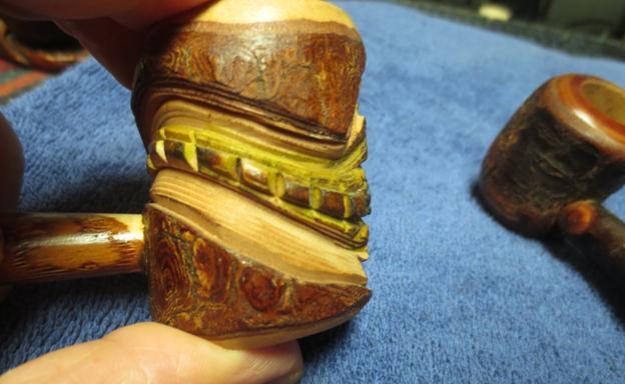
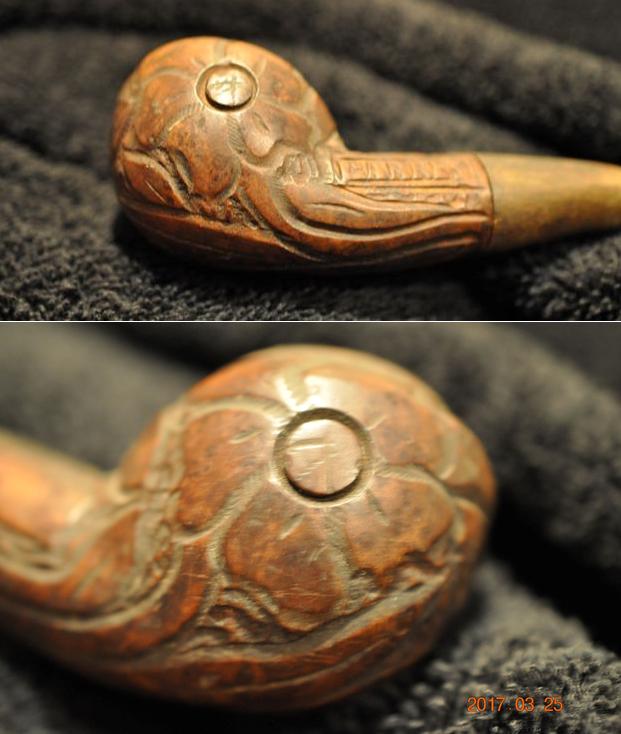
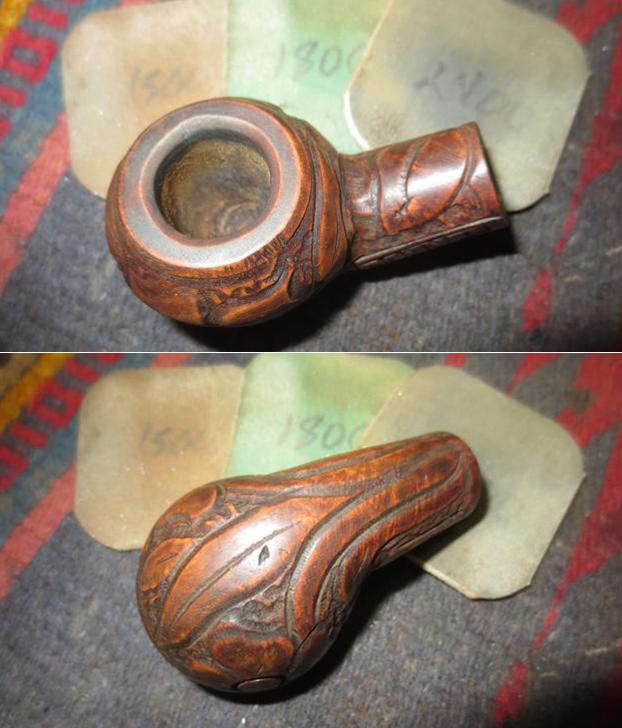
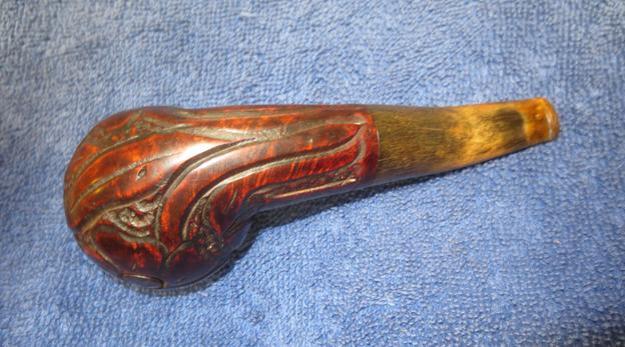
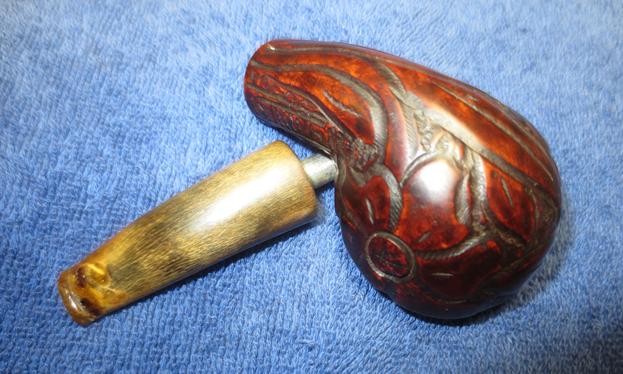
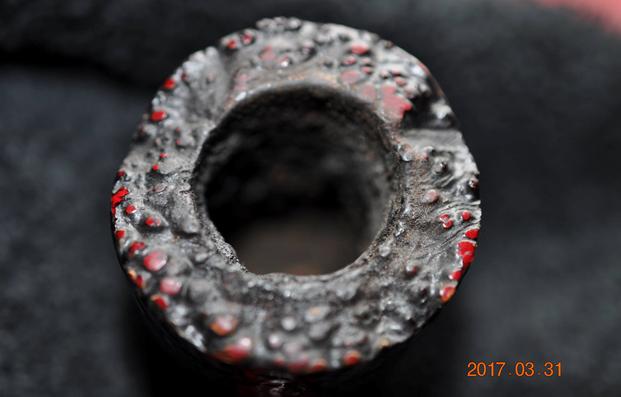
The underside of the bowl shows the rustication pattern on the briar and the cleanness of the exterior of the pipe.
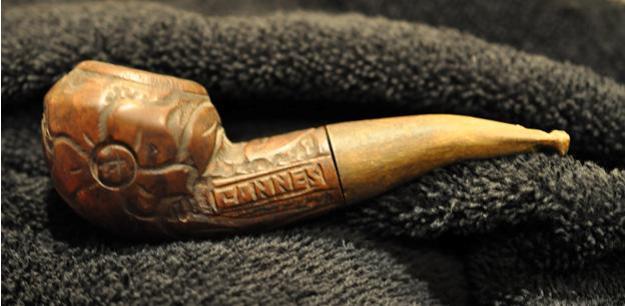
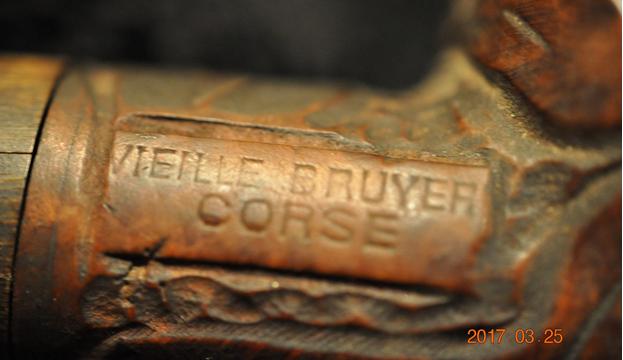
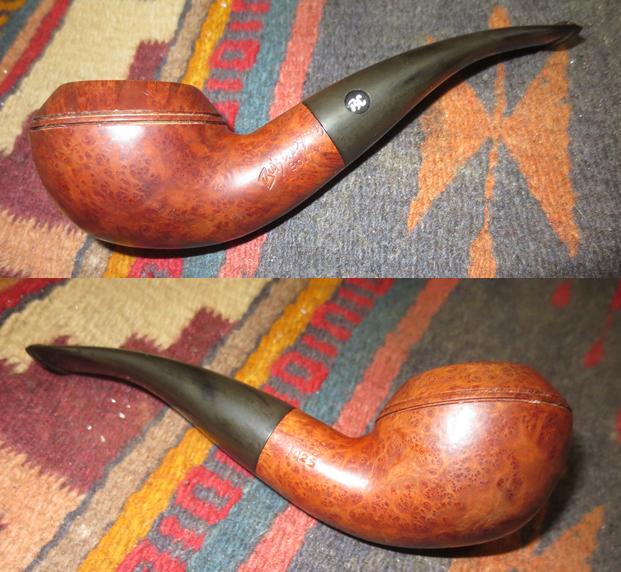
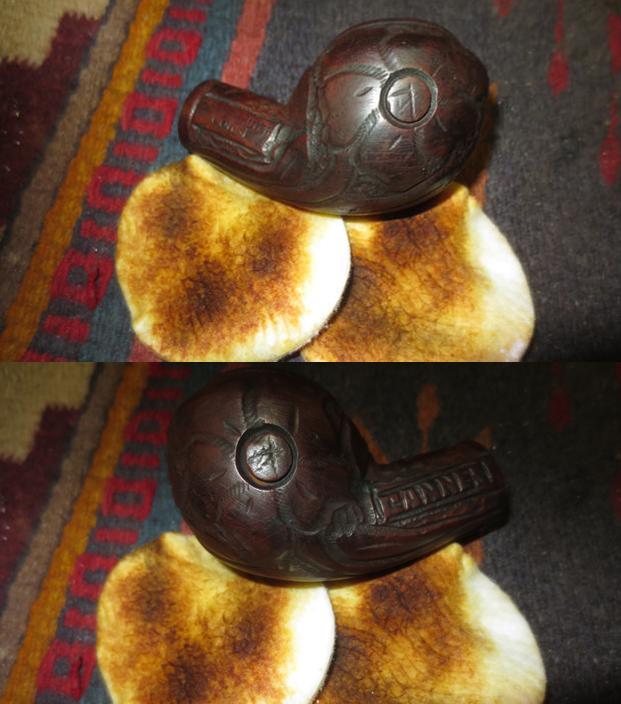
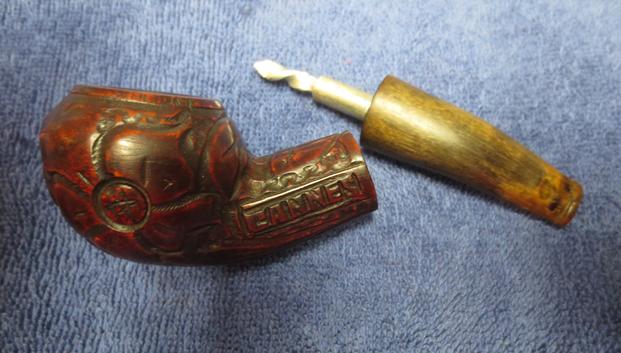
The next photo, though a little out of focus shows the stamping on the shank. It is very readable and clear.
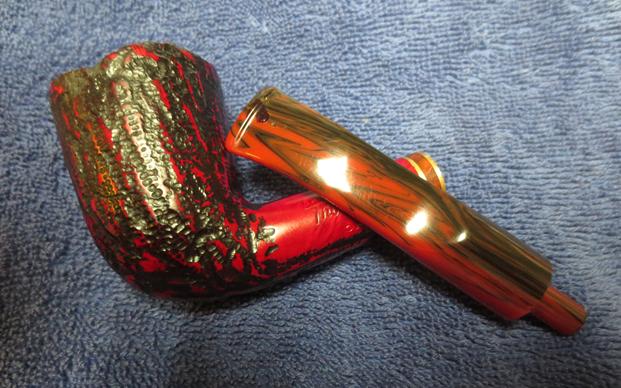
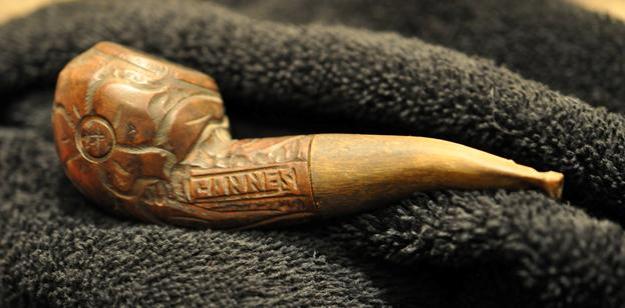
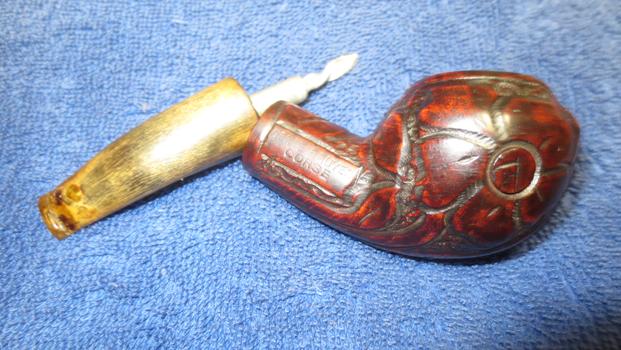
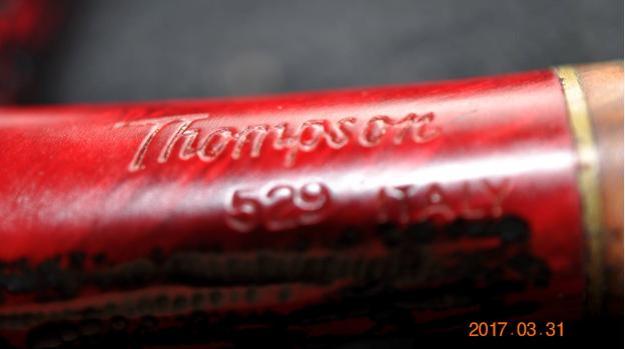
The Cumberland acrylic stem looks very good with the red and black of the stain on the rusticated bowl. The shank band or twin brass bands separated by a briar insert makes a stunning separator for the shank and the stem.
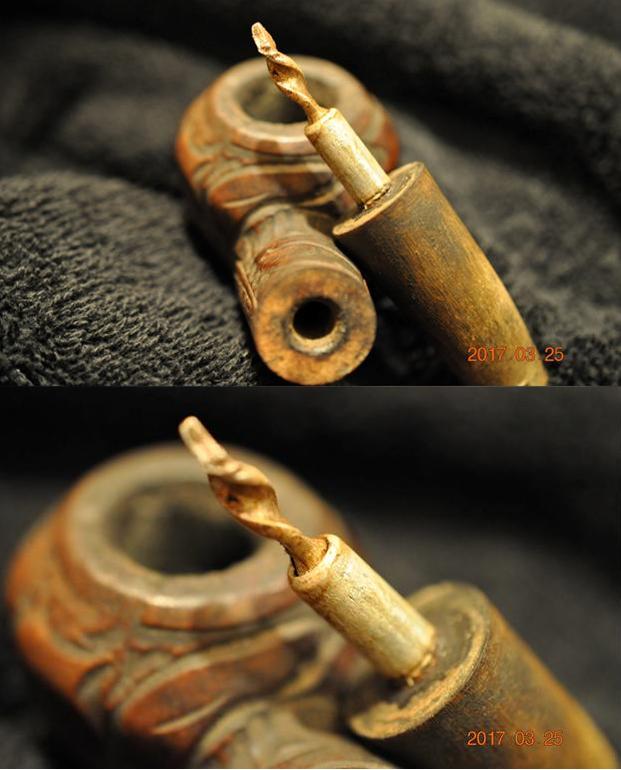
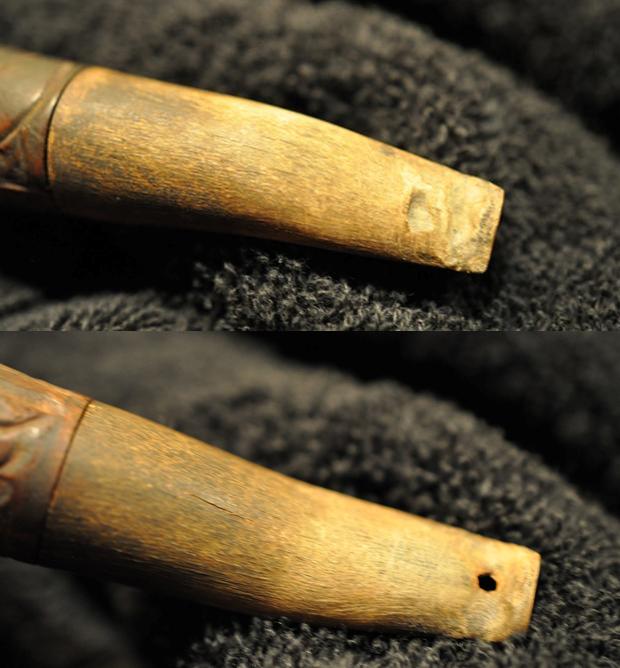
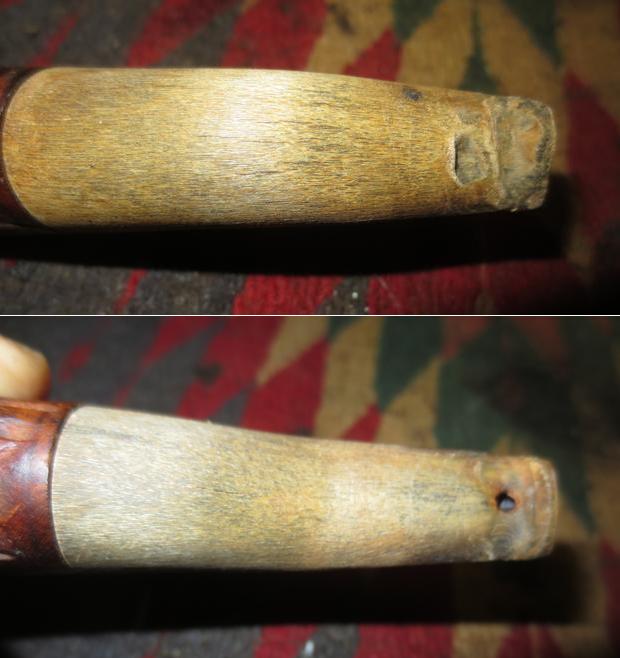
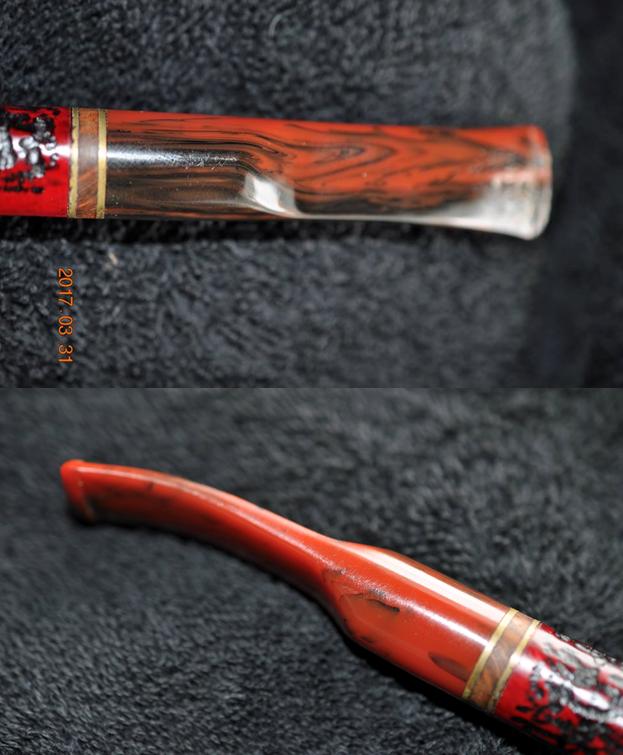
The stem was in rough condition as mentioned above. The top of the stem had a lot of tooth chatter and the button was chewed down. There was a small hole in the middle of the stem just below the button. The underside of the stem also showed a lot of tooth chatter and bite marks.
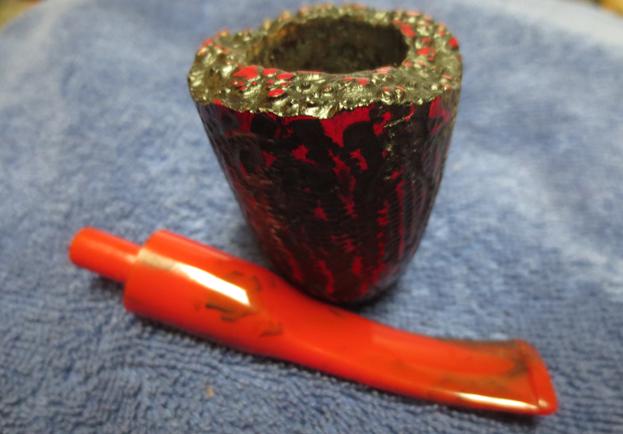
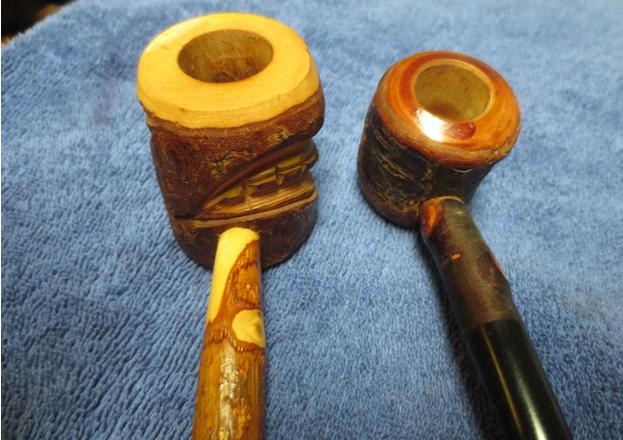
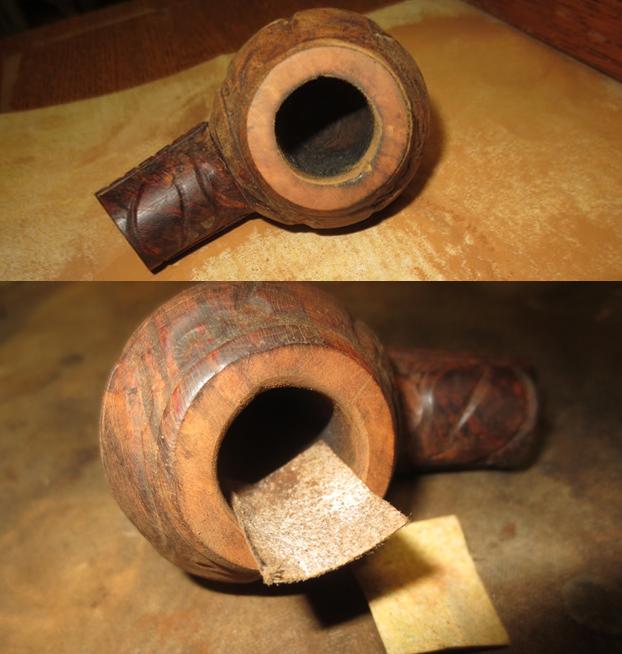
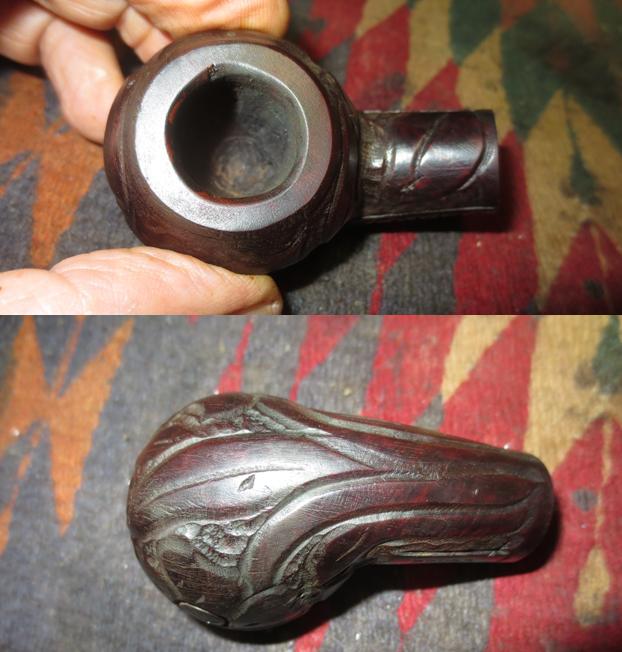
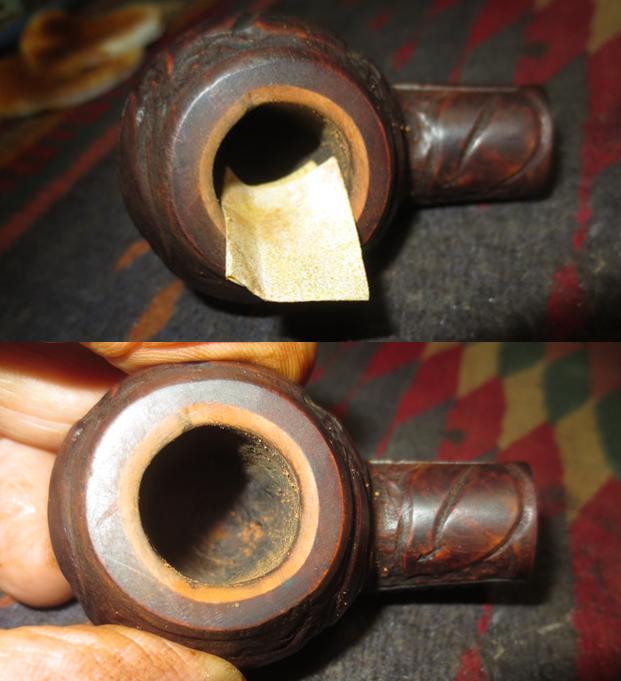
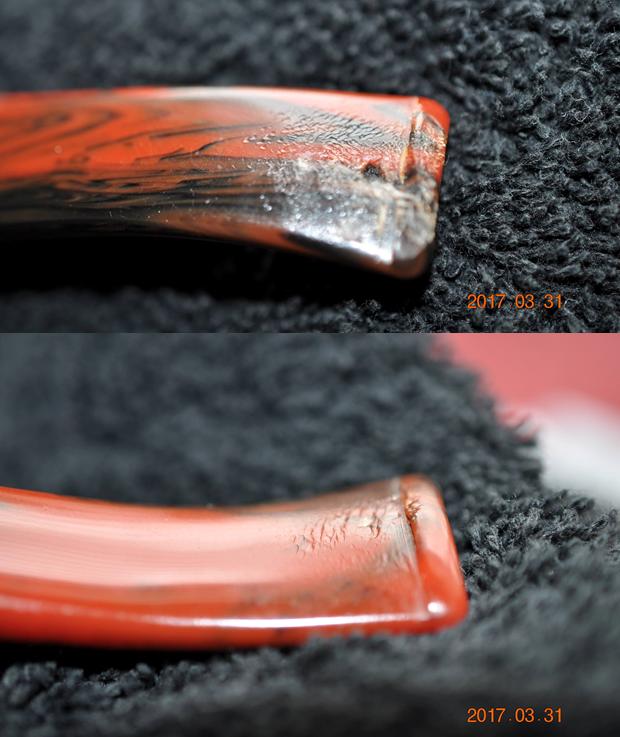
The rim top looked really good once he had removed all the built up tar and lava. The high spots and the valleys in contrasts of red and black.
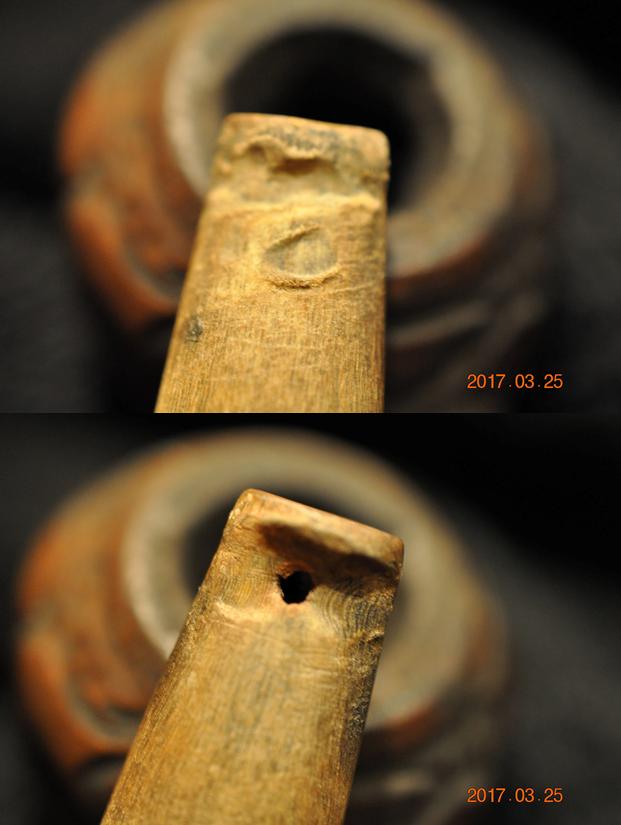
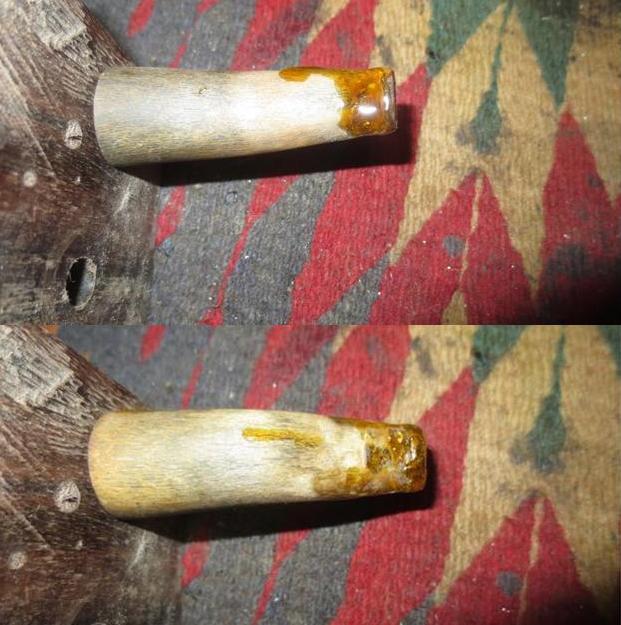
The stem was clean but the topside showed a lot of damage. There were tooth marks and the hole to deal with and the large dent in the top of the button edge on the stem top. The underside had some deep tooth marks and some chatter.
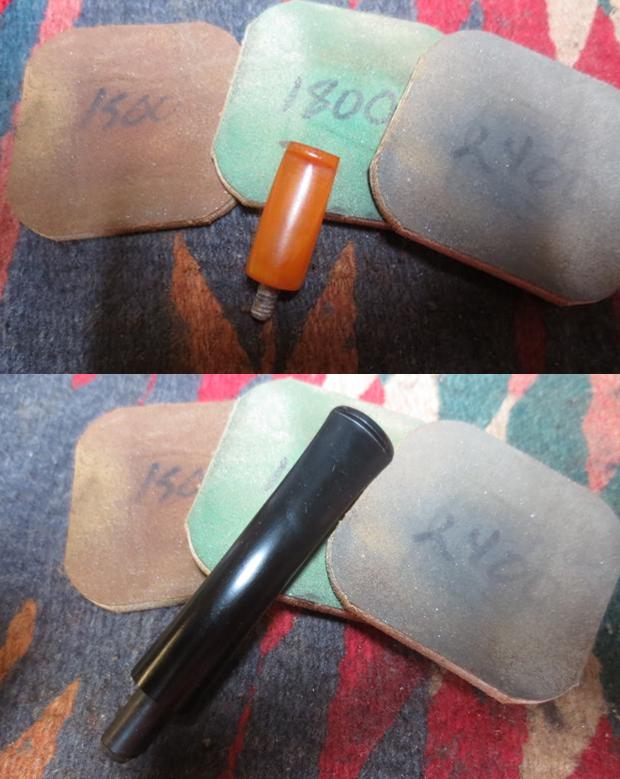
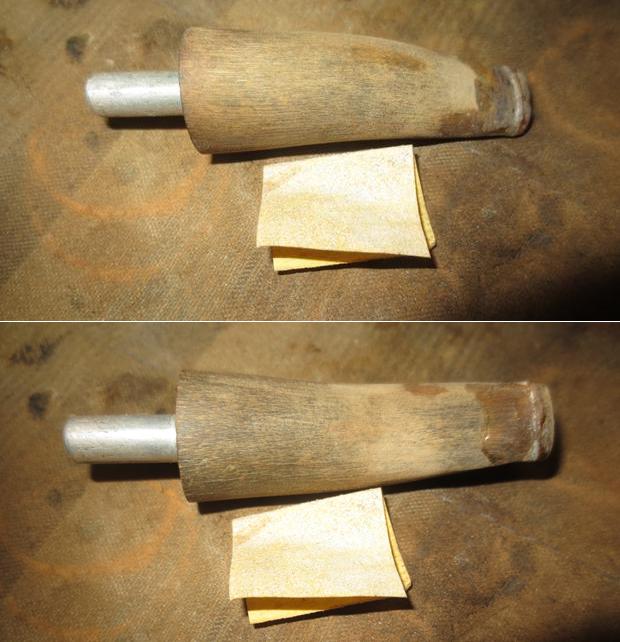
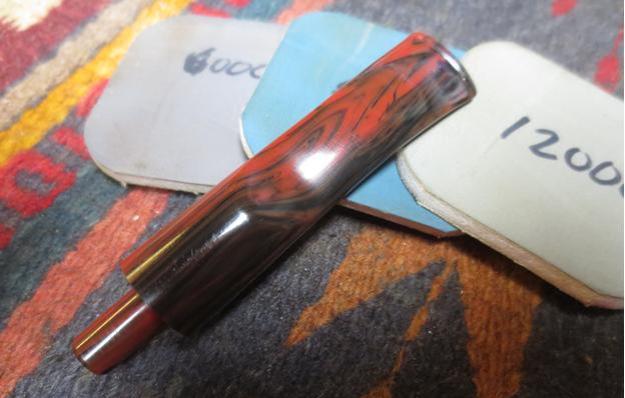
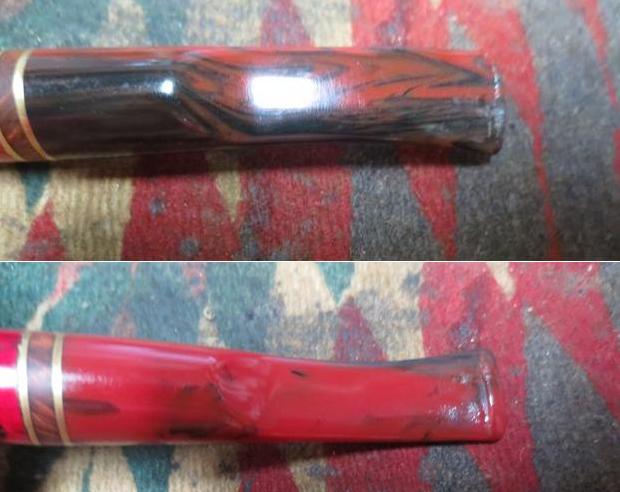
I sanded the damaged areas on the top and underside of the stem to prepare for the repairs to the tooth marks and dents. I was able to remove much of the chatter and only left behind the deep marks in the surface of the stem.
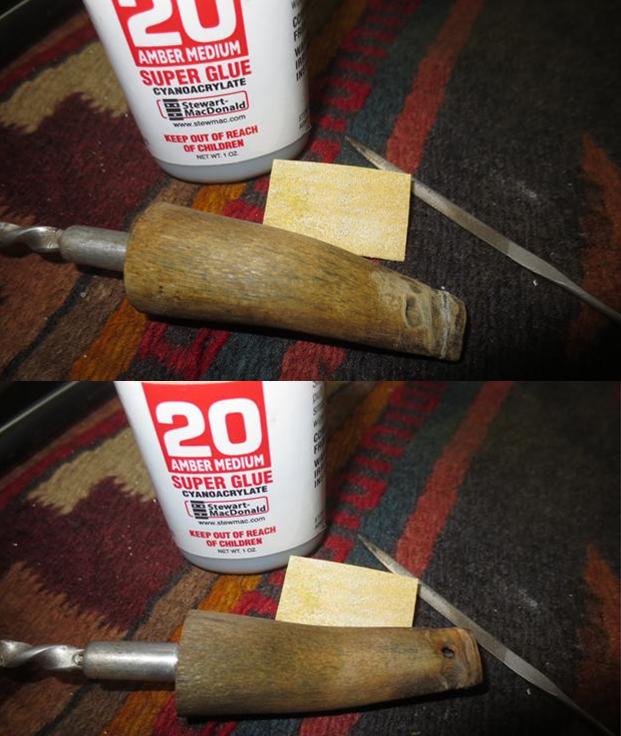
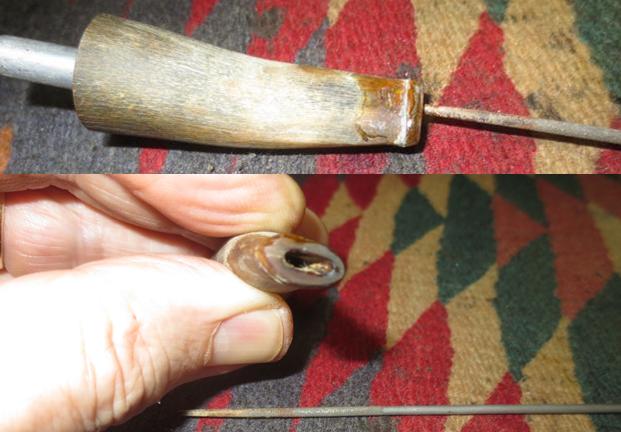
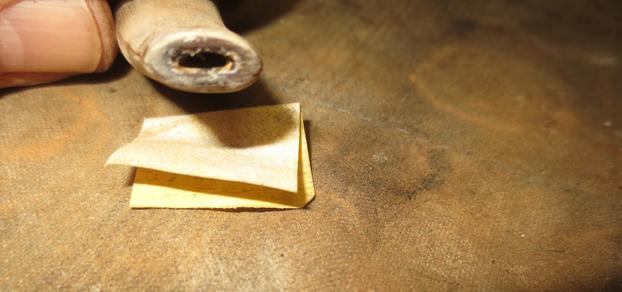
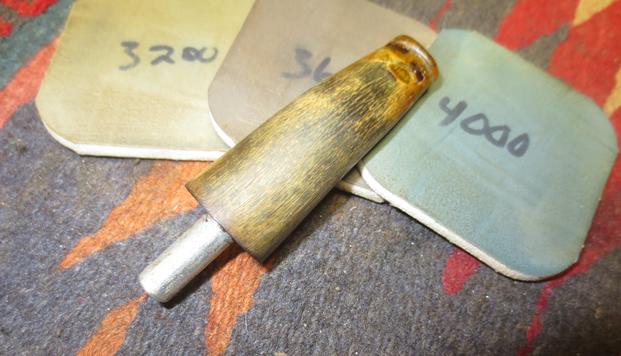
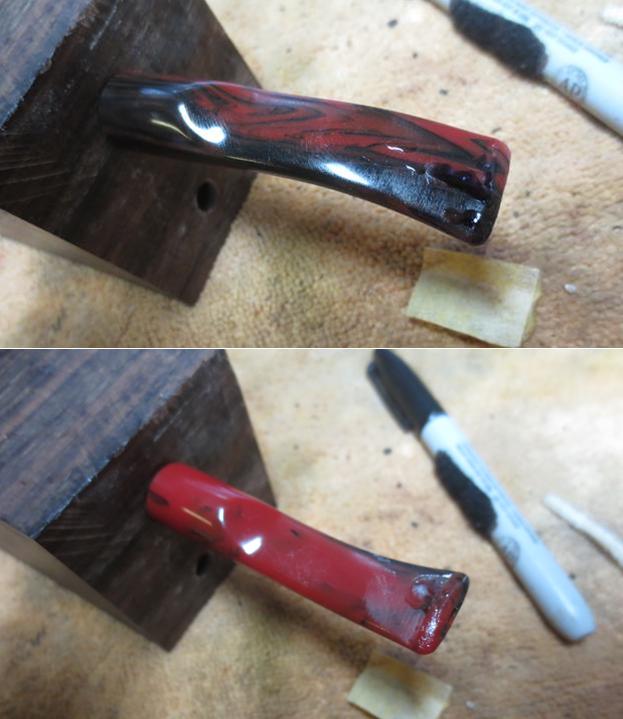
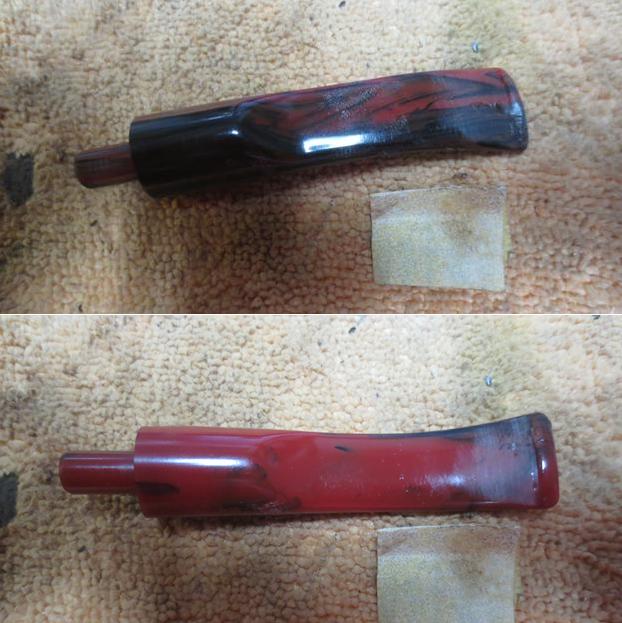
I coated a pipe cleaner with Vaseline and inserted it in the stem below the hole in the stem surface. The greased pipe cleaner would prevent the super glue repair from sticking to the pipe cleaner or clogging the airway. I filled in the hole and the deep tooth marks on both sides of the stem with clear super glue. I used my drilled block to hold the stem so both sides of the stem would dry without interference from my work surface. 
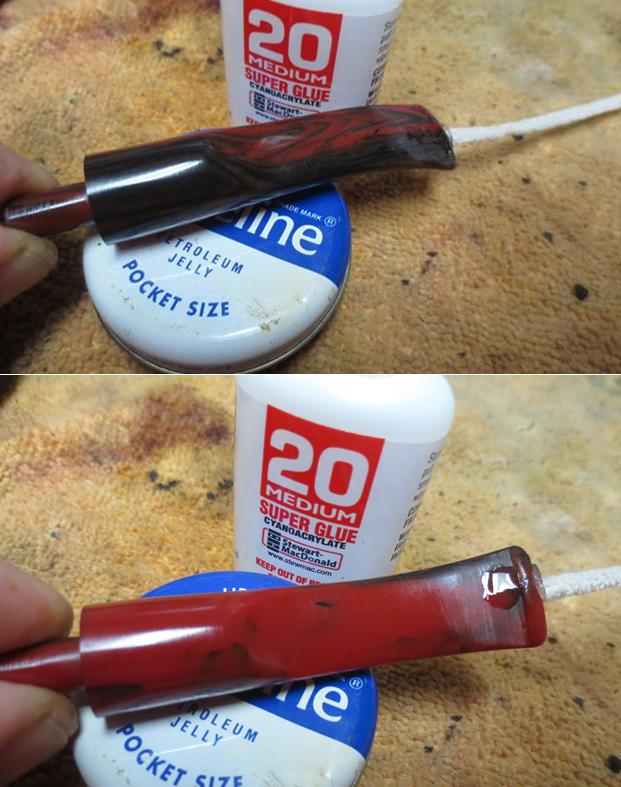
While the repair cured I buffed the bowl with a soft cotton buffing pad to bring up a shine. 
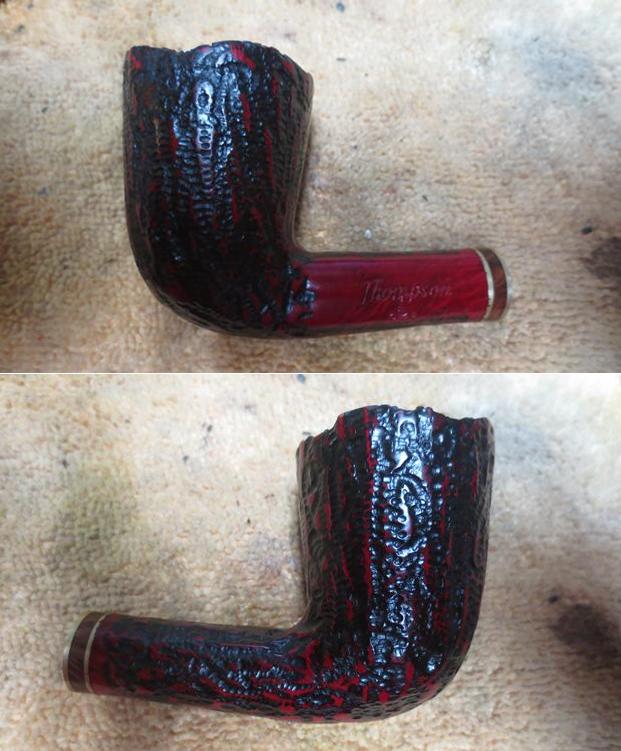
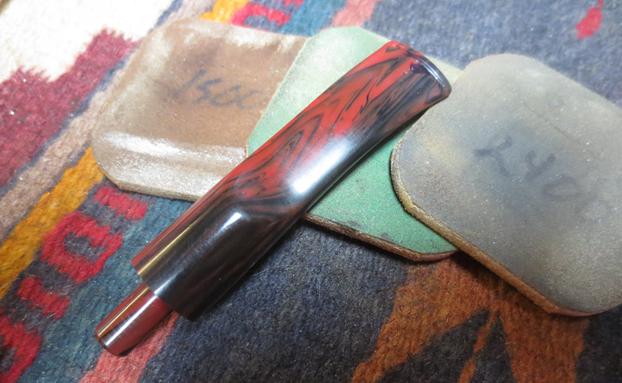
Once the repair had cured I used a needle file on both sides of the stem to bring the repair even with the surface of the stem. I sanded the repaired areas with 220 grit sandpaper to smooth them out and blend them into the surface of the stem. The photos below tell the story. 
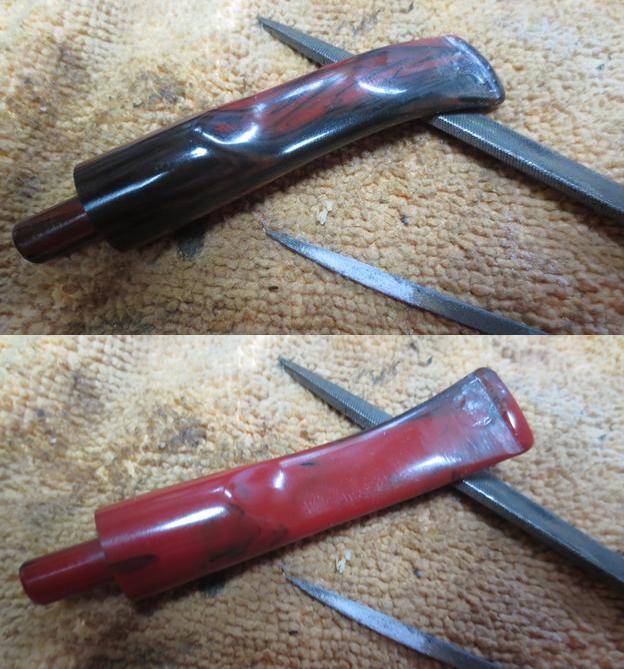
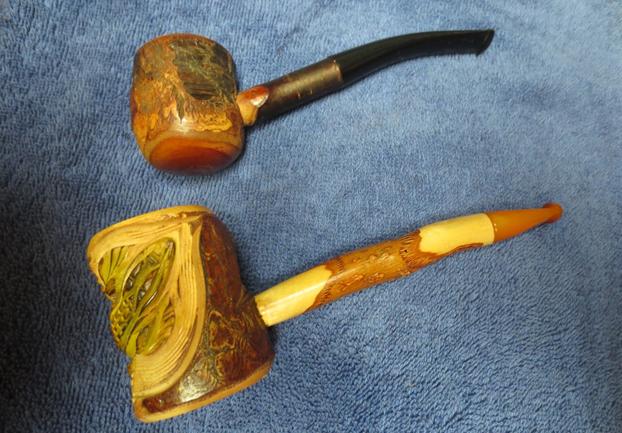
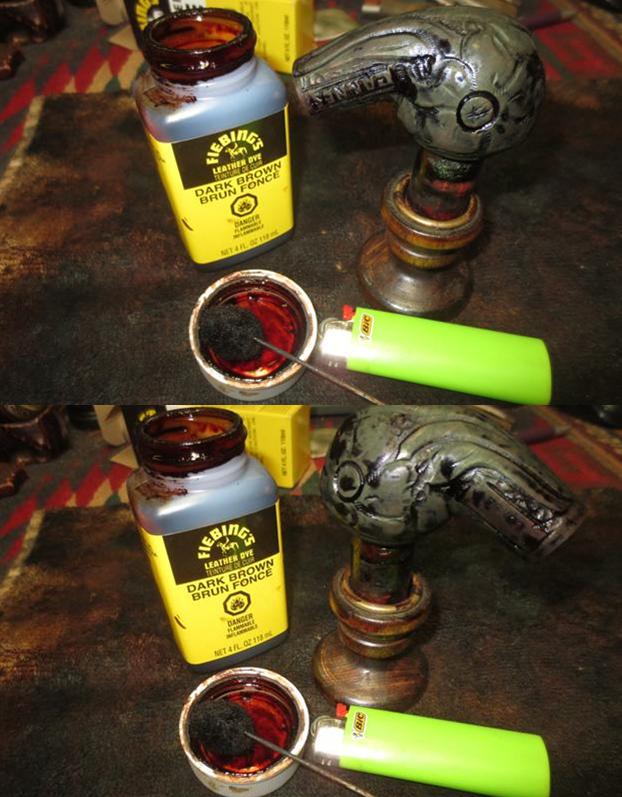
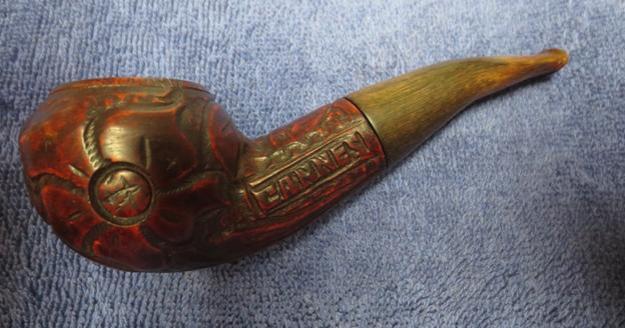
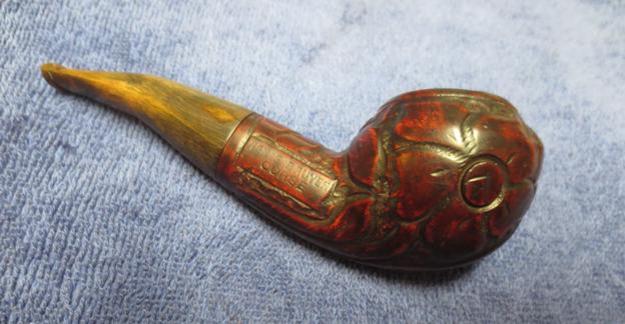
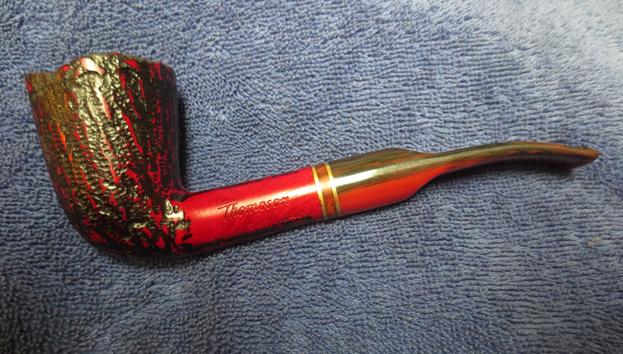
I put the stem back on the bowl and buffed it with Blue Diamond polish on the buffing wheel. I buffed lightly to keep the polish from getting in the grooves of the rustication. I buffed the stem to polish out the remaining scratches. I gave the stem multiple coats of carnauba wax and buffed it with a clean buffing pad to raise the shine. I gave the rusticated bowl several coats of Conservator’s Wax and buffed it with a shoe brush. I buffed the entire pipe with a microfiber cloth to deepen the shine. The dimensions of the pipe are Length: 6 inches, Height: 2 inches, Diameter of the bowl: 1 ½ inches, Diameter of the chamber: ¾ inches. The finished pipe is shown in the photos below. I will be putting it on the rebornpipes store soon. If you are interested in adding this one to your collection email me at slaug@uniserve.com or send me a message on Facebook. Thanks for looking.

Cleaning up a Ropp Cherrywood and a Carved Cherrywood Pipe


Blog by Steve Laug

I decided this afternoon to work on a couple of easy pipes – the first is a French Made Ropp Cherrywood and the second is also a Cherrywood but sports that carving of an alligator around the bowl front and sides. The Ropp is stamped on the bottom of the bowl with the typical Ropp circle stamp reading Ropp Cherry arched over Made in France. The “Gator” pipe bears no stamping at all. The Ropp is unsmoked but the stem seems to have marks that make me wonder if it was not a prop in a play or something. I am pretty sure that the stem is not original but a replacement. The “Gator” pipe appears to have been smoked at least once because there is a very faint darkening in the bowl but otherwise it too looks unsmoked. The stem is tiny but it too had some tooth marks on the top and underside near the button. That meant that for both of these I would only need to do the stem work. I took a close up photo of both of the bowls to show the condition. You can see that Ropp is unsmoked (NOS) and that the “Gator” also looks virtually unsmoked.The only thing that looked used on either pipe was the stem. The acrylic yellow stem on the “Gator” pipe had some tooth marks on both sides near the stem. The same was true of the vulcanite stem on the Ropp.I sanded the tooth marks on both stems smooth with 220 grit sandpaper. It did not take too much work to smooth out the tooth marks and chatter. I polished each of the stems with micromesh sanding pads – wet sanding with 1500-2400 grit pads and dry sanding with 3200-12000 grit pads. I rubbed the stem down with Obsidian Oil after each sanding pad and after the last pad I rubbed it down and set it aside to dry. I buffed the stems down with Blue Diamond on the buffing wheel and gave them both multiple coats of carnauba wax. I buffed them with a clean buffing pad to raise the shine. I wiped down the bowls with a light coat of olive oil and gave them a coat of Conservator’s Wax. I hand buffed them both with a shoe brush to raise the shine. The finished pipes are shown in the photos below. The dimensions of the pipes are: ROPP – Length: 5 ½ inches, Height: 1 5/8 inches, Bowl diameter: 1 ½ inches, Chamber diameter: ¾ inches. GATOR – Length: 5 ¾ inches, Height: 2 inches, Bowl diameter: 1 ½ inches, Chamber diameter: ¾ inches. I will be adding both of them to the rebornpipes store shortly. If you are interested they can both be yours for one price. Check out the shop if interested or email me at slaug@uniserve.com or send me a message on Facebook. Thanks for looking. I took some photos of the Gator carving on the one Cherrywood to give you a sense of what it looks like. The first photo shows the head and shoulders on the left side of the bowl. The second photo shows the front of the bowl with the rear legs and body. The last photo shows the tail of the Gator.

Restoring a French made Horn Stem Folk Art Rhodesian


Blog by Steve Laug

The next pipe to the worktable was one my brother picked up on EBay. I think the folk art carving in the shank and bowl drew him to this one. It has what looks like a poppy on each side of the bowl with leaves on the front and back as well as on the shank and the bottom of the bowl. The left side of the shank has the word CANNES carved into the briar and contained in rectangle with a thin box carved around it. I believe this is the French city of Cannes which is located on the French Riviera. I wonder if the pipe man who carved the pipe might have come from there or at least dreamed of that place. On the right side of the shank it is stamped Vielle Bruyer over Corse which translates from the French as Old Briar Corsica. The horn stem makes me wonder about the possibility of the pipe being a trench art piece carved in the trenches of WWI. I am not sure I will ever know for certain but I think that it would be an interesting addition to the story of this old pipe. It would be great to be able to add the information about the carver to the story of the carving and why he chose what he did – poppies and leaves with the word CANNES on the shank side.The pipe was dirty with grit and grime deep into the petals and centre of each flower and lines and grooves of the leaves. The horn stem was dried and was rough and dirty as well. It was also well gnawed leaving behind deep tooth gouges on the top of the stem and a bite through on the underside of the stem. The button was worn down and the slot in the end was almost filled in with tars and oils. It made me wonder how air was pulled through the shank through the stem.The photo below shows the dirt and stains from the smoker’s hands on the shank and the bowl and the stem itself. It was an oily dark substance that had coloured the briar and the horn stem.Jeff took the above photos and the ones that follow to show the condition of the pipe before he began to do his magic on them cleaning them up. The bowl had a thick cake in it that had overflowed like lava to the top of the bowl. The inner edge of the bowl had nicks and cuts in it that looked like it had been damaged somewhere along its long life by a reaming with a knife. The next two photos show the bowl and the rim. The exterior of the bowl also had spots of paint on the briar that had been either dripped or smeared on the bowl sides. Jeff took some photos of the sides and the bottom of the bowl to give a clear picture of the carving on the pipe – the flowers and the leaves. The anonymous carver had carved a rectangle around the stamping on the right side of the shank. The stamping is clear and readable and as mentioned above translates as Old Briar Corsica. You can also see all the debris in the grooves of the carving. At the shank/stem junction you can see a small crack opening in the horn stem.The next two photos show the bowl with the stem removed. The stem had a spiral stinger screwed into the metal tenon on the stem. The tenon itself was also threaded and screwed into the horn of the stem.The next two photos show the damage to the stem surface. Not only were there tooth marks on both sides of the stem and a bite through on the underside near the button there was also a lot of damage to the button itself. The horn was very dirty and was rough and worn feeling. The horn had dried out and was close to delaminating. The first two photos give an overview look at the stem  and the second set of photos show a close up view of the damage at the button end. Jeff carried out his usual detailed cleanup on the pipe. He reamed the bowl with his PipNet and Savinelli Fitsall Reamer and took the cake all the way back to bare briar. He scraped and scrubbed the rim and the bowl with a tooth brush and Murphy’s Oil Soap until he had cleaned off all of the oils and debris from the bowl. He scrubbed the horn stem with the soap as well until it was clean. He rinsed the pipe and stem under running water to remove the grime and the soap. He cleaned the internals of the pipe with pipe cleaners, cotton swabs and alcohol. He unscrewed the spiral stinger and cleaned out the airway in the stem with alcohol and cotton swabs. Once the pipe was clean it joined a shipment to me in Canada. I took photos of it before I started my part of the work. It is a pleasure to work on clean pipes. I just had a thought about the pipe. There is something about the shape and the French stamping that makes me think it may well be an old Butz Choquin 1025 Rhodesian. I have a BC Rhodesian 1025 on my work table so I have included it below. You can see the similarity of the shapes. He cleaned the rim top and in doing so revealed the damage to the top of the bowl. The rim top has some deep gouges from the flat surface and the inner edge has some large nicks as well. Fortunately none of these go too deep into the briar so it should clean up well. The walls of the bowl look very good.The stem looks better than it did in the pre-clean photos but it is still in very rough condition. The ground in grease and grime in the surface of the horn has been removed. I am hoping that it will polish up better once I have repaired the damage on the stem.I sanded the areas around the damaged spots near the button and on the button with 220 grit sandpaper in preparation for repairing it with amber super glue. I also recut the edge of the button to give the button area definition before I repaired the button top and bottom as well.I pushed my wedge of cardboard covered with packing tape into the slot in the button so that I could repair the hole in the underside of the stem. This usually is a very simple repair. This time it got complicated. The wedge allowed the amber glue to slip past it into the airway in the stem. I was able to remove the wedge but the airway itself was sealed closed. Arghhhhh… just what I needed, more work on this old stem. I slipped a pipe cleaner into the stem from the tenon end and measuring it could see that the clog was not thick. I could put a pipe cleaner into the slot as well. From this I surmised that the blockage was about ¼ inch thick and it was hardened super glue. I decided to use a 1/16 inch drill bit and using my Dremel on the slowest speed carefully redrilled the airway. It is easy to go too far when drilling so I chucked it deep in the Dremel leaving only enough bit to penetrate the clog. I went straight in and broke through easily. I went in from each side of the slot as well to clean out the Y of the slot. I let out a deep breath – I had repaired my faux pas. I apologize for the fact that the whole process flustered me enough that I did not take any photos of this part of the process.

The good news was that the hole in the underside of the stem was closed off. I filled it with some more of the amber super glue and also added some more to the tooth marks and the split on the left side of the stem at the shank end. I have a piece of ebony that I have drilled out the size of a tenon so I stuck the stem in that to allow the glue to cure. The drilled block allows me to repair both sides of the stem and let them cure at the same time.Once the glue had cured I used a needle file to recut and reshape the edge of the button on both sides of the stem. I also reshaped the button surface on both sides at the same time. I used a round needle file to shape the slot in the end of the button and smooth it out. I set the stem aside for a while and turned to address the damage to the rim top. I topped the bowl on a sanding board with 220 grit sandpaper to remove the damage surface of the rim. I used a folded piece of 180 and 220 grit sandpaper to give the inner edge of the rim a slight bevel. This bevel took care of the damage to the inside edge of the bowl. I wiped the bowl down with acetone on a cotton pad to remove the remaining finish and the grime from the sanding process. I set the bowl aside to let the acetone evaporate and worked on the stem again. I sanded the repaired areas with 220 grit sandpaper to blend them into the surface of the surrounding horn. While they are shinier than the rest of the stem at this point they have filled in the surfaces and the hole and the stem is smooth once again.I worked on the slot in the button with a folded piece of sandpaper to smooth it out. I will need to do more work on that area but the shape is correct. That was the last remnant of the clogged airway that had to go. The flow of air through the stem is even and smooth now.The stem was loose in the shank so I painted the tenon with some clear fingernail polish to give it enough bite that it would sit snug in the shank. Once the polish had dried I pushed the stem into the shank to check out the fit. I took a picture of the pipe as it stood at this point in the process. I stained the bowl with a dark brown aniline stain and flamed it with a Bic lighter set the stain in the grain of the briar. I repeated the process until the coverage was even all the way around the bowl. I flamed it and set it aside to dry.When the stain had dried for an hour I took it off the stand and took photos of the bowl at this point. The scratches in the briar are very clear in the photos. I was going to need to do more work on the bevel of the inner edge of the rim as the damage was very evident in the top down view of the bowl. Before I worked on that though I wiped the bowl down with acetone on cotton pads to lighten the stain and make it more transparent. At this point I paused on the finish of the bowl and reworked the bevel of the inner edge of the rim with 220 grit sandpaper. I made the bevel a bit steeper to smooth out the damage on right and the left side.I wiped the rim down with alcohol on a cotton pad and restained the area with the dark brown aniline stain. I repeated the wipe down with alcohol to get the finish on the rim to match the bowl colours. I sanded the smooth surfaces of the briar with 1500-2400 grit micromesh sanding pads and wiped the bowl down with alcohol after each pad. I wanted to lighten the high spots on the carving while leaving the grooves and deeper marks on the leaves dark. I polished it further with 3200-4000 grit micromesh sanding pads to remove more of the brown stain and polish the briar further.  I finished polishing the bowl with 6000-12000 grit micromesh sanding pads. Each grit pad brought more shine to the briar. The scratches in the smooth parts of the bowl add character to the old pipe and probably tell tales of pockets and packs that the pipe was carried in those many years ago. With the bowl  polished I turned to polishing the stem with micromesh sanding pads. I wet sanded it with 1500-2400 grit pads and wiped it down after each pad with Obsidian Oil. I dry sanded it with 3200-4000 grit pads and wiped it down with the oil after each pad. I screwed the spiral stinger into the tenon before doing the final polishing. I finished the polishing with the 6000-12000 grit pads and I gave it a coat after each pad. The rubdown with oil was finished and I set it aside to dry. I put the stem back on the bowl and buffed the pipe with Blue Diamond. I used a light touch on the briar so as not to get the polish in the grooves of the carving. I gave the stem multiple coats of carnauba wax and the bowl several coats of Conservator’s Wax. I buffed the pipe with a clean buffing pad to raise the shine. I hand buffed it with a microfibre cloth and it really deepened the shine. What started as a tired looking piece of memorabilia has turned into a beautiful looking pipe that is ready to load with a favourite tobacco and be enjoyed. The horn stem just shines with a new translucence that was long lost when I startd the process. The finished pipe is shown in the photos below. If you can add any information to the brand or to the carving leave a message in the comments below. Thanks for your help. Thanks for journeying with my on this old timer.

Cannes46Cannes47 Cannes50